question,answer,url
How to Set Up CyberGhost VPN on Windows,"Give your Windows the ultimate privacy shield with CyberGhost VPN.With CyberGhost VPN our quick connect options lets you establish a VPN connection on your PC with just one simple click or tap on the screen.What's more, you're never more than a few clicks away from connecting to any of our115 VPN locationsworldwide.Jump to...Download AppInstall AppLog into CyberGhost VPNYour first VPN connectionDownload the AppGo to yourCyberGhost VPN online accountand log in with your Premium Username and PasswordSelect the""Download Hub""and then select the""Download"" buttonnext to the Windows versionLocate the installation file on your device after the download is complete. Most likely you will find it in the""Downloads""folder of your deviceInstall the App1. Double-click on the downloaded file2. Wait until the automatic installation is finished3. Choose""Agree & Continue""if you consent to this data being shared or you can select""I want to opt-out"" if you prefer not to4. Once the installation is successful, please wait a few seconds and your application will start automaticallyLog into CyberGhost VPN1. Once the application has opened, you will either have to create a new account or to log in.If you don't have a subscription yet, you can get if fromhere.Upon receiving your account details by email, simply click on""Return to Login""and enter your username and password to log inIf you already have an active subscription, click on""Return to Login""and log in with your CyberGhost username and password2. If you do not have an active subscription and would like to use our1-day trial offer- enter a valid email address and choose a strong password, then clickSign Up.Note :An example of a strong password is ""Cartoon4Coffee!"". It is long, contains uppercase letters, lowercase letters, numbers, and special characters. Strong passwords should not contain any personal information.Before the Trial period starts, you mustconfirmyour email address. Please check your inbox and follow the instructions to verify your email.Connect to CyberGhost VPNThe app will first open in compact mode, click on the expand button (to open the list of all servers and features available, as seen in the image example below):ThePrivacy SettingsandSmart Rulesentries include additional features that will help you customize CyberGhost VPN:For a quick VPN connection, click the""Power""button and the application will connect you to the best VPN server available based on your current location.If your connection was successful, you should see the status""Connected"".In the lower part of the main window you can view information about your VPN connection:Your new IP addressThe amount of data transferred in and outThe protocol used to establish the connectionTo disconnect, just tap again on the""Power""button, and you will return to the""Best server location""connection profile.I am having problems with the VPN connection, what can I do ?Check ourhelp pageto troubleshoot specific issues.For any additional information or concerns - it is best to approach the Support Department:via e-mail:support@cyberghost.rovia on-line request:https://support.cyberghostvpn.com/hc/en-us/requests/newvia 24/7 Live! Chat Sessions on our website",https://support.cyberghostvpn.com/hc/en-us/articles/360018024419-How-to-Set-Up-CyberGhost-VPN-on-Windows
Stream with CyberGhost VPN on Windows,"This article will explain how you can stream with CyberGhost VPN on Windows.The CyberGhost Windows app has a dedicated menu for streaming, that will highlight all servers compatible with various streaming services.Follow these steps to connect to these servers:Open the app and expand the menuSelectFor StreamingChoose the streaming server suited to your needsTip: It's recommended to clear the browser's cache and cookies before connecting to the VPN.Encountered connection issues?Check ourhelp pageto troubleshoot specific streaming issues.Need assistance? Contact our Customer Support team:via email atsupport@cyberghost.rovia online request athttps://support.cyberghostvpn.com/hc/en-us/requests/newvia 24/7 Live Chat by clicking the Support button below",https://support.cyberghostvpn.com/hc/en-us/articles/360016962519-Stream-with-CyberGhost-VPN-on-Windows
How to use Peer-to-Peer (Torrent) optimized servers with CyberGhost VPN on Windows,"We designed CyberGhost VPN to protect your anonymity online. You also get access to VPN servers optimized for P2P traffic, that guarantee secure torrenting, uninterrupted downloads, unlimited bandwidth, and blazing fast speeds.Quick and easy to set up.Sign upto get started safely with our45-Day Money-Back Guarantee.Download and install the application by following our set-up guidehere.Log in to the CyberGhost VPN App and click on the expand button (to open the list of all servers and features available) :To make sure you find a suitable, fast, and reliable peer-to-peer ( torrent ) server, you can filter the list of servers by displaying only those servers that are P2P-optimized.Now, determine which server you want to use. It is recommended to choose one close to your place of residence. However, you can use country attributes as a filtered measure.Distance:The distance between you and the country you want to surf. The higher the distance, the lower your download speed might be.To start the connection double-click on the chosen Country or click on the power button on the control screen.Some hints :Clear Cookies !Cookies in your browser keep location information from sites you've previously accessed without being connected to the VPN among other details. Clearing cookies is always a good idea when you wish to use a VPN and ensure that you do NOT enable any location services; Another good idea is to always use the private/incognito mode of your browser.Which precautions to consider regarding your anonymity ?None. In the seldom case, your connection to the CyberGhost VPN network gets interrupted, all your Internet traffic will be blocked until you decide to reconnect or shut down. In the meantime, no data will be transmitted.What else should I consider ?CyberGhost VPN blocks by nature all incoming traffic, so nobody can access your computer. If other peers in a P2P net also use access restrictions, your downloads are limited to those, who don't. If there are enough peers providing a certain file, you’re good to go. If there are not enough, the download rate can be lower than usual.For any additional information or concerns - it is best to approach the Support Department:via e-mail:support@cyberghost.rovia on-line request:https://support.cyberghostvpn.com/hc/en-us/requests/newvia 24/7 Live! Chat Sessions on our website",https://support.cyberghostvpn.com/hc/en-us/articles/360016966099-How-to-use-Peer-to-Peer-Torrent-optimized-servers-with-CyberGhost-VPN-on-Windows
Download & Install CyberGhost Security Suite on Windows,"This article will show you can download and install CyberGhost Security Suite on Windows.System requirements:.NET 4.6 compatible PC1 GHz PC 32-bit (x86) or 64-bit (x64) processor2 Gigabyte RAM (depending on your running Windows operating system)310 Megabyte free hard drive space (280 MB less, if Microsoft .NET 4.6 is already installed)Windows 10 (32 and 64 bits) or Windows 11Jump to...Download the AppInstall the AppLog into CyberGhost VPNDownload the AppGo to yourCyberGhost VPN online accountand log in with your Premium Username and PasswordSelect the""Download Hub""and then select the""Download"" buttonnext to the Windows versionLocate the installation file on your device after the download is complete. Most likely you will find it in the""Downloads""folder of your deviceInstall the App1. Double-click on the downloaded file2. Wait until the automatic installation is finished3. Choose""Agree & Continue""if you consent to this data being shared or you can select""I want to opt-out"" if you prefer not to4. Once the installation is successful, please wait a few seconds and your application will start automaticallyLog into CyberGhost VPN1. Once the application has opened, you will either have to create a new account or to log in.If you don't have a subscription yet, you can get if fromhere.Upon receiving your account details by email, simply click on""Return to Login""and enter your username and password to log inIf you already have an active subscription, click on""Return to Login""and log in with your CyberGhost username and password2. If you do not have an active subscription and would like to use our1-day trial offer- enter a valid email address and choose a strong password, then clickSign Up.Note :An example of a strong password is ""Cartoon4Coffee!"". It is long, contains uppercase letters, lowercase letters, numbers, and special characters. Strong passwords should not contain any personal information.Before the Trial period starts, you mustconfirmyour email address. Please check your inbox and follow the instructions to verify your email.The app will open in compact mode with theNotificationscenter as main screen and you can then select from the left side the components of the security suite (Privacy Guard,Security UpdaterandAntivirus).For any additional information or concerns - it is best to approach the Support Department:via e-mail:support@cyberghost.rovia online request:https://support.cyberghostvpn.com/hc/en-us/requests/newvia 24/7 Live! Chat Sessions on our website",https://support.cyberghostvpn.com/hc/en-us/articles/360016919000-Download-Install-CyberGhost-Security-Suite-on-Windows
Getting started with CyberGhost Privacy Suite on Windows,"Start theCyberGhost VPNclient by clicking on its desktop icon or from the start menu entry.The app will open in compact mode with theNotificationscenter as main screen.At this point you'll need to activatePrivacy GuardandSecurity Updaterin order to get an initial status your device's privacy and security.You can start your journey from different areas around the app:the navigation side-menu on the left sidethe mainActivatebuttons for each appthe right-sidedCyberHealthsegments which reflect each status of the apps.Each of the apps will display an initialwelcomescreen with a short description.You'll be given the possibility to eitherStart nowby activating the app and going through the setup, or toLearn moreabout the product on theCyberGhost VPN page.CyberGhost VPNWe've been actively listening to your constant feedback and kept the same easyone-click solutionapproach while doing a lot of improvements under the hood, like:New WireGuard protocolMore than 8000 VPN serversat your dispositionFaster connection time on all the available protocolsImproved overall stability of VPN connectionsWith just a fewclicks, you can fully customize your VPN experience according to your own needs fromthePrivacy settingsorSmart Rulestabs.CyberGhost Privacy GuardWe created this tool because we believe you should be the one deciding how much of your data you share with Microsoft.You will be able to disable the intrusive functionalities of your operating system and safeguard your privacy by choosing an initialprivacy level:No worries though. You canchangeit at any point in time, go full custom mode andtweakeach little setting or evenrevertto system default :CyberGhost Security UpdaterThere are enough security threats to worry about online and peopleare rarely awarethatusing apps that arenot up to dateposes asignificantsecurityrisk.The longerthe apps remain outdated, the worse the situation can get for you and your device's security.With theSecurity Updaterat your side you can:Scanyour device andgetanoverviewofyour existing softwareSeea list ofall the outdated appsSpotthe apps that need updating based on security vulnerabilitiesUninstall any potential threat from the impacted apps listMy DashboardIt's time for you to get in charge of your operating system's security and reclaim your privacy.Look at it as your personal command center from where you make the rules and achieve digital freedom.CyberGhost VPNcomes to your aid by providing individual statuses for each app and notifies you when any changes are made.Let’s reclaim your privacy!You can always find out more about our new Privacy Suite by checking theWhat's newbutton in the left navigation menu.For any additional information or concerns - it is best to approach the Support Department:via e-mail:support@cyberghost.rovia on-line request:https://support.cyberghostvpn.com/hc/en-us/requests/newvia 24/7 Live! Chat Sessions on our website",https://support.cyberghostvpn.com/hc/en-us/articles/360014517339-Getting-started-with-CyberGhost-Privacy-Suite-on-Windows
How to Set Up CyberGhost Privacy Guard on Windows,"CyberGhost Privacy Guard lets you disable the intrusive functionalities of your operating system and safeguard your privacy.Privacy Guard is the perfect tool to customize your privacy when it comes to:Microsoft Store appsMicrosoft EdgeMicrosoft DefenderWindows feature updatesSyncsAt this point you'll need to activatePrivacy Guardin order to get an initial status your device's privacy and security.To accessPrivacy Guard, open the CyberGhost app, select its logo from the left side of the dashboard and then hitStart Now.Awelcomescreen with a short description will be displayed. You'll be given the possibility to eitherStart nowby activating the app and going through the setup, or toLearn moreabout the product on theCyberGhost VPN page.You will be able to disable the intrusive functionalities of your operating system and safeguard your privacy by choosing an initialprivacy level:For this example, we choose the""Advanced""mode and selected""Next""to go through the setup :You can opt to disable or not additional Microsoft features. No worries though, you canchangeit at any point in time, select""Preview changes""totweakeach little setting or evenrevertto system default :Browse through the list of changes that are ready to be applied to your system. You can adjust each change by turning itONorOFF.Select""Apply""to implement the selected changes :After the Optimizations are applied, selectOK.Please note, some optimizations require a system reboot to be applied successfully. Either choose to""Reboot now""or receive a reminder later :How to Revert settingsThe settings can be reverted to their original state, if you choose to do so.Go to the main menu of the application and from the dropdown list you can pick one of the options below:Revert: it will revert to the initial state of the specific optimization chosen from the list.System default:it will revert All changes to their initial state.Clean up:it will remove old entries preferences.For any additional information or concerns - it is best to approach the Support Department:via e-mail:support@cyberghost.rovia on-line request:https://support.cyberghostvpn.com/hc/en-us/requests/newvia 24/7 Live! Chat Sessions on our website",https://support.cyberghostvpn.com/hc/en-us/articles/360018114459-How-to-Set-Up-CyberGhost-Privacy-Guard-on-Windows
How to configure OpenVPN for OpenELEC 6 on a Raspberry Pi,"Please note:This instruction covers Kodi installations with OpenELEC 5 and 7 as well as LibreELEC 7 final, LibreELEC 8 Alpha andLibreELEC 9with the 'VPN Manager for OpenVPN'. OpenELEC 6 doesn't support OpenVPN and will be covered in a separate article.Disclaimer:Please keep in mind that, although the technical process is as thoroughly documented as possible, you need to have at least some technical understanding. There's always a chance for an overseen mistake and/or things have changed and the article is not updated yet.Step 1: Create the VPN Configuration filesVisit yourCyberGhost VPN online accountand login with your Premium Username and PasswordClick on section'VPN'from the left-side menu, scroll down the page and click 'Configure Device'.Choose your desired protocol, in our example:OpenVPNand your preferredcountryandserver group, as described below.Also, type in aDevice nameto assign to your device, then configure the parameters for the new device.Country:Since native protocol connections may only be used with exactly one server you now have to choose the country you want to surf from; the server to be used in this country will be chosen by CyberGhost automatically.Server group:Choose the server group and the OpenVPN protocol (UDP or TCP) you want to use:UDPallows higher speed than the TCP version, but can result in broken downloads in some cases. This is the default setting.TCPallows more stable connections than the UDP version, but is a bit slower. Choose this version, if you have recurrent connection issues such as sudden disconnections.Once the desired parameters are chosen, save them with«Save Configuration»To view theOpenVPNcredentials that are generated for you on the configuration dashboard, press 'View'.Once the new page is opened, your connection credentials are generated for you but make note of the following information:Server group:This is the address of the country (server) you want to be connected with, e.g. '12345-1-ca.cg-dialup.net'. Note: This address changes with every country you have chosen in the step before. The actual single server to be used will be chosen automatically by CyberGhost.User name:A solely for this protocol generated user name.This is NOT your regular CyberGhost account user name, it's used only to authenticate with our servers via Manual Configurations.Password (you need to check the ""Show Password"" option in order to see it):A solely for protocol usage generated password.This is NOT your regular CyberGhost account Password, it's used only to authenticate with our servers via Manual Configurations.Pre-Shared KeyPlease download the configuration file. For that please click on 'Download Configuration' and download the config file to your computer (it's recommended that you create a special folder for the config, somewhere accessible like your Desktop andExtract/Copy thecontents of the .zip file there).Now, the saved config is a ZIP file, which contains the following single files:Once configured (as detailed above), please download the configuration file. Click on 'Download Configuration'and save the file on your computer. It's a ZIP file, which contains the following single configuration files:client.crt:This is the user certification fileclient.key:This is your private key fileopenvpn.ovpn:This is your OpenVPN configuration which can be deleted (the VPN Manager creates it's own)ca.crt:This is the certificate of the certification authority (not needed, later on, can also be deleted)Unzip the files 'client.crt' and 'client.key' from the zipped configuration file to a folder on your desktop.If you need to change the country you connect to, you must re-configure the location to use in your account management and download the new zipped config file.Step 2: Get and install OpenVPNSince OpenELEC 6 doesn't include OpenVPN you first need to download and install the 'Unofficial addon repository': For that start OpenELEC and click on 'System > Addons > Search':Type 'Unofficial' in the search field and click on 'Done':Open the repository entry either via a double click or the context menu ...... and install it:After the installation move back to the add-on's root ('Myadd‐ons') and click on 'Install from repository':Choose 'Unofficial OpenELEC Add‐ons':Move to 'Program add‐ons' and install 'openvpn' by Stefan Saraev.Optional:Test the OpenVPN installationTo test your installation of OpenVPN, you need an SSH connection provided by the program 'Putty'. Download itsWindows installer, install the program, and start it. In the first window enter the IP address of your Kodi device, press 'Open', and enter login ('root') and password ('openelec', resp. 'libreelec').Type 'openvpn' at the prompt. You should get a bunch of options displayed.Step 3:Get VPN Manager for OpenVPN and copy filesTo make sure, the VPN Manager gets updated properly, download the completerepository, as opposed to just the single add-on and copy theunzippedfile to the folder with the certificate and the key.Now copy all files to your device. For that, you need access to the file system on your OpenELEC/LibreELEC device. The easiest way is by using a FTP client likeFilezilla:First check for the OpenELEC/LibreELEC network IP address, usually something like '192.168.178.XXX' and note it. If you don't know how to find it, have a look at 'System > System info > Summary > IP address' in your Kodi media center.Start Filezilla, click on 'File > Server manager' and configure a new connection to your OpenELEC/LibreELEC device:Enter the 'Server' address (this is the network address of your OpenELEC/LibreELEC device), e. g. '192.168.178.25'Choose 'SFTP' as the 'Protocol'Choose 'Normal' as 'Connection type'Enter the 'User name' of OpenELEC/LibreELEC, usually 'root'Enter 'Password' for OpenELEC (usually 'openelec'), resp LibreELEC (usually 'libreelec')Click on 'Connect'Filezilla opens the file system of your Kodi installation right inside the folder 'storage'. Create a new folder called 'downloads' or 'VPN' or whatever you want to call it.Open the newly created download folder and copy all files into it (namely the files 'client.crt' and 'client.key' and the zipped repository file).Step 4: Install VPN Manager for OpenVPNAs before click on 'Install from zip file' and move to the folder, where you copied the three files from the last step to. Mark the repository and click on 'OK'.After the repository got installed, click on 'Install from repository', choose the 'Zomboided Add-on Repository', click on 'Services', then on 'VPN Manager for OpenVPN' and at last on 'Install'.Step 5: Configure VPN Manager for OpenVPNAfter installation move to 'My add-ons' and open the entry 'Services':Open 'VPN Manager for OpenVPN' and click on 'Configure'. You can use the Wizard or do it manually as we do it here (although the steps are the same). In the tab 'VPN Configuration' choose 'CyberGhost' as the 'VPN Provider' and enter the user name and the password you noted in step 1. DO NOT use your regular CyberGhost credentials.Click on 'OK' and select the connection profile, which fits your subscription: 'Premium and Premium Plus Account' or 'Promo Account':The next step is about the two files you saved from the downloaded configuration file.Click on 'OK' and then select the user certificate ('client.crt') and the user key ('client.key'). Once done, the VPN Manager will connect to your first VPN.For any additional information or concerns - it is best to approach the Support Department:via e-mail:support@cyberghost.rovia on-line request:https://support.cyberghostvpn.com/hc/en-us/requests/newvia 24/7 Live! Chat Sessions on our website",https://support.cyberghostvpn.com/hc/en-us/articles/213270949-How-to-configure-OpenVPN-for-OpenELEC-6-on-a-Raspberry-Pi
How do I manage my CyberGhost online account?,"This article presents a short overview of the features available on the CyberGhost account page. This can be managed online and can be accessed through theCyberGhost Account Management pagedirectly from your preferred web browser.Jump to…Download HubVPNSmart DNSSecurity SuitePassword ManagerIdentity GuardMy AccountDownload HubHere you can download and manage every CyberGhost application and service.Once a product is installed or configured on a device, it will be visible in the products list. As you can observe in the figure below, selecting a product, such as the VPN, will give you the option to edit a certain configuration or delete it from a device. It will also provide other information such, as the date of installation and the number of devices that can still be linked with your subscription.VPNThis page lists all registered devices (between 1 and 7 devices, depending on your subscription). A device can either be a Mac, Windows PC, Android Firestick, Android devices or iOS devices used with a CyberGhost client or manual configuration.Note that the number of possible devices refers to the ones that can be used at the same time and not the number of devices in general. This means that you can use your CyberGhost account on more than the standard 7 devices, just not at the same.Smart DNSSmartDNS is a CyberGhost feature that allows you to access geo-restricted Internet content. This feature will help you unblock streaming content like US Netflix, US Hulu, UK Netflix, etc.Clickherefor more information on how to configure it.Security SuiteSecurity Suite refers to the CyberGhost additional security apps:Privacy Guard, an application meant to help you control the Microsoft privacy settings.Security Updater, an app meant to detect vulnerable applications or programs from the system that require updates.Antivirus, an app that offers real time protection against malicious software.The account section of this feature from Cyberghost has minimal functionality, as the main control for the suite is done through the CyberGhost installed application's dashboard. From the account section, it just presents the list of your devices that the suite is used on and the option to remove it or edit its name.The Security Suite pack is available to purchase, separately, as an addon to the standard VPN subscription.Password ManagerThe Password Manager is a feature that allows you to save passwords and obtain an easier access to your online platforms and accounts. The extension of this feature is available on Google Chrome, Firefox and Safari browsers.The web-vault of the Password Manager allows you to also import other passwords, from other managers, if these are compatible with the file format.Identity GuardCyberGhost ID Guardis a feature that will automatically alert you in case your email address is revealed in a data breach. allowing you to change your password quickly.It also includes aPassword Checkerwhich allows you to test a password if it was used before in a data breach. For more information on the Identity guard, clickhere.My Account1.Account settingsFields where you can edityour: Username, E-mail, and Password and even assign a profile Ghostie to your account.Use your activation key: This is used to activate purchases that are either made through a third party site or from a box.Delete my account: This allows you to delete a certain account, however take note that it does not also serve as a subscription cancelation or a refund request. After deleting an account, you can't reactivate an already used activation keynor is our support able to recover deleted activation keys.2. SubscriptionsThis area is only visible if you have a running subscription connected to this account and presents 3 main categories:Active Subscriptions: Displays the current subscription type this account is running on and its details, such as: date of purchase, expiration date, to download the invoice of it or cancel the automatic renewal.Payment Details: Shows the payment method that was used for the CyberGhost subscription, and an option to update it, in case the listed card is either expired or not available anymore.Subscription Historylists the transactions that were made on this account3. Refer a FriendIf you join and refer CyberGhost to a friend, he or she will know, you’re wide awake of what’s going on in this world, that you care about him or her and you know your way around.How does it work?Check it outhere.For any additional information or concerns - it is best to approach the Support Department:via e-mail:support@cyberghost.rovia on-line request:https://support.cyberghostvpn.com/hc/en-us/requests/newvia 24/7 Live! Chat Sessions on our website",https://support.cyberghostvpn.com/hc/en-us/articles/360017307440-How-do-I-manage-my-CyberGhost-online-account
"How to use MediaStreamer on your Apple TV (HD, 4K, tvOS)","MediaStreamer is a DNS service designed to improve your streaming experience. If your device doesn’t natively support VPN, MediaStreamer is a great alternative for streaming. https://www.youtube.com/embed/AmRlndxw8qE?rel=0",https://www.expressvpn.com/support/vpn-setup/stream-to-apple-tv-with-dns/)
Install CyberGhost VPN on MacOS,"This guide will show you can install CyberGhost on your Mac.You can watch our short demonstration video, or scroll below for a step-by-step guide.Jump to...System RequirementsInstallationSystem RequirementsTo install CyberGhost VPN successfully and use the software you need the following minimum system requirements:Mac OS X 10.13 (High Sierra) or newer OSAt least 70 megabytes of free hard drive spaceIf you're unsure whether your Mac is compatible, you can check Apple’s officialcompatibility list.InstallationFollow these steps to install CyberGhost VPN on your Mac:Go to your onlineaccount management page.Log in with your username and password.UnderDownload Hub, selectDownloadnext toCyberGhost VPN for macOS.On the next page, you will receive a pop-up asking if you wish to allow downloads on our site. SelectAllowand wait for the file to downloadOpen the downloads folder and double-click on the installation file.Follow the on-screen instructions.You will need to confirm the installation with your macOS username and password. Please do not enter your CyberGhost username and password here.Once the installation process in finishee, you can move the installer to bin.Next, you will receive a pop-up asking if you wish to receive notifications from our app. SelectAllowand close the installation window.You will receive a notification asking for your consent to send a limited amount of anonymized data.This data cannot be tracked back to you, and cannot be used to compromise your digital anonymity. It is meant to help us troubleshoot any potential issues, so you can selectAgree & continue.At the login screen, enter your CyberGhost username and password and selectLogin.Next, the software will ask to install a VPN profile. This will enable CyberGhost VPN to redirect your internet traffic through an encrypted tunnel to secure your data.Lastly, you will need to give CyberGhost VPN Keychain access. This ensures that the app has permission to encrypt your internet traffic. For this, please selectAllow keychain access.Enter your macOS account password in theKeychain dialogue boxand selectAlways Allow. Now, you have successfully installed CyberGhost VPN on your Mac.Need assistance? Contact our Customer Support team:via email atsupport@cyberghost.rovia online request athttps://support.cyberghostvpn.com/hc/en-us/requests/newvia 24/7 Live Chat by clicking the Support button below",https://support.cyberghostvpn.com/hc/en-us/articles/360020876860-Install-CyberGhost-VPN-on-MacOS
How to sign up (new users) or log-in (existing users) to CyberGhost VPN for macOS,"I am new to CyberGhost|I am an existing subscriberI am new to CyberGhostNew subscribers can benefit of a 1 day trial on MacOS devices.Once you install the CyberGhost application, you need to select the option toSign up.Enter a valid email address, confirm the password in the two available fields and then hit theSign upbutton.On the next page, you will be informed that a confirmation e-mail was sent to the e-mail address of the trial account, simply check your e-mail and confirm it by hitting the ""Activate Trial"" button.Once the trial is activated and the app from the Mac is refreshed, it will display a timer that indicates the validity period of the trial. This also works as a button to upgrade to a paid plan, where it will open the page with our latest offers.I am an existing subscriberIn case you already have aregularCyberGhost multi-platform subscription please enter your credentials (user name and password) and click on 'Login'.For any additional information or concerns - it is best to approach the Support Department:via e-mail:support@cyberghost.rovia on-line request:https://support.cyberghostvpn.com/hc/en-us/requests/newvia 24/7 Live! Chat Sessions on our website",https://support.cyberghostvpn.com/hc/en-us/articles/360020878880-How-to-sign-up-new-users-or-log-in-existing-users-to-CyberGhost-VPN-for-macOS
How to use CyberGhost VPN for macOS,"This article will guide you on how to perform the most basic steps with CyberGhost VPN on MacOS.To jump to a specific topic, check out the hyperlinks below:How to establish a quick connectionHow to select various server locationsHow to mark favorite serversHow to use download serversHow to stream popular channelsHow to change the VPN protocolConnect to CyberGhostTo open the app, use the top menu icon or you can useSiriwith the voice command ""start CyberGhost"".This will bring the CyberGhost app menu and to have a quick connection, you can simply leave the default ""Best location"" option and just hit the power button from the middle.Once the connection is established, the power button will change color and it will show the details of the connected server. The same button can also be used to disconnect from the server.The CyberGhost server categoriesAll ServersIn this category you will find all the available regular servers from all the countries that we have available:1.Expand the CyberGhost menu from the top left arrow2.Select the ""All servers"" section to see the list of all the available country locations.3.If you wish to narrow it down to a specific city or server, you can expand the server menu further to see a full listOnce you have the full list displayed, select the server that you wish to connect to and then hit the power button to connect.FavoritesCyberGhost comes with a custom category entitled ""Favorites"" , where you can populate it with specific countries or cities that you would like to connect to more often or even certain streaming servers.To add a server to ""Favorites"", highlight the star next to its name and this will be instantly added to the Favorites category.If you ever need to remove a server from Favorites, you can just hit the star icon again so that it will not be highlighted.For downloadingIn this category you will find servers for download purposes, e. g. for Torrents, that meet special conditions for speed, stability, performance, and compatibility (since not all countries allow P2P technologies).1.Expand the CyberGhost menu2.Select the ""For downloading"" category3.Select any of the servers listed on the right sideAlbeit our servers have absolutely no limit in speed or performance, this can be influenced by other factors as well, thus, it is recommended to choose download server locations that are closer, for a better performance.For StreamingAs you may know, most streaming sites are against VPN usage and actively block the IP addresses of VPN servers; for this reason most of the regular servers might not work with a desired channel.In the ""For streaming"" category, you will find the servers that are constantly tested by us to work with the popular sites that are listed.For better results, it is recommended to clear the browser cache and cookies after a VPN streaming server connection is well established. Then you can access the streaming site through the browser application.Dedicated IPThis category applies only to a subscription that contains a dedicated IP addon. In here you can activate the dedicated IP token and afterwards find the location of the dedicated server.More information about dedicated IP subscriptions can be foundhere.To redeem your Dedicated IP check out ourguide!CyberGhost SettingsHow to change the VPN protocol (available on system version MacOS 10.14 or higher)A protocol is a set of rules that are used to establish a secure connection between the VPN client and the VPN server. On MacOS, there are two protocols that CyberGhost can use, IKEv2 and the latest WireGuard.As far as security goes, they are similar but since performance is rather subjective each user can experience different results. Thus, if the performance of a certain connection is not as expected, starting with MacOS versions 10.14 (Mojave), you can select between the two of them from the CyberGhost app:1. Go to CyberGhost settings2. Select ""Preferences""3. A new Window will appear, usually set on the default ""General"" tab4. Underneath Protocol: you will be given the option to switch between the two available protocols, IKEv2 and WireGuard.Note:WireGuard protocol will need a helper tool to establish the connection and you will receive a pop-up to install it, the first time you try to establish a connection through this protocol.For any additional information or concerns - it is best to approach the Support Department:via e-mail:support@cyberghost.rovia on-line request:https://support.cyberghostvpn.com/hc/en-us/requests/newvia 24/7 Live! Chat Sessions on our website",https://support.cyberghostvpn.com/hc/en-us/articles/360020933060-How-to-use-CyberGhost-VPN-for-macOS
How to use streaming - optimized servers with CyberGhost VPN on macOS,"As you may know, most streaming sites are against VPN usage and actively block the IP addresses of VPN servers; for this reason most of the regular servers might not work with a desired channel.In the ""For streaming"" category, you will find the servers that are constantly tested by us to work with the popular sites that are listed.Expand the CyberGhost menu by clicking the arrowSelect the ""For streaming"" categorySearch from the right side menu for a streaming server that might be optimized for the site that you wish to watch (for example, Netflix, BBC iPlayer, Hulu etc.) and connect to it.For better results, it is recommended to clear the browser cache and cookies after a VPN streaming server connection is well established. Then you can access the streaming site through the browser application.For any additional information or concerns - it is best to approach the Support Department:via e-mail:support@cyberghost.rovia on-line request:https://support.cyberghostvpn.com/hc/en-us/requests/newvia 24/7 Live! Chat Sessions on our website",https://support.cyberghostvpn.com/hc/en-us/articles/360021003640-How-to-use-streaming-optimized-servers-with-CyberGhost-VPN-on-macOS
How to change the VPN protocol from CyberGhost VPN on macOS Mojave or higher,"A VPN protocol is a set of rules used to establish the VPN connection securely to a server.Although we use protocols that are both secure and fast, the performance of a connection can differ from one user's experience to another. That is why with the new version of CyberGhost, you have now the possibility to choose between IKEv2 or WireGuard protocol.For more detailed information on our VPN protocols, you can accessthis link.The steps to perform this change from the app's interface are illustrated below:1. Go to CyberGhost settings2. Select ""Preferences""3. A new Window will appear, usually set on the default ""General"" tab4. Underneath Protocol: you will be given the option to switch between the two available protocols, IKEv2 and WireGuard.Note:This extra feature is available on macOS systems 10.14 (Mojave) or higher and it will need a helper tool to establish the connection. You will receive a pop-up to install it, the first time you try to establish a connection through this protocol :For any additional information or concerns - it is best to approach the Support Department:via e-mail:support@cyberghost.rovia on-line request:https://support.cyberghostvpn.com/hc/en-us/requests/newvia 24/7 Live! Chat Sessions on our website",https://support.cyberghostvpn.com/hc/en-us/articles/360021003440-How-to-change-the-VPN-protocol-from-CyberGhost-VPN-on-macOS-Mojave-or-higher
Uninstall CyberGhost on a Mac,"A. Ensure that the CyberGhost app is properly closed1.Open the CyberGhost app from the Top menu2.Rich-click on the Settings symbol (the gear icon)3.Select ""Quit CyberGhost VPN""B. Uninstall the CyberGhost app from the Application's menu1.Open Finder2.Select Applications3.Right-click on the CyberGhost app icon4.Select""Move to Bin""or""Move to Trash""- You will be asked to confirm the deletion of this app with your MacOS password- It is also recommended to perform a restart of the system after you uninstall CyberGhostFor any additional information or concerns - it is best to approach the Support Department:via e-mail:support@cyberghost.rovia on-line request:https://support.cyberghostvpn.com/hc/en-us/requests/newvia 24/7 Live! Chat Sessions on our website",https://support.cyberghostvpn.com/hc/en-us/articles/360020901160-Uninstall-CyberGhost-on-a-Mac
Will the payment be logged and/or compromise my anonymity ?,"No. Your personal data like Credit Card number or PayPal account will be stored by the respective third party seller and held separately from your CyberGhost VPN account and CyberGhost S.R.L. in general. Neither will the seller or reseller get any data about an account other than an anonymous ID nor will CyberGhost ever be informed, who bought a subscription.",https://support.cyberghostvpn.com/hc/en-us/articles/214531685-Will-the-payment-be-logged-and-or-compromise-my-anonymity
Why don’t I get 100% of my normal internet speed ?,"What impacts speed ?The 'VPN Process'What can I do to improve my speed ?Given optimal conditions, your VPN speed might nearly reach the speed of your physical Internet connection. However, certain additional factors can also have a negative impact.What impacts speed ?If your physical Internet connection is limited to e.g. 768 kBit/s, then your VPN speed can't be any faster.Problems related to the infrastructure of the Internet. When connecting to a foreign VPN server, an issue with the network links between you and this server can cause performance problems. This may be congestion caused by a failure of an undersea Internet cable or maintenance by your ISP's upstream network provider.ISP throttling. Some providers will intentionally throttle VPN connections or throttle your entire connection if you are using a lot of bandwidth. This degrades your VPN speed as your entire connection is now running slower.Your Internet service provider's connection speed. In most cases, the speed of your VPN connection is limited by the overall amount of data that your ISP can process and the speed at which it can carry it over its network..CyberGhost's configuration is not compatible with your Internet connection (different packet sizes). If that's the case, there should be the same problem on all servers and at all times.The number of people using the VPN server.The VPN tunneling protocol you are using.What can I do to improve my speed ?Restart your device.Switch theVPN serverto another one that is located closer to your current location.Change your Protocol Settings- open theSettingsmenu and switch toWireGuard®in the VPN protocol selection.Change to a server with a lower load percentage.Temporarily disable your antivirus or firewall.Close P2P-based programs (generally software downloads) running in the background.Refresh your local network1. Remove the power cables from the modem and router.2. After waiting 30 seconds, connect the modem to the router.3. After waiting 30 seconds, plug in the router.4. Wait 30 seconds, it is now refreshed.Install thelatest versionof CyberGhost VPNTry another connection option on your device. Clickherefor tutorials on the different connection methods.Furthermore, the speed of the internet can be affected directly by the state of your hardware and firmware, so we recommend also :Use an Ethernet cable instead of Wi-Fi.Obsolete routers can cause problems with your Wi-Fi connectivity and slow down your Internet speed. Check the router itself. You will see numbers like these :11ac - operates according to the latest standards;11n - a bit older, but still functional;11g - fairly outdated, so it's probably time to consider replacing it';Up-to-date drivers can also influence the speed; check for the latest updates for your Ethernet adapter, motherboard chipset, and network drivers, BIOS updates, etc.The 'VPN Process'When using a VPN connection, all data is divided into packets before being sent. These data packets are then encrypted with AES-256 bit. This is a complex and computationally intensive step.After the encryption, more control information is set before the data (Header), so due to additional information, every packet is bigger as it originally was. This so-called “Overhead” is proportionally bigger, the more small packages are sent since the control information has a fixed size regardless of the size of the original packets. For example, at CyberGhost (via OpenVPN) this takes approximately 50 bytes per packet (it varies depending on the setting for encryption, authentication, etc.).For example, a 1 MB file which is sent into 874 packets has 874*50 Byte additional data (Overhead), which must be transmitted, so 43700 Byte. This means 5%. If 1 MB file is sent into 2097 packets, then 2097*50 Byte additional data (Overhead) must be transmitted, so 123723 Byte. This means approx. 12% Overhead.The size of the data packets depends among others on the following aspects: over which servers are these sent and which packets size does the remote station accepts (MTU).At the measurement of speed tests with an active VPN connection is measured only how many user data can be transmitted over a period of time, therefore the above-mentioned Overhead is not measured.So when using a VPN, more data must be transmitted. Through the encryption, this lasts even longer, depending on the processor load of the PC. When you are surfing on the Internet over a CyberGhost server, you are not the only one using this, which means that this server must receive a lot of packets, to encrypt/decrypt and forward.A server on which are connected for example 50 persons and each of them wants to download with 50 Mbit/s, must be able to handle at least 2,4 Gbit/s user data. But the TCP/IP protocol used on the Internet adds another “Overhead”, so in practice, the measurements have shown that a 1 Gbit fastened server reaches approx. 580 Mbit/s net bandwidth (user data bandwidth). Therefore in order to transmit 2,4 Gbit/s user data, the server must be equipped with a 5 Gbit connection. Such servers are hardly available, usually, the regular servers offer only 1 Gbit connections. If we would decrease too much the number of simultaneous users per server, this would no longer be financially viable on one hand, and on the other hand, the anonymity level would have to suffer.For any additional information or concerns - it is best to approach the Support Department:via e-mail:support@cyberghost.rovia on-line request:https://support.cyberghostvpn.com/hc/en-us/requests/newvia 24/7 Live! Chat Sessions on our website",https://support.cyberghostvpn.com/hc/en-us/articles/213895605-Why-don-t-I-get-100-of-my-normal-internet-speed
Set Up CyberGhost VPN on Android,"This guide will show you how to set up CyberGhost VPN on an Android device. You need an Android device running at leastOS 5.0 (Lollipop)and an active CyberGhost VPN subscription to enjoy enhanced privacy and security. To become a Ghostie clickhere.Jump to...Download & InstallLog into the AppConnect to a VPN ServerDownload & Install1. From your Android device, go to the Play Store app.2. Search forCyberGhostand click on theInstallbutton once you find the right app.Log into the AppWhen you first open the app, you’ll receive a notification asking for your consent to send a limited amount of anonymized data that will help us troubleshoot any potential issues.This data cannot be tracked back to you, and cannot be used to compromise your digital security.1. Read the notification and selectAgree & continue, if you so choose.2. If you are already subscribed, tap onExisting user. Otherwise, seehow you can subscribe to CyberGhost VPNvia Google Play Store.3. Enter your username and password.4. Tap onLogin.Connect to a VPN ServerFollow these simple steps to connect to VPN for the first time:Click the 'Power' button in the app, and it will automatically connect you to the best server available based on your current location.If you connect to a VPN server for the first time, a pop-up window will appear asking you to accept the connection request. ClickAcceptto allow the CyberGhost application to manage the VPN tunnel.If your connection is successful, the status will show asConnectedto in the main window. In the lower part of the main window, you will also see your new IP address, the amount of data transferred, and the protocol used.To disconnect from the server, you just have to hit the power button once again and the status will change to disconnected.Following these steps will ensure that you are successfully connected to a VPN server, and that your online activities remain secure and private.For any additional information or concerns - it is best to approach the Support Department:via e-mail:support@cyberghost.rovia on-line request:https://support.cyberghostvpn.com/hc/en-us/requests/newvia 24/7 Live! Chat Sessions on our website",https://support.cyberghostvpn.com/hc/en-us/articles/360006572433-Set-Up-CyberGhost-VPN-on-Android
How to use CyberGhost VPN on Android,"This article presents the basic features and functionalities of the VPN on Android mobile devices, will guide you on how to apply the steps and provide tips and tricks. If you wish to skip some of the steps, and jump to a specific topic, simply select it from the below list:How to Connect to the VPNHow to Select Streaming ServersHow to Mark Favorite ServersHow to Set-Up a Dedicated IPHow to set a Wi- Fi ruleHow to Use Split TunnelHow to Connect to the VPN1.Start by finding the CyberGhost VPN application from your device menu and tap to open it.2.The app will open the main screen of the app, in a disconnected mode.To perform a quick connection, simply hit the power button from the middle of the screen. This will connect you to theBest Locationoption, a server which provides the best performance in accordance with your current location, with optimal settings in terms of speed and user load.To expand the list of servers and select a more specific location, you need to push the ""Best Location"" button and then you can choose any server from what will be listed in the expanded categories.Countries:Lists all the available countries / cities.Streaming:Lists the servers that are optimized for watching entertainment channels.Favorites:Lists servers that you marked as favorites, using the star symbol.To disconnect from the server, simply tap the power button once again and to switch back to the ""Best Server"" option, just press the X next to the selected country.How to Select Streaming Servers1.Expand the CyberGhost app menu by tapping onBest Location2.Select theStreamingcategory3.Select the streaming channel that you wish to watch and connectNote:To obtain better results, it is recommended to stream via a browser application and to clear the cache and cookies before playing a video.How to Mark Favorite Servers1.Expand the CyberGhost app menu by tapping onBest Location2.Select theCountriescategory3.Here, you can either add a specific city by further expanding the menu or just add a country as favorites by tapping on the star symbol, as shown in the example below:Note:Some servers are represented by a single city, thus, the expansion arrow (as shown at step 3) is not displayed for such countries.How to Set-Up a Dedicated IP1.From the CyberGhost app menu, tap on Settings2.Select the VPN tab3.Next to ""Dedicated IP"", tap on the ""Not set up"" button. If you already have a dedicated IP active, it will not display such feature, as only one dedicated IP can be validated per device.4.On the next screen, simply copy and paste the token that you redeemed and tap OK.To connect to the dedicated IP server, you can either find in the countries category or marked as favorites.Note:This addon is purchased separately and it is linked with a unique token that you need to redeem; it is not linked directly to the CyberGhost account. For more information on how to redeem the Dedicated IP token, clickhere.How to set a Wi-Fi ruleCyberGhost gives you the option to set rules either on secure Wi-Fi networks (such as ones from a home network) or an unsecured Wi-Fi (such as public ones).From the CyberGhost main menu tap on SettingsNext, tap on Wi-FiMake sure that this feature is enabledYou can set any rule for a Wi-Fi connection from the available list:Ask :When the specific Wi-Fi connection is detected, CyberGhost asks you if you want to be protected.Protect :When the specific Wi-Fi connection is detected, CyberGhost automatically starts a VPN connection.Disable protection :If you already have a VPN connection running and you enter a (different) Wi-Fi network, CyberGhost will disable the VPN connection.Ignore :By choosing this option, CyberGhost will not connect automatically to any Wi-Fi network, nor send any notification, leaving you the option to connect manually to the VPNIf you would ever want to change a rule for any specific Wi-Fi, you can select the buttonManage Wi-FI Networksand edit the rules of each network that you had set rules on.How to UseSplit TunnelThe Split Tunneling feature enables you to choose which apps will access the Internetthrough the VPN tunneland which apps you would like to allow to access the Internet via your main connection.Note:By default, CyberGhost routes ALL traffic from ALL apps through the VPN tunnel (where your IP is changed and all traffic encrypted). If you do not make any changes to Split tunneling after installing CyberGhost, all of your apps will go through the VPN by default.First, ensure that no active connection is on, when trying to set a new Split Tunneling rule, and go toSettingsTap on theVPNtabScroll down and select theApp Split TunnelTap onModeSetCustom rulesOnce ""Custom rules"" is set, you can simplyuncheckthe boxes next to each app you want toallow accessthrough your main Internet connection and not the VPN tunnel.Note:When selecting the Custom rules mode, you can use the ""Protect new apps"" option to ensure any NEW app, installed after you've set the custom rules is protected automatically.For any additional information or concerns - it is best to approach the Support Department:via e-mail:support@cyberghost.rovia on-line request:https://support.cyberghostvpn.com/hc/en-us/requests/newvia 24/7 Live! Chat Sessions on our website",https://support.cyberghostvpn.com/hc/en-us/articles/360006573873-How-to-use-CyberGhost-VPN-on-Android
How to Stream with CyberGhost VPN on Android,"Servers used for streaming purposes must meet special conditions, e. g. for speed and stability, but also for other aspects, since not all streaming services are easily available outside a certain region.Server Choice1.Expand the CyberGhost app menu by tapping onBest Location2.Select theStreamingcategory3.Select the streaming channel that you wish to watch and connectNote:To obtain better results, it is recommended to stream via a browser application and to clear the cache and cookies before playing a video.If a streaming channel is not yet available in our list, feel free toshare your feedbackwith our team so that we may include it in the future.For any additional information or concerns - it is best to approach the Support Department:via e-mail:support@cyberghost.rovia on-line request:https://support.cyberghostvpn.com/hc/en-us/requests/newvia 24/7 Live! Chat Sessions on our website",https://support.cyberghostvpn.com/hc/en-us/articles/360007874873-How-to-Stream-with-CyberGhost-VPN-on-Android
How to select a Country or Single Server with CyberGhost VPN on Android,"When using the'Best Location'option you will establish a connection per default completely automatically on a server in one of the available countries, but you can also choose your favorite location manually by either changing the respective country or by directly activating an individual server.Country Choice1. To manually select a country, go to the main screen and simply press on the""Best Location""area.2. On the next screen, you see a list of all countries CyberGhost operates servers in.To make it easier for you to find your country of interest, simply type the respective name in the search field above the first country line.Note:If the search field is not visible, swipe downwards to reveal it.City Server Choice1.Expand the CyberGhost app menu by tapping onBest Location2.Select theCountriescategory3.Further expand the list of servers and select one of the displayed citiesNote: Country servers that do not have the expand button are represented by a single city.Main ScreenOnce a country or single server is activated, the app switches back to the main screen, where the country or server will be shown right beneath the connection confirmation. The lower part of the main window will display also information about your new IP address, the amount of data transferred and the protocol used to establish the connection.Note that, although you are anonymized, you still need to be careful with your personal data. If you participate on a social network like Facebook, or if you are logged in to real name Google account while being anonymized, or expose your real name and/or email address in a different context, you will most certainly compromise your anonymity. Also some apps have rights to access your GPS.DisconnectingTo disconnect from the current connection tap on the power button.After disconnecting the VPN, the country or server you used last will replace the default connection type and stay valid for all future connections - until you choose a different country or city or switch back to 'Best Location'.For any additional information or concerns - it is best to approach the Support Department:via e-mail:support@cyberghost.rovia on-line request:https://support.cyberghostvpn.com/hc/en-us/requests/newvia 24/7 Live! Chat Sessions on our website",https://support.cyberghostvpn.com/hc/en-us/articles/360006574053-How-to-select-a-Country-or-Single-Server-with-CyberGhost-VPN-on-Android
Manage your CyberGhost VPN Settings and Features on Android,"In this article you will find a presentation of the CyberGhost application settings on Android mobile devices and features that you can optimize your VPN connection with. If you wish to skip to a specific topic, you can use the links below:Jump to...AccountGeneralVPNWi-fi ProtectionAccountUsername :Shows the current active account name, for trial version users it's the e-mail address used when registering. You can change your user name at any time in yourCyberGhost online accountPlan:Your type of subscription.Active devices :Amount of active devices. Depending on your subscription you can use your plan with different numbers of devices at the same time. To remove or add a device, please visit youronline account.Renews on: Show the end date of the current subscription.Manage devices:This is a link that will redirect you to the personal account page.GeneralAnonymous statistics :If you activate it, we only examine a limited amount of anonymous data - device type (phone, tablet, or tv), Android version, and whether you are a free or a paying user. This data cannot be traced back to a real person, but it helps us scale our infrastructure and troubleshoot any potential issue.Use Domain Fronting :The 'Domain Fronting' feature is needed, if the domains *.cyberghostvpn.comor the corresponding IP addresses are blocked (meaning: our API is not reachable; e.g. because of censorship).Share Network Data for Troubleshooting: Useful for debugging connections when contacting SupportHaptic response :Use your device's sensors with our app to add a sensory experienceArticle catalog :Displays all articles available in the application.FAQ :Displays a list of all our F.A.Qs articles.Report a problem :A direct link to send out requests to our support team or share your opinion about the CyberGhost app! Any kind of feedback helps us improve and we are eager to hear your thoughts.App version, Terms of use, privacy policy, Imprint:Legal and internal information.Log out :Here you log out from the current active account. The app switches to the start page, where you can log-in again.VPNConnection Checker :It will help you determine whether or not you have a properly working internet connection and are ready for a VPN. By simply tapping on, the tool will analyze the reachability of your device as well as the Internet connection and the passage to the CyberGhost network.Dedicated IP :Here you can add and activate your Dedicated IP address token.VPN protocol :Here you can choose between OpenVPN and WireGuard® to be your default protocol.'Auto'option will connect you by default with WireGuard®.Small packet size :Here you can enable a small MTU size, if you are experiencing website blockages. This option will automatically adjust it according to the capabilities of your underlying network.Use random port to connect:This option allows CyberGhost to establish connections through randomly chosen ports (which will be changed with each new connection), instead of a fixed port (which makes it easy for providers to slow down or block CyberGhost connections). In case your provider or network admin (such as in Hotels or Airports) doesn't allow VPN traffic, the activation of this option might help to successfully connect to the CyberGhost network because usually only a few ports are blocked.Content Blocker:Enabling this will block domains used for ads, trackers and malware.App Split Tunnel:This features allows you to choose which apps will access the Internet through the VPN tunnel and which apps will be omitted by the VPN encryption. By default, CyberGhost routes all traffic from all apps through the VPN tunnel (where your IP is changed and all traffic encrypted). If you do not make any changes to Split tunneling after installing CyberGhost, all of your apps will go through the VPN by default.Wi-Fi ProtectionHere you activate a warning each time CyberGhost detects a new Wi-Fi network. If you are concerned about your device's security in public hotspots (which you should), it's recommended to keep this option activated at any time. To define the way Wi-Fi networks should be treated at availability, tap on the resp. entry.Now choose one of the following actions (all options are available for password-protected networks and open networks alike):Ask :Every time your device detects a Wi-Fi network, CyberGhost asks you if you want to be protected.Protect :Every time your device detects a Wi-Fi network, CyberGhost automatically starts a VPN connection.Disable protection :If you already have a VPN connection running and you enter a (different) Wi-Fi network, CyberGhost will disable the VPN connection.Ignore :By choosing this option, CyberGhost will ignore any Wi-Fi network.Manage Wi-Fi Networks :Since CyberGhost remembers networks and the reaction wanted on any particular network you can manage here all known networks, such as assigning a different reaction to a specific one, by simply tapping on the respective Wi-Fi Network.These are all you can currently find on our Android application and everything you need to customize it to your needs.For any additional information or concerns - it is best to approach the Support Department:via e-mail:support@cyberghost.rovia on-line request:https://support.cyberghostvpn.com/hc/en-us/requests/newvia 24/7 Live! Chat Sessions on our website",https://support.cyberghostvpn.com/hc/en-us/articles/360008755234-Manage-your-CyberGhost-VPN-Settings-and-Features-on-Android
Sign Up (New Users) or Log Into (Existing Users) CyberGhost VPN,"After installing CyberGhost VPN, you can login or subscribe within the app.Jump to...I Am New to CyberGhost VPNI Already Own a CyberGhost VPN Subscription1. I Am New to CyberGhost VPNWhen you open CyberGhost VPN for the first time, you will receive a notification. It asks for your consent in sharing a limited amount of anonymous data.This data will not be tracked back to you.It just helps us to scale our infrastructure and troubleshoot any potential issues, so you can safely agree without compromising your digital identity.1. Read the notification and selectAgree & continue, if you so choose.2. On the next page, choose your preferred subscription plan. You have the option to choose between a yearly plan or a monthly plan.3. When subscribing via Google in-app purchases, you’ll be prompted tocreate a new accountat the next screen.4. Enter your email address and select a password. Choose a secure one with minimum 8 characters, lowercase and uppercase letters, a number, and a special character.5. You will receive an email to confirm your account. Click on the link in the email to activate your account.2. I Already Own a CyberGhost VPN Subscription1. Tap onExisting useron the bottom of the screen.2. Enter your username and password3. Tap onLogin.4.Get started with CyberGhost VPN!Encountered issues logging in?Read here:Lost your password?Tap on Recover Account, and follow the on-screen instructions.Activated too many devices?You might encounter an error letting you know you activated the maximum amount of allowed devices. Please visit My Account, and remove any device(s) you no longer use. Then you can login on your Android device.For any additional information or concerns - it is best to approach the Support Department:via e-mail:support@cyberghost.rovia on-line request:https://support.cyberghostvpn.com/hc/en-us/requests/newvia 24/7 Live! Chat Sessions on our website",https://support.cyberghostvpn.com/hc/en-us/articles/360007962953-Sign-Up-New-Users-or-Log-Into-Existing-Users-CyberGhost-VPN
How to Set Up CyberGhost VPN on iOS,"The CyberGhost app for iOS provides the functionality of a fully-featured VPN for your Apple iOS device with all its advantages, such as anonymization, IP change, streaming, safe transactions, and more.It can be downloaded from Apple's iTunes Store and used for free without limitation for 7 days, after deciding on a subscription type. After 7 days the chosen subscription sets in automatically unless it has been canceled beforehand.You need a device runningiOS 13 or lateran active CyberGhost subscription.You don't have a subscription yet? To become a Ghostie, clickhere.Jump to...Download & InstallLog into CyberGhost VPNYour first VPN connectionDownload & Install1. Locate theApp Storeon your device and search for'CyberGhost VPN'2. Tap on 'GET'and the installation process will start.Log into CyberGhost VPN1. Launch the application directly or go back to your phone's home screen and click on the CyberGhost VPN application.2. Choose""Agree & Continue""if you consent to this data being shared or you can select ""I want to opt-out"" if you prefer not to.3. If you don't have the subscription yet, feel free to sign up for a7-day free trialby entering a valid e-mail address and clicking on 'Continue'.4. Click on 'I already have an account' and log in as an existing user. Enter the email address / username you use when logging in and your password.5. CyberGhost also would like to send push notifications for better device protection, e.g. when automatically detecting an open Wi-Fi network to instantly establish a VPN tunnel. Again, please allow CyberGhost to act accordingly and tap on'Enable notifications'and select'Allow'in the next step.Your first VPN connection1. Once you are logged in, the main screen of the app is displayed.Tap on the'Power'button and the app will instantly connect to the Best Server available based on your current location.2. When making a VPN connection the first time, CyberGhost VPN will need to add VPN configurations to your device. That is necessary for CyberGhost VPN to be able to create and manage a VPN tunnel.CyberGhost DOES NOT spy on your traffic and/or analyze any individual data. Instead CyberGhost offers a unique and strict No-Logs policy, which keeps your data private, no matter which server you use or in which country a server is located. The required rights to add VPN configurations and send notifications solely serve basic CyberGhost functions and in no way mean any harm to your device or your data.3. If your connection was successful, you should see the status'Connected to'.The lower part of the main window will display also information about your new IP address and the protocol used to establish the connection.For any additional information or concerns - it is best to approach the Support Department:via e-mail:support@cyberghost.rovia on-line request:https://support.cyberghostvpn.com/hc/en-us/requests/newvia 24/7 Live! Chat Sessions on our website",https://support.cyberghostvpn.com/hc/en-us/articles/360005354933-How-to-Set-Up-CyberGhost-VPN-on-iOS
How do I change my username (alias) and/or my password ?,"To change your username and/or password, open yourCyberGhost accountand hit the user log from the right side.Move to 'Account Settings', click on the button 'Edit' beside the element you want to change, type in your new username resp. password (this one needs to be typed twice) and confirmed by clicking on 'Save' again.In order for the password to be accepted, this must include the following:At least 8 characters and maximum 32 charactersLetters: lowercase and uppercaseNumbers: 0-9At least one special character ! @ # $ % ^ & * ? ~ - _ ( )Please acknowledge the rules shown for creating new credentials :For any additional information or concerns - it is best to approach the Support Department:via e-mail:support@cyberghost.rovia on-line request:https://support.cyberghostvpn.com/hc/en-us/requests/newvia 24/7 Live! Chat Sessions on our website",https://support.cyberghostvpn.com/hc/en-us/articles/360017315720-How-do-I-change-my-username-alias-and-or-my-password
How to manually select a Country or a City with CyberGhost VPN on iOS,"When using the'Best Location'option you will establish a connection per default completely automatically on a server in one of the available countries, but you can also choose a different country or city.Country Choice1. To manually select a country, go to the main screen and simply press on the""Best Location""area.2. On the next screen, you will see a list of all the countries CyberGhost operates servers in.3. As you can see the list can be pre-filtered:All :All available countries will be displayed.Streaming :Only countries with optimized streaming servers will be displayed.Favorites :Only countries, cities or single streaming options you previously marked will be shown in this list.Connect to a countryTap to connect to the chosen country right now, the single server to be used will be determined by CyberGhost automatically, based on the internal load balancing.City Selection1. To go further and activate a specific city from one of the available countries , press the arrow at the right end of the country entry line.* If the arrow is missing on some countries, it means that all the servers from it are placed in a single city.2. Then, you can select one of the available cities that will be displayed.Main ScreenOnce a country or single server is activated, the app switches back to the main screen, where the country or server will be shown right beneath the connection confirmation. The lower part of the main window will display also information about your new IP address, the amount of data transferred and the protocol used to establish the connection.DisconnectingTo disconnect from the current connection tap on the 'Power'button.After disconnecting the VPN, the country or server you used last will replace the default connection type and stay valid for all future connections - until you choose a different country or city or switch back to 'Best Location'.For any additional information or concerns - it is best to approach the Support Department:via e-mail:support@cyberghost.rovia on-line request:https://support.cyberghostvpn.com/hc/en-us/requests/newvia 24/7 Live! Chat Sessions on our website",https://support.cyberghostvpn.com/hc/en-us/articles/360005355033-How-to-manually-select-a-Country-or-a-City-with-CyberGhost-VPN-on-iOS
How to Stream with CyberGhost VPN on iOS,"Servers used for streaming purposes must meet special conditions, e. g. for speed and stability, but also for other aspects, since not all streaming services are easily available outside a certain region.1. Once you log in, you will land on the Homepage of your CyberGhost app. You can simply click on the 'Best Location'area to access the Server list.2. Now either choose a country by tapping on the respective name or flag or switch the list of countries to be displayed from 'All' to 'Streaming'.This will show you all countries, where streaming-optimized servers are installed.3. Tap on the country from which you want to stream (by tapping on the star, you will add this country to your favorites list).4. A simple tap will connect you to a server in the country designed forStreamingpurposes.That's it, enjoy now watching the streaming content you like.For any additional information or concerns - it is best to approach the Support Department:via e-mail:support@cyberghost.rovia on-line request:https://support.cyberghostvpn.com/hc/en-us/requests/newvia 24/7 Live! Chat Sessions on our website",https://support.cyberghostvpn.com/hc/en-us/articles/360017503439-How-to-Stream-with-CyberGhost-VPN-on-iOS
How to use CyberGhost VPN on iOS,"Start the CyberGhost VPN client by tapping on its icon. The app will open with the main screen, stating you are not connected to the VPN network yet.To make sure, everything is working as it should, or if you are not sure, your Internet connection works properly, please use the CyberGhost Connection Checker, a tool that analyzes connection issues. You find it via 'Settings > VPN'.To activate your VPN tap on the'Power'button (while the connection mode is in 'Best Location').Alternatively choose a country by tapping on the 'Best Location' area, which opens a country list.Go for any country, return to the main screen and fire up your connection now. It will be established immediately.If you choose 'Best Location' as your connection mode, CyberGhost automatically connects to the best suited server, which provides the best performance in accordance with your current location (meaning the server with the most optimal settings in terms of speed and user load).If you choose a specific country, CyberGhost automatically connects to the best suited serverin this country.Only if you also specify a specific server in a country the automatic load balancing system will be deactivated completely and you get connected directly to a server. Please consultthis articleon how to choose a single server manually.Note:To quickly return from a selected country (or single server) to the'Best Location'as the default connection type, press the""X""on the right side of the country or single server.-----------------------------------------------------Some background info ...... on the connection types:Depending on the connection type valid (as can be seen directly below the power button), a VPN connection will be initiated either ...... completely automatically: If you use the'Best Location'option, the country as well as the single server to be used will be chosen by CyberGhost, based on an internal load balancing system, which takes account of performance as well as protection levels.... partly automatically: If you choose a specific country or, the server from that location will be selected automatically by CyberGhost, again based on an internal load balancing system.... on anonymity:After being successfully connected to a server, CyberGhost displays the country you are surfing from, the name of the server in use, and its IP address. This new IP address can not be tracked back to your identity or your real IP address.Note that, although you are anonymized, you still need to be careful with your personal data. If you participated on a social network like Facebook, or if you were logged in to your Google account while being anonymized, or exposed your real name and/or email address in a different form, you will most certainly compromise your anonymity.... on VPN functionsAll of the following functions are activated by default without the possibility to turn them off on each server inside the CyberGhost network:Encryption:All VPN connections are secured with 256-bit AES, which can't be intruded from the outside.Hidden IP:Your original IP address will be replaced by an IP address from the CyberGhost network, so your identity can't be tracked down. At the same time, the very same IP address will be shared with all other users on a respective server, thus extending your anonymity.No logs:CyberGhost is committed to its strict NO LOGS policy requiring the minimum anonymous user data to run the service.KillSwitch:The automatic Internet KillSwitch blocks all connections as soon as it detects an unexpected connection loss to the CyberGhost network.LeakProtection:CyberGhost protects against IPv6, Port Forwarding, and DNS leaks.For any additional information or concerns - it is best to approach the Support Department:via e-mail:support@cyberghost.rovia on-line request:https://support.cyberghostvpn.com/hc/en-us/requests/newvia 24/7 Live! Chat Sessions on our website",https://support.cyberghostvpn.com/hc/en-us/articles/360005355013-How-to-use-CyberGhost-VPN-on-iOS
Manage your CyberGhost VPN Settings and Features on iOS,"Here you will find all the settings and features you need to personalize and troubleshoot your VPN connection. With a tap on the gear symbol, you will open the Settings Menu.Jump to...AccountGeneralVPNWi-Fi ProtectionAccountUsername :Shows the current active account name, for trial version users it's the mail address used when registering. You can change your user name at any time in yourCyberGhost online accountPlan:Your type of subscription.Active devices :Amount of active devices. Depending on your subscription you can use your plan with different numbers of devices at the same time. To remove or add a device, please visit youronline account.Renews on: The date your current subscription will run-out.Manage subscription :It will redirect you to your CyberGhost online account.GeneralAnonymous statistics :If you activate it, we only examine a limited amount of anonymous data - device type (phone, tablet, etc.), IOS version, and whether you are a free or a paying user. This data cannot be traced back to a real person, but it helps us scale our infrastructure and troubleshoot any potential issue.Haptic response :Use your device's sensors with our app to add a sensory experienceShare network data for debugging :Activate this option for a better debugging experienceFAQ :Displays a list of all our F.A.Qs articles.Contact Support :Report a problem to our support team and/or tell us your opinion about the CyberGhost app! Every kind of feedback helps to improve and we are eager to hear your thoughts!Terms and Conditions and Privacy Policy:Legal and internal information.Log out :Here you log out from the current active account. The app switches to the start page, where you can log-in again.VPNProtocol :Here you can choose between IKEv2 and WireGuard® to be your default protocol.'Auto'option will connect you by default with WireGuard®.Dedicated IP :Here you can add and activate your Dedicated IP address token.Connection Checker :It will help you determine whether or not you have a properly working internet connection and are ready for a VPN. By simply tapping on, the tool will analyze the reachability of your device as well as the Internet connection and the passage to the CyberGhost network.Small packet size:Here you can enable a small MTU size, if you are experiencing website blockages. This option will automatically adjust it according to the capabilities of your underlying network.Wi-Fi ProtectionHere you activate a warning each time CyberGhost detects a new Wi-Fi network. If you are concerned about your device's security in public hotspots (which you should), it's recommended to keep this option activated at any time.To define the way Wi-Fi networks should be treated at availability, tap on the resp. entry.Now choose one of the following actions (all options are available for password-protected networks and open networks alike):Ask :Every time your device detects a Wi-Fi network, CyberGhost asks you if you want to be protected.Always connect :Every time your device detects a Wi-Fi network, CyberGhost automatically starts a VPN connection.Terminate connection:By choosing this option, CyberGhost will ignore any Wi-Fi network.Never protect :If you already have a VPN connection running and you enter a (different) Wi-Fi network, CyberGhost will disable the VPN connection.Manage Wi-Fi Networks :Since CyberGhost remembers networks and the reaction wanted on any particular network you can manage here all known networks, such as assigning a different reaction to a specific one, by simply tapping on the respective Wi-Fi Network.These are all you can currently find on our iOS application and everything you need to customize it to your needs.For any additional information or concerns - it is best to approach the Support Department:via e-mail:support@cyberghost.rovia on-line request:https://support.cyberghostvpn.com/hc/en-us/requests/newvia 24/7 Live! Chat Sessions on our website",https://support.cyberghostvpn.com/hc/en-us/articles/360006182994-Manage-your-CyberGhost-VPN-Settings-and-Features-on-iOS
Sign up or Log-in to CyberGhost VPN on iOS,"Directly after a new installation, CyberGhost VPN for iOS starts with a welcome screen.Jump to...Start a TrialRecover purchasesI already have an accountDepending on whether you already own a CyberGhost iOS subscription from the App Store, are a regular user of the CyberGhost desktop apps, or want to become a new CyberGhost user, please tap on one of the following three options:Start trialCyberGhost offers you acost-free 7 days trial, including all features and the full functionality of our infrastructure, with no limitations set. An account is necessary to use the CyberGhost service and can be created anonymously.Just enter a valid email address, type in a password twice. Pick a plan that suits your needs the best. This plan will be started automatically after the end of the cost-free trial period unless you canceled beforehand at any given time.Note :Please note that you need to purchase a plan of your choice to start the trial. However, the trial will continue the full course, whether you cancel your chosen subscription or not.Recover purchasesIf you purchased your CyberGhost VPN subscription via the App Store, you can log in by tapping 'Recover purchases'.This is especially useful if you have:Logged out by accident on your current iOS device.Reinstalled CyberGhost VPN on your iOS device.Want to use CyberGhost VPN on another iOS device.Login trouble?If the recovery process fails, make sure you are logged in to the same Apple account you used when purchasing your CyberGhost subscription on the App Store.Make sure you also check you aren't currently using CuberGhost VPN on seven other devices at the same time.I already have an accountExisting CyberGhost VPN users with regular subscriptions can log-in with their user names and passwords. Tap on'I already have an account'. Have your credentials at hand, type in your user name and password, and log-in.Log-in trouble?In case of a log-in failure please check the following:Lost your password?Please visit youraccount managementwith a browser and click/tap on'I forgot my password'.Enter your account email address or the fallback email address entered in your CyberGhost account management and click on'Recover my account'. A recovery mail will be sent to this address. Check your emails and use the provided link to reset your account.Activated too many devices?A log-in failure might also be the result of already having activated the maximum amount of allowed devices. Please visit youraccount managementand check on the current status of registered devices. Regular CyberGhost subscriptions are good for up to seven devices, regardless of the respective operating system, but if all slots are occupied, at least one old device has to be removed, before you can successfully log-in with your iOS device (hereyou find more details on how to manage your devices).For any additional information or concerns - it is best to approach the Support Department:via e-mail:support@cyberghost.rovia on-line request:https://support.cyberghostvpn.com/hc/en-us/requests/newvia 24/7 Live! Chat Sessions on our website",https://support.cyberghostvpn.com/hc/en-us/articles/360008950993-Sign-up-or-Log-in-to-CyberGhost-VPN-on-iOS
How to Set Up CyberGhost VPN on your Android TV,"Before installation, make sure your Android TV runs at least Android 5.0 (Lollipop) or higher. CyberGhost can be used on up to 7 devices simultaneously – as long as they’re tied to the same CyberGhost account.1. Go to the Google Play Store on your Android TV. Search for the CyberGhost VPN and select our app.2. Click on theinstallbutton and wait for the installation to finish then selectOpenLog into the appOnce the installation is complete, you can click ""Open"" or press the Burger menu symbol on your remote to launch the application.Choose ""Agree & Continue"" if you agree to the sharing of this data or you can choose ""I wish to opt-out"" if you refuse.The application automatically generates a PIN code. You can validate the PIN code displayed in youronline accountor open the regular login option and authenticate with your username and password.In the application, the first time you establish a VPN connection, a pop-up message appears; selectOKto give CyberGhost VPN permission to encrypt your Internet traffic.As soon as you connect, you should see the connection status on the main screen, the IP information of the server and the protocol in use.For any additional information or concerns - it is best to approach the Support Department:via e-mail:support@cyberghost.rovia on-line request:https://support.cyberghostvpn.com/hc/en-us/requests/newvia 24/7 Live! Chat Sessions on our website",https://support.cyberghostvpn.com/hc/en-us/articles/360016421413-How-to-Set-Up-CyberGhost-VPN-on-your-Android-TV
How to sign up or log in to CyberGhost on Android TV,"If you have purchased your CyberGhost VPN already, simply enter your username and password and press Login!If you do not have the subscription yet, feel free to sign up for a free 7-day trial.1. Press the ""New user"" option2. At the 'Create a new Account'screen, enter aVALIDemail address and choose a password for your new account > press""Sign up""3. If availabvle, pressStart your trialand you'll receive an email with a link to confirm validate the account(this needs to be used in order for the trial to start)4. Choose the plan you want and click Subscribe Now. Add a payment method and start the trial period.For any additional information or concerns - it is best to approach the Support Department:via e-mail:support@cyberghost.rovia on-line request:https://support.cyberghostvpn.com/hc/en-us/requests/newvia 24/7 Live! Chat Sessions on our website",https://support.cyberghostvpn.com/hc/en-us/articles/360016424473-How-to-sign-up-or-log-in-to-CyberGhost-on-Android-TV
How to Get started with CyberGhost for Android TV,"To start using CyberGhost, simply start the app via your home screen.The app will open with the main screen, stating you are not connected to the VPN network yet.To activate your VPN tap on the yellow power button (while the connection mode is in'Best Location').Note:To cancel your connection you don't have to wait until the connection process ends. Just click on the yellow power button while connecting.Alternatively, choose a country by tapping on the connection description between 'Connect to' and the little downwards showing arrow:This opens a country list. Go for any country, return to the main screen and fire up your connection now. It will be established immediately.If you choose a specific country, CyberGhost automatically connects to the best suited serverin this country.Some background info ...a) ... on the connection types:Depending on the connection type valid (as can be seen directly below the power button), a VPN connection will be initiated either ...... completely automatically: If you use the'Best Location'option, the country as well as the server to be used will be chosen by CyberGhost, based on an internal load balancing system, which takes account of performance as well as protection levels.... partly automatically: If you choose a specific country, the server to be used will be activated automatically by CyberGhost, again based on an internal load balancing system.b) ... on anonymity:After being successfully connected to a server, CyberGhost displays the country you are surfing from, the name of the server in use, and its IP address. This new IP address cannot be tracked back to your identity or your real IP address.Note that, although you are anonymized, you still need to be careful with your personal data. If you participated on a social network like Facebook, or if you were logged in to your Google account while being anonymized, or exposed your real name and/or email address in a different form, you will most certainly compromise your anonymity.c) ... on VPN functionsAll of the following functions are activated (and not to be deactivated) on each server inside the CyberGhost network:Encryption:All VPN connections are secured with 256-bit AES, which can't be intruded from the outside.Hidden IP:Your original IP address will be replaced by an IP address from the CyberGhost network, so your identity can't be tracked down. At the same time, the very same IP address will be shared with all other users on a respective server, thus extending your anonymity.No logs:CyberGhost is committed to its strict NO LOGS policy requiring the minimum anonymous user data to run the service.LeakProtection:CyberGhost protects against IPv6, Port Forwarding, and DNS leaks.For any additional information or concerns - it is best to approach the Support Department:via e-mail:support@cyberghost.rovia on-line request:https://support.cyberghostvpn.com/hc/en-us/requests/newvia 24/7 Live! Chat Sessions on our website",https://support.cyberghostvpn.com/hc/en-us/articles/360016424693-How-to-Get-started-with-CyberGhost-for-Android-TV
How to select a country or single server with CyberGhost for Android TV,"When using the 'Best server' option, CyberGhost will establish a connection automatically to the best server it can find for your connection ( determined by several factors such as distance to server, user load, server reply speed, etc ). You can of course also choose your favorite location manually by either changing the respective country or by directly activating an individual server.Country choiceTo manually choose a country switch to the main screen and simply tap on the connection description between 'Connect to' and the little downwards showing arrow:In the next screen, you see a list of all countries CyberGhost operates servers in.To make it easier for you to find your country of interest, simply type the respective name in the search field above the first country line.Note:If the search field is not visible, swipe downwards to reveal it.As you can see the list can be pre-filtered:Countries :All available countries will be displayed.Streaming :Only countries with optimized streaming servers will be displayed.Favorites :Only countries, single servers, or single streaming servers you previously marked as 'Favorites' will be shown in this list.To activate the country of your choice simply tap on the resp. name or flag. The single server to be used in the country of choice will be determined by CyberGhost automatically, based on an internal load balancing.Single server choiceTo go one step further and activate a single, specific city in a country of your choice, tap on the expand button from the right side of a country entry line.The next screen shows you internal information on the respective country, such as the average server load.The menu allows you to :Add to Favorites:Tap to add the chosen country to your list of favorite countries to connect to.Show servers:Tap here for a complete list of servers in the country chosen. There you can choose any single server available (see below).Connect to country:Tap to connect to the chosen country right now, the single server to be used will be determined by CyberGhost automatically, based on the internal load balancing.Main screenOnce a country or single server is activated, the app switches back to the main screen, where the country or server will be shown right beneath the connection confirmation. Also, the valid new IP address (different from your original one) is going to be displayed.Please note that, although you are anonymized, you still need to be careful with your personal data. If you participate on a social network like Facebook, or if you are logged in to real name Google account while being anonymized, or expose your real name and/or email address in a different context, you will most certainly compromise your anonymity. Also some apps have rights to access your GPS.DisconnectingTo disconnect from the current connection tap on the power button.After disconnecting the VPN, the country or server you used last will replace the default connection type and stay valid for all future connections - until you choose a different country or server or switch back to 'Best Location'.For any additional information or concerns - it is best to approach the Support Department:via e-mail:support@cyberghost.rovia on-line request:https://support.cyberghostvpn.com/hc/en-us/requests/newvia 24/7 Live! Chat Sessions on our website",https://support.cyberghostvpn.com/hc/en-us/articles/360016301974-How-to-select-a-country-or-single-server-with-CyberGhost-for-Android-TV
CyberGhost VPN’s Virtual Server Locations,"This article will explain everything about CyberGhost VPN’s virtual server locations.Jump to...What Is a Virtual Server Location?List of Virtual Server LocationsWhat Is a Virtual Server Location?CyberGhost VPN offers access to servers in 100 countries. Most of our network is physical, meaning the servers are physically located in the country you are choosing to connect to. But we also offer virtual server locations, sometimes known as geo-located servers, for certain locations. These servers are physically situated in a nearby country but provide an IP address that matches the country selected.We insist that all our servers adhere to our strict No Logs policy while delivering optimal performance and connection quality. Unfortunately, in some countries, it’s difficult to find providers that meet these requirements. Virtual server locations enable connections to these countries while allowing you to surf free of restrictions.List of Virtual Server LocationsCyberGhost VPN has virtual server locations in:Algiers, Algeria (via Madrid, Spain)Andorra, Andorra (via Madrid, Spain)Buenos Aires, Argentina (via Miami, USA)Yerevan, Armenia (via Sofia, Bulgaria)Nassau, Bahamas (via Miami, USA)Dhaka, Bangladesh (via Singapore)Minsk, Belarus (via Vilnius, Lithuania)São Paulo, Brazil (via Miami, USA)Phnom Penh, Cambodia (via Singapore)Santiago, Chile (via Miami, USA)Shenzhen, China (via Singapore)Bogota, Colombia (via Miami, USA)San Jose, Costa Rica (via Miami, USA)Zagreb, Croatia (via Budapest, Hungary)Nicosia, Cyprus (via Bucharest, Romania)Cairo, Egypt (via Bucharest, Romania)Tbilisi, Georgia (via Sofia, Bulgaria)Nuuk, Greenland (via Montreal, Canada)Mumbai, India (via Singapore)Jakarta, Indonesia (via Singapore)Tehran, Iran (via Dubai, UAE)Douglas, Isle of Man (via Dublin, Ireland)Rome, Italy (via Milano, Italy)Astana, Kazakhstan (via Sofia, Bulgaria)Vaduz, Liechtenstein (via Zurich, Switzerland)Luxembourg, Luxembourg (via Amsterdam, Netherlands)Macau, Macau (via Singapore)Kuala Lumpur, Malaysia (via Singapore)Valletta, Malta (via Milano, Italy)Mexico City, Mexico (via Miami, USA)Monaco, Monaco (via Milano, Italy)Ulaanbaatar, Mongolia (via Tokyo, Japan)Podgorica, Montenegro (via Belgrade, Serbia)Rabat, Morocco (via Madrid, Spain)Lagos, Nigeria (via Madrid, Spain)Karachi, Pakistan (via Singapore)Panama City, Panama (via Los Angeles, USA)Manila, Philippines (via Singapore/Tokyo, Japan)Lisbon, Portugal (via Madrid, Spain)Doha, Qatar (via Dubai, UAE)Moscow, Russia (via Stockholm, Sweden)RIyadh, Saudi Arabia (via Dubai, UAE)Seoul, South Korea (via Tokyo, Japan)Colombo, Sri Lanka (via Singapore)Taipei, Taiwan (via Tokyo, Japan)Bangkok, Thailand (via Singapore)Istanbul, Turkey (via Bucharest, Romania)Caracas, Venezuela (via New York, USA)Hanoi, Vietnam (via Singapore)For a full list of our servers, see ourserver page.",https://support.cyberghostvpn.com/hc/en-us/articles/214495965-CyberGhost-VPN-s-Virtual-Server-Locations
What Server should I choose ?,"In most cases, performance and geographical location are the main factors in the choice of a server for most users. In case you want an IP address to be linked to a geographical location, select the server manually. You can also find the server with the fastest connection by using the results obtained from in-app ping, which is the network latency-based ping.In terms of speed, the load of users allows you to anticipate the speed of your transfers. The higher the load, the more the server concerned will be used and the lower the speed will be for a single user. Furthermore, the more users share a server, the more anonymity that a single user will get from the crowd.Find the best CyberGhost VPN server on thispage.",https://support.cyberghostvpn.com/hc/en-us/articles/214496305-What-Server-should-I-choose
How to stream with CyberGhost for Android TV,"Servers for streaming purposes must meet special conditions, e. g. for speed and stability, but also for other aspects, since not all streaming services areeasily available outside a certain region.Server Choice1. In the main screen tap in the'Best location'area2. Now switch to the'Streaming'section and opt for a server that is optimized for Firesticks.3. Tap on your desired Streaming ServiceThe connection starts instantly and the streaming server of choice will be determined by CyberGhost's automatic load balancing.If you want to add a streaming service to your favorites list, tap star symbol from the right side.Tip:Some streaming apps detect your country of origin simply by the language of its interface or using your GPS data. It's recommended to open a browser then and visit your streaming service directly, circumventing the respective app.Main ScreenThe last server selected will replace the default connection on the main screen. It will remain valid as the default connection type until you choose another service or server or until you return tothe ""Best location"" by hitting the X button.For any additional information or concerns - it is best to approach the Support Department:via e-mail:support@cyberghost.rovia on-line request:https://support.cyberghostvpn.com/hc/en-us/requests/newvia 24/7 Live! Chat Sessions on our website",https://support.cyberghostvpn.com/hc/en-us/articles/360016426293-How-to-stream-with-CyberGhost-for-Android-TV
Settings for CyberGhost VPN for Android TV,"This article presents the basic features from the CyberGhost VPN app on Android TVs.Tap on the gear symbol to open the Settings menu and view the main categories:Account and General|VPN|Wi-FiAccount and GeneralUsername :Shows the current active account name or e-mail address used when registering. You can change your user name at any time in yourCyberGhost online accountPlan:Your type of subscription.Active devices :Amount of active devices. Depending on your subscription you can use your plan with different numbers of devices at the same time. To remove or add a device, please visit youronline account.Renews on: Show the end date of the current subscription.Anonymous statistics :If you activate it, we only examine a limited amount of anonymous data - device type (phone, tablet, or tv), Android version, and whether you are a free or a paying user. This data cannot be traced back to a real person, but it helps us scale our infrastructure and troubleshoot any potential issue.Use Domain Fronting :The 'Domain Fronting' feature is needed, if the domains *.cyberghostvpn.comor the corresponding IP addresses are blocked (meaning: our API is not reachable; e.g. because of censorship).Article catalog :Displays all articles available in the application.FAQ :Displays a list of all our F.A.Qs articles.Report a problem :A direct link to send out requests to our support team or share your opinion about the CyberGhost app! Any kind of feedback helps us improve and we are eager to hear your thoughts.App version, Terms of use, privacy policy, Imprint:Legal and internal information.Log out :Here you log out from the current active account. The app switches to the start page, where you can log-in again.VPNConnection Checker :It will help you determine whether or not you have a properly working internet connection and are ready for a VPN. By simply tapping on, the tool will analyze the reachability of your device as well as the Internet connection and the passage to the CyberGhost network.Dedicated IP :Here you can add and activate your Dedicated IP address token.VPN protocol :Here you can choose between OpenVPN and WireGuard® to be your default protocol.'Auto'option will connect you by default with WireGuard®.Small packet size :Here you can enable a small MTU size, if you are experiencing website blockages. This option will automatically adjust it according to the capabilities of your underlying network.Use random port to connect:This option allows CyberGhost to establish connections through randomly chosen ports (which will be changed with each new connection), instead of a fixed port (which makes it easy for providers to slow down or block CyberGhost connections). In case your provider or network admin (such as in Hotels or Airports) doesn't allow VPN traffic, the activation of this option might help to successfully connect to the CyberGhost network because usually only a few ports are blocked.Content Blocker:Enabling this will block domains used for ads, trackers and malware.App Split Tunnel:This features allows you to choose which apps will access the Internet through the VPN tunnel and which apps will be omitted by the VPN encryption. By default, CyberGhost routes all traffic from all apps through the VPN tunnel (where your IP is changed and all traffic encrypted). If you do not make any changes to Split tunneling after installing CyberGhost, all of your apps will go through the VPN by default.Wi-FiHere you activate a warning each time CyberGhost detects a new Wi-Fi network. If you are concerned about your device's security in public hotspots (which you should), it's recommended to keep this option activated at any time.You can choose one of the following actions (all options are available for password-protected networks and open networks alike):Ask :Every time your device detects a Wi-Fi network, CyberGhost asks you if you want to be protected.Protect :Every time your device detects a Wi-Fi network, CyberGhost automatically starts a VPN connection.Disable protection :If you already have a VPN connection running and you enter a (different) Wi-Fi network, CyberGhost will disable the VPN connection.Ignore :By choosing this option, CyberGhost will ignore any Wi-Fi network.Known Wi-Fi networks:Since CyberGhost remembers networks and the reaction wanted on any particular network you can manage here all known networks, such as assigning a different reaction to a specific one, by simply tapping on the specific Wi-Fi network.For any additional information or concerns - it is best to approach the Support Department:via e-mail:support@cyberghost.rovia on-line request:https://support.cyberghostvpn.com/hc/en-us/requests/newvia 24/7 Live! Chat Sessions on our website",https://support.cyberghostvpn.com/hc/en-us/articles/360016305454-Settings-for-CyberGhost-VPN-for-Android-TV
How to install CyberGhost on Amazon Fire TV / Fire Stick,"This article will show you how you can set up CyberGhost VPN on your Amazon Fire TV or Fire Stick.System Requirements & InstallationCyberGhost VPN app isavailablefor:Fire TV ( at least Fire OS 4.6 )Fire Stick ( 2nd generation and later )How to installGo to the Amazon Store on your Fire TV or Firestick and search for CyberGhost VPN and select our application.Click on theGetbutton to start downloading the application onto your Fire TV or Firestick device. As soon as the download is complete, the app will be automatically installed.Log into the appOnce the installation is complete, you can either click ""Open"" or press the Burger menu symbol on your remote to launch the application.Choose ""Agree & Continue"" if you agree to the sharing of this data or you can choose ""I wish to opt-out"" if you refuse.The application automatically generates a PIN code. You can validate the PIN code in youronline accountunderDownload Hubby clickingConnectnext toCyberGhost VPN for Amazon Fire TV. Alternatively, you can visitcgvpn.info/linkand perform the same steps.In the application, the first time you establish a VPN connection, a pop-up message appears; selectOKto give CyberGhost VPN permission to encrypt your Internet traffic.As soon as you connect, you should see the connection status on the main screen, the IP information of the server and the protocol in use.Need assistance? Contact our Customer Support team:via email atsupport@cyberghost.rovia online request athttps://support.cyberghostvpn.com/hc/en-us/requests/newvia 24/7 Live Chat by clicking the Support button below",https://support.cyberghostvpn.com/hc/en-us/articles/360008388454-How-to-install-CyberGhost-on-Amazon-Fire-TV-Fire-Stick
How to stream with CyberGhost for Amazon Fire TV / Fire Stick,"Servers for streaming purposes must meet special conditions, e. g. for speed and stability, but also for other aspects, since not all streaming services areeasily available outside a certain region.Server Choice1. In the main screen tap in the'Best location'area2. Now switch to the'Streaming'section and opt for a server that is optimized for Firesticks.3. Tap on your desired Streaming ServiceThe connection starts instantly and the streaming server of choice will be determined by CyberGhost's automatic load balancing.If you want to add a streaming service to your favorites list, tap star symbol from the right side.Tip:Some streaming apps detect your country of origin simply by the language of its interface or using your GPS data. It's recommended to open a browser then and visit your streaming service directly, circumventing the respective app.Main ScreenThe last server selected will replace the default connection on the main screen. It will remain valid as the default connection type until you choose another service or server or until you return tothe ""Best location"" by hitting the X button.For any additional information or concerns - it is best to approach the Support Department:via e-mail:support@cyberghost.rovia on-line request:https://support.cyberghostvpn.com/hc/en-us/requests/newvia 24/7 Live! Chat Sessions on our website",https://support.cyberghostvpn.com/hc/en-us/articles/360008388594-How-to-stream-with-CyberGhost-for-Amazon-Fire-TV-Fire-Stick
Settings for CyberGhost VPN for Amazon Fire TV / Fire Stick,"This article presents the basic features from the CyberGhost VPN app on Firestick devices.Tap on the gear symbol to open the Settings menu and view the main categories:Account and General|VPN|Wi-FiAccount and GeneralUsername :Shows the current active account name or e-mail address used when registering. You can change your user name at any time in yourCyberGhost online accountPlan:Your type of subscription.Active devices :Amount of active devices. Depending on your subscription you can use your plan with different numbers of devices at the same time. To remove or add a device, please visit youronline account.Renews on: Show the end date of the current subscription.Anonymous statistics :If you activate it, we only examine a limited amount of anonymous data - device type (phone, tablet, or tv), Android version, and whether you are a free or a paying user. This data cannot be traced back to a real person, but it helps us scale our infrastructure and troubleshoot any potential issue.Use Domain Fronting :The 'Domain Fronting' feature is needed, if the domains *.cyberghostvpn.comor the corresponding IP addresses are blocked (meaning: our API is not reachable; e.g. because of censorship).Article catalog :Displays all articles available in the application.FAQ :Displays a list of all our F.A.Qs articles.Report a problem :A direct link to send out requests to our support team or share your opinion about the CyberGhost app! Any kind of feedback helps us improve and we are eager to hear your thoughts.App version, Terms of use, privacy policy, Imprint:Legal and internal information.Log out :Here you log out from the current active account. The app switches to the start page, where you can log-in again.VPNConnection Checker :It will help you determine whether or not you have a properly working internet connection and are ready for a VPN. By simply tapping on, the tool will analyze the reachability of your device as well as the Internet connection and the passage to the CyberGhost network.Dedicated IP :Here you can add and activate your Dedicated IP address token.VPN protocol :Here you can choose between OpenVPN and WireGuard® to be your default protocol.'Auto'option will connect you by default with WireGuard®.Small packet size :Here you can enable a small MTU size, if you are experiencing website blockages. This option will automatically adjust it according to the capabilities of your underlying network.Use random port to connect:This option allows CyberGhost to establish connections through randomly chosen ports (which will be changed with each new connection), instead of a fixed port (which makes it easy for providers to slow down or block CyberGhost connections). In case your provider or network admin (such as in Hotels or Airports) doesn't allow VPN traffic, the activation of this option might help to successfully connect to the CyberGhost network because usually only a few ports are blocked.Content Blocker:Enabling this will block domains used for ads, trackers and malware.App Split Tunnel:This features allows you to choose which apps will access the Internet through the VPN tunnel and which apps will be omitted by the VPN encryption. By default, CyberGhost routes all traffic from all apps through the VPN tunnel (where your IP is changed and all traffic encrypted). If you do not make any changes to Split tunneling after installing CyberGhost, all of your apps will go through the VPN by default.Wi-FiHere you activate a warning each time CyberGhost detects a new Wi-Fi network. If you are concerned about your device's security in public hotspots (which you should), it's recommended to keep this option activated at any time.You can choose one of the following actions (all options are available for password-protected networks and open networks alike):Ask :Every time your device detects a Wi-Fi network, CyberGhost asks you if you want to be protected.Protect :Every time your device detects a Wi-Fi network, CyberGhost automatically starts a VPN connection.Disable protection :If you already have a VPN connection running and you enter a (different) Wi-Fi network, CyberGhost will disable the VPN connection.Ignore :By choosing this option, CyberGhost will ignore any Wi-Fi network.Known Wi-Fi networks:Since CyberGhost remembers networks and the reaction wanted on any particular network you can manage here all known networks, such as assigning a different reaction to a specific one, by simply tapping on the specific Wi-Fi network.For any additional information or concerns - it is best to approach the Support Department:via e-mail:support@cyberghost.rovia on-line request:https://support.cyberghostvpn.com/hc/en-us/requests/newvia 24/7 Live! Chat Sessions on our website",https://support.cyberghostvpn.com/hc/en-us/articles/360008526733-Settings-for-CyberGhost-VPN-for-Amazon-Fire-TV-Fire-Stick
How to select a country or a city with CyberGhost VPN for Amazon Fire TV / Fire Stick,"When using the 'Best Location' option, CyberGhost will establish a connection automatically to the best server it can find for your connection ( determined by several factors such as distance to server, user load, server reply speed, etc ). You can of course also choose your favorite location manually by either changing the respective country or by directly activating an individual server.Country choiceTo manually choose a country switch to the main screen and simply tap on the connection description between 'Connect to' and the little downwards showing arrow:In the next screen, you see a list of all countries CyberGhost operates servers in.To make it easier for you to find your country of interest, simply type the respective name in the search field above the first country line.Note:If the search field is not visible, swipe downwards to reveal it.As you can see the list can be pre-filtered:Countries :All available countries will be displayed.Streaming :Only countries with optimized streaming servers will be displayed.Favorites :Only countries, single servers, or single streaming servers you previously marked as 'Favorites' will be shown in this list.To activate the country of your choice simply tap on the resp. name or flag. The single server to be used in the country of choice will be determined by CyberGhost automatically, based on an internal load balancing.The menu allows you to :Add to Favorites:Tap to add the chosen country to your list of favorite countries to connect to.Show servers:Tap here for a complete list of servers in the country chosen. There you can also choose from any available city.Connect to country:Tap to connect to the chosen country right now, the single server to be used will be determined by CyberGhost automatically, based on the internal load balancing.Main screenOnce a country or single server is activated, the app switches back to the main screen, where the country or server will be shown right beneath the connection confirmation. Also, the valid new IP address (different from your original one) is going to be displayed.Please note that, although you are anonymized, you still need to be careful with your personal data. If you participate on a social network like Facebook, or if you are logged in to real name Google account while being anonymized, or expose your real name and/or email address in a different context, you will most certainly compromise your anonymity. Also some apps have rights to access your GPS.DisconnectingTo disconnect from the current connection tap on the power button.After disconnecting the VPN, the country or server you used last will replace the default connection type and stay valid for all future connections - until you choose a different country or server or switch back to 'Best Location'.For any additional information or concerns - it is best to approach the Support Department:via e-mail:support@cyberghost.rovia on-line request:https://support.cyberghostvpn.com/hc/en-us/requests/newvia 24/7 Live! Chat Sessions on our website",https://support.cyberghostvpn.com/hc/en-us/articles/360008526653-How-to-select-a-country-or-a-city-with-CyberGhost-VPN-for-Amazon-Fire-TV-Fire-Stick
How to Get started with CyberGhost for Amazon Fire TV / Fire Stick,"To start using CyberGhost, simply start the app via your home screen.The app will open with the main screen, stating you are not connected to the VPN network yet.To activate your VPN tap on the yellow power button (while the connection mode is in'Best Location').Note:To cancel your connection you don't have to wait until the connection process ends. Just click on the yellow power button while connecting.Alternatively, choose a country by tapping on the connection description between 'Connect to' and the little downwards showing arrow:This opens a country list. Go for any country, return to the main screen and fire up your connection now. It will be established immediately.If you choose a specific country, CyberGhost automatically connects to the best suited serverin this country.Some background info ...a) ... on the connection types:Depending on the connection type valid (as can be seen directly below the power button), a VPN connection will be initiated either ...... completely automatically: If you use the'Best Location'option, the country as well as the server to be used will be chosen by CyberGhost, based on an internal load balancing system, which takes account of performance as well as protection levels.... partly automatically: If you choose a specific country, the server to be used will be activated automatically by CyberGhost, again based on an internal load balancing system.b) ... on anonymity:After being successfully connected to a server, CyberGhost displays the country you are surfing from, the name of the server in use, and its IP address. This new IP address cannot be tracked back to your identity or your real IP address.Note that, although you are anonymized, you still need to be careful with your personal data. If you participated on a social network like Facebook, or if you were logged in to your Google account while being anonymized, or exposed your real name and/or email address in a different form, you will most certainly compromise your anonymity.c) ... on VPN functionsAll of the following functions are activated (and not to be deactivated) on each server inside the CyberGhost network:Encryption:All VPN connections are secured with 256-bit AES, which can't be intruded from the outside.Hidden IP:Your original IP address will be replaced by an IP address from the CyberGhost network, so your identity can't be tracked down. At the same time, the very same IP address will be shared with all other users on a respective server, thus extending your anonymity.No logs:CyberGhost is committed to its strict NO LOGS policy requiring the minimum anonymous user data to run the service.KillSwitch:The automatic Internet KillSwitch blocks all connections as soon as it detects an unexpected connection loss to the CyberGhost network.LeakProtection:CyberGhost protects against IPv6, Port Forwarding, and DNS leaks.For any additional information or concerns - it is best to approach the Support Department:via e-mail:support@cyberghost.rovia on-line request:https://support.cyberghostvpn.com/hc/en-us/requests/newvia 24/7 Live! Chat Sessions on our website",https://support.cyberghostvpn.com/hc/en-us/articles/360008526633-How-to-Get-started-with-CyberGhost-for-Amazon-Fire-TV-Fire-Stick
How to automatically protect Wi-Fis with CyberGhost VPN for Amazon Fire TV / Fire Stick,"To specify the way how CyberGhost's automatic Wi-Fi protection should set in you can define the general reaction of CyberGhost to Wi-Fi networks as well as a specific reaction to a specific WiFi.Set up the general reaction to new / unknown Wi-Fi networks1. Open the app settings with a single finger tap on the gear symbol :2. In the app settings page first make sure that under the 'Smart Rules' section Wi-Fi Protection is enabled.3. Now choose one of the following actions (all options are available for password-protected networks and open networks alike):Ask :Every time your device detects a Wi-Fi network, CyberGhost asks you if you want to be protected.Protect :Every time your device detects a Wi-Fi network, CyberGhost automatically starts a VPN connection.Disable protection :If you already have a VPN connection running and you enter a (different) Wi-Fi network, CyberGhost will disable the VPN connection.Ignore :By choosing this option, CyberGhost will ignore any Wi-Fi network.Adjust specific reaction to known Wi-Fi networksKnown Wi-Fi networks:Since CyberGhost remembers networks and the reaction wanted on any particular network you can manage here all known networks, such as assigning a different reaction to a specific one, by simply tapping on the respective Wi-Fi Network. Search for the network you want to assign a different reaction to and tap on it. The options are the same as described above.About the interaction of CyberGhost with known and unknown networksThe moment you enter a free or password-protected Wi-Fi, CyberGhost recognizes, if it's a known or unknown network. If unknown, the app reacts the way you defined in the general Wi-Fi settings, that is, either asks, protects, or ignores. If a network is already known, CyberGhost remembers how you wanted this single network to be treated the last time you visited, e. g. protect your device automatically.For any additional information or concerns - it is best to approach the Support Department:via e-mail:support@cyberghost.rovia on-line request:https://support.cyberghostvpn.com/hc/en-us/requests/newvia 24/7 Live! Chat Sessions on our website",https://support.cyberghostvpn.com/hc/en-us/articles/360008388554-How-to-automatically-protect-Wi-Fis-with-CyberGhost-VPN-for-Amazon-Fire-TV-Fire-Stick
How to set up ExpressVPN on Amazon Fire Stick and Amazon Fire TV,This tutorial will show youhow to set up the ExpressVPN app on your Amazon Fire TV Stick or Fire TV.,https://www.expressvpn.com/support/vpn-setup/setup-amazon-fire-stick-fire-tv/)
EdgeRouter and Ubiquiti setup with NordVPN,"EdgeRouter routers with EdgeOS firmware version 2.0.9 and later support long passwords and can be used to establish a connection to our servers using the [OpenVPN protocol](https://support.nordvpn.com/hc/en-us/articles/19683394518161-OpenVPN-connection-on-NordVPN). If you are using an older version of the firmware, please update it before following this guide. Instructions on how to update the router firmware can be found on the [official Ubiquiti website](https://help.ui.com/hc/en-us/articles/205146110-EdgeRouter-How-to-Upgrade-the-EdgeOS-Firmware).
Here are the instructions on how to set up an OpenVPN connection to NordVPN servers on EdgeRouter via SSH:
1. Create a new file on your computer and call it ""nordvpnauth.txt. ""Open it and type in your NordVPN service username in the first line and NordVPN service password in the second line:usernamepasswordYou can find your NordVPN service credentials (service username and service password) in the [Nord Account dashboard](https://my.nordaccount.com/dashboard/nordvpn/):
Follow the steps below to find the service credentials for manual connection setup:
1. Log into your [Nord Account](https://my.nordaccount.com/), click NordVPN, and, under Manual setup, click on Service credentials. Here you'll find the Username and Password needed to connect manually.
2. Go to your NordAccount dashboard to download your manual connection configuration files:
Follow the steps below to find the best server for your connection:
1. Log into your [Nord Account](https://my.nordaccount.com/), and click NordVPN.
2. Scroll down to Advanced Settings and click Set up NordVPN manually.
3. Select the Server recommendation tab. According to your location, the best server will be recommended.
4. By pressing Advanced filters you can further customize the recommended servers by selecting the Server type and the Security protocol.
In case you wish to select a specific server, follow these steps:
1. Under Set up NordVPN manually, select OpenVPN configuration files.
2. Find the server you wish to connect to by using the Search bar or by scrolling down and download it by clicking Download UDP or Download TCP.
3. Open the downloaded server configuration file (for example, “de978.nordvpn.com.udp1194.ovpn”) and make the following changes:
Your configured file should look like this:
clientdev tunproto udpremote 5.180.62.90 1194resolv-retry infiniteremote-randomnobindtun-mtu 1500tun-mtu-extra 32mssfix 1450persist-keypersist-tunping 15ping-restart 0ping-timer-remreneg-sec 0comp-lzo no remote-cert-tls server auth-user-pass /config/openvpn/nordvpnauth.txtroute-nopull verb 3pullfast-iocipher AES-256-CBCauth SHA512-----BEGIN CERTIFICATE-----MIIFCjCCAvKgAwIBAgIBATANBgkqhkiG9w0BAQ0FADA5MQswCQYDVQQGEwJQQTEQMA4GA1UEChMHTm9yZFZQTjEYMBYGA1UEAxMPTm9yZFZQTiBSb290IENBMB4XDTE2MDEwMTAwMDAwMFoXDTM1MTIzMTIzNTk1OVowOTELMAkGA1UEBhMCUEExEDAOBgNVBAoTB05vcmRWUE4xGDAWBgNVBAMTD05vcmRWUE4gUm9vdCBDQTCCAiIwDQYJKoZIhvcNAQEBBQADggIPADCCAgoCggIBAMkr/BYhyo0F2upsIMXwC6QvkZps3NN2/eQFkfQIS1gql0aejsKsEnmY0Kaon8uZCTXPsRH1gQNgg5D2gixdd1mJUvV3dE3y9FJrXMoDkXdCGBodvKJyU6lcfEVF6/UxHcbBguZK9UtRHS9eJYm3rpL/5huQMCppX7kUeQ8dpCwd3iKITqwd1ZudDqsWaU0vqzC2H55IyaZ/5/TnCk31Q1UP6BksbbuRcwOVskEDsm6YoWDnn/IIzGOYnFJRzQH5jTz3j1QBvRIuQuBuvUkfhx1FEwhwZigrcxXuMP+QgM54kezgziJUaZcOM2zF3lvrwMvXDMfNeIoJABv9ljw969xQ8czQCU5lMVmA37ltv5Ec9U5hZuwk/9QO1Z+d/r6Jx0mlurS8gnCAKJgwa3kyZw6e4FZ8mYL4vpRRhPdvRTWCMJkeB4yBHyhxUmTRgJHm6YR3D6hcFAc9cQcTEl/I60tMdz33G6m0O42sQt/+AR3YCY/RusWVBJB/qNS94EtNtj8iaebCQW1jHAhvGmFILVR9lzD0EzWKHkvyWEjmUVRgCDd6Ne3eFRNS73gdv/C3l5boYySeu4exkEYVxVRn8DhCxs0MnkMHWFK6MyzXCCn+JnWFDYPfDKHvpff/kLDobtPBf+Lbch5wQy9quY27xaj0XwLyjOltpiSTLWae/Q4vAgMBAAGjHTAbMAwGA1UdEwQFMAMBAf8wCwYDVR0PBAQDAgEGMA0GCSqGSIb3DQEBDQUAA4ICAQC9fUL2sZPxIN2mD32VeNySTgZlCEdVmlq471o/bDMP4B8gnQesFRtXY2ZCjs50Jm73B2LViL9qlREmI6vE5IC8IsRBJSV4ce1WYxyXro5rmVg/k6a10rlsbK/eg//GHoJxDdXDOokLUSnxt7gk3QKpX6eCdh67p0PuWm/7WUJQxH2SDxsT9vB/iZriTIEe/ILoOQF0Aqp7AgNCcLcLAmbxXQkXYCCSB35Vp06u+eTWjG0/pyS5V14stGtw+fA0DJp5ZJV4eqJ5LqxMlYvEZ/qKTEdoCeaXv2QEmN6dVqjDoTAok0t5u4YRXzEVCfXAC3ocplNdtCA72wjFJcSbfif4BSC8bDACTXtnPC7nD0VndZLp+RiNLeiENhk0oTC+UVdSc+n2nJOzkCK0vYu0Ads4JGIB7g8IB3z2t9ICmsWrgnhdNdcOe15BincrGA8avQ1cWXsfIKEjbrnEuEk9b5jel6NfHtPKoHc9mDpRdNPISeVawDBM1mJChneHt59Nh8Gah74+TM1jBsw4fhJPvoc7Atcg740JErb904mZfkIEmojCVPhBHVQ9LHBAdM8qFI2kRK0IynOmAZhexlP/aT/kpEsEPyaZQlnBn3An1CRz8h0SPApL8PytggYKeQmRhl499+6jLxcZ2IegLfqq41dzIjwHwTMplg+1pKIOVojpWA==-----END CERTIFICATE-----key-direction 1## 2048 bit OpenVPN static key#-----BEGIN OpenVPN Static key V1-----e685bdaf659a25a200e2b9e39e51ff030fc72cf1ce07232bd8b2be5e6c670143f51e937e670eee09d4f2ea5a6e4e69965db852c275351b86fc4ca892d78ae002d6f70d029bd79c4d1c26cf14e9588033cf639f8a74809f29f72b9d58f9b8f5fefc7938eade40e9fed6cb92184abb2cc10eb1a296df243b251df0643d53724cdb5a92a1d6cb817804c4a9319b57d53be580815bcfcb2df55018cc83fc43bc7ff82d51f9b88364776ee9d12fc85cc7ea5b9741c4f598c485316db066d52db4540e212e1518a9bd4828219e24b20d88f598a196c9de96012090e333519ae18d35099427e7b372d348d352dc4c85e18cd4b93f8a56ddb2e64eb67adfc9b337157ff4-----END OpenVPN Static key V1-----
---
4. Now, access your EdgeMax router via SSH:
5. Then perform these commands:sudo -icd /config/mkdir openvpnchmod 770 openvpn
6. If you're using Linux, disconnect from SSH and copy the created “nordvpnauth.txt” and the downloaded “.ovpn” (in this case “de978.nordvpn.com.udp.ovpn”) files into your EdgeMax router's “/config/openvpn” directory via SCP:scp nordvpnauth.txt ubnt@routersIPaddress:/config/openvpnscp de978.nordvpn.com.udp1194.ovpn ubnt@routersIPaddress:/config/openvpnTo copy these files into the EdgeRouter while using Windows, upload them via SFTP. The default port for the SFTP connection is 22:
7. Use SSH again to connect to your router and run the following commands (adjusting some lines according to your network and file names):configureset interfaces openvpn vtun0 config-file /config/openvpn/de978.nordvpn.com.udp.ovpnset interfaces openvpn vtun0 description 'OpenVPN VPN tunnel'commitset service nat rule 5000 description 'OpenVPN Clients'set service nat rule 5000 log disableset service nat rule 5000 outbound-interface vtun0set service nat rule 5000 source address 192.168.1.0/24set service nat rule 5000 type masqueradecommitset protocols static table 1 interface-route 0.0.0.0/0 next-hop-interface vtun0set firewall modify SOURCE_ROUTE rule 10 description 'traffic from 192.168.1.0/24 to vtun0'set firewall modify SOURCE_ROUTE rule 10 source address 192.168.1.0/24set firewall modify SOURCE_ROUTE rule 10 modify table 1set interfaces ethernet eth1 firewall in modify SOURCE_ROUTEcommitsave
Note: The last command can also be “ethernet eth2,” depending on which slot is used for the LAN cable, or “switch switch0” if you are using a switch interface.
If you are using a different subnet (or want to set up the connection for specific devices only), modify 192.168.1.0/24 on all lines to your values.
8. To check the connection log, type in:run show logScroll down until you see “Initialization sequence completed.” That means your router has successfully connected to our service. You can also check our [“What is my IP?” page](https://nordvpn.com/what-is-my-ip/) to see if you are connected to NordVPN.
Additional notes:
* Change the line “auth-user-pass” to “auth-user-pass /config/openvpn/nordvpnauth.txt” (without the quotation marks.)
* After “auth-user-pass /config/openvpn/nordvpnauth.txt,” insert a new line with “route-nopull” (again, without the quotation marks.)
* Save the file.
* For UNIX-like machines, use the command “ssh ubnt@routersIPaddress” (no quotation marks) and enter your EdgeRouter password.
* For Windows devices, [download this app](https://www.bitvise.com/ssh-client-download).
* To disable a VPN, use the following commands:configureset interfaces openvpn vtun0 disablecommitsave
* To re-enable a VPN after disabling it, use the following commands:configuredelete interfaces openvpn vtun0 disablecommitsave
* To change your VPN server, simply upload a new file to your router (as described in step 6) and use the following commands:configureset interfaces openvpn vtun0 config-file /config/openvpn/new_file.ovpncommitsave",https://support.nordvpn.com/hc/en-us/articles/20321386897041-EdgeRouter-and-Ubiquiti-setup-with-NordVPN
Set Up CyberGhost VPN CLI App on Linux,"This article will show you how you can set up the CyberGhost CLI app on Linux.CyberGhost VPN is compatible with the following Linux operating systems:Debian-basedUbuntu 20.04 | 22.04 PopOSRPM-basedFedora 29 | 30 | 31 CentOS 7Note:Before getting started, for a better user experience, please make sure that your CyberGhost account password does not contain any of the following special symbols:""$"" ""⁎"" ""%"" ""[ ]""Follow these steps to set up CyberGhost VPN on your Linux device. For this tutorial, we'll be using Ubuntu 20.04.3, but the same steps apply to all supported distributions.Log in to youronline account.ClickDownload Hub.ChooseConfigurenext to CyberGhost VPN for Linux.Select your Linux distribution underServer Distribution.ClickDownload App.This will automatically download the Linux CLI configuration file (zipped).ClickExtract Hereto unzip the contents of the compressed folder to your computer.For the purpose of this tutorial, we will rename the extracted folder to ""cyberghost"".Open a Terminal window in thecyberghostfolder by right-clicking on the folder's name and selectingOpen in Terminal.Type in ""sudobash install.sh"" (no quotes) > pressEnterand confirm your sudo access by writing the sudo password.Note: Make sure you choose""Y""(yes) if asked to install any additional packages, likePython 3andOpenVPN.Enter your CyberGhost username and password to confirm the installation.Once you see theInstall completed...message, you're ready to start using the CyberGhost VPN app.You can type insudo cyberghostvpnto see the list of available commands.You might also be interested in the following articles:How to Select a Country or a City with CyberGhost on LinuxHow to Stream with CyberGhost on LinuxHow to Torrent with CyberGhost on LinuxNeed assistance? Contact our Customer Support team:via email atsupport@cyberghost.rovia online request athttps://support.cyberghostvpn.com/hc/en-us/requests/newvia 24/7 Live Chat by clicking the Support button below",https://support.cyberghostvpn.com/hc/en-us/articles/360020436274-Set-Up-CyberGhost-VPN-CLI-App-on-Linux
Select a Country or City with CyberGhost VPN CLI App on Linux,"This article will show you how you can select a country or a city with the CyberGhost Linux app.Jump to...Select a CountrySelect a CitySelect a CountryTo connect to one of the available countries, just open a Terminal window after installing CyberGhost VPN and type:sudocyberghostvpn --traffic --country-code (country code) --connectThen press Enter. For example, if you want to connect to a US server, type:sudocyberghostvpn --traffic --country-code US --connectFor Germany, you would type:sudocyberghostvpn --traffic --country-code DE --connectCyberGhost VPN will display aVPN connection establishedmessage once the connection is successful.To see a list of available countries and their country codes, type:sudo cyberghostvpn --traffic --country-code> press EnterNote:You can always type in ""cyberghostvpn"" in the Terminal and press Enter to see the list of available commands.Select a CityTo see a list of available locations of a specific country, type:sudo cyberghostvpn --traffic --country-code (country code)For example, to see a list of cities in the US, type:sudo cyberghostvpn --traffic --country-code USTo connect to a specific city, like New York, type:sudo cyberghostvpn --traffic --country-code US --city ""New York"" --connectTo confirm that you're successfully connected to the VPN you can type incyberghostvpn --statusoryou can visit a site such ashttps://www.iplocation.net/to check your IP address. Make sure you wait a few seconds after connecting to the VPN server. It's also advisable to check your IP using incognito mode, as some sites often rely on cookies which can store details about your location.Need assistance? Contact our Customer Support team:via email atsupport@cyberghost.rovia online request athttps://support.cyberghostvpn.com/hc/en-us/requests/newvia 24/7 Live Chat by clicking the Support button below",https://support.cyberghostvpn.com/hc/en-us/articles/360020673194-Select-a-Country-or-City-with-CyberGhost-VPN-CLI-App-on-Linux
How to Stream with CyberGhost VPN CLI App on Linux,"With CyberGhost for Linux, you can take advantage of our Streaming-Optimized servers to access region-restricted content from websites such as Netflix, Amazon US, or BBC iPlayer.In order to accomplish this, you'll need to connect to one of our servers optimized for this purpose. This is done fairly quickly by instructing the app to connect through a 'streaming' server > specify the 'website' (BBC/Netflix, etc) and simulated 'country' ( which version of Netflix for example,US/FR/DE, etc ).The process is detailed below in 3 easy steps ( we'll use 'Netflix US'for this example )1. With CyberGhost installed> Open aTerminalwindowNOTE :You do not need to navigate to CyberGhost's folder, you can type in the commands right away.2. First, we need to fetch the list of supported 'Streaming Services'and from which country.NOTE:Once you get used to the commands, you doNOTneed to fetch the country/services list each time,you can just type in the command as soon as you open a Terminal window.In theTerminaltype in :cyberghostvpn --streaming --country-code3. Once you've made your decision (Netflix USwill be used in this example), you're ready to type in the command which will include:Server-type 'Streaming'.Service 'Netflix US'.CountryUS+ the 'connect' command.The command for Netflix US would be :sudocyberghostvpn --streaming 'Netflix US' --country-code US --connectImportant :The quotes when typing in'Netflix US'are mandatory as the name of the service includes space and Linux need the quotes to be added when using 2 wordsin order to read it as a single string(such as Netflix US).TIP:If you wish to filter all available Streaming Services in asingle country, let's sayFrance, use this command :cyberghostvpn --streaming --country-code FRYou'll see all of theFrench Streaming Services supported,then you can connect to the desired service as shown above (For Canal+, the command would be :sudo cyberghostvpn --streaming 'Canal+' --country-code FR --connectFor any additional information or concerns - it is best to approach the Support Department:via e-mail:support@cyberghost.rovia on-line request:https://support.cyberghostvpn.com/hc/en-us/requests/newvia 24/7 Live! Chat Sessions on our website",https://support.cyberghostvpn.com/hc/en-us/articles/360020741974-How-to-Stream-with-CyberGhost-VPN-CLI-App-on-Linux
Peer-to-Peer (P2P) traffic with CyberGhost VPN CLI App on Linux via Terminal,"The CyberGhost app for Linux offers a wide range of Peer-to-Peer (P2P) Torrents servers which allow you to download torrents safely and securely.NOTE :Please ensure that youNOTstart your Torrent Client untilAFTERconnecting to the VPN server as anytorrent in the Seed queue WILL generate traffic on your main connectionand can be tracked.To connect to one of our P2P file-sharing servers, please take the following steps :1. Open a Terminal window.2. Now, we need to fetch a list of countries which support P2P File Sharing( not all countries and/or servers support Peer-to-peer file sharing due to various laws and policies in effect in their respective region ) by typing in :cyberghostvpn --torrent --country-codepressENTER3. Once the list of countries that supportP2P file sharingis displayed, simply enter the desired country's code into the connection command. For this example, we'll usePoland (PL)and the command is :sudocyberghostvpn --torrent --country-code PL --connect4. To confirm that you're connected to the VPN you can type in :cyberghostvpn --statusAlso, you can visit a site such ashttps://www.iplocation.net/( make sure that you wait a few seconds after connecting and access this site in a new browser window, Incognito Mode is advised as these sites often rely on cookies and your old location may be stored until a restart of the browser or Incognito Mode is used )5. After confirming that you're connected to the VPN server, you can start yourTorrent Client.For any additional information or concerns - it is best to approach the Support Department:via e-mail:support@cyberghost.rovia on-line request:https://support.cyberghostvpn.com/hc/en-us/requests/newvia 24/7 Live! Chat Sessions on our website",https://support.cyberghostvpn.com/hc/en-us/articles/360020942153-Peer-to-Peer-P2P-traffic-with-CyberGhost-VPN-CLI-App-on-Linux-via-Terminal
How can I use WireGuard® in the CyberGhost VPN CLI app for Linux?,WireGuard® is a fast and modern protocol taking the world of VPN connections by storm. Its state-of-the-art cryptography makes it the best alternative for OpenVPN.1. Install theCyberGhost VPN CLI app for Linux. You can find our tutorialhere2. Connect with WireGuard® by typing the following command :Example US traffic server :sudo cyberghostvpn --traffic --country-code US --wireguard --connectExample US streaming server :sudocyberghostvpn --streaming 'Netflix US' --country-code US --wireguard --connectExample US torrenting server :sudocyberghostvpn --torrent --country-code US --wireguard --connectWireGuard is a registered trademark of Jason A. Donenfeld.For any additional information or concerns - it is best to approach the Support Department:via e-mail:support@cyberghost.rovia on-line request:https://support.cyberghostvpn.com/hc/en-us/requests/newvia 24/7 Live! Chat Sessions on our website,https://support.cyberghostvpn.com/hc/en-us/articles/360016651600-How-can-I-use-WireGuard-in-the-CyberGhost-VPN-CLI-app-for-Linux
How to connect your Amazon Fire device to a VPN router or virtual VPN router,This tutorial will show youhow to set up a VPN connection for yourAmazon Fire TV stick and Fire TVusing anExpressVPN routeror virtual VPN router.,https://www.expressvpn.com/support/vpn-setup/stream-to-amazon-fire-tv-with-virtual-router-or-router/)
CyberGhost VPN CLI App Linux FAQ,"In this FAQ, we'll go over what you need to know about the CyberGhost app for Linux, as well as some quick pointers to get you started.1.Q:What kind of app is CyberGhost for Linux?A:It is aCLI-type (Command Line Interface) application.2. Q:What Linux distributions does the app support?A:The app currently supportsUbuntu 20.04,Ubuntu 22.04,Fedora 29, Fedora 30, Fedora 31, CentOS 7,andPopOS.3. Q:Does the CyberGhost VPN app run on32-bit or 64-bit?A:Our app requires 64-bit Linux distributions to run.4. Q:Are there any preparations required before installing?A:You just need to download the right version of the app depending on your distribution and unzipp it on your machine.5.Q:How do I install the CyberGhost app for Linux?A:It's very straightforward, just run the ""install.sh"" installer with the ""sudobash install.sh"" command.6.Q:Does the app have any dependencies?A:The app has 3 dependencies:-Python3(Which is preinstalled on all of the Linux distributions mentioned above)-OpenVPN(which will be installed alongside the app itself)-Sudo(where connection commands are used with sudo parameter)7. Q:How do I bring up the app's arguments?A:You can bring up the app's arguments by running the command ""cyberghostvpn"" or ""cyberghostvpn --help.""8.Q:How can I see all of the available countries?A:You can see all available countries by using the argument ""--country-code"". Ex: ""cyberghostvpn --traffic --country-code.""9. Q:How do I select a country?A:You can select a country by using the argument ""--country-code"" with the desired country's code. Ex: ""cyberghostvpn --country-code DE.""10.Q:How do I select a city?A:You can select a city by using the argument ""--city"". Ex: ""cyberghostvpn --country-code DE --city frankfurt.""11.Q:How do I connect to the VPN?A:You can connect to the VPN by adding the argument ""--connect"" to the command. Ex: ""sudo cyberghostvpn --country-code DE --city frankfurt --connect.""12.Q:How can I check if I have an active VPN connection?A:You can check if you have an active VPN connection by running the ""cyberghostvpn --status"" command.14. Q:How do I terminate my VPN connection ?A:You can terminate the VPN connection by running the ""sudo cyberghostvpn --stop"" command.Need assistance? Contact our Customer Support team:via email atsupport@cyberghost.rovia online request athttps://support.cyberghostvpn.com/hc/en-us/requests/newvia 24/7 Live Chat by clicking the Support button below",https://support.cyberghostvpn.com/hc/en-us/articles/360020835894-CyberGhost-VPN-CLI-App-Linux-FAQ
How Does Smart DNS Work?,"This article will answer commonly asked questions about CyberGhost VPN's Smart DNS feature.Jump to...What is Smart DNS?How does Smart DNS work?Will my connection be encrypted?Will my IP hidden/changed?How many devices can I use simultaneously with CyberGhost Smart DNS service?Can ISPs interfere with the Smart DNS service?Can I use Smart DNS and VPN simultaneously?What is Smart DNS?A Smart DNS is a service you can use on devices that do not natively support VPN apps. It does not change your IP and does not encrypt your connection like a VPN does, but instead it offers better speed for watching video content. This feature will let you stream content like US Netflix, US Hulu, UK Netflix, and others.How does Smart DNS work?As the name implies, this feature simply works by changing the DNS servers on your device from your local servers (which contain information that can reveal your location) to our DNS servers based in the US, UK, DE, and JP.Will my connection be encrypted?No, you connection will not be encrypted. Smart DNS is not meant for security purposes.Will my IP be hidden/changed?Your IP address is not changed. It will only change your DNS addresses, as the name suggests.How many devices can I use simultaneously with CyberGhost Smart DNS service ?There is no limit to the number of devices you can use as long as they are located in the same network and have the same external IP address.Can ISPs interfere with the Smart DNS service ?It is worth mentioning that in some situations Smart DNS cannot be used successfully. If your Internet Service Provider diverts the DNS while using a technology called 'Transparent DNS proxy', they intercept all DNS lookup queries (TCP/UDP port 53) and transparently proxy the results. This forces you to use their DNS addresses without being able to change them. Smart DNS might have issues.In other cases, port 53 (DNS) may be intentionally blocked. In such a situation, we recommend that you submit a request for unblocking to your ISP's technical support department.Should the above solutions not work for you and you still can't use Smart DNS as foreseen, try an alternative way to use CyberGhost VPN on your TV or console:How to share a VPN connection over Ethernet on WindowsHow to use CyberGhost with your game consoleCan I use Smart DNS and VPN simultaneously ?You cannot use both VPN and Smart DNS service at the same time because they conflict with each other.As long as the CyberGhost VPN application can be installed on your specific device, you do not need to use Smart DNS. The CyberGhost VPN application will provide you with more functionality on any device.Our articles and guides will help you implement Smart DNS on various devices:https://support.cyberghostvpn.com/hc/en-us/sections/360003585160-How-to-configure-My-Smart-DNSNeed assistance? Contact our Customer Support team:via email atsupport@cyberghost.rovia online request athttps://support.cyberghostvpn.com/hc/en-us/requests/newvia 24/7 Live Chat by clicking the Support button below",https://support.cyberghostvpn.com/hc/en-us/articles/360015373219-How-Does-Smart-DNS-Work
How to configure My Smart DNS,"With your DNS settings enabled, you can now stream and access geo-restricted content. All with zero drops in your internet connection speed.Step 1: Access your Account Dashboard and head to My Smart DNSAccessing the Account Dashboard is made possible here:https://my.cyberghostvpn.com/en_US/loginStep 2: From the available choices, pick the DNS that corresponds to the service which is aimed at for unblocking:Hulu US AddressNetflix US addressNetflix UK AddressStep 3: The DNS address listed in the Account Dashboard can now be implemented in your preferred device. See related articles for the respective device:PlayStation 4PlayStation 3-------Xbox OneXbox 360-------Apple TV 4Apple TV 3-------Samsung SmartTV with TizenOS-------WiiWii U-------Rooku TV-------DD-WRT Router-------For any additional information or concerns - it is best to approach the Support Department:via e-mail:support@cyberghost.rovia on-line request:https://support.cyberghostvpn.com/hc/en-us/requests/newvia 24/7 Live! Chat Sessions on our website",https://support.cyberghostvpn.com/hc/en-us/articles/360012002360-How-to-configure-My-Smart-DNS
Configure My Smart DNS for LG SmartTV with webOS,"Through to theAccount Dashboard-Smart DNSneeds to be enabled. Once thisone-clickstep has been accomplished the next steps are completed directly from your LG smart TV.Completing the only requirement as described above, head over to your LG smart TV. The below steps are presented for you which will help you apply the CyberGhost Smart DNS to your LG smart TV:Step 1 of 8: From the remote control for your LG TV - press theHome/Smart *to bring up the Launcher bar.*the placement of the Home/Smart button may vary from one remote controller to another;a. For some remote controllers, the button will have the Home logob. For other remote controllers, the same button will have the Settings logoStep 2 of 8: ChooseSettingsfrom the list of choices and select:Network.Step 3 of 8: Select theWi-Fi Connection.The Wi-Fi that is used by the LG TV should have a checkmark.Step 4 of 8: Choose the Wi-Fi connection that your TV is using and chooseAdvanced Wi-Fi Settings.Step 5 of 8:Make sure that IPv6 is disabled(OFF)and chooseEditfor the respective Wi-Fi.Step 6 of 8:Un-Check(disable) ""Set Automatically"".Step 7 of 8: InDNS Server- input the respective DNS address listed in the CyberGhost Account Dashboard - DNS address which pertains to the program that you wish to unblock.IP address - Leave unchangedSubnet Mask - Leave unchangedGateway - Leave unchangedStep 8 of 8:Confirm withConnect.Note: While it may not be mandatory, restarting the LG TV can help to save the changes that are made.-------For any additional information or concerns - it is best to approach the Support Department:via e-mail:support@cyberghost.rovia on-line request:https://support.cyberghostvpn.com/hc/en-us/requests/newvia 24/7 Live! Chat Sessions on our website",https://support.cyberghostvpn.com/hc/en-us/articles/360012518540-Configure-My-Smart-DNS-for-LG-SmartTV-with-webOS
How Can I Cancel My Subscription?,"This page will show you how you can cancel your CyberGhost VPN subscription.CyberGhost VPN subscriptions automatically renew at the end of each service period, until you decide to cancel your automatic payments.Note: Canceling your subscription doesn't automatically refund your subscription. Please contact our support team to request a refund.Jump to...Cancel a subscription purchased from www.cyberghostvpn.comCancel a subscription purchased via the Apple App StoreCancel a subscription purchased via the Google Play StoreCancel a subscription purchased from www.cyberghostvpn.comFollow these steps:1. Go to yourCyberGhost accountand select the profile logo in the top-right side.2. SelectSubscriptions.3. SelectCancelSubscription.4. SelectContinue To Cancel.You will see a screen saying “The automatic billing for your CyberGhost VPN subscription has been turned OFF.” This means you have successfully cancelled your CyberGhost VPN subscription, and can keep using it until the end of your paid subscription period.Cancel a subscription purchased via the Apple App StoreFollow these steps:Open the Settings menu on your iPhone or iPad.Tap the name that appears at the top of the Settings menu.Tap oniTunes & App Store.TapApple IDat the very top of the screen.ChooseView Apple ID.Log in with your Apple ID.Scroll down toSubscriptionsand tap on the CyberGhost subscription.TapCancel Subscription.You will receive a pop-up message to confirm that you wish to cancel the subscription.Note: This will only cancel any future charges. To refund an iTunes subscription, please contact the Apple support team.Cancel a subscription purchased via the Google Play StoreFollow these steps:Go to the Google Play Store.Tap on your profile in the upper right corner.TapPayments & subscriptions.TapSubscriptionsand select the CyberGhost VPN subscription.TapCancel Subscription.Follow the on-screen instructions.Note: This will only cancel any future charges. To refund your subscription, please contact our support team.Need assistance? Contact our Customer Support team:via email atsupport@cyberghost.rovia online request athttps://support.cyberghostvpn.com/hc/en-us/requests/newvia 24/7 Live Chat by clicking the Support button below",https://support.cyberghostvpn.com/hc/en-us/articles/360017373799-How-Can-I-Cancel-My-Subscription
Configure My Smart DNS for Samsung SmartTV with Tizen OS,"Through to theAccount Dashboard-Smart DNSneeds to be enabled.Completing the only requirement as described above, head over to your Samsung SmartTV. The below steps are presented for you which will help you apply the CyberGhost Smart DNS via Samsung SmartTV:Step 1 of 6: From the remote control for your Smart TV - press theSettings button*.*the placement of the Settings button may vary from one remote controller to anothera. For some remote controllers, the Settings button is located under the Volume buttonb. For some remote controllers, the Settings button is located in the lower part of the remote controllerAs alternatives, the below buttons are available as a substitute for the Settings button:Home button - Head to the Settings menu in the lower-left cornerSource button - Head to the Settings menu in the lower-left cornerStep 2 of 6: ChooseNetworkfrom the list of choicesStep 3 of 6:Network Statusis the option which must be chosen from the available fields and allow the Connection verification to finalize.Step 4 of 6: PickIP SettingsStep 5 of 6: Within the IP Settings menu, simply choose DNS Setting and enter the DNS manuallyPrimary DNS - Enter the Smart DNS provided in the Account Dashboard under My SmartDNS tabSecondary DNS - leave blankStep 6 of 6: Confirm withOKRestart the Smart TV- Settings completed --------For any additional information or concerns - it is best to approach the Support Department:via e-mail:support@cyberghost.rovia on-line request:https://support.cyberghostvpn.com/hc/en-us/requests/newvia 24/7 Live! Chat Sessions on our website",https://support.cyberghostvpn.com/hc/en-us/articles/360012126339-Configure-My-Smart-DNS-for-Samsung-SmartTV-with-Tizen-OS
Configure My Smart DNS for AppleTV 4,"Through to theAccount Dashboard-Smart DNSneeds to be enabled.It is advised to save your original DNS settings before making any other changes.You may need them in case you will want to switch back to your original settingsor different settings based on your needs. Changing the DNS is done one-time.Completing the only requirement as described above, now head over to your AppleTV 4. The below steps are presented for you which will help you apply the CyberGhost SmartDNS via AppleTV 4:Step 1 of 6: From the home screen of your AppleTV 4 – chooseSettingsStep 2 of 6: ChooseNetworkStep 3 of 6: UnderConnectionpick the Wi-Fi that is being used by your AppleTV 4 and select the Wi-FiStep 4 of 6: Opening Wi-Fi menu, scroll down to Configure DNS and pick Manual mode**Manual mode refers to settings that are made manually by yourselfStep 5 of 6: Continue with adding the DNS* within the DNS Address screen and confirm withDone*The DNS provided to you within the Account Dashboard under the My Smart DNS tabStep 6 of 6: Head to System menu within theSettingsof your AppleTV 4 and chooseRestart-------For any additional information or concerns - it is best to approach the Support Department:via e-mail:support@cyberghost.rovia on-line request:https://support.cyberghostvpn.com/hc/en-us/requests/newvia 24/7 Live! Chat Sessions on our website",https://support.cyberghostvpn.com/hc/en-us/articles/360012120419-Configure-My-Smart-DNS-for-AppleTV-4
Configure My Smart DNS for PlayStation 4,"This guide will show you how you can configure CyberGhost Smart DNS for your PlayStation 4.Note:CyberGhost Smart DNS is not a VPN and does not offer the privacy and security benefits of a VPN.Jump to...Enable Smart DNSSet Up Smart DNS on Your PlayStation 4Enable Smart DNSBefore setting up a Smart DNS connection, you first have to enable this type of connection.Go to yourAccount Dashboard.SelectSmart DNSfrom the left-side menu.ChooseEnable Smart DNS.Keep the tab open and turn your attention to your PlayStation 4.Set Up Smart DNS on Your PlayStation 4Go to your PlayStation’s settings menu.SelectNetwork.SelectSet Up Internet Connection.SelectUse Wi-FiorUse a LAN Cable, depending on how you connect your PlayStation 4 to the internet.SelectCustom.Select your Wi-Fi network. Skip this step if you use a LAN cable.SelectAutomatic.UnderDHCP Host Name, chooseDo Not Specify.UnderDNS Settings, selectManual.UnderPrimary DNS, enter the DNS address from your account dashboard. Leave Secondary DNS blank.UnderMTU Settings, selectAutomatic.UnderProxy Server, selectDo Not Use.ForInternet settings updated, selectTest Internet Connection.Restart your PlayStation 4 for the DNS changes to take effect.Need assistance? Contact our Customer Support team:via email atsupport@cyberghost.rovia online request athttps://support.cyberghostvpn.com/hc/en-us/requests/newvia 24/7 Live Chat by clicking the Support button below",https://support.cyberghostvpn.com/hc/en-us/articles/360012104059-Configure-My-Smart-DNS-for-PlayStation-4
Add a Dedicated IP Address to Your Subscription,"If you want to use a Dedicated IP address, you can add one to your current CyberGhost subscription.We offer dedicated IP addresses in these locations:AustraliaBelgiumCanadaFranceGermanyJapanNetherlandsSingaporeSpainSwedenUnited KingdomUnited StatesNote:For the time being, you can subscribe to the Dedicated IP feature from your online account only if your subscription has been previously processed by our payment partner Stripe or Cleverbridge and the subscription plan was no more than 18 months long.1. Log into your CyberGhost accounthere.2. Request a Dedicated IP address in the'My Account'section and then complete your purchase.3. Once your payment has been successfully processed, you can pick your location and generate a token:4. From this step on, please refer to our guides below on how to redeem and activate your new dedicated IP address based on your device platform:How to redeem and activate your Dedicated IP on WindowsHow to redeem and activate your Dedicated IP on MacHow to redeem and activate your Dedicated IP on AndroidHow to redeem and activate your Dedicated IP on iOSFor any additional information or concerns - it is best to approach the Support Department:via e-mail:support@cyberghost.rovia on-line request:https://support.cyberghostvpn.com/hc/en-us/requests/newvia 24/7 Live! Chat Sessions on our website",https://support.cyberghostvpn.com/hc/en-us/articles/360017310400-Add-a-Dedicated-IP-Address-to-Your-Subscription
How to configure the CyberGhost client with Kodi on a Windows device,"If you use a Kodi Media Center based on Windows Vista, 7, 8, or 10, connect to the VPN with the CyberGhost app before starting Kodi (all traffic will then be routed through the VPN network)Using the CyberGhost clientIf your Kodi Media Center doesn't start automatically when booting up Windows, simply start CyberGhost before Kodi and connect to your desired VPN server.Start the CyberGhost VPN client by clicking on its desktop symbol or start menu entry and then click on the Expand button to open the extended program view with all different server lists and settings.Make sure you activated the menu entry 'All servers':The next step is to choose the country you want to use the Internet. For that simply click on the resp. entry. If you want, you can use the distance between you and the country you want to surf. This information might be useful to share a light on your Internet speed at a given moment. The higher the distance, the more time data packets need to be delivered.To quickly connect, just select the desired country and click the Connect button (or double-click on respective country)You can also use the search field to search for a specific country (case insensitive) :Select the country of your choice. The respective country name will show up in the control window.To activate the chosen connection click on the""Power ""button.Finally, Start Kodi.",https://support.cyberghostvpn.com/hc/en-us/articles/115000376969-How-to-configure-the-CyberGhost-client-with-Kodi-on-a-Windows-device
How to redeem and activate your Dedicated IP on Windows,"Enjoy smooth access to IP-restricted networks with CyberGhost VPN without sacrificing any of your privacy and security.Jump to...Update of the CyberGhost AppActivate your Dedicated IPAdd your Dedicated IP to the CyberGhost AppUpdate of the CyberGhost AppBefore starting the activation of the new dedicated IP address, you will need to update the current version of the CyberGhost that you are using, in order to complete this process.Please refer to our guide on how to install and update your CyberGhost App.How to Set Up CyberGhost VPNActivate your Dedicated IP1. Now, once the new version of CyberGhost has been installed, we can continue with the process as follows :Return to yourCyberGhost account.Click on the'Dedicated IP'entry from the left-side menu.2.Acknowledge that once you redeem it, your Dedicated IP token will only be available one time. Once you redeem it, this section will be gone for good.3. Select thelocationfrom where your Dedicated IP will appear. You willnot be ableto change it afterward. Click on 'Redeem Token'. Once you click on it, you'll notice that your Token will be automatically downloaded on your PC along with further instructions.4. Make sure youwrite it down, print it, or save itsomewhere only you know about.*Important*If you lose it, it will be gone forever!Once you have selected your Location and clicked on Redeem Token, please be aware that this process is irreversible and there is no support we can offer to change it afterward.For security reasons, your Token will only be visible while you are on that page. Therefore, do not close it or refresh it before saving the Token.Should you lose the Token, there is no way to retrieve it. Make sure that you save it before refreshing or closing the page.Add your Dedicated IP to the CyberGhost App1. Next, open your CyberGhost App and click on the expand button located on the left side of the main screen.2. Click on the'Dedicated IP' tab.Fill in your Token code that has been automatically downloaded on your PC - take a look under the'Downloads'folder and you'll find a .txt file named'Token'.*Please make sure that you save that Token code, as there is no way to generate another one.3. We highly recommend that you Copy / Paste your dedicated IP token, previously downloaded from your account, in order to avoid any typos.4. Hit theActivatebutton.Finally, you will receive a confirmation message that your dedicated IP has been added to your CyberGhost VPN App, along with the expiration date.You can also click on the star-shaped icon right next to your dedicated IP address, so that you can easily find your dedicated IP address in theFavoritessection.For any additional information or concerns - it is best to approach the Support Department:via e-mail:support@cyberghost.rovia on-line request:https://support.cyberghostvpn.com/hc/en-us/requests/newvia 24/7 Live! Chat Sessions on our website",https://support.cyberghostvpn.com/hc/en-us/articles/360015809879-How-to-redeem-and-activate-your-Dedicated-IP-on-Windows
How to redeem and activate your Dedicated IP on Mac,"Enjoy smooth access to IP-restricted networks with CyberGhost VPN without sacrificing any of your privacy and security.Jump to...Update of the CyberGhost AppActivate your Dedicated IPAdd your Dedicated IP to the CyberGhost AppUpdate of the CyberGhost AppBefore getting started, you will need to update the current version of the CyberGhost that you are using, in order to complete this process.Please refer to our guide below on how to install and update your CyberGhost App.How to install CyberGhost VPN for macOSActivate your Dedicated IP1. Now, once the new version of CyberGhost has been installed, we can continue with the process as follows :Return to yourCyberGhost accountClick on'Dedicated IP'entry from the left-side menu2.Acknowledge that once you redeem it, your Dedicated IP token will only be available one time. Once you redeem it, this section will be gone for good.3. Select thelocationfrom where your Dedicated IP will appear. You willnot be ableto change it afterward. Click on 'Redeem Token'.4. Once you have clicked on it, select'Allow'to give permission to download the .txt file. Then you will notice that your token will be automatically downloaded to your Mac with further instructions.*Important*If you lose it, it will be gone forever!Once you have selected your Location and clicked on Redeem Token, please be aware that this process is irreversible and there is no support we can offer to change it afterward.For security reasons, your Token will only be visible while you are on that page. Therefore, do not close it or refresh it before saving the Token.Should you lose the Token, there is no way to retrieve it. Make sure that you save it before refreshing or closing the page.Add your Dedicated IP to the CyberGhost App1. If you have installed the latest version of the CyberGhost application, click on the App logo in the menu bar.2. Click on the expand button to open the list of all servers and features available.3. Click on the'Dedicated IP'section and here you will have to fill in your Token code that has been automatically downloaded on your Mac - take a look in the downloads tab and you will find a *.txt file named'Token'.4.. We highly recommend that youCopy / Pasteyour dedicated IP token, previously downloaded from your account, in order to avoid any typos. Then hit theActivatebutton.5. Your Dedicated IP has been added to your CyberGhost VPN app along with the expiry date.6. You can now easily find your dedicated IP address in the'Favorites'tab.For any additional information or concerns - it is best to approach the Support Department:via e-mail:support@cyberghost.rovia on-line request:https://support.cyberghostvpn.com/hc/en-us/requests/newvia 24/7 Live! Chat Sessions on our website",https://support.cyberghostvpn.com/hc/en-us/articles/360016903179-How-to-redeem-and-activate-your-Dedicated-IP-on-Mac
How to redeem and activate your Dedicated IP on Android,"Prior to activating the new dedicated IP address, you will need to update your current version of the Cyberghost application to complete this process.Jump to...Update of the CyberGhost App.Activate your Dedicated IPAdd your Dedicated IP to the CyberGhost App.Update of the CyberGhost App.1. Just click on the Play Store application logo below and the CyberGhost VPN application page will open:2. Click onUpdate/Installand the setup will be completed in a couple of moments.Activate your Dedicated IP1. Now, once the new version of CyberGhost has been installed, we can continue with the process as follows :Return to yourCyberGhost account.Go to'My VPN'and select the'Dedicated IP'tab.2.Acknowledge that once you redeem it, your Dedicated IP token will only be available one time. Once you redeem it, this section will be gone for good.3. Select thelocationfrom where your Dedicated IP will appear. You willnot be ableto change it afterward. Click on 'Redeem Token'. Once you click on it, you'll notice that your Token will be automatically downloaded on your PC along with further instructions.4. Make sure youwrite it down, print it, or save itsomewhere only you know about.*Important*If you lose it, it will be gone forever!Once you have selected your Location and clicked on Redeem Token, please be aware that this process is irreversible and there is no support we can offer to change it afterward.For security reasons, your Token will only be visible while you are on that page. Therefore, do not close it or refresh it before saving the Token.Should you lose the Token, there is no way to retrieve it. Make sure that you save it before refreshing or closing the page.Add your Dedicated IP to the CyberGhost App.Launch the CG app and then hit SettingsSelect VPNSet the Dedicated IP4. We highly recommend that you copy / paste your dedicated IP token, previously downloaded from your account, in order to avoid any typos. Then hit theOKbutton.Finally, you will notice that your Dedicated IP address has been added to your CyberGhost VPN application along with the expiration date.Check theFavoritessection to view your new dedicated IP.All you have to do now is to connect to your Dedicated Server. Tap on your Dedicated IP and the application will connect to your server.For any additional information or concerns - it is best to approach the Support Department:via e-mail:support@cyberghost.rovia on-line request:https://support.cyberghostvpn.com/hc/en-us/requests/newvia 24/7 Live! Chat Sessions on our website",https://support.cyberghostvpn.com/hc/en-us/articles/360016141919-How-to-redeem-and-activate-your-Dedicated-IP-on-Android
How to redeem and activate your Dedicated IP on iOS,"Prior to activating the new dedicated IP address, you will need to update your current version of the Cyberghost application to complete this process.Jump to...Activate your Dedicated IPAdd your Dedicated IP to the CyberGhost App.Activate your Dedicated IPNow, once the application is installed/updated, we can proceed to redeem your Dedicated IP as follows:Return to yourCyberGhost account.Click on the hamburger button to open the menu and select ""Dedicated IP""3. Acknowledge the security measures, as your token will only be available one time only. Once you redeem it, the dedicated IP section will be gone for good.4. Choose any location that you want from the provided list.6. Once the token is redeemed,Make sure youwrite it down, print it, or save itsomewhere only you know about.*IMPORTANT*Losing it will mean that it will be gone forever!Once you have selected your location and clicked on 'Redeem Token', be aware that this process is irreversible and that we cannot help you modify it afterward.For security reasons, your Token will only be visible when you are on this page. Therefore, do not close or refresh it before saving it.If you lose the token, there is no way to recover it. Be sure to save it before you refresh or close the page.Add your Dedicated IP to the CyberGhost App.1. Launch the application directly or go back to your phone's home screen and click on the CyberGhost VPN application. Then, you will need to access theSettingstab from the upper left corner.2. Select the VPN tab and then click on Dedicated IP3. We highly recommend that you copy / paste your dedicated IP token, previously downloaded from your account, in order to avoid any typos. Then hit theOKbutton.Finally, you will notice that your Dedicated IP address has been added to your CyberGhost VPN application along with the expiration date.6. You can easily find the dedicated IP address in the'Favorites'section :For any additional information or concerns - it is best to approach the Support Department:via e-mail:support@cyberghost.rovia on-line request:https://support.cyberghostvpn.com/hc/en-us/requests/newvia 24/7 Live! Chat Sessions on our website",https://support.cyberghostvpn.com/hc/en-us/articles/360016457540-How-to-redeem-and-activate-your-Dedicated-IP-on-iOS
How to configure OpenVPN for Kodi on a Linux device,"Please note:Disclaimer:Please keep in mind that, although the technical process is as thoroughly documented as possible, you need to have at least some technical understanding. There's always a chance for an overseen mistake and/or things have changed and the article is not updated yet.PreparationsIf you use a Kodi Media Center based on a Linux distributionother thanOpenELEC/LibreELEC, OSMC, etc. (such as Ubuntu) you need to install OpenVPN first and make sure the command 'killall' is available. Usually, you do this by the following commands:sudo apt-get updatesudo apt-get install openvpnsudo apt-get install psmiscYou might have a different Linux installation running, with different steps to take, but they should at least be similar. Below you will find an example of how to install OpenVPN for Linux Mint, others can be seenherein the 'CyberGhost for Linux' section.Step 1: Configure an OpenVPN connection1. Visit yourCyberGhost VPN online accountand login with your CyberGhost Username and Password.2. Click on section'VPN'from the left-side menu, scroll down the page and click 'Configure Device'.3. Each server has a configuration file that you will need to create in order to connect to the VPN server. You can download all the configuration files after creating them.ChooseOpenVPNand your preferredCountryandServer Group, as described below.Also, type in aDevice nameto assign to your device, then configure the parameters for the new device.Country:Since native protocol connections may only be used with exactly one server you now have to choose the country you want to surf from; the server to be used in this country will be chosen by CyberGhost automatically.Server group:Choose the server group and the OpenVPN protocol (UDP or TCP) you want to use:UDPallows higher speed than the TCP version but can result in broken downloads in some cases. This is the default setting.TCPallows more stable connections than the UDP version but is a bit slower. Choose this version, if you have recurrent connection issues such as sudden disconnections.Once the desired parameters are chosen, save them with«Save Configuration»To view theOpenVPNcredentials that are generated for you on the configuration dashboard, press 'View Configuration'.Once the new page is opened, your connection credentials are generated for you but make note of the following information:Server group:This is the address of the country (server) you want to be connected with, e.g. '12345-1-ca.cg-dialup.net'. Note This address changes with every country you have chosen in the step before. The actual single server to be used will be chosen automatically by CyberGhost.User name:A solely for this protocol generated user name.This is NOT your regular CyberGhost account user name, it's used only to authenticate with our servers via Manual Configurations.Password (you need to check the ""Show Password"" option in order to see it):A solely for protocol usage generated password.This is NOT your regular CyberGhost account Password, it's used only to authenticate with our servers via Manual Configurations.Pre-Shared KeyClick on 'Download Configuration' (if the automatic download has not started) and download the config file to your Mac. It's recommended that you create a special folder for the config, somewhere accessible like your Desktop, andExtract / Copy thecontents of the .zip file there.Now, the saved config is a ZIP file, which contains the following single files:ca.crt:This is the certificate of the certification authorityclient.crt:This is the user certification fileclient.key:This is your private key fileopenvpn.ovpn:This is yourOpenVPNconfiguration fileIf you need to change the country you connect to, you must re-configure the location to use in your account management and download the new zipped config file.Step 2Install OpenVPN and the network manager on Linux.For that click on 'Menu > All Applications > Software Manager' and type in the search field (in the upper right corner) 'OpenVPN'. Install the following programs with a double click:openvpnnetwork-manager-openvpn gnomenetwork-manager-openvpnTo make sure that already installed components are up to date, open a terminal and enter the following commands:sudo apt-get install openvpnsudo apt-get install openvpn bridge-utilssudo apt-get install network-manager-openvpn network-manager-openvpn-gnomesudo apt-get install psmiscLog out and in again or restart your computer or open a terminal and type in the following command:sudo restart network-managerStep 3:Get VPN Manager for OpenVPN and copy filesDownload the completerepositoryfor the Kodi VPN Manager (so the VPN Manager will be updated properly if a new version is published) and leave itunzipped,while the zipped configuration file should be unzipped to an external drive or a folder accessible from within Kodi.Step 4: Install VPN Manager for OpenVPNStart Kodi, move to the add-on section, and click on 'Install from zip file'. Select the path to the folder where you copied the repository, mark it, and click 'OK'.After the repository gets installed, click on 'Install from repository', choose the 'Zomboided Add-on Repository', click on 'Services', then on 'VPN Manager for OpenVPN' and lastly, click 'Install'.Step 5: Configure VPN Manager for OpenVPNAfter the installation move to 'My add-ons' and open the entry called 'Services':Open 'VPN Manager for OpenVPN' and click on 'Configure'. You can use the Wizard or do it manually as we do it here (although the steps are the same). In the tab 'VPN Configuration' choose 'CyberGhost' as the 'VPN Provider' and enter the user name and the password you noted in step 1. DO NOT use your regular CyberGhost credentials.Click 'OK' and select the connection profile, which fits your subscription: 'Premium and Premium Plus Account' or 'Promo Account':For the next step, we will need the unzipped files from the configuration file you saved somewhere on your device.Click on 'OK' and then select the user certificate ('client.crt') and the user key ('client.key'). Once done, the VPN Manager will connect to your first VPN. If not, click on the 'VPN connection' tab and start your 'first connection' (which is highlighted).",https://support.cyberghostvpn.com/hc/en-us/articles/115000440669-How-to-configure-OpenVPN-for-Kodi-on-a-Linux-device
What is an IP address and what dangers might it include ?,"The IP address is a 32-bit number that uniquely identifies a network interface on a machine. An IP address is typically written in decimal digits, formatted as four 8-bit fields separated by periods. Each 8-bit field represents a byte of the IP address.Every time you’re online, your IP address lets web servers know where to reach you. It’s how you can visit websites, for example.However, your IP address includes a lot of details, like:Your countryYour regionYour cityYour ZIP codeYour longitudeYour latitudeYou probably wouldn’t share such info with strangers, yet you’re doing it online all the time.One of the biggest trackers of your digital life is your Internet Service Provider, ISP for short. Since your IP address is uniquely assigned to you, they can easily keep tabs on everything you do.In most countries, ISPs are legally required to store logs on your digital activity and browsing history. They can even be forced to monitor traffic and throttle speeds when you’re on file-sharing or streaming platforms.When dealing with ISPs, authorities and law enforcement agencies can generally access everything without a hitch, and your consent as a user is not needed. And because of how browsing databases work, the information is often handed over in bulk.This way, even if you’re not under investigation, your data can still get to the authorities if another ISP client does something shady.And if you’re not already worried about your privacy, let me add one more thing:many ISPs dabble in selling your data to advertisers.Switch to CyberGhost VPNAVPNis a secure way of accessing the internet and keeping your connection private. Short for Virtual Private Network, ithides your IP address, cloaks it with a different one, and drives your traffic through anencrypted tunnel.After connecting to a VPN server, you can simply browse the web as you would normally do. There’s no need to change browsers or risk using suspicious exit nodes.CyberGhost VPN can help you:Bypass geo-restrictions and unblock contentTorrent safelySecuring your digital transactionsGetting better online dealsProtect your digital identityHide your IP, encrypt your connection, and stay safe from prying eyes. Don’t let your digital footprint be a backdoor that links directly to you.For any additional information or concerns - it is best to approach the Support Department:via e-mail:support@cyberghost.rovia on-line request:https://support.cyberghostvpn.com/hc/en-us/requests/newvia 24/7 Live! Chat Sessions on our website",https://support.cyberghostvpn.com/hc/en-us/articles/214037489-What-is-an-IP-address-and-what-dangers-might-it-include
How to set up your Samsung Smart TV to use MediaStreamer,"MediaStreamer is a DNS service designed to improve your streaming experience. If your device doesn’t natively support VPN, MediaStreamer is a great alternative for streaming. https://www.youtube.com/embed/eU1IxeE2TOI",https://www.expressvpn.com/support/vpn-setup/samsung-smart-tv-mediastreamer/)
"Read me first: How to use CyberGhost on a Router, Raspberry Pi, Synology NAS, Sat-Receiver","Your CyberGhost subscription can be used smoothly with different devices, if it supports the native protocol OpenVPN.However, it strongly depends on the respective firmware and/or your device, if and, if yes, which of the named protocols are supported and if a connection can be established properly.Preconditions are a CyberGhost account and a CyberGhost subscription.And that's how you do it:Create a CyberGhost account:CyberGhost provides you with the possibilityto create an account through our homepage.Purchase a subscription:You can order a subscription from right inside your account management; the activation will be done automatically for you.Here you learn, how to do it.Optional: Activate a prepaid key:In case you already have an activation key (maybe from a Bitcoin or offline sale), please referto this articleon how to activate a key manually.For the following devices you might find these instructions helpful:Router:How to Set Up OpenVPN on DD-WRT RoutersRouter:How to Set Up OpenVPN on TomatoRouter:How to Set Up OpenVPN on TomatoUSB Merlin BuildRaspberry Pi:How to configure a Raspberry Pi as a web proxy with OpenVPNRaspberry Pi:How to Set Up OpenVPN on Raspberry PiSynology NAS :How to use CyberGhostVPN for Synology NAS via OpenVPNSat-Receiver:How to Set Up OpenVPN Enigma2 and VU+ Solo² with CyberGhost via OpenVPNNo chance to get a VPN protocol into your device? Then read here a different approach to anonymize your communication:Which possibilities do I have on devices without direct VPN support?",https://support.cyberghostvpn.com/hc/en-us/articles/213811185-Read-me-first-How-to-use-CyberGhost-on-a-Router-Raspberry-Pi-Synology-NAS-Sat-Receiver
Router: How to Set Up OpenVPN on DD-WRT Routers,"Please note the following requirements:Router with alternative DD-WRT firmware and support of OpenVPN.Older versions need to be updated.Info:DD-WRT WebsiteA CyberGhost accountInfo:Here's how to create a CyberGhost account onlineInfo:How to manage your CyberGhost accountA CyberGhost subscriptionInfo:How to purchase or upgrade a subscriptionInfo(only prepaid subscribers):Enter activation keyDisclaimer:Please keep in mind that, although the technical process is as thoroughly documented as possible, you need to have at least some technical understanding. There's always a chance for an overseen mistake and/or things have changed and the article is not updated yet.FlashRouters offers plug and playDD-WRT Routers preconfigured with CyberGhost VPNfor this setup.Some general notes on routers:Routers are usually not equipped with state of the art hardware, meaning you will have speed losses when using a VPN connection (due to low CPU power to process encryption). Direct connections from your PC, Laptop, Tablet, etc. to the VPN network (without the router providing the VPN software) will work better for you if speed is among your favorite desires.If your flashed router doesn't provide DSL functionality, your Internet connection will still need to be managed by your DSL modem. In that case, your device pool will hook on your router (via cable or wireless) and the router itself will be hooked to your DSL modem. So don’t forget to configure your WLAN devices to connect to the new router, so they won’t log in to the old WLAN. Alternatively, you can deactivate your modem’s WLAN completely (only if you don’t need it for unencrypted traffic).If you flash your router with an alternative firmware you might lose your device’s guarantee; please consult your dealers’ policies regarding this matter. Furthermore, it might happen that the flash process leaves your device unusable, e.g. after a power failure while flashing. CyberGhost is not to be held responsible for any damages, does not acknowledge any liabilities, and will not adopt your manufacturer’s warranty.Also please note that not all routers with VPN client support will be able to connect to the CyberGhost network or might lose that ability with future firmware updates.DD-WRT is a custom firmware for routers, it offers OpenVPN protocol support and is available on a wide variety of routers. You can check if your router supports DD-WRT firmwarehere. An article on how to install DD-WRT firmware on a router can be foundhere.This is a tutorial on how to set up an OpenVPN connection on your DD-WRT router using the OpenVPN client UI.It has been made using this configuration:Firmware: DD-WRT v3.0-r40900 std (09/04/19)Hardware: Linksys WRT32xStep1The first thing you should do is make sure your DD-WRT router can connect to the Internet.Connect to your Router Management console by starting your web browser and typing the following IP in the address bar:192.168.1.1(this is the default router management address, yours may differ if you've manually set a different one)1. Now click on'Setup'>'Basic Setup'- ensure the'Automatic Configuration'of IP addresses (DHCP) is set as the connection type and give your DD-WRT router a fixed local IP address under 'Network Setup' >Local IP Address -If you set this to something other than the default, please note that the address you enter here WILL be the one you'll be using when you wish to access the router Management Console (default is 192.168.1.1).NOTE :The default settings should do just fine once 'Automatic Configuration' is selected, only tweak this if you have specific settings provided by your ISP2.Navigate toSetup>IPV6. Set IPv6 to Disable, thenSave&ApplySettings.(this is a recommended step to make sure you get no IP leaks)Step 2Visit yourCyberGhost VPN online accountand login with your Premium Username and PasswordSelect""VPN""from the left-side menu, then click""Configure Device""and create your server configuration, as described below:Now create your server configuration, as described below :Protocol :OpenVPNCountry :Since native protocol connections may only be used with exactly one server you now have to choose the country you want to surf from; the server to be used in this country will be chosen by CyberGhost automatically.Server group :Choose the server group and the OpenVPN protocol (UDP or TCP) you want to useOpenVPN UDPallows higher speed than the TCP version but can result in broken downloads in some cases. This is the default setting.OpenVPN TCPallows more stable connections than the UDP version but is a bit slower. Choose this version, if you have recurrent connection issues such as sudden disconnections.Once the desired parameters are chosen, save them with«Save Configuration»To view theOpenVPNcredentials that are generated for you on the configuration dashboard, pressView Configuration.After setting up your connection preferences, please take note of the following:Server Group :This is the address of the country (server) you want to be connected with, e.g. '12345-1-ca.cg-dialup.net'. This address changes with every country you have chosen in the step before. The actual single server to be used will be chosen automatically by CyberGhost.Username :A solely for this protocol generated user name.This is NOT your regular CyberGhost account user name, it's used only to authenticate with our servers via Manual Configurations.Password :A solely for protocol usage generated password.This is NOT your regular CyberGhost account password, it's used only to authenticate with our servers via Manual Configurations.Pre-Shared KeyOnce done, please download the configuration file. For that click on«Download Configuration»and download the config file to your computer (it's recommended that you create a special folder for the config, somewhere accessible like your Desktop andExtract/Copy thecontents of the .zip file there.Important:please keep your username and password obtained during the configuration process at hand, you will be asked to enter them later in the setup.Now, the saved config is a ZIP file, which contains the following single files:ca.crt:This is the certificate of the certification authorityclient.crt:This is the user certification fileclient.key:This is your private key fileopenvpn.ovpn:This is yourOpenVPNconfiguration fileIf you need to change the country you connect to, you must re-configure the location to use in your account management and download the new zipped config file.Step3Open your router interface, as before, by starting your web browser and typing the following IP in the address bar:192.168.1.1(this is the default router management address, yours may differ if you've manually set a different one)Once in the router management console,'Services'> then'VPN'.Scroll down to'OpenVPN Client'and check the 'Enable' option next to'Start OpenVPN Client'.Now you can quickly fill in the client's settings as shown below:Server IP / Name:Please enter the server group of Step 2, e. g.'12345-1-ca.cg-dialup.net'. Depending on the country to connect with, fist part of each address will be changed, e.g. instead of'12345-1-dialup.net‘(CA meaning Canada and12345-1being the server group), when choosing a different country, the first part would be similar to'12345-1-gb.cg-dialup.net'(GB meaning Great Britain and12345-1the server group).Port:443Tunnel Device:TUNTunnel Protocol:UDP or TCP,(depending on which protocol type you have chosen in step 1)Encryption Cipher:AES-256-CBCHash Algorithm:SHA256User Pass Authentication:EnableUSERNAME:The username you have generated when adding the device in STEP 1(this is NOT your regular CyberGhost Username)PASSWORD:The password you have generated when adding the device in STEP 1(this is NOT your regular CyberGhost Password)Advanced Options:EnabledTLS Cipher:NoneLZO Compression:DisabledNAT:EnableFirewall Protection: EnableIP Address:leave blankSubnet Mask:leave blankTunnel MTU setting:1500Tunnel UDP Fragment:leave blankTunnel UDP MSS-Fix:DisablensCertType verification: Leave uncheckedTLS Auth Key: leave blankAdditional Config:Go to the folder where you've extracted the downloaded configuration,right-clickthe'openvpn.ovpn'file and open it with aTEXTeditor (any text editor will do butWordPaddisplays the config. more clearly).-Once open, select the passage from 'resolv-retry infinite' to 'verb 4' andright-click > COPYthe selected text (or use CTRL+C)- Right-click in the'Additional Config'field and clickPASTEPolicy based Routing:leave blankPKCS12 Key:leave blankStatic Key:leave blankCA Cert:In this box please copyallof the textfound in the'CA.crt'file.Just like with the .ovpn file, right-click the'CA.crt'file and choose Open With > WordPad/Notepad >copy ALL of the text 'ca.crt' and PASTE it in this boxPublic Client Cert:In this box please copyallof the textfound in the'client.crt'file.Just like with the .ovpn file, right-click the'client.crt'file and choose Open With > WordPad/Notepad >copy ALL of the text 'client.crt' and PASTE it in this boxPrivate Client Key:In this box please copyallof the textfound in the'client.key'file.Just like with the .ovpn file, right-click the'client.key'file and choose Open With > WordPad/Notepad >copy ALL of the text 'client.key' and PASTE it in this boxClick onSaveand then onApply SettingsBelow is an example of a properly configured router :Step 4Finally, click on theAdministrationtab >CommandsIn the Command Shell field, copy and paste the following commands(from this article, select all commands beginning with iptables > right-click > copy :iptables -I FORWARD -i br0 -o tun1 -j ACCEPTiptables -I FORWARD -i tun1 -o br0 -j ACCEPTiptables -I INPUT -i tun1 -j REJECTiptables -t nat -A POSTROUTING -o tun1 -j MASQUERADERight-click in the'Commands'box > PASTE > click on'Save Firewall'.You can now reboot the device by going toAdministration>Management> scroll all the way down and clickReboot RouterNOTE :You may need to wait some time (upwards of 1 minute, depending on the router) for the settings to apply.To verify the VPN is working, navigate toStatus > OpenVPNUnderState, you should see the message: Client:CONNECTED SUCCESSImportant: You WILL need to Reboot the Router each time you set a different countryFinally, restart your browser (this is extremely important as location info may be cached in the browser) and visit a website likeiplocation.netto verify the change of your IPFor any additional information or concerns - it is best to approach the Support Department:via e-mail:support@cyberghost.rovia on-line request:https://support.cyberghostvpn.com/hc/en-us/requests/newvia 24/7 Live! Chat Sessions on our website",https://support.cyberghostvpn.com/hc/en-us/articles/213811885-Router-How-to-Set-Up-OpenVPN-on-DD-WRT-Routers
Router: How to Set Up OpenVPN on TomatoUSB,"Please note the following requirements:Router with alternative Tomato firmware and support of OpenVPN.Older versions need to be updated.Info:Official Tomato websiteA CyberGhost accountInfo:Here's how to create a CyberGhost account onlineInfo:How to manage your CyberGhost accountA CyberGhost subscriptionInfo:How to purchase or upgrade a subscriptionInfo(only prepaid subscribers):Enter activation keyDisclaimer:Please keep in mind that, although the technical process is as thoroughly documented as possible, you need to have at least some technical understanding. There's always a chance for an overseen mistake and/or things have changed and the article is not updated yet.Tomato is a custom firmware for routers. It offers OpenVPN client support and is available on a variety of routers. To verify if your router supports Tomato firmware, you can check if your router supports Tomato firmwarehere. An article on how to install Tomato firmware on a router can be foundhere.Some general notes on routers:Routers are usually not equipped with state of the art hardware, meaning you will have speed losses when using a VPN connection (due to low CPU power to process encryption). Direct connections from your PC, Laptop, Tablet, etc. to the VPN network (without the router providing the VPN software) will work better for you if speed is among your favorite desires.If your flashed router doesn't provide DSL functionality, your Internet connection will still need to be managed by your DSL modem. In that case, your device pool will hook on your router (via cable or wireless) and the router itself will be hooked to your DSL modem. So don’t forget to configure your WLAN devices to connect to the new router, so they won’t log in to the old WLAN. Alternatively, you can deactivate your modem’s WLAN completely (only if you don’t need it for unencrypted traffic).If you flash your router with an alternative firmware you might lose your device’s guarantee; please consult your dealers’ policies regarding this matter. Furthermore, it might happen that the flash process leaves your device unusable, e.g. after a power failure while flashing. CyberGhost is not to be held responsible for any damages, does not acknowledge any liabilities, and will not adopt your manufacturer’s warranty.Also please note that not all routers with VPN client support will be able to connect to the CyberGhost network or might lose that ability with future firmware updates.Step1Visit yourCyberGhost VPN online account.Select""VPN""then click""Configure Device""and create your server configuration, as described below:Protocol :Open VPNCountry :Since native protocol connections may only be used with exactly one server you now have to choose the country you want to surf from; the server to be used in this country will be chosen by CyberGhost automatically.Server group :Choose the server group and the OpenVPN protocol (UDP or TCP) you want to useImportant :please keep your username and password obtained during the configuration process at hand, you will need them later in the setup.Now, the saved config is a ZIP file, which contains the following single files:ca.crt:This is the certificate of the certification authorityclient.crt:This is the user certification fileclient.key:This is your private key fileopenvpn.ovpn:This is yourOpenVPNconfiguration fileIf you need to change the country you connect to, you must re-configure the location to use in your account management and download the new zipped config file.Step2First things first, these changes are made in the web configuration panel of your router. You can access it by visiting the local IP of your router from your web browser. The two most common, the default local IPs that most routers have are 192.168.1.1 or 192.168.0.1 – you can access these by openinghttp://192.168.1.1orhttp://192.168.0.1in your browser. The default IP, username, and password are listed in your router’s User Manual.Open the router settings page on your browser by entering the router local address (192.168.1.1 by default).On the left side menu, clickVPN Tunneling->OpenVPN ClientBasicActivate the main tabClient 1and the sub-tabBasic. Check all of the following options and change those which show different:Start with WAN:UncheckInterface Type:TUNProtocol:UDP or TCP (depending on what type you decided to use in step 1)Server Address/Port:Please enter the server address/group of Step 1, e. g.'12345-1-ca.cg-dialup.net'. Depending on the country to connect with, fist part of each address will be changed, e.g. instead of'12345-1-dialup.net‘(CA meaning Canada and12345-1being the server group), when choosing a different country, the first part would be similar to'12345-1-gb.cg-dialup.net'(GB meaning Great Britain and12345-1the server group).Firewall:AutomaticAuthorization Mode:TLSUsername/Password Authentication:CheckedUsername:The user name created in step 1. DO NOT use your regular user name!Password:The password created in step 1. DO NOT use your regular password!Username Authentication only:UncheckedExtra HMAC authorization:DisabledCreate NAT on tunnel:CheckedOpening'Basic > Network'you can also configure the DNS server to be used. If you want to, please exchange the first DNS IP address with a censorship-free CyberGhost name server:Primary:10.101.0.243Secondary:38.132.106.139Also, take care of the correct configuration of the time zone and server in the tab'Basic > Time'.Click onAdvancedtab and set the following options:Poll Interval:0 (deactivated)Redirect Internet traffic:CheckedAccept DNS configuration:StrictEncryption cypher:AES-256-CBCCompression:DisabledTLS Renegotiation Time:-1Connection retry:-1Verify server certificate:UncheckedCustom Configuration:Here you mark all existing lines, delete them and exchange them with some parts of your downloaded 'openvpn.ovpn' configuration file: For that, open the OpenVPN file with a simple text editor, mark the text beginning with 'resolve-retry infinete' and ending with 'verb 4' (including both lines), copy the text with 'Control-C' and insert it here with 'Control-V'. It should look like this:resolv-retry infiniteredirect-gateway def1persist-keypersist-tunnobindcipher AES-256-CBCauth SHA256ping 5ping-exit 60ping-timer-remexplicit-exit-notify 2script-security 2remote-cert-tls serverroute-delay 5verb 4# Note : Some routers don't understand this command. In cases of doubt or if the configuration doesn't work, please remove this entry.]Please don’t copy this example for a server configuration might change after publishing this article.KeysNow switch to the tab ‚Keys‘. There you find three fields, which have to be filled with the corresponding content of the other three files you downloaded from your CyberGhost account management. For that you also open the respective file with a simple editor and copy the respective text passages:Certificate Authority:Copy all text of the file 'ca.crt' in here.Client Certificate:Copy all text of the file 'client.crt' in here.Client Key:Copy all text of the file 'client.key' in here.At last click onStart Nowto initiate the VPN.Click on the“Status”tab to check if you’re now connected.For any additional information or concerns - it is best to approach the Support Department:via e-mail:support@cyberghost.rovia on-line request:https://support.cyberghostvpn.com/hc/en-us/requests/newvia 24/7 Live! Chat Sessions on our website",https://support.cyberghostvpn.com/hc/en-us/articles/213269969-Router-How-to-Set-Up-OpenVPN-on-TomatoUSB
Router: How to Set Up OpenVPN on TomatoUSB Merlin Build,"Please note the following requirements:Router with alternative TomatoUSB Merlin Build firmware and support of OpenVPN.Older versions need to be updated.Info:Official Tomato websiteA CyberGhost accountInfo:Here's how to create a CyberGhost account onlineInfo:How to manage your CyberGhost accountA CyberGhost subscriptionInfo:How to purchase or upgrade a subscriptionInfo(only prepaid subscribers):Enter activation keyDisclaimer:Please keep in mind that, although the technical process is as thoroughly documented as possible, you need to have at least some technical understanding. There's always a chance for an overseen mistake and/or things have changed and the article is not updated yet.Some general notes on routers :Routers are usually not equipped with state of the art hardware, meaning you will have speed losses when using a VPN connection (due to low CPU power to process encryption). Direct connections from your PC, Laptop, Tablet, etc. to the VPN network (without the router providing the VPN software) will work better for you if speed is among your favorite desires.If your flashed router doesn't provide DSL functionality, your Internet connection will still need to be managed by your DSL modem. In that case, your device pool will hook on your router (via cable or wireless) and the router itself will be hooked to your DSL modem. So don’t forget to configure your WLAN devices to connect to the new router, so they won’t log in to the old WLAN. Alternatively, you can deactivate your modem’s WLAN completely (only if you don’t need it for unencrypted traffic).If you flash your router with an alternative firmware you might lose your device’s guarantee; please consult your dealers’ policies regarding this matter. Furthermore, it might happen that the flash process leaves your device unusable, e.g. after a power failure while flashing. CyberGhost is not to be held responsible for any damages, does not acknowledge any liabilities, and will not adopt your manufacturer’s warranty.Also please note that not all routers with VPN client support will be able to connect to the CyberGhost network or might lose that ability with future firmware updates.Step1Visit yourCyberGhost VPN online accountand login with your Premium Username and PasswordSelect the ""VPN"" section from the left-side menuSelect ""Configure Device""Now create your server configuration, as described below :Protocol :Open VPNCountry :Since native protocol connections may only be used with exactly one server you now have to choose the country you want to surf from; the server to be used in this country will be chosen by CyberGhost automatically.Server group :Choose the server group and the OpenVPN protocol (UDP or TCP) you want to useOpenVPN UDPallows higher speed than the TCP version but can result in broken downloads in some cases. This is the default setting.OpenVPN TCPallows more stable connections than the UDP version but is a bit slower. Choose this version, if you have recurrent connection issues such as sudden disconnections.Once the desired parameters are chosen, save them with""Save Configuration""To view theOpenVPNcredentials that are generated for you on the configuration dashboard, click on the""View""button.After setting up your connection preferences, please take note of the following:Server Group :This is the address of the country (server) you want to be connected with, e.g. '12345-1-ca.cg-dialup.net'. This address changes with every country you have chosen in the step before. The actual single server to be used will be chosen automatically by CyberGhost.Username :A solely for this protocol generated user name.This is NOT your regular CyberGhost account user name, it's used only to authenticate with our servers via Manual Configurations.Password :A solely for protocol usage generated password.This is NOT your regular CyberGhost account password, it's used only to authenticate with our servers via Manual Configurations.Pre-Shared KeyOnce done, please download the configuration file. For that click on""Download Configuration""and download the config file to your computer (it's recommended that you create a special folder for the config, somewhere accessible like your Desktop andExtract/Copy thecontents of the .zip file there).Important :please keep your username and password obtained during the configuration process at hand, you will need them later in the setup.Now, the saved config is a ZIP file, which contains the following single files:ca.crt:This is the certificate of the certification authorityclient.crt:This is the user certification fileclient.key:This is your private key fileopenvpn.ovpn:This is yourOpenVPNconfiguration fileIf you need to change the country you connect to, you must re-configure the location to use in your account management and download the new zipped config file.Step 2Open your TomatoUSB (Merlin Build) router’s configuration page and click on the left side in the area ‚Advanced Settings‘ on ‚VPN Server‘ and after that in the upper menu on ‚OpenVPN Client Settings‘Basic SettingsActivate under ‚Select client Instance‘ the entry ‚Client 1‘, check the following options and change those which show different:Start with WAN:NoInterface Type:TUNProtocol:UDP or TCP (depending on what type you decided to use in step 1)Server Address and Port:Server Group Address: 1234-5-ro.cg-dialup.net / Port: 443 (Step 1)Firewall:AutomaticAuthorization Mode:TLSUsername/Password Authentication:YesUsername:The user name created in step 1. DO NOT use your regular user name!Password:The password created in step 1. DO NOT use your regular password!Username Authentication only:NoExtra HMAC authorization:DisabledCreate NAT on tunnel:YesAdvanced SettingsAfter activating the tabAdvanced Settingsplease check the following options:Poll Interval:0 (means deactivated)Redirect Internet traffic:YesAccept DNS configuration:RelaxedEncryption cypher:AES-256-CBCCompression:DisabledTLS Renegotiation Time:-1Connection retry:30Verify server certificate:NoCustom Configuration:Here you mark all existing lines, delete them and exchange them with some parts of your downloaded 'openvpn.ovpn' configuration file: For that, open the OpenVPN file with a simple text editor, mark the text beginning with :'resolve-retry infinite'and ending with'verb 4'(including both lines), copy the text with 'Ctrl-C', and insert it here with 'Ctrl-V'.It should look like this:resolv-retry infiniteredirect-gateway def1persist-keypersist-tunnobindcipher AES-256-CBCauth SHA256ping 5ping-exit 60ping-timer-remexplicit-exit-notify 2script-security 2remote-cert-tls serverroute-delay 5verb 4#Note : Some routers don't understand this command. In cases of doubt or if the configuration doesn't work, please remove this entry.]Please don’t simply copy this example for a server configuration might change after publishing this article.OpenVPN KeysNow switch to the tabOpenVPN KeysThere you find four fields, whereas three of them have to be filled with the corresponding content of the other three files you downloaded from your CyberGhost account management. For that you also open the respective file with a simple editor and copy the respective text passages:Certificate Authority:Copy all text of the file 'ca.crt' in here.Client Certificate:Copy all text of the file 'client.crt' in here.Client Key:Copy all text of the file 'client.key' in here.At last click onApplyto save your configuration.For any additional information or concerns - it is best to approach the Support Department:via e-mail:support@cyberghost.rovia on-line request:https://support.cyberghostvpn.com/hc/en-us/requests/newvia 24/7 Live! Chat Sessions on our website",https://support.cyberghostvpn.com/hc/en-us/articles/213269809-Router-How-to-Set-Up-OpenVPN-on-TomatoUSB-Merlin-Build
How to use CyberGhostVPN on Synology NAS via OpenVPN,"This tutorial guide will take you through the steps of setting up a VPN on your Synology using OpenVPN.Download OpenVPN configuration filesLogin into yourCyberGhostVPN accountand then click onVPNScroll down toManual setupand then click onConfigure DeviceProtocol :Make sure to use onlyOpenVPN 2.3orOpenVPN 2.3 TCPCountry :Since native protocol connections can only be used with a single server, you must now choose the country from which you want to surf; the server to be used in this country will be automatically chosen by CyberGhost.Server Group :Select the available server group from the list.OpenVPN 2.3allows higher speed than the TCP version but can result in broken downloads in some cases. This is the default setting;OpenVPN 2.3 TCPallows more stable connections than the UDP version but is a bit slower. Choose this version, if you have recurrent connection issues such as sudden disconnections;Once the desired parameters are chosen, save them with""Save Configuration""To view theOpenVPN 2.3credentials that are generated for you on the configuration dashboard,press""View""After setting up your connection preferences, please take note of the following :Server Group :This is the address of the country (server) you want to be connected with, e.g. 'xx-xx-ca.cg-dialup.net'. This address changes with every country you have chosen in the step before. The actual single server to be used will be chosen automatically by CyberGhost.User name :A solely for this protocol generated user name.This is NOT your regular CyberGhost account user name, it's used only to authenticate with our servers via Manual Configurations.Password :A solely for protocol usage generated password.This is NOT your regular CyberGhost account password, it's used only to authenticate with our servers via Manual Configurations.Once done, please download the configuration file. For that click on""Download Configuration""and download the config file to your computer (it's recommended that you create a special folder for the config, somewhere accessible like your Desktop andExtract/Copy thecontents of the .zip file there.Important: please keep your username and password obtained during the configuration process at hand, you will be asked to enter them later in the setup.The archive file contains 4 files that need to be extracted :Server security certificate: ca.crtClient safety certificate: client.crtKey file: client.keyOpenVPN configuration file: openvpn.ovpnTurn off IPv6Before enabling VPN on your Synology, CyberGhost VPN highly recommends you to disable IPv6 to prevent IPv6 traffic from leaking out of the VPN tunnelTo turn off IPv6, go toControl Panel>Network>Network Interface.Click theNetwork Interfacetab and then click theLANmenu to expand it.ClickEditIn the Edit menu, click theIPv6tab. For IPv6 setup, selectOff. ClickOK.After disabling IPv6,reboot your Synology.Create a new VPN profileTo add a new VPN profile, we need to return to the Network Interface settings. Go toControl Panel>Network>Network Interface.SelectCreate>Create VPN Profile.Set up your VPN profileFrom the VPN Connection Method screen, selectOpenVPN (via importing a .ovpn file)and clickNext.On the General Settings screen, enter the following information :Profile name: CyberGhost VPN (or a name to help you remember the connection)User name: user name that you have obtained during the configuration processPassword: the password that you have obtained during the configuration processThen, you will continue the setup by adding the 4 files downloaded from your online account :in the field '.ovpn files' -> import the .ovpn filein the field 'CA certificate' -> import the file ca.crtin the field 'Client certificate' -> import the file client.crtin the field 'Client key' -> import the file client.keyClickNext.Check the boxes forUse default gateway on a remote networkandReconnect when the VPN connection is lost.The box forAllow other network devices...is optional.ClickApplyto continue.Connect to the VPN serverYou should now see your new VPN profile in the network interface window. Click on your new VPN profile and then clickConnect.After a successful connection, the status of the profile will change toConnectedand that's it!",https://support.cyberghostvpn.com/hc/en-us/articles/360012606699-How-to-use-CyberGhostVPN-on-Synology-NAS-via-OpenVPN
How to Set Up OpenVPN on Raspberry Pi (Raspbian/RaspBMC),"Please note the following requirements:Raspberry Pi with ARM processorLinux distribution like Raspbian or RaspBMCUp to date software packagesA CyberGhost accountInfo:Here's how to create a CyberGhost account onlineInfo:How to manage your CyberGhost accountA CyberGhost subscriptionInfo:How to purchase or upgrade a subscriptionInfo(only prepaid subscribers):Enter activation keyDisclaimer:Please keep in mind that, although the technical process is as thoroughly documented as possible, you need to have at least some technical understanding. There's always a chance for an overseen mistake and/or things have changed and the article is not updated yet.Step1Visit yourCyberGhost VPN online accountand login with your Premium Username and PasswordSelect the""VPN""from the left-side menuScroll down the page and select""Configure Device""3. Now create your server configuration, as described below :Protocol :Open VPNCountry :Since native protocol connections may only be used with exactly one server you now have to choose the country you want to surf from; the server to be used in this country will be chosen by CyberGhost automatically.Server group :Choose the server group and the OpenVPN protocol (UDP or TCP) you want to useOpenVPN UDPallows higher speed than the TCP version but can result in broken downloads in some cases. This is the default setting.OpenVPN TCPallows more stable connections than the UDP version but is a bit slower. Choose this version, if you have recurrent connection issues such as sudden disconnections.Once the desired parameters are chosen, save them with""Save Configuration"":4. To view theOpenVPNcredentials that are generated for you on the configuration dashboard, pressView Configuration.After setting up your connection preferences, please take note of the following:Server Group :This is the address of the country (server) you want to be connected with, e.g. '12345-1-ca.cg-dialup.net'. This address changes with every country you have chosen in the step before. The actual single server to be used will be chosen automatically by CyberGhost.Username :A solely for this protocol generated user name.This is NOT your regular CyberGhost account user name, it's used only to authenticate with our servers via Manual Configurations.Password :A solely for protocol usage generated password.This is NOT your regular CyberGhost account password, it's used only to authenticate with our servers via Manual Configurations.Pre-Shared Key5. Once done, please download the configuration file. For that click on""Download Configuration""and download the config file to your computer (it's recommended that you create a special folder for the config, somewhere accessible like your Desktop andExtract/Copy thecontents of the .zip file there).Important :please keep your username and password obtained during the configuration process at hand, you will need them later in the setup.Now, the saved config is a ZIP file, which contains the following single files:ca.crt:This is the certificate of the certification authorityclient.crt:This is the user certification fileclient.key:This is your private key fileopenvpn.ovpn:This is yourOpenVPNconfiguration fileIf you need to change the country you connect to, you must re-configure the location to use in your account management and download the new zipped config file.Step 2Unzip all containing files, rename the file 'openvpn.ovpn' to e. g. ‘CG_RO.conf’ (depends on the location you want to connect to) and copy all files into your OpenVPN directory on your Raspi. For that first move to the folder in which you unzipped all files by typing:cd [path to configuration folder]Now copy them:sudo cp CG_XX.conf /etc/openvpn/sudo cp ca.crt /etc/openvpn/sudo cp client.crt /etc/openvpn/sudo cp client.key /etc/openvpn/If you want to surf from more than one country, download after the selection of a different country in your account management the next zipped configuration file and rename the new 'openvpn.ovpn' to 'CG_AnotherCountry.conf'.For two different countries you need for example do the following steps:Specify device, protocol and operating systemChoose a country, e.g. USADownload the zipped configuration file with certificates, key and OpenVPN configuration fileUnzip the downloaded file and copy all files in your OpenVPN configuration folderRename the OpenVPN configuration file from ‘openvpn.ovpn’ to ‘CG_USA.conf’.Choose the next country, e.g. RomaniaDownload the next zipped configuration fileUnzip the downloaded file and copy just the file 'openvpn.ovpn' into the configuration folderRename it to ‘CG_RO.ovpn’.etc. ...Step 3Make sure you have the right packages:Before you can begin configuring your network settings make sure you already installed the needed packages and have an up to date system:Download the package information by opening a console and typing :sudo apt-get update && sudo apt-get upgradeOnce done download the needed OpenVPN package with :sudo apt-get install openvpn openssl openresolvTo be able to log in automatically, save your user name and password in a file called ‘user.txt’ and store it in your OpenVPN folder. For that first move to the respective folder:cd /etc/openvpnEnter the following command to create and open a text file called 'user':sudo nano user.txtType in your credentials (one in each line). In the first line type in the user name created in step 1, in the second line the password, also created in step 1, both as displayed in your account management when setting up a connection:UsernamePassword#First line is a generated username and the second line is a generated password.DO NOT use your regular CyberGhost user name and password, which you use to login in the client and your account management!Save your changes with ‘CTRL+O’ and leave the editor via ‘CTRL+X’Next, open the configuration file ‘CG_XX.conf’ by typingsudo nano CG_XX.confExtend the line ‘auth-user-pass’ …[...]auth-user-pass[...]… with the path to your credential file:[...]auth-user-pass /etc/openvpn/user.txt[...]At the bottom of the configuration passage (after 'verb 4') add the following two lines:up /etc/openvpn/update-resolv-confdown /etc/openvpn/update-resolv-confSave via ‘CTRL+O’ and leave the editor with ‘CTRL+X’.Then get the file autoloaded by typing :sudo nano /etc/default/openvpnand adding the following line:AUTOSTART=""CG_XX"" (the name of the file WITHOUT the file extension ‘.conf’)Again, save with ‘CTRL+O’ and leave the editor with ‘CTRL+X’.At last type in your console :sudo update-rc.d openvpn enableStep 4Before starting OpenVPN check your configuration with …cat /etc/resolv.conf… and have a look, if the last line (‘nameserver’) shows the IP of the router. If not, change it.Now start OpenVPN:sudo service openvpn startWait a few seconds and then test, if everything works fine.Furthermore, you might want to open the websitehttps://dnsleaktest.com/and test on leaks. For that choose ‘Standard Test’ or ‘Extended Test’.*Many thanks to ‘Haudrauf’ for the original tutorial!",https://support.cyberghostvpn.com/hc/en-us/articles/213270689-How-to-Set-Up-OpenVPN-on-Raspberry-Pi-Raspbian-RaspBMC
How to Set Up OpenVPN client on Windows 10,"Please make sure the following requirements are met:Windows 10Installed OpenVPN softwareA CyberGhost accountInfo:Here's how to create a CyberGhost account onlineInfo:Here's how to manage your CyberGhost accountA CyberGhost subscriptionInfo:How to purchase or upgrade a subscriptionInfo for prepaid subscribers:How to enter an activation keyStep 1Visit yourCyberGhost VPN online accountand login with your Premium Username and PasswordClick on 'VPN' section from the left-side menu, scroll down the page and then, on ""Manual Setup"" section > click the 'Configure Device' button :In the new window, choose your desired protocol, in our example:OpenVPNand your preferredcountryandserver group, as described below.Also, type in aDevice nameto assign to your device, then configure the parameters for the new device.Country:Since native protocol connections may only be used with exactly one server you now have to choose the country you want to surf from; the server to be used in this country will be chosen by CyberGhost automatically.Server group:Choose the server group and the OpenVPN protocol (UDP or TCP) you want to use:UDPallows higher speed than the TCP version but can result in broken downloads in some cases. This is the default setting.TCPallows more stable connections than the UDP version but is a bit slower. Choose this version, if you have recurrent connection issues such as sudden disconnections.Once the desired parameters are chosen, save them with«Save Configuration»To view theOpenVPNcredentials that are generated for you on the configuration dashboard, press 'View Configuration'.Once the new page is opened, your connection credentials are generated for you but make note of the following information:Server group:This is the address of the country (server) you want to be connected with, e.g. '12345-1-ca.cg-dialup.net'. Note: This address changes with every country you have chosen in the step before. The actual single server to be used will be chosen automatically by CyberGhost.User name:A solely for this protocol generated user name.This is NOT your regular CyberGhost account user name, it's used only to authenticate with our servers via Manual Configurations.Password (you need to check the ""Show Password"" option in order to see it):A solely for protocol usage generated password.This is NOT your regular CyberGhost account Password, it's used only to authenticate with our servers via Manual Configurations.Pre-Shared KeyPlease download the configuration file. For that please click on 'Download Configuration' and download the config file to your computer (it's recommended that you create a special folder for the config, somewhere accessible like your Desktop andExtract/Copy thecontents of the .zip file there).Now, the saved config is a ZIP file, which contains the following single files:ca.crt:This is the certificate of the certification authorityclient.crt:This is the user certification fileclient.key:This is your private key fileopenvpn.ovpn:This is yourOpenVPNconfiguration fileIf you need to change the country you connect to, you must re-configure the location to use in your account management and download the new zipped config file.Step 2OpenVPN is a third party software which is not built into Windows and therefore needs to be downloaded from itshomepage> once on the site, scroll down and download the following file:Or clickHEREfor the direct download link.Save the respective installer file on your computer and start the installation. When it comes to choosing single components leave all settings as you found them and click on 'Install Now'. Remember the installation path (by defaultC:\Program Files\OpenVPN\), for you will need it later on.A warning message informing that the TAP network adapter will be installed needs to be confirmed by clicking on 'Yes'. After that click one more time on 'Next' and then on 'Finish'.Step 3Go to the OpenVPN installation folder (Default is""C:\Program Files\OpenVPN\"") and copy all of the downloaded configuration files into the sub-folder 'config', in detail: 'ca.crt', 'client.crt', 'client.key' and 'openvpn.ovpn'.If you want to surf from different countries, rename the unzipped OpenVPN configuration file from 'openvpn.ovpn' to e.g. 'CG_RO_NoSpy.ovpn' (or whatever location/server group combination you have chosen while setting up the configuration file in your account management). Choose then a different location and a different server group (if available) and download the next zipped configuration file. Unzip it, rename the containing 'OpenVPN.ovpn' as well und copy it inside the 'config' sub-folder. The inside the ZIP file remaining certificate and key files do not need to be copied again, for you already have them from the first download.For two different countries you need for example do the following steps:Specify device, protocol and operating systemChoose a country, e.g. USADownload the zipped configuration file with certificates, key and OpenVPN configuration fileUnzip the downloaded file and copy all files into the 'config' sub-folder inside your OpenVPN program folderRename the OpenVPN configuration file from ‘openvpn.ovpn’ to ‘CG_USA.ovpn’.Choose the next country, e.g. RomaniaDownload the next zipped configuration fileUnzip the downloaded file and copy just the file 'openvpn.ovpn' into the 'config' sub-folder inside your OpenVPN program folderRename it to ‘CG_RO.ovpn’.etc. ...The sub-folder 'config' now consists of the following files (regarding the example above):ca.crtclient.crtclient.keyCG_USA.ovpnCG_RO.ovpnxxx.ovpnStep 4Start the 'OpenVPN GUI' with administration rights, also necessary for all Windows Vista, Windows 7, and Windows 8 installations.To do this, right-click on the OpenVPN icon on your desktop or inside your start menu and activate OpenVPN via the context menu entry 'Start as administrator'.Don't ever forget to start OpenVPN as an administrator. Otherwise it might happen, that you get connected without being anonymized!After OpenVPN started you can locate its icon in the system tray. Right-click on that icon, choose the entry with the respective CyberGhost connection, and click on 'Connect'.Enter your credentials which consist of 1) the user name created in step 1, and 2) the password, also created in step 1. DO NOT use your regular CyberGhost user name and password, which you use to login into the client and your account management!As soon as the icon changes its color from gray to green you're good to go.For any additional information or concerns - it is best to approach the Support Department:via e-mail:support@cyberghost.rovia on-line request:https://support.cyberghostvpn.com/hc/en-us/requests/newvia 24/7 Live! Chat Sessions on our website",https://support.cyberghostvpn.com/hc/en-us/articles/214109325-How-to-Set-Up-OpenVPN-client-on-Windows-10
How to Set Up OpenVPN client on Windows 8/8.1,"Please make sure the following requirements are met:Windows 8Installed OpenVPN softwareA CyberGhost accountInfo:Here's how to create a CyberGhost account onlineInfo:Here's how to manage your CyberGhost accountA CyberGhost subscriptionInfo:How to purchase or upgrade a subscriptionInfo for prepaid subscribers:How to enter an activation keyStep 1Visit yourCyberGhost VPN online accountand login with your Premium Username and PasswordClick on section'VPN'from the left-side menu, scroll down the page and click 'Configure Device'.Choose your desired protocol, in our example:OpenVPNand your preferredcountryandserver group, as described below.Also, type in aDevice nameto assign to your device, then configure the parameters for the new device.Country:Since native protocol connections may only be used with exactly one server you now have to choose the country you want to surf from; the server to be used in this country will be chosen by CyberGhost automatically.Server group:Choose the server group and the OpenVPN protocol (UDP or TCP) you want to use:UDPallows higher speed than the TCP version, but can result in broken downloads in some cases. This is the default setting.TCPallows more stable connections than the UDP version, but is a bit slower. Choose this version, if you have recurrent connection issues such as sudden disconnections.Once the desired parameters are chosen, save them with«Save Configuration»To view theOpenVPNcredentials that are generated for you on the configuration dashboard, press 'View'.Once the new page is opened, your connection credentials are generated for you but make note of the following information:Server group:This is the address of the country (server) you want to be connected with, e.g. '12345-1-ca.cg-dialup.net'. Note: This address changes with every country you have chosen in the step before. The actual single server to be used will be chosen automatically by CyberGhost.User name:A solely for this protocol generated user name.This is NOT your regular CyberGhost account user name, it's used only to authenticate with our servers via Manual Configurations.Password (you need to check the ""Show Password"" option in order to see it):A solely for protocol usage generated password.This is NOT your regular CyberGhost account Password, it's used only to authenticate with our servers via Manual Configurations.Pre-Shared KeyPlease download the configuration file. For that please click on 'Download Configuration' and download the config file to your computer (it's recommended that you create a special folder for the config, somewhere accessible like your Desktop andExtract/Copy thecontents of the .zip file there).Now, the saved config is a ZIP file, which contains the following single files:ca.crt:This is the certificate of the certification authorityclient.crt:This is the user certification fileclient.key:This is your private key fileopenvpn.ovpn:This is yourOpenVPNconfiguration fileIf you need to change the country you connect to, you must re-configure the location to use in your account management and download the new zipped config file.Step 21. OpenVPN is a third party software which is not built into Windows and therefore needs to be downloaded from itshomepage. Please be aware you need to download the version that fits your Windows operating system:WINDOWS 7/8/8.1/SERVER 2012R2 INSTALLER (NSIS)2. Save the respective installation file ('openvpn-install...') on your computer and start the installation. When it comes to choosing single components leave all settings as you found them and click on 'Next'.3. Define the folder to save to and click on 'Install'. Remember the path, for you will need it later on.4. A warning message, claiming a TAP network adapter will be installed, needs to be confirmed by clicking on 'Yes'. After that click one more time on 'Next' and then on 'Finish'.Step 3Move to the OpenVPN installation folder and unzip all single files of your downloaded configuration file into the sub-folder 'config', in detail: 'ca.crt', 'client.crt', 'client.key' und 'openvpn.ovpn'.If you want to surf from different countries, rename the unzipped OpenVPN configuration file from 'openvpn.ovpn' to e.g. 'CG_RO_NoSpy.ovpn' (or whatever location/server group combination you have chosen while setting up the configuration file in your account management). Choose then a different location and a different server group (if available) and download the next zipped configuration file. Unzip it, rename the containing 'OpenVPN.ovpn' as well und copy it inside the 'config' sub-folder. The inside the ZIP file remaining certificate and key files do not need to be copied again, for you already have them from the first download.For two different countries you need for example do the following steps:Specify device, protocol and operating systemChoose a country, e.g. USADownload the zipped configuration file with certificates, key and OpenVPN configuration fileUnzip the downloaded file and copy all files into the 'config' sub-folder inside your OpenVPN program folderRename the OpenVPN configuration file from ‘openvpn.ovpn’ to ‘CG_USA.ovpn’.Choose the next country, e.g. RomaniaDownload the next zipped configuration fileUnzip the downloaded file and copy just the file 'openvpn.ovpn' into the 'config' sub-folder inside your OpenVPN program folderRename it to ‘CG_RO.ovpn’.etc. ...The sub-folder 'config' now consists of the following files (regarding the example above):ca.crtclient.crtclient.keyCG_USA.ovpnCG_RO.ovpnxxx.ovpnStep 4Start the 'OpenVPN GUI' with administration rights, which is necessary for all Windows Vista, Windows 7, and Windows 8 installations.To do this, right-click on the OpenVPN icon on your desktop or inside your start menu and activate OpenVPN via the context menu entry 'Start as administrator'.Don't forget to start OpenVPN as an administrator. Otherwise it might happen, that you get connected without being anonymized!After OpenVPN started you can locate its icon in the system tray. Right-click on that icon, choose the entry with the respective CyberGhost connection, and click on 'Connect'.Enter your credentials which consist of 1) the user name created in step 1, and 2) the password, also created in step 1. DO NOT use your regular CyberGhost user name and password, which you use to login to the client and your account management!As soon as the icon changes its color from gray to green you're good to go.For any additional information or concerns - it is best to approach the Support Department:via e-mail:support@cyberghost.rovia on-line request:https://support.cyberghostvpn.com/hc/en-us/requests/newvia 24/7 Live! Chat Sessions on our website",https://support.cyberghostvpn.com/hc/en-us/articles/214109185-How-to-Set-Up-OpenVPN-client-on-Windows-8-8-1
How to Set Up OpenVPN client on Windows 7,"Please make sure the following requirements are met:Windows 7Installed OpenVPN softwareA CyberGhost accountInfo:Here's how to create a CyberGhost account onlineInfo:Here's how to manage your CyberGhost accountA CyberGhost subscriptionInfo:How to purchase or upgrade a subscriptionInfo for prepaid subscribers:How to enter an activation keyStep 1Visit yourCyberGhost VPN online accountand login with your Premium Username and PasswordClick on section'VPN'from the left-side menu, scroll down the page and click 'Configure Device'.Choose your desired protocol, in our example:OpenVPNand your preferredcountryandserver group, as described below.Also, type in aDevice nameto assign to your device, then configure the parameters for the new device.Country:Since native protocol connections may only be used with exactly one server you now have to choose the country you want to surf from; the server to be used in this country will be chosen by CyberGhost automatically.Server group:Choose the server group and the OpenVPN protocol (UDP or TCP) you want to use:UDPallows higher speed than the TCP version, but can result in broken downloads in some cases. This is the default setting.TCPallows more stable connections than the UDP version, but is a bit slower. Choose this version, if you have recurrent connection issues such as sudden disconnections.Once the desired parameters are chosen, save them with«Save Configuration»To view theOpenVPNcredentials that are generated for you on the configuration dashboard, press 'View'.Once the new page is opened, your connection credentials are generated for you but make note of the following information:Server group:This is the address of the country (server) you want to be connected with, e.g. '12345-1-ca.cg-dialup.net'. Note: This address changes with every country you have chosen in the step before. The actual single server to be used will be chosen automatically by CyberGhost.User name:A solely for this protocol generated user name.This is NOT your regular CyberGhost account user name, it's used only to authenticate with our servers via Manual Configurations.Password (you need to check the ""Show Password"" option in order to see it):A solely for protocol usage generated password.This is NOT your regular CyberGhost account Password, it's used only to authenticate with our servers via Manual Configurations.Pre-Shared KeyPlease download the configuration file. For that please click on 'Download Configuration' and download the config file to your computer (it's recommended that you create a special folder for the config, somewhere accessible like your Desktop andExtract/Copy thecontents of the .zip file there).Now, the saved config is a ZIP file, which contains the following single files:ca.crt:This is the certificate of the certification authorityclient.crt:This is the user certification fileclient.key:This is your private key fileopenvpn.ovpn:This is yourOpenVPNconfiguration fileIf you need to change the country you connect to, you must re-configure the location to use in your account management and download the new zipped config file.Step 21. OpenVPN is a third party software which is not built into Windows and therefore needs to be downloaded from itshomepage. Please be aware you need to download the version that fits your Windows operating system:WINDOWS 7/8/8.1/SERVER 2012R2 INSTALLER (NSIS)2. Save the respective installation file ('openvpn-install...') on your computer and start the installation. When it comes to choosing single components leave all settings as you found them and click on 'Next'.3. Define the folder to save to and click on 'Install'. Remember the path, for you will need it later on.4. A warning message, claiming a TAP network adapter will be installed, needs to be confirmed by clicking on 'Yes'. After that click one more time on 'Next' and then on 'Finish'.Step 3Move to the OpenVPN installation folder and unzip all single files of your downloaded configuration file into the sub-folder 'config', in detail: 'ca.crt', 'client.crt', 'client.key' und 'openvpn.ovpn'.If you want to surf from different countries, rename the unzipped OpenVPN configuration file from 'openvpn.ovpn' to e.g. 'CG_RO_NoSpy.ovpn' (or whatever location/server group combination you have chosen while setting up the configuration file in your account management). Choose then a different location and a different server group (if available) and download the next zipped configuration file. Unzip it, rename the containing OpenVPN.ovpn as well und copy it inside the 'config' sub-folder. The inside the ZIP file remaining certificate and key files do not need to be copied again, for you already have them from the first download.For two different countries you need for example do the following steps:Specify device, protocol and operating systemChoose a country, e.g. USADownload the zipped configuration file with certificates, key and OpenVPN configuration fileUnzip the downloaded file and copy all files into the 'config' sub-folder inside your OpenVPN program folderRename the OpenVPN configuration file from ‘openvpn.ovpn’ to ‘CG_USA.ovpn’.Choose the next country, e.g. RomaniaDownload the next zipped configuration fileUnzip the downloaded file and copy just the file 'openvpn.ovpn' into the 'config' sub-folder inside your OpenVPN programRename it to ‘CG_RO.ovpn’.etc. ...The sub-folder 'config' now consists of the following files (regarding the example above):ca.crtclient.crtclient.keyCG_USA.ovpnCG_RO.ovpnxxx.ovpnStep 4Start the 'OpenVPN GUI' with administration rights, which is necessary for all Windows Vista, Windows 7, and Windows 8 installations.To do this, right-click on the OpenVPN icon on your desktop or inside your start menu and activate OpenVPN via the context menu entry 'Start as administrator'.Don't forget to start OpenVPN as an administrator. Otherwise it might happen, that you get connected without being anonymized!After OpenVPN started you can locate its icon in the system tray. Right-click on that icon, choose the entry with the respective CyberGhost connection, and click on 'Connect'.Enter your credentials which consist of 1) the user name created in step 1, and 2) the password, also created in step 1. DO NOT use your regular CyberGhost user name and password, which you use to login to the client and your account management!As soon as the icon changes its color from gray to green you're good to go.For any additional information or concerns - it is best to approach the Support Department:via e-mail:support@cyberghost.rovia on-line request:https://support.cyberghostvpn.com/hc/en-us/requests/newvia 24/7 Live! Chat Sessions on our website",https://support.cyberghostvpn.com/hc/en-us/articles/213562209-How-to-Set-Up-OpenVPN-client-on-Windows-7
How to Set Up OpenVPN client on Windows Vista,"Please make sure the following requirements are met:Windows Vista(please be aware that Microsoft doesn't support Windows Vista anymore and it can't be considered safe due to lacks of security updates)Installed OpenVPN softwareA CyberGhost accountInfo:Here's how to create a CyberGhost account onlineInfo:Here's how to manage your CyberGhost accountA CyberGhost subscriptionInfo:How to purchase or upgrade a subscriptionInfo for prepaid subscribers:How to enter an activation keyStep 1Visit yourCyberGhost VPN online accountand login with your Premium Username and PasswordClick on section'VPN'from the left-side menu, scroll down the page and click 'Configure Device'.Choose your desired protocol, in our example:OpenVPNand your preferredcountryandserver group, as described below.Also, type in aDevice nameto assign to your device, then configure the parameters for the new device.Country:Since native protocol connections may only be used with exactly one server you now have to choose the country you want to surf from; the server to be used in this country will be chosen by CyberGhost automatically.Server group:Choose the server group and the OpenVPN protocol (UDP or TCP) you want to use:UDPallows higher speed than the TCP version, but can result in broken downloads in some cases. This is the default setting.TCPallows more stable connections than the UDP version, but is a bit slower. Choose this version, if you have recurrent connection issues such as sudden disconnections.Once the desired parameters are chosen, save them with«Save Configuration»To view theOpenVPNcredentials that are generated for you on the configuration dashboard, press 'View'.Once the new page is opened, your connection credentials are generated for you but make note of the following information:Server group:This is the address of the country (server) you want to be connected with, e.g. '12345-1-ca.cg-dialup.net'. Note: This address changes with every country you have chosen in the step before. The actual single server to be used will be chosen automatically by CyberGhost.User name:A solely for this protocol generated user name.This is NOT your regular CyberGhost account user name, it's used only to authenticate with our servers via Manual Configurations.Password (you need to check the ""Show Password"" option in order to see it):A solely for protocol usage generated password.This is NOT your regular CyberGhost account Password, it's used only to authenticate with our servers via Manual Configurations.Pre-Shared KeyPlease download the configuration file. For that please click on 'Download Configuration' and download the config file to your computer (it's recommended that you create a special folder for the config, somewhere accessible like your Desktop andExtract/Copy thecontents of the .zip file there).Now, the saved config is a ZIP file, which contains the following single files:ca.crt:This is the certificate of the certification authorityclient.crt:This is the user certification fileclient.key:This is your private key fileopenvpn.ovpn:This is yourOpenVPNconfiguration fileIf you need to change the country you connect to, you must re-configure the location to use in your account management and download the new zipped config file.Step 2OpenVPN is a third party software which is not built into Windows and therefore needs to be downloaded from itshomepage. Please be aware you need to download the version that fits your Windows operating system:For 32 Bit Windows Vista and newer: openvpn-install-x.x.x-I603-i686.exeFor 64 Bit Windows Vista and newer: openvpn-install-x.x.x-I603-x86_64.exeSave the respective installation file ('openvpn-install...') on your computer and start installation. When it comes to choosing single components leave all settings as you found them and click on 'Next'.Define the folder to save to and click on 'Install'. Remember the path, for you will need it later on.A warning message, claiming a TAP network adapter will be installed, needs to be confirmed by clicking on 'Yes'. After that click one more time on 'Next' and then on 'Finish'.Step 3Move to the OpenVPN installation folder and unzip all single files of your downloaded configuration file into the sub-folder 'config', in detail: 'ca.crt', 'client.crt', 'client.key' und 'openvpn.ovpn'.If you want to surf from different countries, rename the unzipped OpenVPN configuration file from 'openvpn.ovpn' to e.g. 'CG_RO_NoSpy.ovpn' (or whatever location/server group combination you have chosen while setting up the configuration file in your account management). Choose then a different location and a different server group (if available) and download the next zipped configuration file. Unzip it, rename the containing OpenVPN.ovpn as well und copy it inside the 'config' sub-folder. The inside the ZIP file remaining certificate and key files do not need to be copied again, for you already have them from the first download.For two different countries you need for example do the following steps:Specify device, protocol and operating systemChoose a country, e.g. USADownload the zipped configuration file with certificates, key and OpenVPN configuration fileUnzip the downloaded file and copy all files into the 'config' sub-folder inside your OpenVPN program folderRename the OpenVPN configuration file from ‘openvpn.ovpn’ to ‘CG_USA.ovpn’.Choose the next country, e.g. RomaniaDownload the next zipped configuration fileUnzip the downloaded file and copy just the file 'openvpn.ovpn' into the 'config' sub-folder inside your OpenVPN programRename it to ‘CG_RO.ovpn’.etc. ...The sub-folder 'config' now consists of the following files (regarding the example above):ca.crtclient.crtclient.keyCG_USA.ovpnCG_RO.ovpnxxx.ovpnStep 4Start the 'OpenVPN GUI'with administration rights, which is necessary for all Windows Vista, Windows 7 and Windows 8 installations.To do this, right click on the OpenVPN icon on your desktop or inside your start menu and activate OpenVPN via the context menu entry 'Start as administrator'.Don't forget to start OpenVPN as an administrator. Otherwise it might happen, that you get connected without being anonymized!After OpenVPN started you can locate its icon in the system tray. Right click on that icon, choose the entry with the respective CyberGhost connection and click on 'Connect'.Enter your credentials which consist of 1) the user name created in step 1, and 2) the password, also created in step 1. DO NOT use your regular CyberGhost user name and password, which you use to login in the client and your account management!As soon as the icon changes its color from gray to green you're good to go.",https://support.cyberghostvpn.com/hc/en-us/articles/214106765-How-to-Set-Up-OpenVPN-client-on-Windows-Vista
How to Set Up OpenVPN client on Android,"OpenVPN Connect application can be used as an alternative way to connect to our servers.1. First download the CyberGhost VPN configuration files from youronline accountLog in in your account > Tap on the menu on top-right of the screen > 'Download Hub' :Scroll down and then tap the""Configure""button next to the""Other""devices entry:Create your server configuration, as described below :Protocol :OpenVPNCountry :Since native protocol connections may only be used with exactly one server you now have to choose the country you want to surf from; the server to be used in this country will be chosen by CyberGhost automatically.Server group :Choose the server group and the OpenVPN protocol (UDP or TCP) you want to useOpenVPN UDPallows higher speed than the TCP version but can result in broken downloads in some cases. This is the default setting.OpenVPN TCPallows more stable connections than the UDP version but is a bit slower. Choose this version, if you have recurrent connection issues such as sudden disconnections.Once the desired parameters are chosen, save them with«Save Configuration» :After the configuration is saved, you will be redirected to the""VPN""section of your web-account, from where you can see all the linked devices and existing configurations.To view theOpenVPNcredentials that were generated for you on the configuration dashboard, tap on""View"", after having identified from the list the configuration you need to see.Once done, please download the configuration file. For that click on«Download Configuration»The configurations will download as a .zip file. Extract these files to any directory.2. Open the Google Play Store andInstallthe OpenVPN Connect client.3. Once you have installed the OpenVPN Connect client, run it and select 'Import Profile'> 'FILE'section.4. The list of folders will appear. Open the folder with the extracted files. Select to import the openvpn.ovpn file.5. After the Profile was imported successfully, enter theUsernameandPassword, you have to use OpenVPN credentials generated inStep 1.6. After you add the profile, click on it to connect. You may have to accept to trust the service, if so - feel free to accept it.After you establish a connection, thestatuswill turngreen.At this point, you are connected successfully via OpenVPN.For any additional information or concerns - it is best to approach the Support Department:via e-mail:support@cyberghost.rovia online request:https://support.cyberghostvpn.com/hc/en-us/requests/newvia 24/7 Live! Chat Sessions on our website",https://support.cyberghostvpn.com/hc/en-us/articles/360016722420-How-to-Set-Up-OpenVPN-client-on-Android
How to Set Up OpenVPN on macOS (Viscosity),"This guide is designed to help you set up an OpenVPN connection using Viscosity.Jump to...Download OpenVPN configuration filesDownload and Install Viscosity AppImport VPN ConfigurationYour first VPN ConnectionDownload OpenVPN configuration files1. Visit yourCyberGhost VPN online accountand login with your CyberGhost Username and Password.2. Click on section'VPN'from the left-side menu, scroll down the page and click 'Configure Device'.3. Each server has a configuration file that you will need to create in order to connect to the VPN server. You can download all the configuration files after creating them.ChooseOpenVPNand your preferredCountryandServer Group, as described below.Also, type in aDevice nameto assign to your device, then configure the parameters for the new device.Country:Since native protocol connections may only be used with exactly one server you now have to choose the country you want to surf from; the server to be used in this country will be chosen by CyberGhost automatically.Server group:Choose the server group and the OpenVPN protocol (UDP or TCP) you want to use:UDPallows higher speed than the TCP version but can result in broken downloads in some cases. This is the default setting.TCPallows more stable connections than the UDP version but is a bit slower. Choose this version, if you have recurrent connection issues such as sudden disconnections.Once the desired parameters are chosen, save them with«Save Configuration»To view theOpenVPNcredentials that are generated for you on the configuration dashboard, press 'View Configuration'.Once the new page is opened, your connection credentials are generated for you but make note of the following information:Server group:This is the address of the country (server) you want to be connected with, e.g. '12345-1-ca.cg-dialup.net'. Note This address changes with every country you have chosen in the step before. The actual single server to be used will be chosen automatically by CyberGhost.User name:A solely for this protocol generated user name.This is NOT your regular CyberGhost account user name, it's used only to authenticate with our servers via Manual Configurations.Password (you need to check the ""Show Password"" option in order to see it):A solely for protocol usage generated password.This is NOT your regular CyberGhost account Password, it's used only to authenticate with our servers via Manual Configurations.Pre-Shared KeyClick on 'Download Configuration' (if the automatic download has not started) and download the config file to your Mac. It's recommended that you create a special folder for the config, somewhere accessible like your Desktop, andExtract / Copy thecontents of the .zip file there.Now, the saved config is a ZIP file, which contains the following single files:ca.crt:This is the certificate of the certification authorityclient.crt:This is the user certification fileclient.key:This is your private key fileopenvpn.ovpn:This is yourOpenVPNconfiguration fileIf you need to change the country you connect to, you must re-configure the location to use in your account management and download the new zipped config file.Download and Install Viscosity App1.Download and install Viscosity–https://www.sparklabs.com/viscosity/download/2. Open the Viscosity.dmg file (usually located in your Downloads folder) by double-clicking it.3. Drag Viscosity to your Applications folder.Import VPN Configuration1. Locate the Viscosity icon in the menu bar. Right-click on it and select 'Preferences'2. Click the“+”button in the bottom left-hand corner of the window. Select 'Import Connection'then 'From File...'from the menu that appears.3. Locate and select the OpenVPN configuration folder you created atStep 1. Click on theOpenbutton.4. Your connection will now appear on the Viscosity menu.Your first VPN Connection1. Locate the Viscosity icon in the menu bar. Click on it and select your OpenVPN configuration file.2.Enteryour OpenVPN credentials which consist of :The OpenVPN Username, created inStep 1.The OpenVPN Password, also created inStep 1.If you want to save the service credentials for the next login, be sure to check the Keychain checkbox.NOTE :DO NOTuse your regular CyberGhost user name and password, which you use to login to the client and your account management!3. Click on the Viscosity logo again located in the right corner of your screen. You will see a pop-up window indicating the connection status. It will turngreenonce the connection is successful.4. That's it ! You are now successfully connected to the VPN server using the Viscosity app. Your privacy is assured and your data is secure.If you want to surf from different countries, rename the unzipped OpenVPN configuration file from 'openvpn.ovpn' to e.g. 'CG_RO_NoSpy.ovpn' (or whatever location/server group combination you have chosen while setting up the configuration file in your account management). Choose then a different location and a different server group (if available) and download the next zipped configuration file. Unzip it, rename the containing 'OpenVPN.ovpn' as well und copy it inside the configuration folder. Inside the ZIP file remaining certificate and key files do not need to be copied again, for you already have them from the first download.For two different countries, you need for example do the following steps:Specify device, protocol, and operating systemChoose a country, e.g. USADownload the zipped configuration file with certificates, key, and OpenVPN configuration fileUnzip the downloaded file and copy all files into the configuration folderRename the OpenVPN configuration file from ‘openvpn.ovpn’ to ‘CG_USA.ovpn’.Choose the next country, e.g. RomaniaDownload the next zipped configuration fileUnzip the downloaded file and copy just the file 'openvpn.ovpn' into the configuration folderRename it to ‘CG_RO.ovpn’.etc. ...The sub-folder 'config' now consists of the following files (regarding the example above):ca.crtclient.crtclient.keyCG_USA.ovpn (the renamed 'openvpn.ovpn' file from your first download)CG_RO.ovpn (the renamed 'openvpn.ovpn' file from your second download)xxx.ovpnFor any additional information or concerns - it is best to approach the Support Department:via e-mail:support@cyberghost.rovia on-line request:https://support.cyberghostvpn.com/hc/en-us/requests/newvia 24/7 Live! Chat Sessions on our website",https://support.cyberghostvpn.com/hc/en-us/articles/214239965-How-to-Set-Up-OpenVPN-on-macOS-Viscosity
How to configure OpenVPN for OpenELEC 5 & 7 and LibreELEC 7 & 8 on a Raspberry Pi,"Please note:This instruction covers Kodi installations with OpenELEC 5 and 7 as well as LibreELEC 7 final, LibreELEC 8 Alpha andLibreELEC 9with the 'VPN Manager for OpenVPN'. OpenELEC 6 doesn't support OpenVPN and will be covered in a separate article.Disclaimer:Please keep in mind that, although the technical process is as thoroughly documented as possible, you need to have at least some technical understanding. There's always a chance for an overseen mistake and/or things have changed and the article is not updated yet.Step 1 : Create the VPN Configuration filesVisit yourCyberGhost VPN online accountand login with your Premium Username and PasswordClick on section'VPN'from the left-side menu, scroll down the page and click 'Configure Device'.Choose your desired protocol, in our example:OpenVPNand your preferredcountryandserver group, as described below.Also, type in aDevice nameto assign to your device, then configure the parameters for the new device.Country:Since native protocol connections may only be used with exactly one server you now have to choose the country you want to surf from; the server to be used in this country will be chosen by CyberGhost automatically.Server group:Choose the server group and the OpenVPN protocol (UDP or TCP) you want to use:UDPallows higher speed than the TCP version, but can result in broken downloads in some cases. This is the default setting.TCPallows more stable connections than the UDP version, but is a bit slower. Choose this version, if you have recurrent connection issues such as sudden disconnections.Once the desired parameters are chosen, save them with«Save Configuration»To view theOpenVPNcredentials that are generated for you on the configuration dashboard, press 'View'.Once the new page is opened, your connection credentials are generated for you but make note of the following information:Server group:This is the address of the country (server) you want to be connected with, e.g. '12345-1-ca.cg-dialup.net'. Note: This address changes with every country you have chosen in the step before. The actual single server to be used will be chosen automatically by CyberGhost.User name:A solely for this protocol generated user name.This is NOT your regular CyberGhost account user name, it's used only to authenticate with our servers via Manual Configurations.Password (you need to check the ""Show Password"" option in order to see it):A solely for protocol usage generated password.This is NOT your regular CyberGhost account Password, it's used only to authenticate with our servers via Manual Configurations.Pre-Shared KeyPlease download the configuration file. For that please click on 'Download Configuration' and download the config file to your computer (it's recommended that you create a special folder for the config, somewhere accessible like your Desktop andExtract/Copy thecontents of the .zip file there).Important:please keep your username and password obtained during the configuration process at hand, you will need them later in the setup.Now, the saved config is a ZIP file, which contains the following single files:ca.crt:This is the certificate of the certification authority(THIS WILL NOT BE NEEDED FOR THIS TYPE OF CONFIGURATION)client.crt:This is the user certification fileclient.key:This is your private key fileopenvpn.ovpn:This is yourOpenVPNconfiguration file(THIS WILL NOT BE NEEDED FOR THIS TYPE OF CONFIGURATION)If you need to change the country you connect to, you must re-configure the location to use in your account management and download the new zipped config file.Only copy the the 'client.crt' and 'client.key' files from the zipped configuration file to a folder on your desktop.Step 2:Get VPN Manager for OpenVPNTo make sure, the VPN Manager gets updated properly, download the completerepositoryinstead of just the single add-on and copy theunzippedfile to the folder with the certificate and the key.Now copy all files to your device. For that, you need access to the file system on your OpenELEC/LibreELEC device. The easiest way is by using a FTP client likeFilezilla:First check for the OpenELEC/LibreELEC network IP address, usually something like '192.168.178.XXX' and note it. If you don't know how to find it, have a look at 'System>System info>Summary> IP address' in your Kodi media centerStart Filezilla, click on 'File > Site manager' > New Site > Name it 'Kodi' (or whatever you wish) :Enter the 'Server' address (this is the network address of your OpenELEC/LibreELEC device), e.g. '192.168.186.128'Choose 'SFTP' as the 'Protocol'Choose 'Normal' as 'Connection type'Enter the 'User name' of OpenELEC/LibreELEC, usually'root'Enter 'Password' for OpenELEC (usually 'openelec'), resp LibreELEC (usually 'libreelec') - you can set a personalized password inSETTINGS > LIbreElec> Services > SSH sectionClick on'Connect'Filezilla opens the file system of your Kodi installation right inside the folder 'storage'. Create a new folder called 'downloads' or 'VPN' or whatever you want to call it.Open the newly created download folder and copy all files into it (namely the files'client.crt','client.key',and the zipped repository file named 'repository.zomboided.plugins-1.0.0.zip').Step 3: Install VPN Manager for OpenVPN1.Start your Kodi. Here we'll be using LibreELEC to illustrate the general method, so you might have to adapt some steps, but in essence, there are no big differences between the distributions and/or skins and when it comes to configuring the VPN Manager it's all over the same procedure.In case the installation of apps from unknown sources is deactivated (which is the default setting), first go to SETTINGS > SYSTEM > 'Add-ons'. There you'll need to enable'Unknown sources'.2.Now go back to the main screen > 'Add-ons > 'Install from zip file'3.Navigate to the folder where you've copied the three files via FileZilla4.Select the Zomboided Repository zip file and clickOK5. Nowgo back to Add-ons > My Add-ons >Zomboided Repository6.Click Services> VPN Manager for OpenVPN> then clickINSTALLStep 4: Configure VPN Manager for OpenVPN1.After installing theVPN Manager for OpenVPN, the VPN Manager setup Wizard should appear, you can use it to quickly configure the VPN connection.2.After selecting the ""Wizard"" > ChooseCyberGhostas the VPN provider3. When asked for the Username and password, do NOT use your CyberGhost account credentials! > you need to use theOpenVPN generated Username and Password from step 1.4.Click OK then you should be asked if you wish to connect to the VPN at Startup or manually initiate the connection whenever you need to.5.Click on'OK'once again to create the new connection.6.Last steps, now all you need to do ischoose your desired VPN country and select the user certificate ('client.crt') and the user key ('client.key') you've copied to the Kodi machine in Step 2.Once done, the VPN Manager will connect to the VPN service.You may be asked if you wish to set-up additional VPN connections, to different countries. You can do so at any time via the SETTINGS menu of theVPN Manager for OpenVPN, the process is the same.Finally,Kodi, by default may not show your External IP, in order to verify that you're indeed connected to the VPN, you'll need to install another plug-in, as illustrated inthis quick article.",https://support.cyberghostvpn.com/hc/en-us/articles/214059905-How-to-configure-OpenVPN-for-OpenELEC-5-7-and-LibreELEC-7-8-on-a-Raspberry-Pi
Read me first: How to use CyberGhost with Kodi,"Your CyberGhost subscription can be used with many Kodi installations, if the respective one supports at least one of the native protocols OpenVPN. Please note that not all Operating Systems, a Kodi install is based on, will support all kind of VPN protocols and, if a protocol is available, not all installations will be able to establish a connection to CyberGhost properly.Preconditions are:You need aCyberGhost accountandaCyberGhost subscription.Depending on your Kodi install, the base OS and the wanted protocol you might have to install third party software and/or add-onsHow to:Create a CyberGhost account:You can create an anonymous CyberGhost account for free online.Here you will find instructions on how to create itPurchase a CyberGhost subscription:A monthly or yearly subscription can be ordereddirectly from within your account management.Or activate a prepaid key:If you own an activation key, e. g. from a Bitcoin sale, please read here, howto activate a subscription manually.Configure protocol:CyberGhost supports, IPSec,, and native OpenVPN. Here you find some instructions for some example distributions:How to configure OpenVPN for OpenELEC 6 on a Raspberry PiHow to configure OpenVPN for OpenELEC 5 & 7, resp. LibreELEC 7 & 8 on a RaspberryHow to configure the CyberGhost client or OpenVPN for Kodi on a Windows deviceHow to configure OpenVPN for Kodi on a Linux device",https://support.cyberghostvpn.com/hc/en-us/articles/115000372549-Read-me-first-How-to-use-CyberGhost-with-Kodi
AsusWRT Merlin setup with NordVPN,"Fortunately, you can use NordVPN with your Asus router. These instructions will help you set up an OpenVPN connection with NordVPN on your ASUS router flashed with AsusWRT-Merlin firmware. The instructions were made using an ASUS RT-AC87U router with version 384.19 of the AsusWRT-Merlin firmware.
1. Log in to the control panel of your router. To do this, open your internet browser and in the address bar enter the router’s address, which is 192.168.1.1 by default. A prompt will appear, asking you to enter your username and password. If you have never changed the username or password, enter the default values admin for the username and admin for the password.
2. Once you have signed in, select VPN in the left sidebar.
3. In the VPN section, go to the OpenVPN Clients tab.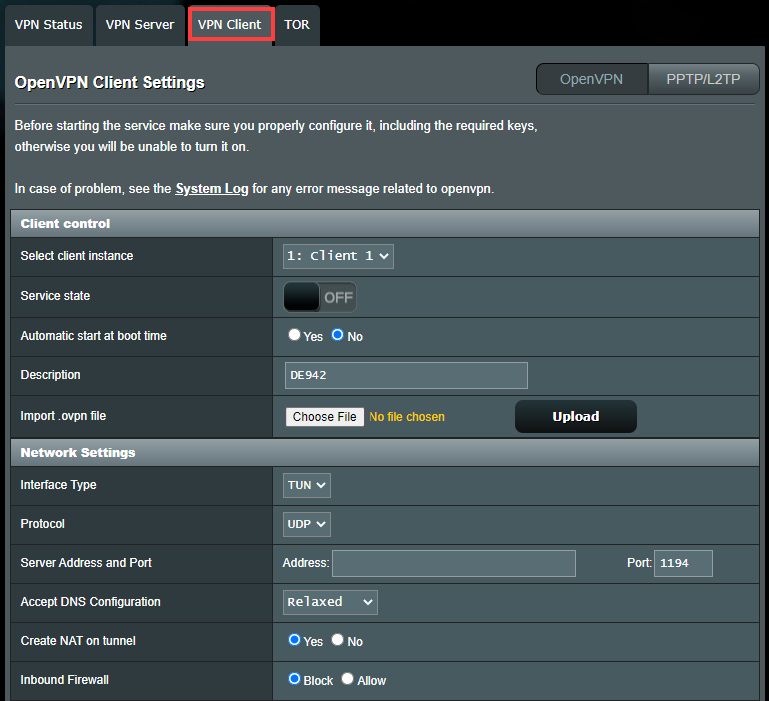
4. Now you need to download the OpenVPN configuration files.
Follow the steps below to find the best server for your connection:
1. Log into your [Nord Account](https://my.nordaccount.com/), and click NordVPN.
2. Scroll down to Advanced Settings and click Set up NordVPN manually.
3. Select the Server recommendation tab. According to your location, the best server will be recommended.
4. By pressing Advanced filters you can further customize the recommended servers by selecting the Server type and the Security protocol.
In case you wish to select a specific server, follow these steps:
1. Under Set up NordVPN manually, select OpenVPN configuration files.
2. Find the server you wish to connect to by using the Search bar or by scrolling down and download it by clicking Download UDP or Download TCP.
1. Go back to the router’s control panel and click Choose File….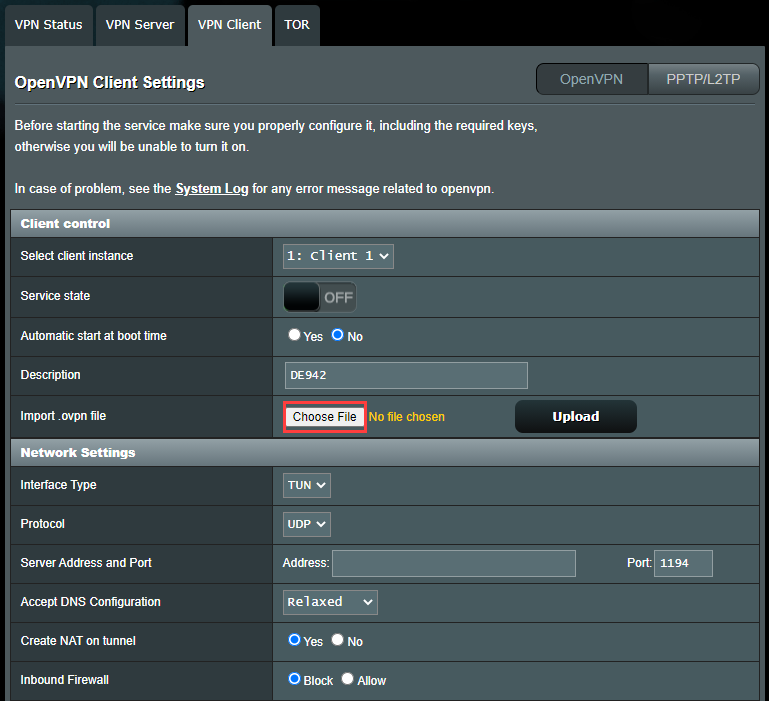
2. Select the configuration file you have just downloaded and press Open. If you need help deciding which configuration file to choose, feel free to contact our customer support team.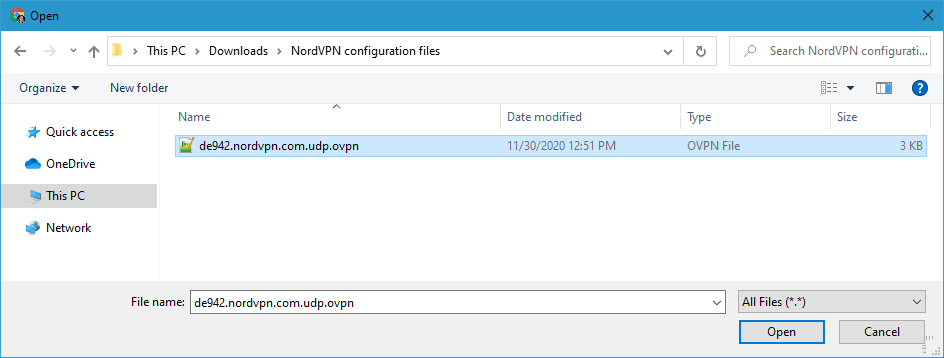We recommend using UDP files that have udp1194 in their names. It means that the configuration will use UDP, which is faster than TCP.
3. Click Upload and wait for the page to refresh.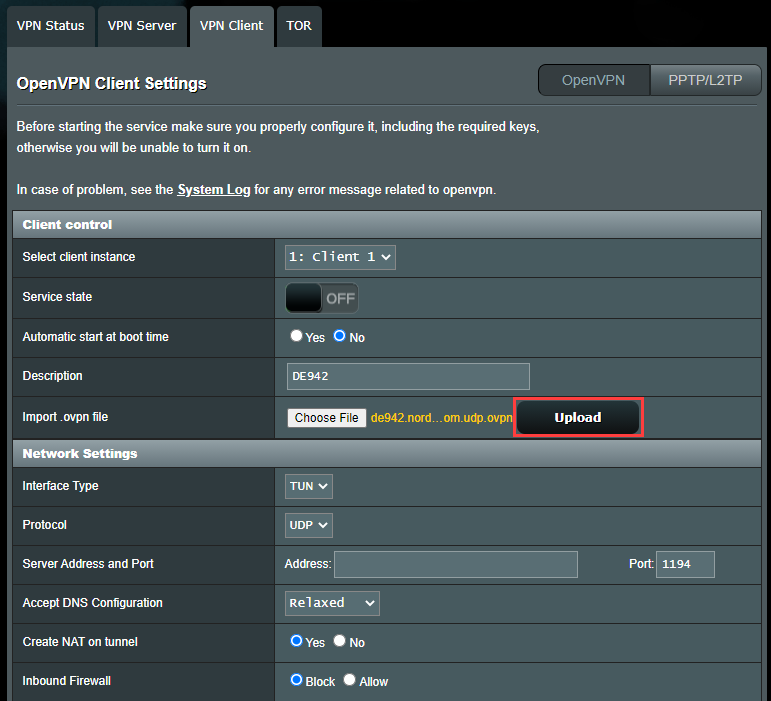
4. Once the page has refreshed, most fields will be filled in automatically, except for your NordVPN service username and password — you will have to type those in manually.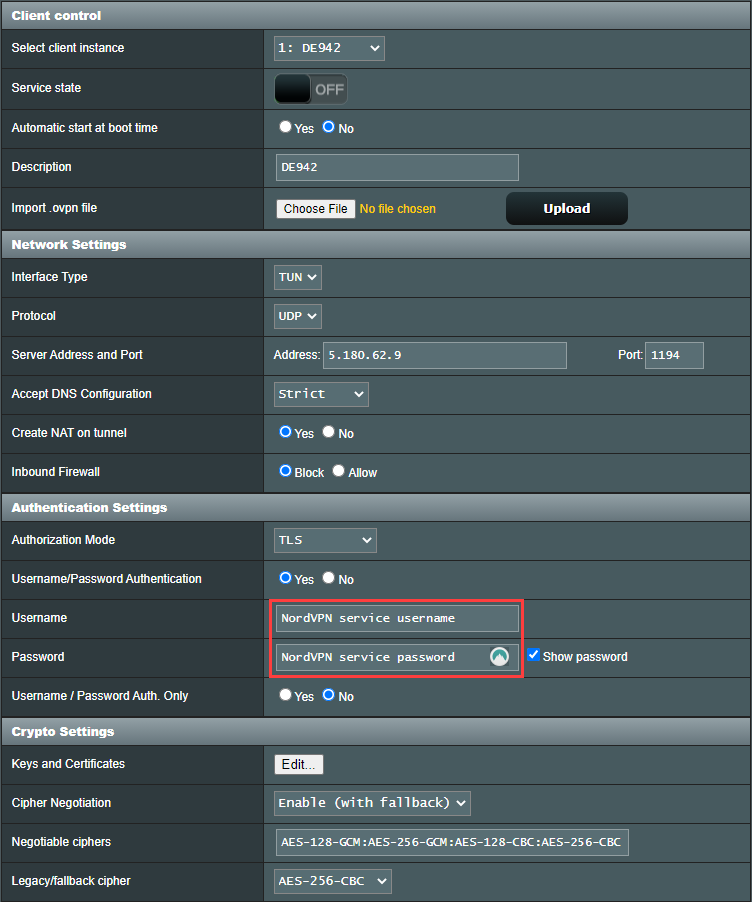
Follow the steps below to find the service credentials for manual connection setup:
1. Log into your [Nord Account](https://my.nordaccount.com/), click NordVPN, and, under Manual setup, click on Service credentials. Here you'll find the Username and Password needed to connect manually.
1. Set Accept DNS Configuration to Strict if you are planning to use NordVPN on all your home network devices or Exclusive if you will use it on specific devices. We recommend setting it to Strict.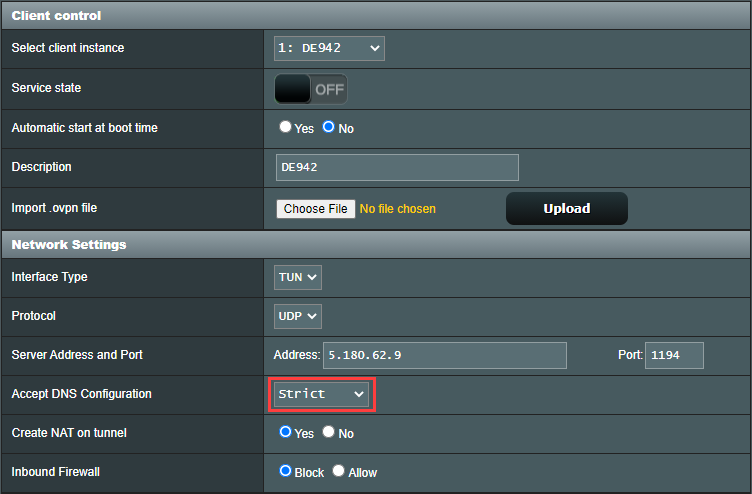
2. In the Custom Configuration field, enter this text:remote-cert-tls serverremote-randomnobindtun-mtu 1500tun-mtu-extra 32mssfix 1450persist-keypersist-tunping-timer-remreneg-sec 0#log /tmp/vpn.log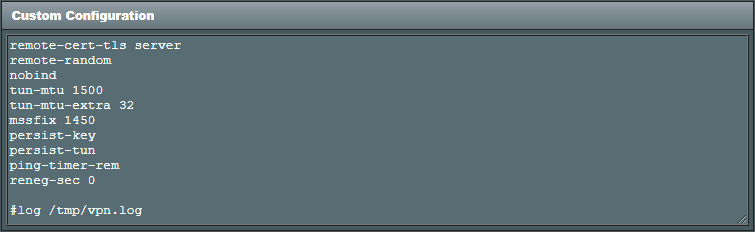
3. Now you need to configure NordVPN’s DNS settings. In the left sidebar, click WAN. In the Connect to DNS Server automatically field, select No and fill in NordVPN’s DNS servers as follows:103.86.96.100103.86.99.100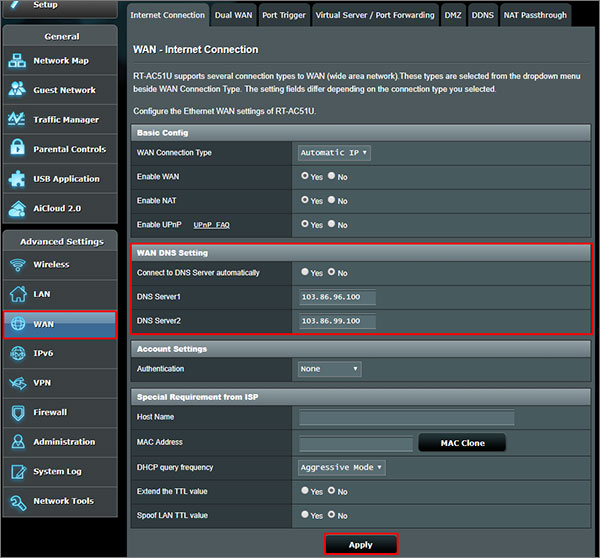
4. Click Apply at the bottom of the page and wait a few seconds for the changes to apply. If you can see the green ON button, congratulations – you are now connected! You can verify this by going back to the VPN Status tab or by checking your IP address on [our website](https://nordvpn.com/) (you will find your connection status, along with your IP address and ISP, at the top of the page).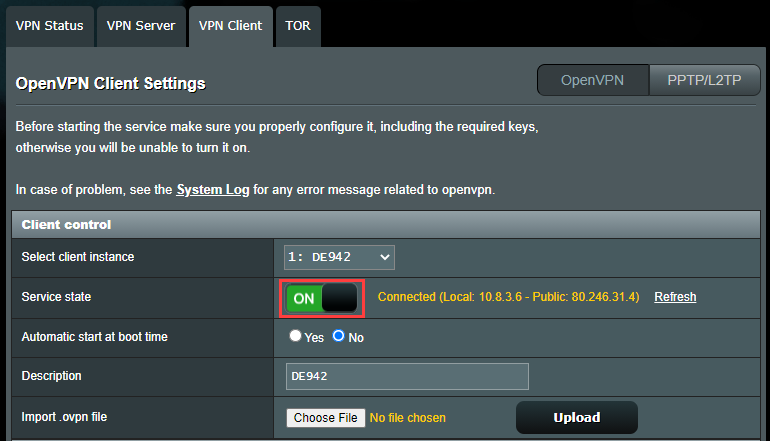
Optional Kill Switch setup (for advanced users):
Here’s how to set up the Kill Switch feature on AsusWRT Merlin firmware:
1. Go to VPN > OpenVPN Client.
2. Under Advanced Settings, select Redirect Internet Traffic: Policy Rules
3. A new option will appear, Block routed clients if tunnel goes down. Enable it.
4. Under Rules for routing client traffic through the tunnel, add your whole network:Description: all devicesSource IP: 192.168.1.0/24 (if you have a different network or subnet mask, change accordingly)Destination IP: leave blankIface: VP
If you're wondering what other opportunities there are for using NordVPN with a router, here are some more compatible routers.",https://support.nordvpn.com/hc/en-us/articles/20319214011921-AsusWRT-Merlin-setup-with-NordVPN
How to check your External IP when using a VPN with Kodi on LibreELEC,"After setting up a VPN connection on LibreELEC, the default System Information sectionmay notshow the actualExternal/Public IP(the one used to access the Internet, in this case, it should be theVPN server's IP), it may only show thelocal IP (network IP).To see your External IP, you'll need to install an Add-on likeIndigo, as seen below:Go to theSettingsIcon in the top left corner >System Settings -> Expert Mode -> Addons.Make sure to turn on‘Unknown Sources.’Otherwise, you will not be able to install third-party add-ons.When the warning box pops up, click‘Yes’.Now go back to the Kodi home screen, and click on the ‘Settings’ icon.From here, go toFile Manager->Add Source.Select None and then enter the following path without the quotes“http://fusion.tvaddons.co/”.Name it ‘Fusion’ and click ‘OK’.From the Kodi home screen, selectAddons.Click on thePackage Installer Iconat the top left corner.Choose‘Install from Zip file’ -> Fusion -> begin-here.Selectplugin.program.indigo-x.x.x.zipand install it.Wait until you see the add-on enabled notification.Now go back to the Kodi home screen and select ‘My Add-ons’ -> ‘Program Addons’Choose Indigo from the listIndigo is now installed, it’s time to check your External IP address on Kodi.Launch Indigo and go to ‘System Information’.Both your Local and External IPs will be shown here, these addresses should be different, the External IP will be the one belonging to the VPN service (this is the IP used for all of your traffic on the Internet)You can verify the External IP address with a service likehttps://www.iplocation.net/> simply type in the External IP from Kodi in the ""IP Location Finder"" section and click IP Lookup",https://support.cyberghostvpn.com/hc/en-us/articles/360019577234-How-to-check-your-External-IP-when-using-a-VPN-with-Kodi-on-LibreELEC
Read me first: How to use CyberGhost with your game console,"Neither Microsoft’s Xbox One nor Sony’s PlayStation 4 or Nintendo's Wii directly support VPN connections, but, of course, many users nonetheless would like to have the opportunity of entering the Internet camouflaged, e. g. for one of the following reasons:At least the PS4 and the Xbox are powerful media centers and able to stream Netflix, Amazon Prime, and other services. A VPN opens the respective console for streaming options from different countries.Some games and DLCs are barred, allowing only access from specific regions. A VPN makes it possible to get access to the resp. games from other regions as well.A VPN will encrypt all in- and outgoing Internet traffic and that way secure your transactions inside the respective game network.Some Internet Service Providers throttle bandwidth for online gamers. If that’s the case, a VPN might decrease ping times, improve lag and allow more efficient server hops - even though the traffic gets rerouted through an additional network.A VPN protects against DDoS attacks.Connect a VPNSince it's not possible to start a VPN from right inside the respective game console, one needs to find a way to hop on a VPN connection established by a different device. This can happen in two ways:By using the VPN connection a PC or Mac established via CyberGhost (Internet Connection Sharing).By using a VPN compatible router.Some preconditions:A CyberGhost account:If you don't have one yet, you cancreate an account on our homepage.A CyberGhost subscription:You can order a subscription from our website.Here you learn how to do it. (Optional: Activate a prepaid key:In case you bought an activation key from a Bitcoin or offline sale, please referto this article on how to activate a key manually.)Check on the following guides, depending on your console and the type of VPN support you want to use:PlayStation with Internet Connection Sharing on WindowsPlayStation with Internet Connection Sharing on Mac OSXbox with Internet Connection Sharing on WindowsXbox with Internet Connection Sharing on Mac OSPlayStation with VPN compatible routerXbox with VPN compatible router",https://support.cyberghostvpn.com/hc/en-us/articles/360001991214-Read-me-first-How-to-use-CyberGhost-with-your-game-console
How to use CyberGhost with Sony PlayStation & Windows ICS,"Step 1Install and activate CyberGhost VPN on your Windows PC. Choose the server to be used. If you don't know, how to install and use CyberGhost on Windows, please refer toour instructions hereStep 2The Windows' 'Internet Connection Sharing' function (ICS) allows using the encrypted VPN connection established in step 1 with different devices in your local network. For that, you need to connect the respective device, in this case, the PlayStation console, to your Windows PC using an Ethernet cable.Please note that your PC needs to have two network cards, one for a connection to your router (to the Internet) and one for the connection to your game console. Alternatively you can use a wireless LAN, either from your PC to the router or from the console to your PC (or both). However, if you need to share a wireless Internet connection, more steps are necessary and it’s a bit more complicated to realize. Pleaserefer to this articleto share a wireless Internet connection under Windows 10.Step 3The first settings have to be made on the host computer, that is the Windows PC, which encrypted Internet connection should be used by the PlayStation:Start CyberGhost VPN, choose the profile you want to use, and establish the VPN connection. Once done, open the Start menu, type 'Control Panel' and switch to the ‚Network and Sharing Center‘.Click on ‚Change adapter settings‘(on older Windows versions ‚Show Network Connections‘).Search for an Ethernet connection related to the ‚TAP-Windows Adapter V9‘. Click on it with your right mouse button and choose the entry ‚Properties‘.Activate the tab ‚Sharing‘ and then the option ‚Allow other network users [...]‘. Also choose the fitting ‚Home Network Connection‘ from the drop-down list, usually the second physical network card or a WiFi stick.Click on 'OK‘.Double click on the adapter representing the Ethernet (or Wi-Fi) connection that goes to your router, click on 'Details' and note down the network IPv4 address, usually something such as '192.168.xxx.xxx'.Close all windows, connect your PlayStation to your Windows PC, and configure the console:Step 4Depending on the PlayStation device you are using, the options to set can be found in menu entries like ‚Network‘ or ‚Internet‘. There you first deactivate the automatic search for networks and then set up an Internet connection manually.Activate either 'Use LAN cable' or 'Wi-Fi' (depending on how you connect to the Windows PC with the running CyberGhost connection). In the case of an Ethernet connection, all settings will usually be adjusted automatically, in case of a Wi-Fi connection you additionally need to enter the correct password set for the wireless network of the Windows PC.If you use a Wi-Fi connection from your PlayStation to your Windows PC AND from your Windows PC to your router, make double sure you don't accidently connect the PlayStation directly to the router.Please also note that older versions of your game console might only have an Ethernet port and therefor need a WiFi hardware add on in order to establish a wireless connection.The noted IP address will be the gateway to be set.For any additional information or concerns - it is best to approach the Support Department:via e-mail:support@cyberghost.rovia on-line request:https://support.cyberghostvpn.com/hc/en-us/requests/newvia 24/7 Live! Chat Sessions on our website",https://support.cyberghostvpn.com/hc/en-us/articles/360001993134-How-to-use-CyberGhost-with-Sony-PlayStation-Windows-ICS
How to use CyberGhost with Microsoft Xbox & Windows ICS,"Step 1Install and activate CyberGhost VPN on your Windows PC. Choose the server to be used. If you don't know, how to install and use CyberGhost on Windows, please refer toour instructions here.Step 2The Windows' 'Internet Connection Sharing' function (ICS) allows using the encrypted VPN connection established in step 1 with different devices in your local network. For that, you need to connect the respective device, in this case, your Xbox console, to your Windows PC using an Ethernet cable.Please note that your PC needs to have two network cards, one for a connection to your router (to the Internet) and one for the connection to your game console. Alternatively you can use a wireless LAN, either from your PC to the router or from the console to your PC (or both). However, if you need to share a wireless Internet connection, more steps are necessary and it’s a bit more complicated to realize. Pleaserefer to this articleto share a wireless Internet connection under Windows 10.Step 3The first settings have to be made on the host computer, that is the Windows PC, which encrypted Internet connection should be used by the Xbox:Start CyberGhost VPN, choose the profile you want to use, and establish the VPN connection. Once done, open the Start menu, type'Control Panel'and switch to the ‚Network and Sharing Center‘.Click on ‚Change adapter settings‘ (on older Windows versions ‚Show Network Connections‘).Search for an Ethernet connection related to the ‚TAP-Windows Adapter V9‘. Click on it with your right mouse button and choose the entry ‚Properties‘.Activate the tab ‚Sharing‘ and then the option ‚Allow other network users [...]‘. Also choose the fitting ‚Home Network Connection‘ from the drop-down list, usually the second physical network card or a WLAN stick.Click on 'OK‘.Double click on the adapter representing the Ethernet (or Wi-Fi) connection that goes to your router, click on 'Details' and note down the network IPv4 address, usually something such as '192.168.xxx.xxx'.Close all windows, connect your Xbox to your Windows PC, and configure the console:Step 4The options to be set can be found in menu entries like ‚Network‘ and ‚Internet‘. So first open your 'Settings' menu and switch to 'System'.Open 'Network Settings' and choose, if you either want to set up a cable connection or a Wi-Fi connection. In case of an Ethernet connection, all settings will be adjusted automatically, in case of a Wi-Fi connection you additionally need to enter the correct password set for the wireless network of the Windows PC.If you use a Wi-Fi connection from your Xbox to your Windows PC AND from your Windows PC to your router, make double sure you don't accidentally connect the Xbox directly to the router.Please also note that older versions of your game console might only have an Ethernet port and therefor need a WiFi hardware add on in order to establish a wireless connection.Now open 'Configure network' and tap 'A' on your controller. In the next window, you can change your IP settings. Do so by switching to 'Manually'.Enter an IP address. This address must be unique in your network. In case you don't know how many devices you run and which IP addresses already are in use, open your router's web interface, and check on all addresses. The address for the Xbox will look similar to something like 192.168.xxx.xxx.Enter the subnet mask, usually 255.255.255.0, which should also be the subnet mask of your gateway.At last enter the gateway address, which is the noted IP address of your Windows PC with the running CyberGhost connection.For any additional information or concerns - it is best to approach the Support Department:via e-mail:support@cyberghost.rovia on-line request:https://support.cyberghostvpn.com/hc/en-us/requests/newvia 24/7 Live! Chat Sessions on our website",https://support.cyberghostvpn.com/hc/en-us/articles/360001989013-How-to-use-CyberGhost-with-Microsoft-Xbox-Windows-ICS
How to use CyberGhost with Sony PlayStation & MacOS ICS,"Step 1Download and install CyberGhost VPN on your Mac. If you don't know, how to do this, please refer toour instructions here.Step 2The 'Internet Connection Sharing' function allows using an encrypted VPN connection with different devices in your local network. For that, you need to connect the respective device, in this case, the PlayStation console, to your Mac using a crossover cable.Please note that your Mac needs to have two network cards, one for a connection to your router (to the Internet) and one for the connection to your game console. Alternatively, you can use a wireless LAN, either from your Mac to the router or from the console to your Mac (or both).Step 3The first settings have to be made on the host computer, that is the Mac, which encrypted Internet connection should be used by the PlayStation:Go to 'System Preferences' at the bottom of the home screen, open 'Sharing' and tap on 'Internet Sharing'.Open the drop-down menu titled 'Share Your Connection From' and select your established Internet connection. This could either be 'Ethernet' (cable connection), 'AirPort', or 'Wireless'. Make sure to choose the right source.Click on the drop-down menu titled 'To computer using' and select 'Ethernet' (since you want to connect your PlayStation with a cable to your Mac). The Internet Sharing icon should now turn to green, symbolizing a working sharing connection.Step 4Start CyberGhost VPN, choose the profile you want to use, and establish the VPN connection. Once done, open the PlayStation menu, go to ‚Settings > Network Settings > Set up Internet Connection‘. There you deactivate the automatic search for networks and then set up an Internet connection manually.Activate either 'Use LAN cable' or 'Wi-Fi' (depending on how you connect to the Mac with the running CyberGhost connection) and specify the connection method to 'Easy' to make sure that the PlayStation will automatically scan your Ethernet connection. In the case of an Ethernet connection, all settings will usually be adjusted automatically, in case of a Wi-Fi connection you additionally need to enter the correct password set for the wireless network of the Mac.If you use a Wi-Fi connection from your PlayStation to your Mac AND from your Mac to your router, make double sure you don't accidently connect the PlayStation directly to the router.Please also note that older versions of your game console might only have an Ethernet port and therefor need a WiFi hardware add on in order to establish a wireless connection.Click on 'Do Not Use A Proxy Server' when asked, accept all settings and lastly select 'Test Connection'.",https://support.cyberghostvpn.com/hc/en-us/articles/360001988993-How-to-use-CyberGhost-with-Sony-PlayStation-MacOS-ICS
How to use CyberGhost with Microsoft Xbox & Mac ICS,"Step 1Install and activate CyberGhost VPN on your Mac. If you don't know, how to do this, please refer toour instructions here.Step 2The 'Internet Connection Sharing' function allows using an encrypted VPN connection with different devices in your local network. For that, you need to connect the respective device, in this case, your Xbox console, to your Mac using a crossover cable.Please note that your Mac needs to have two network cards, one for a connection to your router (to the Internet) and one for the connection to your game console. Alternatively you can use a wireless LAN, either from your Mac to the router or from the console to your Mac (or both).Step 3The first settings have to be made on the host computer, that is the Mac, which encrypted Internet connection should be used by the Xbox:Go to 'System Preferences' at the bottom of the home screen, open 'Sharing' and tap on 'Internet Sharing'.Open the drop-down menu titled 'Share Your Connection From' and select your established Internet connection. This could either be 'Ethernet' (cable connection), 'AirPort', or 'Wireless'. Make sure to choose the right source.Click on the drop-down menu titled 'To computer using' and select 'Ethernet' (since you want to connect your Xbox with a cable to your Mac). The Internet Sharing icon should now turn to green, symbolizing a working sharing connection.Step 4The options to be set can be found in menu entries like ‚Network‘ and ‚Internet‘. So first open your 'Settings' menu and switch to 'System'.Open 'Network Settings' and choose, if you either want to set up a cable connection or a Wi-Fi connection. In case of an Ethernet connection, all settings will be adjusted automatically, in case of a Wi-Fi connection you additionally need to enter the correct password set for the wireless network of the Mac.If you use a Wi-Fi connection from your Xbox to your Mac AND from your Mac to your router, make double sure you don't accidently connect the Xbox directly to the router.Please also note that older versions of your game console might only have an Ethernet port and therefor need a WiFi hardware add on in order to establish a wireless connection.Now open 'Configure network' and tap 'A' on your controller. In the next window, you can change your IP settings. Do so by switching to 'Manually'.Enter an IP address. This address must be unique in your network. In case you don't know how many devices you run and which IP addresses already are in use, open your router's web interface, and check on all addresses. The address for the Xbox will look similar to something like 192.168.xxx.xxx.Enter the subnet mask, usually 255.255.255.0, which should also be the subnet mask of your gateway.At last enter the gateway address, which is the IP address of your Mac with the running CyberGhost connection.",https://support.cyberghostvpn.com/hc/en-us/articles/360001989053-How-to-use-CyberGhost-with-Microsoft-Xbox-Mac-ICS
How to set up your LG Smart TV to use MediaStreamer,"MediaStreamer is a DNS service designed to improve your streaming experience. Since LG TVs do not natively support VPN, you can use MediaStreamer as an alternative for streaming.",https://www.expressvpn.com/support/vpn-setup/lg-smart-tv-mediastreamer/)
How to use CyberGhost with Sony PlayStation & a VPN-compatible router,"To use your PlayStation with a VPN equipped router you first need to know that despite the router you decide for, very few can be used both ways, as a VPN router and at the same time as your Internet gateway. Most of the time you will end up with the original router, delivered by your Internet Service Provider, and a separate one: the VPN compatible router.While the first will connect you to the Internet, the latter will provide a (Wi-Fi) network on its own and connect to the CyberGhost network through your ISP router. In the case of a second Wi-Fi network, it also means that you have two separate wireless networks in your home: an encrypted and anonymized one (provided by the VPN compatible router) and your regular network (provided by the ISP router). Beware then which device you connect to which Wi-Fi network.Step 1To configure a VPN compatible router and establish a working VPN connection to the CyberGhost network you might want to read one of the following instructions:How to configure OpenVPN for DD-WRT routersHow to configure OpenVPN for TomatoUSB routersHow to configure OpenVPN for TomatoUSB Merlin Build routersStep 2The way you configure your PlayStation to use the VPN compatible router is exactly the same as using the ISP router. You just need to open your console's system settings, move to ‚Network‘ and deactivate or remove the regular Internet connection, resp. deactivate the automatic search for networks. Instead, you set up a new Internet connection manually.For this either activate 'Use LAN cable' or 'Wi-Fi' (depending on how you won't connect to the VPN router with the running CyberGhost connection). In case of an Ethernet connection, all settings will usually be adjusted automatically, in case of a Wi-Fi connection you additionally need to enter the correct password set for the wireless network of the VPN compatible router.If you have two separate Wi-Fi networks running and want to use the Wi-Fi with VPN connection, make double sure you don't accidently connect the PlayStation to the ISP router.Please also note that older versions of your game console might only have an Ethernet port and therefor need a WiFi hardware add on in order to establish a wireless connection.",https://support.cyberghostvpn.com/hc/en-us/articles/360001989073-How-to-use-CyberGhost-with-Sony-PlayStation-a-VPN-compatible-router
What is CyberGhost Identity Guard ?,"CyberGhost ID Guardis a feature that will automatically alert you in case your email address is revealed in a data breach. allowing you to change your password quickly.How to activate it :1. Log in to youronline account.2. Click on 'Identity Guard'.3. Enter avalid email addressthat you want to be checked and monitored by CyberGhost ID Guard.Then press 'Activate'4. Before the monitoring starts, you must confirm your email address. Please check your inbox andfollow the instructions to verify your email.5. Once you have successfully registered your email with CyberGhost ID Guard, a quick scan will be performed to check for previous breaches, and a report will be available to you.You can add a maximum of two email accounts and select which one should be your primary address to get reports immediately. You can also remove the existing addresses and add new ones.NOTE :In the event that your email is compromised, we'll instantly send you an alert and the steps you need to take to regain control.This feature is powered by HaveIBeenPwned.For any additional information or concerns - it is best to approach the Support Department:via e-mail:support@cyberghost.rovia on-line request:https://support.cyberghostvpn.com/hc/en-us/requests/newvia 24/7 Live! Chat Sessions on our website",https://support.cyberghostvpn.com/hc/en-us/articles/360016885879-What-is-CyberGhost-Identity-Guard
How to automatically protect Wi-Fi networks with CyberGhost VPN for Android,"To specify the way how CyberGhost's automatic Wi-Fi protection should set in you can define the general reaction of CyberGhost to Wi-Fi networks as well as a specific reaction to a specific Wi-Fi.Set up the general reaction to new / unknown Wi-Fi networks1. Open the app settings with a single finger tap on the gear symbol :2. Tap on the'Wi-Fi'area.3.Here you activate a warning each time CyberGhost detects a new Wi-Fi network. If you are concerned about your device's security in public hotspots (which you should), it's recommended to keep this option activated at any time. To define the way Wi-Fi networks should be treated at availability, tap on the resp. entry.Now choose one of the following actions (all options are available for password-protected networks and open networks alike):Ask :Every time your device detects a Wi-Fi network, CyberGhost asks you if you want to be protected.Protect :Every time your device detects a Wi-Fi network, CyberGhost automatically starts a VPN connection.Disable protection :If you already have a VPN connection running and you enter a (different) Wi-Fi network, CyberGhost will disable the VPN connection.Ignore :By choosing this option, CyberGhost will ignore any Wi-Fi network.Manage Wi-Fi Networks :Since CyberGhost remembers networks and the reaction wanted on any particular network you can manage here all known networks, such as assigning a different reaction to a specific one, by simply tapping on the respective Wi-Fi Network.For any additional information or concerns - it is best to approach the Support Department:via e-mail:support@cyberghost.rovia on-line request:https://support.cyberghostvpn.com/hc/en-us/requests/newvia 24/7 Live! Chat Sessions on our website",https://support.cyberghostvpn.com/hc/en-us/articles/360006574133-How-to-automatically-protect-Wi-Fi-networks-with-CyberGhost-VPN-for-Android
Set Up CyberGhost VPN for Android via APK File,"Please be aware that the CyberGhost VPN may not be accessible through various app stores in certain regions.If you are unable to download CyberGhost VPN through the Google Store or equivalent store on your Android device,download the APK file directly from our website. Please keep in mind thatwe do not recommend downloading CyberGhost VPN APK files from third-party websites, as they could contain malware.In order to download the APK file, you will need toenable APK installations first. This setting is disabled by default as a security measure to protect your device from potentially malicious files.Jump to…Enable APK Installation on Your Android DeviceDownload the CyberGhost VPN APK file1. Enable APK Installation on Your Android DeviceThis process differs based on your device’s manufacturer.Huawei & HonorGo toSettingsSelectSecuritySelectMore settingsTap onInstall apps from external sourcesFind your browser and tap on itToggle the button to allowXiaomiGo toSettingsSelectPrivacySelectSpecial permissionSelectInstall unknown appsTap on your browser and enableAllow from this sourceTapOKSamsung (Android 8.x and higher)Go toSettingsSelectAppsTap the three buttons in the upper right cornerChooseSpecial accessSelectInstall unknown appsFind the browser you are using and toggle the button onSamsung (Android 7.x and lower)Go to SettingsSelect SecurityTap theUnknown sourcesswitch to turn it onNext, you can download the APK file.2. Download the CyberGhost VPN APK fileContact ourSupport Teamfor the latest APK version, and download the fileGo to your downloads folder, and tap on the downloaded fileYou will receive a pop-up notification. SelectAllowto continueTap onInstallOnce the installation is complete, tap onOpenAfter installing CyberGhost VPN, consider disabling APK installations to keep your device safe from unreliable third-party apps.Check outhow to use CyberGhost VPN for Androidto get you started.Need assistance? Contact our Customer Support team:via email atsupport@cyberghost.rovia online request athttps://support.cyberghostvpn.com/hc/en-us/requests/newvia 24/7 Live Chat by clicking the Support button below",https://support.cyberghostvpn.com/hc/en-us/articles/8268889053724-Set-Up-CyberGhost-VPN-for-Android-via-APK-File
Set Up Amazon Prime Video with CyberGhost VPN,"This guide will show you the best way tostream Amazon Prime Video with CyberGhost VPN.To access Amazon Prime Video with CyberGhost VPN, you will need:An active Amazon Prime Video account.An active CyberGhost VPN account.To stream Amazon Prime Video, please follow these steps:Connect to one of our streaming-optimized servers for Amazon Prime Video on your device. Please refer to these device-specific guides:AndroidiOSWindowsMacLinuxOpen Amazon Prime Video and start streaming.Now you know how you can set up Amazon Prime Video with CyberGhost VPN on your device!Important:If you encounter general issues with accessing Amazon Prime Video after following the steps above, make sureyou are connected to the VPN properly. If you see the “Service area restriction” error message, please refer tothis troubleshooting article.For any additional information or concerns - it is best to approach the Support Department:via e-mail:support@cyberghost.rovia on-line request:https://support.cyberghostvpn.com/hc/en-us/requests/newvia 24/7 Live! Chat Sessions on our website",https://support.cyberghostvpn.com/hc/en-us/articles/360017180900-Set-Up-Amazon-Prime-Video-with-CyberGhost-VPN
How to set up NordVPN on Asus WRT firmware,"In 2022, Asus introduced a new version of Asus WRT for the following routers: ASUS ZenWiFi XT9, ROG Rapture GT-AXE11000, RT-AX88U, RT-AX86U, RT-AX86S, and RT-AXE7800. If you have an older version, follow our guide on [setting up a VPN connection with older Asus WRT firmware](https://support.nordvpn.com/hc/en-us/articles/20194412700305-How-to-Set-Up-VPN-on-Asus-Router).
## How to set up an OpenVPN connection
1. First, you must log in to your Asus router's control panel. You can do that by typing “192.168.1.1” (or “192.168.50.1” if it does not work) in the address bar of your browser or by entering “router.asus.com” or “asusrouter.com” into the WEB GUI. A window will pop up asking for your username and password. For some router models, “admin” is both the default username and password, but you may also be asked to set up your credentials.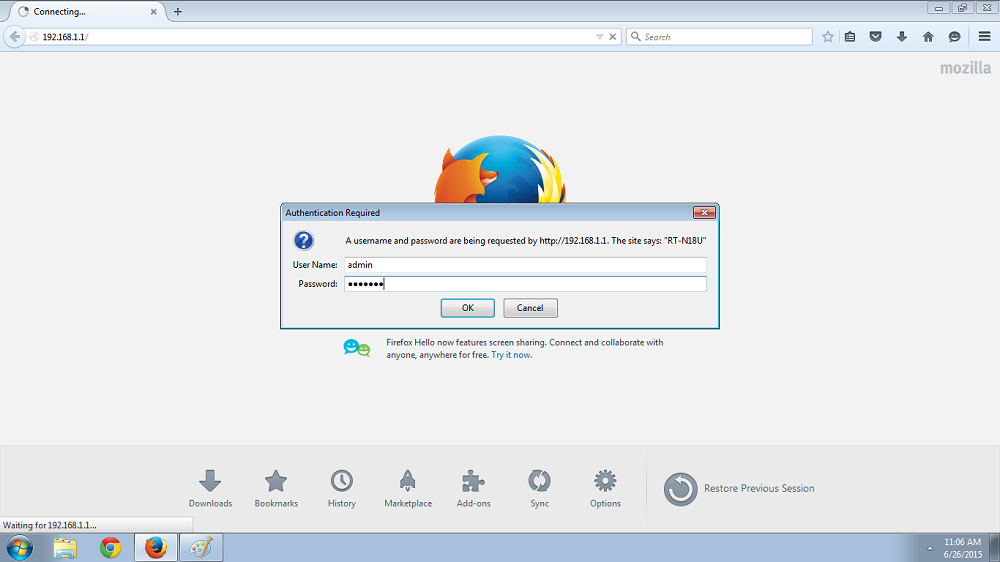
2. Once you have logged into the control panel, select “VPN” in the left sidebar menu and click on the “VPN Fusion” tab at the top of the page.
3. Click on the “Add profile” or the “+” buttons.
4. In the pop-up window, select the “OpenVPN” VPN type and fill in the following fields:Connection name: Any name you likeUsername: Your NordVPN service usernamePassword: Your NordVPN service password
Follow the steps below to find the service credentials for manual connection setup:
1. Log into your [Nord Account](https://my.nordaccount.com/), click NordVPN, and, under Manual setup, click on Service credentials. Here you'll find the Username and Password needed to connect manually.
1. Now you will need to download the OpenVPN client configuration files.
Follow the steps below to find the best server for your connection:
1. Log into your [Nord Account](https://my.nordaccount.com/), and click NordVPN.
2. Scroll down to Advanced Settings and click Set up NordVPN manually.
3. Select the Server recommendation tab. According to your location, the best server will be recommended.
4. By pressing Advanced filters you can further customize the recommended servers by selecting the Server type and the Security protocol.
In case you wish to select a specific server, follow these steps:
1. Under Set up NordVPN manually, select OpenVPN configuration files.
2. Find the server you wish to connect to by using the Search bar or by scrolling down and download it by clicking Download UDP or Download TCP.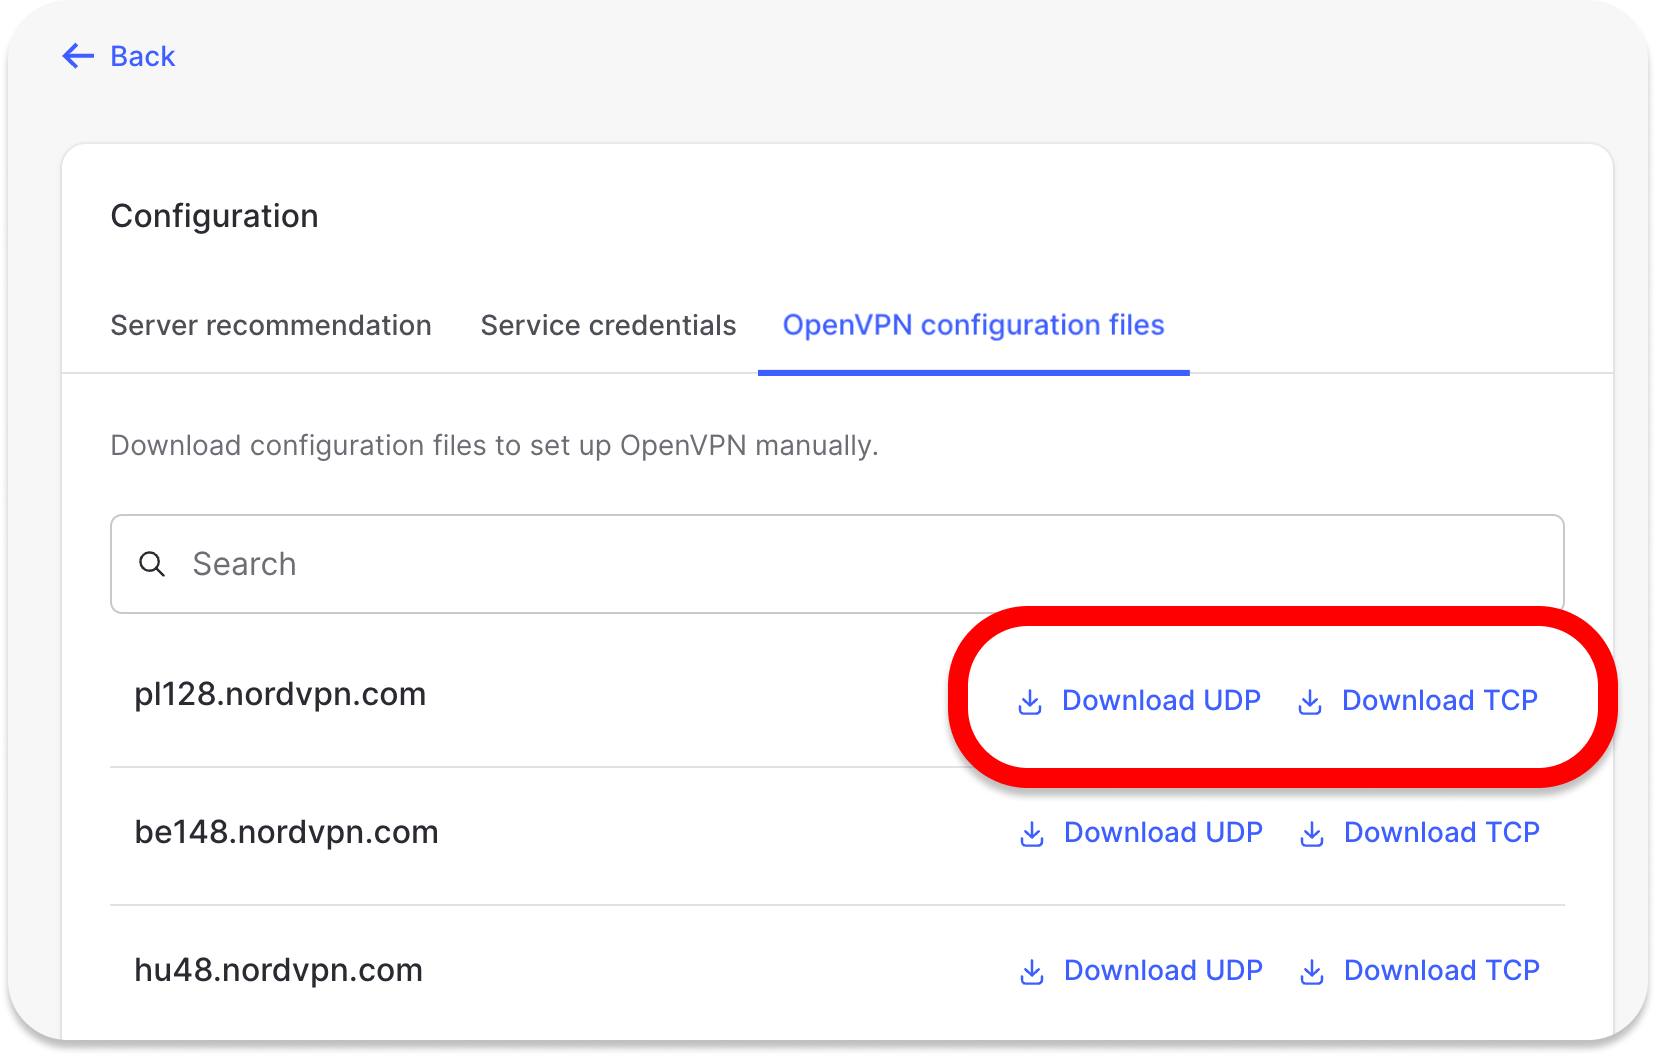
1. Once you have downloaded the files, go back to the control panel of your router and click the “Import .ovpn” file in the pop-up window.
2. After filling in the fields and uploading the “Import .ovpn” configuration file, select which devices you wish to route through a [VPN tunnel](https://nordvpn.com/blog/vpn-tunnel/). You can do so by pressing the pen icon in the upper-right corner of the “Device” section.Select which devices you wish to include by ticking the checkmark box and clicking “OK.”
3. Press ""Apply and enable.""
[Your IP address](https://nordvpn.com/what-is-my-ip/) and protection status will be visible at the top of the NordVPN page. Please make sure to refresh the webpage because it might be loaded from the [cache](https://nordvpn.com/blog/what-is-a-cache/).
",https://support.nordvpn.com/hc/en-us/articles/20286376420753-How-to-set-up-NordVPN-on-Asus-WRT-firmware
Having trouble with your favorite streaming platform? This is the place for you.,"Seeing that you already are connecting with CyberGhost through the Optimized server for Netflix US but you are not getting the desired result, this page is dedicated to you.NOTE: The Netflix app was used for the purpose of this example article but you can apply the same steps to the respective streaming platform as the differences (if any) will be very little, close to none at all.If you are unsure as to how to connect through the Optimized server for Netflix US, please visit this tutorialhere. Then you can return and follow these steps presented below.After being accustomed to a working service, it can be annoying to be in a situation in which you cannot view your favorite movie or documentary. Luckily,CyberGhost VPNhas you covered with the following tips and tricks that will result in a better outcome.What we have presented below can be achieved through an Android device (the steps below are to illustrate the steps for a Galaxy S10 with Android 9 - where other Android versions may have small differences if any - and refers to the Netflix application which should already be installed at the time when following this tutorial) but if you are referring to a different streaming platform, apply the same steps as below(with small differences-if any):1. Open theSettingsmenu on your Android device and head toApps. Locate and tap onNetflix(or the respective streaming platform; eg: Amazon Prime or BBC iPlayer):2. Press on ""Storage"" and choose both ""Clear cache"" and ""Clear Data"".3. Now, head back and choose ""Uninstall"" and confirm with ""OK""4. Proceed with restarting your Android device. Once the device has rebooted, please re-install theNetflixapp. In case you no longer have it handy, here is a directlink.*As exemplified, consider your preferred streaming platform instead of Netflix5. After finishing with theNetflixinstallation, you can now startCyberGhostand connect via theOptimized server for Netflix US. If you are unsure how to do so, please followthis tutorial.*Important: It goes without saying that to unblock Amazon Prime US, you will have to connect through the corresponding server in the CyberGhost app - Optimized for Amazon Prime USFor any additional information or concerns - it is best to approach the Support Department:via e-mail:support@cyberghost.rovia on-line request:https://support.cyberghostvpn.com/hc/en-us/requests/newvia 24/7 Live! Chat Sessions on our website",https://support.cyberghostvpn.com/hc/en-us/articles/360010009280-Having-trouble-with-your-favorite-streaming-platform-This-is-the-place-for-you
Smart DNS troubleshooting,"This article will help you if you have alreadySet Up Smart DNSon your device, but something doesn't work as expected.Loss of internet connection once Smart DNS is set up|Smart DNS couldn't be enabled due to IPv6|Streaming service is unavailableLoss of Internet connection once Smart DNS is in placeYou can activate our Smart DNS service only for 1 IP address. Therefore, one of the main reasons you may lose the internet access with Smart DNS is that you have activated Smart DNS for a different IP address than the one of your device (PlayStation, Router, Nintendo, Smart TV, etc.).You might also experience this if you have a dynamic IP address and the IP address of your network changes.So here's what you need to do in this situation:Login to your account dashboardwhile using your laptop or a smartphone.Please make sure that your laptop or phone is connected to the same network as the device on which you will be using your Smart DNS.After logging in to your online account, go to the Smart DNS section.Click the""Get a new Smart DNS""button and then click""Enable Smart DNS""5. Test whether the Smart DNS is now working on your TV or gaming device.Smart DNS couldn't be enabled due to IPv6Smart DNS can only be enabled for IPv4 addresses (normal IPs). For some networks, however, both protocols - IPv4 and IPv6 - are enabled. Should you get this error, your network also has IPv6.We offer how-to tutorials on disabling IPv6 on different devices:Mac|Windows|Linux|RouterStreaming service is unavailableIf you have successfully set-up Smart DNS on your device, however, your preferred streaming service does not work, here are several steps you should try:Clear the cache of that specific streaming application;Uninstall and reinstall the streaming application;Reboot your device;If your device has the capacity for two DNS servers, try entering the same Smart DNS server on both lines;In some situations, Smart DNS cannot be used successfully. If your Internet Service Provider diverts the DNS while using a technology called ""transparent DNS proxy"", they intercept all DNS queries (TCP/UDP port 53) and transmit the results transparently. This forces you to use their DNS addresses without being able to change them. Smart DNS might have issues.In other cases, port 53 may be blocked. You can check the port status by contacting your Internet Service Provider (ISP).Should the above solutions not work for you and you still can't use Smart DNS as foreseen, try an alternative way to use CyberGhost VPN on your TV or console:How to share a VPN connection over Ethernet on WindowsHow to use CyberGhost with your game consoleFor any additional information or concerns - it is best to approach the Support Department:via e-mail:support@cyberghost.rovia on-line request:https://support.cyberghostvpn.com/hc/en-us/requests/newvia 24/7 Live! Chat Sessions on our website",https://support.cyberghostvpn.com/hc/en-us/articles/360013636000-Smart-DNS-troubleshooting
Configure My Smart DNS for Xbox One,"Through to theAccount Dashboard-Smart DNSneeds to be enabled.Completing the only requirement as described above, now head over to your Xbox One. The below steps are presented for you which will help you apply the CyberGhost Smart DNS via Xbox One:Step 1 of 6: From the System settings menu of your Xbox One – chooseSettingsStep 2 of 6: ChooseNetworkfrom the list of choicesStep 3 of 6:Network Settingsis the option which must be chosen from the available fieldsStep 4 of 6: PickAdvanced settingsStep 5 of 6: Within the Advanced settings menu, the following changes are made:IP settings -will be left unchangedDNS Settings -choose Manual and input the DNS displayed in the Account Dashboard as Primary IPv4 DNSSecondary IPv4 DNS -will be left unchangedStep 6 of 6: You will be prompted withIt's all good - Your console is connected to the Internet.PressContinue.- Settings completed -*Head back to the Settings Menu of your Xbox One and chooseRestart console.-------For any additional information or concerns - it is best to approach the Support Department:via e-mail:support@cyberghost.rovia on-line request:https://support.cyberghostvpn.com/hc/en-us/requests/newvia 24/7 Live! Chat Sessions on our website",https://support.cyberghostvpn.com/hc/en-us/articles/360012010840-Configure-My-Smart-DNS-for-Xbox-One
Sat Receiver: How to Set Up Enigma2 and VU+ Solo² with CyberGhost via OpenVPN,"The digital HDTV satellite receiver 'VU+ Solo²' is based on Linux and can be used with your CyberGhost account with an OpenVPN installation if the following requirements are met:Most recent firmwareInstalled OpenVPN plug-in for the receiverLinux operating system (PC)A CyberGhost accountInfo:Here's how to create a CyberGhost account onlineInfo:How to manage your CyberGhost accountA CyberGhost subscriptionInfo:How to purchase or upgrade a subscriptionInfo(only prepaid subscribers):Enter activation keyDisclaimer:Please keep in mind that, although the technical process is as thoroughly documented as possible, you need to have at least some technical understanding. There's always a chance for an overseen mistake and/or things being changed whilst the article may not yet have been updated.Step 1Visit yourCyberGhost VPN online accountand log in with your CyberGhost Username and PasswordClick on the ""VPN""section from the left-side menuSelect""Configure Device""Now create your server configuration, as described below :Protocol :Open VPNCountry :Since native protocol connections may only be used with exactly one server you now have to choose the country you want to surf from; the server to be used in this country will be chosen by CyberGhost automatically.Server group :Choose the server group and the OpenVPN protocol (UDP or TCP) you want to useOpenVPN UDPallows higher speed than the TCP version but can result in broken downloads in some cases. This is the default setting.OpenVPN TCPallows more stable connections than the UDP version but is a bit slower. Choose this version, if you have recurrent connection issues such as sudden disconnections.Once the desired parameters are chosen, save them with""Save Configuration""To view theOpenVPNcredentials that are generated for you on the configuration dashboard, go again to the""VPN""section and press the""View""button associated with your configuration.After setting up your connection preferences, please take note of the following:Server Group :This is the address of the country (server) you want to be connected with, e.g. '12345-1-ca.cg-dialup.net'. This address changes with every country you have chosen in the step before. The actual single server to be used will be chosen automatically by CyberGhost.Username :A solely for this protocol generated user name.This is NOT your regular CyberGhost account user name, it's used only to authenticate with our servers via Manual Configurations.Password :A solely for protocol usage generated password.This is NOT your regular CyberGhost account password, it's used only to authenticate with our servers via Manual Configurations.Pre-Shared KeyOnce done, please download the configuration file. For that click on""Download Configuration""and download the config file to your computer (it's recommended that you create a special folder for the config, somewhere accessible like your Desktop andExtract/Copy thecontents of the .zip file there).Important :please keep your username and password obtained during the configuration process at hand, you will need them later in the setup.Now, the saved config is a ZIP file, which contains the following single files:ca.crt:This is the certificate of the certification authorityclient.crt:This is the user certification fileclient.key:This is your private key fileopenvpn.ovpn:This is yourOpenVPNconfiguration fileOnce you unzip all single files to a computer and rename the file 'openvpn.ovpn' to ‘CyberGhost.conf’.If you need to change the country to surf from, you must re-configure the location (select a different country) to use in your account management, download the new config file, unzip it and rename the new OpenVPN file to 'CyberGhost.conf'.Step 21. To be able to log in automatically, save your user name and password in a file called ‘pas.key’. For this you need to have access to a Linux computer where you type the following command in a terminal window:sudo nano pas.keyType in your credentials (one in each line):UsernamePassword#First line is a generated username and the second line is a generated password.Save your changes with ‘CTRL+O’ and leave the nano editor via ‘CTRL+X’2. Next, open the configuration file ‘CyberGhost.conf’ by typing :sudo nano CyberGhost.confExtend the line ‘auth-user-pass’ …[...]auth-user-pass[...]… with the path to your credentials file:[...]auth-user-pass /etc/openvpn/pas.key[...]3. Connect to your device through the Telnet and enter the following command:opkg install openvpnWhen setup is complete, reboot the device.4. Connect to your device through the FTP or SSH, and create a new folder namedopenvpnin/etc/path. After that, copy both files (‘CyberGhost.conf’ and 'pas.key') along with all certificates and key files from the downloaded ZIP file into the OpenVPN folder ('etc/openvpn') on your VU+.5. Start the OpenVPN on theMenu >Setup >System >Network >OpenVPN Setup >Press Green To Start OpenVPN.",https://support.cyberghostvpn.com/hc/en-us/articles/213271089-Sat-Receiver-How-to-Set-Up-Enigma2-and-VU-Solo-with-CyberGhost-via-OpenVPN
How to troubleshoot streaming issues on IOS?,"If you're having problems with certain streaming services while using CyberGhost, please follow these troubleshooting steps :1. Try to disconnect and reconnect to the dedicated streaming profile to get a new IP Address;2. Open theSettingsmenu on your IOS device and head toGeneral -> iPhone Storage. Locate and tap onNetflix (or the respective streaming platform; eg: Amazon Prime US or BBC iPlayer):3. Press onOffload Appand afterwards onDelete App;Proceed with restarting your IOS device and clear your browser's cache as well;Open your iPhone settings;Tap on Privacy and disable Location services;Go back to iPhone settings and tap on Safari;Tap on Clear History and Website Data;Tap on Advanced;Tap on Website Data;Tap on Show All Sites and then Tap on Remove All Website Data;Restart your iPhone;Start Cyberghost and connect via theOptimized server for Netflix US.For any other questions or concerns, please reach out to the Support Team at:support@cyberghost.ro.The entire Support Team is ready to assist.",https://support.cyberghostvpn.com/hc/en-us/articles/360022254699-How-to-troubleshoot-streaming-issues-on-IOS
Unable to connect on my iPhone or iPad,"There are a number of factors that may be responsible for why a VPN connection could not be established. This topic covers various troubleshooting steps to help resolve connectivity issues.After each step, check if the issue still remains.What to try firstReset your Wi-Fi network settings (only if using Wi-Fi):All your Wi-Fi networks and passwords, cellular settings, will be removed and default Wi-Fi settings restored. This includes VPNs and APN you've set up.1. In your Settings app, tap “General.”2. On the General settings page, tap “Reset.”3. On the Reset page, tap “Reset Network Settings”4. If you have a passcode set up, you’ll be asked to enter it.5. And when asked to confirm your action, tap“Reset Network Settings.”6. Also, launch the Settings app from the Home screen and navigate to Wi-Fi. On the right side of your wireless network field, tap on the 'i'button to view the settings for the network.7. Tap ""Renew Lease"" at the bottom of the settings pane to reset your device’s IP address and to refresh your connection. Reboot the device after that.Try different locations.Due to a series of factors, one location may offer a more stable connection than others.Restart your device.Sometimes restarting your device will do the trick.Try switching the protocol to WireGuard®:1. Start your Cyberghost App and tap onSettings:2. Tap theVPNtab :3. Tap on Protocol and chooseWireGuard® :Alternate between Wi-Fi and mobile data:Switch to mobile data if you are using Wi-Fi.Switch to a Wi-Fi network if you are using mobile data.Disable Low Power ModeGo toSettings > Batteryand check if the Low Power mode is turned on.Turn ON and OFF Airplane Mode(if you are on a cellular network, place your phone in airplane mode, wait 30 seconds, then disable airplane mode)Swipe up from thebottom of the screento bring upControl Center. Tap theAirplane Mode buttonDisable Low Data ModeWi-FiOn your iPhone or iPad launch Settings and go to Wi-Fi settings. Once you are on the Wi-Fi page tap on the ‘i’ button next to your connected network’s name. On the next screen turn off the toggle for Low Data Mode.CellularLaunch Settings and go to Mobile Data. Once you are on the Mobile Data screen tap on Mobile Data Options. Turn off Low Data Mode.Remove potential safety Security or Parental controls from your router.Some ISPs usually equipped their routers with parental/security controls enabled by default. Log in to your router, look for the ""Security"" tab and see if any security features or parental controls are turned on.Reboot your router/modem.1. Unplug power cables from modem and router*2. Wait 30 seconds, plug modem in3. Wait 30 seconds, plug router in4. Wait 30 seconds, the network is now refreshed.*If you have a router/modem combo, just unplug that device.For any additional information or concerns - it is best to approach the Support Department:via e-mail:support@cyberghost.rovia on-line request:https://support.cyberghostvpn.com/hc/en-us/requests/newvia 24/7 Live! Chat Sessions on our website",https://support.cyberghostvpn.com/hc/en-us/articles/360016688239-Unable-to-connect-on-my-iPhone-or-iPad
How to create a CyberGhost Account,"You start account creation directly on theCyberGhost Account Management page. For that click on 'New to CyberGhost VPN?Sign up now' located on the right side of the page:In the next window please enter the following data:Your e-mail:You need an e-mail to be able to use a CyberGhost subscription across multiple devices. In youronline account managementyou can change the e-mail at any time you want.Your Password:A password is also needed to log-in to the CyberGhost network. As the e-mail can be changed in your online account page at any time you want. Make sure to write the password again in the box labeled with ""Retype your password"" to avoid any typos.IMPORTANT: Your password must meet all the following conditions:At least 8 characters and maximum 32 charactersLetters: lowercase and uppercaseNumbers: 0-9At least one special character ! @ # $ % ^ & * ? ~ - _ ( )",https://support.cyberghostvpn.com/hc/en-us/articles/5382058040988-How-to-create-a-CyberGhost-Account
Cyberghost VPN CLI commands on Linux,The CyberGhost CLI VPN application runs on a command-based system in the terminal window.Please note that when running the command :sudo cyberghostvpn --helpyou can see the list of all available commands.Install CyberGhost VPN :sudo bash install.shQuick connection :cyberghostvpn --country-code US --connectGet country-code list for regular web traffic :cyberghostvpn --traffic --country-codeTo view the full list of available commands :cyberghostvpn --helpShow P2P (Torrent) country list :cyberghostvpn --torrent --country-codeShow list of All Streaming Services :cyberghostvpn --streaming --country-codeCheck if VPN is running :cyberghostvpn --statusRemove / uninstall :cyberghostvpn --uninstallCheck your public IP :curl ifconfig.ioDisconnect from the VPN server :cyberghostvpn --stopSelect OpenVPN as the connection protocol :cyberghostvpn --country-code US --openvpn --connectSelect WireGuard® as the connection protocol :cyberghostvpn --country-code US --wireguard --connectTCP connection :cyberghostvpn --country-code US --tcp --connectUDP connection:cyberghostvpn --country-code US --udp --connectFor any additional information or concerns - it is best to approach the Support Department:via e-mail:support@cyberghost.rovia on-line request:https://support.cyberghostvpn.com/hc/en-us/requests/newvia 24/7 Live! Chat Sessions on our website,https://support.cyberghostvpn.com/hc/en-us/articles/360016669140-Cyberghost-VPN-CLI-commands-on-Linux
Unable to connect on Linux ?,"There are a number of factors that may be responsible for why a VPN connection could not be established. This topic covers various troubleshooting steps to help resolve connectivity issues.After each step, check if the issue still remains.Here is what you should try at first:Restart the networking serviceDebiansudo service network-manager restartRHEL and CentOSsystemctl restart NetworkManagerTry connecting with WireGuard® protocolsudo cyberghostvpn --traffic --country-code US --wireguard --connectsudo cyberghostvpn --streaming 'Netflix US' --country-code US --wireguard --connectsudo cyberghostvpn --torrent --country-code US --wireguard --connectTry different server locations.Due to a series of factors, one location may offer a more stable connection than others.Reinstall the application:Type the following command to remove the app:sudo cyberghostvpn --uninstallReinstall the app following our tutorialhereRemove potential safety Security or Parental controls from your router.Certain ISPs usually equip their routers with parental/security controls enabled by default. Log in to your router, look for the ""Security"" tab and see if any security features or parental controls are turned on.Disable IPv6 support. Please find below our how-to guides:From the TerminalFrom Network SettingsReboot your router/modem.1. Unplug power cables from modem and router*2. Wait 30 seconds, plug modem in3. Wait 30 seconds, plug router in4. Wait 30 seconds, the network is now refreshed.*If you have a router/modem combo, just unplug that device.Use the manual connection method:If the issue remains, try connecting using themanual connection method.For any additional information or concerns - it is best to approach the Support Department:via e-mail:support@cyberghost.rovia on-line request:https://support.cyberghostvpn.com/hc/en-us/requests/newvia 24/7 Live! Chat Sessions on our website",https://support.cyberghostvpn.com/hc/en-us/articles/360016665760-Unable-to-connect-on-Linux
Troubleshooting VPN connection on Linux,"There are a number of factors that could contribute to why a VPN connection could not be established. This topic covers various troubleshooting steps to help resolve connectivity issues.After each step, check if the issue still remains.Here is what you should try at first:Change the default protocol.For the CyberGhost Linux CLI app, you will find 2 protocols available: OpenVPN and WireGuard. If you have experienced an unstable connection, switch to WireGuard and see if the problem persists:OpenVPN :cyberghostvpn --country-code US --openvpn --connectSelect WireGuard® as the connection protocol :cyberghostvpn --country-code US --wireguard --connectTCP OpenVPN :cyberghostvpn --country-code US --tcp --connectUDP OpenVPN :cyberghostvpn --country-code US --udp --connectTry different server locations.Due to a series of factors, one location may offer a more stable connection than others.Reinstall the application:Type the following command to remove the app:sudo cyberghostvpn --uninstallReinstall the app following our tutorialhereRemove potentialsafety Security or Parental controls from your router.Certain ISPs usually equip their routers with parental/security controls enabled by default. Log in to your router, look for the ""Security"" tab and see if any security features or parental controls are turned on.Disable IPv6 support. Please find below our how-to guides:From the TerminalFrom Network SettingsReboot your router/modem.If the connection remains unstable, try connecting using the manual connection option:How to Set Up OpenVPN on Linux MintHow to Set Up OpenVPN on Linux UbuntuFor any additional information or concerns - it is best to approach the Support Department:via e-mail:support@cyberghost.rovia on-line request:https://support.cyberghostvpn.com/hc/en-us/requests/newvia 24/7 Live! Chat Sessions on our website",https://support.cyberghostvpn.com/hc/en-us/articles/360013664040-Troubleshooting-VPN-connection-on-Linux
How to watch Netflix with CyberGhost VPN?,"To access Netflix content with the help of ourdedicated profiles for Streamingwhile connected to CyberGhost VPN, please ensure that you meet the following requirements:1. Sign Up for an account with Netflix | Registerhere.2. Ensure that you connect to our specially designed streaming servers for Netflix.Windows |Mac |Android |iOS |Linux3. Check that you have successfully connected to CyberGhost VPN |How to ensure that CyberGhost VPN is working ?If Netflix reports that you are not in the service area after fulfilling the above-mentioned requirements, here are some main issue that we have noticed and may occur when streaming with Netflix:Jump to...Content loads but does not playYou seem to be using an unblocker or a proxyThe Netflix library does not changeNetflix Site errorNetflix content is loading, but not playingShould this happen on your device, try this:Change the defaultprotocolused on the CyberGhost app.Clear your browser's cacheif you are streaming via the browser.Open the Incognito (Private Browsing) mode on your browser and go to the streaming website there.Restart your device and try again.Reset the router.Remove parental/security controls on your router.Change the default DNS on your router.Whoops, something went wrong... You seem to be using an unblocker or proxyVarious reasons may be responsible for this error. If you get this error, please try this:Clear your browser's cacheif you are viewing Netflix via the browser;Uninstall and reinstall the Netflix app if you are using their app;Try to disconnect and reconnect to the dedicated Netflix streaming server and try again;The Netflix library does not switch - you see the same content after logging in to our serversIt is important to mention that in European countries, the switch to the Netflix library will be delayed as a result of the new Netflix policy. If you are physically located in France and connect to our server in Germany to watch the German version of Netflix, it will take some time for the Netflix content to change.You can check the new Netflix policyhereIf you connect to the server outside the EU and keep getting the same content, reinstall the Netflix application or clear the browser's cache.Netflix Site ErrorIn some cases, Netflix is unable to respond to connection requests via the VPN. In such cases, log out of our server, log into your Netflix account, and then log back into our dedicated Netflix streaming server.Refresh your browser and try again.For any additional information or concerns - it is best to approach the Support Department:via e-mail:support@cyberghost.rovia on-line request:https://support.cyberghostvpn.com/hc/en-us/requests/newvia 24/7 Live! Chat Sessions on our website",https://support.cyberghostvpn.com/hc/en-us/articles/360016573419-How-to-watch-Netflix-with-CyberGhost-VPN
Watching BBC iPlayer with CyberGhost VPN,"This guide will show you how you can watch BBC iPlayer with CyberGhost VPN.CyberGhost VPN is fully compatible with BBC iPlayer. Connect to one of our dedicated servers for streaming to watch BBC iPlayer on any network and device.To access BBC iPlayer with CyberGhost VPN, you will need:An active BBC iPlayer account.An active CyberGhost VPN account.To stream BBC iPlayer with CyberGhost VPN, follow these steps:Start CyberGhost VPN andexpand the screen so you can view the full menu.Open theFor streamingtab.Connect to our server for streaming BBC iPlayer.Tip:use the search bar for quick server discovery by country or service.If you need help finding these servers on your device, see our guides for all major operating systems:WindowsMacAndroidiOSLinuxNow you know how you can watch BBC iPlayer with CyberGhost VPN on your device!Note:In case you still encounter difficulties accessing BBC iPlayer after following these steps,double-checkyou’re connected to the VPN.If you get a notification from BBC iPlayer that you’re not in the service area after following the steps above, please check our streaming troubleshooting guidehere.For any additional information or concerns - it is best to approach the Support Department:via e-mail:support@cyberghost.rovia on-line request:https://support.cyberghostvpn.com/hc/en-us/requests/newvia 24/7 Live! Chat Sessions on our website",https://support.cyberghostvpn.com/hc/en-us/articles/360016546840-Watching-BBC-iPlayer-with-CyberGhost-VPN
Unable to connect to CyberGhost VPN servers,"Various internal and external factors play a role in the process of establishing a VPN connection, such as the network preferences of your device, the protocols used on your network, other software, the type of network (home, public, mobile data), and so on.Should you encounter connection problems on any of these devices, check our guides below:Troubleshooting VPN connection on WindowsTroubleshooting VPN connection on MacTroubleshooting VPN connection on AndroidTroubleshooting VPN connection on iOSTroubleshooting VPN connection on Linux appSome general recommendations if you are unable to connect are also given below. After following each set of instructions, check to see if the problem persists.Try different server locations.Log out of your account in the application and log back in. Try logging in again.Temporarily disable potentially antivirus/firewall software or any other possible interfering apps. In some cases, they interfere with VPN connections. Then they try to connect again.Remove the application, reboot your device, and install the VPN client again. Now try logging in again.Please try to connect using a different connection protocol.Remove parental/security controls on your router.Reboot your router/modem.Alternatively, you can also try to connect a different device on the same network. Doing so will let you know if it is a networking or device problem. For instance, if you cannot connect the Android device, check with your PC to see if you can connect. And if they are both failing to establish a connection, then the issue is with your home network. However, if your PC can connect, something is wrong with the setup on your phone.Whichever is the case, feel free to contact our Customer Support team via live chat or e-mail and they will assist you!via e-mail:support@cyberghost.rovia on-line request:https://support.cyberghostvpn.com/hc/en-us/requests/newvia 24/7 Live! Chat Sessions on our website",https://support.cyberghostvpn.com/hc/en-us/articles/360013738039-Unable-to-connect-to-CyberGhost-VPN-servers
How to purchase a subscription,"You can order CyberGhost directly from theCyberGhost homepage, from a newsletter, an affiliate or through various special promotions. Either way the order process takes place online, where you first decide for the payment interval (e. g. monthly or yearly).For monthly plans, the Money Back Guarantee is 14 days, whereas the yearly subscriptions they are covered by a 45 day Money Back Guarantee in case you are not satisfied.Scroll down the page to the lower part of the website.In order to use a CyberGhost subscription you need a CyberGhost account. Depending on whether or not you already have one, the next steps are slightly different:Existing customer:In order to renew, upgrade or extend your CyberGhost subscription please login to yourOnline Account Management pagefirst. Once done you will see your account data and the remaining run-time of your current CyberGhost subscription (if existing). After purchase the new subscription will be added as additional time on top of any remaining days.For an account recovery, please clickhere.New customer:If you are new to CyberGhost or want a new account, please enter a valid email address, needed for payment confirmation, invoice and account data delivery.After the purchase is complete, new users will have to set up their password (please check below).Now decide for a payment method, enter your e-mail address and click on'Complete your purchase'and enter your payment details. Payments will be processed by a third party service to avoid privacy breaches based on common data bases. Click on'Next'.All personal data such as credit card number, PayPal account, names, etc. will stay private with the payment provider and never be submitted to third parties, not even to CyberGhost itself.On the next page check your details andacknowledge that you buy a subscription with recurring payment cycles. Click on 'Next'.Some special conditions (e. g. half the price) areonly valid for the first payment, while the next payments will reflect the regular subscription price.After the payment process ended successfully you will receive aconfirmation emailwith yourinvoice(this is where you will find the reference number as well - please always submit this number, if you have questions regarding your purchase such as asking for a refund or an account recovery) and you will be asked toset up a passwordfor yournew CyberGhost web-account.Finally, you will be redirected to your CyberGhost web-account to startinstalling the app on your favorite devices:Using native VPN ProtocolsTo use your CyberGhost subscription with a native protocol such asOpenVPNit is mandatory to first visit yourOnline Account Management page, manually add a new device and create another new pair of login data, solely meant for native protocols.Once done you can start configure your connection details as described in the various instruction manuals for VPN connections ondifferent platforms.",https://support.cyberghostvpn.com/hc/en-us/articles/213650885-How-to-purchase-a-subscription
CyberGhost VPN’s Refund Policy,"CyberGhost VPN’s refund policy is as follows:For 1 month subscriptions we offer a14-day money-back guarantee.For subscriptions of 6 months or longer we offer a45-day money-back guarantee.This means that within 14 or 45 days of your purchase you can request a refund. To request a refund, please contact our Support Team. You have 3 options:Via e-mail tosupport@cyberghost.roVia ticket athttps://support.cyberghostvpn.com/hc/en-us/requests/newVia our 24/7 Live Chat by clicking on the button in the lower right cornerYou should have your purchase Order Number or Reference Number at hand, so that our Support Team can find your account quicker. Check your invoice to find all the details.Note: If you purchased a CyberGhost VPN subscription as an in-app purchase via the App Store or iTunes, CyberGhost VPN's money-back guarantee does not apply. Instead,you will need to request a refund through the App Store, which issued solely at the discretion ofApple Support.Similarly, if you purchased a CyberGhost VPN subscription through a physical gift card or a third-party seller, you will need to contact the seller for their respective refund policy.Keep in mind thatdisabling automatic renewalwill not initiate a refund request.",https://support.cyberghostvpn.com/hc/en-us/articles/213834369-CyberGhost-VPN-s-Refund-Policy
What payment methods do you offer ?,"CyberGhost VPN partners with different third party Internet sellers. Here you need to check with the respective seller, which payment methods are supported. Your personal data like credit card number or PayPal account will always be stored solely by the respective third party seller and is in no way connected to a CyberGhost VPN account or available to CyberGhost S.R.L. in general. Neither will the payment partner get any data about the account, an activation code might be connected to.Currently, we accept PayPal, Credit Cards, Cryptocurrency, and other payment methods.At any time, you can always go to ourorder pageand start following the necessary steps to make a payment for the subscription - the available payment methods will be listed after you select your favorite plan.For any additional information or concerns - it is best to approach the Support Department:via e-mail:support@cyberghost.rovia on-line request:https://support.cyberghostvpn.com/hc/en-us/requests/newvia 24/7 Live! Chat Sessions on our website",https://support.cyberghostvpn.com/hc/en-us/articles/360013667240-What-payment-methods-do-you-offer
Why am I not able to make a payment ?,"Payments may fail for a number of reasons. Here are some tips that may help:Credit CardPlease note:in order to avoid multiple fees or a temporary hold on your funds,do notattempt to make a purchase repeatedly.To begin with, check with your bank to see if they have any information about the failed transactions and the status of your account. Make also sure your bank authorizes international payments.Should you have tried to pay with a credit card but your account is still not active, there are a few common causes for this:Incorrect information - all information you provide during payment must match your credit card information;Your credit card does not have the funds to make this payment;Your card has expired;Payment may also fail due to the detection of fraud. Typically, this happens when you try to complete the payment while connected to a VPN or using a proxy. The fact that you have an unusual IP address (for example, an IP address from a different country than the one where your credit card was issued) can also be the cause.The transaction was rejected by the issuing bank. You can contact your bank and authorize future payments.PayPalIf paying by Paypal, make sure do add to add some sort of card, debit, or credit to your Paypal account in order to complete the purchase.BitPayHave you tried to make a payment with BitPay but your account is still inactive? Your transaction may not be confirmed yet - you should give it a bit more time.For any additional information or concerns - it is best to approach the Support Department:via e-mail:support@cyberghost.rovia on-line request:https://support.cyberghostvpn.com/hc/en-us/requests/newvia 24/7 Live! Chat Sessions on our website",https://support.cyberghostvpn.com/hc/en-us/articles/360013734659-Why-am-I-not-able-to-make-a-payment
How can I be sure that CyberGhost VPN works ?,"Not sure if CyberGhost VPN really changed your IP address ?Take our Privacy testhereand find out if your sensitive data isProtectedorExposed.Jump to...IP Leak TestRun a DNS Leak TestCheck the steps below to ensure that your online experience is secure and that no private information is exposed.Check the status of the connection in the App1. Connect to CyberGhost VPNThe home screen of your CyberGhost application provides the first sign that a successful VPN connection has been established.2. Make sure your connection is properly configured, check if your status is 'Protected'on our website.Should you be connected to one of our servers but your status is 'Exposed', please refer to the following steps to ensure that your connection is secure.To stop your connection from leaking, follow these tutorials :1.Disable IPv62.WebRTC leak preventionDNS leak testGo to thispageto perform the DNS leak test.As with the IP test, a DNS test should display only one DNS server address from the same location.You will also see a notification saying 'Protected'For any additional information or concerns - it is best to approach the Support Department:via e-mail:support@cyberghost.rovia on-line request:https://support.cyberghostvpn.com/hc/en-us/requests/newvia 24/7 Live! Chat Sessions on our website",https://support.cyberghostvpn.com/hc/en-us/articles/213894425-How-can-I-be-sure-that-CyberGhost-VPN-works
What is Peer-to-Peer ( Torrents ) traffic ?,"We allow P2P traffic via our P2P special servers. No further adjustments are required in our applications to securely connect to the P2P servers, as your P2P and normal traffic is already protected.Peer to Peer (P2P) refers to a self organized network, in which each connected computer has equal rights and functions at the same time as a server and a client.One thing that can be accomplished by such a network isfile-sharing(another one is for example VoIP like Skype), where each downloader automatically turns into an uploader for other downloaders.To access a P2P network one needs a dedicated application, based on different prior conditions, depending which P2P technology you decide to use.Broadly known names are for example 'BitTorrent'‚ 'qBTorrent'‚ 'BitComet‘, uTorrent'‚ 'eMule‘ and Vuze.Peer to Peer filesharing is most commonly known for its role in howTorrentswork.This type of file sharing can be is very effective, allowing for greaterdownload speedsas opposed to downloading from a website (which usually stores files on an actual server).Peer to Peer is not prone to beinglimitedby any particularfile hosting serviceand part of its efficiency has to do with the fact that each downloader can also be an uploader, even if they haven't finished downloading the entire file(they can instantly start uploading any parts of the download they already have).However,Torrent Trackerscan be blocked in certain countries and in some areas, evendownloading Torrents (regardless of the nature of the file) is frowned upon.CyberGhostoffers a wide range of servers which supportP2P trafficand allow you to Download Torrents with full Anonymity (your IP will be hidden as it's changed to the VPN Server's IP and all of your traffic isencryptedwithAES 256-bit Encryption).In order to learn how to use CyberGhost's Torrent Optimized servers, please consult these comprehensive articles:Windows - How to connect to Torrent-Optimized ServersMacOS - How to connect to Torrent-Optimized ServersFor any additional information or concerns - it is best to approach the Support Department:via e-mail:support@cyberghost.rovia on-line request:https://support.cyberghostvpn.com/hc/en-us/requests/newvia 24/7 Live! Chat Sessions on our website",https://support.cyberghostvpn.com/hc/en-us/articles/214479345-What-is-Peer-to-Peer-Torrents-traffic
Cannot Send Email while Connected to CyberGhost VPN,"If you are unable to send emails while connected to a VPN server, it might be that CyberGhost VPN has blocked your email provider’s TCP port 25. Port 25 is the default SMTP port that enables transfers between email servers. In recent years, internet service providers and email providers have started blocking port 25 as a security measure because of the prevalence of email-based attacks associated with the port.To solve this issue, please adjust your CyberGhost VPN settings.macOSOn macOS, please follow these steps:Open CyberGhost VPN.Click on the cog icon in the upper right corner.SelectPreferences.EnableAllow access to devices on local network.Note: TheAllow access to devices on local network featureis only available with the IKEv2 protocol. You can change the protocol underPreferences.iOSOn iPhones and iPads, please follow these steps:Open CyberGhost VPN.Tap on the cog in the upper right corner.SelectVPN.ToggleAllow access to devices on local networkon.AndroidOn Android, please follow these steps to exclude your email app from the VPN tunnel. Please keep in mind that any traffic through your email app will not be encrypted.Open CyberGhost VPN.Tap on the cog in the upper right corner.SelectVPN.Go toApp Split Tunnel.TapMode.SelectCustom rules.Uncheck the box next to your email app.WindowsOn Windows, please follow these steps to exclude the domains associated with your email provider from the VPN tunnel. Please keep in mind that any traffic through these domains will not be encrypted.Open CyberGhost VPN.Go toSmart rules.Go toExceptions.Toggle the button underMake exceptionson.Enter the domains associated with your email providers.Note: You might need to enter the SMTP, POP, and IMAP domains to the exception list. This option is only available with the OpenVPN protocol.Need assistance? Contact our Customer Support team:via email atsupport@cyberghost.rovia online request athttps://support.cyberghostvpn.com/hc/en-us/requests/newvia 24/7 Live Chat by clicking the Support button below",https://support.cyberghostvpn.com/hc/en-us/articles/13130528470812-Cannot-Send-Email-while-Connected-to-CyberGhost-VPN
Change DNS Settings on Windows,"This guide will show you how you can change DNS settings on your Windows device.The Domain Name System (DNS) translates domain names into IP addresses, enabling your browser to load the correct pages.Normally, you use your internet service provider’s (ISP) DNS servers for this. However, you can manually change DNS settings for better security or faster connections.Note: While you’re connected to CyberGhost VPN, your DNS queries are by default redirected and encrypted through our DNS servers. To change DNS settings, disconnect from the CyberGhost VPN server first.Jump to...Change DNS Settings on Windows 11Change DNS Settings on Windows 10, 8 & 7Change DNS Settings on Windows 11Go toSettings.SelectNetwork & internet.Select Wi-Fi or Ethernet depending on your connection.UnderDNS server assignment, selectEdit.From the drop-down menu, selectManual.Turn on the IPv4 toggle switch.UnderPreferred DNS, enter your desired address.Change DNS Settings on Windows 10, 8 & 7Open the Windows Start menu.Click on the gear icon to open theSettingsmenu.SelectNetwork & Internet.EnableUse the following DNS server addresses.UnderPreferred DNS server, enter your desired address.Afterwards clickOKto save your changes.",https://support.cyberghostvpn.com/hc/en-us/articles/10512734670620-Change-DNS-Settings-on-Windows
What Is CyberGhost VPN Leak Protection?,"CyberGhost VPN’s leak protection feature is built for better digital security on macOS. When your Mac connects to an attacker-controlled malicious access point - which could include untrusted Wi-Fi networks in airports or cafes - your device may leak traffic in cleartext. Enabling CyberGhost VPN’s leak protection will automatically push all macOS traffic through the VPN, giving you greater safety against data leaks.Note:By default, certain macOS features such as AirDrop and AirPlay were engineered to operate outside the VPN. Leak protection will route these features through the VPN for added security, but they may not work as expected.Jump to...Enable Leak ProtectionAllow Access to Devices on Local NetworkEnable Leak ProtectionNote: Make sure you are using the latest version of the CyberGhost macOS app. At the moment, leak protection is not compatible with the WireGuard® protocol.On the app, click the cog icon in the upper right-hand corner.ClickPreferences...Under theGeneraltab, toggleLeak Protectionon.If you don’t see theLeak protectionfeature, ensure yourVPN Protocolis set to IKEv2.Allow Access to Devices on Local NetworkTo keep you safe from data leaks, using the VPN will disconnect you from other devices on your Wi-Fi network. If you trust your network, you may choose to remain connected to these devices by enablingAllow access to devices on local network.To enableAllow access to devices on local network:On the app, click the cog icon in the upper right-hand corner.ClickPreferences...Under theGeneraltab,toggleAllow access to devices on local networkon.",https://support.cyberghostvpn.com/hc/en-us/articles/9912617679644-What-Is-CyberGhost-VPN-Leak-Protection
Unable to connect on Windows ?,"There are a number of factors that may be responsible for why a VPN connection could not be established. This topic covers various troubleshooting steps to help resolve connectivity issues.After each step, check if the issue still remains.What to try firstResetting your computer’s Internet Protocol (TCP/IP) settings to default can solve some connectivity issues.1. Opencmd.exe as administratorand run these commands one by one :ipconfig /releaseipconfig /flushdnsipconfig /renewnetsh winsock resetnetsh interface ipv4 resetnetsh interface ipv6 resetnetsh winsock reset catalognetsh int ipv4 reset reset.lognetsh int ipv6 reset reset.logRestart your computer and check if the issue persists.If you still can't connect, here is what you should try further :Change the ""Automatic selection"" option used on the CyberGhost VPN application.To do so, launch the CyberGhost application, visit the Settings tab, look for the VPN protocol, and choose between OpenVPN or IKEv2.Try different server locations.Due to a series of factors, one location may offer a more stable connection than others.Restart your device.Sometimes restarting your device will do the trick.Reinstall the application.Uninstall the app, reboot your device, and install the app again. Then try connecting again.Disable IPv6 support. Please find below our how-to guide:How to disable IPv6 on WindowsTemporarily disable any applications that may interfere.Certain apps that can gain control of the network on your device may interfere with the VPN connection of CyberGhost. Your VPN connection might be blocked by a firewall, antivirus, or anti-spyware program.Remove potential safety Security or Parental controls from your router.Some ISPs usually equipped their routers with parental/security controls enabled by default. Log in to your router, look for the ""Security"" tab and see if any security features or parental controls are turned on.Repair virtual network card using the CyberGhost VPN function.Conflicts with other software can disable or damage CyberGhost's virtual network card.To do that, launch the CyberGhost VPN app and go toSettings (the Cogwheel icon) -> CyberGhost VPN -> Repair Virtual Network CardReboot your router/modem.1. Unplug power cables from modem and router*2. Wait 30 seconds, plug modem in3. Wait 30 seconds, plug router in4. Wait 30 seconds, the network is now refreshed.*If you have a router/modem combo, just unplug that device.Should the connection problems persist, please contact us :via e-mail:support@cyberghost.rovia on-line request:https://support.cyberghostvpn.com/hc/en-us/requests/newvia 24/7 Live! Chat Sessions on our website",https://support.cyberghostvpn.com/hc/en-us/articles/360016429900-Unable-to-connect-on-Windows
TAP driver error,"For Windows systems, the TAP adapter is in charge of managing VPN connections for the OpenVPN.If an error occurs with the TAP adapter, the easiest solution is to restart the TAP adapter.Disable and re-enable TAP adapter1. Go to Control Panel -> Network and Sharing Center -> Change Adapter Settings.2. One of the local area connections will have an under-name'TAP-Windows Adapter V9'3. Disable it and enable it again. Try to connect now.Should the issue persist, uninstall the TAP driver, and then reinstall CyberGhost VPN.Uninstall TAP adapterPress theWindows+Rkeys to open theRundialog box.Enter the following text, then press the Enter key :devmgmt.mscIn theDevice Managerwindow, double-clickNetwork adaptersto expand it.Right-click TAP-Windows Adapter V9 and select Properties.If you cannot find TAP-Windows Adapter V9 under Network Adapter, on the top menu bar, click View > Show Hidden Devices.On theDrivertab, clickUninstall.Check 'Delete the driver software for this device', and clickOKto continue.Install TAP adapterGo to this download link:Windows 10 -https://build.openvpn.net/downloads/releases/tap-windows-9.24.2-I601-Win10.exeWindows 7 -https://build.openvpn.net/downloads/releases/tap-windows-9.24.2-I601-Win7.exeRight-click the TAP-Windows 'exe' and selectRun as administrator.Restart Windows after installing the driver.For any additional information or concerns - it is best to approach the Support Department:via e-mail:support@cyberghost.rovia on-line request:https://support.cyberghostvpn.com/hc/en-us/requests/newvia 24/7 Live! Chat Sessions on our website",https://support.cyberghostvpn.com/hc/en-us/articles/360016431900-TAP-driver-error
.NET Framework issues,"First, make sure that the version of Windows running on your device is fully up-to-date. You can also consult the Windows Update Troubleshooting GuidehereInstalling .NET FrameworkCyberGhost VPN requires.NET 4.6to be installed.Ensure that you have the proper version of .NET software running on your Windows. If the installation of .NET starts and fails during setup, follow the steps below to try the offline installer :Reinstalling .NETFollow the below steps to fix this issue:1.UninstallCyberGhost VPN.2. Run a full .NET Framework cleanup using the tool providedhere3. Restart your device.4. Install .NET framework from the URL provided below:Microsoft .NET Framework 4.6- Windows Vista SP2, Windows 7 SP1, Windows 8, Windows 8.1Microsoft .NET Framework 4.8- Windows 10Updating .NET frameworkFor the latest version and NET framework support for your operating system, please refer to the followinglinkFor any additional information or concerns - get in touch with us. We can handle your requests in English, German, French, and Romanian.via e-mail:support@cyberghost.rovia on-line request:https://support.cyberghostvpn.com/hc/en-us/requests/newvia 24/7 Live! Chat Sessions on our website",https://support.cyberghostvpn.com/hc/en-us/articles/360016606160--NET-Framework-issues
Having problems with Windows 10 ?,"This is quite common and happens with more programs that use components that have changed their configuration or entirely during the upgrade.Try to remove CyberGhost using the Windows Control Panel uninstaller, or a utility uninstaller.Make sure to keep the antivirus and firewall off during this and the following steps :Change the compatibility mode for the setup program. Right-click on the *.exe file, choose properties\ Compatibility, and under Compatibility choose Windows 8.Run the setup executable with elevated privileges (right-click on it\ run as administrator...). During the setup, make sure to accept and install all necessary components that the setup will prompt you to install.If this does not help, please email us a couple of screenshots of the errors you get so that we can investigate them.For any additional information or concerns - it is best to approach the Support Department:via e-mail:support@cyberghost.rovia on-line request:https://support.cyberghostvpn.com/hc/en-us/requests/newvia 24/7 Live! Chat Sessions on our website",https://support.cyberghostvpn.com/hc/en-us/articles/360016456319-Having-problems-with-Windows-10
How to configure Windows Firewall to unblock CyberGhost?,"This is how you configure your Windows Firewall in case you suspect it blocks CyberGhost from working correctly :1. Add the following 6 rules in your Windows firewall :3 outbound rulesDashboard.exe(available in the CyberGhost VPN program directory: c:\Program Files).Dashboard.Service.exe(available in the CyberGhost VPN program directory: c:\Program Files)OpenVPN.exe- must add x64 and x86 *.exe files available in the sub-folder ""OpenVPN"" of the CyberGhost VPN program directory :c:\Program Files\CyberGhost 8\Applications\VPN\Data\OpenVPN\x64c:\Program Files\CyberGhost 8\Applications\VPN\Data\OpenVPN\x863 inbound rulesDashboard.exe(available in the CyberGhost VPN program directory: c:\Program Files).Dashboard.Service.exe(available in the CyberGhost VPN program directory: c:\Program Files)OpenVPN.exe- must add x64 and x86 *.exe files available in the sub-folder ""OpenVPN"" of the CyberGhost VPN program directory :c:\Program Files\CyberGhost 8\Applications\VPN\Data\OpenVPN\x64c:\Program Files\CyberGhost 8\Applications\VPN\Data\OpenVPN\x86Here is aguideon how to manage Windows firewall rules.2. If you are using another third-party firewall or antivirus software, create a rule for CyberGhost in the application's settings.Make sure you put these files in the exception list of your Firewall / Antivirus:Dashboard.exe(available in the CyberGhost VPN program directory: c:\Program Files)Dashboard.Service.exe(available in the CyberGhost VPN program directory: c:\Program Files)wyUpdate.exe(available in the CyberGhost VPN program directory: c:\Program Files)PeLauncher.exe(available in c:\Program Files\CyberGhost 8\Applications\VPN)OpenVPN.exe- must add x64 and x86 *.exe files available in the sub-folder ""OpenVPN"" of the CyberGhost VPN program directory :c:\Program Files\CyberGhost 8\Applications\VPN\Data\OpenVPN\x64c:\Program Files\CyberGhost 8\Applications\VPN\Data\OpenVPN\x86For any additional information or concerns - it is best to approach the Support Department:via e-mail:support@cyberghost.rovia on-line request:https://support.cyberghostvpn.com/hc/en-us/requests/newvia 24/7 Live! Chat Sessions on our website",https://support.cyberghostvpn.com/hc/en-us/articles/360016440480-How-to-configure-Windows-Firewall-to-unblock-CyberGhost
Is my activation code transferable ?,"After you get an activation code you can do with it whatever you like: Save it for the end of the world, use it for your needs (aka activate it) or pass it on as a gift.After your activation code has been activated (by you or somebody else), the code is bound to the respective account. Furthermore an activation code can only be activated once; pauses and transfers after an initial activation are not possible.",https://support.cyberghostvpn.com/hc/en-us/articles/213848889-Is-my-activation-code-transferable
How come my activation key is called invalid?,"If your activation code is being rejected, please note that an activation code becomes invalid the second it has been assigned to an account (which happens when you enter the activation code).In case you need to re-install CyberGhost later on or want to use your account with a different computer, just log in with your credentials (user name & password) and not with the now invalid activation code. Your subscription is bound to your account, not the code, and will automatically wait for you.If abrand newactivation key is being rejected, one of the following possibilities might have happened:The time frame in which an activation code has to be used is closed:Activation codes of promotions have to be entered in a certain time frame (which is communicated along with the respective promotion). After the window is closed, the codes become invalid.A technical problem arose,please contact support from insideyour account management.You bought a used or promotional activation code from an unauthorized person, e.g. on eBay or Amazon.If the latter applies to you, meaning, if you accidentally bought a key from an unauthorized person or shop reselling promotional CyberGhost activation codes, please note that these promotional activation codes are given away for free or as a part of a special sale (like in a computer magazine) and not meant to be resold for different reasons:First of all, most promotional activation codes are free one way or the other. If you paid for one it’s like having paid for a Freeware product. You have been created.Special sales (e.g. you have to buy a computer magazine to get the serial) and free promotional activation codes come with service limitations. Often the number of servers is limited, the speed as well, the account will be bound to your computer, and so on. If you paid for a full CyberGhost subscription and just got a promotional one, you also have been created.Promotional activation codes, be it for free or for a small fee, always have limited activation periods and have to be activated before a certain date. If you miss this window and try to activate the code, later on, the activation code is blocked.For your information: Authorized resellers are:CleverbridgeApple iTunesNexwayTrialPayS.A.D. (Retail)Please also note, that affiliates don’t sell CyberGhost products directly, but lead you to the respective authorized seller.If your activation code gets rejected, please contact the shop you bought this activation code from, and ask for a refund. You most certainly had been sold a promotion activation code from an unauthorized reseller.If you have bought your activation code from an authorized reseller or think for some reason, this objection does not apply to you, please contact support via youronline account management. We will then hunt down for you the origin of your activation code and clarify if there had been any other reason for rejecting it.For any additional information or concerns - it is best to approach the Support Department:via e-mail:support@cyberghost.rovia on-line request:https://support.cyberghostvpn.com/hc/en-us/requests/newvia 24/7 Live! Chat Sessions on our website",https://support.cyberghostvpn.com/hc/en-us/articles/213440329-How-come-my-activation-key-is-called-invalid
Why does CyberGhost VPN require me to install a helper tool on Mac ?,"The'Helper tool'dialog is a consequence of asking the kernel for an escalation of privileges. It allows establishing a stable and secure WireGuard® connection with our VPN servers. When you are not using CyberGhost, the helper tool also ensures that all your Internet settings return to normal.You will need to enter your computer's administrator password to allow CyberGhost VPN to install the help tool. If you are not the administrator of your device, you may need to obtain the administrator's authorization for the installation.CyberGhost VPN has nothing to do with it and never sees what you type in.Note :Please note that this password is different from your CyberGhost VPN account password ( it must be the password you use to log in to your computer ).Be sure to select ""Install Helper"" when prompted.What the 'Helper Tool' does :Sets up the network devices for the WireGuard®connection.Controls the WireGuard® connection (up/down).Changes the network routing (for WireGuard®) to get the packages routed over the WireGuard® interface.For any additional information or concerns - it is best to approach the Support Department:via e-mail:support@cyberghost.rovia on-line request:https://support.cyberghostvpn.com/hc/en-us/requests/newvia 24/7 Live! Chat Sessions on our website",https://support.cyberghostvpn.com/hc/en-us/articles/360016909820-Why-does-CyberGhost-VPN-require-me-to-install-a-helper-tool-on-Mac
Troubleshooting connectivity on macOS,"There are a number of factors that may be responsible for why a VPN connection could not be established. This topic covers various troubleshooting steps to help resolve connectivity issues.After each step, check if the issue still remains.What to try firstTCP IP reset / Renew DHCP Lease1. Click onApple iconin the top left corner and then selectSystem Preferences.2. Now, openNetwork.3. Click on Internet connection with statusConnected. Then clickAdvancedbutton in the bottom left corner.4. OpenTCP/IP taband clickRenew DHCP Lease5. PressOKto complete the task.6. Reboot your Mac.Try different server locations.Due to a series of factors, one location may offer a more stable connection than others.Restart your device.Sometimes restarting your device will do the trick.Reinstall the application.Uninstall the app, reboot your device, and install the app again. Then try connecting again.Disable IPv6 support. Please find below our how-to guide:How to disable IPv6 on macOSTemporarily disable any applications that may interfere.Certain apps that can gain control of the network on your device may interfere with the VPN connection of CyberGhost. Your VPN connection might be blocked by a firewall, antivirus, or anti-spyware program.Remove potential safety Security or Parental controls from your router.Some ISPs usually equipped their routers with parental/security controls enabled by default. Log in to your router, look for the ""Security"" tab and see if any security features or parental controls are turned on.Reboot your router/modem.1. Unplug power cables from modem and router*2. Wait 30 seconds, plug modem in3. Wait 30 seconds, plug router in4. Wait 30 seconds, the network is now refreshed.*If you have a router/modem combo, just unplug that device.Should the connection problems persist, please contact our customer support team via live chat or email and we will help you!Should the connection problems persist, please contact us :via e-mail:support@cyberghost.rovia on-line request:https://support.cyberghostvpn.com/hc/en-us/requests/newvia 24/7 Live! Chat Sessions on our website",https://support.cyberghostvpn.com/hc/en-us/articles/360016552499-Troubleshooting-connectivity-on-macOS
macOS authentication issue,"After trying to connect to CyberGhost VPN, you may encounter this message:""VPN Connection - Please enter your authentication information"".Follow the steps below to resolve the issue :1. Go toSystem Preferences>Network.2. Find and select the CyberGhost associated network interface.3. Use the minus(-)symbol button to delete the corresponding interface.4.Rebootyour device.For any additional information or concerns - it is best to approach the Support Department:via e-mail:support@cyberghost.rovia on-line request:https://support.cyberghostvpn.com/hc/en-us/requests/newvia 24/7 Live! Chat Sessions on our website",https://support.cyberghostvpn.com/hc/en-us/articles/360016522320-macOS-authentication-issue
What is Neagent ?,"Neagentis short for 'Network Extension Agent' and makes it easy to connect your Mac to our VPN servers. Since our VPN application for Mac uses the IKEv2/IPSec VPN protocol, allowing the agent to access the Keychain is a necessary step in creating a secure VPN connection.Before you can log in, the neagent has to receive the VPN authentication data stored in the Keychain Password Management System of your Mac. Clicking ""Deny"" will cause the neagent to fail to connect to the Keychain and you will not be able to establish a VPN connection.SelectingAllowwill only apply to your current session. You will need to re-authorize the neagent the next time you attempt to connect to a VPN server.If you clickAlways Allow,the app will automatically access Keychain each time you log in, and you will not need to give the neagent permission upon each connection.For any additional information or concerns - it is best to approach the Support Department:via e-mail:support@cyberghost.rovia on-line request:https://support.cyberghostvpn.com/hc/en-us/requests/newvia 24/7 Live! Chat Sessions on our website",https://support.cyberghostvpn.com/hc/en-us/articles/360016474019-What-is-Neagent
“Could Not Retrieve the Password from the Keychain” error message,"You could receive the error message ""Unable to retrieve keychain password"" when trying to connect on your macOS.Here is what you should try first :1. Exit the CyberGhost APP. Reboot your device. Log in using your credentials to connect to the device. If that does not fix the problem, continue to the next step.2. Go to 'Applications' and open the 'Utilities' folder.3. Click on the Keychain Access icon.4. On the right side of the application window you will see a list of sites and services for which you have registered a password. Find CyberGhost from that list. You can type CyberGhost in the search tab to refine your search.5. Select all items named 'CyberGhost VPN' and right-click to choose the option toDeleteeach of them.6. Enter your Mac Admin password as required and clickAllowon the pop-up message.7. Relaunch CyberGhost VPN.For any additional information or concerns - it is best to approach the Support Department:via e-mail:support@cyberghost.rovia on-line request:https://support.cyberghostvpn.com/hc/en-us/requests/newvia 24/7 Live! Chat Sessions on our website",https://support.cyberghostvpn.com/hc/en-us/articles/360016711199--Could-Not-Retrieve-the-Password-from-the-Keychain-error-message
What is Keychain Access on the Mac ?,"The Keychain Access is a macOS application for storing your passwords and account information and reduces the number of passwords you need to memorize and manage.While you access a password-protected website, email account, network server, or another password-protected item, for example, you may have the ability to remember or save the password. If you choose to save the password, it is saved in your keychain, so you do not have to remember or type your password every time.CyberGhost VPN stores your credentials in the Keychain for safety and convenience. Every time you connect to a VPN server, CyberGhost VPN will access the Keychain for the password and you may get a prompt for your Keychain password*.*The Keychain password is usually your macOS User password (the one you use when starting the macOS device). The Keychain password may be different IF you have deliberately set one specifically for the Keychain app.In order to skip this prompt in the future, click the'Always Allow'button after you enter the password and you will never have to worry about it again.For any additional information or concerns - it is best to approach the Support Department:via e-mail:support@cyberghost.rovia on-line request:https://support.cyberghostvpn.com/hc/en-us/requests/newvia 24/7 Live! Chat Sessions on our website",https://support.cyberghostvpn.com/hc/en-us/articles/360016473899-What-is-Keychain-Access-on-the-Mac
Send Debug Logs on Android,"Sometimes our customer support team may ask you to send the application debug log files to assist in the troubleshooting process.This article will show you how you can send debug logs.Open the app and tap on theSettingsicon.TapReport a problem.This will open a new web page. Please fill in the fields on screen and give as many details as possible about the issue you are facing. The CSI ID will automatically be filled in.Note:The information you send is for debugging purposes. CyberGhost VPN will receive non-personal data such as crashes, connectivity errors, server authentication problems, etc. It will only be used to provide you with the best assistance possible.",https://support.cyberghostvpn.com/hc/en-us/articles/360016813060-Send-Debug-Logs-on-Android
Unable to connect on Android,"There are a number of factors that may be responsible for why a VPN connection could not be established. This topic covers various troubleshooting steps to help resolve connectivity issues.After each step, check if the issue still remains.Check out different locations.Due to a series of factors, one location may offer a more stable connection than others.Reboot your device.Sometimes restarting your device will do the trick.Reinstall the application.Uninstall the app, reboot your device, and install the app again. Then try connecting again.Disable the battery saving mode.Battery save mode also disables many of the phone's systems, along with some network functions.Change the network.To determine if this problem occurs only on the network in question, it is helpful to check if the same problem persists on other networks as well.With Android devices, this can easily be done by simply switching from the Wi-Fi network to the Data network.Try switching the protocol on WireGuard:Go to the app settings (top right gear icon) and selectWireGuardas thedefault VPN protocol :Also,turn onthe switch""Small packet size"":Try resetting your network settings:Doing so will not remove any of your applications, photos, or other data. It will just delete your saved Wi-Fi passwords and other connection details.1. Open the Settings app on your Android.2.Scroll to and tap either ""General management"" or ""System,"" depending on what device you have.3. Tap either ""Reset"" or ""Reset options.""4. Tap on ""Reset network settings.""5. You'll have to confirm that you want to reset your network settings. Do so.Your device will restart. Once it does, your network settings will have been cleared and reset.For any additional information or concerns - it is best to approach the Support Department:via e-mail:support@cyberghost.rovia on-line request:https://support.cyberghostvpn.com/hc/en-us/requests/newvia 24/7 Live! Chat Sessions on our website",https://support.cyberghostvpn.com/hc/en-us/articles/360016688779-Unable-to-connect-on-Android
How to troubleshoot streaming issues on Android?,"If you're having problems with certain streaming services while using CyberGhost, please follow these troubleshooting steps :1. Ensure your connection is not leaking any data -DNS,IPv6, andWebRTCare the most common leaks. To make sure your connection is properly configured, check to see if your status shows ""Protected"" on our website.2. Try to disconnect and reconnect to the dedicated streaming profile to get a new IP Address.3. Open theSettingsmenu on your Android device and head toApps. Locate and tap onNetflix (or the respective streaming platform; eg: Amazon Prime US or BBC iPlayer):Press on ""Storage"" and choose both ""Clear cache"" and ""Clear Data""Now, head back and choose ""Uninstall"" and confirm with ""OK""Proceed with restarting your Android device. Once the device has rebooted, please re-install theNetflixapp. In case you no longer have it handy, here is a directlink.After finishing with theNetflixinstallation, you can now startCyberGhostand connect via theOptimized server for Netflix US. If you are unsure how to do so, please followthis tutorial.*Important: It goes without saying that to unblock Amazon Prime US, you will have to connect through the corresponding server in the CyberGhost app - Optimized for Amazon Prime US.NOTE :Clear your browser's cacheif you are streaming via the browser.4. Finally, if you are still facing problems accessing the content, please disable the location services and the smart network switch.How to turn off Location Services on AndroidGo to Android's SettingsSelectLocationSwitch to OFFHow to turn off Smart Network switch on AndroidOpen theSettingsappTapConnectionsTapWi-FiTap theMenu icon(upper-right)TapAdvancedTap theSwitch to mobile data switchto turn offFor any other questions or concerns, please reach out to the Support Team at:support@cyberghost.ro.The entire Support Team is ready to assist.",https://support.cyberghostvpn.com/hc/en-us/articles/360016639239-How-to-troubleshoot-streaming-issues-on-Android
How can I use WireGuard® protocol ?,"WireGuard®is a free and open-source software application and communication protocol that implements virtual private network (VPN) techniques to create secure point-to-point connections in routed or bridged configurations.This is a fairly new VPN protocol, still labeled as a work in progress. It aims to marry the security of the OpenVPN protocol with the speed of (the now easier to block) IPsec.When it comes to encryption,WireGuard®is all about the strictest security standards. It also comes with some extra benefits like faster speeds, more user-friendliness, and less power usage.1. To start with, make sure you are using the latest version of Android.2. Navigate to the app settings in the upper right-hand corner and tap onSettings:3. Go to the""VPN""tab and tap""VPN protocol"" :4. SelectWireGuard®and connect to the VPN.For any additional information or concerns - it is best to approach the Support Department:via e-mail:support@cyberghost.rovia on-line request:https://support.cyberghostvpn.com/hc/en-us/requests/newvia 24/7 Live! Chat Sessions on our website",https://support.cyberghostvpn.com/hc/en-us/articles/360016552619-How-can-I-use-WireGuard-protocol
High battery consumption when CyberGhost is activated,"Given that CyberGhost VPN will intercept all network traffic after you connect to it, and that all other data from the application is transmitted by the CyberGhost VPN application on your Android device, this may lead to an increase in battery or network usage for the application.Below are some tips that you can apply to avoid high battery consumption :Switch toWireGuardprotocol. It has been proven to offer superior performance while causing less stress to the battery.Be sure to connect to CyberGhost only when you require your connection to be encrypted.Ensure that no other applications are running in the background.Consider choosing the Battery Saver option from the Preferences menu to pause the VPN when the device screen is cleared. The VPN will then disconnect when the screen is cleared and will automatically reconnect when the screen becomes visible again. This option may extend battery life, however, it should not be used if you have applications running in the background that requires ongoing Internet access via the VPN.Set up the VPN on your routerinstead, in case you use your device very often at home.For any additional information or concerns - it is best to approach the Support Department:via e-mail:support@cyberghost.rovia on-line request:https://support.cyberghostvpn.com/hc/en-us/requests/newvia 24/7 Live! Chat Sessions on our website",https://support.cyberghostvpn.com/hc/en-us/articles/360016522500-High-battery-consumption-when-CyberGhost-is-activated
How to clear CyberGhost VPN app cache ?,"Use the following steps to do this :Open your Android's SettingsFind the Applications & Notifications areaSelect CyberGhost VPNTap StorageSelect bothClear Cacheas well asClear DataReboot your device and launch CyberGhost again*Remember that if you delete the data from the application, all your settings will be deleted and you will need to log in again, so make sure you have access to your username and password.For any additional information or concerns - it is best to approach the Support Department:via e-mail:support@cyberghost.rovia on-line request:https://support.cyberghostvpn.com/hc/en-us/requests/newvia 24/7 Live! Chat Sessions on our website",https://support.cyberghostvpn.com/hc/en-us/articles/360016552699-How-to-clear-CyberGhost-VPN-app-cache
Send Debug Logs on iOS,"Sometimes our customer support team may ask you to send the application debug log files to assist in the troubleshooting process.This article will show you how you can send debug logs.Open the app and tap on theSettingsicon.TapSubmit a request.This will open a new web page. Please fill in the fields on screen and give as many details as possible about the issue you are facing. The CSI ID will automatically be filled in.Note:The information you send is for debugging purposes. CyberGhost VPN will receive non-personal data such as crashes, connectivity errors, server authentication problems, etc. It will only be used to provide you with the best assistance possible.",https://support.cyberghostvpn.com/hc/en-us/articles/360022232980-Send-Debug-Logs-on-iOS
How can I use WireGuard® in the CyberGhost VPN app for iOS ?,WireGuard® is a fast and modern protocol taking the world of VPN connections by storm. Its state-of-the-art cryptography makes it the best alternative for OpenVPN and IKEv2.1. Install theCyberGhost VPN Appfor iOS. You can find our tutorialhere2. Navigate to the app settings in the upper left-hand corner3. Tap on'VPN'4. Tap onProtocolSelectWireGuard®and connect to the VPNThat's it !WireGuard is a registered trademark of Jason A. Donenfeld.For any additional information or concerns - it is best to approach the Support Department:via e-mail:support@cyberghost.rovia on-line request:https://support.cyberghostvpn.com/hc/en-us/requests/newvia 24/7 Live! Chat Sessions on our website,https://support.cyberghostvpn.com/hc/en-us/articles/360016659720-How-can-I-use-WireGuard-in-the-CyberGhost-VPN-app-for-iOS
How do I terminate my VPN connection on Linux?,You can terminate an active connection through the Terminal using the command:sudo cyberghostvpn --stopFor any additional information or concerns - it is best to approach the Support Department:via e-mail:support@cyberghost.rovia on-line request:https://support.cyberghostvpn.com/hc/en-us/requests/newvia 24/7 Live! Chat Sessions on our website,https://support.cyberghostvpn.com/hc/en-us/articles/360016695059-How-do-I-terminate-my-VPN-connection-on-Linux
Send Debug Logs on Linux,"Sometimes our customer support team may ask you to send the application debug log files to assist in the troubleshooting process.This article will show you how you can send debug logs.To get debug logs on Linux, please open the Terminal window and type these commands:sudo cat ~/.cyberghost/logs/* >> ~/Desktop/clilog.txtThis will save theclilog.txtfile on your desktop. Please send us the file:via email:support@cyberghost.rovia online request:https://support.cyberghostvpn.com/hc/en-us/requests/newvia 24/7 live chat on our websiteNote:The information you send is for debugging purposes. CyberGhost VPN will receive non-personal data such as crashes, connectivity errors, server authentication problems, etc. It will only be used to provide you with the best assistance possible.",https://support.cyberghostvpn.com/hc/en-us/articles/360016663420-Send-Debug-Logs-on-Linux
How to troubleshoot streaming issues ?,"If you experience streaming service problems while using CyberGhost VPN, follow these first steps to bypass them.First of all, make sure that you are connected to the dedicated streaming server and that the connection is not leaking any data - DNS, IPv6, and WebRTC are the most common leaks. To make sure your connection is properly configured, check if your status is ""Protected"" on ourwebsite.Should you be connected to one of our servers but your status is ""unprotected"", please refer to the following steps to ensure that your connection is secure.To stop your connection from leaking, follow these tutorials:1.Disable IPv62.WebRTC leak prevention3. Check the steps below for a specific device. After each step, check if the problem is solved - if not, continue to the next step.Windows, macOS, Linux users1.Clear your browser's cacheif you are streaming via the browser.2. Reinstall the streaming app if you are using their app.3. Restart the device.4. Try to disconnect and reconnect to the dedicated streaming profile and try again.5. Restart the CyberGhost VPN app.Android/iOS users1. If you are using the app for a specific streaming service, force stop it, clear app cache, and reinstall it.2. Clear cache of your browser/app.3. Restart your device.4. Uninstall and reinstall the app that you use for streaming.5. Try to disconnect and reconnect to the dedicated streaming profile and try again.Amazon Fire TV users1. Uninstall and reinstall the app that you use for streaming :1. Click theHomebutton, select theSettingsoption, and from the Settings selectApplicationsmenu.2. In theApplicationsmenu, selectManage Installed Applications.3. Find the Streaming app and clickForce Stop, then hitCleardataandClearcacheoptions.4. Go toSettings,selectDevice,and clickRestartandRestart your Fire Stick.2. Restart the device.3. Try to disconnect and reconnect to the dedicated streaming profile and try again.4. Restart the CyberGhost VPN app.Android TV users1. Uninstall and reinstall the app that you use for streaming :1. Go toSettings>APPS >Select the Streaming app >Clear DataandCache >ClickUninstall2. Restart the device.3. Try to disconnect and reconnect to the dedicated streaming profile and try again.4. Restart the CyberGhost VPN app.Should the streaming problems persist, please contact our customer support team via live chat or email and we will help you!via e-mail:support@cyberghost.rovia on-line request:https://support.cyberghostvpn.com/hc/en-us/requests/newvia 24/7 Live! Chat Sessions on our website",https://support.cyberghostvpn.com/hc/en-us/articles/360015894799-How-to-troubleshoot-streaming-issues
Issues in reaching streaming services geographically restricted,"To check out the streaming services we currently support, please visit thispage.If you are experiencing difficulty accessing any of these services, please follow the recommended troubleshooting steps below :Clear your DNS cache:WindowsPress theWindows Keyor hover your mouse over the bottom left corner and click theWindows IconBegin typingCommand PromptRight-click the application and selectRun as Administrator.Run the following command in the command line and hit enter.ipconfig /flushdnsMacClick theTerminalicon in the dock or inFinderunder Application/Utilities/TerminalRun the following command in the command line and hit enter.sudo killall -HUP mDNSResponder; sleep 2;LinuxOpen a terminal window (gnome-terminal, konsole, xterm, etc)sudo /etc/init.d/nscd restartorsudo /etc/init.d/nscd restartClear your browser's cacheif you are streaming via the browser.Change theVPN protocolTurn off all location services in your browserand all location services on your machine or device (GPS, etc...).Disconnect and reconnectto the selected streaming server to get a new IP address.Sign out of all Google Accountson your device. Google caches IP addresses, this can reveal your real location.Reboot your router/modem.1. Unplug power cables from modem and router*2. Wait 30 seconds, plug modem in3. Wait 30 seconds, plug router in4. Wait 30 seconds, the network is now refreshed.*If you have a router/modem combo, just unplug that device.If you need any further assistance, please contact our customer support team via live chat or email and we will help you out!via e-mail:support@cyberghost.rovia on-line request:https://support.cyberghostvpn.com/hc/en-us/requests/newvia 24/7 Live! Chat Sessions on our website",https://support.cyberghostvpn.com/hc/en-us/articles/360016576499-Issues-in-reaching-streaming-services-geographically-restricted
Netflix Tips and Tricks,"Unblocking the Netflix content for the United States, Germany, France or the United Kingdom is possible when connected to each individual Optimized servers, which you'll be able to locate in the CyberGhost app.Note: If for example, the connection is established the server Optimized for Netflix US but instead Netflix Germany needs to be unblocked, disconnect from the server designed to unblock Netflix US, and establish a new connection to the server designed to unblock Netflix Germany.Windows - CyberGhost|MacOS - CyberGhost|Linux - CyberGhost CLI|iOS - CyberGhost|Android - CyberGhost***********************************************Windows - CyberGhostFor the purpose of this example, Netflix US is the program unblocked via the CyberGhost software for Windows:Note: Netflix US content is unblocked via the Optimized server for Netflix US however - the requirement is that a Netflix US account is needed.* Where owning a Netflix subscription purchased from a different country, connecting to Netflix US via CyberGhost, the portfolio displayed is the portfolio for the country where the subscription is purchased from - in spite of connecting to the Optimized server for Netflix US.Step 1 out of 2: WithCyberGhost VPNsoftware opened, click the 'Expand' button in the left side of the app to open the extended program view;Step 2 out of 2: Click 'For streaming' on the left side menu > select the ""Optimized for Netflix US"" and double click it in order toConnect.Final note: With the VPN displaying ""VPN Connected"" - you can now minimize the CyberGhost software, open your preferred browser and stream Netflix directly in your preferred browser.Tips and Tricks:- The recommendation is to use Google Chrome or Mozilla Firefox by also clearing the history, cache, and cookies;- Stream directly from your browser, not by using third-party software or by using the Netflix program(software);- The server may be grayed out, showing ""FULL"" - it does not mean that there is a malfunction but a protection measure to avoid the server being overcrowded.***********************************************macOS - CyberGhostmacOS 10.15 Catalina, macOS 10.14 Mojave, macOS 10.13 High Sierra, macOS 10.12 SierraFor the purpose of this example, Netflix US is the program unblocked via theCyberGhost 7software for macOS:Step 1 out of 2: WithCyberGhost VPNsoftware opened, click the 'Expand' button in the top left side of the app to open the extended program view;Step 2 out of 2: On the left side menu - choose ""For Streaming"" > scroll through the list of available choices and choose the program which needs to be unblocked.For the scope of this article, the server ""Optimized for Netflix US"" is displayed.Final note: With the VPN displaying ""VPN Connected"" - you can now minimize the CyberGhost software, open your preferred browser and stream Netflix directly in the browser.Tips and Tricks:- Stream directly from your browser, not by using a third party software or by using the Netflix program(software);- The server may be grayed out, showing ""FULL"" - it does not mean that there is a malfunction but a protection measure to avoid the server being overcrowded. The fix is to wait for new slots to be available as new connections can be established after.***********************************************Linux - CyberGhost CLI applicationFor the compatible releases of Linux that work with the CLI CyberGhost application, confirm with the information displayed in the Account DashboardThe United States is the country that is exemplified in this part of the article and everything is displayed after CyberGhost has been properly installed on your Linux machine.Step 1 out of 2: Once Terminal opened, run the command:sudo cyberghostvpn --streaming --country-code USwhich will display all the streaming choices for the United States;Step 2 out of 2: In order to unblock Netflix, the command is:sudo cyberghostvpn --streaming 'Netflix US' --country-code US --connectFinal note: Writing Netflix US as the opposite of 'Netflix US' will deliver two different and opposite results.Tips and Tricks:- To ensure that the correct arguments(parameters) are used, consult the FAQ section where further documentation is provided.- Seeing the compatible Linux versions is possible within the Account Dashboard > My devices***********************************************iOSStep 1 out of 3: WithCyberGhost VPNalready installed on your iOS device(iPhone or iPad), tap the bubble labeled with 'Best location' right in the middle of the CyberGhost app for iOSStep 2 out of 3:Opening the list of all the countries available switches to the 'Streaming' tab. The streaming tab will display all the streaming programs that are unblocked with the CyberGhost app for iOS.Step 3 out of 3: All the separate servers Optimized for each service, in particular, are displayed in the 'Streaming' tab. ChooseUnited States - Optimized for Netflix US*.* Differentiating between servers is possible by looking at the description below each country name.Final note: With CyberGhost displaying ""VPN Connected!' - you can now minimize the CyberGhost app, open your preferred browser and stream Netflix directly in your preferred browser.Tips and Tricks:- Choosing the United States under the tab ""All' will not unblock Netflix US. It is imperative that switching to the 'Streaming' tab is accomplished.- With the VPN enabled, casting to Chromecast or other devices will not be possible as the VPN tunnel is end-to-end and the connection is not 3 way.- Streaming will be accomplished only to the device where the VPN tunnel is established from.***********************************************AndroidStep 1 out of 3: WithCyberGhost VPNalready installed on your Android device(phone or tablet), tap the bubble labeled with 'Best location' right in the middle of the CyberGhost app for Android.Step 2 out of 3:Opening the list of all the countries available switches to the 'Streaming' tab. The streaming tab will display all the streaming programs that are unblocked with the CyberGhost app for Android.Step 3 out of 3: All the separate servers Optimized for each service, in particular, are displayed in the 'Streaming' tab. ChooseUnited States - Optimized for Netflix US*.* Differentiating between servers is possible by looking at the description below each country name.Final note: With CyberGhost displaying ""VPN Connected!' - you can now minimize the CyberGhost app, open your preferred browser, and stream Netflix directly in your preferred browser.Tips and Tricks:- Choosing the United States under the tab ""All' will not unblock Netflix US. It is imperative that switching to the 'Streaming' tab is accomplished.- With the VPN enabled, casting to Chromecast or other devices will not be possible as the VPN tunnel is end-to-end and the connection is not 3 way.- Streaming will be accomplished only to the device where the VPN tunnel is established from.***********************************************TroubleshootingQ: When connected to CyberGhost, Netflix US is telling me(detecting) that I am using a Proxy or an unblocker. What do I do now?A:As a rule of thumb, make sure to use the Optimized server for Netflix US. Should the Optimized server for Netflix is showing ""full"" - picking a server that is based in the United States but Optimized for a different streaming service, will not help in unblocking Netflix US. Allow time, usually 10 minutes, for more slots to be available andthenconnect.Q: I am using my phone/tablet and casting/mirroring to my TV but the screen is black and does not play.A:The VPN connection is not 3 ways and casting/mirroring to other devices will not share the connection to other devices, for example a TV and installing CyberGhost on your TV is needed. Connecting the VPN directly from the TV is the only correct approach.Q: Connection is established to the Optimized server for Netflix US but the contents are not for the US but for the same country.A:The current policy of Netflix is that the content displayed is the content for the country where the Netflix subscription is purchased from. As in this way, Netflix limits the content to the originating country, not the IP where the connection is established. An additional Netflix US subscription would be needed. If you are a US resident and traveling outside of the US, only the US portfolio will be unblocked.Q: I am using IPv6 but not IPv4. What can CyberGhost do ?A:In such cases, either contact Support atsupport@cyberghost.roor disable IPv6 and enable IPv4 only.Q: My device is FireStick/FireTV but cannot manage to stream properly. What do I do now ?A:First things first, make sure that the FireStick is the 2nd generation and/or the FireTV is Fire OS 4.6. As 1st generation Fire Stick devices are not compatible due to the lower performance levels and to meet performance output and stability aspects, high processing power is needed. Where 1st generation devices do not compute the high processing power needed to operate the VPN and this will result in an unstable connection and low-performance output.Q: Using CyberGhost still causes high buffering time. Why ?A:Depending on various factors, for the best troubleshooting steps, we recommend to contact Support at:support@cyberghost.ro",https://support.cyberghostvpn.com/hc/en-us/articles/360016542200-Netflix-Tips-and-Tricks
When Will My Activation Key Expire?,"This article will explain how you can tell when your activation key will expire.If you purchased a CyberGhost VPN subscription as a physical gift card, you will receive an activation key that you will need to redeem in your online account management page. The activation key is a unique code used to activate your subscription.Every box has an expiry date written above the code. That’s the date by which you have to redeem your activation key. It is not your subscription’s expiry date. You can follow our guide on how to activate your subscriptionhere.Note: Please keep in mind that offline purchases are not covered by our 45-day money-back guarantee.Need assistance? Contact our Customer Support team:via email atsupport@cyberghost.rovia online request athttps://support.cyberghostvpn.com/hc/en-us/requests/newvia 24/7 Live Chat by clicking the Support button below",https://support.cyberghostvpn.com/hc/en-us/articles/214383285-When-Will-My-Activation-Key-Expire
How to disable IPv6 on Windows 10,"With numerous choices of configuring your VPN,disabling IPv6can be a good step for a more stable configuration with more performance output.In order to successfully disable IPv6, the below steps are provided to you so that in the event of further troubleshooting steps are needed - this will be a good step in the right direction.Prerequisites: Being logged in Windows 10 with an Administrator account.Step 1 out of 6: Make sure that the Administrator account is logged with your Windows profile.Step 2 out of 6: Look in the lower right of the Windows task-bar in thesys-tray menuand right-click theNetwork icon. Choose:Open Network & Internet settings.Step 3 out of 6: Scroll through the menu and chooseNetwork and Sharing Center.Step 4 out of 6: On the left side menu - choose:Change adapter settings.Step 5 out of 6: Locate yourInternet connectionand right click it. From the drop down menu, please chooseProperties:Step 6 out of 6: Opening the Wi-Fi properties menu,disable Internet Protocol Version 6 (TCP / IPv6)and pressOK.For any additional information or concerns - it is best to approach the Support Department:via e-mail:support@cyberghost.rovia on-line request:https://support.cyberghostvpn.com/hc/en-us/requests/newvia 24/7 Live! Chat Sessions on our website",https://support.cyberghostvpn.com/hc/en-us/articles/360012633939-How-to-disable-IPv6-on-Windows-10
How to disable IPv6 on MacOS ?,"WithnumerouschoicesofconfiguringyourVPN,disablingIPv6canbea reliablemethodfor a more stable configurationwithmore performance output.InordertosuccessfullydisableIPv6, thebelowstepsareprovidedtoyousothatin theeventoffurthertroubleshootingstepsareneeded-thiswillbea goodstepin the right direction.Step1:Head to the Apple logo on theupperleftsideofyourscreen andchoose >SystemPreferences.Step2:Withthe SystemPreferencesmenuopened,headto >Network.Step3:On theleftsidemenu, click theappropriateInternetconnectionthatyourMacisusingtoconnectto the Internet. The articledisplays:Ethernetbut ifyourMacisusingWi-Fi,chooseWi-Fiinstead.Step4:Once theappropriateInternetconnectionisclicked,choose:Advanced.Step5:WiththeAdvancedmenuopened,underTCP/IPtabheadto:Configure IPv6andchoose:Off.Ifyoudo not havethisoption, select ""Link-localOnly"".Step6:For the changes tobetakenintoeffect,choose: OK andproceedwitharestart ofyourMacOS.Foranyadditionalinformation orconcerns-itisbest toapproachthe SupportDepartment:viae-mail:support@cyberghost.roviaon-linerequest:https://support.cyberghostvpn.com/hc/en-us/requests/newvia24/7Live!Chat Sessions onourwebsite.",https://support.cyberghostvpn.com/hc/en-us/articles/360016666739-How-to-disable-IPv6-on-MacOS
How to disable IPv6 on Android ?,"Complete this tutorial step by step to see how to disable IPv6 on Android. For this, you will need to change the APN settings on your Android device to use IPv4 only.1. Go Settings -> Connections -> Mobile networks -> Access Point Names. Select your mobile operator the scroll down to APN protocol and select it.2. SelectIPv4.3. And that's it !For any other questions or concerns, please reach out to the Support Team at:support@cyberghost.ro.The entire Support Team is ready to assist.",https://support.cyberghostvpn.com/hc/en-us/articles/360016604180-How-to-disable-IPv6-on-Android
How to disable IPv6 on MacOS from the terminal ?,"You can disable IPv6 on more recent releases of OS X by running a command in the Terminal application.1. Clickin the upper-right corner of the menu bar, or press Command-Space bar.2. Type in'Terminal'and double-click the item.3. Execute the following command in the terminal window :sudo networksetup -listallnetworkservices4. You will find here a list of all your network interfaces and their descriptions.Locate the network interface you are currently using, typically Ethernet or Wi-Fi. Now use the following command in the terminal window to disable IPv6 on that interface. Please note that you may need to use quotation marks to include the interface name.sudo networksetup -setv6off Ethernetsudo networksetup -setv6off Wi-Fi5. Then you will be invited to enter your OS X administrator password. Afterwards, IPv6 will be deactivated.If you want to re-enable IPv6 on your device, you can simply execute this command in the terminal :sudo networksetup -setv6automatic Wi-Fisudo networksetup -setv6automatic Ethernet-------For any additional information or concerns - it is best to approach the Support Department:via e-mail:support@cyberghost.rovia on-line request:https://support.cyberghostvpn.com/hc/en-us/requests/newvia 24/7 Live! Chat Sessions on our website",https://support.cyberghostvpn.com/hc/en-us/articles/360016552479-How-to-disable-IPv6-on-MacOS-from-the-terminal
How to disable IPv6 for Linux via Network Manager,"Using Linux has become more and more frequent with more and more users getting accustomed with the Linux environment. Luckily, the below steps are provided as to how to disable IPv6 - via Settings menu.Note: Make sure that when opening the Terminal window, the Linux account has Administrator privileges.Step 1: Head to the Network icon in the upper right corner and choose the Internet connection (Wired or Wi-Fi) and choose Wired settings.Q: I am seeing Wi-Fi instead of Wired/Ethernet. Is there something wrong ?A: The purpose of the tutorial is for a Wired connection(Ethernet) and if yourLinux is connecting via Wi-Fi, please choose Wi-Fi instead.Step 2: With the new settings panel opened, locateNetwork(in the left side panel). ClickNetworkand choose theSettingsicon for the respective Internet connection used.*Presented here in this tutorial is Wired(Ethernet/cable).Step 3: With the settings panel opened for the Wired connection(Ethernet), head to the IPv6 tab. For IPv6 method, simply choose: Disable.Confirm the changes with ""Apply"".-------Q: Why does Support ask me to disable IPv6 ?A: Support may request that IPv6 is disabled from your end as this step is imperative that the VPN tunnel is working optimally and nothing will hinder the traffic even if only IPv4 is used.Q: My ISP provides only IPv6 !A: No worries ! For the best approach, please get in touch with the Support Team at the below addresses and the best action plan will be put up so that your privacy and anonymity is ensured.Q: I disabled IPv6 but my VPN still does not work. What do I do now ?A: Disabling IPv6 is just one of the steps that can be used for troubleshooting and for a more extensive investigation, please get in touch with the Support Team.-------For any additional information or concerns - it is best to approach the Support Department:via e-mail:support@cyberghost.rovia on-line request:https://support.cyberghostvpn.com/hc/en-us/requests/newvia 24/7 Live! Chat Sessions on our website.",https://support.cyberghostvpn.com/hc/en-us/articles/360012645799-How-to-disable-IPv6-for-Linux-via-Network-Manager
How to avoid anonymity leaks ?,"In case you have successfully connected to our VPN servers, but your real IP address appears on sites such asiplocation.netoripleak.net, it is most likely that your real IP address is leaking as a result of one or more of the following problems, kindly check the following to fix the problem :1. IPv6 is enabled your device or routerCurrently, CyberGhost does not support IPv6 protocol. The activation of IPv6 on your network may create difficulties to connect to our servers in certain situations.Checkhereto learn how to disable IPv6 on your device.2. DNS leakGo to thispageto perform the DNS leak test. DNS test should show only one DNS server address from the same location. In case you use DNS servers other than ours, your real IP address may leak because all other DNS servers are located outside of our protected VPN tunnel and are not secure.3. WebRTC leakIn some cases, different browsers experience WebRTC leaks that can cause real IP address leakage, even when using a VPN.To protect yourself from this issue, please check ourWebRC leak preventionarticleFor any additional information or concerns - it is best to approach the Support Department:via e-mail:support@cyberghost.rovia on-line request:https://support.cyberghostvpn.com/hc/en-us/requests/newvia 24/7 Live! Chat Sessions on our website",https://support.cyberghostvpn.com/hc/en-us/articles/213353589-How-to-avoid-anonymity-leaks
How to disable IPv6 for Linux via Terminal,"Using Linux has become more and more frequent with more and more users getting accustomed with the Linux environment. Luckily, the below steps are provided as to how to disable IPv6 - via terminal command line parameters.Note: Make sure that when opening the Terminal window, the Linux account has Administrator privileges.Step 1: Once Terminal is opened, the following command line is needed:sudo nano /etc/sysctl.confYou may be required to input thesudopassword for the Administrator accountStep 2: With thesysctl.confopened, scroll to the bottom of the document and - one by one - add the following parameters:net.ipv6.conf.all.disable_ipv6 = 1net.ipv6.conf.default.disable_ipv6 = 1net.ipv6.conf.lo.disable_ipv6 = 1To save the changes, pressCtrl+Xand next press the ""Y"" key to confirm :Finally confirm again by pressing""Enter"":Step 3: The following command is needed to verify the settings implemented earlier:sudo sysctl -pStep 4: Running the following line will display ifIPv6is disabled:cat /proc/sys/net/ipv6/conf/all/disable_ipv6Resulting with: 1 - it means that IPv6 is DisabledResulting with: 0 - it means that IPv6 is still Enabled-------Q: I am getting the result ""0"". Does it mean that that IPv6 is still Enabled ?A: Ensuring maximum privacy is our top concern and to make sure that IPv6 is Disabled, the recommendation is to make sure that redoing all the steps carefully is equally important but Support will stand by for any difficulties that are encountered.Q: Why does Support ask me to disable IPv6 ?A: Support may request that IPv6 is disabled from your end as this step is imperative that the VPN tunnel is working optimally and nothing will hinder the traffic even if only IPv4 is used.Q: My ISP provides only IPv6 !A: No worries ! For the best approach, please get in touch with the Support Team at the below addresses and the best action plan will be put up so that your privacy and anonymity is ensured.Q: I disabled IPv6 but my VPN still does not work. What do I do now ?A: Disabling IPv6 is just one of the steps that can be used for troubleshooting and for a more extensive investigation, please get in touch with the Support Team.-------For any additional information or concerns - it is best to approach the Support Department:via e-mail:support@cyberghost.rovia on-line request:https://support.cyberghostvpn.com/hc/en-us/requests/newvia 24/7 Live! Chat Sessions on our website.",https://support.cyberghostvpn.com/hc/en-us/articles/360012642239-How-to-disable-IPv6-for-Linux-via-Terminal
Troubleshooting VPN connection on Windows,"There are a number of factors that may be responsible for why a VPN connection could not be established. This topic covers various troubleshooting steps to help resolve connectivity issues.After each step, check if the issue still remains.Change the ""Automatic selection"" option used on the CyberGhost VPN application.To do so, launch the CyberGhost application, visit the Settings tab, look for the VPN protocol, and choose betweenWireGuard,OpenVPNorIKEv2. For WireGuard you can try all options available for the MTU Size,we recommend using the ""Small""value :Try different server locations.Due to a series of factors, one location may offer a more stable connection than others.Restart your device.Sometimes restarting your device will do the trick.Reinstall the application.Uninstall the app, reboot your device, and install the app again. Then try connecting again.Disable IPv6 support. Please find below our how-to guide:How to disable IPv6 on WindowsTemporarily disable any applications that may interfere.Certain apps that can gain control of the network on your device may interfere with the VPN connection of CyberGhost. Your VPN connection might be blocked by a firewall, antivirus, or anti-spyware program.Remove potential safety Security or Parental controls from your router.Some ISPs usually equipped their routers with parental/security controls enabled by default. Log in to your router, look for the ""Security"" tab and see if any security features or parental controls are turned on.Repair virtual network card using the CyberGhost VPN function.Conflicts with other software can disable or damage CyberGhost's virtual network card.To do that, launch the CyberGhost VPN app and go toSettings (the Cogwheel icon) -> CyberGhost VPN -> Repair Virtual Network CardReboot your router/modemShould the connection problems persist, please contact our customer support team via live chat or email and we will help you!via e-mail:support@cyberghost.rovia on-line request:https://support.cyberghostvpn.com/hc/en-us/requests/newvia 24/7 Live! Chat Sessions on our website",https://support.cyberghostvpn.com/hc/en-us/articles/360013670100-Troubleshooting-VPN-connection-on-Windows
Troubleshooting VPN connection on Mac,"There are a number of factors that may be responsible for why a VPN connection could not be established. This topic covers various troubleshooting steps to help resolve connectivity issues.After each step, check if the issue still remains.Try different server locations.Due to a series of factors, one location may offer a more stable connection than others.Restart your device.Sometimes restarting your device will do the trick.Reinstall the application.Uninstall the app, reboot your device, and install the app again. Then try connecting again.Disable IPv6 support. Please find below our how-to guide:How to disable IPv6 on macOSTemporarily disable any applications that may interfere.Certain apps that can gain control of the network on your device may interfere with the VPN connection of CyberGhost. Your VPN connection might be blocked by a firewall, antivirus, or anti-spyware program.Remove potential safety Security or Parental controls from your router.Some ISPs usually equipped their routers with parental/security controls enabled by default. Log in to your router, look for the ""Security"" tab and see if any security features or parental controls are turned on.Reboot your router/modem.Should the connection problems persist, please contact our customer support team via live chat or email and we will help you!via e-mail:support@cyberghost.rovia on-line request:https://support.cyberghostvpn.com/hc/en-us/requests/newvia 24/7 Live! Chat Sessions on our website",https://support.cyberghostvpn.com/hc/en-us/articles/360013738079-Troubleshooting-VPN-connection-on-Mac
Troubleshooting VPN connection on Android,"There are a number of factors that may be responsible for why a VPN connection could not be established. This topic covers various troubleshooting steps to help resolve connectivity issues.After each step, check if the issue still remains.Check out different server locations.Due to a series of factors, one location may offer a more stable connection than others.Reboot your device.Sometimes restarting your device will do the trick.Reinstall the application.Uninstall the app, reboot your device, and install the app again. Then try connecting again.Disable the battery saving mode.Battery save mode also disables many of the phone's systems, along with some network functions.Change the network.To determine if this problem occurs only on the network in question, it is helpful to check if the same problem persists on other networks as well.With Android devices, this can easily be done by simply switching from the Wi-Fi network to the Data network.Try switching between TCP and UDP:Go to the app settings (top right gear icon) and turn theUse TCPoption on or off.Try resetting your network settings:Doing so will not remove any of your applications, photos, or other data. It will just delete your saved Wi-Fi passwords and other connection details.1. Open the Settings app on your Android.2.Scroll to and tap either ""General management"" or ""System,"" depending on what device you have.3. Tap either ""Reset"" or ""Reset options.""4. Tap on ""Reset network settings.""5. You'll have to confirm that you want to reset your network settings. Do so.Your device will restart. Once it does, your network settings will have been cleared and reset.Disable IPv6 support.Should the connection problems persist, please contact our customer support team via live chat or email and we will help you!via e-mail:support@cyberghost.rovia on-line request:https://support.cyberghostvpn.com/hc/en-us/requests/newvia 24/7 Live! Chat Sessions on our website",https://support.cyberghostvpn.com/hc/en-us/articles/360013670140-Troubleshooting-VPN-connection-on-Android
Where can I download the latest version of CyberGhost VPN ?,"To start using CyberGhost VPN safely and securely right away, simply go to ourdownload pageor access youronline account dashboardto download the latest version of the CyberGhost application or browser extension.How to install CyberGhost VPNHow to install onWindowsHow to install onMacHow to install onAndroidHow to install oniOSHow to install onLinuxHow to install onChromeHow to install onFireFoxFor any additional information or concerns - it is best to approach the Support Department:via e-mail:support@cyberghost.rovia on-line request:https://support.cyberghostvpn.com/hc/en-us/requests/newvia 24/7 Live! Chat Sessions on our website",https://support.cyberghostvpn.com/hc/en-us/articles/360016419880-Where-can-I-download-the-latest-version-of-CyberGhost-VPN
How to set up ExpressVPN for your Roku,"Roku devices don’t natively support VPN. Touse ExpressVPN on your Roku device, you can set up a connection using theExpressVPN app for routers, the ExpressVPN manual configuration for routers, or a virtual VPN router. https://www.youtube.com/embed/daWATSXK-qE?rel=0",https://www.expressvpn.com/support/vpn-setup/stream-on-roku-with-virtual-router-or-router/)
Troubleshooting VPN connection on iOS,"There are a number of factors that may be responsible for why a VPN connection could not be established. This topic covers various troubleshooting steps to help resolve connectivity issues.After each step, check if the issue still remains.Change the default protocol.Change the protocol from IKEv2 to Wireguard and try to connect again.Temporarily disable any applications that may interfere.Certain apps that can gain control of the network on your device may interfere with the VPN connection of CyberGhost. Your VPN connection might be blocked by a firewall, antivirus, or anti-spyware program.Change the network.To determine if this problem occurs only on the network in question, it is helpful to check if the same problem persists on other networks as well.With iOS devices, this can easily be done by simply switching from the Wi-Fi network to the Data network.Try different server locations.Due to a series of factors, one location may offer a more stable connection than others.Reboot your device.Sometimes rebooting your device will do the trick.Disable the low power mode.Low power mode also disables many of the phone's systems, along with some network functions.Reinstall the application.Uninstall the app, reboot your device, and install the app again. Then try connecting again.Reset your Wi-Fi network settings (only if using Wi-Fi):All your Wi-Fi networks and passwords, cellular settings, will be removed and default Wi-Fi settings restored. This includes VPNs and APN you've set up.1. In your Settings app, tap “General.”2. On the General settings page, tap “Reset.”3. On the Reset page, tap “Reset Network Settings.”4. If you have a passcode set up, you’ll be asked to enter it.5. And when asked to confirm your action, tap“Reset Network Settings.”6. Also, launch the Settings app from the Home screen and navigate to Wi-Fi. On the right side of your wireless network field, tap on theibutton to view the settings for the network.7. Tap ""Renew Lease"" at the bottom of the settings pane to reset your device’s IP address and to refresh your connection. Reboot the device after that.Should the connection problems persist, please contact our customer support team via live chat or email and we will help you!via e-mail:support@cyberghost.rovia on-line request:https://support.cyberghostvpn.com/hc/en-us/requests/newvia 24/7 Live! Chat Sessions on our website",https://support.cyberghostvpn.com/hc/en-us/articles/360013738099-Troubleshooting-VPN-connection-on-iOS
My subscription got lost or hasn't been activated,"Auto-Activation|Manual Activation |Re-Installation|Ordering/Payment ProblemsMy recurring subscription has not been activated automaticallyAfter successfully ordering and paying a recurring CyberGhost subscription it will be automatically activated in the account, you were logged into when starting the purchase. Please log in to your client with exactly the same account, if not done already. Your subscription is waiting there for you.If your paid subscription has not been activated immediately, please contact the respective vendor, you bought the product from (seeherefor contact details). From there you will get an explanation, why the process has been interrupted. If CyberGhost is responsible, your request will be forwarded to us on the very same day and activation will be made up for. If you want, you can contact support by yourself and send your billing confirmation, so it can be checked, why an activation didn't occur.Some users have different CyberGhost accounts, so it's important to make sure one is logged in the same account one used when making a purchase.Manual activation of a new subscriptionIf you received an activation key via email, there is no automatic activation and you have to enter the key manually in either your CyberGhost client or directly in youraccount management page. You will find a descriptionhere.If you haven't yet received a mail with an activation code, please first check your spam/junk folder. Very often the missing mail has just been filtered and moved after receiving. If the mail's still missing, please contact the seller you bought the product from.If you get an error message saying your key has already been activated and is therefore not valid anymore, this code has already been used for this or a different account. See also the next passage 'Use of account afterre-installation'.Use of account after re-installationTo have access to all features on a new CyberGhost installation (e. g. after a system crash and a new operating system installation), just log in to your client with your old credentials (user name and password). Please make sure, you log in to the right account (one with an active subscription).For key owners : If you try to activate your subscription once again with a key, you will get an error message.Users with an in-app subscription for Android, iPad, iPhone, and iPod touchPlease tap in the client's menu on 'Restore Purchase'. In-app purchases are no regular CyberGhost subscriptions as can be bought at the CyberGhost homepage, the restoring process will therefore be handled directly by Apple/iTunes, resp. Google/Play Store.Problems when ordering or payingIf errors or problems occur while ordering or paying (e. g. payment will be refused or got delayed) or if you want a refund, please contact the seller you bought the product from, respective Cleverbridge, if you bought from the CyberGhost homepage.For any additional information or concerns - it is best to approach the Support Department:via e-mail:support@cyberghost.rovia on-line request:https://support.cyberghostvpn.com/hc/en-us/requests/newvia 24/7 Live! Chat Sessions on our website",https://support.cyberghostvpn.com/hc/en-us/articles/213332129-My-subscription-got-lost-or-hasn-t-been-activated
How can I get back my CyberGhost subscription after re-installing my system and/or the client?,"You don't have access to your CyberGhost subscription after you re-installed your operating system and/or the CyberGhost client?CyberGhost and/or your operating system got a fresh install, but your purchased activation code is declared invalid all of a sudden?An activation key can only be used once, when registering a subscription for an account. After that the key expires. However, your subscription is still valid and accessible on the account used for key activation. Please open your client and login with your user data of this account (user name and password), your subscription will be recognized automatically.Your operating system got a fresh install and now CyberGhost doesn't login to your account anymore?After changing the operating system CyberGhost registers the device as a new device, since all references to your old platform are lost or overwritten. Depending on the type of CyberGhost subscription and amount of registered devices you then might have exceeded the maximum amount of allowed devices. To be able to use CyberGhost on the new system, please do as follows:- Open youronline account managementand login with the credentials of an account, a subscription had been registered for.- Activate the menu entry'VPN'and remove the registered obsolete device by clicking on the 'Delete' button :- Then reinstall CyberGhost VPN by downloading the correct version for your system from theDownload Hub:",https://support.cyberghostvpn.com/hc/en-us/articles/213438749-How-can-I-get-back-my-CyberGhost-subscription-after-re-installing-my-system-and-or-the-client
Maximum number of devices reached! What can I do?,"If you reinstall CyberGhost (even if it’s on the same device) or you update your operating system, CyberGhost will see this as a new installation (the same device will occupy a new slot as it will be seen as a duplicate) and you might receive an error that “Maximum number of devices reached!”. After you reached the allowed number of devices, you can't add another one to use with your current CyberGhost account, unless you delete at least one of the already registered ones.Native protocol users :If you use a manual configuration and extend your device limit, you might not get connected without receiving any notification. If that's the case and you experience connection problems, please first visit youraccount management pageto check on your device list.How to remove a device ?Go to yourCyberGhost accountSelect VPN and check the number of available devices from the right sideTo clear a slot, simply press the delete button, as shown in the above figure.After a slot has been freed you can log-in on any new device with your username and password.The new device will be synchronized automatically. The complete process will reactivate the subscription on the respective device.The removal of a device from theaccount management pagewill block access to the VPN on the very same device at once and any existing connection will be terminated. Please make sure the respective device does not have an active connection at the time of removal.For any additional information or concerns - it is best to approach the Support Department:via e-mail:support@cyberghost.rovia on-line request:https://support.cyberghostvpn.com/hc/en-us/requests/newvia 24/7 Live! Chat Sessions on our website",https://support.cyberghostvpn.com/hc/en-us/articles/360017378339-Maximum-number-of-devices-reached-What-can-I-do
WebRTC leak prevention,"In some cases, different browsers experience WebRTC leaks that can cause real IP address leakage, even when using a VPN.However, you can quickly disable WebRTC leaks.Mozilla Firefox:Typeabout:configin the address bar. Scroll down tomedia.peerconnection.enabled, double click to set it tofalseGoogle Chrome:Just installthis plug-inand it will prevent WebRTC leakageOpera:Type ""about:config"" in the address bar and next click on ""Privacy & security"". Scroll at the bottom and click on ""Advanced"". At ""WebRTC"", select ""Disable non-proxied UDP"".For any additional information or concerns - it is best to approach the Support Department:via e-mail:support@cyberghost.rovia on-line request:https://support.cyberghostvpn.com/hc/en-us/requests/newvia 24/7 Live! Chat Sessions on our website",https://support.cyberghostvpn.com/hc/en-us/articles/360016572999-WebRTC-leak-prevention
Who's responsible regarding a subscription ?,"The online shop you bought your subscription at is solely responsible for everything related to the buying process. If you want to cancel a subscription or want your money back or if the paying process failed, please contact the respective reseller, e.g.Cleverbridge.If an activation key from a promotion or an offline or Bitcoin sale can't be used, please read the articleActivation key invalid?before you contact CyberGhost support via youraccount management.",https://support.cyberghostvpn.com/hc/en-us/articles/213834889-Who-s-responsible-regarding-a-subscription
How to set up ExpressVPN on your Chromecast with Google TV,1. Download the ExpressVPN app on your Chromecast with Google TV2. Activate the ExpressVPN app3. Connect to a VPN server locationDisconnect from a VPN server locationChoose a different VPN server locationUninstall ExpressVPN from your Chromecast with Google TV,https://www.expressvpn.com/support/vpn-setup/setup-chromecast-with-google-tv/)
How do the CyberGhost plans look like ?,"You can purchase CyberGhost as a subscription. If the chosen time frame ends the subscription will be renewed automatically and you will be charged again. To end a subscription you have to cancel it.The billing period commences from the time the serial number is input, either by you or automatically at the date of purchase. You have unlimited access to all VPN servers included in your package. If your subscription runs out or will be terminated by you, CyberGhost VPN will not continue to run.For pricing information have a look at ourwebsite. Furthermore maybe think about subscribing to our newsletter or visiting our homepage, for there you might find special conditions or promotional rates.PromotionsPromotional subscriptions are special priced (or free) CyberGhost subscriptions with different conditions than usual, mostly regarding the available server pool and in some cases also other traffic limitations. Also there is a time frame, in which a promotional serial must have been activated.RetailSimilar conditions might accompany special retail versions of CyberGhost, that can be bought from vendors likeAmazonor others - but usually you find here much more features to use than in promotional subscriptions.",https://support.cyberghostvpn.com/hc/en-us/articles/213849009-How-do-the-CyberGhost-plans-look-like
Any additional payments or hidden costs ?,"Neither one nor the other !This is a one-time purchase - you are buying the services provided by CyberGhost VPN for a limited time.Once your account has passed the expiration date, the subscription is automatically renewed. If you have canceled the automatic renewal, you must re-subscribe to our services to continue using them.For any additional information or concerns - it is best to approach the Support Department:via e-mail:support@cyberghost.rovia on-line request:https://support.cyberghostvpn.com/hc/en-us/requests/newvia 24/7 Live! Chat Sessions on our website",https://support.cyberghostvpn.com/hc/en-us/articles/360013734599-Any-additional-payments-or-hidden-costs
How Do I Retrieve an Invoice for My Purchase?,"This article will show you how you can retrieve an invoice for your CyberGhost VPN subscription.To retrieve your invoice, follow these steps:Log into yourCyberGhost VPN account.Click on the CyberGhost icon in the upper right side.Click onSubscriptions.UnderActive Subscriptions, click onSee invoicein the final column.5. Click onSee invoiceagain.This will download your invoice as a PDF file.Need assistance? Contact our Customer Support team:via email atsupport@cyberghost.rovia online request athttps://support.cyberghostvpn.com/hc/en-us/requests/newvia 24/7 Live Chat by clicking the Support button below",https://support.cyberghostvpn.com/hc/en-us/articles/360013734679-How-Do-I-Retrieve-an-Invoice-for-My-Purchase
"Payment possibilities, sorted by countries","Depending on their location, users have different payment options. Below you will find the payment methods per country:Albania: PayPal, VISA, MasterCard, American Express, Discover, BitPay, GooglePayAlgeria: PayPal, VISA, MasterCard, American Express, Discover, BitPay, GooglePayAmericanSamoa: PayPal, VISA, MasterCard, American Express, Discover, BitPay, GooglePayAngola: PayPal, VISA, MasterCard, American Express, Discover, BitPay, GooglePayAntigua and Barbuda: PayPal, VISA, MasterCard, American Express, Discover, BitPay, GooglePayArgentina: PayPal, VISA, MasterCard, American Express, Discover, BitPay, GooglePayAustralia: PayPal, VISA, MasterCard, American Express, Discover, BitPay, Apple/GooglePayAustria: PayPal, VISA, MasterCard, American Express, Discover, Amazon Pay, BitPay, Apple/GooglePayAzerbaijan: PayPal, VISA, MasterCard, American Express, Discover, BitPay, GooglePayBahrain: PayPal, VISA, MasterCard, American Express, Discover, BitPay, GooglePayBelarus: PayPal, VISA, MasterCard, American Express, Discover, BitPay, Apple/GooglePayBelgium: PayPal, VISA, MasterCard, American Express, Discover, Amazon Pay, BitPay, Apple/GooglePayBrazil: PayPal, VISA, MasterCard, American Express, Discover, BitPay, Apple/GooglePayBulgaria: PayPal, VISA, MasterCard, American Express, Discover, BitPayCanada: PayPal, VISA, MasterCard, American Express, Discover, BitPay, Apple/GooglePayChile: PayPal, VISA, MasterCard, American Express, Discover, BitPay, GooglePayChina: PayPal, VISA, MasterCard, American Express, Discover, BitPay, ApplePayColombia: PayPal, VISA, MasterCard, American Express, Discover, BitPay, GooglePayCroatia: PayPal, VISA, MasterCard, American Express, Discover, BitPayCyprus: PayPal, VISA, MasterCard, American Express, Discover, BitPay, ApplePayCzech Republic: PayPal, VISA, MasterCard, American Express, Discover, BitPayDenmark: PayPal, VISA, MasterCard, American Express, Discover, BitPayDominican Republic: PayPal, VISA, MasterCard, American Express, Discover, BitPay, GooglePayEgypt: PayPal, VISA, MasterCard, American Express, Discover, BitPay, GooglePayEstonia: PayPal, VISA, MasterCard, American Express, Discover, BitPay, Apple/GooglePayFaroe Islands: PayPal, VISA, MasterCard, American Express, Discover, BitPay, ApplePayFinland: PayPal, VISA, MasterCard, American Express, Discover, BitPay, Apple/GooglePayFrance: PayPal, VISA, MasterCard, American Express, Discover, Amazon Pay, BitPay, Apple/GooglePayGeorgia: PayPal, VISA, MasterCard, American Express, Discover, BitPay, ApplePayGermany: PayPal, VISA, MasterCard, American Express, Discover, Amazon Pay, SEPA Direct Debit, BitPay, Apple/GooglePayGreece: PayPal, VISA, MasterCard, American Express, Discover, BitPay, Apple/GooglePayGreenland: PayPal, VISA, MasterCard, American Express, Discover, BitPay, ApplePayGuernsey: PayPal, VISA, MasterCard, American Express, Discover, BitPay, ApplePayHongKong: PayPal, VISA, MasterCard, American Express, Discover, BitPay, Apple/GooglePayHungary: PayPal, VISA, MasterCard, American Express, Discover, BitPayIceland: PayPal, VISA, MasterCard, American Express, Discover, BitPay, ApplePayIndia: PayPal, VISA, MasterCard, American Express, Discover, BitPay, GooglePayIndonesia: PayPal, VISA, MasterCard, American Express, Discover, BitPay, GooglePayIreland: PayPal, VISA, MasterCard, American Express, Discover, BitPay, Apple/GooglePayIsle of Man: PayPal, VISA, MasterCard, American Express, Discover, BitPay, ApplePayIsrael: PayPal, VISA, MasterCard, American Express, Discover, BitPay, GooglePayItaly: PayPal, VISA, MasterCard, American Express, Discover, Amazon Pay, BitPay, Apple/GooglePayJapan: PayPal, VISA, MasterCard, American Express, Discover, BitPay, Apple/GooglePayJersey: PayPal, VISA, MasterCard, American Express, Discover, BitPay, ApplePayJordan: PayPal, VISA, MasterCard, American Express, Discover, BitPay, GooglePayKazakhstan: PayPal, VISA, MasterCard, American Express, Discover, BitPay, Apple/GooglePayKenya: PayPal, VISA, MasterCard, American Express, Discover, BitPay, GooglePayKuwait: PayPal, VISA, MasterCard, American Express, Discover, BitPay, GooglePayLatvia: PayPal, VISA, MasterCard, American Express, Discover, BitPay, ApplePayLebanon: PayPal, VISA, MasterCard, American Express, Discover, BitPay, GooglePayLiechtenstein: PayPal, VISA, MasterCard, American Express, Discover, BitPay, ApplePayLithuania: PayPal, VISA, MasterCard, American Express, Discover, BitPay, Apple/GooglePayLuxembourg: PayPal, VISA, MasterCard, American Express, Discover, Amazon Pay, BitPay, Apple/GooglePayMacao: PayPal, VISA, MasterCard, American Express, Discover, BitPay, ApplePayMalaysia: PayPal, VISA, MasterCard, American Express, Discover, BitPay, GooglePayMalta: PayPal, VISA, MasterCard, American Express, Discover, BitPay, ApplePayMexico: PayPal, VISA, MasterCard, American Express, Discover, BitPay, GooglePayMonaco: PayPal, VISA, MasterCard, American Express, Discover, BitPay, ApplePayMontenegro: PayPal, VISA, MasterCard, American Express, Discover, BitPay, ApplePayNetherlands: iDeal, PayPal, VISA, MasterCard, American Express, Discover, Amazon Pay, BitPay, Apple/GooglePayNew Zealand: PayPal, VISA, MasterCard, American Express, Discover, BitPay, Apple/GooglePayNorway: PayPal, VISA, MasterCard, American Express, Discover, BitPay, Apple/GooglePayOman: PayPal, VISA, MasterCard, American Express, Discover, BitPay, GooglePayPakistan: PayPal, VISA, MasterCard, American Express, Discover, BitPay, GooglePayPanama: PayPal, VISA, MasterCard, American Express, Discover, BitPay, GooglePayPeru: PayPal, VISA, MasterCard, American Express, Discover, BitPay, GooglePayPhilippines: PayPal, VISA, MasterCard, American Express, Discover, BitPay, GooglePayPoland: PayPal, VISA, MasterCard, American Express, Discover, BitPay, Apple/GooglePayPortugal: PayPal, VISA, MasterCard, American Express, Discover, BitPayQatar: PayPal, VISA, MasterCard, American Express, Discover, BitPay, GooglePayRomania: PayPal, VISA, MasterCard, American Express, Discover, BitPay, Apple/GooglePayRussia: Qiwi, BitPay, UnionPay, PayPal, Apple/GooglePaySan Marino: PayPal, VISA, MasterCard, American Express, Discover, BitPay, ApplePaySaudi Arabia: PayPal, VISA, MasterCard, American Express, Discover, BitPay, Apple/GooglePaySingapore: PayPal, VISA, MasterCard, American Express, Discover, BitPay, Apple/GooglePaySlovakia: PayPal, VISA, MasterCard, American Express, Discover, BitPay, Apple/GooglePaySlovenia: PayPal, VISA, MasterCard, American Express, Discover, BitPay, ApplePaySouth Africa: PayPal, VISA, MasterCard, American Express, Discover, BitPay, GooglePaySpain: PayPal, VISA, MasterCard, American Express, Discover, Amazon Pay, BitPay, Apple/GooglePaySri Lanka: PayPal, VISA, MasterCard, American Express, Discover, BitPay, GooglePaySweden: PayPal, VISA, MasterCard, American Express, Discover, BitPaySwitzerland: PayPal, VISA, MasterCard, American Express, Discover, BitPayTaiwan: PayPal, VISA, MasterCard, American Express, Discover, BitPay, Apple/GooglePayThailand: PayPal, VISA, MasterCard, American Express, Discover, BitPay, GooglePayTurkey: PayPal, VISA, MasterCard, American Express, Discover, BitPay, GooglePayUkraine: PayPal, VISA, MasterCard, American Express, Discover, WebMoney, BitPay, Apple/GooglePayUnited Arab Emirates: PayPal, VISA, MasterCard, American Express, Discover, BitPay, Apple/GooglePayUnited Kingdom: PayPal, VISA, MasterCard, American Express, Discover, BitPay, Apple/GooglePayUnited States: PayPal, VISA, MasterCard, American Express, Discover, Amazon Pay, BitPay, Apple/GooglePayUruguay: PayPal, VISA, MasterCard, American Express, Discover, BitPay, GooglePayVatican: PayPal, VISA, MasterCard, American Express, Discover, BitPay, ApplePayVietnam: PayPal, VISA, MasterCard, American Express, Discover, BitPay, GooglePayOther Countries: PayPal, VISA, MasterCard, American Express, Discover, BitPayFor any additional information or concerns - it is best to approach the Support Department:via e-mail:support@cyberghost.rovia online request:https://support.cyberghostvpn.com/hc/en-us/requests/newvia 24/7 Live! Chat Sessions on our website",https://support.cyberghostvpn.com/hc/en-us/articles/360013734499-Payment-possibilities-sorted-by-countries
I didn't get my activation key. Where is it ?,"OnlyOffline Sales(purchased from a physical store, Bitcoin purchases, and Promotional subscriptions) include activation keys that have to be entered manually. Since the payment does not go through our website, no account can be created automatically and a key will be used to activate the subscription. Before activating the subscription, you mustcreate a CyberGhost web-accountand then,use the key to activate the subscription.WhenpurchasingCyberGhost VPN online,via our website, you won't receive an Activation Key as your subscription isactivatedimmediately.All you'll need is yourUsernameandPassword !All of the required info (subscription type and duration) isfetchedfrom our servers.No activation key requiredNote:To use a subscription, ensure that you always login with the credentials you originally used while purchasing.If the application does not reflect the subscription you've bought,you may not be logged in with the account originally used when purchasingthe subscription.For new accounts, just after the purchase is made, you will be asked to set up a password for yournew CyberGhost web-accountand finally you will be redirected to your CyberGhost web-account to start installing the app on your favorite devices :For any existing accounts,in case you've made a purchase with your email address and you can't remember your username and password, please check our guide onhow to recover your accountso that you can further enjoy the benefits of your CyberGhost VPN subscription.The activation of subscriptions purchased online will, as mentioned, happen automatically after the payment process is complete on the exact account used during the purchase.To make sure you are logged in with the correct Username / Password, please make sure you log in again. You can consult the following articles ( depending on your OS)WindowsmacOSiOSAndroidFor any additional information or concerns - it is best to approach the Support Department:via e-mail:support@cyberghost.rovia on-line request:https://support.cyberghostvpn.com/hc/en-us/requests/newvia 24/7 Live! Chat Sessions on our website",https://support.cyberghostvpn.com/hc/en-us/articles/360013667260-I-didn-t-get-my-activation-key-Where-is-it
How Do I Activate a Prepaid or Promotion Key?,"This article will show you how you can use an activation key or a prepaid key to subscribe to CyberGhost VPN.Note: You will receive an activation key with physical gift cards or promotional events. Subscriptions purchased through our website, App Store, or Google Play Store are automatically activated without the use of an activation key.First you will need a CyberGhost account. If you do not have one, you can create one for free. Please see our guide on how to create an accounthere.To activate a key, first go to your onlineaccount management.Login with your credentials and expand the menu by clicking on your profile logo in the upper right corner of the screen.SelectAccount Settings.SelectUse your activation key.Enter your activation key in the specified box, and selectUse.Encountered issues? This might be whyYou already used your key- All activation keys can only be used once. To use CyberGhost VPN on other devices, simply log into the app with your credentials. You do not have to activate every device.Your key has expired- For physical gift cards, please check your box for the expiry date.Downgrades are not possible- Make sure your activation key corresponds to the subscription type active on your account.You have an active subscription that you are trying to extend with an activation key- Prepaid subscriptions or gift cards cannot be used to extend subscriptions purchased from our website, Google Play Store, or App Store. If you want to force it, you must cancel your old subscription and request a refund provided it falls within our refund policy.Note: You will lose all your remaining runtime of your subscription this way.You are trying to extend a promotional subscription- Promotional subscriptions cannot be extended by another activation key. Using an activation key will replace your remaining subscription and you will lose any remaining runtime.Note: Subscriptions coming from physical gift cards are not covered by ourrefund policy.Need assistance? Contact our Customer Support team:via email atsupport@cyberghost.rovia online request athttps://support.cyberghostvpn.com/hc/en-us/requests/newvia 24/7 Live Chat by clicking the Support button below",https://support.cyberghostvpn.com/hc/en-us/articles/360017320500-How-Do-I-Activate-a-Prepaid-or-Promotion-Key
Do you accept keys from key generators ?,"There are certain key generators for CyberGhost sailing through the Internet, some of them hosted at places, you know exactly what to expect from (nothing good) and some of them promoted on more un-suspicious platforms like Youtube.Either way, as you already might suspect, a key generator does not only sometimes do, what you run it for (generating a key), but also checks out your PC and adds a few codes here and there. Key generators are the perfect tools for transporting Trojans and other malware and one doesn't even have to convince people to use it.So, please beware, there are no official CyberGhost key generators out there. And of course, we neither accept nor support keys obtained from a key generator.",https://support.cyberghostvpn.com/hc/en-us/articles/213835089-Do-you-accept-keys-from-key-generators
How many devices can I use at the same time with one account or subscription ?,"With a single CyberGhost subscription, you can connect to the VPN on up to seven different devices at the same time, regardless of platform.You can install CyberGhost VPN on any number of devices, but only seven devices can be connected to the VPN at once.Also, no matter where you purchased your subscription, you can use CyberGhost VPN on up seven devices at the same time. This includes subscriptions purchased via iOS in-app purchase, Android in-app purchase, or via the CyberGhost website.Please note :Your e-mail address needs to be linked to the iTunes or Android purchase so that you can use the same plan across 7 devices in the same time on various platforms.Apart from the rules for same time operations as stated above, your CyberGhost subscription can be used on as many devices as you like. For that you just have to remove a device from the list of registered devices in your account management under the“VPN” section. Once done you can occupy the free slot with any other different device, be it a Windows, Mac, iOS or Android client, be it a native protocol.For any additional information or concerns - it is best to approach the Support Department:via e-mail:support@cyberghost.rovia on-line request:https://support.cyberghostvpn.com/hc/en-us/requests/newvia 24/7 Live! Chat Sessions on our website",https://support.cyberghostvpn.com/hc/en-us/articles/214371165-How-many-devices-can-I-use-at-the-same-time-with-one-account-or-subscription
Where is my username / password for my iOS / Android subscription ?,"By default, there are no usernames and passwords for iOS and Android subscriptions.All CyberGhost subscriptions bought via Apple's App Store or Google's Play Store are limited to the resp. platform and you only have to log-in to the Google or Apple account you used, when purchasing the subscription. All this up to the point where you link the purchase with your e-mail address and thus turning the subscription good for up to 7 mobile devices.At the beginning you cannot:Use your Android/iOS subscription on an Android / iOS device running under a different account.Use your iOS subscription on a macOS device, even if you are using the same Apple ID which you used for purchasing the subscription.Use any mobile CyberGhost subscription with any different operating platforms other than iOS, resp. Android.If you want to use CyberGhost with different platforms at the same time, you need to link your e-mail address to the existing iOS or Android plan or purchase a regular CyberGhost subscription, available through ourhomepage.",https://support.cyberghostvpn.com/hc/en-us/articles/360003159893-Where-is-my-username-password-for-my-iOS-Android-subscription
What devices and platforms do you support ?,"We support a variety of devices and platforms. CyberGhost VPN has applications and manual configurations for :Computers (desktops and laptops)WindowsPre-configured and optimized profiles for most usage scenarios (Streaming, Torrenting, etc)Additional security features, such as a kill-switch, an ad blocker, a no-tracking tool and moreBased on OpenVPN, IKEv2 and WireGuard®MacPre-configured and optimized profiles for most usage scenarios (Streaming, Torrenting, etc)Protect Wi-Fi smart featureBased on IKEv2LinuxOptimized profiles for most usage scenarios for Streaming and TorrentingWireGuard® and OpenVPN protocolCLI-type (Command Line Interface) applicationMobile devices (smartphones and tablets)iOSEasy to useEasy to installWireGuard® and IKEv2 protocolsAndroidOne-tap connectBased on OpenVPNandWireGuard®Wi-FI protect featureSmart TV'sAndroid TVOne-tap connectBased on OpenVPN(highly secure)Intuitive integrationAmazon Fire TVOne-tap connectBased on OpenVPN(highly secure)Intuitive integrationSmart TV's - with Smart DNSLG SmartTV with webOSSamsung SmartTV with Tizen OSRoutersDD-WRTTomatoUSBTomatoUSB Merlin BuildStreaming consoles - with Smart DNSApple TV 3Apple TV 4Roku TVGaming consoles - with Smart DNSPlayStation 3PlayStation 4Xbox OneXbox 360Nintendo SwitchNintendo Wii UNintendo WiiOthersSynology NAS via OpenVPNRaspberry PiVU+ Solo²LibreELEC “Kodi”OpenELEC “Kodi”Web Browser Extension (Proxy)CyberGhost VPN Proxy for ChromeCyberGhost VPN Proxy for FirefoxCyberGhost Cookie Cleaner ExtensionCookie Cleaner for ChromeCookie Cleaner for Firefox“WireGuard” is a registered trademark of Jason A. Donenfeld.",https://support.cyberghostvpn.com/hc/en-us/articles/213898525-What-devices-and-platforms-do-you-support
What is a VPN and why do I need one ?,"A virtual private network is a service that allows you to connect to the Internet through an encrypted tunnel to ensure your online privacy and protect your sensitive data. VPNs are generally used to secure connections to public Wi-Fi hotspots, hide IP addresses and make your browsing private.If you’re wondering if VPNs are legal, you should know that most countries have no laws banning or restricting VPN usage.This isn’t to say that there aren’t some governments out there that stifle freedom of expression and resort to censorship. Such repressive regimes have resorted tooutlawing the use of VPNs, citing reasons ranging from tackling extremist views to upholding national security.Outside of these countries, VPNs are legal to use. However, bear in mind that activities considered illegal without a VPN are still unlawful even when you connect to VPN servers.Isn't 'regular' security software enough to protect my privacy ?An anti-virus software or firewall does not protect your personal freedom on the Internet, nor does it protect you if your privacy is violated. Nor does it guarantee your anonymity on the Internet. A firewall monitors network traffic and, if necessary, can protect you from unauthorized access, whereas anti-virus software focuses exclusively on harmful software.",https://support.cyberghostvpn.com/hc/en-us/articles/214536205-What-is-a-VPN-and-why-do-I-need-one
Server Security Policy,"To get access to one of our servers one needs an RSA key which will be generated individually and is stored secured on an encrypted mobile drive inside a TrueCrypt Volume. The private key on that drive is encrypted with a password.Any direct access to our VPN servers, e.g. for installation and configuration is restricted to four people worldwide (April 2013), among them only CyberGhost VPN members and no worker of a computer center or a service provider, both solely providing the hardware. Furthermore, we have strict contracts with our partners, among them Kaia Global as our own carrier, establishing very harsh security requirements, e.g. that a system has to be wiped completely before a server can be withdrawn.",https://support.cyberghostvpn.com/hc/en-us/articles/213853329-Server-Security-Policy
How does anonymity provided by Cyberghost VPN ensure more freedom ?,"We are forced to draw this bitter conclusion: the protection of our privacy on the Internet during browsing is almost non-existent and too often based on the concept ""nobody is (probably) interested in me"".From the moment you enter the online domain, your digital identity is shaped by a variety of factors, such as:Login credentialsPersonally identifiable information (like your date of birth, registered email, and profile photos)Online transactionsOnline search history and DNS requestsBrowsing historyIP addressBrowser fingerprintYour device’s MAC addressThe apps you useEach one of your online interactions is added to your online ID. But as opposed to your papers, your digital ID can be easily accessed and viewed.Your Internet Service Provider, the authorities, online service providers, third parties, and snoopers can track your digital footprint and online activities.Your private datacan be easily exposed.How to protect your digital identityProtecting your entire online identity and securing your gadgets is essential. And VPN software is what you need to preserve your digital privacy.CyberGhost VPN was designed with privacy in mind and has dedicated apps forWindows,macOS,iOS,Android,Amazon Fire TV & Fire Stick,Android TV,Linux, and evenRouters.Our DNS-leak protection and kill switch always keep your wireless connections secure. And, no matter what happens, we always make sure your IP is hidden so that your online activities are shielded from any snoopers.Here at CyberGhost VPN, we are genuinely committed to protecting your privacy.It’s one of the reasons we’re headquartered in Bucharest, Romania. In this country, we are under no legal obligation to keep logs on our Ghosties. And becauseRomania is not a member of any surveillance alliance, we don’t ever have to collaborate with the authorities.For any additional information or concerns - get in touch with us. We can handle your requests in English, German, French, and Romanian.via e-mail:support@cyberghost.rovia on-line request:https://support.cyberghostvpn.com/hc/en-us/requests/newvia 24/7 Live! Chat Sessions on our website",https://support.cyberghostvpn.com/hc/en-us/articles/214033749-How-does-anonymity-provided-by-Cyberghost-VPN-ensure-more-freedom
Who is behind CyberGhost VPN and how can I contact you?,"We are a private company located in Romania and specialized in network security and privacy protection :CyberGhost S.R.L.Address : 68Polona, District 1, Bucharest, RomaniaContact UsCyberGhost subsists of real people in a real office and if you feel like it, come visit us anytime:FacebookTwitterGoogleYouTubePinterestVimeoLinkedInFlickrTeampageFor any additional information or concerns - get in touch with us. We can handle your requests in English, German, French, and Romanian.via e-mail:support@cyberghost.rovia on-line request:https://support.cyberghostvpn.com/hc/en-us/requests/newvia 24/7 Live! Chat Sessions on our website",https://support.cyberghostvpn.com/hc/en-us/articles/214432605-Who-is-behind-CyberGhost-VPN-and-how-can-I-contact-you
Why should I trust CyberGhost VPN ?,"Because, just like you, we want to keep the Internet free and to reconquer its freedom where lost.Because the protection of your privacy is our fundamental concern.Because our trust and your trust have been violated by too many people so far, but we have to start anew somewhere.Because our offer is as transparent as it can be and because we try to give you, through this Internet page, as many and as complete information as possible.Because protecting your privacy, expanding your freedoms and increasing your safety on the Internet are the essence of our business and our passion. We believe it is worth fighting for a free and secure Internet and we use all our available time to bring you a VPN with unique safety, speed and reliability.So, is CyberGhost VPN trustworthy ?Using VPN software is a great way to protect your data online. But it’s crucial to know whether your VPN provider keeps tabs on you.We have always been open and honest with our Ghosties. And back in 2011, we took it a step further. That’s when we reached a milestone: being the first company in the VPN industry ever to publish aTransparency Report.Since then, we’ve made a tradition out of publishing our Transparency Reports. To us, it’s vital to give our community a chance to see how we are safeguarding their data. That’s whyin 2018we began including more details in our reports, such as key statistics about our infrastructure.Everyone can check the number of DMCA complaints, malware activity flags, and police requests we get. But thanks to our strictNo Logs policy, we never have any data on our users to share with the authorities. Plus, we’re based in Romania. Here we are under no legal obligation to store customer data.",https://support.cyberghostvpn.com/hc/en-us/articles/213901169-Why-should-I-trust-CyberGhost-VPN
How can personal data be used against me and how does anonymity protect my privacy ?,"The information regarding the transactions you carry out on your computer, the pages you access, the files you load, the music you listen to, the persons you chat with (and the reasons behind all these) have a monetary value, and is actually a valuable asset in the modern world - which is why anyone would be especially interested in these data and spying the Internet surfing behavior of individuals has become a truly profitable business. The results are then sold to interested companies, as customer profiles.These cumulated data are extracted, for example, from cookies, which are generated by your personal computer when accessing an Internet page, and various entities then examine the email addresses we send, or our membership on different forums, etc. After collecting, associating and assigning these data to a person, high amounts of data are concentrated - some of them harmless, some of them less harmless, e. g. when used by organizations in order to formulate actions for alleged violation of copyrights.When talking about curiosity driven fellow citizens, don't disregard your dear neighbors, your boss, or the organized crime. The Internet knows all your good and bad parts and forgets almost nothing. Regardless of the pages you access and the opinions you express - web pages, Blogs, communities, forums, YouTube, Facebook, Flickr etc. - you leave traces everywhere, which only have to be collected and associated by somebody interested in doing so. The number of Internet users increases daily, people who create their own Internet or blog pages, who permanently access other Weblogs and/or are members of a Community - and, starting from the idea of an alleged protection offered by the anonymity of the network, do not refrain themselves from directly expressing their opinions. Suddenly, sexual preferences, medical situations, hate tirades aimed at their superiors or less advantageous photographs become public. Every future employer is grateful for as many unaltered information as possible on a new candidate for a job position, which is why the human resources managers have already been using for a while now the information offered by the Internet when it comes to a possible hiring.The state is also interested in your data. ""Who doesn't have anything to hide..."" has turned, in this context, into a defining argument frequently supported when discussing if state representatives should access personal computers, deliberately not mentioning that. Through such actions, the fundamental existential rights of an individual are violated, without even partially knowing the intensity of that accessing and the intensity of its effects.The fact that those who agree that the state entities should survey the Internet, minimize the significance of the various online communication forms, as a new way of conversing is one of the issues debated - however, one that distances itself from reality. The young generation, especially those who grew up with the Internet and are almost always online, believes that the communication forms offered by their personal computer is almost the only way of permanently maintaining private and long distance social connections. A surveillance of the operations they carry out in this context would be the equivalent of an agent constantly present in that person's living room.Then a search on Wikipedia for detailed information about certain sensitive subject in your country that is geo-restricted, could turn out a a fatal mistake. In numerous western democracies with currently expanding surveillance structures, issues concerning terrorism are targeted as well as crimes carried out by hackers by stealing data. We can only assume other subjects managed 'under the counter' and discussed little or none at all in public (for example, file-sharing and merchandise management frauds). If you show 'too great' an interest towards a certain subject and if it can be concluded, on forums, that you have certain political orientations, you might be included in a category of people you wouldn't like to be part of.Warning: those who are looking for potential 'terrorism supporters' are not interested in knowing that you are a convinced vegetarian and couldn't even hurt a fly, but they become extremely attentive if, at some point, you express in a harsher way your discontent with the decisions of the current political class. This means you are constantly filling just one side of the account, while the other one is overlooked, so that, in time, a completely erroneous image of your personality is formed.In other countries without democratic traditions you will certainly want to use CyberGhost VPN more often and in many more situations, because, in those states, the standards for defining an unwanted subject are much lower.",https://support.cyberghostvpn.com/hc/en-us/articles/214036749-How-can-personal-data-be-used-against-me-and-how-does-anonymity-protect-my-privacy
Can my real IP address be exposed when being camouflaged by CyberGhost VPN ?,"As long as you surf protected by CyberGhost VPN, nobody can find out your real IP address and associate it with the connection owner through the information request sent to the Internet provider.So, can I let go of other security measures when surfing with CyberGhost VPN?No, your anonymity may be significantly endangered if you carelessly reveal personal data, such as emails, names, dates of birth, credit card data, etc. CyberGhost VPN does not monitor at any time the nature of the data you send, which is why it cannot make a difference between sensitive information and unimportant information, blocking the ones in the first category.We also recommend that you keep the safety measures on, for example blocking cookies and continuing to use an antivirus, as well as other safety software solutions, as you normally do. Trojans are just as dangerous in the anonymous networks like they are in the non-anonymous ones.",https://support.cyberghostvpn.com/hc/en-us/articles/214034369-Can-my-real-IP-address-be-exposed-when-being-camouflaged-by-CyberGhost-VPN
Can an assigned server compromise my anonymity ?,"Can the fact, that I'm logged in to, say, a server in Hamburg, be a hint to where I live and be used to identify me?No, for two reasons:The next best suited server near your real location is not necessarily the one, that is really located next to you. It could also be a server hundreds of miles away, because the keyword is 'load balancing' for maximum performance. If a server farer away is better suited, then that's the one you will be assigned to.Nobody can tell one user from the other - so nobody will know if you have been assigned a server or logged in to the same server from a different country.",https://support.cyberghostvpn.com/hc/en-us/articles/214034269-Can-an-assigned-server-compromise-my-anonymity
Can traffic data compromise my anonymity ?,"No. CyberGhost VPN just logs and stores (for a very short time) non-personal data, which in no way can be used to compromise one's anonymity. No content of websites, nor IP addresses, nor any communication data will ever be logged.",https://support.cyberghostvpn.com/hc/en-us/articles/214531925-Can-traffic-data-compromise-my-anonymity
How will keys for a secure VPN connection be created ?,"The encryption process, at a very basic level, consists of substituting letters and numbers to encode data so that only authorized groups can access and understand it.CyberGhost VPN operates using protected surfing encryption based on the SSL standard (RSA procedure) which, unlike the procedures used by rival products, creates both the public and private keys directly and individually on the users system. This preventsMan in the middleattacks that are possible if key pairs are created on the server.",https://support.cyberghostvpn.com/hc/en-us/articles/214387505-How-will-keys-for-a-secure-VPN-connection-be-created
Is it legal to distribute files on P2P networks ?,"None of the current P2P technologies are illegal per definition. The target file of a download or upload might be a violation of copyright laws, though, which is the reason why some people try to criminalize the complete technology. Actually the deal with P2P is as with any other technology or invention, beginning from the first stone age knife: It’s meant as a helpful tool, but can be misused at any given time.The misuse of the P2P technology is the reason why P2P traffic is often strongly observed by certain organizations. In case one is uncertain, if the up- or download of a file might be unlawful, it’s better not to do either one. By rule of thumb one can say, that Open Source files and files in the Public Domain are free to share – though one must also keep in mind, that Public Domain in the USA for example doesn't mean, the same content might be free elsewhere. In certain situations one has to analyze the given situation and decide the sharing of each file individually.It’s important to understand that each download usually also is an upload (if one does not block incoming traffic) and therefore the sharing of a file. If you download an illegal distributed file, you are not only violating copyright laws in a passive manner, but also very actively, if the file segments also are uploaded. Both activities are forbidden by law and enforced very strictly throughout the world.",https://support.cyberghostvpn.com/hc/en-us/articles/213983029-Is-it-legal-to-distribute-files-on-P2P-networks
How can I use a P2P client with CyberGhost VPN ?,"After installing the CyberGhost VPN, start the client and launch the ""For Torrenting""profile.If you choose a server manually from the profiles, please note that in some countries, the use of Peer to Peer (P2P) technology may be prohibited and your P2P program will not work if you are forced to use a server that is not equipped to work with P2P technology.Some more hints :Clear Cookies!Cookies in your browser keep location information from sites you've previously accessed without being connected to the VPN among other details. Clearing cookies is always a good idea when you wish to use a VPN and ensure that you do NOT enable any location services;Which precautions to consider regarding your anonymity?None. In the seldom case your connection to the CyberGhost VPN network gets interrupted, all your Internet traffic will be blocked until you decide to reconnect or shut down. In the meantime no data will be transmitted.What else should I consider?CyberGhost VPN blocks by nature all incoming traffic, so nobody can access your computer. If other peers in a P2P net also use access restrictions, your downloads are limited to those, who doesn't. If there are enough peers providing a certain file, you’re good to go. If there are not enough, the download rate can be lower than usual.For any additional information or concerns - it is best to approach the Support Department:via e-mail:support@cyberghost.rovia on-line request:https://support.cyberghostvpn.com/hc/en-us/requests/newvia 24/7 Live! Chat Sessions on our website",https://support.cyberghostvpn.com/hc/en-us/articles/213982989-How-can-I-use-a-P2P-client-with-CyberGhost-VPN
Why does my torrent not work ?,"None of the current P2P technologies are illegal per definition, but we have to block P2P protocols on certain servers, either due to strategic (this is traffic that unnecessary slows down other user's traffic) or due to legal reasons in countries where we are forced by providers to block torrent traffic, among them USA, Russia, Singapore, Australia and Hongkong (China).For torrenting, we offer suitable servers in the ""For torrenting"" profile.Please also note that using CyberGhost for downloading copyrighted content is illegal and an abuse of our service.For further guidance, you can always check out our dedicated setup guides section or contact us via live chat or email. They’re available 24/7 and can answer your requests in English, French, German, or Romanian.",https://support.cyberghostvpn.com/hc/en-us/articles/213982089-Why-does-my-torrent-not-work
Why are my P2P download rates so low ?,"In some cases, people report very slow download rates. This is due to the fact that CyberGhost does not allow port forwarding, which means that all incoming connections are blocked.This behavior causes other clients to be unavailable, users can no longer connect with your P2P client and you get a weak ID (because you don't seed and just leech). In this case, there is no point in adapting your software's router and/or firewall and opening the necessary port to the client or activating UPnP or NAT-PMP (which provide port forwarding).If CyberGhost allowed port forwarding, a user would be identifiable because a port can be assigned to him.",https://support.cyberghostvpn.com/hc/en-us/articles/213982169-Why-are-my-P2P-download-rates-so-low
About P2P protocol encryption,"Because some Internet Service Providers (ISPs) slow down P2P activities, certain clients have a protocol encryption implemented to keep P2P traffic from being recognized. Usually one finds the needed settings in the program’s options, e.g. as ‘Outgoing Protocol Encryption’ or something equivalent. Depending on your ISP, you also need to set an outgoing connection to ‘forced’ as well, but keep in mind, that an option like this will also reduce the number of peers you can connect to.",https://support.cyberghostvpn.com/hc/en-us/articles/214479265-About-P2P-protocol-encryption
What are the technical principles and equipment of your service ?,"The CyberGhost service is based on three main systems plus a few web servers, which are used for hosting the company's web appearance at cyberghostvpn.com :The log-in servers, consisting of one master and one backup server.Different Domain Name Servers (DNS) in different countriesThe exit nodes, where an anonymized user leaves the CyberGhost net and enters the Internet. At this time the service consists of more than 200 OpenVPN servers around the world, mainly Europe and the USA.Log-in ServersThe log-in servers contain each their own database, supplied with the least necessary account data (user name and password), exit node data, system settings and statistics – which all is continuously synced between master and backup server. In case a data center or server fails, the backup server becomes immediately master. The DNS settings of the master-URL will also be changed to the backup server IP within seconds, so the exit nodes can reach the new master server for internal communications without interruption.Domain Name ServerThe Domain Name Servers receive all DNS-queries from the exit nodes and give back the answers in an anonymous way, so for any target servers the respective CyberGhost server will be the only partner to communicate with. They also resolve the routes to the master server, to the exit nodes, and the account management.Exit NodeThe exit nodes connect the clients with the Internet. They receive the DNS-queries from the clients, forward them to the DN-Servers and give back the answers in an anonymous way. Furthermore, on all exit nodes a NAT service with firewall-functions is running, and the exit nodes communicate with the master server during a user log-in and an active connection (with a traffic conveyance every five minutes).CyberGhost works with static shared IP addresses which means that every user has the same address as any other user joining the same server at the same time. That way a single user gets not only a different IP address (different from his original one), but also vanishes into the the background communication noises of all others. The more user a server inhabitant, the better, for your 2nd level anonymity rises with the amount of users. The downside: Many users will slow down a server.Web ServerThe Web-Servers handle the user registration, the account management and system controlling functions. After a user has been registered through the web site, his user name and password-hash will be stored in the log-in systems’ databases.And this is, how it functionsThe typical pattern of a CyberGhost session usually follows these steps (a little bit different depending on what kind of connection one prefers, the Windows client or native OpenVPN).If one uses the Windows client software, he must enter his user name and password after startup. After that happened, he will be connected to an exit node, encrypted with 256bit AES. While connecting, the client PC’s default route and the DNS settings will be adapted to the exit node.If one uses the native OpenVPN configuration files, provided for subscribers in their accounts, he must first extract all files from the downloaded ZIP to the config folder of her local OpenVPN installation. After that one starts the OpenVPN GUI and selects one of the shown connections. While the connection is being established, one needs to enter user name and password. The client PC’s default route and the DNS settings will be adapted to the exit node after a successful log-in.Is the connection to the exit node fully established, all traffic will use this server, encrypted with 256bit AES. All connected clients will share the public IP of the used exit node. Note: While connecting with 256 SSL a new key will be negotiated and renewed every 30 minutes, so all your traffic will be encrypted with 256bit AES.",https://support.cyberghostvpn.com/hc/en-us/articles/214479965-What-are-the-technical-principles-and-equipment-of-your-service
Which VPN protocols do you support ?,"VPN tunneling protocols are a technology that helps VPNs securely send your data over the Internet, something that is necessary if you want to use social media, surf the web, or do almost any other online activity.The various protocols differ in terms of speed and security. Most of them are considered obsolete and insecure, so they are rarely used - like PPTP or L2TP, which we don't offer in any of our applications.Jump to...OpenVPNIKEv2WireGuardOpenVPNReliable, stable, and secure protocol with 18+ experience of open source development.Using OpenVPN you connect to CyberGhost via an encrypted TLS (Transport Layer Security) connection. Originally released in 2002 OpenVPN has become very popular and a de-facto standard, among others, because it isn't impressed by wireless access points, firewalls, NAT-based routers, and HTTP proxy servers and will bypass them without problems, can use different ports, and keeps its speed even on long-distance Internet routing. As for the security, OpenVPN is a must-have for it provides an up to 256 bits encryption and works with the OpenSSL library of both the control channels and the data you send through. the easiest task ever.Availability:Windows , Android, Linux, and Fire TV app.IKEv2Fast speed, strong security.IKEv2 (short for Internet Key Exchange version 2) is a fast and secure protocol that tends to work best when the server you’re connecting to is physically nearby. It was developed by Cisco and Microsoft security engineers.Availability:Windows, macOS, and iOS.WireGuard®Newer, more efficient protocol with the potential for increased performance.WireGuard® is a fast and modern protocol taking the world of VPN connections by storm. Its state-of-the-art cryptography makes it the best alternative for OpenVPN.An important element that makes WireGuard different from other VPN protocols such as OpenVPN, IPSEC, L2TP, and PPTP is the layer at which it works. It supports onlylayer 3.WireGuard® is widely regarded as the most secure, user-friendly, and simple VPN protocol solution in the industry. WireGuard® offers a number of advantages that outperform other types of VPN protocols :Offers faster speeds than OpenVPNBoosting performanceLess memory and CPU resources required than IPsecAvailable on all major operating systemsIt supports IPv4 and IPv6 addresses, as well as the ability to encapsulate IPv4 packets into IPv6 and vice versa. WireGuard uses ""crypto-key routing"", i.e. each IP address allowed on the VPN is associated with a public key. WireGuard also guarantees the perfect confidentiality of the transmissions.Availability:Windows, macOS, Android, iOS, Linux, and Android / Fire TV App.",https://support.cyberghostvpn.com/hc/en-us/articles/213983829-Which-VPN-protocols-do-you-support
Discover more about the WireGuard®VPN protocol,"What is WireGuard ?Can I use WireGuard ?How is WireGuard different ?Which cryptography is used in WireGuard ?What is WireGuard® ?WireGuard® is a fast and modern protocol taking the world of VPN connections by storm. Its state-of-the-art cryptography makes it the best alternative for OpenVPN.Can I use WireGuard® ?WireGuard can already be implemented depending on your operating system :Windows - CyberGhost VPN version 8 users can take full advantage of the new WireGuard® protocol.macOS- supports WireGuard®protocolAndroid and iOS - WireGuard® is the default protocol.Linux-supports WireGuard®protocolHow is WireGuard® different ?An important element that makes WireGuard different from other VPN protocols such as OpenVPN, IPSEC, L2TP, and PPTP is the layer at which it works. It supports onlylayer 3.WireGuard® is widely regarded as the most secure, user-friendly, and simple VPN protocol solution in the industry. WireGuard® offers a number of advantages that outperform other types of VPN protocols :Offers faster speeds than OpenVPNBoosting performanceLess memory and CPU resources required than IPsecAvailable on all major operating systemsWireGuard supports IPv4 and IPv6 addresses, as well as the ability to encapsulate IPv4 packets into IPv6 and vice versa. WireGuard uses ""crypto-key routing"", i.e. each IP address allowed on the VPN is associated with a public key. WireGuard also guarantees the perfect confidentiality of the transmissions.Which cryptography is used in WireGuard®?Unlike using AES or SHA for the encryption or hashing,WireGuard® combines a set of newer algorithms. These algorithms are :ChaCha20 for symmetric encryption, authenticated with Poly1305, using RFC7539’s AEAD constructionCurve25519 for ECDHBLAKE2s for hashing and keyed hashing, described in RFC7693SipHash24 for hashtable keysHKDF for key derivation, as described in RFC5869With WireGuard, all packets are sent over UDP.A detailed overview can be found on theWireGuard website.""WireGuard"" is a registered trademark of Jason A. Donenfeld.",https://support.cyberghostvpn.com/hc/en-us/articles/360015810460-Discover-more-about-the-WireGuard-VPN-protocol
VPN vs. Proxy,"What is a proxy server ?You can think of proxy servers as an intermediary between you and the web pages you want to access. You give this anonymous web proxy a request, and it will perform it on your behalf.For example, you can use a proxy to get internet access to a streaming video that’s usually blocked in your country.Once you give this request, your IP address (which acts as your identity) gets replaced with an IP provided by the proxy server. This makes it possible for you to access blocked websites.Because your proxy server uses an IP address allocated to a country where the content you want to access is not geo-blocked or restricted, you will be able to gain access to that content now.CyberGhost offers a solution for both ends of the spectrum. For those looking for a proxy solution they can trust, we offer our dedicated browser extensions.CyberGhost VPN Proxy for ChromeCyberGhost VPN Proxy for FirefoxProxy vs. VPNThere’s one significant difference when it comes to proxies and VPNs. And that’s encryption.A proxy can only hide your real IP and give you another address to unblock sites or social media platforms, but your internet activity is not anonymous. The reason is simple: there is no encryption in place.Things are different with a VPN.With a virtual private network, youhide your IPand swap it for a different one. You’re also protected by an encrypted tunnel connecting you to the web page you want to visit.And since VPNs also deploy security protocols like IP or DNS leak protection, you’ll be able to access even restricted content from streaming services likeNetflix US,Hulu, Sling, andplenty of others.To get all-round protection,CyberGhost VPNis your safest bet.",https://support.cyberghostvpn.com/hc/en-us/articles/214496485-VPN-vs-Proxy
What is DNS-Poisoning ?,"Domain Name System (DNS) poisoning and spoofing are types of attacks that leverage vulnerability in DNS servers to divert traffic from a legitimate server to fake servers. After you visit a scam page, you might be wondering how to fix it - even if only you can do it. You need to know exactly what works to protect yourself.DNS cache poisoning are some of the most malicious cyber-threats. If you don't understand how the Internet connects you to websites, you may be led to believe that a website is itself being hacked. In some cases, it may simply be your device. Even worse, cybersecurity suites can only stop some of the threats related to DNS spoofing.",https://support.cyberghostvpn.com/hc/en-us/articles/213989129-What-is-DNS-Poisoning
Can I replace my Internet provider with CyberGhost VPN?,"No. You need an active Internet connection and, through it, a functional communication, in order for you to use CyberGhost VPN. This is only possible through a real ISP. CyberGhost VPN starts from this connection and then creates an encoded tunnel from your computer to our server. Therefore, your Internet connection becomes more secure and anonymous, completely isolated from your Internet provider.The latter cannot identify the destinations you access, and the Internet pages you open cannot identify the IP address assigned to you by your provider. However, they can view the address we assign, but which cannot be allotted to a connection.",https://support.cyberghostvpn.com/hc/en-us/articles/213983389--Can-I-replace-my-Internet-provider-with-CyberGhost-VPN
Can CyberGhost VPN be used abusively for illegal activities?,"Can we commit crimes with a knife ? Of course, we can. Does this mean that we should give up on cutting bread ? Of course, it doesn't. However, CyberGhost VPN, like all other similar services, is frequently accused of supporting criminal activities. Nothing can be further away from the truth, which is why we take this opportunity to highlight once again the following aspects:CyberGhost VPN is a service with one purpose only: to increase Internet safety, freedom, and individuality - for all users equally. For private persons, for journalists and political activists, but also for those, who frequently support the enforcement of Internet-related restrictions: companies (first of all those in the creative field), state authorities, army, secret services, and political dignitaries. In the end, they all have something to gain from additional security, privacy, and freedom, all possible due to increased anonymity on the Internet.While, through CyberGhost VPN, citizens take charge and make sure that their human rights are respected, this service also offers other people the possibility to carry out their attributions adequately, for, undoubtedly, these anonymity possibilities are also used by the criminal investigation authorities, the secret services, and the army when carrying out check-ups. However, data security, unlimited privacy, and the freedom to access all content elements on the Internet must not be reserved for selected groups.We believe that security, freedom, and the private sphere of all Internet users is based on anonymity and, consequently, restricting these possibilities of anonymously accessing the network would eliminate all of it.The fact that CyberGhost VPN can be theoretically used by criminal organizations as well shouldn't be a reason to discriminate against the service. People, and not the instruments they use, commit the deeds in question - the criminals having, no doubt, greater possibilities to hide their identity than the law-abiding citizens. To hide behind false identities, the criminals steal mobile telephones, forge documents, abusively use wireless Internet connections and, through fraudulently loaded programs, take over the control of an entire computer, which they later use to carry out their activities. In conclusion, people with fraudulent intentions can surf the Internet anonymously at any given time: big and small criminals alike, but also repressive governments. If they have enough know-how, time, and money, they don't even need a service like CyberGhost VPN.On the other hand, the common people, who obey the law, benefit from more restricted means. The same situation is valid for the militants for civil rights, whistle-blowers, activists for political rights in oppressed states and regions, environmentalists, journalists, supporters of human rights, and all the other persons who get involved in such actions for themselves and for their fellow beings and who promote the interests of large groups of people. We have created CyberGhost VPN for them, to offer them the unrestricted and risk-free possibility to exert their right to freedom, to more privacy, and to enhanced Internet security, so they can benefit from better protection against criminals, so they can get involved in the political field without putting themselves at risk and to offer them freedom of movement in the social field.This service also offers the secret services and the army the possibility to anonymously plan and apply for strategies and grants the police investigation authorities the freedom to act undercover and to efficiently investigate law-breakers.",https://support.cyberghostvpn.com/hc/en-us/articles/214013865-Can-CyberGhost-VPN-be-used-abusively-for-illegal-activities
Are there any figures concerning the abusive use of the CyberGhost VPN network ?,"We have statistics regarding the requests we have received so far from investigation authorities, individuals, and companies. If we consider this figure to be a standard for abusive usage, we must say that the illegal usage of the service is very low. For example, in 2008 we only received 32 requests to investigate crime suspects, 177 requests in 2009, and 99 in 2010, all this taking into account that the number of users has increased almost four times, from 160,000 in 2008 to approximately 600,000 in 2010. Currently, CyberGhost VPN has over 1.5 million account holders, and the number of crimes reported is still low. It is obvious that a very low percentage of our users commit crimes on the Internet.The conclusion stands even if, instead of the number of requests received, we take as a standard the seriousness of the crimes committed by abusively using the service. Most of the requests report petty crimes, for example, frauds in the merchandise field, a very low number of requests covering serious crimes, and none of them targeting terrorism acts.As above, newer statistics show the same trend, as can be investigated in ourTransparency Report, published on the CyberGhost homepage.",https://support.cyberghostvpn.com/hc/en-us/articles/213467029-Are-there-any-figures-concerning-the-abusive-use-of-the-CyberGhost-VPN-network
I have a suspicion about one of your users. Can I ask for him to be checked ?,"No. We are simply service providers. CyberGhost VPN does not operate outside the legal system and therefore cannot ignore the legislation in force. If there is no data communication request issued by a court, if we did check up on that person, we would violate the legal provisions.Nevertheless, even if there were a court request, we cannot identify a user of our network. The same mechanisms that offer protection to respectable citizens, journalists, and other persons against data espionage and more serious deeds make it impossible for us to identify or track users suspected of having committed crimes using the CyberGhost VPN network.There is only the theoretical possibility to intercept them, based on a court order, to record future surfing on a specific account (for example, to survey the activities of a terrorist cell). However, such operations require that, in addition to the court request, the relevant investigation authorities communicate us a connection IP or log-in data. In practice, this theoretical hypothesis is almost completely void of significance, and we have never used it.",https://support.cyberghostvpn.com/hc/en-us/articles/214013845-I-have-a-suspicion-about-one-of-your-users-Can-I-ask-for-him-to-be-checked
How to use streaming - optimized servers with CyberGhost VPN on macOS,"As you may know, most streaming sites are against VPN usage and actively block the IP addresses of VPN servers; for this reason most of the regular servers might not work with a desired channel.In the ""For streaming"" category, you will find the servers that are constantly tested by us to work with the popular sites that are listed.Expand the CyberGhost menu by clicking the arrowSelect the ""For streaming"" categorySearch from the right side menu for a streaming server that might be optimized for the site that you wish to watch (for example, Netflix, BBC iPlayer, Hulu etc.) and connect to it.For better results, it is recommended to clear the browser cache and cookies after a VPN streaming server connection is well established. Then you can access the streaming site through the browser application.For any additional information or concerns - it is best to approach the Support Department:via e-mail:support@cyberghost.rovia on-line request:https://support.cyberghostvpn.com/hc/en-us/requests/newvia 24/7 Live! Chat Sessions on our website",https://support.cyberghostvpn.com/hc/en-us/articles/360021003640-How-to-use-streaming-optimized-servers-with-CyberGhost-8-on-macOS
How to Set Up CyberGhost Security Updater on Windows,"There are enough security threats to worry about online and peopleare rarely awarethatusing apps that arenot up to dateposes asignificantsecurityrisk.The longerthe apps remain outdated, the worse the situation can get for you and your device's security.WithSecurity Updaterat your side, you can:Scan your device and get an overview of all your softwareSpot the apps that need updatingSee the security impact of your outdated appsTo access Security Updater, open the CyberGhost dashboard and select its logo from the left side.Awelcomescreen with a short description will be displayed. You'll be given the possibility to eitherStart nowby activating the app and going through the setup, or toLearn moreabout the product on theCyberGhost VPN page.SelectStart Nowto start your first application scan on your device.Once the scan is complete, a list of all your PC applications appears and a primary scan status will be displayed.How to handle Impacted AppsSelect the affected application from the list and choose the following actions:Show details:it will redirect you to the NVD ( National Vulnerability Database ) website for more additional information.Ignore:if you trust the app, you can stop Security Updater from alerting you.Update (Recommended):it will redirect you to the application's website for an update to the latest version.Uninstall:it will remove the software from your PC.For any additional information or concerns - it is best to approach the Support Department:via e-mail:support@cyberghost.rovia on-line request:https://support.cyberghostvpn.com/hc/en-us/requests/newvia 24/7 Live! Chat Sessions on our website",https://support.cyberghostvpn.com/hc/en-us/articles/360018083360-How-to-Set-Up-CyberGhost-Security-Updater-on-Windows
How to Set Up CyberGhost Antivirus on Windows,"Protecting your Windows devices with CyberGhost Antivirus is as easy as it gets.Intego, the world-class antivirus solution, is now our trusted ally in the fight to protect your data. Because you deserve full access to the features, robust protection, and complete peace of mind, Intego Antivirus is also installed as a separate app on your device, supporting your CyberGhost Security Suite for WindowsSystem requirementsfor CyberGhost Antivirus powered by Intego:Operating system:Windows 7 or higherHardware:500 MB free drive space2 GB RAMInternet Connection -Required.High-speed connection is highly recommendedJump to...How to InstallHow to run your first scanHow to handle threatsReal-Time ProtectionHow to Install1. Start theCyberGhost VPNclient by clicking on its desktop icon or from the start menu entry. Log in with your CyberGhost credentials.2. The app will open in compact mode, select the antivirus logo, from the left side.3. Awelcomescreen with a short description will be displayed.Click the'Install'button to launch the installation process.4. Wait until the process is complete. If prompted, please select 'YES' to allow the app to make changes to your device.How to run your first scanOnce installation is complete, CyberGhost Antivirus automatically updates virus definitions. If you suspect you have a potential threat, you can manually perform the following actions :Quick Scan:to analyze the areas of your computer that are most vulnerable to threats.Full Scan:to analyze your entire system, along with applications, files, and running processes that are less vulnerable than those checked in a quick scan.Custom scan:you can drag & drop to analyze particular files, folders or disks if you think they are at risk.How to handle Security risksWhen CyberGhost Antivirus identifies a security risk, it automatically blocks it and places it in quarantine to protect you.CyberGhost displays aThreats Foundalert with suggestions on how to address the security risk :In the CyberGhost main window, click onActivity, and then clickto open quarantine files.Select a threat from the list and choose what action to take:Keep in quarantine:will continue to isolate the suspected virus-infected file to prevent it from infecting parts of your computer.Delete file:permanently deletes the threat from your PC.Restore file:if you think that the file does not pose any security risk, you can restore the file from quarantine to its original location.Real-Time ProtectionThe Real-Time Protection constantly watches over your PC, protecting you from viruses and malware at all times. You can see the status ofReal-Time Protectionin the main screen window. It ensures that your PC is protected by scanning every file that is created, copied, modified or saved. It does not, however, scan other files. This is why we suggest you run a Complete Virus Scan of all of your files when you first install CyberGhost Antivirus.For any additional information or concerns - it is best to approach the Support Department:via e-mail:support@cyberghost.rovia on-line request:https://support.cyberghostvpn.com/hc/en-us/requests/newvia 24/7 Live! Chat Sessions on our website",https://support.cyberghostvpn.com/hc/en-us/articles/360017987300-How-to-Set-Up-CyberGhost-Antivirus-on-Windows
Use Privacy Settings with CyberGhost VPN on Windows,"This article will show you how you can use Privacy Settings on Windows.Privacy settings include additional connection features on CyberGhost VPN for Windows. They help customize your CyberGhost VPN experience.Here's how you can activate a feature.Expand the main page.Select the VPN dashboard.SelectPrivacy settings.Click on the respective button of the feature you want to activate.Here are the features you can select:Block content:Block content is a feature developed by CyberGhost to help protect the privacy and security of our customers. The content blocking function returns the IP addresses of unwanted domain names as an address that cannot be routed over the public Internet.Prevent DNS leaks: Activated, this option forces your system to use the CyberGhost Domain Name Server (DNS) instead of those of your Internet provider. (A DNS takes care of the correct access to an address. For example, if you enter 'www.cyberghostvpn.com' in your browser, he sends your wish to a DNS, which translates the address into numbers. Only then the connection can be established. This also means that a DNS has complete control over the accessibility of each web address and therefore is the perfect tool for censors. When using the CyberGhost DNS servers you avoid this kind of manipulation).Automatic Kill-Switch:The kill-switch is a feature that will automatically disconnect you from the internet if the VPN connection drops unexpectedly. This prevents your private data from being leaked.Need assistance? Contact our Customer Support team:via email atsupport@cyberghost.rovia online request athttps://support.cyberghostvpn.com/hc/en-us/requests/newvia 24/7 Live Chat by clicking the Support button below",https://support.cyberghostvpn.com/hc/en-us/articles/360017096200-Use-Privacy-Settings-with-CyberGhost-VPN-on-Windows
How to sign up (new users) or log-in (existing users) to CyberGhost VPN on Windows,"Jump to...I am new to CyberGhostI am an existing subscriberGet your 1-day free trial(no credit card required)I am new to CyberGhost VPNIf you don't have a subscription yet, you can get it fromhere.Upon receiving your account details by email, simply click on""Return to Login""and enter your CyberGhost username and password to log in.The username you are trying to log in with is incorrect.Make sure you use the same username that you received by email after you completed the sign-up process. Should you need any further assistance concerning, get in touch with us by simply using theLive Chatfeature on ourSupport Page.The password that you're using is incorrect.Check again your account details received by email or try resetting your password and login again after that. You can reset it here:Forgot your login details?I am an existing subscriberIf you already have an active subscription, click on""Return to login""and log in with your CyberGhost username and password.Get your 1-day free trial(no credit card required)If you do not have an active subscription and would like to use our1-day trial offer- enter a valid email address and choose a strong password, then clickSign Up.NOTE :An example of a strong password is ""Cartoon4Coffee!"". It is long, contains uppercase letters, lowercase letters, numbers, and special characters. ... Strong passwords should not contain any personal information.Before the Trial period starts, you mustconfirmyour email address. Please check your inbox and follow the instructions to verify your email.Possible log-in problems :Lost your password ?Please click on""Ooops, I forgot my password""to open a recovery webpage in your default browser :Enter the fallback email address entered in your CyberGhost account management.If you haven't bought your subscription via Cleverbridge, please get in touch with us by simply using theLive Chatfeature on ourSupport Page.Activated too many devices ?A connection failure may also be due to having already activated the maximum number of devices allowed. Please go to yourAccount Managementand check the current status of the registered devices. Regular subscriptions to CyberGhost are valid for a maximum of seven devices, regardless of the operating system involved, but if all slots are occupied, at least one old device must be removed before you can log in with another device.You don't have CyberGhost credentials ?If you purchased a CyberGhost subscription for mobile devices through the Google Play Store or the Apple App Store and you did not get any credentials, it is because subscriptions for mobile devices are limited to the platform (iOS or Android) and the account used at the time of purchase (Apple ID or Google account) and cannot be used on Windows, Linux or Mac. For these desktops, you must purchase a regular CyberGhost subscription.For any additional information or concerns - it is best to approach the Support Department:via e-mail:support@cyberghost.rovia on-line request:https://support.cyberghostvpn.com/hc/en-us/requests/newvia 24/7 Live! Chat Sessions on our website",https://support.cyberghostvpn.com/hc/en-us/articles/360017094960-How-to-sign-up-new-users-or-log-in-existing-users-to-CyberGhost-VPN-on-Windows
How to mark a Favorite Location in CyberGhost VPN on Windows,"Using""Favorites""is roughly equivalent to using shortcuts, which they literally are since any favorite will establish its inherent link with a simple mouse click.To use favorites you first need to define them, as presented below.How to add a server as favorite1. Open the CyberGhost VPN app and extend the menu2. You can add as favorites servers from all categories; however, for this example we will add a specific city from one of the available countries from theAll Serverscategory3. Expand the city locations from that specific country by hitting the arrow pointing to the right4. Mark the star shaped symbol to add it as favorites and the Favorites category will be populated with that specific city location.You can also mark your preferred location after connecting to CyberGhost VPN by clicking on the star-shaped icon as shown below.F.A.Q.Q: How do I remove a Favorite?A: To remove a favorite simply click again on the yellow star, either in any country or city list or directly in your favorite list.For any additional information or concerns - it is best to approach the Support Department:via e-mail:support@cyberghost.rovia on-line request:https://support.cyberghostvpn.com/hc/en-us/requests/newvia 24/7 Live! Chat Sessions on our website",https://support.cyberghostvpn.com/hc/en-us/articles/360017094440-How-to-mark-a-Favorite-Location-in-CyberGhost-VPN-on-Windows
How to select a country or specific city with CyberGhost VPN on Windows,"When you use the""Best server location""option, a connection will be established fully automatically to the most suitable server that our Server Parser can find for your connection (depending on response time tests, number of users, server load, etc.). Based on a server in one of the available countries, but you can also choose your preferred location manually by changing the respective country.Country Choice1. Log in to the CyberGhost VPN App and click on the expand button (to open the list of all servers and features available)2. Make sure you activated the menu entry""All servers""3. The next step is to choose the country to which you wish to connect. For that simply click on its respective entry4. If you want to select a specific city from that country, hit the arrow to further expand the list and then select the city that you wish to connect toNote: The multiple city locations are available only in a few countries, such as Australia, Canada, France, Germany, Italy, Romania, Spain, Switzerland, United Kingdom and the United States.Remember :The default mode for connections is""Best server location""whereas CyberGhost automatically connects to a country/server combination providing you the best performance.After changing the connection typeto a specific country, CyberGhost will switch off the automatic country choice of its internal load balancing system (since you already decided for a country), but still decides automatically for the best performing server in that respective country.DisconnectingTo disconnect from the current connection click on the power button.After disconnecting the VPN, the country or server you used last will replace the default connection type and stay valid for all future connections - until you choose a different country or server or switch back to""Best server location"".For any additional information or concerns - it is best to approach the Support Department:via e-mail:support@cyberghost.rovia on-line request:https://support.cyberghostvpn.com/hc/en-us/requests/newvia 24/7 Live! Chat Sessions on our website",https://support.cyberghostvpn.com/hc/en-us/articles/360016967419-How-to-select-a-country-or-specific-city-with-CyberGhost-VPN-on-Windows
How to manage Account and App Settings in CyberGhost VPN on Windows,"You can open your Account and Settings page via the gear symbol on the lower left part of the main CyberGhost window :Jump to...My AccountGeneral SettingsCyberGhost VPN SettingsMy AccountHere you can quickly access your account details, such as user name, email address, plan, and runtime. You can also logout from the current account and login to a different one, or open your online account management in a browser window.Username :Shows the current active account name, for trial version users it's the mail address used when registering. You can change your user name at any time in your online account management.Email :Your email address as entered when registering, resp. your email address as entered in your online account management. This address might come in handy if you ever need to restore your account, e. g. after a loss of credentials.Number of devices :Amount of active devices. Depending on your subscription you can use your plan with different numbers of devices at the same time. To remove or add a device, please visit your online account management.Take the lead :Loads the online account management page into your default browser. Account management might be necessary to e. g. activate or deactivate a device slot.Log-out this device :Here you log out from the current active account. The app switches to the start page, where you can log-in again.General SettingsIn the 'General' settings page you find the following options :App launch :Enabling it will cause Windows to automatically start CyberGhost once the operating system has booted.Language :Specify here the app language (application needs to be restarted in order to apply the changes).Theme :Here you can choose between System Default, Light, or a Dark theme.App Shutdown :You can choose to automatically quit the app when you disconnect the VPNBackground service :You can tell the app to terminate the CyberGhost VPN background service when the application is closed (when quitting the app)Version :Displays your current version of the application. If applicable, notifies you if a new version is available for download. You can also check manually for new updates.Submit anonymous usage data :Will sendNon-personaldata that helps us improve our app.Reset your Settings :Resets all settings to default values.CyberGhost VPN SettingsVPN protocol :Select the VPN protocol to be used. By default, it is set to'Automatic selection'.For more information on our supported protocols, clickhere.MTU (Maximum Transmission Unit) size:The size of the largest protocol data unit that can be communicated in a single network layer transaction. By adjusting the size, it can increase the connection performance.Use TCP instead of UDP (available for OpenVPN only) :By default, CyberGhost uses for its connections UDP, which allows higher speed due to its less restrictive data checking procedures. The downside: Downloads can be suddenly interrupted or corrupted and packages can get lost, e.g. when playing online games. TCP stands for more stable connections, but lower speed due to more precise data checking. Please activate this option, if your Internet connection suffers from unstable traffic or if a provider blocks or slows down UDP connections. Note: This option is only effective if using the OpenVPN protocol, which allows both different connection variations.Use random port to connect (available for OpenVPN only) :This option allows CyberGhost to establish its connections through a randomly chosen port (which will be changed with each new connection), instead of a fixed port that makes it easy for providers to slow down or block CyberGhost connections. The used port range can be changed anytime if needed. All ports are secured internally by Firewall rules. Note: This option is only effective if using the OpenVPN protocol.Disable IPv6 connections when NOT connected to the VPN :To avoid data leaks provoked by IPv6 traffic running outside the safe VPN tunnel, when using a WebRTC leak vulnerable browser, activate this option. It blocks all IPv6 traffic on the network card and allows only IPv4 traffic.Repair virtual network card:If you experience driver problems (e.g. after installing a different VPN) use this function to repair the original drivers installed by CyberGhost.For any additional information or concerns - it is best to approach the Support Department:via e-mail:support@cyberghost.rovia on-line request:https://support.cyberghostvpn.com/hc/en-us/requests/newvia 24/7 Live! Chat Sessions on our website",https://support.cyberghostvpn.com/hc/en-us/articles/360016970559-How-to-manage-Account-and-App-Settings-in-CyberGhost-VPN-on-Windows
How to set up ExpressVPN for your Chromecast,1. Set up your VPN-enabled virtual router or router2. Set up your ChromecastCast or mirror from your device to a TV with Chromecast https://www.youtube.com/embed/F7EH31lR_-c?rel=0,https://www.expressvpn.com/support/vpn-setup/stream-to-chromecast-with-virtual-router-or-router/)
How to define Smart Rules for CyberGhost VPN on Windows,"Smart Rules is a specific CyberGhost feature to help you automatically customize CyberGhost to work with your preferences or to trigger different apps or have CyberGhost connect to a preferred server based on your needs.Jump to...Cyber launch rulesWi-Fi protectionExceptionsApp rulesTo define specific rules, when and where they apply, open the 'Extended view' of CyberGhost, and choose'Smart rules' :CyberGhost launch rulesConnect on launchOnce'Connect on launch'is enabled, CyberGhost will also initialize a VPN connection for you.*Depending on your needs or preferences, it is possible to choosea country,a specific server within a country,orthe desired streaming program. The defaulted choice is ""Best server location"" which will leave CyberGhost to choose a server for you.NOTE :If you wish to have CyberGhost connect you to the same server every time, your desired serverneeds to be addedas a 'Favorite' and then choosing that respective server when configuring the 'Connect on launch' feature.Launch an appYou can choose a'.exe'for the Application / Program that you wish to start after the VPN connection establishes and in case you will choose a "".exe"" for a torrenting program, make sure to specify a server from the 'For Torrenting' area when configuring the feature 'Connect on launch'.The displayed screenshot below exemplifies the Brave browser ( as it is the defaulted browser and may vary from one set-up to another ).Wi-Fi ProtectionCyberGhost will offer you the choice to adjust how the app will behave when given specific or various Wi-Fi networks.1. CyberGhost will detect when your laptop is in the range of a New Wi-Fi which is encrypted or not encrypted.Specific behavior can be configured :Never launch a VPN connection - CyberGhost will not take any action (will not trigger a VPN connection)Ask me what to do - Will display a pop-up message, where your choice or action is neededAlways launch a VPN connection - CyberGhost will trigger a VPN connection for youDisconnect the VPN - This will cause a termination of an existing VPN connectionExceptionsExceptions will come in handy when a specific website or an address cannot pass through a VPN and with the help of it you can exclude the respective page or address from being covered by the VPN.*One usual case would be with incoming and outgoing e-mail protocols(such as IMAPP or POP3)App rulesIt will come in handy when CyberGhost will trigger a VPN connection for a desired (specific) location based on the programs that you will open. Use this feature when you are trying to either torrent or stream.For any additional information or concerns - it is best to approach the Support Department:via e-mail:support@cyberghost.rovia on-line request:https://support.cyberghostvpn.com/hc/en-us/requests/newvia 24/7 Live! Chat Sessions on our website",https://support.cyberghostvpn.com/hc/en-us/articles/360016968679-How-to-define-Smart-Rules-for-CyberGhost-VPN-on-Windows
CyberGhost VPN’s Refund Policy,"CyberGhost VPN’s refund policy is as follows:For 1 month subscriptions we offer a14-day money-back guarantee.For subscriptions of 6 months or longer we offer a45-day money-back guarantee.This means that within 14 or 45 days of your purchase you can request a refund. To request a refund, please contact our Support Team. You have 3 options:Via e-mail tosupport@cyberghost.roVia ticket athttps://support.cyberghostvpn.com/hc/en-us/requests/newVia our 24/7 Live Chat by clicking on the button in the lower right cornerYou should have your purchase Order Number or Reference Number at hand, so that our Support Team can find your account quicker. Check your invoice to find all the details.Note: If you purchased a CyberGhost VPN subscription as an in-app purchase via the App Store or iTunes, CyberGhost VPN's money-back guarantee does not apply. Instead,you will need to request a refund through the App Store, which issued solely at the discretion ofApple Support.Similarly, if you purchased a CyberGhost VPN subscription through a physical gift card or a third-party seller, you will need to contact the seller for their respective refund policy.Keep in mind thatdisabling automatic renewalwill not initiate a refund request.",https://support.cyberghostvpn.com/hc/en-us/articles/213834369-Refund-Policy-45-day-money-back-guarantee
How to add and use favorites with CyberGhost VPN on macOS,"CyberGhost comes with a custom category entitled ""Favorites"" , where you can populate it with specific countries or cities that you would like to connect to more often or even certain streaming servers.To add a server to ""Favorites"", highlight the star next to its name and this will be instantly added to the Favorites category.If you ever need to remove a server from Favorites, you can just hit the star icon again so that it will not be highlighted.For any additional information or concerns - it is best to approach the Support Department:via e-mail:support@cyberghost.rovia on-line request:https://support.cyberghostvpn.com/hc/en-us/requests/newvia 24/7 Live! Chat Sessions on our website",https://support.cyberghostvpn.com/hc/en-us/articles/360021024359-How-to-add-and-use-favorites-with-CyberGhost-VPN-on-macOS
How to use Torrent - optimized servers with CyberGhost VPN on macOS,"In this category you will find servers for download purposes, e. g. for Torrents, that meet special conditions for speed, stability, performance, and compatibility (since not all countries allow P2P technologies).1.Expand the CyberGhost menu2.Select the ""For downloading"" category3.Select any of the servers listed on the right sideAlbeit our servers have absolutely no limit in speed or performance, this can be influenced by other factors as well, thus, it is recommended to choose download server locations that are closer, for a better performance.For any additional information or concerns - it is best to approach the Support Department:via e-mail:support@cyberghost.rovia on-line request:https://support.cyberghostvpn.com/hc/en-us/requests/newvia 24/7 Live! Chat Sessions on our website",https://support.cyberghostvpn.com/hc/en-us/articles/360021024319-How-to-use-Torrent-optimized-servers-with-CyberGhost-VPN-on-macOS
How to use the advanced features from CyberGhost VPN on macOS,"There are a couple of extra features coming with CyberGhost VPN for macOS, all meant to enhance your security, respective your browsing, Internet and CyberGhost experience.All features are server-based, meaning running directly on a CyberGhost server, thus saving bandwidth and Mac processing time.Privacy SettingsBlock content:This feature improves your Internet experience by filtering annoying ads which also results for web-pages to load faster. This also improves the Internet security by blocking potential dangerous websites and prevents monitoring your surfing behaviors.Open CyberGhostExtend the menuSelect the Privacy settings sectionTurn ON the Block content buttonNOTE:This feature will only be paired when using Wireguard protocol, to view the steps on how to select this protocol, clickhere.Smart rulesWIFI rulesIf you use your device on multiple locations or have multiple WIFI networks in your home, you can set a rule for each one so that the CyberGhost app can remember this option when you come in range to that WIFI signal.The 4 rules that you can set for a WIFI network are:Ask me what to do- This will prompt you with a pop-up when a WIFI signal is detected by the app and will ask you if you wish to secure it with a VPN connection.Ignore- This will simply perform no action on a detected WIFI signal, leaving you only the option to select manually a server connection, if you ever wish to secure it.Always connect- Will secure the WIFI to the best available server without receiving any pop-up notification.Disconnect VPN- This option would be set for a WIFI network that you would never wish to have the VPN connection ever established, it will basically prevent the connection.Startup rules:Similar to an auto-pilot, you can set CyberGhost to connect automatically either every time you start the system or when opening a specific application, for example your browser app or a download client.For any additional information or concerns - it is best to approach the Support Department:via e-mail:support@cyberghost.rovia on-line request:https://support.cyberghostvpn.com/hc/en-us/requests/newvia 24/7 Live! Chat Sessions on our website",https://support.cyberghostvpn.com/hc/en-us/articles/360021003560-How-to-use-the-advanced-features-from-CyberGhost-VPN-on-macOS
How to refer a friend ?,"Invite up to 3 friends to CyberGhost. Each accepted invite gives you and your friend 30 free days of VPN protection.How does it work?1. Log into your online accounthereand select the profile log from the right side.2. Select theRefer a friendoption.3. You can then create the invitation which will generate a link. Each account that will be created via the invite link, will be rewarded with 30 days of run-time to your current account. You can generate on up to 3 invitations and you can also revoke some of them, in case you would want that.For any additional information or concerns - it is best to approach the Support Department:via e-mail:support@cyberghost.rovia on-line request:https://support.cyberghostvpn.com/hc/en-us/requests/newvia 24/7 Live! Chat Sessions on our website",https://support.cyberghostvpn.com/hc/en-us/articles/360017307980-How-to-refer-a-friend
What is Keychain Access on the Mac ?,"The Keychain Access is a macOS application for storing your passwords and account information and reduces the number of passwords you need to memorize and manage.While you access a password-protected website, email account, network server, or another password-protected item, for example, you may have the ability to remember or save the password. If you choose to save the password, it is saved in your keychain, so you do not have to remember or type your password every time.CyberGhost VPN stores your credentials in the Keychain for safety and convenience. Every time you connect to a VPN server, CyberGhost VPN will access the Keychain for the password and you may get a prompt for your Keychain password*.*The Keychain password is usually your macOS User password (the one you use when starting the macOS device). The Keychain password may be different IF you have deliberately set one specifically for the Keychain app.In order to skip this prompt in the future, click the'Always Allow'button after you enter the password and you will never have to worry about it again.For any additional information or concerns - it is best to approach the Support Department:via e-mail:support@cyberghost.rovia on-line request:https://support.cyberghostvpn.com/hc/en-us/requests/newvia 24/7 Live! Chat Sessions on our website",https://support.cyberghostvpn.com/hc/en-us/articles/360016473899-What-is-Keychain-Access-on-the-Mac-
Which VPN protocols do you support ?,"VPN tunneling protocols are a technology that helps VPNs securely send your data over the Internet, something that is necessary if you want to use social media, surf the web, or do almost any other online activity.The various protocols differ in terms of speed and security. Most of them are considered obsolete and insecure, so they are rarely used - like PPTP or L2TP, which we don't offer in any of our applications.Jump to...OpenVPNIKEv2WireGuardOpenVPNReliable, stable, and secure protocol with 18+ experience of open source development.Using OpenVPN you connect to CyberGhost via an encrypted TLS (Transport Layer Security) connection. Originally released in 2002 OpenVPN has become very popular and a de-facto standard, among others, because it isn't impressed by wireless access points, firewalls, NAT-based routers, and HTTP proxy servers and will bypass them without problems, can use different ports, and keeps its speed even on long-distance Internet routing. As for the security, OpenVPN is a must-have for it provides an up to 256 bits encryption and works with the OpenSSL library of both the control channels and the data you send through. the easiest task ever.Availability:Windows , Android, Linux, and Fire TV app.IKEv2Fast speed, strong security.IKEv2 (short for Internet Key Exchange version 2) is a fast and secure protocol that tends to work best when the server you’re connecting to is physically nearby. It was developed by Cisco and Microsoft security engineers.Availability:Windows, macOS, and iOS.WireGuard®Newer, more efficient protocol with the potential for increased performance.WireGuard® is a fast and modern protocol taking the world of VPN connections by storm. Its state-of-the-art cryptography makes it the best alternative for OpenVPN.An important element that makes WireGuard different from other VPN protocols such as OpenVPN, IPSEC, L2TP, and PPTP is the layer at which it works. It supports onlylayer 3.WireGuard® is widely regarded as the most secure, user-friendly, and simple VPN protocol solution in the industry. WireGuard® offers a number of advantages that outperform other types of VPN protocols :Offers faster speeds than OpenVPNBoosting performanceLess memory and CPU resources required than IPsecAvailable on all major operating systemsIt supports IPv4 and IPv6 addresses, as well as the ability to encapsulate IPv4 packets into IPv6 and vice versa. WireGuard uses ""crypto-key routing"", i.e. each IP address allowed on the VPN is associated with a public key. WireGuard also guarantees the perfect confidentiality of the transmissions.Availability:Windows, macOS, Android, iOS, Linux, and Android / Fire TV App.",https://support.cyberghostvpn.com/hc/en-us/articles/213983829-Which-VPN-protocols-do-you-support-
How to upgrade from a Trial subscription to a Premium subscription on Android,"Once activated, the trial will allow you to benefit from either 3 or 7 days of premium access based on the chosen plan. Once the trial is over, a CyberGhost subscription is required to continue to benefit from the premium access.UpgradeTo buy a subscription tap on'Upgrade now'and decide on a payment plan. All plans are subscriptions, although the run-time will differ. If you decide on a monthly subscription, you will be billed once a month, if you decide for a yearly subscription, you will be billed once, for the entire year.External Upgrade'All platforms'subscriptions can also be purchased through theCyberGhost Website. Your order takes place online in a browser window, where you first decide on the payment interval (e. g. monthly or yearly).Now decide on a payment method :Click on 'Continue to payment' and enter your payment details. Payment will be processed by a third-party service to avoid privacy breaches based on common databases. Click on 'Continue'.All personal data such as credit card number, PayPal account, names, etc. will stay private with the payment provider and never be submitted to third parties, not even to CyberGhost itself.Please check your details before proceeding andacknowledge that you buy a subscription with recurring payment cycles.Special conditions (e. g. half the price) areonly valid for the first payment, while the next payment will reflect the regular subscription price.After the payment process ended successfully you will receive a confirmation and your credentials to use your subscription with CyberGhost:User name:A temporary user name to log in to the client and your online account management.Password:A temporary password to login to the client and your online account management.Reference number:Your purchase number. Please always submit this number, if you have questions regarding your purchase such as asking for a refund or an account recovery.You can change your temporary credentials at any time inyour account management. It is strongly recommended to do so.How to use your external subscription on AndroidOpen your Android CyberGhost client and log-in with the credentials generated for you. In case you are logged in to a different account at the moment, please log out first via the side menu and then log-in with the new credentials, because the system neither recognizes your external purchase automatically nor is it able to transfer the subscription from that different account to your Google Play Store subscription).For any additional information or concerns - it is best to approach the Support Department:via e-mail:support@cyberghost.rovia on-line request:https://support.cyberghostvpn.com/hc/en-us/requests/newvia 24/7 Live! Chat Sessions on our website",https://support.cyberghostvpn.com/hc/en-us/articles/360006470514-How-to-upgrade-from-a-Trial-subscription-to-a-Premium-subscription-on-Android
Use Split Tunneling with CyberGhost VPN for Android,"The split-tunneling feature lets you to choose which apps will access the internetthrough the VPN tunneland which apps you'd like to allow to access the internet via your main connection.Note:By default, CyberGhost VPN routes all traffic from all apps through the VPN tunnel (which conceals your IP and encrypts your traffic).How to Customize Which Apps Go through the VPNEnsure that no active connection is on when trying to set a new Split-tunneling rule.Go toSettings.Tap on theVPNtab.Scroll down and select theApp Split Tunnel.Check the box next to the apps you want to bypass the VPN tunnel.You can simply uncheck the boxes to revert the changes.Need assistance? Contact our Customer Support team:via email atsupport@cyberghost.rovia online request athttps://support.cyberghostvpn.com/hc/en-us/requests/newvia 24/7 Live Chat by clicking the Support button below",https://support.cyberghostvpn.com/hc/en-us/articles/360022345054-Use-Split-Tunneling-with-CyberGhost-VPN-for-Android
How to cancel the Cyberghost Google Play Subscription or Trial,"The steps below show how to cancel the CyberGhost Google Play subscription or trial that was made through the Play-Store App from an Android device:1. Open the Play-Store Application.2. Tap on the hamburger button.3. Next, tap on “Subscriptions”4. Tap the CyberGhost icon5. Select 'CANCEL SUBSCRIPTION'Please note that the cancellation will stop future renewal charges but will not lead to a refund of previous orders.For all refund requests, please contact our support department by email atsupport@cyberghost.ro.",https://support.cyberghostvpn.com/hc/en-us/articles/360025309034-How-to-cancel-the-Cyberghost-Google-Play-Subscription-or-Trial
How to mark Favorite Location in CyberGhost VPN for Android,"In this article we will show the steps on how to mark a server as favorite so that future connections are made easier.The example below will guide you to select a specific city, however, you can add as favorite a specific country or a server optimized forstreaming. Regardless of the category chosen, the connection will be to a server that provides the best performance in accordance with your current location, with optimal settings in terms of speed and user load.How to Mark Favorite Servers1.Expand the CyberGhost app menu by tapping onBest Location2.Select theCountriescategory3.Here, you can either add a specific city by further expanding the menu or just add a country as favorites by tapping on the star symbol, as shown in the example below:Note:Some servers are represented by a single city, thus, the expansion arrow (as shown at step 3) is not displayed for such countries.For any additional information or concerns - it is best to approach the Support Department:via e-mail:support@cyberghost.rovia on-line request:https://support.cyberghostvpn.com/hc/en-us/requests/newvia 24/7 Live! Chat Sessions on our website",https://support.cyberghostvpn.com/hc/en-us/articles/360007773354-How-to-mark-Favorite-Location-in-CyberGhost-VPN-for-Android
How Can I Delete My CyberGhost VPN Account?,"This article will show you the steps to delete your CyberGhost VPN account.Note: If you still have an active subscription, you shouldcancelit first. If not, you will continue to be charged.Log into theaccount dashboard.In the upper right side, click on your profile.SelectAccount settings.ClickDelete my account.Confirm on the next prompt. Now, you have successfully deleted your CyberGhost VPN account.All your personal data will automatically be deleted with your account, and you will lose access to CyberGhost VPN services.Warning: You cannot undo this process. Deleting your account is final, and you cannot restore it.For any additional information or concerns - it is best to approach the Support Department:via e-mail:support@cyberghost.rovia on-line request:https://support.cyberghostvpn.com/hc/en-us/requests/newvia 24/7 Live! Chat Sessions on our websitesubject-access-request-form.docx30 KBDownload",https://support.cyberghostvpn.com/hc/en-us/articles/360017378259-How-Can-I-Delete-My-CyberGhost-VPN-Account
Sign Up (New Users) or Log Into (Existing Users) CyberGhost VPN,"After installing CyberGhost VPN, you can login or subscribe within the app.Jump to...I Am New to CyberGhost VPNI Already Own a CyberGhost VPN Subscription1. I Am New to CyberGhost VPNWhen you open CyberGhost VPN for the first time, you will receive a notification. It asks for your consent in sharing a limited amount of anonymous data.This data will not be tracked back to you.It just helps us to scale our infrastructure and troubleshoot any potential issues, so you can safely agree without compromising your digital identity.1. Read the notification and selectAgree & continue, if you so choose.2. On the next page, choose your preferred subscription plan. You have the option to choose between a yearly plan or a monthly plan.3. When subscribing via Google in-app purchases, you’ll be prompted tocreate a new accountat the next screen.4. Enter your email address and select a password. Choose a secure one with minimum 8 characters, lowercase and uppercase letters, a number, and a special character.5. You will receive an email to confirm your account. Click on the link in the email to activate your account.2. I Already Own a CyberGhost VPN Subscription1. Tap onExisting useron the bottom of the screen.2. Enter your username and password3. Tap onLogin.4.Get started with CyberGhost VPN!Encountered issues logging in?Read here:Lost your password?Tap on Recover Account, and follow the on-screen instructions.Activated too many devices?You might encounter an error letting you know you activated the maximum amount of allowed devices. Please visit My Account, and remove any device(s) you no longer use. Then you can login on your Android device.For any additional information or concerns - it is best to approach the Support Department:via e-mail:support@cyberghost.rovia on-line request:https://support.cyberghostvpn.com/hc/en-us/requests/newvia 24/7 Live! Chat Sessions on our website",https://support.cyberghostvpn.com/hc/en-us/articles/360007962953-How-to-sign-up-new-users-or-log-in-existing-users-to-CyberGhost-VPN-for-Android
How to install CyberGhost Private Browser for iOS,"Discover a new, improved and infinitely more secure alternative of browsing incognito. CyberGhost Private Browser app for iOS, is a free, fast and 100% private app that stops all types of online tracking and monitoring.Browse like no one's watching by simply accessing AppStore, search for CyberGhost Private Browser and get it installed.One-Tap History RemovalDeleting all your history, cached files, or cookies has never been this easy. Just one tap of a button intuitively placed inside the main screen fully removes all traces of your browsing activity.Further still, you can fully automatize the history removal option by setting your very own privacy rules from within the app settings.100% Privacy- FocusedTired of that nagging feeling of constantly being watched over your shoulder ? With built-in add-blocker and tracking blocker, CyberGhost Private Browser puts your privacy first letting you enjoy total peace of mind knowing no one will ever be able to track your browsing history.Biometric Bookmark SecuritySave bookmarks to easily navigate online without having to worry about anyone else seeing them. Our biometric security recognizes your unique physical features (like your face or your fingerprints) and unlocks those bookmarks in a completely secure environment.Improved Speed and Data ConsumptionSince the web pages you'll visit won't load trackers and ads anymore, not only will you browse faster, but you'll use less internet.For any additional information or concerns - it is best to approach the Support Department:via e-mail:support@cyberghost.rovia on-line request:https://support.cyberghostvpn.com/hc/en-us/requests/newvia 24/7 Live! Chat Sessions on our website",https://support.cyberghostvpn.com/hc/en-us/articles/360015895860-How-to-install-CyberGhost-Private-Browser-for-iOS
How to cancel a subscription from your Apple device,"You can find your Apple subscription management inside your account settings for your Apple ID, which can be accessed for example via the App Store. There you can can cancel any subscription and trial subscriptions.In detail:Open the Settings icon on your iPhone or iPad and tap on your iTunes account or name in the upper part of the screenChoose iTunes & App StoreTap Apple ID:Tap View Apple ID and Sign in with your iTunes passwordScroll down and tap on SubscriptionsTap Cancel Subscription (you will receive a pop-up message to confirm cancellation).Once all is done, you are all set ! This means that no other charge will happen and your subscription has been stopped.If you want to have a payment examined, please visithttps://reportaproblem.apple.comand explain, why you want a refund. It's usually a fast procedure.",https://support.cyberghostvpn.com/hc/en-us/articles/360011444113-How-to-cancel-a-subscription-from-your-Apple-device
How to automatically protect Wi-Fi networks with CyberGhost VPN on iOS,"There are two possibilities to automatically protect your device when entering a Wi-Fi network, either by defining the general reaction of CyberGhost to new and / or unknown networks or by assigning a reaction on the fly when entering a specific hotspot.How to configure the general behavior of your CyberGhost application on new networks1. A single finger tap on the gear symbol that opens the settings menu.2. Tap on the'Wi-Fi'area. Make sure that the 'Wi-Fi Auto-Protect'option is enabled.3. Now specify how you want CyberGhost to react in general, when joining a Wi-Fi network. This can be doneseparately for Secure Wi-Fis (password-protected Wi-Fi networks) and Open Wi-Fis (free access networks) by simply tapping on the respective entry and then chooseone of the following actions:Ask :Every time your device detects a Wi-Fi network, CyberGhost asks you if you want to be protected.Never protect :If you already have a VPN connection running and you enter a (different) Wi-Fi network, CyberGhost will disable the VPN connection.Always connect :Every time your device detects a Wi-Fi network, CyberGhost automatically starts a VPN connection.Terminate connection :By choosing this option, CyberGhost will ignore any Wi-Fi network.Manage Wi-Fi Networks :Since CyberGhost remembers networks and the reaction wanted on any particular network you can manage here all known networks, such as assigning a different reaction to a specific one, by simply tapping on the respective Wi-Fi Network.For any additional information or concerns - it is best to approach the Support Department:via e-mail:support@cyberghost.rovia on-line request:https://support.cyberghostvpn.com/hc/en-us/requests/newvia 24/7 Live! Chat Sessions on our website",https://support.cyberghostvpn.com/hc/en-us/articles/360005289374-How-to-automatically-protect-Wi-Fi-networks-with-CyberGhost-VPN-on-iOS
How to automatically protect Wi-Fis with CyberGhost VPN for Android TV,"To specify the way how CyberGhost's automatic Wi-Fi protection should set in you can define the general reaction of CyberGhost to Wi-Fi networks as well as a specific reaction to a specific WiFi.Set up the general reaction to new / unknown Wi-Fi networks1. Open the app settings with a single finger tap on the gear symbol :2. In the app settings page first make sure that under the 'Smart Rules' section Wi-Fi Protection is enabled.3. Now choose one of the following actions (all options are available for password-protected networks and open networks alike):Ask :Every time your device detects a Wi-Fi network, CyberGhost asks you if you want to be protected.Protect :Every time your device detects a Wi-Fi network, CyberGhost automatically starts a VPN connection.Disable protection :If you already have a VPN connection running and you enter a (different) Wi-Fi network, CyberGhost will disable the VPN connection.Ignore :By choosing this option, CyberGhost will ignore any Wi-Fi network.Adjust specific reaction to known Wi-Fi networksKnown Wi-Fi networks:Since CyberGhost remembers networks and the reaction wanted on any particular network you can manage here all known networks, such as assigning a different reaction to a specific one, by simply tapping on the respective Wi-Fi Network. Search for the network you want to assign a different reaction to and tap on it. The options are the same as described above.About the interaction of CyberGhost with known and unknown networksThe moment you enter a free or password-protected Wi-Fi, CyberGhost recognizes, if it's a known or unknown network. If unknown, the app reacts the way you defined in the general Wi-Fi settings, that is, either asks, protects, or ignores. If a network is already known, CyberGhost remembers how you wanted this single network to be treated the last time you visited, e. g. protect your device automatically.For any additional information or concerns - it is best to approach the Support Department:via e-mail:support@cyberghost.rovia on-line request:https://support.cyberghostvpn.com/hc/en-us/requests/newvia 24/7 Live! Chat Sessions on our website",https://support.cyberghostvpn.com/hc/en-us/articles/360016303514-How-to-automatically-protect-Wi-Fis-with-CyberGhost-VPN-for-Android-TV
How to use Favorites with CyberGhost VPN on iOS,"Using 'Favorites' is pretty much the equivalent of using short-cuts, which they literally are since any favorite will establish its inherent connection with a simple fingertip.Jump to...Add a CountrySelect a CityAdd a Streaming connectionList of FavoritesHow to add a Country1. Simply click on the 'Best Location'area to access the Server list.2. Now, in the country list, make sure that the menu highlights the entry 'All'. If you wish to add a country to your favorites list, click on the star-shaped icon next to your end of the entry line for that country.Select a CityFurther expand the server listSelect a desired city and connectNOTE: Some server locations do not have the expansion menu, as they are only represented by a single city.Add a Streaming connectionIf you are after a streaming-optimized connection, first activate the 'Streaming'section. Then, proceed in the same manner as adding a regular country, resp. a single server.List of FavoritesAfter activating the'Favorites' section you will find it categorized on three types of entries:General servers from a countryCitiesStreaming servers optimized for specific channels or sites.For any additional information or concerns - it is best to approach the Support Department:via e-mail:support@cyberghost.rovia on-line request:https://support.cyberghostvpn.com/hc/en-us/requests/newvia 24/7 Live! Chat Sessions on our website",https://support.cyberghostvpn.com/hc/en-us/articles/360007211234-How-to-use-Favorites-with-CyberGhost-VPN-on-iOS
How to manually select a Country or a City with CyberGhost VPN on iOS,"When using the'Best Location'option you will establish a connection per default completely automatically on a server in one of the available countries, but you can also choose a different country or city.Country Choice1. To manually select a country, go to the main screen and simply press on the""Best Location""area.2. On the next screen, you will see a list of all the countries CyberGhost operates servers in.3. As you can see the list can be pre-filtered:All :All available countries will be displayed.Streaming :Only countries with optimized streaming servers will be displayed.Favorites :Only countries, cities or single streaming options you previously marked will be shown in this list.Connect to a countryTap to connect to the chosen country right now, the single server to be used will be determined by CyberGhost automatically, based on the internal load balancing.City Selection1. To go further and activate a specific city from one of the available countries , press the arrow at the right end of the country entry line.* If the arrow is missing on some countries, it means that all the servers from it are placed in a single city.2. Then, you can select one of the available cities that will be displayed.Main ScreenOnce a country or single server is activated, the app switches back to the main screen, where the country or server will be shown right beneath the connection confirmation. The lower part of the main window will display also information about your new IP address, the amount of data transferred and the protocol used to establish the connection.DisconnectingTo disconnect from the current connection tap on the 'Power'button.After disconnecting the VPN, the country or server you used last will replace the default connection type and stay valid for all future connections - until you choose a different country or city or switch back to 'Best Location'.For any additional information or concerns - it is best to approach the Support Department:via e-mail:support@cyberghost.rovia on-line request:https://support.cyberghostvpn.com/hc/en-us/requests/newvia 24/7 Live! Chat Sessions on our website",https://support.cyberghostvpn.com/hc/en-us/articles/360005355033-How-to-manually-define-a-country-or-a-single-server-with-CyberGhost-7-for-iOS
Maximum number of devices reached! What can I do?,"If you reinstall CyberGhost (even if it’s on the same device) or you update your operating system, CyberGhost will see this as a new installation (the same device will occupy a new slot as it will be seen as a duplicate) and you might receive an error that “Maximum number of devices reached!”. After you reached the allowed number of devices, you can't add another one to use with your current CyberGhost account, unless you delete at least one of the already registered ones.Native protocol users :If you use a manual configuration and extend your device limit, you might not get connected without receiving any notification. If that's the case and you experience connection problems, please first visit youraccount management pageto check on your device list.How to remove a device ?Go to yourCyberGhost accountSelect VPN and check the number of available devices from the right sideTo clear a slot, simply press the delete button, as shown in the above figure.After a slot has been freed you can log-in on any new device with your username and password.The new device will be synchronized automatically. The complete process will reactivate the subscription on the respective device.The removal of a device from theaccount management pagewill block access to the VPN on the very same device at once and any existing connection will be terminated. Please make sure the respective device does not have an active connection at the time of removal.For any additional information or concerns - it is best to approach the Support Department:via e-mail:support@cyberghost.rovia on-line request:https://support.cyberghostvpn.com/hc/en-us/requests/newvia 24/7 Live! Chat Sessions on our website",https://support.cyberghostvpn.com/hc/en-us/articles/360017378339
How to use connection features with CyberGhost for Android TV,"A single finger tap on the gear symbol opens the settings menu with different options, among them the area 'Connection features':Connection Checker :It will help you determine whether or not you have a properly working internet connection and are ready for a VPN. By simply tapping on, the tool will analyze the reachability of your device as well as the Internet connection and the passage to the CyberGhost network.Use Domain Fronting :The 'Domain Fronting' feature is needed, if the domains *.cyberghostvpn.comor the corresponding IP addresses are blocked (meaning: our API is not reachable; e.g. because of censorship).Content Blocker:Improves your Internet experience by filtering annoying ads. Web pages can be loaded faster and read better. Furthermore your online security profits a lot, since malware often also got distributed by ad networks. On mobile data connections, this feature can help saving money (fewer data to transfer) and battery (fewer data to process).Small Packet Size: This feature is used to improve the performance when a speed or connection issue is encountered.For any additional information or concerns - it is best to approach the Support Department:via e-mail:support@cyberghost.rovia on-line request:https://support.cyberghostvpn.com/hc/en-us/requests/newvia 24/7 Live! Chat Sessions on our website",https://support.cyberghostvpn.com/hc/en-us/articles/360016426973-How-to-use-connection-features-with-CyberGhost-for-Android-TV
Raspberry Pi: How to configure a Raspberry Pi as a web proxy with OpenVPN,"Please note the following requirements:Raspberry Pi with sticky IP addressRaspbian OSUp to date software packagesA CyberGhost accountInfo:Here's how to create a CyberGhost account onlineInfo:How to manage your CyberGhost accountA CyberGhost subscriptionInfo:How to purchase or upgrade a subscriptionInfo(only prepaid subscribers):Enter activation keyDisclaimer:Please keep in mind that, although the technical process is as thoroughly documented as possible, you need to have at least some technical understanding. There's always a chance for an overseen mistake and/or things have changed and the article is not updated yet.Step1Open your router's web interface andassign a sticky IP addressto your Raspberry. Depending on your router model and/or manufacturer the respective option(s) can be found in different places, so make sure you have a proper documentation of your router at hand, which you can consult to find the right spot.Step 2Visit yourCyberGhost VPN online accountand login with your Username and PasswordClick on the ""VPN"" section from the left-side menuScroll down and then click on""Configure Device""In the new window, choose your desired protocol, in our example: OpenVPN and your preferred country and server group, as described below.Also type in aDevice nameto assign to your device, then configure the parameters for the new device.For the purpose of settingOpenVPNfor your Router, chooseOpenVPNfrom the Protocol drop down menu. Your desiredCountryandServer Group, as described below, need to be defined too:Protocol : For Raspberry Pi configurations, please choose Open VPNCountry :Since native protocol connections may only be used with exactly one server you now have to choose the country you want to surf from; the server to be used in this country will be chosen by CyberGhost automatically.Server group :Choose the server group accordinglyNote: Please note that the above step depends on the OpenVPN client used : version 2.4 or 2.3.UDPallows higher speed than the TCP version, but can result in broken downloads in some cases. This is the default setting.TCPallows more stable connections than the UDP version, but is a bit slower. Choose this version, if you have recurrent connection issues such as sudden disconnections.After setting up your preferred settings, save them with""Save Configuration""To view theOpenVPNcredentials that are generated for you on the configuration dashboard, press 'View':Once the new page is opened, your connection credentials are generated for you but make note of the following information:Server group:This is the address of the country (server) you want to be connected with, e.g. '12345-1-ca.cg-dialup.net'. Note: This address changes with every country you have chosen in the step before. The actual single server to be used will be chosen automatically by CyberGhost.User name:A solely for this protocol generated user name.This is NOT your regular CyberGhost account user name, it's used only to authenticate with our servers via Manual Configurations.Password (you need to check the ""Show Password"" option in order to see it):A solely for protocol usage generated password.This is NOT your regular CyberGhost account Password, it's used only to authenticate with our servers via Manual Configurations.Pre-Shared KeyPlease download the configuration file. For that please click on 'Download configuration' and download the config file to your computer (it's recommended that you create a special folder for the config, somewhere accessible like your Desktop andExtract/Copy thecontents of the .zip file there).Now, the saved config is a ZIP file, which contains the following single files:ca.crt:This is the certificate of the certification authorityclient.crt:This is the user certification fileclient.key:This is your private key fileopenvpn.ovpn:This is yourOpenVPNconfiguration fileIf you need to change the country you connect to, you must re-configure the location to use in your account management and download the new zipped config file.Step 3Make sure you have the right packages:Before you can begin configuring your network settings make sure you already installed the needed packages and have an up to date system:Download the package information by opening a console and typing :sudo apt-get update && sudo apt-get upgradeOnce done download the needed OpenVPN package with :sudo apt-get install openvpn openssl openresolvNow install your wanted webproxy, e. g. 'Privoxy':sudo apt-get install privoxyPrivoxy listens to connections ariving the Raspberry through the assigned IP (for example 192.168.178.24) and port 8118. To check open the Privoxy configuration file ('/etc/privoxy/config') and look out for the line 'localhost:8118'.Step 4To adjust the IP address for Privoxy, type in this command:sudo nano /etc/privoxy/configConfirm and scroll down to section 4.1. There you change the 'listen-address' entry to the address you assigned for your Raspi in your Router configuration, in this example it is '192.168.178.24':listen-address 192.168.178.24:8118Restart the Raspberry.To check your web proxy connection, you need a different computer in the same local network like your Raspi. There you open a browser window and then the browser's settings to add the address of the web proxy, e. g. in Firefox 'Preferences -> Advanced -> Connection -> Settings'. There you activate 'Manual Proxy Configuration' and add address and port of the Privoxy web server, in this example it's '192.168.178.24' and '8118'. Now you should be able to surf the Internet as if you were connected directly.Step 5Unzip all files of the downloaded CyberGhost configuration ZIP file, rename the file 'openvpn.ovpn' to e. g. ‘CG_RO.conf’ (depends on the location you have chosen before) and copy all files into your OpenVPN directory on your Raspi. For that first move to the folder in which you unzipped all files by typing:cd [path to configuration folder]Now copy them:sudo cp CG_XX.conf /etc/openvpn/sudo cp ca.crt /etc/openvpn/sudo cp client.crt /etc/openvpn/sudo cp client.key /etc/openvpn/If you want to surf from more than one country, download after the selection of a different country in your account management the next zipped configuration file and rename the new 'openvpn.ovpn' to 'CG_AnotherCountry.conf'.For two different countries you need for example do the following steps:Specify device, protocol and operating systemChoose a country, e.g. USADownload the zipped configuration file with certificates, key and OpenVPN configuration fileUnzip the downloaded file and copy all files in your OpenVPN configuration folderRename the OpenVPN configuration file from ‘openvpn.ovpn’ to ‘CG_USA.conf’.Choose the next country, e.g. RomaniaDownload the next zipped configuration fileUnzip the downloaded file and copy just the file 'openvpn.ovpn' into the configuration folderRename it to ‘CG_RO.ovpn’.etc. ...Step 6Move to the OpenVPN directory:cd /etc/openvpnTo be able to log in automatically, save your user name and password in a file called ‘user.txt’ and store it in your OpenVPN folder. For that, first move to the respective folder:cd /etc/openvpnEnter the following command to create and open a text file called 'user':sudo nano user.txtType in your credentials (one in each line). In the first line type in the user name created in step 1, in the second line the password, also created in step 1, both as displayed in your account management when setting up a connection:UsernamePassword#First line is a generated username and the second line is a generated password.DO NOT use your regular CyberGhost user name and password, which you use to login in the client and your account management!Save your changes with ‘CTRL+O’ and leave the editor via ‘CTRL+X’Next open the configuration file ‘CG_XX.conf’ by typingsudo nano CG_XX.confExtend the line ‘auth-user-pass’ …[...]auth-user-pass[...]… with the path to your credential file:[...]auth-user-pass /etc/openvpn/user.txt[...]At the bottom of the configuration passage (after 'verb 4') add the following two lines:up /etc/openvpn/update-resolv-confdown /etc/openvpn/update-resolv-confSave via ‘CTRL+O’ and leave the editor with ‘CTRL+X’.Then get the file auto loaded by typingsudo nano /etc/default/openvpnand adding the following line:AUTOSTART=""CG_XX"" (the name of the file WITHOUT the file extension ‘.conf’)Again, save with ‘CTRL+O’ and leave the editor with ‘CTRL+X’.At last type in your console:sudo update-rc.d openvpn enablesudo service openvpn startStep 4Again, open a browser window on a different PC in the same local network like your Raspi. Move to the browser's settings to add the address of the web proxy (like described above for Firefox) and activate the 'Manual Proxy Configuration'. Add address and port of the Privoxy web server, in this example it's '192.168.178.24' and '8118'.To test your IP use a site likehttps://whoer.net/. Furthermore you might want to open the websitehttps://dnsleaktest.com/and test on leaks. For that choose ‘Standard Test’ or ‘Extended Test’.",https://support.cyberghostvpn.com/hc/en-us/articles/213813045-Raspberry-Pi-How-to-configure-a-Raspberry-Pi-as-a-web-proxy-with-OpenVPN
Send Debug Logs on macOS,"Sometimes our customer support team may ask you to send the application debug log files to assist in the troubleshooting process.This article will show you how you can send debug logs.Open the application and click on theSettingsicon.SelectSend Feedback...This will open a new web page. Please fill in the fields on screen and give as many details as possible about the issue you are facing. The CSI ID will automatically be filled in.Note:The information you send is for debugging purposes. CyberGhost VPN will receive non-personal data such as crashes, connectivity errors, server authentication problems, etc. It will only be used to provide you with the best assistance possible.",https://support.cyberghostvpn.com/hc/en-us/articles/360016522360-Send-Debug-Logs-on-macOS
How to add and use favorites with CyberGhost for Android TV,"Using 'Favorites' is pretty much the equivalent of using short-cuts, which they literally are since any favorite will establish its inherent connection with a simple fingertip.Add a country to Favorites1. In the main screen tap on the 'Best Location'area.Now, in the country list, make sure that the menu highlights the entry 'Countries'. Scroll all the way down to a desired country and hit the star symbol from the right side.You can also further expand the list of locations and include in Favorites specific Cities.Add a streaming connection to FavoritesIf you are after a streaming-optimized connection activate the 'Streaming' section and then proceed in the same manner as adding a regular country by tapping on the entry line of the respective country and then on the star symbol.List of favoritesAfter activating the 'Favorites' section you will find your set favorites categorized by three types of entries:Countries :Here you find all entire countries marked as favorite.Streaming :Here you find all favorited streaming connections.Cities:Here you find city servers marked as favorites.Use a favoriteTo use one of your favorites simply tap in the main screen on the connection description, in the 'Connect to' section. After that switch to your favorite list.For any additional information or concerns - it is best to approach the Support Department:via e-mail:support@cyberghost.rovia on-line request:https://support.cyberghostvpn.com/hc/en-us/requests/newvia 24/7 Live! Chat Sessions on our website",https://support.cyberghostvpn.com/hc/en-us/articles/360016426553-How-to-add-and-use-favorites-with-CyberGhost-for-Android-TV
How to upgrade from trial to Premium for Android TV,"UpgradeYou can purchase a subscription as follows:1.From thePlay Store(via the app itself) where you have the option of purchasing an Android-Only plan or a Cross-Platform subscription (this can be used on all supported Operating Systems, 7 devices)2.From theCyberGhost VPN homepage. Your order takes place online in a browser window, where you first decide for the payment interval (e. g. monthly or yearly) - All subscription types from the Main CyberGhost site can be used on ALL supported platforms and on up to 7 devices.Now decide for a payment method.Now you can enter your payment details. Payment will be processed by a third party service to avoid privacy breaches based on common data bases. Click on 'Continue'.All personal data such as credit card number, PayPal account, names, etc. will stay private with the payment provider and never be submitted to third parties, not even to CyberGhost itself.Please check your details before proceeding andacknowledge that you buy a subscription with recurring payment cycles.Special conditions (e. g. half the price) areonly valid for the first payment, while the next payment will reflect the regular subscription price.After the payment process ended successfully you will receive a confirmation and your credentials to use your subscription with CyberGhost:User name:A temporary user name to login to the client and youronline account management.Password:A temporary password to login to the client and youronline account management.Reference number:Your cleverbridge purchase number. Please always submit this number, if you have questions regarding your purchase such as asking for a refund or an account recovery.You can change your temporary credentials at any time in youraccount management page. It is strongly recommended to do so, just in case your automatically generated credentials got compromised at a certain point in time. Pleasesee here how to do it.",https://support.cyberghostvpn.com/hc/en-us/articles/360016429293-How-to-upgrade-from-trial-to-Premium-for-Android-TV
How to log-in (existing users) to CyberGhost VPN for Amazon Fire TV / Fire Stick,"To log in to the CyberGhost application on a Firestick device, you have two options:A. Using the regular login optionA VPN is dependent on an active Internet connection, therefore, it is important that you connect the device in question to the Internet, afterwards, you simply have to insert the username and password of the CyberGhost account and hit the login button.Note:In case you have forgotten the credentials, you have the option to ""recover account"" which will send an a recovery link to the e-mail address that is registered to the CyberGhost account.B. Logging in by PIN.As you noticed in the image example above, a large 4 digit PIN code is displayed. This code will be generated automatically and will be different at each new setup.Once the PIN is displayed, you just have to log in to yourCyberGhost accountfrom a regular browser, from any device (Windows, Mac, Android or iOS) and insert the PIN. Once the process is done, simply hit the Validate PIN button and it will auto-sync with your account page.In case you don't have a paid subscription yet, you can acquire one from ourweb-store.For any additional information or concerns - it is best to approach the Support Department:via e-mail:support@cyberghost.rovia on-line request:https://support.cyberghostvpn.com/hc/en-us/requests/newvia 24/7 Live! Chat Sessions on our website",https://support.cyberghostvpn.com/hc/en-us/articles/360008388494-How-to-log-in-existing-users-to-CyberGhost-VPN-for-Amazon-Fire-TV-Fire-Stick
How to add and use favorites with CyberGhost for Amazon Fire TV / Fire Stick,"Using 'Favorites' is pretty much the equivalent of using short-cuts, which they literally are since any favorite will establish its inherent connection with a simple fingertip.Add a country to Favorites1. In the main screen tap on the 'Best Location'area.Now, in the country list, make sure that the menu highlights the entry 'Countries'. Scroll all the way down to a desired country and hit the star symbol from the right side.You can also further expand the list of locations and include in Favorites specific Cities.Add a streaming connection to FavoritesIf you are after a streaming-optimized connection activate the 'Streaming' section and then proceed in the same manner as adding a regular country by tapping on the entry line of the respective country and then on the star symbol.List of favoritesAfter activating the 'Favorites' section you will find your set favorites categorized by three types of entries:Countries :Here you find all entire countries marked as favorite.Streaming :Here you find all favorited streaming connections.Cities:Here you find city servers marked as favorites.Use a favoriteTo use one of your favorites simply tap in the main screen on the connection description, in the 'Connect to' section. After that switch to your favorite list.For any additional information or concerns - it is best to approach the Support Department:via e-mail:support@cyberghost.rovia on-line request:https://support.cyberghostvpn.com/hc/en-us/requests/newvia 24/7 Live! Chat Sessions on our website",https://support.cyberghostvpn.com/hc/en-us/articles/360008388634-How-to-add-and-use-favorites-with-CyberGhost-for-Amazon-Fire-TV-Fire-Stick
Stream with CyberGhost VPN on Windows,"This article will explain how you can stream with CyberGhost VPN on Windows.The CyberGhost Windows app has a dedicated menu for streaming, that will highlight all servers compatible with various streaming services.Follow these steps to connect to these servers:Open the app and expand the menuSelectFor StreamingChoose the streaming server suited to your needsTip: It's recommended to clear the browser's cache and cookies before connecting to the VPN.Encountered connection issues?Check ourhelp pageto troubleshoot specific streaming issues.Need assistance? Contact our Customer Support team:via email atsupport@cyberghost.rovia online request athttps://support.cyberghostvpn.com/hc/en-us/requests/newvia 24/7 Live Chat by clicking the Support button below",https://support.cyberghostvpn.com/hc/en-us/articles/360016962519-How-to-Unblock-Streaming-Services-with-CyberGhost-VPN-8
How to set up ExpressVPN with OpenVPN on your Asus router,"Not all ExpressVPN locations may be available for manually configured connections. To use the full list of VPN locations,use the app setup. https://www.youtube.com/embed/0BihQPiqjgw?rel=0",https://www.expressvpn.com/support/vpn-setup/manual-config-for-asus-router-with-openvpn/)
How to use connection features with CyberGhost VPN for Amazon Fire TV / Fire Stick,"A single finger tap on the gear symbol opens the settings menu with different options, among them the area 'Connection features':Connection Checker :It will help you determine whether or not you have a properly working internet connection and are ready for a VPN. By simply tapping on, the tool will analyze the reachability of your device as well as the Internet connection and the passage to the CyberGhost network.Use Domain Fronting :The 'Domain Fronting' feature is needed, if the domains *.cyberghostvpn.comor the corresponding IP addresses are blocked (meaning: our API is not reachable; e.g. because of censorship).Content Blocker:Improves your Internet experience by filtering annoying ads. Web pages can be loaded faster and read better. Furthermore your online security profits a lot, since malware often also got distributed by ad networks. On mobile data connections, this feature can help saving money (fewer data to transfer) and battery (fewer data to process).Small Packet Size: This feature is used to improve the performance when a speed or connection issue is encountered.For any additional information or concerns - it is best to approach the Support Department:via e-mail:support@cyberghost.rovia on-line request:https://support.cyberghostvpn.com/hc/en-us/requests/newvia 24/7 Live! Chat Sessions on our website",https://support.cyberghostvpn.com/hc/en-us/articles/360008526713-How-to-use-connection-features-with-CyberGhost-VPN-for-Amazon-Fire-TV-Fire-Stick
How to upgrade from trial to Premium for Amazon Fire TV / Fire Stick,"After your trial has come to an end, a CyberGhost subscription is needed in order to continue with premium access.UpgradeTo buy a subscription tap on 'Subscribe now' and decide for a payment plan. All plans are subscriptions, although the run-time will differ. If you decide for a monthly subscription, you will be billed once a month, if you decide for a yearly subscription, you will be billed once, for the entire year.External upgrade'All platforms' subscriptions can also be purchased through theCyberGhost Website. Your order takes place online in a browser window, where you first decide for the payment interval (e. g. monthly or yearly).Now decide for a payment method :Click on 'Continue to payment' and enter your payment details. Payment will be processed by a third-party service to avoid privacy breaches based on common databases. Click on 'Continue'.All personal data such as credit card number, PayPal account, names, etc. will stay private with the payment provider and never be submitted to third parties, not even to CyberGhost itself.Please check your details before proceeding andacknowledge that you buy a subscription with recurring payment cycles.Special conditions (e. g. half the price) areonly valid for the first payment, while the next payment will reflect the regular subscription price.After the payment process ended successfully you will receive a confirmation and your credentials to use your subscription with CyberGhost:User name:A temporary user name to log in to the client and your online account management.Password:A temporary password to login to the client and your online account management.Reference number:Your purchase number. Please always submit this number, if you have questions regarding your purchase such as asking for a refund or an account recovery.How to use your external subscription on Fire OSOpen your Fire OS CyberGhost client and log-in with the credentials generated for you. In case you are logged in to a different account at the moment, please log out first via the side menu and then log-in with the new credentials (because the system neither recognizes your external purchase automatically nor is it able to transfer the subscription from that different account to your Amazon account).For any additional information or concerns - it is best to approach the Support Department:via e-mail:support@cyberghost.rovia on-line request:https://support.cyberghostvpn.com/hc/en-us/requests/newvia 24/7 Live! Chat Sessions on our website",https://support.cyberghostvpn.com/hc/en-us/articles/360008526773-How-to-upgrade-from-trial-to-Premium-for-Amazon-Fire-TV-Fire-Stick
How to uninstall CyberGhost for Linux,"If by any chance you should wish to uninstall CyberGhost for Linux or perform a reinstall of the CLI application (you'll be able to keep your config in case of a reinstall), all you need to do is run the appropriate command, as follows:NOTE : For this example, the CyberGhost app is located on the Desktop.1.Open a Terminal window and access the main menu of the CyberGhost app by running the following command: 'cyberghostvpn'2.Run the command:sudo cyberghostvpn --uninstallThen pressEnter:You will be asked for :[sudo] password for your Linux User account.Do you want to remove the configuration files for CyberGhost application? [Y/N].Once the above process has finalized, CyberGhost is uninstalled.Moreover, you can now re-install CyberGhost as shown in our guide called:How to install CyberGhost on Linux",https://support.cyberghostvpn.com/hc/en-us/articles/360023116213-How-to-uninstall-CyberGhost-for-Linux
Select a Country or City with CyberGhost VPN CLI App on Linux,"This article will show you how you can select a country or a city with the CyberGhost Linux app.Jump to...Select a CountrySelect a CitySelect a CountryTo connect to one of the available countries, just open a Terminal window after installing CyberGhost VPN and type:sudocyberghostvpn --traffic --country-code (country code) --connectThen press Enter. For example, if you want to connect to a US server, type:sudocyberghostvpn --traffic --country-code US --connectFor Germany, you would type:sudocyberghostvpn --traffic --country-code DE --connectCyberGhost VPN will display aVPN connection establishedmessage once the connection is successful.To see a list of available countries and their country codes, type:sudo cyberghostvpn --traffic --country-code> press EnterNote:You can always type in ""cyberghostvpn"" in the Terminal and press Enter to see the list of available commands.Select a CityTo see a list of available locations of a specific country, type:sudo cyberghostvpn --traffic --country-code (country code)For example, to see a list of cities in the US, type:sudo cyberghostvpn --traffic --country-code USTo connect to a specific city, like New York, type:sudo cyberghostvpn --traffic --country-code US --city ""New York"" --connectTo confirm that you're successfully connected to the VPN you can type incyberghostvpn --statusoryou can visit a site such ashttps://www.iplocation.net/to check your IP address. Make sure you wait a few seconds after connecting to the VPN server. It's also advisable to check your IP using incognito mode, as some sites often rely on cookies which can store details about your location.Need assistance? Contact our Customer Support team:via email atsupport@cyberghost.rovia online request athttps://support.cyberghostvpn.com/hc/en-us/requests/newvia 24/7 Live Chat by clicking the Support button below",https://support.cyberghostvpn.com/hc/en-us/articles/360020673194
How to Stream with CyberGhost VPN CLI App on Linux,"With CyberGhost for Linux, you can take advantage of our Streaming-Optimized servers to access region-restricted content from websites such as Netflix, Amazon US, or BBC iPlayer.In order to accomplish this, you'll need to connect to one of our servers optimized for this purpose. This is done fairly quickly by instructing the app to connect through a 'streaming' server > specify the 'website' (BBC/Netflix, etc) and simulated 'country' ( which version of Netflix for example,US/FR/DE, etc ).The process is detailed below in 3 easy steps ( we'll use 'Netflix US'for this example )1. With CyberGhost installed> Open aTerminalwindowNOTE :You do not need to navigate to CyberGhost's folder, you can type in the commands right away.2. First, we need to fetch the list of supported 'Streaming Services'and from which country.NOTE:Once you get used to the commands, you doNOTneed to fetch the country/services list each time,you can just type in the command as soon as you open a Terminal window.In theTerminaltype in :cyberghostvpn --streaming --country-code3. Once you've made your decision (Netflix USwill be used in this example), you're ready to type in the command which will include:Server-type 'Streaming'.Service 'Netflix US'.CountryUS+ the 'connect' command.The command for Netflix US would be :sudocyberghostvpn --streaming 'Netflix US' --country-code US --connectImportant :The quotes when typing in'Netflix US'are mandatory as the name of the service includes space and Linux need the quotes to be added when using 2 wordsin order to read it as a single string(such as Netflix US).TIP:If you wish to filter all available Streaming Services in asingle country, let's sayFrance, use this command :cyberghostvpn --streaming --country-code FRYou'll see all of theFrench Streaming Services supported,then you can connect to the desired service as shown above (For Canal+, the command would be :sudo cyberghostvpn --streaming 'Canal+' --country-code FR --connectFor any additional information or concerns - it is best to approach the Support Department:via e-mail:support@cyberghost.rovia on-line request:https://support.cyberghostvpn.com/hc/en-us/requests/newvia 24/7 Live! Chat Sessions on our website",https://support.cyberghostvpn.com/hc/en-us/articles/360020741974
Peer-to-Peer (P2P) traffic with CyberGhost VPN CLI App on Linux via Terminal,"The CyberGhost app for Linux offers a wide range of Peer-to-Peer (P2P) Torrents servers which allow you to download torrents safely and securely.NOTE :Please ensure that youNOTstart your Torrent Client untilAFTERconnecting to the VPN server as anytorrent in the Seed queue WILL generate traffic on your main connectionand can be tracked.To connect to one of our P2P file-sharing servers, please take the following steps :1. Open a Terminal window.2. Now, we need to fetch a list of countries which support P2P File Sharing( not all countries and/or servers support Peer-to-peer file sharing due to various laws and policies in effect in their respective region ) by typing in :cyberghostvpn --torrent --country-codepressENTER3. Once the list of countries that supportP2P file sharingis displayed, simply enter the desired country's code into the connection command. For this example, we'll usePoland (PL)and the command is :sudocyberghostvpn --torrent --country-code PL --connect4. To confirm that you're connected to the VPN you can type in :cyberghostvpn --statusAlso, you can visit a site such ashttps://www.iplocation.net/( make sure that you wait a few seconds after connecting and access this site in a new browser window, Incognito Mode is advised as these sites often rely on cookies and your old location may be stored until a restart of the browser or Incognito Mode is used )5. After confirming that you're connected to the VPN server, you can start yourTorrent Client.For any additional information or concerns - it is best to approach the Support Department:via e-mail:support@cyberghost.rovia on-line request:https://support.cyberghostvpn.com/hc/en-us/requests/newvia 24/7 Live! Chat Sessions on our website",https://support.cyberghostvpn.com/hc/en-us/articles/360020942153
Set Up CyberGhost VPN CLI App on Linux,"This article will show you how you can set up the CyberGhost CLI app on Linux.CyberGhost VPN is compatible with the following Linux operating systems:Debian-basedUbuntu 20.04 | 22.04 PopOSRPM-basedFedora 29 | 30 | 31 CentOS 7Note:Before getting started, for a better user experience, please make sure that your CyberGhost account password does not contain any of the following special symbols:""$"" ""⁎"" ""%"" ""[ ]""Follow these steps to set up CyberGhost VPN on your Linux device. For this tutorial, we'll be using Ubuntu 20.04.3, but the same steps apply to all supported distributions.Log in to youronline account.ClickDownload Hub.ChooseConfigurenext to CyberGhost VPN for Linux.Select your Linux distribution underServer Distribution.ClickDownload App.This will automatically download the Linux CLI configuration file (zipped).ClickExtract Hereto unzip the contents of the compressed folder to your computer.For the purpose of this tutorial, we will rename the extracted folder to ""cyberghost"".Open a Terminal window in thecyberghostfolder by right-clicking on the folder's name and selectingOpen in Terminal.Type in ""sudobash install.sh"" (no quotes) > pressEnterand confirm your sudo access by writing the sudo password.Note: Make sure you choose""Y""(yes) if asked to install any additional packages, likePython 3andOpenVPN.Enter your CyberGhost username and password to confirm the installation.Once you see theInstall completed...message, you're ready to start using the CyberGhost VPN app.You can type insudo cyberghostvpnto see the list of available commands.You might also be interested in the following articles:How to Select a Country or a City with CyberGhost on LinuxHow to Stream with CyberGhost on LinuxHow to Torrent with CyberGhost on LinuxNeed assistance? Contact our Customer Support team:via email atsupport@cyberghost.rovia online request athttps://support.cyberghostvpn.com/hc/en-us/requests/newvia 24/7 Live Chat by clicking the Support button below",https://support.cyberghostvpn.com/hc/en-us/articles/360020436274-How-to-install-the-CyberGhostVPN-CLI-App-on-Linux-
Stream Netflix US via Smart DNS,"This article will explain how you can configure your DNS settings to stream Netflix US.You can use our Smart DNS option to enable streaming on devices that do not natively support VPNs.Note: CyberGhost's Smart DNS does not constitute a VPN services and does not offer the privacy and security settings a VPN service does.Follow these steps to configure your DNS settings to stream Netflix US:Access youronline account dashboardOn the left side, selectSmart DNSSelectEnable Smart DNSNote and copy the address next to Netflix USPaste the address into the DNS settings of the device you want to stream onNetflix UK Streaming Address:Netflix US Streaming Address:You can clear these settings to remove CyberGhost Smart DNS from your device if you no longer wish to stream Netflix US.***************************************Use Smart DNS for:|PlayStation 3orPlayStation 4|Xbox 360orXbox One|Apple TV 3orApple TV 4|WiiorWii U||Roku TV|Samsung SmartTV with Tizen OS|DD-WRT Router|**************************Need assistance? Contact our Customer Support team:via email atsupport@cyberghost.rovia online request athttps://support.cyberghostvpn.com/hc/en-us/requests/newvia 24/7 Live Chat by clicking the Support button below",https://support.cyberghostvpn.com/hc/en-us/articles/360012476619-Stream-Netflix-US-via-Smart-DNS
How to unblock port TCP/UDP 53 ?,"It is worth mentioning that in some situations Smart DNS cannot be used successfully. If your Internet Service Provider diverts the DNS while using a technology called 'Transparent DNS proxy', they intercept all DNS lookup queries (TCP/UDP port 53) and transparently proxy the results. This forces you to use their DNS addresses without being able to change them. Smart DNS might have issues.In other cases, port 53 (DNS) may be intentionally blocked.In such a situation, we recommend that you submit a request for unblocking to your ISP's technical support department.",https://support.cyberghostvpn.com/hc/en-us/articles/360015581760-How-to-unblock-port-TCP-UDP-53
Stream Netflix UK via Smart DNS,"This article will explain how you can configure your DNS settings to stream Netflix UK.You can use our Smart DNS option to enable streaming on devices that do not natively support VPNs.Note: CyberGhost's Smart DNS does not constitute a VPN services and does not offer the privacy and security settings a VPN service does.Follow these steps to configure your DNS settings to stream Netflix UK:Access youronline account dashboardOn the left side, selectSmart DNSSelectEnable Smart DNSNote and copy the address next to Netflix UKPaste the address into the DNS settings of the device you want to stream onNetflix UK Streaming Address:Netflix US Streaming Address:You can clear these settings to remove CyberGhost Smart DNS from your device if you no longer wish to stream Netflix UK.***************************************Use Smart DNS for:|PlayStation 3orPlayStation 4|Xbox 360orXbox One|Apple TV 3orApple TV 4|WiiorWii U||Roku TV|Samsung SmartTV with Tizen OS|DD-WRT Router|**************************Need assistance? Contact our Customer Support team:via email atsupport@cyberghost.rovia online request athttps://support.cyberghostvpn.com/hc/en-us/requests/newvia 24/7 Live Chat by clicking the Support button below",https://support.cyberghostvpn.com/hc/en-us/articles/360012375880-Stream-Netflix-UK-via-Smart-DNS
How do I take a screenshot on my Android device (smartphone or tablet) ?,To take a screenshot of an Android device please follow these steps :Hold down at onceVolume Down + Powerfor 1 - 2 seconds. The screen flashed white and your device captures the entire screen and saves it as a photo.Where do I find my screenshots ?Look for a Screenshots folder in your Gallery or Photos app.,https://support.cyberghostvpn.com/hc/en-us/articles/360016522480--How-do-I-take-a-screenshot-on-my-Android-device-smartphone-or-tablet
Question not found,Answer not found,https://support.cyberghostvpn.com/hc/en-us/articles/360016552679-How-to-change-your-DNS-servers-on-Android-
Configure My Smart DNS for AppleTV 3,"Through to theAccount Dashboard-Smart DNSneeds to be enabled.It is advised to save your original DNS settings before making any other changes.You may need them in case you will want to switch back to your original settingsor different settings based on your needs. Changing the DNS is done one-time.Completing the only requirement as described above, now head over to your AppleTV 3. The below steps are presented for you which will help you apply the CyberGhost SmartDNS via AppleTV 3:Step 1 of 6: From the home screen of your AppleTV 3 – chooseSettingsStep 2 of 6: ChooseGeneralStep 3 of 6: ChooseNetworkStep 4 of 6: Select the Wi-Fi that is being used by the Apple TV 3 to connect to the InternetStep 5 of 6: Scroll down toConfigure DNSand selectManualStep 6 of 6: Input theCyberGhost Smart DNSwithin theConfigure DNSscreen and confirm withDone- Settings completed -Additional settings:a. Head back to the Settings menu of your Apple TV 3 and choose iTunes storeb. ChooseLocationc. Scroll to and chooseUnited States(or the country for which the SmartDNS is for)d. Head back to the main menu for Settings and choose Sleep now.e. After your Apple TV 3 is in Sleep Mode - disconnect the Apple TV 3 from the power supply. Allow 15 seconds to pass and reconnect the Apple TV 3 to the power supply.Your Apple TV 3 can now be started back up.-------For any additional information or concerns - it is best to approach the Support Department:via e-mail:support@cyberghost.rovia on-line request:https://support.cyberghostvpn.com/hc/en-us/requests/newvia 24/7 Live! Chat Sessions on our website",https://support.cyberghostvpn.com/hc/en-us/articles/360012023140-Configure-My-Smart-DNS-for-AppleTV-3
Configure My Smart DNS for Roku TV,"Through to theAccount Dashboard-Smart DNSneeds to be enabled.With Roku TV not supporting any DNS changes from the device itself, the best alternative would be to install / configure your Internet access point(usually your router) to make use of the CyberGhost Smart DNS feature. By doing so, the advantage is not only on behalf of the Roku TV device but also across all devices that are used for streaming as they too will be covered by the CyberGhost Smart DNS when the respective devices are connecting to the Internet via the Internet access point where the CyberGhost Smart DNS is configured.Currently, CyberGhost Smart DNS can be configured on a DD-WRT Router(that supports DD-WRT)The following tutorial will be useful for your purpose:https://support.cyberghostvpn.com/hc/en-us/articles/360012029500-Configure-My-Smart-DNS-for-your-DD-WRT-Router-------For any additional information or concerns - it is best to approach the Support Department:via e-mail:support@cyberghost.rovia on-line request:https://support.cyberghostvpn.com/hc/en-us/requests/newvia 24/7 Live! Chat Sessions on our website",https://support.cyberghostvpn.com/hc/en-us/articles/360012029280-Configure-My-Smart-DNS-for-Roku-TV
Configure My Smart DNS for your DD-WRT Router,"Through to theAccount Dashboard-Smart DNSneeds to be enabled.Completing the only requirement as described above, now head over to your compatible DD-WRT router. The below steps are presented for you which will help you apply the CyberGhost SmartDNS via DD-WRT router:Step 1 of 6: Log in your router dashboard via your preferred browserStep 2 of 6: ChooseSetupStep 3 of 6: ChooseBasic SetupStep 4 of 6: Under Network Address server Settings (DHCP) fill in the following fields:Static DNS 1: Use the DNS provided to you in the Account Dashboard under My SmartDNSStatic DNS 2: leave blankStatic DNS 3: leave blankStep 5 of 6: EnableUse DNSMasq for DNSStep 6 of 6: ChooseApply Settings.- DNS settings completed -Note: Make sure to reboot the router in order to use the newly implemented DNS settings-------For any additional information or concerns - it is best to approach the Support Department:via e-mail:support@cyberghost.rovia on-line request:https://support.cyberghostvpn.com/hc/en-us/requests/newvia 24/7 Live! Chat Sessions on our website",https://support.cyberghostvpn.com/hc/en-us/articles/360012029500-Configure-My-Smart-DNS-for-your-DD-WRT-Router
Configure My Smart DNS for PlayStation 3,"Through to theAccount Dashboard-Smart DNSneeds to be enabled.Completing the only requirement as described above, now head over to your PlayStation 3. The below steps are presented for you which will help you apply the CyberGhost Smart DNS via PlayStation 3:Step 1 of 13: From the main menu of your Play Station 3 – chooseSettingsStep 2 of 13: ChooseNetwork SettingsStep 3 of 13:Internet Connection Settingsis the option which must be chosen from the available choices and click ""OK"" at any pop-up(if any) where one may appear if using an Ethernet cableStep 4 of 13: When prompted “Select a setting method.” – chooseCustomStep 5 of 13: When asked “Select a connection method” choose the method through which your Play Station 3 is connected to the Internet:Wired ConnectionWireless**The case presented is displayed for Wireless methodStep 6 of 13: After being prompted for ""WLAN Settings"" - choose Scan*.*This will scan all Wi-Fi networks and ensure that there is no mistake with the Wi-Fi used.Step 7 of 13: Choose the respective Wi-Fi through which your Play Station 3 is connected to the InternetStep 8 of 13:WLAN Security Setting- chooseWPA-PSK/WPA2-PSKand enter the password* for the Wi-Fi that the connection is made through*this is the password that is used for your Wi-FiStep 9 of 13:Set the DHCP Hostname* -Do not Setis the appropriate choice*In most cases this setting does not need to be changed.Step 10 of 13:DNS Settingis set toManual:Primary DNS– found in yourAccount DashboardunderMy Smart DNStabSecondary DNS –can be left blankStep 11 of 13: BetweenAutomaticorManual– chooseAutomaticfor MTU SettingsStep 12 of 13:Proxy Server– The appropriate choice to make isDo Not UseStep 13 of 13:UPnP– The appropriate choice to make isEnable- Save completed -After prompted with Save Completed - Test connection will be a good way to obtain results about the settings above. This step is not mandatory but can be requested by Support for troubleshooting purposes.*Head to Quick Menu of your Play Station 3 and choosePower.Restart Play Station 3.-------For any additional information or concerns - it is best to approach the Support Department:via e-mail:support@cyberghost.rovia on-line request:https://support.cyberghostvpn.com/hc/en-us/requests/newvia 24/7 Live! Chat Sessions on our website",https://support.cyberghostvpn.com/hc/en-us/articles/360012106179-Configure-My-Smart-DNS-for-PlayStation-3
Configure My Smart DNS for Nintendo Switch,"Through to theAccount Dashboard-Smart DNSneeds to be enabled. Once thisone-clickstep has been accomplished the next steps are completed directly from your Nintendo Switch.Completing the only requirement as described above, now head over to your Nintendo Switch. The below steps are presented for you which will help you apply the CyberGhost SmartDNS via Nintendo Switch:Step 1 of 9: Open the Nintendo Switch;Step 2 of 9: ChooseSystem Settings;Step 3 of 9: Locate and tap:Internet;Step 4 of 9: ChooseInternet Settings;Step 5 of 9: Pick the Internet connection which you wish to configure with the CyberGhost Smart DNS;Step 6 of 9: ChooseChange SettingsAdditional information:IP Address Settings: Leave it to AutomaticProxy Settings: Leave it to OffMTU: Leave it to default (typically 1400 or 1500) but change only if requested by SupportStep 7 of 9: Scroll down through the set-up menu and tap on DNS Settings and choose Manual;Step 8 of 9: After choosing Manual, configure as follows:Primary DNS: Use the CyberGhost Smart DNS presented in the Account DashboardSecondary DNS: leave blankStep 9 of 9: PressSave- DNS settings completed -Note: Should your IP address change after already whitelisting the IP address in the Account Dashboard your new IP address needs to be linked(activated) again in the Account Dashboard but the DNS settings in the Nintendo Switch do not need to be changed.-------For any additional information or concerns - it is best to approach the Support Department:via e-mail:support@cyberghost.rovia on-line request:https://support.cyberghostvpn.com/hc/en-us/requests/newvia 24/7 Live! Chat Sessions on our website",https://support.cyberghostvpn.com/hc/en-us/articles/360013156220-Configure-My-Smart-DNS-for-Nintendo-Switch
Configure My Smart DNS for Nintendo Wii U,"Through to theAccount Dashboard-Smart DNSneeds to be enabled.Completing the only requirement as described above, now head over to your Nintendo Wii U. The below steps are presented for you which will help you apply the CyberGhost SmartDNS via Nintendo Wii U:Step 1 of 12: Press the Home button on your Wii U controllerStep 2 of 12: ChooseSystem SettingsStep 3 of 12: TapInternetStep 4 of 12: ChooseConnect to the InternetStep 5 of 12: PickConnections- located in the top-right cornerStep 6 of 12: Highlight and tap the Wi-Fi connection used by your Wii U and configure itStep 7 of 12: ChooseChange SettingsStep 8 of 12: Scroll through the Internet-Connection Setup menu (left or right) . Once the DNS menu is reached tap on DNSStep 9 of 12: For the purpose of using the CyberGhost SmartDNS, the following choices are possible:Auto-Obtain: Use this feature if you wish the DNS to be the same one provided to you by your ISPDon't Auto-obtain: you can manually input the CyberGhost DNS shown in the Account DashboardStep 10 of 12: After choosing Don't Auto-Obtain, configure as follows:Primary DNS: Use the CyberGhost Smart DNS presented in the Account DashboardSecondary DNS: leave blankStep 11 of 12: PressConfirmStep 12 of 12: Push the Home button on the Wii U controller to complete the set-up- DNS settings completed -Additional Steps:When asked by the Support Team - the following steps are useful:a. Press the Home button on your Wii U controllerb. Choose System Settingsc. Select Internetd. Connect to the Internete. Tap Connections in the upper right cornerf. Pick the Wi-Fi used by your Wii U to connect to the Internetg. Choose Connection Testh. The test will run automatically and the results will be displayed to you.With the results displayed, return to the Support Team with the results in order to help with any(if any) troubleshooting stepsNote: Upon implementing the DNS and associating the DNS with your IP address - should your IP address change, your IP address needs to be linked(activated) again in the Account Dashboard but the DNS does not need to be changed.-------For any additional information or concerns - it is best to approach the Support Department:via e-mail:support@cyberghost.rovia on-line request:https://support.cyberghostvpn.com/hc/en-us/requests/newvia 24/7 Live! Chat Sessions on our website",https://support.cyberghostvpn.com/hc/en-us/articles/360012029120-Configure-My-Smart-DNS-for-Nintendo-Wii-U
Configure My Smart DNS for Nintendo Wii,"Through to theAccount Dashboard-Smart DNSneeds to be enabled.Completing the only requirement as described above, now head over to your Nintendo Wii. The below steps are presented for you which will help you apply the CyberGhost SmartDNS via Nintendo Wii:Step 1 of 10: From the main menu of your Nintendo Wii – choose WiiSettingsStep 2 of 10: PickInternet Options. and pressthe right arrow on your Wii remote and chooseInternetStep 3 of 10: SelectConnection Settingsand pick the Wi-Fi or Wired connection that is used by your WiiStep 4 of 10: Choose Change Settings and pick the Active connection used by your Wii (Wi-Fi or cable)Step 5 of 10: Browse right on your Wii remote fromType of Security* towardsAuto-Obtain IP Address*No changes need to be made at this stage.Step 6 of 10: PressNowhen asked to Auto-Obtain IP address and chooseAdvanced Settings:Primary DNS: Use the DNS provided to you in the Account Dashboard under My SmartDNSSecondary DNS: leave blankStep 7 of 10: PressConfirmStep 8 of 10: ChooseSaveStep 9 of 10: Connection test will run automatically and it's recommended to allow the test to finalizeStep 10 of 10:Restart your Nintendo Wii- DNS settings completed -Note: Upon implementing the DNS and associating the DNS with your IP address - should your IP address change, your IP address needs to be linked(activated) again in the Account Dashboard but the DNS does not need to be changed.-------For any additional information or concerns - it is best to approach the Support Department:via e-mail:support@cyberghost.rovia on-line request:https://support.cyberghostvpn.com/hc/en-us/requests/newvia 24/7 Live! Chat Sessions on our website",https://support.cyberghostvpn.com/hc/en-us/articles/360012127199-Configure-My-Smart-DNS-for-Nintendo-Wii
Configure My Smart DNS for Xbox 360,"Through to theAccount Dashboard-Smart DNSneeds to be enabled.Completing the only requirement as described above, head over to your Xbox 360. The below steps are presented for you which will help you apply the CyberGhost SmartDNS via Xbox 360:Step 1 of 9: Open the main menu of your Xbox 360 – chooseSettingsfrom the choices displayedStep 2 of 9: ChooseSystemand selectNetwork SettingsStep 3 of 9:HighlightandSelectthe Wi-FI through which the Xbox 360 is connected to the InternetStep 4 of 9: ChooseConfigure Networkfrom the available choicesStep 5 of 9: Highlight and selectDNS SettingsStep 6 of 9: ChooseManualin the Edit DNS Settings menuStep 7 of 9: Edit the choices as described below:Primary DNS - Fill in the DNS mentioned in the Account Dashboard under My Smart DNS tabSecondary DNS - leave blankStep 8 of 9: Confirm the changes by pressingDoneand head back to the Network Settings menu**heading back to the Network Settings menu is done by pressing the B button on your Xbox 360 controllerAdditional step: Run the feature ""Test Xbox Live Connection"" when requested by Support TeamStep 9 of 9:Return to the main menu of your Xbox 360 and choose Settings- Turn off(reboot) the Xbox 360 --------For any additional information or concerns - it is best to approach the Support Department:via e-mail:support@cyberghost.rovia on-line request:https://support.cyberghostvpn.com/hc/en-us/requests/newvia 24/7 Live! Chat Sessions on our website",https://support.cyberghostvpn.com/hc/en-us/articles/360012119999-Configure-My-Smart-DNS-for-Xbox-360
How to share a VPN connection over Ethernet on Windows,"This article will show youhow to share a VPN connection over Ethernet on Windows.Note:Before you begin, make sure you connect your Windows 10/11 host device and the device you wish to share the VPN connection with using an Ethernet cable. Also ensure both devices are powered on before proceeding.Toshare a VPN connection over Ethernet on Windows:On your host Windows device, open CyberGhost VPN and turn on the VPN.PressWindows Key+Xand clickNetwork Connections.Right-click on the connected CyberGhost Network Adapter. The name of the network adapter will depend on the VPN protocol you're using:Wintun Tunnel: If you're using the OpenVPN protocol.WAN Miniport: If you're using the IKEv2 protocol.WireGuard Tunnel: If you're using the WireGuard protocol.ClickProperties>Sharing.ToggleAllow other network users to connect through this computer's Internetconnectionon.Under theHome networking connectiondropdown menu, select eitherEthernetorEthernet 2.ClickOK.Congratulations. You are now sharing a VPN connection via Ethernet on Windows.",https://support.cyberghostvpn.com/hc/en-us/articles/115003162009-How-to-share-a-VPN-connection-over-Ethernet-on-Windows
Install CyberGhost VPN on MacOS,"This guide will show you can install CyberGhost on your Mac.You can watch our short demonstration video, or scroll below for a step-by-step guide.Jump to...System RequirementsInstallationSystem RequirementsTo install CyberGhost VPN successfully and use the software you need the following minimum system requirements:Mac OS X 10.13 (High Sierra) or newer OSAt least 70 megabytes of free hard drive spaceIf you're unsure whether your Mac is compatible, you can check Apple’s officialcompatibility list.InstallationFollow these steps to install CyberGhost VPN on your Mac:Go to your onlineaccount management page.Log in with your username and password.UnderDownload Hub, selectDownloadnext toCyberGhost VPN for macOS.On the next page, you will receive a pop-up asking if you wish to allow downloads on our site. SelectAllowand wait for the file to downloadOpen the downloads folder and double-click on the installation file.Follow the on-screen instructions.You will need to confirm the installation with your macOS username and password. Please do not enter your CyberGhost username and password here.Once the installation process in finishee, you can move the installer to bin.Next, you will receive a pop-up asking if you wish to receive notifications from our app. SelectAllowand close the installation window.You will receive a notification asking for your consent to send a limited amount of anonymized data.This data cannot be tracked back to you, and cannot be used to compromise your digital anonymity. It is meant to help us troubleshoot any potential issues, so you can selectAgree & continue.At the login screen, enter your CyberGhost username and password and selectLogin.Next, the software will ask to install a VPN profile. This will enable CyberGhost VPN to redirect your internet traffic through an encrypted tunnel to secure your data.Lastly, you will need to give CyberGhost VPN Keychain access. This ensures that the app has permission to encrypt your internet traffic. For this, please selectAllow keychain access.Enter your macOS account password in theKeychain dialogue boxand selectAlways Allow. Now, you have successfully installed CyberGhost VPN on your Mac.Need assistance? Contact our Customer Support team:via email atsupport@cyberghost.rovia online request athttps://support.cyberghostvpn.com/hc/en-us/requests/newvia 24/7 Live Chat by clicking the Support button below",https://support.cyberghostvpn.com/hc/en-us/articles/360020876860-How-to-install-CyberGhost-VPN-for-Mac-OS
Which possibilities do I have on devices without direct VPN support?,"If a device's firmware (e. g. Smart TVs, Satellite receiver, Kindle and game consoles) lacks settings for a VPN configuration and possibilities to install a third-party app or a native VPN, you have the following possibilities to circumvent those limitations:Internet Connection Sharing via Ethernet:You can set up your Windows Desktop PC as a gateway. Requirements are two network cards (physical ones) and, of course, a Windows operating system. One card processes the connection from the Windows PC via CyberGhost to the Internet, while the other card is used to connect to the respective devices you want to use. For a proper set up you need to know the IP address of the gateway PC (e.g. 192.168.0.2). This IP address is the gateway setting to be set in the respective device. For more detailed instructions seehere.Internet Connection Sharing via Wi-Fi:You can also set up your Windows Desktop PC as a gateway for Wi-Fi-capable devices.For detailed instruction please checkthis article.Proxy Server:Connect your device to a proxy server, running on a computer located in your local network. If this computer connects to the Internet via CyberGhost VPN, your device will do so as well. For that you will have to install a proxy server like Bouncer.exe or something similar; important is to write down the IP address of the local computer running the proxy server and the port number by which the proxy communicates. On your device, e.g. Sony’s PlayStation, open now the network settings. There you activate the option ‘Proxy Server’ (if available) and enter the noted IP address and the port number. Ignore all UPnP settings, confirm your changes, and test your new connection. If it works, it should show you the Internet IP address of the CyberGhost VPN server in use.VPN based router:Use a router with an alternative firmware like Tomato(USB), set up a CyberGhost connection and connect it to a modem. That way all devices connected to the router will be anonymized, while all other devices connected directly to the modem will not. Seehere(DD-WRT),here(TomatoUSB), orhere(TomatoUSB Merlin Build) to find out how to accomplish it.",https://support.cyberghostvpn.com/hc/en-us/articles/213271249-Which-possibilities-do-I-have-on-devices-without-direct-VPN-support
How to share a VPN connection over Wi-Fi on Windows 10,"This article will show how you can share a VPN connection over Wi-Fi on Windows 10.Step 1: Check on available networksMake sure you have a wireless device running, such as a built in interface or an external USB wireless adapter. Also the respective device needs to support hosted networks. To check on the latter do as follows:Press the 'Windows' button on your keyboard and type in 'cmd'.Right click on the result list entry called 'Command Prompt' and choose the entry 'Run as administrator'In the command prompt window type innetsh wlan show driversand press 'Enter'. Depending on the result do the following:If the generated output says'No wireless interface found'or similar you don't have a built in Wi-Fi card or haven't inserted your USB wireless adapter yet. Insert a card or an external adapter and repeat the test.If it shows'Hosted network supported: No'your device doesn't apply to the minimum system requirements. Add a compatible card or adapter and repeat the test.If it shows'Hosted network supported: Yes'you can continue with step 2.Step 2: Create and start a wireless hosted networkThink about how to name your shared network and what password you want people to enter when connecting to your connection: The SSID is the name your wireless network can be identified with, while the SSID key is the pass phrase (with at least 8 characters) you want users to type in.To specify the credentials enter this command in the Command prompt window:netsh wlan set hostednetwork mode=allow ssid=YourSSID key=YourPassphrasePlease add your own SSID and key and press 'Enter'.Activate the newly created hosted network by typing:netsh wlan start hostednetworkStep 3: Start CyberGhost VPNNow select the CyberGhost VPN Network Adapter. The VPN protocol used to establish the connection will determine the network adapter's name:Wintun Tunnel (if OpenVPN is used)WAN Miniport (if IKEv2 is used)WireGuard Tunnel (if WireGuard is used)Step 4: Share your VPN Internet connection via the hosted networkAfter creating and starting your hosted network and establishing a CyberGhost connection you need to bind the VPN connection to the hosted network and make it accessible to wireless capable devices. For that you use the 'Internet Connection Sharing' feature of the Windows 10 host system.Press 'Windows + X' on your keyboard and select 'network connections'.Right click on the running and connected CyberGhost Network Adapter. In this example, you'll see the OpenVPN-based Wintun Adapter.Choose the entry 'Properties'.Click on the tab 'Sharing'.Activate the option'Allow other network users to connect through this computer's Internet connection'.Choose the 'Microsoft Hosted Virtual Adapter' from the drop-down menu called 'Home networking connection'. It's usually labeled as 'LAN Connection* XX' whereas 'XX' responds to the number given to that network adapter, which has the SSID given to the hosted network created by you.Click 'OK' to finish.If you see just a text field (seems to be a Windows bug), close the 'Sharing' tab, click on 'OK' and repeat the sharing process.Step 5: Connect devices to your hosted networkNow that your hosted network is created, activated and ready to be shared hand over the credentials to those you want to share your CyberGhost VPN connection with and tell them to do the following:Search for new networks on the respective device.Tap on the Wi-Fi network with the name given by you, in this example it's 'SSIDvpn'.Enter the password given to this network, in this example it's 'SSIDvpnxxx'.Tap on 'Connect'.Note: CyberGhost VPN creates the network adapters only during a successful connection. Disconnecting from the app will delete the configuration.Need assistance? Contact our Customer Support team:via email atsupport@cyberghost.rovia online request athttps://support.cyberghostvpn.com/hc/en-us/requests/newvia 24/7 Live Chat by clicking the Support button below",https://support.cyberghostvpn.com/hc/en-us/articles/115002698345-How-to-share-a-VPN-connection-over-Wi-Fi-on-Windows-10
How to create a CyberGhost Account,"You start account creation directly on theCyberGhost Account Management page. For that click on 'New to CyberGhost VPN?Sign up now' located on the right side of the page:In the next window please enter the following data:Your e-mail:You need an e-mail to be able to use a CyberGhost subscription across multiple devices. In youronline account managementyou can change the e-mail at any time you want.Your Password:A password is also needed to log-in to the CyberGhost network. As the e-mail can be changed in your online account page at any time you want. Make sure to write the password again in the box labeled with ""Retype your password"" to avoid any typos.IMPORTANT: Your password must meet all the following conditions:At least 8 characters and maximum 32 charactersLetters: lowercase and uppercaseNumbers: 0-9At least one special character ! @ # $ % ^ & * ? ~ - _ ( )",https://support.cyberghostvpn.com/hc/en-us/articles/5382058040988
How to purchase a subscription,"You can order CyberGhost directly from theCyberGhost homepage, from a newsletter, an affiliate or through various special promotions. Either way the order process takes place online, where you first decide for the payment interval (e. g. monthly or yearly).For monthly plans, the Money Back Guarantee is 14 days, whereas the yearly subscriptions they are covered by a 45 day Money Back Guarantee in case you are not satisfied.Scroll down the page to the lower part of the website.In order to use a CyberGhost subscription you need a CyberGhost account. Depending on whether or not you already have one, the next steps are slightly different:Existing customer:In order to renew, upgrade or extend your CyberGhost subscription please login to yourOnline Account Management pagefirst. Once done you will see your account data and the remaining run-time of your current CyberGhost subscription (if existing). After purchase the new subscription will be added as additional time on top of any remaining days.For an account recovery, please clickhere.New customer:If you are new to CyberGhost or want a new account, please enter a valid email address, needed for payment confirmation, invoice and account data delivery.After the purchase is complete, new users will have to set up their password (please check below).Now decide for a payment method, enter your e-mail address and click on'Complete your purchase'and enter your payment details. Payments will be processed by a third party service to avoid privacy breaches based on common data bases. Click on'Next'.All personal data such as credit card number, PayPal account, names, etc. will stay private with the payment provider and never be submitted to third parties, not even to CyberGhost itself.On the next page check your details andacknowledge that you buy a subscription with recurring payment cycles. Click on 'Next'.Some special conditions (e. g. half the price) areonly valid for the first payment, while the next payments will reflect the regular subscription price.After the payment process ended successfully you will receive aconfirmation emailwith yourinvoice(this is where you will find the reference number as well - please always submit this number, if you have questions regarding your purchase such as asking for a refund or an account recovery) and you will be asked toset up a passwordfor yournew CyberGhost web-account.Finally, you will be redirected to your CyberGhost web-account to startinstalling the app on your favorite devices:Using native VPN ProtocolsTo use your CyberGhost subscription with a native protocol such asOpenVPNit is mandatory to first visit yourOnline Account Management page, manually add a new device and create another new pair of login data, solely meant for native protocols.Once done you can start configure your connection details as described in the various instruction manuals for VPN connections ondifferent platforms.",https://support.cyberghostvpn.com/hc/en-us/articles/213650885
How Do I Activate a Prepaid or Promotion Key?,"This article will show you how you can use an activation key or a prepaid key to subscribe to CyberGhost VPN.Note: You will receive an activation key with physical gift cards or promotional events. Subscriptions purchased through our website, App Store, or Google Play Store are automatically activated without the use of an activation key.First you will need a CyberGhost account. If you do not have one, you can create one for free. Please see our guide on how to create an accounthere.To activate a key, first go to your onlineaccount management.Login with your credentials and expand the menu by clicking on your profile logo in the upper right corner of the screen.SelectAccount Settings.SelectUse your activation key.Enter your activation key in the specified box, and selectUse.Encountered issues? This might be whyYou already used your key- All activation keys can only be used once. To use CyberGhost VPN on other devices, simply log into the app with your credentials. You do not have to activate every device.Your key has expired- For physical gift cards, please check your box for the expiry date.Downgrades are not possible- Make sure your activation key corresponds to the subscription type active on your account.You have an active subscription that you are trying to extend with an activation key- Prepaid subscriptions or gift cards cannot be used to extend subscriptions purchased from our website, Google Play Store, or App Store. If you want to force it, you must cancel your old subscription and request a refund provided it falls within our refund policy.Note: You will lose all your remaining runtime of your subscription this way.You are trying to extend a promotional subscription- Promotional subscriptions cannot be extended by another activation key. Using an activation key will replace your remaining subscription and you will lose any remaining runtime.Note: Subscriptions coming from physical gift cards are not covered by ourrefund policy.Need assistance? Contact our Customer Support team:via email atsupport@cyberghost.rovia online request athttps://support.cyberghostvpn.com/hc/en-us/requests/newvia 24/7 Live Chat by clicking the Support button below",https://support.cyberghostvpn.com/hc/en-us/articles/360017320500
Router: How to Set Up OpenVPN on DD-WRT Routers,"Please note the following requirements:Router with alternative DD-WRT firmware and support of OpenVPN.Older versions need to be updated.Info:DD-WRT WebsiteA CyberGhost accountInfo:Here's how to create a CyberGhost account onlineInfo:How to manage your CyberGhost accountA CyberGhost subscriptionInfo:How to purchase or upgrade a subscriptionInfo(only prepaid subscribers):Enter activation keyDisclaimer:Please keep in mind that, although the technical process is as thoroughly documented as possible, you need to have at least some technical understanding. There's always a chance for an overseen mistake and/or things have changed and the article is not updated yet.FlashRouters offers plug and playDD-WRT Routers preconfigured with CyberGhost VPNfor this setup.Some general notes on routers:Routers are usually not equipped with state of the art hardware, meaning you will have speed losses when using a VPN connection (due to low CPU power to process encryption). Direct connections from your PC, Laptop, Tablet, etc. to the VPN network (without the router providing the VPN software) will work better for you if speed is among your favorite desires.If your flashed router doesn't provide DSL functionality, your Internet connection will still need to be managed by your DSL modem. In that case, your device pool will hook on your router (via cable or wireless) and the router itself will be hooked to your DSL modem. So don’t forget to configure your WLAN devices to connect to the new router, so they won’t log in to the old WLAN. Alternatively, you can deactivate your modem’s WLAN completely (only if you don’t need it for unencrypted traffic).If you flash your router with an alternative firmware you might lose your device’s guarantee; please consult your dealers’ policies regarding this matter. Furthermore, it might happen that the flash process leaves your device unusable, e.g. after a power failure while flashing. CyberGhost is not to be held responsible for any damages, does not acknowledge any liabilities, and will not adopt your manufacturer’s warranty.Also please note that not all routers with VPN client support will be able to connect to the CyberGhost network or might lose that ability with future firmware updates.DD-WRT is a custom firmware for routers, it offers OpenVPN protocol support and is available on a wide variety of routers. You can check if your router supports DD-WRT firmwarehere. An article on how to install DD-WRT firmware on a router can be foundhere.This is a tutorial on how to set up an OpenVPN connection on your DD-WRT router using the OpenVPN client UI.It has been made using this configuration:Firmware: DD-WRT v3.0-r40900 std (09/04/19)Hardware: Linksys WRT32xStep1The first thing you should do is make sure your DD-WRT router can connect to the Internet.Connect to your Router Management console by starting your web browser and typing the following IP in the address bar:192.168.1.1(this is the default router management address, yours may differ if you've manually set a different one)1. Now click on'Setup'>'Basic Setup'- ensure the'Automatic Configuration'of IP addresses (DHCP) is set as the connection type and give your DD-WRT router a fixed local IP address under 'Network Setup' >Local IP Address -If you set this to something other than the default, please note that the address you enter here WILL be the one you'll be using when you wish to access the router Management Console (default is 192.168.1.1).NOTE :The default settings should do just fine once 'Automatic Configuration' is selected, only tweak this if you have specific settings provided by your ISP2.Navigate toSetup>IPV6. Set IPv6 to Disable, thenSave&ApplySettings.(this is a recommended step to make sure you get no IP leaks)Step 2Visit yourCyberGhost VPN online accountand login with your Premium Username and PasswordSelect""VPN""from the left-side menu, then click""Configure Device""and create your server configuration, as described below:Now create your server configuration, as described below :Protocol :OpenVPNCountry :Since native protocol connections may only be used with exactly one server you now have to choose the country you want to surf from; the server to be used in this country will be chosen by CyberGhost automatically.Server group :Choose the server group and the OpenVPN protocol (UDP or TCP) you want to useOpenVPN UDPallows higher speed than the TCP version but can result in broken downloads in some cases. This is the default setting.OpenVPN TCPallows more stable connections than the UDP version but is a bit slower. Choose this version, if you have recurrent connection issues such as sudden disconnections.Once the desired parameters are chosen, save them with«Save Configuration»To view theOpenVPNcredentials that are generated for you on the configuration dashboard, pressView Configuration.After setting up your connection preferences, please take note of the following:Server Group :This is the address of the country (server) you want to be connected with, e.g. '12345-1-ca.cg-dialup.net'. This address changes with every country you have chosen in the step before. The actual single server to be used will be chosen automatically by CyberGhost.Username :A solely for this protocol generated user name.This is NOT your regular CyberGhost account user name, it's used only to authenticate with our servers via Manual Configurations.Password :A solely for protocol usage generated password.This is NOT your regular CyberGhost account password, it's used only to authenticate with our servers via Manual Configurations.Pre-Shared KeyOnce done, please download the configuration file. For that click on«Download Configuration»and download the config file to your computer (it's recommended that you create a special folder for the config, somewhere accessible like your Desktop andExtract/Copy thecontents of the .zip file there.Important:please keep your username and password obtained during the configuration process at hand, you will be asked to enter them later in the setup.Now, the saved config is a ZIP file, which contains the following single files:ca.crt:This is the certificate of the certification authorityclient.crt:This is the user certification fileclient.key:This is your private key fileopenvpn.ovpn:This is yourOpenVPNconfiguration fileIf you need to change the country you connect to, you must re-configure the location to use in your account management and download the new zipped config file.Step3Open your router interface, as before, by starting your web browser and typing the following IP in the address bar:192.168.1.1(this is the default router management address, yours may differ if you've manually set a different one)Once in the router management console,'Services'> then'VPN'.Scroll down to'OpenVPN Client'and check the 'Enable' option next to'Start OpenVPN Client'.Now you can quickly fill in the client's settings as shown below:Server IP / Name:Please enter the server group of Step 2, e. g.'12345-1-ca.cg-dialup.net'. Depending on the country to connect with, fist part of each address will be changed, e.g. instead of'12345-1-dialup.net‘(CA meaning Canada and12345-1being the server group), when choosing a different country, the first part would be similar to'12345-1-gb.cg-dialup.net'(GB meaning Great Britain and12345-1the server group).Port:443Tunnel Device:TUNTunnel Protocol:UDP or TCP,(depending on which protocol type you have chosen in step 1)Encryption Cipher:AES-256-CBCHash Algorithm:SHA256User Pass Authentication:EnableUSERNAME:The username you have generated when adding the device in STEP 1(this is NOT your regular CyberGhost Username)PASSWORD:The password you have generated when adding the device in STEP 1(this is NOT your regular CyberGhost Password)Advanced Options:EnabledTLS Cipher:NoneLZO Compression:DisabledNAT:EnableFirewall Protection: EnableIP Address:leave blankSubnet Mask:leave blankTunnel MTU setting:1500Tunnel UDP Fragment:leave blankTunnel UDP MSS-Fix:DisablensCertType verification: Leave uncheckedTLS Auth Key: leave blankAdditional Config:Go to the folder where you've extracted the downloaded configuration,right-clickthe'openvpn.ovpn'file and open it with aTEXTeditor (any text editor will do butWordPaddisplays the config. more clearly).-Once open, select the passage from 'resolv-retry infinite' to 'verb 4' andright-click > COPYthe selected text (or use CTRL+C)- Right-click in the'Additional Config'field and clickPASTEPolicy based Routing:leave blankPKCS12 Key:leave blankStatic Key:leave blankCA Cert:In this box please copyallof the textfound in the'CA.crt'file.Just like with the .ovpn file, right-click the'CA.crt'file and choose Open With > WordPad/Notepad >copy ALL of the text 'ca.crt' and PASTE it in this boxPublic Client Cert:In this box please copyallof the textfound in the'client.crt'file.Just like with the .ovpn file, right-click the'client.crt'file and choose Open With > WordPad/Notepad >copy ALL of the text 'client.crt' and PASTE it in this boxPrivate Client Key:In this box please copyallof the textfound in the'client.key'file.Just like with the .ovpn file, right-click the'client.key'file and choose Open With > WordPad/Notepad >copy ALL of the text 'client.key' and PASTE it in this boxClick onSaveand then onApply SettingsBelow is an example of a properly configured router :Step 4Finally, click on theAdministrationtab >CommandsIn the Command Shell field, copy and paste the following commands(from this article, select all commands beginning with iptables > right-click > copy :iptables -I FORWARD -i br0 -o tun1 -j ACCEPTiptables -I FORWARD -i tun1 -o br0 -j ACCEPTiptables -I INPUT -i tun1 -j REJECTiptables -t nat -A POSTROUTING -o tun1 -j MASQUERADERight-click in the'Commands'box > PASTE > click on'Save Firewall'.You can now reboot the device by going toAdministration>Management> scroll all the way down and clickReboot RouterNOTE :You may need to wait some time (upwards of 1 minute, depending on the router) for the settings to apply.To verify the VPN is working, navigate toStatus > OpenVPNUnderState, you should see the message: Client:CONNECTED SUCCESSImportant: You WILL need to Reboot the Router each time you set a different countryFinally, restart your browser (this is extremely important as location info may be cached in the browser) and visit a website likeiplocation.netto verify the change of your IPFor any additional information or concerns - it is best to approach the Support Department:via e-mail:support@cyberghost.rovia on-line request:https://support.cyberghostvpn.com/hc/en-us/requests/newvia 24/7 Live! Chat Sessions on our website",https://support.cyberghostvpn.com/hc/en-us/articles/213811885-Router-How-to-configure-OpenVPN-for-flashed-DD-WRT-routers
Router: How to Set Up OpenVPN on TomatoUSB,"Please note the following requirements:Router with alternative Tomato firmware and support of OpenVPN.Older versions need to be updated.Info:Official Tomato websiteA CyberGhost accountInfo:Here's how to create a CyberGhost account onlineInfo:How to manage your CyberGhost accountA CyberGhost subscriptionInfo:How to purchase or upgrade a subscriptionInfo(only prepaid subscribers):Enter activation keyDisclaimer:Please keep in mind that, although the technical process is as thoroughly documented as possible, you need to have at least some technical understanding. There's always a chance for an overseen mistake and/or things have changed and the article is not updated yet.Tomato is a custom firmware for routers. It offers OpenVPN client support and is available on a variety of routers. To verify if your router supports Tomato firmware, you can check if your router supports Tomato firmwarehere. An article on how to install Tomato firmware on a router can be foundhere.Some general notes on routers:Routers are usually not equipped with state of the art hardware, meaning you will have speed losses when using a VPN connection (due to low CPU power to process encryption). Direct connections from your PC, Laptop, Tablet, etc. to the VPN network (without the router providing the VPN software) will work better for you if speed is among your favorite desires.If your flashed router doesn't provide DSL functionality, your Internet connection will still need to be managed by your DSL modem. In that case, your device pool will hook on your router (via cable or wireless) and the router itself will be hooked to your DSL modem. So don’t forget to configure your WLAN devices to connect to the new router, so they won’t log in to the old WLAN. Alternatively, you can deactivate your modem’s WLAN completely (only if you don’t need it for unencrypted traffic).If you flash your router with an alternative firmware you might lose your device’s guarantee; please consult your dealers’ policies regarding this matter. Furthermore, it might happen that the flash process leaves your device unusable, e.g. after a power failure while flashing. CyberGhost is not to be held responsible for any damages, does not acknowledge any liabilities, and will not adopt your manufacturer’s warranty.Also please note that not all routers with VPN client support will be able to connect to the CyberGhost network or might lose that ability with future firmware updates.Step1Visit yourCyberGhost VPN online account.Select""VPN""then click""Configure Device""and create your server configuration, as described below:Protocol :Open VPNCountry :Since native protocol connections may only be used with exactly one server you now have to choose the country you want to surf from; the server to be used in this country will be chosen by CyberGhost automatically.Server group :Choose the server group and the OpenVPN protocol (UDP or TCP) you want to useImportant :please keep your username and password obtained during the configuration process at hand, you will need them later in the setup.Now, the saved config is a ZIP file, which contains the following single files:ca.crt:This is the certificate of the certification authorityclient.crt:This is the user certification fileclient.key:This is your private key fileopenvpn.ovpn:This is yourOpenVPNconfiguration fileIf you need to change the country you connect to, you must re-configure the location to use in your account management and download the new zipped config file.Step2First things first, these changes are made in the web configuration panel of your router. You can access it by visiting the local IP of your router from your web browser. The two most common, the default local IPs that most routers have are 192.168.1.1 or 192.168.0.1 – you can access these by openinghttp://192.168.1.1orhttp://192.168.0.1in your browser. The default IP, username, and password are listed in your router’s User Manual.Open the router settings page on your browser by entering the router local address (192.168.1.1 by default).On the left side menu, clickVPN Tunneling->OpenVPN ClientBasicActivate the main tabClient 1and the sub-tabBasic. Check all of the following options and change those which show different:Start with WAN:UncheckInterface Type:TUNProtocol:UDP or TCP (depending on what type you decided to use in step 1)Server Address/Port:Please enter the server address/group of Step 1, e. g.'12345-1-ca.cg-dialup.net'. Depending on the country to connect with, fist part of each address will be changed, e.g. instead of'12345-1-dialup.net‘(CA meaning Canada and12345-1being the server group), when choosing a different country, the first part would be similar to'12345-1-gb.cg-dialup.net'(GB meaning Great Britain and12345-1the server group).Firewall:AutomaticAuthorization Mode:TLSUsername/Password Authentication:CheckedUsername:The user name created in step 1. DO NOT use your regular user name!Password:The password created in step 1. DO NOT use your regular password!Username Authentication only:UncheckedExtra HMAC authorization:DisabledCreate NAT on tunnel:CheckedOpening'Basic > Network'you can also configure the DNS server to be used. If you want to, please exchange the first DNS IP address with a censorship-free CyberGhost name server:Primary:10.101.0.243Secondary:38.132.106.139Also, take care of the correct configuration of the time zone and server in the tab'Basic > Time'.Click onAdvancedtab and set the following options:Poll Interval:0 (deactivated)Redirect Internet traffic:CheckedAccept DNS configuration:StrictEncryption cypher:AES-256-CBCCompression:DisabledTLS Renegotiation Time:-1Connection retry:-1Verify server certificate:UncheckedCustom Configuration:Here you mark all existing lines, delete them and exchange them with some parts of your downloaded 'openvpn.ovpn' configuration file: For that, open the OpenVPN file with a simple text editor, mark the text beginning with 'resolve-retry infinete' and ending with 'verb 4' (including both lines), copy the text with 'Control-C' and insert it here with 'Control-V'. It should look like this:resolv-retry infiniteredirect-gateway def1persist-keypersist-tunnobindcipher AES-256-CBCauth SHA256ping 5ping-exit 60ping-timer-remexplicit-exit-notify 2script-security 2remote-cert-tls serverroute-delay 5verb 4# Note : Some routers don't understand this command. In cases of doubt or if the configuration doesn't work, please remove this entry.]Please don’t copy this example for a server configuration might change after publishing this article.KeysNow switch to the tab ‚Keys‘. There you find three fields, which have to be filled with the corresponding content of the other three files you downloaded from your CyberGhost account management. For that you also open the respective file with a simple editor and copy the respective text passages:Certificate Authority:Copy all text of the file 'ca.crt' in here.Client Certificate:Copy all text of the file 'client.crt' in here.Client Key:Copy all text of the file 'client.key' in here.At last click onStart Nowto initiate the VPN.Click on the“Status”tab to check if you’re now connected.For any additional information or concerns - it is best to approach the Support Department:via e-mail:support@cyberghost.rovia on-line request:https://support.cyberghostvpn.com/hc/en-us/requests/newvia 24/7 Live! Chat Sessions on our website",https://support.cyberghostvpn.com/hc/en-us/articles/213269969-Router-How-to-setup-OpenVPN-on-Tomato
Router: How to Set Up OpenVPN on TomatoUSB Merlin Build,"Please note the following requirements:Router with alternative TomatoUSB Merlin Build firmware and support of OpenVPN.Older versions need to be updated.Info:Official Tomato websiteA CyberGhost accountInfo:Here's how to create a CyberGhost account onlineInfo:How to manage your CyberGhost accountA CyberGhost subscriptionInfo:How to purchase or upgrade a subscriptionInfo(only prepaid subscribers):Enter activation keyDisclaimer:Please keep in mind that, although the technical process is as thoroughly documented as possible, you need to have at least some technical understanding. There's always a chance for an overseen mistake and/or things have changed and the article is not updated yet.Some general notes on routers :Routers are usually not equipped with state of the art hardware, meaning you will have speed losses when using a VPN connection (due to low CPU power to process encryption). Direct connections from your PC, Laptop, Tablet, etc. to the VPN network (without the router providing the VPN software) will work better for you if speed is among your favorite desires.If your flashed router doesn't provide DSL functionality, your Internet connection will still need to be managed by your DSL modem. In that case, your device pool will hook on your router (via cable or wireless) and the router itself will be hooked to your DSL modem. So don’t forget to configure your WLAN devices to connect to the new router, so they won’t log in to the old WLAN. Alternatively, you can deactivate your modem’s WLAN completely (only if you don’t need it for unencrypted traffic).If you flash your router with an alternative firmware you might lose your device’s guarantee; please consult your dealers’ policies regarding this matter. Furthermore, it might happen that the flash process leaves your device unusable, e.g. after a power failure while flashing. CyberGhost is not to be held responsible for any damages, does not acknowledge any liabilities, and will not adopt your manufacturer’s warranty.Also please note that not all routers with VPN client support will be able to connect to the CyberGhost network or might lose that ability with future firmware updates.Step1Visit yourCyberGhost VPN online accountand login with your Premium Username and PasswordSelect the ""VPN"" section from the left-side menuSelect ""Configure Device""Now create your server configuration, as described below :Protocol :Open VPNCountry :Since native protocol connections may only be used with exactly one server you now have to choose the country you want to surf from; the server to be used in this country will be chosen by CyberGhost automatically.Server group :Choose the server group and the OpenVPN protocol (UDP or TCP) you want to useOpenVPN UDPallows higher speed than the TCP version but can result in broken downloads in some cases. This is the default setting.OpenVPN TCPallows more stable connections than the UDP version but is a bit slower. Choose this version, if you have recurrent connection issues such as sudden disconnections.Once the desired parameters are chosen, save them with""Save Configuration""To view theOpenVPNcredentials that are generated for you on the configuration dashboard, click on the""View""button.After setting up your connection preferences, please take note of the following:Server Group :This is the address of the country (server) you want to be connected with, e.g. '12345-1-ca.cg-dialup.net'. This address changes with every country you have chosen in the step before. The actual single server to be used will be chosen automatically by CyberGhost.Username :A solely for this protocol generated user name.This is NOT your regular CyberGhost account user name, it's used only to authenticate with our servers via Manual Configurations.Password :A solely for protocol usage generated password.This is NOT your regular CyberGhost account password, it's used only to authenticate with our servers via Manual Configurations.Pre-Shared KeyOnce done, please download the configuration file. For that click on""Download Configuration""and download the config file to your computer (it's recommended that you create a special folder for the config, somewhere accessible like your Desktop andExtract/Copy thecontents of the .zip file there).Important :please keep your username and password obtained during the configuration process at hand, you will need them later in the setup.Now, the saved config is a ZIP file, which contains the following single files:ca.crt:This is the certificate of the certification authorityclient.crt:This is the user certification fileclient.key:This is your private key fileopenvpn.ovpn:This is yourOpenVPNconfiguration fileIf you need to change the country you connect to, you must re-configure the location to use in your account management and download the new zipped config file.Step 2Open your TomatoUSB (Merlin Build) router’s configuration page and click on the left side in the area ‚Advanced Settings‘ on ‚VPN Server‘ and after that in the upper menu on ‚OpenVPN Client Settings‘Basic SettingsActivate under ‚Select client Instance‘ the entry ‚Client 1‘, check the following options and change those which show different:Start with WAN:NoInterface Type:TUNProtocol:UDP or TCP (depending on what type you decided to use in step 1)Server Address and Port:Server Group Address: 1234-5-ro.cg-dialup.net / Port: 443 (Step 1)Firewall:AutomaticAuthorization Mode:TLSUsername/Password Authentication:YesUsername:The user name created in step 1. DO NOT use your regular user name!Password:The password created in step 1. DO NOT use your regular password!Username Authentication only:NoExtra HMAC authorization:DisabledCreate NAT on tunnel:YesAdvanced SettingsAfter activating the tabAdvanced Settingsplease check the following options:Poll Interval:0 (means deactivated)Redirect Internet traffic:YesAccept DNS configuration:RelaxedEncryption cypher:AES-256-CBCCompression:DisabledTLS Renegotiation Time:-1Connection retry:30Verify server certificate:NoCustom Configuration:Here you mark all existing lines, delete them and exchange them with some parts of your downloaded 'openvpn.ovpn' configuration file: For that, open the OpenVPN file with a simple text editor, mark the text beginning with :'resolve-retry infinite'and ending with'verb 4'(including both lines), copy the text with 'Ctrl-C', and insert it here with 'Ctrl-V'.It should look like this:resolv-retry infiniteredirect-gateway def1persist-keypersist-tunnobindcipher AES-256-CBCauth SHA256ping 5ping-exit 60ping-timer-remexplicit-exit-notify 2script-security 2remote-cert-tls serverroute-delay 5verb 4#Note : Some routers don't understand this command. In cases of doubt or if the configuration doesn't work, please remove this entry.]Please don’t simply copy this example for a server configuration might change after publishing this article.OpenVPN KeysNow switch to the tabOpenVPN KeysThere you find four fields, whereas three of them have to be filled with the corresponding content of the other three files you downloaded from your CyberGhost account management. For that you also open the respective file with a simple editor and copy the respective text passages:Certificate Authority:Copy all text of the file 'ca.crt' in here.Client Certificate:Copy all text of the file 'client.crt' in here.Client Key:Copy all text of the file 'client.key' in here.At last click onApplyto save your configuration.For any additional information or concerns - it is best to approach the Support Department:via e-mail:support@cyberghost.rovia on-line request:https://support.cyberghostvpn.com/hc/en-us/requests/newvia 24/7 Live! Chat Sessions on our website",https://support.cyberghostvpn.com/hc/en-us/articles/213269809-Router-How-to-setup-OpenVPN-on-TomatoUSB-Merlin-Build
How to Set Up OpenVPN on Raspberry Pi (Raspbian/RaspBMC),"Please note the following requirements:Raspberry Pi with ARM processorLinux distribution like Raspbian or RaspBMCUp to date software packagesA CyberGhost accountInfo:Here's how to create a CyberGhost account onlineInfo:How to manage your CyberGhost accountA CyberGhost subscriptionInfo:How to purchase or upgrade a subscriptionInfo(only prepaid subscribers):Enter activation keyDisclaimer:Please keep in mind that, although the technical process is as thoroughly documented as possible, you need to have at least some technical understanding. There's always a chance for an overseen mistake and/or things have changed and the article is not updated yet.Step1Visit yourCyberGhost VPN online accountand login with your Premium Username and PasswordSelect the""VPN""from the left-side menuScroll down the page and select""Configure Device""3. Now create your server configuration, as described below :Protocol :Open VPNCountry :Since native protocol connections may only be used with exactly one server you now have to choose the country you want to surf from; the server to be used in this country will be chosen by CyberGhost automatically.Server group :Choose the server group and the OpenVPN protocol (UDP or TCP) you want to useOpenVPN UDPallows higher speed than the TCP version but can result in broken downloads in some cases. This is the default setting.OpenVPN TCPallows more stable connections than the UDP version but is a bit slower. Choose this version, if you have recurrent connection issues such as sudden disconnections.Once the desired parameters are chosen, save them with""Save Configuration"":4. To view theOpenVPNcredentials that are generated for you on the configuration dashboard, pressView Configuration.After setting up your connection preferences, please take note of the following:Server Group :This is the address of the country (server) you want to be connected with, e.g. '12345-1-ca.cg-dialup.net'. This address changes with every country you have chosen in the step before. The actual single server to be used will be chosen automatically by CyberGhost.Username :A solely for this protocol generated user name.This is NOT your regular CyberGhost account user name, it's used only to authenticate with our servers via Manual Configurations.Password :A solely for protocol usage generated password.This is NOT your regular CyberGhost account password, it's used only to authenticate with our servers via Manual Configurations.Pre-Shared Key5. Once done, please download the configuration file. For that click on""Download Configuration""and download the config file to your computer (it's recommended that you create a special folder for the config, somewhere accessible like your Desktop andExtract/Copy thecontents of the .zip file there).Important :please keep your username and password obtained during the configuration process at hand, you will need them later in the setup.Now, the saved config is a ZIP file, which contains the following single files:ca.crt:This is the certificate of the certification authorityclient.crt:This is the user certification fileclient.key:This is your private key fileopenvpn.ovpn:This is yourOpenVPNconfiguration fileIf you need to change the country you connect to, you must re-configure the location to use in your account management and download the new zipped config file.Step 2Unzip all containing files, rename the file 'openvpn.ovpn' to e. g. ‘CG_RO.conf’ (depends on the location you want to connect to) and copy all files into your OpenVPN directory on your Raspi. For that first move to the folder in which you unzipped all files by typing:cd [path to configuration folder]Now copy them:sudo cp CG_XX.conf /etc/openvpn/sudo cp ca.crt /etc/openvpn/sudo cp client.crt /etc/openvpn/sudo cp client.key /etc/openvpn/If you want to surf from more than one country, download after the selection of a different country in your account management the next zipped configuration file and rename the new 'openvpn.ovpn' to 'CG_AnotherCountry.conf'.For two different countries you need for example do the following steps:Specify device, protocol and operating systemChoose a country, e.g. USADownload the zipped configuration file with certificates, key and OpenVPN configuration fileUnzip the downloaded file and copy all files in your OpenVPN configuration folderRename the OpenVPN configuration file from ‘openvpn.ovpn’ to ‘CG_USA.conf’.Choose the next country, e.g. RomaniaDownload the next zipped configuration fileUnzip the downloaded file and copy just the file 'openvpn.ovpn' into the configuration folderRename it to ‘CG_RO.ovpn’.etc. ...Step 3Make sure you have the right packages:Before you can begin configuring your network settings make sure you already installed the needed packages and have an up to date system:Download the package information by opening a console and typing :sudo apt-get update && sudo apt-get upgradeOnce done download the needed OpenVPN package with :sudo apt-get install openvpn openssl openresolvTo be able to log in automatically, save your user name and password in a file called ‘user.txt’ and store it in your OpenVPN folder. For that first move to the respective folder:cd /etc/openvpnEnter the following command to create and open a text file called 'user':sudo nano user.txtType in your credentials (one in each line). In the first line type in the user name created in step 1, in the second line the password, also created in step 1, both as displayed in your account management when setting up a connection:UsernamePassword#First line is a generated username and the second line is a generated password.DO NOT use your regular CyberGhost user name and password, which you use to login in the client and your account management!Save your changes with ‘CTRL+O’ and leave the editor via ‘CTRL+X’Next, open the configuration file ‘CG_XX.conf’ by typingsudo nano CG_XX.confExtend the line ‘auth-user-pass’ …[...]auth-user-pass[...]… with the path to your credential file:[...]auth-user-pass /etc/openvpn/user.txt[...]At the bottom of the configuration passage (after 'verb 4') add the following two lines:up /etc/openvpn/update-resolv-confdown /etc/openvpn/update-resolv-confSave via ‘CTRL+O’ and leave the editor with ‘CTRL+X’.Then get the file autoloaded by typing :sudo nano /etc/default/openvpnand adding the following line:AUTOSTART=""CG_XX"" (the name of the file WITHOUT the file extension ‘.conf’)Again, save with ‘CTRL+O’ and leave the editor with ‘CTRL+X’.At last type in your console :sudo update-rc.d openvpn enableStep 4Before starting OpenVPN check your configuration with …cat /etc/resolv.conf… and have a look, if the last line (‘nameserver’) shows the IP of the router. If not, change it.Now start OpenVPN:sudo service openvpn startWait a few seconds and then test, if everything works fine.Furthermore, you might want to open the websitehttps://dnsleaktest.com/and test on leaks. For that choose ‘Standard Test’ or ‘Extended Test’.*Many thanks to ‘Haudrauf’ for the original tutorial!",https://support.cyberghostvpn.com/hc/en-us/articles/213270689-Raspberry-Pi-How-to-configure-OpenVPN-for-Raspbian-RaspBMC-Raspberry-Pi-
How to use CyberGhostVPN on Synology NAS via OpenVPN,"This tutorial guide will take you through the steps of setting up a VPN on your Synology using OpenVPN.Download OpenVPN configuration filesLogin into yourCyberGhostVPN accountand then click onVPNScroll down toManual setupand then click onConfigure DeviceProtocol :Make sure to use onlyOpenVPN 2.3orOpenVPN 2.3 TCPCountry :Since native protocol connections can only be used with a single server, you must now choose the country from which you want to surf; the server to be used in this country will be automatically chosen by CyberGhost.Server Group :Select the available server group from the list.OpenVPN 2.3allows higher speed than the TCP version but can result in broken downloads in some cases. This is the default setting;OpenVPN 2.3 TCPallows more stable connections than the UDP version but is a bit slower. Choose this version, if you have recurrent connection issues such as sudden disconnections;Once the desired parameters are chosen, save them with""Save Configuration""To view theOpenVPN 2.3credentials that are generated for you on the configuration dashboard,press""View""After setting up your connection preferences, please take note of the following :Server Group :This is the address of the country (server) you want to be connected with, e.g. 'xx-xx-ca.cg-dialup.net'. This address changes with every country you have chosen in the step before. The actual single server to be used will be chosen automatically by CyberGhost.User name :A solely for this protocol generated user name.This is NOT your regular CyberGhost account user name, it's used only to authenticate with our servers via Manual Configurations.Password :A solely for protocol usage generated password.This is NOT your regular CyberGhost account password, it's used only to authenticate with our servers via Manual Configurations.Once done, please download the configuration file. For that click on""Download Configuration""and download the config file to your computer (it's recommended that you create a special folder for the config, somewhere accessible like your Desktop andExtract/Copy thecontents of the .zip file there.Important: please keep your username and password obtained during the configuration process at hand, you will be asked to enter them later in the setup.The archive file contains 4 files that need to be extracted :Server security certificate: ca.crtClient safety certificate: client.crtKey file: client.keyOpenVPN configuration file: openvpn.ovpnTurn off IPv6Before enabling VPN on your Synology, CyberGhost VPN highly recommends you to disable IPv6 to prevent IPv6 traffic from leaking out of the VPN tunnelTo turn off IPv6, go toControl Panel>Network>Network Interface.Click theNetwork Interfacetab and then click theLANmenu to expand it.ClickEditIn the Edit menu, click theIPv6tab. For IPv6 setup, selectOff. ClickOK.After disabling IPv6,reboot your Synology.Create a new VPN profileTo add a new VPN profile, we need to return to the Network Interface settings. Go toControl Panel>Network>Network Interface.SelectCreate>Create VPN Profile.Set up your VPN profileFrom the VPN Connection Method screen, selectOpenVPN (via importing a .ovpn file)and clickNext.On the General Settings screen, enter the following information :Profile name: CyberGhost VPN (or a name to help you remember the connection)User name: user name that you have obtained during the configuration processPassword: the password that you have obtained during the configuration processThen, you will continue the setup by adding the 4 files downloaded from your online account :in the field '.ovpn files' -> import the .ovpn filein the field 'CA certificate' -> import the file ca.crtin the field 'Client certificate' -> import the file client.crtin the field 'Client key' -> import the file client.keyClickNext.Check the boxes forUse default gateway on a remote networkandReconnect when the VPN connection is lost.The box forAllow other network devices...is optional.ClickApplyto continue.Connect to the VPN serverYou should now see your new VPN profile in the network interface window. Click on your new VPN profile and then clickConnect.After a successful connection, the status of the profile will change toConnectedand that's it!",https://support.cyberghostvpn.com/hc/en-us/articles/360012606699-How-to-use-CyberGhostVPN-for-Synology-NAS-via-OpenVPN
Sat Receiver: How to Set Up Enigma2 and VU+ Solo² with CyberGhost via OpenVPN,"The digital HDTV satellite receiver 'VU+ Solo²' is based on Linux and can be used with your CyberGhost account with an OpenVPN installation if the following requirements are met:Most recent firmwareInstalled OpenVPN plug-in for the receiverLinux operating system (PC)A CyberGhost accountInfo:Here's how to create a CyberGhost account onlineInfo:How to manage your CyberGhost accountA CyberGhost subscriptionInfo:How to purchase or upgrade a subscriptionInfo(only prepaid subscribers):Enter activation keyDisclaimer:Please keep in mind that, although the technical process is as thoroughly documented as possible, you need to have at least some technical understanding. There's always a chance for an overseen mistake and/or things being changed whilst the article may not yet have been updated.Step 1Visit yourCyberGhost VPN online accountand log in with your CyberGhost Username and PasswordClick on the ""VPN""section from the left-side menuSelect""Configure Device""Now create your server configuration, as described below :Protocol :Open VPNCountry :Since native protocol connections may only be used with exactly one server you now have to choose the country you want to surf from; the server to be used in this country will be chosen by CyberGhost automatically.Server group :Choose the server group and the OpenVPN protocol (UDP or TCP) you want to useOpenVPN UDPallows higher speed than the TCP version but can result in broken downloads in some cases. This is the default setting.OpenVPN TCPallows more stable connections than the UDP version but is a bit slower. Choose this version, if you have recurrent connection issues such as sudden disconnections.Once the desired parameters are chosen, save them with""Save Configuration""To view theOpenVPNcredentials that are generated for you on the configuration dashboard, go again to the""VPN""section and press the""View""button associated with your configuration.After setting up your connection preferences, please take note of the following:Server Group :This is the address of the country (server) you want to be connected with, e.g. '12345-1-ca.cg-dialup.net'. This address changes with every country you have chosen in the step before. The actual single server to be used will be chosen automatically by CyberGhost.Username :A solely for this protocol generated user name.This is NOT your regular CyberGhost account user name, it's used only to authenticate with our servers via Manual Configurations.Password :A solely for protocol usage generated password.This is NOT your regular CyberGhost account password, it's used only to authenticate with our servers via Manual Configurations.Pre-Shared KeyOnce done, please download the configuration file. For that click on""Download Configuration""and download the config file to your computer (it's recommended that you create a special folder for the config, somewhere accessible like your Desktop andExtract/Copy thecontents of the .zip file there).Important :please keep your username and password obtained during the configuration process at hand, you will need them later in the setup.Now, the saved config is a ZIP file, which contains the following single files:ca.crt:This is the certificate of the certification authorityclient.crt:This is the user certification fileclient.key:This is your private key fileopenvpn.ovpn:This is yourOpenVPNconfiguration fileOnce you unzip all single files to a computer and rename the file 'openvpn.ovpn' to ‘CyberGhost.conf’.If you need to change the country to surf from, you must re-configure the location (select a different country) to use in your account management, download the new config file, unzip it and rename the new OpenVPN file to 'CyberGhost.conf'.Step 21. To be able to log in automatically, save your user name and password in a file called ‘pas.key’. For this you need to have access to a Linux computer where you type the following command in a terminal window:sudo nano pas.keyType in your credentials (one in each line):UsernamePassword#First line is a generated username and the second line is a generated password.Save your changes with ‘CTRL+O’ and leave the nano editor via ‘CTRL+X’2. Next, open the configuration file ‘CyberGhost.conf’ by typing :sudo nano CyberGhost.confExtend the line ‘auth-user-pass’ …[...]auth-user-pass[...]… with the path to your credentials file:[...]auth-user-pass /etc/openvpn/pas.key[...]3. Connect to your device through the Telnet and enter the following command:opkg install openvpnWhen setup is complete, reboot the device.4. Connect to your device through the FTP or SSH, and create a new folder namedopenvpnin/etc/path. After that, copy both files (‘CyberGhost.conf’ and 'pas.key') along with all certificates and key files from the downloaded ZIP file into the OpenVPN folder ('etc/openvpn') on your VU+.5. Start the OpenVPN on theMenu >Setup >System >Network >OpenVPN Setup >Press Green To Start OpenVPN.",https://support.cyberghostvpn.com/hc/en-us/articles/213271089-Sat-Receiver-How-to-set-up-Enigma2-and-VU-Solo-with-CyberGhost-via-OpenVPN
Which possibilities do I have on devices without direct VPN support?,"If a device's firmware (e. g. Smart TVs, Satellite receiver, Kindle and game consoles) lacks settings for a VPN configuration and possibilities to install a third-party app or a native VPN, you have the following possibilities to circumvent those limitations:Internet Connection Sharing via Ethernet:You can set up your Windows Desktop PC as a gateway. Requirements are two network cards (physical ones) and, of course, a Windows operating system. One card processes the connection from the Windows PC via CyberGhost to the Internet, while the other card is used to connect to the respective devices you want to use. For a proper set up you need to know the IP address of the gateway PC (e.g. 192.168.0.2). This IP address is the gateway setting to be set in the respective device. For more detailed instructions seehere.Internet Connection Sharing via Wi-Fi:You can also set up your Windows Desktop PC as a gateway for Wi-Fi-capable devices.For detailed instruction please checkthis article.Proxy Server:Connect your device to a proxy server, running on a computer located in your local network. If this computer connects to the Internet via CyberGhost VPN, your device will do so as well. For that you will have to install a proxy server like Bouncer.exe or something similar; important is to write down the IP address of the local computer running the proxy server and the port number by which the proxy communicates. On your device, e.g. Sony’s PlayStation, open now the network settings. There you activate the option ‘Proxy Server’ (if available) and enter the noted IP address and the port number. Ignore all UPnP settings, confirm your changes, and test your new connection. If it works, it should show you the Internet IP address of the CyberGhost VPN server in use.VPN based router:Use a router with an alternative firmware like Tomato(USB), set up a CyberGhost connection and connect it to a modem. That way all devices connected to the router will be anonymized, while all other devices connected directly to the modem will not. Seehere(DD-WRT),here(TomatoUSB), orhere(TomatoUSB Merlin Build) to find out how to accomplish it.",https://support.cyberghostvpn.com/hc/en-us/articles/213271249-Which-possibilities-do-I-have-on-devices-without-direct-VPN-support-
How do I manage my CyberGhost online account?,"This article presents a short overview of the features available on the CyberGhost account page. This can be managed online and can be accessed through theCyberGhost Account Management pagedirectly from your preferred web browser.Jump to…Download HubVPNSmart DNSSecurity SuitePassword ManagerIdentity GuardMy AccountDownload HubHere you can download and manage every CyberGhost application and service.Once a product is installed or configured on a device, it will be visible in the products list. As you can observe in the figure below, selecting a product, such as the VPN, will give you the option to edit a certain configuration or delete it from a device. It will also provide other information such, as the date of installation and the number of devices that can still be linked with your subscription.VPNThis page lists all registered devices (between 1 and 7 devices, depending on your subscription). A device can either be a Mac, Windows PC, Android Firestick, Android devices or iOS devices used with a CyberGhost client or manual configuration.Note that the number of possible devices refers to the ones that can be used at the same time and not the number of devices in general. This means that you can use your CyberGhost account on more than the standard 7 devices, just not at the same.Smart DNSSmartDNS is a CyberGhost feature that allows you to access geo-restricted Internet content. This feature will help you unblock streaming content like US Netflix, US Hulu, UK Netflix, etc.Clickherefor more information on how to configure it.Security SuiteSecurity Suite refers to the CyberGhost additional security apps:Privacy Guard, an application meant to help you control the Microsoft privacy settings.Security Updater, an app meant to detect vulnerable applications or programs from the system that require updates.Antivirus, an app that offers real time protection against malicious software.The account section of this feature from Cyberghost has minimal functionality, as the main control for the suite is done through the CyberGhost installed application's dashboard. From the account section, it just presents the list of your devices that the suite is used on and the option to remove it or edit its name.The Security Suite pack is available to purchase, separately, as an addon to the standard VPN subscription.Password ManagerThe Password Manager is a feature that allows you to save passwords and obtain an easier access to your online platforms and accounts. The extension of this feature is available on Google Chrome, Firefox and Safari browsers.The web-vault of the Password Manager allows you to also import other passwords, from other managers, if these are compatible with the file format.Identity GuardCyberGhost ID Guardis a feature that will automatically alert you in case your email address is revealed in a data breach. allowing you to change your password quickly.It also includes aPassword Checkerwhich allows you to test a password if it was used before in a data breach. For more information on the Identity guard, clickhere.My Account1.Account settingsFields where you can edityour: Username, E-mail, and Password and even assign a profile Ghostie to your account.Use your activation key: This is used to activate purchases that are either made through a third party site or from a box.Delete my account: This allows you to delete a certain account, however take note that it does not also serve as a subscription cancelation or a refund request. After deleting an account, you can't reactivate an already used activation keynor is our support able to recover deleted activation keys.2. SubscriptionsThis area is only visible if you have a running subscription connected to this account and presents 3 main categories:Active Subscriptions: Displays the current subscription type this account is running on and its details, such as: date of purchase, expiration date, to download the invoice of it or cancel the automatic renewal.Payment Details: Shows the payment method that was used for the CyberGhost subscription, and an option to update it, in case the listed card is either expired or not available anymore.Subscription Historylists the transactions that were made on this account3. Refer a FriendIf you join and refer CyberGhost to a friend, he or she will know, you’re wide awake of what’s going on in this world, that you care about him or her and you know your way around.How does it work?Check it outhere.For any additional information or concerns - it is best to approach the Support Department:via e-mail:support@cyberghost.rovia on-line request:https://support.cyberghostvpn.com/hc/en-us/requests/newvia 24/7 Live! Chat Sessions on our website",https://support.cyberghostvpn.com/hc/en-us/articles/360017307440-How-do-I-manage-my-CyberGhost-online-account-
Question not found,Answer not found,https://support.cyberghostvpn.com/hc/en-us/articles/213268729-How-to-purchase-special-offers-by-newsletters-banners-etc-
How Do I Activate a Prepaid or Promotion Key?,"This article will show you how you can use an activation key or a prepaid key to subscribe to CyberGhost VPN.Note: You will receive an activation key with physical gift cards or promotional events. Subscriptions purchased through our website, App Store, or Google Play Store are automatically activated without the use of an activation key.First you will need a CyberGhost account. If you do not have one, you can create one for free. Please see our guide on how to create an accounthere.To activate a key, first go to your onlineaccount management.Login with your credentials and expand the menu by clicking on your profile logo in the upper right corner of the screen.SelectAccount Settings.SelectUse your activation key.Enter your activation key in the specified box, and selectUse.Encountered issues? This might be whyYou already used your key- All activation keys can only be used once. To use CyberGhost VPN on other devices, simply log into the app with your credentials. You do not have to activate every device.Your key has expired- For physical gift cards, please check your box for the expiry date.Downgrades are not possible- Make sure your activation key corresponds to the subscription type active on your account.You have an active subscription that you are trying to extend with an activation key- Prepaid subscriptions or gift cards cannot be used to extend subscriptions purchased from our website, Google Play Store, or App Store. If you want to force it, you must cancel your old subscription and request a refund provided it falls within our refund policy.Note: You will lose all your remaining runtime of your subscription this way.You are trying to extend a promotional subscription- Promotional subscriptions cannot be extended by another activation key. Using an activation key will replace your remaining subscription and you will lose any remaining runtime.Note: Subscriptions coming from physical gift cards are not covered by ourrefund policy.Need assistance? Contact our Customer Support team:via email atsupport@cyberghost.rovia online request athttps://support.cyberghostvpn.com/hc/en-us/requests/newvia 24/7 Live Chat by clicking the Support button below",https://support.cyberghostvpn.com/hc/en-us/articles/360017320500-How-do-I-activate-a-prepaid-or-promotion-key-
How to Set Up OpenVPN on macOS (Tunnelblick),"Tunneblick app is an alternative method of connecting to CyberGhost VPN servers that will be useful if the CyberGhost application cannot be installed on your Mac or if it does not work as expected.Jump to...Download OpenVPN configuration filesDownload TunnelblickInstall Tunnelblick and VPN configurationYour first VPN ConnectionDownload OpenVPN configuration files1. Visit yourCyberGhost VPN online accountand login with your CyberGhost Username and Password.2. Click on section'VPN'from the left-side menu, scroll down the page and click 'Configure Device'.3. Each server has a configuration file that you will need to create in order to connect to the VPN server. You can download all the configuration files after creating them.ChooseOpenVPNand your preferredCountryandServer Group, as described below.Also, type in aDevice nameto assign to your device, then configure the parameters for the new device.Country:Since native protocol connections may only be used with exactly one server you now have to choose the country you want to surf from; the server to be used in this country will be chosen by CyberGhost automatically.Server group:Choose the server group and the OpenVPN protocol (UDP or TCP) you want to use:UDPallows higher speed than the TCP version but can result in broken downloads in some cases. This is the default setting.TCPallows more stable connections than the UDP version but is a bit slower. Choose this version, if you have recurrent connection issues such as sudden disconnections.Once the desired parameters are chosen, save them with«Save Configuration»To view theOpenVPNcredentials that are generated for you on the configuration dashboard, press 'View Configuration'.Once the new page is opened, your connection credentials are generated for you but make note of the following information:Server group:This is the address of the country (server) you want to be connected with, e.g. '12345-1-ca.cg-dialup.net'. Note This address changes with every country you have chosen in the step before. The actual single server to be used will be chosen automatically by CyberGhost.User name:A solely for this protocol generated user name.This is NOT your regular CyberGhost account user name, it's used only to authenticate with our servers via Manual Configurations.Password (you need to check the ""Show Password"" option in order to see it):A solely for protocol usage generated password.This is NOT your regular CyberGhost account Password, it's used only to authenticate with our servers via Manual Configurations.Pre-Shared KeyClick on 'Download Configuration' (if the automatic download has not started) and download the config file to your Mac. It's recommended that you create a special folder for the config, somewhere accessible like your Desktop, andExtract / Copy thecontents of the .zip file there.Now, the saved config is a ZIP file, which contains the following single files:ca.crt:This is the certificate of the certification authorityclient.crt:This is the user certification fileclient.key:This is your private key fileopenvpn.ovpn:This is yourOpenVPNconfiguration fileIf you need to change the country you connect to, you must re-configure the location to use in your account management and download the new zipped config file.Download TunnelblickNow download'Tunnelblick'to establish OpenVPN on your Mac OS X platform. Tunnelblick is an open-source graphic user interface for OpenVPN, allowing control of OpenVPN clients and consists of all necessary binaries and drivers.1. Go to theofficial Tunnelblick website.2. Click on the green arrow to download the latest version of Tunnelblick.Install Tunnelblick App and Import VPN configuration1. To start the installation process, double-click on the Tunnelblick installation package in your Downloads folder.2. Double-click on theTunnelblickicon in the next window.3. PressOpento confirm4. Define your preferences for the Tunnelblick application and clickContinue.5. SelectI have configuration files. These files were previously downloaded in the first part of this guide.6. SelectOK7. Locate the created folder with your downloaded configuration files fromStep 1.8. Rename the automatically created folder with your downloaded configuration files to'tunnelblick.tblk'.9. Double-click to load the configuration.SelectOnly Me.Note:You may need to enter your Admin credentials after this action.10. You will see a pop-up message of VPN configuration successfully installed on your screen.Your first VPN Connection1. To connect to a VPN location, double-click on the Tunnelblick icon in the menu bar.2. Click on the configuration file and pressConnect.3.Enteryour credentials which consist of :The OpenVPN Username, created inStep 1.The OpenVPN Password, also created inStep 1.If you want to save the service credentials for the next login, be sure to check both Save to Keychain checkboxes.NOTE :DO NOTuse your regular CyberGhost user name and password, which you use to login to the client and your account management!4. In the upper right corner of your screen you will see a pop-up window indicating the connection status.It will turngreenonce the connection is successful.5. That's it ! You are now successfully connected to the VPN server using the Tunnelblick app. Your privacy is assured and your data is secure.If you want to surf from different countries, rename the folder with your downloaded configuration files to e.g. 'CG_RO_NoSpy.tblk'. Choose then a different location and a different server group (if available) in your account management and download the next zipped configuration file.For two different countries you need for example do the following steps:Specify device, protocol and operating systemChoose a country, e.g. USADownload the zipped configuration file with certificates, key and OpenVPN configuration file, it will be extracted automatically in a sub-folder in your download folderRename the folder to 'CG_USA.tblk'Load the configuration by double clicking on the 'CG_USA.tblk' folderChoose the next country, e.g. GermanyDownload the next zipped configuration fileRename the folder to 'CG_DE.tblk'Load the configuration by double clicking on the 'CG_DE.tblk' folder.etc. ...For any additional information or concerns - it is best to approach the Support Department:via e-mail:support@cyberghost.rovia on-line request:https://support.cyberghostvpn.com/hc/en-us/requests/newvia 24/7 Live! Chat Sessions on our website",https://support.cyberghostvpn.com/hc/en-us/articles/214239925-How-to-Set-Up-OpenVPN-on-macOS-Tunnelblick
Set Up OpenVPN on Linux Mint via Network Manager,"Please make sure the following requirements are met:Linux Mint 19.3 (instructions might also work for older/newer versions, but can differin details)Updated software packagesInstalled OpenVPN softwareInstalled network managerA CyberGhost VPN accountInfo:Here's how to create a CyberGhost VPN account onlineInfo:Here's how to manage your CyberGhost VPN accountA CyberGhost VPN subscriptionInfo:How to purchase or upgrade a subscriptionInfo for prepaid subscribers:How to enter an activation keyDisclaimer:Please keep in mind that, although the technical process is as thoroughly documented as possible, you need to have at least some technical understanding. There's always a chance for an overseen mistake and/or things have changed and the article is not updated yet.Step 11. Visit yourCyberGhost VPN online accountand login with your CyberGhost Username and Password.2. Click on section'VPN'from the left-side menu, scroll down the page and click 'Configure Device'.3. Each server has a configuration file that you will need to create in order to connect to the VPN server. You can download all the configuration files after creating them.ChooseOpenVPNand your preferredCountryandServer Group, as described below.Also, type in aDevice nameto assign to your device, then configure the parameters for the new device.Country:Since native protocol connections may only be used with exactly one server you now have to choose the country you want to surf from; the server to be used in this country will be chosen by CyberGhost automatically.Server group:Choose the server group and the OpenVPN protocol (UDP or TCP) you want to use:UDPallows higher speed than the TCP version but can result in broken downloads in some cases. This is the default setting.TCPallows more stable connections than the UDP version but is a bit slower. Choose this version, if you have recurrent connection issues such as sudden disconnections.Once the desired parameters are chosen, save them with«Save Configuration»To view theOpenVPNcredentials that are generated for you on the configuration dashboard, press 'View Configuration'.Once the new page is opened, your connection credentials are generated for you but make note of the following information:Server group:This is the address of the country (server) you want to be connected with, e.g. '12345-1-ca.cg-dialup.net'. Note This address changes with every country you have chosen in the step before. The actual single server to be used will be chosen automatically by CyberGhost.User name:A solely for this protocol generated user name.This is NOT your regular CyberGhost account user name, it's used only to authenticate with our servers via Manual Configurations.Password (you need to check the ""Show Password"" option in order to see it):A solely for protocol usage generated password.This is NOT your regular CyberGhost account Password, it's used only to authenticate with our servers via Manual Configurations.Pre-Shared KeyClick on 'Download Configuration' (if the automatic download has not started) and download the config file to your device. It's recommended that you create a special folder for the config, somewhere accessible like your Desktop, andExtract / Copy thecontents of the .zip file there.Now, the saved config is a ZIP file, which contains the following single files:ca.crt:This is the certificate of the certification authorityclient.crt:This is the user certification fileclient.key:This is your private key fileopenvpn.ovpn:This is yourOpenVPNconfiguration fileIf you need to change the country you connect to, you must re-configure the location to use in your account management and download the new zipped config file.Step 2For this tutorial, we'll be usingLinux Mint 19.03 (Tricia)Install OpenVPN (if applicable) and the network manager on Linux Mint.For that click onMenu > All Applications > Software Manager' and type in the search field (in the upper right corner) 'OpenVPN'. Install the following programs with a double click:openvpnnetwork-manager-openvpn gnomenetwork-manager-openvpnAlternatively or to make sure that already installed components are up to date, open a terminal and enter the following commands:sudo apt-get install openvpnsudo apt-get install openvpn bridge-utilssudo apt-get install network-manager-openvpnsudo apt-get install network-manager-openvpn-gnomeNote:Depending on your distribution it might happen that the network manager lacks the option to go for an OpenVPN connection. If that's the case please open a terminal and enter the following commands:sudo apt-get install network-manager-pptpsudo apt-get install network-manager-vpncLog out and in again or restart your computer or open a terminal and type in the following command :sudo service network-manager restartStep 3Open your personal folder in your file manager and create a new folder called 'CyberGhost'. Extract the content of the downloaded configuration ZIP file and copy all single files into the new folder.If you want to surf from different countries, rename the unzipped OpenVPN configuration file from 'openvpn.ovpn' to e.g. 'CG_RO_NoSpy.ovpn' (or respective location/server group combination you have chosen while setting up the configuration file in your account management). Choose then a different location and a different server group (if available) and download the next zipped configuration file. Unzip it, rename the containing 'OpenVPN.ovpn' as well und copy it also inside the new folder. The also downloaded remaining certificate and key files in the ZIP do not need to be copied again, for you already have them from the first download.For two different countries, you need for example do the following steps:Specify device, protocol and operating systemChoose a country, e.g. USADownload the zipped configuration file with certificates, key and OpenVPN configuration fileUnzip the downloaded file and copy all files into the new 'CyberGhost' folderRename the OpenVPN configuration file from ‘openvpn.ovpn’ to ‘CG_USA.ovpn’. (If you need to address a single server instead of a country in general, you are to edit the OVPN file and exchange the pre-configured server address line.Choose the next country, e.g. RomaniaDownload the next zipped configuration fileUnzip the downloaded file and copy just the file 'openvpn.ovpn' into the 'CyberGhost' folderRename it to ‘CG_RO.ovpn’.etc. ...The sub-folder 'config' now consists of the following files (regarding the example above):ca.crtclient.crtclient.keyCG_USA.ovpnCG_RO.ovpnxxx.ovpnTurn off IPv6Before enabling the VPN profile on your Linux Mint, CyberGhost VPN strongly recommends you to disable IPv6 to prevent IPv6 traffic from leaking out of the VPN tunnel :To turn off IPv6, go toNetwork Settings>Wired / Wireless Interface Settings>IPv6 > Switch to OFF > Click ApplyCreate a new VPN profileTo add a new VPN profile, click in the lower right corner on the network icon and start the network manager via 'Network Settings'. Click on '+' symbol (Add VPN).Choose'Import from a file...'Open your 'CyberGhost' folder, and choose to import the.ovpnconfiguration file (see step 3)and click on 'Open'.Focus on the tab 'AddVPN'and take care of the following options:Connection name:Type in a name for this connection, ideally composed out of the country to surf from and maybe the server group to be used, e. g. 'CG_France'Gateway:The server address is already filled in by the loaded configuration fileType:Choose 'Password with certificates (TLS)' - already filled in by the loaded configuration fileUser name:The user name created in step 1.DO NOT use your CyberGhost username!Password:The password created in step 1.DO NOT use your CyberGhost password!User certificate:Enter here the path to the user certification file ('client.crt') - usually already filled in by the loaded configuration fileCA certificate:Enter here the path to the CA certification file ('ca.crt') - usually already filled in by the loaded configuration filePrivate Key:Enter here the path to the key file ('client.key') - usually already filled in by the loaded configuration fileClick on 'Add' and enter the password of your keyring (only necessary, if it hasn't been unlocked when logging in).The VPN profile is now available in the network-manager. Click to activate it and if you receive the message ""The VPN connection has been successfully established"", your VPN tunnel is up.Step 3 alternatively (manual configuration)Click on '+' symbol (Add VPN), but this time don't import a configuration file. Instead, click on 'OpenVPN'Connection name:Type in a name for this connection, ideally composed out of the country to surf from and maybe the server group to be used, e. g. 'CyberGhost VPN US'Gateway:The server address you noted from your account management, e. g. '12345-5-us.cg-dialup.net'Type:Choose 'Password with certificates (TLS)'User name:The user name created in step 1. DO NOT use your regular CyberGhost user name!Password:The password created in step 1. DO NOT use your regular CyberGhost password!User certificate:Enter here the path to the user certification file ('client.crt'). For that click on the symbol right-handed and search for the respective file in your CyberGhost folder.CA certificate:Enter here the path to the CA certification file ('ca.crt'). For that click on the symbol right-handed and search for the respective file in your CyberGhost folder.Private Key:Enter here the path to the key file ('client.key'). For that click on the symbol right-handed and search for the respective file in your CyberGhost folder.Now click on 'Advanced' on the right bottom of the window and check all of these options (and deactivate the rest), then clickOKTab 'General':Use custom gateway port:443Use a TCP connection:Only activated, if you have chosen an OpenVPN TCP connection while configuring your native VPN in your account management.Set 'Set virtual device type :'TUN' and name 'tun'Specify ping interval: 5Specify exit or restart ping: 'ping-exit' > 60Tab 'Security'Cipher:AES-256-CBC (also for TCP)HMAC Authentification:SHA256Click on 'OK' and 'Save' and enter the password of your keyring (only necessary, if it hasn't been unlocked when logging in).Step 4Back in the network manager you now should have an entry with your new OpenVPN connection.Choose the entry via your menu, wait a moment ... and you're in:Note:As we all know there are seldom two Linux distribution built the same way; therefore the Linux Mint 19.3 instructions might be of no help for you. If that's the case, please consult the help documentation of your distribution. Furthermore, the following links might also help you out:The original HowTo from OpenVPN.net (recommended)",https://support.cyberghostvpn.com/hc/en-us/articles/213651505-Set-Up-OpenVPN-on-Linux-Mint-via-Network-Manager
Set Up OpenVPN on Linux Ubuntu via Network Manager,"Before proceeding, please make sure the following requirements are met:Linux Ubuntu 19.10 - instructions might also work for older/newer versions, but can slightly differ. In this article, the VPN connection on Ubuntu 19.10 is demonstratedUpdated software packagesInstalled OpenVPN softwareInstalled network-managerA CyberGhost VPN accountHere's how to create a CyberGhost VPN account onlineHere's how to manage your CyberGhost VPN accountA CyberGhost VPN subscriptionHow to purchase or upgrade a subscriptionOnly prepaid subscribers:How to enter an activation keyDisclaimer:Please keep in mind that, although the technical process is as thoroughly documented as possible, you need to have at least some technical understanding. Although we will always try our best to keep these articles updated, there's always a chance for certain things to change since Linux distributions are regularly updated and some menus may get rearranged, packages required may change, etc.Step 11. Visit yourCyberGhost VPN online accountand login with your CyberGhost Username and Password.2. Click on section'VPN'from the left-side menu, scroll down the page and click 'Configure Device'.3. Each server has a configuration file that you will need to create in order to connect to the VPN server. You can download all the configuration files after creating them.ChooseOpenVPNand your preferredCountryandServer Group, as described below.Also, type in aDevice nameto assign to your device, then configure the parameters for the new device.Country:Since native protocol connections may only be used with exactly one server you now have to choose the country you want to surf from; the server to be used in this country will be chosen by CyberGhost automatically.Server group:Choose the server group and the OpenVPN protocol (UDP or TCP) you want to use:UDPallows higher speed than the TCP version but can result in broken downloads in some cases. This is the default setting.TCPallows more stable connections than the UDP version but is a bit slower. Choose this version, if you have recurrent connection issues such as sudden disconnections.Once the desired parameters are chosen, save them with«Save Configuration»To view theOpenVPNcredentials that are generated for you on the configuration dashboard, press 'View Configuration'.Once the new page is opened, your connection credentials are generated for you but make note of the following information:Server group:This is the address of the country (server) you want to be connected with, e.g. '12345-1-ca.cg-dialup.net'. Note This address changes with every country you have chosen in the step before. The actual single server to be used will be chosen automatically by CyberGhost.User name:A solely for this protocol generated user name.This is NOT your regular CyberGhost account user name, it's used only to authenticate with our servers via Manual Configurations.Password (you need to check the ""Show Password"" option in order to see it):A solely for protocol usage generated password.This is NOT your regular CyberGhost account Password, it's used only to authenticate with our servers via Manual Configurations.Pre-Shared KeyClick on 'Download Configuration' (if the automatic download has not started) and download the config file to your device. It's recommended that you create a special folder for the config, somewhere accessible like your Desktop, andExtract / Copy thecontents of the .zip file there.Now, the saved config is a ZIP file, which contains the following single files:ca.crt:This is the certificate of the certification authorityclient.crt:This is the user certification fileclient.key:This is your private key fileopenvpn.ovpn:This is yourOpenVPNconfiguration fileIf you need to change the country you connect to, you must re-configure the location to use in your account management and download the new zipped config file.Step 2InstallOpenVPNand the network manager on (you may already have these installed but if unsure, proceed with the following steps).If Terminal isn’t visible on the Launch bar, click on the‘Show Applications’button (in the bottom-left part of the screen) > then type in 'Terminal' in the search field or just pressCtrl + Alt + Tkeyboard shortcut to openTerminalIn the terminal window enter the following commands and confirm with 'Enter'You may be required to enter your Ubuntu account password – please do so and although there will be no visual feedback that you’re typing something, you can indeed enter the password and confirm with ""Enter""):sudo apt-get updatesudo apt-get install openvpnsudo apt-get install network-manager-openvpnNote: Depending on your distribution it might happen that the network manager lacks the option to go for an OpenVPN connection. If that's the case, please open a terminal window and enter the following commands:sudo apt-get install network-manager-openvpnsudo apt-get install network-manager-openvpn-gnomesudo apt-get install network-manager-pptpsudo apt-get install network-manager-vpncLog out and log in again, restart your computer,or open a terminal and enter the following command:sudo systemctl restart network-manager(alternatively, you can use:sudo service network-manager restart)Note for users of older Ubuntu versions (older than 16.04): you will need to use the ‘sudo restart network-manager’ command. Recent Ubuntu versions have replaced this command with those shown above.Turn OFF IPv6At the moment CyberGhost VPN does not support IPv6, therefore sometimes users can experience issues with connection or leaks that are related specifically to IPv6.To disable IPv6 support on your Ubuntu device, please visitHow to disable IPv6 for LinuxStep 3Start the file manager, open your home folder, and create a sub-folder called'CyberGhost'.Unzip the content of the downloaded ZIP file and copy all of the configuration files inside the 'CyberGhost'folder.Click on the Network icon in the upper right corner of the screen > click the Settings iconUnder ‘Network’ > VPN section >click the [+] buttonClick ‘Import from file...’ and go to the CyberGhost folder you’ve created > double-click on the openvpn configuration file (with the .ovpnextension) e.g.:UnitedStates.ovpn(or the defaultopenvpn.ovpnif you haven’t changed its name)Name:Type in a name for this connection, ideally composed out of the country to surf from and maybe the server group to be used, e. g. 'US OpenVPN'In the Add VPN menu see to the following options:Gateway:The server address is already filled in by the loaded configuration file(usually already filled in by the loaded configuration file)Type:Choose 'Password with certificates (TLS)'(usually already filled in by the loaded configuration file)Username:The user name created inStep 1.DO NOT use your regular CyberGhost VPN user name!Password:The password created inStep 1.DO NOT use your regular CyberGhost VPN password!CA certificate:Enter here the path to the CA certification file ('ca.crt') -usually already filled in by the loaded configuration fileUser certificate:Enter here the path to the user certification file ('client.crt') -usually already filled in by the loaded configuration filePrivate Key:Enter here the path to the key file ('client.key') -usually already filled in by the loaded configuration fileUser key password:Enter here the user key password created in Step 1Now just clickADDand you'll be able to connect by simply switching theVPN ONfrom the top-right part of the screen under the VPN OFF entry (see the examples below)NOTE : You can check your IP with any Online service (likewww.iplocation.net) or by simply Googling ""What's my IP"".It is strongly recommended that you clear your browser's cache and cookies before accessing any IP location online service.If you want to surf from multiple countries (a brief overview):You will have to first rename the unzipped OpenVPN configuration file from'openvpn.ovpn'to the country you’ve currently chosen e.g.‘UnitedStates.ovpn'(or whatever location/server group combination you have chosen while setting up the configuration file in your account management).Back in the Device management menu (where you’ve selected the country for the connection) just choose a different location and a different server group (if available), then download the zipped configuration file. Unzip it anywhere, rename the containing 'openvpn.ovpn' to reflect the new country and copy it inside the CyberGhost folder you’ve previously created.Note: The re-downloaded certificate and key files in the ZIPdo notneed to be copied again as they will be the same as the ones you’ve previously downloaded,just copy the .ovpn file.In essence, to add another country, please take the following steps (after configuring the first connection):After creating the first connection, let's say it is to the United States for the sake of this example, go back to the 'My Devices' menu and click on thepreviously created OpenVPN configuration (the same one)Specify the protocol and choose a country, let's useFranceas the second countryDownload the zipped configuration file by clicking'Download Configuration'(The Username and Password are the same as the initial setup)Unzip the downloaded file and copy just the *.ovpn file into the 'CyberGhost' folder you have previously createdIF you have not renamed the initial config file, rename the OpenVPN configuration file from the default ‘openvpn.ovpn’ to ‘UnitedStates.ovpn’ (or whatever country you've initially chosen).Rename the newly copied file to ‘France.ovpn’.Import the France.ovpn as illustrated in Step 2 (just like you did for the initial config)You can use this method to add as many countries as you wish they’ll appear separately in the Network Manager and you’ll be able to connect to whichever you wish.The CyberGhost folder now consists of the following files (regarding the example above):ca.crtclient.crtclient.keyUnitedStates.ovpnFrance.ovpnMultiple countries will appear in the network menu as well and you’ll be able to quickly connect to any of them by using theOn/Offswitch.For any additional information or concerns - it is best to approach the Support Department:via e-mail:support@cyberghost.rovia on-line request:https://support.cyberghostvpn.com/hc/en-us/requests/newvia 24/7 Live! Chat Sessions on our website",https://support.cyberghostvpn.com/hc/en-us/articles/360007929314-Set-Up-OpenVPN-on-Linux-Ubuntu-via-Network-Manager
How to Set Up OpenVPN on Linux Debian via Terminal,"Please make sure the following requirements are met:Linux Debian (instructions might work for different versions, but steps can differin details)Updated software packagesInstalled OpenVPN softwareA CyberGhost accountHere's how to create a CyberGhost account onlineHere's how to manage your CyberGhost accountA CyberGhost subscriptionHow to purchase or upgrade a subscriptionOnly prepaid subscribers:How to enter an activation keyDisclaimer:Please keep in mind that, although the technical process is as thoroughly documented as possible, you need to have at least some technical understanding. There's always a chance for an overseen mistake and/or things have changed and the article is not updated yet.Step 11. Visit yourCyberGhost VPN online accountand login with your CyberGhost Username and Password.2. Click on section'VPN'from the left-side menu, scroll down the page and click 'Configure Device'.3. Each server has a configuration file that you will need to create in order to connect to the VPN server. You can download all the configuration files after creating them.ChooseOpenVPNand your preferredCountryandServer Group, as described below.Also, type in aDevice nameto assign to your device, then configure the parameters for the new device.Country:Since native protocol connections may only be used with exactly one server you now have to choose the country you want to surf from; the server to be used in this country will be chosen by CyberGhost automatically.Server group:Choose the server group and the OpenVPN protocol (UDP or TCP) you want to use:UDPallows higher speed than the TCP version but can result in broken downloads in some cases. This is the default setting.TCPallows more stable connections than the UDP version but is a bit slower. Choose this version, if you have recurrent connection issues such as sudden disconnections.Once the desired parameters are chosen, save them with«Save Configuration»To view theOpenVPNcredentials that are generated for you on the configuration dashboard, press 'View Configuration'.Once the new page is opened, your connection credentials are generated for you but make note of the following information:Server group:This is the address of the country (server) you want to be connected with, e.g. '12345-1-ca.cg-dialup.net'. Note This address changes with every country you have chosen in the step before. The actual single server to be used will be chosen automatically by CyberGhost.User name:A solely for this protocol generated user name.This is NOT your regular CyberGhost account user name, it's used only to authenticate with our servers via Manual Configurations.Password (you need to check the ""Show Password"" option in order to see it):A solely for protocol usage generated password.This is NOT your regular CyberGhost account Password, it's used only to authenticate with our servers via Manual Configurations.Pre-Shared KeyClick on 'Download Configuration' (if the automatic download has not started) and download the config file to your Mac. It's recommended that you create a special folder for the config, somewhere accessible like your Desktop, andExtract / Copy thecontents of the .zip file there.Now, the saved config is a ZIP file, which contains the following single files:ca.crt:This is the certificate of the certification authorityclient.crt:This is the user certification fileclient.key:This is your private key fileopenvpn.ovpn:This is yourOpenVPNconfiguration fileIf you need to change the country you connect to, you must re-configure the location to use in your account management and download the new zipped config file.Turn OFF IPv6At the moment CyberGhost VPN does not support IPv6, therefore sometimes users can experience issues with connection or leaks that are related specifically to IPv6.To disable IPv6 support on your Debian device, please visitHow to disable IPv6 for LinuxStep 2Extract the downloaded configuration file and rename the containing 'openvpn.ovpn' to 'CG_Country.conf'.Copy the file into your OpenVPN configuration directory. For that you open a terminal window and move to the folder in which you extracted the configuration files by typing:cd [path to the folder with the extracted configuration files]Now copy the files:sudo cp CG_XX.conf /etc/openvpn/sudo cp ca.cert /etc/openvpn/sudo cp client.crt /etc/openvpn/sudo cp client.key /etc/openvpn/If you want to surf from more than one country, download after the selection of a different country in your account management the next zipped configuration file and rename that one also from 'openvpn.ovpn' to 'CG_AnotherCountry.conf'.For two different countries, you need for example do the following steps:Specify device, protocol and operating systemChoose a country, e.g. USADownload the zipped configuration file with certificates, key and OpenVPN configuration fileUnzip the downloaded file and copy all files in your OpenVPN configuration folderRename the OpenVPN configuration file from ‘openvpn.ovpn’ to ‘CG_USA.conf’. (If you need to address a single server instead of a country in general, you are to edit the OVPN file and exchange the pre-configured server address line.Choose the next country, e.g. RomaniaDownload the next zipped configuration fileUnzip the downloaded file and copy just the file 'openvpn.ovpn' into the configuration folderRename it to ‘CG_RO.ovpn’.etc. ...Step 3Before you can begin configuring your network settings make sure you already installed the needed packages. If they are missing, please do as follows:Download the package information by opening a console and typing ‘sudo apt-get update’.Once done download the package with :sudo apt-get install openvpn openssl openresolvTo be able to log in automatically, save your user name and password in a file called ‘user.txt’ and store it in your OpenVPN folder. For that first move to the OpenVPN folder:cd /etc/openvpnNow enter the following command to create and open a text file called 'user':sudo nano user.txtType in your credentials (one in each line). In the first line type in the user name created in step 1, in the second line type in the password, also created in step 1:YourUsernameYourPasswordDO NOT use your regular CyberGhost user name and password, which you use to login in to the client and your account management!Save your changes with ‘CTRL+O’ and leave the editor via ‘CTRL+X’Next, open the configuration file ‘CG_XX.conf’ by typingsudo nano CG_XX.confExtend the line ‘auth-user-pass’ …[...]auth-user-pass[...]… with the path to your credentials file:[...]auth-user-pass /etc/openvpn/user.txt[...]At the bottom of the configuration passage (after 'verb 4') add the following two lines:up /etc/openvpn/update-resolv-confdown /etc/openvpn/update-resolv-confSave via‘CTRL+O’and leave the editor with ‘CTRL+X’.Then get the file autoloaded by typingsudo nano /etc/default/openvpnand adding the following line:AUTOSTART=""CG_XX"" (the name of the file WITHOUT the file extension ‘.conf’)Again, save with ‘CTRL+O’ and leave the editor with ‘CTRL+X’.At last type in your consolesudo update-rc.d openvpn enableStep 4Before starting OpenVPN check your configuration with …cat /etc/resolv.conf… and have a look, if the last line (‘nameserver’) shows the IP of the router. If not, change it.Now start OpenVPN:sudo service openvpn startWait a few seconds and then test, if everything works fine.Furthermore, you might want to open the websitehttps://dnsleaktest.com/and test on leaks. For that choose ‘Standard Test’ or ‘Extended Test’.*Many thanks to ‘Haudrauf’ for the original tutorial!",https://support.cyberghostvpn.com/hc/en-us/articles/213190009-How-to-Set-Up-OpenVPN-on-Linux-Debian-via-Terminal
Ghostie,Welcome to Cyberghost Live Support. In a few seconds a Live Chat window will pop up and a Cyberghost specialist will gladly assist you further.Thank you!,https://support.cyberghostvpn.com/hc/en-us/articles/360034450174-Ghostie
Question not found,Answer not found,https://support.cyberghostvpn.com/hc/en-us/articles/115004525485-How-to-purchase-special-offers-by-newsletters-banners-etc-
How to configure OpenVPN for OpenELEC 5 & 7 and LibreELEC 7 & 8 on a Raspberry Pi,"Please note:This instruction covers Kodi installations with OpenELEC 5 and 7 as well as LibreELEC 7 final, LibreELEC 8 Alpha andLibreELEC 9with the 'VPN Manager for OpenVPN'. OpenELEC 6 doesn't support OpenVPN and will be covered in a separate article.Disclaimer:Please keep in mind that, although the technical process is as thoroughly documented as possible, you need to have at least some technical understanding. There's always a chance for an overseen mistake and/or things have changed and the article is not updated yet.Step 1 : Create the VPN Configuration filesVisit yourCyberGhost VPN online accountand login with your Premium Username and PasswordClick on section'VPN'from the left-side menu, scroll down the page and click 'Configure Device'.Choose your desired protocol, in our example:OpenVPNand your preferredcountryandserver group, as described below.Also, type in aDevice nameto assign to your device, then configure the parameters for the new device.Country:Since native protocol connections may only be used with exactly one server you now have to choose the country you want to surf from; the server to be used in this country will be chosen by CyberGhost automatically.Server group:Choose the server group and the OpenVPN protocol (UDP or TCP) you want to use:UDPallows higher speed than the TCP version, but can result in broken downloads in some cases. This is the default setting.TCPallows more stable connections than the UDP version, but is a bit slower. Choose this version, if you have recurrent connection issues such as sudden disconnections.Once the desired parameters are chosen, save them with«Save Configuration»To view theOpenVPNcredentials that are generated for you on the configuration dashboard, press 'View'.Once the new page is opened, your connection credentials are generated for you but make note of the following information:Server group:This is the address of the country (server) you want to be connected with, e.g. '12345-1-ca.cg-dialup.net'. Note: This address changes with every country you have chosen in the step before. The actual single server to be used will be chosen automatically by CyberGhost.User name:A solely for this protocol generated user name.This is NOT your regular CyberGhost account user name, it's used only to authenticate with our servers via Manual Configurations.Password (you need to check the ""Show Password"" option in order to see it):A solely for protocol usage generated password.This is NOT your regular CyberGhost account Password, it's used only to authenticate with our servers via Manual Configurations.Pre-Shared KeyPlease download the configuration file. For that please click on 'Download Configuration' and download the config file to your computer (it's recommended that you create a special folder for the config, somewhere accessible like your Desktop andExtract/Copy thecontents of the .zip file there).Important:please keep your username and password obtained during the configuration process at hand, you will need them later in the setup.Now, the saved config is a ZIP file, which contains the following single files:ca.crt:This is the certificate of the certification authority(THIS WILL NOT BE NEEDED FOR THIS TYPE OF CONFIGURATION)client.crt:This is the user certification fileclient.key:This is your private key fileopenvpn.ovpn:This is yourOpenVPNconfiguration file(THIS WILL NOT BE NEEDED FOR THIS TYPE OF CONFIGURATION)If you need to change the country you connect to, you must re-configure the location to use in your account management and download the new zipped config file.Only copy the the 'client.crt' and 'client.key' files from the zipped configuration file to a folder on your desktop.Step 2:Get VPN Manager for OpenVPNTo make sure, the VPN Manager gets updated properly, download the completerepositoryinstead of just the single add-on and copy theunzippedfile to the folder with the certificate and the key.Now copy all files to your device. For that, you need access to the file system on your OpenELEC/LibreELEC device. The easiest way is by using a FTP client likeFilezilla:First check for the OpenELEC/LibreELEC network IP address, usually something like '192.168.178.XXX' and note it. If you don't know how to find it, have a look at 'System>System info>Summary> IP address' in your Kodi media centerStart Filezilla, click on 'File > Site manager' > New Site > Name it 'Kodi' (or whatever you wish) :Enter the 'Server' address (this is the network address of your OpenELEC/LibreELEC device), e.g. '192.168.186.128'Choose 'SFTP' as the 'Protocol'Choose 'Normal' as 'Connection type'Enter the 'User name' of OpenELEC/LibreELEC, usually'root'Enter 'Password' for OpenELEC (usually 'openelec'), resp LibreELEC (usually 'libreelec') - you can set a personalized password inSETTINGS > LIbreElec> Services > SSH sectionClick on'Connect'Filezilla opens the file system of your Kodi installation right inside the folder 'storage'. Create a new folder called 'downloads' or 'VPN' or whatever you want to call it.Open the newly created download folder and copy all files into it (namely the files'client.crt','client.key',and the zipped repository file named 'repository.zomboided.plugins-1.0.0.zip').Step 3: Install VPN Manager for OpenVPN1.Start your Kodi. Here we'll be using LibreELEC to illustrate the general method, so you might have to adapt some steps, but in essence, there are no big differences between the distributions and/or skins and when it comes to configuring the VPN Manager it's all over the same procedure.In case the installation of apps from unknown sources is deactivated (which is the default setting), first go to SETTINGS > SYSTEM > 'Add-ons'. There you'll need to enable'Unknown sources'.2.Now go back to the main screen > 'Add-ons > 'Install from zip file'3.Navigate to the folder where you've copied the three files via FileZilla4.Select the Zomboided Repository zip file and clickOK5. Nowgo back to Add-ons > My Add-ons >Zomboided Repository6.Click Services> VPN Manager for OpenVPN> then clickINSTALLStep 4: Configure VPN Manager for OpenVPN1.After installing theVPN Manager for OpenVPN, the VPN Manager setup Wizard should appear, you can use it to quickly configure the VPN connection.2.After selecting the ""Wizard"" > ChooseCyberGhostas the VPN provider3. When asked for the Username and password, do NOT use your CyberGhost account credentials! > you need to use theOpenVPN generated Username and Password from step 1.4.Click OK then you should be asked if you wish to connect to the VPN at Startup or manually initiate the connection whenever you need to.5.Click on'OK'once again to create the new connection.6.Last steps, now all you need to do ischoose your desired VPN country and select the user certificate ('client.crt') and the user key ('client.key') you've copied to the Kodi machine in Step 2.Once done, the VPN Manager will connect to the VPN service.You may be asked if you wish to set-up additional VPN connections, to different countries. You can do so at any time via the SETTINGS menu of theVPN Manager for OpenVPN, the process is the same.Finally,Kodi, by default may not show your External IP, in order to verify that you're indeed connected to the VPN, you'll need to install another plug-in, as illustrated inthis quick article.",https://support.cyberghostvpn.com/hc/en-us/articles/214059905-How-to-configure-OpenVPN-for-OpenELEC-5-7-and-LibreELEC-Raspberry-Pi-
How to configure the CyberGhost client with Kodi on a Windows device,"If you use a Kodi Media Center based on Windows Vista, 7, 8, or 10, connect to the VPN with the CyberGhost app before starting Kodi (all traffic will then be routed through the VPN network)Using the CyberGhost clientIf your Kodi Media Center doesn't start automatically when booting up Windows, simply start CyberGhost before Kodi and connect to your desired VPN server.Start the CyberGhost VPN client by clicking on its desktop symbol or start menu entry and then click on the Expand button to open the extended program view with all different server lists and settings.Make sure you activated the menu entry 'All servers':The next step is to choose the country you want to use the Internet. For that simply click on the resp. entry. If you want, you can use the distance between you and the country you want to surf. This information might be useful to share a light on your Internet speed at a given moment. The higher the distance, the more time data packets need to be delivered.To quickly connect, just select the desired country and click the Connect button (or double-click on respective country)You can also use the search field to search for a specific country (case insensitive) :Select the country of your choice. The respective country name will show up in the control window.To activate the chosen connection click on the""Power ""button.Finally, Start Kodi.",https://support.cyberghostvpn.com/hc/en-us/articles/115000376969-How-to-configure-the-CyberGhost-client-or-OpenVPN-for-Kodi-on-a-Windows-device
How to disable IPv6 on Android ?,"Complete this tutorial step by step to see how to disable IPv6 on Android. For this, you will need to change the APN settings on your Android device to use IPv4 only.1. Go Settings -> Connections -> Mobile networks -> Access Point Names. Select your mobile operator the scroll down to APN protocol and select it.2. SelectIPv4.3. And that's it !For any other questions or concerns, please reach out to the Support Team at:support@cyberghost.ro.The entire Support Team is ready to assist.",https://support.cyberghostvpn.com/hc/en-us/articles/360016604180-How-to-disable-IPv6-on-Android-
How to change DNS settings for Asus Routers,"MediaStreamer is a DNS service designed to offer faster streaming speeds. To use MediaStreamer smoothly, you must register your IP address on the ExpressVPN website so ExpressVPN will recognize your IP address and grant MediaStreamer access to your device.",https://www.expressvpn.com/support/vpn-setup/dns-settings-for-asus-routers/)
How to use CyberGhost with Microsoft Xbox & a VPN-compatible router,"To use your Xbox with a VPN equipped router you first need to know that despite the router you decide for, very few can be used both ways, as a VPN router and at the same time as your Internet gateway. Most of the time you will end up with the original router, delivered by your Internet Service Provider, and a separate one: the VPN compatible router.While the first will connect you to the Internet, the latter will provide a (Wi-Fi) network on its own and connect to the CyberGhost network through your ISP router. In the case of a second Wi-Fi network, it also means that you have two separate wireless networks in your home: an encrypted and anonymized one (provided by the VPN compatible router) and your regular network (provided by the ISP router). Beware then which device you connect to which Wi-Fi network.Step 1To configure a VPN compatible router and establish a working VPN connection to the CyberGhost network you might want to read one of the following instructions:How to configure OpenVPN for DD-WRT routersHow to configure OpenVPN for TomatoUSB routersHow to configure OpenVPN for TomatoUSB Merlin Build routersStep 2The way you configure your Xbox to use the VPN compatible router is exactly the same as using the ISP router. You just need to open your 'Settings' menu and switch to 'System'.Now open 'Network Settings' and choose, if you either want to set up a cable connection or a Wi-Fi connection. In case of an Ethernet connection, all settings will be adjusted automatically, in case of a Wi-Fi connection you additionally need to enter the correct password set for the wireless network of the VPN compatible router.If you have two separate Wi-Fi networks running and want to use the Wi-Fi with VPN connection, make double sure you don't accidently connect the Xbox to the ISP router.Please also note that older versions of your game console might only have an Ethernet port and therefor need a WiFi hardware add on in order to establish a wireless connection.If you want to set up your connection manually, open 'Configure network' and tap 'A' on your controller. In the next window, you can change your IP settings. Do so by switching to 'Manually'.Enter an IP address. This address must be unique in your network. In case you don't know how many devices you run and which IP addresses already are in use, open your ISP router's web interface and check on all addresses. The address for the Xbox will look similar to something like 192.168.xxx.xxx.Enter the subnet mask, usually 255.255.255.0, which should also be the subnet mask of your gateway.At last enter the gateway address, which is the IP address of your VPN compatible router with the running CyberGhost connection.",https://support.cyberghostvpn.com/hc/en-us/articles/360001989173-How-to-use-CyberGhost-with-Microsoft-Xbox-a-VPN-compatible-router
How to use CyberGhost with Sony PlayStation & Windows ICS,"Step 1Install and activate CyberGhost VPN on your Windows PC. Choose the server to be used. If you don't know, how to install and use CyberGhost on Windows, please refer toour instructions hereStep 2The Windows' 'Internet Connection Sharing' function (ICS) allows using the encrypted VPN connection established in step 1 with different devices in your local network. For that, you need to connect the respective device, in this case, the PlayStation console, to your Windows PC using an Ethernet cable.Please note that your PC needs to have two network cards, one for a connection to your router (to the Internet) and one for the connection to your game console. Alternatively you can use a wireless LAN, either from your PC to the router or from the console to your PC (or both). However, if you need to share a wireless Internet connection, more steps are necessary and it’s a bit more complicated to realize. Pleaserefer to this articleto share a wireless Internet connection under Windows 10.Step 3The first settings have to be made on the host computer, that is the Windows PC, which encrypted Internet connection should be used by the PlayStation:Start CyberGhost VPN, choose the profile you want to use, and establish the VPN connection. Once done, open the Start menu, type 'Control Panel' and switch to the ‚Network and Sharing Center‘.Click on ‚Change adapter settings‘(on older Windows versions ‚Show Network Connections‘).Search for an Ethernet connection related to the ‚TAP-Windows Adapter V9‘. Click on it with your right mouse button and choose the entry ‚Properties‘.Activate the tab ‚Sharing‘ and then the option ‚Allow other network users [...]‘. Also choose the fitting ‚Home Network Connection‘ from the drop-down list, usually the second physical network card or a WiFi stick.Click on 'OK‘.Double click on the adapter representing the Ethernet (or Wi-Fi) connection that goes to your router, click on 'Details' and note down the network IPv4 address, usually something such as '192.168.xxx.xxx'.Close all windows, connect your PlayStation to your Windows PC, and configure the console:Step 4Depending on the PlayStation device you are using, the options to set can be found in menu entries like ‚Network‘ or ‚Internet‘. There you first deactivate the automatic search for networks and then set up an Internet connection manually.Activate either 'Use LAN cable' or 'Wi-Fi' (depending on how you connect to the Windows PC with the running CyberGhost connection). In the case of an Ethernet connection, all settings will usually be adjusted automatically, in case of a Wi-Fi connection you additionally need to enter the correct password set for the wireless network of the Windows PC.If you use a Wi-Fi connection from your PlayStation to your Windows PC AND from your Windows PC to your router, make double sure you don't accidently connect the PlayStation directly to the router.Please also note that older versions of your game console might only have an Ethernet port and therefor need a WiFi hardware add on in order to establish a wireless connection.The noted IP address will be the gateway to be set.For any additional information or concerns - it is best to approach the Support Department:via e-mail:support@cyberghost.rovia on-line request:https://support.cyberghostvpn.com/hc/en-us/requests/newvia 24/7 Live! Chat Sessions on our website",https://support.cyberghostvpn.com/hc/en-us/articles/360001993134-Sony-s-PlayStation-with-Internet-Connection-Sharing-on-Windows
How to use CyberGhost with Sony PlayStation & MacOS ICS,"Step 1Download and install CyberGhost VPN on your Mac. If you don't know, how to do this, please refer toour instructions here.Step 2The 'Internet Connection Sharing' function allows using an encrypted VPN connection with different devices in your local network. For that, you need to connect the respective device, in this case, the PlayStation console, to your Mac using a crossover cable.Please note that your Mac needs to have two network cards, one for a connection to your router (to the Internet) and one for the connection to your game console. Alternatively, you can use a wireless LAN, either from your Mac to the router or from the console to your Mac (or both).Step 3The first settings have to be made on the host computer, that is the Mac, which encrypted Internet connection should be used by the PlayStation:Go to 'System Preferences' at the bottom of the home screen, open 'Sharing' and tap on 'Internet Sharing'.Open the drop-down menu titled 'Share Your Connection From' and select your established Internet connection. This could either be 'Ethernet' (cable connection), 'AirPort', or 'Wireless'. Make sure to choose the right source.Click on the drop-down menu titled 'To computer using' and select 'Ethernet' (since you want to connect your PlayStation with a cable to your Mac). The Internet Sharing icon should now turn to green, symbolizing a working sharing connection.Step 4Start CyberGhost VPN, choose the profile you want to use, and establish the VPN connection. Once done, open the PlayStation menu, go to ‚Settings > Network Settings > Set up Internet Connection‘. There you deactivate the automatic search for networks and then set up an Internet connection manually.Activate either 'Use LAN cable' or 'Wi-Fi' (depending on how you connect to the Mac with the running CyberGhost connection) and specify the connection method to 'Easy' to make sure that the PlayStation will automatically scan your Ethernet connection. In the case of an Ethernet connection, all settings will usually be adjusted automatically, in case of a Wi-Fi connection you additionally need to enter the correct password set for the wireless network of the Mac.If you use a Wi-Fi connection from your PlayStation to your Mac AND from your Mac to your router, make double sure you don't accidently connect the PlayStation directly to the router.Please also note that older versions of your game console might only have an Ethernet port and therefor need a WiFi hardware add on in order to establish a wireless connection.Click on 'Do Not Use A Proxy Server' when asked, accept all settings and lastly select 'Test Connection'.",https://support.cyberghostvpn.com/hc/en-us/articles/360001988993-Sony-s-PlayStation-with-Internet-Connection-Sharing-on-Mac-OS
How to use CyberGhost with Microsoft Xbox & Windows ICS,"Step 1Install and activate CyberGhost VPN on your Windows PC. Choose the server to be used. If you don't know, how to install and use CyberGhost on Windows, please refer toour instructions here.Step 2The Windows' 'Internet Connection Sharing' function (ICS) allows using the encrypted VPN connection established in step 1 with different devices in your local network. For that, you need to connect the respective device, in this case, your Xbox console, to your Windows PC using an Ethernet cable.Please note that your PC needs to have two network cards, one for a connection to your router (to the Internet) and one for the connection to your game console. Alternatively you can use a wireless LAN, either from your PC to the router or from the console to your PC (or both). However, if you need to share a wireless Internet connection, more steps are necessary and it’s a bit more complicated to realize. Pleaserefer to this articleto share a wireless Internet connection under Windows 10.Step 3The first settings have to be made on the host computer, that is the Windows PC, which encrypted Internet connection should be used by the Xbox:Start CyberGhost VPN, choose the profile you want to use, and establish the VPN connection. Once done, open the Start menu, type'Control Panel'and switch to the ‚Network and Sharing Center‘.Click on ‚Change adapter settings‘ (on older Windows versions ‚Show Network Connections‘).Search for an Ethernet connection related to the ‚TAP-Windows Adapter V9‘. Click on it with your right mouse button and choose the entry ‚Properties‘.Activate the tab ‚Sharing‘ and then the option ‚Allow other network users [...]‘. Also choose the fitting ‚Home Network Connection‘ from the drop-down list, usually the second physical network card or a WLAN stick.Click on 'OK‘.Double click on the adapter representing the Ethernet (or Wi-Fi) connection that goes to your router, click on 'Details' and note down the network IPv4 address, usually something such as '192.168.xxx.xxx'.Close all windows, connect your Xbox to your Windows PC, and configure the console:Step 4The options to be set can be found in menu entries like ‚Network‘ and ‚Internet‘. So first open your 'Settings' menu and switch to 'System'.Open 'Network Settings' and choose, if you either want to set up a cable connection or a Wi-Fi connection. In case of an Ethernet connection, all settings will be adjusted automatically, in case of a Wi-Fi connection you additionally need to enter the correct password set for the wireless network of the Windows PC.If you use a Wi-Fi connection from your Xbox to your Windows PC AND from your Windows PC to your router, make double sure you don't accidentally connect the Xbox directly to the router.Please also note that older versions of your game console might only have an Ethernet port and therefor need a WiFi hardware add on in order to establish a wireless connection.Now open 'Configure network' and tap 'A' on your controller. In the next window, you can change your IP settings. Do so by switching to 'Manually'.Enter an IP address. This address must be unique in your network. In case you don't know how many devices you run and which IP addresses already are in use, open your router's web interface, and check on all addresses. The address for the Xbox will look similar to something like 192.168.xxx.xxx.Enter the subnet mask, usually 255.255.255.0, which should also be the subnet mask of your gateway.At last enter the gateway address, which is the noted IP address of your Windows PC with the running CyberGhost connection.For any additional information or concerns - it is best to approach the Support Department:via e-mail:support@cyberghost.rovia on-line request:https://support.cyberghostvpn.com/hc/en-us/requests/newvia 24/7 Live! Chat Sessions on our website",https://support.cyberghostvpn.com/hc/en-us/articles/360001989013-Microsoft-s-Xbox-with-Internet-Connection-Sharing-on-Windows
How to use CyberGhost with Microsoft Xbox & Mac ICS,"Step 1Install and activate CyberGhost VPN on your Mac. If you don't know, how to do this, please refer toour instructions here.Step 2The 'Internet Connection Sharing' function allows using an encrypted VPN connection with different devices in your local network. For that, you need to connect the respective device, in this case, your Xbox console, to your Mac using a crossover cable.Please note that your Mac needs to have two network cards, one for a connection to your router (to the Internet) and one for the connection to your game console. Alternatively you can use a wireless LAN, either from your Mac to the router or from the console to your Mac (or both).Step 3The first settings have to be made on the host computer, that is the Mac, which encrypted Internet connection should be used by the Xbox:Go to 'System Preferences' at the bottom of the home screen, open 'Sharing' and tap on 'Internet Sharing'.Open the drop-down menu titled 'Share Your Connection From' and select your established Internet connection. This could either be 'Ethernet' (cable connection), 'AirPort', or 'Wireless'. Make sure to choose the right source.Click on the drop-down menu titled 'To computer using' and select 'Ethernet' (since you want to connect your Xbox with a cable to your Mac). The Internet Sharing icon should now turn to green, symbolizing a working sharing connection.Step 4The options to be set can be found in menu entries like ‚Network‘ and ‚Internet‘. So first open your 'Settings' menu and switch to 'System'.Open 'Network Settings' and choose, if you either want to set up a cable connection or a Wi-Fi connection. In case of an Ethernet connection, all settings will be adjusted automatically, in case of a Wi-Fi connection you additionally need to enter the correct password set for the wireless network of the Mac.If you use a Wi-Fi connection from your Xbox to your Mac AND from your Mac to your router, make double sure you don't accidently connect the Xbox directly to the router.Please also note that older versions of your game console might only have an Ethernet port and therefor need a WiFi hardware add on in order to establish a wireless connection.Now open 'Configure network' and tap 'A' on your controller. In the next window, you can change your IP settings. Do so by switching to 'Manually'.Enter an IP address. This address must be unique in your network. In case you don't know how many devices you run and which IP addresses already are in use, open your router's web interface, and check on all addresses. The address for the Xbox will look similar to something like 192.168.xxx.xxx.Enter the subnet mask, usually 255.255.255.0, which should also be the subnet mask of your gateway.At last enter the gateway address, which is the IP address of your Mac with the running CyberGhost connection.",https://support.cyberghostvpn.com/hc/en-us/articles/360001989053-Microsoft-s-Xbox-with-Internet-Connection-Sharing-on-Mac-OS
How to use CyberGhost with Sony PlayStation & a VPN-compatible router,"To use your PlayStation with a VPN equipped router you first need to know that despite the router you decide for, very few can be used both ways, as a VPN router and at the same time as your Internet gateway. Most of the time you will end up with the original router, delivered by your Internet Service Provider, and a separate one: the VPN compatible router.While the first will connect you to the Internet, the latter will provide a (Wi-Fi) network on its own and connect to the CyberGhost network through your ISP router. In the case of a second Wi-Fi network, it also means that you have two separate wireless networks in your home: an encrypted and anonymized one (provided by the VPN compatible router) and your regular network (provided by the ISP router). Beware then which device you connect to which Wi-Fi network.Step 1To configure a VPN compatible router and establish a working VPN connection to the CyberGhost network you might want to read one of the following instructions:How to configure OpenVPN for DD-WRT routersHow to configure OpenVPN for TomatoUSB routersHow to configure OpenVPN for TomatoUSB Merlin Build routersStep 2The way you configure your PlayStation to use the VPN compatible router is exactly the same as using the ISP router. You just need to open your console's system settings, move to ‚Network‘ and deactivate or remove the regular Internet connection, resp. deactivate the automatic search for networks. Instead, you set up a new Internet connection manually.For this either activate 'Use LAN cable' or 'Wi-Fi' (depending on how you won't connect to the VPN router with the running CyberGhost connection). In case of an Ethernet connection, all settings will usually be adjusted automatically, in case of a Wi-Fi connection you additionally need to enter the correct password set for the wireless network of the VPN compatible router.If you have two separate Wi-Fi networks running and want to use the Wi-Fi with VPN connection, make double sure you don't accidently connect the PlayStation to the ISP router.Please also note that older versions of your game console might only have an Ethernet port and therefor need a WiFi hardware add on in order to establish a wireless connection.",https://support.cyberghostvpn.com/hc/en-us/articles/360001989073-Using-Sony-s-PlayStation-with-a-VPN-compatible-router
How to set up ExpressVPN on a Freebox using OpenVPN,"This setup does not protect all the devices connected to the Freebox. Instead, only the integrated “seedbox” and all downloads initiated through the seedbox will be protected by the VPN. If you want full VPN protection on your Freebox, you will need to use your Freebox as a secondary router and connect it to a router running ExpressVPN.",https://www.expressvpn.com/support/vpn-setup/freebox-openvpn/)
How to use CyberGhost with Microsoft Xbox & a VPN-compatible router,"To use your Xbox with a VPN equipped router you first need to know that despite the router you decide for, very few can be used both ways, as a VPN router and at the same time as your Internet gateway. Most of the time you will end up with the original router, delivered by your Internet Service Provider, and a separate one: the VPN compatible router.While the first will connect you to the Internet, the latter will provide a (Wi-Fi) network on its own and connect to the CyberGhost network through your ISP router. In the case of a second Wi-Fi network, it also means that you have two separate wireless networks in your home: an encrypted and anonymized one (provided by the VPN compatible router) and your regular network (provided by the ISP router). Beware then which device you connect to which Wi-Fi network.Step 1To configure a VPN compatible router and establish a working VPN connection to the CyberGhost network you might want to read one of the following instructions:How to configure OpenVPN for DD-WRT routersHow to configure OpenVPN for TomatoUSB routersHow to configure OpenVPN for TomatoUSB Merlin Build routersStep 2The way you configure your Xbox to use the VPN compatible router is exactly the same as using the ISP router. You just need to open your 'Settings' menu and switch to 'System'.Now open 'Network Settings' and choose, if you either want to set up a cable connection or a Wi-Fi connection. In case of an Ethernet connection, all settings will be adjusted automatically, in case of a Wi-Fi connection you additionally need to enter the correct password set for the wireless network of the VPN compatible router.If you have two separate Wi-Fi networks running and want to use the Wi-Fi with VPN connection, make double sure you don't accidently connect the Xbox to the ISP router.Please also note that older versions of your game console might only have an Ethernet port and therefor need a WiFi hardware add on in order to establish a wireless connection.If you want to set up your connection manually, open 'Configure network' and tap 'A' on your controller. In the next window, you can change your IP settings. Do so by switching to 'Manually'.Enter an IP address. This address must be unique in your network. In case you don't know how many devices you run and which IP addresses already are in use, open your ISP router's web interface and check on all addresses. The address for the Xbox will look similar to something like 192.168.xxx.xxx.Enter the subnet mask, usually 255.255.255.0, which should also be the subnet mask of your gateway.At last enter the gateway address, which is the IP address of your VPN compatible router with the running CyberGhost connection.",https://support.cyberghostvpn.com/hc/en-us/articles/360001989173-Using-Microsoft-s-Xbox-with-a-VPN-compatible-router
Install CyberGhost VPN on MacOS,"This guide will show you can install CyberGhost on your Mac.You can watch our short demonstration video, or scroll below for a step-by-step guide.Jump to...System RequirementsInstallationSystem RequirementsTo install CyberGhost VPN successfully and use the software you need the following minimum system requirements:Mac OS X 10.13 (High Sierra) or newer OSAt least 70 megabytes of free hard drive spaceIf you're unsure whether your Mac is compatible, you can check Apple’s officialcompatibility list.InstallationFollow these steps to install CyberGhost VPN on your Mac:Go to your onlineaccount management page.Log in with your username and password.UnderDownload Hub, selectDownloadnext toCyberGhost VPN for macOS.On the next page, you will receive a pop-up asking if you wish to allow downloads on our site. SelectAllowand wait for the file to downloadOpen the downloads folder and double-click on the installation file.Follow the on-screen instructions.You will need to confirm the installation with your macOS username and password. Please do not enter your CyberGhost username and password here.Once the installation process in finishee, you can move the installer to bin.Next, you will receive a pop-up asking if you wish to receive notifications from our app. SelectAllowand close the installation window.You will receive a notification asking for your consent to send a limited amount of anonymized data.This data cannot be tracked back to you, and cannot be used to compromise your digital anonymity. It is meant to help us troubleshoot any potential issues, so you can selectAgree & continue.At the login screen, enter your CyberGhost username and password and selectLogin.Next, the software will ask to install a VPN profile. This will enable CyberGhost VPN to redirect your internet traffic through an encrypted tunnel to secure your data.Lastly, you will need to give CyberGhost VPN Keychain access. This ensures that the app has permission to encrypt your internet traffic. For this, please selectAllow keychain access.Enter your macOS account password in theKeychain dialogue boxand selectAlways Allow. Now, you have successfully installed CyberGhost VPN on your Mac.Need assistance? Contact our Customer Support team:via email atsupport@cyberghost.rovia online request athttps://support.cyberghostvpn.com/hc/en-us/requests/newvia 24/7 Live Chat by clicking the Support button below",https://support.cyberghostvpn.com/hc/en-us/articles/360020876860-How-to-install-CyberGhost-8-for-Mac-OS
Router: How to Set Up OpenVPN on TomatoUSB,"Please note the following requirements:Router with alternative Tomato firmware and support of OpenVPN.Older versions need to be updated.Info:Official Tomato websiteA CyberGhost accountInfo:Here's how to create a CyberGhost account onlineInfo:How to manage your CyberGhost accountA CyberGhost subscriptionInfo:How to purchase or upgrade a subscriptionInfo(only prepaid subscribers):Enter activation keyDisclaimer:Please keep in mind that, although the technical process is as thoroughly documented as possible, you need to have at least some technical understanding. There's always a chance for an overseen mistake and/or things have changed and the article is not updated yet.Tomato is a custom firmware for routers. It offers OpenVPN client support and is available on a variety of routers. To verify if your router supports Tomato firmware, you can check if your router supports Tomato firmwarehere. An article on how to install Tomato firmware on a router can be foundhere.Some general notes on routers:Routers are usually not equipped with state of the art hardware, meaning you will have speed losses when using a VPN connection (due to low CPU power to process encryption). Direct connections from your PC, Laptop, Tablet, etc. to the VPN network (without the router providing the VPN software) will work better for you if speed is among your favorite desires.If your flashed router doesn't provide DSL functionality, your Internet connection will still need to be managed by your DSL modem. In that case, your device pool will hook on your router (via cable or wireless) and the router itself will be hooked to your DSL modem. So don’t forget to configure your WLAN devices to connect to the new router, so they won’t log in to the old WLAN. Alternatively, you can deactivate your modem’s WLAN completely (only if you don’t need it for unencrypted traffic).If you flash your router with an alternative firmware you might lose your device’s guarantee; please consult your dealers’ policies regarding this matter. Furthermore, it might happen that the flash process leaves your device unusable, e.g. after a power failure while flashing. CyberGhost is not to be held responsible for any damages, does not acknowledge any liabilities, and will not adopt your manufacturer’s warranty.Also please note that not all routers with VPN client support will be able to connect to the CyberGhost network or might lose that ability with future firmware updates.Step1Visit yourCyberGhost VPN online account.Select""VPN""then click""Configure Device""and create your server configuration, as described below:Protocol :Open VPNCountry :Since native protocol connections may only be used with exactly one server you now have to choose the country you want to surf from; the server to be used in this country will be chosen by CyberGhost automatically.Server group :Choose the server group and the OpenVPN protocol (UDP or TCP) you want to useImportant :please keep your username and password obtained during the configuration process at hand, you will need them later in the setup.Now, the saved config is a ZIP file, which contains the following single files:ca.crt:This is the certificate of the certification authorityclient.crt:This is the user certification fileclient.key:This is your private key fileopenvpn.ovpn:This is yourOpenVPNconfiguration fileIf you need to change the country you connect to, you must re-configure the location to use in your account management and download the new zipped config file.Step2First things first, these changes are made in the web configuration panel of your router. You can access it by visiting the local IP of your router from your web browser. The two most common, the default local IPs that most routers have are 192.168.1.1 or 192.168.0.1 – you can access these by openinghttp://192.168.1.1orhttp://192.168.0.1in your browser. The default IP, username, and password are listed in your router’s User Manual.Open the router settings page on your browser by entering the router local address (192.168.1.1 by default).On the left side menu, clickVPN Tunneling->OpenVPN ClientBasicActivate the main tabClient 1and the sub-tabBasic. Check all of the following options and change those which show different:Start with WAN:UncheckInterface Type:TUNProtocol:UDP or TCP (depending on what type you decided to use in step 1)Server Address/Port:Please enter the server address/group of Step 1, e. g.'12345-1-ca.cg-dialup.net'. Depending on the country to connect with, fist part of each address will be changed, e.g. instead of'12345-1-dialup.net‘(CA meaning Canada and12345-1being the server group), when choosing a different country, the first part would be similar to'12345-1-gb.cg-dialup.net'(GB meaning Great Britain and12345-1the server group).Firewall:AutomaticAuthorization Mode:TLSUsername/Password Authentication:CheckedUsername:The user name created in step 1. DO NOT use your regular user name!Password:The password created in step 1. DO NOT use your regular password!Username Authentication only:UncheckedExtra HMAC authorization:DisabledCreate NAT on tunnel:CheckedOpening'Basic > Network'you can also configure the DNS server to be used. If you want to, please exchange the first DNS IP address with a censorship-free CyberGhost name server:Primary:10.101.0.243Secondary:38.132.106.139Also, take care of the correct configuration of the time zone and server in the tab'Basic > Time'.Click onAdvancedtab and set the following options:Poll Interval:0 (deactivated)Redirect Internet traffic:CheckedAccept DNS configuration:StrictEncryption cypher:AES-256-CBCCompression:DisabledTLS Renegotiation Time:-1Connection retry:-1Verify server certificate:UncheckedCustom Configuration:Here you mark all existing lines, delete them and exchange them with some parts of your downloaded 'openvpn.ovpn' configuration file: For that, open the OpenVPN file with a simple text editor, mark the text beginning with 'resolve-retry infinete' and ending with 'verb 4' (including both lines), copy the text with 'Control-C' and insert it here with 'Control-V'. It should look like this:resolv-retry infiniteredirect-gateway def1persist-keypersist-tunnobindcipher AES-256-CBCauth SHA256ping 5ping-exit 60ping-timer-remexplicit-exit-notify 2script-security 2remote-cert-tls serverroute-delay 5verb 4# Note : Some routers don't understand this command. In cases of doubt or if the configuration doesn't work, please remove this entry.]Please don’t copy this example for a server configuration might change after publishing this article.KeysNow switch to the tab ‚Keys‘. There you find three fields, which have to be filled with the corresponding content of the other three files you downloaded from your CyberGhost account management. For that you also open the respective file with a simple editor and copy the respective text passages:Certificate Authority:Copy all text of the file 'ca.crt' in here.Client Certificate:Copy all text of the file 'client.crt' in here.Client Key:Copy all text of the file 'client.key' in here.At last click onStart Nowto initiate the VPN.Click on the“Status”tab to check if you’re now connected.For any additional information or concerns - it is best to approach the Support Department:via e-mail:support@cyberghost.rovia on-line request:https://support.cyberghostvpn.com/hc/en-us/requests/newvia 24/7 Live! Chat Sessions on our website",https://support.cyberghostvpn.com/hc/en-us/articles/213269969-Router-How-to-configure-OpenVPN-for-TomatoUSB
Router: How to Set Up OpenVPN on TomatoUSB Merlin Build,"Please note the following requirements:Router with alternative TomatoUSB Merlin Build firmware and support of OpenVPN.Older versions need to be updated.Info:Official Tomato websiteA CyberGhost accountInfo:Here's how to create a CyberGhost account onlineInfo:How to manage your CyberGhost accountA CyberGhost subscriptionInfo:How to purchase or upgrade a subscriptionInfo(only prepaid subscribers):Enter activation keyDisclaimer:Please keep in mind that, although the technical process is as thoroughly documented as possible, you need to have at least some technical understanding. There's always a chance for an overseen mistake and/or things have changed and the article is not updated yet.Some general notes on routers :Routers are usually not equipped with state of the art hardware, meaning you will have speed losses when using a VPN connection (due to low CPU power to process encryption). Direct connections from your PC, Laptop, Tablet, etc. to the VPN network (without the router providing the VPN software) will work better for you if speed is among your favorite desires.If your flashed router doesn't provide DSL functionality, your Internet connection will still need to be managed by your DSL modem. In that case, your device pool will hook on your router (via cable or wireless) and the router itself will be hooked to your DSL modem. So don’t forget to configure your WLAN devices to connect to the new router, so they won’t log in to the old WLAN. Alternatively, you can deactivate your modem’s WLAN completely (only if you don’t need it for unencrypted traffic).If you flash your router with an alternative firmware you might lose your device’s guarantee; please consult your dealers’ policies regarding this matter. Furthermore, it might happen that the flash process leaves your device unusable, e.g. after a power failure while flashing. CyberGhost is not to be held responsible for any damages, does not acknowledge any liabilities, and will not adopt your manufacturer’s warranty.Also please note that not all routers with VPN client support will be able to connect to the CyberGhost network or might lose that ability with future firmware updates.Step1Visit yourCyberGhost VPN online accountand login with your Premium Username and PasswordSelect the ""VPN"" section from the left-side menuSelect ""Configure Device""Now create your server configuration, as described below :Protocol :Open VPNCountry :Since native protocol connections may only be used with exactly one server you now have to choose the country you want to surf from; the server to be used in this country will be chosen by CyberGhost automatically.Server group :Choose the server group and the OpenVPN protocol (UDP or TCP) you want to useOpenVPN UDPallows higher speed than the TCP version but can result in broken downloads in some cases. This is the default setting.OpenVPN TCPallows more stable connections than the UDP version but is a bit slower. Choose this version, if you have recurrent connection issues such as sudden disconnections.Once the desired parameters are chosen, save them with""Save Configuration""To view theOpenVPNcredentials that are generated for you on the configuration dashboard, click on the""View""button.After setting up your connection preferences, please take note of the following:Server Group :This is the address of the country (server) you want to be connected with, e.g. '12345-1-ca.cg-dialup.net'. This address changes with every country you have chosen in the step before. The actual single server to be used will be chosen automatically by CyberGhost.Username :A solely for this protocol generated user name.This is NOT your regular CyberGhost account user name, it's used only to authenticate with our servers via Manual Configurations.Password :A solely for protocol usage generated password.This is NOT your regular CyberGhost account password, it's used only to authenticate with our servers via Manual Configurations.Pre-Shared KeyOnce done, please download the configuration file. For that click on""Download Configuration""and download the config file to your computer (it's recommended that you create a special folder for the config, somewhere accessible like your Desktop andExtract/Copy thecontents of the .zip file there).Important :please keep your username and password obtained during the configuration process at hand, you will need them later in the setup.Now, the saved config is a ZIP file, which contains the following single files:ca.crt:This is the certificate of the certification authorityclient.crt:This is the user certification fileclient.key:This is your private key fileopenvpn.ovpn:This is yourOpenVPNconfiguration fileIf you need to change the country you connect to, you must re-configure the location to use in your account management and download the new zipped config file.Step 2Open your TomatoUSB (Merlin Build) router’s configuration page and click on the left side in the area ‚Advanced Settings‘ on ‚VPN Server‘ and after that in the upper menu on ‚OpenVPN Client Settings‘Basic SettingsActivate under ‚Select client Instance‘ the entry ‚Client 1‘, check the following options and change those which show different:Start with WAN:NoInterface Type:TUNProtocol:UDP or TCP (depending on what type you decided to use in step 1)Server Address and Port:Server Group Address: 1234-5-ro.cg-dialup.net / Port: 443 (Step 1)Firewall:AutomaticAuthorization Mode:TLSUsername/Password Authentication:YesUsername:The user name created in step 1. DO NOT use your regular user name!Password:The password created in step 1. DO NOT use your regular password!Username Authentication only:NoExtra HMAC authorization:DisabledCreate NAT on tunnel:YesAdvanced SettingsAfter activating the tabAdvanced Settingsplease check the following options:Poll Interval:0 (means deactivated)Redirect Internet traffic:YesAccept DNS configuration:RelaxedEncryption cypher:AES-256-CBCCompression:DisabledTLS Renegotiation Time:-1Connection retry:30Verify server certificate:NoCustom Configuration:Here you mark all existing lines, delete them and exchange them with some parts of your downloaded 'openvpn.ovpn' configuration file: For that, open the OpenVPN file with a simple text editor, mark the text beginning with :'resolve-retry infinite'and ending with'verb 4'(including both lines), copy the text with 'Ctrl-C', and insert it here with 'Ctrl-V'.It should look like this:resolv-retry infiniteredirect-gateway def1persist-keypersist-tunnobindcipher AES-256-CBCauth SHA256ping 5ping-exit 60ping-timer-remexplicit-exit-notify 2script-security 2remote-cert-tls serverroute-delay 5verb 4#Note : Some routers don't understand this command. In cases of doubt or if the configuration doesn't work, please remove this entry.]Please don’t simply copy this example for a server configuration might change after publishing this article.OpenVPN KeysNow switch to the tabOpenVPN KeysThere you find four fields, whereas three of them have to be filled with the corresponding content of the other three files you downloaded from your CyberGhost account management. For that you also open the respective file with a simple editor and copy the respective text passages:Certificate Authority:Copy all text of the file 'ca.crt' in here.Client Certificate:Copy all text of the file 'client.crt' in here.Client Key:Copy all text of the file 'client.key' in here.At last click onApplyto save your configuration.For any additional information or concerns - it is best to approach the Support Department:via e-mail:support@cyberghost.rovia on-line request:https://support.cyberghostvpn.com/hc/en-us/requests/newvia 24/7 Live! Chat Sessions on our website",https://support.cyberghostvpn.com/hc/en-us/articles/213269809-Router-How-to-configure-OpenVPN-for-TomatoUSB-Merlin-Build
How to disable IPv6 on MacOS ?,"WithnumerouschoicesofconfiguringyourVPN,disablingIPv6canbea reliablemethodfor a more stable configurationwithmore performance output.InordertosuccessfullydisableIPv6, thebelowstepsareprovidedtoyousothatin theeventoffurthertroubleshootingstepsareneeded-thiswillbea goodstepin the right direction.Step1:Head to the Apple logo on theupperleftsideofyourscreen andchoose >SystemPreferences.Step2:Withthe SystemPreferencesmenuopened,headto >Network.Step3:On theleftsidemenu, click theappropriateInternetconnectionthatyourMacisusingtoconnectto the Internet. The articledisplays:Ethernetbut ifyourMacisusingWi-Fi,chooseWi-Fiinstead.Step4:Once theappropriateInternetconnectionisclicked,choose:Advanced.Step5:WiththeAdvancedmenuopened,underTCP/IPtabheadto:Configure IPv6andchoose:Off.Ifyoudo not havethisoption, select ""Link-localOnly"".Step6:For the changes tobetakenintoeffect,choose: OK andproceedwitharestart ofyourMacOS.Foranyadditionalinformation orconcerns-itisbest toapproachthe SupportDepartment:viae-mail:support@cyberghost.roviaon-linerequest:https://support.cyberghostvpn.com/hc/en-us/requests/newvia24/7Live!Chat Sessions onourwebsite.",https://support.cyberghostvpn.com/hc/en-us/articles/360016666739-How-to-disable-IPv6-on-MacOS-
How to disable IPv6 for Linux via Network Manager,"Using Linux has become more and more frequent with more and more users getting accustomed with the Linux environment. Luckily, the below steps are provided as to how to disable IPv6 - via Settings menu.Note: Make sure that when opening the Terminal window, the Linux account has Administrator privileges.Step 1: Head to the Network icon in the upper right corner and choose the Internet connection (Wired or Wi-Fi) and choose Wired settings.Q: I am seeing Wi-Fi instead of Wired/Ethernet. Is there something wrong ?A: The purpose of the tutorial is for a Wired connection(Ethernet) and if yourLinux is connecting via Wi-Fi, please choose Wi-Fi instead.Step 2: With the new settings panel opened, locateNetwork(in the left side panel). ClickNetworkand choose theSettingsicon for the respective Internet connection used.*Presented here in this tutorial is Wired(Ethernet/cable).Step 3: With the settings panel opened for the Wired connection(Ethernet), head to the IPv6 tab. For IPv6 method, simply choose: Disable.Confirm the changes with ""Apply"".-------Q: Why does Support ask me to disable IPv6 ?A: Support may request that IPv6 is disabled from your end as this step is imperative that the VPN tunnel is working optimally and nothing will hinder the traffic even if only IPv4 is used.Q: My ISP provides only IPv6 !A: No worries ! For the best approach, please get in touch with the Support Team at the below addresses and the best action plan will be put up so that your privacy and anonymity is ensured.Q: I disabled IPv6 but my VPN still does not work. What do I do now ?A: Disabling IPv6 is just one of the steps that can be used for troubleshooting and for a more extensive investigation, please get in touch with the Support Team.-------For any additional information or concerns - it is best to approach the Support Department:via e-mail:support@cyberghost.rovia on-line request:https://support.cyberghostvpn.com/hc/en-us/requests/newvia 24/7 Live! Chat Sessions on our website.",https://support.cyberghostvpn.com/hc/en-us/articles/360012645799-How-to-disable-IPv6-for-Linux-via-Settings-menu
Set Up OpenVPN on Linux Mint via Network Manager,"Please make sure the following requirements are met:Linux Mint 19.3 (instructions might also work for older/newer versions, but can differin details)Updated software packagesInstalled OpenVPN softwareInstalled network managerA CyberGhost VPN accountInfo:Here's how to create a CyberGhost VPN account onlineInfo:Here's how to manage your CyberGhost VPN accountA CyberGhost VPN subscriptionInfo:How to purchase or upgrade a subscriptionInfo for prepaid subscribers:How to enter an activation keyDisclaimer:Please keep in mind that, although the technical process is as thoroughly documented as possible, you need to have at least some technical understanding. There's always a chance for an overseen mistake and/or things have changed and the article is not updated yet.Step 11. Visit yourCyberGhost VPN online accountand login with your CyberGhost Username and Password.2. Click on section'VPN'from the left-side menu, scroll down the page and click 'Configure Device'.3. Each server has a configuration file that you will need to create in order to connect to the VPN server. You can download all the configuration files after creating them.ChooseOpenVPNand your preferredCountryandServer Group, as described below.Also, type in aDevice nameto assign to your device, then configure the parameters for the new device.Country:Since native protocol connections may only be used with exactly one server you now have to choose the country you want to surf from; the server to be used in this country will be chosen by CyberGhost automatically.Server group:Choose the server group and the OpenVPN protocol (UDP or TCP) you want to use:UDPallows higher speed than the TCP version but can result in broken downloads in some cases. This is the default setting.TCPallows more stable connections than the UDP version but is a bit slower. Choose this version, if you have recurrent connection issues such as sudden disconnections.Once the desired parameters are chosen, save them with«Save Configuration»To view theOpenVPNcredentials that are generated for you on the configuration dashboard, press 'View Configuration'.Once the new page is opened, your connection credentials are generated for you but make note of the following information:Server group:This is the address of the country (server) you want to be connected with, e.g. '12345-1-ca.cg-dialup.net'. Note This address changes with every country you have chosen in the step before. The actual single server to be used will be chosen automatically by CyberGhost.User name:A solely for this protocol generated user name.This is NOT your regular CyberGhost account user name, it's used only to authenticate with our servers via Manual Configurations.Password (you need to check the ""Show Password"" option in order to see it):A solely for protocol usage generated password.This is NOT your regular CyberGhost account Password, it's used only to authenticate with our servers via Manual Configurations.Pre-Shared KeyClick on 'Download Configuration' (if the automatic download has not started) and download the config file to your device. It's recommended that you create a special folder for the config, somewhere accessible like your Desktop, andExtract / Copy thecontents of the .zip file there.Now, the saved config is a ZIP file, which contains the following single files:ca.crt:This is the certificate of the certification authorityclient.crt:This is the user certification fileclient.key:This is your private key fileopenvpn.ovpn:This is yourOpenVPNconfiguration fileIf you need to change the country you connect to, you must re-configure the location to use in your account management and download the new zipped config file.Step 2For this tutorial, we'll be usingLinux Mint 19.03 (Tricia)Install OpenVPN (if applicable) and the network manager on Linux Mint.For that click onMenu > All Applications > Software Manager' and type in the search field (in the upper right corner) 'OpenVPN'. Install the following programs with a double click:openvpnnetwork-manager-openvpn gnomenetwork-manager-openvpnAlternatively or to make sure that already installed components are up to date, open a terminal and enter the following commands:sudo apt-get install openvpnsudo apt-get install openvpn bridge-utilssudo apt-get install network-manager-openvpnsudo apt-get install network-manager-openvpn-gnomeNote:Depending on your distribution it might happen that the network manager lacks the option to go for an OpenVPN connection. If that's the case please open a terminal and enter the following commands:sudo apt-get install network-manager-pptpsudo apt-get install network-manager-vpncLog out and in again or restart your computer or open a terminal and type in the following command :sudo service network-manager restartStep 3Open your personal folder in your file manager and create a new folder called 'CyberGhost'. Extract the content of the downloaded configuration ZIP file and copy all single files into the new folder.If you want to surf from different countries, rename the unzipped OpenVPN configuration file from 'openvpn.ovpn' to e.g. 'CG_RO_NoSpy.ovpn' (or respective location/server group combination you have chosen while setting up the configuration file in your account management). Choose then a different location and a different server group (if available) and download the next zipped configuration file. Unzip it, rename the containing 'OpenVPN.ovpn' as well und copy it also inside the new folder. The also downloaded remaining certificate and key files in the ZIP do not need to be copied again, for you already have them from the first download.For two different countries, you need for example do the following steps:Specify device, protocol and operating systemChoose a country, e.g. USADownload the zipped configuration file with certificates, key and OpenVPN configuration fileUnzip the downloaded file and copy all files into the new 'CyberGhost' folderRename the OpenVPN configuration file from ‘openvpn.ovpn’ to ‘CG_USA.ovpn’. (If you need to address a single server instead of a country in general, you are to edit the OVPN file and exchange the pre-configured server address line.Choose the next country, e.g. RomaniaDownload the next zipped configuration fileUnzip the downloaded file and copy just the file 'openvpn.ovpn' into the 'CyberGhost' folderRename it to ‘CG_RO.ovpn’.etc. ...The sub-folder 'config' now consists of the following files (regarding the example above):ca.crtclient.crtclient.keyCG_USA.ovpnCG_RO.ovpnxxx.ovpnTurn off IPv6Before enabling the VPN profile on your Linux Mint, CyberGhost VPN strongly recommends you to disable IPv6 to prevent IPv6 traffic from leaking out of the VPN tunnel :To turn off IPv6, go toNetwork Settings>Wired / Wireless Interface Settings>IPv6 > Switch to OFF > Click ApplyCreate a new VPN profileTo add a new VPN profile, click in the lower right corner on the network icon and start the network manager via 'Network Settings'. Click on '+' symbol (Add VPN).Choose'Import from a file...'Open your 'CyberGhost' folder, and choose to import the.ovpnconfiguration file (see step 3)and click on 'Open'.Focus on the tab 'AddVPN'and take care of the following options:Connection name:Type in a name for this connection, ideally composed out of the country to surf from and maybe the server group to be used, e. g. 'CG_France'Gateway:The server address is already filled in by the loaded configuration fileType:Choose 'Password with certificates (TLS)' - already filled in by the loaded configuration fileUser name:The user name created in step 1.DO NOT use your CyberGhost username!Password:The password created in step 1.DO NOT use your CyberGhost password!User certificate:Enter here the path to the user certification file ('client.crt') - usually already filled in by the loaded configuration fileCA certificate:Enter here the path to the CA certification file ('ca.crt') - usually already filled in by the loaded configuration filePrivate Key:Enter here the path to the key file ('client.key') - usually already filled in by the loaded configuration fileClick on 'Add' and enter the password of your keyring (only necessary, if it hasn't been unlocked when logging in).The VPN profile is now available in the network-manager. Click to activate it and if you receive the message ""The VPN connection has been successfully established"", your VPN tunnel is up.Step 3 alternatively (manual configuration)Click on '+' symbol (Add VPN), but this time don't import a configuration file. Instead, click on 'OpenVPN'Connection name:Type in a name for this connection, ideally composed out of the country to surf from and maybe the server group to be used, e. g. 'CyberGhost VPN US'Gateway:The server address you noted from your account management, e. g. '12345-5-us.cg-dialup.net'Type:Choose 'Password with certificates (TLS)'User name:The user name created in step 1. DO NOT use your regular CyberGhost user name!Password:The password created in step 1. DO NOT use your regular CyberGhost password!User certificate:Enter here the path to the user certification file ('client.crt'). For that click on the symbol right-handed and search for the respective file in your CyberGhost folder.CA certificate:Enter here the path to the CA certification file ('ca.crt'). For that click on the symbol right-handed and search for the respective file in your CyberGhost folder.Private Key:Enter here the path to the key file ('client.key'). For that click on the symbol right-handed and search for the respective file in your CyberGhost folder.Now click on 'Advanced' on the right bottom of the window and check all of these options (and deactivate the rest), then clickOKTab 'General':Use custom gateway port:443Use a TCP connection:Only activated, if you have chosen an OpenVPN TCP connection while configuring your native VPN in your account management.Set 'Set virtual device type :'TUN' and name 'tun'Specify ping interval: 5Specify exit or restart ping: 'ping-exit' > 60Tab 'Security'Cipher:AES-256-CBC (also for TCP)HMAC Authentification:SHA256Click on 'OK' and 'Save' and enter the password of your keyring (only necessary, if it hasn't been unlocked when logging in).Step 4Back in the network manager you now should have an entry with your new OpenVPN connection.Choose the entry via your menu, wait a moment ... and you're in:Note:As we all know there are seldom two Linux distribution built the same way; therefore the Linux Mint 19.3 instructions might be of no help for you. If that's the case, please consult the help documentation of your distribution. Furthermore, the following links might also help you out:The original HowTo from OpenVPN.net (recommended)",https://support.cyberghostvpn.com/hc/en-us/articles/213651505-How-to-Set-Up-OpenVPN-on-Linux-Mint-via-Network-Manager
Set Up OpenVPN on Linux Ubuntu via Network Manager,"Before proceeding, please make sure the following requirements are met:Linux Ubuntu 19.10 - instructions might also work for older/newer versions, but can slightly differ. In this article, the VPN connection on Ubuntu 19.10 is demonstratedUpdated software packagesInstalled OpenVPN softwareInstalled network-managerA CyberGhost VPN accountHere's how to create a CyberGhost VPN account onlineHere's how to manage your CyberGhost VPN accountA CyberGhost VPN subscriptionHow to purchase or upgrade a subscriptionOnly prepaid subscribers:How to enter an activation keyDisclaimer:Please keep in mind that, although the technical process is as thoroughly documented as possible, you need to have at least some technical understanding. Although we will always try our best to keep these articles updated, there's always a chance for certain things to change since Linux distributions are regularly updated and some menus may get rearranged, packages required may change, etc.Step 11. Visit yourCyberGhost VPN online accountand login with your CyberGhost Username and Password.2. Click on section'VPN'from the left-side menu, scroll down the page and click 'Configure Device'.3. Each server has a configuration file that you will need to create in order to connect to the VPN server. You can download all the configuration files after creating them.ChooseOpenVPNand your preferredCountryandServer Group, as described below.Also, type in aDevice nameto assign to your device, then configure the parameters for the new device.Country:Since native protocol connections may only be used with exactly one server you now have to choose the country you want to surf from; the server to be used in this country will be chosen by CyberGhost automatically.Server group:Choose the server group and the OpenVPN protocol (UDP or TCP) you want to use:UDPallows higher speed than the TCP version but can result in broken downloads in some cases. This is the default setting.TCPallows more stable connections than the UDP version but is a bit slower. Choose this version, if you have recurrent connection issues such as sudden disconnections.Once the desired parameters are chosen, save them with«Save Configuration»To view theOpenVPNcredentials that are generated for you on the configuration dashboard, press 'View Configuration'.Once the new page is opened, your connection credentials are generated for you but make note of the following information:Server group:This is the address of the country (server) you want to be connected with, e.g. '12345-1-ca.cg-dialup.net'. Note This address changes with every country you have chosen in the step before. The actual single server to be used will be chosen automatically by CyberGhost.User name:A solely for this protocol generated user name.This is NOT your regular CyberGhost account user name, it's used only to authenticate with our servers via Manual Configurations.Password (you need to check the ""Show Password"" option in order to see it):A solely for protocol usage generated password.This is NOT your regular CyberGhost account Password, it's used only to authenticate with our servers via Manual Configurations.Pre-Shared KeyClick on 'Download Configuration' (if the automatic download has not started) and download the config file to your device. It's recommended that you create a special folder for the config, somewhere accessible like your Desktop, andExtract / Copy thecontents of the .zip file there.Now, the saved config is a ZIP file, which contains the following single files:ca.crt:This is the certificate of the certification authorityclient.crt:This is the user certification fileclient.key:This is your private key fileopenvpn.ovpn:This is yourOpenVPNconfiguration fileIf you need to change the country you connect to, you must re-configure the location to use in your account management and download the new zipped config file.Step 2InstallOpenVPNand the network manager on (you may already have these installed but if unsure, proceed with the following steps).If Terminal isn’t visible on the Launch bar, click on the‘Show Applications’button (in the bottom-left part of the screen) > then type in 'Terminal' in the search field or just pressCtrl + Alt + Tkeyboard shortcut to openTerminalIn the terminal window enter the following commands and confirm with 'Enter'You may be required to enter your Ubuntu account password – please do so and although there will be no visual feedback that you’re typing something, you can indeed enter the password and confirm with ""Enter""):sudo apt-get updatesudo apt-get install openvpnsudo apt-get install network-manager-openvpnNote: Depending on your distribution it might happen that the network manager lacks the option to go for an OpenVPN connection. If that's the case, please open a terminal window and enter the following commands:sudo apt-get install network-manager-openvpnsudo apt-get install network-manager-openvpn-gnomesudo apt-get install network-manager-pptpsudo apt-get install network-manager-vpncLog out and log in again, restart your computer,or open a terminal and enter the following command:sudo systemctl restart network-manager(alternatively, you can use:sudo service network-manager restart)Note for users of older Ubuntu versions (older than 16.04): you will need to use the ‘sudo restart network-manager’ command. Recent Ubuntu versions have replaced this command with those shown above.Turn OFF IPv6At the moment CyberGhost VPN does not support IPv6, therefore sometimes users can experience issues with connection or leaks that are related specifically to IPv6.To disable IPv6 support on your Ubuntu device, please visitHow to disable IPv6 for LinuxStep 3Start the file manager, open your home folder, and create a sub-folder called'CyberGhost'.Unzip the content of the downloaded ZIP file and copy all of the configuration files inside the 'CyberGhost'folder.Click on the Network icon in the upper right corner of the screen > click the Settings iconUnder ‘Network’ > VPN section >click the [+] buttonClick ‘Import from file...’ and go to the CyberGhost folder you’ve created > double-click on the openvpn configuration file (with the .ovpnextension) e.g.:UnitedStates.ovpn(or the defaultopenvpn.ovpnif you haven’t changed its name)Name:Type in a name for this connection, ideally composed out of the country to surf from and maybe the server group to be used, e. g. 'US OpenVPN'In the Add VPN menu see to the following options:Gateway:The server address is already filled in by the loaded configuration file(usually already filled in by the loaded configuration file)Type:Choose 'Password with certificates (TLS)'(usually already filled in by the loaded configuration file)Username:The user name created inStep 1.DO NOT use your regular CyberGhost VPN user name!Password:The password created inStep 1.DO NOT use your regular CyberGhost VPN password!CA certificate:Enter here the path to the CA certification file ('ca.crt') -usually already filled in by the loaded configuration fileUser certificate:Enter here the path to the user certification file ('client.crt') -usually already filled in by the loaded configuration filePrivate Key:Enter here the path to the key file ('client.key') -usually already filled in by the loaded configuration fileUser key password:Enter here the user key password created in Step 1Now just clickADDand you'll be able to connect by simply switching theVPN ONfrom the top-right part of the screen under the VPN OFF entry (see the examples below)NOTE : You can check your IP with any Online service (likewww.iplocation.net) or by simply Googling ""What's my IP"".It is strongly recommended that you clear your browser's cache and cookies before accessing any IP location online service.If you want to surf from multiple countries (a brief overview):You will have to first rename the unzipped OpenVPN configuration file from'openvpn.ovpn'to the country you’ve currently chosen e.g.‘UnitedStates.ovpn'(or whatever location/server group combination you have chosen while setting up the configuration file in your account management).Back in the Device management menu (where you’ve selected the country for the connection) just choose a different location and a different server group (if available), then download the zipped configuration file. Unzip it anywhere, rename the containing 'openvpn.ovpn' to reflect the new country and copy it inside the CyberGhost folder you’ve previously created.Note: The re-downloaded certificate and key files in the ZIPdo notneed to be copied again as they will be the same as the ones you’ve previously downloaded,just copy the .ovpn file.In essence, to add another country, please take the following steps (after configuring the first connection):After creating the first connection, let's say it is to the United States for the sake of this example, go back to the 'My Devices' menu and click on thepreviously created OpenVPN configuration (the same one)Specify the protocol and choose a country, let's useFranceas the second countryDownload the zipped configuration file by clicking'Download Configuration'(The Username and Password are the same as the initial setup)Unzip the downloaded file and copy just the *.ovpn file into the 'CyberGhost' folder you have previously createdIF you have not renamed the initial config file, rename the OpenVPN configuration file from the default ‘openvpn.ovpn’ to ‘UnitedStates.ovpn’ (or whatever country you've initially chosen).Rename the newly copied file to ‘France.ovpn’.Import the France.ovpn as illustrated in Step 2 (just like you did for the initial config)You can use this method to add as many countries as you wish they’ll appear separately in the Network Manager and you’ll be able to connect to whichever you wish.The CyberGhost folder now consists of the following files (regarding the example above):ca.crtclient.crtclient.keyUnitedStates.ovpnFrance.ovpnMultiple countries will appear in the network menu as well and you’ll be able to quickly connect to any of them by using theOn/Offswitch.For any additional information or concerns - it is best to approach the Support Department:via e-mail:support@cyberghost.rovia on-line request:https://support.cyberghostvpn.com/hc/en-us/requests/newvia 24/7 Live! Chat Sessions on our website",https://support.cyberghostvpn.com/hc/en-us/articles/360007929314-How-to-Set-Up-OpenVPN-on-Linux-Ubuntu-via-Network-Manager
How to set up ExpressVPN on pfSense (OpenVPN),Not all ExpressVPN locations may be available for manually configured connections.,https://www.expressvpn.com/support/vpn-setup/pfsense-with-expressvpn-openvpn/)
How to set up ExpressVPN for your WD TV Live,Set up your VPN-enabled virtual router or routerConnect your WD TV to your virtual router or router,https://www.expressvpn.com/support/vpn-setup/stream-to-wd-tv-with-virtual-router-or-router/)
How can I be sure that CyberGhost VPN works ?,"Not sure if CyberGhost VPN really changed your IP address ?Take our Privacy testhereand find out if your sensitive data isProtectedorExposed.Jump to...IP Leak TestRun a DNS Leak TestCheck the steps below to ensure that your online experience is secure and that no private information is exposed.Check the status of the connection in the App1. Connect to CyberGhost VPNThe home screen of your CyberGhost application provides the first sign that a successful VPN connection has been established.2. Make sure your connection is properly configured, check if your status is 'Protected'on our website.Should you be connected to one of our servers but your status is 'Exposed', please refer to the following steps to ensure that your connection is secure.To stop your connection from leaking, follow these tutorials :1.Disable IPv62.WebRTC leak preventionDNS leak testGo to thispageto perform the DNS leak test.As with the IP test, a DNS test should display only one DNS server address from the same location.You will also see a notification saying 'Protected'For any additional information or concerns - it is best to approach the Support Department:via e-mail:support@cyberghost.rovia on-line request:https://support.cyberghostvpn.com/hc/en-us/requests/newvia 24/7 Live! Chat Sessions on our website",https://support.cyberghostvpn.com/hc/en-us/articles/213894425-How-can-I-be-sure-that-CyberGhost-VPN-works-
Issues in reaching streaming services geographically restricted,"To check out the streaming services we currently support, please visit thispage.If you are experiencing difficulty accessing any of these services, please follow the recommended troubleshooting steps below :Clear your DNS cache:WindowsPress theWindows Keyor hover your mouse over the bottom left corner and click theWindows IconBegin typingCommand PromptRight-click the application and selectRun as Administrator.Run the following command in the command line and hit enter.ipconfig /flushdnsMacClick theTerminalicon in the dock or inFinderunder Application/Utilities/TerminalRun the following command in the command line and hit enter.sudo killall -HUP mDNSResponder; sleep 2;LinuxOpen a terminal window (gnome-terminal, konsole, xterm, etc)sudo /etc/init.d/nscd restartorsudo /etc/init.d/nscd restartClear your browser's cacheif you are streaming via the browser.Change theVPN protocolTurn off all location services in your browserand all location services on your machine or device (GPS, etc...).Disconnect and reconnectto the selected streaming server to get a new IP address.Sign out of all Google Accountson your device. Google caches IP addresses, this can reveal your real location.Reboot your router/modem.1. Unplug power cables from modem and router*2. Wait 30 seconds, plug modem in3. Wait 30 seconds, plug router in4. Wait 30 seconds, the network is now refreshed.*If you have a router/modem combo, just unplug that device.If you need any further assistance, please contact our customer support team via live chat or email and we will help you out!via e-mail:support@cyberghost.rovia on-line request:https://support.cyberghostvpn.com/hc/en-us/requests/newvia 24/7 Live! Chat Sessions on our website",https://support.cyberghostvpn.com/hc/en-us/articles/360016576499-Problems-to-reach-geographically-restricted-streaming-services
Troubleshooting VPN connection on Linux,"There are a number of factors that may be responsible for why a VPN connection could not be established. This topic covers various troubleshooting steps to help resolve connectivity issues.After each step, check if the issue still remains.Here is what you should try at first:Change the default protocol.For the CyberGhost Linux CLI app, you will find 2 protocols available: OpenVPN and WireGuard. If you have experienced an unstable connection,switch to WireGuardand see if the problem persists.Try different server locations.Due to a series of factors, one location may offer a more stable connection than others.Reinstall the application:Type the following command to remove the app:sudo cyberghostvpn --uninstallReinstall the app following our tutorialhereRemove potential safety Security or Parental controls from your router.Certain ISPs usually equip their routers with parental/security controls enabled by default. Log in to your router, look for the ""Security"" tab and see if any security features or parental controls are turned on.Disable IPv6 support. Please find below our how-to guides:From the TerminalFrom Network SettingsReboot your router/modem.If the connection remains unstable, try connecting using the manual connection option:How to Set Up OpenVPN on Linux MintHow to Set Up OpenVPN on Linux UbuntuFor any additional information or concerns - it is best to approach the Support Department:via e-mail:support@cyberghost.rovia on-line request:https://support.cyberghostvpn.com/hc/en-us/requests/newvia 24/7 Live! Chat Sessions on our website",https://support.cyberghostvpn.com/hc/en-us/articles/360013738119-Troubleshooting-VPN-connection-on-Linux
Troubleshoot VPN connection on Amazon Fire TV/Fire Stick,"NOTE:The first generation Fire Stick (FCCID: 2ABDU-0509) can be used to install and may even launch the CyberGhost VPN app, however, you cannot use it. Due to the old first-generation Fire Stick hardware, it will not allow the application to work properly and will make it an unusable device.The CyberGhost VPN app isavailablefor:Fire TV (all versions)Fire Stick (2nd generation or newer)If you are experiencing any difficulties, please follow the troubleshooting steps given below :PIN couldn't be validated errorTry cleaning your Fire TV/Fire Stick cache and data:1. Click theHomebutton, selectSettingsoption, and from Settings selectApplicationsmenu.2. In theApplicationsmenu, selectManage Installed Applications.3. Find the CyberGhost VPN app and clickForce Stop, then hitCleardataandClearcacheoptions.4. Go toSettings,selectDevice,and clickRestartandRestart your Fire Stick.After following these steps you should get a new PIN which you can validate in the Cyberghostonline account. After validating the PIN please make sure you also press “validate” on the FireTV Stick.Removing the cache and data from the CyberGhost VPN application will fix the ""invalid PIN"" problem as well as the most connection and speed problems on FireOS devices.Try switching between TCP and UDPGo to the app settings (top right gear icon) and turn theUse TCPoption on or off.Change the networkIf you are having connectivity difficulties with CyberGhost VPN on your Fire Stick or Fire TV, we recommend you check your network connection and wireless signal strength first.We suggest that you store your Fire Stick/Fire TV in the same room as your wireless access point and if you are on a Fire TV, run a test via a wired connection.Reinstall the application.Uninstall the app, reboot your device, and install the app again. Then try connecting again.Restart your Fire TV device and any home network devices like modems or routers.1. To restart your device from the menu:2. Go toSettings.3. SelectMy Fire TV, and thenRestart.Reboot your router and modem if you suspect your network isn't working as it should.1. Unplug your router & modem;2. Wait at least 30 seconds;3. Plug it back in and test again;Should the connection problems persist, please contact our customer support team via live chat or email and we will help you!via e-mail:support@cyberghost.rovia on-line request:https://support.cyberghostvpn.com/hc/en-us/requests/newvia 24/7 Live! Chat Sessions on our website",https://support.cyberghostvpn.com/hc/en-us/articles/360013917079-Troubleshoot-VPN-connection-on-Amazon-Fire-TV-Fire-Stick
What data does CyberGhost hold ?,"The 'personal' data CyberGhost might 'know' about you consist of the following:Your arbitrary user name, needed to let you log-in (can be anything from 'HogTheDog' to 'kdl,.hdftr443'). A connection to your real identity is not possible, even if CyberGhost is forced to hand over all its account names - unless you use your real name plus address as a user name.Your password, needed to let you log-in (encrypted)Your activated serial numbers and your rights as a user, e.g. which servers you are allowed to use (encrypted). Please acknowledge that there is no connection possible between your real identity (at the place you bought your serial) and the serial you activate on your account.",https://support.cyberghostvpn.com/hc/en-us/articles/214034709-What-data-does-CyberGhost-hold
Connection Problems in Certain Countries,"In some countries with more restrictive internet laws, your CyberGhost client might freeze, have difficulty starting and/or connecting, or have persistently slow speeds.Because of local laws, VPN use might be forbidden in certain countries, such as Saudi Arabia and the United Arab Emirates, while in countries like China it is subject to specific conditions defined by the government. In some cases, VPN use might lead to face criminal charges. Additionally, VPN traffic might be blocked (as reported from SA, UAE, Syria, Iran, Turkmenistan, Iraq, North Korea, Turkey, Russia, Egypt, and Myanmar) or slowed down significantly.We are sorry for any inconvenience this behavior may have for you, but we are limited in what assistance we can provide.Although there might be possible workarounds around these restrictions, CyberGhost VPN does not currently offer any obfuscation methods to conceal VPN usage.CyberGhost is aware that identifying VPN traffic as such is a new threat and the company is working on a solution to offer maximal protection for all its users.In the meantime, to avoid recurrent payments, please visit your online account management and cancel your subscription (as describedhere). For further questions, please contact our support team.",https://support.cyberghostvpn.com/hc/en-us/articles/360013738859-Connection-Problems-in-Certain-Countries
Troubleshooting VPN connection on Linux,"There are a number of factors that may be responsible for why a VPN connection could not be established. This topic covers various troubleshooting steps to help resolve connectivity issues.After each step, check if the issue still remains.Here is what you should try at first:Change the default protocol.For the CyberGhost Linux CLI app, you will find 2 protocols available: OpenVPN and WireGuard. If you have experienced an unstable connection,switch to WireGuardand see if the problem persists.Try different server locations.Due to a series of factors, one location may offer a more stable connection than others.Reinstall the application:Type the following command to remove the app:sudo cyberghostvpn --uninstallReinstall the app following our tutorialhereRemove potential safety Security or Parental controls from your router.Certain ISPs usually equip their routers with parental/security controls enabled by default. Log in to your router, look for the ""Security"" tab and see if any security features or parental controls are turned on.Disable IPv6 support. Please find below our how-to guides:From the TerminalFrom Network SettingsReboot your router/modem.If the connection remains unstable, try connecting using the manual connection option:How to Set Up OpenVPN on Linux MintHow to Set Up OpenVPN on Linux UbuntuFor any additional information or concerns - it is best to approach the Support Department:via e-mail:support@cyberghost.rovia on-line request:https://support.cyberghostvpn.com/hc/en-us/requests/newvia 24/7 Live! Chat Sessions on our website",https://support.cyberghostvpn.com/hc/en-us/articles/360013738119-Troubleshooting-VPN-connection-on-Linux-app
I lost my username & password - How can I recover my account after losing my credentials ?,"How can I recover my account if I forgot or lost my credentials ?In case you need to recover an account (in case you misplace your username or password), you can quickly access your account in 3 ways:[A] With the email associated with your account[B] By using Your Cleverbridge Reference number[C] Contact CyberGhost Support[A] - Via the email associated with your accountSimply head over tohttps://my.cyberghostvpn.com/en_US/loginand click on""Recover them"":At the following screen, just enter the email address associated with your account (by default, the email you've used when you've made the purchase) and click the'Recover'button :After a couple of minutes, you'll receive an email containing a list of all your existing accounts, each with a link that will take you straight to your account page where you you will be able to set up a new password :[B] – By using Your Cleverbridge Reference number- Access theonline account management pageand choose “Forgot your login details? Recover them” where you will need to choose: “Forgot your email address?” and simply choose:Recover your account with Cleverbridge.” where you will be asked to enter:Your Cleverbridge reference numberwhich was delivered to you via e-mail as a purchase confirmation :[C] Contact CyberGhost SupportIf you got an activation key, e. g. from a promotion, an offline purchase, or a Bitcoin purchase,please create a support ticketHEREand make sure you include the activation key and/or the receipt of the purchase.NOTE: If the lost account is a FREE account but not associated with any purchase,please simply create a new accountHERE.For any additional information or concerns - it is best to approach the Support Department:via e-mail:support@cyberghost.rovia on-line request:https://support.cyberghostvpn.com/hc/en-us/requests/newvia 24/7 Live! Chat Sessions on our website",https://support.cyberghostvpn.com/hc/en-us/articles/213332269-I-lost-my-username-password-How-can-I-recover-my-account-after-losing-my-credentials-
How Can I Cancel My Subscription?,"This page will show you how you can cancel your CyberGhost VPN subscription.CyberGhost VPN subscriptions automatically renew at the end of each service period, until you decide to cancel your automatic payments.Note: Canceling your subscription doesn't automatically refund your subscription. Please contact our support team to request a refund.Jump to...Cancel a subscription purchased from www.cyberghostvpn.comCancel a subscription purchased via the Apple App StoreCancel a subscription purchased via the Google Play StoreCancel a subscription purchased from www.cyberghostvpn.comFollow these steps:1. Go to yourCyberGhost accountand select the profile logo in the top-right side.2. SelectSubscriptions.3. SelectCancelSubscription.4. SelectContinue To Cancel.You will see a screen saying “The automatic billing for your CyberGhost VPN subscription has been turned OFF.” This means you have successfully cancelled your CyberGhost VPN subscription, and can keep using it until the end of your paid subscription period.Cancel a subscription purchased via the Apple App StoreFollow these steps:Open the Settings menu on your iPhone or iPad.Tap the name that appears at the top of the Settings menu.Tap oniTunes & App Store.TapApple IDat the very top of the screen.ChooseView Apple ID.Log in with your Apple ID.Scroll down toSubscriptionsand tap on the CyberGhost subscription.TapCancel Subscription.You will receive a pop-up message to confirm that you wish to cancel the subscription.Note: This will only cancel any future charges. To refund an iTunes subscription, please contact the Apple support team.Cancel a subscription purchased via the Google Play StoreFollow these steps:Go to the Google Play Store.Tap on your profile in the upper right corner.TapPayments & subscriptions.TapSubscriptionsand select the CyberGhost VPN subscription.TapCancel Subscription.Follow the on-screen instructions.Note: This will only cancel any future charges. To refund your subscription, please contact our support team.Need assistance? Contact our Customer Support team:via email atsupport@cyberghost.rovia online request athttps://support.cyberghostvpn.com/hc/en-us/requests/newvia 24/7 Live Chat by clicking the Support button below",https://support.cyberghostvpn.com/hc/en-us/articles/360017373799-How-can-I-pause-or-reactivate-a-subscription-recurring-payment-
I lost my username & password - How can I recover my account after losing my credentials ?,"How can I recover my account if I forgot or lost my credentials ?In case you need to recover an account (in case you misplace your username or password), you can quickly access your account in 3 ways:[A] With the email associated with your account[B] By using Your Cleverbridge Reference number[C] Contact CyberGhost Support[A] - Via the email associated with your accountSimply head over tohttps://my.cyberghostvpn.com/en_US/loginand click on""Recover them"":At the following screen, just enter the email address associated with your account (by default, the email you've used when you've made the purchase) and click the'Recover'button :After a couple of minutes, you'll receive an email containing a list of all your existing accounts, each with a link that will take you straight to your account page where you you will be able to set up a new password :[B] – By using Your Cleverbridge Reference number- Access theonline account management pageand choose “Forgot your login details? Recover them” where you will need to choose: “Forgot your email address?” and simply choose:Recover your account with Cleverbridge.” where you will be asked to enter:Your Cleverbridge reference numberwhich was delivered to you via e-mail as a purchase confirmation :[C] Contact CyberGhost SupportIf you got an activation key, e. g. from a promotion, an offline purchase, or a Bitcoin purchase,please create a support ticketHEREand make sure you include the activation key and/or the receipt of the purchase.NOTE: If the lost account is a FREE account but not associated with any purchase,please simply create a new accountHERE.For any additional information or concerns - it is best to approach the Support Department:via e-mail:support@cyberghost.rovia on-line request:https://support.cyberghostvpn.com/hc/en-us/requests/newvia 24/7 Live! Chat Sessions on our website",https://support.cyberghostvpn.com/hc/en-us/articles/213332269-I-lost-my-username-password-How-can-I-recover-my-account-after-losing-my-credentials
Refer a friend: FAQ,"What is it all about?It’s about you taking care of your friend’s online safety and privacy. So, yeah, basically it’s about you and your friends. If you join and refer CyberGhost to a friend, he or she will know, you’re wide awake of what’s going on in this world, that you care about him or her and you know your way around.Who is eligible to join the best friend program?YOU! That is if you have an existing CyberGhost account with an active CyberGhost subscription.What’s in it for me?30 free additional days on your running CyberGhost subscription – regardless of its type or length. And that goes just for one friend. You refer two, you’re good for 60 days. And if you refer three …, well, right, you got the point: 90 days! Also: Friends will be friends will be friends. Ask Queen (the band, that is) ;-)What’s in it for my friends?Beside online anonymity, borderless streaming, safe downloads, the right to go, where none wants him or her to go? Also, 30 free additional days on top of the subscription chosen.How does it work?So easy, it will cost us a lot of money:Step 1Open https://www.cyberghostvpn.com/en_US/refer-a-friend(if you’re not already here) and click on the big yellow button to log-in to your CyberGhost account. Remember: You need to have an account and a running subscription, to be able to join the Best Friend Program. If you don’t have one, you might consider purchasing a subscription just for yourself first – and then fill it up with extra days by referring some good friends.Step 2Once logged in you see a bunch of slots, called (surprise) ‘Invite a friend’. Click on the button ‘Create invitation’.The next window provides you with a link, generated solely for you. This link grants that, whoever it gets and purchases a subscription by using this link, you will be entitled to receive 30 free days of CyberGhost Premium, extending your current subscription.Now share this link any way you like. Click on ‘Copy’ and either insert the link wherever you want to, be it a private mail, a social media post, or whatever you can think of. Just remember that only one person can use this specific link.Or you enter your friend’s email address here in the same window. If you don’t feel like exposing his or her address, give him or her a call and ask for an allowance or a special address for usages such as this. You can also enter his or her name as well as your name and a personal note – but none of it is mandatory. CyberGhost will send him a nice introduction and save you the time to explain, including the info that he or she will get 30 additional days for free on his/her subscription when using the link you just sent.Once the invitation is being sent, relax, and wait for an answer. It might take some time, depending on how often your buddy checks his/her mails and how much time he/she needs to purchase. The slot you used will change its color and show a ‘Pending’ info.If you have more than one friend you’re not only a lucky dude, but you can also send two more invitations. And remember: Each of your friends will get 30 additional days (while you get up to 90!).Step 3If your friend accepts the link and clicks on it, he or she will be redirected to a special landing page, where he/she can choose between different subscription types.After your friend(s) purchase of a CyberGhost subscription (and successful payment, of course), you will instantly get your 30 additional free days on top of your current running subscription. Thumbs up, my friend.How can I cancel an invitation already sent?If you by accident entered a wrong email address or if your friend changed his/her mind, simply return to the Refer a Friend page, log-in, and click on ‘Cancel invitation’ to free the slot once again and send the link to a different friend.What happens if I delete a link before my friend purchased it?Deleting a link means revoking the invitation. Instead of being invited to a special CyberGhost subscription with 30 free additional days, your friend will be redirected to the regular pricing page, while a banner informs about the dead link.What happens if a friend will use a link that already had been used?If you publish your link on social media and don’t send it to someone specific, only the first one will get the special offer. For all others goes the same as above (‘What happens if I delete a link?’).",https://support.cyberghostvpn.com/hc/en-us/articles/360002481673-Refer-a-friend-FAQ
How to stream Twitch with ExpressVPN,"Before you start, you will need: An active ExpressVPN subscription The Twitch app (if you are watching Twitch on a mobile device or streaming console and prefer to use the app)",https://www.expressvpn.com/support/vpn-setup/watch-twitch-vpn/)
Can a Data Center Compromise My Anonymity?,"To get access to a server one needs a RSA key (just a username and password are no option). That key will be generated individually and is secured on an encrypted mobile media (usually an USB stick with a TrueCrypt Volume). Furthermore the private key on that drive will be encrypted with a different password.A direct access to our VPN servers is restricted to a small group which consists at the time being (April 2013) of four persons. Neither a worker of a computer center nor a server provider is included to this group of persons. Furthermore we have strict contracts with our partners, among them Kaia Global as our own carrier, establishing very harsh security requirements, e.g. that a system has to be wiped completely before a server can be withdrawn.All servers are installed and configured by CyberGhost VPN. A computer center only provides the hardware. This too is due to our high security policy.Please note also that we don't store any data on our VPN servers or login system that could be used to find out, who accessed which server at what time or compromise the anonymity of our users in any other manner.",https://support.cyberghostvpn.com/hc/en-us/articles/213903049-Can-a-Data-Center-Compromise-My-Anonymity
Will a VPN country ID compromise my anonymity ?,"Profile users might automatically be assigned to the next server near their real location. Can this compromise one's anonymity?The automatic assigning of servers is made in order to keep a load balance on our servers, from which our users benefit as much as we do. Goal is to reach a maximum performance for everybody.The decision, which server will be assigned to you, bases on your country ID along with data like total number of users and the total bandwidth of a server. Your country ID will be extracted from your original IP address. For that we use an offline database that provides us with your geo-location. This information will neither be stored nor shared and is in no way a threat to your anonymity.",https://support.cyberghostvpn.com/hc/en-us/articles/214432845-Will-a-VPN-country-ID-compromise-my-anonymity
Can an email address given to CyberGhost compromise my anonymity ?,"If you are asked about a valid email address from us for promotion, sales, support or other reasons, be assured, we never will use this address for any other reason than contacting you. We will never sell your address nor share it with third parties of any kind.Furthermore this address will be stored separately from your CyberGhost VPN account and thus can in no way be used to track down your identity.",https://support.cyberghostvpn.com/hc/en-us/articles/214034209-Can-an-email-address-given-to-CyberGhost-compromise-my-anonymity
Can an activation key compromise my anonymity ?,"The activation key will be generated by our payment partner and can then be used to activate the respective subscription on a certain account. This triggers the question, if third parties can force CyberGhost to expose the activation key of an already known account name and then use that information with the payment partner to further identify a real person behind the numbers.For certain reasons this is not possible, because:CyberGhost as a VPN provider and cleverbridge as the payment partner are located in different countries (CyberGhost in Romania, cleverbridge in Germany).The needed trapping mechanism is not existent in Romanian laws.It's not practicable to establish a surveillance like that, there are no known respective data basics or legal ones.The usage of CyberGhost is no illegal activity.Besides: CyberGhost doesn't store any user data, so it's not possible to find relations anyway. Even if a complete data center as well as all in- and outgoing traffic will be observed directly, there's just an encrypted data stream to be found on one side and a chaotic mix of inquires and answers of all connected users on the other - without any relations, sequences or other usable data to identify a person (see also Wikipedia, keywordNAT). Apart from that, mass surveillance of all connected users is still illegal and in no way practicable. Even if a server gets confiscated and thoroughly inspected, it would be to no avail, because there is no data on it. Not even in an active connection a server knows a user name or any other details of an account. (In fact we never got such an order in all the years CyberGhost operated in Germany or in Romania.)Those users, who still have doubts regarding the giveaway of private data, we recommend the box versions of CyberGhost, available in Germany, Switzerland and Austria at stores like MediaMarkt and Saturn. It can be paid in cash and can't be tracked down, where it was bought (no key tracking or similar). Also possible is an anonymous buy process via BitCoins.",https://support.cyberghostvpn.com/hc/en-us/articles/214034169-Can-an-activation-key-compromise-my-anonymity
Do different servers have different levels of anonymity ?,"CyberGhost VPN anonymizes you on two different levels. The first level is the exchange of your original IP address, assigned to you by your ISP, with the IP address of the CyberGhost VPN server you are logged into. That way any data sniffer will not get your address, but the one of the respective CyberGhost VPN server. This level is of a fixed nature.The second level is more an additional protection and depends on the amount of users, who reside on the same server as you at the same time. All current users on a certain server will surf the Internet with the same CyberGhost VPN IP address. This level is of a variable nature, because the more users a server bears, the better a single user gets hidden by the others.The latter is also the reason, why the server map provides you with an anonymization score for each server, based on the number of users online. If a server is highly frequented, your anonymity is better than on a server with less users. Then again, the traffic speed might be slower than on a server with less users. Vice versa a low anonymization score reminds you, that less users are surfing at the same time - but they might do it faster ;-).",https://support.cyberghostvpn.com/hc/en-us/articles/213903189--Do-different-servers-have-different-levels-of-anonymity
How strong does Cyberghost VPN encode my connection ?,"CyberGhost VPN offers a 256-bit encoding for your traffic from your PC to and inside the CyberGhost network. It works regardless of the application you use and keeps you safe from data sniffing like Deep Packet Inspection. The safety level is comparable with that of a secure web page, like Internet Banking pages. In fact, in case you visit an HTTPS address (like Internet Banking pages) on the Internet, your data is secured all the way from your PC to your banking account.To get more security in your daily surfing routes you might also consider using the CyberGhost function called 'Force HTTPS', which helps you access many web sites automatically via https instead of the insecure HTTP. Alternatively, you can use the Chrome/Firefox add-on 'HTTPS Everywhere' (More Infos here:https://www.eff.org/https-everywhere).If one tries to hack a 256 bit AES secured connection, it will take 1,1 * 10 to the 77 combination - which keeps a usual computer busy for about more than 3.000.000.000.000.000.000.000.000.000.000.000.000.000.000.000.000.000.000 years.",https://support.cyberghostvpn.com/hc/en-us/articles/214387545-How-strong-does-Cyberghost-VPN-encode-my-connection
How to use Kodi with ExpressVPN on Android,Note:These steps will also work for anAndroid TV Box. Make sure yourAndroid TV Box is compatible with ExpressVPNbefore proceeding. https://www.youtube.com/embed/RL9Im-dj7Ow,https://www.expressvpn.com/support/vpn-setup/watch-kodi-expressvpn-android/)
How to use Kodi with ExpressVPN on Chromebook,"If you have further questions, pleasecontact the ExpressVPN Support team for immediate assistance.",https://www.expressvpn.com/support/vpn-setup/watch-kodi-expressvpn-chromebook/)
How fast are the CyberGhost servers ?,"The minimum bandwidth for connections using a regular subscription usually won't fall back behind an average speed of 6 Mbps, while the maximum could reach at best ( given ideal preconditions are in charge) 1 Gb ( the usual server speed). In daily life instead, you should count in certain factors, which will most certainly slow down your Internet experience :Your original Internet connection:Regular Internet connections that don't exceed 2 Mbps can not enable higher speed, even though a VPN connection might theoretically reach 20 Mbps and beyond.Quality of backbones:The quality of backbones, wires, and other infrastructure hardware may not allow high speeds.Distance to the VPN server:The nearer, the better. Near servers will naturally react faster than far away servers.The number of users:The more users share one server, the less bandwidth remains for every single one, since the overall bandwidth of a server needs to be divided among all users.Atwww.speedtest.netyou can carry out speed tests for connections between various individual countries.",https://support.cyberghostvpn.com/hc/en-us/articles/213440889-How-fast-are-the-CyberGhost-servers
What happens if a VPN connection drops ?,"The Kill Switch is a smart feature of CyberGhost applications for Windows, macOS and iOS, and Android. Basically, it cuts off your internet connection if the VPN connection drops, protecting your personal data and location from unexpected exposure.When establishing a VPN connection to the CyberGhost network :All in- and outgoing connections are being blocked by CyberGhost, so all Internet activities such as downloads, Skype, etc. are interrupted. This goes for all IPs, all ports, and all programs/apps.The IP of the login system will be excluded, so the client can communicate with the system and locate a VPN server.The IP of the respective VPN server will be excluded, so the client can establish a connection to the VPN server.The IPs of Domain Name Servers will be excluded, so names can be translated to address numbers.The IPs of websites, which are part of the client's exception list, will be excluded.The connection will be established.After establishing the VPN connection, all blockages will be reversed.When the VPN connection gets interrupted :All in- and outgoing connections will be blocked by CyberGhost.The IP of the login system will be excluded, so the client can communicate with the system and locate a VPN server.The reconnect dialog will be shown, so the user can either open all connections or start a new connection attempt.If an error occurs while trying to connect (e. g. if the Internet connection had been inactive for more than the 30 seconds, the reconnect usually takes), any connections will be blocked, until the dialog gets confirmed.When closing a VPN connection:If a VPN connection gets closed by the user, CyberGhost immediately ends the control of all in- and outgoing Internet connections.",https://support.cyberghostvpn.com/hc/en-us/articles/214387805-What-happens-if-a-VPN-connection-drops
Send Debug Logs on Windows,"Sometimes our customer support team may ask you to send the application debug log files to assist in the troubleshooting process.This article will show you how you can send debug logs.Open the application and click on theSettingsicon.ClickSend Feedback.This will open a new web page. Please fill in the fields on screen and give as many details as possible about the issue you are facing. The CSI ID will automatically be filled in.Note:The information you send is for debugging purposes. CyberGhost VPN will receive non-personal data such as crashes, connectivity errors, server authentication problems, etc. It will only be used to provide you with the best assistance possible.",https://support.cyberghostvpn.com/hc/en-us/articles/360016438180-Send-Debug-Logs-on-Windows
Can I merge two or more accounts into one ?,"Unfortunately, not. Due to technical reasons it is not possible to merge two or more single accounts into one. If you have multiple subscriptions activated on different accounts, you need to use them at the same time.Possible alternative solutions:Subscriptions not older than 1 month:In case one or all subscriptions are not older than 45 days, please contact Cleverbridge and under the Money Back Guarantee by CyberGhost, you can claim your money back. CyberGhost offers 45 days Money Back Guarantee.Monthly subscription:If at least one of your subscription is a monthly subscription, cancel it/them right away. You can do this very easily in your account management. As for monthly subscriptions, CyberGhost does offer a Money Back Guarantee but it will be just 14 days.*For more details, please see ourMoney Back Guarantee policyFor any additional information or concerns - it is best to approach the Support Department:via e-mail:support@cyberghost.rovia on-line request:https://support.cyberghostvpn.com/hc/en-us/requests/newvia 24/7 Live! Chat Sessions on our website",https://support.cyberghostvpn.com/hc/en-us/articles/213834189-Can-I-merge-two-or-more-accounts-into-one
Can I share a CyberGhost account?,"With a regular subscription you can share your account with a friend or family member but need to consider that if only one device is allowed for your subscription, you both cannot connect in simultaneously. This means that if a friend of yours is surfing the Internet anonymously using your account, you must wait until he disconnects before you can, in turn, connect using that same account.This doesn't necessarily apply if you can use up to 7 devices at the same time with one account. If you don't exceed your limitation of devices, you both can surf simultaneously on multiple computers or mobile devices, regardless, who owns the respective device if the limit of 7 devices is not exceeded.Important:Please remember that you are solely responsible for your account. If you forward your login data to any third person you are also responsible to any actions taken place by others on that very same account as CyberGhost is not liable for illicit account sharing with other family members.For any additional information or concerns - it is best to approach the Support Department:via e-mail:support@cyberghost.rovia on-line request:https://support.cyberghostvpn.com/hc/en-us/requests/newvia 24/7 Live! Chat Sessions on our website",https://support.cyberghostvpn.com/hc/en-us/articles/214382965-Can-I-share-a-CyberGhost-account
How to change your DNS servers on macOS ?,"You can configure the DNS servers manually in your macOS settings(applicable only via the WireGuard protocol). These are the steps to follow:1. Go toSystem Preferences, thenNetwork.2. Choose the network interface you are using, and click onAdvanced...3. Open the DNS tab, and click on the+button at the bottom to add the DNS addresses of CyberGhost servers :10.101.0.243194.187.251.674. Click onOKand that's it!For any additional information or concerns - it is best to approach the Support Department:via e-mail:support@cyberghost.rovia on-line request:https://support.cyberghostvpn.com/hc/en-us/requests/newvia 24/7 Live! Chat Sessions on our website",https://support.cyberghostvpn.com/hc/en-us/articles/360016552459-How-to-change-your-DNS-servers-on-macOS
How to use Kodi with ExpressVPN on iOS,"Before you start, you will need: An active ExpressVPN subscription Kodi installed on your iOS device https://www.youtube.com/embed/ibLcgGh2hEk",https://www.expressvpn.com/support/vpn-setup/watch-kodi-expressvpn-ios/)
How can I use WireGuard® protocol ?,"WireGuard®is a free and open-source software application and communication protocol that implements virtual private network (VPN) techniques to create secure point-to-point connections in routed or bridged configurations.This is a fairly new VPN protocol, still labeled as a work in progress. It aims to marry the security of the OpenVPN protocol with the speed of (the now easier to block) IPsec.When it comes to encryption,WireGuard®is all about the strictest security standards. It also comes with some extra benefits like faster speeds, more user-friendliness, and less power usage.1. To start with, make sure you are using the latest version of Android.2. Navigate to the app settings in the upper right-hand corner and tap onSettings:3. Go to the""VPN""tab and tap""VPN protocol"" :4. SelectWireGuard®and connect to the VPN.For any additional information or concerns - it is best to approach the Support Department:via e-mail:support@cyberghost.rovia on-line request:https://support.cyberghostvpn.com/hc/en-us/requests/newvia 24/7 Live! Chat Sessions on our website",https://support.cyberghostvpn.com/hc/en-us/articles/360016552619-How-can-I-use-WireGuard-protocol-
How to disable IPv6 on your ASUS router,"With various router models available, the current tutorial represents the steps as to how to disable IPv6 on ASUS models.*NOTE: For the purpose of this tutorial, ASUS RT-AX88U is used to depict the steps but for other models, the process can be the exact same or very similar, with little to no differences.For other models, refer to the Support Team to the pages listed at the end of the tutorial.It is advised that CyberGhost does provide IPv4 capabilities and perhaps, forextensive troubleshooting, disabling IPv6 on your device will be requested.Step 1 out of 4:Access your Router dashboard(homepage) by writing the home address (LAN IP) in any Internet browser page.* Typically, the default home address(LAN IP) is:http://192.168.1.1but may vary if a different one was assigned buthttp://router.asus.commay work as well.Step 2 out of 4:After loading the Router dashboard in your browser, look in the left side panel and find:Advanced Settings. Under Advanced settings, choose:IPv6.Step 3 out of 4:Loading the IPv6 menu, choose:Disablefor IPv6.Step 4 out of 4:Confirm the change with ""Apply"".-------For any additional information or concerns - it is best to approach the Support Department:via e-mail:support@cyberghost.rovia on-line request:https://support.cyberghostvpn.com/hc/en-us/requests/newvia 24/7 Live! Chat Sessions on our website.",https://support.cyberghostvpn.com/hc/en-us/articles/360012634419-How-to-disable-IPv6-on-your-ASUS-router
How to disable IPv6 on your TP-Link router (firmware v4 and v5).,"With various router models available, the current tutorial reproduces the steps as to how to disable IPv6 on TP-Link routers (firmware v4 and v5).*NOTE: For the purpose of this tutorial, TP-Link AC1750 - Archer C7 with firmware version v5.0 is used to depict the steps but for other models, the process can be the exact same or very similar, with little to no differences.For other models, refer to the Support Team at the pages listed at the end of the tutorial.It is advised that CyberGhost does provide IPv4 capabilities and perhaps, forextensive troubleshooting, disabling IPv6 on your device will be requested.Step 1 out of 5:Access your router dashboard(homepage) by writing the home address (LAN IP) in any Internet browser page.* Typically, the default home address(LAN IP) is:http://192.168.1.1but may vary if a different one was assigned.Step 2 out of 5:After loading the Router dashboard, refer to theAdvancedtab:Step 3 out of 5:In the left side menu, choose:IPv6.Step 4 out of 5:Disable IPv6 and make sure that the check box is grayed out to tell that IPv6 is disabled.Step 5 out of 5:Confirm the change by pressing ""Save"" under Internet tab.Mac Clone tab is left unchanged.-------Q: I only need IPv6 capabilities, as I do not trust IPv4. Why do I need to disable IPv6 ?A: Ensuring maximum privacy is our top concern and by using IPv4, it does provide maximum privacy capabilities and performance output. What this in turn means is that whichever server you may be using, with IPv4, your traffic is encrypted with AES 256-BIT encryption.Q: Why does Support ask me to disable IPv6 ?A: Support may request that IPv6 is disabled from your end as this step is imperative that the VPN tunnel is working optimally and nothing will hinder the traffic even if only IPv4 is used.Q: My ISP provides only IPv6 !A: No worries ! For the best approach, please get in touch with the Support Team at the below addresses and the best action plan will be put up so that your privacy and anonymity is ensured.Q: I disabled IPv6 but my VPN still does not work. What do I do now ?A: Disabling IPv6 is just one of the steps that can be used for troubleshooting and for a more extensive investigation, please get in touch with the Support Team.-------For any additional information or concerns - it is best to approach the Support Department:via e-mail:support@cyberghost.rovia on-line request:https://support.cyberghostvpn.com/hc/en-us/requests/newvia 24/7 Live! Chat Sessions on our website.",https://support.cyberghostvpn.com/hc/en-us/articles/360012539460-How-to-disable-IPv6-on-your-TP-Link-router-firmware-v4-and-v5
"How to disable IPv6 on your TP-Link router (firmware v1, v2 and v3).","With various router models available, the current tutorial reproduces the steps as to how to disable IPv6 on TP-Link routers (firmware V1, V2 and V3).*NOTE: For the purpose of this tutorial, TP-Link AC1750 - Archer C7 with firmware version 3.13.32 is used to depict the steps but for other models, the process can be the exact same or very similar, with little to no differences.For other models, refer to the Support Team at the pages listed at the end of the tutorial.It is advised that CyberGhost does provide IPv4 capabilities and perhaps, forextensive troubleshooting, disabling IPv6 on your device will be requested.Step 1 out of 4:Access your router dashboard(homepage) by writing the home address (LAN IP) in any Internet browser page.* Typically, the default home address(LAN IP) is:http://192.168.1.1but may vary if a different one was assigned.Step 2 out of 4:After loading the Router dashboard, look on the left side panel, clickIPv6 Supportand then:IPv6 setup:Step 3 out of 4:Under WAN Setup, pleaseun-checkthe option:Enable IPv6.Step 4 out of 4:Confirm the change with ""Save"" and confirm if a pop-up message displays that notifies IPv6 will only be disabled with a router reboot.-------Q: I only need IPv6 capabilities, as I do not trust IPv4. Why do I need to disable IPv6 ?A: Ensuring maximum privacy is our top concern and by using IPv4, it does provide maximum privacy capabilities and performance output. What this in turn means is that whichever server you may be using, with IPv4, your traffic is encrypted with AES 256-BIT encryption.Q: Why does Support ask me to disable IPv6 ?A: Support may request that IPv6 is disabled from your end as this step is imperative that the VPN tunnel is working optimally and nothing will hinder the traffic even if only IPv4 is used.Q: My ISP provides only IPv6 !A: No worries ! For the best approach, please get in touch with the Support Team at the below addresses and the best action plan will be put up so that your privacy and anonymity is ensured.Q: I disabled IPv6 but my VPN still does not work. What do I do now ?A: Disabling IPv6 is just one of the steps that can be used for troubleshooting and for a more extensive investigation, please get in touch with the Support Team.-------For any additional information or concerns - it is best to approach the Support Department:via e-mail:support@cyberghost.rovia on-line request:https://support.cyberghostvpn.com/hc/en-us/requests/newvia 24/7 Live! Chat Sessions on our website.",https://support.cyberghostvpn.com/hc/en-us/articles/360012634299-How-to-disable-IPv6-on-your-TP-Link-router-firmware-v1-v2-and-v3
How to manage Account and App Settings in CyberGhost VPN on Windows,"You can open your Account and Settings page via the gear symbol on the lower left part of the main CyberGhost window :Jump to...My AccountGeneral SettingsCyberGhost VPN SettingsMy AccountHere you can quickly access your account details, such as user name, email address, plan, and runtime. You can also logout from the current account and login to a different one, or open your online account management in a browser window.Username :Shows the current active account name, for trial version users it's the mail address used when registering. You can change your user name at any time in your online account management.Email :Your email address as entered when registering, resp. your email address as entered in your online account management. This address might come in handy if you ever need to restore your account, e. g. after a loss of credentials.Number of devices :Amount of active devices. Depending on your subscription you can use your plan with different numbers of devices at the same time. To remove or add a device, please visit your online account management.Take the lead :Loads the online account management page into your default browser. Account management might be necessary to e. g. activate or deactivate a device slot.Log-out this device :Here you log out from the current active account. The app switches to the start page, where you can log-in again.General SettingsIn the 'General' settings page you find the following options :App launch :Enabling it will cause Windows to automatically start CyberGhost once the operating system has booted.Language :Specify here the app language (application needs to be restarted in order to apply the changes).Theme :Here you can choose between System Default, Light, or a Dark theme.App Shutdown :You can choose to automatically quit the app when you disconnect the VPNBackground service :You can tell the app to terminate the CyberGhost VPN background service when the application is closed (when quitting the app)Version :Displays your current version of the application. If applicable, notifies you if a new version is available for download. You can also check manually for new updates.Submit anonymous usage data :Will sendNon-personaldata that helps us improve our app.Reset your Settings :Resets all settings to default values.CyberGhost VPN SettingsVPN protocol :Select the VPN protocol to be used. By default, it is set to'Automatic selection'.For more information on our supported protocols, clickhere.MTU (Maximum Transmission Unit) size:The size of the largest protocol data unit that can be communicated in a single network layer transaction. By adjusting the size, it can increase the connection performance.Use TCP instead of UDP (available for OpenVPN only) :By default, CyberGhost uses for its connections UDP, which allows higher speed due to its less restrictive data checking procedures. The downside: Downloads can be suddenly interrupted or corrupted and packages can get lost, e.g. when playing online games. TCP stands for more stable connections, but lower speed due to more precise data checking. Please activate this option, if your Internet connection suffers from unstable traffic or if a provider blocks or slows down UDP connections. Note: This option is only effective if using the OpenVPN protocol, which allows both different connection variations.Use random port to connect (available for OpenVPN only) :This option allows CyberGhost to establish its connections through a randomly chosen port (which will be changed with each new connection), instead of a fixed port that makes it easy for providers to slow down or block CyberGhost connections. The used port range can be changed anytime if needed. All ports are secured internally by Firewall rules. Note: This option is only effective if using the OpenVPN protocol.Disable IPv6 connections when NOT connected to the VPN :To avoid data leaks provoked by IPv6 traffic running outside the safe VPN tunnel, when using a WebRTC leak vulnerable browser, activate this option. It blocks all IPv6 traffic on the network card and allows only IPv4 traffic.Repair virtual network card:If you experience driver problems (e.g. after installing a different VPN) use this function to repair the original drivers installed by CyberGhost.For any additional information or concerns - it is best to approach the Support Department:via e-mail:support@cyberghost.rovia on-line request:https://support.cyberghostvpn.com/hc/en-us/requests/newvia 24/7 Live! Chat Sessions on our website",https://support.cyberghostvpn.com/hc/en-us/articles/360016970559-How-to-manage-Account-and-App-Settings-in-CyberGhost-VPN-on-Windows#h_01EM6VWMW6963KB0N0459TX8WH
Neues in ExpressVPN für Apple TV,"Version/Date: 20. März 2024Version 11.138.0
* Wir haben unsere internen Engines aufgemöbelt; die App läuft besser als zuvor.
Version/Date: 26. Februar 2024Version 11.133.0
* Werbung und Tracker blockieren.
Version/Date: 24. Januar 2024Version 11.128.0
* Ein brandneuer Knopf, den Sie verwenden können, um sich mit einem iOS-Gerät anzumelden.
Version/Date: 18. Dezember 2023Version 11.126.0
* Senden Sie eine Nachricht an unser Support-Team, einschließlich Diagnoseinformationen, um mögliche Probleme zu lösen, die Sie möglicherweise haben.
Version/Date: 4. Dezember 2023Version 11.124.0
* Senden Sie eine Nachricht an unser Support-Team, einschließlich Diagnoseinformationen, um mögliche Probleme zu lösen, die Sie möglicherweise haben.
Version/Date: 29. November 2023Version 11.123.0
* VPN für alle Geräte",https://www.expressvpn.com/de/support/vpn-setup/release-notes/tvos-app/)
Set Up CyberGhost VPN on Android,"This guide will show you how to set up CyberGhost VPN on an Android device. You need an Android device running at leastOS 5.0 (Lollipop)and an active CyberGhost VPN subscription to enjoy enhanced privacy and security. To become a Ghostie clickhere.Jump to...Download & InstallLog into the AppConnect to a VPN ServerDownload & Install1. From your Android device, go to the Play Store app.2. Search forCyberGhostand click on theInstallbutton once you find the right app.Log into the AppWhen you first open the app, you’ll receive a notification asking for your consent to send a limited amount of anonymized data that will help us troubleshoot any potential issues.This data cannot be tracked back to you, and cannot be used to compromise your digital security.1. Read the notification and selectAgree & continue, if you so choose.2. If you are already subscribed, tap onExisting user. Otherwise, seehow you can subscribe to CyberGhost VPNvia Google Play Store.3. Enter your username and password.4. Tap onLogin.Connect to a VPN ServerFollow these simple steps to connect to VPN for the first time:Click the 'Power' button in the app, and it will automatically connect you to the best server available based on your current location.If you connect to a VPN server for the first time, a pop-up window will appear asking you to accept the connection request. ClickAcceptto allow the CyberGhost application to manage the VPN tunnel.If your connection is successful, the status will show asConnectedto in the main window. In the lower part of the main window, you will also see your new IP address, the amount of data transferred, and the protocol used.To disconnect from the server, you just have to hit the power button once again and the status will change to disconnected.Following these steps will ensure that you are successfully connected to a VPN server, and that your online activities remain secure and private.For any additional information or concerns - it is best to approach the Support Department:via e-mail:support@cyberghost.rovia on-line request:https://support.cyberghostvpn.com/hc/en-us/requests/newvia 24/7 Live! Chat Sessions on our website",https://support.cyberghostvpn.com/hc/en-us/articles/360006572433-How-to-Set-Up-CyberGhost-VPN-on-Android
How come my activation key is called invalid?,"If your activation code is being rejected, please note that an activation code becomes invalid the second it has been assigned to an account (which happens when you enter the activation code).In case you need to re-install CyberGhost later on or want to use your account with a different computer, just log in with your credentials (user name & password) and not with the now invalid activation code. Your subscription is bound to your account, not the code, and will automatically wait for you.If abrand newactivation key is being rejected, one of the following possibilities might have happened:The time frame in which an activation code has to be used is closed:Activation codes of promotions have to be entered in a certain time frame (which is communicated along with the respective promotion). After the window is closed, the codes become invalid.A technical problem arose,please contact support from insideyour account management.You bought a used or promotional activation code from an unauthorized person, e.g. on eBay or Amazon.If the latter applies to you, meaning, if you accidentally bought a key from an unauthorized person or shop reselling promotional CyberGhost activation codes, please note that these promotional activation codes are given away for free or as a part of a special sale (like in a computer magazine) and not meant to be resold for different reasons:First of all, most promotional activation codes are free one way or the other. If you paid for one it’s like having paid for a Freeware product. You have been created.Special sales (e.g. you have to buy a computer magazine to get the serial) and free promotional activation codes come with service limitations. Often the number of servers is limited, the speed as well, the account will be bound to your computer, and so on. If you paid for a full CyberGhost subscription and just got a promotional one, you also have been created.Promotional activation codes, be it for free or for a small fee, always have limited activation periods and have to be activated before a certain date. If you miss this window and try to activate the code, later on, the activation code is blocked.For your information: Authorized resellers are:CleverbridgeApple iTunesNexwayTrialPayS.A.D. (Retail)Please also note, that affiliates don’t sell CyberGhost products directly, but lead you to the respective authorized seller.If your activation code gets rejected, please contact the shop you bought this activation code from, and ask for a refund. You most certainly had been sold a promotion activation code from an unauthorized reseller.If you have bought your activation code from an authorized reseller or think for some reason, this objection does not apply to you, please contact support via youronline account management. We will then hunt down for you the origin of your activation code and clarify if there had been any other reason for rejecting it.For any additional information or concerns - it is best to approach the Support Department:via e-mail:support@cyberghost.rovia on-line request:https://support.cyberghostvpn.com/hc/en-us/requests/newvia 24/7 Live! Chat Sessions on our website",https://support.cyberghostvpn.com/hc/en-us/articles/213440329-How-come-my-activation-key-is-called-invalid-
I lost my username & password - How can I recover my account after losing my credentials ?,"How can I recover my account if I forgot or lost my credentials ?In case you need to recover an account (in case you misplace your username or password), you can quickly access your account in 3 ways:[A] With the email associated with your account[B] By using Your Cleverbridge Reference number[C] Contact CyberGhost Support[A] - Via the email associated with your accountSimply head over tohttps://my.cyberghostvpn.com/en_US/loginand click on""Recover them"":At the following screen, just enter the email address associated with your account (by default, the email you've used when you've made the purchase) and click the'Recover'button :After a couple of minutes, you'll receive an email containing a list of all your existing accounts, each with a link that will take you straight to your account page where you you will be able to set up a new password :[B] – By using Your Cleverbridge Reference number- Access theonline account management pageand choose “Forgot your login details? Recover them” where you will need to choose: “Forgot your email address?” and simply choose:Recover your account with Cleverbridge.” where you will be asked to enter:Your Cleverbridge reference numberwhich was delivered to you via e-mail as a purchase confirmation :[C] Contact CyberGhost SupportIf you got an activation key, e. g. from a promotion, an offline purchase, or a Bitcoin purchase,please create a support ticketHEREand make sure you include the activation key and/or the receipt of the purchase.NOTE: If the lost account is a FREE account but not associated with any purchase,please simply create a new accountHERE.For any additional information or concerns - it is best to approach the Support Department:via e-mail:support@cyberghost.rovia on-line request:https://support.cyberghostvpn.com/hc/en-us/requests/newvia 24/7 Live! Chat Sessions on our website",https://support.cyberghostvpn.com/hc/en-us/articles/213332269-I-lost-my-username-password-How-can-I-recover-my-account-after-loosing-my-credentials-
How to sign up (new users) or log-in (existing users) to CyberGhost VPN on Windows,"Jump to...I am new to CyberGhostI am an existing subscriberGet your 1-day free trial(no credit card required)I am new to CyberGhost VPNIf you don't have a subscription yet, you can get it fromhere.Upon receiving your account details by email, simply click on""Return to Login""and enter your CyberGhost username and password to log in.The username you are trying to log in with is incorrect.Make sure you use the same username that you received by email after you completed the sign-up process. Should you need any further assistance concerning, get in touch with us by simply using theLive Chatfeature on ourSupport Page.The password that you're using is incorrect.Check again your account details received by email or try resetting your password and login again after that. You can reset it here:Forgot your login details?I am an existing subscriberIf you already have an active subscription, click on""Return to login""and log in with your CyberGhost username and password.Get your 1-day free trial(no credit card required)If you do not have an active subscription and would like to use our1-day trial offer- enter a valid email address and choose a strong password, then clickSign Up.NOTE :An example of a strong password is ""Cartoon4Coffee!"". It is long, contains uppercase letters, lowercase letters, numbers, and special characters. ... Strong passwords should not contain any personal information.Before the Trial period starts, you mustconfirmyour email address. Please check your inbox and follow the instructions to verify your email.Possible log-in problems :Lost your password ?Please click on""Ooops, I forgot my password""to open a recovery webpage in your default browser :Enter the fallback email address entered in your CyberGhost account management.If you haven't bought your subscription via Cleverbridge, please get in touch with us by simply using theLive Chatfeature on ourSupport Page.Activated too many devices ?A connection failure may also be due to having already activated the maximum number of devices allowed. Please go to yourAccount Managementand check the current status of the registered devices. Regular subscriptions to CyberGhost are valid for a maximum of seven devices, regardless of the operating system involved, but if all slots are occupied, at least one old device must be removed before you can log in with another device.You don't have CyberGhost credentials ?If you purchased a CyberGhost subscription for mobile devices through the Google Play Store or the Apple App Store and you did not get any credentials, it is because subscriptions for mobile devices are limited to the platform (iOS or Android) and the account used at the time of purchase (Apple ID or Google account) and cannot be used on Windows, Linux or Mac. For these desktops, you must purchase a regular CyberGhost subscription.For any additional information or concerns - it is best to approach the Support Department:via e-mail:support@cyberghost.rovia on-line request:https://support.cyberghostvpn.com/hc/en-us/requests/newvia 24/7 Live! Chat Sessions on our website",https://support.cyberghostvpn.com/hc/en-us/articles/360017094960-How-to-sign-up-new-users-or-log-in-existing-users-to-CyberGhost-VPN-8-on-Windows
How to sign up (new users) or log-in (existing users) to CyberGhost VPN for macOS,"I am new to CyberGhost|I am an existing subscriberI am new to CyberGhostNew subscribers can benefit of a 1 day trial on MacOS devices.Once you install the CyberGhost application, you need to select the option toSign up.Enter a valid email address, confirm the password in the two available fields and then hit theSign upbutton.On the next page, you will be informed that a confirmation e-mail was sent to the e-mail address of the trial account, simply check your e-mail and confirm it by hitting the ""Activate Trial"" button.Once the trial is activated and the app from the Mac is refreshed, it will display a timer that indicates the validity period of the trial. This also works as a button to upgrade to a paid plan, where it will open the page with our latest offers.I am an existing subscriberIn case you already have aregularCyberGhost multi-platform subscription please enter your credentials (user name and password) and click on 'Login'.For any additional information or concerns - it is best to approach the Support Department:via e-mail:support@cyberghost.rovia on-line request:https://support.cyberghostvpn.com/hc/en-us/requests/newvia 24/7 Live! Chat Sessions on our website",https://support.cyberghostvpn.com/hc/en-us/articles/360020878880-How-to-sign-up-new-users-or-log-in-existing-users-to-CyberGhost-VPN-8-for-macOS
How to Set Up CyberGhost VPN on your Android TV,"Before installation, make sure your Android TV runs at least Android 5.0 (Lollipop) or higher. CyberGhost can be used on up to 7 devices simultaneously – as long as they’re tied to the same CyberGhost account.1. Go to the Google Play Store on your Android TV. Search for the CyberGhost VPN and select our app.2. Click on theinstallbutton and wait for the installation to finish then selectOpenLog into the appOnce the installation is complete, you can click ""Open"" or press the Burger menu symbol on your remote to launch the application.Choose ""Agree & Continue"" if you agree to the sharing of this data or you can choose ""I wish to opt-out"" if you refuse.The application automatically generates a PIN code. You can validate the PIN code displayed in youronline accountor open the regular login option and authenticate with your username and password.In the application, the first time you establish a VPN connection, a pop-up message appears; selectOKto give CyberGhost VPN permission to encrypt your Internet traffic.As soon as you connect, you should see the connection status on the main screen, the IP information of the server and the protocol in use.For any additional information or concerns - it is best to approach the Support Department:via e-mail:support@cyberghost.rovia on-line request:https://support.cyberghostvpn.com/hc/en-us/requests/newvia 24/7 Live! Chat Sessions on our website",https://support.cyberghostvpn.com/hc/en-us/articles/360016421413-How-to-install-CyberGhost-on-Android-TV
How to Set Up OpenVPN on Raspberry Pi (Raspbian/RaspBMC),"Please note the following requirements:Raspberry Pi with ARM processorLinux distribution like Raspbian or RaspBMCUp to date software packagesA CyberGhost accountInfo:Here's how to create a CyberGhost account onlineInfo:How to manage your CyberGhost accountA CyberGhost subscriptionInfo:How to purchase or upgrade a subscriptionInfo(only prepaid subscribers):Enter activation keyDisclaimer:Please keep in mind that, although the technical process is as thoroughly documented as possible, you need to have at least some technical understanding. There's always a chance for an overseen mistake and/or things have changed and the article is not updated yet.Step1Visit yourCyberGhost VPN online accountand login with your Premium Username and PasswordSelect the""VPN""from the left-side menuScroll down the page and select""Configure Device""3. Now create your server configuration, as described below :Protocol :Open VPNCountry :Since native protocol connections may only be used with exactly one server you now have to choose the country you want to surf from; the server to be used in this country will be chosen by CyberGhost automatically.Server group :Choose the server group and the OpenVPN protocol (UDP or TCP) you want to useOpenVPN UDPallows higher speed than the TCP version but can result in broken downloads in some cases. This is the default setting.OpenVPN TCPallows more stable connections than the UDP version but is a bit slower. Choose this version, if you have recurrent connection issues such as sudden disconnections.Once the desired parameters are chosen, save them with""Save Configuration"":4. To view theOpenVPNcredentials that are generated for you on the configuration dashboard, pressView Configuration.After setting up your connection preferences, please take note of the following:Server Group :This is the address of the country (server) you want to be connected with, e.g. '12345-1-ca.cg-dialup.net'. This address changes with every country you have chosen in the step before. The actual single server to be used will be chosen automatically by CyberGhost.Username :A solely for this protocol generated user name.This is NOT your regular CyberGhost account user name, it's used only to authenticate with our servers via Manual Configurations.Password :A solely for protocol usage generated password.This is NOT your regular CyberGhost account password, it's used only to authenticate with our servers via Manual Configurations.Pre-Shared Key5. Once done, please download the configuration file. For that click on""Download Configuration""and download the config file to your computer (it's recommended that you create a special folder for the config, somewhere accessible like your Desktop andExtract/Copy thecontents of the .zip file there).Important :please keep your username and password obtained during the configuration process at hand, you will need them later in the setup.Now, the saved config is a ZIP file, which contains the following single files:ca.crt:This is the certificate of the certification authorityclient.crt:This is the user certification fileclient.key:This is your private key fileopenvpn.ovpn:This is yourOpenVPNconfiguration fileIf you need to change the country you connect to, you must re-configure the location to use in your account management and download the new zipped config file.Step 2Unzip all containing files, rename the file 'openvpn.ovpn' to e. g. ‘CG_RO.conf’ (depends on the location you want to connect to) and copy all files into your OpenVPN directory on your Raspi. For that first move to the folder in which you unzipped all files by typing:cd [path to configuration folder]Now copy them:sudo cp CG_XX.conf /etc/openvpn/sudo cp ca.crt /etc/openvpn/sudo cp client.crt /etc/openvpn/sudo cp client.key /etc/openvpn/If you want to surf from more than one country, download after the selection of a different country in your account management the next zipped configuration file and rename the new 'openvpn.ovpn' to 'CG_AnotherCountry.conf'.For two different countries you need for example do the following steps:Specify device, protocol and operating systemChoose a country, e.g. USADownload the zipped configuration file with certificates, key and OpenVPN configuration fileUnzip the downloaded file and copy all files in your OpenVPN configuration folderRename the OpenVPN configuration file from ‘openvpn.ovpn’ to ‘CG_USA.conf’.Choose the next country, e.g. RomaniaDownload the next zipped configuration fileUnzip the downloaded file and copy just the file 'openvpn.ovpn' into the configuration folderRename it to ‘CG_RO.ovpn’.etc. ...Step 3Make sure you have the right packages:Before you can begin configuring your network settings make sure you already installed the needed packages and have an up to date system:Download the package information by opening a console and typing :sudo apt-get update && sudo apt-get upgradeOnce done download the needed OpenVPN package with :sudo apt-get install openvpn openssl openresolvTo be able to log in automatically, save your user name and password in a file called ‘user.txt’ and store it in your OpenVPN folder. For that first move to the respective folder:cd /etc/openvpnEnter the following command to create and open a text file called 'user':sudo nano user.txtType in your credentials (one in each line). In the first line type in the user name created in step 1, in the second line the password, also created in step 1, both as displayed in your account management when setting up a connection:UsernamePassword#First line is a generated username and the second line is a generated password.DO NOT use your regular CyberGhost user name and password, which you use to login in the client and your account management!Save your changes with ‘CTRL+O’ and leave the editor via ‘CTRL+X’Next, open the configuration file ‘CG_XX.conf’ by typingsudo nano CG_XX.confExtend the line ‘auth-user-pass’ …[...]auth-user-pass[...]… with the path to your credential file:[...]auth-user-pass /etc/openvpn/user.txt[...]At the bottom of the configuration passage (after 'verb 4') add the following two lines:up /etc/openvpn/update-resolv-confdown /etc/openvpn/update-resolv-confSave via ‘CTRL+O’ and leave the editor with ‘CTRL+X’.Then get the file autoloaded by typing :sudo nano /etc/default/openvpnand adding the following line:AUTOSTART=""CG_XX"" (the name of the file WITHOUT the file extension ‘.conf’)Again, save with ‘CTRL+O’ and leave the editor with ‘CTRL+X’.At last type in your console :sudo update-rc.d openvpn enableStep 4Before starting OpenVPN check your configuration with …cat /etc/resolv.conf… and have a look, if the last line (‘nameserver’) shows the IP of the router. If not, change it.Now start OpenVPN:sudo service openvpn startWait a few seconds and then test, if everything works fine.Furthermore, you might want to open the websitehttps://dnsleaktest.com/and test on leaks. For that choose ‘Standard Test’ or ‘Extended Test’.*Many thanks to ‘Haudrauf’ for the original tutorial!",https://support.cyberghostvpn.com/hc/en-us/articles/213270689-How-to-Set-Up-OpenVPN-on-Raspberry-Pi-Raspbian-RaspBMC-
Can the CyberGhost account name compromise my anonymity ?,"No, it's not possible to connect a user name to an existing email address or compromise his/her anonymity otherwise.In case a user tries to use an email address as a user name (which in fact might compromise one's anonymity in certain cases), CyberGhost VPN reacts and warns about a possible security risk.",https://support.cyberghostvpn.com/hc/en-us/articles/214034109-Can-the-CyberGhost-account-name-compromise-my-anonymity
How to use Kodi with ExpressVPN on Mac,"Before you start, you will need: An active ExpressVPN subscription Kodi installed on your Mac device https://www.youtube.com/embed/inq-onQjuQs",https://www.expressvpn.com/support/vpn-setup/watch-kodi-expressvpn-mac/)
Is personal data communicated to third parties ?,"Absolutely NOT !We are widely aware of our responsibility towards our clients and their data. Especially, since in many countries access to a free Internet is strongly monitored and controlled and any violation against this surveillance may lead to serious consequences for the person in question and be punished harshly. But because no data of any user is known by us (except the arbitrary user name, which could easily be ‘Mighty Mouse’ or any other nonexistent person), there is no data, that anybody can actually share with any other person – even if we are forced to hand over our hardware. We also do not log or record IP addresses, connections or any content, specific or in general.Users who provided us with a valid email address, can be assured, that their address is being stored encrypted as a hash tag and can't ever be used to connect a person with a CyberGhost account. No email address, given to us for what reason ever (sales, support, promotion, whatever) can be used to track down a CyberGhost identity or will be communicated to third parties.",https://support.cyberghostvpn.com/hc/en-us/articles/213902949-Is-personal-data-communicated-to-third-parties
How does CyberGhost VPN improve my WiFi security ?,"By ensuring encoding on your computer and tunneling you to the CyberGhost VPN network, before you are released to the Internet, those interested in collecting data from public networks have no chance of accessing or abusively using your personal data or your data traffic.",https://support.cyberghostvpn.com/hc/en-us/articles/214387105-How-does-CyberGhost-VPN-improve-my-WiFi-security
How to change the VPN protocol from CyberGhost VPN on macOS Mojave or higher,"A VPN protocol is a set of rules used to establish the VPN connection securely to a server.Although we use protocols that are both secure and fast, the performance of a connection can differ from one user's experience to another. That is why with the new version of CyberGhost, you have now the possibility to choose between IKEv2 or WireGuard protocol.For more detailed information on our VPN protocols, you can accessthis link.The steps to perform this change from the app's interface are illustrated below:1. Go to CyberGhost settings2. Select ""Preferences""3. A new Window will appear, usually set on the default ""General"" tab4. Underneath Protocol: you will be given the option to switch between the two available protocols, IKEv2 and WireGuard.Note:This extra feature is available on macOS systems 10.14 (Mojave) or higher and it will need a helper tool to establish the connection. You will receive a pop-up to install it, the first time you try to establish a connection through this protocol :For any additional information or concerns - it is best to approach the Support Department:via e-mail:support@cyberghost.rovia on-line request:https://support.cyberghostvpn.com/hc/en-us/requests/newvia 24/7 Live! Chat Sessions on our website",https://support.cyberghostvpn.com/hc/en-us/articles/360021003440-How-to-change-the-VPN-protocol-from-CyberGhost-8-on-macOS-Mojave-or-higher
Set Up CyberGhost VPN CLI App on Linux,"This article will show you how you can set up the CyberGhost CLI app on Linux.CyberGhost VPN is compatible with the following Linux operating systems:Debian-basedUbuntu 20.04 | 22.04 PopOSRPM-basedFedora 29 | 30 | 31 CentOS 7Note:Before getting started, for a better user experience, please make sure that your CyberGhost account password does not contain any of the following special symbols:""$"" ""⁎"" ""%"" ""[ ]""Follow these steps to set up CyberGhost VPN on your Linux device. For this tutorial, we'll be using Ubuntu 20.04.3, but the same steps apply to all supported distributions.Log in to youronline account.ClickDownload Hub.ChooseConfigurenext to CyberGhost VPN for Linux.Select your Linux distribution underServer Distribution.ClickDownload App.This will automatically download the Linux CLI configuration file (zipped).ClickExtract Hereto unzip the contents of the compressed folder to your computer.For the purpose of this tutorial, we will rename the extracted folder to ""cyberghost"".Open a Terminal window in thecyberghostfolder by right-clicking on the folder's name and selectingOpen in Terminal.Type in ""sudobash install.sh"" (no quotes) > pressEnterand confirm your sudo access by writing the sudo password.Note: Make sure you choose""Y""(yes) if asked to install any additional packages, likePython 3andOpenVPN.Enter your CyberGhost username and password to confirm the installation.Once you see theInstall completed...message, you're ready to start using the CyberGhost VPN app.You can type insudo cyberghostvpnto see the list of available commands.You might also be interested in the following articles:How to Select a Country or a City with CyberGhost on LinuxHow to Stream with CyberGhost on LinuxHow to Torrent with CyberGhost on LinuxNeed assistance? Contact our Customer Support team:via email atsupport@cyberghost.rovia online request athttps://support.cyberghostvpn.com/hc/en-us/requests/newvia 24/7 Live Chat by clicking the Support button below",https://support.cyberghostvpn.com/hc/en-us/articles/360020436274-How-to-install-CyberGhost-on-Linux
Question not found,Answer not found,https://support.cyberghostvpn.com/hc/en-us/articles/213814005-How-do-I-change-my-user-account-name-and-or-my-password-
Question not found,Answer not found,https://support.cyberghostvpn.com/hc/en-us/articles/213188329-How-to-purchase-special-offers-by-newsletters-banners-etc-
Configure My Smart DNS for PlayStation 3,"Through to theAccount Dashboard-Smart DNSneeds to be enabled.Completing the only requirement as described above, now head over to your PlayStation 3. The below steps are presented for you which will help you apply the CyberGhost Smart DNS via PlayStation 3:Step 1 of 13: From the main menu of your Play Station 3 – chooseSettingsStep 2 of 13: ChooseNetwork SettingsStep 3 of 13:Internet Connection Settingsis the option which must be chosen from the available choices and click ""OK"" at any pop-up(if any) where one may appear if using an Ethernet cableStep 4 of 13: When prompted “Select a setting method.” – chooseCustomStep 5 of 13: When asked “Select a connection method” choose the method through which your Play Station 3 is connected to the Internet:Wired ConnectionWireless**The case presented is displayed for Wireless methodStep 6 of 13: After being prompted for ""WLAN Settings"" - choose Scan*.*This will scan all Wi-Fi networks and ensure that there is no mistake with the Wi-Fi used.Step 7 of 13: Choose the respective Wi-Fi through which your Play Station 3 is connected to the InternetStep 8 of 13:WLAN Security Setting- chooseWPA-PSK/WPA2-PSKand enter the password* for the Wi-Fi that the connection is made through*this is the password that is used for your Wi-FiStep 9 of 13:Set the DHCP Hostname* -Do not Setis the appropriate choice*In most cases this setting does not need to be changed.Step 10 of 13:DNS Settingis set toManual:Primary DNS– found in yourAccount DashboardunderMy Smart DNStabSecondary DNS –can be left blankStep 11 of 13: BetweenAutomaticorManual– chooseAutomaticfor MTU SettingsStep 12 of 13:Proxy Server– The appropriate choice to make isDo Not UseStep 13 of 13:UPnP– The appropriate choice to make isEnable- Save completed -After prompted with Save Completed - Test connection will be a good way to obtain results about the settings above. This step is not mandatory but can be requested by Support for troubleshooting purposes.*Head to Quick Menu of your Play Station 3 and choosePower.Restart Play Station 3.-------For any additional information or concerns - it is best to approach the Support Department:via e-mail:support@cyberghost.rovia on-line request:https://support.cyberghostvpn.com/hc/en-us/requests/newvia 24/7 Live! Chat Sessions on our website",https://support.cyberghostvpn.com/hc/en-us/articles/360012106179
Nyheder i ExpressVPN til Apple TV,"Version/Date: 20. marts 2024version 11.138.0
* Vi har frisket vores interne motorer op; appen kører bedre end den gjorde.
Version/Date: 26. februar 2024version 11.133.0
* Blokér annoncer og trackere.
Version/Date: 24. januar 2024version 11.128.0
* En helt ny knap, som du kan bruge til at tilmelde dig med en iOS-enhed.
Version/Date: 18. december 2023version 11.126.0
* Send en besked til vores supportteam, inklusiv diagnostiske oplysninger, for at hjælpe med at løse de problemer, du måtte opleve.
Version/Date: 4. december 2023version 11.124.0
* Send en besked til vores supportteam, inklusiv diagnostiske oplysninger, for at hjælpe med at løse de problemer, du måtte opleve.
Version/Date: 29. november 2023version 11.123.0
* VPN til alle enheder",https://www.expressvpn.com/dk/support/vpn-setup/release-notes/tvos-app/)
Configure My Smart DNS for PlayStation 4,"This guide will show you how you can configure CyberGhost Smart DNS for your PlayStation 4.Note:CyberGhost Smart DNS is not a VPN and does not offer the privacy and security benefits of a VPN.Jump to...Enable Smart DNSSet Up Smart DNS on Your PlayStation 4Enable Smart DNSBefore setting up a Smart DNS connection, you first have to enable this type of connection.Go to yourAccount Dashboard.SelectSmart DNSfrom the left-side menu.ChooseEnable Smart DNS.Keep the tab open and turn your attention to your PlayStation 4.Set Up Smart DNS on Your PlayStation 4Go to your PlayStation’s settings menu.SelectNetwork.SelectSet Up Internet Connection.SelectUse Wi-FiorUse a LAN Cable, depending on how you connect your PlayStation 4 to the internet.SelectCustom.Select your Wi-Fi network. Skip this step if you use a LAN cable.SelectAutomatic.UnderDHCP Host Name, chooseDo Not Specify.UnderDNS Settings, selectManual.UnderPrimary DNS, enter the DNS address from your account dashboard. Leave Secondary DNS blank.UnderMTU Settings, selectAutomatic.UnderProxy Server, selectDo Not Use.ForInternet settings updated, selectTest Internet Connection.Restart your PlayStation 4 for the DNS changes to take effect.Need assistance? Contact our Customer Support team:via email atsupport@cyberghost.rovia online request athttps://support.cyberghostvpn.com/hc/en-us/requests/newvia 24/7 Live Chat by clicking the Support button below",https://support.cyberghostvpn.com/hc/en-us/articles/360012104059
Configure My Smart DNS for Xbox 360,"Through to theAccount Dashboard-Smart DNSneeds to be enabled.Completing the only requirement as described above, head over to your Xbox 360. The below steps are presented for you which will help you apply the CyberGhost SmartDNS via Xbox 360:Step 1 of 9: Open the main menu of your Xbox 360 – chooseSettingsfrom the choices displayedStep 2 of 9: ChooseSystemand selectNetwork SettingsStep 3 of 9:HighlightandSelectthe Wi-FI through which the Xbox 360 is connected to the InternetStep 4 of 9: ChooseConfigure Networkfrom the available choicesStep 5 of 9: Highlight and selectDNS SettingsStep 6 of 9: ChooseManualin the Edit DNS Settings menuStep 7 of 9: Edit the choices as described below:Primary DNS - Fill in the DNS mentioned in the Account Dashboard under My Smart DNS tabSecondary DNS - leave blankStep 8 of 9: Confirm the changes by pressingDoneand head back to the Network Settings menu**heading back to the Network Settings menu is done by pressing the B button on your Xbox 360 controllerAdditional step: Run the feature ""Test Xbox Live Connection"" when requested by Support TeamStep 9 of 9:Return to the main menu of your Xbox 360 and choose Settings- Turn off(reboot) the Xbox 360 --------For any additional information or concerns - it is best to approach the Support Department:via e-mail:support@cyberghost.rovia on-line request:https://support.cyberghostvpn.com/hc/en-us/requests/newvia 24/7 Live! Chat Sessions on our website",https://support.cyberghostvpn.com/hc/en-us/articles/360012119999
Configure My Smart DNS for Xbox One,"Through to theAccount Dashboard-Smart DNSneeds to be enabled.Completing the only requirement as described above, now head over to your Xbox One. The below steps are presented for you which will help you apply the CyberGhost Smart DNS via Xbox One:Step 1 of 6: From the System settings menu of your Xbox One – chooseSettingsStep 2 of 6: ChooseNetworkfrom the list of choicesStep 3 of 6:Network Settingsis the option which must be chosen from the available fieldsStep 4 of 6: PickAdvanced settingsStep 5 of 6: Within the Advanced settings menu, the following changes are made:IP settings -will be left unchangedDNS Settings -choose Manual and input the DNS displayed in the Account Dashboard as Primary IPv4 DNSSecondary IPv4 DNS -will be left unchangedStep 6 of 6: You will be prompted withIt's all good - Your console is connected to the Internet.PressContinue.- Settings completed -*Head back to the Settings Menu of your Xbox One and chooseRestart console.-------For any additional information or concerns - it is best to approach the Support Department:via e-mail:support@cyberghost.rovia on-line request:https://support.cyberghostvpn.com/hc/en-us/requests/newvia 24/7 Live! Chat Sessions on our website",https://support.cyberghostvpn.com/hc/en-us/articles/360012010840
Configure My Smart DNS for AppleTV 3,"Through to theAccount Dashboard-Smart DNSneeds to be enabled.It is advised to save your original DNS settings before making any other changes.You may need them in case you will want to switch back to your original settingsor different settings based on your needs. Changing the DNS is done one-time.Completing the only requirement as described above, now head over to your AppleTV 3. The below steps are presented for you which will help you apply the CyberGhost SmartDNS via AppleTV 3:Step 1 of 6: From the home screen of your AppleTV 3 – chooseSettingsStep 2 of 6: ChooseGeneralStep 3 of 6: ChooseNetworkStep 4 of 6: Select the Wi-Fi that is being used by the Apple TV 3 to connect to the InternetStep 5 of 6: Scroll down toConfigure DNSand selectManualStep 6 of 6: Input theCyberGhost Smart DNSwithin theConfigure DNSscreen and confirm withDone- Settings completed -Additional settings:a. Head back to the Settings menu of your Apple TV 3 and choose iTunes storeb. ChooseLocationc. Scroll to and chooseUnited States(or the country for which the SmartDNS is for)d. Head back to the main menu for Settings and choose Sleep now.e. After your Apple TV 3 is in Sleep Mode - disconnect the Apple TV 3 from the power supply. Allow 15 seconds to pass and reconnect the Apple TV 3 to the power supply.Your Apple TV 3 can now be started back up.-------For any additional information or concerns - it is best to approach the Support Department:via e-mail:support@cyberghost.rovia on-line request:https://support.cyberghostvpn.com/hc/en-us/requests/newvia 24/7 Live! Chat Sessions on our website",https://support.cyberghostvpn.com/hc/en-us/articles/360012023140
Configure My Smart DNS for AppleTV 4,"Through to theAccount Dashboard-Smart DNSneeds to be enabled.It is advised to save your original DNS settings before making any other changes.You may need them in case you will want to switch back to your original settingsor different settings based on your needs. Changing the DNS is done one-time.Completing the only requirement as described above, now head over to your AppleTV 4. The below steps are presented for you which will help you apply the CyberGhost SmartDNS via AppleTV 4:Step 1 of 6: From the home screen of your AppleTV 4 – chooseSettingsStep 2 of 6: ChooseNetworkStep 3 of 6: UnderConnectionpick the Wi-Fi that is being used by your AppleTV 4 and select the Wi-FiStep 4 of 6: Opening Wi-Fi menu, scroll down to Configure DNS and pick Manual mode**Manual mode refers to settings that are made manually by yourselfStep 5 of 6: Continue with adding the DNS* within the DNS Address screen and confirm withDone*The DNS provided to you within the Account Dashboard under the My Smart DNS tabStep 6 of 6: Head to System menu within theSettingsof your AppleTV 4 and chooseRestart-------For any additional information or concerns - it is best to approach the Support Department:via e-mail:support@cyberghost.rovia on-line request:https://support.cyberghostvpn.com/hc/en-us/requests/newvia 24/7 Live! Chat Sessions on our website",https://support.cyberghostvpn.com/hc/en-us/articles/360012120419
How to set up ExpressVPN on Kodi for Windows,"Before you start, you will need: An active ExpressVPN subscription Kodi installed on your Windows device https://www.youtube.com/embed/L51PNXfIXAs",https://www.expressvpn.com/support/vpn-setup/watch-kodi-expressvpn-windows/)
Configure My Smart DNS for Nintendo Wii,"Through to theAccount Dashboard-Smart DNSneeds to be enabled.Completing the only requirement as described above, now head over to your Nintendo Wii. The below steps are presented for you which will help you apply the CyberGhost SmartDNS via Nintendo Wii:Step 1 of 10: From the main menu of your Nintendo Wii – choose WiiSettingsStep 2 of 10: PickInternet Options. and pressthe right arrow on your Wii remote and chooseInternetStep 3 of 10: SelectConnection Settingsand pick the Wi-Fi or Wired connection that is used by your WiiStep 4 of 10: Choose Change Settings and pick the Active connection used by your Wii (Wi-Fi or cable)Step 5 of 10: Browse right on your Wii remote fromType of Security* towardsAuto-Obtain IP Address*No changes need to be made at this stage.Step 6 of 10: PressNowhen asked to Auto-Obtain IP address and chooseAdvanced Settings:Primary DNS: Use the DNS provided to you in the Account Dashboard under My SmartDNSSecondary DNS: leave blankStep 7 of 10: PressConfirmStep 8 of 10: ChooseSaveStep 9 of 10: Connection test will run automatically and it's recommended to allow the test to finalizeStep 10 of 10:Restart your Nintendo Wii- DNS settings completed -Note: Upon implementing the DNS and associating the DNS with your IP address - should your IP address change, your IP address needs to be linked(activated) again in the Account Dashboard but the DNS does not need to be changed.-------For any additional information or concerns - it is best to approach the Support Department:via e-mail:support@cyberghost.rovia on-line request:https://support.cyberghostvpn.com/hc/en-us/requests/newvia 24/7 Live! Chat Sessions on our website",https://support.cyberghostvpn.com/hc/en-us/articles/360012127199
Configure My Smart DNS for Nintendo Wii U,"Through to theAccount Dashboard-Smart DNSneeds to be enabled.Completing the only requirement as described above, now head over to your Nintendo Wii U. The below steps are presented for you which will help you apply the CyberGhost SmartDNS via Nintendo Wii U:Step 1 of 12: Press the Home button on your Wii U controllerStep 2 of 12: ChooseSystem SettingsStep 3 of 12: TapInternetStep 4 of 12: ChooseConnect to the InternetStep 5 of 12: PickConnections- located in the top-right cornerStep 6 of 12: Highlight and tap the Wi-Fi connection used by your Wii U and configure itStep 7 of 12: ChooseChange SettingsStep 8 of 12: Scroll through the Internet-Connection Setup menu (left or right) . Once the DNS menu is reached tap on DNSStep 9 of 12: For the purpose of using the CyberGhost SmartDNS, the following choices are possible:Auto-Obtain: Use this feature if you wish the DNS to be the same one provided to you by your ISPDon't Auto-obtain: you can manually input the CyberGhost DNS shown in the Account DashboardStep 10 of 12: After choosing Don't Auto-Obtain, configure as follows:Primary DNS: Use the CyberGhost Smart DNS presented in the Account DashboardSecondary DNS: leave blankStep 11 of 12: PressConfirmStep 12 of 12: Push the Home button on the Wii U controller to complete the set-up- DNS settings completed -Additional Steps:When asked by the Support Team - the following steps are useful:a. Press the Home button on your Wii U controllerb. Choose System Settingsc. Select Internetd. Connect to the Internete. Tap Connections in the upper right cornerf. Pick the Wi-Fi used by your Wii U to connect to the Internetg. Choose Connection Testh. The test will run automatically and the results will be displayed to you.With the results displayed, return to the Support Team with the results in order to help with any(if any) troubleshooting stepsNote: Upon implementing the DNS and associating the DNS with your IP address - should your IP address change, your IP address needs to be linked(activated) again in the Account Dashboard but the DNS does not need to be changed.-------For any additional information or concerns - it is best to approach the Support Department:via e-mail:support@cyberghost.rovia on-line request:https://support.cyberghostvpn.com/hc/en-us/requests/newvia 24/7 Live! Chat Sessions on our website",https://support.cyberghostvpn.com/hc/en-us/articles/360012029120
Configure My Smart DNS for Roku TV,"Through to theAccount Dashboard-Smart DNSneeds to be enabled.With Roku TV not supporting any DNS changes from the device itself, the best alternative would be to install / configure your Internet access point(usually your router) to make use of the CyberGhost Smart DNS feature. By doing so, the advantage is not only on behalf of the Roku TV device but also across all devices that are used for streaming as they too will be covered by the CyberGhost Smart DNS when the respective devices are connecting to the Internet via the Internet access point where the CyberGhost Smart DNS is configured.Currently, CyberGhost Smart DNS can be configured on a DD-WRT Router(that supports DD-WRT)The following tutorial will be useful for your purpose:https://support.cyberghostvpn.com/hc/en-us/articles/360012029500-Configure-My-Smart-DNS-for-your-DD-WRT-Router-------For any additional information or concerns - it is best to approach the Support Department:via e-mail:support@cyberghost.rovia on-line request:https://support.cyberghostvpn.com/hc/en-us/requests/newvia 24/7 Live! Chat Sessions on our website",https://support.cyberghostvpn.com/hc/en-us/articles/360012029280
Configure My Smart DNS for Samsung SmartTV with Tizen OS,"Through to theAccount Dashboard-Smart DNSneeds to be enabled.Completing the only requirement as described above, head over to your Samsung SmartTV. The below steps are presented for you which will help you apply the CyberGhost Smart DNS via Samsung SmartTV:Step 1 of 6: From the remote control for your Smart TV - press theSettings button*.*the placement of the Settings button may vary from one remote controller to anothera. For some remote controllers, the Settings button is located under the Volume buttonb. For some remote controllers, the Settings button is located in the lower part of the remote controllerAs alternatives, the below buttons are available as a substitute for the Settings button:Home button - Head to the Settings menu in the lower-left cornerSource button - Head to the Settings menu in the lower-left cornerStep 2 of 6: ChooseNetworkfrom the list of choicesStep 3 of 6:Network Statusis the option which must be chosen from the available fields and allow the Connection verification to finalize.Step 4 of 6: PickIP SettingsStep 5 of 6: Within the IP Settings menu, simply choose DNS Setting and enter the DNS manuallyPrimary DNS - Enter the Smart DNS provided in the Account Dashboard under My SmartDNS tabSecondary DNS - leave blankStep 6 of 6: Confirm withOKRestart the Smart TV- Settings completed --------For any additional information or concerns - it is best to approach the Support Department:via e-mail:support@cyberghost.rovia on-line request:https://support.cyberghostvpn.com/hc/en-us/requests/newvia 24/7 Live! Chat Sessions on our website",https://support.cyberghostvpn.com/hc/en-us/articles/360012126339
Configure My Smart DNS for your DD-WRT Router,"Through to theAccount Dashboard-Smart DNSneeds to be enabled.Completing the only requirement as described above, now head over to your compatible DD-WRT router. The below steps are presented for you which will help you apply the CyberGhost SmartDNS via DD-WRT router:Step 1 of 6: Log in your router dashboard via your preferred browserStep 2 of 6: ChooseSetupStep 3 of 6: ChooseBasic SetupStep 4 of 6: Under Network Address server Settings (DHCP) fill in the following fields:Static DNS 1: Use the DNS provided to you in the Account Dashboard under My SmartDNSStatic DNS 2: leave blankStatic DNS 3: leave blankStep 5 of 6: EnableUse DNSMasq for DNSStep 6 of 6: ChooseApply Settings.- DNS settings completed -Note: Make sure to reboot the router in order to use the newly implemented DNS settings-------For any additional information or concerns - it is best to approach the Support Department:via e-mail:support@cyberghost.rovia on-line request:https://support.cyberghostvpn.com/hc/en-us/requests/newvia 24/7 Live! Chat Sessions on our website",https://support.cyberghostvpn.com/hc/en-us/articles/360012029500
Question not found,Answer not found,https://support.cyberghostvpn.com/hc/en-us/articles/360013734519-How-can-I-pause-or-reactivate-a-subscription-
How Can I Cancel My Subscription?,"This page will show you how you can cancel your CyberGhost VPN subscription.CyberGhost VPN subscriptions automatically renew at the end of each service period, until you decide to cancel your automatic payments.Note: Canceling your subscription doesn't automatically refund your subscription. Please contact our support team to request a refund.Jump to...Cancel a subscription purchased from www.cyberghostvpn.comCancel a subscription purchased via the Apple App StoreCancel a subscription purchased via the Google Play StoreCancel a subscription purchased from www.cyberghostvpn.comFollow these steps:1. Go to yourCyberGhost accountand select the profile logo in the top-right side.2. SelectSubscriptions.3. SelectCancelSubscription.4. SelectContinue To Cancel.You will see a screen saying “The automatic billing for your CyberGhost VPN subscription has been turned OFF.” This means you have successfully cancelled your CyberGhost VPN subscription, and can keep using it until the end of your paid subscription period.Cancel a subscription purchased via the Apple App StoreFollow these steps:Open the Settings menu on your iPhone or iPad.Tap the name that appears at the top of the Settings menu.Tap oniTunes & App Store.TapApple IDat the very top of the screen.ChooseView Apple ID.Log in with your Apple ID.Scroll down toSubscriptionsand tap on the CyberGhost subscription.TapCancel Subscription.You will receive a pop-up message to confirm that you wish to cancel the subscription.Note: This will only cancel any future charges. To refund an iTunes subscription, please contact the Apple support team.Cancel a subscription purchased via the Google Play StoreFollow these steps:Go to the Google Play Store.Tap on your profile in the upper right corner.TapPayments & subscriptions.TapSubscriptionsand select the CyberGhost VPN subscription.TapCancel Subscription.Follow the on-screen instructions.Note: This will only cancel any future charges. To refund your subscription, please contact our support team.Need assistance? Contact our Customer Support team:via email atsupport@cyberghost.rovia online request athttps://support.cyberghostvpn.com/hc/en-us/requests/newvia 24/7 Live Chat by clicking the Support button below",https://support.cyberghostvpn.com/hc/en-us/articles/360017373799-How-can-I-cancel-or-reactivate-my-recurring-payment-
What’s new in ExpressVPN for Windows?,"Version/Date: 2025 January 24
* We’ve rolled out a couple of minor fixes and code changes. It’s all part of improving your app experience, and nothing you’ll likely notice.
Version/Date: 2025 January 2
* In this release, we upgraded Lightway to use hybrid ML-KEM instead of hybrid Kyber for post-quantum cryptography.
Version/Date: 2024 November 22
* A couple of fixes here and there to ensure everything works as it should.
Version/Date: 2024 November 15
* After the app’s weekly pitstop, it’s running better than ever. Boot it up and check it out for yourself!
Version/Date: 2024 November 4
* Our engineers have weeded out some minor bugs to enrich your VPN experience.
Version/Date: 2024 October 28
* We’ve updated some of our backend systems for improved performance while you use the app.
Version/Date: 2024 October 22
* Just a minor fix here and there to improve your app experience.
Version/Date: 2024 October 16
* The landlord’s ordered a mass eviction of bugs. We’ve squashed several to help make your app run smoother.
Version/Date: 2024 September 16
* Just like your car, a VPN needs a good service now and then. We’ve tuned it up and it’s now running better than ever.
Version/Date: 2024 August 19
* We’ve blown away some dust and cobwebs to keep the app running smoother than ever for you.",https://www.expressvpn.com/fr/support/vpn-setup/release-notes/windows-app/)
What’s new in ExpressVPN for iOS?,"Version/Date: 2025 January 11version 11.188.3
* We’ve rolled up our sleeves to gone on a bug hunt, squishing several in the process.
Version/Date: 2025 January 7version 11.188.1
* Eureka! Our genius engineers, fueled by coffee and frozen bagels, have made the app more efficient than ever.
Version/Date: 2024 December 21version 11.188.0
* In this release, we upgraded Lightway to use ML-KEM instead of Kyber for post-quantum cryptography.
Version/Date: 2024 December 12version 11.185.0
* We’ve done a bit of spring cleaning in the codebase. All’s right in your ExpressVPN garden now.
Version/Date: 2024 December 3version 11.184.0
* Our tech wizards have waved their magic wands! Enjoy enhanced app stability and performance.
Version/Date: 2024 November 16version 11.179.1
* Just a little touch-up here and there. All routine maintenance to keep the app running in tip-top shape for you.
Version/Date: 2024 November 13version 11.179.0
* Ding! You’ve got mail. You’ll get a notification when one of our support agents replies to you via the in-app Live Chat.
Version/Date: 2024 November 5version 11.178.0
* You can now chat directly with our customer support team right in the app. No need to waste time waiting for email replies, just tap the Live Chat icon in the bottom right-hand corner of the app or in the Help tab to get immediate answers and solutions from our world-class team of experts.
Version/Date: 2024 October 27version 11.177.0
* Our engineers have weeded out some minor bugs to enrich your VPN experience.
Version/Date: 2024 October 16version 11.175.0
* We’ve updated some of our backend systems for improved performance while you use the app.",https://www.expressvpn.com/es/support/vpn-setup/release-notes/ios-app/)
Hva er nytt i ExpressVPN for Apple TV,"Version/Date: 20. mars 2024versjon 11.138.0
* Vi har pyntet opp våre interne motorer; appen kjører bedre enn den gjorde.
Version/Date: 26. februar 2024versjon 11.133.0
* Blokker annonser og sporere.
Version/Date: 24. januar 2024versjon 11.128.0
* En helt ny knapp du kan bruke til å registrere deg med en iOS-enhet.
Version/Date: 18. desember 2023versjon 11.126.0
* Send en melding til vårt supportteam, inkludert diagnostisk informasjon, for å løse eventuelle problemer du måtte oppleve.
Version/Date: 4. desember 2023versjon 11.124.0
* Send en melding til vårt supportteam, inkludert diagnostisk informasjon, for å løse eventuelle problemer du måtte oppleve.
Version/Date: 29. november 2023versjon 11.123.0
* VPN for alle enheter",https://www.expressvpn.com/no/support/vpn-setup/release-notes/tvos-app/)
"O que há de novo na extensão de navegador VPN para Chrome, Firefox e Edge?","Version/Date: 10 de maio de 2024versão 6.0.4
* Nesta versão, temos uma correção que veio de um dos nossos usuários talentosos. Eles relataram um problema sobre o nosso código de falsificação de localização e como ele estava interferindo com arquivos SVG. Agora implementamos uma correção baseada no código sugerido pelo usuário, então queremos dar a eles um grande agradecimento por identificar o problema e nos ajudar a resolvê-lo.
Version/Date: 10 de agosto de 2022versão 5.1.2
* Melhoramos as traduções de algumas localizações de VPN.
Version/Date: 12 de novembro de 2021versão 5.1.1
* Adicionamos suporte para o app ExpressVPN Windows v12.
Version/Date: 23 de junho de 2021versão 5.0.2
* Correções de bugs.
Version/Date: 13 de abril de 2021versão 5.0.1
* Correções de bugs.
Version/Date: 18 de janeiro de 2021versão 5.0.0
* Apresentando o novo design do app ExpressVPN.
Version/Date: 23 de dezembro de 2020versão 4.9.6
* Correções de bugs.
Version/Date: 16 de novembro de 2020versão 4.9.5
* Correções de bugs.
Version/Date: 28 de agosto de 2020versão 4.9.4
* Correções de bugs.
Version/Date: 23 de junho de 2020versão 4.9.3
* Correções de bugs.",https://www.expressvpn.com/pt/support/vpn-setup/release-notes/browser-extension/)
What’s new in ExpressVPN for Apple TV,"Version/Date: 2024 March 20version 11.138.0
* We spruced up our internal engines; the app is running better than it was.
Version/Date: 2024 February 26version 11.133.0
* Block ads and trackers.
Version/Date: 2024 January 24version 11.128.0
* A brand-new button you can use to sign up with an iOS device.
Version/Date: 2023 December 18version 11.126.0
* Send a message to our support team, including diagnostic information, to help solve any issues you might be experiencing.
Version/Date: 2023 December 4version 11.124.0
* Send a message to our support team, including diagnostic information, to help solve any issues you might be experiencing.
Version/Date: 2023 November 29version 11.123.0
* What is malware?",https://www.expressvpn.com/support/vpn-setup/release-notes/tvos-app/)
What’s new in ExpressVPN for Windows?,"Version/Date: 2025 January 24
* We’ve rolled out a couple of minor fixes and code changes. It’s all part of improving your app experience, and nothing you’ll likely notice.
Version/Date: 2025 January 2
* In this release, we upgraded Lightway to use hybrid ML-KEM instead of hybrid Kyber for post-quantum cryptography.
Version/Date: 2024 November 22
* A couple of fixes here and there to ensure everything works as it should.
Version/Date: 2024 November 15
* After the app’s weekly pitstop, it’s running better than ever. Boot it up and check it out for yourself!
Version/Date: 2024 November 4
* Our engineers have weeded out some minor bugs to enrich your VPN experience.
Version/Date: 2024 October 28
* We’ve updated some of our backend systems for improved performance while you use the app.
Version/Date: 2024 October 22
* Just a minor fix here and there to improve your app experience.
Version/Date: 2024 October 16
* The landlord’s ordered a mass eviction of bugs. We’ve squashed several to help make your app run smoother.
Version/Date: 2024 September 16
* Just like your car, a VPN needs a good service now and then. We’ve tuned it up and it’s now running better than ever.
Version/Date: 2024 August 19
* We’ve blown away some dust and cobwebs to keep the app running smoother than ever for you.",https://www.expressvpn.com/ru/support/vpn-setup/release-notes/windows-app/)
What’s new in ExpressVPN for iOS?,"Version/Date: 2025 January 11version 11.188.3
* We’ve rolled up our sleeves to gone on a bug hunt, squishing several in the process.
Version/Date: 2025 January 7version 11.188.1
* Eureka! Our genius engineers, fueled by coffee and frozen bagels, have made the app more efficient than ever.
Version/Date: 2024 December 21version 11.188.0
* In this release, we upgraded Lightway to use ML-KEM instead of Kyber for post-quantum cryptography.
Version/Date: 2024 December 12version 11.185.0
* We’ve done a bit of spring cleaning in the codebase. All’s right in your ExpressVPN garden now.
Version/Date: 2024 December 3version 11.184.0
* Our tech wizards have waved their magic wands! Enjoy enhanced app stability and performance.
Version/Date: 2024 November 16version 11.179.1
* Just a little touch-up here and there. All routine maintenance to keep the app running in tip-top shape for you.
Version/Date: 2024 November 13version 11.179.0
* Ding! You’ve got mail. You’ll get a notification when one of our support agents replies to you via the in-app Live Chat.
Version/Date: 2024 November 5version 11.178.0
* You can now chat directly with our customer support team right in the app. No need to waste time waiting for email replies, just tap the Live Chat icon in the bottom right-hand corner of the app or in the Help tab to get immediate answers and solutions from our world-class team of experts.
Version/Date: 2024 October 27version 11.177.0
* Our engineers have weeded out some minor bugs to enrich your VPN experience.
Version/Date: 2024 October 16version 11.175.0
* We’ve updated some of our backend systems for improved performance while you use the app.",https://www.expressvpn.com/de/support/vpn-setup/release-notes/ios-app/)
Apple TV용 ExpressVPN의 새로운 기능,"Version/Date: 2024년 3월 20일버전 11.138.0
* 내부 엔진을 개선하여 앱 성능을 향상시켰습니다.
Version/Date: 2024년 2월 26일버전 11.133.0
* 광고 및 추적기를 차단하세요.
Version/Date: 2024년 1월 24일버전 11.128.0
* iOS 기기로 가입할 수 있는 새로운 버튼입니다.
Version/Date: 2023년 12월 18일버전 11.126.0
* 진단 정보를 포함하여 지원팀에 메시지를 보내 문제를 해결하세요.
Version/Date: 2023년 12월 4일버전 11.124.0
* 진단 정보를 포함하여 지원팀에 메시지를 보내 문제를 해결하세요.
Version/Date: 2023년 11월 29일버전 11.123.0
* 모든 기기를 위한 VPN",https://www.expressvpn.com/kr/support/vpn-setup/release-notes/tvos-app/)
O que há de novo na extensão de navegador ExpressVPN Keys?,"Version/Date: 27 de setembro de 2023versão 2.0.2
* Corrigimos um problema onde a posição de rolagem na lista de logins era perdida quando a sincronização ocorria.
Version/Date: 22 de setembro de 2023versão 2.0.1
* Corrigimos um problema onde, em fluxos de login com múltiplas etapas, o ExpressVPN Keys mostrava um diálogo de salvamento automático inesperadamente.
Version/Date: 21 de setembro de 2023versão 2.0.0
* Adicionar, editar, visualizar e buscar por notas seguras.
Version/Date: 20 de abril de 2023versão 1.0.16
* Melhoramos a confiabilidade da importação de cartões de crédito e notas de outros gerenciadores de senhas.
Version/Date: 30 de março de 2023versão 1.0.14
* Melhoramos a confiabilidade ao importar logins do 1Password.
Version/Date: 22 de março de 2023versão 1.0.13
* Corrigimos alguns erros gráficos nas telas do gerador de senhas e de visualização.
Version/Date: 16 de março de 2023versão 1.0.12
* Agora você tem mais caracteres para brincar! Aumentamos os limites de caracteres para títulos e nomes de usuário.
Version/Date: 13 de março de 2023versão 1.0.11
* Adicionamos alguns ícones que estavam faltando de outros gerenciadores de senhas, cujos armazenamentos de senhas podem ser importados para o ExpressVPN Keys.
Version/Date: 9 de março de 2023versão 1.0.10
* Visualizar suas notas seguras salvas.
Version/Date: 17 de fevereiro de 2023versão 1.0.7
* Corrigimos um bug que ocasionalmente impedia você de importar logins do Microsoft Edge com sucesso.",https://www.expressvpn.com/pt/support/vpn-setup/release-notes/keys-browser-extension/)
"Chrome, Firefox 및 Edge를 위한 VPN 브라우저 확장 프로그램의 새로운 기능은 무엇입니까?","Version/Date: 2024년 5월 10일버전 6.0.4
* 이번 릴리스에서는 재능 있는 사용자 중 한 명이 제보한 문제를 수정했습니다. 사용자는 지오 스푸핑 코드가 SVG 파일에 간섭하고 있는 문제를 보고했습니다. 사용자가 제안한 코드를 바탕으로 수정을 수행하였으며, 문제를 찾아내고 해결하는 데 도움을 주신 사용자에게 감사드립니다.
Version/Date: 2022년 8월 10일버전 5.1.2
* 일부 VPN 위치의 번역을 개선했습니다.
Version/Date: 2021년 11월 12일버전 5.1.1
* ExpressVPN Windows 앱 v12 지원 추가했습니다.
Version/Date: 2021년 6월 23일버전 5.0.2
* 버그 수정.
Version/Date: 2021년 4월 13일버전 5.0.1
* 버그 수정.
Version/Date: 2021년 1월 18일버전 5.0.0
* ExpressVPN의 새로운 앱 디자인 소개.
Version/Date: 2020년 12월 23일버전 4.9.6
* 버그 수정.
Version/Date: 2020년 11월 16일버전 4.9.5
* 버그 수정.
Version/Date: 2020년 8월 28일버전 4.9.4
* 버그 수정.
Version/Date: 2020년 6월 23일버전 4.9.3
* 버그 수정.",https://www.expressvpn.com/kr/support/vpn-setup/release-notes/browser-extension/)
How to use MediaStreamer on your Nintendo Switch,"MediaStreamer is a DNS service designed to improve your streaming experience. If your device doesn’t natively support VPN, MediaStreamer is a great alternative for streaming. https://www.youtube.com/embed/TFqTP15WRpA?rel=0",https://www.expressvpn.com/support/vpn-setup/nintendo-switch-mediastreamer/)
How to use MediaStreamer on your PlayStation 4 and PlayStation 3,"MediaStreamer is a DNS service designed to improve your streaming experience. If your device does not natively support VPN, MediaStreamer is a great alternative for streaming. https://www.youtube.com/embed/NvuzRZodlRE",https://www.expressvpn.com/support/vpn-setup/stream-to-ps4-with-dns/)
Mitä uutta ExpressVPN Keysin selainlaajennuksessa on?,"Version/Date: 27. syyskuuta 2023versio 2.0.2
* Korjattu ongelma, jossa kirjautumistietojen luettelon vierityspaikka katosi synkronoinnin yhteydessä.
Version/Date: 22. syyskuuta 2023versio 2.0.1
* Korjasimme ongelman, jossa ExpressVPN Keys näytti automaattitallennusdialogin odottamatta monivaiheisissa kirjautumisprosesseissa.
Version/Date: 21. syyskuuta 2023versio 2.0.0
* Lisätä, muokata, tarkastella ja hakea suojattuja muistiinpanoja.
Version/Date: 20. huhtikuuta 2023versio 1.0.16
* Olemme parantaneet luottokorttien ja muistiinpanojen tuonnin luotettavuutta muista salasanojen hallinnoijista.
Version/Date: 30. maaliskuuta 2023versio 1.0.14
* Olemme parantaneet luotettavuutta kirjautumistietojen tuonnissa 1Passwordista.
Version/Date: 22. maaliskuuta 2023versio 1.0.13
* Olemme korjanneet joitakin graafisia virheitä salasanageneraattorissa ja näyttöruuduissa.
Version/Date: 16. maaliskuuta 2023versio 1.0.12
* Nyt käytössäsi on enemmän merkkejä! Olemme kasvattaneet kenttien rajoja otsikoille ja käyttäjätunnuksille.
Version/Date: 13. maaliskuuta 2023versio 1.0.11
* Lisätty joitakin puuttuvia kuvakkeita muista salasanojen hallinnoijista, joiden salasanat voidaan tuoda ExpressVPN Keysiin.
Version/Date: 9. maaliskuuta 2023versio 1.0.10
* Tarkastella tallennettuja suojattuja muistiinpanoja.
Version/Date: 17. helmikuuta 2023versio 1.0.7
* Olemme korjanneet bugina, joka ajoittain esti kirjautumistietojen onnistuneen tuomisen Microsoft Edgestä.",https://www.expressvpn.com/fi/support/vpn-setup/release-notes/keys-browser-extension/)
Co nowego w rozszerzeniu przeglądarki ExpressVPN Keys?,"Version/Date: 27 września 2023wersja 2.0.2
* Naprawiono problem, gdzie pozycja przewijania na liście loginów była gubiona podczas synchronizacji.
Version/Date: 22 września 2023wersja 2.0.1
* Naprawiliśmy problem, gdzie w wieloetapowym procesie logowania, ExpressVPN Keys niespodziewanie wyświetlał okno dialogowe automatycznego zapisu.
Version/Date: 21 września 2023wersja 2.0.0
* Dodawać, edytować, przeglądać i wyszukiwać bezpieczne notatki.
Version/Date: 20 kwietnia 2023wersja 1.0.16
* Poprawiono niezawodność importu kart kredytowych i notatek z innych menedżerów haseł.
Version/Date: 30 marca 2023wersja 1.0.14
* Poprawiono niezawodność podczas importu loginów z 1Password.
Version/Date: 22 marca 2023wersja 1.0.13
* Naprawiliśmy kilka błędów graficznych w generatorze haseł i ekranach widoku.
Version/Date: 16 marca 2023wersja 1.0.12
* Teraz masz do dyspozycji więcej znaków! Zwiększyliśmy limity pól dla tytułów i nazw użytkownika.
Version/Date: 13 marca 2023wersja 1.0.11
* Dodano brakujące ikony innych menedżerów haseł, z których można importować hasła do ExpressVPN Keys.
Version/Date: 9 marca 2023wersja 1.0.10
* Wyświetlać zapisane bezpieczne notatki.
Version/Date: 17 lutego 2023wersja 1.0.7
* Naprawiliśmy błąd, który czasami uniemożliwiał pomyślny import loginów z Microsoft Edge.",https://www.expressvpn.com/pl/support/vpn-setup/release-notes/keys-browser-extension/)
What’s new in ExpressVPN for iOS?,"Version/Date: 2025 January 11version 11.188.3
* We’ve rolled up our sleeves to gone on a bug hunt, squishing several in the process.
Version/Date: 2025 January 7version 11.188.1
* Eureka! Our genius engineers, fueled by coffee and frozen bagels, have made the app more efficient than ever.
Version/Date: 2024 December 21version 11.188.0
* In this release, we upgraded Lightway to use ML-KEM instead of Kyber for post-quantum cryptography.
Version/Date: 2024 December 12version 11.185.0
* We’ve done a bit of spring cleaning in the codebase. All’s right in your ExpressVPN garden now.
Version/Date: 2024 December 3version 11.184.0
* Our tech wizards have waved their magic wands! Enjoy enhanced app stability and performance.
Version/Date: 2024 November 16version 11.179.1
* Just a little touch-up here and there. All routine maintenance to keep the app running in tip-top shape for you.
Version/Date: 2024 November 13version 11.179.0
* Ding! You’ve got mail. You’ll get a notification when one of our support agents replies to you via the in-app Live Chat.
Version/Date: 2024 November 5version 11.178.0
* You can now chat directly with our customer support team right in the app. No need to waste time waiting for email replies, just tap the Live Chat icon in the bottom right-hand corner of the app or in the Help tab to get immediate answers and solutions from our world-class team of experts.
Version/Date: 2024 October 27version 11.177.0
* Our engineers have weeded out some minor bugs to enrich your VPN experience.
Version/Date: 2024 October 16version 11.175.0
* We’ve updated some of our backend systems for improved performance while you use the app.",https://www.expressvpn.com/nl/support/vpn-setup/release-notes/ios-app/)
Wat is er nieuw in ExpressVPN voor Apple TV,"Version/Date: 20 maart 2024versie 11.138.0
* We hebben onze interne motoren opgefrist; de app werkt beter dan voorheen.
Version/Date: 26 februari 2024versie 11.133.0
* Blokkeer advertenties en trackers.
Version/Date: 24 januari 2024versie 11.128.0
* Een gloednieuwe knop waarmee je je kunt aanmelden met een iOS-apparaat.
Version/Date: 18 december 2023versie 11.126.0
* Stuur een bericht naar ons helpdeskteam, inclusief diagnostische informatie, om te helpen eventuele problemen op te lossen die je ervaart.
Version/Date: 4 december 2023versie 11.124.0
* Stuur een bericht naar ons helpdeskteam, inclusief diagnostische informatie, om te helpen eventuele problemen op te lossen die je ervaart.
Version/Date: 29 november 2023versie 11.123.0
* VPN voor alle apparaten",https://www.expressvpn.com/nl/support/vpn-setup/release-notes/tvos-app/)
Co nowego w ExpressVPN dla Linux?,"Version/Date: 6 lutego 2025wersja 3.82.0
* Drobne poprawki, które zapewniają płynne działanie aplikacji.
Version/Date: 24 grudnia 2024wersja 3.81.0
* Wczoraj był dzień spa dla aplikacji — teraz działa lepiej niż kiedykolwiek.
Version/Date: 23 grudnia 2024wersja 3.80.0
* W tej wersji zaktualizowaliśmy Lightway, aby używał hybrydowego ML-KEM zamiast hybrydowego Kyber dla kryptografii post-kwantowej.
Version/Date: 10 grudnia 2024wersja 3.79.0
* Nasi technomagicy machnęli magicznymi różdżkami! Ciesz się lepszą stabilnością i wydajnością aplikacji.
Version/Date: 12 listopada 2024wersja 3.78.0
* Wprowadziliśmy kilka drobnych poprawek, aby utrzymać najwyższą jakość korzystania z aplikacji.
Version/Date: 5 listopada 2024wersja 3.77.0
* Maszynownia była zajęta! Spodziewaj się lepszej wydajności aplikacji.
Version/Date: 19 sierpnia 2024wersja 3.76.0
* Usunęliśmy kilka zagnieceń, aby upewnić się, że aplikacja działa prawidłowo.
Version/Date: 5 sierpnia 2024wersja 3.75.0
* Wprowadziliśmy kilka drobnych poprawek i zmian w kodzie. To wszystko w celu poprawy Twojego doświadczenia z aplikacją, choć prawdopodobnie tego nie zauważysz.
Version/Date: 23 lipca 2024wersja 3.74.0
* Zacieśniliśmy kilka linii kodu, aby zapewnić, że aplikacja jest w idealnej formie, gdy jej potrzebujesz.
Version/Date: 8 lipca 2024wersja 3.73.0
* Wprowadziliśmy kilka ulepszeń pod maską, aby zapewnić płynniejsze działanie.",https://www.expressvpn.com/pl/support/vpn-setup/release-notes/linux-app/)
How to set up MediaStreamer on your PlayStation 5,"MediaStreamer is a DNS service designed to improve your streaming experience. Since PlayStation 5 does not natively support VPN, you can use MediaStreamer as an alternative for streaming. https://www.youtube.com/embed/yoWKYkKYIvQ",https://www.expressvpn.com/support/vpn-setup/stream-to-ps5-with-dns/)
What’s new in ExpressVPN for Windows?,"Version/Date: 2025 January 24
* We’ve rolled out a couple of minor fixes and code changes. It’s all part of improving your app experience, and nothing you’ll likely notice.
Version/Date: 2025 January 2
* In this release, we upgraded Lightway to use hybrid ML-KEM instead of hybrid Kyber for post-quantum cryptography.
Version/Date: 2024 November 22
* A couple of fixes here and there to ensure everything works as it should.
Version/Date: 2024 November 15
* After the app’s weekly pitstop, it’s running better than ever. Boot it up and check it out for yourself!
Version/Date: 2024 November 4
* Our engineers have weeded out some minor bugs to enrich your VPN experience.
Version/Date: 2024 October 28
* We’ve updated some of our backend systems for improved performance while you use the app.
Version/Date: 2024 October 22
* Just a minor fix here and there to improve your app experience.
Version/Date: 2024 October 16
* The landlord’s ordered a mass eviction of bugs. We’ve squashed several to help make your app run smoother.
Version/Date: 2024 September 16
* Just like your car, a VPN needs a good service now and then. We’ve tuned it up and it’s now running better than ever.
Version/Date: 2024 August 19
* We’ve blown away some dust and cobwebs to keep the app running smoother than ever for you.",https://www.expressvpn.com/es/support/vpn-setup/release-notes/windows-app/)
Chrome、Firefox、およびEdge用のVPNブラウザ拡張機能の新機能は何ですか?,"Version/Date: 2024年5月10日バージョン6.0.4
* このリリースでは、有能なユーザーの一人から寄せられた問題の修正が含まれています。彼らは私たちに、ジオスプーフィングコードがSVGファイルに干渉しているという問題を報告しました。 ユーザーの提案したコードを基に修正を実装しましたので、問題を見つけて解決に協力してくれたことに感謝したいと思います。
Version/Date: 2022年8月10日バージョン5.1.2
* いくつかのVPNロケーションの翻訳を改善しました。
Version/Date: 2021年11月12日バージョン5.1.1
* ExpressVPN Windowsアプリv12のサポートを追加しました。
Version/Date: 2021年6月23日バージョン5.0.2
* バグ修正。
Version/Date: 2021年4月13日バージョン5.0.1
* バグ修正。
Version/Date: 2021年1月18日バージョン5.0.0
* ExpressVPNの新しいアプリデザインの紹介。
Version/Date: 2020年12月23日バージョン4.9.6
* バグ修正。
Version/Date: 2020年11月16日バージョン4.9.5
* バグ修正。
Version/Date: 2020年8月28日バージョン4.9.4
* バグ修正。
Version/Date: 2020年6月23日バージョン4.9.3
* バグ修正。",https://www.expressvpn.com/jp/support/vpn-setup/release-notes/browser-extension/)
Co nowego w ExpressVPN dla Apple TV,"Version/Date: 20 marca 2024wersja 11.138.0
* Podrasowaliśmy nasze wewnętrzne silniki; aplikacja działa lepiej niż dotychczas.
Version/Date: 26 lutego 2024wersja 11.133.0
* Blokowanie reklam i trakerów.
Version/Date: 24 stycznia 2024wersja 11.128.0
* Nowiutki przycisk, który możesz użyć do rejestracji na urządzeniu iOS.
Version/Date: 18 grudnia 2023wersja 11.126.0
* Wyślij wiadomość do naszego zespołu pomocy technicznej, dołączając informacje diagnostyczne, aby pomóc rozwiązać wszelkie problemy, z jakimi możesz się spotkać.
Version/Date: 4 grudnia 2023wersja 11.124.0
* Wyślij wiadomość do naszego zespołu pomocy technicznej, dołączając informacje diagnostyczne, aby pomóc rozwiązać wszelkie problemy, z jakimi możesz się spotkać.
Version/Date: 29 listopada 2023wersja 11.123.0
* VPN na wszystkie urządzenia",https://www.expressvpn.com/pl/support/vpn-setup/release-notes/tvos-app/)
Uutta ExpressVPN:ssä Apple TV:lle,"Version/Date: 2024 Maaliskuun 20versio 11.138.0
* Olemme parannelleet sisäisiä moottoreitamme; sovellus toimii nyt paremmin kuin ennen.
Version/Date: 2024 Helmikuun 26versio 11.133.0
* Estä mainokset ja seuranta.
Version/Date: 24. tammikuuta 2024versio 11.128.0
* Uusi painike, jolla voit kirjautua sisään iOS-laitteella.
Version/Date: 2023 Joulukuun 18versio 11.126.0
* Lähetä viesti tukitiimillemme, mukaan lukien diagnostiikkatiedot, jotta voimme ratkaista mahdolliset ongelmat.
Version/Date: 2023 Joulukuun 4versio 11.124.0
* Lähetä viesti tukitiimillemme, mukaan lukien diagnostiikkatiedot, jotta voimme ratkaista mahdolliset ongelmat.
Version/Date: 2023 Marraskuun 29versio 11.123.0
* VPN kaikille laitteille",https://www.expressvpn.com/fi/support/vpn-setup/release-notes/tvos-app/)
"What’s new in the VPN browser extension for Chrome, Firefox, and Edge?","Version/Date: 2024 May 10version 6.0.4
* In this release, we have a fix that comes from one of our talented users.They reported an issue to us regarding our geo spoofing code and how it was interfering with SVG files. We have now implemented a fix based on the user’s suggested code, so we want to give them a big thank you for spotting the issue and helping us solve it.
Version/Date: 2022 August 10version 5.1.2
* We improved the translations of some VPN locations.
Version/Date: 2021 November 12version 5.1.1
* Added support for ExpressVPN Windows app v12.
Version/Date: 2021 June 23version 5.0.2
* Bug fixes.
Version/Date: 2021 April 13version 5.0.1
* Bug fixes.
Version/Date: 2021 January 18version 5.0.0
* Introducing ExpressVPN’s new app design.
Version/Date: 2020 December 23version 4.9.6
* Bug fixes.
Version/Date: 2020 November 16version 4.9.5
* Bug fixes.
Version/Date: 2020 August 28version 4.9.4
* Bug fixes.
Version/Date: 2020 June 23version 4.9.3
* Bug fixes.",https://www.expressvpn.com/support/vpn-setup/release-notes/browser-extension/).
What’s new in ExpressVPN for Windows?,"Version/Date: 2025 January 24
* We’ve rolled out a couple of minor fixes and code changes. It’s all part of improving your app experience, and nothing you’ll likely notice.
Version/Date: 2025 January 2
* In this release, we upgraded Lightway to use hybrid ML-KEM instead of hybrid Kyber for post-quantum cryptography.
Version/Date: 2024 November 22
* A couple of fixes here and there to ensure everything works as it should.
Version/Date: 2024 November 15
* After the app’s weekly pitstop, it’s running better than ever. Boot it up and check it out for yourself!
Version/Date: 2024 November 4
* Our engineers have weeded out some minor bugs to enrich your VPN experience.
Version/Date: 2024 October 28
* We’ve updated some of our backend systems for improved performance while you use the app.
Version/Date: 2024 October 22
* Just a minor fix here and there to improve your app experience.
Version/Date: 2024 October 16
* The landlord’s ordered a mass eviction of bugs. We’ve squashed several to help make your app run smoother.
Version/Date: 2024 September 16
* Just like your car, a VPN needs a good service now and then. We’ve tuned it up and it’s now running better than ever.
Version/Date: 2024 August 19
* We’ve blown away some dust and cobwebs to keep the app running smoother than ever for you.",https://www.expressvpn.com/fi/support/vpn-setup/release-notes/windows-app/)
How to use MediaStreamer on your Xbox 360,"MediaStreamer is a DNS service designed to improve your streaming experience. If your device does not natively support VPN, MediaStreamer is a great alternative for streaming.",https://www.expressvpn.com/support/vpn-setup/stream-to-xbox-360-with-dns/)
Hva er nytt i ExpressVPN Keys nettleserutvidelse?,"Version/Date: 27. september 2023versjon 2.0.2
* Vi har fikset et problem der rulleposisjonen i listen over innlogginger mistes ved synkronisering.
Version/Date: 22. september 2023versjon 2.0.1
* Vi har fikset et problem der, i flerstegs påloggingsprosesser, ExpressVPN Keys uventet viste en dialogboks for automatisk lagring.
Version/Date: 21. september 2023versjon 2.0.0
* Legge til, redigere, se og søke etter sikre notater.
Version/Date: 20. april 2023versjon 1.0.16
* Vi har forbedret påliteligheten ved import av kredittkort og notater fra andre passordhåndterere.
Version/Date: 30. mars 2023versjon 1.0.14
* Vi har forbedret påliteligheten når du importerer innlogginger fra 1Password.
Version/Date: 22. mars 2023versjon 1.0.13
* Vi har fikset noen grafiske feil på passordgeneratoren og visningsskjermene.
Version/Date: 16. mars 2023versjon 1.0.12
* Du har nå flere tegn å leke med! Vi har økt feltbegrensningene for titler og brukernavn.
Version/Date: 13. mars 2023versjon 1.0.11
* Vi la til noen manglende ikoner av andre passordhåndterere, hvis passordlagre kan importeres til ExpressVPN Keys.
Version/Date: 9. mars 2023versjon 1.0.10
* Se dine lagrede sikre notater.
Version/Date: 17. februar 2023versjon 1.0.7
* Vi har fikset en feil som av og til forhindret deg fra å importere innlogginger fra Microsoft Edge.",https://www.expressvpn.com/no/support/vpn-setup/release-notes/keys-browser-extension/)
Was gibt’s Neues bei ExpressVPN für Android?,"Version/Date: 25. Februar 2025Version 11.89.0
* Reduzierung der App-Größe. Unsere Ingenieure haben die App optimiert, sodass Sie sie schneller als je zuvor herunterladen können.
Version/Date: 9. Februar 2025Version 11.88.0
* Genau wie Ihr Auto braucht auch ein VPN hin und wieder eine Wartung. Wir haben es optimiert, und es läuft jetzt besser als je zuvor.
Version/Date: 6. Februar 2025Version 11.87.0
* Wir haben ein paar Staub- und Spinnweben entfernt, damit die App noch reibungsloser läuft.
Version/Date: 1. Februar 2025Version 11.86.0
* Nur ein paar kleine Fehlerbehebungen hier und da.
Version/Date: 31. Januar 2025Version 11.85.0
* Unsere Ingenieure haben sich mit Fehlerbehebungen und Leistungsverbesserungen beschäftigt, um Ihnen eine noch flüssigere VPN-Erfahrung zu bieten.
Version/Date: 21. Januar 2025Version 11.84.0
* Ihre Sicherheit hat oberste Priorität – deshalb haben wir unsere Verschlüsselungsprotokolle und unseren Code verstärkt. Genießen Sie die zusätzliche Sicherheit.
Version/Date: 16. Januar 2025Version 11.83.0
* Eureka! Unsere brillanten Ingenieure, angetrieben von Kaffee und tiefgekühlten Bagels, haben die App effizienter gemacht als je zuvor.
Version/Date: 9. Januar 2025Version 11.82.0
* Wir haben die Segel nachjustiert und sichergestellt, dass die App reibungslos läuft.
Version/Date: 20. Dezember 2024Version 11.81.0
* In diesem Update haben wir Lightway auf ML-KEM statt Kyber für die Post-Quanten-Kryptografie umgestellt.
Version/Date: 11. Dezember 2024Version 11.80.0
* Fällt Ihnen etwas Neues auf? Sagen Sie Hallo zum Upgrades-Tab! Hier finden Sie Funktionen wie Dedicated IP, Advanced Protection und Keys.",https://www.expressvpn.com/de/support/vpn-setup/release-notes/android-app/)
O que há de novo no ExpressVPN para Android?,"Version/Date: 25 de fevereiro de 2025versão 11.89.0
* Redução no tamanho do aplicativo. Nossos engenheiros trabalharam duro para otimizar o app, permitindo um download mais rápido do que nunca.
Version/Date: 9 de fevereiro de 2025versão 11.88.0
* Assim como seu carro, uma VPN precisa de uma boa manutenção de vez em quando. Fizemos alguns ajustes e agora está rodando melhor do que nunca.
Version/Date: 6 de fevereiro de 2025versão 11.87.0
* Eliminamos algumas poeiras e teias de aranha para manter o aplicativo funcionando perfeitamente para você.
Version/Date: 1 de fevereiro de 2025versão 11.86.0
* Apenas algumas pequenas correções de bugs aqui e ali.
Version/Date: 31 de janeiro de 2025versão 11.85.0
* Nossos engenheiros fizeram alguns ajustes e melhorias de desempenho para proporcionar uma experiência de VPN mais fluida.
Version/Date: 21 de janeiro de 2025versão 11.84.0
* Sua segurança é nossa prioridade — por isso, fortalecemos nossos protocolos de criptografia e código. Aproveite a proteção extra.
Version/Date: 16 de janeiro de 2025versão 11.83.0
* Eureka! Nossos engenheiros geniais, movidos a café e bagels congelados, tornaram o aplicativo mais eficiente do que nunca.
Version/Date: 9 de janeiro de 2025versão 11.82.0
* Apenas ajustando as velas para garantir que o aplicativo continue rodando sem problemas.
Version/Date: 20 de dezembro de 2024versão 11.81.0
* Nesta versão, atualizamos o Lightway para usar ML-KEM em vez de Kyber para criptografia pós-quântica.
Version/Date: 11 de dezembro de 2024versão 11.80.0
* Percebeu algo novo? Apresentamos a aba Upgrades! É onde você encontrará recursos como IP Dedicado, Proteção Avançada e Keys.",https://www.expressvpn.com/pt/support/vpn-setup/release-notes/android-app/)
What’s new in ExpressVPN for iOS?,"Version/Date: 2025 January 11version 11.188.3
* We’ve rolled up our sleeves to gone on a bug hunt, squishing several in the process.
Version/Date: 2025 January 7version 11.188.1
* Eureka! Our genius engineers, fueled by coffee and frozen bagels, have made the app more efficient than ever.
Version/Date: 2024 December 21version 11.188.0
* In this release, we upgraded Lightway to use ML-KEM instead of Kyber for post-quantum cryptography.
Version/Date: 2024 December 12version 11.185.0
* We’ve done a bit of spring cleaning in the codebase. All’s right in your ExpressVPN garden now.
Version/Date: 2024 December 3version 11.184.0
* Our tech wizards have waved their magic wands! Enjoy enhanced app stability and performance.
Version/Date: 2024 November 16version 11.179.1
* Just a little touch-up here and there. All routine maintenance to keep the app running in tip-top shape for you.
Version/Date: 2024 November 13version 11.179.0
* Ding! You’ve got mail. You’ll get a notification when one of our support agents replies to you via the in-app Live Chat.
Version/Date: 2024 November 5version 11.178.0
* You can now chat directly with our customer support team right in the app. No need to waste time waiting for email replies, just tap the Live Chat icon in the bottom right-hand corner of the app or in the Help tab to get immediate answers and solutions from our world-class team of experts.
Version/Date: 2024 October 27version 11.177.0
* Our engineers have weeded out some minor bugs to enrich your VPN experience.
Version/Date: 2024 October 16version 11.175.0
* We’ve updated some of our backend systems for improved performance while you use the app.",https://www.expressvpn.com/support/vpn-setup/release-notes/ios-app/)
How to use MediaStreamer on your Xbox Series X or Xbox One,"MediaStreamer is a DNS service designed to improve your streaming experience. Since Xbox does not natively support VPN, you can use MediaStreamer as an alternative for streaming. https://www.youtube.com/embed/XXp_3THUDFY?rel=0",https://www.expressvpn.com/support/vpn-setup/stream-to-xbox-one-with-dns/)
How to set up ExpressVPN Aircove or Aircove Go,This tutorial will show youhow to set up your ExpressVPN Aircove or Aircove Go. The setup for both Aircove routers is similar. https://www.youtube.com/embed/-ZRFVzNKwGc,https://www.expressvpn.com/support/vpn-setup/how-to-set-up-expressvpn-aircove/)
Linux için ExpressVPN’de Yenilikler neler?,"Version/Date: 2025 Şubat 6versiyon 3.82.0
* Yelkenleri ayarlıyoruz ve uygulamanın sorunsuz çalıştığından emin oluyoruz.
Version/Date: 2024 Aralık 24versiyon 3.81.0
* Dün uygulama için bir spa günüydü—şimdi her zamankinden daha iyi çalışıyor.
Version/Date: 2024 Aralık 23versiyon 3.80.0
* Bu sürümde, kuantum sonrası kriptografi için hibrit Kyber yerine hibrit ML-KEM kullanan Lightway’i yükselttik.
Version/Date: 2024 Aralık 10versiyon 3.79.0
* Teknoloji büyücülerimiz sihirli değneklerini salladı! Artık daha gelişmiş bir uygulama kararlılığı ve performansı deneyimi.
Version/Date: 12 Kasım 2024versiyon 3.78.0
* Uygulama deneyiminizi en üst seviyede tutmak için bazı ufak ayarlamalar ve düzeltmeler yaptık.
Version/Date: 5 Kasım 2024versiyon 3.77.0
* Makine dairesi meşgul! Uygulamadan daha iyi bir performans bekleyin.
Version/Date: 2024 Ağustos 19versiyon 3.76.0
* Uygulamanın gerektiği gibi çalışmasını sağlamak için birkaç kırışıklığı düzledik.
Version/Date: 2024 Ağustos 5versiyon 3.75.0
* Birkaç küçük düzeltme ve kod değişikliği yaptık. Bunların hepsi uygulama deneyiminizi geliştirmek için yapıldı, ancak fark etmeyebilirsiniz.
Version/Date: 2024 Temmuz 23versiyon 3.74.0
* Uygulamanın en iyi şekilde çalışması için birkaç kod satırını sıkılaştırdık.
Version/Date: 2024 Temmuz 8versiyon 3.73.0
* Size daha sorunsuz bir deneyim sağlamak için gizli değişiklikler yaptık.",https://www.expressvpn.com/tr/support/vpn-setup/release-notes/linux-app/)
"Was ist neu in der VPN-Browsererweiterung für Chrome, Firefox und Edge?","Version/Date: 10. Mai 2024Version 6.0.4
* In dieser Version haben wir einen Fix, der von einem unserer talentierten Nutzer stammt. Sie haben uns ein Problem mit unserem Geo-Spoofing-Code gemeldet, das mit SVG-Dateien interferierte. Wir haben nun einen Fix auf Basis des vom Nutzer vorgeschlagenen Codes implementiert und möchten uns bei ihm herzlich bedanken, dass er das Problem erkannt und uns bei der Lösung geholfen hat.
Version/Date: 10. August 2022Version 5.1.2
* Wir haben die Übersetzungen einiger VPN-Standorte verbessert.
Version/Date: 12. November 2021Version 5.1.1
* Support für ExpressVPN Windows-App v12 hinzugefügt.
Version/Date: 23. Juni 2021Version 5.0.2
* Fehlerbehebungen.
Version/Date: 13. April 2021Version 5.0.1
* Fehlerbehebungen.
Version/Date: 18. Januar 2021Version 5.0.0
* Wir präsentieren das neue App-Design von ExpressVPN.
Version/Date: 23. Dezember 2020Version 4.9.6
* Fehlerbehebungen.
Version/Date: 16. November 2020Version 4.9.5
* Fehlerbehebungen.
Version/Date: 28. August 2020Version 4.9.4
* Fehlerbehebungen.
Version/Date: 23. Juni 2020Version 4.9.3
* Fehlerbehebungen.",https://www.expressvpn.com/de/support/vpn-setup/release-notes/browser-extension/)
What’s new in ExpressVPN for Windows?,"Version/Date: 2025 January 24
* We’ve rolled out a couple of minor fixes and code changes. It’s all part of improving your app experience, and nothing you’ll likely notice.
Version/Date: 2025 January 2
* In this release, we upgraded Lightway to use hybrid ML-KEM instead of hybrid Kyber for post-quantum cryptography.
Version/Date: 2024 November 22
* A couple of fixes here and there to ensure everything works as it should.
Version/Date: 2024 November 15
* After the app’s weekly pitstop, it’s running better than ever. Boot it up and check it out for yourself!
Version/Date: 2024 November 4
* Our engineers have weeded out some minor bugs to enrich your VPN experience.
Version/Date: 2024 October 28
* We’ve updated some of our backend systems for improved performance while you use the app.
Version/Date: 2024 October 22
* Just a minor fix here and there to improve your app experience.
Version/Date: 2024 October 16
* The landlord’s ordered a mass eviction of bugs. We’ve squashed several to help make your app run smoother.
Version/Date: 2024 September 16
* Just like your car, a VPN needs a good service now and then. We’ve tuned it up and it’s now running better than ever.
Version/Date: 2024 August 19
* We’ve blown away some dust and cobwebs to keep the app running smoother than ever for you.",https://www.expressvpn.com/jp/support/vpn-setup/release-notes/windows-app/)
"Hva er nytt i VPN nettleserutvidelsen for Chrome, Firefox og Edge?","Version/Date: 2024 May 10versjon 6.0.4
* I denne utgivelsen har vi en løsning som kommer fra en av våre talentfulle brukere. De rapporterte et problem til oss angående vår geo-spoofing-kode og hvordan den påvirket SVG-filer. Vi har nå implementert en løsning basert på brukerens foreslåtte kode, så vi vil gi dem en stor takk for å ha oppdaget problemet og bidratt til å løse det.
Version/Date: 10. august 2022versjon 5.1.2
* Vi forbedret oversettelsene av noen VPN-lokasjoner.
Version/Date: 12. november 2021versjon 5.1.1
* Lagt til støtte for ExpressVPN Windows-app v12.
Version/Date: 23. juni 2021versjon 5.0.2
* Feilrettinger.
Version/Date: 13. april 2021versjon 5.0.1
* Feilrettinger.
Version/Date: 18. januar 2021versjon 5.0.0
* Introduserer ExpressVPNs nye app-design.
Version/Date: 23. desember 2020versjon 4.9.6
* Feilrettinger.
Version/Date: 16. november 2020versjon 4.9.5
* Feilrettinger.
Version/Date: 28. august 2020versjon 4.9.4
* Feilrettinger.
Version/Date: 23. juni 2020versjon 4.9.3
* Feilrettinger.",https://www.expressvpn.com/no/support/vpn-setup/release-notes/browser-extension/)
Vad är nytt i ExpressVPN för Android?,"Version/Date: 25 februari 2025version 11.89.0
* Minskad appstorlek. Våra ingenjörer har optimerat appen så att du kan ladda ner den snabbare än någonsin.
Version/Date: 9 februari 2025version 11.88.0
* Precis som din bil behöver en VPN regelbundet underhåll. Vi har finjusterat appen så att den nu kör bättre än någonsin.
Version/Date: 6 februari 2025version 11.87.0
* Vi har blåst bort lite damm och spindelväv för att hålla appen smidigare än någonsin för dig.
Version/Date: 1 februari 2025version 11.86.0
* Bara ett par mindre buggfixar här och där.
Version/Date: 31 januari 2025version 11.85.0
* Våra ingenjörer har jobbat med buggfixar och prestandaförbättringar för att ge dig en smidigare VPN-upplevelse.
Version/Date: 21 januari 2025version 11.84.0
* Din säkerhet är vår prioritet – därför har vi stärkt våra krypteringsprotokoll och kod. Njut av den extra säkerheten.
Version/Date: 16 januari 2025version 11.83.0
* Eureka! Våra geniala ingenjörer, drivna av kaffe och frysta bagels, har gjort appen mer effektiv än någonsin.
Version/Date: 9 januari 2025version 11.82.0
* Bara lite finjusteringar för att se till att appen rullar på smidigt.
Version/Date: 20 december 2024version 11.81.0
* I denna version har vi uppgraderat Lightway till att använda ML-KEM istället för Kyber för post-kvantkryptografi.
Version/Date: 11 december 2024version 11.80.0
* Ser du något nytt? Säg hej till fliken Uppgraderingar! Här hittar du funktioner som Dedikerad IP, Avancerat skydd och Keys.",https://www.expressvpn.com/se/support/vpn-setup/release-notes/android-app/)
How to set up ExpressVPN on Asus routers,ExpressVPN is supported on the following Asus router models: RT-AC68U (up to v3) RT-AC87U RT-AC56R RT-AC56S RT-AC56U https://www.youtube.com/embed/HpebihXQy38,https://www.expressvpn.com/support/vpn-setup/app-for-routers-asus/)
How to set up ExpressVPN on your DD-WRT router (OpenVPN),This tutorial will show youhow to set up ExpressVPN on your DD-WRT router using theOpenVPN protocol. https://www.youtube.com/embed/1gBUpl_UdmA?rel=0,https://www.expressvpn.com/support/vpn-setup/manual-config-for-dd-wrt-router-with-openvpn/)
What’s new in ExpressVPN for iOS?,"Version/Date: 2025 January 11version 11.188.3
* We’ve rolled up our sleeves to gone on a bug hunt, squishing several in the process.
Version/Date: 2025 January 7version 11.188.1
* Eureka! Our genius engineers, fueled by coffee and frozen bagels, have made the app more efficient than ever.
Version/Date: 2024 December 21version 11.188.0
* In this release, we upgraded Lightway to use ML-KEM instead of Kyber for post-quantum cryptography.
Version/Date: 2024 December 12version 11.185.0
* We’ve done a bit of spring cleaning in the codebase. All’s right in your ExpressVPN garden now.
Version/Date: 2024 December 3version 11.184.0
* Our tech wizards have waved their magic wands! Enjoy enhanced app stability and performance.
Version/Date: 2024 November 16version 11.179.1
* Just a little touch-up here and there. All routine maintenance to keep the app running in tip-top shape for you.
Version/Date: 2024 November 13version 11.179.0
* Ding! You’ve got mail. You’ll get a notification when one of our support agents replies to you via the in-app Live Chat.
Version/Date: 2024 November 5version 11.178.0
* You can now chat directly with our customer support team right in the app. No need to waste time waiting for email replies, just tap the Live Chat icon in the bottom right-hand corner of the app or in the Help tab to get immediate answers and solutions from our world-class team of experts.
Version/Date: 2024 October 27version 11.177.0
* Our engineers have weeded out some minor bugs to enrich your VPN experience.
Version/Date: 2024 October 16version 11.175.0
* We’ve updated some of our backend systems for improved performance while you use the app.",https://www.expressvpn.com/it/support/vpn-setup/release-notes/ios-app/)
มีอะไรใหม่ใน ExpressVPN สำหรับ Android?,"Version/Date: 25 กุมภาพันธ์ 2025เวอร์ชัน 11.89.0
* ลดขนาดของแอป วิศวกรของเราทำงานอย่างหนักเพื่อเพิ่มประสิทธิภาพ ทำให้คุณดาวน์โหลดแอปได้เร็วขึ้นกว่าเดิม
Version/Date: 9 กุมภาพันธ์ 2025เวอร์ชัน 11.88.0
* เหมือนกับรถของคุณ VPN ก็ต้องการการบำรุงรักษาเป็นครั้งคราว เราได้ปรับแต่งให้ทำงานได้ดีขึ้นกว่าเดิม
Version/Date: 6 กุมภาพันธ์ 2025เวอร์ชัน 11.87.0
* เราได้กำจัดฝุ่นและใยแมงมุมออกไป เพื่อให้แอปของคุณทำงานได้อย่างราบรื่น
Version/Date: 1 กุมภาพันธ์ 2025เวอร์ชัน 11.86.0
* มีการแก้ไขข้อบกพร่องเล็กน้อยบางส่วน
Version/Date: 31 มกราคม 2025เวอร์ชัน 11.85.0
* ทีมวิศวกรของเราทำงานปรับปรุงและแก้ไขข้อบกพร่อง เพื่อให้คุณได้รับประสบการณ์ VPN ที่ราบรื่นยิ่งขึ้น
Version/Date: 21 มกราคม 2025เวอร์ชัน 11.84.0
* ความปลอดภัยของคุณคือสิ่งสำคัญ เราได้เสริมความแข็งแกร่งให้กับโปรโตคอลการเข้ารหัสและโค้ดของเราเพื่อความปลอดภัยที่เพิ่มขึ้น
Version/Date: 16 มกราคม 2025เวอร์ชัน 11.83.0
* ยูเรก้า! วิศวกรอัจฉริยะของเรา (พร้อมกาแฟและเบเกิลแช่แข็ง) ได้ทำให้แอปมีประสิทธิภาพยิ่งขึ้น
Version/Date: 9 มกราคม 2025เวอร์ชัน 11.82.0
* ปรับแต่งเล็กน้อยเพื่อให้แน่ใจว่าแอปทำงานได้อย่างราบรื่น
Version/Date: 20 ธันวาคม 2024เวอร์ชัน 11.81.0
* ในเวอร์ชันนี้ เราได้อัปเกรด Lightway ให้ใช้ ML-KEM แทน Kyber สำหรับการเข้ารหัสโพสต์ควอนตัม
Version/Date: 11 ธันวาคม 2024เวอร์ชัน 11.80.0
* สังเกตเห็นอะไรใหม่ไหม? ขอแนะนำแท็บ Upgrades! ที่นี่คุณจะพบฟีเจอร์ เช่น Dedicated IP, Advanced Protection และ Keys",https://www.expressvpn.com/th/support/vpn-setup/release-notes/android-app/)
What’s new in ExpressVPN for Linux?,"Version/Date: 2025 March 4version 4.0.1
* Fixed an issue that was preventing the app to connect to another server while connected.
Version/Date: 2025 February 21version 4.0.0
* Graphical User Interface (GUI)
Version/Date: 2025 February 6version 3.82.0
* Just adjusting the sails and making sure the app runs smoothly.
Version/Date: 2024 December 24version 3.81.0
* Yesterday was a spa day for the app—it’s now running better than ever.
Version/Date: 2024 December 23version 3.80.0
* In this release, we upgraded Lightway to use hybrid ML-KEM instead of hybrid Kyber for post-quantum cryptography.
Version/Date: 2024 December 10version 3.79.0
* Our tech wizards have waved their magic wands! Enjoy enhanced app stability and performance.
Version/Date: 2024 November 12version 3.78.0
* We made some small tweaks and fixes to keep your app experience top-notch.
Version/Date: 2024 November 5version 3.77.0
* The engine room’s been busy! Expect better performance from the app.
Version/Date: 2024 August 19version 3.76.0
* We’ve ironed out a few wrinkles to ensure the app runs as it should.
Version/Date: 2024 August 5version 3.75.0
* We’ve rolled out a couple of minor fixes and code changes. It’s all part of improving your app experience, and nothing you’ll likely notice.",https://www.expressvpn.com/nl/support/vpn-setup/release-notes/linux-app/)
What’s new in ExpressVPN for Linux?,"Version/Date: 2025 March 4version 4.0.1
* Fixed an issue that was preventing the app to connect to another server while connected.
Version/Date: 2025 February 21version 4.0.0
* Graphical User Interface (GUI)
Version/Date: 2025 February 6version 3.82.0
* Just adjusting the sails and making sure the app runs smoothly.
Version/Date: 2024 December 24version 3.81.0
* Yesterday was a spa day for the app—it’s now running better than ever.
Version/Date: 2024 December 23version 3.80.0
* In this release, we upgraded Lightway to use hybrid ML-KEM instead of hybrid Kyber for post-quantum cryptography.
Version/Date: 2024 December 10version 3.79.0
* Our tech wizards have waved their magic wands! Enjoy enhanced app stability and performance.
Version/Date: 2024 November 12version 3.78.0
* We made some small tweaks and fixes to keep your app experience top-notch.
Version/Date: 2024 November 5version 3.77.0
* The engine room’s been busy! Expect better performance from the app.
Version/Date: 2024 August 19version 3.76.0
* We’ve ironed out a few wrinkles to ensure the app runs as it should.
Version/Date: 2024 August 5version 3.75.0
* We’ve rolled out a couple of minor fixes and code changes. It’s all part of improving your app experience, and nothing you’ll likely notice.",https://www.expressvpn.com/support/vpn-setup/release-notes/linux-app/)
ExpressVPN Android için Yenilikler Neler?,"Version/Date: 25 Şubat 2025sürüm 11.89.0
* Uygulamanın boyutunu küçülttük. Mühendislerimiz uygulamayı optimize etmek için çok çalıştı, böylece artık daha hızlı indirebilirsiniz.
Version/Date: 9 Şubat 2025sürüm 11.88.0
* Arabanız gibi VPN’inizin de zaman zaman bakıma ihtiyacı var. Gerekli ayarlamaları yaptık ve artık her zamankinden daha iyi çalışıyor.
Version/Date: 6 Şubat 2025sürüm 11.87.0
* Biraz toz ve örümcek ağlarını temizledik, böylece uygulamanız eskisinden de sorunsuz çalışacak.
Version/Date: 1 Şubat 2025sürüm 11.86.0
* Birkaç küçük hata düzeltmesi yaptık.
Version/Date: 31 Ocak 2025sürüm 11.85.0
* Mühendislerimiz hata düzeltmeleri ve performans iyileştirmeleri üzerinde çalışarak VPN deneyiminizi daha akıcı hale getirdi.
Version/Date: 21 Ocak 2025sürüm 11.84.0
* Güvenliğiniz bizim önceliğimizdir. Bu nedenle şifreleme protokollerimizi ve kodumuzu güçlendirdik. Artık daha fazla güvenliğin keyfini çıkarabilirsiniz.
Version/Date: 16 Ocak 2025sürüm 11.83.0
* Evraka! Kahve ve donmuş simitlerle çalışan dahiyane mühendislerimiz uygulamayı her zamankinden daha verimli hale getirdi.
Version/Date: 9 Ocak 2025sürüm 11.82.0
* Yelkenleri ayarlıyoruz ve uygulamanın sorunsuz çalıştığından emin oluyoruz.
Version/Date: 20 Aralık 2024sürüm 11.81.0
* Bu sürümde, post-kuantum şifreleme için Lightway’i ML-KEM kullanacak şekilde güncelledik.
Version/Date: 11 Aralık 2024sürüm 11.80.0
* Yeni bir şey fark ettiniz mi? Upgrades sekmesi ile tanışın! Dedicated IP, Advanced Protection ve Keys gibi özellikleri burada bulabilirsiniz.",https://www.expressvpn.com/tr/support/vpn-setup/release-notes/android-app/)
How to use ExpressVPN on your Google Wifi,"Before you proceed, pleaseset up your Google Wifi.",https://www.expressvpn.com/support/vpn-setup/google-wifi/)
What’s new in ExpressVPN for Windows?,"Version/Date: 2025 January 24
* We’ve rolled out a couple of minor fixes and code changes. It’s all part of improving your app experience, and nothing you’ll likely notice.
Version/Date: 2025 January 2
* In this release, we upgraded Lightway to use hybrid ML-KEM instead of hybrid Kyber for post-quantum cryptography.
Version/Date: 2024 November 22
* A couple of fixes here and there to ensure everything works as it should.
Version/Date: 2024 November 15
* After the app’s weekly pitstop, it’s running better than ever. Boot it up and check it out for yourself!
Version/Date: 2024 November 4
* Our engineers have weeded out some minor bugs to enrich your VPN experience.
Version/Date: 2024 October 28
* We’ve updated some of our backend systems for improved performance while you use the app.
Version/Date: 2024 October 22
* Just a minor fix here and there to improve your app experience.
Version/Date: 2024 October 16
* The landlord’s ordered a mass eviction of bugs. We’ve squashed several to help make your app run smoother.
Version/Date: 2024 September 16
* Just like your car, a VPN needs a good service now and then. We’ve tuned it up and it’s now running better than ever.
Version/Date: 2024 August 19
* We’ve blown away some dust and cobwebs to keep the app running smoother than ever for you.",https://www.expressvpn.com/th/support/vpn-setup/release-notes/windows-app/)
Linux版ExpressVPNの新着情報?,"Version/Date: 2025年2月6日バージョン3.82.0
* 舵を調整し、アプリがスムーズに動作することを確認しました。
Version/Date: 2024年12月24日バージョン3.81.0
* 昨日はアプリにスパの日を設け、今では以前よりも良好に動作しています。
Version/Date: 2024年12月23日バージョン3.80.0
* このリリースでは、Lightwayのポスト量子暗号のためにハイブリッドKyberの代わりにハイブリッドML-KEMを使用するようにアップグレードしました。
Version/Date: 2024年12月10日バージョン3.79.0
* 技術の魔法使いが魔法の杖を振りました! アプリの安定性とパフォーマンスが向上しました。
Version/Date: 2024年11月12日バージョン3.78.0
* アプリ体験を最高に保つために小さな調整と修正を行いました。
Version/Date: 2024年11月5日バージョン3.77.0
* エンジンルームは大忙しでした! アプリから今後の性能向上を期待してください。
Version/Date: 2024年8月19日バージョン3.76.0
* いくつかの問題を解消し、アプリが正しく動作するようにしました。
Version/Date: 2024年8月5日バージョン3.75.0
* いくつかの軽微な修正とコードの変更を実施しました。 これはすべてアプリ体験の向上の一環であり、おそらく気付かないでしょう。
Version/Date: 2024年7月23日バージョン3.74.0
* アプリを最良の状態に保つために、いくつかのコードを見直しました。
Version/Date: 2024年7月8日バージョン3.73.0
* 滑らかな体験を提供するため、内部の改善を行いました。",https://www.expressvpn.com/jp/support/vpn-setup/release-notes/linux-app/)
What’s new in ExpressVPN for Linux?,"Version/Date: 2025 March 4version 4.0.1
* Fixed an issue that was preventing the app to connect to another server while connected.
Version/Date: 2025 February 21version 4.0.0
* Graphical User Interface (GUI)
Version/Date: 2025 February 6version 3.82.0
* Just adjusting the sails and making sure the app runs smoothly.
Version/Date: 2024 December 24version 3.81.0
* Yesterday was a spa day for the app—it’s now running better than ever.
Version/Date: 2024 December 23version 3.80.0
* In this release, we upgraded Lightway to use hybrid ML-KEM instead of hybrid Kyber for post-quantum cryptography.
Version/Date: 2024 December 10version 3.79.0
* Our tech wizards have waved their magic wands! Enjoy enhanced app stability and performance.
Version/Date: 2024 November 12version 3.78.0
* We made some small tweaks and fixes to keep your app experience top-notch.
Version/Date: 2024 November 5version 3.77.0
* The engine room’s been busy! Expect better performance from the app.
Version/Date: 2024 August 19version 3.76.0
* We’ve ironed out a few wrinkles to ensure the app runs as it should.
Version/Date: 2024 August 5version 3.75.0
* We’ve rolled out a couple of minor fixes and code changes. It’s all part of improving your app experience, and nothing you’ll likely notice.",https://www.expressvpn.com/fr/support/vpn-setup/release-notes/linux-app/)
Co nowego w ExpressVPN dla routerów?,"Version/Date: 6 grudnia 2024
* Zaktualizowano Lightway w celu lepszej stabilności i wydajności.
Version/Date: Router v4.2.6
* Zaktualizowano Lightway w celu lepszej stabilności i wydajności.
Version/Date: 12 lipca 2024
* Zaktualizowano Lightway w celu lepszej stabilności i wydajności.
Version/Date: Router v4.2.5
* Zaktualizowano Lightway w celu lepszej stabilności i wydajności.
Version/Date: 14 marca 2024
* Zaktualizowano Lightway w celu lepszej stabilności i wydajności.
Version/Date: Router v4.2.4
* Zaktualizowano Lightway w celu lepszej stabilności i wydajności.
Version/Date: 24 stycznia 2024
* Naprawiono problem, który mógł powodować automatyczne ponowne łączenie VPN co 15 do 20 minut.
Version/Date: Router v4.2.3
* Naprawiono problem, który mógł powodować automatyczne ponowne łączenie VPN co 15 do 20 minut.
Version/Date: 30 maja 2023
* Zmniejszono liczbę przypadków, w których pojawia się komunikat „Utracono połączenie z routerem”.
Version/Date: Router v4.2.2
* Zmniejszono liczbę przypadków, w których pojawia się komunikat „Utracono połączenie z routerem”.",https://www.expressvpn.com/pl/support/vpn-setup/release-notes/router-app/)
Hvad er nyt i ExpressVPN til routere?,"Version/Date: 6. december 2024
* Opdateret Lightway for bedre stabilitet og ydeevne.
Version/Date: Router v4.2.6
* Opdateret Lightway for bedre stabilitet og ydeevne.
Version/Date: 12. juli 2024
* Opdateret Lightway for bedre stabilitet og ydeevne.
Version/Date: Router v4.2.5
* Opdateret Lightway for bedre stabilitet og ydeevne.
Version/Date: 14. marts 2024
* Opdateret Lightway for bedre stabilitet og ydeevne.
Version/Date: Router v4.2.4
* Opdateret Lightway for bedre stabilitet og ydeevne.
Version/Date: 24. januar 2024
* Rettet et problem, der kunne få VPN’en til automatisk at genoprette forbindelsen hver 15. til 20. minut.
Version/Date: Router v4.2.3
* Rettet et problem, der kunne få VPN’en til automatisk at genoprette forbindelsen hver 15. til 20. minut.
Version/Date: 30. maj 2023
* Reducerede antallet af gange, hvor du måske ser en “Forbindelse til router tabt” besked.
Version/Date: Router v4.2.2
* Reducerede antallet af gange, hvor du måske ser en “Forbindelse til router tabt” besked.",https://www.expressvpn.com/dk/support/vpn-setup/release-notes/router-app/)
How to set up ExpressVPN on Linksys routers,ExpressVPN is supported on the following Linksys router models: Linksys EA6200 Linksys WRT1200AC Linksys WRT1900AC 13J1 Linksys WRT1900AC 13J2 Linksys WRT1900ACS Linksys WRT1900ACS V2 Linksys WRT3200ACM Linksys WRT32X https://www.youtube.com/embed/ys_3uQPFaaY,https://www.expressvpn.com/support/vpn-setup/app-for-routers-linksys/)
How to set up ExpressVPN on Netgear routers,ExpressVPN is supported on the following Netgear router models: Netgear R6300v2 Netgear R6400v2 Netgear R6700v3 Netgear Nighthawk R7000 Netgear Nighthawk R7000P https://www.youtube.com/embed/eHLrZKWyFdo,https://www.expressvpn.com/support/vpn-setup/app-for-routers-netgear/)
"Mitä uutta VPN-selainlaajennuksessa on Chromelle, Firefoxille ja Edgelle?","Version/Date: 2024 touko 10versio 6.0.4
* Tässä julkaisussa on korjaus yhden lahjakkaan käyttäjämme ilmoittamaan ongelmaan. He raportoivat meille geo-spoofing-koodimme ongelmasta, joka vaikutti SVG-tiedostoihin. Olemme nyt toteuttaneet korjauksen käyttäjän ehdottaman koodin perusteella, joten haluamme kiittää heitä suuresti ongelman tunnistamisesta ja auttamisesta sen ratkaisemisessa.
Version/Date: 2022 Elokuun 10versio 5.1.2
* Paransimme joidenkin VPN-sijaintien käännöksiä.
Version/Date: 12. marraskuuta 2021versio 5.1.1
* Lisätty tuki ExpressVPN Windows -sovellus v12:lle.
Version/Date: 2021 Kesäkuun 23versio 5.0.2
* Virheenkorjauksia.
Version/Date: 2021 Huhtikuun 13versio 5.0.1
* Virheenkorjauksia.
Version/Date: 18. tammikuuta 2021versio 5.0.0
* Esittelyssä ExpressVPN:n uuden sovelluksen muotoilu.
Version/Date: 2020 Joulukuun 23versio 4.9.6
* Virheenkorjauksia.
Version/Date: 16. marraskuuta 2020versio 4.9.5
* Virheenkorjauksia.
Version/Date: 2020 Elokuun 28versio 4.9.4
* Virheenkorjauksia.
Version/Date: 2020 Kesäkuun 23versio 4.9.3
* Virheenkorjauksia.",https://www.expressvpn.com/fi/support/vpn-setup/release-notes/browser-extension/)
"¿Qué hay de nuevo en la extensión para navegador VPN para Chrome, Firefox y Edge?","Version/Date: 10 de mayo de 2024versión 6.0.4
* En esta versión, tenemos una corrección que proviene de uno de nuestros talentosos usuarios. Ellos nos informaron sobre un problema con nuestro código de suplantación de geolocalización y cómo estaba interfiriendo con los archivos SVG. Ahora hemos implementado una solución basada en el código sugerido por el usuario, por lo que queremos darles un gran agradecimiento por detectar el problema y ayudarnos a resolverlo.
Version/Date: 10 de agosto de 2022versión 5.1.2
* Mejoramos las traducciones de algunas ubicaciones de VPN.
Version/Date: 12 de noviembre de 2021versión 5.1.1
* Se añadió soporte para la aplicación ExpressVPN para Windows v12.
Version/Date: 23 de junio de 2021versión 5.0.2
* Corrección de errores.
Version/Date: 13 de abril de 2021versión 5.0.1
* Corrección de errores.
Version/Date: 18 de enero de 2021versión 5.0.0
* Presentamos el nuevo diseño de la aplicación de ExpressVPN.
Version/Date: 23 de diciembre de 2020versión 4.9.6
* Corrección de errores.
Version/Date: 16 de noviembre de 2020versión 4.9.5
* Corrección de errores.
Version/Date: 28 de agosto de 2020versión 4.9.4
* Corrección de errores.
Version/Date: 23 de junio de 2020versión 4.9.3
* Corrección de errores.",https://www.expressvpn.com/es/support/vpn-setup/release-notes/browser-extension/)
Quelles sont les nouveautés dans l’extension de navigateur ExpressVPN Keys ?,"Version/Date: 27 septembre 2023version 2.0.2
* Avons corrigé un problème où la position de défilement dans la liste des identifiants était perdue lors de la synchronisation.
Version/Date: 22 septembre 2023version 2.0.1
* Avons corrigé un problème où, dans les flux de connexion multiples, ExpressVPN Keys vous montrait une boîte de dialogue d’auto-enregistrement de manière inattendue.
Version/Date: 21 septembre 2023version 2.0.0
* Ajouter, éditer, visualiser et rechercher des notes sécurisées.
Version/Date: 20 avril 2023version 1.0.16
* Nous avons amélioré la fiabilité de l’importation des cartes de crédit et des notes depuis d’autres gestionnaires de mots de passe.
Version/Date: 30 mars 2023version 1.0.14
* Nous avons amélioré la fiabilité de l’importation des identifiants depuis 1Password.
Version/Date: 22 mars 2023version 1.0.13
* Nous avons corrigé quelques erreurs graphiques sur le générateur de mots de passe et les écrans de visualisation.
Version/Date: 16 mars 2023version 1.0.12
* Vous avez maintenant plus de caractères à utiliser ! Nous avons augmenté les limites de champs pour les titres et les noms d’utilisateur.
Version/Date: 13 mars 2023version 1.0.11
* Avons ajouté quelques icônes manquantes d’autres gestionnaires de mots de passe, dont le magasin de mots de passe peut être importé dans ExpressVPN Keys.
Version/Date: 9 mars 2023version 1.0.10
* Voir vos notes sécurisées enregistrées.
Version/Date: 17 février 2023version 1.0.7
* Nous avons corrigé un bug qui vous empêchait occasionnellement d’importer avec succès des identifiants depuis Microsoft Edge.",https://www.expressvpn.com/fr/support/vpn-setup/release-notes/keys-browser-extension/)
Что нового в расширении браузера ExpressVPN Keys?,"Version/Date: 2023 Сентябрь 27версия 2.0.2
* Исправлена ошибка, при которой позиция прокрутки в списке логинов терялась во время синхронизации.
Version/Date: 2023 Сентябрь 22версия 2.0.1
* Мы исправили ошибку, при которой в многоступенчатых процессах входа в систему ExpressVPN Keys неожиданно показывал диалог автосохранения.
Version/Date: 2023 Сентябрь 21версия 2.0.0
* Добавлять, редактировать, просматривать и искать защищенные заметки.
Version/Date: 2023 20 апреляверсия 1.0.16
* Мы улучшили надёжность импорта кредитных карт и заметок из других менеджеров паролей.
Version/Date: 2023 30 мартаверсия 1.0.14
* Мы улучшили надёжность при импорте логинов из 1Password.
Version/Date: 2023 22 мартаверсия 1.0.13
* Мы исправили несколько графических ошибок в генераторе паролей и на экранах просмотра.
Version/Date: 2023 16 мартаверсия 1.0.12
* Теперь у вас есть доступ к большему количеству символов! Мы увеличили лимиты на количество символов для заголовков и имен пользователей.
Version/Date: 2023 13 мартаверсия 1.0.11
* Добавлены недостающие иконки других менеджеров паролей, чье хранилище паролей можно импортировать в ExpressVPN Keys.
Version/Date: 2023 9 мартаверсия 1.0.10
* Просматривать сохранённые защищённые заметки.
Version/Date: 2023 17 февраляверсия 1.0.7
* Мы исправили баг, который иногда мешал успешно импортировать логины из Microsoft Edge.",https://www.expressvpn.com/ru/support/vpn-setup/release-notes/keys-browser-extension/)
"Cosa c’è di nuovo nell’estensione browser VPN per Chrome, Firefox ed Edge?","Version/Date: 10 maggio 2024versione 6.0.4
* In questo rilascio, abbiamo risolto un problema segnalato da uno dei nostri utenti talentuosi. Hanno riportato un problema riguardante il nostro codice di geo spoofing e come interferiva con i file SVG. Ora abbiamo implementato una correzione basata sul codice suggerito dall’utente, quindi vogliamo ringraziarlo calorosamente per aver individuato il problema e aiutato a risolverlo.
Version/Date: 10 agosto 2022versione 5.1.2
* Abbiamo migliorato le traduzioni di alcune Posizioni VPN.
Version/Date: 12 novembre 2021versione 5.1.1
* Aggiunto supporto per l’app ExpressVPN su Windows v12.
Version/Date: 23 giugno 2021versione 5.0.2
* Correzioni di bug.
Version/Date: 13 aprile 2021versione 5.0.1
* Correzioni di bug.
Version/Date: 18 gennaio 2021versione 5.0.0
* Presentazione del nuovo design dell’app ExpressVPN.
Version/Date: 23 dicembre 2020versione 4.9.6
* Correzioni di bug.
Version/Date: 16 novembre 2020versione 4.9.5
* Correzioni di bug.
Version/Date: 28 agosto 2020versione 4.9.4
* Correzioni di bug.
Version/Date: 23 giugno 2020versione 4.9.3
* Correzioni di bug.",https://www.expressvpn.com/it/support/vpn-setup/release-notes/browser-extension/)
How to set up and use the ExpressVPN GUI app for Linux,ExpressVPN is compatible with theseLinuxoperating systems: Ubuntu: 24.04 and above Debian: 10 and above Fedora: 30 and above Arch: Latest rolling release Raspberry Pi: Pi OS (64-bit) Mint: Linux Mint 20 and above,https://www.expressvpn.com/support/vpn-setup/app-for-linux/)
How to set up and use the ExpressVPN CLI app for Linux,ExpressVPN is compatible with these 64-bitLinuxoperating systems: Ubuntu: 24.04 and above Debian: 10 and above Fedora: 30 and above Arch: Latest rolling release Raspberry Pi: Pi OS (64-bit) Mint: Linux Mint 20 and above,https://www.expressvpn.com/support/vpn-setup/app-for-linux-cli/)
Vad är nytt med ExpressVPN för Linux?,"Version/Date: 6 februari 2025version 3.82.0
* Bara några justeringar för att se till att appen körs smidigt.
Version/Date: 24 december 2024version 3.81.0
* Igår var en spadag för appen—den körs nu bättre än någonsin.
Version/Date: 23 december 2024version 3.80.0
* I denna version har vi uppgraderat Lightway för att använda hybrid ML-KEM istället för hybrid Kyber för post-kvantkryptografi.
Version/Date: 10 december 2024version 3.79.0
* Våra teknikgurus har svingat sina magiska stavar! Njut av förbättrad appstabilitet och prestanda.
Version/Date: 12 november 2024version 3.78.0
* Vi gjorde några små förändringar och korrigeringar för att hålla din appexperience på topp.
Version/Date: 5 november 2024version 3.77.0
* Maskinrummet har haft fullt upp! Förvänta dig bättre prestanda från appen.
Version/Date: 19 augusti 2024version 3.76.0
* Vi har rätat ut några rynkor för att säkerställa att appen körs som den ska.
Version/Date: 5 augusti 2024version 3.75.0
* Vi har rullat ut ett par mindre korrigeringar och kodändringar. Det är en del av att förbättra din appupplevelse, och ingenting du troligen kommer att märka.
Version/Date: 23 juli 2024version 3.74.0
* Vi har skärpt ett par kodrader för att säkerställa att appen är i toppform när du behöver den.
Version/Date: 8 juli 2024version 3.73.0
* Vi har genomfört några förbättringar under huven för att ge dig en smidigare upplevelse.",https://www.expressvpn.com/se/support/vpn-setup/release-notes/linux-app/)
Android용 ExpressVPN의 새로운 기능은?,"Version/Date: 2025년 2월 25일버전 11.89.0
* 앱의 크기를 줄였습니다. 다운로드 속도가 더 빨라졌어요!
Version/Date: 2025년 2월 9일버전 11.88.0
* 자동차처럼 VPN도 주기적인 점검이 필요합니다. 이번 업데이트로 더욱 원활하게 작동합니다!
Version/Date: 2025년 2월 6일버전 11.87.0
* 앱이 더욱 부드럽게 실행되도록 불필요한 요소들을 정리했습니다.
Version/Date: 2025년 2월 1일버전 11.86.0
* 몇 가지 사소한 버그를 수정했습니다.
Version/Date: 2025년 1월 31일버전 11.85.0
* 더욱 부드러운 VPN 경험을 위해 성능을 향상하고 버그를 수정했습니다.
Version/Date: 2025년 1월 21일버전 11.84.0
* 보안 강화를 위해 암호화 프로토콜과 코드 개선을 진행했습니다.
Version/Date: 2025년 1월 16일버전 11.83.0
* 우리 엔지니어들이 커피와 냉동 베이글의 힘으로 앱을 더욱 효율적으로 만들었습니다!
Version/Date: 2025년 1월 9일버전 11.82.0
* 앱이 매끄럽게 실행되도록 약간의 조정을 했습니다.
Version/Date: 2024년 12월 20일버전 11.81.0
* Lightway가 후양자 암호화(Post-Quantum Cryptography) 방식으로 ML-KEM을 사용하도록 업데이트되었습니다.
Version/Date: 2024년 12월 11일버전 11.80.0
* 새로운 기능이 보이시나요? ‘업그레이드’ 탭이 추가되었습니다! 전용 IP(Dedicated IP), 고급 보호(Advanced Protection), Keys 기능을 한눈에 확인할 수 있어요.",https://www.expressvpn.com/kr/support/vpn-setup/release-notes/android-app/)
มีอะไรใหม่ใน ExpressVPN สำหรับ Apple TV,"Version/Date: 20 มีนาคม 2024เวอร์ชัน 11.138.0
* เราได้ปรับปรุงการทำงานภายในเพื่อให้แอปทำงานได้ดีกว่าที่เคย.
Version/Date: 26 กุมภาพันธ์ 2024เวอร์ชัน 11.133.0
* บล็อกโฆษณาและตัวติดตาม.
Version/Date: 24 มกราคม 2024เวอร์ชัน 11.128.0
* ปุ่มใหม่ที่สามารถใช้สมัครใช้งานด้วยอุปกรณ์ iOS.
Version/Date: 18 ธันวาคม 2023เวอร์ชัน 11.126.0
* ส่งข้อความไปยังทีมสนับสนุนของเรา รวมถึงข้อมูลการวินิจฉัย เพื่อช่วยแก้ปัญหาที่คุณอาจกำลังประสบอยู่.
Version/Date: 4 ธันวาคม 2023เวอร์ชัน 11.124.0
* ส่งข้อความไปยังทีมสนับสนุนของเรา รวมถึงข้อมูลการวินิจฉัย เพื่อช่วยแก้ปัญหาที่คุณอาจกำลังประสบอยู่.
Version/Date: 29 พฤศจิกายน 2023เวอร์ชัน 11.123.0
* VPN สำหรับทุกอุปกรณ์",https://www.expressvpn.com/th/support/vpn-setup/release-notes/tvos-app/)
O que há de novo no ExpressVPN para Apple TV,"Version/Date: 20 de março de 2024versão 11.138.0
* Aprimoramos nossos motores internos; o aplicativo está funcionando melhor do que antes.
Version/Date: 26 de fevereiro de 2024versão 11.133.0
* Bloquear anúncios e rastreadores.
Version/Date: 24 de janeiro de 2024versão 11.128.0
* Um botão novinho em folha que você pode usar para se inscrever com um dispositivo iOS.
Version/Date: 18 de dezembro de 2023versão 11.126.0
* Envie uma mensagem para nossa equipe de suporte, incluindo informações de diagnóstico, para ajudar a resolver qualquer problema que você esteja enfrentando.
Version/Date: 4 de dezembro de 2023versão 11.124.0
* Envie uma mensagem para nossa equipe de suporte, incluindo informações de diagnóstico, para ajudar a resolver qualquer problema que você esteja enfrentando.
Version/Date: 29 de novembro de 2023versão 11.123.0
* VPN para todos dispositivos",https://www.expressvpn.com/pt/support/vpn-setup/release-notes/tvos-app/)
Linux용 ExpressVPN의 새로운 기능은 무엇입니까?,"Version/Date: 2025년 2월 6일버전 3.82.0
* 앱이 원활하게 실행되도록 세부 조정 중입니다.
Version/Date: 2024년 12월 24일버전 3.81.0
* 앱의 성능이 더욱 좋아졌습니다.
Version/Date: 2024년 12월 23일버전 3.80.0
* 이번 릴리스에서는 양자 이후 암호화를 위해 hybrd Kyber 대신 hybrid ML-KEM을 사용하는 것으로 Lightway를 업그레이드했습니다.
Version/Date: 2024년 12월 10일버전 3.79.0
* 기술 전문가들이 놀라운 성과를 이루었습니다! 앱의 안정성과 성능을 향상시켰습니다.
Version/Date: 2024년 121월 1일버전 3.78.0
* 최고의 앱 경험을 유지하기 위해 몇 가지 작은 조정과 수정을 했습니다.
Version/Date: 2024년 51월 1일버전 3.77.0
* 내부 작업이 활발히 진행되고 있습니다! 앱의 성능이 향상되었습니다.
Version/Date: 2024년 8월 19일버전 3.76.0
* 앱이 제대로 실행될 수 있도록 몇 가지 문제를 해결했습니다.
Version/Date: 2024년 8월 5일버전 3.75.0
* 몇 가지 작은 수정과 코드 변경을 적용했습니다. 앱 경험을 개선하기 위한 조치이며, 사용자가 인지할 수 없는 부분입니다.
Version/Date: 2024년 7월 23일버전 3.74.0
* 앱이 필요할 때 완벽한 상태로 실행되도록 몇 줄의 코드를 최적화했습니다.
Version/Date: 2024년 7월 8일버전 3.73.0
* 원활한 경험을 제공하기 위해 일부 내부 조정을 적용했습니다.",https://www.expressvpn.com/kr/support/vpn-setup/release-notes/linux-app/)
How to set up MediaStreamer on your Linksys router,"To use MediaStreamer smoothly, you must register your IP address on the ExpressVPN website. This allows ExpressVPN to recognize your IP address and grant your device access to MediaStreamer.",https://www.expressvpn.com/support/vpn-setup/stream-via-linksys-router-with-dns/)
ExpressVPN Keys 브라우저 확장 프로그램의 새로운 기능은 무엇인가요?,"Version/Date: 2023년 9월 27일버전 2.0.2
* 동기화 시 로그인 목록에서 스크롤 위치가 사라지는 문제를 해결했습니다.
Version/Date: 2023년 9월 22일버전 2.0.1
* 다단계 로그인 절차에서 예상치 못하게 자동 저장 대화 상자가 표시되는 문제를 해결했습니다.
Version/Date: 2023년 9월 21일버전 2.0.0
* 보안 노트를 추가, 편집, 보기 및 검색할 수 있습니다.
Version/Date: 2023년 4월 20일버전 1.0.16
* 다른 비밀번호 관리자에서 신용카드와 노트를 가져올 때의 신뢰성을 개선했습니다.
Version/Date: 2023년 3월 30일버전 1.0.14
* 1Password에서 로그인 정보를 가져올 때의 신뢰성을 개선했습니다.
Version/Date: 2023년 3월 22일버전 1.0.13
* 비밀번호 생성기와 보기 화면에서 몇 가지 그래픽 오류를 수정했습니다.
Version/Date: 2023년 3월 16일버전 1.0.12
* 이제 더 많은 문자를 사용할 수 있습니다! 제목과 사용자명의 필드 제한을 늘렸습니다.
Version/Date: 2023년 3월 13일버전 1.0.11
* 다른 비밀번호 관리자에서 비밀번호를 ExpressVPN Keys로 가져올 수 있도록 몇 가지 누락된 아이콘을 추가했습니다.
Version/Date: 2023년 3월 9일버전 1.0.10
* 저장된 보안 노트를 볼 수 있습니다.
Version/Date: 2023년 2월 17일버전 1.0.7
* Microsoft Edge에서 로그인 정보를 가져오지 못하는 문제를 해결했습니다.",https://www.expressvpn.com/kr/support/vpn-setup/release-notes/keys-browser-extension/)
What’s new in ExpressVPN for Routers?,"Version/Date: 2024 December 6
* Updated Lightway for better stability and performance.
Version/Date: Router v4.2.6
* Updated Lightway for better stability and performance.
Version/Date: 2024 July 12
* Updated Lightway for better stability and performance.
Version/Date: Router v4.2.5
* Updated Lightway for better stability and performance.
Version/Date: 2024 March 14
* Updated Lightway for better stability and performance.
Version/Date: Router v4.2.4
* Updated Lightway for better stability and performance.
Version/Date: 2024 January 24
* Fixed an issue that might cause the VPN to automatically reconnect every 15 to 20 minutes.
Version/Date: Router v4.2.3
* Fixed an issue that might cause the VPN to automatically reconnect every 15 to 20 minutes.
Version/Date: 2023 May 30
* Reduced the number of times where you might see a “Connection to router lost” message.
Version/Date: Router v4.2.2
* Reduced the number of times where you might see a “Connection to router lost” message.",https://www.expressvpn.com/de/support/vpn-setup/release-notes/router-app/)
ルーター版ExpressVPNの新着情報は?,"Version/Date: 2024年12月6日
* 安定性とパフォーマンスの向上のためにLightwayを更新しました。
Version/Date: ルーター v4.2.6
* 安定性とパフォーマンスの向上のためにLightwayを更新しました。
Version/Date: 2024年7月12日
* 安定性とパフォーマンスの向上のためにLightwayを更新しました。
Version/Date: ルーター v4.2.5
* 安定性とパフォーマンスの向上のためにLightwayを更新しました。
Version/Date: 2024年3月14日
* 安定性とパフォーマンスの向上のためにLightwayを更新しました。
Version/Date: ルーター v4.2.4
* 安定性とパフォーマンスの向上のためにLightwayを更新しました。
Version/Date: 2024年1月24日
* VPNが15〜20分ごとに自動的に再接続する可能性がある問題を修正しました。
Version/Date: ルーター v4.2.3
* VPNが15〜20分ごとに自動的に再接続する可能性がある問題を修正しました。
Version/Date: 2023年5月30日
* 「ルーターへの接続が失われました」というメッセージが表示される頻度を減らしました。
Version/Date: ルーター v4.2.2
* 「ルーターへの接続が失われました」というメッセージが表示される頻度を減らしました。",https://www.expressvpn.com/jp/support/vpn-setup/release-notes/router-app/)
มีอะไรใหม่ในส่วนขยายเบราว์เซอร์ ExpressVPN Keys?,"Version/Date: 27 กันยายน 2023เวอร์ชัน 2.0.2
* แก้ไขปัญหาที่ตำแหน่งการเลื่อนในรายการข้อมูลการเข้าระบบจะหายไปเมื่อมีการซิงค์เกิดขึ้น.
Version/Date: 22 กันยายน 2023เวอร์ชัน 2.0.1
* เราได้แก้ไขปัญหาที่จะทำให้ ExpressVPN Keys แสดงกล่องโต้ตอบการบันทึกอัตโนมัติโดยไม่คาดหมายในกระบวนการลงชื่อเข้าใช้หลายขั้นตอน.
Version/Date: 21 กันยายน 2023เวอร์ชัน 2.0.0
* เพิ่ม แก้ไข ดู และค้นหาบันทึกที่ปลอดภัย.
Version/Date: 20 เมษายน 2023เวอร์ชัน 1.0.16
* เราได้ปรับปรุงความเสถียรของการนำเข้าบัตรเครดิตและบันทึกจากตัวจัดการรหัสผ่านอื่น ๆ.
Version/Date: 30 มีนาคม 2023เวอร์ชัน 1.0.14
* เราได้ปรับปรุงความเสถียรเมื่อคุณนำเข้าข้อมูลการเข้าสู่ระบบจาก 1Password.
Version/Date: 22 มีนาคม 2023เวอร์ชัน 1.0.13
* เราได้แก้ไขข้อผิดพลาดทางกราฟิกเล็กน้อยในเครื่องมือช่วยสร้างรหัสผ่านและหน้าจอดู.
Version/Date: 16 มีนาคม 2023เวอร์ชัน 1.0.12
* ตอนนี้คุณมีอักขระให้ใช้งานมากขึ้น! เราได้เพิ่มกำหนดความยาวของเขตข้อมูลสำหรับชื่อเรื่องและชื่อผู้ใช้งาน.
Version/Date: 13 มีนาคม 2023เวอร์ชัน 1.0.11
* เพิ่มไอคอนที่ขาดหายของตัวจัดการรหัสผ่านอื่น ๆ ซึ่งสามารถนำเข้ารหัสผ่านเข้ามาใน ExpressVPN Keys ได้.
Version/Date: 9 มีนาคม 2023เวอร์ชัน 1.0.10
* ดูบันทึกที่ปลอดภัยที่บันทึกไว้.
Version/Date: 17 กุมภาพันธ์ 2023เวอร์ชัน 1.0.7
* เราได้แก้ไขข้อผิดพลาดที่บางครั้งทำให้คุณไม่สามารถนำเข้าข้อมูลการเข้าสู่ระบบจาก Microsoft Edge ได้สำเร็จ.",https://www.expressvpn.com/th/support/vpn-setup/release-notes/keys-browser-extension/)
What’s new in ExpressVPN for Windows?,"Version/Date: 2025 March 11
* Introducing Lightway Turbo
Version/Date: 2025 March 6
* Introducing Lightway Turbo
Version/Date: 2025 January 24
* We’ve rolled out a couple of minor fixes and code changes. It’s all part of improving your app experience, and nothing you’ll likely notice.
Version/Date: 2025 January 2
* In this release, we upgraded Lightway to use hybrid ML-KEM instead of hybrid Kyber for post-quantum cryptography.
Version/Date: 2024 November 22
* A couple of fixes here and there to ensure everything works as it should.
Version/Date: 2024 November 15
* After the app’s weekly pitstop, it’s running better than ever. Boot it up and check it out for yourself!
Version/Date: 2024 November 4
* Our engineers have weeded out some minor bugs to enrich your VPN experience.
Version/Date: 2024 October 28
* We’ve updated some of our backend systems for improved performance while you use the app.
Version/Date: 2024 October 22
* Just a minor fix here and there to improve your app experience.
Version/Date: 2024 October 16
* The landlord’s ordered a mass eviction of bugs. We’ve squashed several to help make your app run smoother.",https://www.expressvpn.com/support/vpn-setup/release-notes/windows-app/)
What’s new in ExpressVPN for Routers?,"Version/Date: 2024 December 6
* Updated Lightway for better stability and performance.
Version/Date: Router v4.2.6
* Updated Lightway for better stability and performance.
Version/Date: 2024 July 12
* Updated Lightway for better stability and performance.
Version/Date: Router v4.2.5
* Updated Lightway for better stability and performance.
Version/Date: 2024 March 14
* Updated Lightway for better stability and performance.
Version/Date: Router v4.2.4
* Updated Lightway for better stability and performance.
Version/Date: 2024 January 24
* Fixed an issue that might cause the VPN to automatically reconnect every 15 to 20 minutes.
Version/Date: Router v4.2.3
* Fixed an issue that might cause the VPN to automatically reconnect every 15 to 20 minutes.
Version/Date: 2023 May 30
* Reduced the number of times where you might see a “Connection to router lost” message.
Version/Date: Router v4.2.2
* Reduced the number of times where you might see a “Connection to router lost” message.",https://www.expressvpn.com/it/support/vpn-setup/release-notes/router-app/)
Mitä uutta ExpressVPN:n Android-versiossa?,"Version/Date: 2025. helmikuuta 25versio 11.89.0
* Sovelluksen koon pienentämisestä. Insinöörimme ovat optimoineet sovelluksen, joten sen lataaminen on nyt nopeampaa kuin koskaan.
Version/Date: 2025. helmikuuta 9versio 11.88.0
* Aivan kuten autosi, myös VPN tarvitsee huoltoa silloin tällöin. Olemme hienosäätäneet sitä, ja nyt se toimii paremmin kuin koskaan.
Version/Date: 2025. helmikuuta 6versio 11.87.0
* Olemme puhdistaneet pölyt ja hämähäkinseitit, jotta sovellus toimii entistä sulavammin.
Version/Date: 2025. helmikuuta 1versio 11.86.0
* Muutama pieni bugikorjaus siellä täällä.
Version/Date: 2025. tammikuuta 31versio 11.85.0
* Insinöörimme ovat ahkeroineet bugikorjausten ja suorituskykyparannusten parissa, jotta VPN-kokemuksesi olisi entistä sujuvampi.
Version/Date: 2025. tammikuuta 21versio 11.84.0
* Turvallisuutesi on meille etusijalla – siksi olemme vahvistaneet salausprotokollia ja koodia. Nauti lisäturvasta!
Version/Date: 2025. tammikuuta 16versio 11.83.0
* Eureka! Nerokkaat insinöörimme, kahvin ja pakastebagelien voimin, ovat tehneet sovelluksesta tehokkaamman kuin koskaan.
Version/Date: 2025. tammikuuta 9versio 11.82.0
* Vain pientä hienosäätöä varmistaaksemme, että sovellus toimii sujuvasti.
Version/Date: 2024. joulukuuta 20versio 11.81.0
* Tässä julkaisussa päivitimme Lightwayn käyttämään ML-KEM:iä Kyberin sijaan post-kvanttikryptografiaa varten.
Version/Date: 2024. joulukuuta 11versio 11.80.0
* Huomasitko jotain uutta? Tervetuloa Upgrades-välilehti! Löydät sieltä ominaisuuksia kuten Dedicated IP, Advanced Protection ja Keys.",https://www.expressvpn.com/fi/support/vpn-setup/release-notes/android-app/)
Что нового в ExpressVPN для Android?,"Version/Date: 25 февраля 2025версия 11.89.0
* Уменьшенного размера приложения. Наши инженеры оптимизировали код, чтобы скачивание стало быстрее, чем когда-либо.
Version/Date: 9 февраля 2025версия 11.88.0
* Как и вашему автомобилю, VPN время от времени нужен хороший техосмотр. Мы все настроили, и теперь он работает лучше, чем когда-либо.
Version/Date: 6 февраля 2025версия 11.87.0
* Мы смахнули пыль и паутину, чтобы приложение работало еще плавнее.
Version/Date: 1 февраля 2025версия 11.86.0
* Несколько небольших исправлений ошибок.
Version/Date: 31 января 2025версия 11.85.0
* Наши инженеры поработали над исправлением багов и улучшением производительности, чтобы обеспечить вам еще более плавную работу VPN.
Version/Date: 21 января 2025версия 11.84.0
* Безопасность – наш приоритет, поэтому мы усилили шифрование и оптимизировали код. Наслаждайтесь дополнительной защитой.
Version/Date: 16 января 2025версия 11.83.0
* Эврика! Наши гениальные инженеры, вдохновленные кофе и замороженными бубликами, сделали приложение еще эффективнее.
Version/Date: 9 января 2025версия 11.82.0
* Настроили паруса и убедились, что приложение работает гладко.
Version/Date: 20 декабря 2024версия 11.81.0
* В этом обновлении мы обновили
Version/Date: 11 декабря 2024версия 11.80.0
* Заметили что-то новое? Встречайте вкладку",https://www.expressvpn.com/ru/support/vpn-setup/release-notes/android-app/)
Что нового в ExpressVPN для роутеров?,"Version/Date: 6 декабря 2024
* Обновили Lightway для повышения стабильности и производительности.
Version/Date: Роутер версия 4.2.6
* Обновили Lightway для повышения стабильности и производительности.
Version/Date: 12 июля 2024
* Обновили Lightway для повышения стабильности и производительности.
Version/Date: Роутер версия 4.2.5
* Обновили Lightway для повышения стабильности и производительности.
Version/Date: 14 марта 2024
* Обновили Lightway для повышения стабильности и производительности.
Version/Date: Роутер версия 4.2.4
* Обновили Lightway для повышения стабильности и производительности.
Version/Date: 24 января 2024
* Исправлена проблема, из-за которой VPN мог автоматически переподключаться каждые 15–20 минут.
Version/Date: Роутер версия 4.2.3
* Исправлена проблема, из-за которой VPN мог автоматически переподключаться каждые 15–20 минут.
Version/Date: 30 мая 2023
* Сократили количество ситуаций, когда вы могли видеть сообщение «Связь с роутером потеряна».
Version/Date: Роутер версия 4.2.2
* Сократили количество ситуаций, когда вы могли видеть сообщение «Связь с роутером потеряна».",https://www.expressvpn.com/ru/support/vpn-setup/release-notes/router-app/)
Что нового в ExpressVPN для Linux?,"Version/Date: 2025 6 февраляверсия 3.82.0
* Проводим корректировку и обеспечиваем бесперебойную работу приложения.
Version/Date: 2024 24 декабряверсия 3.81.0
* Вчера был день спа для приложения — теперь оно работает лучше, чем когда-либо.
Version/Date: 2024 23 декабряверсия 3.80.0
* В этом выпуске мы обновили Lightway для использования гибридного ML-KEM вместо гибридного Kyber для пост-квантовой криптографии.
Version/Date: 2024 10 декабряверсия 3.79.0
* Наши технические мастера взмахнули своими волшебными палочками! Наслаждайтесь улучшенной стабильностью и производительностью приложения.
Version/Date: 2024 12 ноябряверсия 3.78.0
* Мы внесли небольшие изменения и исправления, чтобы ваш опыт использования приложения оставался на высшем уровне.
Version/Date: 2024 5 ноябряверсия 3.77.0
* В машинном отделении царит оживление! Ожидайте улучшения производительности от приложения.
Version/Date: 2024 19 августаверсия 3.76.0
* Мы сгладили несколько шероховатостей, чтобы приложение работало, как следует.
Version/Date: 2024 5 августаверсия 3.75.0
* Мы внесли пару незначительных исправлений и изменений в код. Это часть улучшения работы вашего приложения, но вы вряд ли заметите.
Version/Date: 2024 23 июляверсия 3.74.0
* Мы уплотнили несколько строк кода, чтобы приложение было в отличной форме, когда это нужно.
Version/Date: 2024 8 июляверсия 3.73.0
* Мы внесли улучшения в код, чтобы обеспечить вам более гладкий опыт работы.",https://www.expressvpn.com/ru/support/vpn-setup/release-notes/linux-app/)
มีอะไรใหม่ใน ExpressVPN สำหรับเราเตอร์?,"Version/Date: 6 ธันวาคม 2024
* อัปเดต Lightway เพื่อเสถียรภาพและประสิทธิภาพที่ดีขึ้น.
Version/Date: เราเตอร์ v4.2.6
* อัปเดต Lightway เพื่อเสถียรภาพและประสิทธิภาพที่ดีขึ้น.
Version/Date: 12 กรกฎาคม 2024
* อัปเดต Lightway เพื่อเสถียรภาพและประสิทธิภาพที่ดีขึ้น.
Version/Date: เราเตอร์ v4.2.5
* อัปเดต Lightway เพื่อเสถียรภาพและประสิทธิภาพที่ดีขึ้น.
Version/Date: 14 มีนาคม 2024
* อัปเดต Lightway เพื่อเสถียรภาพและประสิทธิภาพที่ดีขึ้น.
Version/Date: เราเตอร์ v4.2.4
* อัปเดต Lightway เพื่อเสถียรภาพและประสิทธิภาพที่ดีขึ้น.
Version/Date: 24 มกราคม 2024
* แก้ไขปัญหาที่อาจทำให้ VPN เชื่อมต่อใหม่อัตโนมัติทุกๆ 15 ถึง 20 นาที.
Version/Date: เราเตอร์ v4.2.3
* แก้ไขปัญหาที่อาจทำให้ VPN เชื่อมต่อใหม่อัตโนมัติทุกๆ 15 ถึง 20 นาที.
Version/Date: 30 พฤษภาคม 2023
* ลดจำนวนครั้งที่อาจเห็นข้อความ “การเชื่อมต่อกับเราเตอร์หายไป.”
Version/Date: เราเตอร์ v4.2.2
* ลดจำนวนครั้งที่อาจเห็นข้อความ “การเชื่อมต่อกับเราเตอร์หายไป.”",https://www.expressvpn.com/th/support/vpn-setup/release-notes/router-app/)
"Hvad er nyt i VPN-browserudvidelsen til Chrome, Firefox og Edge?","Version/Date: 10. maj 2024version 6.0.4
* I denne udgivelse har vi en rettelse, der kommer fra en af vores talentfulde brugere. De rapporterede et problem til os vedrørende vores geo-spoofing kode og hvordan den forstyrrede SVG-filer. Vi har nu implementeret en rettelse baseret på brugerens foreslåede kode, så vi vil gerne give dem en stor tak for at finde problemet og hjælpe os med at løse det.
Version/Date: 10. august 2022version 5.1.2
* Vi forbedrede oversættelserne af nogle VPN-placeringer.
Version/Date: 12. november 2021version 5.1.1
* Tilføjet support til ExpressVPN Windows-app v12.
Version/Date: 23. juni 2021version 5.0.2
* Fejlrettelser.
Version/Date: 13. april 2021version 5.0.1
* Fejlrettelser.
Version/Date: 18. januar 2021version 5.0.0
* Introduktion af ExpressVPN’s nye app-design.
Version/Date: 23. december 2020version 4.9.6
* Fejlrettelser.
Version/Date: 16. november 2020version 4.9.5
* Fejlrettelser.
Version/Date: 28. august 2020version 4.9.4
* Fejlrettelser.
Version/Date: 23. juni 2020version 4.9.3
* Fejlrettelser.",https://www.expressvpn.com/dk/support/vpn-setup/release-notes/browser-extension/)
What’s new in ExpressVPN for Windows?,"Version/Date: 2025 January 24
* We’ve rolled out a couple of minor fixes and code changes. It’s all part of improving your app experience, and nothing you’ll likely notice.
Version/Date: 2025 January 2
* In this release, we upgraded Lightway to use hybrid ML-KEM instead of hybrid Kyber for post-quantum cryptography.
Version/Date: 2024 November 22
* A couple of fixes here and there to ensure everything works as it should.
Version/Date: 2024 November 15
* After the app’s weekly pitstop, it’s running better than ever. Boot it up and check it out for yourself!
Version/Date: 2024 November 4
* Our engineers have weeded out some minor bugs to enrich your VPN experience.
Version/Date: 2024 October 28
* We’ve updated some of our backend systems for improved performance while you use the app.
Version/Date: 2024 October 22
* Just a minor fix here and there to improve your app experience.
Version/Date: 2024 October 16
* The landlord’s ordered a mass eviction of bugs. We’ve squashed several to help make your app run smoother.
Version/Date: 2024 September 16
* Just like your car, a VPN needs a good service now and then. We’ve tuned it up and it’s now running better than ever.
Version/Date: 2024 August 19
* We’ve blown away some dust and cobwebs to keep the app running smoother than ever for you.",https://www.expressvpn.com/pt/support/vpn-setup/release-notes/windows-app/)
What’s new in ExpressVPN for Android?,"Version/Date: 2025 March 8version 11.91.0
* We’ve updated some of our backend systems for improved performance while you use the app.
Version/Date: 2025 February 25version 11.89.0
* A reduction in the size of the app. Our engineers have worked hard to optimize the app so you can download it quicker than ever.
Version/Date: 2025 February 9version 11.88.0
* Just like your car, a VPN needs a good service now and then. We’ve tuned it up and it’s now running better than ever.
Version/Date: 2025 February 6version 11.87.0
* We’ve blown away some dust and cobwebs to keep the app running smoother than ever for you.
Version/Date: 2025 February 1version 11.86.0
* Just a couple of minor bug fixes here and there.
Version/Date: 2025 January 31version 11.85.0
* Our engineers have been tinkering away with bug fixes and performance enhancements to give you a smoother VPN experience.
Version/Date: 2025 January 21version 11.84.0
* Your security is our priority—that’s why we’ve strengthened our encryption protocols and code. Enjoy the added security.
Version/Date: 2025 January 16version 11.83.0
* Eureka! Our genius engineers, fueled by coffee and frozen bagels, have made the app more efficient than ever.
Version/Date: 2025 January 9version 11.82.0
* Just adjusting the sails and making sure the app runs smoothly.
Version/Date: 2024 December 20version 11.81.0
* In this release, we upgraded Lightway to use ML-KEM instead of Kyber for post-quantum cryptography.",https://www.expressvpn.com/support/vpn-setup/release-notes/android-app/)
Nyheter i ExpressVPN för Apple TV,"Version/Date: 20 mars 2024version 11.138.0
* Vi har snyggat till våra interna motorer; appen kör nu bättre än tidigare.
Version/Date: 26 februari 2024version 11.133.0
* Blockera annonser och spårare.
Version/Date: 24 januari 2024version 11.128.0
* En helt ny knapp som du kan använda för att registrera dig med en iOS-enhet.
Version/Date: 18 december 2023version 11.126.0
* Skicka ett meddelande till vårt supportteam, inklusive diagnostisk information, för att hjälpa till med att lösa eventuella problem.
Version/Date: 4 december 2023version 11.124.0
* Skicka ett meddelande till vårt supportteam, inklusive diagnostisk information, för att hjälpa till med att lösa eventuella problem.
Version/Date: 29 november 2023version 11.123.0
* VPN för alla enheter",https://www.expressvpn.com/se/support/vpn-setup/release-notes/tvos-app/)
What’s new in ExpressVPN for Windows?,"Version/Date: 2025 March 11
* Introducing Lightway Turbo
Version/Date: 2025 March 6
* Introducing Lightway Turbo
Version/Date: 2025 January 24
* We’ve rolled out a couple of minor fixes and code changes. It’s all part of improving your app experience, and nothing you’ll likely notice.
Version/Date: 2025 January 2
* In this release, we upgraded Lightway to use hybrid ML-KEM instead of hybrid Kyber for post-quantum cryptography.
Version/Date: 2024 November 22
* A couple of fixes here and there to ensure everything works as it should.
Version/Date: 2024 November 15
* After the app’s weekly pitstop, it’s running better than ever. Boot it up and check it out for yourself!
Version/Date: 2024 November 4
* Our engineers have weeded out some minor bugs to enrich your VPN experience.
Version/Date: 2024 October 28
* We’ve updated some of our backend systems for improved performance while you use the app.
Version/Date: 2024 October 22
* Just a minor fix here and there to improve your app experience.
Version/Date: 2024 October 16
* The landlord’s ordered a mass eviction of bugs. We’ve squashed several to help make your app run smoother.",https://www.expressvpn.com/nl/support/vpn-setup/release-notes/windows-app/)
Novità in ExpressVPN per Android,"Version/Date: 25 febbraio 2025versione 11.89.0
* Una riduzione delle dimensioni dell’app. I nostri ingegneri hanno lavorato sodo per ottimizzarla, così ora puoi scaricarla più velocemente che mai.
Version/Date: 9 febbraio 2025versione 11.88.0
* Proprio come la tua auto, anche una VPN ha bisogno di manutenzione ogni tanto. Abbiamo fatto un po’ di messa a punto e ora funziona meglio che mai.
Version/Date: 6 febbraio 2025versione 11.87.0
* Abbiamo eliminato un po’ di polvere e ragnatele per mantenere l’app più fluida che mai per te.
Version/Date: 1 febbraio 2025versione 11.86.0
* Solo un paio di correzioni di bug minori qua e là.
Version/Date: 31 gennaio 2025versione 11.85.0
* I nostri ingegneri hanno lavorato su correzioni di bug e miglioramenti delle prestazioni per offrirti un’esperienza VPN più fluida.
Version/Date: 21 gennaio 2025versione 11.84.0
* La tua sicurezza è la nostra priorità: per questo motivo abbiamo rafforzato i nostri protocolli di crittografia e il codice. Goditi una protezione ancora maggiore.
Version/Date: 16 gennaio 2025versione 11.83.0
* Eureka! I nostri ingegneri geniali, alimentati da caffè e bagel surgelati, hanno reso l’app più efficiente che mai.
Version/Date: 9 gennaio 2025versione 11.82.0
* Solo un piccolo ritocco per assicurarci che l’app funzioni senza intoppi.
Version/Date: 20 dicembre 2024versione 11.81.0
* In questo aggiornamento, abbiamo aggiornato Lightway per utilizzare ML-KEM invece di Kyber per la crittografia post-quantistica.
Version/Date: 11 dicembre 2024versione 11.80.0
* Noti qualcosa di nuovo? Dai il benvenuto alla scheda Upgrades! Qui troverai funzionalità come Dedicated IP, Advanced Protection e Keys.",https://www.expressvpn.com/it/support/vpn-setup/release-notes/android-app/)
How to set up and use the ExpressVPN legacy app for Linux,ExpressVPN is compatible with theseLinuxoperating systems: Ubuntu: 20.04 and above Debian: 10 and above Fedora: 37 and above Arch: Latest rolling release Raspberry Pi (armhf): Pi OS 10 and above Mint: Linux Mint 20 and above https://www.youtube.com/embed/jdl8i9-feFI,https://www.expressvpn.com/support/vpn-setup/legacy-app-for-linux/)
How to set up and use the ExpressVPN app for Raspberry Pi,"Note:If you prefer to control the ExpressVPN Linux app with a graphical user interface (GUI), you can do so with theExpressVPN browser extensionforChromeorFirefox. Install the browser extension after setting up the app.",https://www.expressvpn.com/support/vpn-setup/app-for-raspberry-pi/)
"Quoi de neuf dans l’extension de navigateur VPN pour Chrome, Firefox et Edge ?","Version/Date: 10 mai 2024version 6.0.4
* Dans cette version, nous avons corrigé un problème signalé par l’un de nos utilisateurs talentueux. Ils nous ont rapporté un problème concernant notre code de géo-déguisement et son interférence avec les fichiers SVG. Nous avons maintenant mis en œuvre une correction basée sur le code suggéré par l’utilisateur, donc nous tenons à les remercier chaleureusement pour avoir repéré le problème et nous avoir aidés à le résoudre.
Version/Date: 10 août 2022version 5.1.2
* Nous avons amélioré les traductions de certaines localisations VPN.
Version/Date: 12 novembre 2021version 5.1.1
* Ajout de la prise en charge de l’application ExpressVPN pour Windows v12.
Version/Date: 23 juin 2021version 5.0.2
* Corrections de bugs.
Version/Date: 13 avril 2021version 5.0.1
* Corrections de bugs.
Version/Date: 18 janvier 2021version 5.0.0
* Présentation du nouveau design de l’appli ExpressVPN.
Version/Date: 23 décembre 2020version 4.9.6
* Corrections de bugs.
Version/Date: 16 novembre 2020version 4.9.5
* Corrections de bugs.
Version/Date: 28 août 2020version 4.9.4
* Corrections de bugs.
Version/Date: 23 juin 2020version 4.9.3
* Corrections de bugs.",https://www.expressvpn.com/fr/support/vpn-setup/release-notes/browser-extension/)
Novità in ExpressVPN per Apple TV,"Version/Date: 20 marzo 2024versione 11.138.0
* Abbiamo migliorato i nostri motori interni; l’app funziona meglio di prima.
Version/Date: 26 febbraio 2024versione 11.133.0
* Bloccar annunci e tracker.
Version/Date: 24 gennaio 2024versione 11.128.0
* Un nuovissimo pulsante che puoi utilizzare per registrarti con un dispositivo iOS.
Version/Date: 18 dicembre 2023versione 11.126.0
* Invia un messaggio al nostro team di supporto, comprese le informazioni di diagnostica, per aiutare a risolvere qualsiasi problema tu possa incontrare.
Version/Date: 4 dicembre 2023versione 11.124.0
* Invia un messaggio al nostro team di supporto, comprese le informazioni di diagnostica, per aiutare a risolvere qualsiasi problema tu possa incontrare.
Version/Date: 29 novembre 2023versione 11.123.0
* VPN per tutti i dispositivi",https://www.expressvpn.com/it/support/vpn-setup/release-notes/tvos-app/)
"Co nowego w rozszerzeniu przeglądarki VPN dla Chrome, Firefox i Edge?","Version/Date: 10 maja 2024wersja 6.0.4
* W tej wersji mamy poprawkę pochodzącą od jednego z naszych utalentowanych użytkowników. Zgłosili nam problem dotyczący naszego kodu geospoofingowego i tego, jak wpływał na pliki SVG. Teraz wdrożyliśmy poprawkę opartą na zasugerowanym przez użytkownika kodzie, więc chcemy im serdecznie podziękować za dostrzeżenie problemu i pomoc w jego rozwiązaniu.
Version/Date: 10 sierpnia 2022wersja 5.1.2
* Udoskonaliliśmy tłumaczenia niektórych lokalizacji VPN.
Version/Date: 12 listopada 2021wersja 5.1.1
* Dodano Pomoc techniczną dla aplikacji ExpressVPN na Windows w wersji 12.
Version/Date: 23 czerwca 2021wersja 5.0.2
* Poprawki błędów.
Version/Date: 13 kwietnia 2021wersja 5.0.1
* Poprawki błędów.
Version/Date: 18 stycznia 2021wersja 5.0.0
* Przedstawiamy nowy design aplikacji ExpressVPN.
Version/Date: 23 grudnia 2020wersja 4.9.6
* Poprawki błędów.
Version/Date: 16 listopada 2020wersja 4.9.5
* Poprawki błędów.
Version/Date: 28 sierpnia 2020wersja 4.9.4
* Poprawki błędów.
Version/Date: 23 czerwca 2020wersja 4.9.3
* Poprawki błędów.",https://www.expressvpn.com/pl/support/vpn-setup/release-notes/browser-extension/)
"Chrome, Firefox ve Edge için VPN tarayıcı uzantısında ne yenilikler var?","Version/Date: 2024 Mayıs 10versiyon 6.0.4
* Bu sürümde, yetenekli kullanıcılarımızdan birinin bize ilettiği, coğrafi aldatma kodumuzla ilgili ve SVG dosyalarına müdahil olan bir sorunu çözdük. Kullanıcının önerdiği kodu baz alarak bir düzeltme uyguladık, bu nedenle sorunu tespit ettikleri ve çözmemize yardımcı oldukları için büyük bir teşekkür etmek istiyoruz.
Version/Date: 2022 Ağustos 10versiyon 5.1.2
* Bazı VPN konumlarının çevirilerini iyileştirdik.
Version/Date: 12 Kasım 2021versiyon 5.1.1
* ExpressVPN Windows uygulaması v12 desteği eklendi.
Version/Date: 2021 Haziran 23versiyon 5.0.2
* Hata düzeltmeleri.
Version/Date: 2021 Nisan 13versiyon 5.0.1
* Hata düzeltmeleri.
Version/Date: 18 Ocak 2021versiyon 5.0.0
* ExpressVPN’in yeni uygulama tasarımı tanıtıldı.
Version/Date: 2020 Aralık 23versiyon 4.9.6
* Hata düzeltmeleri.
Version/Date: 16 Kasım 2020versiyon 4.9.5
* Hata düzeltmeleri.
Version/Date: 2020 Ağustos 28versiyon 4.9.4
* Hata düzeltmeleri.
Version/Date: 2020 Haziran 23versiyon 4.9.3
* Hata düzeltmeleri.",https://www.expressvpn.com/tr/support/vpn-setup/release-notes/browser-extension/)
Novedades en ExpressVPN para Apple TV,"Version/Date: 20 de marzo de 2024versión 11.138.0
* Hemos mejorado nuestros motores internos; la aplicación está funcionando mejor que antes.
Version/Date: 26 de febrero de 2024versión 11.133.0
* Boqueo de anuncios y rastreadores.
Version/Date: 24 de enero de 2024versión 11.128.0
* Un botón completamente nuevo que puede usar para registrarse con un dispositivo iOS.
Version/Date: 18 de diciembre de 2023versión 11.126.0
* Envíe un mensaje a nuestro equipo de soporte técnico, incluida la información de diagnóstico, para ayudar a resolver cualquier problema que pueda estar experimentando.
Version/Date: 4 de diciembre de 2023versión 11.124.0
* Envíe un mensaje a nuestro equipo de soporte técnico, incluida la información de diagnóstico, para ayudar a resolver cualquier problema que pueda estar experimentando.
Version/Date: 29 de noviembre de 2023versión 11.123.0
* VPN para todos los dispositivos",https://www.expressvpn.com/es/support/vpn-setup/release-notes/tvos-app/)
What’s new in ExpressVPN for Routers?,"Version/Date: 2024 December 6
* Updated Lightway for better stability and performance.
Version/Date: Router v4.2.6
* Updated Lightway for better stability and performance.
Version/Date: 2024 July 12
* Updated Lightway for better stability and performance.
Version/Date: Router v4.2.5
* Updated Lightway for better stability and performance.
Version/Date: 2024 March 14
* Updated Lightway for better stability and performance.
Version/Date: Router v4.2.4
* Updated Lightway for better stability and performance.
Version/Date: 2024 January 24
* Fixed an issue that might cause the VPN to automatically reconnect every 15 to 20 minutes.
Version/Date: Router v4.2.3
* Fixed an issue that might cause the VPN to automatically reconnect every 15 to 20 minutes.
Version/Date: 2023 May 30
* Reduced the number of times where you might see a “Connection to router lost” message.
Version/Date: Router v4.2.2
* Reduced the number of times where you might see a “Connection to router lost” message.",https://www.expressvpn.com/es/support/vpn-setup/release-notes/router-app/)
How to manually configure OpenVPN on Linux,"Not all ExpressVPN locations may be available for manually configured connections. To use the full list of VPN locations,use the app setup.",https://www.expressvpn.com/support/vpn-setup/manual-config-for-linux-with-openvpn/)
How to set up ExpressVPN OpenVPN using Ubuntu Network Manager,"Not all ExpressVPN locations may be available for manually configured connections. To use the full list of VPN locations,use the app setup.",https://www.expressvpn.com/support/vpn-setup/manual-config-for-linux-ubuntu-with-openvpn/)
What’s new in ExpressVPN for Routers?,"Version/Date: 2024 December 6
* Updated Lightway for better stability and performance.
Version/Date: Router v4.2.6
* Updated Lightway for better stability and performance.
Version/Date: 2024 July 12
* Updated Lightway for better stability and performance.
Version/Date: Router v4.2.5
* Updated Lightway for better stability and performance.
Version/Date: 2024 March 14
* Updated Lightway for better stability and performance.
Version/Date: Router v4.2.4
* Updated Lightway for better stability and performance.
Version/Date: 2024 January 24
* Fixed an issue that might cause the VPN to automatically reconnect every 15 to 20 minutes.
Version/Date: Router v4.2.3
* Fixed an issue that might cause the VPN to automatically reconnect every 15 to 20 minutes.
Version/Date: 2023 May 30
* Reduced the number of times where you might see a “Connection to router lost” message.
Version/Date: Router v4.2.2
* Reduced the number of times where you might see a “Connection to router lost” message.",https://www.expressvpn.com/support/vpn-setup/release-notes/router-app/)
What’s new in ExpressVPN for Linux?,"Version/Date: 2025 March 4version 4.0.1
* Fixed an issue that was preventing the app to connect to another server while connected.
Version/Date: 2025 February 21version 4.0.0
* Graphical User Interface (GUI)
Version/Date: 2025 February 6version 3.82.0
* Just adjusting the sails and making sure the app runs smoothly.
Version/Date: 2024 December 24version 3.81.0
* Yesterday was a spa day for the app—it’s now running better than ever.
Version/Date: 2024 December 23version 3.80.0
* In this release, we upgraded Lightway to use hybrid ML-KEM instead of hybrid Kyber for post-quantum cryptography.
Version/Date: 2024 December 10version 3.79.0
* Our tech wizards have waved their magic wands! Enjoy enhanced app stability and performance.
Version/Date: 2024 November 12version 3.78.0
* We made some small tweaks and fixes to keep your app experience top-notch.
Version/Date: 2024 November 5version 3.77.0
* The engine room’s been busy! Expect better performance from the app.
Version/Date: 2024 August 19version 3.76.0
* We’ve ironed out a few wrinkles to ensure the app runs as it should.
Version/Date: 2024 August 5version 3.75.0
* We’ve rolled out a couple of minor fixes and code changes. It’s all part of improving your app experience, and nothing you’ll likely notice.",https://www.expressvpn.com/de/support/vpn-setup/release-notes/linux-app/)
Hvad er nyt i ExpressVPN til Linux?,"Version/Date: 6. februar 2025version 3.82.0
* Vi justerer bare sejlene og sikrer, at appen kører gnidningsfrit.
Version/Date: 24. december 2024version 3.81.0
* I går var spa-dag for appen—den kører nu bedre end nogensinde.
Version/Date: 23. december 2024version 3.80.0
* I denne udgivelse har vi opgraderet Lightway til at bruge hybrid ML-KEM i stedet for hybrid Kyber til post-kvantum kryptografi.
Version/Date: 10. december 2024version 3.79.0
* Vores tech-guruer har svinget deres tryllestave! Nyd forbedret app-stabilitet og ydeevne.
Version/Date: 12. november 2024version 3.78.0
* Vi har lavet nogle små justeringer og rettelser for at holde din app-oplevelse i top.
Version/Date: 5. november 2024version 3.77.0
* Maskinrummet har haft travlt! Forvent bedre ydeevne fra appen.
Version/Date: 19. august 2024version 3.76.0
* Vi har udjævnet et par rynker for at sikre, at appen kører som den skal.
Version/Date: 5. august 2024version 3.75.0
* Vi har udrullet et par mindre rettelser og kodeændringer. Det er alt sammen en del af at forbedre din app-oplevelse, og intet du sandsynligvis vil bemærke.
Version/Date: 23. juli 2024version 3.74.0
* Vi har strammet lidt op i koden for at sikre, at appen er i topform, når du har brug for det.
Version/Date: 8. juli 2024version 3.73.0
* Vi har foretaget nogle forbedringer under motorhjelmen for at give dig en mere gnidningsfri oplevelse.",https://www.expressvpn.com/dk/support/vpn-setup/release-notes/linux-app/)
Wat is nieuw in ExpressVPN voor Android?,"Version/Date: 25 februari 2025versie 11.89.0
* Een verkleining van de app-grootte. Onze ingenieurs hebben hard gewerkt om de app te optimaliseren, zodat je deze sneller dan ooit kunt downloaden.
Version/Date: 9 februari 2025versie 11.88.0
* Net als je auto heeft een VPN af en toe een onderhoudsbeurt nodig. We hebben hem opgepoetst en hij draait nu beter dan ooit.
Version/Date: 6 februari 2025versie 11.87.0
* We hebben wat stof en spinnenwebben weggeblazen om de app soepeler dan ooit te laten werken.
Version/Date: 1 februari 2025versie 11.86.0
* Slechts een paar kleine bugfixes hier en daar.
Version/Date: 31 januari 2025versie 11.85.0
* Onze ingenieurs hebben gewerkt aan bugfixes en prestatieverbeteringen om je een soepelere VPN-ervaring te bieden.
Version/Date: 21 januari 2025versie 11.84.0
* Jouw beveiliging is onze prioriteit—daarom hebben we onze versleutelingsprotocollen en code versterkt. Geniet van de extra beveiliging.
Version/Date: 16 januari 2025versie 11.83.0
* Eureka! Onze geniale ingenieurs, gevoed door koffie en bevroren bagels, hebben de app efficiënter dan ooit gemaakt.
Version/Date: 9 januari 2025versie 11.82.0
* Even de zeilen bijstellen en ervoor zorgen dat de app soepel blijft draaien.
Version/Date: 20 december 2024versie 11.81.0
* In deze release hebben we Lightway geüpgraded om ML-KEM te gebruiken in plaats van Kyber voor post-quantumcryptografie.
Version/Date: 11 december 2024versie 11.80.0
* Zie je iets nieuws? Zeg hallo tegen het Upgrades-tabblad! Hier vind je functies zoals Dedicated IP, Advanced Protection en Keys.",https://www.expressvpn.com/nl/support/vpn-setup/release-notes/android-app/)
ExpressVPN Keysブラウザ拡張機能の新機能は何ですか?,"Version/Date: 2023年9月27日バージョン2.0.2
* 同期が発生した際にログイン情報のリストのスクロール位置が失われる問題を修正しました。
Version/Date: 2023年9月22日バージョン2.0.1
* マルチステップのサインインフローで、ExpressVPN Keysが予期せずオートセーブのダイアログを表示する問題を修正しました。
Version/Date: 2023年9月21日バージョン2.0.0
* セキュアノートの追加、編集、閲覧、検索。
Version/Date: 2023年4月20日バージョン1.0.16
* 他のパスワードマネージャーからクレジットカードやノートをインポートする際の信頼性を向上させました。
Version/Date: 2023年3月30日バージョン1.0.14
* 1Passwordからログイン情報をインポートする際の信頼性を向上させました。
Version/Date: 2023年3月22日バージョン1.0.13
* パスワード生成ツールと表示画面でいくつかのグラフィカルエラーを修正しました。
Version/Date: 2023年3月16日バージョン1.0.12
* 使用できる文字が増えました! タイトルとユーザー名のフィールド制限を増やしました。
Version/Date: 2023年3月13日バージョン1.0.11
* 他のパスワードマネージャーからExpressVPN Keysにインポート可能なパスワードのアイコンをいくつか追加しました。
Version/Date: 2023年3月9日バージョン1.0.10
* 保存されたセキュアノートを表示。
Version/Date: 2023年2月17日バージョン1.0.7
* Microsoft Edgeからのログイン情報のインポートを妨げるバグを修正しました。",https://www.expressvpn.com/jp/support/vpn-setup/release-notes/keys-browser-extension/)
How to set up ExpressVPN with OpenVPN on your Netduma R1 router,Not all ExpressVPN locations may be available for manually configured connections.,https://www.expressvpn.com/support/vpn-setup/setup-expressvpn-openvpn-netduma-router/)
"Vad är nytt i VPN-webbläsartillägget för Chrome, Firefox och Edge?","Version/Date: 2024 Maj 10version 6.0.4
* I denna version har vi en fix som kommer från en av våra talangfulla användare. De rapporterade ett problem till oss angående vår geo-spoofing-kod och hur den störde SVG-filer. Vi har nu implementerat en fix baserad på användarens föreslagna kod, så vi vill ge dem ett stort tack för att de upptäckte problemet och hjälpte oss att lösa det.
Version/Date: 10 augusti 2022version 5.1.2
* Vi har förbättrat översättningarna av vissa VPN-positioner.
Version/Date: 12 november 2021version 5.1.1
* Tillagt stöd för ExpressVPN Windows-app v12.
Version/Date: 23 juni 2021version 5.0.2
* Bugfixar.
Version/Date: 13 april 2021version 5.0.1
* Bugfixar.
Version/Date: 18 januari 2021version 5.0.0
* Introducing ExpressVPN’s new app design.
Version/Date: 23 december 2020version 4.9.6
* Bugfixar.
Version/Date: 16 november 2020version 4.9.5
* Bugfixar.
Version/Date: 28 augusti 2020version 4.9.4
* Bugfixar.
Version/Date: 23 juni 2020version 4.9.3
* Bugfixar.",https://www.expressvpn.com/se/support/vpn-setup/release-notes/browser-extension/)
What’s new in ExpressVPN for Linux?,"Version/Date: 2025 March 4version 4.0.1
* Fixed an issue that was preventing the app to connect to another server while connected.
Version/Date: 2025 February 21version 4.0.0
* Graphical User Interface (GUI)
Version/Date: 2025 February 6version 3.82.0
* Just adjusting the sails and making sure the app runs smoothly.
Version/Date: 2024 December 24version 3.81.0
* Yesterday was a spa day for the app—it’s now running better than ever.
Version/Date: 2024 December 23version 3.80.0
* In this release, we upgraded Lightway to use hybrid ML-KEM instead of hybrid Kyber for post-quantum cryptography.
Version/Date: 2024 December 10version 3.79.0
* Our tech wizards have waved their magic wands! Enjoy enhanced app stability and performance.
Version/Date: 2024 November 12version 3.78.0
* We made some small tweaks and fixes to keep your app experience top-notch.
Version/Date: 2024 November 5version 3.77.0
* The engine room’s been busy! Expect better performance from the app.
Version/Date: 2024 August 19version 3.76.0
* We’ve ironed out a few wrinkles to ensure the app runs as it should.
Version/Date: 2024 August 5version 3.75.0
* We’ve rolled out a couple of minor fixes and code changes. It’s all part of improving your app experience, and nothing you’ll likely notice.",https://www.expressvpn.com/it/support/vpn-setup/release-notes/linux-app/)
"Что нового в расширении браузера VPN для Chrome, Firefox и Edge?","Version/Date: 2024 10 маяверсия 6.0.4
* В этом выпуске мы исправили проблему, которая была обнаружена одним из наших талантливых пользователей. Они сообщили нам о проблеме с нашим кодом геолокации, который мешал работе с SVG файлами. Мы реализовали исправление на основе предложенного пользователем кода, и хотим выразить большую благодарность за обнаружение проблемы и помощь в её решении.
Version/Date: 2022 10 августаверсия 5.1.2
* Мы улучшили переводы некоторых локаций VPN.
Version/Date: 2021 Ноябрь 12версия 5.1.1
* Добавлена поддержка приложения ExpressVPN для Windows версии 12.
Version/Date: 2021 23 июняверсия 5.0.2
* Исправления ошибок.
Version/Date: 2021 13 апреляверсия 5.0.1
* Исправления ошибок.
Version/Date: 2021 Январь 18версия 5.0.0
* Представлен новый дизайн приложения ExpressVPN.
Version/Date: 2020 23 декабряверсия 4.9.6
* Исправления ошибок.
Version/Date: 2020 Ноябрь 16версия 4.9.5
* Исправления ошибок.
Version/Date: 2020 28 августаверсия 4.9.4
* Исправления ошибок.
Version/Date: 2020 23 июняверсия 4.9.3
* Исправления ошибок.",https://www.expressvpn.com/ru/support/vpn-setup/release-notes/browser-extension/)
Hva er nytt i ExpressVPN for Linux?,"Version/Date: 6. februar 2025versjon 3.82.0
* Vi justerer seilene og sørger for at appen kjører jevnt.
Version/Date: 24. desember 2024versjon 3.81.0
* I går var en spa-dag for appen – den kjører nå bedre enn noensinne.
Version/Date: 23. desember 2024versjon 3.80.0
* I denne utgivelsen oppgraderte vi Lightway til å bruke hybrid ML-KEM i stedet for hybrid Kyber for post-kvante kryptografi.
Version/Date: 10. desember 2024versjon 3.79.0
* Våre teknologiske trollmenn har veivet med tryllestavene sine! Nyt forbedret stabilitet og ytelse i appen.
Version/Date: 12. november 2024versjon 3.78.0
* Vi gjorde noen små justeringer og rettelser for å holde app-opplevelsen din på topp.
Version/Date: 5. november 2024versjon 3.77.0
* Maskinrommet har vært travelt! Forvent bedre ytelse fra appen.
Version/Date: 19. august 2024versjon 3.76.0
* Vi har strøket ut noen få rynker for å sikre at appen fungerer som den skal.
Version/Date: 5. august 2024versjon 3.75.0
* Vi har rullet ut et par mindre rettelser og endringer i koden. Alt for å forbedre app-opplevelsen din, og ingenting du sannsynligvis vil legge merke til.
Version/Date: 23. juli 2024versjon 3.74.0
* Vi har strammet opp noen linjer med kode for å sikre at appen er i toppform når du trenger den.
Version/Date: 8. juli 2024versjon 3.73.0
* Vi har gjort noen forbedringer under panseret for å gi deg en jevnere opplevelse.",https://www.expressvpn.com/no/support/vpn-setup/release-notes/linux-app/)
¿Qué hay de nuevo en la extensión para navegador de ExpressVPN Keys?,"Version/Date: 27 de septiembre de 2023versión 2.0.2
* Solucionamos un problema donde se perdía la posición de desplazamiento en la lista de inicios de sesión al sincronizar.
Version/Date: 22 de septiembre de 2023versión 2.0.1
* Solucionamos un problema donde, en flujos de inicio de sesión de varios pasos, ExpressVPN Keys le mostraba inesperadamente un cuadro de diálogo de guardado automático.
Version/Date: 21 de septiembre de 2023versión 2.0.0
* Agregar, editar, ver y buscar notas seguras.
Version/Date: 20 de abril de 2023versión 1.0.16
* Hemos mejorado la fiabilidad de la importación de tarjetas de crédito y notas de otros gestores de contraseñas.
Version/Date: 30 de marzo de 2023versión 1.0.14
* Hemos mejorado la fiabilidad al importar inicios de sesión de 1Password.
Version/Date: 22 de marzo de 2023versión 1.0.13
* Hemos corregido algunos errores gráficos en el generador de contraseñas y las pantallas de visualización.
Version/Date: 16 de marzo de 2023versión 1.0.12
* ¡Ahora tiene más caracteres para jugar! Hemos aumentado los límites de los campos para títulos y nombres de usuario.
Version/Date: 13 de marzo de 2023versión 1.0.11
* Agregamos algunos iconos faltantes de otros gestores de contraseñas, cuyo almacén de contraseñas puede importarse a ExpressVPN Keys.
Version/Date: 9 de marzo de 2023versión 1.0.10
* Ver sus notas seguras guardadas.
Version/Date: 17 de febrero de 2023versión 1.0.7
* Hemos solucionado un error que ocasionalmente le impedía importar inicios de sesión desde Microsoft Edge con éxito.",https://www.expressvpn.com/es/support/vpn-setup/release-notes/keys-browser-extension/)
What’s new in ExpressVPN for Windows?,"Version/Date: 2025 January 24
* We’ve rolled out a couple of minor fixes and code changes. It’s all part of improving your app experience, and nothing you’ll likely notice.
Version/Date: 2025 January 2
* In this release, we upgraded Lightway to use hybrid ML-KEM instead of hybrid Kyber for post-quantum cryptography.
Version/Date: 2024 November 22
* A couple of fixes here and there to ensure everything works as it should.
Version/Date: 2024 November 15
* After the app’s weekly pitstop, it’s running better than ever. Boot it up and check it out for yourself!
Version/Date: 2024 November 4
* Our engineers have weeded out some minor bugs to enrich your VPN experience.
Version/Date: 2024 October 28
* We’ve updated some of our backend systems for improved performance while you use the app.
Version/Date: 2024 October 22
* Just a minor fix here and there to improve your app experience.
Version/Date: 2024 October 16
* The landlord’s ordered a mass eviction of bugs. We’ve squashed several to help make your app run smoother.
Version/Date: 2024 September 16
* Just like your car, a VPN needs a good service now and then. We’ve tuned it up and it’s now running better than ever.
Version/Date: 2024 August 19
* We’ve blown away some dust and cobwebs to keep the app running smoother than ever for you.",https://www.expressvpn.com/tr/support/vpn-setup/release-notes/windows-app/)
What’s new in ExpressVPN for iOS?,"Version/Date: 2025 January 11version 11.188.3
* We’ve rolled up our sleeves to gone on a bug hunt, squishing several in the process.
Version/Date: 2025 January 7version 11.188.1
* Eureka! Our genius engineers, fueled by coffee and frozen bagels, have made the app more efficient than ever.
Version/Date: 2024 December 21version 11.188.0
* In this release, we upgraded Lightway to use ML-KEM instead of Kyber for post-quantum cryptography.
Version/Date: 2024 December 12version 11.185.0
* We’ve done a bit of spring cleaning in the codebase. All’s right in your ExpressVPN garden now.
Version/Date: 2024 December 3version 11.184.0
* Our tech wizards have waved their magic wands! Enjoy enhanced app stability and performance.
Version/Date: 2024 November 16version 11.179.1
* Just a little touch-up here and there. All routine maintenance to keep the app running in tip-top shape for you.
Version/Date: 2024 November 13version 11.179.0
* Ding! You’ve got mail. You’ll get a notification when one of our support agents replies to you via the in-app Live Chat.
Version/Date: 2024 November 5version 11.178.0
* You can now chat directly with our customer support team right in the app. No need to waste time waiting for email replies, just tap the Live Chat icon in the bottom right-hand corner of the app or in the Help tab to get immediate answers and solutions from our world-class team of experts.
Version/Date: 2024 October 27version 11.177.0
* Our engineers have weeded out some minor bugs to enrich your VPN experience.
Version/Date: 2024 October 16version 11.175.0
* We’ve updated some of our backend systems for improved performance while you use the app.",https://www.expressvpn.com/pt/support/vpn-setup/release-notes/ios-app/)
Was ist neu in der ExpressVPN Keys Browsererweiterung?,"Version/Date: 27. September 2023Version 2.0.2
* Ein Problem behoben, bei dem die Scrollposition in der Liste der Logins verloren ging, wenn eine Synchronisierung stattfand.
Version/Date: 22. September 2023Version 2.0.1
* Wir haben ein Problem behoben, bei dem Ihnen ExpressVPN Keys bei mehrstufigen Anmeldeabläufen unerwartet einen Dialog zur automatischen Speicherung zeigte.
Version/Date: 21. September 2023Version 2.0.0
* Sichere Notizen hinzufügen, bearbeiten, ansehen und durchsuchen.
Version/Date: 20. April 2023Version 1.0.16
* Wir haben die Zuverlässigkeit beim Importieren von Kreditkarten und Notizen aus anderen Passwort-Managern verbessert.
Version/Date: 30. März 2023Version 1.0.14
* Wir haben die Zuverlässigkeit beim Import von Logins aus 1Password verbessert.
Version/Date: 22. März 2023Version 1.0.13
* Wir haben einige grafische Fehler im Passwortgenerator und auf den Anzeigeseiten behoben.
Version/Date: 16. März 2023Version 1.0.12
* Jetzt stehen Ihnen mehr Zeichen zur Verfügung! Wir haben die Feldgrenzen für Titel und Nutzernamen erhöht.
Version/Date: 13. März 2023Version 1.0.11
* Einige fehlende Symbole anderer Passwort-Manager hinzugefügt, deren gespeicherte Passwörter in ExpressVPN Keys importiert werden können.
Version/Date: 9. März 2023Version 1.0.10
* Ihre gespeicherten sicheren Notizen ansehen.
Version/Date: 17. Februar 2023Version 1.0.7
* Wir haben einen Fehler behoben, der gelegentlich das erfolgreiche Importieren von Logins aus Microsoft Edge verhinderte.",https://www.expressvpn.com/de/support/vpn-setup/release-notes/keys-browser-extension/)
Novità nell’estensione browser di ExpressVPN Keys?,"Version/Date: 27 settembre 2023versione 2.0.2
* Abbiamo risolto un problema in cui la posizione di scorrimento nella lista degli accessi veniva persa durante la sincronizzazione.
Version/Date: 22 settembre 2023versione 2.0.1
* Abbiamo risolto un problema in cui, nei flussi di accesso a più fasi, ExpressVPN Keys mostrava inaspettatamente una finestra di dialogo per il salvataggio automatico.
Version/Date: 21 settembre 2023versione 2.0.0
* Aggiungere, modificare, visualizzare e cercare note sicure.
Version/Date: 20 aprile 2023versione 1.0.16
* Abbiamo migliorato l’affidabilità dell’importazione di carte di credito e note da altri gestori di password.
Version/Date: 30 marzo 2023versione 1.0.14
* Abbiamo migliorato l’affidabilità durante l’importazione di dati di accesso da 1Password.
Version/Date: 22 marzo 2023versione 1.0.13
* Abbiamo corretto alcuni errori grafici sul generatore di password e nelle schermate di visualizzazione.
Version/Date: 16 marzo 2023versione 1.0.12
* Ora hai più caratteri con cui giocare! Abbiamo aumentato i limiti del campo per titoli e nomi utente.
Version/Date: 13 marzo 2023versione 1.0.11
* Abbiamo aggiunto alcune icone mancanti di altri gestori di password, i cui archivi di password possono essere importati in ExpressVPN Keys.
Version/Date: 9 marzo 2023versione 1.0.10
* Visualizzare le tue note sicure salvate.
Version/Date: 17 febbraio 2023versione 1.0.7
* Abbiamo risolto un bug che impediva occasionalmente di importare correttamente i dati di accesso da Microsoft Edge.",https://www.expressvpn.com/it/support/vpn-setup/release-notes/keys-browser-extension/)
มีอะไรใหม่ใน ExpressVPN สำหรับ Linux?,"Version/Date: 6 กุมภาพันธ์ 2025เวอร์ชัน 3.82.0
* เพียงแค่ปรับใบเรือและตรวจสอบให้แน่ใจว่าแอปทำงานได้อย่างราบรื่น.
Version/Date: 24 ธันวาคม 2024เวอร์ชัน 3.81.0
* เมื่อวานนี้เป็นวันดูแลแอปของเรา – ตอนนี้แอปทำงานได้ดีกว่าที่เคยเป็นมา.
Version/Date: 23 ธันวาคม 2024เวอร์ชัน 3.80.0
* ในการเปิดตัวนี้ เราได้อัปเกรด Lightway ให้ใช้ hybrid ML-KEM แทน hybrid Kyber สำหรับการเข้ารหัสด้วยควอนตัมโพสต์.
Version/Date: 10 ธันวาคม 2024เวอร์ชัน 3.79.0
* ผู้เชี่ยวชาญทางด้านเทคโนโลยีของเราได้ใช้เวทมนตร์ของพวกเขาแล้ว! เพลิดเพลินกับเสถียรภาพและประสิทธิภาพที่ดียิ่งขึ้นของแอป.
Version/Date: 12 พฤศจิกายน 2024เวอร์ชัน 3.78.0
* เราได้ทำการปรับและแก้ไขเล็กน้อยเพื่อให้ประสบการณ์ของแอปยังคงยอดเยี่ยม.
Version/Date: 5 พฤศจิกายน 2024เวอร์ชัน 3.77.0
* ห้องเครื่องกำลังยุ่งมาก! คาดหวังประสิทธิภาพที่ดีขึ้นจากแอป.
Version/Date: 19 สิงหาคม 2024เวอร์ชัน 3.76.0
* เราได้ขจัดข้อบกพร่องเล็กน้อยเพื่อให้แอปทำงานได้ตามที่ควร.
Version/Date: 5 สิงหาคม 2024เวอร์ชัน 3.75.0
* เราได้ทำการแก้ไขเล็กน้อยและเปลี่ยนแปลงโค้ดเล็กน้อย. ทั้งหมดเพื่อปรับปรุงประสบการณ์การใช้แอปของคุณ แต่น่าจะไม่มีอะไรที่คุณจะสังเกตเห็นได้.
Version/Date: 23 กรกฎาคม 2024เวอร์ชัน 3.74.0
* เราได้ปรับโค้ดเล็กน้อยเพื่อให้แอปอยู่ในสภาพที่ยอดเยี่ยมเมื่อคุณต้องการใช้งาน.
Version/Date: 8 กรกฎาคม 2024เวอร์ชัน 3.73.0
* เราได้ปรับปรุงเบื้องหลังเพื่อให้คุณได้รับประสบการณ์ที่ราบรื่นขึ้น.",https://www.expressvpn.com/th/support/vpn-setup/release-notes/linux-app/)
Mitä uutta ExpressVPN tarjoaa reitittimille?,"Version/Date: 6. joulukuuta 2024
* Päivitettiin Lightway paremman vakauden ja suorituskyvyn saavuttamiseksi.
Version/Date: Reititin v4.2.6
* Päivitettiin Lightway paremman vakauden ja suorituskyvyn saavuttamiseksi.
Version/Date: 12. heinäkuuta 2024
* Päivitettiin Lightway paremman vakauden ja suorituskyvyn saavuttamiseksi.
Version/Date: Reititin v4.2.5
* Päivitettiin Lightway paremman vakauden ja suorituskyvyn saavuttamiseksi.
Version/Date: 14. maaliskuuta 2024
* Päivitettiin Lightway paremman vakauden ja suorituskyvyn saavuttamiseksi.
Version/Date: Reititin v4.2.4
* Päivitettiin Lightway paremman vakauden ja suorituskyvyn saavuttamiseksi.
Version/Date: 24. tammikuuta 2024
* Korjasimme ongelman, joka saattoi aiheuttaa VPN:n automaattisen uudelleenyhdistämisen 15-20 minuutin välein.
Version/Date: Reititin v4.2.3
* Korjasimme ongelman, joka saattoi aiheuttaa VPN:n automaattisen uudelleenyhdistämisen 15-20 minuutin välein.
Version/Date: 30. toukokuuta 2023
* Vähensimme tilanteita, joissa saatat nähdä viestin ”Yhteys reitittimeen katkesi”.
Version/Date: Reititin v4.2.2
* Vähensimme tilanteita, joissa saatat nähdä viestin ”Yhteys reitittimeen katkesi”.",https://www.expressvpn.com/fi/support/vpn-setup/release-notes/router-app/)
"มีอะไรใหม่ในส่วนขยายเบราว์เซอร์ VPN สำหรับ Chrome, Firefox และ Edge?","Version/Date: 2024 พฤษภาคม 10เวอร์ชัน 6.0.4
* ในเวอร์ชันนี้ เรามีการแก้ไขหนึ่งรายการที่มาจากผู้ใช้ที่มีความสามารถของเรา พวกเขาแจ้งปัญหาเกี่ยวกับโค้ดจำลองสถานที่ให้เราทราบ ซึ่งส่งผลกระทบต่อไฟล์ SVG ของเรา เราได้นำการแก้ไขที่อ้างอิงจากโค้ดที่ผู้ใช้แนะนำมาใช้แล้ว และเราอยากจะขอบคุณพวกเขาอย่างมากที่พบปัญหาและช่วยเราแก้ไขปัญหา.
Version/Date: 10 สิงหาคม 2022เวอร์ชัน 5.1.2
* เราได้ปรับปรุงการแปลของตำแหน่ง VPN บางรายการ.
Version/Date: 12 พฤศจิกายน 2021เวอร์ชัน 5.1.1
* เพิ่มการสนับสนุนสำหรับแอป ExpressVPN Windows เวอร์ชัน 12
Version/Date: 23 มิถุนายน 2021เวอร์ชัน 5.0.2
* แก้ไขบั๊ก.
Version/Date: 13 เมษายน 2021เวอร์ชัน 5.0.1
* แก้ไขบั๊ก.
Version/Date: 18 มกราคม 2021เวอร์ชัน 5.0.0
* ขอแนะนำดีไซน์แอปใหม่ของ ExpressVPN.
Version/Date: 23 ธันวาคม 2020เวอร์ชัน 4.9.6
* แก้ไขบั๊ก.
Version/Date: 16 พฤศจิกายน 2020เวอร์ชัน 4.9.5
* แก้ไขบั๊ก.
Version/Date: 28 สิงหาคม 2020เวอร์ชัน 4.9.4
* แก้ไขบั๊ก.
Version/Date: 23 มิถุนายน 2020เวอร์ชัน 4.9.3
* แก้ไขบั๊ก.",https://www.expressvpn.com/th/support/vpn-setup/release-notes/browser-extension/)
공유기용 ExpressVPN의 새로운 기능은 무엇입니까?,"Version/Date: 2024년 12월 6일
* 안정성과 성능 향상을 위해 Lightway를 업데이트했습니다.
Version/Date: 공유기 v4.2.6
* 안정성과 성능 향상을 위해 Lightway를 업데이트했습니다.
Version/Date: 2024년 7월 12일
* 안정성과 성능 향상을 위해 Lightway를 업데이트했습니다.
Version/Date: 공유기 v4.2.5
* 안정성과 성능 향상을 위해 Lightway를 업데이트했습니다.
Version/Date: 2024년 3월 14일
* 안정성과 성능 향상을 위해 Lightway를 업데이트했습니다.
Version/Date: 공유기 v4.2.4
* 안정성과 성능 향상을 위해 Lightway를 업데이트했습니다.
Version/Date: 2024년 1월 24일
* VPN이 15에서 20분마다 자동으로 재연결될 수 있는 문제를 수정했습니다.
Version/Date: 공유기 v4.2.3
* VPN이 15에서 20분마다 자동으로 재연결될 수 있는 문제를 수정했습니다.
Version/Date: 2023년 5월 30일
* “공유기와의 연결이 끊겼습니다” 메시지가 표시되는 횟수를 줄였습니다.
Version/Date: 공유기 v4.2.2
* “공유기와의 연결이 끊겼습니다” 메시지가 표시되는 횟수를 줄였습니다.",https://www.expressvpn.com/kr/support/vpn-setup/release-notes/router-app/)
Yönlendiriciler için ExpressVPN’de neler yeni?,"Version/Date: 6 Aralık 2024
* Daha iyi kararlılık ve performans için Lightway’i güncelledik.
Version/Date: Yönlendirici v4.2.6
* Daha iyi kararlılık ve performans için Lightway’i güncelledik.
Version/Date: 12 Temmuz 2024
* Daha iyi kararlılık ve performans için Lightway’i güncelledik.
Version/Date: Yönlendirici v4.2.5
* Daha iyi kararlılık ve performans için Lightway’i güncelledik.
Version/Date: 14 Mart 2024
* Daha iyi kararlılık ve performans için Lightway’i güncelledik.
Version/Date: Yönlendirici v4.2.4
* Daha iyi kararlılık ve performans için Lightway’i güncelledik.
Version/Date: 24 Ocak 2024
* VPN’in her 15 ila 20 dakikada bir otomatik olarak yeniden bağlanmasına neden olabilecek bir sorunu düzelttik.
Version/Date: Yönlendirici v4.2.3
* VPN’in her 15 ila 20 dakikada bir otomatik olarak yeniden bağlanmasına neden olabilecek bir sorunu düzelttik.
Version/Date: 30 Mayıs 2023
* “Yönlendirici bağlantısı kayboldu” mesajını görme sıklığını azalttık.
Version/Date: Yönlendirici v4.2.2
* “Yönlendirici bağlantısı kayboldu” mesajını görme sıklığını azalttık.",https://www.expressvpn.com/tr/support/vpn-setup/release-notes/router-app/)
Новости ExpressVPN для Apple TV,"Version/Date: 2024 20 мартаверсия 11.138.0
* Подчистили внутренние механизмы, приложение работает лучше, чем раньше.
Version/Date: 2024 26 февраляверсия 11.133.0
* Блокируйте рекламу и трекеры.
Version/Date: 24 января 2024версия 11.128.0
* Совершенно новая кнопка, которую можно использовать для регистрации с устройства iOS.
Version/Date: 2023 18 декабряверсия 11.126.0
* Отправьте сообщение нашей службе поддержки, включая данные диагностики, чтобы помочь решить любые проблемы, с которыми вы можете столкнуться.
Version/Date: 2023 4 декабряверсия 11.124.0
* Отправьте сообщение нашей службе поддержки, включая данные диагностики, чтобы помочь решить любые проблемы, с которыми вы можете столкнуться.
Version/Date: 2023 Ноябрь 29версия 11.123.0
* VPN для любых устройств",https://www.expressvpn.com/ru/support/vpn-setup/release-notes/tvos-app/)
What’s new in ExpressVPN for Linux?,"Version/Date: 2025 March 4version 4.0.1
* Fixed an issue that was preventing the app to connect to another server while connected.
Version/Date: 2025 February 21version 4.0.0
* Graphical User Interface (GUI)
Version/Date: 2025 February 6version 3.82.0
* Just adjusting the sails and making sure the app runs smoothly.
Version/Date: 2024 December 24version 3.81.0
* Yesterday was a spa day for the app—it’s now running better than ever.
Version/Date: 2024 December 23version 3.80.0
* In this release, we upgraded Lightway to use hybrid ML-KEM instead of hybrid Kyber for post-quantum cryptography.
Version/Date: 2024 December 10version 3.79.0
* Our tech wizards have waved their magic wands! Enjoy enhanced app stability and performance.
Version/Date: 2024 November 12version 3.78.0
* We made some small tweaks and fixes to keep your app experience top-notch.
Version/Date: 2024 November 5version 3.77.0
* The engine room’s been busy! Expect better performance from the app.
Version/Date: 2024 August 19version 3.76.0
* We’ve ironed out a few wrinkles to ensure the app runs as it should.
Version/Date: 2024 August 5version 3.75.0
* We’ve rolled out a couple of minor fixes and code changes. It’s all part of improving your app experience, and nothing you’ll likely notice.",https://www.expressvpn.com/pt/support/vpn-setup/release-notes/linux-app/)
Quoi de neuf dans ExpressVPN pour Android ?,"Version/Date: 25 février 2025version 11.89.0
* Une réduction de la taille de l’application. Nos ingénieurs ont travaillé dur pour optimiser l’application afin que vous puissiez la télécharger plus rapidement que jamais.
Version/Date: 9 février 2025version 11.88.0
* Tout comme votre voiture, un VPN a besoin d’un bon entretien de temps en temps. Nous l’avons optimisé, et il fonctionne mieux que jamais.
Version/Date: 6 février 2025version 11.87.0
* Nous avons soufflé sur la poussière et éliminé les toiles d’araignée pour que l’application fonctionne plus fluidement que jamais.
Version/Date: 1er février 2025version 11.86.0
* Quelques corrections de bugs mineures ici et là.
Version/Date: 31 janvier 2025version 11.85.0
* Nos ingénieurs ont apporté des corrections de bugs et des améliorations de performances pour vous offrir une expérience VPN plus fluide.
Version/Date: 21 janvier 2025version 11.84.0
* Votre sécurité est notre priorité—c’est pourquoi nous avons renforcé nos protocoles de chiffrement et notre code. Profitez de cette sécurité renforcée.
Version/Date: 16 janvier 2025version 11.83.0
* Eurêka ! Nos ingénieurs de génie, dopés au café et aux bagels congelés, ont rendu l’application plus efficace que jamais.
Version/Date: 9 janvier 2025version 11.82.0
* Juste quelques ajustements pour s’assurer que l’application tourne comme une horloge.
Version/Date: 20 décembre 2024version 11.81.0
* Dans cette mise à jour, nous avons amélioré Lightway pour utiliser ML-KEM au lieu de Kyber pour la cryptographie post-quantique.
Version/Date: 11 décembre 2024version 11.80.0
* Vous remarquez quelque chose de nouveau ? Dites bonjour à l’onglet Améliorations ! C’est ici que vous trouverez des fonctionnalités comme l’IP dédiée, la Protection avancée et Keys.",https://www.expressvpn.com/fr/support/vpn-setup/release-notes/android-app/)
Nouveautés dans ExpressVPN pour Apple TV,"Version/Date: 20 mars 2024version 11.138.0
* Nous avons peaufiné nos moteurs internes ; l’appli fonctionne mieux qu’auparavant.
Version/Date: 26 février 2024version 11.133.0
* Bloquer les publicités et les traqueurs.
Version/Date: 24 janvier 2024version 11.128.0
* Un tout nouveau bouton que vous pouvez utiliser pour vous inscrire avec un appareil iOS.
Version/Date: 18 décembre 2023version 11.126.0
* Envoyez un message à notre équipe de support, y compris les informations de diagnostic, pour aider à résoudre les problèmes que vous pourriez rencontrer.
Version/Date: 4 décembre 2023version 11.124.0
* Envoyez un message à notre équipe de support, y compris les informations de diagnostic, pour aider à résoudre les problèmes que vous pourriez rencontrer.
Version/Date: 29 novembre 2023version 11.123.0
* VPN pour tout appareil",https://www.expressvpn.com/fr/support/vpn-setup/release-notes/tvos-app/)
Vad är nytt med ExpressVPN för routrar?,"Version/Date: 6 december 2024
* Uppdaterat Lightway för bättre stabilitet och prestanda.
Version/Date: Router v4.2.6
* Uppdaterat Lightway för bättre stabilitet och prestanda.
Version/Date: 12 juli 2024
* Uppdaterat Lightway för bättre stabilitet och prestanda.
Version/Date: Router v4.2.5
* Uppdaterat Lightway för bättre stabilitet och prestanda.
Version/Date: 14 mars 2024
* Uppdaterat Lightway för bättre stabilitet och prestanda.
Version/Date: Router v4.2.4
* Uppdaterat Lightway för bättre stabilitet och prestanda.
Version/Date: 24 januari 2024
* Åtgärdat ett problem som kan göra att VPN automatiskt återansluts var 15 till 20 minuter.
Version/Date: Router v4.2.3
* Åtgärdat ett problem som kan göra att VPN automatiskt återansluts var 15 till 20 minuter.
Version/Date: 30 maj 2023
* Minskat antalet gånger du kan se ett meddelande om att ”Anslutningen till routern förlorades”.
Version/Date: Router v4.2.2
* Minskat antalet gånger du kan se ett meddelande om att ”Anslutningen till routern förlorades”.",https://www.expressvpn.com/se/support/vpn-setup/release-notes/router-app/)
Hvad er nyt i ExpressVPN til Android?,"Version/Date: 25. februar 2025version 11.89.0
* Mindre appstørrelse. Vores ingeniører har arbejdet hårdt på at optimere appen, så du kan downloade den hurtigere end nogensinde.
Version/Date: 9. februar 2025version 11.88.0
* Ligesom din bil har en VPN brug for service en gang imellem. Vi har givet den et eftersyn, og nu kører den bedre end nogensinde.
Version/Date: 6. februar 2025version 11.87.0
* Vi har fjernet lidt støv og spindelvæv, så appen kører endnu mere gnidningsfrit for dig.
Version/Date: 1. februar 2025version 11.86.0
* Bare et par små fejlrettelser her og der.
Version/Date: 31. januar 2025version 11.85.0
* Vores ingeniører har pillet ved koden og fikset fejl for at give dig en endnu bedre VPN-oplevelse.
Version/Date: 21. januar 2025version 11.84.0
* Din sikkerhed er vores prioritet – derfor har vi styrket vores krypteringsprotokoller og kode. Nyd den ekstra beskyttelse.
Version/Date: 16. januar 2025version 11.83.0
* Eureka! Vores geniale ingeniører, drevet af kaffe og frosne bagels, har gjort appen mere effektiv end nogensinde.
Version/Date: 9. januar 2025version 11.82.0
* Vi justerer sejlene og sørger for, at appen kører gnidningsfrit.
Version/Date: 20. december 2024version 11.81.0
* I denne opdatering har vi opgraderet Lightway til at bruge ML-KEM i stedet for Kyber til post-kvantum-kryptering.
Version/Date: 11. december 2024version 11.80.0
* Ser du noget nyt? Sig hej til fanen *Opgraderinger*! Det er her, du finder funktioner som Dedicated IP, Advanced Protection og Keys.",https://www.expressvpn.com/dk/support/vpn-setup/release-notes/android-app/)
"Wat is er nieuw in de VPN-browserextensie voor Chrome, Firefox en Edge?","Version/Date: 10 mei 2024versie 6.0.4
* In deze release hebben we een oplossing voor een probleem dat door een van onze getalenteerde gebruikers is gerapporteerd. Zij meldden een probleem met onze geospoofingcode die SVG-bestanden beïnvloedde. We hebben nu een oplossing geïmplementeerd gebaseerd op de door de gebruiker voorgestelde code, en we willen hen hartelijk bedanken voor het herkennen van het probleem en ons te helpen het op te lossen.
Version/Date: 10 augustus 2022versie 5.1.2
* We hebben de vertalingen van sommige VPN-locaties verbeterd.
Version/Date: 12 november 2021versie 5.1.1
* Ondersteuning toegevoegd voor ExpressVPN Windows-app v12.
Version/Date: 23 juni 2021versie 5.0.2
* Oplossingen voor bugs.
Version/Date: 13 april 2021versie 5.0.1
* Oplossingen voor bugs.
Version/Date: 18 januari 2021versie 5.0.0
* Maak kennis met het nieuwe app-ontwerp van ExpressVPN.
Version/Date: 23 december 2020versie 4.9.6
* Oplossingen voor bugs.
Version/Date: 16 november 2020versie 4.9.5
* Oplossingen voor bugs.
Version/Date: 28 augustus 2020versie 4.9.4
* Oplossingen voor bugs.
Version/Date: 23 juni 2020versie 4.9.3
* Oplossingen voor bugs.",https://www.expressvpn.com/nl/support/vpn-setup/release-notes/browser-extension/)
How to set up and use your dedicated IP address on Android,Setting up the VPNSetting up your dedicated IPUsing your dedicated IP on other devices,https://www.expressvpn.com/support/vpn-setup/dedicated-ip-android/)
"How to set up ExpressVPN on iOS 12 and above (iPhone, iPad, and iPod)",https://www.youtube.com/embed/ibLcgGh2hEk,https://www.expressvpn.com/support/vpn-setup/app-for-ios/)
How to set up ExpressVPN Keys on the ExpressVPN iOS app,Create an ExpressVPN Keys accountSet up ExpressVPN Keys on another deviceHow to use ExpressVPN KeysReport a bug,https://www.expressvpn.com/support/vpn-setup/password-manager-ios/)
"What’s new in the VPN browser extension for Chrome, Firefox, and Edge?","Version/Date: 2024 May 10version 6.0.4
* In this release, we have a fix that comes from one of our talented users.They reported an issue to us regarding our geo spoofing code and how it was interfering with SVG files. We have now implemented a fix based on the user’s suggested code, so we want to give them a big thank you for spotting the issue and helping us solve it.
Version/Date: 2022 August 10version 5.1.2
* We improved the translations of some VPN locations.
Version/Date: 2021 November 12version 5.1.1
* Added support for ExpressVPN Windows app v12.
Version/Date: 2021 June 23version 5.0.2
* Bug fixes.
Version/Date: 2021 April 13version 5.0.1
* Bug fixes.
Version/Date: 2021 January 18version 5.0.0
* Introducing ExpressVPN’s new app design.
Version/Date: 2020 December 23version 4.9.6
* Bug fixes.
Version/Date: 2020 November 16version 4.9.5
* Bug fixes.
Version/Date: 2020 August 28version 4.9.4
* Bug fixes.
Version/Date: 2020 June 23version 4.9.3
* Bug fixes.",https://www.expressvpn.com/support/vpn-setup/release-notes/browser-extension/)
¿Qué hay de nuevo en ExpressVPN para Android?,"Version/Date: 25 de febrero de 2025versión 11.89.0
* Una reducción en el tamaño de la aplicación. Nuestros ingenieros han trabajado arduamente para optimizarla, permitiéndole descargarla más rápido que nunca.
Version/Date: 9 de febrero de 2025versión 11.88.0
* Al igual que su automóvil, una VPN necesita un buen mantenimiento de vez en cuando. La hemos optimizado y ahora funciona mejor que nunca.
Version/Date: 6 de febrero de 2025versión 11.87.0
* Hemos eliminado un poco de polvo y telarañas para que la aplicación funcione con mayor fluidez.
Version/Date: 1 de febrero de 2025versión 11.86.0
* Solo un par de pequeñas correcciones de errores aquí y allá.
Version/Date: 31 de enero de 2025versión 11.85.0
* Nuestros ingenieros han estado trabajando en correcciones de errores y mejoras de rendimiento para brindarle una experiencia VPN más fluida.
Version/Date: 21 de enero de 2025versión 11.84.0
* Su seguridad es nuestra prioridad; por eso hemos reforzado nuestros protocolos de cifrado y código. Disfrute de la seguridad mejorada.
Version/Date: 16 de enero de 2025versión 11.83.0
* ¡Eureka! Nuestros ingenieros genios, impulsados por café y bagels congelados, han hecho que la aplicación sea más eficiente que nunca.
Version/Date: 9 de enero de 2025versión 11.82.0
* Solo ajustando las velas y asegurándonos de que la aplicación funcione sin problemas.
Version/Date: 20 de diciembre de 2024versión 11.81.0
* En esta versión, actualizamos Lightway para usar ML-KEM en lugar de Kyber para la criptografía post-cuántica.
Version/Date: 11 de diciembre de 2024versión 11.80.0
* ¿Nota algo nuevo? ¡Le damos la bienvenida a la pestaña Mejoras! Aquí encontrará funciones como IP dedicada, Protección avanzada y Keys.",https://www.expressvpn.com/es/support/vpn-setup/release-notes/android-app/)
Mitä uutta ExpressVPN tarjoaa Linuxille?,"Version/Date: 2025 Helmikuun 6versio 3.82.0
* Säätöjä purjeisiin ja varmistuksia sovelluksen sulavan toiminnan takaamiseksi.
Version/Date: 2024 Joulukuun 24versio 3.81.0
* Eilinen oli sovelluksen hemmottelupäivä – se toimii nyt paremmin kuin koskaan.
Version/Date: 2024 Joulukuun 23versio 3.80.0
* Tässä julkaisussa päivitimme Lightwayn käyttämään hybridi ML-KEM:ia sen sijaan, että käyttäisimme hybridi Kyberiä kvanttikestävässä salauksessa.
Version/Date: 2024 Joulukuun 10versio 3.79.0
* Teknologian ihmemiehet ovat heiluttaneet taikasauvaa! Nauti parannellusta sovelluksen vakaudesta ja suorituskyvystä.
Version/Date: 12. marraskuuta 2024versio 3.78.0
* Teimme muutamia pieniä säätöjä ja korjauksia, jotta sovellukseesi saadaan huippuluokan kokemus.
Version/Date: 5. marraskuuta 2024versio 3.77.0
* Konehuone on ollut kiireinen! Odotettavissa parempi sovelluksen suorituskyky.
Version/Date: 2024 Elokuun 19versio 3.76.0
* Olemme korjanneet muutamia virheitä varmistaaksemme sovelluksen toiminnan kuten pitääkin.
Version/Date: 2024 Elokuun 5versio 3.75.0
* Olemme toteuttaneet muutamia pieniä korjauksia ja koodimuutoksia. Kaikki tämä parantaa sovelluskokemustasi, mutta et todennäköisesti huomaa mitään.
Version/Date: 2024 Heinäkuun 23versio 3.74.0
* Olemme tiivistäneet muutaman koodirivin varmistaaksemme, että sovellus on huippukunnossa, kun sitä tarvitsette.
Version/Date: 2024 Heinäkuun 8versio 3.73.0
* Olemme tehneet muutamia parannuksia moottorin alla tarjotaksemme sujuvamman kokemuksen.",https://www.expressvpn.com/fi/support/vpn-setup/release-notes/linux-app/)
ExpressVPN Keys tarayıcı uzantısında yeni neler var?,"Version/Date: 27 Eylül 2023versiyon 2.0.2
* Eşitleme gerçekleştiğinde, giriş bilgileri listesindeki kaydırma pozisyonunun kaybolmasına neden olan bir sorun düzeltildi.
Version/Date: 22 Eylül 2023versiyon 2.0.1
* Çok adımlı giriş akışlarında, ExpressVPN Keys’in beklenmedik bir şekilde otomatik kaydetme diyalog kutusu gösterdiği bir sorun düzeltildi.
Version/Date: 21 Eylül 2023versiyon 2.0.0
* Güvenli notlar ekleyin, düzenleyin, görüntüleyin ve arayın.
Version/Date: 2023 Nisan 20versiyon 1.0.16
* Diğer şifre yöneticilerinden kredi kartları ve notların içe aktarılabilirliği güvenilirliğini artırdık.
Version/Date: 2023 Mart 30versiyon 1.0.14
* 1Password’dan giriş bilgilerini içe aktardığınızda güvenilirliği artırdık.
Version/Date: 2023 Mart 22versiyon 1.0.13
* Şifre oluşturucu ve görüntüleme ekranlarındaki bazı grafik hatalarını düzelttik.
Version/Date: 2023 Mart 16versiyon 1.0.12
* Artık daha fazla karakter kullanabilirsiniz! Başlıklar ve kullanıcı adları için alan limitlerini artırdık.
Version/Date: 2023 Mart 13versiyon 1.0.11
* ExpressVPN Keys’e içe aktarılabilecek şifreleri depolayan diğer şifre yöneticilerinin eksik simgeleri eklendi.
Version/Date: 2023 Mart 9versiyon 1.0.10
* Kaydedilmiş güvenli notlarınızı görüntüleyin.
Version/Date: 2023 Şubat 17versiyon 1.0.7
* Microsoft Edge’den giriş bilgilerini başarılı bir şekilde içe aktarmanızı zaman zaman engelleyen bir hata düzeltildi.",https://www.expressvpn.com/tr/support/vpn-setup/release-notes/keys-browser-extension/)
Apple TV版ExpressVPNの新着情報,"Version/Date: 2024年3月20日バージョン11.138.0
* 内部エンジンを刷新し、アプリがより良く動作しています。
Version/Date: 2024年2月26日バージョン11.133.0
* 広告とトラッカーをブロック。
Version/Date: 2024年1月24日バージョン11.128.0
* iOSデバイスでサインアップするための新しいボタン。
Version/Date: 2023年12月18日バージョン11.126.0
* お困りの点があれば、診断情報を含めたメッセージをサポートチームにお送りいただき、問題解決のお手伝いをいたします。
Version/Date: 2023年12月4日バージョン11.124.0
* お困りの点があれば、診断情報を含めたメッセージをサポートチームにお送りいただき、問題解決のお手伝いをいたします。
Version/Date: 2023年291月1日バージョン11.123.0
* 各デバイス対応のVPN",https://www.expressvpn.com/jp/support/vpn-setup/release-notes/tvos-app/)
How to set up and use your dedicated IP address on iOS,Setting up the VPNSetting up your dedicated IPUsing your dedicated IP on other devices,https://www.expressvpn.com/support/vpn-setup/dedicated-ip-ios/)
What’s new in ExpressVPN for Mac?,"Version/Date: 2025 January 31version 11.69.0
* Just a few more minor fixes.
Version/Date: 2025 January 31version 11.68.0
* The landlord’s ordered a mass eviction of bugs. We’ve squashed several to help make your app run smoother.
Version/Date: 2025 January 2version 11.67.0
* Just like your car, a VPN needs a good service now and then. We’ve tuned it up and it’s now running better than ever.
Version/Date: 2024 December 24version 11.66.0
* In this release, we upgraded Lightway to use hybrid ML-KEM instead of hybrid Kyber for post-quantum cryptography.
Version/Date: 2024 December 4version 11.65.0
* We are excited to introduce Identity Defender, a new suite of tools for our U.S.-based customers designed to give you more control over your personal information. Identity Defender comprises four products: ID Alerts, ID Theft Insurance, Data Removal, and Credit Scanner.
Version/Date: 2024 November 15version 11.64.0
* Our engineers have been tinkering away with bug fixes and performance enhancements to give you a smoother VPN experience.
Version/Date: 2024 November 6version 11.63.0
* We fixed a niggling bug that caused advanced protection settings to turn on unexpectedly.
Version/Date: 2024 October 30version 11.62.0
* Eureka! Our genius engineers, fueled by coffee and frozen bagels, have made the app more efficient than ever.
Version/Date: 2024 October 10version 11.61.0
* Fixed an issue on macOS 15 Sequoia where Apple Messages and FaceTime didn’t work properly while connected to VPN.
Version/Date: 2024 September 30version 11.60.0
* Yesterday was a spa day for the app—it’s now running better than ever.",https://www.expressvpn.com/support/vpn-setup/release-notes/mac-app/)
What’s new in the ExpressVPN Keys browser extension?,"Version/Date: 2023 September 27version 2.0.2
* Fixed an issue where the scrolling position in the list of logins would be lost when syncing occurs.
Version/Date: 2023 September 22version 2.0.1
* We fixed an issue where, on multi-step sign-in flows, ExpressVPN Keys would show you an auto-save dialog unexpectedly.
Version/Date: 2023 September 21version 2.0.0
* Add, edit, view, and search for secure notes.
Version/Date: 2023 April 20version 1.0.16
* We’ve improved the reliability of importing credit cards and notes from other password managers.
Version/Date: 2023 March 30version 1.0.14
* We’ve improved the reliability when you import logins from 1Password.
Version/Date: 2023 March 22version 1.0.13
* We’ve fixed a few graphical errors on the password generator and view screens.
Version/Date: 2023 March 16version 1.0.12
* You now have more characters to play with! We’ve increased the field limits for titles and usernames.
Version/Date: 2023 March 13version 1.0.11
* Added some missing icons of other password managers, who’s store of passwords can be imported into ExpressVPN Keys.
Version/Date: 2023 March 9version 1.0.10
* View your saved secure notes.
Version/Date: 2023 February 17version 1.0.7
* We’ve fixed a bug that was occasionally preventing you from successfully importing logins from Microsoft Edge.",https://www.expressvpn.com/support/vpn-setup/release-notes/keys-browser-extension/)
What’s new in AircoveOS for ExpressVPN Aircove?,"Version/Date: 2025 March 3
* Fixed some bugs in Wi-Fi Link and guest Wi-Fi.
Version/Date: AircoveOS 5.2.2
* Fixed some bugs in Wi-Fi Link and guest Wi-Fi.
Version/Date: 2025 February 4
* Improved Wi-Fi compatibility for Windows devices and some WPA2-only legacy devices.
Version/Date: AircoveOS 5.2.1
* Improved Wi-Fi compatibility for Windows devices and some WPA2-only legacy devices.
Version/Date: 2025 January 15
* Updated AircoveOS v5 so it now supports Aircove Go.
Version/Date: AircoveOS 5.2.0
* Updated AircoveOS v5 so it now supports Aircove Go.
Version/Date: 2024 December 4
* Fixed an issue that prevents some devices from accessing the internet when the VPN is connected.
Version/Date: AircoveOS 5.1.1(for Aircove only)
* Fixed an issue that prevents some devices from accessing the internet when the VPN is connected.
Version/Date: 2024 October 23
* Added the ability to connect to the internet via Wi-Fi Link while setting up Aircove Go
Version/Date: AircoveOS 5.1.0 (for Aircove only)
* Added the ability to connect to the internet via Wi-Fi Link while setting up Aircove Go",https://www.expressvpn.com/support/vpn-setup/release-notes/aircoveos/)
What’s new in ExpressVPN for Windows?,"Version/Date: 2025 January 24
* We’ve rolled out a couple of minor fixes and code changes. It’s all part of improving your app experience, and nothing you’ll likely notice.
Version/Date: 2025 January 2
* In this release, we upgraded Lightway to use hybrid ML-KEM instead of hybrid Kyber for post-quantum cryptography.
Version/Date: 2024 November 22
* A couple of fixes here and there to ensure everything works as it should.
Version/Date: 2024 November 15
* After the app’s weekly pitstop, it’s running better than ever. Boot it up and check it out for yourself!
Version/Date: 2024 November 4
* Our engineers have weeded out some minor bugs to enrich your VPN experience.
Version/Date: 2024 October 28
* We’ve updated some of our backend systems for improved performance while you use the app.
Version/Date: 2024 October 22
* Just a minor fix here and there to improve your app experience.
Version/Date: 2024 October 16
* The landlord’s ordered a mass eviction of bugs. We’ve squashed several to help make your app run smoother.
Version/Date: 2024 September 16
* Just like your car, a VPN needs a good service now and then. We’ve tuned it up and it’s now running better than ever.
Version/Date: 2024 August 19
* We’ve blown away some dust and cobwebs to keep the app running smoother than ever for you.",https://www.expressvpn.com/dk/support/vpn-setup/release-notes/windows-app/)
Co nowego w ExpressVPN na Androida?,"Version/Date: 25 lutego 2025wersja 11.89.0
* Zmniejszenia rozmiaru aplikacji. Nasi inżynierowie zoptymalizowali ją tak, aby pobieranie było szybsze niż kiedykolwiek.
Version/Date: 9 lutego 2025wersja 11.88.0
* Tak jak Twój samochód, VPN od czasu do czasu potrzebuje przeglądu. Dokonaliśmy niezbędnych poprawek i teraz działa lepiej niż kiedykolwiek.
Version/Date: 6 lutego 2025wersja 11.87.0
* Usunęliśmy trochę kurzu i pajęczyn, aby aplikacja działała płynniej niż kiedykolwiek.
Version/Date: 1 lutego 2025wersja 11.86.0
* Kilka drobnych poprawek błędów tu i tam.
Version/Date: 31 stycznia 2025wersja 11.85.0
* Nasi inżynierowie wprowadzili poprawki błędów i ulepszenia wydajności, aby zapewnić Ci jeszcze płynniejsze korzystanie z VPN.
Version/Date: 21 stycznia 2025wersja 11.84.0
* Twoje bezpieczeństwo jest dla nas priorytetem – dlatego wzmocniliśmy nasze protokoły szyfrowania i kod. Ciesz się zwiększoną ochroną.
Version/Date: 16 stycznia 2025wersja 11.83.0
* Eureka! Nasi genialni inżynierowie, napędzani kawą i mrożonymi bajglami, sprawili, że aplikacja działa jeszcze wydajniej.
Version/Date: 9 stycznia 2025wersja 11.82.0
* Drobne poprawki, aby zapewnić Ci jeszcze płynniejsze działanie aplikacji.
Version/Date: 20 grudnia 2024wersja 11.81.0
* W tej wersji zaktualizowaliśmy Lightway, który teraz wykorzystuje ML-KEM zamiast Kyber do kryptografii postkwantowej.
Version/Date: 11 grudnia 2024wersja 11.80.0
* Zauważyłeś coś nowego? Powitaj zakładkę „Ulepszenia”! To tutaj znajdziesz funkcje takie jak Dedykowany IP, Zaawansowana Ochrona i Keys.",https://www.expressvpn.com/pl/support/vpn-setup/release-notes/android-app/)
What’s new in ExpressVPN for Routers?,"Version/Date: 2024 December 6
* Updated Lightway for better stability and performance.
Version/Date: Router v4.2.6
* Updated Lightway for better stability and performance.
Version/Date: 2024 July 12
* Updated Lightway for better stability and performance.
Version/Date: Router v4.2.5
* Updated Lightway for better stability and performance.
Version/Date: 2024 March 14
* Updated Lightway for better stability and performance.
Version/Date: Router v4.2.4
* Updated Lightway for better stability and performance.
Version/Date: 2024 January 24
* Fixed an issue that might cause the VPN to automatically reconnect every 15 to 20 minutes.
Version/Date: Router v4.2.3
* Fixed an issue that might cause the VPN to automatically reconnect every 15 to 20 minutes.
Version/Date: 2023 May 30
* Reduced the number of times where you might see a “Connection to router lost” message.
Version/Date: Router v4.2.2
* Reduced the number of times where you might see a “Connection to router lost” message.",https://www.expressvpn.com/fr/support/vpn-setup/release-notes/router-app/)
What’s new in ExpressVPN for Windows?,"Version/Date: 2025 January 24
* We’ve rolled out a couple of minor fixes and code changes. It’s all part of improving your app experience, and nothing you’ll likely notice.
Version/Date: 2025 January 2
* In this release, we upgraded Lightway to use hybrid ML-KEM instead of hybrid Kyber for post-quantum cryptography.
Version/Date: 2024 November 22
* A couple of fixes here and there to ensure everything works as it should.
Version/Date: 2024 November 15
* After the app’s weekly pitstop, it’s running better than ever. Boot it up and check it out for yourself!
Version/Date: 2024 November 4
* Our engineers have weeded out some minor bugs to enrich your VPN experience.
Version/Date: 2024 October 28
* We’ve updated some of our backend systems for improved performance while you use the app.
Version/Date: 2024 October 22
* Just a minor fix here and there to improve your app experience.
Version/Date: 2024 October 16
* The landlord’s ordered a mass eviction of bugs. We’ve squashed several to help make your app run smoother.
Version/Date: 2024 September 16
* Just like your car, a VPN needs a good service now and then. We’ve tuned it up and it’s now running better than ever.
Version/Date: 2024 August 19
* We’ve blown away some dust and cobwebs to keep the app running smoother than ever for you.",https://www.expressvpn.com/it/support/vpn-setup/release-notes/windows-app/)
What’s new in ExpressVPN for iOS?,"Version/Date: 2025 January 11version 11.188.3
* We’ve rolled up our sleeves to gone on a bug hunt, squishing several in the process.
Version/Date: 2025 January 7version 11.188.1
* Eureka! Our genius engineers, fueled by coffee and frozen bagels, have made the app more efficient than ever.
Version/Date: 2024 December 21version 11.188.0
* In this release, we upgraded Lightway to use ML-KEM instead of Kyber for post-quantum cryptography.
Version/Date: 2024 December 12version 11.185.0
* We’ve done a bit of spring cleaning in the codebase. All’s right in your ExpressVPN garden now.
Version/Date: 2024 December 3version 11.184.0
* Our tech wizards have waved their magic wands! Enjoy enhanced app stability and performance.
Version/Date: 2024 November 16version 11.179.1
* Just a little touch-up here and there. All routine maintenance to keep the app running in tip-top shape for you.
Version/Date: 2024 November 13version 11.179.0
* Ding! You’ve got mail. You’ll get a notification when one of our support agents replies to you via the in-app Live Chat.
Version/Date: 2024 November 5version 11.178.0
* You can now chat directly with our customer support team right in the app. No need to waste time waiting for email replies, just tap the Live Chat icon in the bottom right-hand corner of the app or in the Help tab to get immediate answers and solutions from our world-class team of experts.
Version/Date: 2024 October 27version 11.177.0
* Our engineers have weeded out some minor bugs to enrich your VPN experience.
Version/Date: 2024 October 16version 11.175.0
* We’ve updated some of our backend systems for improved performance while you use the app.",https://www.expressvpn.com/fr/support/vpn-setup/release-notes/ios-app/)
Hva er nytt i ExpressVPN for rutere?,"Version/Date: 6. desember 2024
* Oppdatert Lightway for bedre stabilitet og ytelse.
Version/Date: Ruter v4.2.6
* Oppdatert Lightway for bedre stabilitet og ytelse.
Version/Date: 12. juli 2024
* Oppdatert Lightway for bedre stabilitet og ytelse.
Version/Date: Ruter v4.2.5
* Oppdatert Lightway for bedre stabilitet og ytelse.
Version/Date: 14. mars 2024
* Oppdatert Lightway for bedre stabilitet og ytelse.
Version/Date: Ruter v4.2.4
* Oppdatert Lightway for bedre stabilitet og ytelse.
Version/Date: 24. januar 2024
* Fikset et problem som kan føre til at VPN automatisk kobles til hvert 15. til 20. minutt.
Version/Date: Ruter v4.2.3
* Fikset et problem som kan føre til at VPN automatisk kobles til hvert 15. til 20. minutt.
Version/Date: 30. mai 2023
* Redusert antall ganger du kan se meldingen «Tilkobling til ruter mistet».
Version/Date: Ruter v4.2.2
* Redusert antall ganger du kan se meldingen «Tilkobling til ruter mistet».",https://www.expressvpn.com/no/support/vpn-setup/release-notes/router-app/)
What’s new in ExpressVPN for Windows?,"Version/Date: 2025 January 24
* We’ve rolled out a couple of minor fixes and code changes. It’s all part of improving your app experience, and nothing you’ll likely notice.
Version/Date: 2025 January 2
* In this release, we upgraded Lightway to use hybrid ML-KEM instead of hybrid Kyber for post-quantum cryptography.
Version/Date: 2024 November 22
* A couple of fixes here and there to ensure everything works as it should.
Version/Date: 2024 November 15
* After the app’s weekly pitstop, it’s running better than ever. Boot it up and check it out for yourself!
Version/Date: 2024 November 4
* Our engineers have weeded out some minor bugs to enrich your VPN experience.
Version/Date: 2024 October 28
* We’ve updated some of our backend systems for improved performance while you use the app.
Version/Date: 2024 October 22
* Just a minor fix here and there to improve your app experience.
Version/Date: 2024 October 16
* The landlord’s ordered a mass eviction of bugs. We’ve squashed several to help make your app run smoother.
Version/Date: 2024 September 16
* Just like your car, a VPN needs a good service now and then. We’ve tuned it up and it’s now running better than ever.
Version/Date: 2024 August 19
* We’ve blown away some dust and cobwebs to keep the app running smoother than ever for you.",https://www.expressvpn.com/no/support/vpn-setup/release-notes/windows-app/)
How to set up ExpressVPN on Android TVs and Android TV boxes,"This tutorial will show youhow toset up the ExpressVPN app on Android TVsor Android TV boxes, which include the following devices: Sony Sharp TCL Xiaomi MINIX Nvidia Shield Formuler https://www.youtube.com/embed/DoVE97IAWKg",https://www.expressvpn.com/support/vpn-setup/setup-android-tv/)
How to set up and use the ExpressVPN app on Apple TV (tvOS),Not yet a customer? Read why you should getExpressVPN for Apple TV.,https://www.expressvpn.com/support/vpn-setup/app-for-apple-tv/)
Verify the authenticity of the ExpressVPN Linux app with PGP key,1. Download the PGP key2. Verify the fingerprint of the PGP key3. Download the app installer and the signature file4. Verifying the signature on an installer,https://www.expressvpn.com/support/vpn-setup/pgp-for-linux/)
What’s new in ExpressVPN for Windows?,"Version/Date: 2025 January 24
* We’ve rolled out a couple of minor fixes and code changes. It’s all part of improving your app experience, and nothing you’ll likely notice.
Version/Date: 2025 January 2
* In this release, we upgraded Lightway to use hybrid ML-KEM instead of hybrid Kyber for post-quantum cryptography.
Version/Date: 2024 November 22
* A couple of fixes here and there to ensure everything works as it should.
Version/Date: 2024 November 15
* After the app’s weekly pitstop, it’s running better than ever. Boot it up and check it out for yourself!
Version/Date: 2024 November 4
* Our engineers have weeded out some minor bugs to enrich your VPN experience.
Version/Date: 2024 October 28
* We’ve updated some of our backend systems for improved performance while you use the app.
Version/Date: 2024 October 22
* Just a minor fix here and there to improve your app experience.
Version/Date: 2024 October 16
* The landlord’s ordered a mass eviction of bugs. We’ve squashed several to help make your app run smoother.
Version/Date: 2024 September 16
* Just like your car, a VPN needs a good service now and then. We’ve tuned it up and it’s now running better than ever.
Version/Date: 2024 August 19
* We’ve blown away some dust and cobwebs to keep the app running smoother than ever for you.",https://www.expressvpn.com/pl/support/vpn-setup/release-notes/windows-app/)
Android版ExpressVPNの最新情報,"Version/Date: 2025年2月25日バージョン 11.89.0
* アプリのサイズを削減しました。エンジニアが最適化に取り組み、これまで以上に素早くダウンロードできるようになりました。
Version/Date: 2025年2月9日バージョン 11.88.0
* 車と同じようにVPNも定期的なメンテナンスが必要です。チューニングを施し、これまで以上に快適に動作するようになりました。
Version/Date: 2025年2月6日バージョン 11.87.0
* アプリをよりスムーズに動作させるため、ほこりやクモの巣を取り除きました。
Version/Date: 2025年2月1日バージョン 11.86.0
* 細かいバグ修正をいくつか実施しました。
Version/Date: 2025年1月31日バージョン 11.85.0
* エンジニアがバグ修正とパフォーマンス向上に取り組み、よりスムーズなVPN体験を提供します。
Version/Date: 2025年1月21日バージョン 11.84.0
* セキュリティを最優先に考え、暗号化プロトコルとコードを強化しました。安心してご利用ください。
Version/Date: 2025年1月16日バージョン 11.83.0
* ひらめきの瞬間!コーヒーと冷凍ベーグルを片手に、エンジニアがアプリをこれまで以上に効率的にしました。
Version/Date: 2025年1月9日バージョン 11.82.0
* 微調整を行い、アプリがスムーズに動作するようにしました。
Version/Date: 2024年12月20日バージョン 11.81.0
* このリリースでは、Lightwayのポスト量子暗号をKyberからML-KEMにアップグレードしました。
Version/Date: 2024年12月11日バージョン 11.80.0
* 何か新しいものに気付きましたか?「アップグレード」タブが登場!専用IP、Advanced Protection、Keysなどの機能をここで確認できます。",https://www.expressvpn.com/jp/support/vpn-setup/release-notes/android-app/)
What’s new in ExpressVPN for Routers?,"Version/Date: 2024 December 6
* Updated Lightway for better stability and performance.
Version/Date: Router v4.2.6
* Updated Lightway for better stability and performance.
Version/Date: 2024 July 12
* Updated Lightway for better stability and performance.
Version/Date: Router v4.2.5
* Updated Lightway for better stability and performance.
Version/Date: 2024 March 14
* Updated Lightway for better stability and performance.
Version/Date: Router v4.2.4
* Updated Lightway for better stability and performance.
Version/Date: 2024 January 24
* Fixed an issue that might cause the VPN to automatically reconnect every 15 to 20 minutes.
Version/Date: Router v4.2.3
* Fixed an issue that might cause the VPN to automatically reconnect every 15 to 20 minutes.
Version/Date: 2023 May 30
* Reduced the number of times where you might see a “Connection to router lost” message.
Version/Date: Router v4.2.2
* Reduced the number of times where you might see a “Connection to router lost” message.",https://www.expressvpn.com/nl/support/vpn-setup/release-notes/router-app/)
What’s new in ExpressVPN for Windows?,"Version/Date: 2025 January 24
* We’ve rolled out a couple of minor fixes and code changes. It’s all part of improving your app experience, and nothing you’ll likely notice.
Version/Date: 2025 January 2
* In this release, we upgraded Lightway to use hybrid ML-KEM instead of hybrid Kyber for post-quantum cryptography.
Version/Date: 2024 November 22
* A couple of fixes here and there to ensure everything works as it should.
Version/Date: 2024 November 15
* After the app’s weekly pitstop, it’s running better than ever. Boot it up and check it out for yourself!
Version/Date: 2024 November 4
* Our engineers have weeded out some minor bugs to enrich your VPN experience.
Version/Date: 2024 October 28
* We’ve updated some of our backend systems for improved performance while you use the app.
Version/Date: 2024 October 22
* Just a minor fix here and there to improve your app experience.
Version/Date: 2024 October 16
* The landlord’s ordered a mass eviction of bugs. We’ve squashed several to help make your app run smoother.
Version/Date: 2024 September 16
* Just like your car, a VPN needs a good service now and then. We’ve tuned it up and it’s now running better than ever.
Version/Date: 2024 August 19
* We’ve blown away some dust and cobwebs to keep the app running smoother than ever for you.",https://www.expressvpn.com/kr/support/vpn-setup/release-notes/windows-app/)
Hva er nytt i ExpressVPN for Android?,"Version/Date: 25. februar 2025versjon 11.89.0
* Redusert appstørrelse. Våre ingeniører har optimalisert appen slik at du kan laste den ned raskere enn noen gang.
Version/Date: 9. februar 2025versjon 11.88.0
* Akkurat som bilen din trenger en service nå og da, gjør også VPN-en din det. Vi har finjustert den, og nå kjører den bedre enn noen gang.
Version/Date: 6. februar 2025versjon 11.87.0
* Vi har børstet bort litt støv og spindelvev for å holde appen i toppform for deg.
Version/Date: 1. februar 2025versjon 11.86.0
* Bare noen små feilrettinger her og der.
Version/Date: 31. januar 2025versjon 11.85.0
* Våre ingeniører har jobbet med feilrettinger og ytelsesforbedringer for å gi deg en enda smidigere VPN-opplevelse.
Version/Date: 21. januar 2025versjon 11.84.0
* Sikkerhet er vår høyeste prioritet – derfor har vi styrket våre krypteringsprotokoller og kode. Nyt den ekstra sikkerheten.
Version/Date: 16. januar 2025versjon 11.83.0
* Eureka! Våre geniale ingeniører, drevet av kaffe og frosne bagels, har gjort appen mer effektiv enn noen gang.
Version/Date: 9. januar 2025versjon 11.82.0
* Bare en liten justering for å sikre at appen kjører sømløst.
Version/Date: 20. desember 2024versjon 11.81.0
* I denne oppdateringen har vi oppgradert Lightway til å bruke ML-KEM i stedet for Kyber for post-kvantum-kryptografi.
Version/Date: 11. desember 2024versjon 11.80.0
* Ser du noe nytt? Si hei til Oppgraderinger-fanen! Her finner du funksjoner som Dedikert IP, Avansert beskyttelse og Keys.",https://www.expressvpn.com/no/support/vpn-setup/release-notes/android-app/)
Apple TV için ExpressVPN’deki Yenilikler,"Version/Date: 2024 Mart 20versiyon 11.138.0
* İç motorlarımızı süsledik; uygulama şimdi öncekinden daha iyi çalışıyor.
Version/Date: 2024 Şubat 26versiyon 11.133.0
* Reklamları ve izleyicileri engelleyin.
Version/Date: 24 Ocak 2024versiyon 11.128.0
* Bir iOS cihazıyla kaydolmanızı sağlayan yepyeni bir düğme.
Version/Date: 2023 Aralık 18versiyon 11.126.0
* Karşılaştığınız sorunları çözmeye yardımcı olmak için hata bilgilerini içeren bir mesajı destek ekibimize gönderin.
Version/Date: 2023 Aralık 4versiyon 11.124.0
* Karşılaştığınız sorunları çözmeye yardımcı olmak için hata bilgilerini içeren bir mesajı destek ekibimize gönderin.
Version/Date: 29 Kasım 2023versiyon 11.123.0
* Tüm Cihazlar için VPN",https://www.expressvpn.com/tr/support/vpn-setup/release-notes/tvos-app/)
Hvad er nyt i ExpressVPN Keys-browserudvidelsen?,"Version/Date: 27. september 2023version 2.0.2
* Vi har rettet et problem, hvor scrollepositionen i listen over logins blev mistet, når synkronisering opstod.
Version/Date: 22. september 2023version 2.0.1
* Vi har rettet et problem, hvor ExpressVPN Keys uventet viste dig en autolagringsdialog i multi-trins login-flows.
Version/Date: 21. september 2023version 2.0.0
* Tilføje, redigere, se og søge efter sikre noter.
Version/Date: 20. april 2023version 1.0.16
* Vi har forbedret pålideligheden ved import af kreditkort og noter fra andre adgangskodeadministratorer.
Version/Date: 30. marts 2023version 1.0.14
* Vi har forbedret pålideligheden, når du importerer logins fra 1Password.
Version/Date: 22. marts 2023version 1.0.13
* Vi har rettet nogle grafiske fejl på adgangskodegeneratoren og visningsskærme.
Version/Date: 16. marts 2023version 1.0.12
* Nu har du flere tegn at lege med! Vi har øget feltgrænserne for titler og brugernavne.
Version/Date: 13. marts 2023version 1.0.11
* Vi har tilføjet nogle manglende ikoner af andre adgangskodeadministratorer, hvis lager af adgangskoder kan importeres til ExpressVPN Keys.
Version/Date: 9. marts 2023version 1.0.10
* Se dine gemte sikre noter.
Version/Date: 17. februar 2023version 1.0.7
* Vi har rettet en fejl, der lejlighedsvis forhindrede dig i at importere logins fra Microsoft Edge med succes.",https://www.expressvpn.com/dk/support/vpn-setup/release-notes/keys-browser-extension/)
Wat is er nieuw in de ExpressVPN Keys browserextensie?,"Version/Date: 27 september 2023versie 2.0.2
* Een probleem opgelost waarbij de scrollpositie in de lijst met inloggegevens verloren ging bij het synchroniseren.
Version/Date: 22 september 2023versie 2.0.1
* We hebben een probleem opgelost waarbij, tijdens multi-stap inlogprocessen, ExpressVPN Keys onverwacht een automatisch opslaan pop-up zou tonen.
Version/Date: 21 september 2023versie 2.0.0
* Toevoegen, bewerken, bekijken en zoeken naar beveiligde notities.
Version/Date: 20 april 2023versie 1.0.16
* We hebben de betrouwbaarheid verbeterd van het importeren van creditcards en notities van andere wachtwoordmanagers.
Version/Date: 30 maart 2023versie 1.0.14
* We hebben de betrouwbaarheid verbeterd bij het importeren van inloggegevens van 1Password.
Version/Date: 22 maart 2023versie 1.0.13
* We hebben enkele grafische fouten op het wachtwoordgenerator- en weergaveschermen opgelost.
Version/Date: 16 maart 2023versie 1.0.12
* Je hebt nu meer tekens om mee te spelen! We hebben de veldlimieten voor titels en gebruikersnamen vergroot.
Version/Date: 13 maart 2023versie 1.0.11
* Enkele ontbrekende iconen van andere wachtwoordmanagers toegevoegd, waarvan de opslag van wachtwoorden kan worden geïmporteerd in ExpressVPN Keys.
Version/Date: 9 maart 2023versie 1.0.10
* Je opgeslagen beveiligde notities bekijken.
Version/Date: 17 februari 2023versie 1.0.7
* We hebben een bug opgelost die je soms weerhield van het succesvol importeren van inloggegevens van Microsoft Edge.",https://www.expressvpn.com/nl/support/vpn-setup/release-notes/keys-browser-extension/)
What’s new in the ExpressVPN Keys browser extension?,"Version/Date: 2023 September 27version 2.0.2
* Fixed an issue where the scrolling position in the list of logins would be lost when syncing occurs.
Version/Date: 2023 September 22version 2.0.1
* We fixed an issue where, on multi-step sign-in flows, ExpressVPN Keys would show you an auto-save dialog unexpectedly.
Version/Date: 2023 September 21version 2.0.0
* Add, edit, view, and search for secure notes.
Version/Date: 2023 April 20version 1.0.16
* We’ve improved the reliability of importing credit cards and notes from other password managers.
Version/Date: 2023 March 30version 1.0.14
* We’ve improved the reliability when you import logins from 1Password.
Version/Date: 2023 March 22version 1.0.13
* We’ve fixed a few graphical errors on the password generator and view screens.
Version/Date: 2023 March 16version 1.0.12
* You now have more characters to play with! We’ve increased the field limits for titles and usernames.
Version/Date: 2023 March 13version 1.0.11
* Added some missing icons of other password managers, who’s store of passwords can be imported into ExpressVPN Keys.
Version/Date: 2023 March 9version 1.0.10
* View your saved secure notes.
Version/Date: 2023 February 17version 1.0.7
* We’ve fixed a bug that was occasionally preventing you from successfully importing logins from Microsoft Edge.",https://www.expressvpn.com/support/vpn-setup/release-notes/keys-browser-extension/).
What’s new in ExpressVPN for Linux?,"Version/Date: 2025 March 4version 4.0.1
* Fixed an issue that was preventing the app to connect to another server while connected.
Version/Date: 2025 February 21version 4.0.0
* Graphical User Interface (GUI)
Version/Date: 2025 February 6version 3.82.0
* Just adjusting the sails and making sure the app runs smoothly.
Version/Date: 2024 December 24version 3.81.0
* Yesterday was a spa day for the app—it’s now running better than ever.
Version/Date: 2024 December 23version 3.80.0
* In this release, we upgraded Lightway to use hybrid ML-KEM instead of hybrid Kyber for post-quantum cryptography.
Version/Date: 2024 December 10version 3.79.0
* Our tech wizards have waved their magic wands! Enjoy enhanced app stability and performance.
Version/Date: 2024 November 12version 3.78.0
* We made some small tweaks and fixes to keep your app experience top-notch.
Version/Date: 2024 November 5version 3.77.0
* The engine room’s been busy! Expect better performance from the app.
Version/Date: 2024 August 19version 3.76.0
* We’ve ironed out a few wrinkles to ensure the app runs as it should.
Version/Date: 2024 August 5version 3.75.0
* We’ve rolled out a couple of minor fixes and code changes. It’s all part of improving your app experience, and nothing you’ll likely notice.",https://www.expressvpn.com/es/support/vpn-setup/release-notes/linux-app/)
What’s new in ExpressVPN for Routers?,"Version/Date: 2024 December 6
* Updated Lightway for better stability and performance.
Version/Date: Router v4.2.6
* Updated Lightway for better stability and performance.
Version/Date: 2024 July 12
* Updated Lightway for better stability and performance.
Version/Date: Router v4.2.5
* Updated Lightway for better stability and performance.
Version/Date: 2024 March 14
* Updated Lightway for better stability and performance.
Version/Date: Router v4.2.4
* Updated Lightway for better stability and performance.
Version/Date: 2024 January 24
* Fixed an issue that might cause the VPN to automatically reconnect every 15 to 20 minutes.
Version/Date: Router v4.2.3
* Fixed an issue that might cause the VPN to automatically reconnect every 15 to 20 minutes.
Version/Date: 2023 May 30
* Reduced the number of times where you might see a “Connection to router lost” message.
Version/Date: Router v4.2.2
* Reduced the number of times where you might see a “Connection to router lost” message.",https://www.expressvpn.com/pt/support/vpn-setup/release-notes/router-app/)
"How to use MediaStreamer on your Apple TV (1st, 2nd, 3rd gen)","MediaStreamer is a DNS service designed to improve your streaming experience. Since Apple TV does not natively support VPN, you can use MediaStreamer as an alternative for streaming. https://www.youtube.com/embed/AmRlndxw8qE",https://www.expressvpn.com/support/vpn-setup/stream-to-apple-tv-older-gens-with-dns/)
How to set up ExpressVPN with OpenVPN on your Netduma R2 router,Not all ExpressVPN locations may be available for manually configured connections.,https://www.expressvpn.com/support/vpn-setup/setup-expressvpn-openvpn-netduma-r2-router/)
What’s new in ExpressVPN for Windows?,"Version/Date: 2025 January 24
* We’ve rolled out a couple of minor fixes and code changes. It’s all part of improving your app experience, and nothing you’ll likely notice.
Version/Date: 2025 January 2
* In this release, we upgraded Lightway to use hybrid ML-KEM instead of hybrid Kyber for post-quantum cryptography.
Version/Date: 2024 November 22
* A couple of fixes here and there to ensure everything works as it should.
Version/Date: 2024 November 15
* After the app’s weekly pitstop, it’s running better than ever. Boot it up and check it out for yourself!
Version/Date: 2024 November 4
* Our engineers have weeded out some minor bugs to enrich your VPN experience.
Version/Date: 2024 October 28
* We’ve updated some of our backend systems for improved performance while you use the app.
Version/Date: 2024 October 22
* Just a minor fix here and there to improve your app experience.
Version/Date: 2024 October 16
* The landlord’s ordered a mass eviction of bugs. We’ve squashed several to help make your app run smoother.
Version/Date: 2024 September 16
* Just like your car, a VPN needs a good service now and then. We’ve tuned it up and it’s now running better than ever.
Version/Date: 2024 August 19
* We’ve blown away some dust and cobwebs to keep the app running smoother than ever for you.",https://www.expressvpn.com/se/support/vpn-setup/release-notes/windows-app/)
What’s new in ExpressVPN for Windows?,"Version/Date: 2025 January 24
* We’ve rolled out a couple of minor fixes and code changes. It’s all part of improving your app experience, and nothing you’ll likely notice.
Version/Date: 2025 January 2
* In this release, we upgraded Lightway to use hybrid ML-KEM instead of hybrid Kyber for post-quantum cryptography.
Version/Date: 2024 November 22
* A couple of fixes here and there to ensure everything works as it should.
Version/Date: 2024 November 15
* After the app’s weekly pitstop, it’s running better than ever. Boot it up and check it out for yourself!
Version/Date: 2024 November 4
* Our engineers have weeded out some minor bugs to enrich your VPN experience.
Version/Date: 2024 October 28
* We’ve updated some of our backend systems for improved performance while you use the app.
Version/Date: 2024 October 22
* Just a minor fix here and there to improve your app experience.
Version/Date: 2024 October 16
* The landlord’s ordered a mass eviction of bugs. We’ve squashed several to help make your app run smoother.
Version/Date: 2024 September 16
* Just like your car, a VPN needs a good service now and then. We’ve tuned it up and it’s now running better than ever.
Version/Date: 2024 August 19
* We’ve blown away some dust and cobwebs to keep the app running smoother than ever for you.",https://www.expressvpn.com/de/support/vpn-setup/release-notes/windows-app/)
How to set up and use ExpressVPN on Windows 10 and above,"The ExpressVPN Windows app is not compatible with: Windows Vista and XP: Use the OpenVPN manual configuration. Windows devices that use Microsoft SQ1, Microsoft SQ2, or Microsoft SQ3 processors: These processors are not compatible with the TAP adapter, which is necessary for ExpressVPN to function. If you are in a country with a high level of internet censorship, we suggest using ExpressVPN for routers . If not, use other Windows versions . https://www.youtube.com/embed/r4-_ITd0uoM",https://www.expressvpn.com/support/vpn-setup/app-for-windows/)
How to set up and use ExpressVPN for Windows 11 on ARM64,"For instructions on how to download, set up, and use the ExpressVPN app for Intel-based Windows devices running Windows 10 and above,click here.",https://www.expressvpn.com/support/vpn-setup/app-for-windows-arm/)
"How to use ExpressVPN with OpenVPN for Windows XP, Vista, 7, 8 and 10","The OpenVPN GUI is a free graphical frontend for running the OpenVPN protocol on Windows XP, Windows Vista, Windows 7, Windows 8, and Windows 10.",https://www.expressvpn.com/support/vpn-setup/manual-config-for-windows-xp-vista-7-8-with-openvpn/)
How to set up MediaStreamer on Windows,"MediaStreamer is a DNS service designed to improve your streaming experience. If your device doesn’t natively support VPN, MediaStreamer is a great alternative for streaming. https://www.youtube.com/embed/8gvhdaq5TIw?rel=0",https://www.expressvpn.com/support/vpn-setup/set-mediastreamer-windows/)
How to use the ExpressVPN CLI for Windows,ExpressVPN command line interface (CLI) can be used to control theExpressVPN app for Windowsin Windows Command Prompt.,https://www.expressvpn.com/support/vpn-setup/how-to-use-expressvpn-cli-windows/)
How to share a VPN connection from your Windows device,"Before you begin, make sure to set up the ExpressVPN app on your Windows device. Do not connect to the app when setting up the virtual router or mobile hotspot.",https://www.expressvpn.com/support/vpn-setup/share-vpn-connection-windows/)
How to set up and use your dedicated IP address on Windows,Setting up the VPNSetting up your dedicated IPUsing your dedicated IP on other devices,https://www.expressvpn.com/support/vpn-setup/dedicated-ip-windows/)
How to set up and use ExpressVPN on Mac OS X or macOS,"The app requires10.13 (High Sierra),10.14 (Mojave),10.15 (Catalina),11 (Big Sur),12 (Monterey),13 (Ventura),14(Sonoma), or15 (Sequoia)to use. To find out which macOS version you are using,refer to this guide. https://www.youtube.com/embed/inq-onQjuQs",https://www.expressvpn.com/support/vpn-setup/app-for-mac-os-x/)
How to use ExpressVPN with Tunnelblick for OpenVPN on OS X,"Not all ExpressVPN locations may be available for manually configured connections. To use the full list of VPN locations,use the app setup.",https://www.expressvpn.com/support/vpn-setup/manual-config-for-mac-os-x-with-tunnelblick-openvpn/)
How to set up MediaStreamer on macOS,"MediaStreamer is a DNS service designed to improve your streaming experience. If you already have the ExpressVPN app on your Mac device, you do not need to set up MediaStreamer, but you can use it as an alternative for streaming.",https://www.expressvpn.com/support/vpn-setup/set-mediastreamer-on-mac/)
Use Auto-connect for Android to stay safe on untrusted networks,https://www.youtube.com/embed/bykLL6iEUA8?rel=0,https://www.expressvpn.com/support/vpn-setup/android-auto-connect/)
How to set up and use ExpressVPN on Android 5.0 and above,This tutorial will show youhow to set up the ExpressVPN Android app. https://www.youtube.com/embed/sqfFA4_XG_g,https://www.expressvpn.com/support/vpn-setup/app-for-android/)
How to enable APK installations on your Android device,1. Enable APK installations on your Android device2. Download the APK file of the ExpressVPN Android app,https://www.expressvpn.com/support/vpn-setup/enable-apk-installs-android/)
How to set up ExpressVPN Keys on the ExpressVPN Android app,Create an ExpressVPN Keys accountSet up ExpressVPN Keys on another deviceHow to use ExpressVPN KeysReport a bug,https://www.expressvpn.com/support/vpn-setup/password-manager-android/)
How to set up MediaStreamer on your Netgear router,"MediaStreamer is a DNS service designed to improve your streaming experience. If your device doesn’t natively support VPN, MediaStreamer is a great alternative for streaming. https://www.youtube.com/embed/SuvxoBcN7Jc?rel=0",https://www.expressvpn.com/support/vpn-setup/stream-via-netgear-router-with-dns/)
How to set up ExpressVPN on a Sabai router with OpenVPN,Not all ExpressVPN locations may be available for manually configured connections.,https://www.expressvpn.com/support/vpn-setup/manual-config-for-sabai-router-with-openvpn/)
How to configure OpenVPN for Tomato Routers,Not all ExpressVPN locations may be available for manually configured connections. https://www.youtube.com/embed/oYeC8EMKfHo?rel=0,https://www.expressvpn.com/support/vpn-setup/manual-config-for-tomato-router-with-openvpn/)
How to use the ExpressVPN browser extension,"To use, you need to download and activate at least one of these ExpressVPN apps: ExpressVPN Mac app (Version 7.1 or newer) ExpressVPN Windows app (Version 6.9 or newer) ExpressVPN Linux app (Version 2.0 or newer) https://www.youtube.com/embed/Y2eAroi21bQ",https://www.expressvpn.com/support/vpn-setup/browser-extension-plugin/)
How to set up the ExpressVPN Keys Chrome browser extension,"To use the extension, you must have the ExpressVPN app installed on your Windows, Mac, or Linux device, and an ExpressVPN account.",https://www.expressvpn.com/support/vpn-setup/keys-password-manager-extension/)
How to set up and use ExpressVPN on Chromebook,1. Download the VPN app2. Set up the VPN app3. Connect to a VPN server locationDisconnect from a VPN server locationChoose a different VPN server locationUninstall the VPN app from your ChromebookTroubleshoot your connection,https://www.expressvpn.com/support/vpn-setup/app-for-chromebook/)
How to set up ExpressVPN on ASUSTOR with OpenVPN,You’ll need a fully set up ASUSTOR device and an ExpressVPN subscription. To begin: Name: a name for you to remember the connection Account: use the ExpressVPN username you obtained above Password: use the ExpressVPN password you obtained above Import file(s): click Browse and upload the configuration file(s) you previously downloaded,https://www.expressvpn.com/support/vpn-setup/manual-config-asustor-openvpn/)
How to use ExpressVPN for Synology using OpenVPN,Not all ExpressVPN locations may be available for manually configured connections.,https://www.expressvpn.com/support/vpn-setup/manual-config-for-synology-with-openvpn/)
How to use MediaStreamer smoothly via DDNS,"MediaStreamer is a DNS service designed to improve your streaming experience. If your device doesn’t natively support VPN, MediaStreamer is a great alternative for streaming. https://www.youtube.com/embed/89OdDV_q1Kk?rel=0",https://www.expressvpn.com/support/vpn-setup/ddns-setup/)
How to set up ExpressVPN on Amazon Fire tablet,Note:The following steps were tested using Amazon Fire HD 10.,https://www.expressvpn.com/support/vpn-setup/app-for-kindle-fire/)
How to start using NordVPN,"If you are interested in starting to use the NordVPN service but are unsure how to do so, this article will introduce you to the steps needed to begin using NordVPN today.
In this article we will cover:
* [Downloading NordVPN](
* [Installing NordVPN](
* [Purchasing a NordVPN plan](
* [Connecting to NordVPN](
* [Connecting to NordVPN on Linux](
* [Additional NordVPN features](
## Downloading NordVPN
To begin using NordVPN, you will first need to download the application for your respective device:
* Download the NordVPN application for Windows
* Download the NordVPN application for macOS
* Download the NordVPN application for Linux
* Download the NordVPN application for Android
* Download the NordVPN application for iOS
## Installing NordVPN
If you are not sure how to install and set up the application, choose the OS you're going to use and follow one of the guides below:
* Learn how to install NordVPN on Windows 7 and 8.1
* Learn how to install NordVPN on Windows 10 and 11
* Learn how to install NordVPN on macOS
* Learn how to install NordVPN on Linux
* Learn how to install NordVPN on Android
* Learn how to install NordVPN on iOS
Once the application has been set up, you need to purchase the desired plan.
## Purchasing a NordVPN plan
The following article will introduce you to [NordVPN Plans and Prices](https://support.nordvpn.com/hc/en-us/articles/19744251757841-Plans-and-prices-of-NordVPN-service). And if you're uncertain how to proceed with the purchase, read the article on [purchasing a NordVPN subscription](https://support.nordvpn.com/hc/en-us/articles/19478048190481-How-to-purchase-a-NordVPN-subscription).
Once you have an active subscription, you need to connect to NordVPN.
## Connecting to NordVPN
In order to connect to NordVPN, follow along below:
1. Use the quick connect button:Alternatively, you can use the dots on the map to connect to specific locations.
2. Click the dot in a country:Lastly, you may also use the search bar.
3. Type in the name of the country you would like to connect to:
### Connecting to NordVPN on Linux
To connect on a Linux device, you will need to type in the following commands :
```
nordvpn connect
```
```
nordvpn c
```
To connect to specific servers, use:
```
nordvpn connect
```
(eg. nordvpn connect uk715)
Follow our article on how to [connect to NordVPN using Linux Terminal](https://support.nordvpn.com/hc/en-us/articles/20164827795345-Connect-to-NordVPN-using-Linux-Terminal).
That's it! Now you can begin using the app and investigating the different features.
## Additional NordVPN features
Here you can find some articles covering NordVPN's features:
* [Different NordVPN server categories explained](https://support.nordvpn.com/hc/en-us/articles/19479130821521-Different-NordVPN-server-categories-explained)
* [NordVPN Kill Switch: how does it work](https://support.nordvpn.com/hc/en-us/articles/19509682644369-NordVPN-Kill-Switch-how-does-it-work)
* [What is Threat Protection Pro™ and Threat Protection?](https://support.nordvpn.com/hc/en-us/articles/19508765521425-What-is-Threat-Protection-Pro-and-Threat-Protection)
* [Dedicated NordVPN IP addresses](https://support.nordvpn.com/hc/en-us/articles/19507808024209-Dedicated-NordVPN-IP-addresses)",https://support.nordvpn.com/hc/en-us/articles/20289779952017-How-to-start-using-NordVPN
Should I choose NordVPN app or NordVPN extension?,"When purchasing a NordVPN subscription, you get access to the [NordVPN application](https://nordvpn.com/download/) for Windows, Android, macOS, iOS, and Linux OS devices. You also get access to the [NordVPN proxy extension](https://nordvpn.com/features/proxy-extension/) for your Chrome, Edge, and Firefox browsers. While both provide security and hide your online presence, they do have different additional benefits.
## NordVPN extension's main benefits:
* NordVPN's proxy extension does not ask for administrator rights for use.
* Secures only your browser traffic.
* Shorter setup than the application.
* The extension allows you to access blocked websites and streaming services without closing or minimizing your browser.
* You can choose websites you wish to exclude from the secure connection using the [Split Tunneling](https://nordvpn.com/features/split-tunneling/) feature.
## NordVPN application's main benefits:
* Has different server categories such as [Double VPN Servers](https://nordvpn.com/features/double-vpn/), [Obfuscated Servers](https://nordvpn.com/features/obfuscated-servers/), and [Dedicated IP](https://nordvpn.com/features/dedicated-ip/).
* Let's you choose between [OpenVPN and Nordlynx](https://support.nordvpn.com/hc/en-us/articles/19482810153745-Which-NordVPN-protocol-should-I-choose) connection protocols.
* You can prevent your device from making unprotected connections by using the [Kill Switch](https://support.nordvpn.com/hc/en-us/articles/19509682644369-NordVPN-Kill-Switch-how-does-it-work) feature.
* Offers a new secure communication between devices feature - [Meshnet](https://nordvpn.com/meshnet/).
* Prevent others from exploiting account information leaked to the dangerous dark web while using the [Dark Web Monitor](https://nordvpn.com/features/dark-web-monitor/) feature.
* Allows you to choose specific cities/regions.
Which product version you should use depends on your online security needs.",https://support.nordvpn.com/hc/en-us/articles/20321910029585-Should-I-choose-NordVPN-app-or-NordVPN-extension
"How many servers does NordVPN have, and where are they located?","NordVPN has over 7,000 servers in 118 countries around the world. In addition to standard VPN servers and locations, such as NordVPN Canada or NordVPN USA, you can choose servers optimized for specific purposes, such as P2P sharing or connecting from countries with internet restrictions. Learn more about different server categories and locations by [clicking here](https://support.nordvpn.com/hc/en-us/articles/19479130821521-Different-NordVPN-server-categories-explained).",https://support.nordvpn.com/hc/en-us/articles/19383127694225-Where-can-I-find-the-NordVPN-server-list
Where can I find servers in the app?,"You can access the list of servers and countries in the app by navigating to the left-side menu on desktop devices. On mobile devices, simply scroll up to find this list.",https://support.nordvpn.com/hc/en-us/articles/19383127694225-Where-can-I-find-the-NordVPN-server-list
DD-WRT setup with NordVPN,"DD-WRT is custom firmware for routers which support the OpenVPN protocol and is available on a wide variety of routers. You can check if your router supports DD-WRT firmware [here](https://wiki.dd-wrt.com/wiki/index.php/Supported_Devices) and learn how to install DD-WRT firmware on a router [here](https://wiki.dd-wrt.com/wiki/index.php/Installation).This tutorial will show you how to set up a DD-WRT VPN using an OpenVPN connection on your DD-WRT router using the DD-WRT OpenVPN client UI.
Alternative setup method:
* [Setup via FlashRouters Privacy App](https://support.nordvpn.com/hc/en-us/articles/20462541897617-DD-WRT-setup-with-FlashRouters-Privacy-app)
1. In the DD-WRT Administrative Interface, navigate to Setup > Basic Setup. Under Network Address Server Settings (DHCP), set these NordVPN DNS addresses:Static DNS 1: 103.86.96.100Static DNS 2: 103.86.99.100Static DNS 3: 0.0.0.0 (default)Use DNSMasq for DHCP: CheckedUse DNSMasq for DNS: CheckedDHCP-Authoritative: CheckedThen, Save and Apply settings.If you're setting up two routers, you should change the second router’s local IP address to a different one from the main router's. (In this case, the main router's IP is 192.168.1.1, while the one you’re connecting to a NordVPN server is accessible via 192.168.2.1)2. Navigate to Setup > IPV6. Set IPv6 to Disable, click Save, and then Apply Settings.(this is a recommended step to make sure your IP doesn’t leak)
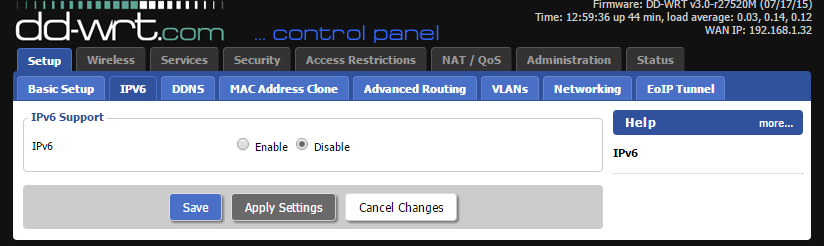
3. Navigate to Service > VPN. Under OpenVPN Client, set Start OpenVPN Client to Enable in order to see the options necessary for this configuration. Then set the following:Server IP/Name: For the sake of this tutorial, we used us936.nordvpn.com, but you should connect to a server suggested to you in the server recommendation tab in your NordAccount dashboard.
Follow the steps below to find the best server for your connection:
1. Log into your [Nord Account](https://my.nordaccount.com/), and click NordVPN.
2. Scroll down to Advanced Settings and click Set up NordVPN manually.
3. Select the Server recommendation tab. According to your location, the best server will be recommended.
4. By pressing Advanced filters you can further customize the recommended servers by selecting the Server type and the Security protocol.
In case you wish to select a specific server, follow these steps:
1. Under Set up NordVPN manually, select OpenVPN configuration files.
2. Find the server you wish to connect to by using the Search bar or by scrolling down and download it by clicking Download UDP or Download TCP.
3. When connecting to OpenVPN & IKEv2 manually, you're going to need to use the Username and Password from the Service credential tab.
Port: 1194 (or 443 for the TCP protocol)Tunnel Device: TUNTunnel Protocol: UDP (or TCP)Encryption Cipher: AES-256-CBCHash Algorithm: SHA-512User Pass Authentication: EnableUsername, Password: Your NordVPN service credentialsFirst Data Cipher: Not setSecond Data Cipher: Not setThird Data Cipher: Not set
Note: If the Username and Password fields are missing, fill in the remaining fields and proceed to step 3.1
You can find your NordVPN service credentials (service username and service password) in the [Nord Account dashboard](https://my.nordaccount.com/dashboard/nordvpn/):
Follow the steps below to find the service credentials for manual connection setup:
1. Log into your [Nord Account](https://my.nordaccount.com/), click NordVPN, and, under Manual setup, click on Service credentials. Here you'll find the Username and Password needed to connect manually.
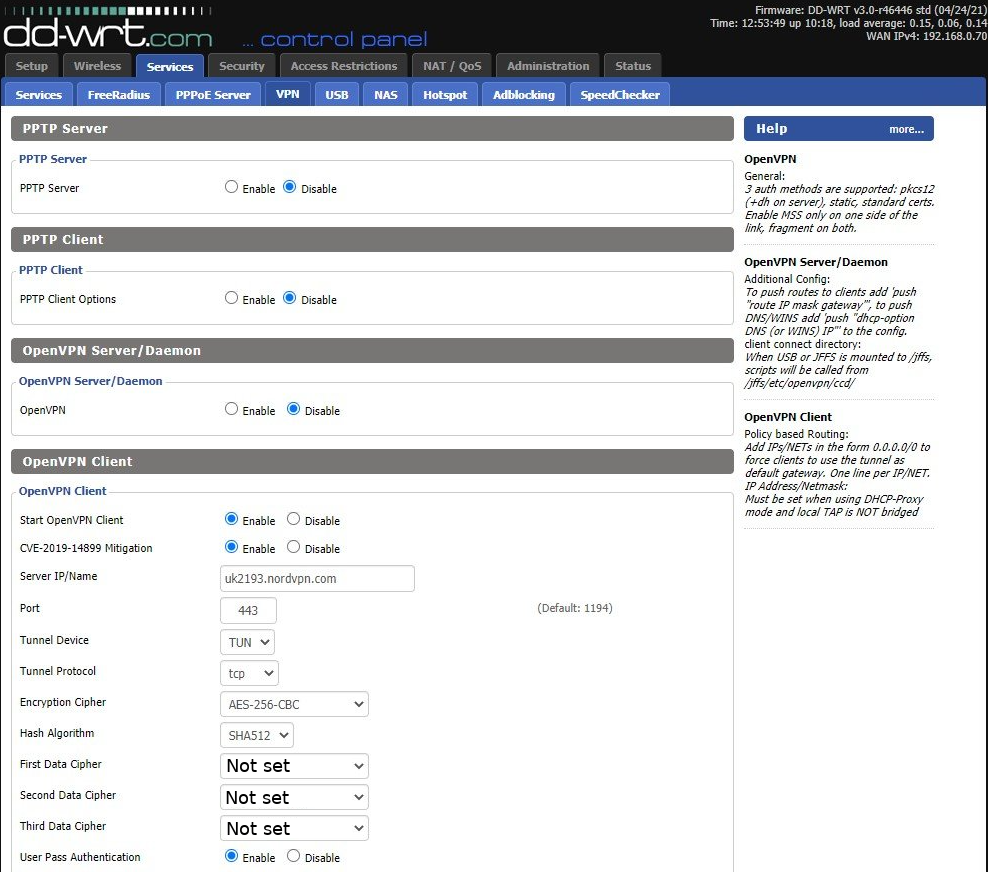
Advanced Options: Enable (this will enable additional options)
TLS Cipher: NoneLZO Compression: NoNAT: Enable
The options not mentioned in this guide should be left with default values.3.1. (Optional, depending on step 3.) If the Username and Password fields are missing, go to Administration > Commands and enter this code:
echo ""YOURUSERNAMEYOURPASSWORD"" > /tmp/openvpncl/user.conf/usr/bin/killall openvpn/usr/sbin/openvpn --config /tmp/openvpncl/openvpn.conf --route-up /tmp/openvpncl/route-up.sh --down-pre /tmp/openvpncl/route-down.sh --daemon
Replace YOURUSERNAME and YOURPASSWORD with your respective NordVPN service credentials. Click Save Startup and return to the previous VPN tab.4. In the Additional Config box either enter or copy/paste these commands:
remote-cert-tls serverremote-randomnobindtun-mtu 1500tun-mtu-extra 32mssfix 1450persist-keypersist-tunping-timer-remreneg-sec 0#log /tmp/vpn.log#Delete `#` in the line below if your router does not have credentials fields and you followed the 3.1 step#auth-user-pass /tmp/openvpncl/user.conf
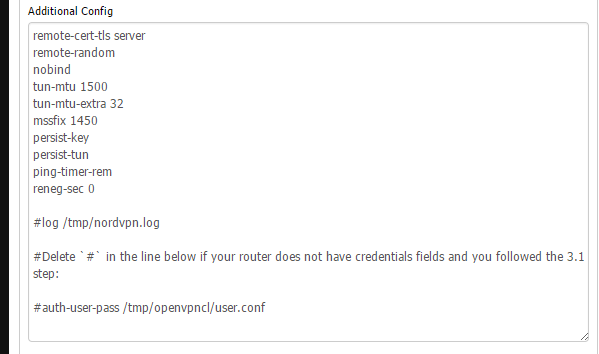5. Open the OpenVPN configuration file you downloaded in Step 3 in any text editor of your preference (preferably WordPad or Notepad++, as regular notepad does not have the correct formatting).
6. When you open the .ovpn file of the server you chose (in our case, us936_nordvpn_com.udp.ovpn) in a text editor, you should see the part of the file (do NOT copy the and tags):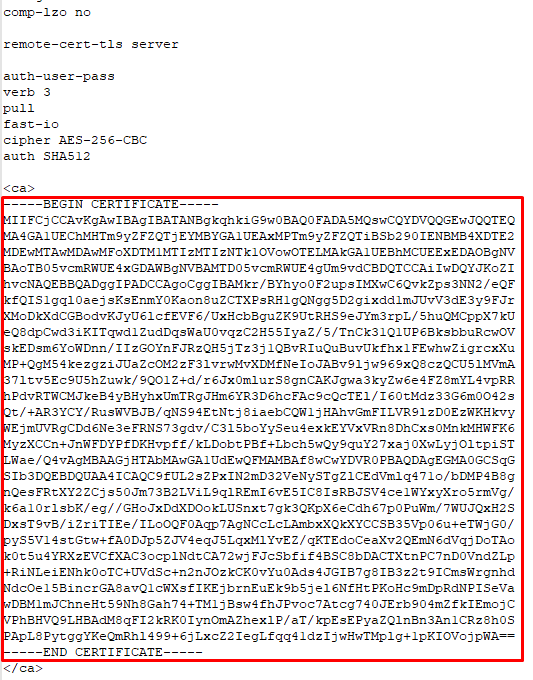
7. Copy its contents into the CA Cert field. Make sure the entire text gets pasted, including the-----BEGIN CERTIFICATE----- and -----END CERTIFICATE----- lines.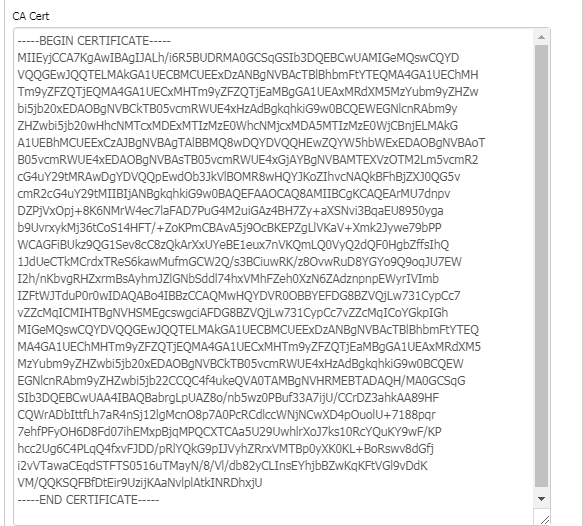8. Now go back to the configuration file and scroll down to the part. Copy the contents of the TLS Key: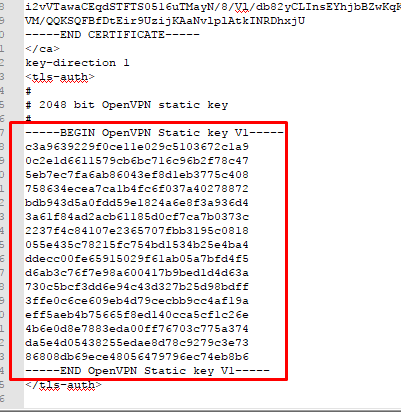9. Paste the contents into the TLS Auth Key field. Make sure the entire text gets pasted in, including the-----BEGIN OpenVPN Static key V1----- and -----END OpenVPN Static key V1----- lines.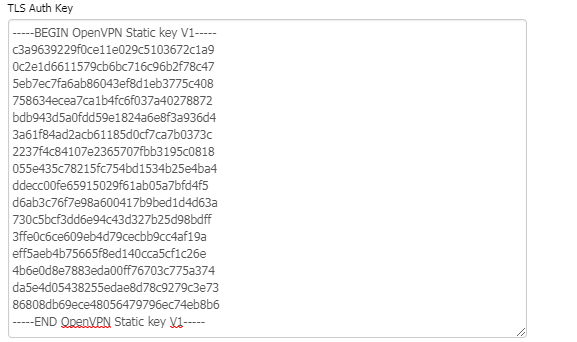10. After entering the data, click Save, and then Apply Settings.

11. To verify that the VPN is working, navigate to Status > OpenVPNUnder State, you should see the message ""Client: CONNECTED SUCCESS"".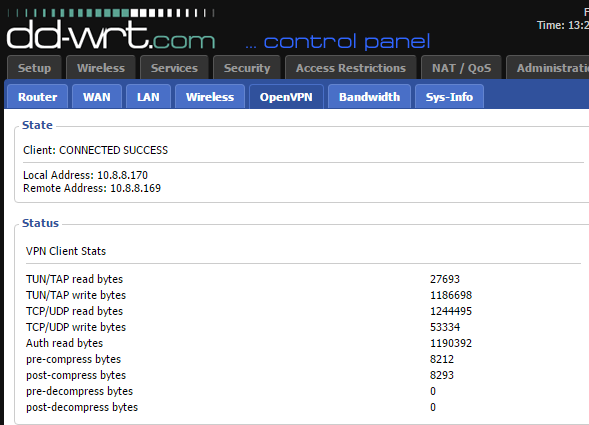Optional Kill Switch setup (for advanced users):To create a kill switch, go to Administration > Commands and enter this script:
WAN_IF=`nvram get wan_iface`iptables -I FORWARD -i br0 -o $WAN_IF -j REJECT --reject-with icmp-host-prohibitediptables -I FORWARD -i br0 -p tcp -o $WAN_IF -j REJECT --reject-with tcp-resetiptables -I FORWARD -i br0 -p udp -o $WAN_IF -j REJECT --reject-with udp-reset
Select Save Firewall, go to Administration > Management > Reboot router.
For other options check out our list of routers compatible with NordVPN.",https://support.nordvpn.com/hc/en-us/articles/20308623061265-DD-WRT-setup-with-NordVPN
Where can I find the NordVPN server list,"The list of NordVPN server locations and the protocols/services supported in each country (for example, USA, Canada) is available at .NordVPN also offers a recommended server picker, which will select the best server for you.
Follow the steps below to find the best server for your connection:
1. Log into your [Nord Account](https://my.nordaccount.com/), and click NordVPN.
2. Scroll down to Advanced Settings and click Set up NordVPN manually.
3. Select the Server recommendation tab. According to your location, the best server will be recommended.
4. By pressing Advanced filters you can further customize the recommended servers by selecting the Server type and the Security protocol.
In case you wish to select a specific server, follow these steps:
1. Under Set up NordVPN manually, select OpenVPN configuration files.
2. Find the server you wish to connect to by using the Search bar or by scrolling down and download it by clicking Download UDP or Download TCP.
3. When connecting to OpenVPN & IKEv2 manually, you're going to need to use the Username and Password from the Service credential tab.
## How many servers does NordVPN have, and where are they located?
NordVPN has over 7,000 servers in 118 countries around the world. In addition to standard VPN servers and locations, such as NordVPN Canada or NordVPN USA, you can choose servers optimized for specific purposes, such as P2P sharing or connecting from countries with internet restrictions. Learn more about different server categories and locations by [clicking here](https://support.nordvpn.com/hc/en-us/articles/19479130821521-Different-NordVPN-server-categories-explained).
## Where can I find servers in the app?
You can access the list of servers and countries in the app by navigating to the left-side menu on desktop devices. On mobile devices, simply scroll up to find this list.",https://support.nordvpn.com/hc/en-us/articles/19383127694225-Where-can-I-find-the-NordVPN-server-list
Different NordVPN server categories explained,"NordVPN has specialty servers that serve different purposes.
NordVPN server types:
* Standard servers
* Double VPN
* Onion over VPN
* Dedicated IP
* [Obfuscated servers](
## Standard servers
Regular NordVPN servers that offer the best connection speeds — ideal for everyday use. Whether you're browsing the internet at home or using public Wi-Fi networks while going out, standard servers provide security and privacy by encrypting your internet traffic and hiding your personal IP address.
The way standard NordVPN servers work is simple. When you connect to a [VPN server](https://nordvpn.com/servers/), all of your internet traffic is encrypted via [a certain VPN protocol](https://nordvpn.com/blog/protocols/). It is then sent through your ISP before reaching a NordVPN server. There, the traffic is decrypted and is then sent to its destination: a web page, banking app, etc.
[Here is an article that explains how a VPN works in detail.](https://nordvpn.com/what-is-a-vpn/#How-does-VPN-work)
## How to connect to a standard server
Choose from 3 options:
* Use the Quick Connect option (1).
* Select a server from the All countries list (2).
* Click on an icon on the server map (3).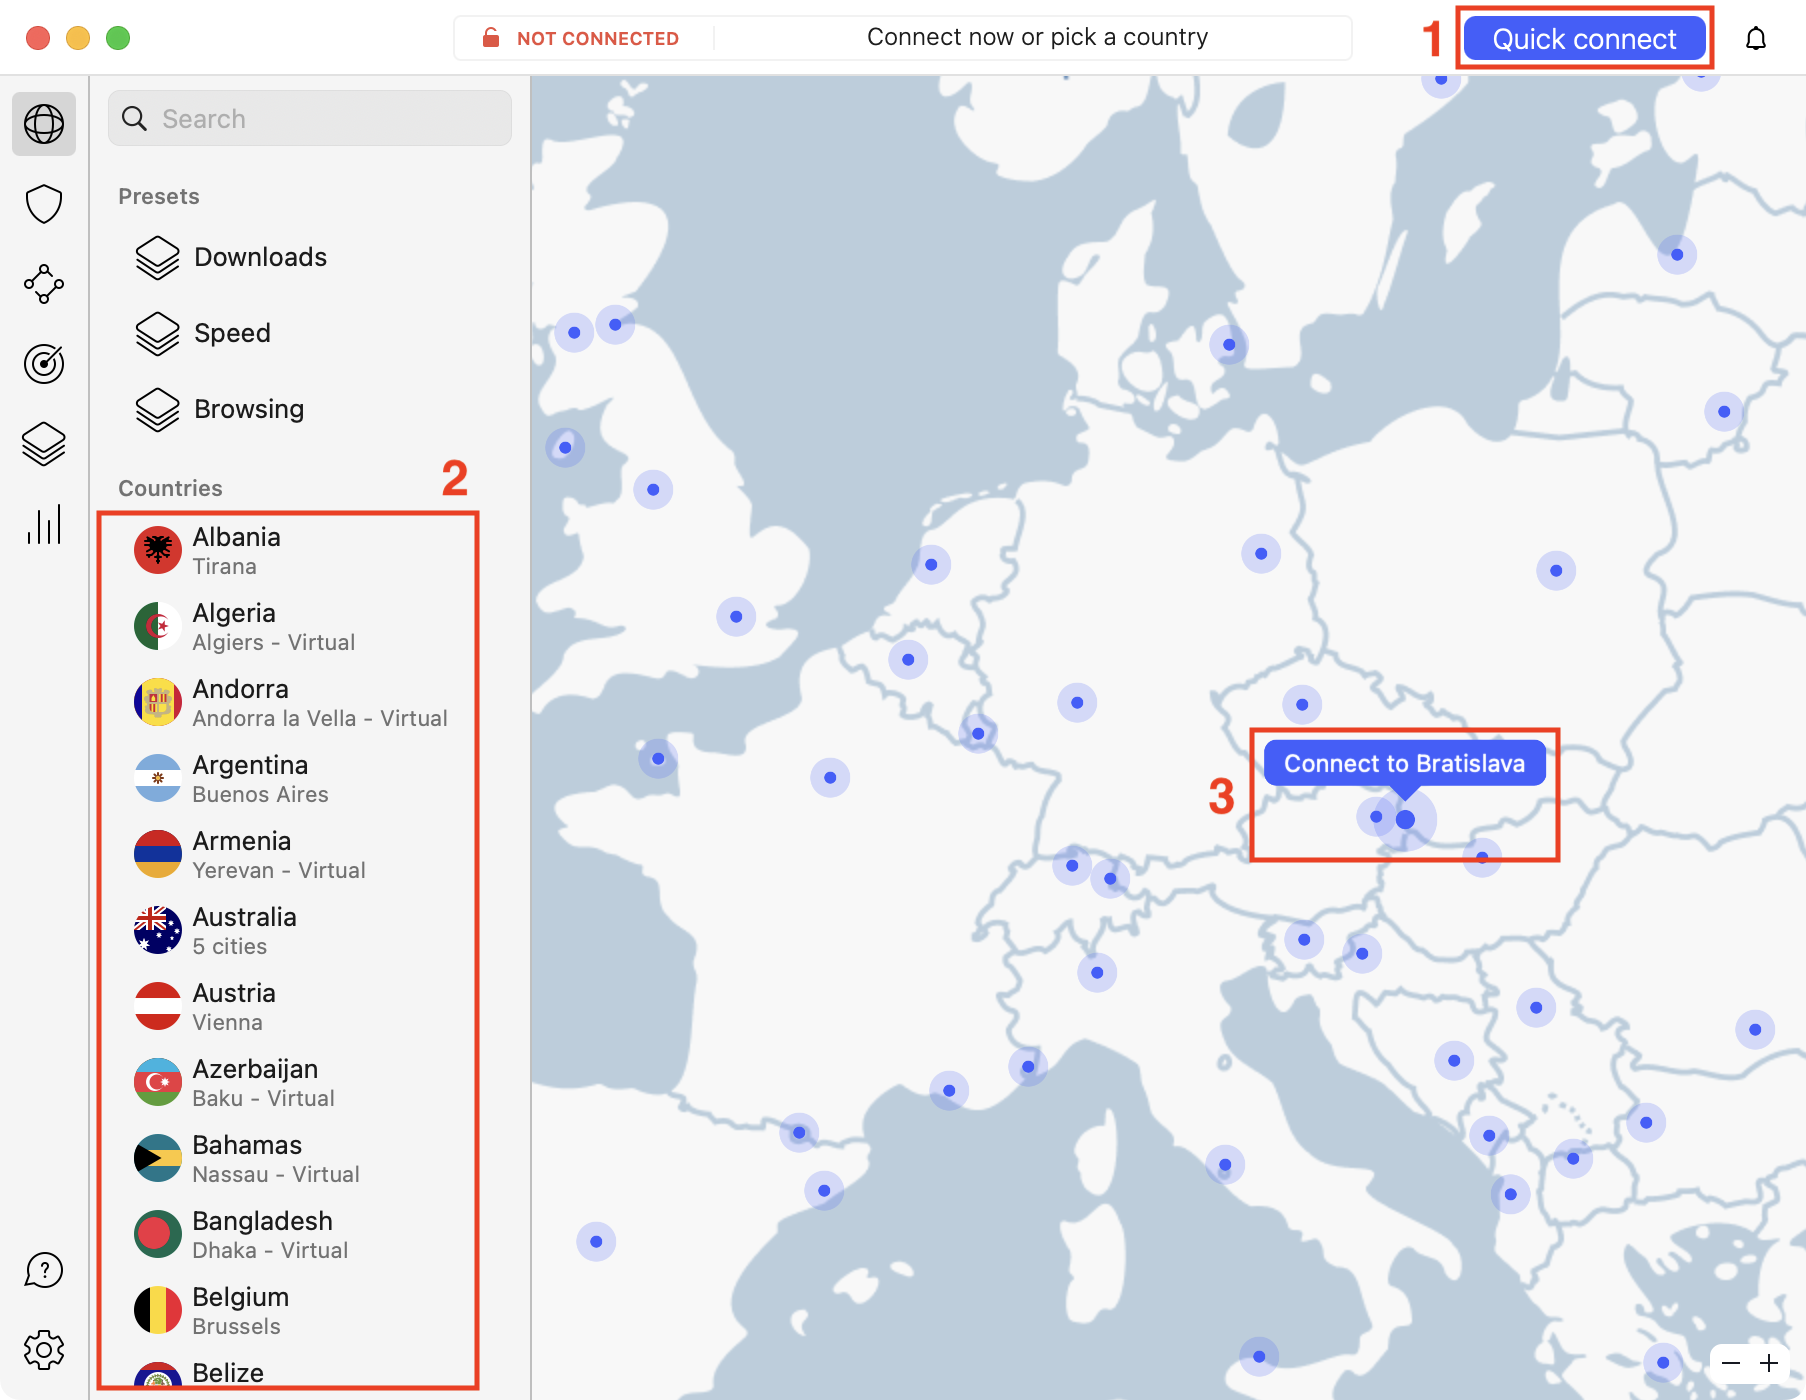
## Double VPN
[Double VPN servers](https://nordvpn.com/features/double-vpn/) are specialized security and privacy solutions intended for journalists, political activists, informants, and anyone who wishes to be extra cautious.
The key benefit that separates Double VPN from standard servers is that your internet traffic is sent through two VPN servers instead of one, encrypting your data and disguising your personal IP address twice.
The additional layer of security comes in handy when traveling through countries with high levels of censorship and/or surveillance.
Here is how to connect to a Double VPN server:
To start using double VPN servers, open the specialty servers category in the NordVPN app and click on double VPN. You will be automatically connected to the fastest available server.
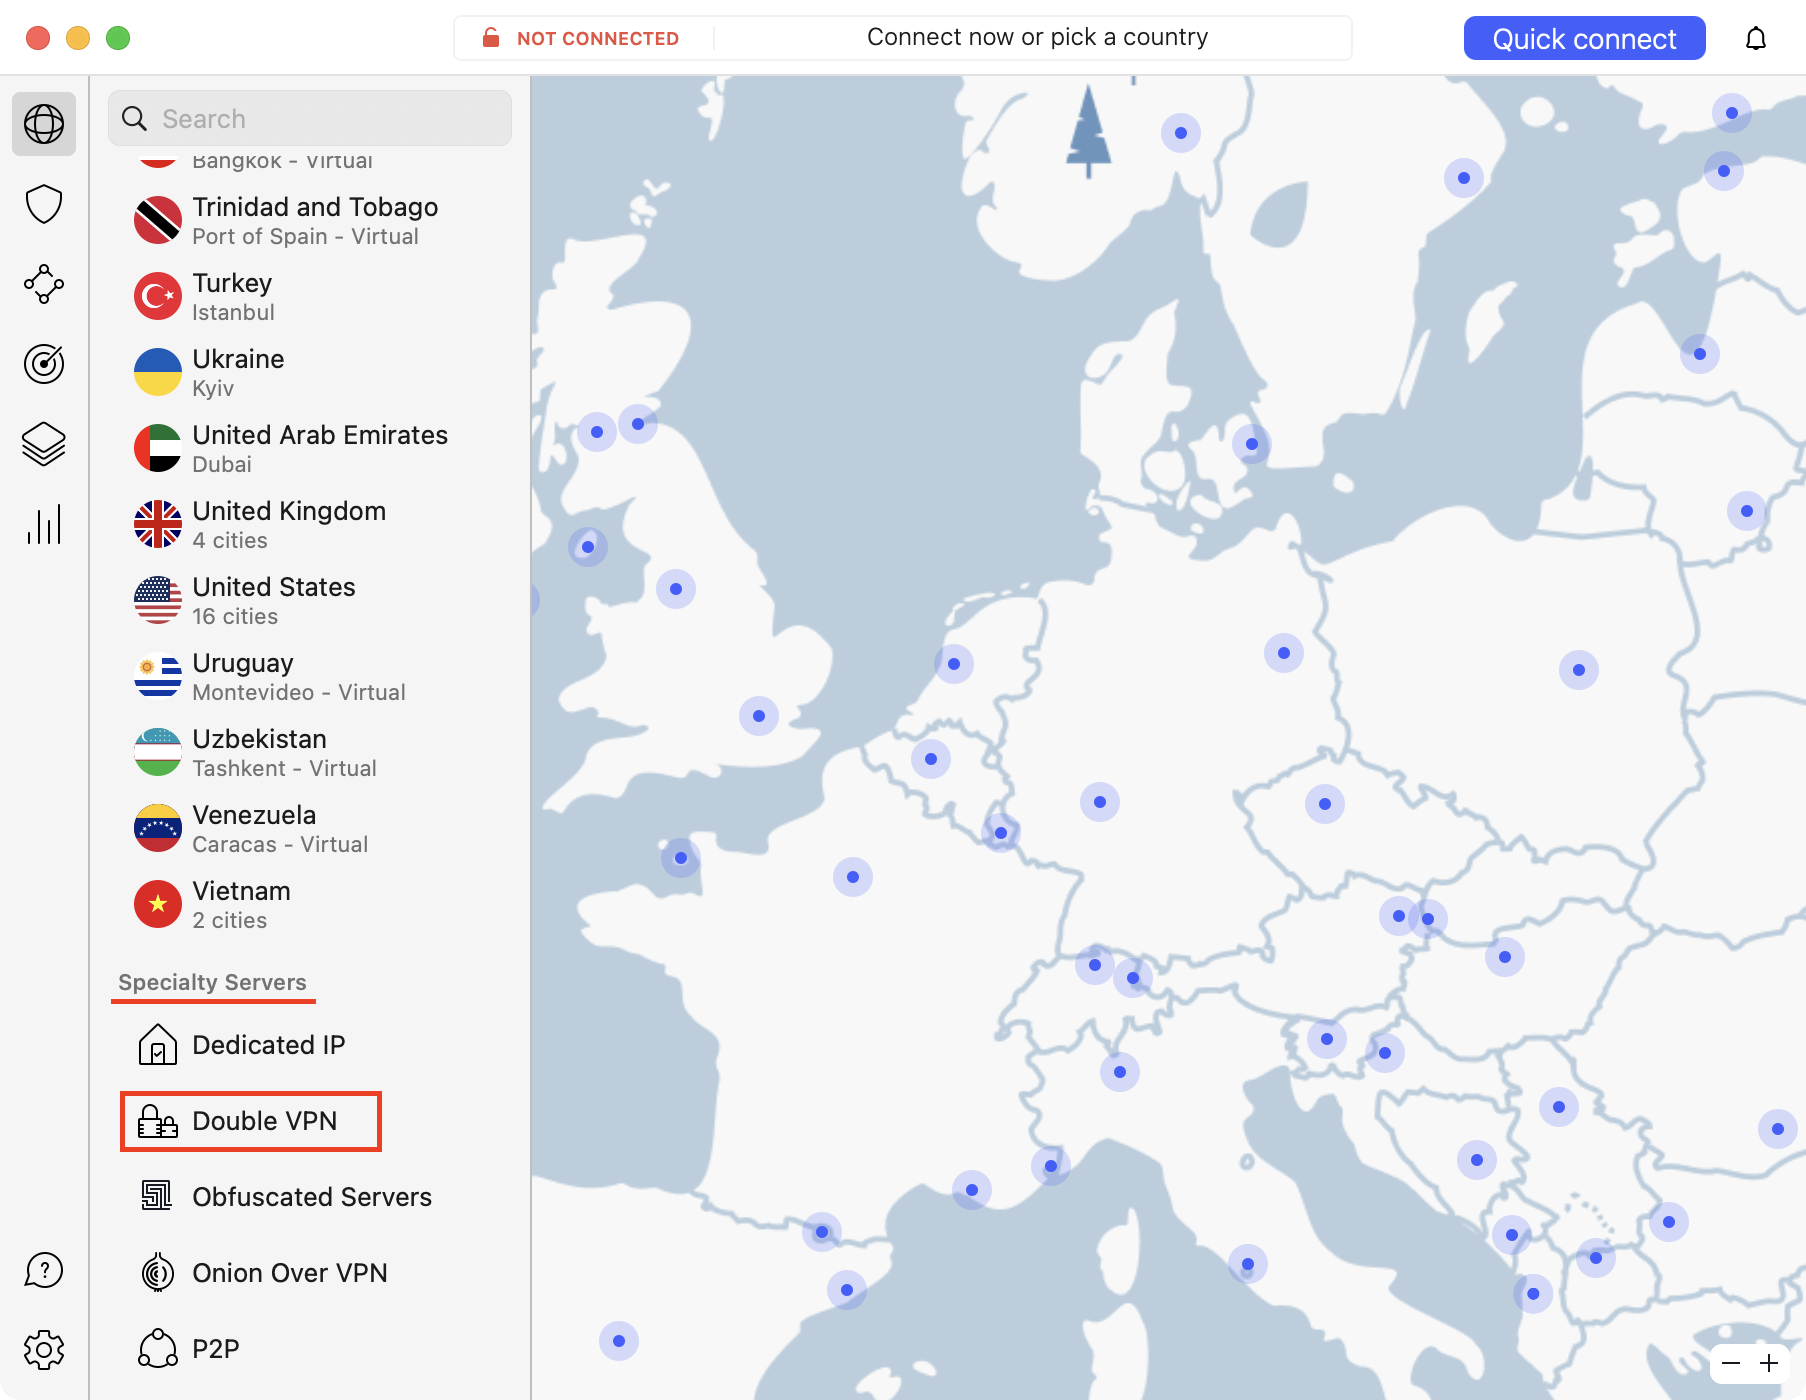
What to do if double VPN is missing from my specialty servers list?
If you do not see the Double VPN option in the specialty servers list, [switch to TCP or UDP OpenVPN protocol](https://support.nordvpn.com/hc/en-us/articles/20465552867345-Switching-protocol-to-OpenVPN-UDP-or-TCP).
Why does my connection feel slow using double VPN?
Your internet connection feels slow using double VPN because transferring internet traffic through a second server requires additional internet resources. For this reason, we do not recommend using Double VPN for simple, day-to-day activities. If you are still facing speed issues, here are some tips on how to make your VPN faster.
## Onion over VPN
[Onion Over VPN](https://nordvpn.com/features/onion-over-vpn/) is a feature that combines the benefits of using The Onion Router (Tor) with VPN tunneling. The result — an increased level of privacy, essential to those living or passing through countries with heavy surveillance.
When connected to an Onion over a VPN server, your internet traffic goes through one of our servers, passes through the Onion network, and only then reaches the internet.
Usually, you can access the Onion network only with The Onion Router (Tor) browser. With NordVPN, you don’t need to download a special browser. All you need to do is open the [NordVPN app](https://nordvpn.com/download/), head over to the specialty servers category, and connect to an Onion Over VPN server. Your internet traffic will then be routed through the Onion network — no additional applications are required.
Onion over VPN is missing from my specialty servers list
If this happens, please reach out to our support for assistance. [How can I reach NordVPN customer support?](https://support.nordvpn.com/hc/en-us/articles/19482416296593-How-can-I-reach-NordVPN-customer-support)
I can't access the Onion network through the Firefox browser.
Don't worry, we have the solution covered in this article: Firefox does not open .onion websites
## Dedicated IP
This category is for our clients who purchased their own dedicated IP addresses.
Dedicated IP servers function like standard servers, except that you're the only person who is able to access the IP address. When you connect to any other kind of server, your IP address is replaced with the server's IP. The server can be used by many other people, who will be sharing the server's IP address in hiding their personal one. Having people share the IP address may lead to a number of unpleasant inconveniences, solved by owning a dedicated IP address.
Some of the benefits of having sole access to an IP address include the possibility to bypass regular VPN blocklists, avoiding CAPTCHA requests, and more.
Dedicated IP is missing from my specialty servers list
If you do not see the dedicated IP option in the specialty servers list, [switch to the TCP, UDP OpenVPN](https://support.nordvpn.com/hc/en-us/articles/20465552867345), or NordLynx protocols. Dedicated IP is not available via browser extension, tvOS, or the IKEv2 protocol.
I've purchased a dedicated IP address, how do I set it up?
Here are tutorials on [how to connect to your dedicated IP by NordVPN on different platforms](https://support.nordvpn.com/hc/en-us/articles/19507808024209-Dedicated-NordVPN-IP-addresses).
## Obfuscated servers
Heavy internet restrictions and VPN blocks can be solved by connecting to [obfuscated servers](https://nordvpn.com/features/obfuscated-servers/#:~:text=Obfuscated%20servers%20are%20specialized%20VPN,even%20in%20heavily%20restrictive%20environments.&text=Therefore%2C%20tools%20that%20are%20meant,VPN%20traffic%20let%20it%20pass.).
These servers bypass VPN-blocking firewalls by using a complicated algorithm. To find out more information about the way obfuscated servers work, [visit our dedicated article](https://nordvpn.com/features/obfuscated-servers/#:~:text=How%20do%20obfuscated%20servers%20work%3F).
I don't see obfuscated servers in my specialty servers list
If you do not see the obfuscated servers in the specialty servers list, switch to TCP or UDP OpenVPN protocol.",https://support.nordvpn.com/hc/en-us/articles/19479130821521-Different-NordVPN-server-categories-explained
What is NordPass?,"NordPass is a tool designed to help you manage your passwords securely and effortlessly. Created by NordSecurity, the same company behind NordVPN, NordPass allows you to store login details, autofill forms, keep private notes safe, and generate strong passwords. Like other NordSecurity products, NordPass integrates with your Nord Account for easy access and management.",https://support.nordvpn.com/hc/en-us/articles/33467690873105-How-to-set-up-password-manager-with-NordPass
What is Nord Account?,"With your Nord Account, you can easily manage all your Nord products, including NordVPN, NordPass, and NordLocker. Purchasing NordVPN or any bundle provides automatic access to a Nord Account. Guidance on how to access NordPass using your Nord Account is provided later in this article.",https://support.nordvpn.com/hc/en-us/articles/33467690873105-How-to-set-up-password-manager-with-NordPass
How to get started with NordPass?,The process to start with NordPass is detailed below.,https://support.nordvpn.com/hc/en-us/articles/33467690873105-How-to-set-up-password-manager-with-NordPass
How to set up password manager with NordPass,"If you've subscribed to a NordVPN Plus, Complete, or Ultra plan, you've got a bundle that includes the NordPass password manager. This guide will walk you through setting it up and securing your passwords.
In this article, we will cover:
* [What is NordPass?](
* [What is Nord Account?](
* [How to get started with NordPass?](
* [Installing NordPass](
* [Logging into NordPass](
## What is NordPass?
NordPass is a tool designed to help you manage your passwords securely and effortlessly. Created by NordSecurity, the same company behind NordVPN, NordPass allows you to store login details, autofill forms, keep private notes safe, and generate strong passwords. Like other NordSecurity products, NordPass integrates with your Nord Account for easy access and management.
## What is Nord Account?
With your Nord Account, you can easily manage all your Nord products, including NordVPN, NordPass, and NordLocker. Purchasing NordVPN or any bundle provides automatic access to a Nord Account. Guidance on how to access NordPass using your Nord Account is provided later in this article.
[Learn more about Nord Account and how to use it.](https://support.nordvpn.com/hc/en-us/articles/19571345334033-What-is-a-Nord-Account-and-how-do-you-use-it)
## How to get started with NordPass?
The process to start with NordPass is detailed below.
### Installing NordPass
Start securing your passwords with NordPass by choosing your preferred installation method:
* You can install the NordPass application directly on your device. [Installation guides for different operating systems are available. ](https://support.nordpass.com/hc/en-us/articles/360004799257-Installing-NordPass-desktop-application)
* Alternatively, for seamless browsing, install the NordPass browser extension – [learn how across various browsers.](https://support.nordpass.com/hc/en-us/articles/360010298318-Adding-the-NordPass-browser-extension)
* MacOS users also have the option to add the Safari NordPass extension. [Learn how to do that.](https://support.nordpass.com/hc/en-us/articles/360009942298-NordPass-Safari-extension-setup-for-macOS)
### Logging into NordPass
Once installed, open your NordPass application or browser extension and click Login with Nord Account. Enter your Nord Account credentials to log in, and you're all set!
Learn more about the password manager, and if you need any further assistance, visit [NordPass's Help Center](https://support.nordpass.com/hc/en-us).",https://support.nordvpn.com/hc/en-us/articles/33467690873105-How-to-set-up-password-manager-with-NordPass
How to set up secure cloud storage with NordLocker,"If you have purchased a bundle package with NordVPN, such as Ultra or Full, next to NordVPN service, you also receive NordLocker cloud storage service, which takes security to further heights! In this article, we will cover what you need to know to get started with NordLocker to use your purchased bundle to its full potential.
In this article, we will cover:
* [Accessing Nord Account](
* [What is NordLocker](
* [Why encrypt files?](
* [How to get started with NordLocker](
## Accessing Nord Account
When purchasing NordVPN or its bundles, you are automatically granted access to Nord Account. This account page lets you easily manage all of your Nord Security services from a single control panel.
Learn more when reading [our article on what Nord Account is and how to use it](https://support.nordvpn.com/hc/en-us/articles/19571345334033-What-is-a-Nord-Account-and-how-do-you-use-it).
## What is NordLocker
With the [Full and Complete bundles](https://nordvpn.com/pricing/), you will receive [NordLocker](https://nordlocker.com/), an easy-to-use file encryption tool that lets you store and share your data securely. [Learn more about what NordLocker is](https://support.nordlocker.com/hc/en-us/articles/360015151437-What-is-NordLocker).A Locker is NordLockers' encrypted folder. It contains your files and configuration data. No one apart from you can access the files you put in a Locker unless you give other people access.
[Learn how to grant other people access to your files on NordLocker](https://support.nordlocker.com/hc/en-us/articles/32188001657617-How-to-share-NordLocker-s-files-via-email-with-another-user).
### Why encrypt files?
Your computer contains a lot of sensitive data like photos of passports and IDs, scanned copies of legal documents, medical and tax information, personal notes, pictures, videos, and more. All of this information could be accessed by hackers if unprotected under additional security layers.
In cases when these files need to be shared with trustworthy people, you can do that safely thanks to [public-key cryptography](https://nordlocker.com/blog/public-key-encryption/).
## How to get started with NordLocker
By purchasing a NordVPN bundle that already includes NordLocker, you will simply need to proceed with logging in to the Web app and creating a Cloud password specifically for NordLocker. [Read NordLocker's article on how to get started](https://support.nordlocker.com/hc/en-us/articles/360015151437-What-is-NordLocker#:~:text=by%20NordLocker%27s%20encryption.-,Getting%20started%20with%20NordLocker,-To%20start%20using).
If you have any questions or wish to learn more, explore [NordLocker's Help Center](https://support.nordlocker.com/hc/en-us).",https://support.nordvpn.com/hc/en-us/articles/33436996432913-How-to-set-up-secure-cloud-storage-with-NordLocker
Installing NordVPN (App Store) version on macOS,"From October 17th, 2024, older applications will have a few function limitations. The issues can affect macOS applications version 8.27.2 and below. They can include not receiving notifications in the app and reduced Dark Web Monitoring and Meshnet functionality.To resolve the issue, please update your application to the latest version.
This article will help you set up the [NordVPN application on your Mac](https://nordvpn.com/download/mac/) and connect to a VPN server. Note: The NordVPN (App Store) app is compatible with macOS 11 and later versions.
## Table of contents:
* [Downloading and installing](
* [Setting up the application](
* [Connecting to servers](
* [NordVPN features menu](
* [NordVPN preference settings](
## Downloading and installing
1. Go to the [NordVPN app page in the App Store](https://apps.apple.com/us/app/nordvpn-vpn-fast-secure/id905953485#?platform=mac) or click download the App Store version of NordVPN on our downloads page: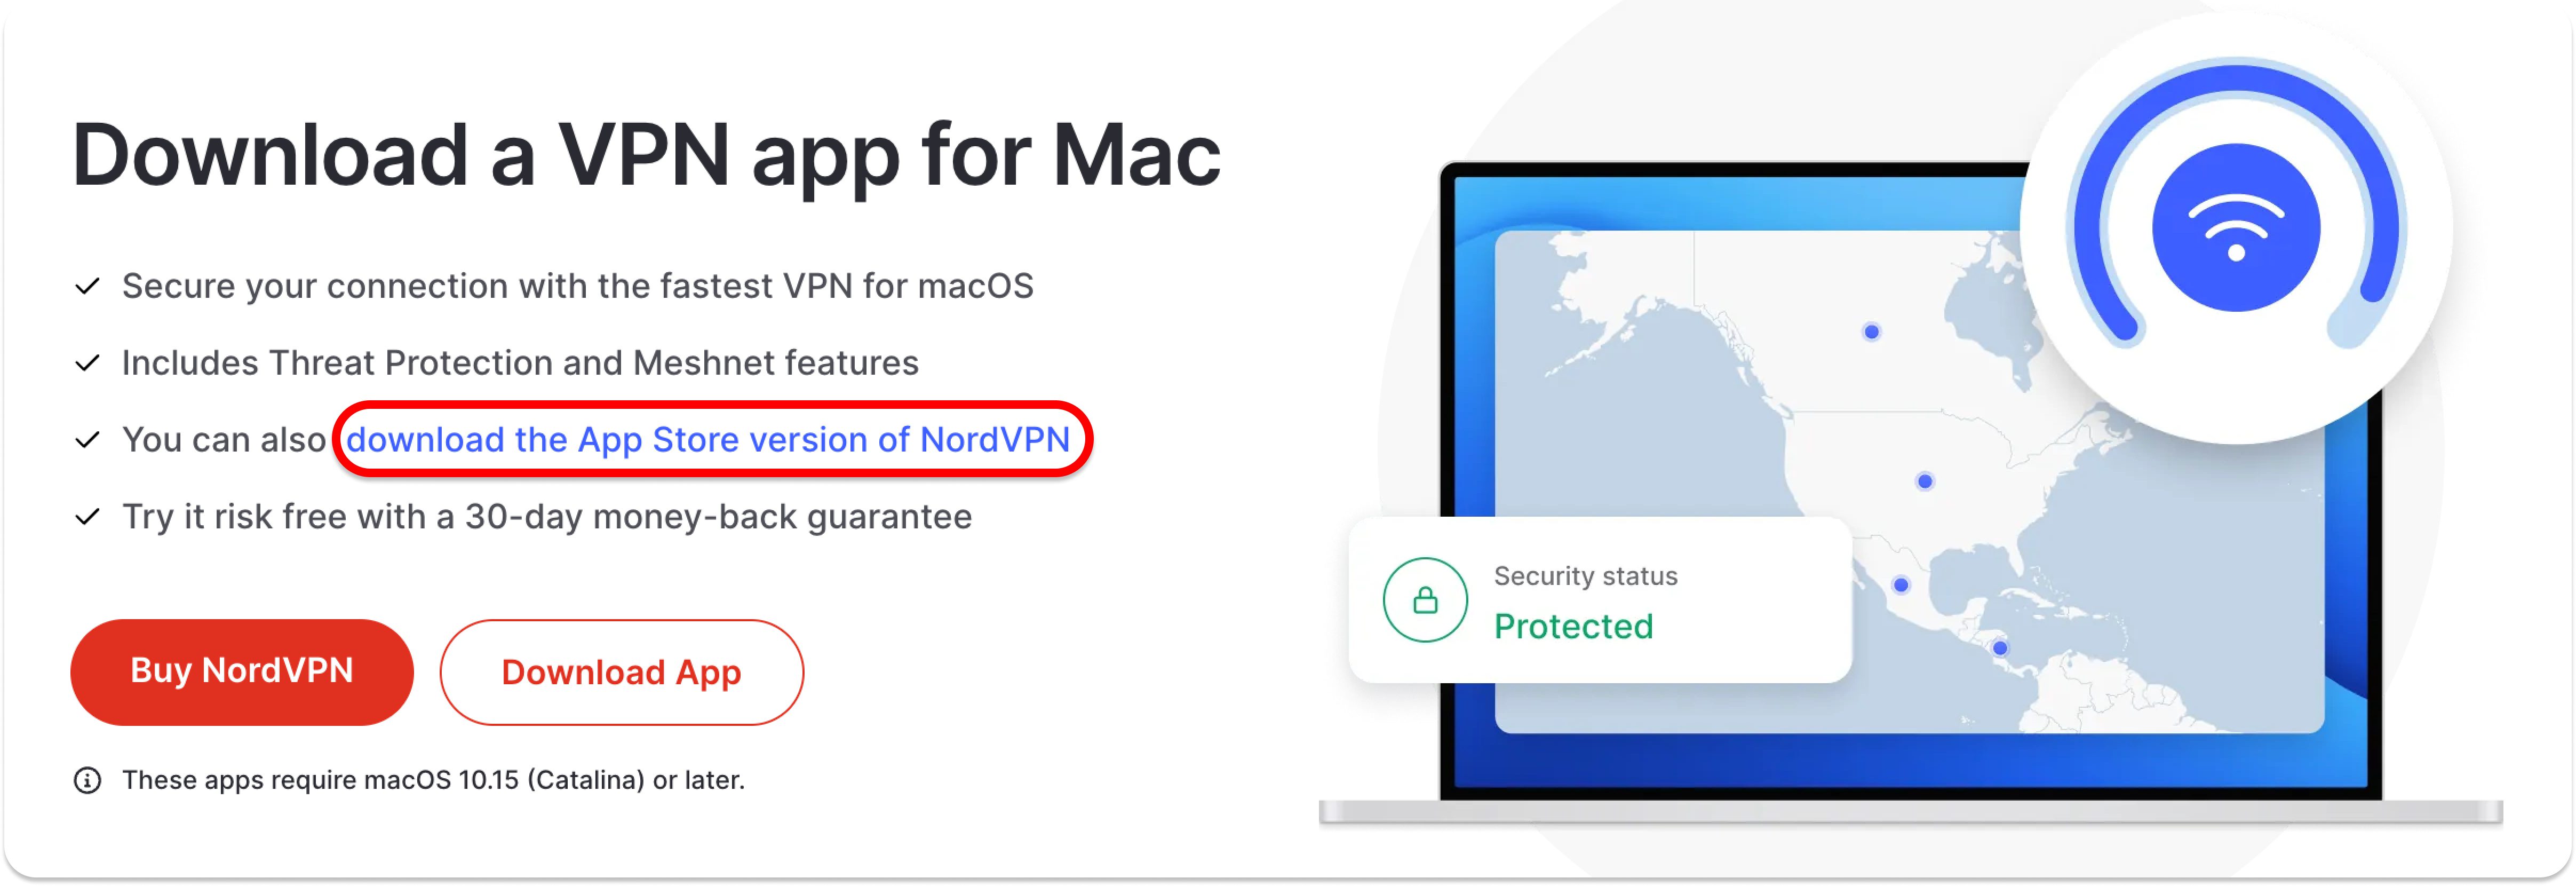
2. Agree to Open App Store.
3. When the App Store launches, click on the blue Get button and choose to Install the app.
4. Once the download is finished, press the Open button.
## Setting up and using the application
1. Open your Launchpad and click on the NordVPN icon.
2. You can Log In or Sign Up in the top-right corner of the screen.
3. You will be redirected to your Nord Account. To log in, enter your registered email address and password. You can also sign in using your Google account or Apple ID or by entering a code. If you are a new user, you will need to create a [Nord Account](https://my.nordaccount.com/) by entering your email address and other required information.
4. After completing the above steps, you will be prompted to open the NordVPN app. Agree always to allow Nord Account and grant access to the app.
5. After a successful login, you will see the main NordVPN application window.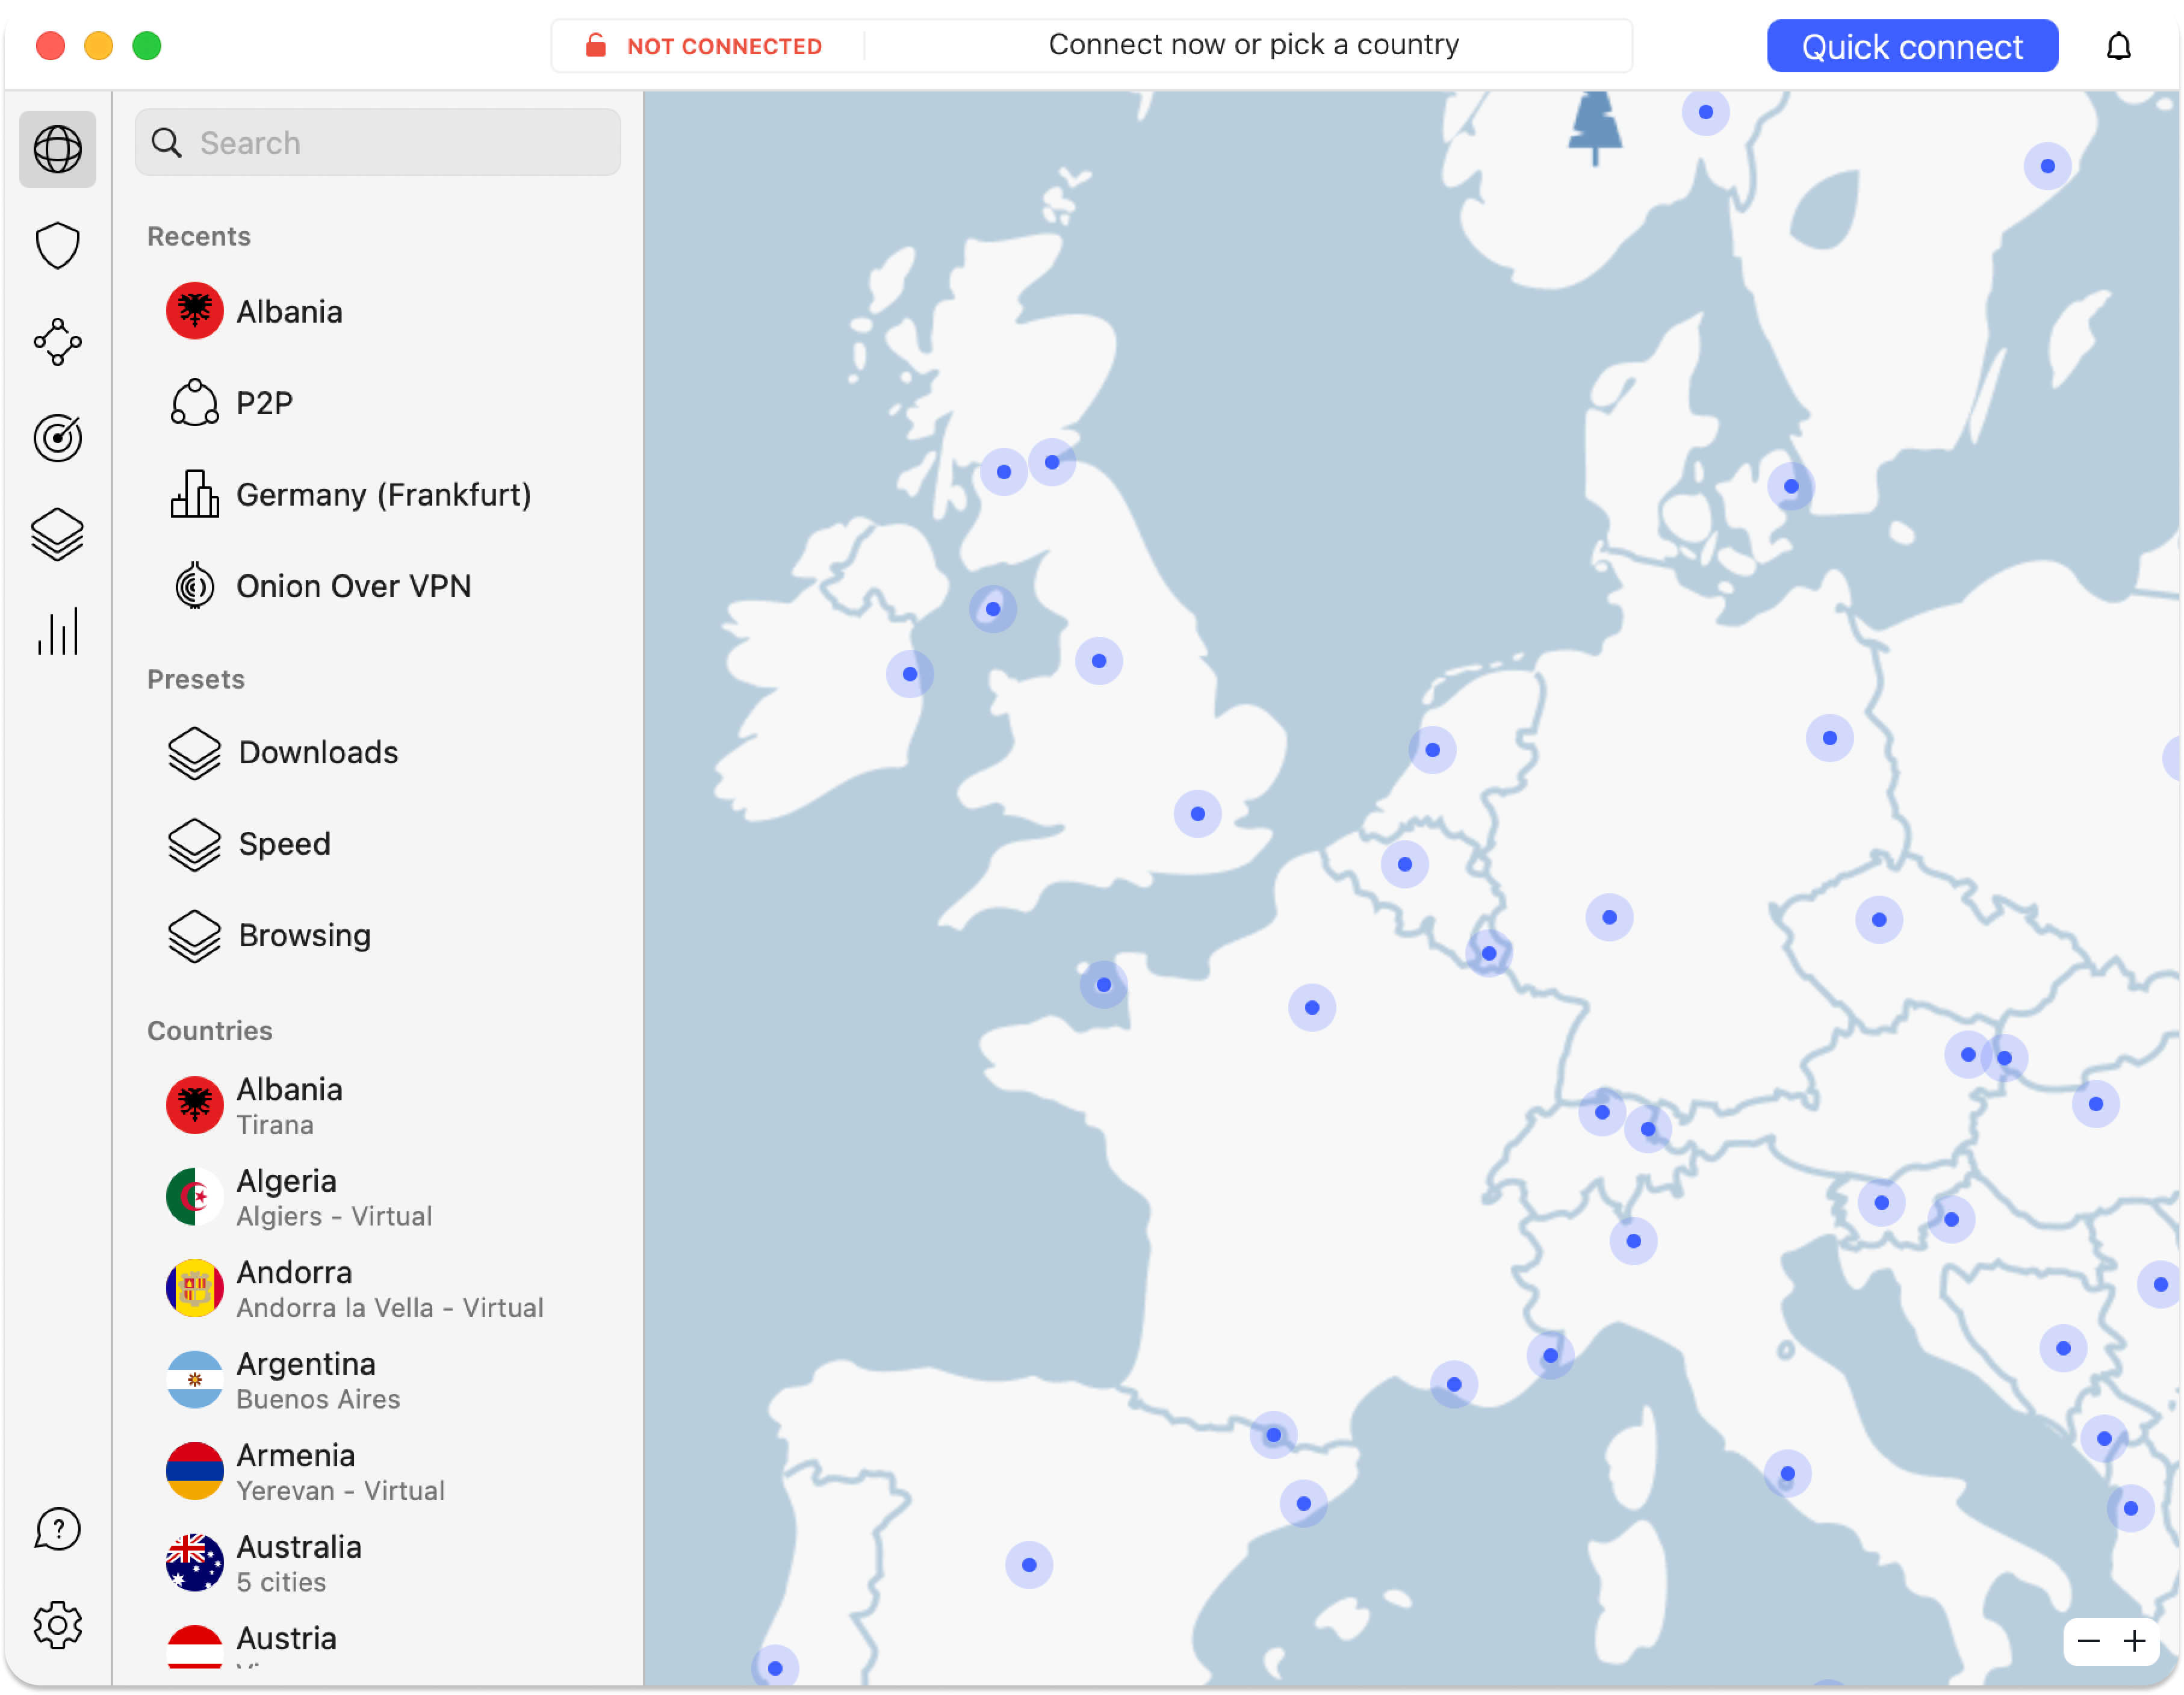Here, you can find NordVPN servers and navigate in the map itself, search bar, or specialty section.
## Connecting to servers
1. The Quick Connect button in the top-right corner will automatically connect you to a server.
2. To connect to a specific server, click on the Search field in the top-left corner of the app. Enter a country, a category, or a specific server number (e.g., Canada #1224) to find what you need.
3. All servers in the left sidebar are sorted by country and specialty.To connect to a specialty server, hover over one of the categories under [Specialty Servers](https://support.nordvpn.com/hc/en-us/articles/19479130821521-Different-NordVPN-server-categories-explained), and click on the three-dot menu to select a Country.
4. To connect to a specific country, click on it.
## NordVPN features menu
### Map

* Map - here, you can find and navigate NordVPN servers in the map itself, search bar, or specialty section
### Threat Protection Pro™/Threat Protection

* Threat Protection Pro™ is a special NordVPN feature that automatically blocks ads, trackers, and malicious URLs. When you visit a website known for scamming people, this feature displays an in-browser alert to warn you about possible fraud. Threat Protection Pro™ also scans downloads for malware and checks your apps for security vulnerabilities. Available with selected NordVPN plans, Threat Protection Pro™ can work without an active VPN connection. Learn more about[ Threat Protection Pro™](https://nordvpn.com/features/threat-protection/).If your NordVPN subscription doesn’t include Threat Protection Pro™, you can use the Threat Protection feature instead. It blocks intrusive ads and malicious domains based on DNS filtering and works whenever you’re connected to a VPN server. Threat Protection comes with all NordVPN plans.
### Meshnet
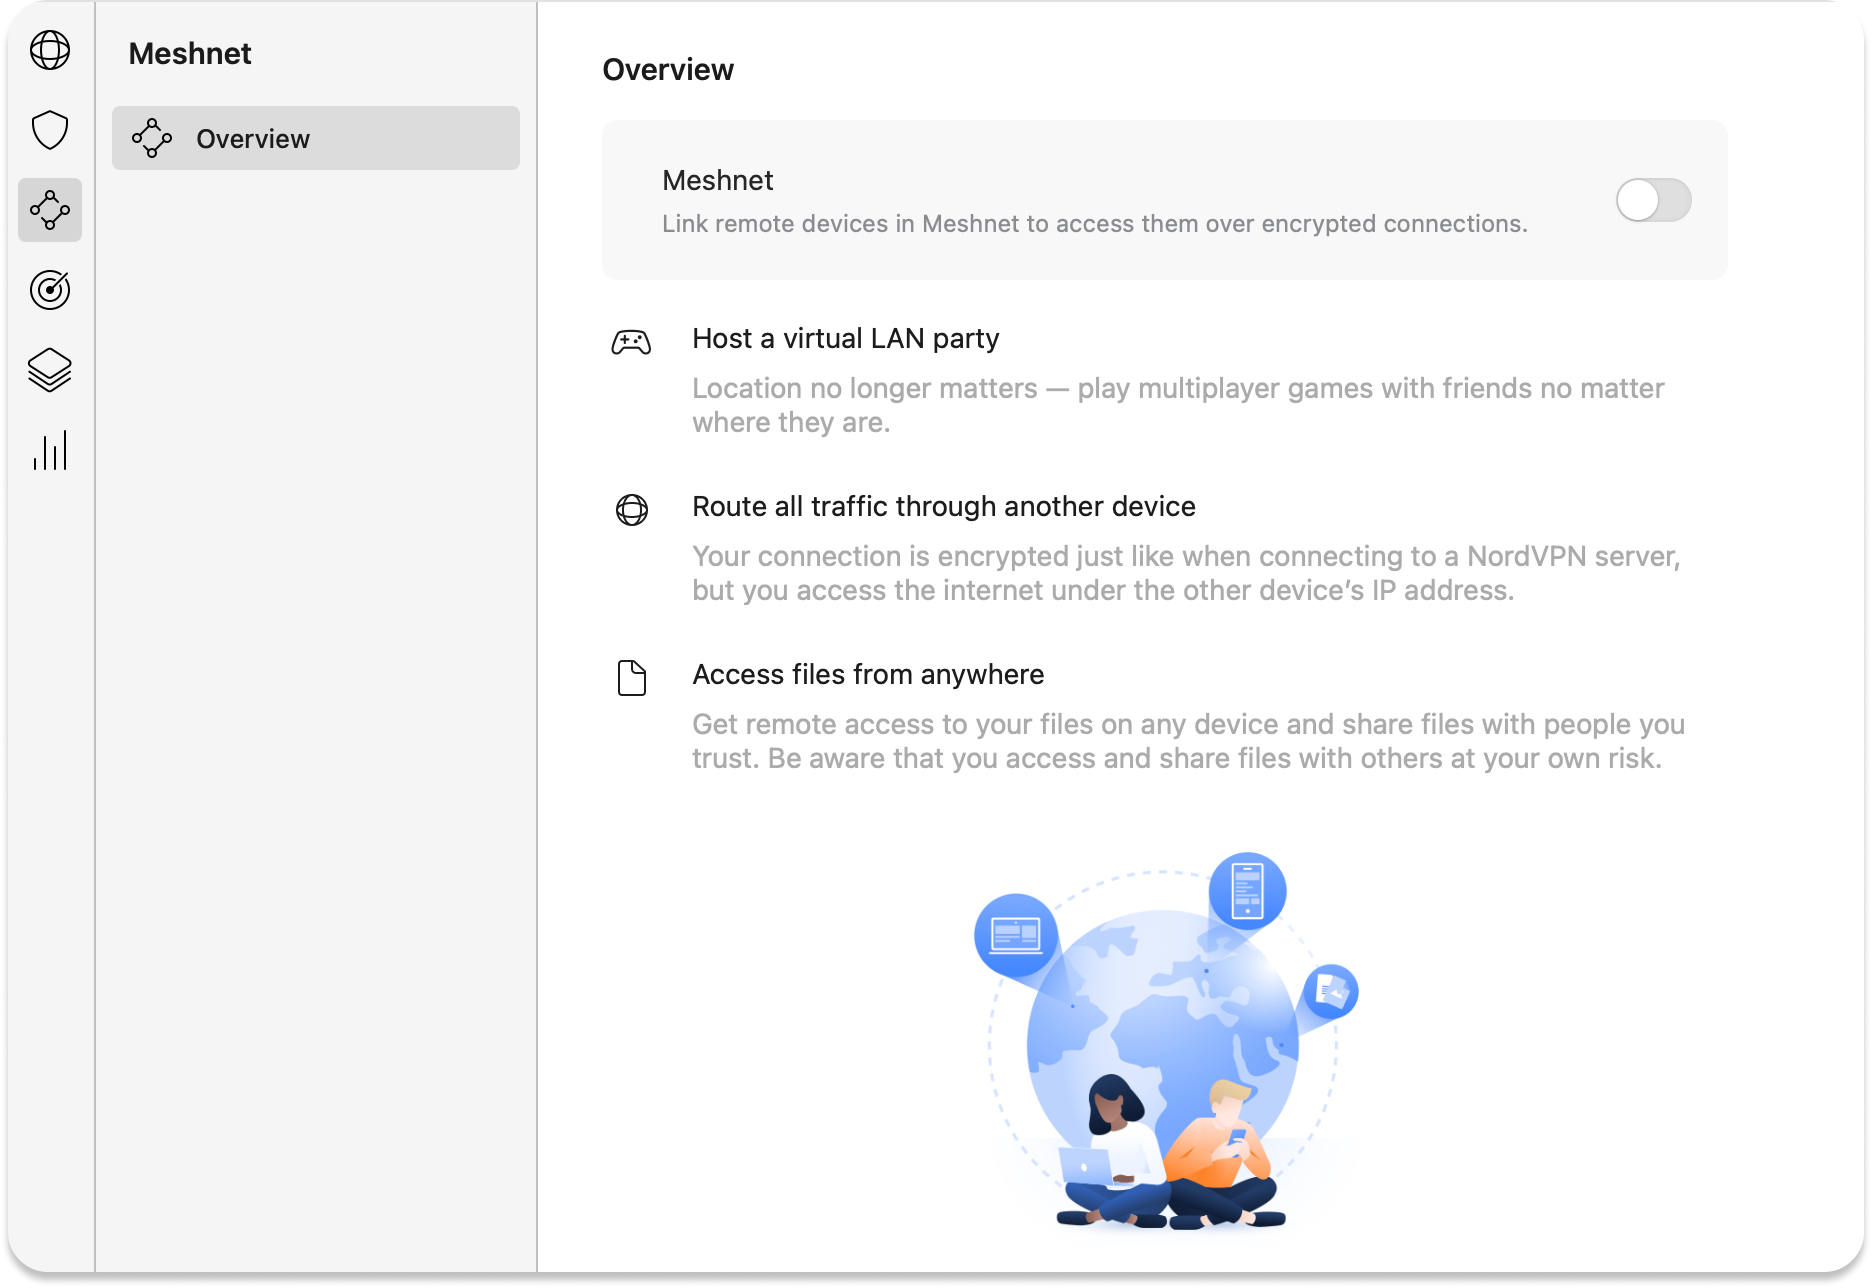
* The [Meshnet](https://nordvpn.com/meshnet/) feature helps you to access devices over encrypted tunnels. [Learn more about Meshnet](https://meshnet.nordvpn.com/getting-started/meshnet-explained).
### Dark Web Monitor
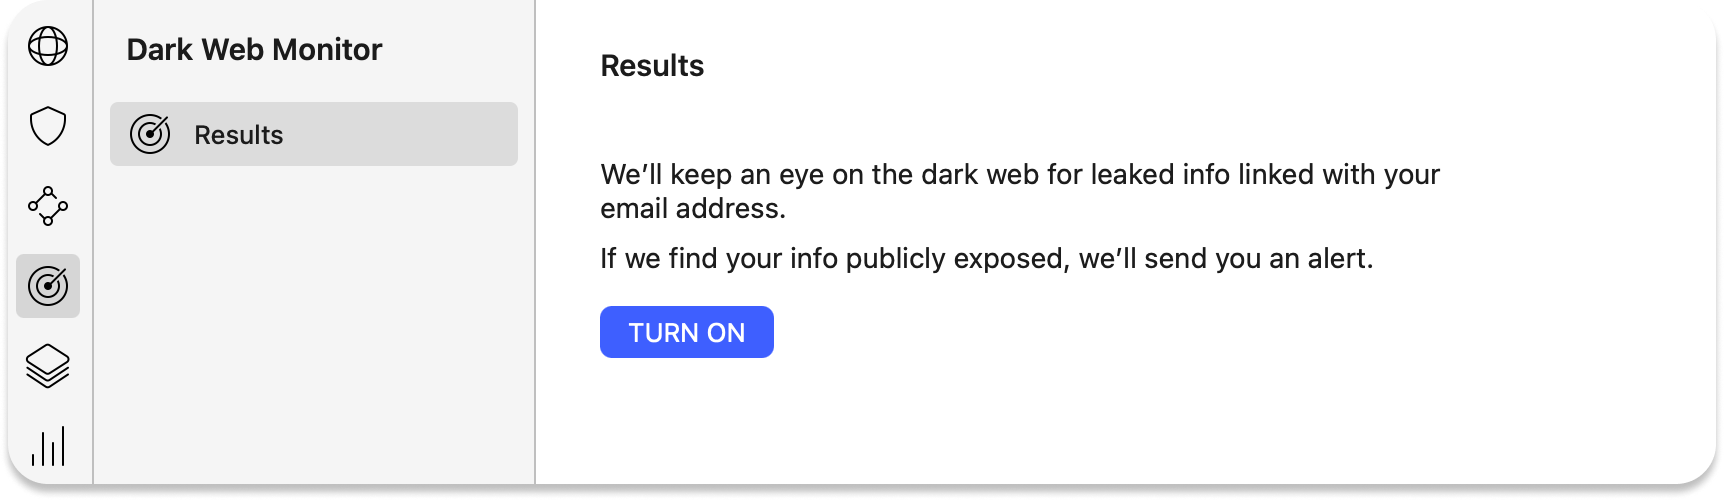
* [Dark Web Monitor](https://nordvpn.com/features/dark-web-monitor/) scans the internet for any credential leaks associated with your registered NordVPN e-mail address.
### Presets
Presets let you load up a specified set of configurations, including server number, type, protocol, and more. You can configure your settings to experience a smooth session, for e.g., so that a streaming service or a game loads up instantly!
#### How to set up presets?
Start at the preferences page. You can either edit an existing preset or create a new one by clicking Add new.Let's build it from scratch. After pressing Add new, you will see a menu with the settings you can use. Give the preset a name. Next, select from available VPN protocols. If you change the default setting Use recommended, you’ll be able to alter the server type. Here you can set a specialty server or any regular one as your type.Depending on the server availability, you may also have the choice of selecting a specific region.Finally, you can add either a web page or an app to the preset. It will be displayed under the preset name on the main screen. If you press Add link button, a field will appear for the URL of the website you would like easy access to. After inserting the URL, press Enter to register it. When you're done, press Save preset, and it will be added to the main screen.
### Statistics
* Statistics show you more information about your connection.
### Settings
To change application settings and find various features click on the gear icon at the bottom-left corner of the app:
* Settings tab displays the NordVPN app settings.
### Quick Help
* Here you can find your connection logs, a direct to our Help Center, or our customer support email.
## NordVPN settings
### General
* Launch the app on computer startup — toggle to open the NordVPN app automatically every time you turn your device on.
* VPN Protocol — this option will let you choose from 3 different [connection protocols](https://support.nordvpn.com/hc/en-us/articles/19482810153745-Which-NordVPN-protocol-should-I-choose) (OpenVPN UDP, OpenVPN TCP, and NordLynx).
* Help Us Improve — makes NordVPN better by sending us aggregated anonymous data.
### Auto-connect
* When using an untrusted network — toggle to automatically be connected to a VPN when you're connected to a network that is not added to a Trusted network list.
* Connect to — you can select a specific country from the list.
* The current network — shows the network you are currently connected to.
* Trusted network — you won't be automatically connected to a VPN while on a trusted Wi-Fi network.
### Kill Switch
* [Kill Switch](https://nordvpn.com/features/vpn-kill-switch/) prevents unprotected access to the internet when your VPN connection accidentally drops.
* Advanced Kill Switch is an additional layer of security that can be enabled to prevent WebRTC leaks. However, it functions separately from the system-wide Internet Kill Switch. Read [more information about Kill Switch](https://support.nordvpn.com/hc/en-us/articles/19509682644369-NordVPN-Kill-Switch-how-does-it-work).
* Stay invisible on a local network — this will let you [keep your device invisible on an unsafe local network](https://support.nordvpn.com/hc/en-us/articles/20225371443345-Staying-invisible-on-unsafe-local-networks-on-macOS).
### Appearance
* Appearance settings let you add an application to your dock and menu bar. Also, it lets you choose between dark and light modes.
### Other Apps
* Other Apps tab introduces other [Nord Security](https://nordsecurity.com/) products. As well as a scannable QR code that directly leads you to the NordVPN mobile app download.
### Account
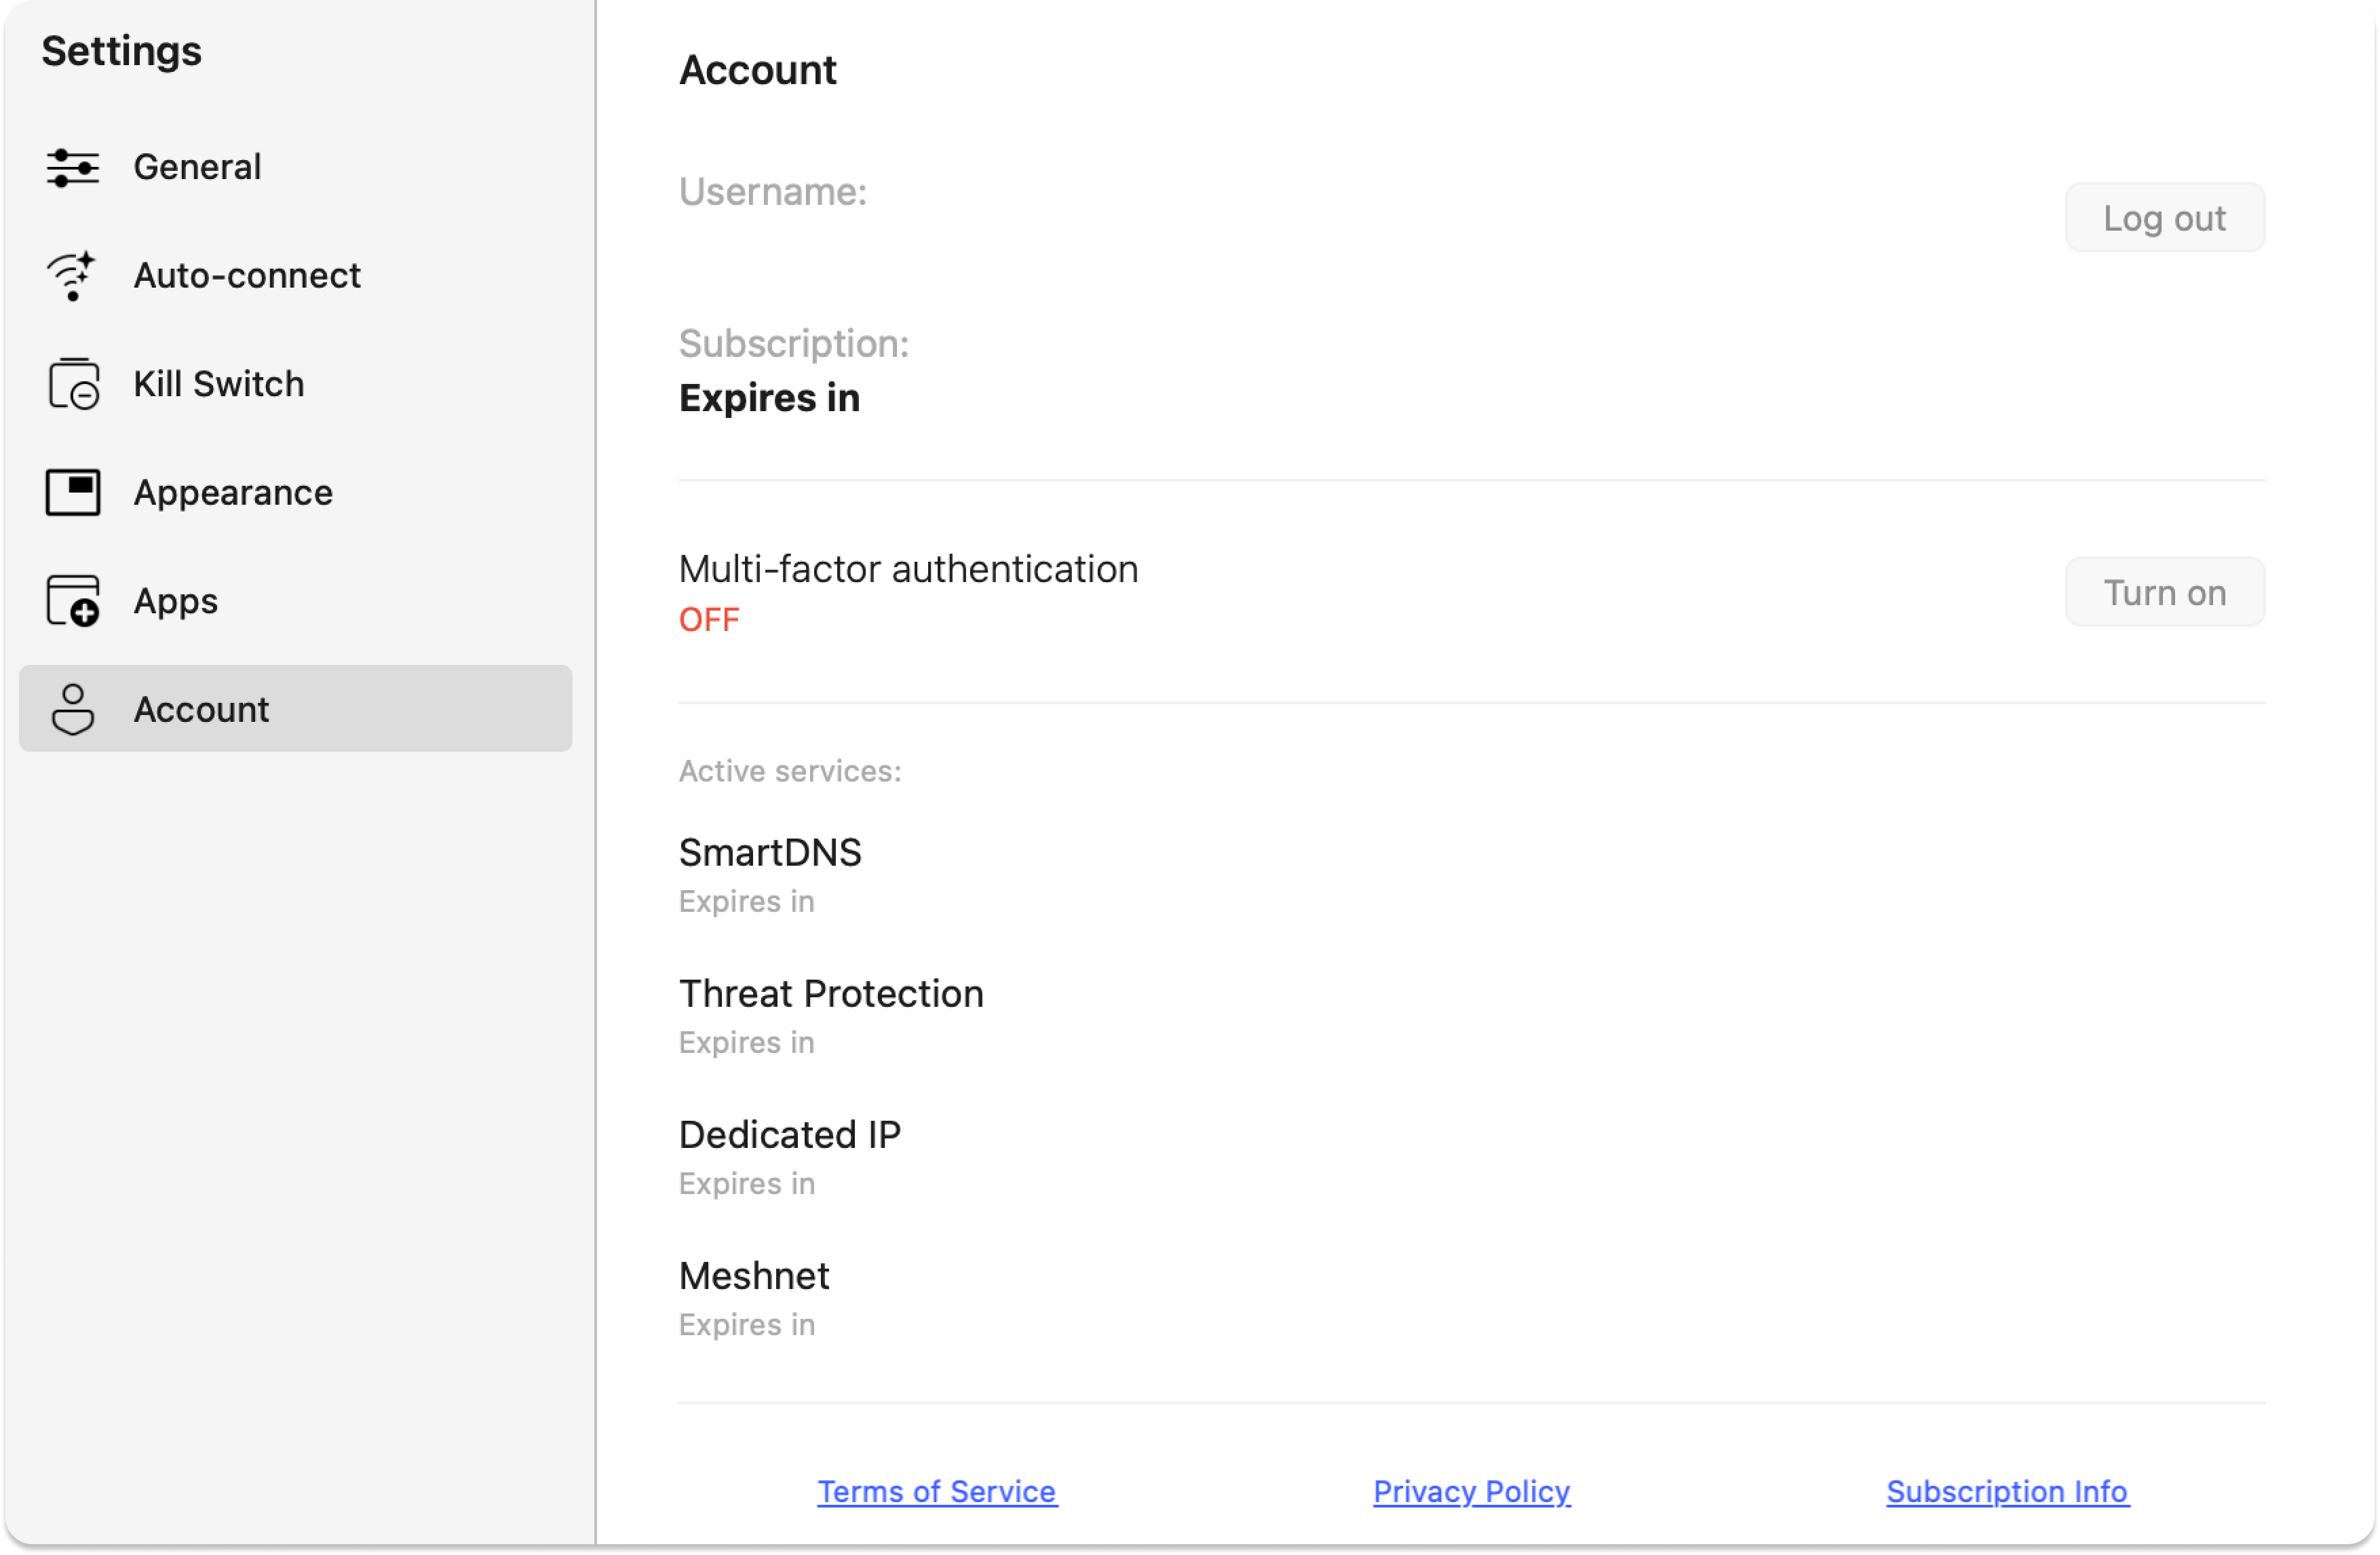
* Account section shows your NordVPN profile and subscription information. Here you’ll also find links to [NordVPN Terms of Services](https://my.nordaccount.com/legal/terms-of-service/) and [Privacy Policy](https://my.nordaccount.com/legal/privacy-policy/).",https://support.nordvpn.com/hc/en-us/articles/20492395403921-Installing-NordVPN-App-Store-version-on-macOS
How to set up NordVPN with Chrome extension,"## How to set up the NordVPN Chrome extension
1. Download [VPN Chrome extension](https://nordvpn.com/download/chrome-extension/) form our website, or you can get it from [Google Chrome Web Store](https://chromewebstore.google.com/detail/nordvpn-vpn-proxy-for-pri/fjoaledfpmneenckfbpdfhkmimnjocfa).
2. Click on Add to Chrome button. 
3. Chrome might ask you if you want to add the extension. Click Add extension.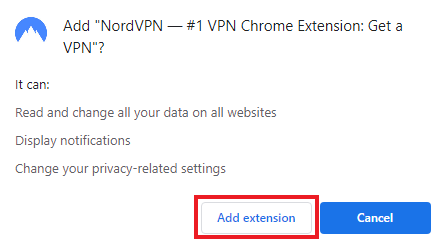
4. Then you will receive a NordVPN notification that the extension was added successfully.
5. After the installation is finished, the NordVPN logo will appear on the toolbar in the top-right corner of the browser. Click on the NordVPN logo and you will be prompted to either login or sign up using Nord Account.
## How to use and customize the NordVPN Chrome Extension
Now that you have a VPN for Chrome let's look at how you can make your first connection and adjust the extension settings to suit your needs.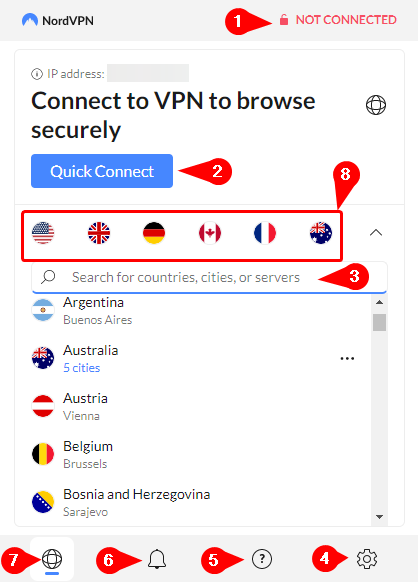
1. Protected status: when you connect to a NordVPN server, this bar will confirm that your connection is successful by displaying the status as Protected.
2. Quick Connect: the fastest way to begin using the NordVPN extension. After pressing Quick Connect, you'll immediately connect to a NordVPN server.
3. Search: whereas the Quick Connect option will decide on a server location for you, this option allows you to specify the country of the NordVPN server.
4. Settings: here, you can find your General, Connection, Security and privacy settings. General: in these settings, you can find your subscription information, application appearance, language preferences, and a function to import and export [split tunneling](https://support.nordvpn.com/hc/en-us/articles/20321703651985-Split-Tunneling-feature-on-NordVPN-extension) settings.Connection: when accessing connection settings, you can choose to automatically connect to NordVPN servers or add URLs that you wish to be excluded from the NordVPN connection.Security and privacy: enable the [WebRTC](https://support.nordvpn.com/hc/en-us/articles/20318383008529-How-to-stop-WebRTC-leaks) Leaks option and the [Threat Protection](https://support.nordvpn.com/General-info/Features/1047407402/What-are-Threat-Protection-and-Threat-Protection-Lite.htm) feature. Also, choose to turn on security warnings for suspicious websites.
5. Support Assistance: more information about the extension and live chat with an agent option can be found here.
6. Notifications: updates and news about the NordVPN extension.
7. Main extension window: If you click here, you can open the main extension window.
8. List of Recently Connected Countries: This section displays the countries to which you have established a recent connection. In case you haven't connected to any server yet, you will find recommendations for countries to connect to.
And that's it! Enjoy browsing securely using your VPN for Chrome.",https://support.nordvpn.com/hc/en-us/articles/20349533941265-How-to-set-up-NordVPN-with-Chrome-extension
Manual OpenVPN connection setup on iPad / iPhone,"Note: if you are using iOS 15 or later, please follow this tutorial.
OpenVPN is a popular protocol our specialty servers use to provide extra functionality. This is an alternative connection method for when you are having trouble with the [native NordVPN app for iOS](https://nordvpn.com/download/ios/). Here’s how to configure your iOS device for this connection method:
1. Go to the [App Store](https://apps.apple.com/us/app/nordvpn-vpn-fast-secure/id905953485?mt=8) on your iPad/iPhone.
2. Tap on Search.
3. Type openvpn connect in the search bar.
4. Tap on the installation button.
5. Enter your iTunes Store credentials and tap OK.
6. Once the app is installed, download the .OVPN configuration file.
Follow the steps below to find the manual connection configuration files:
1. Log into your [Nord Account](https://my.nordaccount.com/), and click NordVPN.
2. Scroll down to Advanced Settings and click Set up NordVPN manually.
3. Select the OpenVPN configuration files tab.
4. Find the server you wish to connect to by using the Search bar or by scrolling down and download it by clicking Download UDP or Download TCP.
5. When connecting to OpenVPN & IKEv2 manually, you're going to need to use the Username and Password from the Service credential tab.
1. Select Open in OpenVPN.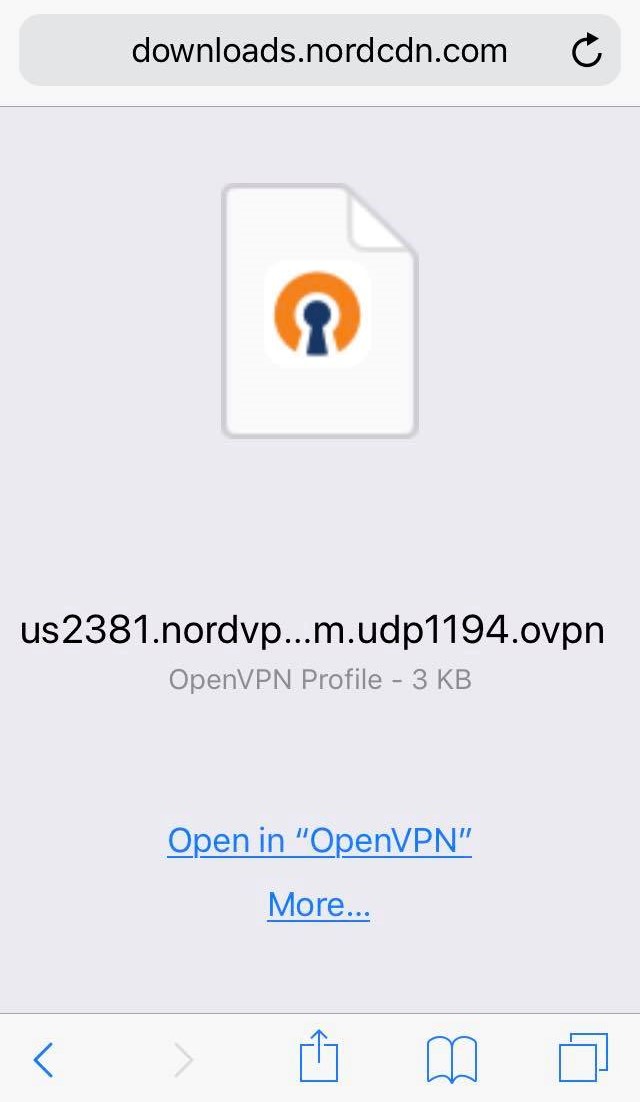Alternatively, if you're brought to a safari window, follow these steps:
1. Click on the Share icon: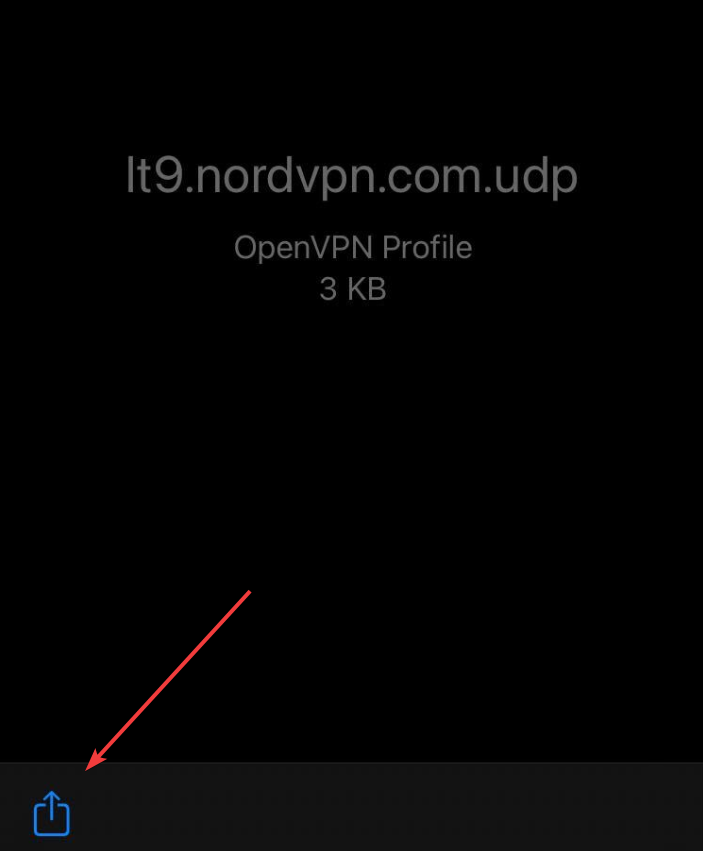
2. In the application list, select the OpenVPN Connect application (in case you don't see it, select more and then choose the application as mentioned earlier):
3. Once the OpenVPN Connect application is open, select File: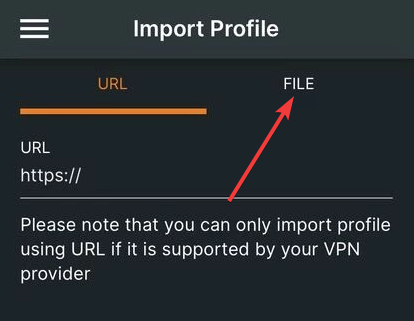
4. Afterward, select Add: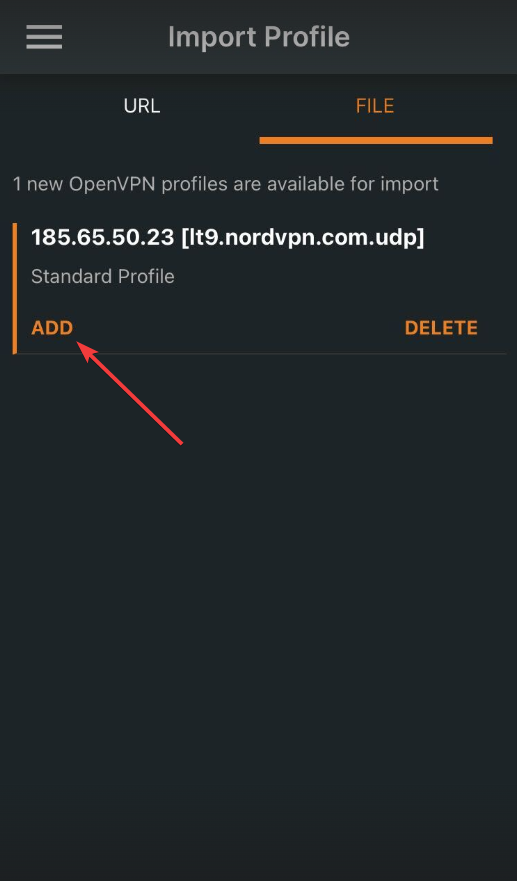
2. Enter your NordVPN service credentials, choose to save the password in a keychain, and tap ADD in the top right corner.You can find your NordVPN service credentials (username and password) through the [Nord Account dashboard](https://my.nordaccount.com/dashboard/nordvpn/):
Follow the steps below to find the service credentials for manual connection setup:
1. Log into your [Nord Account](https://my.nordaccount.com/), click NordVPN, and, under Manual setup, click on Service credentials. Here you'll find the Username and Password needed to connect manually.

1. You will see a pop-up asking for permission to add OpenVPN to your VPN configurations. Click Allow.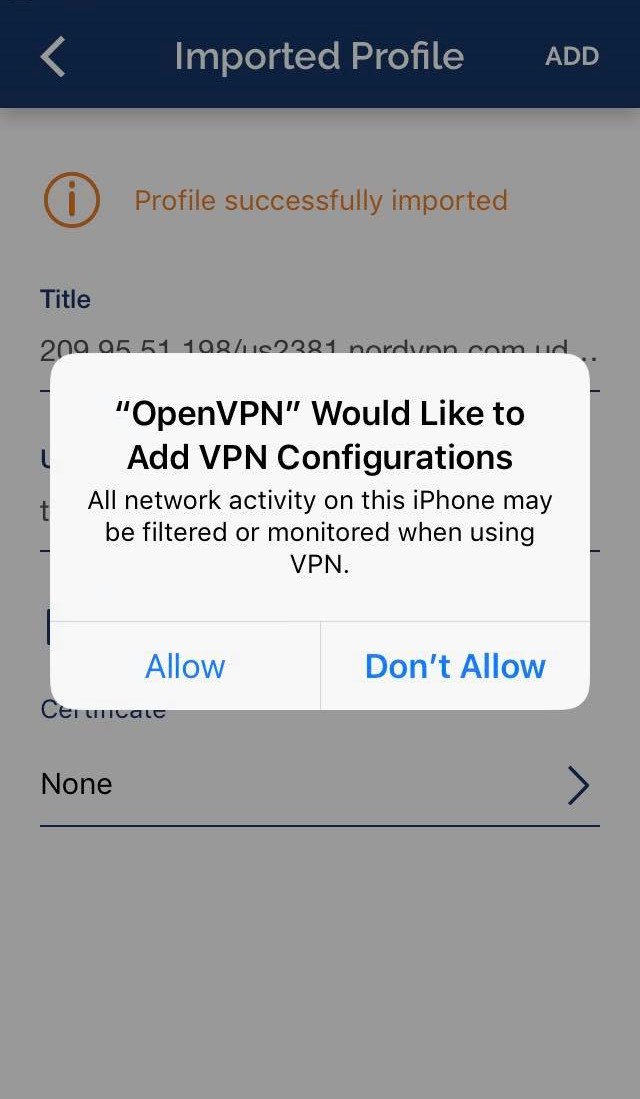
2. Tap on the toggle switch to connect to VPN.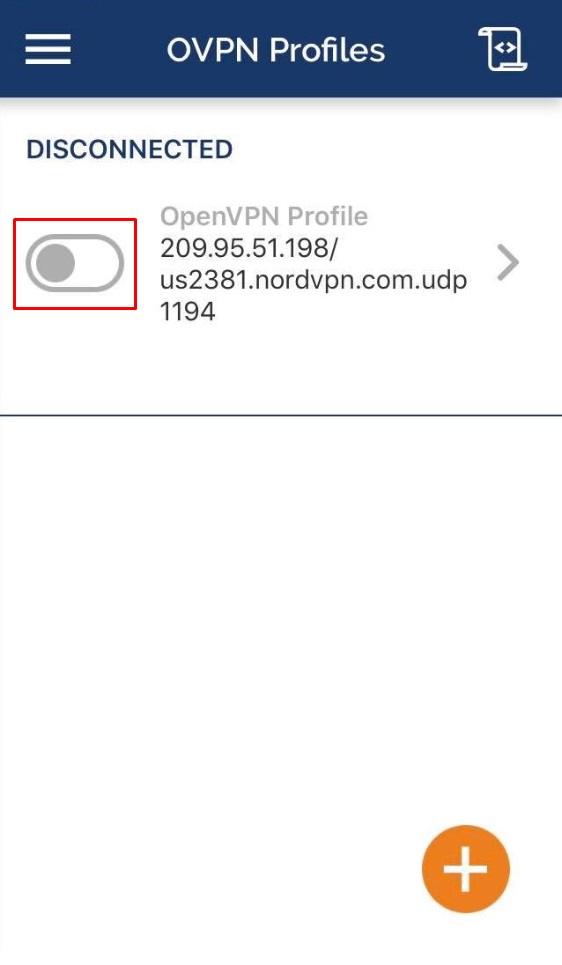
3. That’s it! You have successfully connected.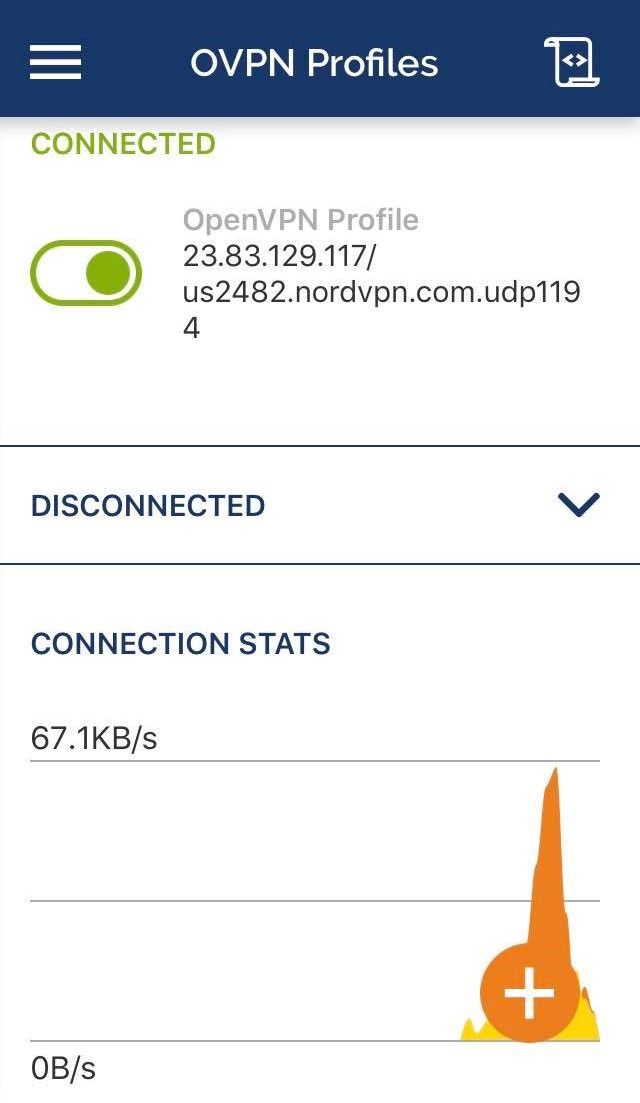
4. To change a server, disconnect from the current server by tapping the toggle switch next to it and enable another imported profile.
5. To disconnect, tap on the same toggle button you used to connect.",https://support.nordvpn.com/hc/en-us/articles/20348613874193-Manual-OpenVPN-connection-setup-on-iPad-iPhone
What is Tomato firmware used for?,Tomato is a custom firmware for routers. It offers OpenVPN client support and is available on a wide variety of routers. You can check if your router supports Tomato firmware [here](https://tomato.groov.pl/?page_id=69). An article on how to install Tomato firmware on a router can be found [here](https://en.wikibooks.org/wiki/Tomato_Firmware/Installation_and_Configuration).,https://support.nordvpn.com/hc/en-us/articles/20317675285777-How-to-set-up-VPN-on-Tomato
How to set up VPN on Tomato,"## What is Tomato firmware used for?
Tomato is a custom firmware for routers. It offers OpenVPN client support and is available on a wide variety of routers. You can check if your router supports Tomato firmware [here](https://tomato.groov.pl/?page_id=69). An article on how to install Tomato firmware on a router can be found [here](https://en.wikibooks.org/wiki/Tomato_Firmware/Installation_and_Configuration).
First things first, these changes are made in the web configuration panel of your router. You can access it by visiting the local IP of your router from your web browser. The two most common, the default local IPs that most routers have are 192.168.1.1 or 192.168.0.1 – you can access these by opening http://192.168.1.1 or http://192.168.0.1 in your browser. The default IP, username and password are listed in your router’s User Manual.
## Here is how to set up VPN on Tomato firmware:
1. Open the router settings page on your browser by entering the router local address (192.168.1.1 by default).
2. On the left side menu, click VPN Tunneling -> OpenVPN Client.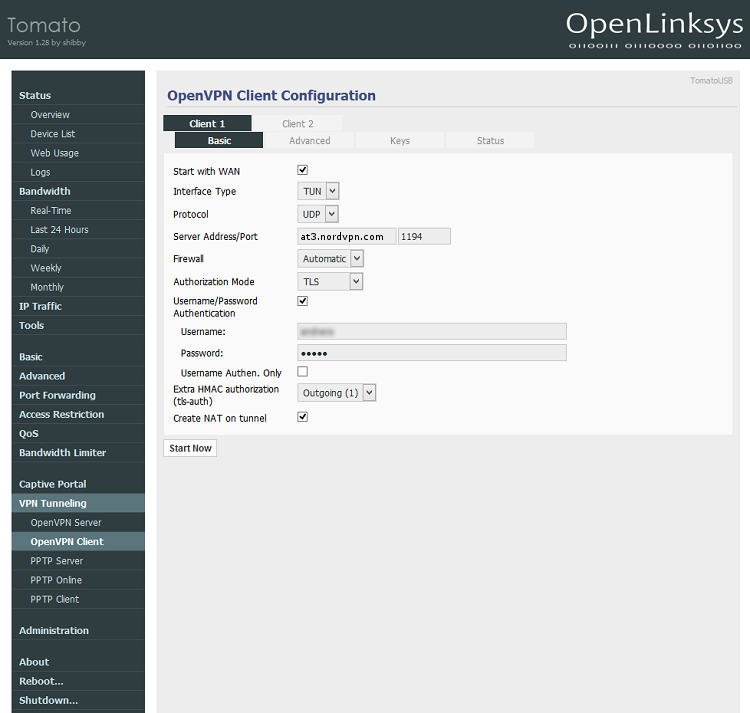
3. Set the following options:Start with WAN - Check the box.Interface Type - Select TUN.Protocol - Choose either UDP or TCP and keep it in mind as this will be important later on.Server Address/Port:
In the first field, enter the hostname of the server you want to connect to.
Follow the steps below to find the best server for your connection:
1. Log into your [Nord Account](https://my.nordaccount.com/), and click NordVPN.
2. Scroll down to Advanced Settings and click Set up NordVPN manually.
3. Select the Server recommendation tab. According to your location, the best server will be recommended.
4. By pressing Advanced filters you can further customize the recommended servers by selecting the Server type and the Security protocol.
In case you wish to select a specific server, follow these steps:
1. Under Set up NordVPN manually, select OpenVPN configuration files.
2. Find the server you wish to connect to by using the Search bar or by scrolling down and download it by clicking Download UDP or Download TCP.
3. When connecting to OpenVPN & IKEv2 manually, you're going to need to use the Username and Password from the Service credential tab.
You can find your NordVPN service credentials (service username and service password) in the [Nord Account dashboard.](https://my.nordaccount.com/dashboard/nordvpn/)
Follow the steps below to find the service credentials for manual connection setup:
1. Log into your [Nord Account](https://my.nordaccount.com/), click NordVPN, and, under Manual setup, click on Service credentials. Here you'll find the Username and Password needed to connect manually.
For the second field, depending on the protocol chosen earlier, input 1194 for UDP or 443 for TCP.
Firewall - Automatic.Authorization Mode - TLS.Username/Password Authentication - Checked. Enter your NordVPN service credentials in the fields below.
Username Authen. Only - Unchecked (default).Extra HMAC authorization (tls-auth) - Choose Outgoing (1) from the drop-down list.Create NAT on tunnel - Checked.
Some Tomato routers may not have any fields for entering OpenVPN credentials. In such a case, go to Administration -> Scripts and the commands below into the Init field. Make sure to change the username and password to your NordVPN service credentials:echo username > /tmp/password.txtecho password >> /tmp/password.txtchmod 600 /tmp/password.txt
1. Click on Advanced tab and set the following options:Poll Interval: 0Redirect Internet traffic: CheckedAccept DNS configuration: StrictEncryption cipher: AES-256-CBCCompression: DisabledTLS Renegotiation Time: -1Connection retry: -1Verify server certificate: UncheckedCustom Configuration:remote-cert-tls serverremote-randomnobindtun-mtu 1500tun-mtu-extra 32mssfix 1450persist-keypersist-tunping-timer-remreneg-sec 0auth sha512#log /tmp/vpn.log#Delete `#` in the line below if your router does not have credentials fields#auth-user-pass /tmp/password.txt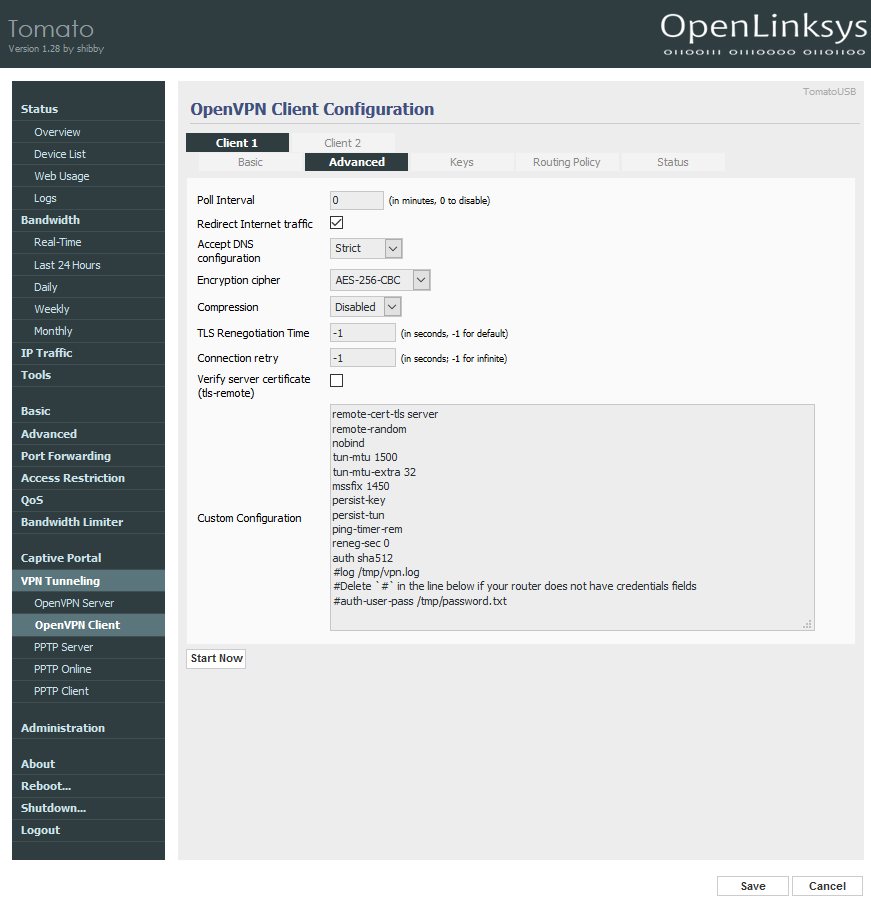
2. Open the Keys tab. Open a configuration file downloaded at step 3.Static key - paste text from to block.Certificate Authority - paste text from to block.It should look like this: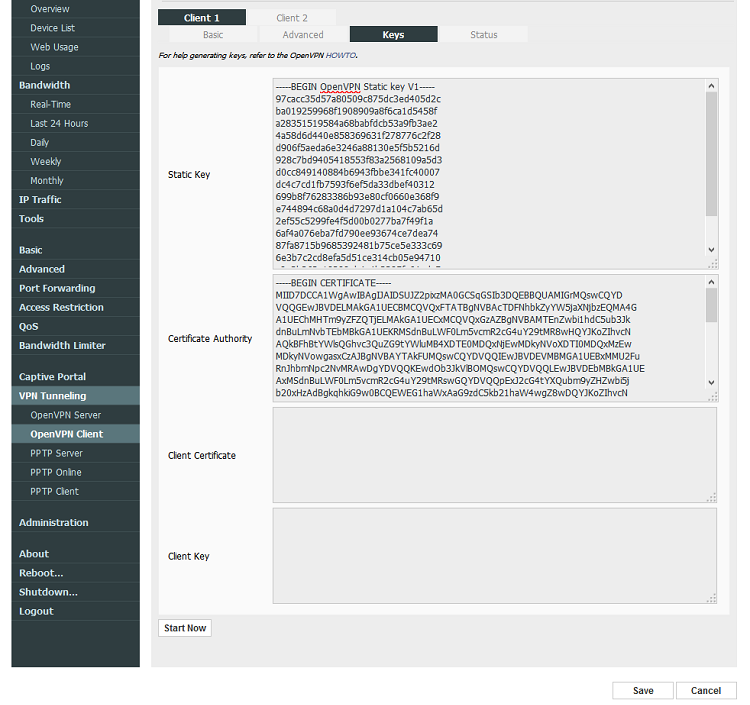
3. Click Save at the bottom of the settings page to confirm and save all settings. To establish a connection, click Start Now. In order to check if you have connected successfully, visit the Status page.
4. Configure the router to use NordVPN DNS servers to prevent DNS leaks:DNS Server: ManualDNS 1: 103.86.96.100DNS 2: 103.86.99.100
Optional Kill Switch set up (for advanced users):Navigate to Administration > Scripts and under Firewall paste one of the following scripts.
* Every client in LAN will lose internet connection in case of a VPN drop:WAN_IF=`nvram get wan_iface`iptables -I FORWARD -i br0 -o $WAN_IF -j REJECT --reject-with icmp-host-prohibitediptables -I FORWARD -i br0 -p tcp -o $WAN_IF -j REJECT --reject-with tcp-resetiptables -I FORWARD -i br0 -p udp -o $WAN_IF -j REJECT --reject-with udp-reset
* Only a specified IP address will lose internet access in case of a VPN drop:WAN_IF=`nvram get wan_iface`iptables -I FORWARD -i br0 -s `ip address` -o $WAN_IF -j REJECT --reject-with icmp-host-prohibitediptables -I FORWARD -i br0 -s `ip address` -p tcp -o $WAN_IF -j REJECT --reject-with tcp-resetiptables -I FORWARD -i br0 -s `ip address` -p udp -o $WAN_IF -j REJECT --reject-with udp-reset",https://support.nordvpn.com/hc/en-us/articles/20317675285777-How-to-set-up-VPN-on-Tomato
Setting up TP-Link with NordVPN,"Do you want to use NordVPN with more than ten devices at the same time? Or set up a VPN connection on your router? Then an OpenVPN connection is a go-to choice.You can set up a NordVPN connection on TP-Link routers that have OpenVPN client settings available. For a complete list of compatible routers, please refer to [TP-Link documentation](https://community.tp-link.com/en/home/forum/topic/272492).
If your router is compatible with NordVPN, log in to the control panel of your TP-Link router. It can usually be accessed using one of the following IP addresses via an internet browser:192.168.0.1 or 192.168.1.1
1. Navigate to Advanced > VPN Client.
2. Enable VPN Client, then save the settings.
3. In the Server List section, click Add, and a new profile configuration window should show up.
4. In the pop-up window, fill in the available fields as follows:Description: NordVPN (or any name you choose)VPN Type: OpenVPNUsername: your NordVPN service usernamePassword: your NordVPN service password
5. You can find your NordVPN service credentials (service username and password) in the Nord Account dashboard: [https://my.nordaccount.com/login/.](https://my.nordaccount.com/login/)
Follow the steps below to find the service credentials for manual connection setup:
1. Log into your [Nord Account](https://my.nordaccount.com/), click NordVPN, and, under Manual setup, click on Service credentials. Here you'll find the Username and Password needed to connect manually.
1. Paste credentials to the router interface profile window.
2. Download OpenVPN client configuration files.
Follow the steps below to find the best server for your connection:
1. Log into your [Nord Account](https://my.nordaccount.com/), and click NordVPN.
2. Scroll down to Advanced Settings and click Set up NordVPN manually.
3. Select the Server recommendation tab. According to your location, the best server will be recommended.
4. By pressing Advanced filters you can further customize the recommended servers by selecting the Server type and the Security protocol.
In case you wish to select a specific server, follow these steps:
1. Under Set up NordVPN manually, select OpenVPN configuration files.
2. Find the server you wish to connect to by using the Search bar or by scrolling down and download it by clicking Download UDP or Download TCP.
1. After downloading the files, go back to the control panel of your router and click Browse in the pop-up window.
2. Navigate to the configuration file you’ve just downloaded and click Open.
3. Save the configured settings by clicking the Save button.In the Server List, enable the newly created NordVPN connection.In the Device List section, click on the Add button.
4. Choose the devices you wish to use the VPN connection on and click the OK button.
5. Enable VPN Access for the added devices by clicking on the slider.
Now, all of the devices that you have added to the Device List will have access to the VPN connection. To add any new devices, repeat steps 11 and 12.",https://support.nordvpn.com/hc/en-us/articles/20280525082001-Setting-up-TP-Link-with-NordVPN
What to do if I lose my MFA access?,"If you’re experiencing temporary trouble accessing your MFA device, you can use one of your backup codes to log in to your Nord Account. However, if you've lost your MFA device, you will need to fill out the MFA reset request form to remove your Nord Account’s current MFA settings.
Follow these instructions to reset the MFA settings of your Nord Account:
1. Open the MFA reset request form.
2. Fill in the fields indicated below. This information is required to make sure that no one makes unauthorized changes to your account.
* Account's current email: Enter the email address you currently use for NordVPN.
* Amount paid: Type in the amount of money you paid the last time you made a payment to NordVPN.
* Method: Select the way you made your last payment (like credit card or PayPal) and enter any other required information.
* Payment date: Choose the exact date of your last payment.
* Do you have a NordLocker or NordPass account?: Let us know if you also have an account for NordLocker or NordPass.
* Description (Optional): Add additional comments or requests for our support team.
* Attachments (Optional): Attach a picture of your last payment to help speed up the process.
1. Click the “Submit” button to finish.
Our customer support team will contact you by email once your Nord Account MFA settings have been successfully reset.",https://support.nordvpn.com/hc/en-us/articles/20323778989969-What-to-do-if-I-lose-my-MFA-access
Can I use NordVPN for business?,"To guarantee a secure connection for you and your business, NordSecurity Team has created a separate product - [NordLayer](https://nordlayer.com/business-vpn/). The NordLayer is an excellent VPN solution for business, that allows you to protect your data from people outside your company, manage your team members and teams, provide secure remote access to companies network, and get a dedicated server with a dedicated IP address.",https://support.nordvpn.com/hc/en-us/articles/20284072795665-NordVPN-for-business
Why is a VPN important for business?,"Every day various organizations experience cyberattacks and data breaches. In order to avoid unauthorized access to your company's sensitive data, a [NordVPN business](https://nordvpn.com/business-solutions/) solution NordLayer is a great option. NordLayer also offers many other features that can be found [here](https://nordlayer.com/business-vpn/).",https://support.nordvpn.com/hc/en-us/articles/20284072795665-NordVPN-for-business
How do I set up a VPN for my business?,1. Sign up for the [NordLayer](https://nordlayer.com/business-vpn/) service by clicking [here](https://nordlayer.com/contact-sales/).,https://support.nordvpn.com/hc/en-us/articles/20284072795665-NordVPN-for-business
NordVPN for business,"## Can I use NordVPN for business?
To guarantee a secure connection for you and your business, NordSecurity Team has created a separate product - [NordLayer](https://nordlayer.com/business-vpn/). The NordLayer is an excellent VPN solution for business, that allows you to protect your data from people outside your company, manage your team members and teams, provide secure remote access to companies network, and get a dedicated server with a dedicated IP address.
## Why is a VPN important for business?
Every day various organizations experience cyberattacks and data breaches. In order to avoid unauthorized access to your company's sensitive data, a [NordVPN business](https://nordvpn.com/business-solutions/) solution NordLayer is a great option. NordLayer also offers many other features that can be found [here](https://nordlayer.com/business-vpn/).
## How do I set up a VPN for my business?
1. Sign up for the [NordLayer](https://nordlayer.com/business-vpn/) service by clicking [here](https://nordlayer.com/contact-sales/).
2. A dedicated sales team member will reach out to you.
3. Follow [a guide](https://help.nordlayer.com/docs/step-4-install-and-configure) on how to set up NordLayer using different operating systems.",https://support.nordvpn.com/hc/en-us/articles/20284072795665-NordVPN-for-business
What operating system versions does NordVPN support?,"You can install and use NordVPN on most devices running the latest versions of popular operating systems. Check the list below to see if your device is supported by NordVPN.
## Windows:
* Windows 10 64-bit (version 1607 and later)
* Windows 11
Legacy support:
* Windows 7
* Windows 8.1
* Windows 10 32-bit
## macOS:
* macOS 11 Big Sur, macOS 12 Monterey, macOS 13 Ventura, and macOS Sanoma 14 and above.
Legacy support:
* macOS 10.15 Catalina, macOS 10.12 Sierra, macOS 10.13 High Sierra, and 10.14 Mojave.
## Linux:
* Debian
* Ubuntu
* Elementary OS
* Linux Mint systems
* RPM-based distributions
## Android:
* Android 7 and up
* Android devices having 6.8 or older versions won't be supported by NordVPN from November 20, 2024. To continue using NordVPN, read our article on [how to re-install NordVPN on Android](https://support.nordvpn.com/hc/en-us/articles/29748627824273-How-to-re-install-NordVPN-on-Android).
## iOS:
* iPhones and iPads running on iOS 15.0 or later",https://support.nordvpn.com/hc/en-us/articles/20226455946257-What-operating-system-versions-does-NordVPN-support
Installing NordVPN (App Store) version on macOS,"From October 17th, 2024, older applications will have a few function limitations. The issues can affect macOS applications version 8.27.2 and below. They can include not receiving notifications in the app and reduced Dark Web Monitoring and Meshnet functionality.To resolve the issue, please update your application to the latest version.
This article will help you set up the [NordVPN application on your Mac](https://nordvpn.com/download/mac/) and connect to a VPN server. Note: The NordVPN (App Store) app is compatible with macOS 11 and later versions.
## Table of contents:
* [Downloading and installing](
* [Setting up the application](
* [Connecting to servers](
* [NordVPN features menu](
* [NordVPN preference settings](
## Downloading and installing
1. Go to the [NordVPN app page in the App Store](https://apps.apple.com/us/app/nordvpn-vpn-fast-secure/id905953485#?platform=mac) or click download the App Store version of NordVPN on our downloads page:
2. Agree to Open App Store.
3. When the App Store launches, click on the blue Get button and choose to Install the app.
4. Once the download is finished, press the Open button.
## Setting up and using the application
1. Open your Launchpad and click on the NordVPN icon.
2. You can Log In or Sign Up in the top-right corner of the screen.
3. You will be redirected to your Nord Account. To log in, enter your registered email address and password. You can also sign in using your Google account or Apple ID or by entering a code. If you are a new user, you will need to create a [Nord Account](https://my.nordaccount.com/) by entering your email address and other required information.
4. After completing the above steps, you will be prompted to open the NordVPN app. Agree always to allow Nord Account and grant access to the app.
5. After a successful login, you will see the main NordVPN application window.Here, you can find NordVPN servers and navigate in the map itself, search bar, or specialty section.
## Connecting to servers
1. The Quick Connect button in the top-right corner will automatically connect you to a server.
2. To connect to a specific server, click on the Search field in the top-left corner of the app. Enter a country, a category, or a specific server number (e.g., Canada #1224) to find what you need.
3. All servers in the left sidebar are sorted by country and specialty.To connect to a specialty server, hover over one of the categories under [Specialty Servers](https://support.nordvpn.com/hc/en-us/articles/19479130821521-Different-NordVPN-server-categories-explained), and click on the three-dot menu to select a Country.
4. To connect to a specific country, click on it.
## NordVPN features menu
### Map

* Map - here, you can find and navigate NordVPN servers in the map itself, search bar, or specialty section
### Threat Protection Pro™/Threat Protection

* Threat Protection Pro™ is a special NordVPN feature that automatically blocks ads, trackers, and malicious URLs. When you visit a website known for scamming people, this feature displays an in-browser alert to warn you about possible fraud. Threat Protection Pro™ also scans downloads for malware and checks your apps for security vulnerabilities. Available with selected NordVPN plans, Threat Protection Pro™ can work without an active VPN connection. Learn more about[ Threat Protection Pro™](https://nordvpn.com/features/threat-protection/).If your NordVPN subscription doesn’t include Threat Protection Pro™, you can use the Threat Protection feature instead. It blocks intrusive ads and malicious domains based on DNS filtering and works whenever you’re connected to a VPN server. Threat Protection comes with all NordVPN plans.
### Meshnet

* The [Meshnet](https://nordvpn.com/meshnet/) feature helps you to access devices over encrypted tunnels. [Learn more about Meshnet](https://meshnet.nordvpn.com/getting-started/meshnet-explained).
### Dark Web Monitor

* [Dark Web Monitor](https://nordvpn.com/features/dark-web-monitor/) scans the internet for any credential leaks associated with your registered NordVPN e-mail address.
### Presets
Presets let you load up a specified set of configurations, including server number, type, protocol, and more. You can configure your settings to experience a smooth session, for e.g., so that a streaming service or a game loads up instantly!
#### How to set up presets?
Start at the preferences page. You can either edit an existing preset or create a new one by clicking Add new.Let's build it from scratch. After pressing Add new, you will see a menu with the settings you can use. Give the preset a name. Next, select from available VPN protocols. If you change the default setting Use recommended, you’ll be able to alter the server type. Here you can set a specialty server or any regular one as your type.Depending on the server availability, you may also have the choice of selecting a specific region.Finally, you can add either a web page or an app to the preset. It will be displayed under the preset name on the main screen. If you press Add link button, a field will appear for the URL of the website you would like easy access to. After inserting the URL, press Enter to register it. When you're done, press Save preset, and it will be added to the main screen.
### Statistics

* Statistics show you more information about your connection.
### Settings
To change application settings and find various features click on the gear icon at the bottom-left corner of the app:

* Settings tab displays the NordVPN app settings.
### Quick Help

* Here you can find your connection logs, a direct to our Help Center, or our customer support email.
## NordVPN settings
### General

* Launch the app on computer startup — toggle to open the NordVPN app automatically every time you turn your device on.
* VPN Protocol — this option will let you choose from 3 different [connection protocols](https://support.nordvpn.com/hc/en-us/articles/19482810153745-Which-NordVPN-protocol-should-I-choose) (OpenVPN UDP, OpenVPN TCP, and NordLynx).
* Help Us Improve — makes NordVPN better by sending us aggregated anonymous data.
### Auto-connect

* When using an untrusted network — toggle to automatically be connected to a VPN when you're connected to a network that is not added to a Trusted network list.
* Connect to — you can select a specific country from the list.
* The current network — shows the network you are currently connected to.
* Trusted network — you won't be automatically connected to a VPN while on a trusted Wi-Fi network.
### Kill Switch

* [Kill Switch](https://nordvpn.com/features/vpn-kill-switch/) prevents unprotected access to the internet when your VPN connection accidentally drops.
* Advanced Kill Switch is an additional layer of security that can be enabled to prevent WebRTC leaks. However, it functions separately from the system-wide Internet Kill Switch. Read [more information about Kill Switch](https://support.nordvpn.com/hc/en-us/articles/19509682644369-NordVPN-Kill-Switch-how-does-it-work).
* Stay invisible on a local network — this will let you [keep your device invisible on an unsafe local network](https://support.nordvpn.com/hc/en-us/articles/20225371443345-Staying-invisible-on-unsafe-local-networks-on-macOS).
### Appearance

* Appearance settings let you add an application to your dock and menu bar. Also, it lets you choose between dark and light modes.
### Other Apps

* Other Apps tab introduces other [Nord Security](https://nordsecurity.com/) products. As well as a scannable QR code that directly leads you to the NordVPN mobile app download.
### Account

* Account section shows your NordVPN profile and subscription information. Here you’ll also find links to [NordVPN Terms of Services](https://my.nordaccount.com/legal/terms-of-service/) and [Privacy Policy](https://my.nordaccount.com/legal/privacy-policy/).",https://support.nordvpn.com/hc/en-us/related/click?data=BAh7CjobZGVzdGluYXRpb25fYXJ0aWNsZV9pZGwrCJHa8kGjEjoYcmVmZXJyZXJfYXJ0aWNsZV9pZGwrCBHEuFZlEjoLbG9jYWxlSSIKZW4tdXMGOgZFVDoIdXJsSSJUL2hjL2VuLXVzL2FydGljbGVzLzIwNDkyMzk1NDAzOTIxLUluc3RhbGxpbmctTm9yZFZQTi1BcHAtU3RvcmUtdmVyc2lvbi1vbi1tYWNPUwY7CFQ6CXJhbmtpBw%3D%3D--ba9647e9954b0490750dbb1a25fadb914f95e3c4
How to get NordVPN with activation code,"To begin using NordVPN, you must activate your account using a [25-character “activation key”](https://my.nordaccount.com/activate/), which can be purchased from a physical or online retailer. This is the only method available for activating your account using the activation key.
To activate NordVPN with an activation key, follow the instructions below:
1. Enter your NordVPN activation code and your email address, then click Continue.
2. Check for the verification code in your email inbox.
3. Copy the verification code from the email we sent you and paste it into the box.
4. If you are a new NordVPN user, create a password for your Nord Account. Otherwise, type in your old password to log in.
5. Download the NordVPN app.
After you've set up your NordVPN account with the activation code and downloaded the app - you'll need to install it. Read our blog's article on [how to set up NordVPN](https://nordvpn.com/blog/how-to-set-up-a-vpn/).
If you experience any error when entering the activation code, please check [our article on common issues with activation codes](https://support.nordvpn.com/hc/en-us/articles/20286544549777-Common-issues-with-activation-codes).A useful reminder: Using a cracked version of NordVPN may lead to the loss of sensitive information, such as personal credentials. There is software online that promises one free access to ”cracked” NordVPN accounts. However, NordVPN serial cracks are most often chock-full of malware, adware intended to gain access to your credentials or devices, or other online threats. We recommend that you read about the [dangers of cracking programs](https://nordvpn.com/blog/crack/).",https://support.nordvpn.com/hc/en-us/articles/19685995851665-How-to-get-NordVPN-with-activation-code
What payment methods does NordVPN accept,"You can pay with a credit card, cryptocurrency, PayPal, Sofort, prepaid (debit) card, and many more payment methods. You can also make a payment through iTunes or Google Pay.
If you want to pay in cash, you can purchase a NordVPN subscription in a retail store.
Once you’ve checked out NordVPN’s plans and prices, you can find out which payment methods are available to you at the checkout page. Simply click “Continue to payment” to see how you can pay for your purchase.",https://support.nordvpn.com/hc/en-us/articles/19685782821265-What-payment-methods-does-NordVPN-accept
How to start using NordVPN dedicated IP,"If you are interested in using [NordVPN's dedicated IP](https://nordvpn.com/features/dedicated-ip/) but are unsure where to start, this article will introduce you to the steps needed to begin using it today.NordVPN's dedicated IP is an [IP address](https://nordvpn.com/what-is-my-ip/) assigned to a specific server and only available to the account it has been purchased for. This means that if you get a dedicated IP - it is not going to be shared amongst other users, which results in receiving better connection and less Captcha requests.
1. First, to be able to start using our dedicated IP, you have to purchase this service alongside an either a new NordVPN subscription or an existing one. To do that, check out our article on how to purchase a dedicated IP address.
2. After you have purchased it, you have to set up the dedicated IP, before you can start using it.
3. Choose the OS you're going to use it on and follow the guidelines in order to connect to your dedicated IP:
* [How to connect to your dedicated IP on Linux](https://support.nordvpn.com/hc/en-us/articles/19684336200081-How-to-connect-to-your-dedicated-IP-on-Linux)
* [How to connect to your dedicated IP on Windows](https://support.nordvpn.com/hc/en-us/articles/20465449537681-How-to-connect-to-your-dedicated-IP-on-Windows)
* [How to connect to your dedicated IP on macOS](https://support.nordvpn.com/hc/en-us/articles/19678530026641-How-to-connect-to-your-dedicated-IP-on-macOS)
* [How to connect to your dedicated IP on iOS](https://support.nordvpn.com/hc/en-us/articles/19682095316625-How-to-connect-to-your-dedicated-IP-on-iOS)
* [How to connect to your dedicated IP on Android](https://support.nordvpn.com/hc/en-us/articles/19682489581585-How-to-connect-to-your-dedicated-IP-on-Android)
That's it – now you can start enjoying the benefits of your dedicated IP.
If you do not see the dedicated IP option in the specialty servers list, [switch to the TCP, UDP OpenVPN](https://support.nordvpn.com/hc/en-us/articles/20465552867345), or NordLynx protocols. Make note that dedicated IP is not available via browser extension, tvOS, or the IKEv2 protocol.",https://support.nordvpn.com/hc/en-us/articles/32830477282449-How-to-start-using-NordVPN-dedicated-IP
How to use NordWhisper on NordVPN,"NordWhisper is a new NordVPN protocol designed to overcome restrictive local network environments, ensuring a smoother and more consistent browsing experience. It is the ideal solution when dealing with filtered content on office or campus networks, Wi-Fi networks with security filtering found at airports, cafes, hotels, or conferences. All of this is achieved while maintaining your security and privacy.Please note that NordWhisper is not compatible with Meshnet, DIP, Obfuscated servers, Onion Over VPN, or P2P servers.Currently, NordWhisper is available on Windows, Android, and Linux devices. To use this protocol, check the guidelines below:
* [Windows](https://support.nordvpn.com/hc/en-us/articles/31528242519953-How-to-use-NordWhisper-on-NordVPN#Windows)
* [Android](https://support.nordvpn.com/hc/en-us/articles/31528242519953-How-to-use-NordWhisper-on-NordVPN#Android)
* [Android TV](https://support.nordvpn.com/hc/en-us/articles/31528242519953-How-to-use-NordWhisper-on-NordVPN#Android-TV)
* [Linux](https://support.nordvpn.com/hc/en-us/articles/31528242519953-How-to-use-NordWhisper-on-NordVPN#Linux)
## Windows
To use the NordWhisper protocol on your Windows device, follow these steps:
1. Open the NordVPN app, click on Settings and select Connection.
2. Next to VPN protocol click on the dropdown list and select NordWhisper.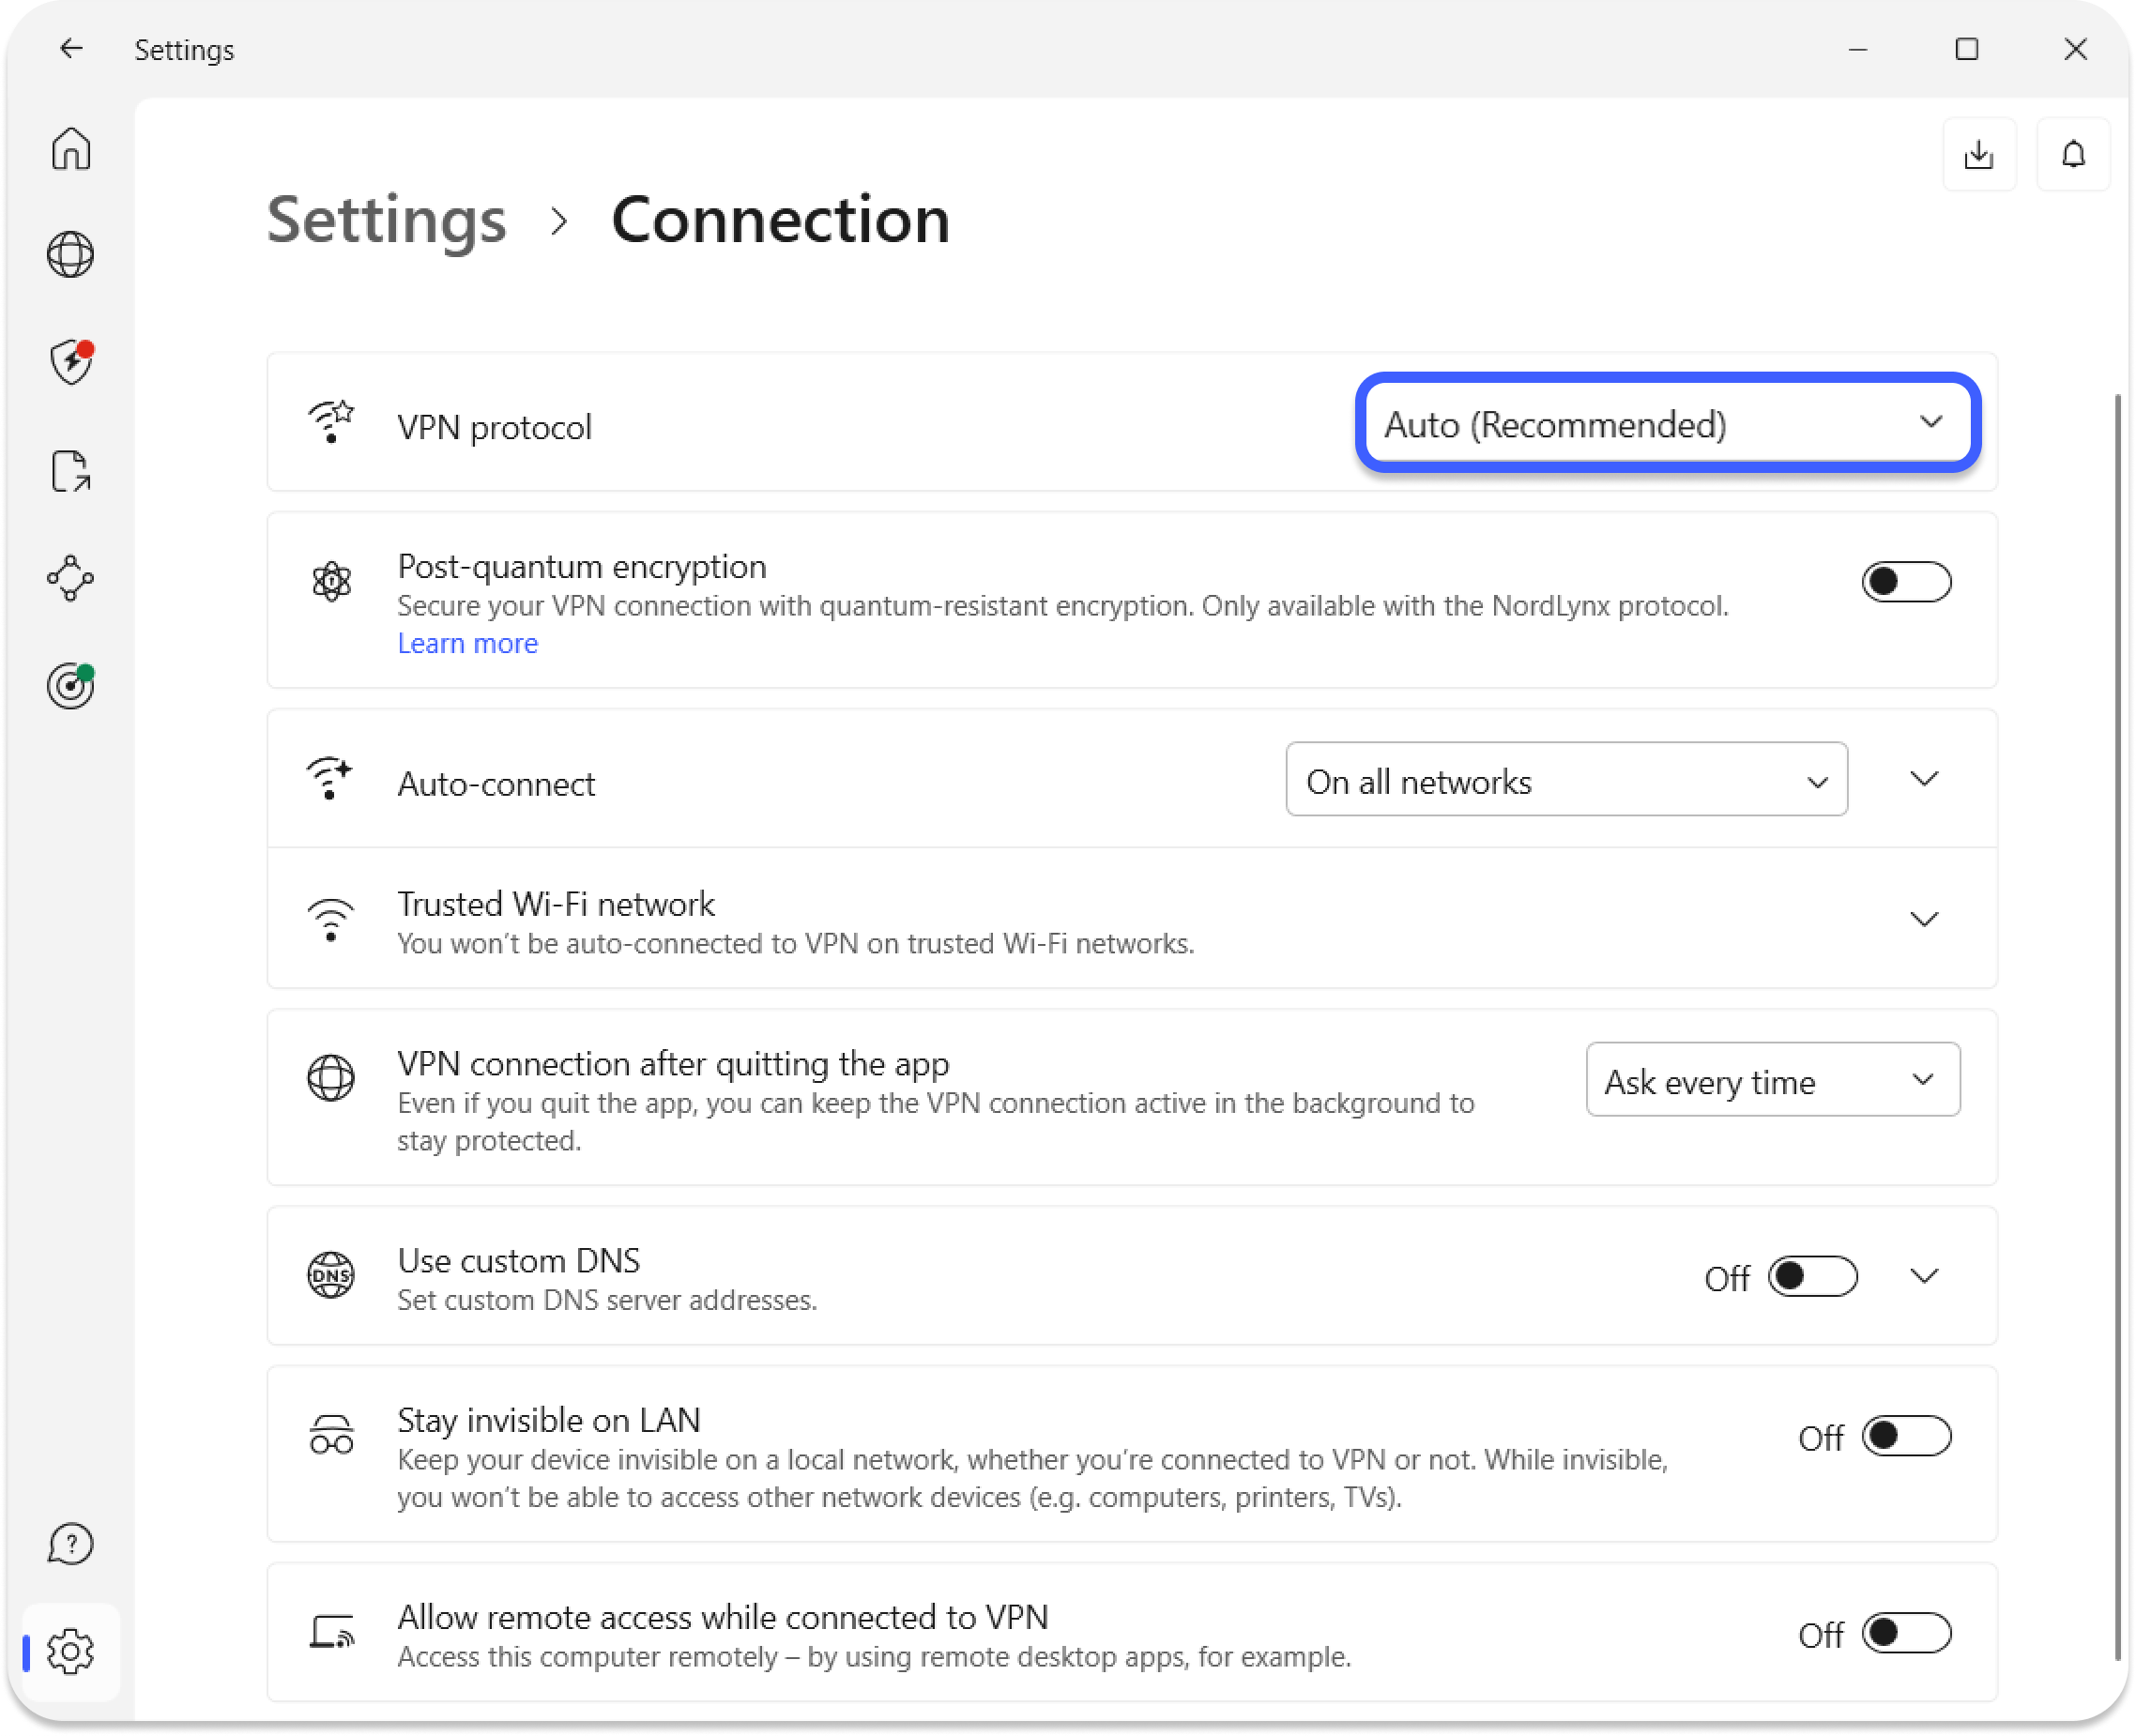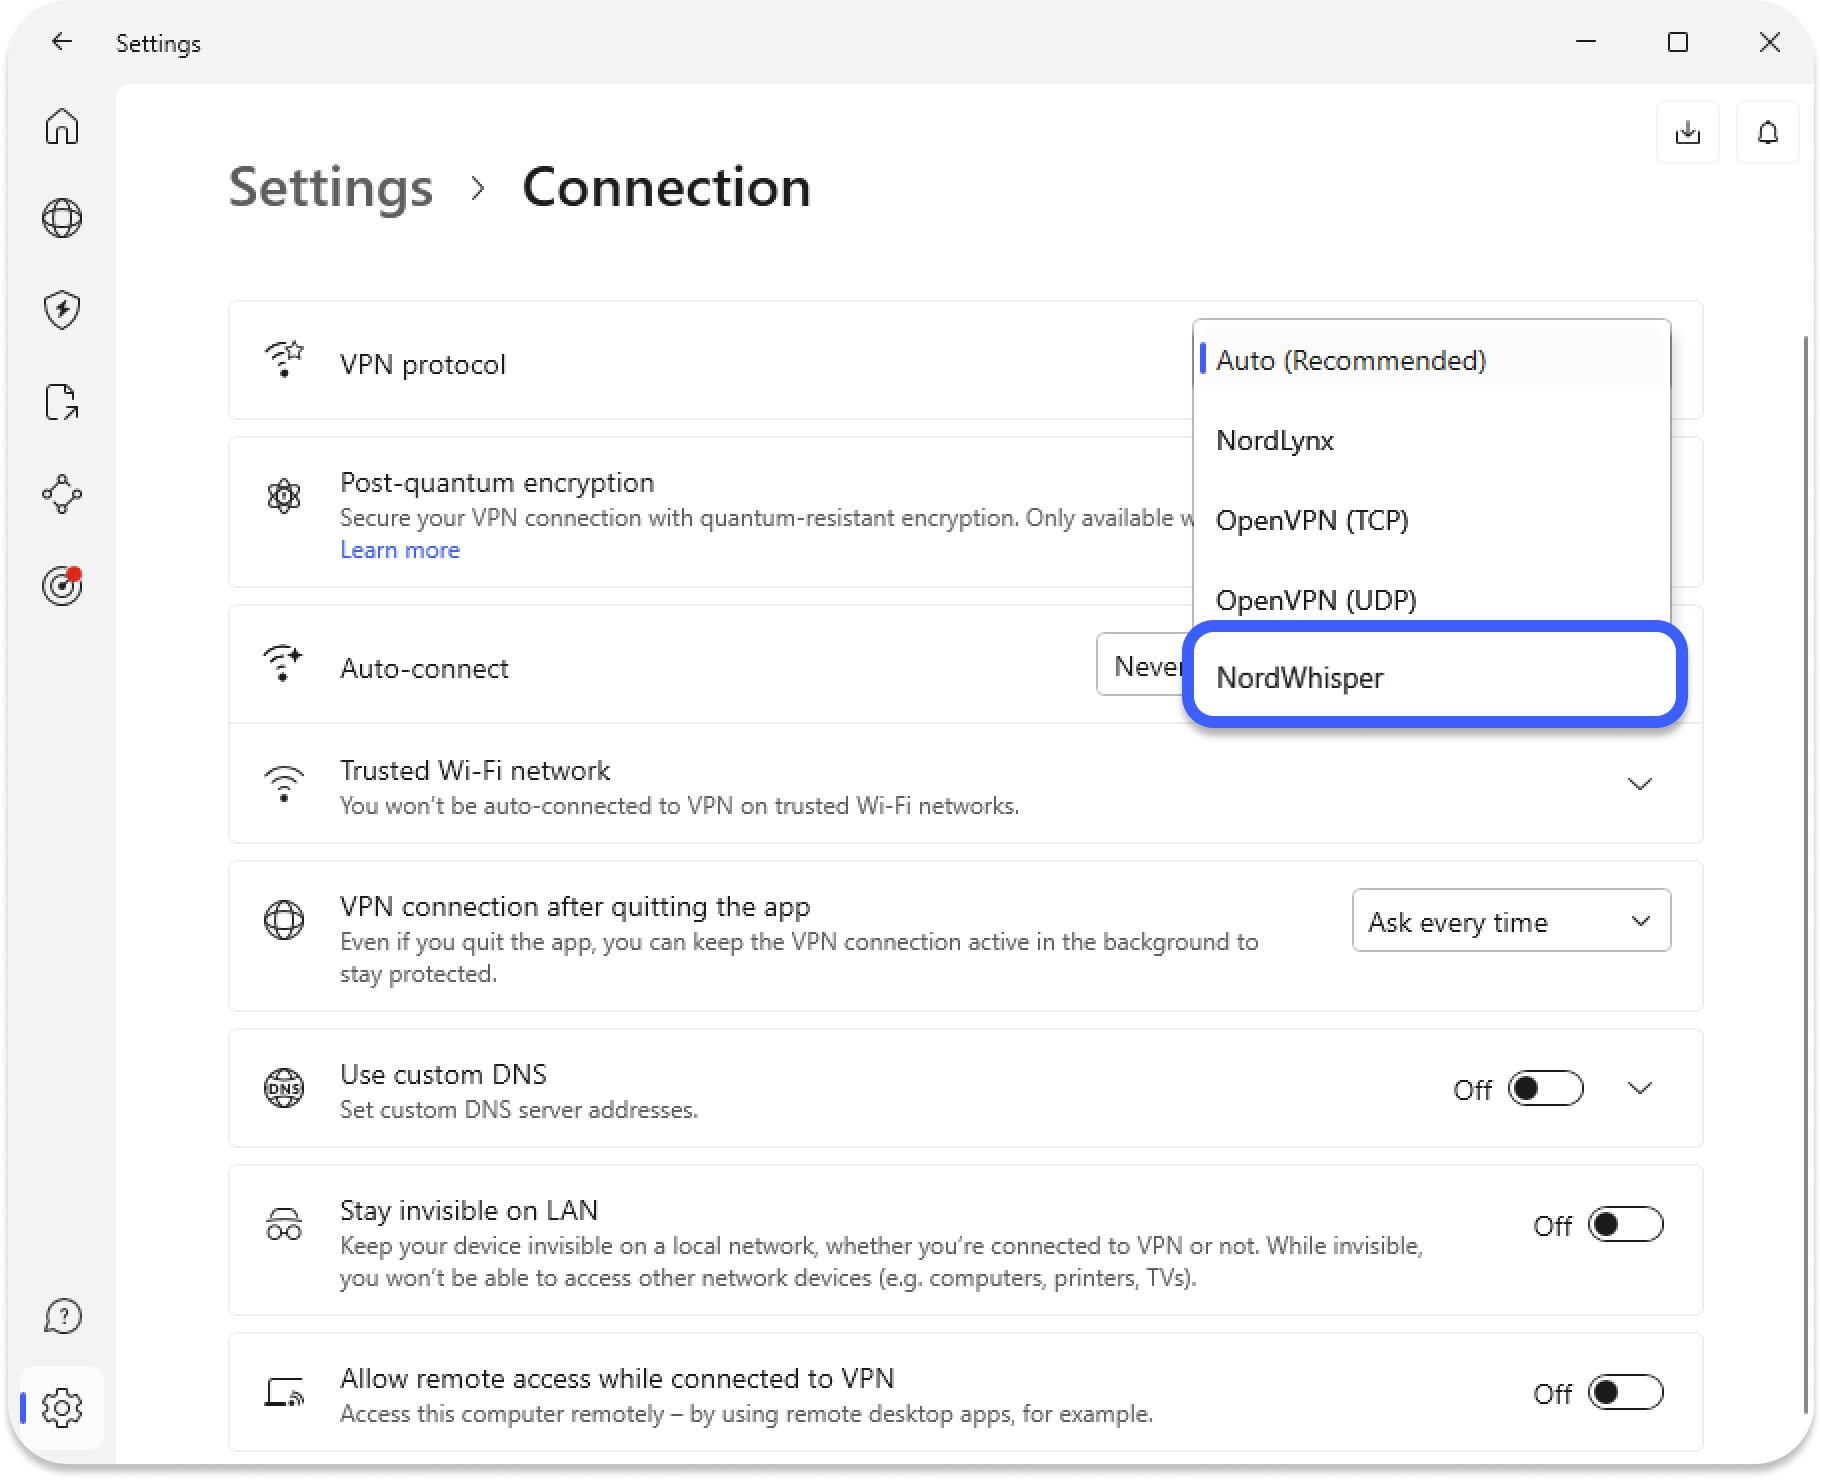Once you reconnect, your Windows device will be under VPN connection using the NordWhisper protocol.
## Android
To use the NordWhisper protocol on your Android device, follow these steps:
1. Open the NordVPN app, tap on your Profile on the bottom right of the screen and select Settings.
2. Tap on VPN Protocol.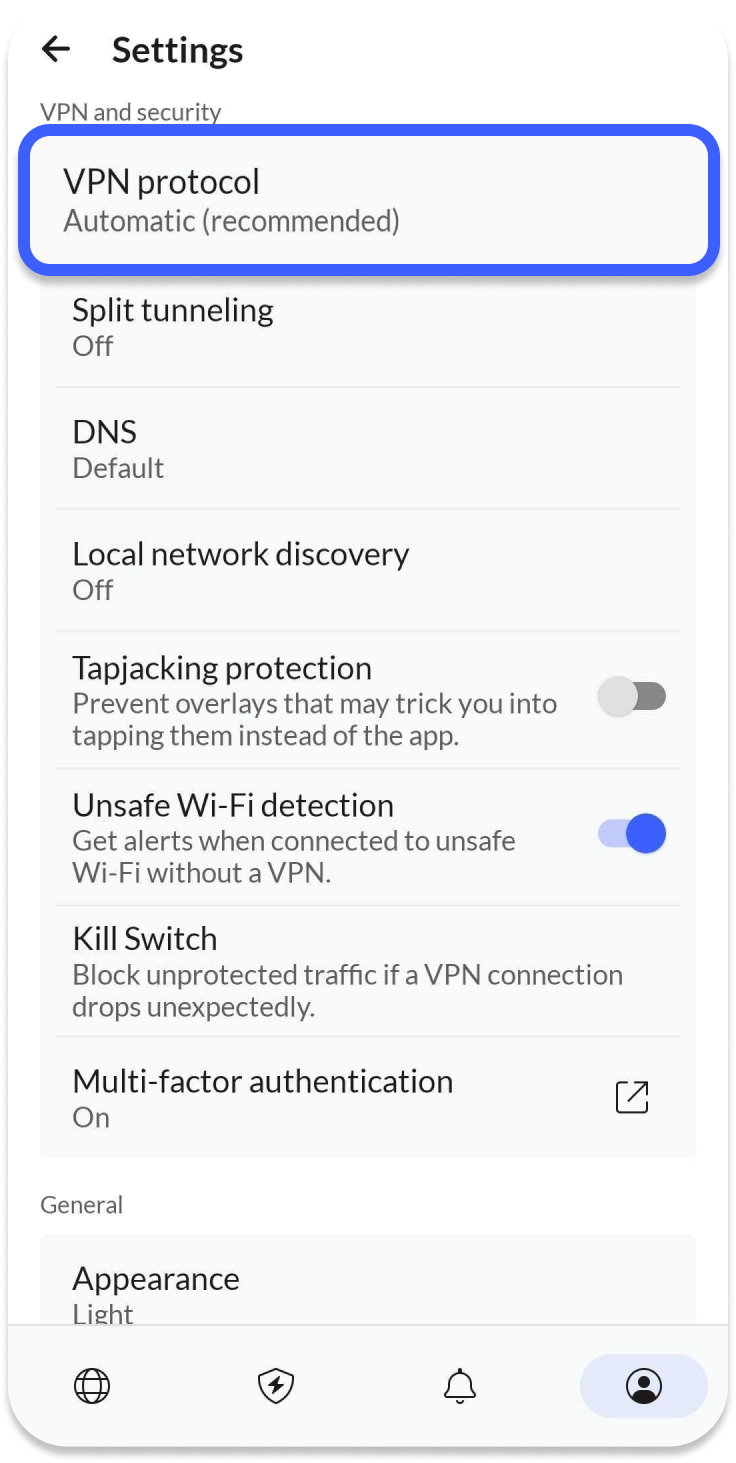
3. Select NordWhisper.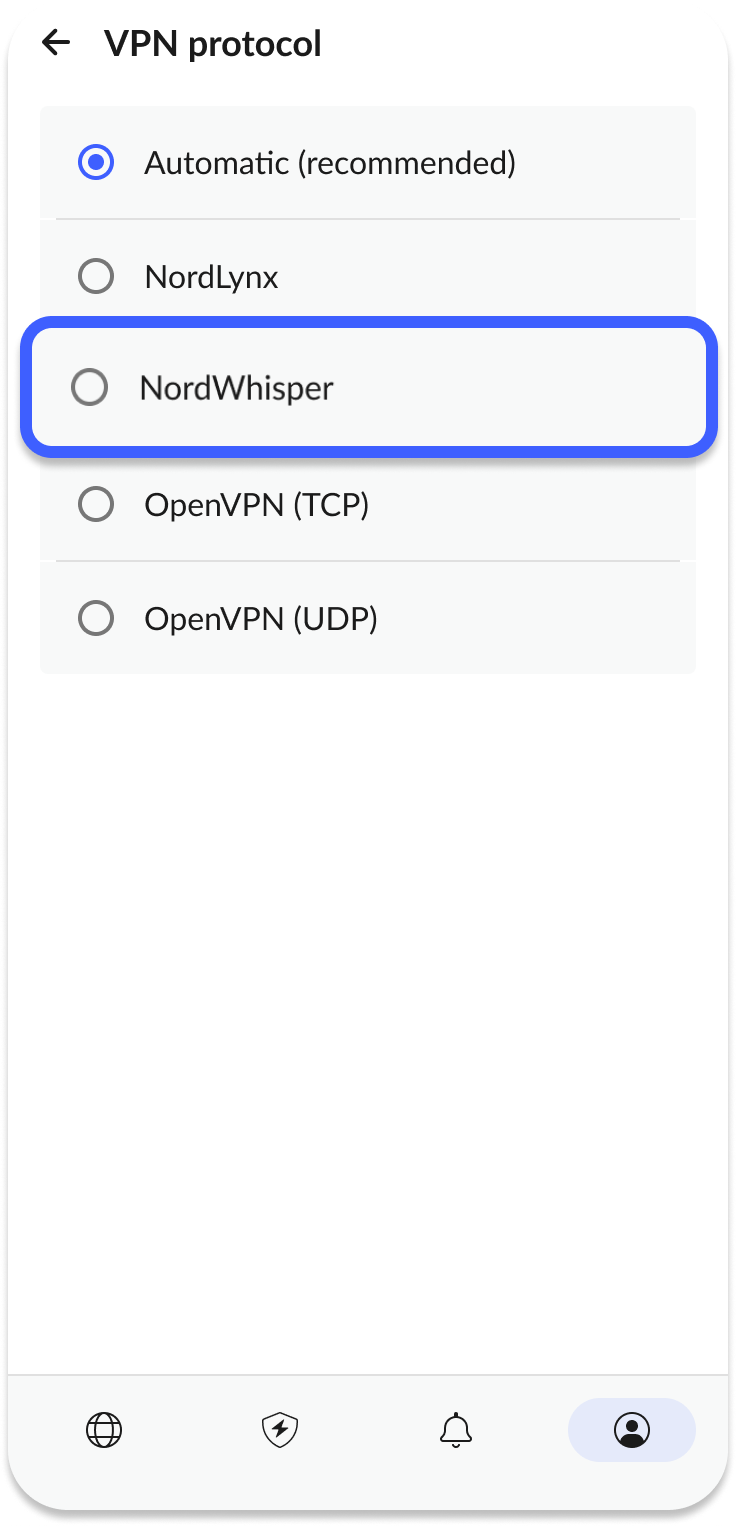Once you reconnect, you'll be connected to the VPN using the NordWhisper protocol on your Android device.
## Android TV
To use the NordWhisper protocol on your Android TV device, follow these steps:
1. Open the NordVPN app, select Settings in the side panel on the left and under App settings choose Protocol. Now select NordWhisper.Once reconnected, your Android TV will be connected to the VPN using the NordWhisper protocol.
## Linux
To use the NordWhisper protocol on your Linux device, follow these steps:
1. Once you've logged into your NordVPN account, you can change the connect protocol in use with the following command:
```
nordvpn set technology NORDWHISPER
```
Now, when connecting to the VPN, you'll be using the NordWhisper protocol.",https://support.nordvpn.com/hc/en-us/articles/31528242519953-How-to-use-NordWhisper-on-NordVPN
NordVPN MFA backup codes,"NordVPN MFA backup codes are necessary to log into your account in case you have lost access to your account login authentication means.
When setting up MFA on your account initially, you are presented with these backup codes alongside the option to copy or print them.
We highly recommend saving the backup codes in cloud storage or even owning a physical copy in a hidden location.
You can also gain access to your backup codes when in your Account settings.
1. In Account settings > Multi-factor authentication (MFA), click on Manage MFA.
2. Verify your email – you should receive a one time use code in the inbox of the email associated with your Nord Account.
3. Press view code to view your backup codes – here you will also be able to regenerate, copy or print your backup codes if needed.",https://support.nordvpn.com/hc/en-us/articles/30047757775249-NordVPN-MFA-backup-codes
Service Notification to update your payment details,"A group of NordVPN customers have received an email inviting them to update their payment details.
If you are a part of this group, please note that you will not be charged when updating your payment details. If your subscription is due to be charged, we will send you a reminder via email. We’re asking for this to be done so that we can improve our payment systems and ensure a smoother experience.
In addition, as a symbol of our thanks for your commitment, if you update your payment details by the deadline mentioned in the email, you become eligible for 1 month of NordVPN service for free, which will be added within 14 days of updating the payment details.
You can change your payment details by:
* clicking the button in the email itself;
* manually changing your payment details via Nord Account.
### Changing payment details via Nord Account
To change your payment details in your Nord Account, follow these steps:
1. 1. Log in to your [Nord Account](https://my.nordaccount.com/).
2. Go to the billing section:
3. Go to subscriptions tab and click update next to your existing payment method:
4. Then you can update your payment details in 2 ways:
1. 1. 1. by filling in your card information and clicking update;
2. by continuing to PayPal and authenticating your payment method there.
After you’re done with these steps - you’ve successfully changed your payment details.
If you have any additional questions, feel free to contact us via the request form.",https://support.nordvpn.com/hc/en-us/articles/24946485468305-Service-Notification-to-update-your-payment-details
What to do if I find data breaches?,"If data exposures associated with one of your monitored email addresses were detected by NordVPN's Dark Web Monitor, it’s crucial to take immediate steps to protect yourself:",https://support.nordvpn.com/hc/en-us/articles/32793721471377-Using-NordVPN-Dark-Web-Monitor
Using NordVPN Dark Web Monitor,"NordVPN’s Dark Web Monitor feature continuously monitors your email address for potential data leaks, which might include passwords or other sensitive personal information, and alerts you once a threat is detected on the web. In this article, you will learn how to enable NordVPN's Dark Web Monitor, and what to do if you get a notification that your data has been breached.
In this article, we will cover:
[How to enable Dark Web Monitor on Windows & macOS]( to enable Dark Web Monitor on iOS]( to enable Dark Web Monitor Android]( to do if I find data breaches?](
## Windows & macOS
If you wish to enable Dark Web Monitor, and track the status of your monitored data, follow the steps down below:
1. Open your NordVPN application.
2. Click the Dark Web Monitor button:
3. Enable Dark Web Monitor:
4. Check the websites that your data was leaked in:
If you see that your data has been leaked, make sure to safeguard your data by following the steps later on in the article.
## iOS
If you would like to enable Dark Web Monitor on iOS, and check for any data leaks, follow the steps below:
1. Open your NordVPN app.
2. Tap the person icon in the bottom right:
3. Turn on Dark Web Monitor:
4. Tap on your email:
5. Check for any data leaks:
If you find that your data has been leaked, make sure to follow the steps on how to protect yourself.
## Android
If you would like to enable Dark Web Monitor on your Android device, and check if your data has been leaked, follow the steps below:
1. Open your NordVPN app.
2. Tap the person icon in the bottom right:
3. Enable Dark Web Monitor:
4. Tap on your email:
5. Check for any leaks:
If you find any leaked data, make sure to follow the steps to protect yourself.
## What to do if I find data breaches?
If data exposures associated with one of your monitored email addresses were detected by NordVPN's Dark Web Monitor, it’s crucial to take immediate steps to protect yourself:
1. Change the password for the affected account and any others using the same password.
2. Set up two-factor authentication on all relevant accounts.
3. Remain vigilant against phishing attempts. Avoid clicking on links or downloading attachments from unknown or suspicious sources.",https://support.nordvpn.com/hc/en-us/articles/32793721471377-Using-NordVPN-Dark-Web-Monitor
Dedicated IP: Renewal and cancellation,"If you want to renew your dedicated IP service or cancel auto-renewal for your dedicated IP subscription, the steps you need to take depend on how you purchased the dedicated IP service.
## You bought the dedicated IP in your Nord Account
If you have purchased a dedicated IP in your [Nord Account](https://my.nordaccount.com/), the service will be renewed automatically. It makes no difference if you bought the dedicated IP as a standalone service or got it with a VPN bundle.
If you no longer want a particular dedicated IP anymore, you can[ cancel auto-renewal for your subscription in your Nord Account](https://support.nordvpn.com/hc/en-us/articles/19556844985489-How-to-cancel-a-subscription). Please note that this is not a refund, as outlined in[ NordVPN’s refund policy](https://support.nordvpn.com/hc/en-us/articles/19476991311121-What-is-your-money-back-policy).
## You bought the dedicated IP using a coupon code
Dedicated IP services purchased using a coupon code are not subject to auto-renewal. To renew your dedicated IP addresses, you will need to manually[ buy the dedicated IP service](https://support.nordvpn.com/hc/en-us/articles/19484196251921-How-to-purchase-a-dedicated-IP-address).
When your dedicated IP subscription is about to expire, we will send a reminder about renewal to your registered Nord Account email address.",https://support.nordvpn.com/hc/en-us/articles/23191235440657-Dedicated-IP-Renewal-and-cancellation
How to set up dedicated IP,"NordVPN’s Dedicated IP feature provides a unique, static IP address that ensures reliable access and improved privacy. Unlike shared IPs, this one is solely yours, making it perfect for services that require a fixed IP. Learn more about [dedicated IP](https://nordvpn.com/features/dedicated-ip/) on our website.If you have purchased a dedicated IP, you can easily set it up through your NordVPN account by following these steps:
1. Log in to your Nord Account:
2. Once logged in, select the NordVPN button located in the upper-left section on your dashboard:
3. If your dedicated IP is not yet ready to use, you will see a setup required warning in the dedicated IP tab:
4. Click the set up dedicated IP button:
5. Press the preferred IP address location drop-down menu:
6. Next, select you wanted dedicated IP location from the drop-down menu:
7. When you select your preferred location, click the set up dedicated IP button:
8. You will be assigned an IP address in the country that you’ve chosen:
9. You should now see your assigned IP address in the dedicated IP tab:
Once this is done, you have successfully set up the NordVPN dedicated IP. You can now proceed with connecting to a dedicated IP on your device:
* Connect to a dedicated IP server on Windows
* Connect to a dedicated IP server on Linux
* Connect to a dedicated IP server on macOS
* Connect to a dedicated IP server on iOS
* Connect to a dedicated IP server on Android
If you experience any issues or have additional questions, do not hesitate to submit a request to our customer success team.",https://support.nordvpn.com/hc/en-us/articles/20595248071185-How-to-set-up-dedicated-IP
How can I use NordLynx in the NordVPN app for Linux,"NordLynx is the technology we built around the WireGuard® protocol. It lets you experience WireGuard’s speed benefits without compromising your privacy.
1. Install the [NordVPN app for Linux](https://nordvpn.com/download/linux/). You can find tutorials for various distributions [here](https://support.nordvpn.com/hc/en-us/articles/19445292364689-Installing-and-using-NordVPN-on-Linux).
2. Enable WireGuard on the NordVPN app and connect to NordVPN by typing the following commands:nordvpn set technology nordlynxnordvpn c
WireGuard is a registered trademark of Jason A. Donenfeld.",https://support.nordvpn.com/hc/en-us/articles/20398711101329-How-can-I-use-NordLynx-in-the-NordVPN-app-for-Linux
Guide for Meshnet users,"Meshnet is a NordVPN feature that allows you to create a secure private network for your devices. You can access the connected devices remotely, link them together, send your online traffic through them, and manage their access.
You can also use Meshnet for various day-to-day online activities:
* [Share files](https://meshnet.nordvpn.com/features/sharing-files-in-meshnet)
* [Play games](https://meshnet.nordvpn.com/how-to/gaming)
* [Create remote file storage](https://meshnet.nordvpn.com/how-to/joint-projects)
* [Change your public IP address](https://meshnet.nordvpn.com/how-to/traffic-routing)
* [Protect your network](https://meshnet.nordvpn.com/how-to/security)
To set up Meshnet on your device and enjoy its benefits, choose [a Meshnet setup guide](https://meshnet.nordvpn.com/getting-started/how-to-start-using-meshnet) for your operating system and follow the steps.To learn more about Meshnet, its functions, and its advantages, visit the Meshnet documentation.",https://support.nordvpn.com/hc/en-us/articles/20278389297041-Guide-for-Meshnet-users
Cyber insurance benefits: payment and charges,"This article will cover cyber insurance payment and charges questions.
## Table of contents:
* [Paying for insurance benefits](https://support.nordvpn.com/hc/en-us/articles/20187729969425-Cyber-insurance-benefits-payment-and-charges#Paying%20for%20insurance%20benefits)
* [Paying excess ](
### How do I pay for these insurance benefits?
There are no separate payments for insurance benefits. These insurance benefits are automatically included in your NordVPN Ultimate bundle subscription.
### What is the excess, and when do I pay it?
The excess is the amount you must pay towards an insurance claim's overall cost. We Cyber Insurance will then contribute the rest – up to the limit of the cover. The excess for the cyber insurance benefits is 100 GBP per claim. The excess is deducted from the reimbursement you will receive in case of an approved claim.",https://support.nordvpn.com/hc/en-us/articles/20187729969425-Cyber-insurance-benefits-payment-and-charges
Cyber insurance benefits: legal and compliance,"This article will cover the legal and compliance topic of cyber insurance.
### Are there any compliance-related restrictions related to claims?
The insurer cannot pay any claims that would result in breaches of the UN resolutions, trade or economic sanctions, or other laws of the UK, EU, or USA.",https://support.nordvpn.com/hc/en-us/articles/20187510348049-Cyber-insurance-benefits-legal-and-compliance
VPN for Virgin Media: how to watch it securely,"Virgin Media provides exclusive content, but to access it securely from anywhere, a VPN is the way to go. Using NordVPN ensures that your connection to the service is encrypted, keeping your data secure from potential threats like hackers or unauthorized monitoring. This article will guide you on how to watch the Virgin Media streaming service using NordVPN.
Table of contents:
* [Required NordVPN servers](
* [Troubleshooting steps](
## Required NordVPN servers
VPN not only helps you bypass geo-restrictions on Virgin Media but also secures your connection by encrypting your data. This ensures your information stays private and safe from hackers and prying eyes while you stream.
If you wish to securely watch Virgin Media television shows and movies on your desktop or mobile device using Virgin Media Player, you need to connect to one of the [VPN servers in Ireland](https://nordvpn.com/servers/ireland/). Also, to safely stream Virgin TV GO on your desktop device, connect to any of our [VPN servers in the United Kingdom](https://nordvpn.com/servers/uk/).
## Troubleshooting steps
Streaming with a VPN can cause various issues, such as interruptions, or access problems, which may affect the overall experience.
If you have trouble connecting, try the following to fix the problem:
* [Clear your browser's cache](https://nordvpn.com/blog/how-to-clear-your-cache/) or test a different browser on your device.
* [Change your DNS addresses to NordVPN's.](https://support.nordvpn.com/hc/en-us/articles/19587726859793-What-are-NordVPN-DNS-server-addresses)
* Disable location services on your device.
If the above steps don't resolve your issue, please refer to our [troubleshooting guide for streaming](https://support.nordvpn.com/hc/en-us/articles/19559968238097-Troubleshooting-steps-for-streaming). For further assistance on streaming securely with a VPN for Virgin Media, feel free to [reach out to our customer support](https://support.nordvpn.com/hc/en-us/articles/19482416296593-How-can-I-reach-NordVPN-customer-support).
Under certain circumstances, streaming content (using video-on-demand, online TV platforms, or other sources) that is only accessible outside your country of residence may be illegal. Always check if you have the legal authority to access the material you wish to stream.
The NordVPN service should never be used to bypass copyright or other regulations. NordVPN does not promote, induce, or otherwise facilitate the use of the service for such purposes. Please read the [General Terms of Service](https://my.nordaccount.com/legal/terms-of-service/) and [NordVPN Additional Terms](https://my.nordaccount.com/legal/terms-of-service/nordvpn/) for more details.",https://support.nordvpn.com/hc/en-us/articles/20284254044561-VPN-for-Virgin-Media-how-to-watch-it-securely
VPN for DAZN: how to watch it securely,"DAZN features a wide array of exclusive content, and to access it securely from anywhere, using a VPN is the ideal solution. NordVPN provides top-notch encryption, ensuring your data is safe from hackers and surveillance. This guide will walk you through the process of streaming DAZN safely with NordVPN.
Table of contents:
* [Required NordVPN servers](
* [Troubleshooting steps](
## Required NordVPN servers
A VPN lets you bypass geographic restrictions on DAZN while safeguarding your connection with encryption. This shields your personal data, keeping it private and secure from hackers and external surveillance during your streaming sessions.
Connect to the following countries to securely access DAZN:
* Italy
* United States
* Germany
* Spain
* Japan
* Brazil
* Canada
* others
For detailed inquiries about other specific DAZN locations, please reach out to our support team directly.
Please note that when traveling abroad, you can only access the DAZN region linked to your subscription's billing address, allowing you to watch free and globally licensed content but preventing access to local paid content. However, for more specific information on the topic, we recommend contacting the providing service's support team.
## Troubleshooting steps
Using a VPN while streaming might cause certain problems that can interrupt your experience.
If you're having trouble, follow these steps:
1. Clear your browser's cache or test a different browser on your device.
2. Change your DNS addresses to NordVPN’s.
3. Disable location services on your device.
If the steps above don't fix the problem, check out our [troubleshooting guide for streaming](https://nordvpn.com/features/streaming/). For additional help with [streaming securely](https://nordvpn.com/features/streaming/) on DAZN using a VPN, don't hesitate to [contact our customer support team](https://support.nordvpn.com/hc/en-us/articles/19482416296593-How-can-I-reach-NordVPN-customer-support).
As you may be aware, streaming content (from video-on-demand or online TV platforms, etc.) that is only accessible in a country other than your country of residence might, under certain circumstances, be considered illegal. Please double-check the authorization or other justification for your actions with the material you are willing to stream before proceeding.
The NordVPN service should never be used to bypass copyright or other regulations. NordVPN does not promote, induce, or otherwise facilitate the use of the service for such purposes. For more details, please read General Terms of Service and NordVPN Additional Terms.",https://support.nordvpn.com/hc/en-us/articles/19564079049617-VPN-for-DAZN-how-to-watch-it-securely
VPN for Hulu: how to watch it securely,"This article is updated whenever our configurations change. If you start experiencing any issues with the VPN for Hulu, you can return to this post for updated information.
* Windows, macOS, and LinuxTo ensure secure access to Hulu, you can connect to any USA server.
* Mobile devicesTo ensure secure access to Hulu on mobile, you can connect to any US VPN server.
* On Smart TV devices (including Android boxes and FireTV devices)Connect to any USA server.
If you are still experiencing any issues with the VPN for Hulu, try following these additional troubleshooting steps for streaming. If you have any questions, feel free to contact our Customer Support team.
As you may be aware streaming content (from video-on-demand or online TV platforms, etc.) that is only accessible in a country other than your country of residence might under certain circumstances be considered illegal. Please double-check the authorization or other justification for your actions with the material you are willing to stream before proceeding.
The NordVPN service should never be used to bypass copyright or other regulations. NordVPN does not promote, induce, or otherwise facilitate the use of the service for such purposes. For more details, please read General Terms of Service and NordVPN Additional Terms.",https://support.nordvpn.com/hc/en-us/articles/19564097931409-VPN-for-Hulu-how-to-watch-it-securely
VPN for MAX: watch it securely,"Max has become a go-to platform for many, but accessing its full content library can be tricky due to geo-restrictions. If you're looking to enhance your streaming experience and unlock more content, using a VPN is a smart solution. In this guide, we’ll show you how to set up a VPN for Max, with tips to help you get the most out of your viewing experience.
Table of contents:
* [Required NordVPN servers](
* [Troubleshooting steps](
## Required NordVPN servers
A VPN does more than just help you get around geo-blocks on MAX; it also encrypts your connection, keeping your data secure. This added layer of protection ensures your personal information remains safe from hackers and anyone trying to spy while you stream.
To securely access MAX, simply connect to any NordVPN server, ensuring a safe and reliable experience. Viewing streaming content from a specific region requires selecting a VPN server in the designated country. For example, to access MAX United States region - connect to any [NordVPN US server](https://nordvpn.com/servers/usa/). For detailed inquiries about other specific supported MAX locations, please reach out to our support team directly.
## Troubleshooting steps
When you stream while using a VPN, you may encounter certain challenges that can hinder the experience.
If you are experiencing any issues, follow these steps:
1. [Clear your browser's cache](https://nordvpn.com/blog/how-to-clear-your-cache/) or test a different browser on your device.
2. [Change your DNS addresses to NordVPN’s](https://support.nordvpn.com/hc/en-us/articles/19587726859793-What-are-the-addresses-of-my-NordVPN-DNS-servers).
3. Disable location services on your device.
If you're still experiencing issues, take a look at our [troubleshooting steps for streaming](https://support.nordvpn.com/hc/en-us/articles/19559968238097-Troubleshooting-steps-for-streaming). For additional assistance on [streaming safely](https://nordvpn.com/features/streaming/) with a VPN for the MAX, [reach out to our support team](https://support.nordvpn.com/hc/en-us/articles/19482416296593-How-can-I-reach-NordVPN-customer-support).
Under certain circumstances, streaming content (using video on demand, online TV platforms, or other sources) that is only accessible outside your country of residence may be illegal. Always check if you have the legal authority to access the material you wish to stream.
The NordVPN service should never be used to bypass copyright regulations. NordVPN does not promote, condone, or endorse the use of the service for such purposes. For more details, please read the NordVPN Terms of Service.",https://support.nordvpn.com/hc/en-us/articles/19564027408657-VPN-for-MAX-watch-it-securely
Cyber insurance benefits: general questions,"This article will cover general questions regarding cyber insurance benefits.
## Table of contents:
* [What cyber insurance benefits are included with the NordVPN Ultimate bundle subscription?](
* [Who is the insurer of the policy?](
* [How do I qualify for the insurance benefits?](
* [When do the insurance benefits come into force, and when do they terminate?](
* [Is there any personal information shared with the insurer when I purchase a plan with insurance benefits?](
### What cyber insurance benefits are included with the NordVPN Ultimate bundle subscription?
The cyber insurance benefits included with the NordVPN Ultimate bundle subscription are:
* Scam loss recovery provides reimbursement for funds you have transferred from a personal account in response to a fraudulent text message, email, or phone call.
* Online shopping fraud recovery provides reimbursement when you have purchased eligible items online from a website/trading platform that turned out to be fraudulent. Eligible items are any items, services, or digital content that are:
* not counterfeit or fake goods.
* not stocks, shares, bonds, currencies, or digital assets.
* not goods bought using store credit or finance/leasing options or which were not paid in full.
* not goods purchased from an individual through a private transaction.
* not confiscated or declared illegal by any government, customs, or public body.
* not animals or livestock.
* not cash or its equivalents, traveler’s cheques, or tickets.
* not classified as real estate.
* not motor vehicles, motorcycles/scooters, watercraft or aircraft, and any equipment and/or parts necessary for their operation or maintenance.
* not subscription-based, where you are paying a recurring fee for a service.
### Who is the insurer of the policy?
The policy's insurer that provides you with the insurance benefits is Chubb European Group SE, UK Branch. For more information about Chubb, please visit .
### How do I qualify for the insurance benefits?
The insurance benefits will be provided on the condition that the insured person:
1. a) is over 18 years of age and is resident and domiciled in the United Kingdom at the start of the coverage period and for the duration of the entire coverage period; and
2. b) holds a NordVPN Ultimate bundle subscription in effect for the duration of the coverage period.
The time when the incident occurred means:
* For claims under the scam loss recovery category — the date you transferred funds in response to a fraudulent text, email, or phone call.
* For claims under the online shopping fraud recovery category — the date you purchased the items/services online.
### When do the insurance benefits come into force, and when do they terminate?
The insurance benefits enter into force as soon as you purchase a NordVPN Ultimate bundle subscription and will terminate:
* if you cancel auto-renewal for your NordVPN Ultimate bundle subscription.
* if the insurer or NordVPN serves notice to end the insurance benefits.
### Is there any personal information shared with the insurer when I purchase a plan with insurance benefits?
No, your personal information is not shared with the insurer when you purchase a plan with insurance benefits. However, if you need to file a claim under any of the insurance benefits, you will be asked to provide your name, address, and email address and may be requested to provide additional information necessary for the purpose of verifying a claim.",https://support.nordvpn.com/hc/en-us/articles/20186481346961-Cyber-insurance-benefits-general-questions
Cyber insurance benefits: coverage and claims,"This article will cover questions on cyber insurance coverage and claims.
## Table of contents:
* [Types of issues covered by the insurance benefits](https://support.nordvpn.com/hc/en-us/articles/20186261142161-Cyber-insurance-benefits-coverage-and-claims#Types%20of%20issues%20covered%20by%20the%20insurance%20benefits)
* [Situations where insurance benefits are not applicable](https://support.nordvpn.com/hc/en-us/articles/20186261142161-Cyber-insurance-benefits-coverage-and-claims#Situations%20where%20insurance%20benefits%20are%20not%20applicable)
* [Conditions for making a claim](https://support.nordvpn.com/hc/en-us/articles/20186261142161-Cyber-insurance-benefits-coverage-and-claims#Conditions%20for%20making%20a%20claim)
* [Where do the insurance benefits cover you](https://support.nordvpn.com/hc/en-us/articles/20186261142161-Cyber-insurance-benefits-coverage-and-claims#Where%20do%20the%20insurance%20benefits%20cover%20you)
* [Cryptocurrency coverage](https://support.nordvpn.com/hc/en-us/articles/20186261142161-Cyber-insurance-benefits-coverage-and-claims#Cryptocurrency%20coverage)
### What types of issues do these insurance benefits cover?
Scam loss recovery provides reimbursement when you have transferred funds from a personal account in response to a cyber scam, whereby you have been tricked into opening or responding to emails, text messages, and phone calls that appeared to be from legitimate entities or people who you trust and/or are known to you, which were sent with the purpose of defrauding you. Examples of such [scams](https://nordvpn.com/blog/what-is-a-scam/) include but are not limited to: [phishing](https://nordvpn.com/blog/what-is-phishing/) (emails); [smishing](https://nordvpn.com/blog/smishing/) (text messages); [vishing](https://nordvpn.com/blog/what-is-vishing/) (fraudulent pre-recorded messages); and [spoofing](https://nordvpn.com/blog/spoofing/) (impersonation phone calls).
Online shopping fraud recovery provides reimbursement when you have purchased eligible items/services online from a website/trading platform that turned out to be fraudulent. Some examples include:
* You purchased an item via an online sales advertisement. No receipt or proof of purchase was provided after you completed the payment. The website subsequently went missing, and it turned out the webpage was fraudulent.
* You performed an electronic transaction to book a scheduled cleaning service from an online advertisement, however, no service was rendered, and all the contact details on the ad turned out to be fabricated.
* You performed an electronic transaction to make a purchase from a webpage that was impersonating a legitimate brand, company, or online merchant and only realized it after the transaction was made.
### Are there any situations not covered by these insurance benefits?
There are a number of situations not covered under the following insurance benefits.
#### Not covered by scam loss recovery:
* Any transactions from a business account
* Advance fee fraud, where you are promised goods, services, and/or financial gains in return for an upfront payment, including payment by electronic transaction
* Confidence scams/[romance scams](https://nordvpn.com/blog/online-dating-scams/), where someone befriends you, forms a personal connection with you, or pretends to be interested in a romantic relationship with you and convinces you to transfer money to them.
#### Not covered by online shopping fraud recovery
* Online purchases where cash, cryptocurrency such as bitcoins, vouchers, or reward points are the form of payment
* Online purchases for items/services which are not classed as eligible items/services
* Unauthorized transactions on your payment card or e-money account because of online shopping fraud, leading to the cloning of your payment card or identity theft
### Is there any restriction or condition for making a claim?
The following conditions apply in order to make a claim:
* You must have had an active NordVPN Ultimate bundle subscription at the time of the incident that resulted in your claim.
* You must report the fraud to the Action Fraud website www.actionfraud.police.uk within 24 hours of you discovering it. Action Fraud will issue you with a crime reference number.
* You must notify your bank or your e-money account provider within 24 hours of you discovering the fraud, so it can make attempts to stop any transactions from going through or to trace where the funds have gone.
* You must make reasonable attempts to recover any lost funds.
* You must retain documentary evidence of the fraud.
* You must submit your claim as soon as practicable by completing an online submission via your NordVPN account.
* You must provide accurate information to us in the event of a claim. If you don’t, you could invalidate your insurance benefits, or we might reject a claim.
Please be aware that the insurer is unable to pay any claims that would result in breaches of the UN resolutions, trade or economic sanctions, or other laws of the UK, EU, or USA.
### Where am I covered?
You are covered worldwide, 24 hours a day. However, please be aware that the insurer cannot pay any claims that would result in breaches of the UN resolutions, trade or economic sanctions, or other laws of the UK, EU, or USA.
### Are transactions involving cryptocurrencies like Bitcoin covered?
No, transactions involving cryptocurrency of any kind are not covered by these insurance benefits.",https://support.nordvpn.com/hc/en-us/articles/20186261142161-Cyber-insurance-benefits-coverage-and-claims
Cyber insurance benefits: insurance claims process,"This article will answer questions about the cyber insurance claims process.
## Table of contents:
* [Filing a claim due to a cyber scam or an online shopping fraud](https://support.nordvpn.com/hc/en-us/articles/20186243152017-Cyber-insurance-benefits-insurance-claims-process#Filing%20a%20claim%20due%20to%20a%20cyber%20scam%20or%20an%20online%20shopping%20fraud)
* [Unable to file a claim via NordVPN account](https://support.nordvpn.com/hc/en-us/articles/20186243152017-Cyber-insurance-benefits-insurance-claims-process#Unable%20to%20file%20a%20claim%20via%20NordVPN%20account)
* [Documentation needed to access a claim](https://support.nordvpn.com/hc/en-us/articles/20186243152017-Cyber-insurance-benefits-insurance-claims-process#Documentation%20needed%20to%20access%20a%20claim)
* [Covered and possible to claim budget](https://support.nordvpn.com/hc/en-us/articles/20186243152017-Cyber-insurance-benefits-insurance-claims-process#Covered%20and%20possible%20to%20claim%20budget)
* [Claim process length and updates](https://support.nordvpn.com/hc/en-us/articles/20186243152017-Cyber-insurance-benefits-insurance-claims-process#Claim%20process%20length%20and%20updates)
### How do I file a claim in the event of a cyber scam or online shopping fraud?
The easiest way to file a claim is via your NordVPN account. Simply log in and select “Cyber insurance” on your account home page. Next, select the “File a claim” button, and from there, you will be asked to select which insurance benefit your claim relates to. You will then be prompted to enter some contact information and details about the incident and follow the remaining steps to completion.
### What do I do if I am unable to file the claim via my NordVPN account?
Alternatively, you can submit your claim to chubbcyberclaims@ie.sedgwick.com, entering “NordVPN claims” in the subject line, providing your name, address, email address, and phone number, a description of the incident, and attaching any supporting documentation.
### What documentation is required to support a claim?
The following supporting documents will be required to assess any claims:
#### For claims under scam loss recovery, supporting documentation includes:
* A bank statement showing evidence of bank transfers relating to the incident
* A copy of the police report/crime reference number obtained after reporting the incident to Action Fraud via www.actionfraud.police.uk
* A copy of any chat communication, SMS, call logs, email, website, or other method of digital communication that led to the incident or request for funds
* A copy of any chat communication, SMS, call logs, email, website, or other method of digital communication showing reasonable attempts to recover the funds back from the third party
* Any additional supporting documents proving that you are the victim of fraud
#### For claims under online shopping fraud recovery, supporting documentation includes:
* A bank statement showing evidence of purchase relating to the incident
* A copy of the police report/crime reference number obtained after reporting the incident to Action Fraud via www.actionfraud.police.uk
* A copy of any chat communication, SMS, call logs, email, website, or other method of digital communication showing reasonable attempts to recover the funds back from the vendor
* Any additional supporting documents proving that you are the victim of fraud
You can attach the supporting documents in the online portal once you are redirected via the “File a claim” button on your NordVPN account, so make sure you have them ready to have as quick handling of your claim as possible.
### What is the maximum amount I can claim?
The maximum amount you can claim under the insurance benefits in total is £5,000 within a 12-month period.
### How long does the claim process typically take, and how will I be updated on the status of my claim?
After submitting a claim, you should receive an acknowledgment email within 1 hour confirming your submission. Please allow for up to 7 business days for us to process your claim. You may be contacted for further information, so please look out for communications to help us process your claim as quickly as possible. Once a claim is approved, payment to your account will typically take 3-5 business days. Please note that we will only make claim payments to a bank account registered in your name in the United Kingdom.",https://support.nordvpn.com/hc/en-us/articles/20186243152017-Cyber-insurance-benefits-insurance-claims-process
VPN for Disney Plus: how to watch it securely,"With the growing popularity of streaming services like Disney+, many users are turning to VPNs to access content securely and bypass geo-restrictions. This guide will walk you through the essentials of using a VPN for streaming Disney+, offering tips to improve your experience and troubleshoot any common issues.
Table of contents:
* [Required NordVPN servers](
* [Troubleshooting steps](
## Required NordVPN servers
Connect to NordVPN servers to ensure your online security while enjoying Disney+. This will provide you with robust data protection, allowing you to stream your favorite content with confidence and peace of mind.
To access Disney+ securely using NordVPN, connect to one of our VPN servers in the following regions:
* United States
* Canada
* Mexico
* Brazil
* United Kingdom
* France
* Germany
* Japan
* South Africa
* and many others
If you have any questions about other specific Disney+ locations, contact our support team directly.
## Troubleshooting steps
Streaming with a VPN can occasionally lead to some issues that might disrupt your experience.
If you are experiencing issues while using a VPN for Disney+, try the following:
* [Clear your browser’s cache](https://nordvpn.com/blog/how-to-clear-your-cache/).
* Connect to another VPN server in the same region.
* Change your device’s DNS addresses to NordVPN’s DNS servers.
If the suggestions above don’t resolve your problem, please consult our [streaming troubleshooting guide](https://support.nordvpn.com/hc/en-us/articles/19559968238097-Troubleshooting-steps-for-streaming). If you have any other questions about [securely streaming](https://nordvpn.com/features/streaming/) with a VPN, don’t hesitate to [contact customer support](https://support.nordvpn.com/hc/en-us/articles/19482416296593-How-can-I-reach-NordVPN-customer-support).
Under certain circumstances, streaming content (using video on demand, online TV platforms, or other sources) that is only accessible outside your country of residence may be illegal. Always check if you have the legal authority to access the material you wish to stream.
The NordVPN service should never be used to bypass copyright or other regulations. NordVPN does not promote, induce, or otherwise facilitate the use of the service for such purposes. For more details, please read our [General Terms of Service](https://my.nordaccount.com/legal/terms-of-service/) and[ the NordVPN Additional Terms](https://my.nordaccount.com/legal/terms-of-service/nordvpn/).",https://support.nordvpn.com/hc/en-us/articles/19563645623441-VPN-for-Disney-Plus-how-to-watch-it-securely
VPN for Amazon Prime: how to watch it securely,"Amazon Prime provides a wealth of exclusive content, and to access it safely from any location, a VPN is an excellent choice. By using NordVPN, your connection is securely encrypted, safeguarding your data from hackers and unwanted surveillance. This article will show you how to access the Amazon Prime streaming service with NordVPN.
Table of contents:
* [Required NordVPN servers](
* [Troubleshooting steps](
## Required NordVPN servers
VPN not only allows you to overcome geo-restrictions on Amazon Prime, but it also protects your connection by encrypting your data. This keeps your information secure and private, safeguarding it from hackers and unwanted surveillance while you're streaming. While connected to [NordVPN servers](https://nordvpn.com/servers/), you can safely access Amazon Prime services in the following countries:
* United States
* Japan
* Canada
* United Kingdom
* Australia
* Italy
* France
* Germany
* New Zealand
* and others
Please note that you should only access Amazon Prime in the same region as is stated in the payment details of your Amazon Prime subscription. The terms and conditions of Amazon Prime do not allow you to change the region of your streaming library to one that is different from your billing address.
## Troubleshooting steps
Using a VPN for streaming can lead to several issues, like interruptions or difficulty accessing content, which can impact your overall experience.
If you're having trouble connecting, try these solutions to resolve the issue:
* Connect to a different server in the same region of your wished streaming content.
* Clear your browser’s cache or test a different browser on your device.
* [Change your DNS addresses to NordVPN's](https://support.nordvpn.com/hc/en-us/articles/19587726859793-What-are-NordVPN-DNS-server-addresses).
* Disable location services on your device.
If the above fails to resolve your issue, please check our troubleshooting steps for streaming. For any additional questions on how to [stream securely](https://nordvpn.com/features/streaming/) using a VPN for Amazon Prime, [contact our customer support](https://support.nordvpn.com/hc/en-us/articles/19482416296593-How-can-I-reach-NordVPN-customer-support).
Under certain circumstances, streaming content (using video on demand, online TV platforms, or other sources) that is only accessible outside your country of residence may be illegal. Always check if you have the legal authority to access the material you wish to stream.
The NordVPN service should never be used to bypass copyright or other regulations. NordVPN does not promote, induce, or otherwise facilitate the use of the service for such purposes. For more details, please read our [General Terms of Service](https://my.nordaccount.com/legal/terms-of-service/) and the [NordVPN Additional Terms](https://my.nordaccount.com/legal/terms-of-service/nordvpn/).",https://support.nordvpn.com/hc/en-us/articles/19563148662545-VPN-for-Amazon-Prime-how-to-watch-it-securely
How to Set Up SmartDNS on Apple TV,"[Smart DNS](https://support.nordvpn.com/hc/en-us/articles/19442825306257-What-is-SmartDNS) technology works by automatically switching your [DNS servers](https://nordvpn.com/blog/what-is-dns-server/) (which provide IP addresses for your devices to connect to) whenever you try to access unavailable content. This is especially useful if you want to access legitimate subscriptions from your home country when you’re away.
To enable NordVPN’s smart DNS on your Apple TV, follow these steps:
1. On the device you're currently using, ensure that you're connected to the same network as your Apple TV.(For example, if your Apple TV is connected to “Wi-Fi_123,” then connect your current device to the same Wi-Fi).
2. Now, [open your Nord Account and log in](https://my.nordaccount.com/dashboard/). Afterward, in the “Services” section, click on NordVPN.
3. In the “Smart DNS” category, press the “Activate” button.This will allowlist your [IP address](https://nordvpn.com/what-is-my-ip/) and allow you to use smart DNS on the network that your Apple TV is connected to. (The next steps could vary based on the model of your Apple TV.)
4. On your Apple TV, navigate to “General” and select “Network.”
5. Click on “Wi-Fi” at the top and select the network you allowlist in step 3.
6. Select “Configure DNS” and choose “Manual.”
7. Enter our smart DNS server addresses:Primary DNS: 103.86.99.103Secondary DNS (if available): 103.86.96.103",https://support.nordvpn.com/hc/en-us/articles/19564451081873-How-to-Set-Up-SmartDNS-on-Apple-TV
Set Up SmartDNS VPN feature on LG TV,"To configure your LG TV for the [Smart DNS VPN feature](https://nordvpn.com/features/streaming/smart-play/), you would need to follow these steps:
1. On the device you're currently using, ensure that you're connected to the same network that is used for the LG TV.(E.g. if your LG TV is connected to Wi-Fi_123, then connect your current device to the same Wi-Fi).
2. Now, open Nord Account and log in. Afterward, in the Services section, click on NordVPN.
3. In the SmartDNS category, press the Activate button.This will allowlist your IP address and allow you to use SmartDNS on the network that your LG TV is connected to. (The following steps may vary depending on the model of your TV)
4. Now, turn on your LG Smart TV and press Settings on your remote.
5. From this settings menu scroll down to Network and select Network Connection.
6. Connect your LG Smart TV to the same network as is used by your current device.
7. Select Your Network and then Select Other Network List.
8. Select Set Expert Button.
9. Select Your Network Connection.
10. Scroll Down to the DNS Mode and select Manual Tab. Then enter 103.86.96.103 (and 103.86.99.103 if allowed to enter second) and Press OK.
And that's it, the SmartDNS VPN feature is now enabled on your LG TV. Enjoy!",https://support.nordvpn.com/hc/en-us/articles/19564250144273-Set-Up-SmartDNS-VPN-feature-on-LG-TV
What is SmartDNS?,"SmartDNS is a technology that lets you access content on your smart TV that may not be available in your region. SmartDNS is integrated into [NordVPN SmartPlay](https://nordvpn.com/features/streaming/smart-play/), so you only need to have a [NordVPN subscription](https://nordvpn.com/pricing/) to access it. SmartDNS does not protect your devices the way a [VPN connection](https://nordvpn.com/what-is-a-vpn/) does — it simply provides access to streaming content. Keep in mind that it may not work with all of the streaming services you can access while connected to NordVPN.
Table of contents:
* [SmartDNS-supported streaming services](
* [How to enable the SmartDNS feature](
* [How to set up the SmartDNS feature on your device](
## SmartDNS-supported streaming services
The landscape of streaming entertainment offers a multitude of choices. To help you navigate these options, the following list presents the complete selection of SmartDNS-supported supported services:
* Amazon Prime (US region)
* Disney Plus (US region)
* Fox Now / Fox Sports Go / Fox News (US region)
* MAX (US region)
* Netflix Originals
* Paramount+
* Peacock TV
* Fubo TV
## How to enable the SmartDNS feature
The activation process is designed for simplicity, allowing you to quickly access region-locked content. Follow these steps to enable NordVPN's SmartDNS feature:
1. Allowlist [your original IP address](https://nordvpn.com/what-is-my-ip/) — the one you have when your VPN is switched off. Make sure to allowlist your IPv4 address, not IPv6, as we do not support IPv6 yet.
2. Disconnect from NordVPN (or any other VPN connection).
3. Log in to your NordAccount:
4. Then, select the NordVPN button located in the upper-left section on your dashboard:
5. Click the enable button on the SmartDNS tab:
6. Activate the SmartDNS feature by clicking on the activate SmartDNS button:Note: the activation can take up to 10 minutes. In the meantime, the status will be shown as pending.
## How to set up the SmartDNS feature on your device
NordVPN SmartDNS offers a simple setup process, allowing you to quickly configure your devices and access geo-restricted streaming content by adjusting a few network settings.
Here’s how to set up SmartDNS on NordVPN for the following devices:
* [SmartDNS on LG TV](https://support.nordvpn.com/hc/en-us/articles/19564250144273-Set-Up-SmartDNS-VPN-feature-on-LG-TV)
* [SmartDNS on Apple TV](https://support.nordvpn.com/hc/en-us/articles/19564451081873-How-to-Set-Up-SmartDNS-on-Apple-TV)
For instructions for other devices, use these [DNS servers](https://nordvpn.com/blog/what-is-dns-server/):
* Primary: 103.86.96.103
* Secondary (if available): 103.86.99.103
If you experience any issues or have additional questions, do not hesitate to [submit a request](https://support.nordvpn.com/hc/en-us/articles/19482416296593-How-to-reach-NordVPN-customer-support) to our customer success team.
The NordVPN service should never be used to bypass copyright regulations. NordVPN does not promote, condone, or endorse the use of the service for such purposes. For more details, please read the [NordVPN Terms of Service](https://my.nordaccount.com/legal/terms-of-service/).",https://support.nordvpn.com/hc/en-us/articles/19442825306257-What-is-SmartDNS
Cyber insurance benefits: subscription and cancellation,"This article covers common questions relating to your cyber insurance benefits subscription and its cancellation.
### How do I cancel my cyber insurance benefits?
Your cyber insurance benefits will end when you cancel your NordVPN Ultimate bundle subscription.
### Will my insurance benefits still be valid if I move abroad?
The insurance benefits are currently only available to customers residing in the UK, US, SE, DE, FR, IT, NL. Hence, it will be available only if you move to one of these countries.",https://support.nordvpn.com/hc/en-us/articles/20187830303889-Cyber-insurance-benefits-subscription-and-cancellation
How can I get a receipt for my payment,"If you are looking for information on how to generate an Invoice for your payment, please check this article instead: [How can I get an Invoice for my company?](https://support.nordvpn.com/hc/en-us/articles/19744005126801-How-can-I-get-an-Invoice-for-my-company)
1. Log in to your account on the [Nord Account](https://my.nordaccount.com/) page.
2. Navigate to Billing History.
3. Click the Receipt button under the Download column.
4. Wait until a PDF file icon pops-up. Click on the Receipt highlight to download it.",https://support.nordvpn.com/hc/en-us/articles/20371782137873-How-can-I-get-a-receipt-for-my-payment
Common issues with activation codes,"Activation codes let you create a prepaid NordVPN account, extend an existing subscription, or even give NordVPN as a gift to others. To get started, follow our guide on [how to use a NordVPN activation code](https://support.nordvpn.com/hc/en-us/articles/19685995851665-How-to-get-NordVPN-with-activation-code).
This article addresses the most common issues that users have encountered when trying to apply activation codes.
Wrong email address
Before you apply the activation code, please double-check the email address you provided. The activation code will be applied to the email address you specify immediately, even if it is incorrect. If you mistakenly enter an email address that is not tied to your Nord Account, please [contact our customer support team](https://nordvpn.com/contact-us/) for assistance.
Ambiguous symbols
It is easy to confuse the letter “O” (capital “o”) for “0” (zero) and the letter “I” (capital “i”) for “l” (lowercase “L”). Try replacing these ambiguous symbols with their lookalikes if you’ve entered the rest of the code correctly.
This issue only affects older NordVPN activation codes, because we have stopped using ambiguous symbols to avoid confusion.
Code already activated
Any given activation code can only be used once. If you’ve applied that activation code to extend your subscription at some point in the past, any further attempts will end in error.
You can check the status of your subscription by logging in to [Nord Account](https://my.nordaccount.com/). If you can’t remember your Nord Account credentials, use our handy password recovery tool.
Activating multiple codes
Each NordVPN activation code must be applied separately. If you have multiple activation codes, simply repeat the [activation process](https://support.nordvpn.com/hc/en-us/articles/19685995851665-How-to-get-NordVPN-with-activation-code) for each one.",https://support.nordvpn.com/hc/en-us/articles/20286544549777-Common-issues-with-activation-codes
What is the currency your prices are shown in,"Our pricing is shown in USD, EUR, GBP, BRL, JPY, INR, CHF, PLN, and KRW currency, depending on the country you are accessing our website. In addition, some local payment methods also support SEK and NOK.However, charges are made in USD except for some payment providers. We also support charges in CAD and AUD, but for such payments, prices on the page itself will be shown in USD.",https://support.nordvpn.com/hc/en-us/articles/19744714597905-What-is-the-currency-your-prices-are-shown-in
Why my recurring payment was not charged,If you have a recurring payment subscription and your VPN account expired do not make a manual payment. Sometimes payment systems are late to make an automatic payment which results in a gap when your account is inactive. You can always contact our support and they will add a free day to your account.,https://support.nordvpn.com/hc/en-us/articles/19744624301585-Why-my-recurring-payment-was-not-charged
I have just paid. Will I be charged again,"Any payment method other than CoinPayments, prepaid and gift cards, will create an ongoing subscription. It will automatically charge you after your NordVPN account expires.",https://support.nordvpn.com/hc/en-us/articles/19744525926801-I-have-just-paid-Will-I-be-charged-again
"If I sign up for 1 month, can I upgrade later","Yes, you can change between billing plans.
Log in to your Nord Account, click on Change Plan, and select the subscription plan you prefer:
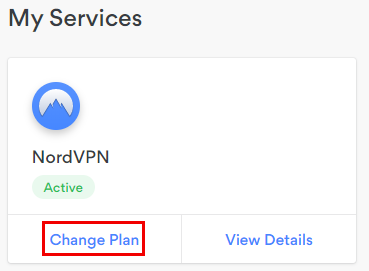",https://support.nordvpn.com/hc/en-us/articles/19744435778705-If-I-sign-up-for-1-month-can-I-upgrade-later
What to do if you’re unable to redeem NordVPN service from Revolut?,"If you are not able to redeem your NordVPN coupon, or your subscription does not get activated, please make sure that the following is in order:",https://support.nordvpn.com/hc/en-us/articles/30639649532049-How-to-redeem-a-Revolut-NordVPN-subscription
How to redeem a Revolut NordVPN subscription,"In this article you will learn how to redeem your NordVPN subscription gifted from Revolut.
In order to be eligible for a NordVPN subscription, you must have a Premium, Metal, or Ultra plan with Revolut.
Follow the steps below to redeem your subscription:
1. Open your Revolut app.
2. Tap your profile icon in the top-left corner.
3. Select Your plan.
4. Scroll down to your benefits, and tap See all
5. Tap NordVPN and follow the instructions.
Once you have followed these steps, you should have redeemed your NordVPN subscription successfully.
## What to do if you’re unable to redeem NordVPN service from Revolut?
If you are not able to redeem your NordVPN coupon, or your subscription does not get activated, please make sure that the following is in order:
* Your Revolut subscription is active.
* If you have changed your Revolut plan, make sure to re-activate your NordVPN services.
* Check for any spelling mistakes in the NordVPN coupon.
If you are still encountering issues, please contact our [customer support team](https://support.nordvpn.com/hc/en-us/requests/new?ticket_form_id=21068086896145).",https://support.nordvpn.com/hc/en-us/articles/30639649532049-How-to-redeem-a-Revolut-NordVPN-subscription
How can I renew my NordVPN subscription?,"If you had a [NordVPN subscription](https://nordcheckout.com/) before that you have decided to discontinue and wish to subscribe to our services again - you can do that in two ways:
### Activate your subscription via Nord Account:
1. Open [Nord Account](https://my.nordaccount.com/) and choose to log in.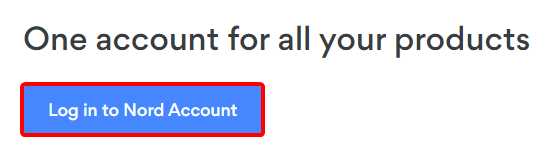
2. Enter your registered NordVPN email address and password, then click ""Log in.""
3. On the homepage of Nord Account, click to ""Renew plan.""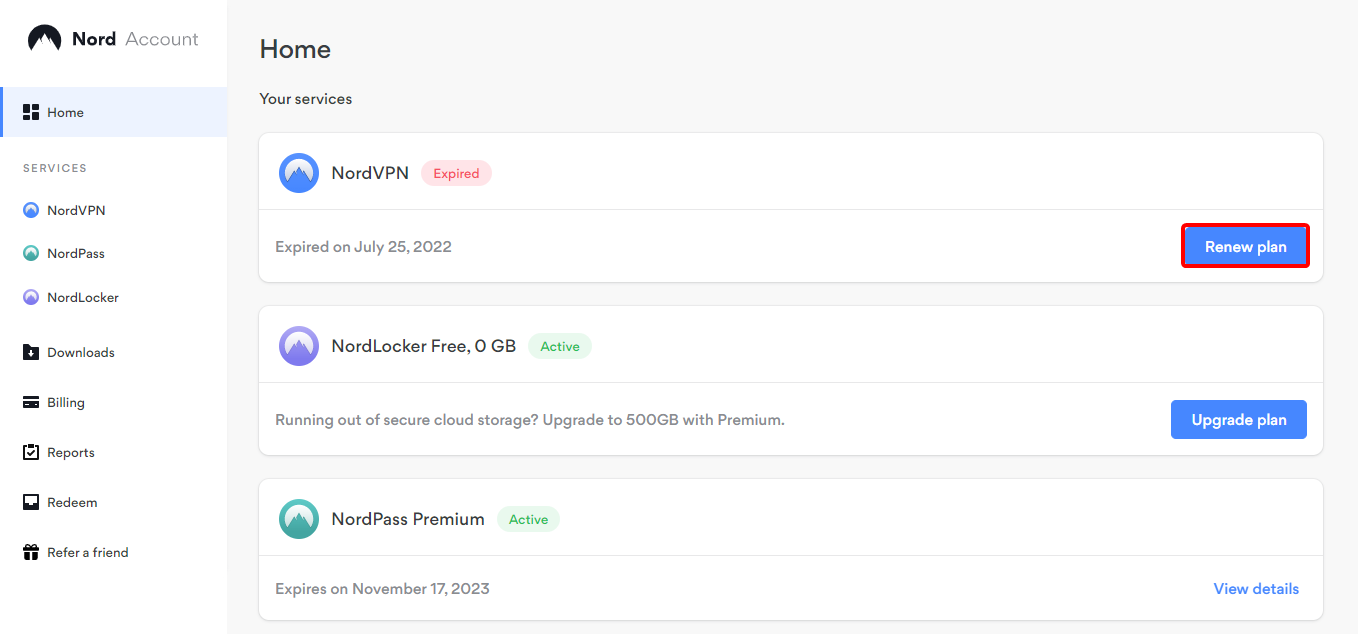
### Purchase a new subscription:
1. Go to NordVPN's official website by clicking [here](https://nordvpn.com/pricing/).
2. Follow the subscription purchase process shown in this article: [How to purchase a NordVPN subscription](https://nordvpn.zendesk.com/hc/en-us/articles/19478048190481).
3. Enter your existing Nord Account email address for a renewal to be added. No need to create a new account.",https://support.nordvpn.com/hc/en-us/articles/20286504059409-How-can-I-renew-my-NordVPN-subscription
How can I change compatibility mode?,"1. Locate the NordVPN folder within your computer. To do so, click on file explorer (the folder icon).",https://support.nordvpn.com/hc/en-us/articles/20286695851537-Error-This-program-does-not-support-the-version-of-Windows-your-computer-is-running
Does NordVPN have a free trial,"NordVPN does not offer a free trial for purchases made on its website, but we do provide our customers with a [30-day money-back guarantee](https://nordvpn.com/risk-free-vpn/) to try out our services: ""Every customer is eligible for a refund, as long as their initial payment is not older than 30 days.""
This and other conditions of our service can be found in our [Terms of Service](https://my.nordaccount.com/legal/terms-of-service/).
A free trial is available for Android users that download our [VPN for Android from Google Play](https://play.google.com/store/apps/details?id=com.nordvpn.android&hl=en&gl=US). This trial is organized by Google Play itself and follows its Terms of Service.
Please keep in mind that we only allow one free trial per customer, so make sure you log into your NordVPN account when ordering a subscription. You can cancel the free Android trial (and avoid being charged) on Google Play.
If you have any questions regarding the trial, [contact the Google Play Store directly](https://support.google.com/store#topic=3237699&contact=1).",https://support.nordvpn.com/hc/en-us/articles/19744837091217-Does-NordVPN-have-a-free-trial
I did not receive an activation email,"When signing up for the [NordVPN service](https://nordvpn.com/), you need to enter an email address. You will be using it for login and will receive your password to that same address. So make sure that the email address you provide is valid and can be accessed by you.
If you have signed up successfully but have not received any email with your login credentials, follow these steps:
* Wait for up to 5 minutes after the signup for your email to arrive.
* Check your junk, spam, promotions, and other sections of your email account. Activation emails are sent to many users so that they might be flagged for spam or similar.
* You can get your password resent by following these steps:
1. Login to your Nord Account on this page: 
2. Click on Forgot your password? hyperlink:
3. Enter your Nord Account registration e-mail address and click Send Reset Link:",https://support.nordvpn.com/hc/en-us/articles/19744561174673-I-did-not-receive-an-activation-email
Plans and prices of NordVPN service,"In this article, you will learn about Nord subscription plan options. [NordVPN subscription plan prices](https://nordvpn.com/pricing/) are regularly updated on our website.
You can purchase NordVPN plans directly from the App Store or [Google Play Store](https://play.google.com/store/apps/details?id=com.nordvpn.android&hl=en), or from the Nord pricing page, where you’ll find all available options.
## Subscription plans
On the [NordPVN pricing page](https://nordvpn.com/pricing/#compare-plans-desktop) you’ll find the available options:
* [Basic](https://support.nordvpn.com/hc/en-us/articles/19744251757841-Plans-and-prices-of-NordVPN-service#Basic)
* [Plus](https://support.nordvpn.com/hc/en-us/articles/19744251757841-Plans-and-prices-of-NordVPN-service#Plus)
* [Complete](https://support.nordvpn.com/hc/en-us/articles/19744251757841-Plans-and-prices-of-NordVPN-service#Complete)
* [Ultra](https://support.nordvpn.com/hc/en-us/articles/19744251757841-Plans-and-prices-of-NordVPN-service#Ultra)
With this plan you'll get:
* [VPN features](https://support.nordvpn.com/hc/en-us/articles/19559429814545-List-of-NordVPN-features)Secure, high-speed VPNThreat Protection10 devices secured at once
* [30-day money-back guarantee](https://support.nordvpn.com/hc/en-us/articles/19476991311121-What-is-your-money-back-policy)
This plan focuses on core security and privacy, making it a great choice for users who only need reliable VPN protection.
With this plan you'll get:
* [VPN features](https://support.nordvpn.com/hc/en-us/articles/19559429814545-List-of-NordVPN-features)Secure, high-speed VPNThreat Protection10 devices secured at once
* Threat Protection Pro™Anti-malware protectionAdvanced browsing protectionAd and tracker blocker
* [Password management]( password managerData breach scanner
* [30-day money-back guarantee](https://support.nordvpn.com/hc/en-us/articles/19476991311121-What-is-your-money-back-policy)
This plan provides a well-rounded security suite, combining VPN protection with advanced tools to protect your online activities.
With this plan you'll get:
* [VPN features](https://support.nordvpn.com/hc/en-us/articles/19559429814545-List-of-NordVPN-features)Secure, high-speed VPNThreat Protection10 devices secured at once
* Threat Protection Pro™Anti-malware protectionAdvanced browsing protectionAd and tracker blocker
* [Password management]( password managerData breach scanner
* [Secure cloud storage](https://support.nordvpn.com/hc/en-us/articles/33436996432913-How-to-set-up-secure-cloud-storage-with-NordLocker)1 TB of encrypted cloud storage
* [30-day money-back guarantee](https://support.nordvpn.com/hc/en-us/articles/19476991311121-What-is-your-money-back-policy)
This plan is perfect for those who want complete online security, privacy, and secure cloud storage in one package.
With this plan you'll get:
* [VPN features](https://support.nordvpn.com/hc/en-us/articles/19559429814545-List-of-NordVPN-features)Secure, high-speed VPNThreat Protection10 devices secured at once
* Threat Protection Pro™Anti-malware protectionAdvanced browsing protectionAd and tracker blocker
* [Password management]( password managerData breach scanner
* [Secure cloud storage](https://support.nordvpn.com/hc/en-us/articles/33436996432913-How-to-set-up-secure-cloud-storage-with-NordLocker)1 TB of encrypted cloud storage
* IncogniPersonal data removal tool
* [30-day money-back guarantee](https://support.nordvpn.com/hc/en-us/articles/19476991311121-What-is-your-money-back-policy)
This plan is ideal for users who want maximum security, privacy, and data protection, including the ability to remove personal data from online sources.
## FAQs
How do I get a NordVPN subscription?
If you’re trying to subscribe to NordVPN, follow our handy guide on [how to get a subscription](https://support.nordvpn.com/hc/en-us/articles/19478048190481-How-to-purchase-a-NordVPN-subscription).
What subscription plans does NordVPN offer?
NordVPN currently offers 2-year, 1-year, and 1-month subscription plans.
Can I pay for a NordVPN subscription in monthly installments?
You can pay monthly by selecting NordVPN’s 1-month plan. NordVPN’s 2-year and 1-year plans must be [paid for in full](https://support.nordvpn.com/hc/en-us/articles/19476182512273-Does-NordVPN-charge-all-at-once) at purchase.
Does NordVPN have a family plan?
Yes, NordVPN now offers a [Family Plan](https://nordvpn.com/pricing/family-site/). It includes the same [subscription options]( Plus, Complete, and Ultra—each with the same features and benefits. The key difference is that the Family Plan allows you to create up to five separate accounts.
Do you offer discounts or coupons for NordVPN plans?
Yes — we have an extensive guide on [how to get NordVPN cheaper.](https://support.nordvpn.com/hc/en-us/articles/19477702164369-How-to-get-NordVPN-cheaper) You can also find our special [monthly deals](https://nordvpn.com/coupon/?nv_tri=TC_4672000958802338_1740990944276&nv_trs=1743145761762_1743150468731_38_251&_gl=1*fomogl*_gcl_aw*R0NMLjE3NDMwODcyNjguQ2p3S0NBanc3cE9fQmhBbEVpd0E0cE1RdkZvWHk2UWEtS0pFOTNOYkk4SWhTY2VhOVJGbGdFaldOTkZxTUxwcXUtNWlCTzQ0ODNXQTFSb0NmOElRQXZEX0J3RQ..*_gcl_au*MTk3MjQ4MjMyLjE3NDA5OTMyMzQ.*FPAU*MTk3MjQ4MjMyLjE3NDA5OTMyMzQ.*_ga*MTc2ODgyMjcxMy4xNzQwOTkwOTQ1*_ga_LEXMJ1N516*MTc0MzE0NTcwMi40Mi4xLjE3NDMxNTAzOTUuMjUuMC4w&_ga=2.254984456.1665114719.1742821287-1768822713.1740990945).
What is your money-back guarantee and how do I cancel?
To learn more about our money-back guarantee, check out [our refund policy](https://support.nordvpn.com/hc/en-us/articles/19476991311121-What-is-your-money-back-policy). If you wish to cancel your subscription, [follow our cancellation guide](https://support.nordvpn.com/hc/en-us/articles/19556844985489-How-to-cancel-auto-renewal-for-your-subscription).",https://support.nordvpn.com/hc/en-us/articles/19744251757841-Plans-and-prices-of-NordVPN-service
How to cancel auto-renewal for your subscription,"If your subscription was purchased via the Google Play Store, Apple App Store, or Amazon App Store and you wish to cancel it, follow the respective articles below:
* Cancelling your [Google Play Store NordVPN subscription](https://support.google.com/googleplay/answer/7018481)
* Cancelling your [Apple App Store NordVPN subscription](https://support.apple.com/en-lamr/118428)
* Cancelling your [Amazon App Store NordVPN subscription](https://www.amazonforum.com/s/question/0D54P00007IG0CkSAL/amazon-appstore-subscriptions)
## Cancelling your NordVPN subscription
If you have purchased your subscription directly from NordVPN and wish for your subscription to no longer renew at the subsequent billing date, you may cancel your subscription via your [Nord Account](https://my.nordaccount.com/).
You can follow the same steps to cancel your NordPass, NordLocker, Dedicated IP, or bundle subscription services.
To cancel the automatic renewal of your NordVPN subscription, follow the steps below:
1. Log in to your [Nord Account](https://my.nordaccount.com/)
2. Open the billing tab:
3. Click cancel next to auto-renewal:
4. Select cancel auto-renewal:
5. Your auto-renewal status will now change to off:
You will receive a confirmation email to your registered email account if your subscription cancellation is successful:
If you wish to receive a refund, please read [our article on NordVPN's refund policy](https://support.nordvpn.com/hc/en-us/articles/19476991311121-What-is-your-money-back-policy).",https://support.nordvpn.com/hc/en-us/articles/19556844985489-How-to-cancel-auto-renewal-for-your-subscription
How to share a wireless NordVPN connection on Windows?,"If you have a device that is not able to connect to NordVPN directly, you can connect to your NordVPN via hotspot, Wi-Fi, or ethernet cable by using a Windows computer. To get started with sharing your NordVPN connection, choose the applicable section below:
* [Mobile hotspot Win10](https://support.nordvpn.com/hc/en-us/articles/32448689404433-How-to-share-a-wireless-NordVPN-connection-on-Windows#Mobile-hotspot-Win10)
* [Wi-Fi Win 7/8.1/10](https://support.nordvpn.com/hc/en-us/articles/32448689404433-How-to-share-a-wireless-NordVPN-connection-on-Windows#Wi-Fi-Win-7%2F8.1%2F10)
* [Ethernet](https://support.nordvpn.com/hc/en-us/articles/32448689404433-How-to-share-a-wireless-NordVPN-connection-on-Windows#Ethernet)
## Share a NordVPN connection via a mobile hotspot on Windows 10
NOTE: A mobile hotspot will NOT work with the NordLynx protocol. Make sure to enable the OpenVPN UDP/TCP protocol instead.
To set up a NordVPN connection using a mobile hotspot on Windows 10, follow the steps below:
1. Go to settings.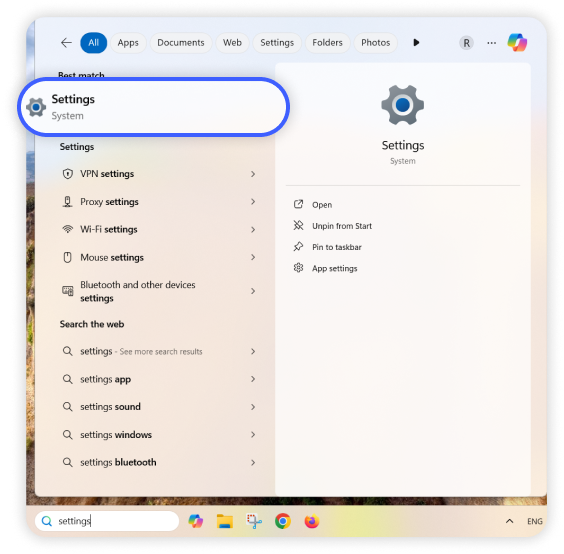
2. Click network & internet.
3. Click mobile hotspot.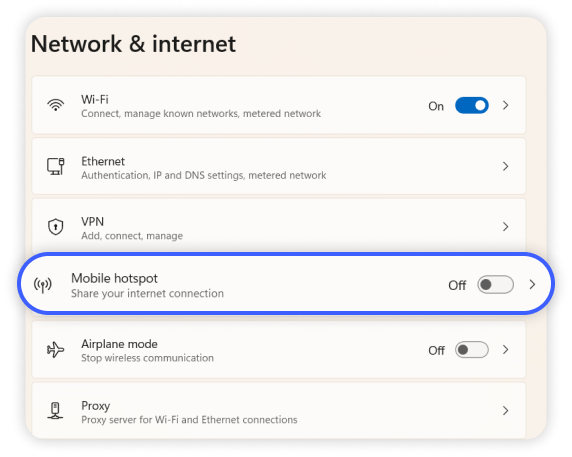
4. Select share over Wi-Fi and enable mobile hotspot.
5. Go to settings.
6. Select network and Internet.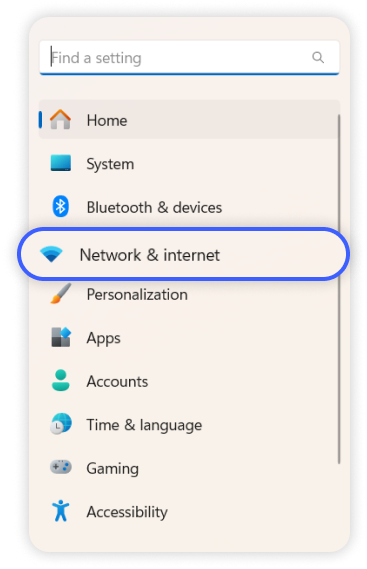
7. Scroll down to your NordVPN adapter and click edit.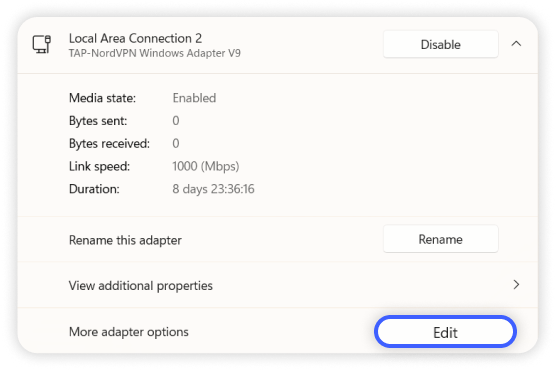Please note: After adjusting the adapter, you will need to switch to a TCP or UDP protocol within the NordVPN app.
1. Open the sharing tab.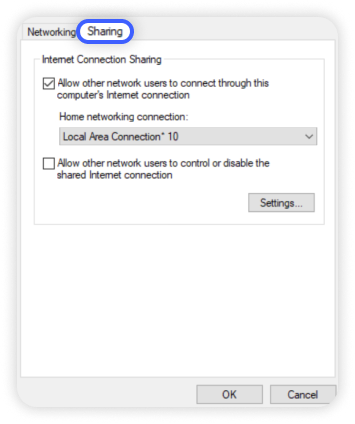
2. Check allow other network users to connect through this computer's internet connection.
3. Select your newly created hotspot from the dropdown menu.
4. Connect to the hotspot with the device that you would like to connect to NordVPN.
After completing these steps, your mobile hotspot will be configured to share the VPN connection with other devices. Make sure to test the connection and ensure that all connected devices are successfully using the shared VPN connection. You can check your connection in the [NordVPN DNS Leak Test](https://nordvpn.com/dns-leak-test/).
## Share a NordVPN connection via Wi-Fi from Windows 7/8.1/10
Note: Recent Intel Wireless Adapters don’t support the wireless hosted network feature on Windows 10. For more information, visit [Intel's support page](https://www.intel.com/content/www/us/en/support/articles/000023257/wireless.html).
To share a NordVPN connection via Wi-Fi on Windows 7/8.1/10 follow these steps:
1. Connect your Windows PC to your network via Wi-Fi.
2. Search Command Prompt in the Windows Search bar, right click it to run as administrator.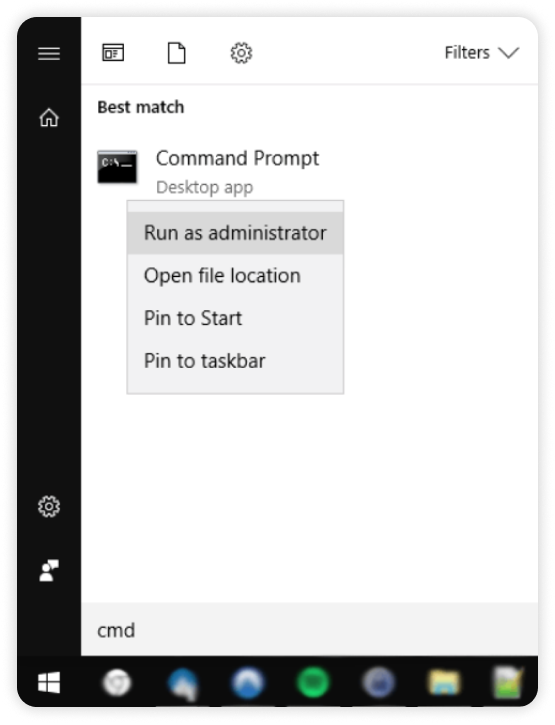
3. In Command Prompt, type the following:
```
netsh wlan show drivers
```
If the hosted network supported line says no, look for a newer version of your adapter drivers and install them.
4. Type in the following command:
```
netsh wlan set hostednetwork mode=allow ssid=NetworkName key=NetworkPassword
```
You should see something similar to this: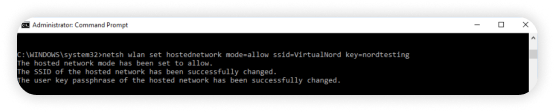
5. To activate this virtual network, type:
```
netsh wlan start hostednetwork
```
6. If you get the message “The hosted network couldn't be started. The group or resource is not in the correct state to perform the requested operation output” after performing netsh wlan start hostednetwork, try the following:Open the run window by pressing windows button + R.
7. Type in:
```
mmc devmgmt.msc
```
8. Once the device manager is open, navigate to Network Adapters and right-click microsoft hosted network virtual adapter.
9. Select enable.
10. Type the following command again:
```
netsh wlan start hostednetwork
```
11. Open the network and sharing Center by right-clicking the network icon in the system tray.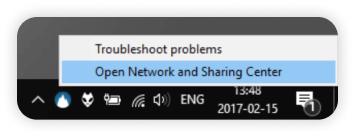
12. Click change adapter settings.
13. Right-click the TAP-NordVPN Windows Adapter V9 adapter.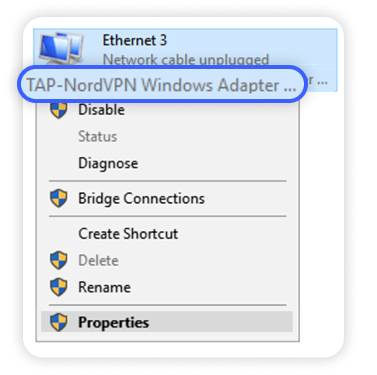
14. Select properties.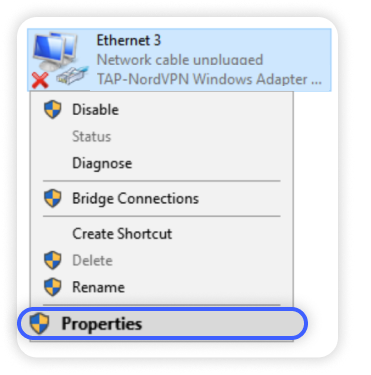
15. Open the sharing tab.
16. Check allow other network users to connect through this computer’s Internet connection box.
17. Select the local area connection from the drop-down list.
18. Click ok.
19. Connect to one of our VPN servers in the NordVPN application.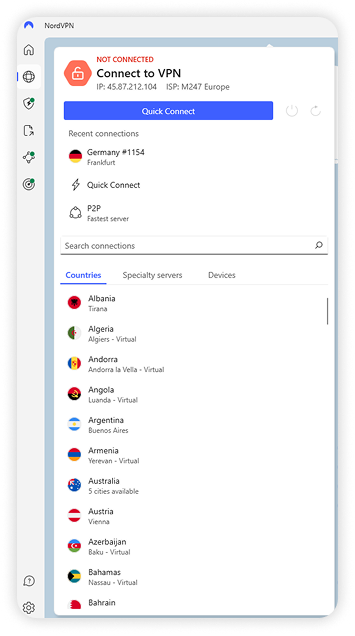
To check the status of your virtual adapter, type the following:
```
netsh wlan show hostednetwork
```
To stop the virtual interface, type:
```
netsh wlan stop hostednetwork
```
After completing the steps, your NordVPN connection will successfully be shared via Wi-Fi.
## Sharing a NordVPN connection through an Ethernet cable
If you're using an Ethernet cable to connect your PC to the network, you'll need a second Ethernet port to share your NordVPN connection with another device.
Laptops should connect to the network via Wi-Fi, leaving their ethernet port free for the device without the NordVPN connection.
To share your NordVPN connection through an Ethernet cable, follow the steps below:
1. Open the network and sharing center by right-clicking the network icon in the system tray.
2. Click open network & internet settings.
3. Click change adapter options.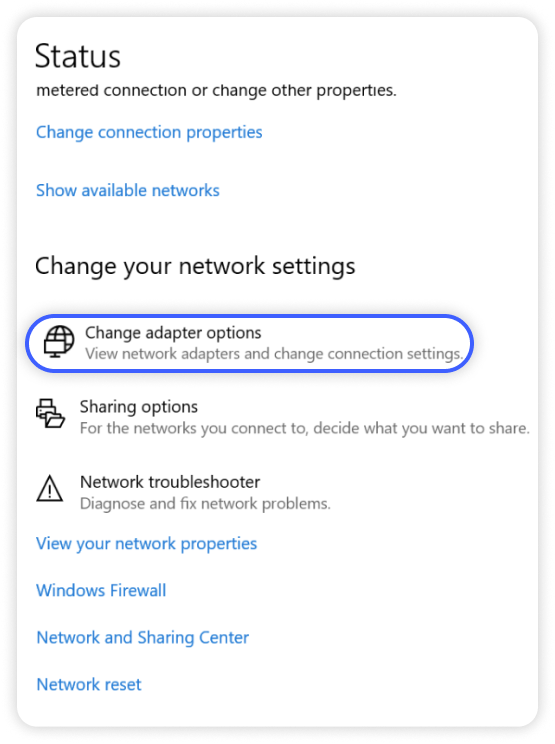
4. There should be at least three interfaces:
* Your internet connection
* The interface you will use to connect the device without a NordVPN connection
* The TAP adapter used by the NordVPN app to establish a NordVPN connection
1. Right-click the TAP-NordVPN Windows adapter.
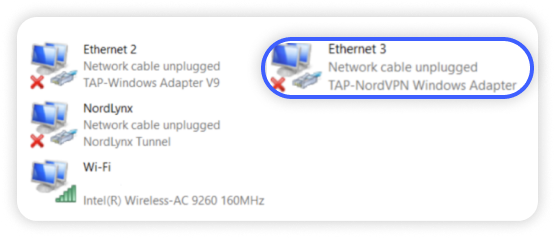
1. Select properties.
2. Open the sharing tab.
3. Tick allow other network users to connect through this computer's internet connection.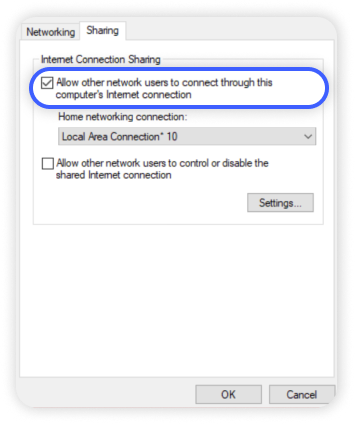
4. Choose the network interface that you will share the connection with.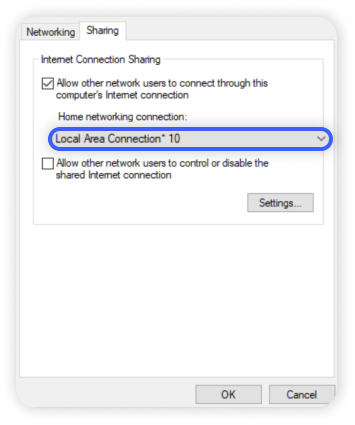
5. Click ok.
6. Switch to the UDP or TCP protocol in the NordVPN app.
7. Connect the desired device to your PC using an Ethernet cable.
8. Once you see the Ethernet interface trying to identify the connection, connect to NordVPN using the NordVPN app.
Once you have followed these steps, the NordVPN connection will be shared with the device.",https://support.nordvpn.com/hc/en-us/articles/32448689404433-How-to-share-a-wireless-NordVPN-connection-on-Windows
"Set up MS Office, OneDrive or Adobe Cloud","If you are experiencing issues with accessing Microsoft services such as Microsoft Office, OneDrive, or Office 365 while connected to NordVPN on your Windows PC, please follow one of the troubleshooting methods below:
1. Disable Threat Protection Pro™ or Threat Protection (depending on which one you use) in the app settings.
2. [Change the DNS server addresses](https://support.nordvpn.com/hc/en-us/articles/19920692061969-Changing-DNS-server-addresses-for-MS-Office-OneDrive).",https://support.nordvpn.com/hc/en-us/articles/22760425180945-Set-up-MS-Office-OneDrive-or-Adobe-Cloud
How to connect to your dedicated IP on Windows,"With a NordVPN dedicated IP, you get faster speeds, less CAPTCHA requests and increased security. NordVPN's dedicated IP is a unique IP that is assigned to a specific server, which ensures that you have your own private connection.
In this article, we will cover how to locate and connect to your [dedicated IP](https://nordvpn.com/features/dedicated-ip/) on Windows.
In order for you to be able to connect, first double-check if you have done the following:
1. Purchased a dedicated IP;
2. Set up the dedicated IP in Nord Account.
If these steps are done, you can move forward and connect to your dedicated IP in the NordVPN app on:
* [ Windows 7 and 8.1](
* [Windows 10 and 11](
For additional information, you can also read [our article about NordVPN's dedicated IP and how it works](https://support.nordvpn.com/hc/en-us/articles/19507808024209-Dedicated-NordVPN-IP-addresses).
## On Windows 7 and 8.1:
To connect to NordVPN dedicated IP on Windows 7 and 8.1, follow these steps:
1. Open the NordVPN application.
2. Go to the dedicated IP category on the left. 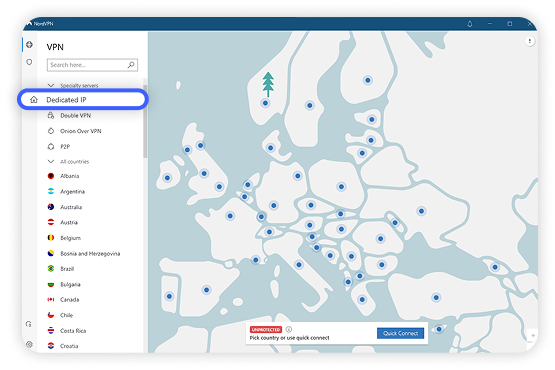
3. Hover over dedicated IP, and click on the three-dot button:
4. Select fastest for your country and server, and click connect: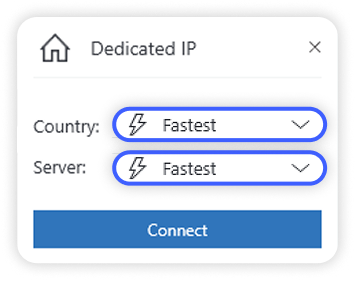
You may also use the search bar located in the top-left corner of the application window to connect to your dedicated IP:
1. Enter your dedicated IP country, and server number: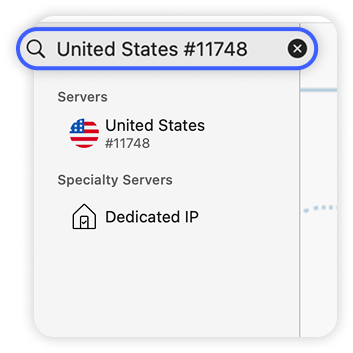
2. Tap your dedicated IP to connect:
## On Windows 10 and 11:
To connect to NordVPN dedicated IP on Windows 10 and 11, follow the steps below:
1. Open your NordVPN application.
2. Click specialty servers: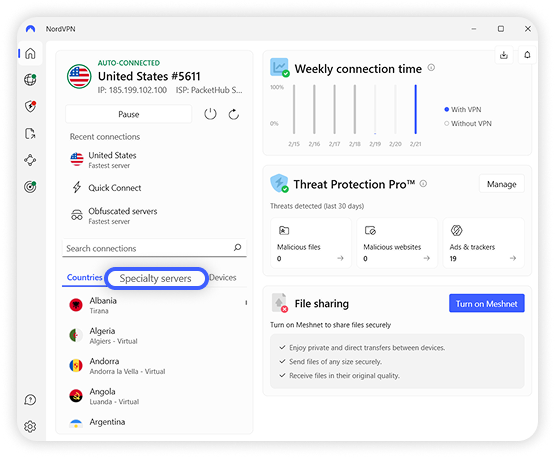
3. Hover over dedicated IP and click the three-dot menu: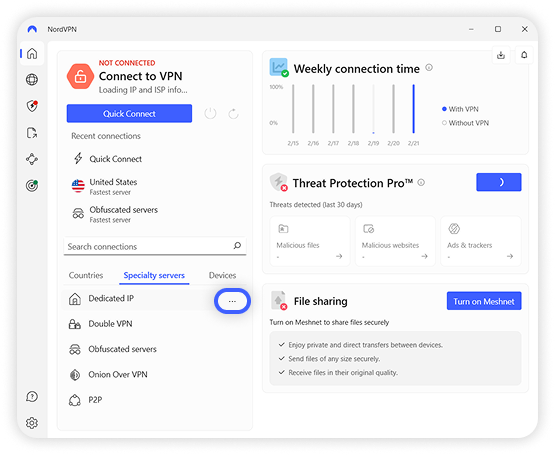
4. Click connect.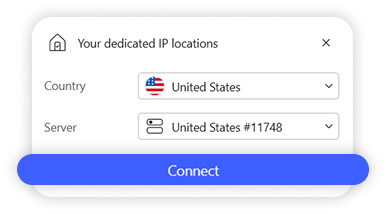
You may also use the search bar located in the top-left corner of the application window to connect to your dedicated IP:
1. Type in your dedicated ip into the search bar:
2. Click your dedicated IP to connect:
After completing the steps, you will have connected to your dedicated IP successfully. If you wish to test your connection, visit [NordVPN's DNS leak checker website](https://nordvpn.com/dns-leak-test/).
Please be aware that your email will be linked to that dedicated IP address.",https://support.nordvpn.com/hc/en-us/articles/20465449537681-How-to-connect-to-your-dedicated-IP-on-Windows
Improve connection speed on Windows with NordVPN app,"If you are experiencing slow connection speed while connected to [NordVPN on Windows](https://nordvpn.com/download/windows/), try the following:
1. Make sure to use the latest version of NordVPN app. You can [uninstall the app](https://support.nordvpn.com/hc/en-us/articles/19481023452561-How-to-uninstall-NordVPN-software) and [install the latest version from our website](https://nordvpn.com/download/windows/).
2. Restart your device.
3. Restart your router or modem. If your router is set up with a VPN, and the speed is insufficient, try using VPN solely on your computer or phone.
4. If you are using Wi-Fi, switch to a wired connection.
5. Connect to a VPN server geographically closer to you.
6. Open the Settings menu and go to the Auto Connect tab. Disable Choose a VPN protocol and server automatically and select NordLynx in the VPN protocol field.
7. Try a different connection method/protocol on your device. Tutorials for various connection methods can be found [here](https://support.nordvpn.com/hc/en-us/sections/19326591402001-Windows)
Internet speed can also be directly affected by the condition of both your hardware and firmware. Here’s what we recommend:
1. Make sure you have the latest available drivers and software on your computer, including Ethernet adapter and motherboard drivers, BIOS updates, router firmware, etc.
2. Temporarily disable your firewall to see whether it will have an impact on your overall internet speed. If it does, check your firewall settings and remove unnecessary rules or consider using different firewall software.
3. Close any applications that may be transferring data in the background, e.g. software for downloading or file sharing.
4. Old and sometimes even new routers provided to you by your internet service provider often use outdated firmware or are technically poorly manufactured. This can directly impact your internet speed, so we recommend investing in a better router.",https://support.nordvpn.com/hc/en-us/articles/20379736354961-Improve-connection-speed-on-Windows-with-NordVPN-app
Error: This program does not support the version of Windows your computer is running,"If you are using a supported Windows Operating System version (Windows 10 64-bit, or Windows 11) for our application and you still receive an error ""This program does not support the version of Windows your computer is running."" try changing the compatibility mode of your settings.If you are using older Windows Operating System version, such as Windows 7, Windows 8.1, or Windows 10 32-bit, make sure to use our [legacy version of the app](https://support.nordvpn.com/hc/en-us/articles/19441140326289-Installing-and-using-NordVPN-on-Windows-7-and-8-1).
## How can I change compatibility mode?
1. Locate the NordVPN folder within your computer. To do so, click on file explorer (the folder icon).
2. Then click on the link bar ar type in C:\Program Files\NordVPN
3. Find the NordVPN file and right-click on it. A window will open up, there choose properties and left-click on this option.
4. A new window will pop up. Go to the Compatability tab.
5. Run this program compatibility mode for: should be disabled. If you can see a checkmark next to it - remove it by right-clicking on the check-box and pressing apply in the lower right corner.
6. Try to update NordVPN application once again.",https://support.nordvpn.com/hc/en-us/articles/20286695851537-Error-This-program-does-not-support-the-version-of-Windows-your-computer-is-running
Common Windows application issues,"This article covers problems you may encounter when using NordVPN on Windows devices, including situations where NordVPN is not working on your Windows 10 device, or you have no internet access with NordVPN on Windows 10.
## “Error 1001” during installation
If you encountered “Error 1001” while trying to install the NordVPN app on Windows, follow these steps:
1. Update your Windows system using the “Windows update” tool.
2. Make sure you’re running the latest .NET Runtime version:
1. Click the “Start” button, type “control panel” in the search bar, and select the “Control panel” app.
2. Click “Programs” and select “Programs and features.”
3. Check the version number beside the “Microsoft .NET Framework” entry. If it is not version 4.8 or later, download the latest .NET Runtime version.
3. Temporarily disable your cybersecurity software (such as your antivirus and firewall) and try installing the NordVPN app for Windows again.
## Crash or freeze
If your NordVPN app keeps freezing, follow these steps:
1. Uninstall the NordVPN application.
2. [Update your Windows operating system to the latest available version](https://support.microsoft.com/en-us/windows/update-windows-3c5ae7fc-9fb6-9af1-1984-b5e0412c556a).
3. Install the [latest NordVPN app for Windows](https://nordvpn.com/download/windows/).
If the above method failed to fix your issue, try the following:
1. Press the “Windows” key and the “R” key at the same time to open the ""Run"" window.
2. Type in ""services.msc"" (without the quotation marks) and press “Enter” to open the ""Services"" window.
3. Check if the “Task scheduler” is running — if it is not, right-click on the “Task scheduler” entry and select “Start.” You can also access the “Windows event log” from this window.
## NordVPN Kill Switch feature does not work
If the Kill Switch feature fails to stop specific apps, you can manually add their executable files (.exe) to the Kill Switch list in the NordVPN app:
1. Go to “Settings.”
2. Select “Kill Switch” in the left sidebar menu.
3. Click on “Add apps” under “App Kill Switch” and select the app’s executable file. For example, you would need to add the following file for Skype:C:\Program Files (x86)\Skype\Phone\Skype.exe
## No internet access when connected to a NordVPN server
If you’re getting disconnected from the internet when you connect to a VPN server, try the following to fix the problem:
* Connect to a different VPN server in the NordVPN app.
* Change your VPN connection protocol:
1. 1. [Switch to OpenVPN](https://support.nordvpn.com/hc/en-us/articles/19774135293969-Switching-protocol-to-OpenVPN-UDP-or-TCP-Windows) (UDP or TCP)
2. Switch to NordLynx
* Disable your other cybersecurity software (such as your antivirus and firewall) to check if it’s responsible for the issue. If the NordVPN app works after disabling other cybersecurity software, you may need to add exceptions for NordVPN files.
* Perform a network flush:
1. 1. Open the NordVPN application.
2. Head to the ""Advanced"" section.
3. Click ""Run diagnostics tool.""
4. In the opened window, select ""Network flush.""
5. Restart your PC and try connecting to VPN servers again.
If the problem persists, reinstall the NordVPN app:
1. Uninstall the NordVPN application.
2. Restart your device.
3. Install the latest version of the NordVPN Windows app.
## A certain feature of the application is not working properly
If you discover that a feature isn’t working as it should, follow these steps:
1. Open the ""Settings"" menu in the NordVPN app.
2. Head to the ""Advanced"" section.
3. Click ""Run diagnostics tool.""
4. In the opened window, select ""Reset app.""
5. Re-launch the application.
If the problem persists, try the following:
* Update to the [latest NordVPN Windows app](https://nordvpn.com/download/windows/) version.
* Reinstall the NordVPN app:
1. 1. [Uninstall the NordVPN application](https://support.nordvpn.com/General-info/1047410452/How-to-uninstall-NordVPN-software.htm).
2. Restart your device.
3. Install the latest version of the NordVPN Windows app.
## NordVPN is not working after an update
If your NordVPN Windows application has stopped working after an update, try the following to fix the problem:
* Disable your other cybersecurity software (such as your antivirus and firewall) to check if it’s responsible for the issue. If the NordVPN app works after disabling other cybersecurity software, you may need to add exceptions for NordVPN files.
* Uninstall the NordVPN app and reboot your Windows device, then download and install the latest version of the NordVPN Windows app.
## The NordVPN icon is missing
If the NordVPN application icon is missing from the NordVPN shortcut on your desktop, follow these steps:
1. Left-click the broken NordVPN app icon to select the shortcut.
2. Right-click the selected shortcut and choose “Delete.”
3. Right-click on your desktop, choose “New,” and select “Shortcut.”
4. Click “Browse,” find the NordVPN directory, and select the NordVPN executable file (.exe).
5. Name the shortcut and click “Finish.”
Alternatively, you can try reinstalling the NordVPN Windows app:
1. Uninstall the NordVPN application.
2. Restart your device.
3. Install the latest version of the NordVPN Windows app.",https://support.nordvpn.com/hc/en-us/articles/20164307373713-Common-Windows-application-issues
Enabling Threat Protection Pro™ on older macOS versions,"Read the guide below to enable and start using [Threat Protection Pro™](https://nordvpn.com/features/threat-protection/) on older macOS versions such as Ventura, Sonoma, Big Sur, or Monterey. If you are using a newer macOS version, check out enabling Threat Protection on macOS instead.
Threat Protection Pro™ is an additional security feature available only with selected NordVPN plans. Learn more about [what NordVPN Threat Protection Pro™ is and how it works](https://support.nordvpn.com/hc/en-us/articles/19508765521425-What-is-Threat-Protection-Pro-and-Threat-Protection).
To be able to enable Threat Protection Pro™, you need to see a shield icon within the app. If you can't find Threat Protection Pro™, you are probably using the App Store version. In that case, [delete the application from your macOS device](https://support.apple.com/en-gb/guide/mac-help/mh35835/mac) and [download NordVPN’s macOS version](https://downloads.nordcdn.com/apps/macos/generic/NordVPN-OpenVPN/latest/NordVPN.pkg) from our website.
If the shield icon is present, follow one of the sections below:
* [Setting up Threat Protection Pro™ on macOS Ventura & Sonoma](
* [Setting up Threat Protection Pro™ on macOS Big Sur & Monterey](https://support.nordvpn.com/hc/en-us/articles/29670177883793-Enabling-Threat-Protection-Pro-on-older-macOS-versions#01JBV0KTJWA4AH5M8XDVEKNTD6)
## Setting up Threat Protection Pro™ on macOS Ventura & Sonoma
When using a native NordVPN application, you can set up Threat Protection Pro™ on macOS Ventura & Sonoma in a few steps:
1. Open the NordVPN application and click on the shield icon in the left bar.
2. Click set up in the overview tab.
3. You’ll see a window. Click on set up Threat Protection Pro™.You'll then have to enter System settings > Privacy & security.
4. Once you are in System Settings, head to Privacy & Security and click Allow under System software from application “NordVPN” was blocked from loading:
5. Confirm this action by typing in your computer’s password or via Touch ID and clicking update settings.
6. Once you have successfully allowed NordVPN to load, go back to the NordVPN app and press continue.
7. Next up, enable browser protection by pressing Add proxy configurations. In the pop-up that appears, press Allow.If you have any web browsers running, you will be asked to reboot them in order to enable the Ad & tracker blocker and advanced browsing protection.
8. Once you've enabled the browsing protection, press continue.
9. Lastly, enable the anti-malware protection by going to System settings > Privacy & security > Full disk access and toggling the NordVPN Threat Protection Pro™ to the ON position.You've successfully set up NordVPN Threat Protection Pro™ on your macOS Ventura or Sonoma device.
## Setting up Threat Protection Pro™ on macOS Big Sur & Monterey
When using a native NordVPN application, you can set up Threat Protection Pro™ on macOS Big Sur & Monterey in a few steps:
1. Open the NordVPN application and click on the shield icon in the left bar.
2. Click set up in the overview tab.
3. You’ll see a window. Click on set up Threat Protection Pro™.You'll then have to enter System settings > Privacy & security and allow the NordVPN application to load:
4. Once you have successfully allowed NordVPN to load, go back to the NordVPN app and press Continue.
5. Next up, press Allow in the pop-up when enabling browser protection.If you have any web browsers running, you will be asked to reboot them in order to enable the Ad & tracker blocker and advanced browsing protection.
6. Once you've enabled the browsing protection, press Continue.
7. Lastly, enable the anti-malware protection by going to System preferences > Security & privacy > Privacy and giving NordVPN Threat Protection Pro™ full disk access. After you're done, make sure to click the lock icon at the bottom.You've successfully set up NordVPN Threat Protection Pro™ on your macOS Monterey or Big Sur device.
To turn on the cloud-based threat scanner for malware after you have finished the setup wizard, go to the NordVPN app > Threat Protection Pro™ > Settings and click the toggle next to Cloud-based threat detection.You’ve successfully enabled the cloud-based deep threat scanning for malware detection.",https://support.nordvpn.com/hc/en-us/articles/29670177883793-Enabling-Threat-Protection-Pro-on-older-macOS-versions
How to resolve the Threat Protection Pro™ browser protection is off pop-up?,"The NordVPN app will notify you in case the browsing protection is off. In order to resolve it, you need to provide the NordVPN app with the permissions needed:",https://support.nordvpn.com/hc/en-us/articles/29668686603793-How-to-resolve-Threat-Protection-Pro-issues-on-macOS
How to resolve the Threat Protection Pro™ anti-malware protection is off pop-up?,"The NordVPN app will also notify you in case the anti-malware protection is off. In order to resolve it, you need to provide the NordVPN app with the permissions needed:",https://support.nordvpn.com/hc/en-us/articles/29668686603793-How-to-resolve-Threat-Protection-Pro-issues-on-macOS
How to resolve the Threat Protection Pro™ failed to start error?,Another error you may be notified about is when Threat Protection Pro™ is unable to start its internal processes.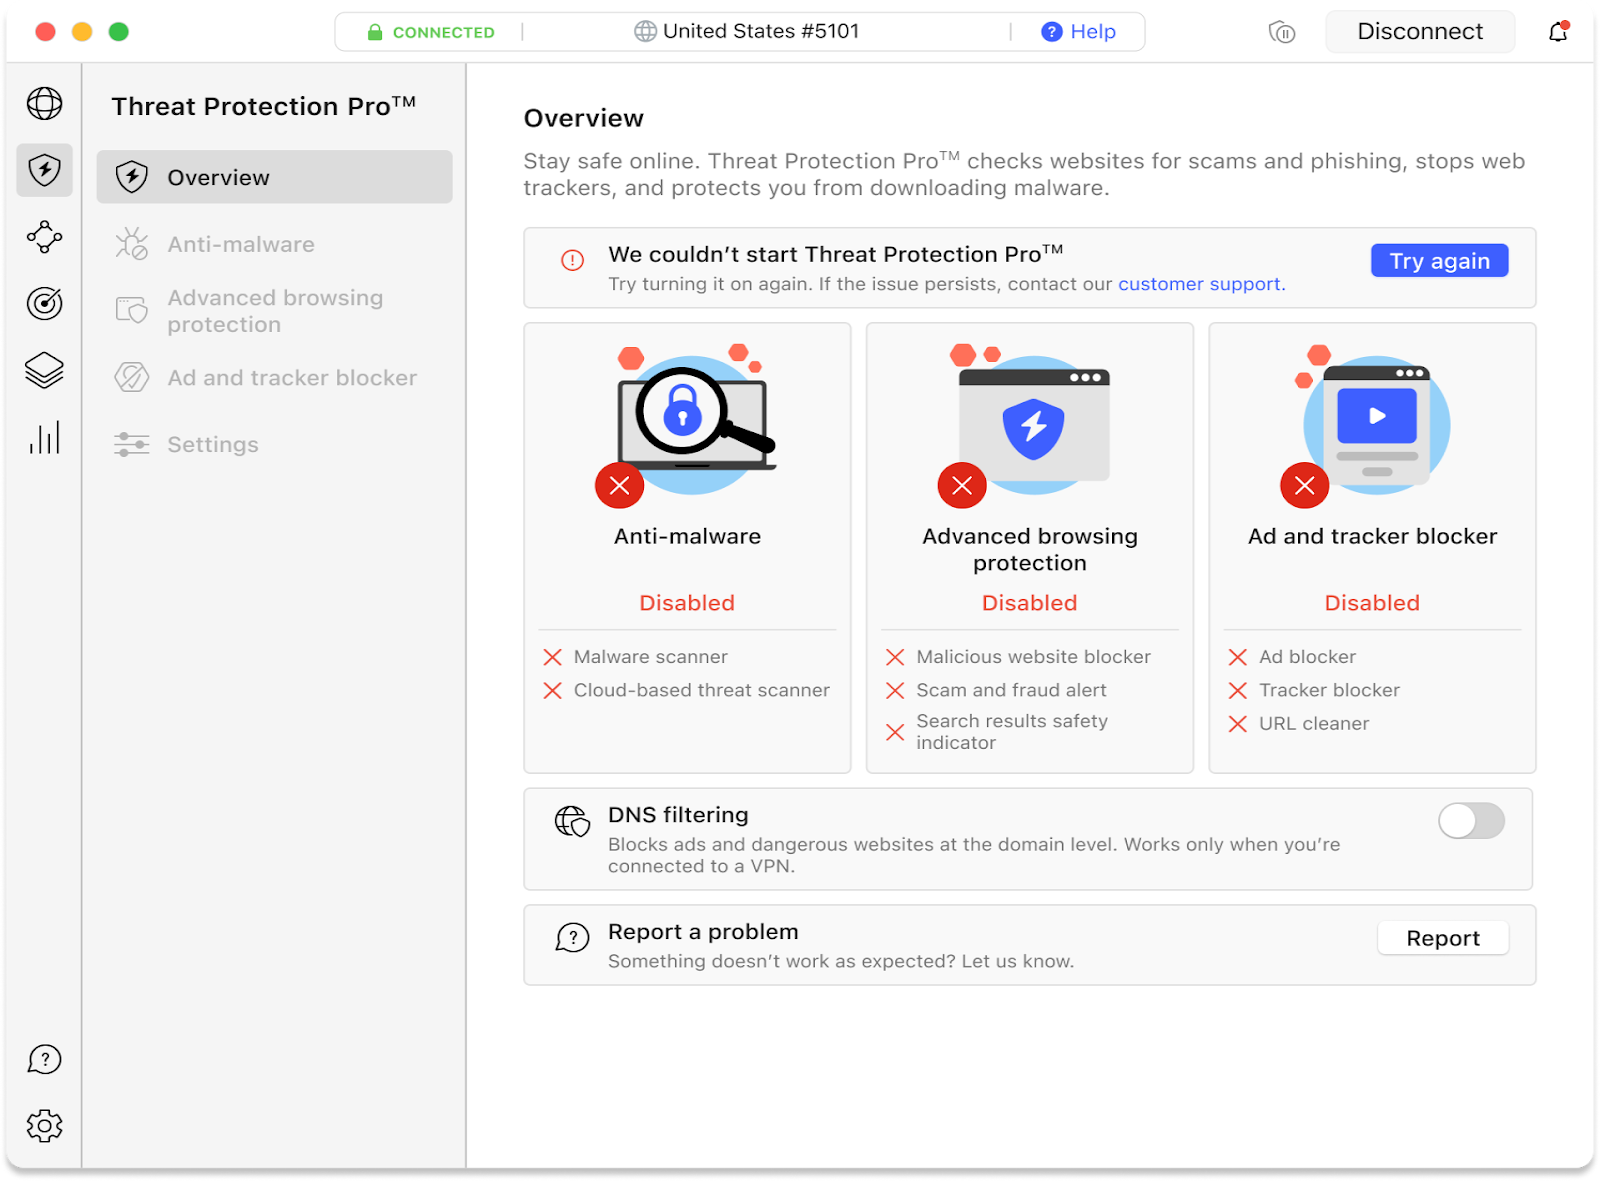,https://support.nordvpn.com/hc/en-us/articles/29668686603793-How-to-resolve-Threat-Protection-Pro-issues-on-macOS
How to resolve Threat Protection Pro™ issues on macOS?,"In order to resolve issues with [Threat Protection Pro™](https://nordvpn.com/features/threat-protection/), it is important to first understand this NordVPN feature and how it works. This feature enhances your security by automatically blocking ads, trackers, and malicious URLs. Threat Protection Pro™ is only available with selected NordVPN plans.
If you wish to know more, check out our article on [what Threat Protection Pro™ is and how it works](https://support.nordvpn.com/hc/en-us/articles/19508765521425-What-is-Threat-Protection-Pro-and-Threat-Protection).
If you need additional guidance, read our article on how to enable Threat Protection Pro™ on your macOS device.
Most of the issues you may get are caused by not providing the NordVPN app with the restrictions needed. The NordVPN app will notify you in case your browsing protection or the anti-malware protection is off. You may also get the Threat Protection Pro failed to start error.
This article covers the following:
* [How to resolve the Threat Protection Pro™ browser protection is off pop-up?](
* [How to resolve the Threat Protection Pro™ anti-malware protection is off pop-up?](
* [How to resolve the Threat Protection Pro™ failed to start error?](
## How to resolve the Threat Protection Pro™ browser protection is off pop-up?
The NordVPN app will notify you in case the browsing protection is off. In order to resolve it, you need to provide the NordVPN app with the permissions needed:
1. On the pop-up, click on restore protection.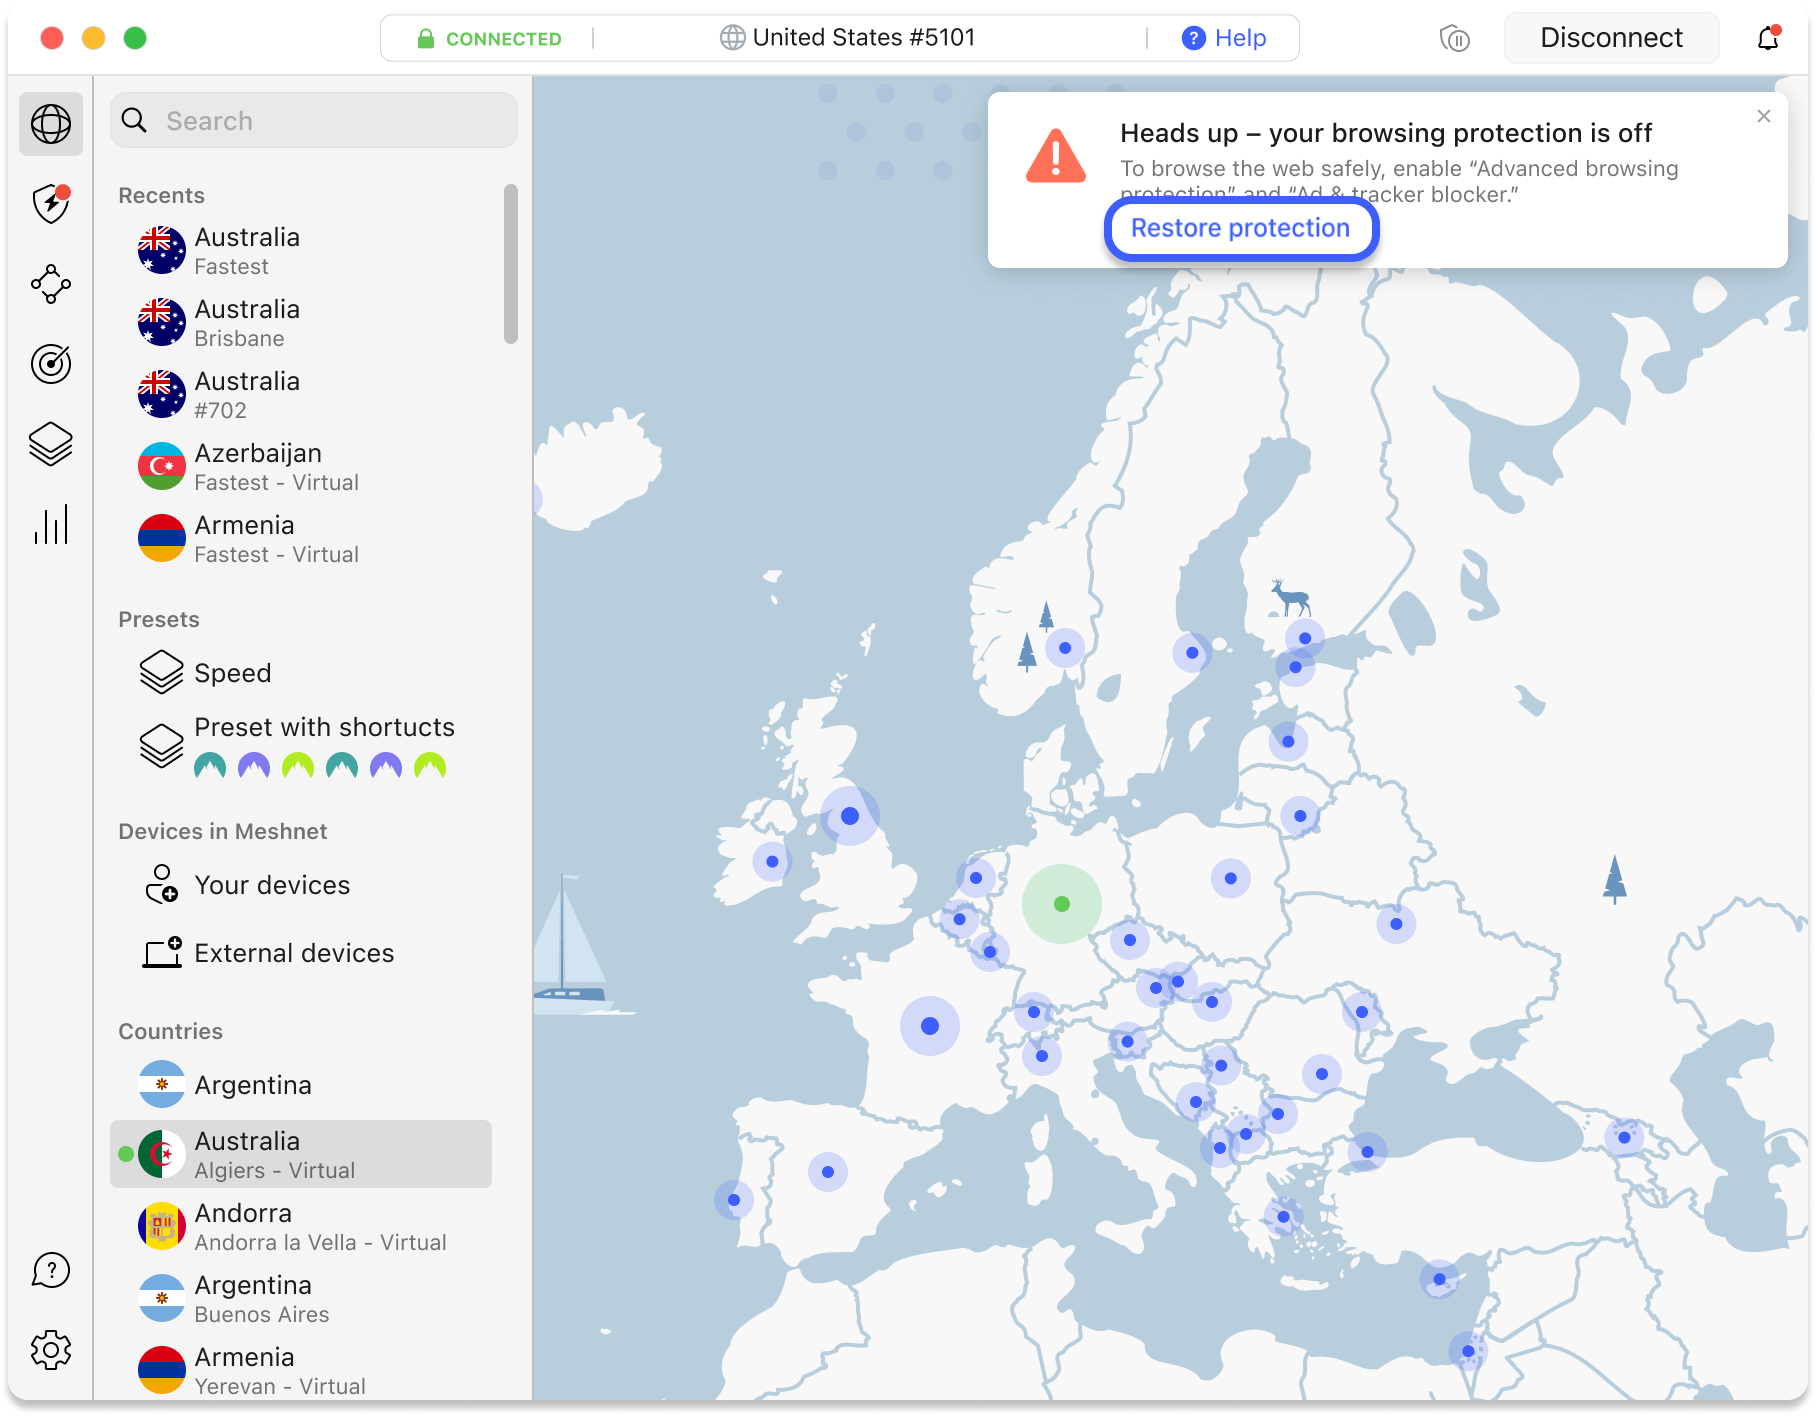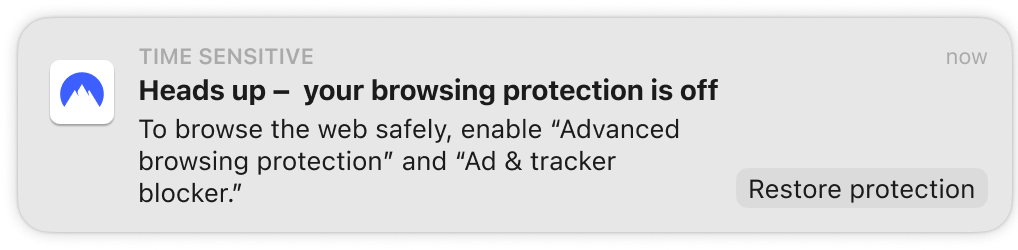
2. Click enable.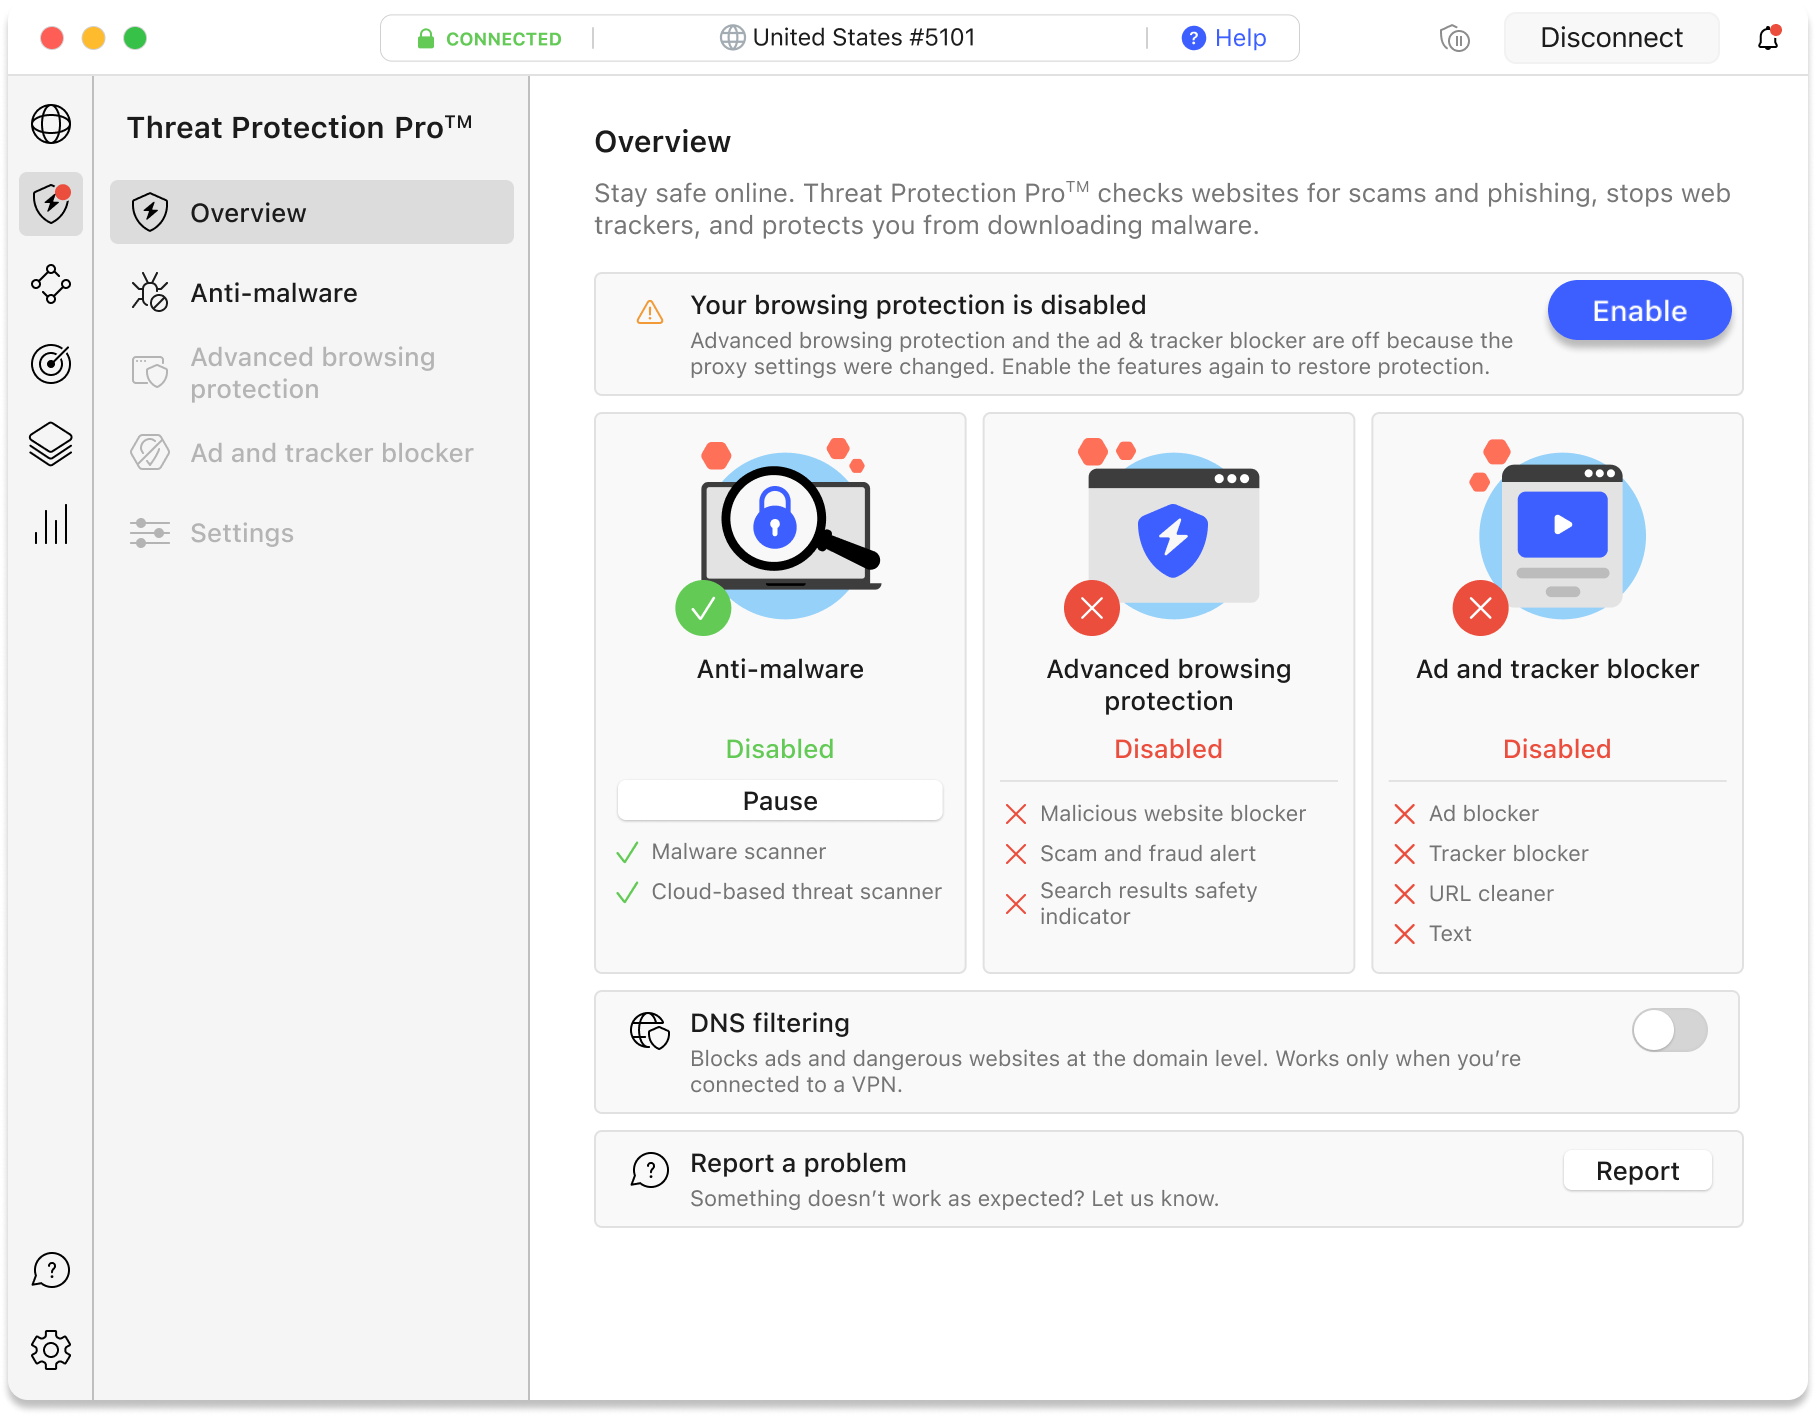
## How to resolve the Threat Protection Pro™ anti-malware protection is off pop-up?
The NordVPN app will also notify you in case the anti-malware protection is off. In order to resolve it, you need to provide the NordVPN app with the permissions needed:
1. On the pop-up, click restore protection.You will also see the following notification in the Overview window – click Set up.
2. Go to System Settings > Privacy & Security > Full Disk Access and click on the toggle icon next to NordVPN Threat Protection Pro™.
## How to resolve the Threat Protection Pro™ failed to start error?
Another error you may be notified about is when Threat Protection Pro™ is unable to start its internal processes.
To resolve this error, try the following:
* Press Try again – this will reboot the internal Threat Protection Pro™ processes and should resolve the issues you are facing in most scenarios.
* Log out and Log back into your account, and try launching Threat Protection Pro™ again.
* Try going to System Settings > General > Login items & extensions > Endpoint security extensions > Click (...) button > Locate the Threat Protection Pro™ extension and enable it manually.
* Try reinstalling the NordVPN app on your macOS device. For reference, see our article on [installing the NordVPN application on macOS](https://support.nordvpn.com/hc/en-us/articles/19456281201041).If you are using macOS Sequoia and above, we recommend a full clean up of Threat Protection Pro™ before reinstalling:1) Go to System Settings > General > Login items & extensions > Endpoint security extensions > Click (...) button > Delete NordVPN extension.2) Go to System Settings > Privacy & Security > Full Disk Access > Delete Threat Protection.3) Delete the NordVPN app. You can check out [how to uninstall NordVPN software](https://support.nordvpn.com/hc/en-us/articles/19481023452561-How-to-uninstall-NordVPN-software) for reference.4) Open terminal and run:
```
defaults delete com.nordvpn.macos
```
Once finished, restart your macOS device. 5) Open terminal again and run the following:
```
systemextensionsctl list
```
It should show 0 – if it does, it means that all NordVPN software has been removed from your macOS device.6) Reinstall the NordVPN application.
* If the issue still persists and you are still unable to start Threat Protection Pro™, submit the issue by pressing report while making sure that send app logs are marked in the report form.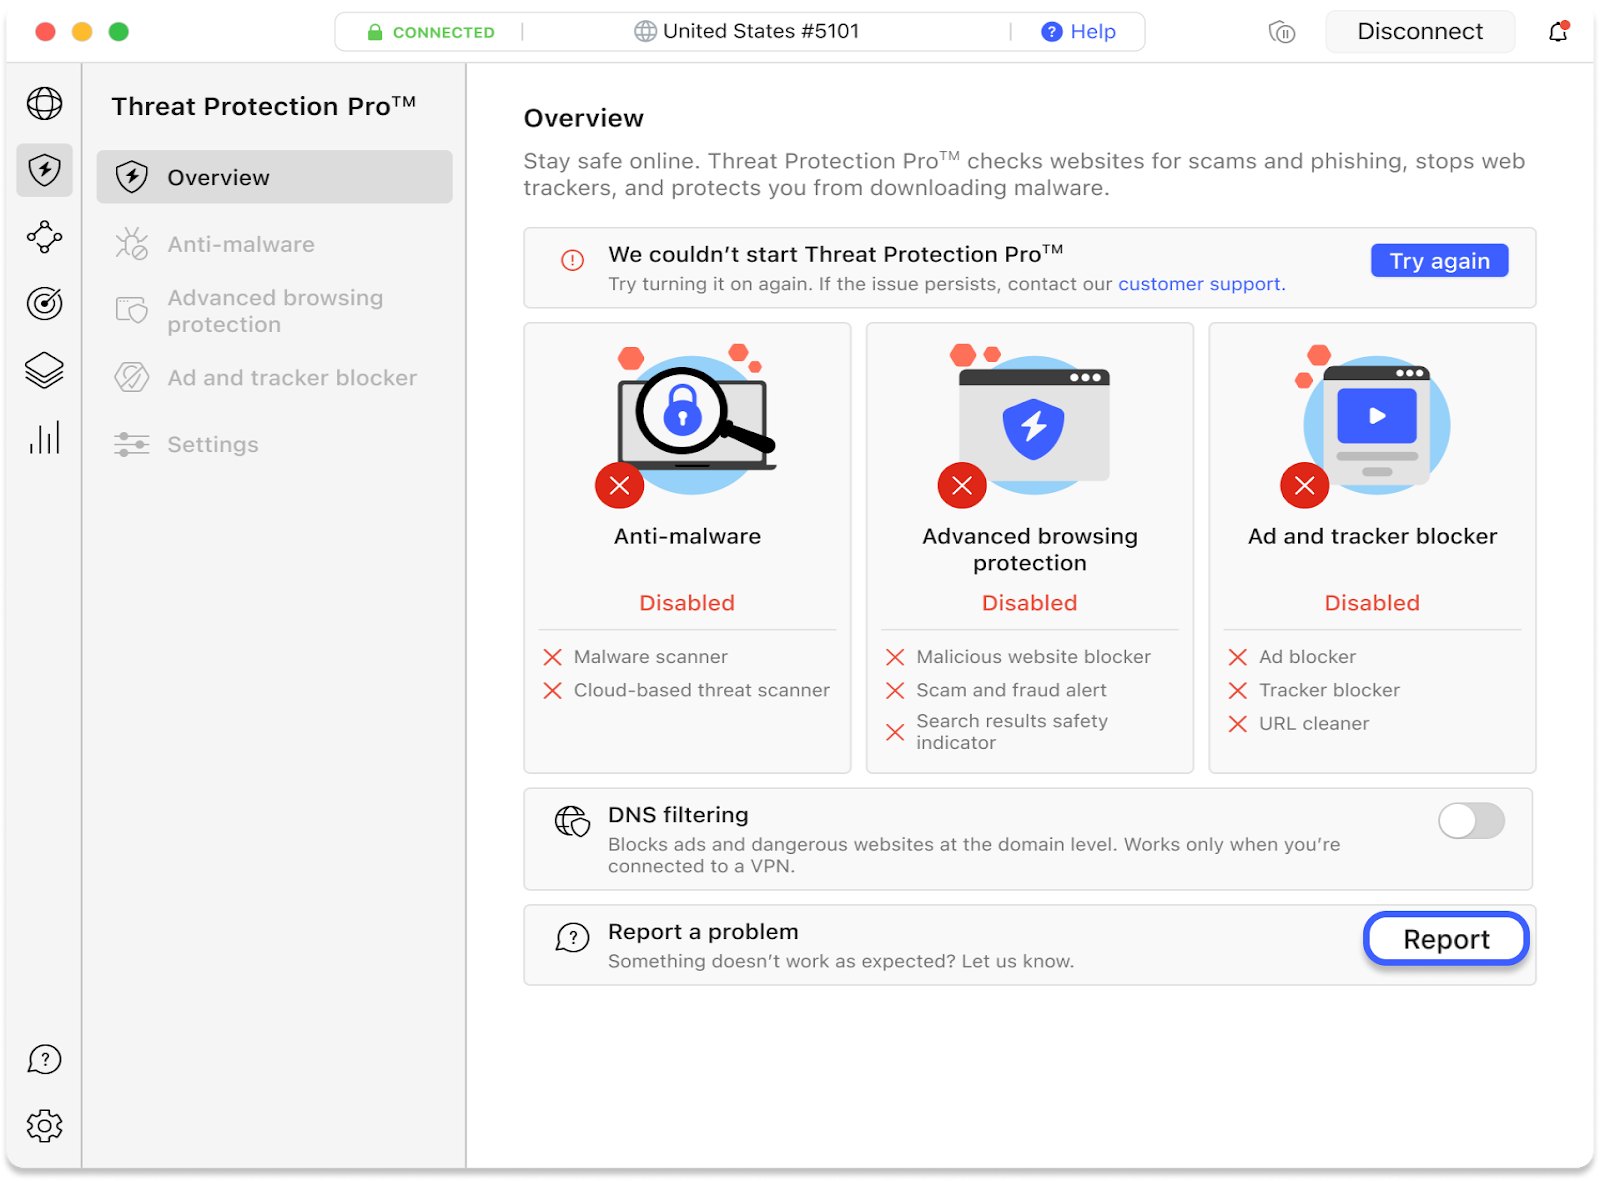",https://support.nordvpn.com/hc/en-us/articles/29668686603793-How-to-resolve-Threat-Protection-Pro-issues-on-macOS
Improve connection speed on macOS with NordVPN app,"If you are experiencing a slow connection speed while connected to NordVPN on macOS, try the following:
1. Make sure to use the latest version of NordVPN app. You can uinstall the app as shown in [this guide](https://support.nordvpn.com/hc/en-us/articles/19481023452561-How-to-uninstall-NordVPN-software) and install the latest version from our website by clicking [here](https://nordvpn.com/download/mac/).
2. Restart your device.
3. If you are using Wi-Fi, switch to a wired connection.
4. Connect to a VPN server geographically closer to you.
5. If you are using a P2P-based program (typically, software for downloading), make sure you are connected to a P2P-optimized server.
6. If you are using the OpenVPN app downloaded from our website, open the app settings and switch from the default UDP protocol to TCP. If you are using the NordVPN IKE app downloaded from the App Store, switch to the [NordLynx](https://support.nordvpn.com/hc/en-us/articles/19564565879441-What-is-NordLynx) protocol.
7. Try a different application version (NordVPN IKE or OpenVPN). You can download it [here](https://nordvpn.com/download/mac/).
Internet speed can also be directly affected by the condition of both your hardware and firmware. Here’s what we recommend:
1. Close any applications that may be transferring data in the background, e.g. software for downloading or file sharing.
2. Old and sometimes even new routers provided to you by your internet service provider often use outdated firmware or are technically poorly manufactured. This can directly impact your internet speed, so we recommend investing in a better router.",https://support.nordvpn.com/hc/en-us/articles/20396667808657-Improve-connection-speed-on-macOS-with-NordVPN-app
macOS Ventura Error: The Installation Failed,"Here are some steps to solve the issue in case you receive an error message about installation being failed, when installing [NordVPN on your macOS Ventura](https://nordvpn.com/download/mac/) device.
After each step, try to [install the NordVPN application again](https://support.apple.com/en-gb/guide/mac-help/mh35835/mac).
1. Move the installer file. Move NordVPN.pkg to the “Applications” folder (from the folder that the file has been downloaded to) and launch the installer from the “Applications” folder.In case you have no rights to move the file to the Applications folder, you can try the same steps by moving the installer file to the Desktop and launching it from there.
2. Check folder access. Make sure you have access to the Downloads folder during installation. Go back and [adjust permissions if needed](https://support.apple.com/en-en/guide/mac-help/mchld5a35146/13.0/mac/13.0).
3. Use a terminal. In case none of the steps above help, try one of the following commands:
* If installed file is in Downloads folder, open the Terminal app and enter:
```
sudo tccutil reset SystemPolicyDownloadsFolder
```
* If the NordVPN.pkg file in other folder, you can enter:
```
sudo tccutil reset All
```
Run the installer again.If you are still unable to install the app. Check the following guide for the assistance: [How can I reach NordVPN customer support?](https://support.nordvpn.com/hc/en-us/articles/19482416296593-How-can-I-reach-NordVPN-customer-support)",https://support.nordvpn.com/hc/en-us/articles/20346744890641-macOS-Ventura-Error-The-Installation-Failed
Switching protocol to OpenVPN UDP or TCP - macOS,"1. Click on the gear icon in the bottom left corner of the app window.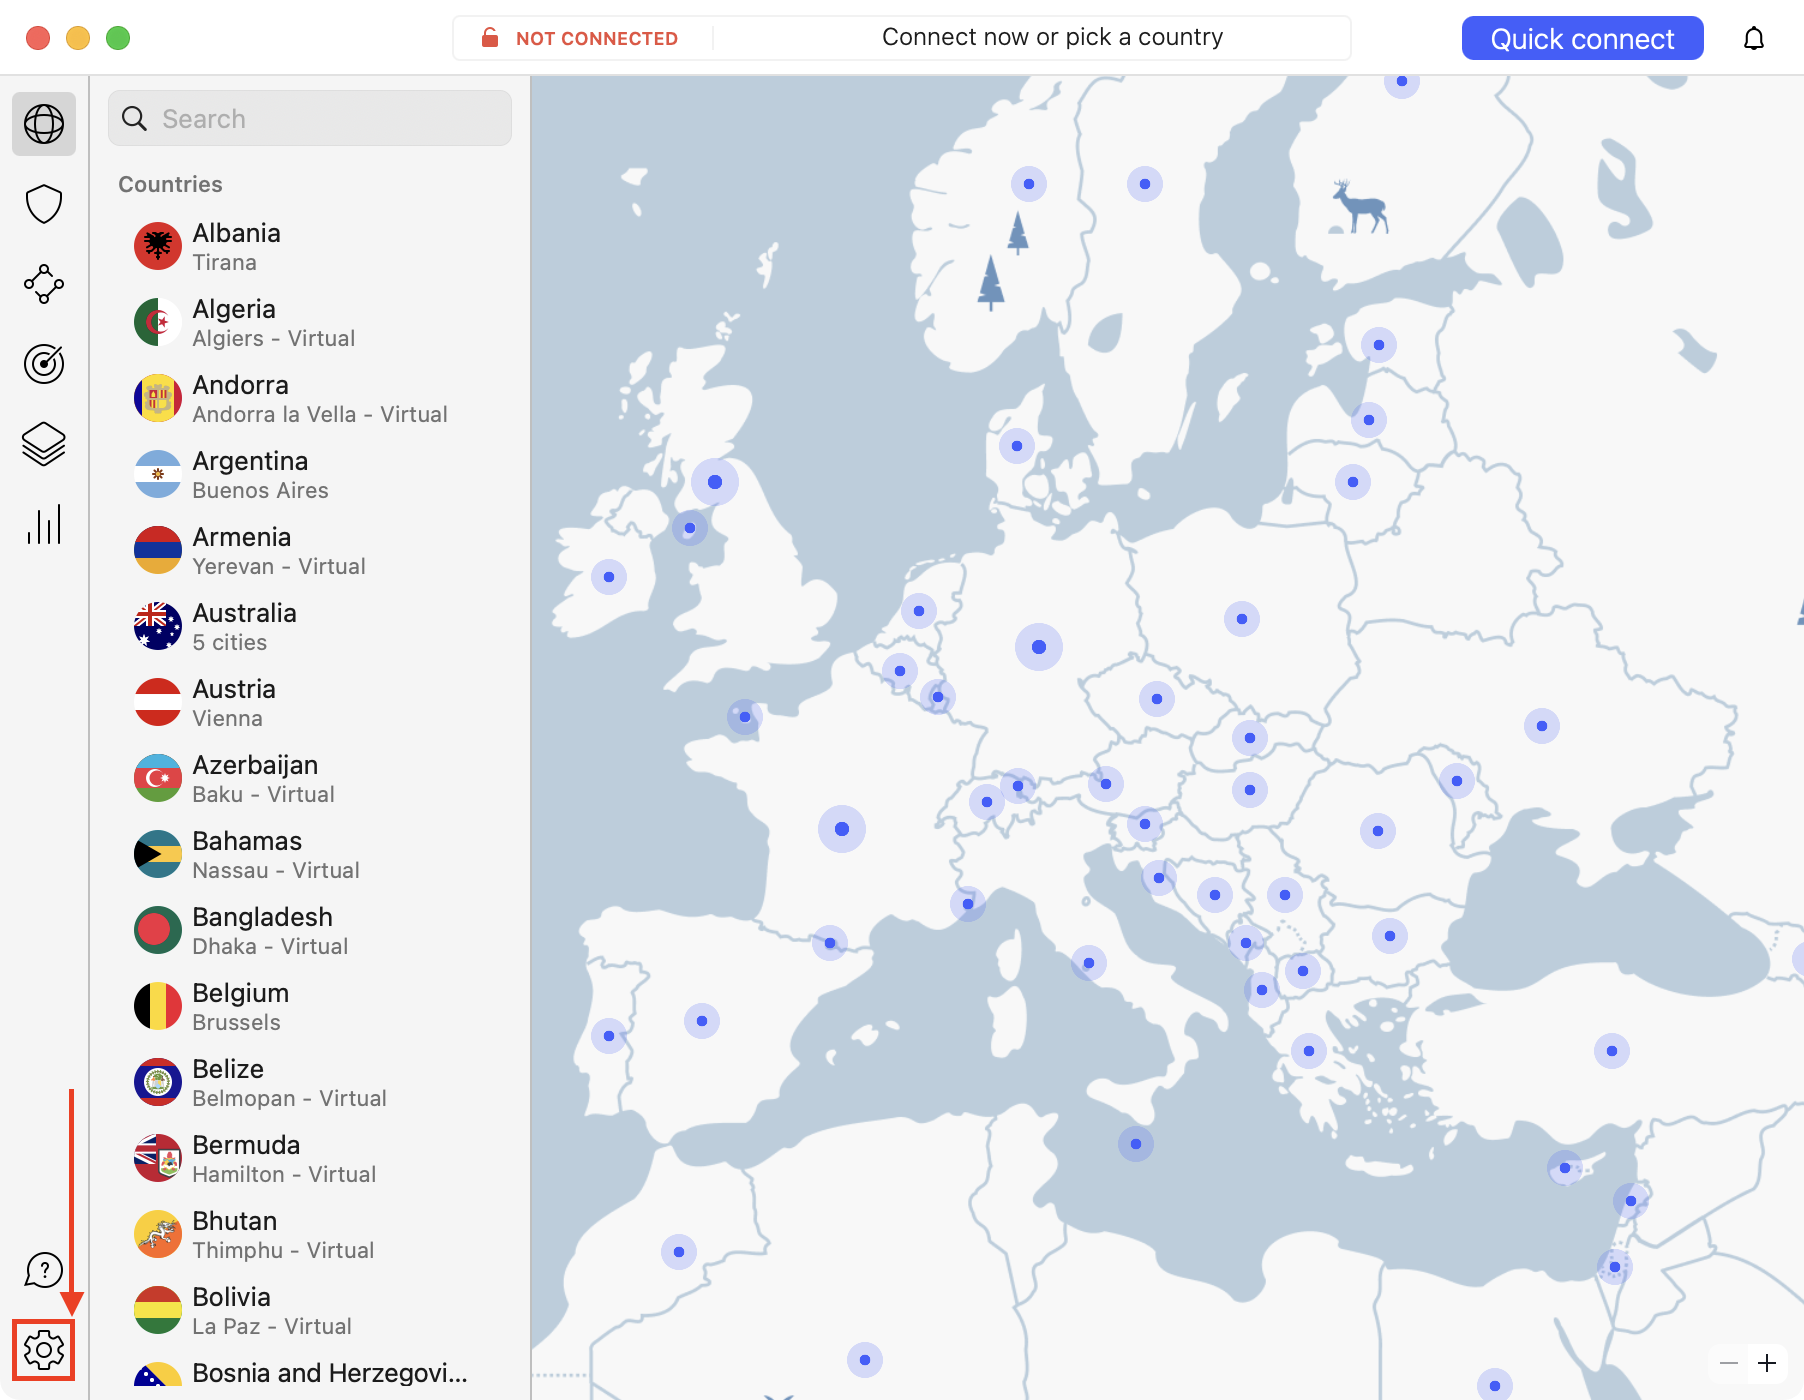
2. Select the General tab, and under VPN Protocol, select the OpenVPN (UDP) or OpenVPN (TCP) protocol.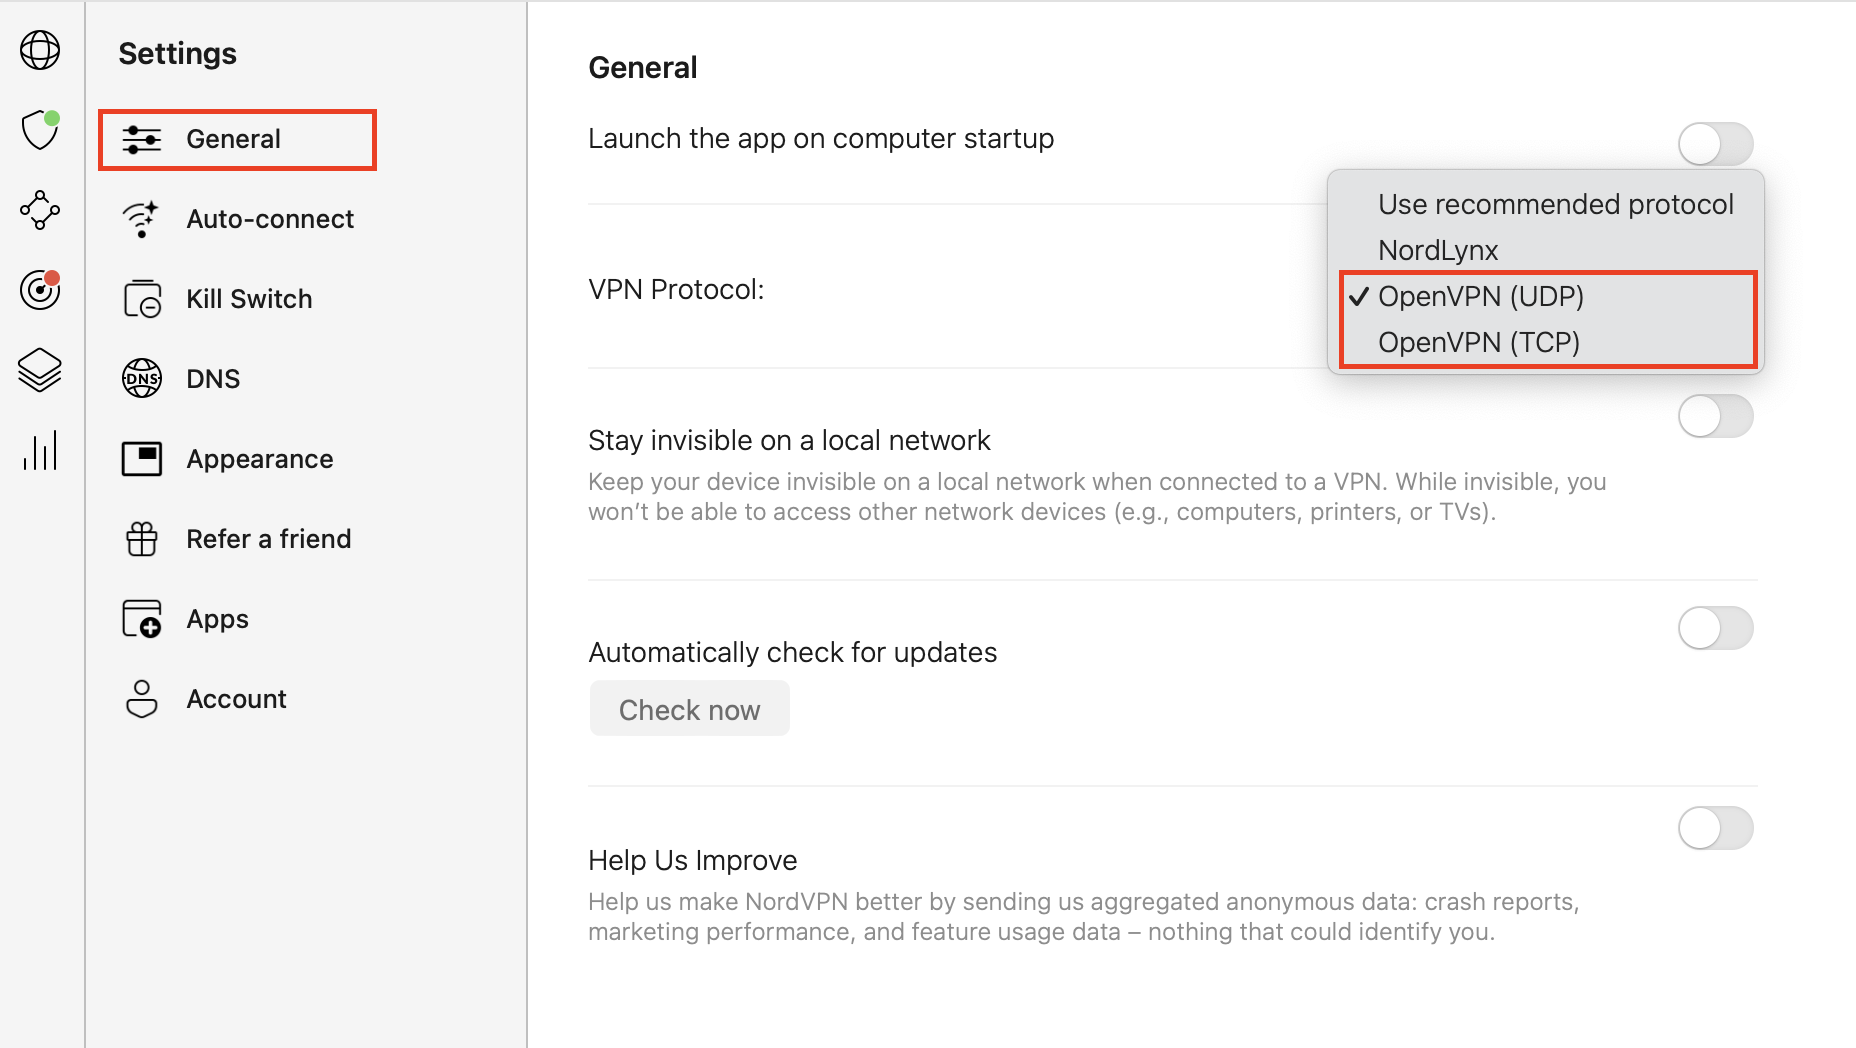",https://support.nordvpn.com/hc/en-us/articles/19921436351505-Switching-protocol-to-OpenVPN-UDP-or-TCP-macOS
Change your DNS servers on macOS Ventura,"Use this guide to manually configure the DNS servers in your macOS Ventura settings.
If you are using an older macOS version, use this guide instead.
### Manual DNS server configuration:
1. Go to System Settings and click Network.
2. Select the network interface you are using (Wi-Fi or Ethernet) and click on Details...
3. Open the DNS tab and click the + button at the bottom to add the NordVPN DNS server addresses:103.86.96.100103.86.99.100
4. Click OK to save the changes.",https://support.nordvpn.com/hc/en-us/articles/20285887299857-Change-your-DNS-servers-on-macOS-Ventura
Enabling Threat Protection Pro™ on macOS,"Read the guide below to enable and start using [Threat Protection Pro™](https://nordvpn.com/features/threat-protection/) on the latest macOS versions. If you are using an older version of macOS, check out [enabling Threat Protection Pro™ on older macOS versions](https://support.nordvpn.com/hc/en-us/articles/29670177883793-Enabling-Threat-Protection-Pro-on-older-macOS-versions).
This feature automatically blocks ads, trackers, and malicious URLs and is only available with selected NordVPN plans. Learn more about what is [NordVPN Threat Protection Pro™](https://support.nordvpn.com/hc/en-us/articles/19508765521425-What-is-Threat-Protection-Pro-and-Threat-Protection).
To be able to enable Threat Protection Pro™, you need to see a shield icon within the app. If you can't find Threat Protection Pro™, you are probably using the App Store version. In that case, [delete the application from your macOS device](https://support.apple.com/en-gb/guide/mac-help/mh35835/mac) and [download NordVPN’s macOS version](https://downloads.nordcdn.com/apps/macos/generic/NordVPN-OpenVPN/latest/NordVPN.pkg) from our website.
## Setting up Threat Protection Pro™ on macOS
To set up Threat Protection Pro™ on macOS, follow the steps bellow:
1. Open the NordVPN application and click on the shield icon in the left bar.
2. Click Set up in the Overview tab.
3. You’ll see a window. Click on Set up Threat Protection Pro™. Please note that this guide displays how to set up Threat Protection Pro™ on macOS Sequoia. If you're using an older macOS version, check out how to set up Threat Protection Pro™ on older macOS versions.You'll then have to enter System settings > General > Login items & extensions > Endpoint security extensions and turn on the toggle the slider next to NordVPN to the ON position.
4. Confirm this action by typing in your computer’s password or via Touch ID and clicking Update Settings.
5. Once you have successfully allowed the NordVPN Threat Protection Pro extension™ to load, press Continue in the NordVPN app.
6. Next up, enable browser protection by pressing Add proxy configurations. In the pop-up that appears, press Allow.You will be asked to reboot any web browsers that are running in order to enable the Ad & tracker blocker and advanced browsing protection.
7. Once you've enabled the browsing protection, press Continue.
8. Lastly, enable the anti-malware protection by going to System settings > Privacy & security > Full disk access and toggling the NordVPN Threat Protection Pro™ to the ON position.We also recommend enabling [cloud-based deep threat scanner](https://nordvpn.com/blog/cloud-based-threat-scanner/) to protect your devices from malware.To do so, go to System Settings > Privacy & Security > Full Disk Access and click on the toggle icon next to NordVPN Threat Protection Pro™.If you’re using macOS Monterey version or older — go to Security & Privacy, select Full Disk Access in the left panel, and click on the lock icon at the bottom.
9. Confirm this action by typing in your computer’s password or via Touch ID and clicking update settings.You've successfully set up NordVPN Threat Protection Pro™.
10. To pause or disable Threat Protection Pro™, click the pause button and select the option you prefer.
## Enabling cloud-based threat scanning for malware in files
If you wish to enable the [cloud-based deep threat scanner](https://nordvpn.com/blog/cloud-based-threat-scanner/) to protect your devices from malware after the initial setup wizard is over, follow these steps: Go to the NordVPN app > Threat Protection Pro™ > Settings and click the toggle next to Cloud-based threat detection.You’ve successfully enabled the cloud-based deep threat scanning for malware detection.",https://support.nordvpn.com/hc/en-us/articles/20225729285393-Enabling-Threat-Protection-Pro-on-macOS
How to re-install NordVPN on Android,"To reinstall NordVPN on your Android device and ensure you have the latest version for the best experience, follow these steps.
1. Open the Settings app on your phone and select Apps or Apps & Notifications (the selection may vary depending on your phone type).
2. After opening the Apps settings, you may also need to press Manage Apps (this may vary depending on your phone type).
3. After opening Manage apps (or just Apps, depending on your phone model), search for or scroll down to find and tap the NordVPN app.
4. Tap Uninstall and confirm app deletion.
5. Once uninstalled, download the latest NordVPN app version from [Google Play](https://play.google.com/store/apps/details?id=com.nordvpn.android&hl=en&pli=1) or our website, where you’ll also find setup instructions.",https://support.nordvpn.com/hc/en-us/articles/29748627824273-How-to-re-install-NordVPN-on-Android
Change your DNS servers on Android TV with NordVPN,"Note: when you’re connected to a NordVPN server, NordVPN’s private DNS servers are used by default.
To use NordVPN’s [DNS servers](https://nordvpn.com/blog/what-is-dns/) on Android TV when not connected to a NordVPN server, follow these steps:
1. Open Settings on your Android TV. They are usually designated by a cogwheel icon.
2. Head to Network and Internet and write down the [IP address](https://nordvpn.com/what-is-my-ip/) (marked “1” in the picture below).Select IP settings (marked “2” in the picture below).
3. In IP settings, switch to Static.
4. Enter the IP address from step 2.
5. [Find your gateway (router IP) address](https://nordvpn.com/blog/find-router-ip-address/) and enter it in the appropriate field.
6. Make sure the Network prefix length is 24 — change it if necessary.
7. Enter the first DNS address: 103.86.96.100
8. Enter the second DNS address: 103.86.99.100
Android TV is now configured to use [private DNS](https://nordvpn.com/blog/private-dns/) servers instead of your ISP's default DNS servers.",https://support.nordvpn.com/hc/en-us/articles/20466230743569-Change-your-DNS-servers-on-Android-TV-with-NordVPN
Using NordLynx in the NordVPN app for Android,"NordLynx is the technology we built around the WireGuard® protocol. It lets you experience WireGuard’s speed benefits without compromising your privacy.
1. Install the [VPN for android](https://nordvpn.com/download/android/).
2. Navigate to Account & App Settings in the bottom right corner and tap on the gear icon in the right top corner:
3. Choose Protocol: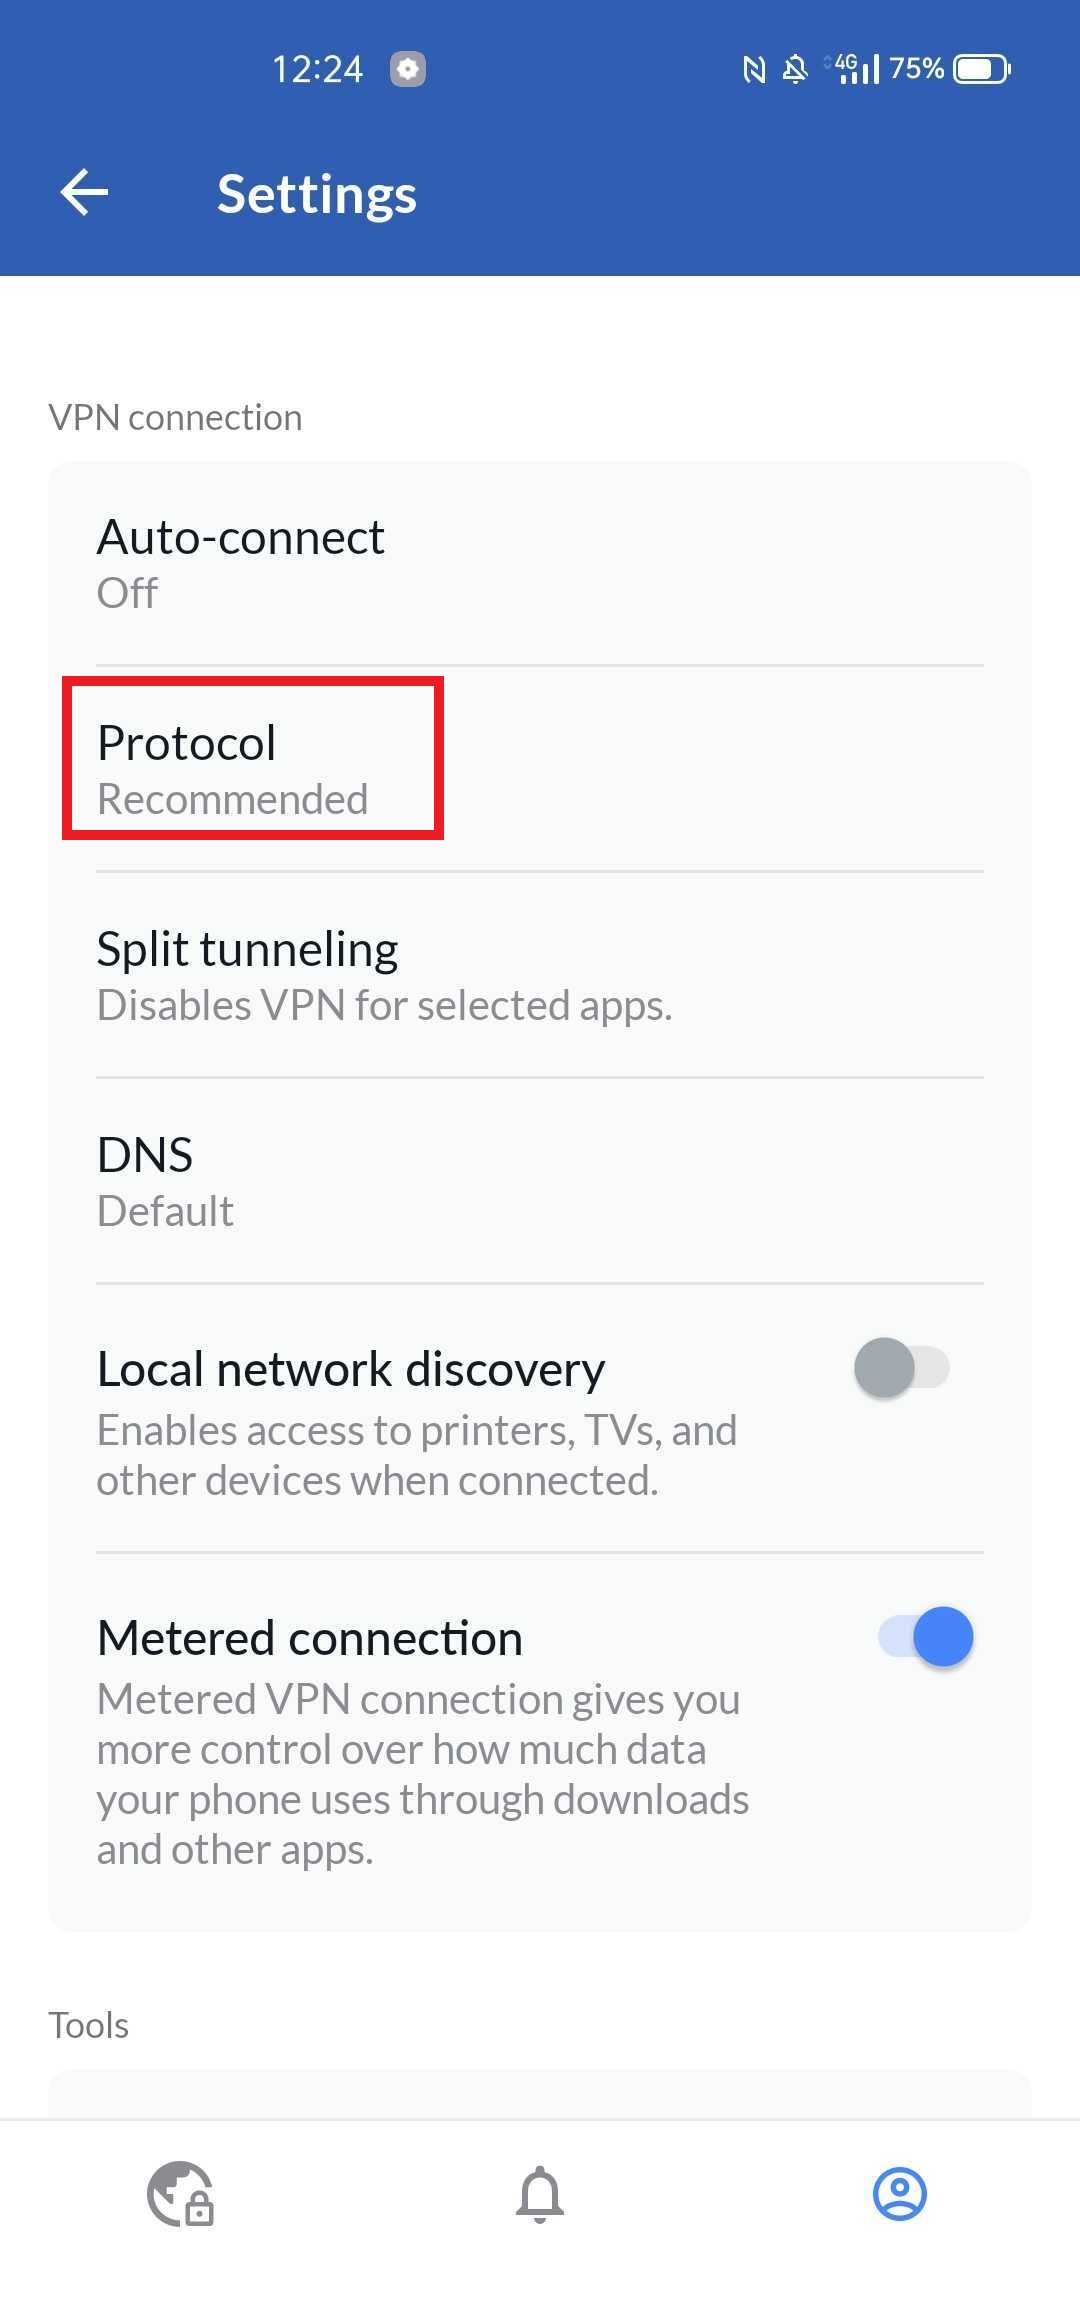
4. Select Nordlynx and connect to the VPN: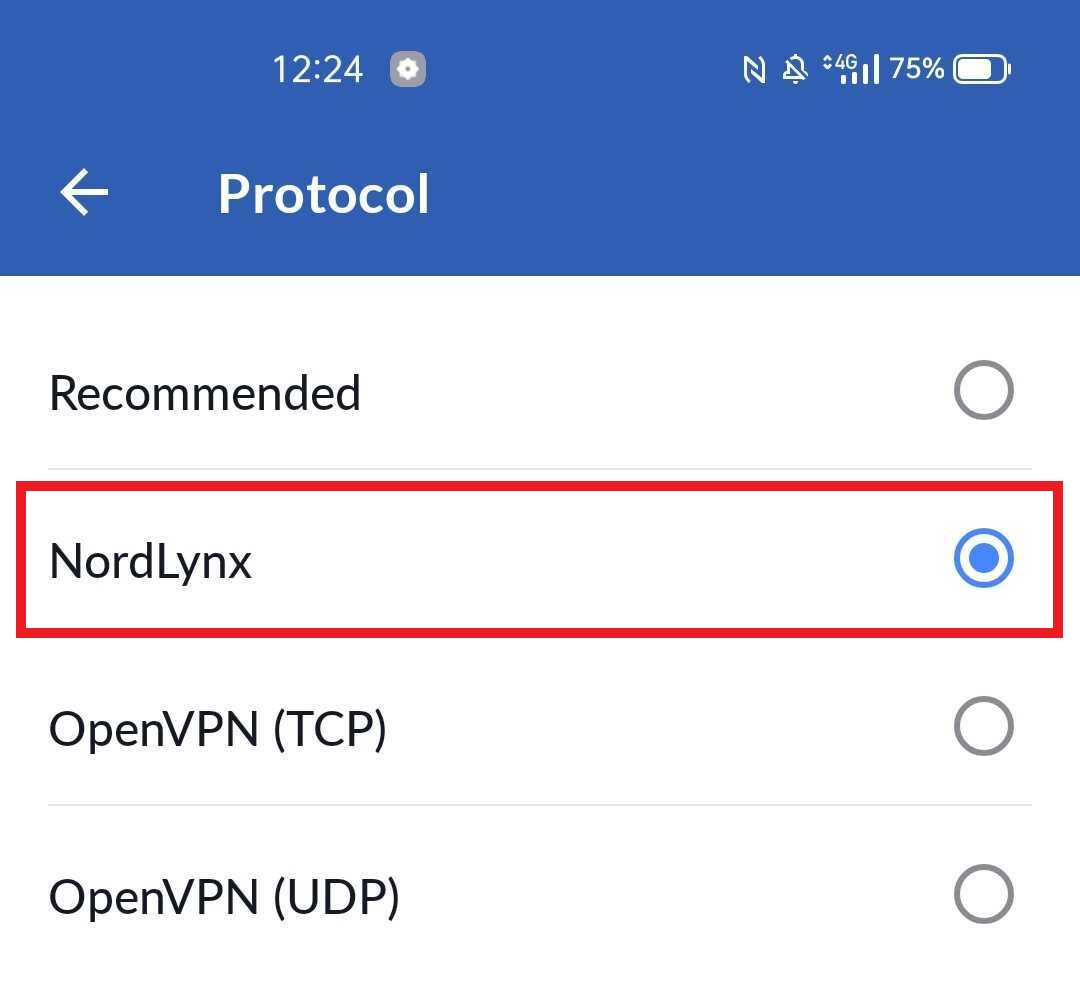
WireGuard is a registered trademark of Jason A. Donenfeld.",https://support.nordvpn.com/hc/en-us/articles/20465306064145-Using-NordLynx-in-the-NordVPN-app-for-Android
Improve connection speed on Android with NordVPN app,"If you are experiencing slow connection speed while connected to [VPN on Android](https://nordvpn.com/download/android/), try these steps:
1. Make sure to use the latest version of NordVPN app. You can [uninstall the app](https://support.nordvpn.com/hc/en-us/articles/19481023452561-How-to-uninstall-NordVPN-software) and [install the latest version from our website](https://nordvpn.com/download/windows/).
2. Restart your device.
3. Switch to [NordLynx](https://support.nordvpn.com/hc/en-us/articles/19564565879441-What-is-NordLynx) protocol.
4. If you are using Wi-Fi, switch to a mobile connection or vice versa.
5. Switch the VPN server to one closer to you geographically.
6. Open app settings and [switch](https://support.nordvpn.com/hc/en-us/articles/19973901502609-Switching-protocol-to-OpenVPN-UDP-or-TCP-Android) from the default UDP protocol to TCP.
7. Try a different connection method/protocol on your device. Tutorials for various connection methods can be found here: [https://support.nordvpn.com/Connectivity/Android/](https://support.nordvpn.com/hc/en-us/sections/19326609878673-Android)",https://support.nordvpn.com/hc/en-us/articles/20379831991697-Improve-connection-speed-on-Android-with-NordVPN-app
Connecting to NordVPN (IKEv2/IPSec) on Android,"These instructions will help you to connect to NordVPN on Android using the IKEv2 protocol.
1. Download the [NordVPN IKEv2 connection certificate](https://downloads.nordcdn.com/certificates/root.der).
2. Download and install the [strongSwan VPN Client app from Google Play](https://play.google.com/store/apps/details?id=org.strongswan.android).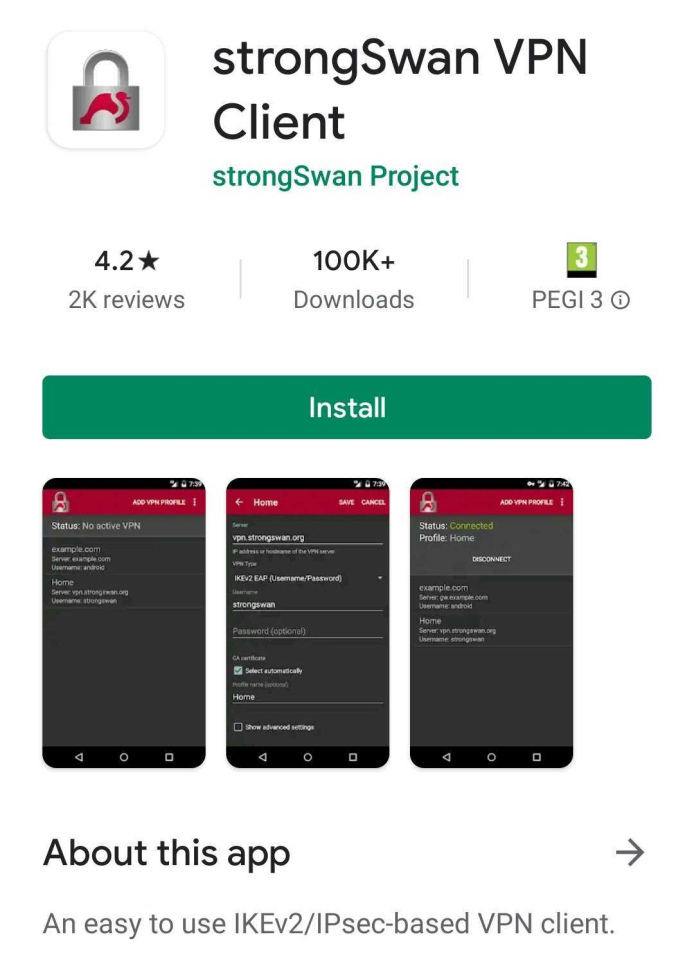
3. Open the strongSwan application.
4. Tap on the three-dot icon in the top-right corner of the app and select ""CA certificates"" from the drop-down menu.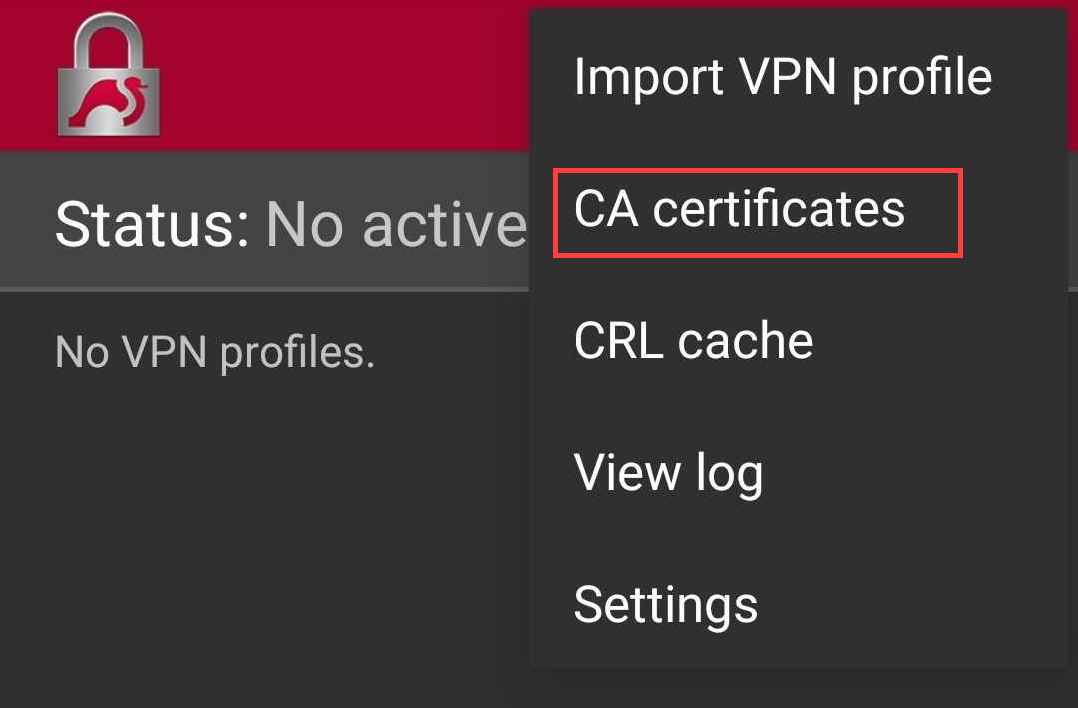
5. In the following screen, tap on the three-dot icon again and select ""Import certificate.""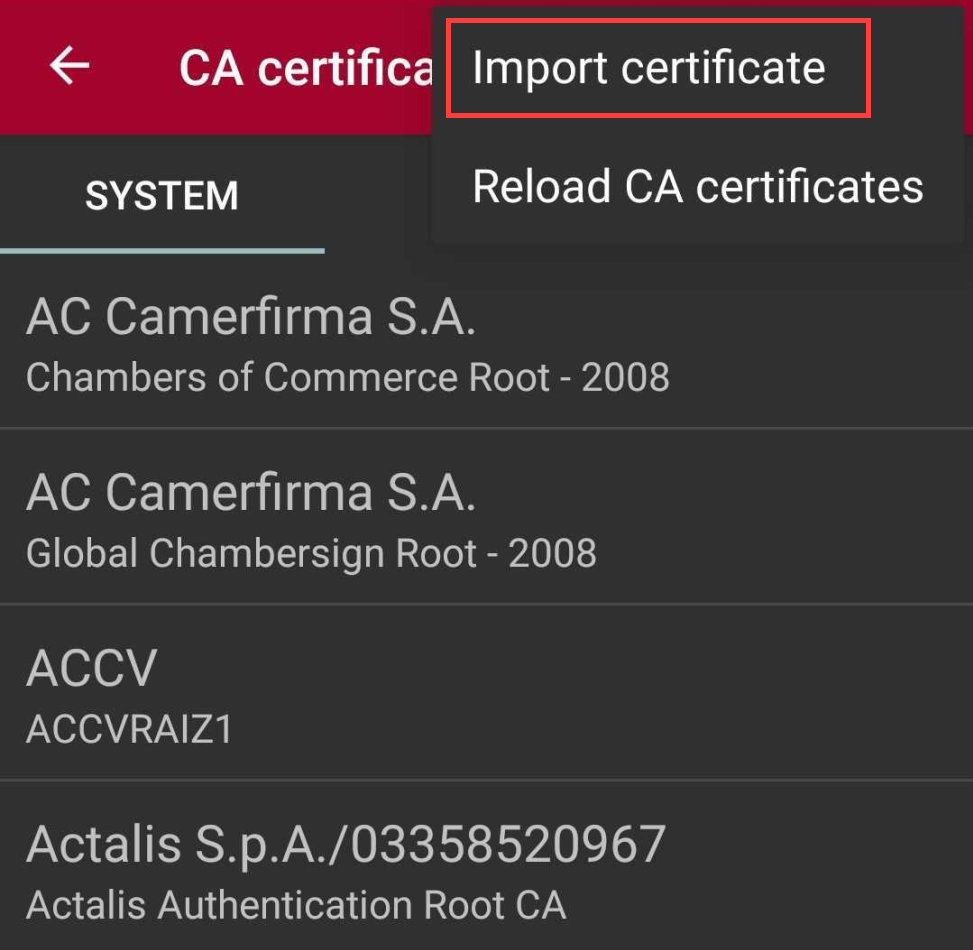
6. Select the root.der file that you have downloaded in step 1.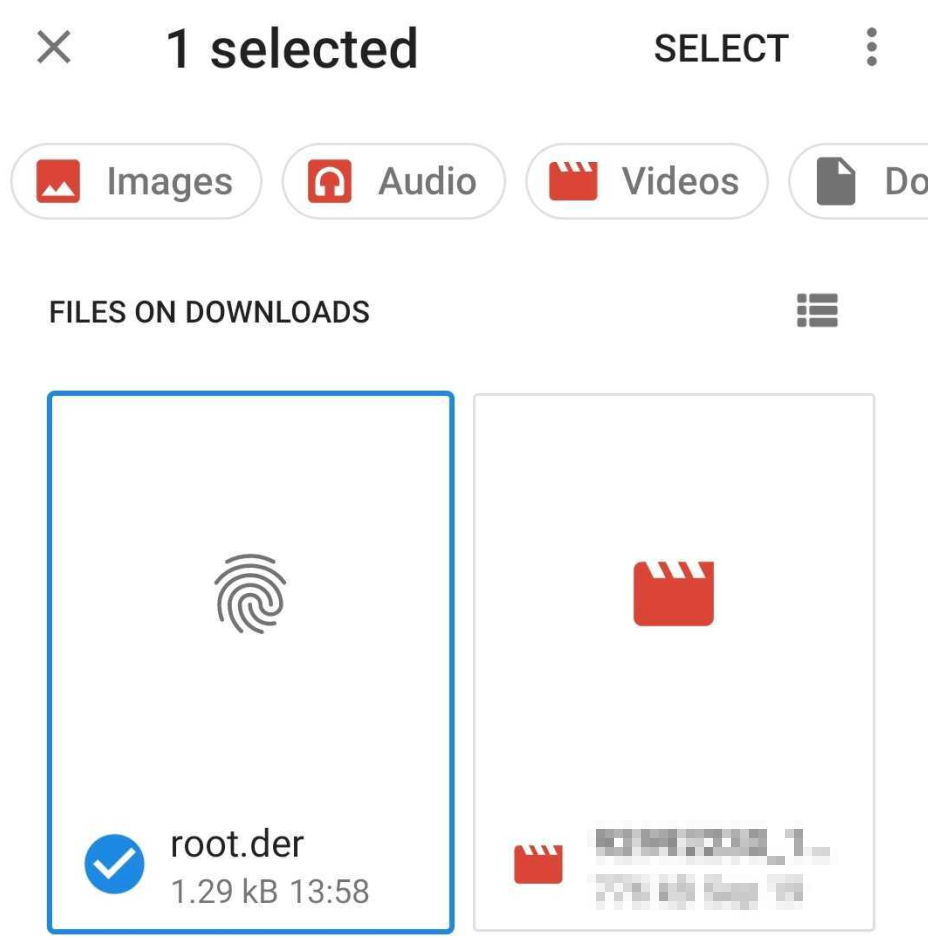
7. Confirm your selection by tapping Import certificate.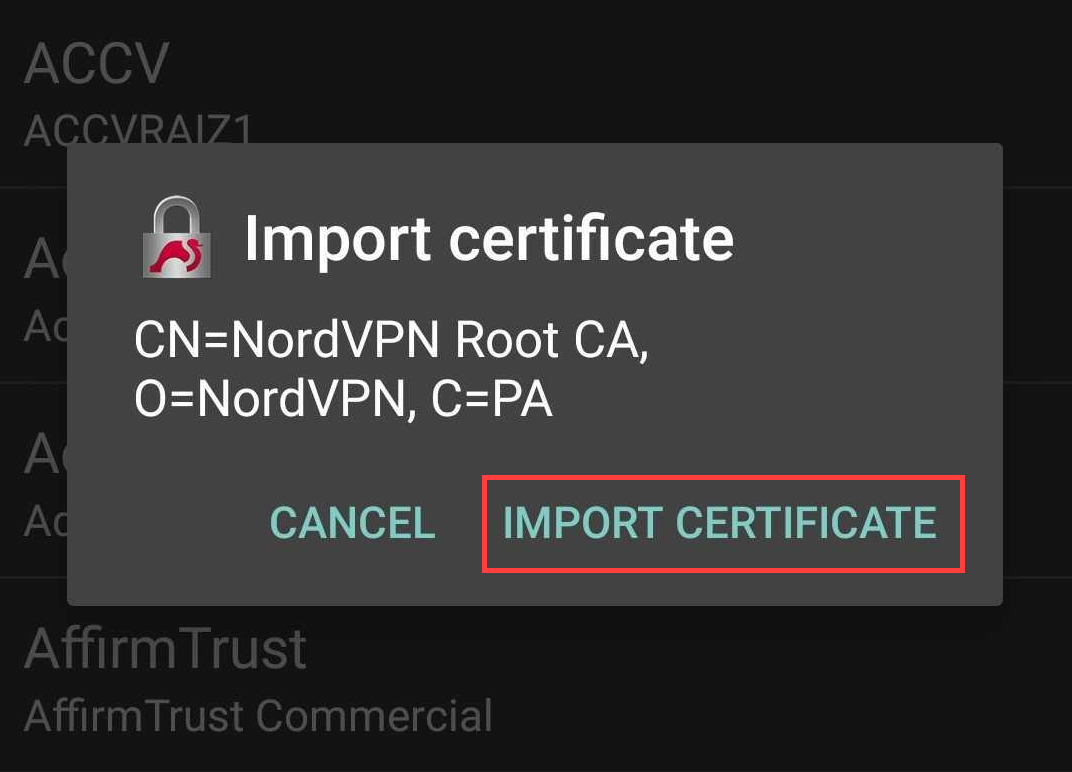
8. Tap the left-pointing arrow to go back to the main screen of the strongSwan app.
9. Select Add VPN profile.
10. In the Server field, enter the hostname of a NordVPN server.For the sake of this tutorial, the server hostname will be “us6180.nordvpn.com.” Press Advanced filters and select in the Security Protocol dropdown, select IKEv2/IPsec.
Follow the steps below to find the best server for your connection:
1. Log into your [Nord Account](https://my.nordaccount.com/), and click NordVPN.
2. Scroll down to Advanced Settings and click Set up NordVPN manually.
3. Select the Server recommendation tab. According to your location, the best server will be recommended.
4. By pressing Advanced filters you can further customize the recommended servers by selecting the Server type and the Security protocol.
5. Under the server IP, next to Available protocols, select IKEv2/IPSec.
6. In the window that pops up, copy the server hostname and use it in your IKEv2 manual connection setup.
7. When connecting to IKEv2 manually, you're going to need to use the Username and Password from the Service credential tab.
1. Enter your NordVPN service credentials in the “Username” and “Password” fields.
2. All other settings can stay the same. You can give the profile whatever name you want in the “Profile name” field.Once you have entered all the required information, click ""Save.""
3. To connect, tap the profile you have just created.
4. The application will ask you for the permissions necessary to form a VPN connection. Tap ""OK.""Note: Different devices may display different warning messages.
5. If the status field shows that you are “Connected,” the connection to the VPN server has been successful. You can now minimize the application and use your device as usual – your internet traffic is now secured by NordVPN.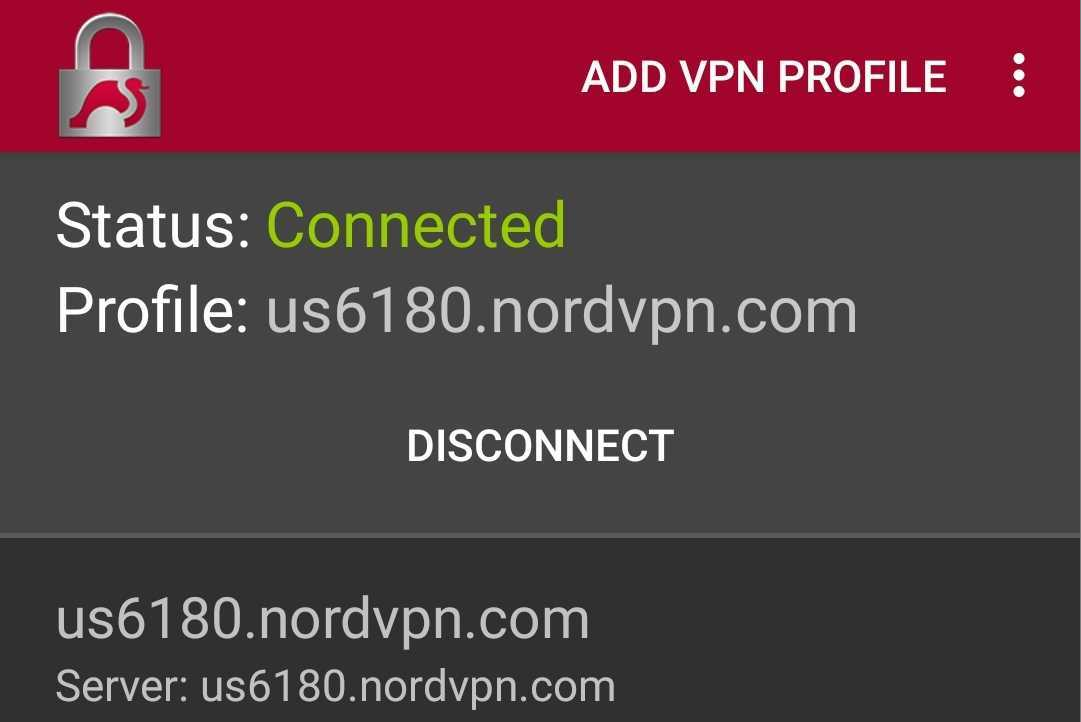To disconnect from the server, tap ""Disconnect.""",https://support.nordvpn.com/hc/en-us/articles/20350995979793-Connecting-to-NordVPN-IKEv2-IPSec-on-Android
How to set up the NordVPN browser extension,"Here are guides on how to set up NordVPN proxy extension on your:
* [Chrome Browser](https://support.nordvpn.com/hc/en-us/articles/20349533941265-How-to-set-up-NordVPN-with-Chrome-extension)
* [Firefox Browser](https://support.nordvpn.com/hc/en-us/articles/20350669461137-Connect-to-NordVPN-with-Firefox-extension)
* [Edge Browser](https://support.nordvpn.com/hc/en-us/articles/19627093939601-Connect-to-NordVPN-with-Edge-Extension)",https://support.nordvpn.com/hc/en-us/articles/20321833806865-How-to-set-up-the-NordVPN-browser-extension
Adjusting the Android app configuration,"Make these adjustments to check if your application is set up correctly:
* Try [switching](https://support.nordvpn.com/hc/en-us/articles/19973901502609-Switching-protocol-to-OpenVPN-UDP-or-TCP-Android) between [TCP and UDP](https://nordvpn.com/blog/tcp-or-udp-which-is-better/)
* Switch between different servers: try connecting to various countries or specific servers
* Try reinstalling the NordVPN app:Go to the Google Play Store, search for NordVPN, and click Uninstall. After the uninstall process finishes, click Install again.
If none of this helps, please check other troubleshooting methods for Android: [Troubleshooting connectivity on Android.](https://support.nordvpn.com/hc/en-us/articles/20041281541777-Troubleshooting-connectivity-on-Android)",https://support.nordvpn.com/hc/en-us/articles/20350711654929-Adjusting-the-Android-app-configuration
Invisibility on a local network: why we had to build a broken feature?,"Our goal at NordVPN is to provide our customers with intuitive experiences, ease of access, and the most advanced VPN features in the industry. We take pride in our continuous focus on security; however, sometimes, it comes with the cost of building a terrible feature. Here's why.
We recently found ourselves facing a Catch-22 situation, when, due to bugs in Apple's VPN API configuration, we had to choose to either sacrifice our users' experience with the app or, under certain scenarios, put a risk on their security or privacy. We believe such a choice should never occur in the first place, and we suspect that a global tech powerhouse often boasting about its focus on users' privacy understands this as well. As of yet, we are saddened by the fact that our pleas for Apple to implement the necessary fixes on their operating systems continue to be acknowledged yet bafflingly ignored.
Being limited in what we can do on our side, we decided to offer a feature that, while aiming to offer the best possible solution security-wise, radically differs from our vision of an intuitive and smooth experience users should expect from their cybersecurity provider.
Stay invisible on a local network feature is our way to mitigate the TunnelCrack and TunnelVision vulnerabilities present in the VPN industry. In the case of TunnelCrack, certain routers may be configured in a way where they leak VPN traffic when using non-RFC1918 IP addresses, which is an industry-wide issue and only applies to macOS and iOS platforms. TunnelVision attack, in general, is a network technique that uses an operating system's dynamic host configuration protocol (DHCP) to try to route the traffic outside of the VPN's tunnel.
For our macOS VPN clients, the “Stay invisible on a local network” feature automatically sets the appropriate API parameters and alerts users when connected to an unsafe network, mitigating the VPN traffic leak on macOS. We have also built an unsecured network detection feature that will detect non-RFC1918 IP ranges, notify about possible risks, and inform users to enable “Stay invisible on a local network.” On iOS, the app will also inform users when they connect to an unsecured network through push notifications and in-app messages. The feature was fully released by the beginning of August 2023.
In contrast, our iOS VPN clients present more considerable challenges due to issues within Apple's implementation of the API parameters. Notably, in iOS versions 14.2 and above, enabling the ""Stay invisible on a local network"" feature causes internet connections to crash under certain conditions. It also prevents our VPN application from receiving client updates, leading to user internet connection crashes when updates are released.
The NordVPN team hopes that this inevitably crude solution for an impossible situation will, for the time being, offer sufficient data privacy for our users and – at the same time – prompt Apple to implement the necessary changes faster.
What OS are impacted?
The TunnelCrack and TunnelVision vulnerabilities affect our macOS and iOS VPN clients, while our Android, Linux, and Windows clients were immune due to implemented mitigations.
NordVPN Linux and Windows applications can configure the OS's firewall to prevent any traffic from exiting the device except through the VPN tunnel.
What connectivity limitations are put in place when this feature is turned ON?
With the feature turned ON, users cannot access other network devices, such as computers, printers, or TVs. The feature also blocks AirDrop usage.
What experience-breaking effects can users expect?
Enabling the feature in iOS 16.4 and later versions can prevent the NordVPN application from receiving client updates, leading to crashes of the user's internet connection when updates are released. Once users are cut off from the internet, the only solution is a device restart.
How can users ensure the safety of their data in NordVPN apps?
NordVPN apps do not leak traffic under any known circumstances if the Stay invisible on a local network and Kill Switch features are enabled within the app settings menu. It’s important to note that the feature is only available to iOS versions 16 and above. Visual instructions on [how to enable the feature on iOS](https://support.nordvpn.com/hc/en-us/articles/20225046536593-What-is-an-unsafe-local-network-on-iOS) or how to enable this feature on macOS.
Does the feature protect users from TunnelVision utilizing Option 121, too?Yes, it does.
Can NordVPN provide a bug-free solution without Apple's input?
No. Unfortunately, the bugs that come with using our feature are beyond our control. Apple's team has confirmed the bugs' existence and gave no clear timeline for their resolution.
What else can users do to ensure a better experience using this feature?
We believe that sufficiently maintained digital security is a collective effort. While we will continue searching for better solutions within our capacity, we are adamant that Apple needs to address the urgent issues of significant bugs in their operating systems. We invite everyone who is not indifferent to user privacy and security issues to keep pressuring Apple to fix its shortcomings in VPN API service.",https://support.nordvpn.com/hc/en-us/articles/25202605194257-Invisibility-on-a-local-network-why-we-had-to-build-a-broken-feature
What is a jailbroken device,"### What does the term mean?
Jailbreaking refers to bypassing of certain device restrictions. These restrictions are set by the manufacturer, usually in order to increase the security and the reliability of their devices. For instance, Apple restricts the ability of its customers when it comes to downloading applications from outside the Apple App Store. In order to sideload applications, which is to download them from an unofficial source, users must first jailbreak their iOS devices. By doing so, root access is gained, meaning that users can modify the needed files and directories that are otherwise hidden.
Essentially, jailbreaking provides greater control over one's device. However, additional freedom comes at a risk to security as well as privacy. One example stems from potential malware that can be downloaded from insecure sources. Unlike the Apple App Store where apps are thoroughly checked, there is no guarantee that the apps from outside will be safe. In the case that they indeed possess malware, your credentials and other personal information could be stolen without your knowledge.
### How can I know if my device is jailbroken, and can NordVPN protect me if it is?
First of all, the iOS version of the NordVPN application comes with a system that automatically detects whether or not your device could be jailbroken. If it is, you will be greeted with the following message:
Additionally, you can also find the jailbreak indication by scrolling to the bottom of the Settings menu:
If you suspect that your device may have malware or spyware installed, we do not recommend installing and using NordVPN. This is because your credentials may be stolen by malicious applications. Additionally, although NordVPN encrypts your connection to the internet, as well as protects your privacy online, it cannot prevent damage from downloading the above-mentioned files.",https://support.nordvpn.com/hc/en-us/articles/20465988825873-What-is-a-jailbroken-device
Switching protocol to OpenVPN UDP or TCP (iOS),"1. Open the application and click on the profile icon in the bottom right corner. 
2. Open the settings menu (gear icon).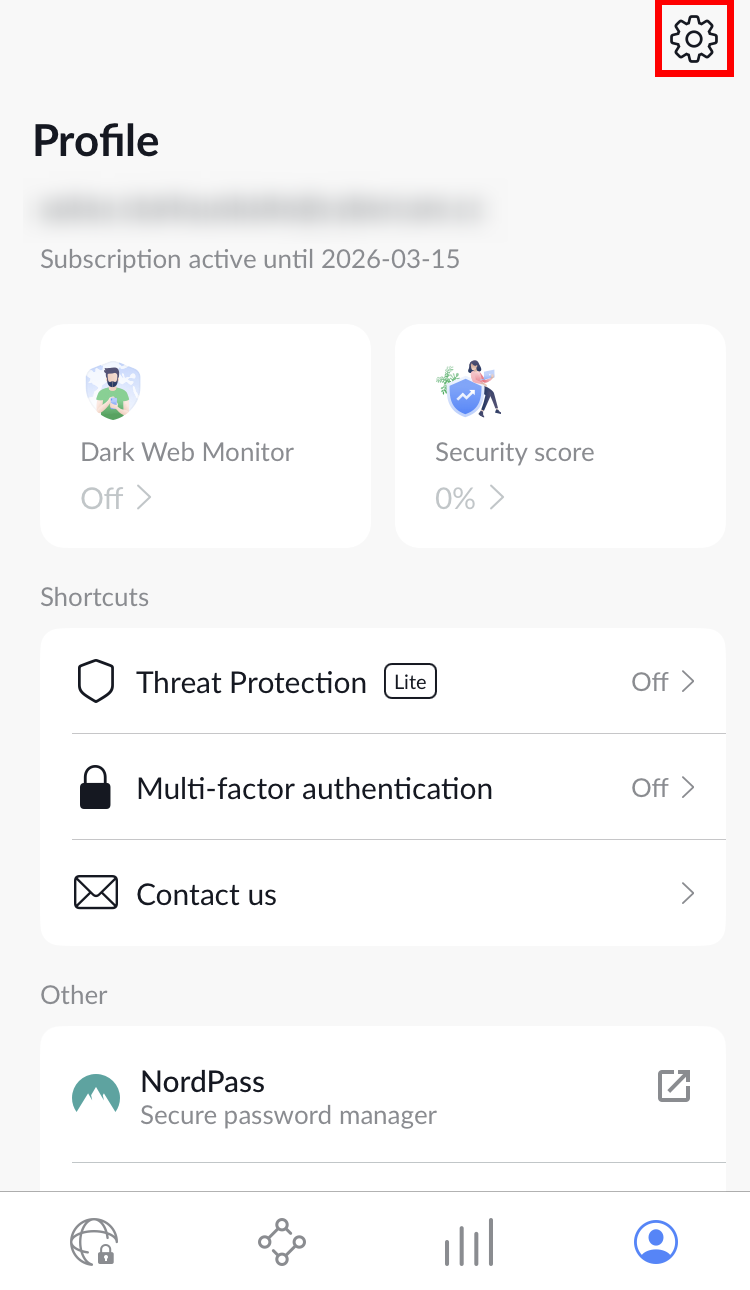
3. Click on the Protocol tab.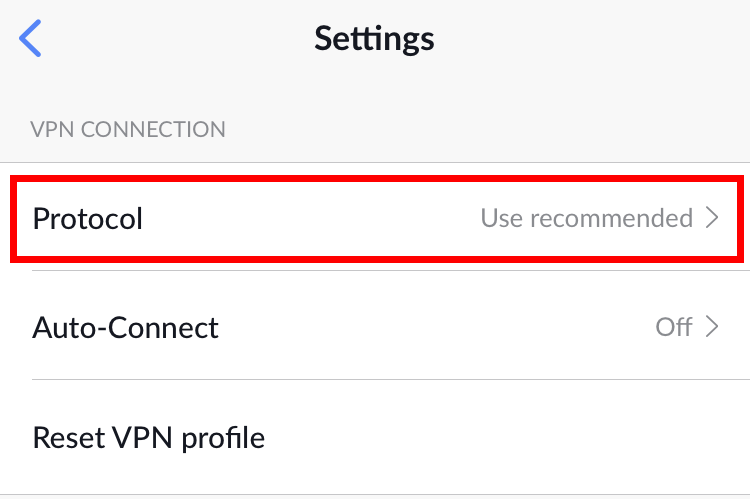
4. Select the OpenVPN (UDP) or OpenVPN (TCP) option.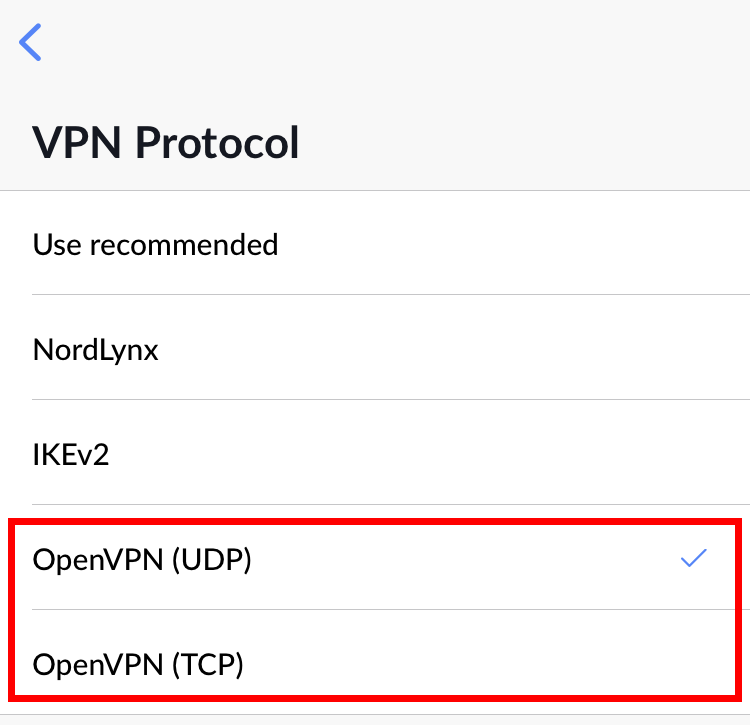",https://support.nordvpn.com/hc/en-us/articles/20465699170321-Switching-protocol-to-OpenVPN-UDP-or-TCP-iOS
How can I use NordLynx in the NordVPN app for iOS,"NordLynx is the technology we built around the WireGuard® protocol. It lets you experience WireGuard’s speed benefits without compromising your privacy.
1. Install the [NordVPN app for iOS](https://nordvpn.com/download/ios/).
2. Navigate to the profile in the bottom right-hand corner:
3. Tap on the gear icon in the upper right corner: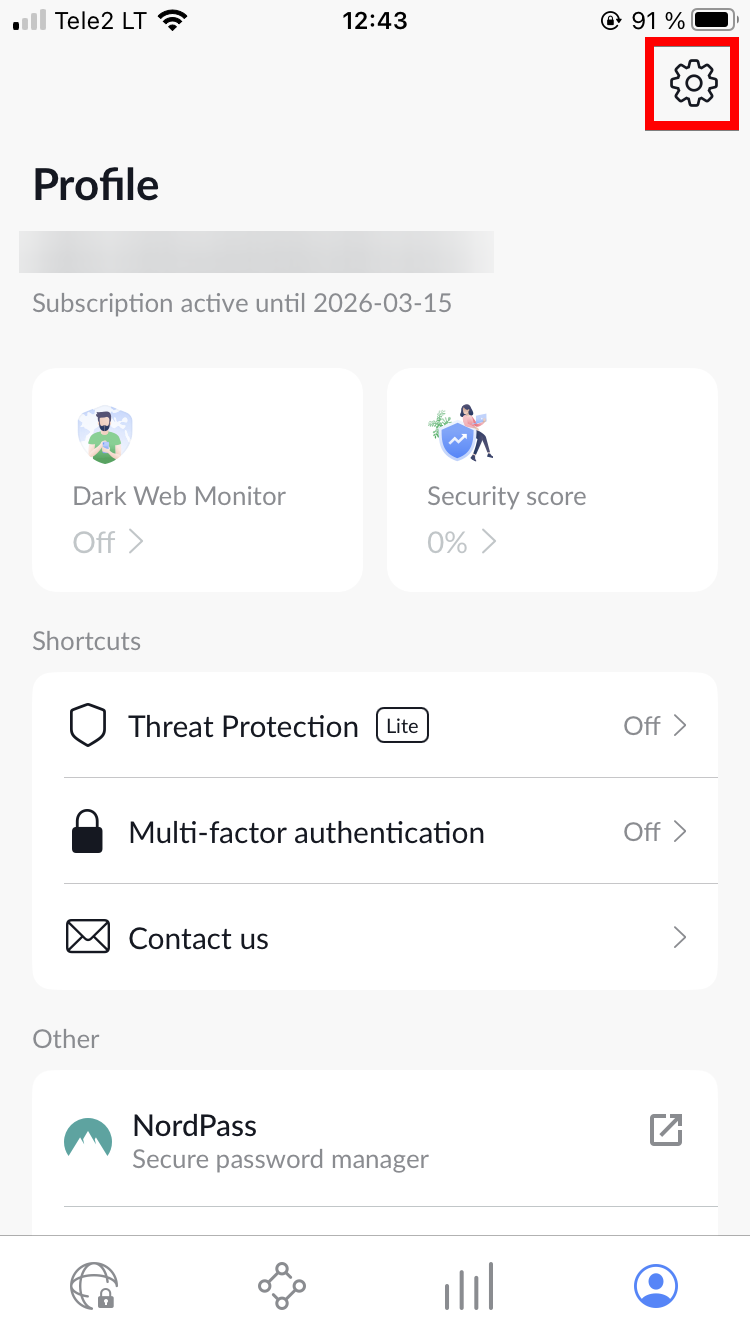
4. Tap on Protocol.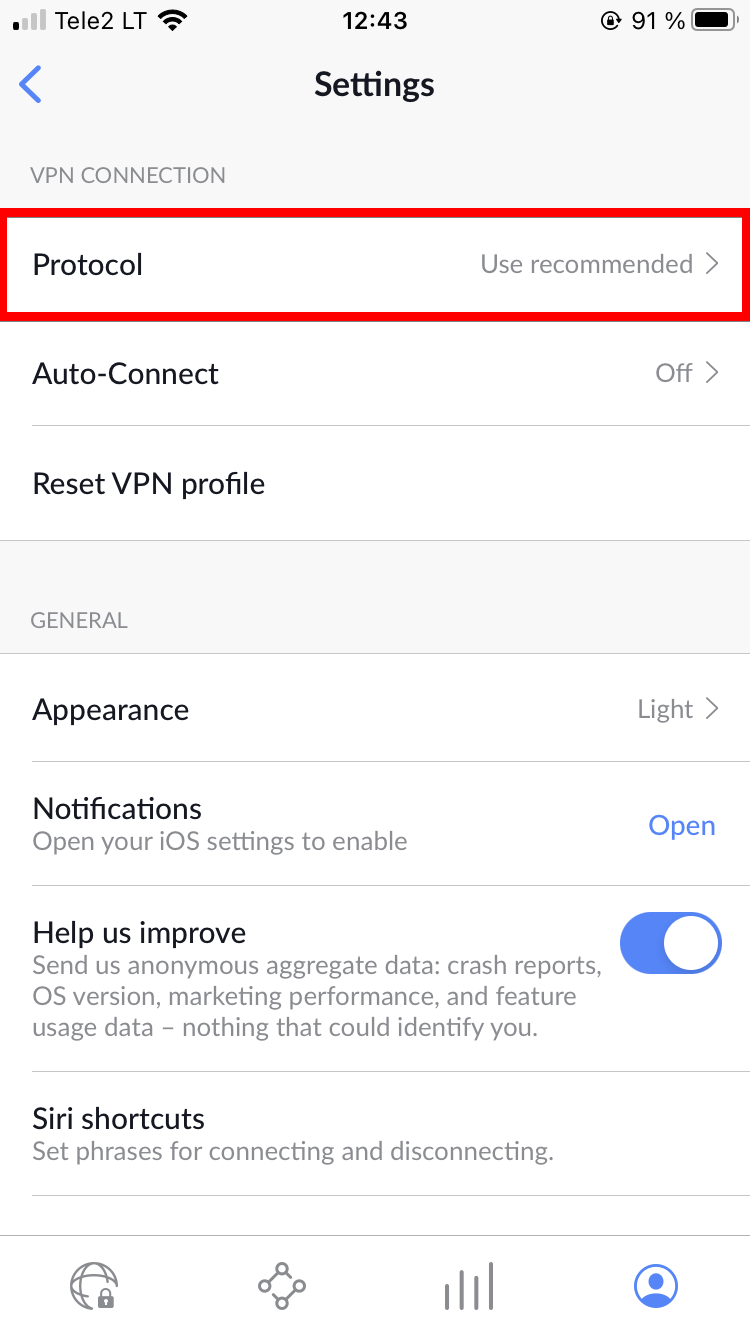
5. Select NordLynx and connect to VPN.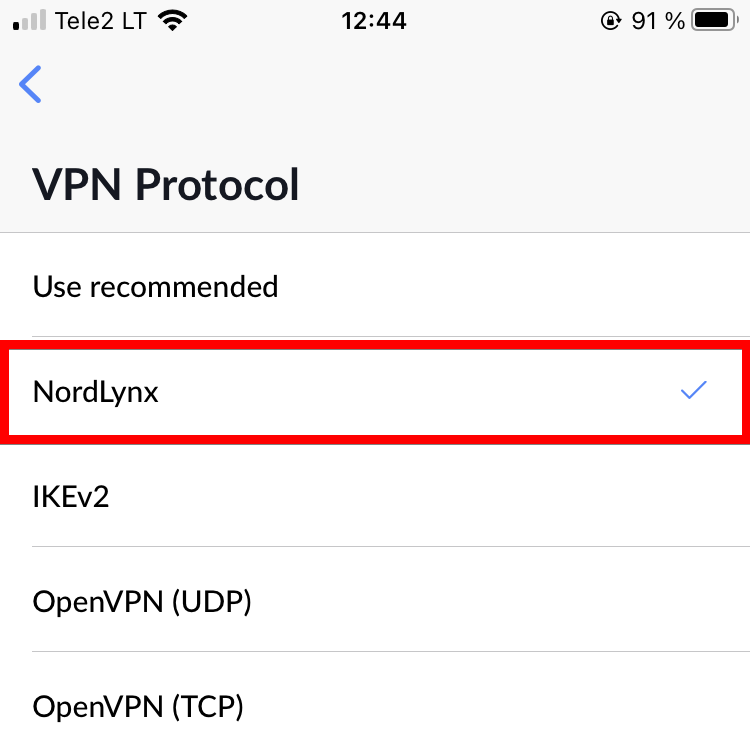
Done! You are now using the NordLynx protocol on your iOS device.
WireGuard is a registered trademark of Jason A. Donenfeld.",https://support.nordvpn.com/hc/en-us/articles/20459436694801-How-can-I-use-NordLynx-in-the-NordVPN-app-for-iOS
Manual OpenVPN connection setup on iOS 15,"Note: The OpenVPN app supports only 15 and newer versions of iOS.
Please follow these OpenVPN setup instructions on your [iOS 15 device](https://nordvpn.com/download/ios/):
1. Go to the App Store on your iPhone/iPad.
2. Tap on Search bar.
3. Enter ""openvpn connect"" in the search bar.
4. Find the OpenVPN Connect application and tap on its installation button.
5. Once the app is installed, download the .ovpn configuration file. You may also use [NordVPN server recommendation tool](https://my.nordaccount.com/dashboard/nordvpn/manual-configuration/server-recommendation/).
Follow the steps below to find the manual connection configuration files:
1. Log into your [Nord Account](https://my.nordaccount.com/), and click NordVPN.
2. Scroll down to Advanced Settings and click Set up NordVPN manually.
3. Select the OpenVPN configuration files tab.
4. Find the server you wish to connect to by using the Search bar or by scrolling down and download it by clicking Download UDP or Download TCP.
5. When connecting to OpenVPN & IKEv2 manually, you're going to need to use the Username and Password from the Service credential tab.
1. When the configuration is downloaded, select the Downloads button in the top right corner. After that, click on the downloaded configuration.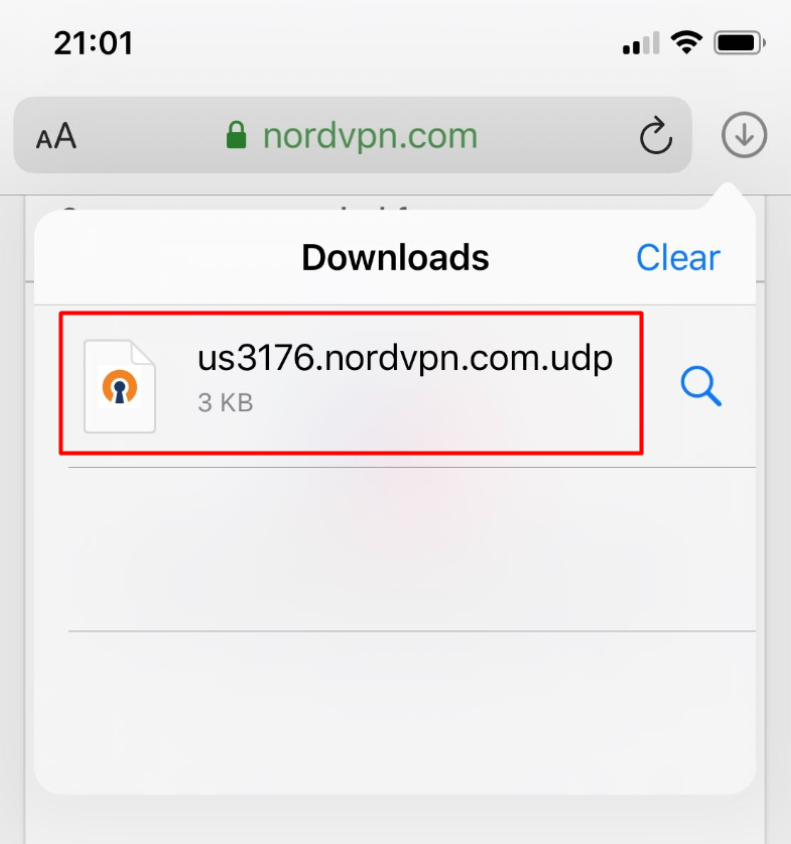
2. When the downloaded configuration opens up, select Share button in the top right corner.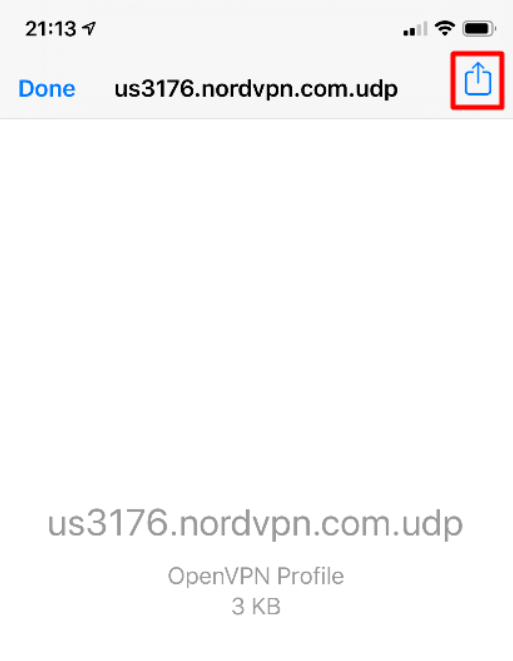
3. In the Share sheet, tap Copy to OpenVPN button.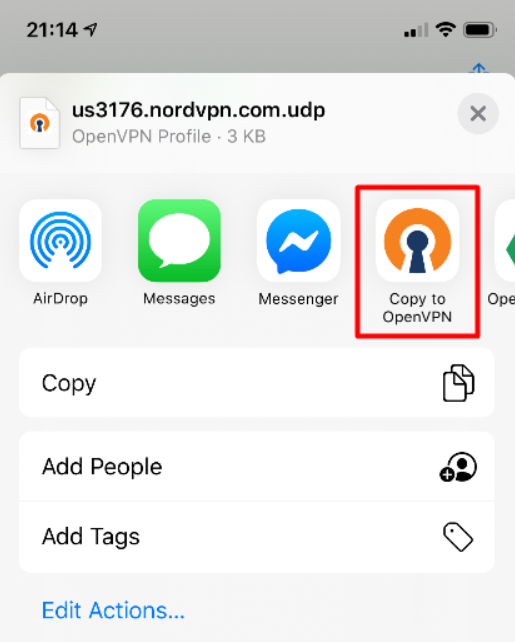
4. Inside the OpenVPN application, select File and tap Add to add the imported configuration.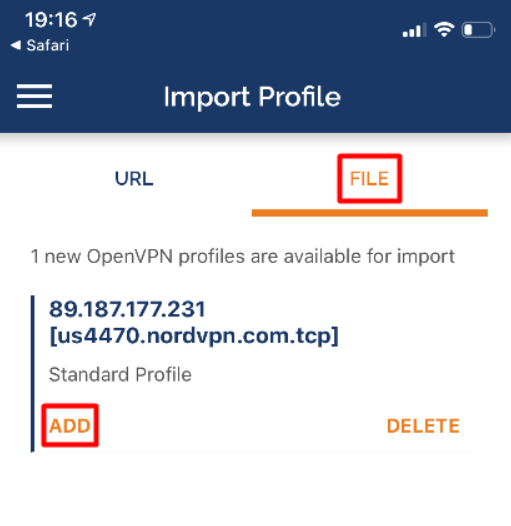
5. You will get a pop-up asking for permission to add OpenVPN to your VPN configurations. Click Allow.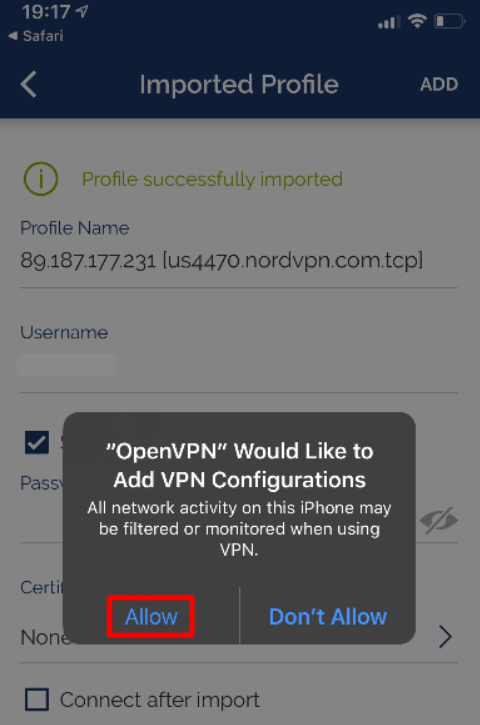
6. Enter your NordVPN service credentials.
Follow the steps below to find the service credentials for manual connection setup:
1. Log into your [Nord Account](https://my.nordaccount.com/), click NordVPN, and, under Manual setup, click on Service credentials. Here you'll find the Username and Password needed to connect manually.
1. Tap on the switch of the imported configuration to connect to a VPN server.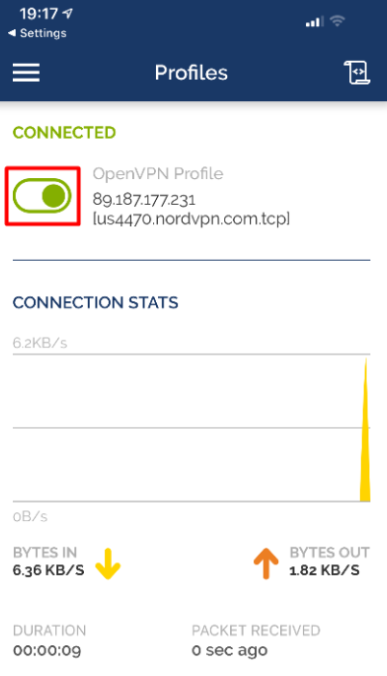
2. To change a server, tap on the slider button to disconnect. Tap on another imported profile to connect to the other server.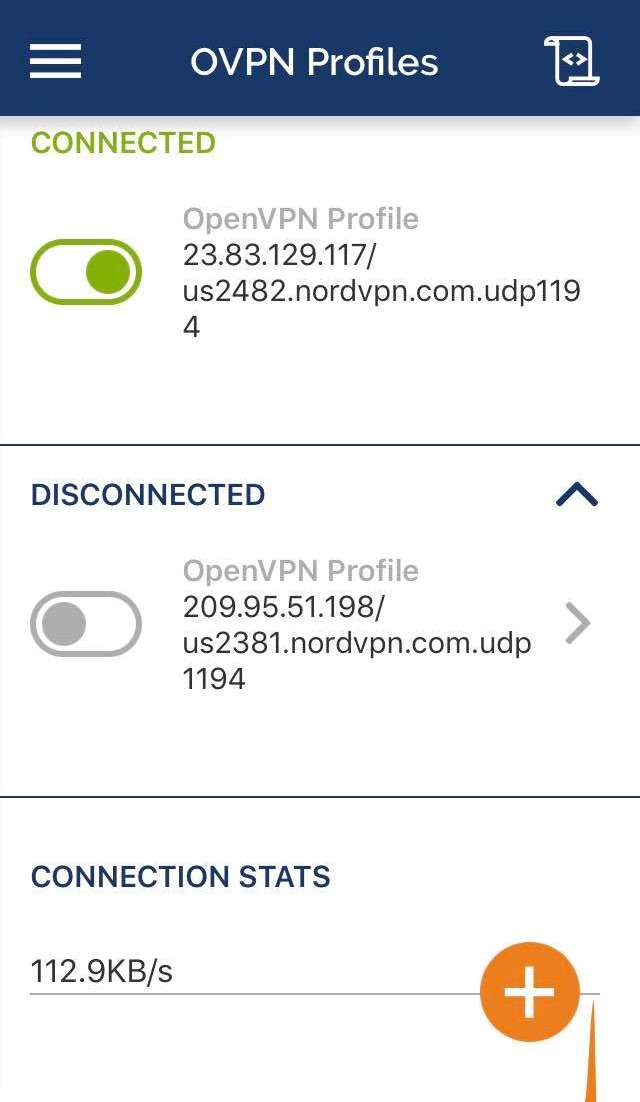
3. To disconnect, tap on the same button you used to connect.",https://support.nordvpn.com/hc/en-us/articles/20459314635281-Manual-OpenVPN-connection-setup-on-iOS-15
Change your DNS servers on iOS,"You can manually configure the DNS servers in your iOS settings. Here is how:
1. Open Settings;
2. Tap on Wi-Fi. If it's switched off, turn it on;
3. Pick a Wi-Fi network and tap on the blue i icon;
4. Tap Configure DNS and select Manual;
5. Tap Add Server and add these DNS addresses:103.86.96.100103.86.99.100
6. Tap Save.",https://support.nordvpn.com/hc/en-us/articles/20398776567313-Change-your-DNS-servers-on-iOS
NordVPN Post-quantum encryption explained,"Post-quantum encryption protects your VPN connection against potential quantum computer attacks. Currently, this encryption works with the NordLynx protocol only, therefore post-quantum encryption will be disabled when you use a dedicated IP, other protocols, Obfuscated servers or Meshnet.
NordVPN Post-quantum encryption is available on [Linux]( [Windows]( [Android]( [iOS](https://support.nordvpn.com/hc/en-us/articles/30046321712529-NordVPN-Post-quantum-encryption-explained#01JKQJSPN00W572Y1VHYZZCQJ7), [tvOS](https://support.nordvpn.com/hc/en-us/articles/30046321712529-NordVPN-Post-quantum-encryption-explained#01JKQN5BSNHG9BX6PV8EEQ6C49), and [Android TV](https://support.nordvpn.com/hc/en-us/articles/30046321712529-NordVPN-Post-quantum-encryption-explained#01JKQNJQSTDV2R7VQ5881RCP7Q).
## On Linux:
To enable or disable the post-quantum protection in NordVPN on your Linux machine, run one of the following commands:
```
nordvpn set pq on/off
```
or
```
nordvpn set post-quantum on/off
```
NordVPN post-quantum protection is the recommended option for connecting to NordVPN servers on your Linux device.
## On Windows:
To enable the post-quantum protection on your Windows machine, follow these steps:
1. Open the settings menu.
2. Click on Connections.
3. Scroll down to Post-quantum encryption and enable it.After you’ve done these steps - Post-quantum encryption will be enabled on your Windows device.
## On macOS:
To enable the post-quantum protection on your macOS device, follow these steps:
1. Open the settings menu in the NordVPN app.
2. In the general tab, enable Post-quantum encryption toggle.
## On Android:
To enable post-quantum protection on your Android device, follow these steps:
1. Tap on the Profile icon in the bottom navigation bar.
2. Head over to the Settings section.
3. Enable Post-quantum encryption toggle.
## On iOS:
To enable post-quantum protection on your iOS device, follow these steps:
1. Tap on the Profile icon in the bottom navigation bar.
2. Select Settings at the top right.
3. Enable the Post-quantum encryption toggle.
## On tvOS:
To enable post-quantum protection on your tvOS device, follow these steps:
1. Open Settings and turn on Post-quantum encryption.
## On Android TV:
Enable post-quantum protection on your Android TV device by following these steps:
1. Open Settings on the left-hand side menu and turn on Post-quantum encryption under App settings.
## Compatibility of post-quantum NordVPN
Although post-quantum encryption enhances security, there are some limits to how VPNs function:
* OpenVPN Protocol: As of right now, post-quantum protection is only compatible with the NordLynx technology and does not support OpenVPN. If you try to enable post-quantum protection with OpenVPN, the following error will display:""Post-quantum encryption is unavailable with OpenVPN. Switch to NordLynx to activate post-quantum protection""
* Meshnet Feature: Meshnet, which turns on private connections across devices, is incompatible with post-quantum protection. If both features are active, the following error will display:""Post-quantum VPN and Meshnet are not compatible. Please disable one feature to use the other.""
* Dedicated IPs: Dedicated IP addresses do not support post-quantum protection. If you want to connect to a dedicated IP while post-quantum protection is enabled, you will need to disable the post-quantum feature first.
Using post-quantum protection means taking better precautions to secure your data for the future. NordVPN will continue to develop post-quantum security functionality to allow your digital privacy to remain safe now and in the future.",https://support.nordvpn.com/hc/en-us/articles/30046321712529-NordVPN-Post-quantum-encryption-explained
Split Tunneling feature on NordVPN extension,"Split Tunneling in NordVPN proxy extension is a feature that allows you to split your browser traffic. If some websites do not work with a VPN or you simply do not want to have the traffic routed through a VPN you can bypass URLs and domains. In other words, it allows you to specify the URLs and domains you want to access with your real IP address and unencrypted traffic.",https://support.nordvpn.com/hc/en-us/articles/20321703651985-Split-Tunneling-feature-on-NordVPN-extension
How to use NordVPN Tray functionality on Linux,"With the release of the 3.18.0 NordVPN version for Linux, we introduce a new feature for all supported Linux devices – The tray icon. This feature allows you to see and control NordVPN connections more easily.
In order to connect to the VPN, you’ll have to install [NordVPN on your Linux](https://nordvpn.com/download/linux/) device and log in.
## Using Tray on Linux
By default, the NordVPN Tray function should be visible at the top right of your screen when the VPN is open. In case you are unable to see it, open the terminal and enter any NordVPN-related command, such as:
```
nordvpn login
```
or
```
nordvpn
```
At the top right of your screen, you will see a white NordVPN logo. This means you’re not connected to the VPN:
When you click on it, you will see the following information:
* VPN connection status, which will indicate that you're disconnected;
* Quick connect button to connect to a recommended server;
* The settings button, where you can toggle the tray icon and notifications;
* The option to log in, or, if you are already logged in, you will see the email address of your account;
* Log out button;
* Quit button to close the app.
Once you’re connected, the NordVPN logo will be blue instead:
If you click on the blue logo, you will see your VPN connection status and information along with an additional disconnect button:
And now you know how to use the Tray functionality on Linux. Read more on using NordVPN on Linux.",https://support.nordvpn.com/hc/en-us/articles/25538632595601-How-to-use-NordVPN-Tray-functionality-on-Linux
Linux error: 'Permission denied accessing /run/nordvpn/nordvpnd.sock',"If you're encountering an issue similar to what you see in the header, here's what you need to do:
1. Run the following command in the terminal:
```
sudo usermod -aG nordvpn $USER
```
2. Restart your device.
If you get an error “Whoops! /run/nordvpn/nordvpnd.sock not found,” run the following commands until the issue is fixed:
```
sudo systemctl restart nordvpnd
```
```
sudo systemctl start nordvpnd
```
```
sudo systemctl enable nordvpnd
```
If the issue persists, follow the troubleshooting steps below:
1. Restart your device.
2. [Reset the app](https://support.nordvpn.com/hc/en-us/articles/20323633965969-Resetting-your-application-preferences-on-Linux).
3. [Reinstall the NordVPN app for Linux](https://nordvpn.com/download/linux/).
4. Check your firewall settings.
5. [Connect manually](https://support.nordvpn.com/hc/en-us/articles/20164827795345-Connect-to-NordVPN-using-Linux-Terminal).
If you can’t resolve the problem, please [contact NordVPN](https://support.nordvpn.com/hc/en-us/articles/19482416296593-How-can-I-reach-NordVPN-customer-support).",https://support.nordvpn.com/hc/en-us/articles/20466091071505-Linux-error-Permission-denied-accessing-run-nordvpn-nordvpnd-sock
How to build the NordVPN Docker image,"Docker is a tool for easy deployment and management of applications in lightweight containers. Setting up NordVPN on a Docker container will secure your internet connection and protect your online privacy of other Docker containers as well.
## Setting up the Docker environment
To build the NordVPN Docker image on Linux, you will first need to set up the Docker environment:
1. [Install the Docker engine on Linux](https://docs.docker.com/engine/install/ubuntu/).
2. Once you have Docker installed, go to the terminal.
3. Create a new directory for your image using this command:
```
mkdir
```
4. Go to the created directory:
```
cd
```
5. Create a Dockerfile:
```
touch Dockerfile
```
6. Go to the file with your preferred text editor. In this example, we use nano.
```
nano Dockerfile
```
7. Copy and paste the following script into the file:
```
FROM ubuntu:24.04RUN apt-get update && \
apt-get install -y --no-install-recommends wget apt-transport-https ca-certificates && \
apt-get install -y --no-install-recommends wget apt-transport-https ca-certificates && \ wget -qO /etc/apt/trusted.gpg.d/nordvpn_public.asc https://repo.nordvpn.com/gpg/nordvpn_public.asc && \ echo ""deb https://repo.nordvpn.com/deb/nordvpn/debian stable main"" > /etc/apt/sources.list.d/nordvpn.list && \ apt-get update && \ apt-get install -y --no-install-recommends nordvpn && \ apt-get clean && \ rm -rf /var/lib/apt/lists/*ENTRYPOINT /etc/init.d/nordvpn start && sleep 5 && /bin/bash -c ""$@""CMD bash
```
8. Click Ctrl + X, then Y, and finally, Enter to save and exit.
Now, you've successfully set up a Docker environment for further NordVPN Docker image building.
## Building the NordVPN Docker image
After you have set up the environment in Docker, make sure you’re in the same directory you have just created, which stores the Dockerfile. Once you’re certain you’re in the correct directory, you can proceed with building the NordVPN Docker image by following these steps:
1. Build the image with this command (add your desired image name):
```
sudo docker build -t .
```
Note: Do not forget the dot at the end of the command line.
2. Run the image:
```
sudo docker run -it --hostname mycontainer --cap-add=NET_ADMIN --sysctl net.ipv6.conf.all.disable_ipv6=0
```
Explanation:-it - instructs Docker to allocate a pseudo-TTY connected to the container’s stdin; creating an interactive bash shell in the container;--cap-add - needed to successfully run the NordVPN Daemon and connect to our servers;--sysctl net.ipv6.conf.all.disable_ipv6=0 - [disables IPv6 traffic on Linux](https://support.nordvpn.com/hc/en-us/articles/20164669224337-How-to-disable-IPv6-on-Linux) for the NordVPN container, making sure that there are no leaks after connecting to our servers.--hostname - the hostname for your container. The flag should be used to prevent Meshnet hostname from changing after restarting the Docker container.
3. [Login to NordVPN using a token](https://support.nordvpn.com/hc/en-us/articles/20286980309265-How-to-use-a-token-with-NordVPN-on-Linux) method:
```
nordvpn login --token
```
After the steps are done, you have successfully set up NordVPN Docker image.
For more detailed information on how to use Docker, check the Docker documentation.",https://support.nordvpn.com/hc/en-us/articles/20465811527057-How-to-build-the-NordVPN-Docker-image
Switching connection protocol to OpenVPN UDP or TCP on Linux,"1. Open the Terminal (Ctrl + Alt + T shortcut).
2. Enable OpenVPN with the following command:nordvpn set technology openvpn
3. Type the following command:nordvpn set protocol tcp (for OpenVPN TCP)ornordvpn set protocol udp (for OpenVPN UDP)
You can also read about the [difference between TCP and UDP](https://nordvpn.com/blog/tcp-or-udp-which-is-better/) protocols.",https://support.nordvpn.com/hc/en-us/articles/20465783529233-Switching-connection-protocol-to-OpenVPN-UDP-or-TCP-on-Linux
Troubleshooting NordVPN connectivity issues on Linux,"If you’re having trouble connecting to NordVPN on your Linux device, you can try making a few adjustments. Check if the issue persists after following each set of Linux troubleshooting commands below.
1. Update the NordVPN app:
* Open the terminal.
* Type the following commands to update the app:sudo apt update (or sudo apt-get update)sudo apt upgrade (or sudo apt-get upgrade)
2. Reinstall the app:
* Type the following command to remove the app:sudo apt --purge autoremove nordvpn* (or sudo apt-get --purge autoremove nordvpn*)
* Reinstall the app following our tutorial on [how to install NordVPN on Linux](https://support.nordvpn.com/hc/en-us/articles/19445292364689-Installing-and-using-NordVPN-on-Linux).
3. If you see the “Whoops! Cannot reach System Daemon” error, enter the following commands:
sudo systemctl start nordvpnd sudo systemctl enable nordvpnd
4. If you get an error message: “rotating: transport rotator: ptr timer is locked.”, try the following methods:
* Run the following command to restart the NordVPN daemon: sudo systemctl restart nordvpnd
* Try to disable IPv6 system-wide, as shown in [this](https://support.nordvpn.com/hc/en-us/articles/20164669224337-How-to-disable-IPv6-on-Linux) article.
5. If NordVPN is not connecting on Linux after you’ve tried all of the above, try connecting using the [manual connection method](https://support.nordvpn.com/hc/en-us/articles/20164827795345-Connect-to-NordVPN-using-Linux-Terminal).",https://support.nordvpn.com/hc/en-us/articles/20398047039889-Troubleshooting-NordVPN-connectivity-issues-on-Linux
How to get connection logs from the NordVPN Browser Extension,"When troubleshooting NordVPN Browser Extension issues with the our customer support team, they may ask you to upload the connection log files from it. Below you can find the steps on how to download them.
1. Open the NordVPN Browser Extension.
2. Click on the Get help menu item.
3. Click Download – you will find the logs file in your downloads directory.",https://support.nordvpn.com/hc/en-us/articles/29758845534993-How-to-get-connection-logs-from-the-NordVPN-Browser-Extension
Connect to NordVPN with Firefox extension,"## Setting up NordVPN extension on Firefox
You can get the [VPN service for Firefox](https://nordvpn.com/download/firefox-extension/) from the [Firefox website for extensions](https://addons.mozilla.org/en-US/firefox/addon/nordvpn-proxy-extension/).
1. To install the extension click Add to Firefox.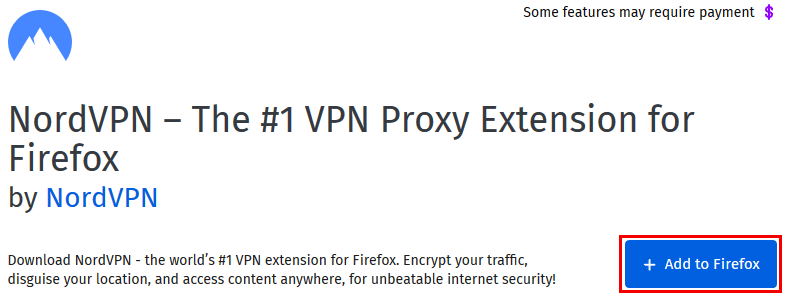
2. Afterward, you will be prompted to grant permission for this application, click Add.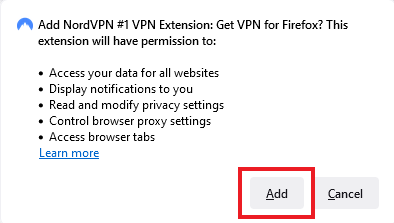
3. After that, you will be asked to allow the extension to run in a private window, check this and click ""Okay"". 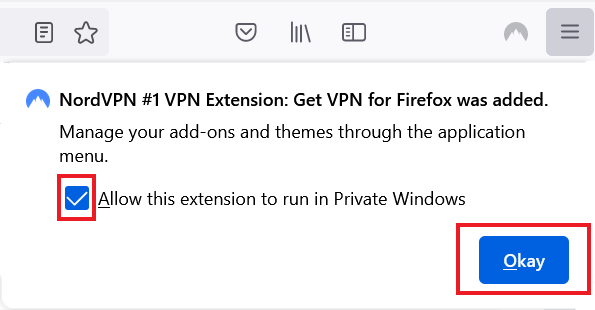
4. After the installation is finished NordVPN logo will appear on the Toolbar on the top right corner of the browser.
5. Click on the NordVPN logo and you will be prompted to sign in, use your NordVPN credentials to do so. 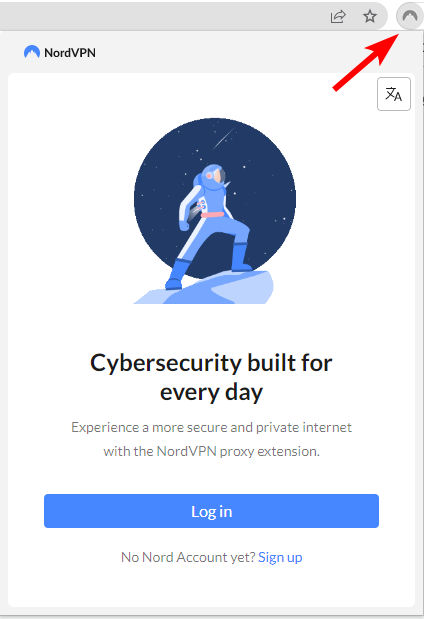
## Using and customizing the NordVPN Firefox Extension
Let's look at how you can make the first connection and adjust the extension settings to suit your needs. 
1. Protected status: when you connect to a NordVPN server, this bar will confirm that your connection is successful by displaying the status as Protected.
2. Quick Connect: the fastest way to begin using the NordVPN extension. After pressing Quick Connect, you'll be immediately connected to a NordVPN server.
3. Search: whereas the Quick Connect option will decide on a server location for you, this option allows you to specify the country of the NordVPN server.
4. Settings: here, you can find your General, Connection, Security and privacy settings.General: in these settings, you can find your subscription information, application appearance, language preferences, and a function to import and export [split tunneling](https://support.nordvpn.com/hc/en-us/articles/20321703651985-Split-Tunneling-feature-on-NordVPN-extension) settings.Connection: when accessing connection settings, you can choose to automatically connect to NordVPN servers or add URLs that you wish to be excluded from the NordVPN connection.Security and privacy: enable the [WebRTC](https://support.nordvpn.com/hc/en-us/articles/20318383008529-How-to-stop-WebRTC-leaks) Leaks option and the [Threat Protection](https://support.nordvpn.com/General-info/Features/1047407402/What-are-Threat-Protection-and-Threat-Protection-Lite.htm) feature. Also, choose to turn on security warnings for suspicious websites.
5. Support Assistance: more information about the extension and live chat with an agent option can be found here.
6. Notifications: updates and news about the NordVPN extension.
7. Main extension window: If you click here, you can open the main extension window.
8. List of Recently Connected Countries: This section displays the countries to which you have established a recent connection. In case you haven't connected to any server yet, you will find recommendations for countries to connect to.",https://support.nordvpn.com/hc/en-us/articles/20350669461137-Connect-to-NordVPN-with-Firefox-extension
What is a NordVPN browser extension and why do I need it?,"NordVPN extension for [Chrome](https://support.nordvpn.com/hc/en-us/articles/20349533941265-How-to-set-up-NordVPN-with-Chrome-extension), [Edge](https://support.nordvpn.com/hc/en-us/articles/19627093939601-Connect-to-NordVPN-with-Edge-Extension), and [Firefox](https://support.nordvpn.com/hc/en-us/articles/20350669461137-Connect-to-NordVPN-with-Firefox-extension) browsers sends your traffic through the proxy server and allows you to have a different IP address that hides your location and identity. Not all websites protect your connection (HTTPS) and encrypt your online traffic. With the NordVPN extension, your browsing information will be secured and your online presence will not be visible to anyone.
The extension also offers these features:
* Split Tunneling allows you to split your traffic through different URLs and domains.
* Block the WebRTC (communication protocol that relies on JavaScript) by blocking it you can avoid leaking your real IP address.
* The Threat Protection function blocks intrusive ads and unsafe websites based on DNS filtering. Make sure you’re connected to the NordVPN server for this feature to work.
Note: Currently NordVPN Extension is not supported on Opera browser.",https://support.nordvpn.com/hc/en-us/articles/20322621196945-What-is-a-NordVPN-browser-extension-and-why-do-I-need-it
Can I use NordVPN app and NordVPN extension simultaneously?,"It is not recommended to connect to both extension and app at the same time since it would create a double connection and can slow your traffic down.However, if you want to use the NordVPN browser extension and app at the same time, you could exclude your browser app (e.g Chrome, Firefox, Edge) from VPN traffic on Windows OS split tunneling feature, connect to VPN on the NordVPN App and NordVPN extension at the same time.",https://support.nordvpn.com/hc/en-us/articles/20321339032465-Can-I-use-NordVPN-app-and-NordVPN-extension-simultaneously
How to set up NordVPN with qBittorrent?,Configure your NordVPN qBittorrent proxy settings to use the qBittorrent client with the NordVPN proxy.,https://support.nordvpn.com/hc/en-us/articles/20195967385745-NordVPN-proxy-setup-for-qBittorrent
NordVPN proxy setup for qBittorrent,"NordVPN works with qBittorrent and most other peer-to-peer platforms, so usually there’s no need for a proxy.
If for some reason you cannot use the [NordVPN app](https://nordvpn.com/download/) but still want to access qBittorrent safely, set up a proxy for qBittorrent by connecting to [NordVPN servers](https://nordvpn.com/servers/).
Note that NordVPN service should never be used to bypass copyright regulations. NordVPN does not promote, condone, or endorse the use of the service for such purposes. For more details, please read the NordVPN [Terms of Service](https://my.nordaccount.com/legal/terms-of-service/).
## How to set up NordVPN with qBittorrent?
Configure your NordVPN qBittorrent proxy settings to use the qBittorrent client with the NordVPN proxy.
1. Open qBittorrent.
2. Navigate to the application preferences by clicking Tools > Options. Alternatively, press Alt + O on your keyboard.
3. Select Connection.
4. Locate the Proxy server section and fill in the following information:• Type: SOCKS5• Host: Address of the proxy server of your choiceChoose from this list of servers:amsterdam.nl.socks.nordhold.netatlanta.us.socks.nordhold.netdallas.us.socks.nordhold.netlos-angeles.us.socks.nordhold.netnl.socks.nordhold.netse.socks.nordhold.netstockholm.se.socks.nordhold.netus.socks.nordhold.netnew-york.us.socks.nordhold.netsan-francisco.us.socks.nordhold.netdetroit.us.socks.nordhold.net
* Port: 1080
* Select the Use proxy for peer connections and the Authentication checkboxes.
* Username: Your NordVPN service username
* Password: Your NordVPN service password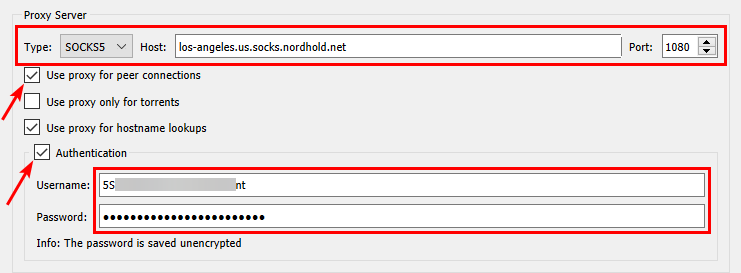
* You can find your NordVPN service credentials (service username and service password) in the [Nord Account dashboard](https://my.nordaccount.com/dashboard/nordvpn/):
1. Click Set up NordVPN manually.
2. You will receive a verification code in your email that you use for NordVPN services. Type the code in: 
3. Copy the credentials using the “Copy” buttons on the right:
1. Click Apply and OK to save the changes.
## How to check if your proxy setup is working
You’ve connected to a NordVPN server via SOCKS5 proxy. But just to be sure, let’s check whether it is working correctly.
1. Visit the [ipleak.net](https://ipleak.net/) website.
2. Scroll down to the Torrent Address detection section, click Activate, and click this Magnet Link.
3. A new window will show up, prompting you to open qBittorrent. Select Open qBittorrent.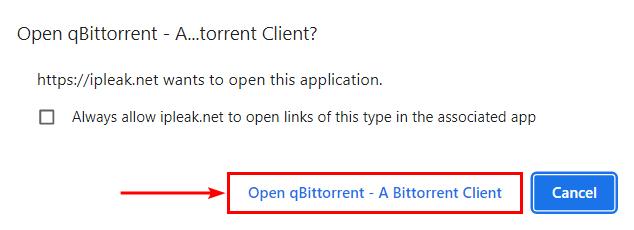Important: keep ipleak.net open.
4. When qBittorrent is open, click OK to add the torrent.
5. While the torrent is downloading metadata, return to the ipleak website.
6. Under Torrent Address detection, you should see the IP address of your chosen proxy server.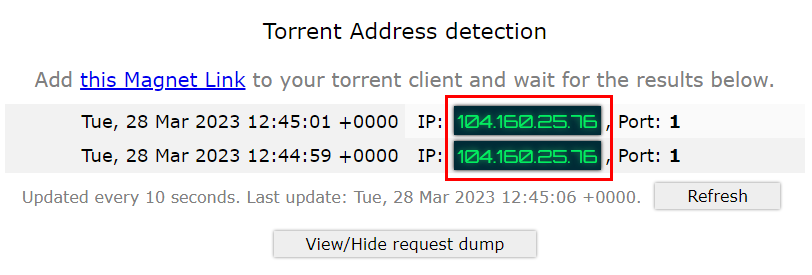If no address is showing, click the Refresh button to update the results.
If you see the NordVPN server IP address, it means that qBittorrent is downloading files through the NordVPN SOCKS5 proxy server and your downloads are secured!",https://support.nordvpn.com/hc/en-us/articles/20195967385745-NordVPN-proxy-setup-for-qBittorrent
NordVPN Proxy servers explained,"In computer networks, a [proxy server](https://nordvpn.com/blog/proxy-server/) acts as an intermediary for queries from internet users seeking resources from other servers. In almost all cases, a proxy server does not have any encryption and works only on a browser. Meanwhile, a [VPN](https://nordvpn.com/) has strong encryption, especially if it is OpenVPN, and it encrypts all your internet traffic entirely.
## NordVPN proxy servers
A proxy server serves various purposes, such as ensuring anonymity, speeding up internet access through caching, saving bandwidth, logging usage, scanning for malware, bypassing restrictions, and enforcing access policies. It can also help bypass filters, parental controls, and cross-domain restrictions for accessing external content.
[NordVPN’s browser extensions](https://nordvpn.com/features/proxy-extension/) use proxy servers to route your browser’s traffic, giving you a different IP address and masking your real one, ensuring your data’s security and encryption. That being said, using the NordVPN app is still more secure, as it encrypts all of your data, not just the browser’s.
## SOCKS5 proxy
SOCKS is an internet protocol used by proxy servers to route network packets between clients and servers, operating at Layer 5 of the OSI model. [SOCKS5](https://nordvpn.com/blog/socks5-proxy/), used by NordVPN proxy servers, supports both TCP and UDP traffic, provides authentication for authorized access, and handles connections at a lower level than HTTP proxies, making it highly versatile for various network tasks.
## Proxy setup guides
Follow the guides below to set up a proxy connection in the application of your choice.
* [qBittorrent](https://support.nordvpn.com/hc/en-us/articles/20195967385745-NordVPN-proxy-setup-for-qBittorrent)
* [Bittorrent](https://support.nordvpn.com/hc/en-us/articles/20465085067665-NordVPN-proxy-setup-for-BitTorrent)
* [uTorrent](https://support.nordvpn.com/hc/en-us/articles/19449763497489-NordVPN-proxy-setup-for-uTorrent)
* [Vuze](https://support.nordvpn.com/hc/en-us/articles/20458691129105-NordVPN-proxy-setup-on-Vuze)
* [Deluge](https://support.nordvpn.com/hc/en-us/articles/20341624031505-NordVPN-proxy-setup-on-Deluge)
Additionally, keep in mind that NordVPN service should never be used to bypass copyright regulations. NordVPN does not promote, condone, or endorse the use of the service for such purposes. For more details, please read the NordVPN Terms of Service.",https://support.nordvpn.com/hc/en-us/articles/19685375790865-NordVPN-Proxy-servers-explained
NordVPN proxy setup for uTorrent,"You can use NordVPN with uTorrent and other peer-to-peer platforms without setting up a proxy.
However, if you don’t want to use the[ NordVPN app](https://nordvpn.com/download/) for uTorrent, setting up a NordVPN proxy is a great alternative.
Note that NordVPN service should never be used to bypass copyright regulations. NordVPN does not promote, condone, or endorse the use of the service for such purposes. For more details, please read the NordVPN[ Terms of Service](https://my.nordaccount.com/legal/terms-of-service/).
## How to set up NordVPN with uTorrent
1. Open uTorrent.
2. In the menu bar, click Option > Preferences. Alternatively, press Ctrl + P on your keyboard.
3. Select the Connection section.
4. Under Proxy Server, from the Type dropdown, select Socks5.
5. In the Proxy field, enter an address of a selected proxy server.Here is a list of servers you can choose from:amsterdam.nl.socks.nordhold.netatlanta.us.socks.nordhold.netdallas.us.socks.nordhold.netlos-angeles.us.socks.nordhold.netnl.socks.nordhold.netse.socks.nordhold.netstockholm.se.socks.nordhold.netus.socks.nordhold.netnew-york.us.socks.nordhold.netsan-francisco.us.socks.nordhold.netdetroit.us.socks.nordhold.net
6. In the Port field, type in 1080.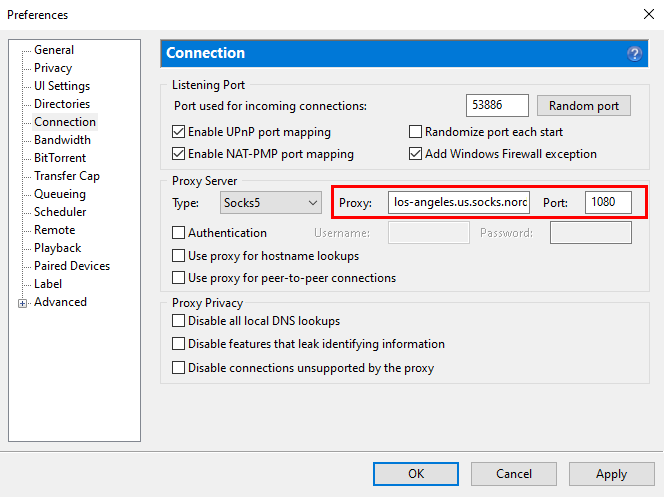
7. Select the following checkboxes:
* Authentication
* Use proxy for hostname lookups
* Use proxy for peer-to-peer connections
* Disable all local DNS lookups
* Disable features that leak identifying information
* Disable connections unsupported by the proxyAnd enter your authentication details.Username: NordVPN service usernamePassword: NordVPN service password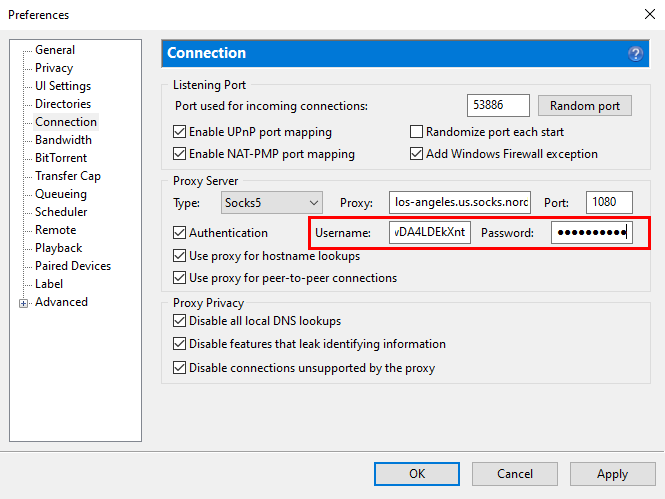
You can find your NordVPN service credentials (service username and service password) in the[ Nord Account dashboard](https://my.nordaccount.com/dashboard/nordvpn/):
1. Click Set up NordVPN manually.
2. You will receive a verification code in your email that you use for NordVPN services. Type the code in: 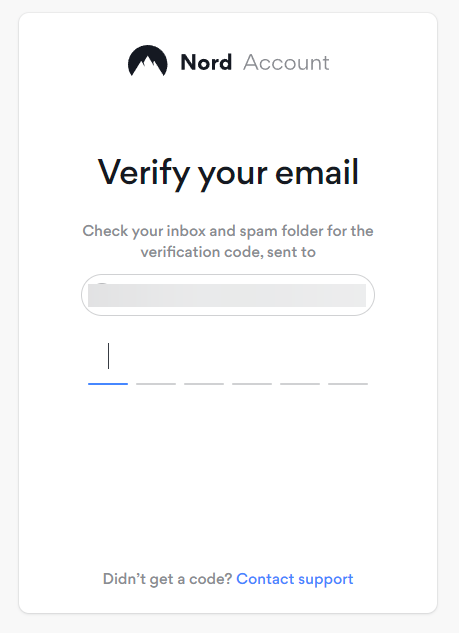
3. Copy the credentials using the “Copy” buttons on the right:
1. Click Apply and OK to save changes.
## How to check if your proxy setup is working
Let’s check if your proxy setup is working.
1. Visit the[ ipleak.net](http://ipleak.net) website.
2. Scroll down to the Torrent Address detection section, click Activate, and click this Magnet Link.
3. A new window will show up, prompting you to open uTorrent. Select Open uTorrent.Important: keep ipleak.net open.
4. Once uTorrent opens, click OK to add the torrent.
5. While the torrent is downloading metadata, return to the ipleak website.
6. Under Torrent Address detection, you should see the IP address of your chosen proxy server.If no address is showing, click the Refresh button to update the results.
If you see the NordVPN server IP address you selected, the setup is working — uTorrent is downloading files through a NordVPN [SOCKS5 proxy](https://nordvpn.com/blog/socks5-proxy/) server.",https://support.nordvpn.com/hc/en-us/articles/19449763497489-NordVPN-proxy-setup-for-uTorrent
How to Set Up VPN on Cudy router,"In this article, you will learn how to set up a NordVPN connection on your Cudy router. Configuring the VPN directly on your router ensures that all devices connected to your network benefit from a secure connection, as all internet traffic will be routed through the VPN.To set up a NordVPN connection on your Cudy router, please follow along to these steps:
1. Open Cudy's admin panel by going to .
2. Open General settings.
3. Click the VPN tab.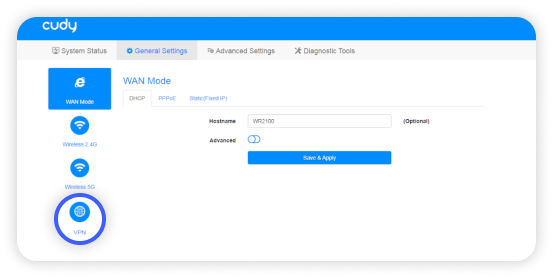
4. Enable the VPN and select your protocol as OpenVPN.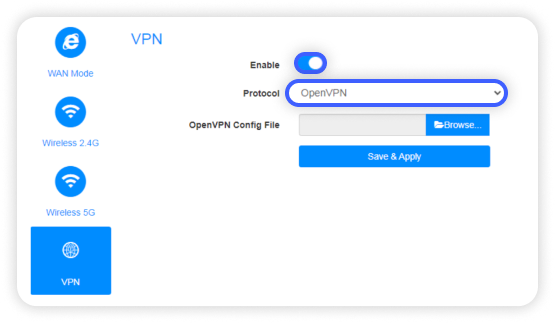
5. Go to your [NordAccount](https://my.nordaccount.com/dashboard/), click on NordVPN and select Set up NordVPN manually.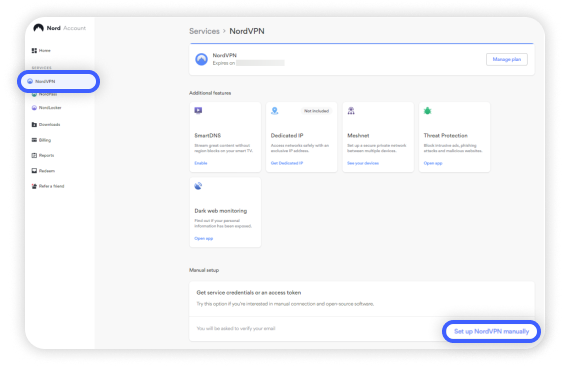
6. Click on Server recommendation and select OpenVPN UDP or TCP.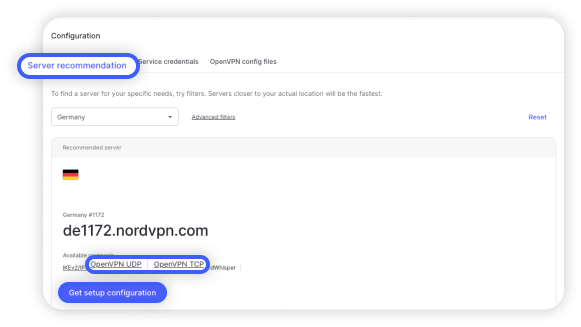
7. Go back to the VPN tab in the Cudy admin panel and click Browse.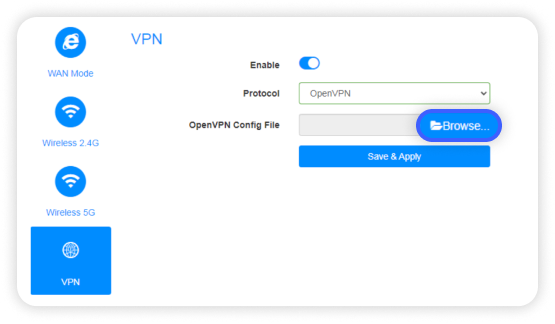
8. Open the downloaded OpenVPN file.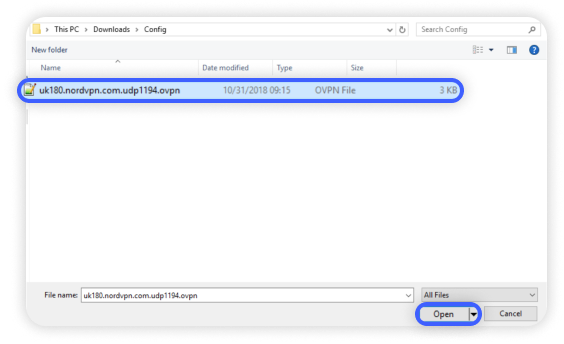Once you have opened the file, you will need to fill in the Username and Password.
9. Go to your [NordAccount](https://my.nordaccount.com/dashboard/nordvpn/manual-configuration/service-credentials/) and copy your Service credentials.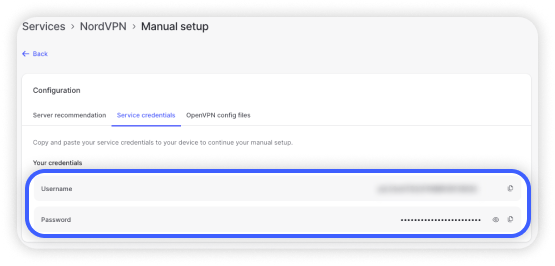
10. Enter your credentials in the Username and Password section in the Cody admin panel, and click Save & Apply.
11. Open Advanced Settings.
12. Click on Custom DNS.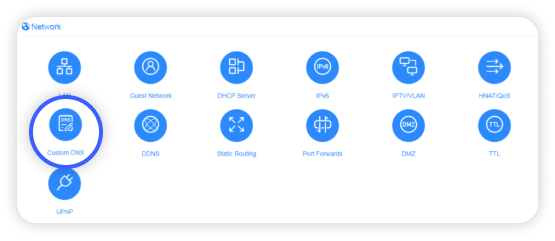
13. Enter 103.86.96.100 and 103.86.99.100 into the Preferred DNS & Alternate DNS fields respectively.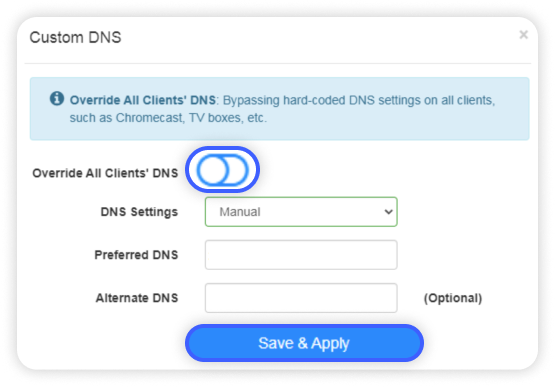
Once you have saved and applied the DNS, your NordVPN connection will be ready.",https://support.nordvpn.com/hc/en-us/articles/31761845199121-How-to-Set-Up-VPN-on-Cudy-router
How to check the version of OpenVPN on an AsusWRT-running router,"When having the VPN setup on router level, some connection issues could be caused by the version of OpenVPN. Specifically, if you are using version 2.4.x, you should encounter no OpenVPN-related problems.
In case you have OpenVPN 2.3.x, you'll need to either upgrade your router firmware or switch to AsusWRT-Merlin in order to use NordVPN.
1. After you have logged into the control panel of your router, select VPN in the left sidebar menu.
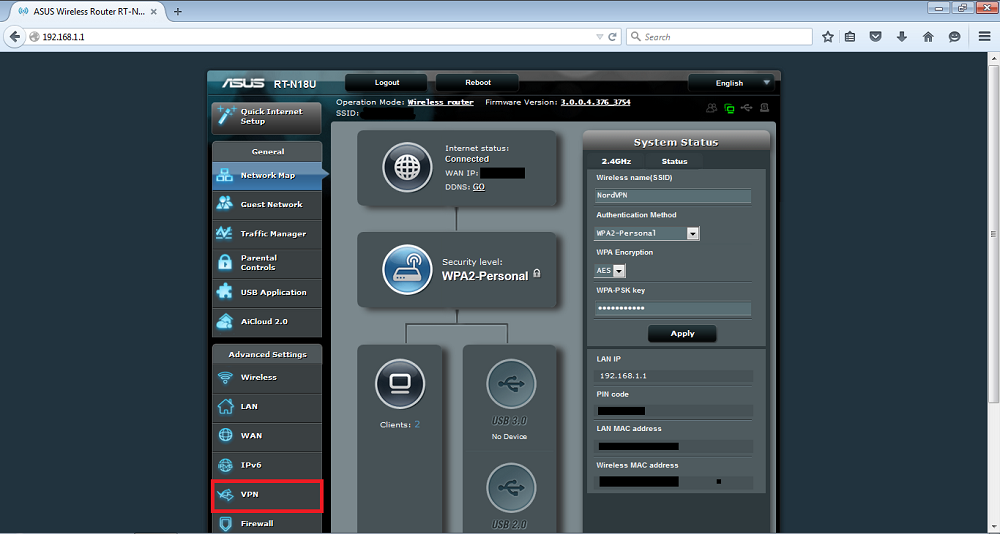
2. Press on the VPN Client tab at the top of the page.
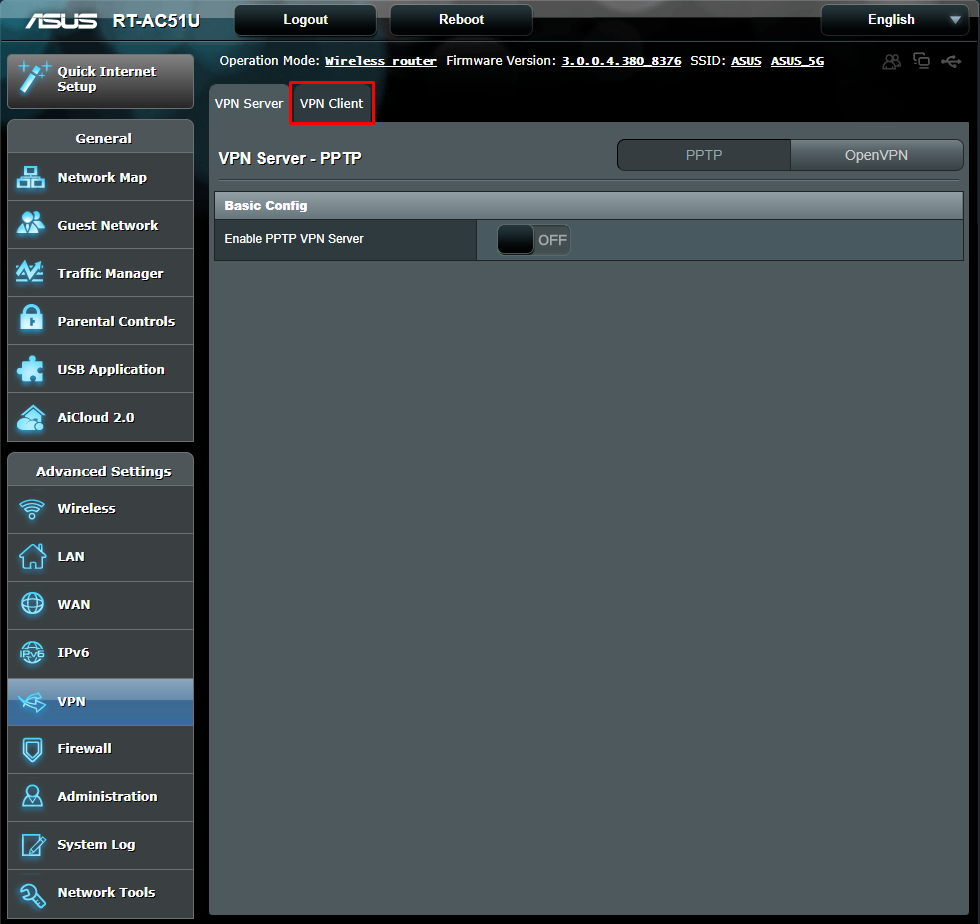
3. Now, next to the VPN profile, click on 'Activate'. 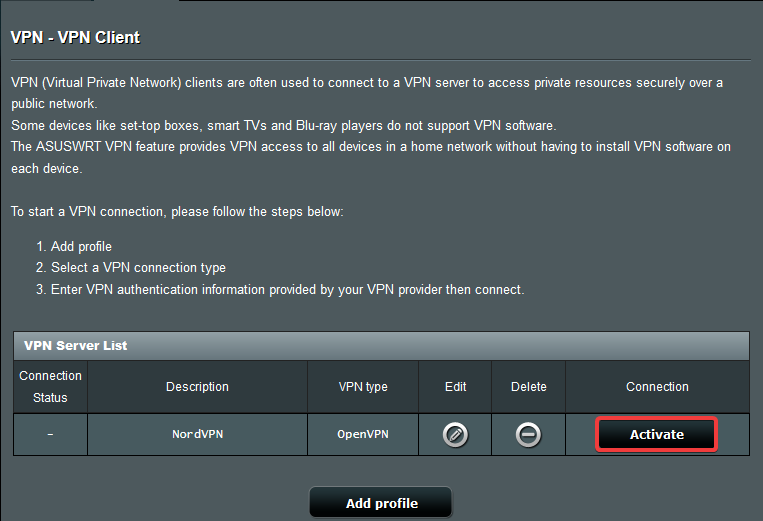4. Now, head to System Log. You will see a detailed indication of your connection status. Scroll to the top, that's where you'll find the OpenVPN version.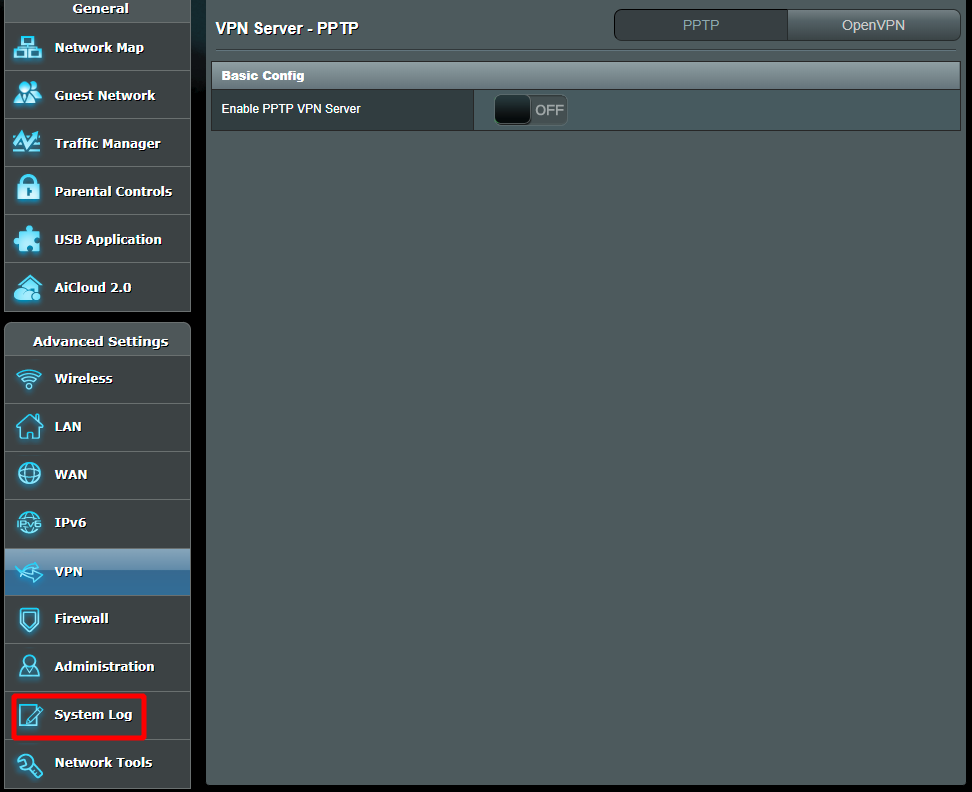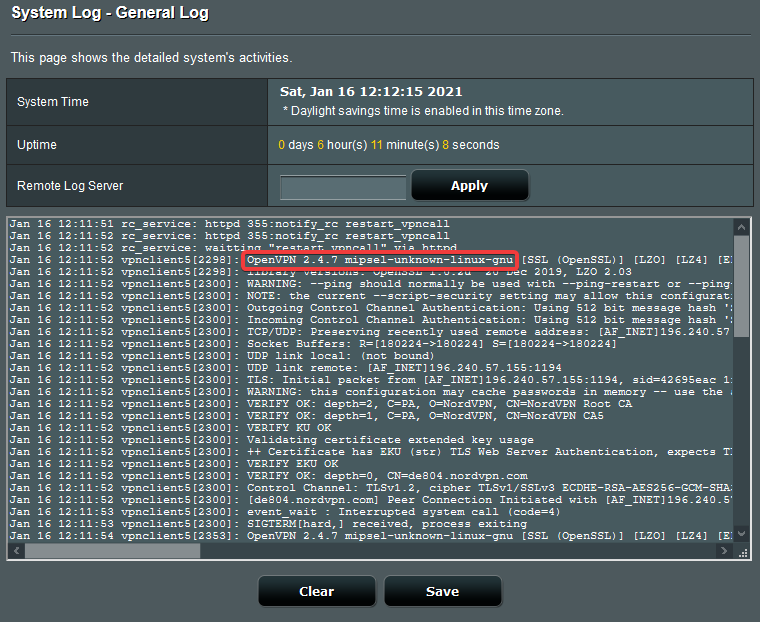",https://support.nordvpn.com/hc/en-us/articles/20466863277969-How-to-check-the-version-of-OpenVPN-on-an-AsusWRT-running-router
DD-WRT setup with FlashRouters Privacy app,"You can set up a VPN on your router easily with [FlashRouters](https://nordvpn.com/flashrouters/).
### DD-WRT firmware build requirements
The minimum required DD-WRT build version for the FlashRouters Privacy App is 02-10-2020-r42335. You can download the latest DD-WRT firmware build for your router model [here](https://support.flashrouters.com/dd-wrt/dd-wrt-features/i-want-to-upgrade-the-dd-wrt-firmware-of-my-flashrouter/).
#### Officially supported routers:
* Asus RT-AC5300
* Asus RT-AC56U
* Asus RT-AC66U
* Asus RT-AC68U
* Linksys WRT1200AC
* Linksys WRT1900AC
* Linksys WRT1900ACv2
* Linksys WRT1900ACS
* Linksys WRT3200ACM
* Linksys WRT32X
* Netgear R6300v2
* Netgear R6400v2
* Netgear R7000
* Netgear R7800
* Netgear R8000
* Netgear R8500
* Netgear R9000
Contact the FlashRouters support if you are uncertain about the model of your router or you can’t find it in the list above.
### How to Install the FlashRouters Privacy App
1. Make sure the router is connected to the internet.
2. Go to Administration > Commands, then copy and paste the following line:
```
curl --silent --retry 3 https://api.flashroutersapp.com/api/v1.0/ddwrt/group/privacy/provider/NordVPN/install | sh
```
3. Click Run Commands.
4. You should see an Installation Successful message.
### How to access the FlashRouters Privacy App
There are a few ways to access the FlashRouters Privacy App:
1. Go to [flashroutersapp.com](https://flashroutersapp.com/)
2. In the DD-WRT settings, go to Status > MyPage
3. Directly at
### How to connect to NordVPN
1. Make sure you are on the Connect page in the FlashRouters App and enter your NordVPN account username and password.
You can find your NordVPN service credentials (service username and service password) in the [Nord Account dashboard](https://my.nordaccount.com/dashboard/nordvpn/):
1. Click Set up NordVPN manually.
2. You will receive a verification code in your email that you use for NordVPN services. Type the code in: 
3. Copy the credentials using the “Copy” buttons on the right:
2. Select a [NordVPN server](https://nordvpn.com/servers/):
* You can scroll through the server dropdown list or type the desired server in the search bar.
* Sort servers by country closest to you.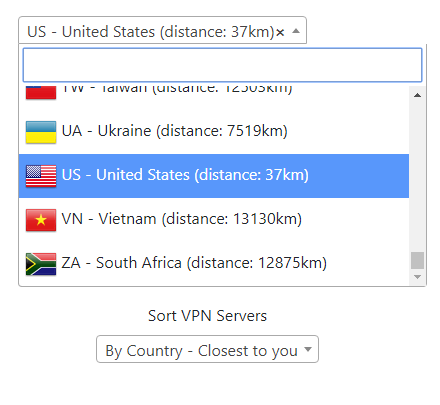
* Sort servers by least loaded country.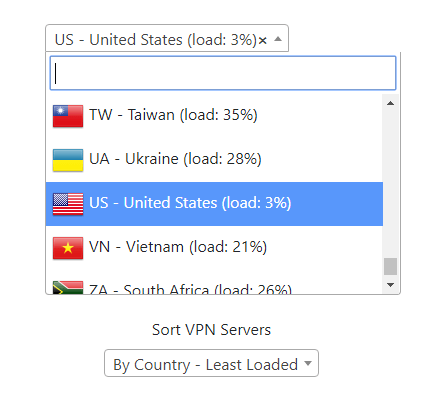
3. Click Connect.
### Using Auto-Connect and Global Kill Switch
1. Check the Auto-Connect box to make FlashRouter connect to NordVPN automatically upon reboot.
2. Check Global Kill Switch to kill internet connection if the VPN disconnects unexpectedly.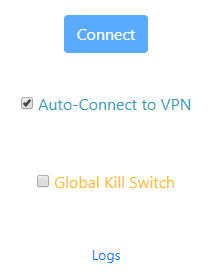
### Using the Options page
1. Device Renaming
2. Policy Routing for Devices:
* Default - Connected to VPN
* Kill-Switch - [Kill Switch](https://nordvpn.com/features/vpn-kill-switch/) per device (Global Kill Switch must be disabled)
* VPN-bypass - device connects directly to the ISP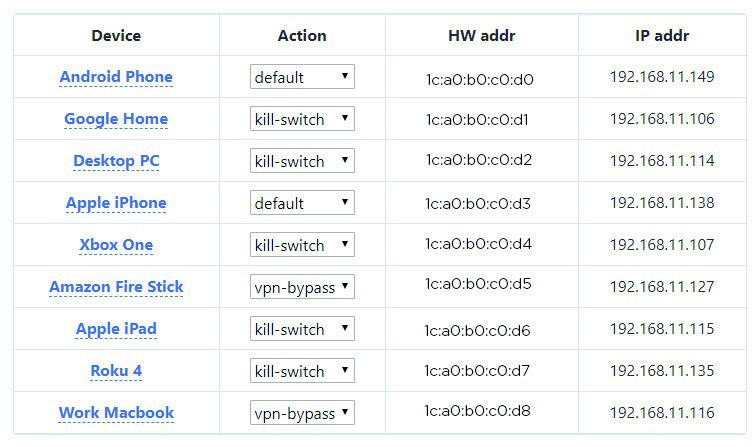
3. Policy Routing for Websites and Host IPs: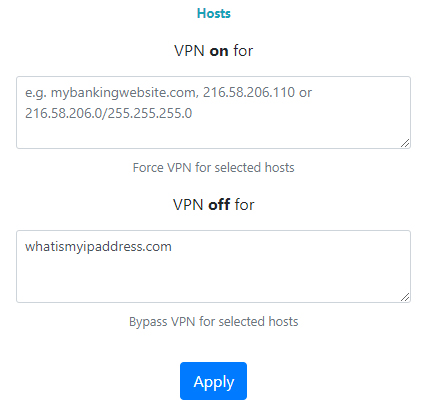
### Simple Setup
DNS Servers: Enter any custom DNS servers from a trusted source like Google and OpenDNS, or the NordVPN DNS servers: 103.86.96.100 and 103.86.99.100.Wi-Fi 2.4 GHz: View and/or edit your FlashRouter 2.4 GHz Wi-Fi network SSID or Password. When you click Apply, your router will automatically reboot, and the 2.4 GHz Wi-Fi network information will be updated.Wi-Fi 5.0 GHz: View and/or edit your FlashRouter 5.0 GHz Wi-Fi network SSID or Password. When you click Apply, your router will automatically reboot, and the 5.0 GHz Wi-Fi network information will be updated.Note: If you have a tri-band router, another Wi-Fi 5 GHz section will be in this area.Remember: After changing the Wi-Fi information, you will need to rejoin the network to regain access to your router and the FlashRouters App.Back to DD-WRT: Click if you would like to change additional settings within the DD-WRT firmware GUI.Configure VPN: All done? Move on to the VPN setup in the FlashRouters Privacy App. More information is available [here](https://support.flashrouters.com/dd-wrt/fr-dd-wrt-privacy-app-features/fr-privacy-app-simple-setup-page-changing-basic-router-settings/).
If you have any issues with the FlashRouters App, please contact the FlashRouters support via [this form](https://www.flashrouters.com/contact/).",https://support.nordvpn.com/hc/en-us/articles/20462541897617-DD-WRT-setup-with-FlashRouters-Privacy-app
MikroTik IKEv2 setup with NordVPN,"MikroTik routers support many VPN services, including NordVPN. In particular, MikroTik routers with RouterOS version 6.45 and later let you establish an IKEv2 EAP [VPN tunnel](https://nordvpn.com/blog/vpn-tunnel/) to a NordVPN server. This tutorial explains how you can connect to a VPN on your MicroTik router.
1. Open the terminal in your RouterOS settings.
2. Install the NordVPN root certificate by running the following commands:/tool fetch url=""https://downloads.nordcdn.com/certificates/root.der""/certificate import file-name=root.der
3. Connect to the NordVPN server to find out the hostname of the [recommended server](https://my.nordaccount.com/dashboard/nordvpn/manual-configuration/server-recommendation/). For our example, we used ""nl125.nordvpn.com.""
Follow the steps below to find the best server for your connection:
1. Log into your [Nord Account](https://my.nordaccount.com/), and click NordVPN.
2. Scroll down to Advanced Settings and click Set up NordVPN manually.
3. Select the Server recommendation tab. According to your location, the best server will be recommended.
4. By pressing Advanced filters you can further customize the recommended servers by selecting the Server type and the Security protocol.
5. Under the server IP, next to Available protocols, select IKEv2/IPSec.
6. In the window that pops up, copy the server hostname and use it in your IKEv2 manual connection setup.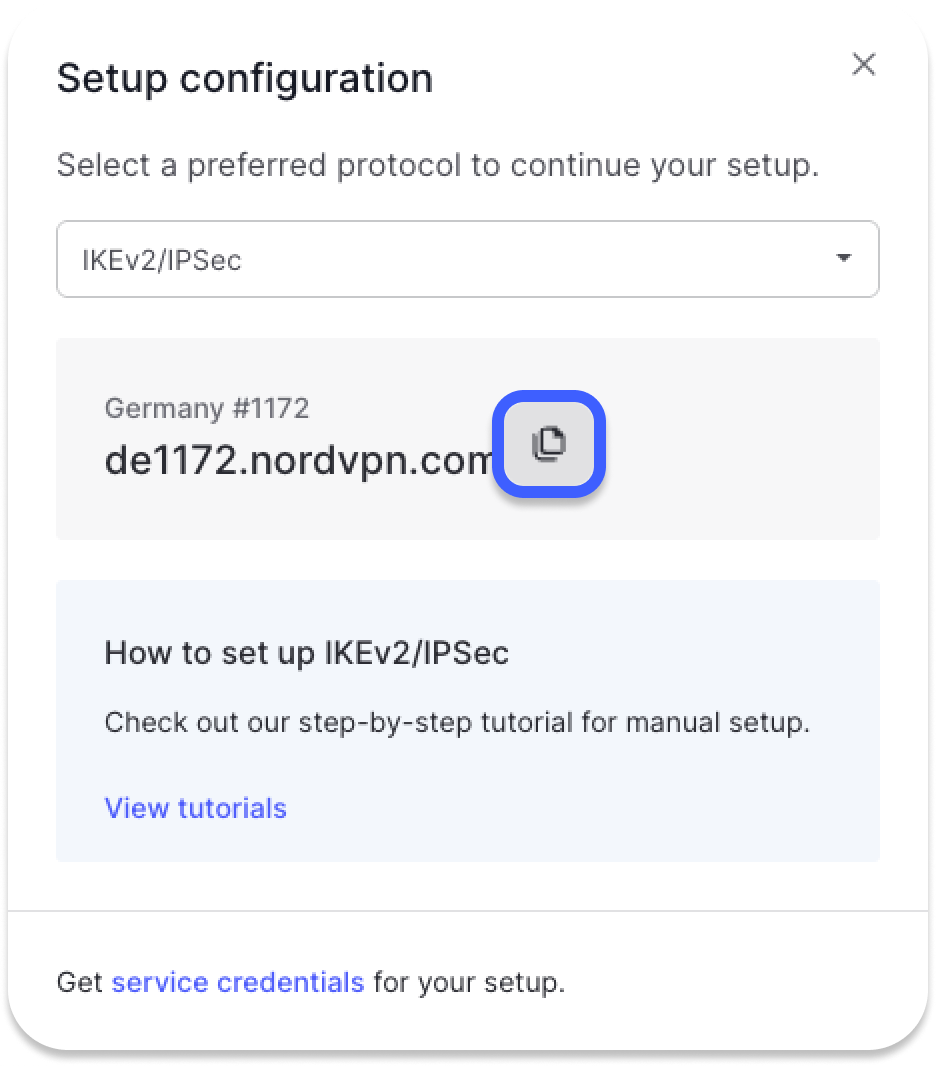
7. When connecting to IKEv2 manually, you're going to need to use the Username and Password from the Service credential tab.
8. Now you have to set up the IPsec tunnel. We recommend creating a separate profile and proposal configuration to avoid interfering with existing or future IPsec configuration:/ip ipsec profileadd name=NordVPN/ip ipsec proposaladd name=NordVPN pfs-group=noneWhile it is possible to use the default policy template, it is better to create a new policy group and template to separate this configuration from other IPsec configurations./ip ipsec policy group add name=NordVPN/ip ipsec policy add dst-address=0.0.0.0/0 group=NordVPN proposal=NordVPN src-address=0.0.0.0/0 template=yes
9. Create a new “mode config” entry with “responder=no” (no quotation marks) that will request configuration parameters from the server:/ip ipsec mode-configadd name=NordVPN responder=no
10. Create peer and identity configurations. Enter your NordVPN credentials in the username and password parameters:/ip ipsec peeradd address=nl125.nordvpn.com exchange-mode=ike2 name=NordVPN profile=NordVPN/ip ipsec identityadd auth-method=eap certificate="""" eap-methods=eap-mschapv2 generate-policy=port-strict mode-config=NordVPN peer=NordVPN policy-template-group=NordVPN username=YourNordVPNServiceUsername password=YourNordVPNServicePassword
11. You can find your NordVPN service credentials (service username and service password) in the [Nord Account dashboard.](https://my.nordaccount.com/dashboard/nordvpn/)
Follow the steps below to find the service credentials for manual connection setup:
1. Log into your [Nord Account](https://my.nordaccount.com/), click NordVPN, and, under Manual setup, click on Service credentials. Here you'll find the Username and Password needed to connect manually.
2. Now choose what to send over the VPN tunnel. In this example, we have the local network “192.168.88.0/24” behind the router, and we want all traffic from this network to be sent through the tunnel. First, we have to make a new “IP/Firewall/Address” list that consists of our local network./ip firewall address-listadd address=192.168.88.0/24 list=localAssign the newly created ""IP/Firewall/Address"" list to the ""mode-config"" configuration:/ip ipsec mode-configset [ find name=NordVPN ] src-address-list=local
3. Verify that the correct source NAT rule is dynamically generated when the tunnel is established./ip firewall nat print",https://support.nordvpn.com/hc/en-us/articles/20398642652561-MikroTik-IKEv2-setup-with-NordVPN
DrayTek Vigor IKEv2 setup with NordVPN,"This tutorial was officially written by DrayTek. You can find the original tutorial here.
Important update: This tutorial will likely only work for DrayTek routers that have the following version of the firmware:
v2135 - 4.2.1.2 v2765 - 4.2.1.1 v2865 - 4.2.2 v2927 - 4.2.2
Older versions may fail to authenticate.
This tutorial will show you how to create an IKEv2 EAP VPN tunnel from Vigor Router to a NordVPN server.
First, we'll need to get the hostname of the server that we'll be connecting to.In order to find the server best suited for you, follow the steps below:
Follow the steps below to find the best server for your connection:
1. Log into your [Nord Account](https://my.nordaccount.com/), and click NordVPN.
2. Scroll down to Advanced Settings and click Set up NordVPN manually.
3. Select the Server recommendation tab. According to your location, the best server will be recommended.
4. By pressing Advanced filters you can further customize the recommended servers by selecting the Server type and the Security protocol.
5. Under the server IP, next to Available protocols, select IKEv2/IPSec.
6. In the window that pops up, copy the server hostname and use it in your IKEv2 manual connection setup.
7. When connecting to IKEv2 manually, you're going to need to use the Username and Password from the Service credential tab.
1. Now, let's log into the router's management page.Open a browser of your choice, click on the address bar, type in 192.168.1.1 and press enter (If this does not open the log-in prompt, please check your router's manual for the proper IP address).You should see a log-in prompt appear. The default Username and Password should both be 'admin' or 'admin'/blank.
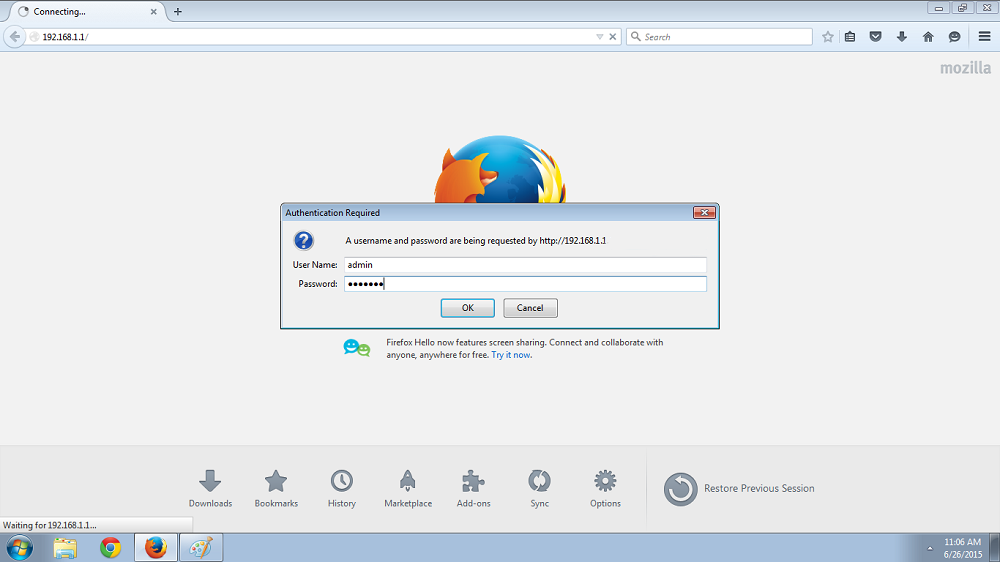
2. Now, navigate to Certificate Management >> Trusted CA Certificate. When there, click IMPORT.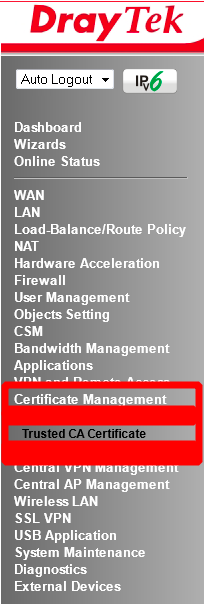
3. We will need to import the NordVPN root CA certificate, which you must first download by following this link: .
4. Afterwards, press on Choose File and select the root file which you downloaded in the previous step. Later, click Import.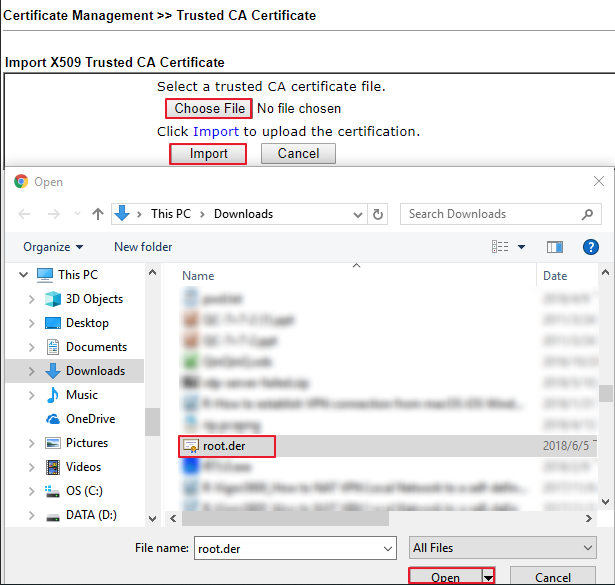
5. Wait for a few seconds until the router responds Import Success and the Certificate Status shows OK.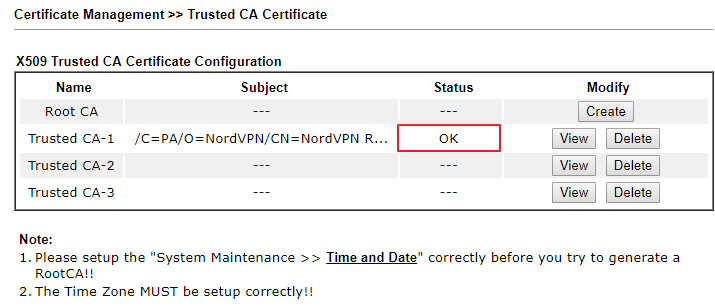
6. Then, go to VPN and Remote Access >> IPsec Peer Identity.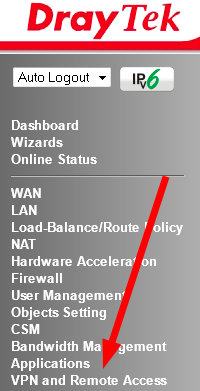Here, you need to set the profile name to NordVPN.
* Also, check Enable this account
* And, select Accept Any Peer ID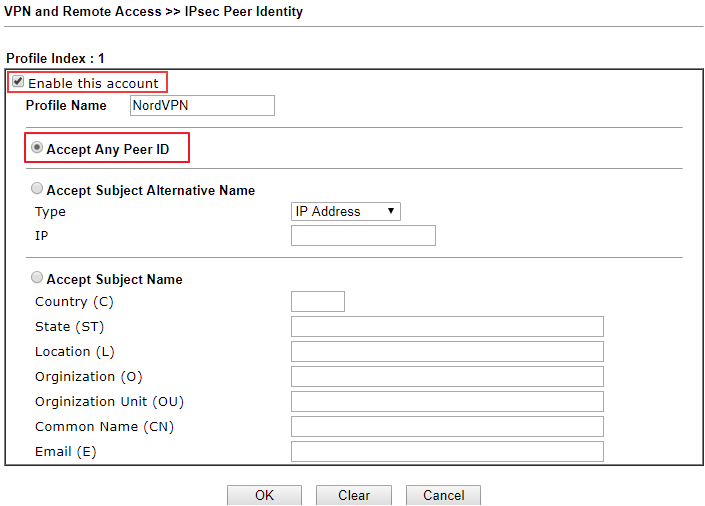
7. Following that, go to VPN and Remote Access >> LAN to LAN, click on an available index number, and edit the profile as follows.In Common Settings:
* Give it a profile name
* Check Enable this profile
* Set Call Direction to ""Dial-Out""
* At Dial-Out Through, select the WAN interface for VPN connection
8. In Dial-Out Settings:
* Select IPsec Tunnel and IKEv2
* Select IPsec EAP for the VPN server type
* Enter the hostname of the VPN server you got in step 1 at Server IP address/Hostname
* Enter your NordVPN service Username
* Enter your NordVPN service PasswordYou can find your NordVPN service credentials (service username and service password) in the [Nord Account dashboard](https://my.nordaccount.com/dashboard/nordvpn/):
Follow the steps below to find the service credentials for manual connection setup:
1. Log into your [Nord Account](https://my.nordaccount.com/), click NordVPN, and, under Manual setup, click on Service credentials. Here you'll find the Username and Password needed to connect manually.
1. * Choose Digital Signature for IKE Authentication Method and select the IPsec Peer Identity Profile created in step 5 for Peer ID
* Select AES with Authentication for IPsec Security Method
* Click Advanced
* 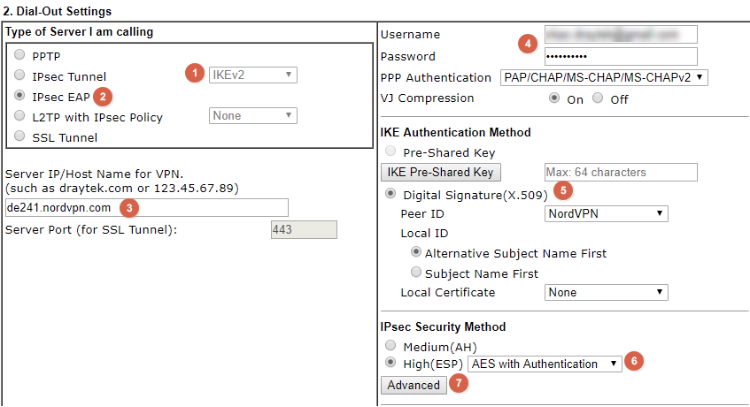
2. In the IKE advanced settings pop-up window, configure the following:
* IKE phase 1 proposal as AES256_SHA1_G14
* IKE phase 2 proposal as AES256_SHA1
* IKE phase 1 key lifetime as 28800
* IKE phase 2 key lifetime as 3600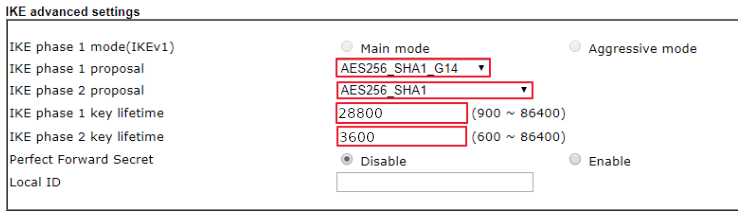
3. Click OK to close the window. At TCP/IP Network Settings:
* Enter Remote Network IP as 0.0.0.0
* Select Remote Network Mask to 0.0.0.0/00
* Change Routing to NAT for this VPN connection
* (optional) Enable Change Default Route to this VPN tunnel option if you want to route all traffic through NordVPN.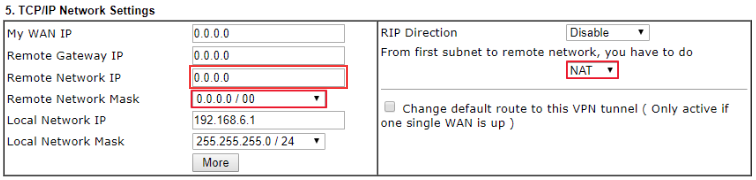
4. After finishing the above settings, you can check the VPN status via VPN and Remote Access >> Connection Management page.
### Optional
You can create Policy Route via Routing >> Load-Balance/Route Policy to send specific traffic to the NordVPN tunnel. To verify the policy, you can use the command “tracert” to check if the defined traffic is going through the VPN tunnel correctly.
",https://support.nordvpn.com/hc/en-us/articles/20397988815633-DrayTek-Vigor-IKEv2-setup-with-NordVPN
pfSense 2.5 Setup with NordVPN,"Disclaimer: With the 2.5.0 update, pfSense routers now have built-in WireGuard VPN client. Currently, it is impossible to setup the NordLynx protocol on pfSense routers using the WireGuard client, as the NordLynx protocol is only available with the NordVPN application on desktop and mobile devices at this time. More information regarding the availability of NordLynx can be found [here](https://support.nordvpn.com/hc/en-us/articles/19564565879441-What-is-NordLynx).
1. To set up OpenVPN on pfSense 2.5.0, access your pfSense from your browser, then navigate to System > Certificate Manager > CAs. Select +Add.You should see this screen:
2. For this tutorial, we will configure our pfSense to connect to a server in the Netherlands, but you should connect to a suggested server.
Follow the steps below to find the best server for your connection:
1. Log into your [Nord Account](https://my.nordaccount.com/), and click NordVPN.
2. Scroll down to Advanced Settings and click Set up NordVPN manually.
3. Select the Server recommendation tab. According to your location, the best server will be recommended.
4. By pressing Advanced filters you can further customize the recommended servers by selecting the Server type and the Security protocol.
In case you wish to select a specific server, follow these steps:
1. Under Set up NordVPN manually, select OpenVPN configuration files.
2. Find the server you wish to connect to by using the Search bar or by scrolling down and download it by clicking Download UDP or Download TCP.
3. When connecting to OpenVPN & IKEv2 manually, you're going to need to use the Username and Password from the Service credential tab.
Fill in the fields as follows:Descriptive Name: NordVPN_CA (we are using this name for the sake of this manual — you can use any name you like)Method: Import an existing Certificate AuthorityTrust Store: UncheckRandomize Serial: UncheckCertificate data:
```
-----BEGIN CERTIFICATE-----MIIFCjCCAvKgAwIBAgIBATANBgkqhkiG9w0BAQ0FADA5MQswCQYDVQQGEwJQQTEQMA4GA1UEChMHTm9yZFZQTjEYMBYGA1UEAxMPTm9yZFZQTiBSb290IENBMB4XDTE2MDEwMTAwMDAwMFoXDTM1MTIzMTIzNTk1OVowOTELMAkGA1UEBhMCUEExEDAOBgNVBAoTB05vcmRWUE4xGDAWBgNVBAMTD05vcmRWUE4gUm9vdCBDQTCCAiIwDQYJKoZIhvcNAQEBBQADggIPADCCAgoCggIBAMkr/BYhyo0F2upsIMXwC6QvkZps3NN2/eQFkfQIS1gql0aejsKsEnmY0Kaon8uZCTXPsRH1gQNgg5D2gixdd1mJUvV3dE3y9FJrXMoDkXdCGBodvKJyU6lcfEVF6/UxHcbBguZK9UtRHS9eJYm3rpL/5huQMCppX7kUeQ8dpCwd3iKITqwd1ZudDqsWaU0vqzC2H55IyaZ/5/TnCk31Q1UP6BksbbuRcwOVskEDsm6YoWDnn/IIzGOYnFJRzQH5jTz3j1QBvRIuQuBuvUkfhx1FEwhwZigrcxXuMP+QgM54kezgziJUaZcOM2zF3lvrwMvXDMfNeIoJABv9ljw969xQ8czQCU5lMVmA37ltv5Ec9U5hZuwk/9QO1Z+d/r6Jx0mlurS8gnCAKJgwa3kyZw6e4FZ8mYL4vpRRhPdvRTWCMJkeB4yBHyhxUmTRgJHm6YR3D6hcFAc9cQcTEl/I60tMdz33G6m0O42sQt/+AR3YCY/RusWVBJB/qNS94EtNtj8iaebCQW1jHAhvGmFILVR9lzD0EzWKHkvyWEjmUVRgCDd6Ne3eFRNS73gdv/C3l5boYySeu4exkEYVxVRn8DhCxs0MnkMHWFK6MyzXCCn+JnWFDYPfDKHvpff/kLDobtPBf+Lbch5wQy9quY27xaj0XwLyjOltpiSTLWae/Q4vAgMBAAGjHTAbMAwGA1UdEwQFMAMBAf8wCwYDVR0PBAQDAgEGMA0GCSqGSIb3DQEBDQUAA4ICAQC9fUL2sZPxIN2mD32VeNySTgZlCEdVmlq471o/bDMP4B8gnQesFRtXY2ZCjs50Jm73B2LViL9qlREmI6vE5IC8IsRBJSV4ce1WYxyXro5rmVg/k6a10rlsbK/eg//GHoJxDdXDOokLUSnxt7gk3QKpX6eCdh67p0PuWm/7WUJQxH2SDxsT9vB/iZriTIEe/ILoOQF0Aqp7AgNCcLcLAmbxXQkXYCCSB35Vp06u+eTWjG0/pyS5V14stGtw+fA0DJp5ZJV4eqJ5LqxMlYvEZ/qKTEdoCeaXv2QEmN6dVqjDoTAok0t5u4YRXzEVCfXAC3ocplNdtCA72wjFJcSbfif4BSC8bDACTXtnPC7nD0VndZLp+RiNLeiENhk0oTC+UVdSc+n2nJOzkCK0vYu0Ads4JGIB7g8IB3z2t9ICmsWrgnhdNdcOe15BincrGA8avQ1cWXsfIKEjbrnEuEk9b5jel6NfHtPKoHc9mDpRdNPISeVawDBM1mJChneHt59Nh8Gah74+TM1jBsw4fhJPvoc7Atcg740JErb904mZfkIEmojCVPhBHVQ9LHBAdM8qFI2kRK0IynOmAZhexlP/aT/kpEsEPyaZQlnBn3An1CRz8h0SPApL8PytggYKeQmRhl499+6jLxcZ2IegLfqq41dzIjwHwTMplg+1pKIOVojpWA==-----END CERTIFICATE-----
```
Do not edit anything else. Press Save.3. Navigate to VPN > OpenVPN > Clients and press +Add.
4. Fill in the fields as follows:Disable this client: UncheckServer mode: Peer to Peer (SSL/TLS)Protocol: UDP on IPv4 only (you can also use TCP)Device mode: tun – Layer 3 Tunnel ModeInterface: WANLocal port: Leave blankServer host or address: the hostname of the server recommended to you (in our case, it’s de855.nordvpn.com);Server port: 1194 (use 443 if you use TCP)Proxy host or address: Leave blankProxy port: Leave blankProxy Authentication: noneDescription: Any name you like. We will use NordVPN.USER AUTHENTICATION SETTINGSUsername: Your NordVPN service username.Password: Your NordVPN service password.
You can find your NordVPN service credentials (service username and service password) in the[ Nord Account dashboard.](https://my.nordaccount.com/dashboard/nordvpn/)
Follow the steps below to find the service credentials for manual connection setup:
1. Log into your [Nord Account](https://my.nordaccount.com/), click NordVPN, and, under Manual setup, click on Service credentials. Here you'll find the Username and Password needed to connect manually.
Authentication Retry: leave unchecked.CRYPTOGRAPHIC SETTINGSTLS Configuration: Use a TLS Key - Check; Automatically generate a TLS key - UncheckTLS Key:
```
-----BEGIN OpenVPN Static key V1-----e685bdaf659a25a200e2b9e39e51ff030fc72cf1ce07232bd8b2be5e6c670143f51e937e670eee09d4f2ea5a6e4e69965db852c275351b86fc4ca892d78ae002d6f70d029bd79c4d1c26cf14e9588033cf639f8a74809f29f72b9d58f9b8f5fefc7938eade40e9fed6cb92184abb2cc10eb1a296df243b251df0643d53724cdb5a92a1d6cb817804c4a9319b57d53be580815bcfcb2df55018cc83fc43bc7ff82d51f9b88364776ee9d12fc85cc7ea5b9741c4f598c485316db066d52db4540e212e1518a9bd4828219e24b20d88f598a196c9de96012090e333519ae18d35099427e7b372d348d352dc4c85e18cd4b93f8a56ddb2e64eb67adfc9b337157ff4-----END OpenVPN Static key V1-----
```
TLS Key Usage Mode: TLS AuthenticationTLS keydir direction: Use default directionPeer certificate authority: NordVPN_CAPeer Certificate Revocation list: Do not defineClient certificate: webConfigurator default (59f92214095d8) (Server: Yes, In Use) (note that the numbers on your machine could be different)Data Encryption Negotiation: CheckData Encryption Algorithms: AES-256-GCM and AES-256-CBCFallback Data Encryption Algorithm: AES-256-CBCAuth digest algorithm: SHA512 (512-bit)Hardware Crypto: No Hardware Crypto AccelerationTUNNEL SETTINGSIPv4 tunnel network: Leave blankIPv6 tunnel network: Leave blankIPv4 remote network(s): Leave blankIPv6 remote network(s): Leave blankLimit outgoing bandwidth: Leave blankAllow Compression: Refuse any non-stub compression (Most Secure)Topology: Subnet – One IP address per client in a common subnetType-of-Service: UncheckDon’t pull routes: UncheckDon’t add/remove routes: CheckADVANCED CONFIGURATIONCustom Options
tls-client;remote-random;tun-mtu 1500;tun-mtu-extra 32;mssfix 1450;persist-key;persist-tun;reneg-sec 0;remote-cert-tls server;
UDP FAST I/O: UncheckExit Notify: DisabledSend/Receive Buffer: DefaultGateway creation: IPv4 onlyVerbosity level: 3 (recommended)5. Navigate to Interfaces > Interface Assignments and Add the NordVPN interface.6. Press on the OPT1 to the left of your assigned interface and fill in the following information:Enable: CheckDescription: NordVPNMac Address: Leave blankMTU: Leave blankMSS: Leave blank
Do not change anything else. Just scroll down to the bottom and press Save.
7. Navigate to Services -> DNS Resolver -> General SettingsEnable: CheckListen port: Leave as isEnable SSL/TLS Service: UncheckSSL/TLS Certificate: webConfigurator default (59f92214095d8) (Server: Yes, In Use) (note that the numbers on your machine could be different);SSL/TLS Listen Port: Leave as isNetwork Interfaces: AllOutgoing Network Interfaces: NordVPNSystem Domains Local Zone Type: TransparentDNSSEC: UncheckPython Module: UncheckDNS Query Forwarding: Enable forwarding mode - Check; Use SSL/TLS for outgoing DNS Queries to Forwarding Servers - UncheckDHCP Registration: CheckStatic DHCP: CheckOpenVPN Clients: UncheckClick Save.
8. While in DNS Resolver, select Advanced Settings at the top and fill in the following:ADVANCED PRIVACY OPTIONS:Hide Identity: CheckHide Version: CheckQuery Name Minimization: UncheckStrict Query Name Minimization: UncheckADVANCED RESOLVER OPTIONS:Prefetch Support: CheckPrefetch DNS Key Support: CheckHarden DNSSEC Data: UncheckDo not change anything else. Just scroll down to the bottom and press Save
9. Navigate to Firewall > NAT > Outbound and select Manual Outbound NAT rule generation. Press Save. Six rules will appear. Delete all IPv6 rules and add a new one.9.1. Interface: NordVPN.9.2. Address Family: IPv49.3. Source: your LAN subnet, for example 192.168.2.0/24.9.4. Click Save. At the end, it should look like this:
Please note that the newly created NAT rule must be on top.
10. Navigate to Firewall > Rules > LAN and delete the IPv6 rule. Also, edit the IPv4 rule.10.1. Press on Display Advanced10.2. Change Gateway to NordVPN10.3. Click Save.Now it should look like this:
11. Go to System > General Setup and fill in the fields as follows:DNS Server 1: 103.86.96.100; noneDNS Server 2: 103.86.99.100; NordVPN_VPNV4 - opt1 - ...Leave everything else as it is. Click Save.
12. Now navigate to Status > OpenVPN. The status and it should state that the service is “up”.
13. You can also check the connection log file under Status > System Logs > OpenVPN:
That’s it! pfsense VPN setup is complete, and you should now have a [VPN connection](https://nordvpn.com/what-is-a-vpn/).
If the IP does not change after setting up the VPN, try restarting the pfSense router and check the IP then.",https://support.nordvpn.com/hc/en-us/articles/20382523899281-pfSense-2-5-Setup-with-NordVPN
How to get connection logs on iOS,"This short article will teach you how to acquire connection logs when using our app on an iOS device, such as an iPad or an iPhone.
1. Open the NordVPN application;
2. Click on the Profile icon.
3. Head to the Settings menu (gear icon in the top-right corner);
4. Scroll down to the very bottom of the settings page:
5. Tap the ""App version..."" 10 times.
6. You will see two options: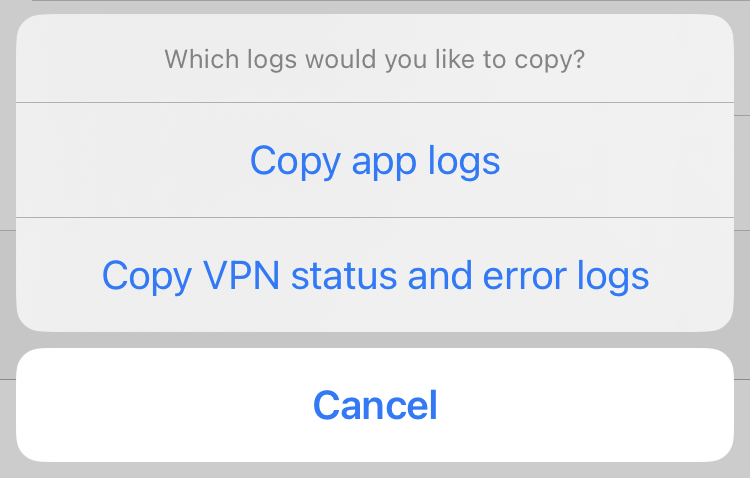
* Copy app logs - send these to our support if you're facing application issues;
* Copy VPN status and error logs - send these logs to our support so they can troubleshoot connection issues.
7. Paste the logs directly to us, either via [e-mail or chat](https://nordvpn.com/contact-us/).",https://support.nordvpn.com/hc/en-us/articles/20465912080785-How-to-get-connection-logs-on-iOS
How to configure AsusTor 2.7.1 and above,"This guide was created using ASUSTOR ADM 4.2.1.DGE2
Follow these steps to set up a NordVPN connection on your ASUSTOR NAS:
1. Log in to your NAS using an internet browser.
2. Open Settings and select the Network section.
3. Switch to the Network interface tab and click Add > Create VPN.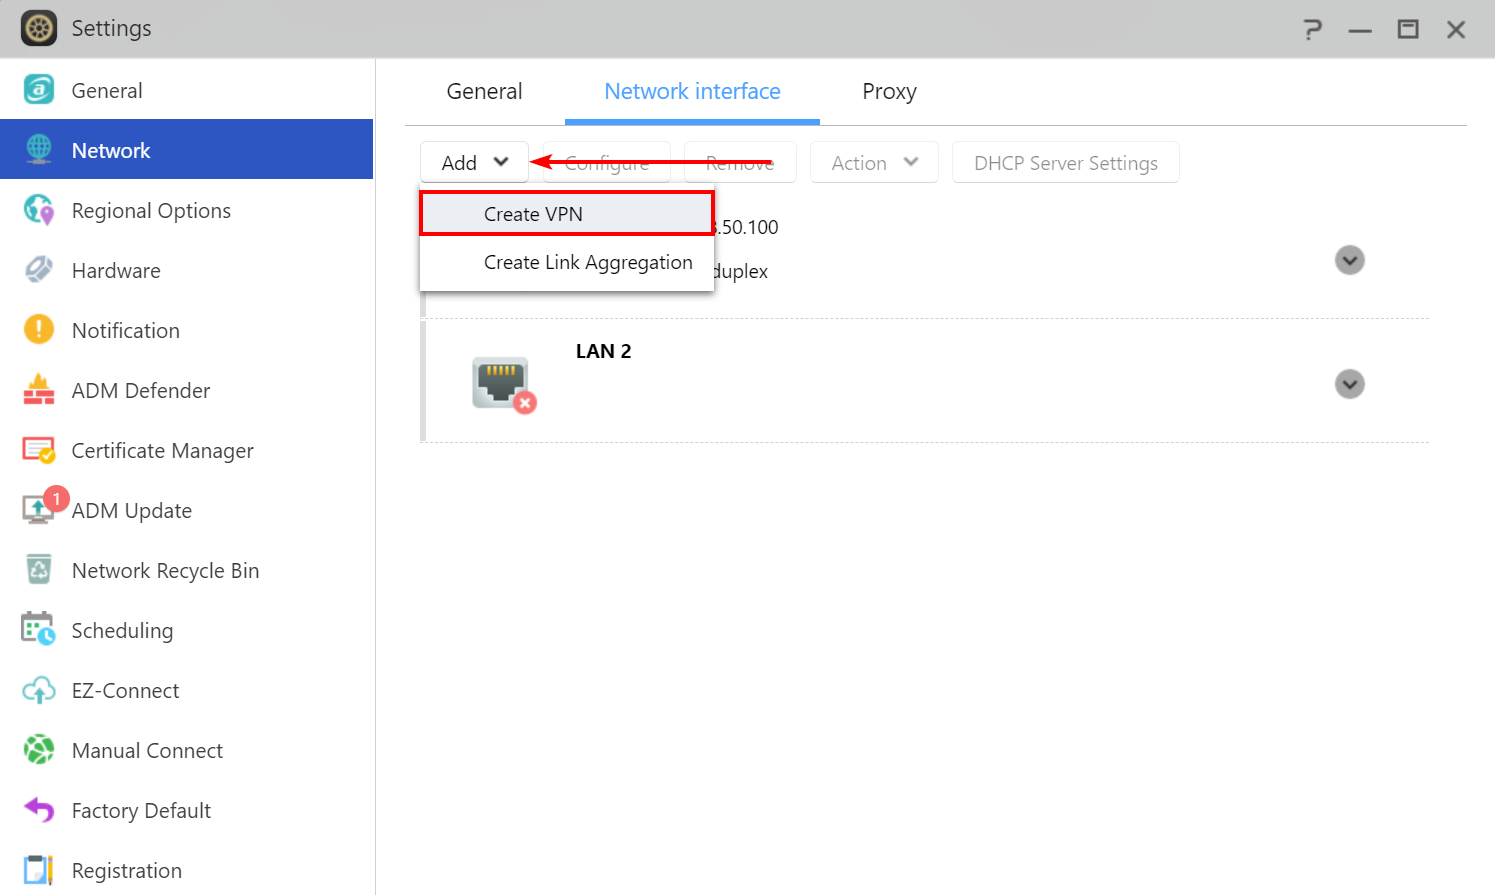
4. In the Add VPN configuration window, select OpenVPN and click Next.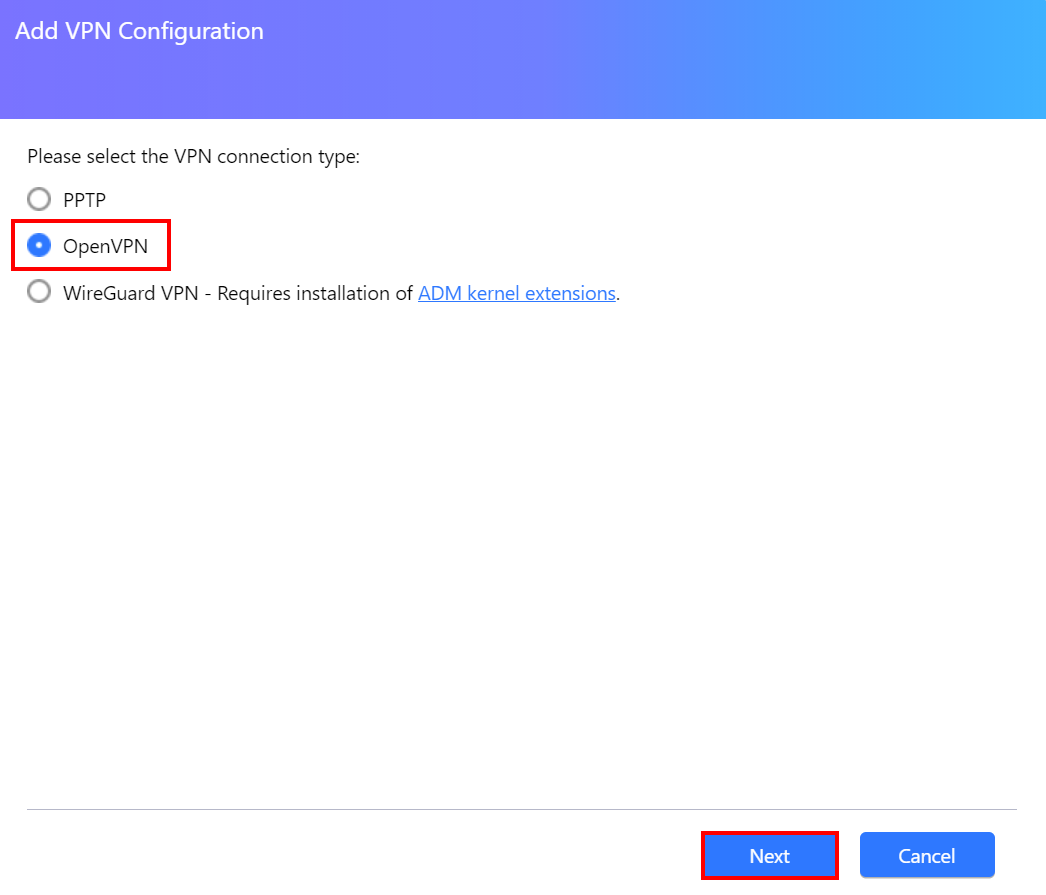
5. Select Import configuration files from the OpenVPN provider and click Next.
6. Fill in the following information:
* Name: NordVPN
* Account: Your NordVPN service username
* Password: Your NordVPN service password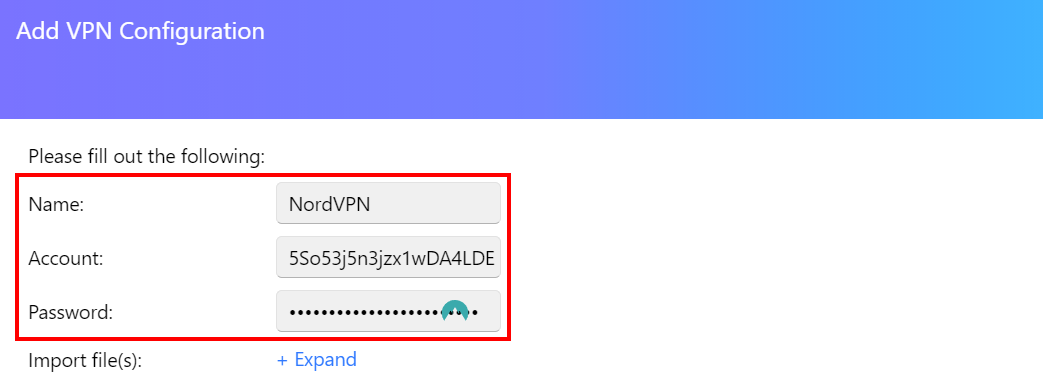Find your NordVPN credentials on your [Nord Account dashboard](https://my.ndaccount.com/).
Follow the steps below to find the service credentials for manual connection setup:
1. Log into your [Nord Account](https://my.nordaccount.com/), click NordVPN, and, under Manual setup, click on Service credentials. Here you'll find the Username and Password needed to connect manually.
1. Download the desired NordVPN server’s OpenVPN Configuration files.
Follow the steps below to find the best server for your connection:
1. Log into your [Nord Account](https://my.nordaccount.com/), and click NordVPN.
2. Scroll down to Advanced Settings and click Set up NordVPN manually.
3. Select the Server recommendation tab. According to your location, the best server will be recommended.
4. By pressing Advanced filters you can further customize the recommended servers by selecting the Server type and the Security protocol.
In case you wish to select a specific server, follow these steps:
1. Under Set up NordVPN manually, select OpenVPN configuration files.
2. Find the server you wish to connect to by using the Search bar or by scrolling down and download it by clicking Download UDP or Download TCP.
Here, you are also able to find the NordVPN service credentials.
Follow the steps below to find the service credentials for manual connection setup:
1. Log into your [Nord Account](https://my.nordaccount.com/), click NordVPN, and, under Manual setup, click on Service credentials. Here you'll find the Username and Password needed to connect manually.
1. Next to Import file(s), click Expand and Add.
2. Select your downloaded server configuration file and click Open.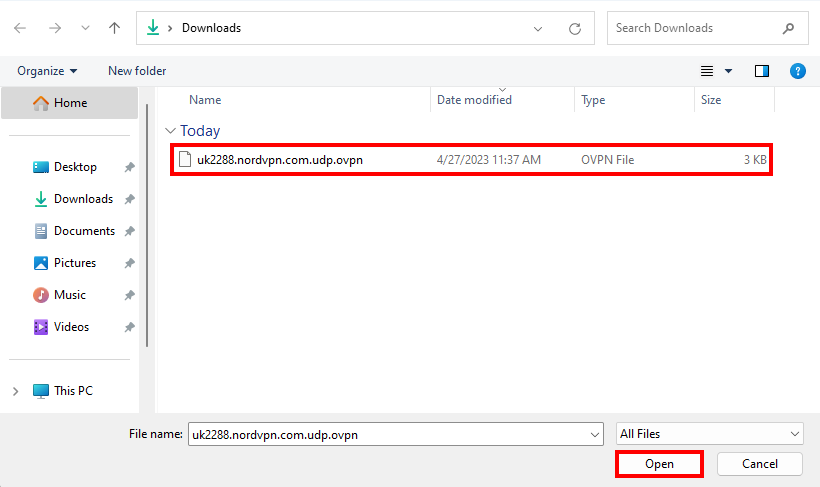
3. Paste the credentials together with the chosen server and click Finish.
When the new network interface is created, select it and click Action > Connect. Now your NAS is connected to a NordVPN server.",https://support.nordvpn.com/hc/en-us/articles/21893059616529-How-to-configure-AsusTor-2-7-1-and-above
Can I use NordVPN on Synology NAS?,"Yes, Synology DiskStation Manager 6.1 and later versions support NordVPN. This article explains what you need to do in order to set up NordVPN on your device. We also have instructions on [how to set up a VPN on Synology 5.1 NAS](https://support.nordvpn.com/hc/en-us/articles/20343522984337-How-to-configure-Synology-5-1-NAS).",https://support.nordvpn.com/hc/en-us/articles/20195188057617-How-to-set-up-a-VPN-on-Synology-6-1-NAS
How to set up a VPN on Synology 6.1 NAS,"## Can I use NordVPN on Synology NAS?
Yes, Synology DiskStation Manager 6.1 and later versions support NordVPN. This article explains what you need to do in order to set up NordVPN on your device. We also have instructions on [how to set up a VPN on Synology 5.1 NAS](https://support.nordvpn.com/hc/en-us/articles/20343522984337-How-to-configure-Synology-5-1-NAS).
## Downloading configuration files
To set up NordVPN on Synology 6.1 NAS, you'll first need to download the OpenVPN configuration files for the server you want.
Follow the steps below to find the manual connection configuration files:
1. Log into your [Nord Account](https://my.nordaccount.com/), and click NordVPN.
2. Scroll down to Advanced Settings and click Set up NordVPN manually.
3. Select the OpenVPN configuration files tab.
4. Find the server you wish to connect to by using the Search bar or by scrolling down and download it by clicking Download UDP or Download TCP.
5. When connecting to OpenVPN & IKEv2 manually, you're going to need to use the Username and Password from the Service credential tab.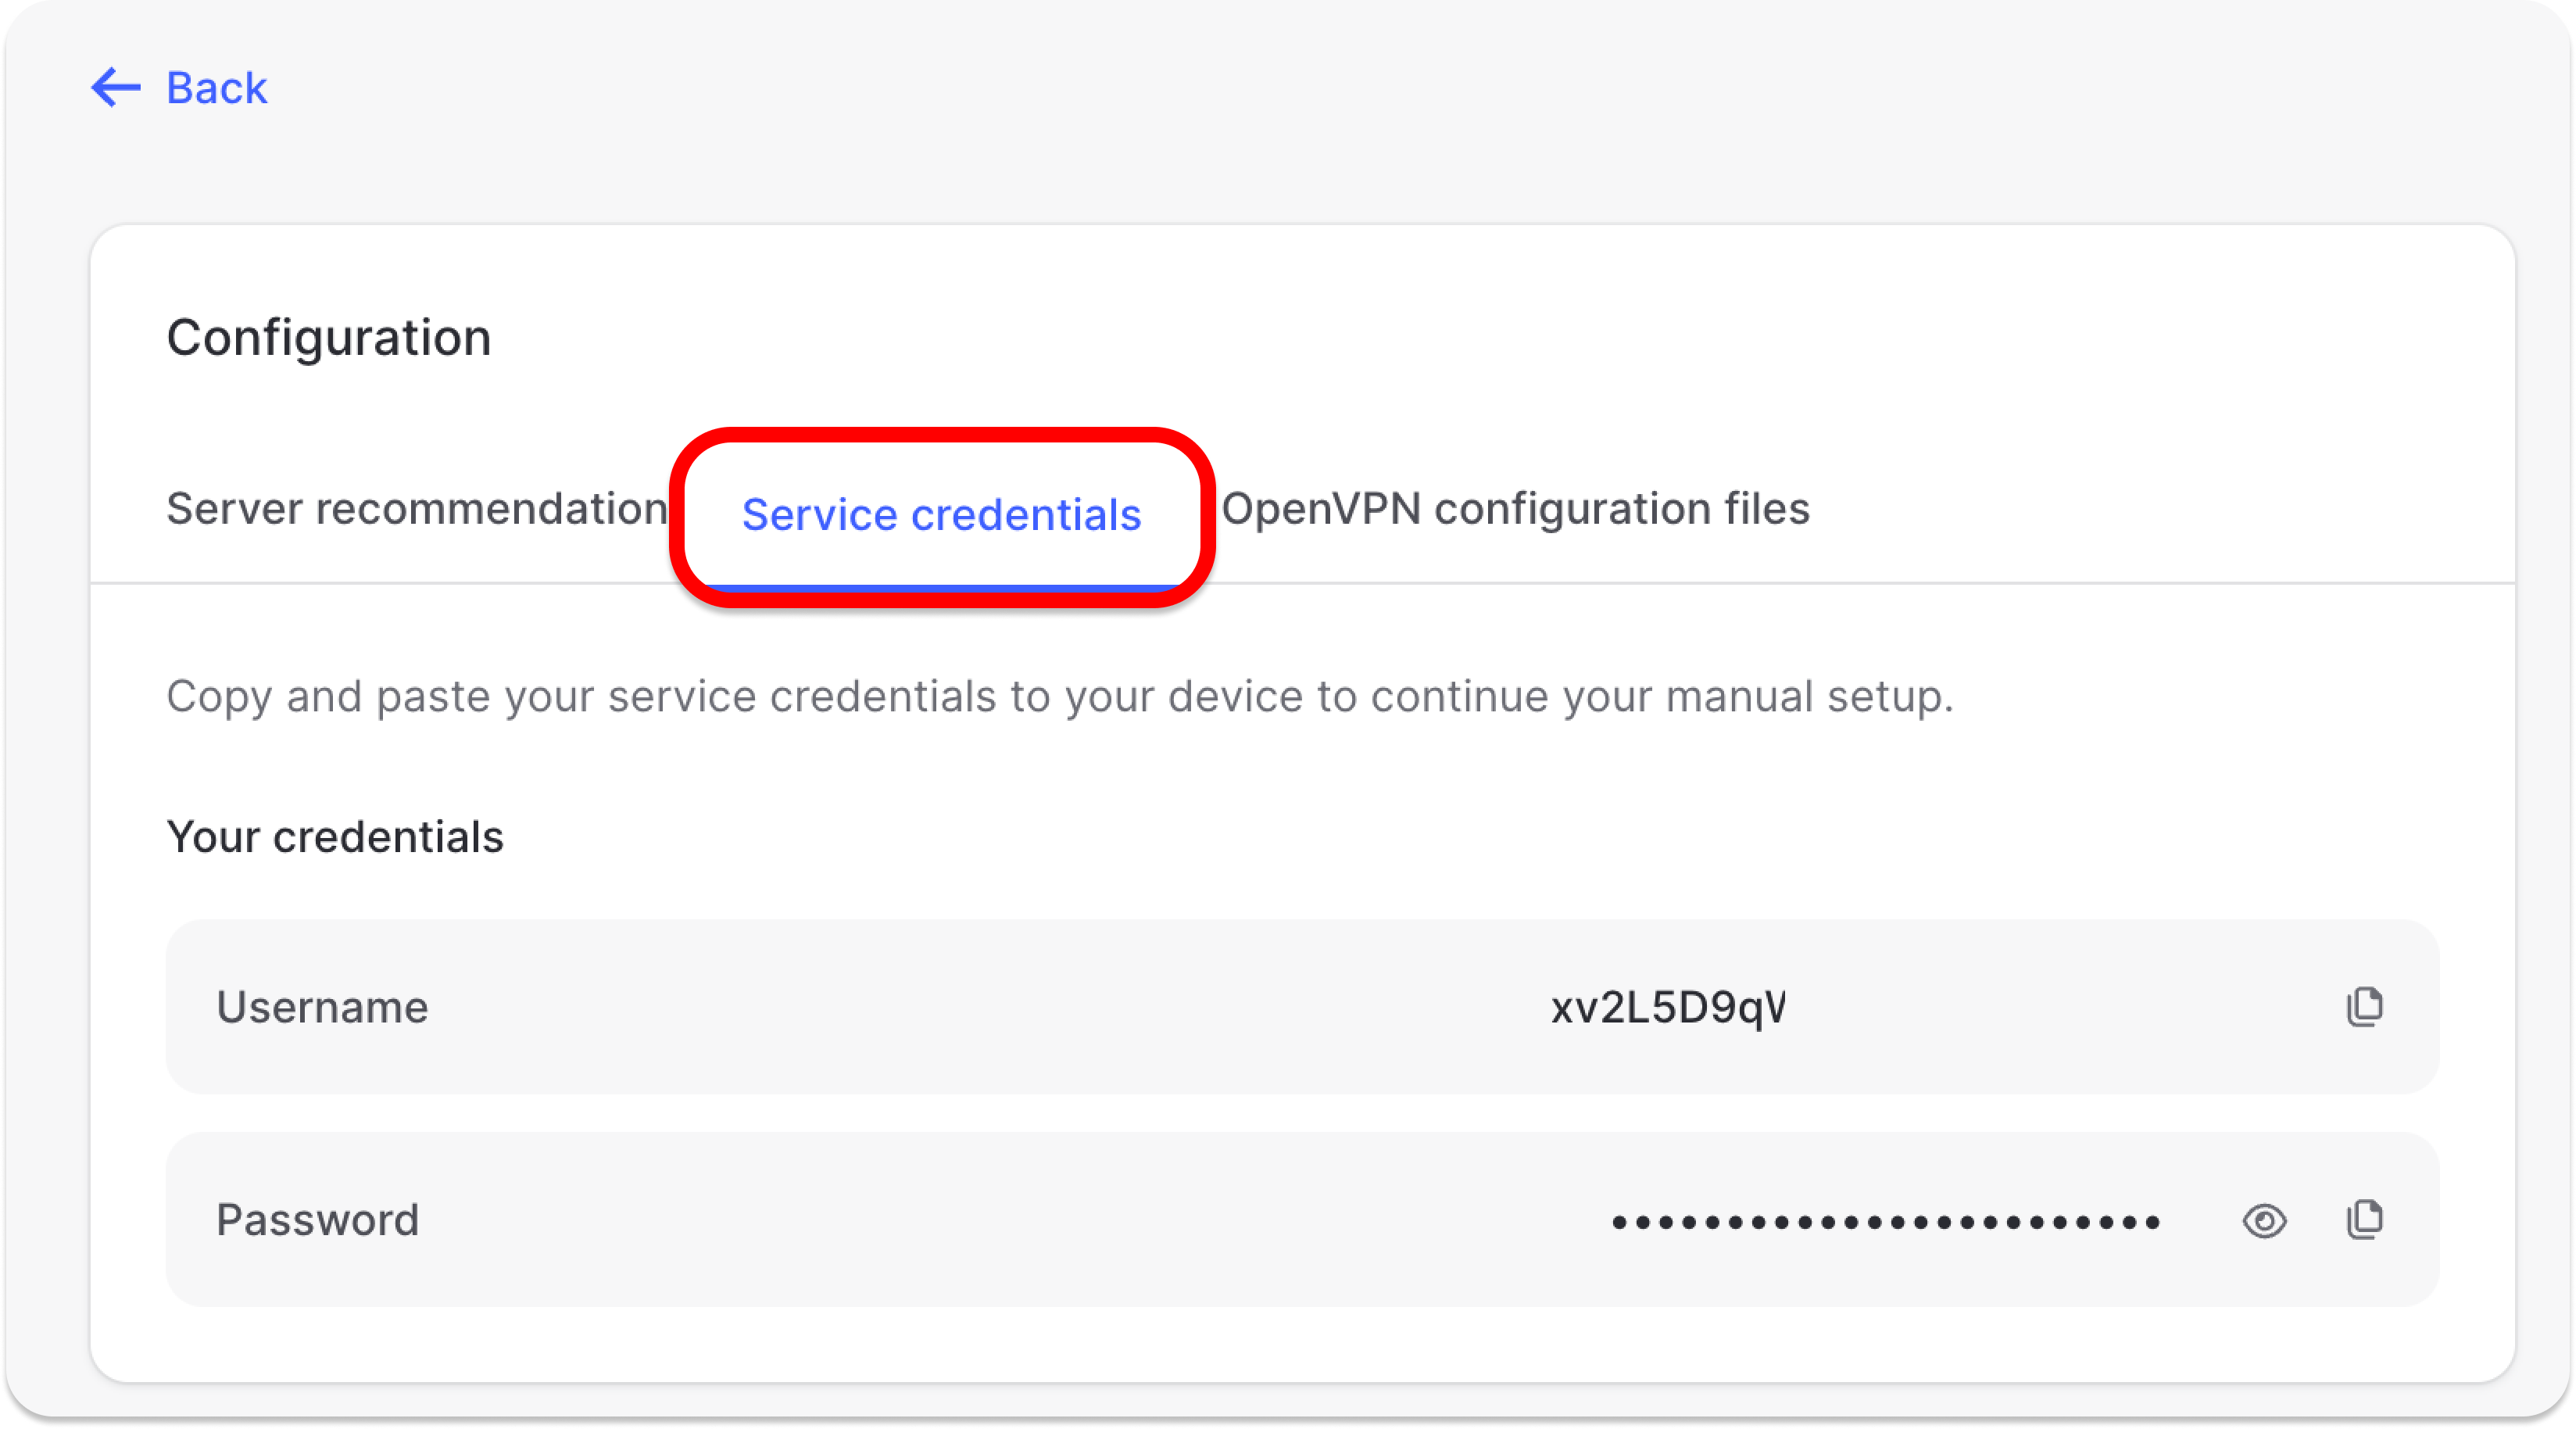
## VPN on Synology setup instructions
1. Log in to Synology and click on “Control Panel.”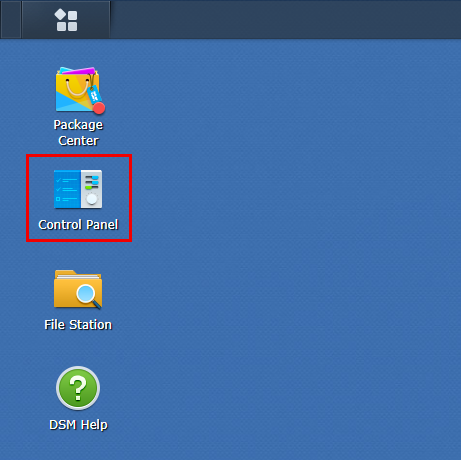
2. Go to “Network.”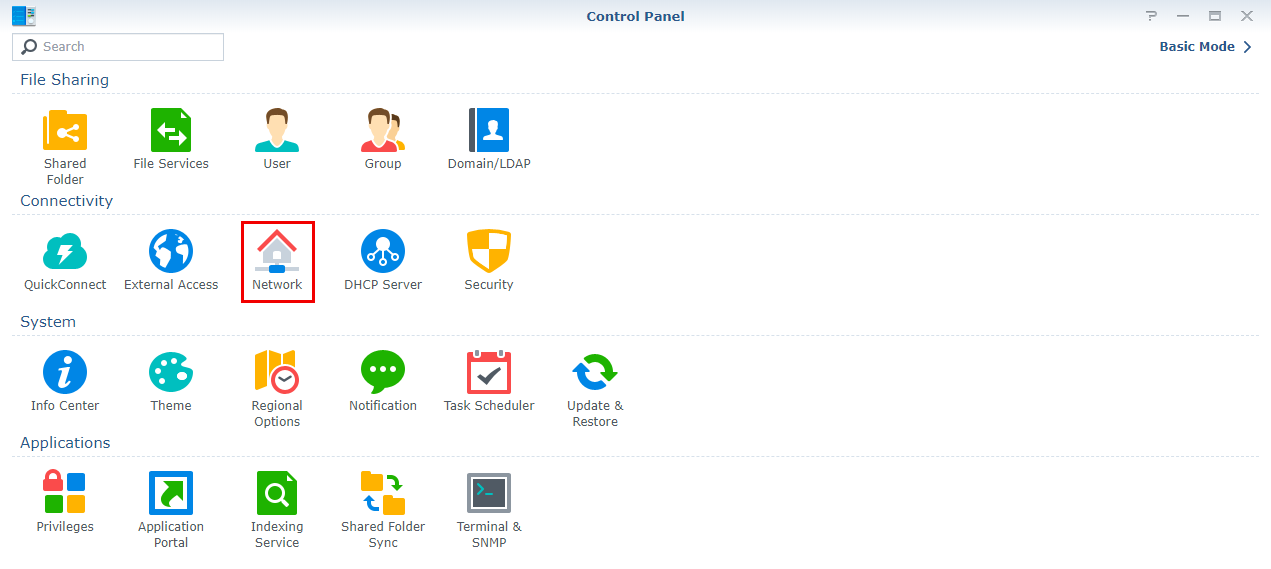
3. Go to “Network interface,” click “Create,” and pick “Create VPN profile.”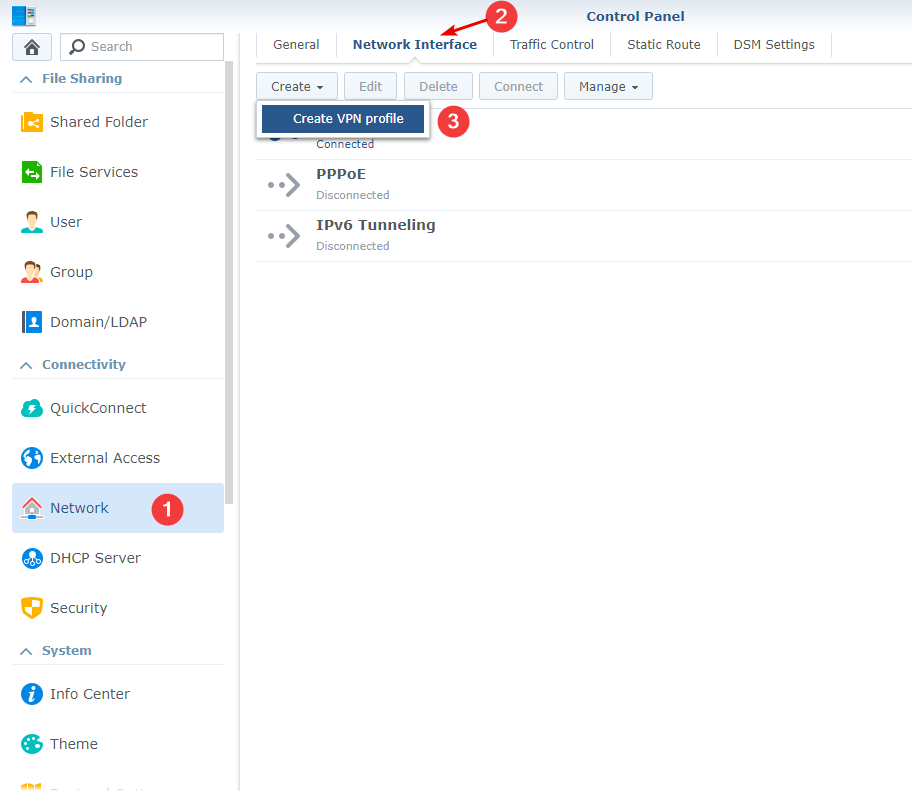
4. Select “OpenVPN (via importing a .ovpn file)” and click “Next.” 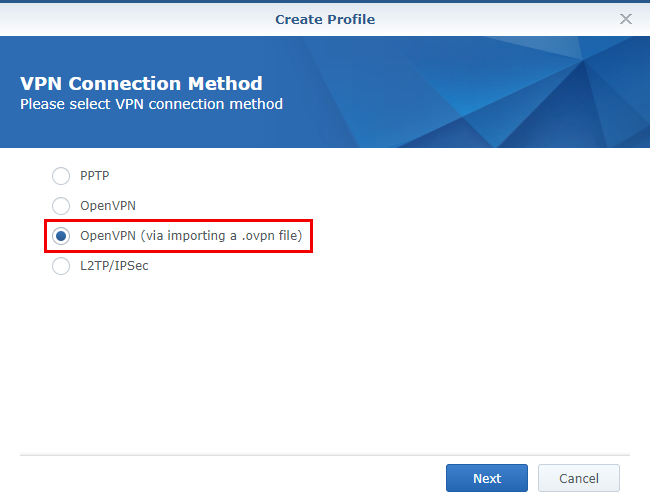
5. Complete the fields as explained below: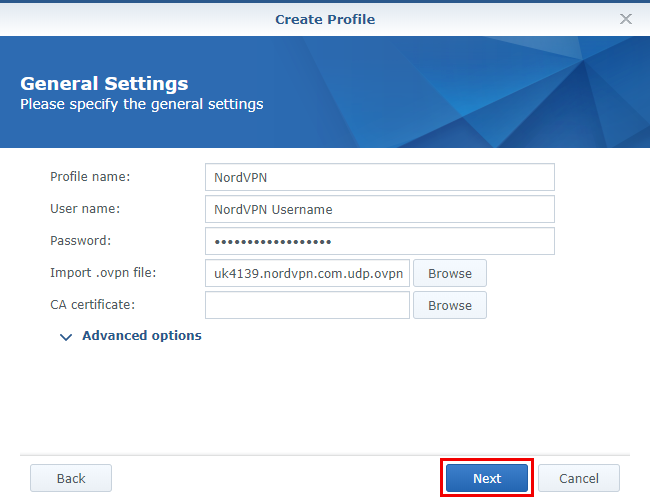Profile name: Can be anything, but for convenience we'll name it ""NordVPN.""Username: NordVPN service credentials.Password: NordVPN service credentials.
Follow the steps below to find the service credentials for manual connection setup:
1. Log into your [Nord Account](https://my.nordaccount.com/), click NordVPN, and, under Manual setup, click on Service credentials. Here you'll find the Username and Password needed to connect manually.
Import .ovpn file: Use the file you have downloaded in the [downloading configuration files]( section.CA certificate:1) First, download the [list of certificates](https://downloads.nordcdn.com/configs/archives/certificates/servers.zip) and find the certificate with the same number as the server you've downloaded in the downloading configuration files section. 2) Back in the “Create profile” screen, press “Browse” to the right of the CA certificate field to manually add the appropriate ca.crt file
1. Select all options and click ""Apply.""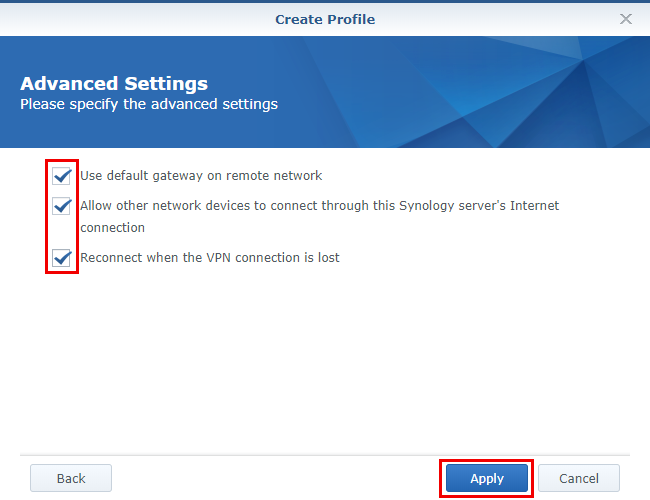
2. Select the created profile and click ""Connect.""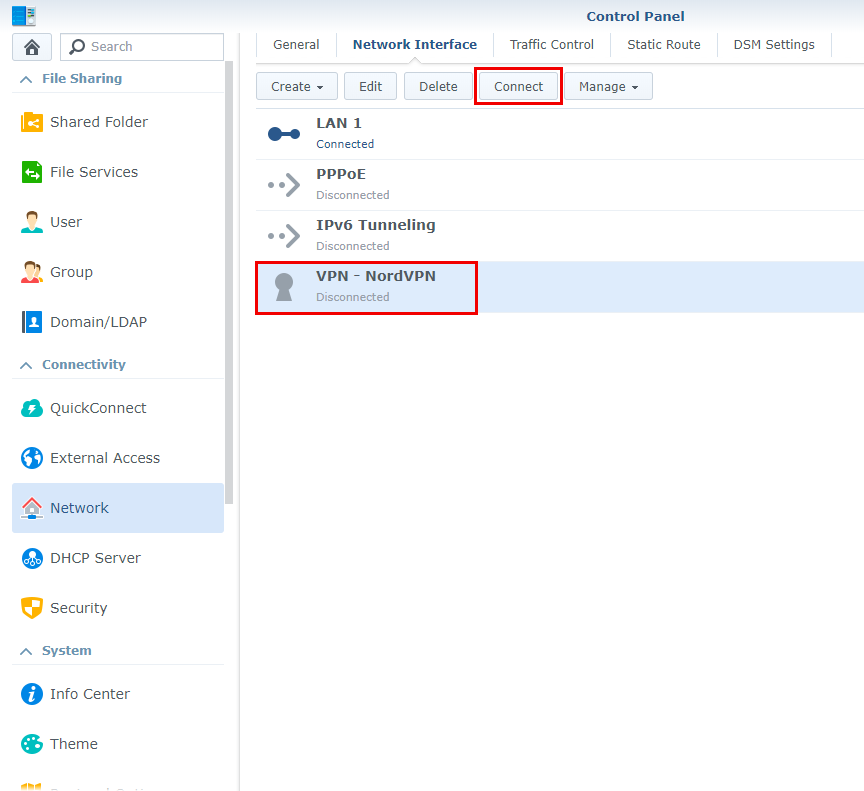The status of this profile will change to ""Connected"" when the connection is established.
If you have any issues while trying to establish the connection, open the .ovpn configuration file on your computer and add this line:
```
log-append /var/log/NordVPN.log
```
Import the edited .ovpn file again into Synology and try connecting again. Afterward, send us the “NordVPN.log” file from the “/var/log/” directory.",https://support.nordvpn.com/hc/en-us/articles/20195188057617-How-to-set-up-a-VPN-on-Synology-6-1-NAS
Manual NordVPN Dedicated IP server setup,"You can connect to [Dedicated IP servers through the NordVPN app](https://support.nordvpn.com/hc/en-us/articles/20595248071185-How-to-set-up-dedicated-IP), a manual connection can be useful if the app isn't functioning properly on your device.
To set up NordVPN Dedicated IP servers manually on your device, you need to:
1. Download your Dedicated IP server configuration files.
2. Set up your manual connection using Dedicated IP configuration files.
## Downloading NordVPN Dedicated IP server configuration files
To be able to set up NordVPN obfuscated servers manually, you first need to download them:
1. Go to [Nord Account](https://my.nordaccount.com/) and log in:
2. Go to NordVPN tab on the left:
3. Click see details under your Dedicated IP: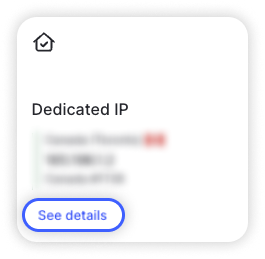
4. Click download configuration file: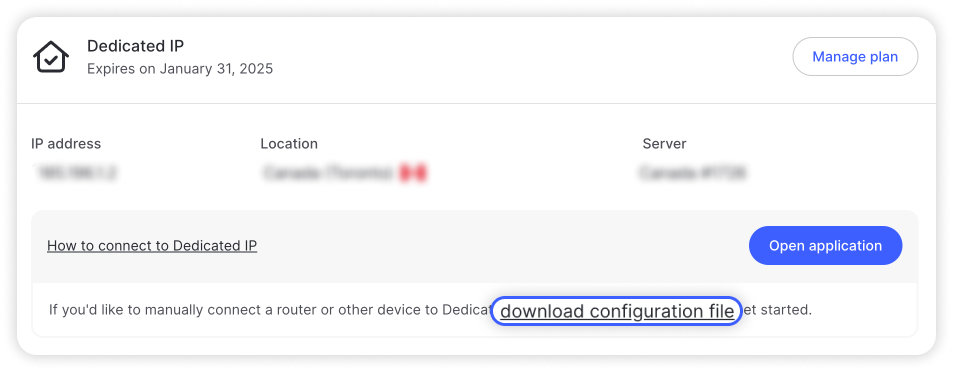
5. Select UDP or TCP: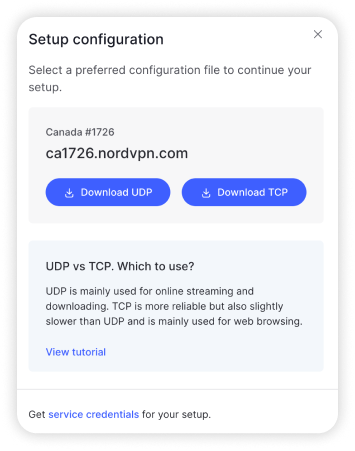
6. Click Download.
Once you complete these steps, the configuration files for the Dedicated IP server will be downloaded to your specified folder. After that, you can proceed with manually setting up the Dedicated IP servers.
## Setting up NordVPN Dedicated IP server manually
Use configuration files downloaded from the Dedicated IP dashboard and head out to service credentials setup on these next guides:
* [Setting up NordVPN manual connection on Windows](https://support.nordvpn.com/hc/en-us/articles/19749554331793-How-to-set-up-a-manual-connection-on-Windows-using-OpenVPN)
* [Setting up NordVPN manual connection on MacOS with TunnelBlick](https://support.nordvpn.com/hc/en-us/articles/19924903986961-Manual-connection-setup-with-Tunnelblick-on-macOS)
* [Setting up NordVPN manual connection on iOS](https://support.nordvpn.com/hc/en-us/articles/20348613874193-Manual-OpenVPN-connection-setup-on-iPad-iPhone)
* [Setting up NordVPN manual connection on Android](https://support.nordvpn.com/hc/en-us/articles/19926132780689-Manual-OpenVPN-setup-on-Android)
* [Setting up NordVPN manual connection on Linux](https://support.nordvpn.com/hc/en-us/articles/20164827795345-Connect-to-NordVPN-using-Linux-Terminal)
* [Setting up NordVPN manual connection on a Router](https://support.nordvpn.com/hc/en-us/sections/19326876055569-Router)",https://support.nordvpn.com/hc/en-us/articles/31386007399057-Manual-NordVPN-Dedicated-IP-server-setup
Manual NordVPN obfuscated server setup,"NordVPN obfuscated servers disguise your VPN usage, allowing to be connected to a VPN even in highly restrictive environments. Read more on [how do obfuscated servers work](https://nordvpn.com/features/obfuscated-servers/?nv_tri=TC_6080914997432754_1702294163449&nv_trs=1734960851198_1734961516607_31_57&_gl=1*14qs60r*_gcl_au*MTA3ODM0NDE2MC4xNzI5MTY1ODEy*FPAU*MTA3ODM0NDE2MC4xNzI5MTY1ODEy*_ga*MTYzNTIwNzc2Mi4xNzA2ODYyMjMy*_ga_LEXMJ1N516*MTczNDk2MDg1MS4xNjcuMS4xNzM0OTYxNTE1LjAuMC4w&_ga=2.2485744.1750424203.1734939907-1635207762.1706862232#:~:text=How%20do%20obfuscated%20servers%20work%3F).
While you're able to c[onnect to obfuscated servers within the NordVPN app](https://support.nordvpn.com/hc/en-us/articles/19615332252561-Enable-or-disable-Obfuscated-servers), manual connection can become handy if the app doesn't work on your device.
To set up NordVPN obfuscated servers manually on your device, you need to:
1. [Download NordVPN obfuscated server configuration files](
2. [Use these configuration files for your device manual setup](
## Downloading NordVPN obfuscated server configuration files
To be able to set up NordVPN obfuscated servers manually, you first need to download them:
1. Go to [Nord Account](https://my.nordaccount.com/) and log in:
2. Go to NordVPN tab on the left:
3. Scroll down until you see advanced settings and click set up NordVPN manually:
4. You will see a [server recommendation tool](https://my.nordaccount.com/dashboard/nordvpn/manual-configuration/server-recommendation/). Click advanced filters:Server type filter will become visible: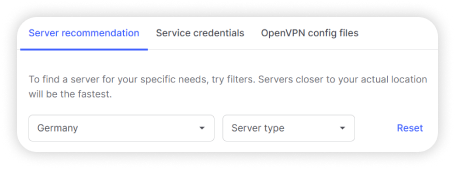
5. If we will have obfuscated servers for a country of your choice - you'll be able to choose that from server type filter: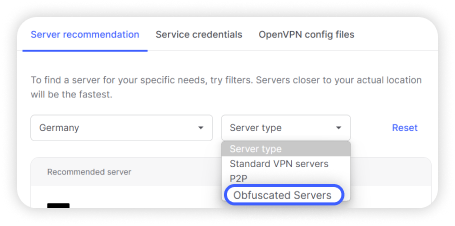
6. Once you've filtered the server of your convenience, click get setup configuration: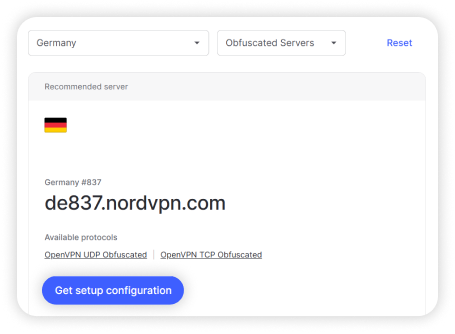
7. Click download configuration files: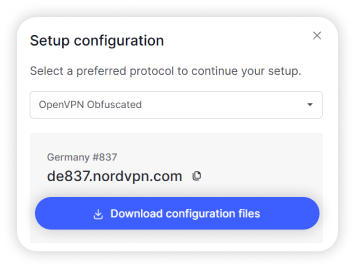
After following these steps, the obfuscated server configuration files will be downloaded to your designated folder. Once that is done, you can move on setting up the obfuscated servers manually.
## Setting up NordVPN obfuscated server manually
To set up NordVPN obfuscated servers manually, you'll need to use the downloaded configuration files for your device's manual setup, instead of the ones given in our guides:
* [Setting up NordVPN manual connection on Windows](https://support.nordvpn.com/hc/en-us/articles/19749554331793-How-to-set-up-a-manual-connection-on-Windows-using-OpenVPN)
* [Setting up NordVPN manual connection on MacOS with TunnelBlick](https://support.nordvpn.com/hc/en-us/articles/19924903986961-Manual-connection-setup-with-Tunnelblick-on-macOS)
* [Setting up NordVPN manual connection on iOS](https://support.nordvpn.com/hc/en-us/articles/20348613874193-Manual-OpenVPN-connection-setup-on-iPad-iPhone)
* [Setting up NordVPN manual connection on Android](https://support.nordvpn.com/hc/en-us/articles/19926132780689-Manual-OpenVPN-setup-on-Android)
* [Setting up NordVPN manual connection on Linux](https://support.nordvpn.com/hc/en-us/articles/20164827795345-Connect-to-NordVPN-using-Linux-Terminal)",https://support.nordvpn.com/hc/en-us/articles/31208651056145-Manual-NordVPN-obfuscated-server-setup
Split Tunneling is not working on NordVPN,"Find out how to solve this issue below.
## The allowlisted app has no internet connection
If NordVPN’s split tunneling is blocking the internet access on an allowlisted application, follow these steps:
* Reset the application. [Find the reset instructions](https://nordvpn.zendesk.com/hc/en-us/articles/20323582191505) in this article.
* Reinstall the NordVPN application.
* In case you are using any antivirus software, allowlist the NordVPN app in the settings of your antivirus app. By default, NordVPN is located in C:\Program Files\NordVPN.
* Reset the network. Keep in mind that this also resets Wi-Fi networks and passwords, VPN, and APN settings you’ve used before. Here is how you can do that:
1. Open the NordVPN app, go to Settings, and open the General section.
2. Find Diagnostics and click on Run Diagnostics Tool. Then, select Network Flush.
3. Lastly, wait for the commands to finish running and restart your computer.
## The allowlisted app is still routed through a VPN
If you have added the application to the allowlist and it is still routed through a VPN, please [contact NordVPN customer support](https://nordvpn.zendesk.com/hc/en-us/articles/19482416296593).",https://support.nordvpn.com/hc/en-us/articles/20913128327313-Split-Tunneling-is-not-working-on-NordVPN
How to fix NordVPN background processes that aren’t running?,"If the NordVPN background process is not running on your computer, follow the steps below.
## Reset application settings
1. Right-click the NordVPN shortcut on Desktop and click Open file location.
2. Double-click the folder of your current NordVPN version (e.g. 7.15).
3. Locate Diagnostics and launch it.
4. Click Reset app.
Afterward, the application will be reloaded, and you will be asked to log in.
## Allowlist NordVPN in your antivirus software
If you are using antivirus software, please allowlist the NordVPN application folder in the settings of your antivirus. By default, NordVPN is located in C:\Program Files\NordVPN.
## Collect diagnostics and contact support
In case both solutions above do not work, share the diagnostics with the customer support team for further investigation. Here is how you can do that:
1. Open the NordVPN application and go to Settings.
2. Go to Advanced and click Run Diagnostics Tool.
3. Select Collect Diagnostics.
4. Take note of the Ticket ID and refer it to our customer service.
In case the Ticket ID fails to generate, check the location of the diagnostics .zip file and send the file to our customer service.
For more detailed instructions on gathering diagnostics, check out our [connection logs tutorial](https://nordvpn.zendesk.com/hc/en-us/articles/20379445229073).",https://support.nordvpn.com/hc/en-us/articles/20912325762321-How-to-fix-NordVPN-background-processes-that-aren-t-running
pfSense 2.4.5 setup with NordVPN,"Please note, if you are using pfSense 2.4.4 you will need to follow this tutorial instead.1. To set up OpenVPN on pfSense 2.4.5, access your pfSense from your browser, then navigate to System > Certificate Manager > CAs. Select +Add.You should see this screen:
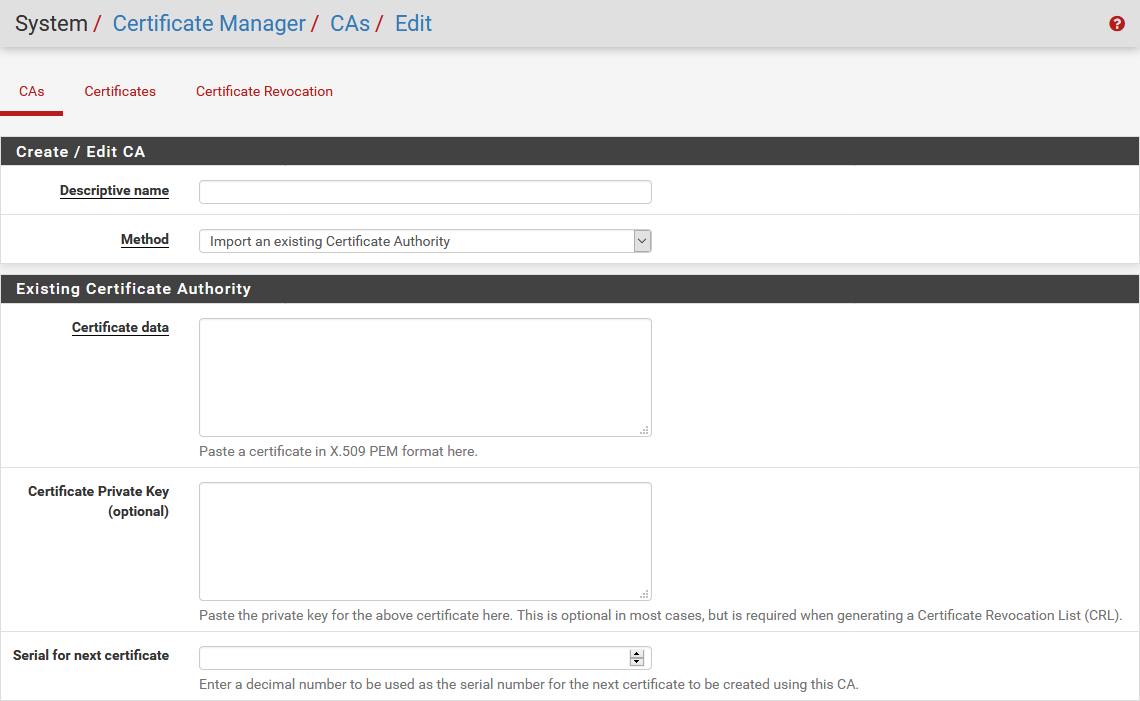2. For this tutorial, we will configure our pfSense to connect to a server in the Netherlands, but you should connect to a server that best suits you.
Follow the steps below to find the best server for your connection:
1. Log into your [Nord Account](https://my.nordaccount.com/), and click NordVPN.
2. Scroll down to Advanced Settings and click Set up NordVPN manually.
3. Select the Server recommendation tab. According to your location, the best server will be recommended.
4. By pressing Advanced filters you can further customize the recommended servers by selecting the Server type and the Security protocol.
In case you wish to select a specific server, follow these steps:
1. Under Set up NordVPN manually, select OpenVPN configuration files.
2. Find the server you wish to connect to by using the Search bar or by scrolling down and download it by clicking Download UDP or Download TCP.
3. When connecting to OpenVPN & IKEv2 manually, you're going to need to use the Username and Password from the Service credential tab.
Fill in the fields as follows:Descriptive Name: NordVPN_CA (we are using this name for the sake of this manual — you can use any name you like)Method: Import an existing Certificate AuthorityCertificate data:
```
-----BEGIN CERTIFICATE-----MIIFCjCCAvKgAwIBAgIBATANBgkqhkiG9w0BAQ0FADA5MQswCQYDVQQGEwJQQTEQMA4GA1UEChMHTm9yZFZQTjEYMBYGA1UEAxMPTm9yZFZQTiBSb290IENBMB4XDTE2MDEwMTAwMDAwMFoXDTM1MTIzMTIzNTk1OVowOTELMAkGA1UEBhMCUEExEDAOBgNVBAoTB05vcmRWUE4xGDAWBgNVBAMTD05vcmRWUE4gUm9vdCBDQTCCAiIwDQYJKoZIhvcNAQEBBQADggIPADCCAgoCggIBAMkr/BYhyo0F2upsIMXwC6QvkZps3NN2/eQFkfQIS1gql0aejsKsEnmY0Kaon8uZCTXPsRH1gQNgg5D2gixdd1mJUvV3dE3y9FJrXMoDkXdCGBodvKJyU6lcfEVF6/UxHcbBguZK9UtRHS9eJYm3rpL/5huQMCppX7kUeQ8dpCwd3iKITqwd1ZudDqsWaU0vqzC2H55IyaZ/5/TnCk31Q1UP6BksbbuRcwOVskEDsm6YoWDnn/IIzGOYnFJRzQH5jTz3j1QBvRIuQuBuvUkfhx1FEwhwZigrcxXuMP+QgM54kezgziJUaZcOM2zF3lvrwMvXDMfNeIoJABv9ljw969xQ8czQCU5lMVmA37ltv5Ec9U5hZuwk/9QO1Z+d/r6Jx0mlurS8gnCAKJgwa3kyZw6e4FZ8mYL4vpRRhPdvRTWCMJkeB4yBHyhxUmTRgJHm6YR3D6hcFAc9cQcTEl/I60tMdz33G6m0O42sQt/+AR3YCY/RusWVBJB/qNS94EtNtj8iaebCQW1jHAhvGmFILVR9lzD0EzWKHkvyWEjmUVRgCDd6Ne3eFRNS73gdv/C3l5boYySeu4exkEYVxVRn8DhCxs0MnkMHWFK6MyzXCCn+JnWFDYPfDKHvpff/kLDobtPBf+Lbch5wQy9quY27xaj0XwLyjOltpiSTLWae/Q4vAgMBAAGjHTAbMAwGA1UdEwQFMAMBAf8wCwYDVR0PBAQDAgEGMA0GCSqGSIb3DQEBDQUAA4ICAQC9fUL2sZPxIN2mD32VeNySTgZlCEdVmlq471o/bDMP4B8gnQesFRtXY2ZCjs50Jm73B2LViL9qlREmI6vE5IC8IsRBJSV4ce1WYxyXro5rmVg/k6a10rlsbK/eg//GHoJxDdXDOokLUSnxt7gk3QKpX6eCdh67p0PuWm/7WUJQxH2SDxsT9vB/iZriTIEe/ILoOQF0Aqp7AgNCcLcLAmbxXQkXYCCSB35Vp06u+eTWjG0/pyS5V14stGtw+fA0DJp5ZJV4eqJ5LqxMlYvEZ/qKTEdoCeaXv2QEmN6dVqjDoTAok0t5u4YRXzEVCfXAC3ocplNdtCA72wjFJcSbfif4BSC8bDACTXtnPC7nD0VndZLp+RiNLeiENhk0oTC+UVdSc+n2nJOzkCK0vYu0Ads4JGIB7g8IB3z2t9ICmsWrgnhdNdcOe15BincrGA8avQ1cWXsfIKEjbrnEuEk9b5jel6NfHtPKoHc9mDpRdNPISeVawDBM1mJChneHt59Nh8Gah74+TM1jBsw4fhJPvoc7Atcg740JErb904mZfkIEmojCVPhBHVQ9LHBAdM8qFI2kRK0IynOmAZhexlP/aT/kpEsEPyaZQlnBn3An1CRz8h0SPApL8PytggYKeQmRhl499+6jLxcZ2IegLfqq41dzIjwHwTMplg+1pKIOVojpWA==-----END CERTIFICATE-----
```
Press Save.3. Navigate to VPN > OpenVPN > Clients and press +Add.
4. Fill in the fields as follows:Disable this client: UncheckServer mode: Peer to Peer (SSL/TLS)Protocol: UDP on IPv4 only (you can also use TCP)Device mode: tun – Layer 3 Tunnel ModeInterface: WANLocal port: Leave blankServer host or address: the hostname of the server recommended to you (in our case, it’s de855.nordvpn.com);Server port: 1194 (use 443 if you use TCP)Proxy host or address: Leave blankProxy port: Leave blankProxy Authentication: noneDescription: Any name you like. We will use NordVPN.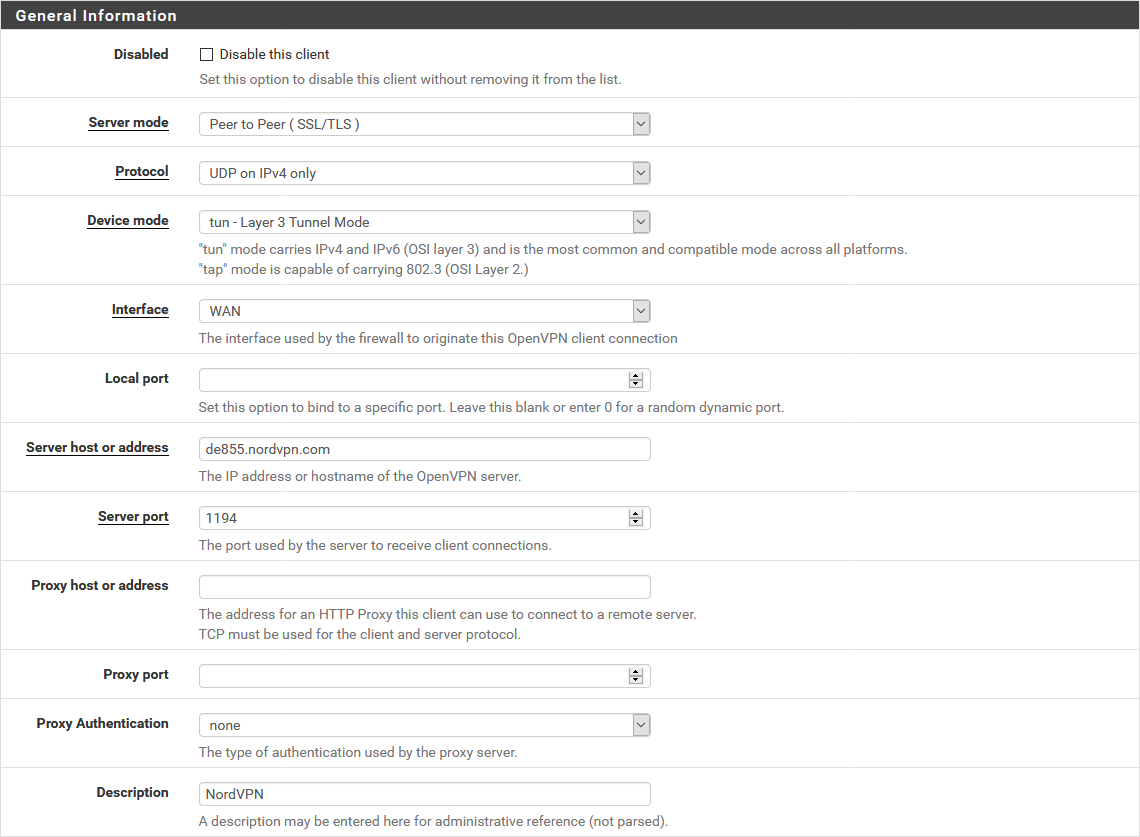USER AUTHENTICATION SETTINGSUsername: Your NordVPN service usernamePassword: Your NordVPN service password in both fields.
Follow the steps below to find the service credentials for manual connection setup:
1. Log into your [Nord Account](https://my.nordaccount.com/), click NordVPN, and, under Manual setup, click on Service credentials. Here you'll find the Username and Password needed to connect manually.
Authentication Retry: leave unchecked.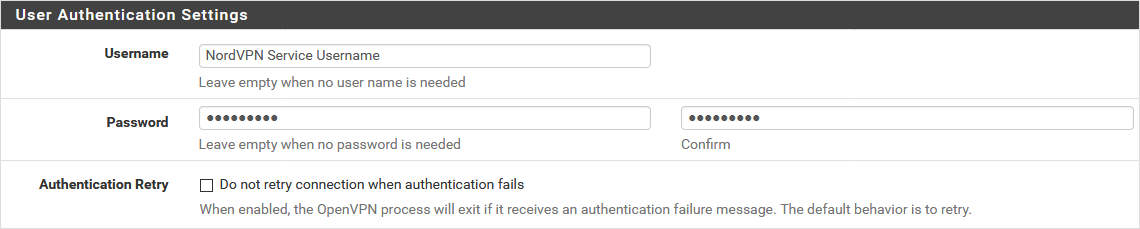CRYPTOGRAPHIC SETTINGSTLS Configuration: Use a TLS Key - Check; Automatically generate a TLS key - UncheckTLS Key:
```
-----BEGIN OpenVPN Static key V1-----e685bdaf659a25a200e2b9e39e51ff030fc72cf1ce07232bd8b2be5e6c670143f51e937e670eee09d4f2ea5a6e4e69965db852c275351b86fc4ca892d78ae002d6f70d029bd79c4d1c26cf14e9588033cf639f8a74809f29f72b9d58f9b8f5fefc7938eade40e9fed6cb92184abb2cc10eb1a296df243b251df0643d53724cdb5a92a1d6cb817804c4a9319b57d53be580815bcfcb2df55018cc83fc43bc7ff82d51f9b88364776ee9d12fc85cc7ea5b9741c4f598c485316db066d52db4540e212e1518a9bd4828219e24b20d88f598a196c9de96012090e333519ae18d35099427e7b372d348d352dc4c85e18cd4b93f8a56ddb2e64eb67adfc9b337157ff4-----END OpenVPN Static key V1-----
```
TLS Key Usage Mode: TLS AuthenticationTLS keydir direction: Use default directionPeer certificate authority: NordVPN_CAPeer Certificate Revocation list: Do not defineClient certificate: webConfigurator default (59f92214095d8) (Server: Yes, In Use) (note that the numbers on your machine could be different)Encryption Algorithm: AES-256-GCMEnable NCP: CheckNCP Algorithms: AES-256-GCM and AES-256-CBCAuth digest algorithm: SHA512 (512-bit)Hardware Crypto: No Hardware Crypto Acceleration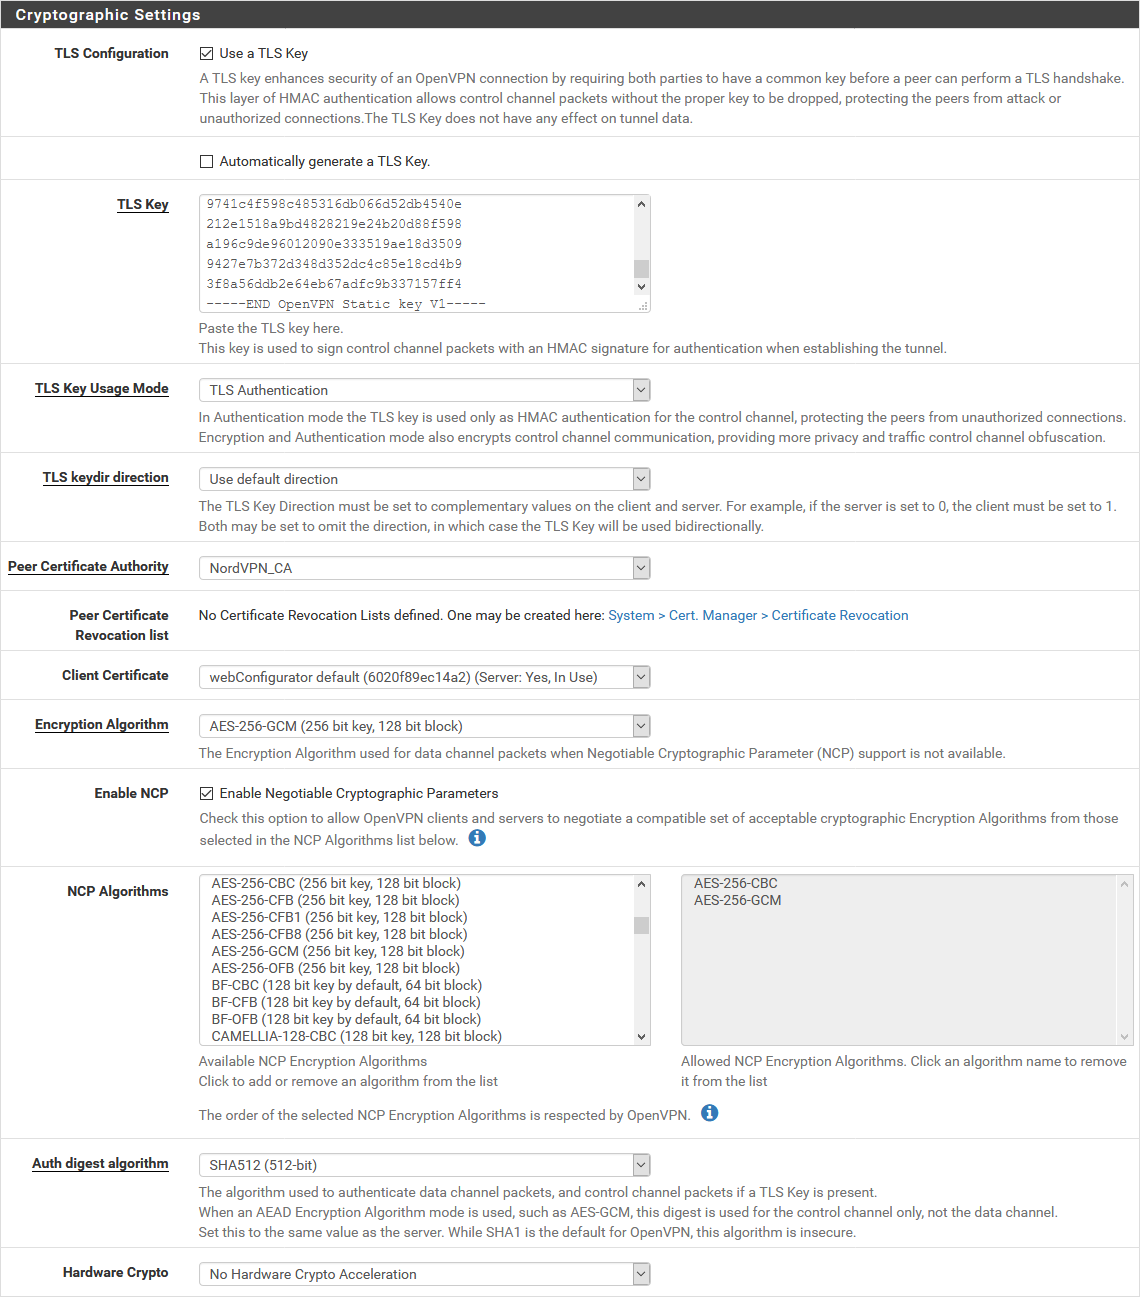TUNNEL SETTINGSIPv4 tunnel network: Leave blankIPv6 tunnel network: Leave blankIPv4 remote network(s): Leave blankIPv6 remote network(s): Leave blankLimit outgoing bandwidth: Leave blankCompression: No LZO Compression [Legacy style,comp-lzo no]Topology: Subnet – One IP address per client in a common subnetType-of-Service: UncheckDon’t pull routes: UncheckDon’t add/remove routes: CheckADVANCED CONFIGURATIONCustom Options
tls-client;remote-random;tun-mtu 1500;tun-mtu-extra 32;mssfix 1450;persist-key;persist-tun;reneg-sec 0;remote-cert-tls server;
UDP FAST I/O: UncheckExit Notify: DisabledSend/Receive Buffer: DefaultGateway creation: IPv4 onlyVerbosity level: 3 (recommended)5. Navigate to Interfaces > Interface Assignments and Add the NordVPN interface.6. Press on the OPT1 to the left of your assigned interface and fill in the following information:Enable: CheckDescription: NordVPNMac Address: Leave blankMTU: Leave blankMSS: Leave blank
Do not change anything else. Just scroll down to the bottom and press Save.
7. Navigate to Services -> DNS Resolver -> General SettingsEnable: CheckListen port: Leave as isEnable SSL/TLS Service: UncheckSSL/TLS Certificate: webConfigurator default (59f92214095d8) (Server: Yes, In Use) (note that the numbers on your machine could be different);SSL/TLS Listen Port: Leave as isNetwork Interfaces: AllOutgoing Network Interfaces: NordVPNSystem Domains Local Zone Type: TransparentDNSSEC: UncheckPython Module: UncheckDNS Query Forwarding: Enable forwarding mode - Check; Use SSL/TLS for outgoing DNS Queries to Forwarding Servers - UncheckDHCP Registration: CheckStatic DHCP: CheckOpenVPN Clients: UncheckClick Save.
8. While in DNS Resolver, select Advanced Settings at the top and fill in the following:ADVANCED PRIVACY OPTIONS:Hide Identity: CheckHide Version: CheckQuery Name Minimization: UncheckStrict Query Name Minimization: UncheckADVANCED RESOLVER OPTIONS:Prefetch Support: CheckPrefetch DNS Key Support: CheckHarden DNSSEC Data: UncheckDo not change anything else. Just scroll down to the bottom and press Save
9. Navigate to Firewall > NAT > Outbound and select Manual Outbound NAT rule generation. Press Save. Six rules will appear. Delete all IPv6 rules and add a new one.9.1. Interface: NordVPN.9.2. Source: your LAN subnet, for example 192.168.2.0/24.9.3. Click Save. At the end, it should look like this:
10. Navigate to Firewall > Rules > LAN and delete the IPv6 rule. Also, edit the IPv4 rule.10.1. Press on Show Advanced Options10.2. Change Gateway to NordVPN10.3. Click Save.Now it should look like this:
11. Go to System > General Setup and fill in the fields as follows:DNS Server 1: 103.86.96.100; noneDNS Server 2: 103.86.99.100; NordVPN_VPNV4 - opt1 - ...Leave everything else as it is. Click Save.
12. Now navigate to Status > OpenVPN. The status and it should state that the service is “up”.
13. You can also check the connection log file under Status > System Logs > OpenVPN:
That’s it! pfsense VPN setup is complete, and you should now have a [VPN connection](https://nordvpn.com/what-is-a-vpn/).
If the IP does not change after setting up the VPN, try restarting the pfSense router and check the IP then.",https://support.nordvpn.com/hc/en-us/articles/20466674776977-pfSense-2-4-5-setup-with-NordVPN
Installing and using NordVPN on Windows 7 and 8.1,"We will stop updating the NordVPN app for older Windows versions.As Windows 7/8.1 10 32-bit no longer receive mainstream security updates from Microsoft, it becomes increasingly difficult to ensure security, reliability and provide the latest features of the NordVPN app.That being said we still recommend using the legacy version of the NordVPN client application for connecting to NordVPN servers on your Windows PC. To begin using the NordVPN Windows client application, download and install the NordVPN app on your Windows PC, log in, and connect to a NordVPN server. All of these steps will be covered in this tutorial. If you need a guide on installing and using NordVPN on a newer Windows system, follow the guide [here](https://support.nordvpn.com/hc/en-us/articles/19472023025169-Installing-and-using-NordVPN-on-Windows-10-and-11).
## Table of contents:
Downloading and installingSetting up the applicationChoosing between different serversNordVPN settings menu
* [General settings](
* [Auto-connect settings](
* [Kill Switch settings](
* [Split Tunneling](
* [Advanced settings](
* [My Account](
* [Dark Web Monitor](
## Downloading and installing the NordVPN app
1. Download the NordVPN app:[Download legacy app version for Windows 64-bit](https://downloads.nordcdn.com/apps/windows/NordVPN/latest/NordVPNSetup_x64.exe)[Download legacy app version for Windows 32-bit](https://downloads.nordcdn.com/apps/windows/NordVPN/latest/NordVPNSetup_x86.exe)
2. Go to your Downloads folder and double-click the NordVPNSetup.exe file. 
3. A pop-up window may ask you if you allow the app to make changes to your device. Click Yes.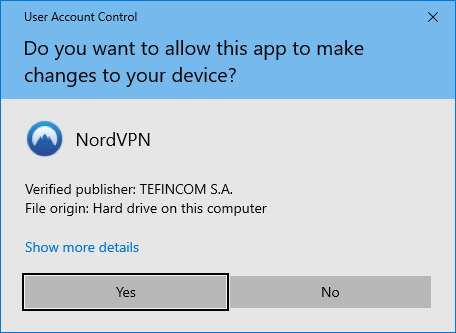
4. The installer window will open. Click Next.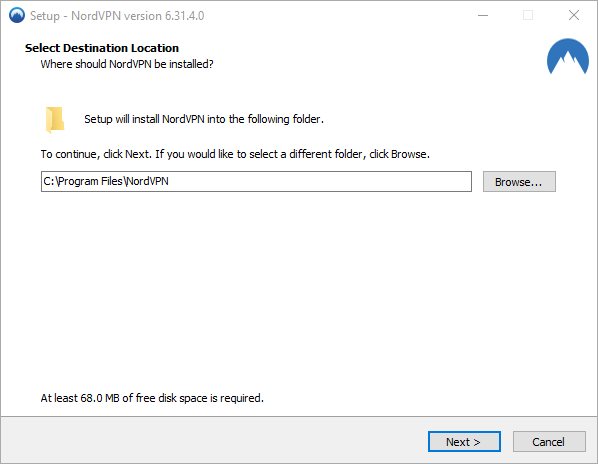
5. Tick the boxes if you want shortcuts for the NordVPN app on your Desktop and/or the Start menu, then click Next and Install.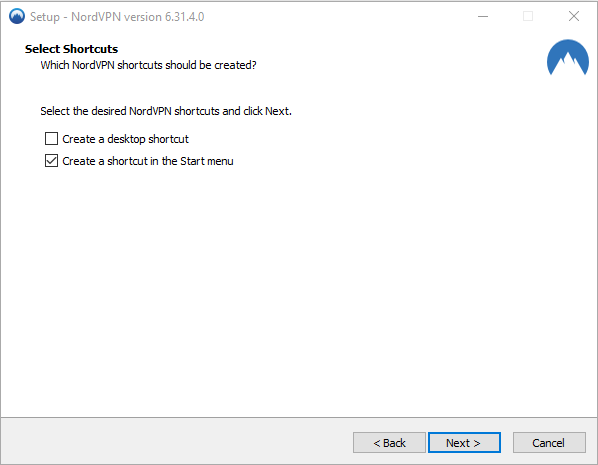
6. The installer will proceed with the installation process. Once it’s complete, you will be asked if you want to launch NordVPN right away. Click Finish to complete the setup.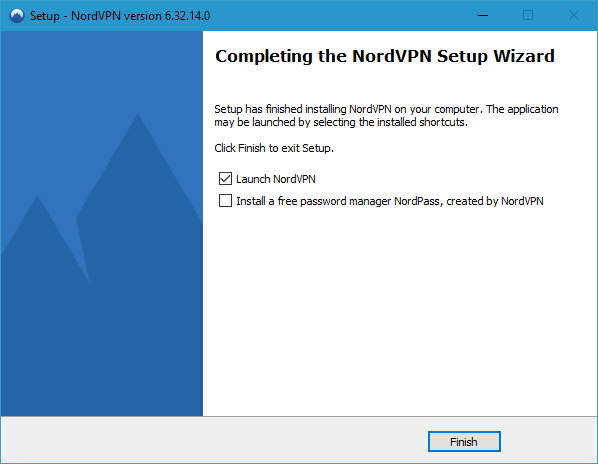
## Setting up and using NordVPN
1. Click on the NordVPN logo on your desktop, and after the app loads up, click Log In to continue.
2. Your browser will open up and load the Nord Account login page. First, enter your username or email address, press Continue, and then enter your password.
3. To start using NordVPN straight away, you can simply press on Quick Connect, wait till you see the status change from Unprotected to Protected and you're good to go for a secure and private session!However, for the full understanding of what the NordVPN app offers, let's briefly go over what you can find on the main screen and then in the settings menu.
1. Search bar: one of the ways you can connect to NordVPN servers. Use the search bar to find specific servers by typing in the name of the country, city, the server number or the specialty server type. Learn more about [VPN servers.](https://nordvpn.com/servers/)
2. Specialty servers: NordVPN offers multiple categories of servers, each one with its own unique benefits. We have a dedicated article explaining the different types in detail: What do the different server categories mean?
3. All countries: a list of countries you can connect to. Hovering over a country's name reveals additional options, such as specifying the city (if applicable) and server name.
4. Quick Connect: this option automatically connects you to the fastest and closest NordVPN server.
5. Threat protection: an innovative solution for dealing with malware, web tracking, malicious ads and more! Read about it here: Threat Protection.
6. Settings menu: clicking on this cogwheel icon reveals additional options which we explain below.
## Choosing between different NordVPN servers
Using the search bar. You can connect to specific servers by typing in a category, region, or a specific server number with a hashtag (e.g. United States #4672) to find what you need.Using the All Countries list or the Servers map. Click on the nodes on the map or on the specific country in the list to connect to the best server in the given location.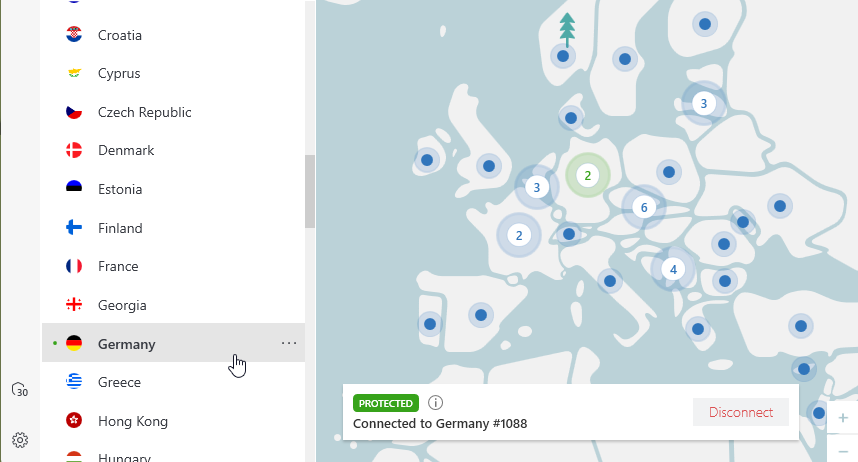 Clicking on the three dots next to the country name reveals additional connection options, such as the ability to select the specific city and server. 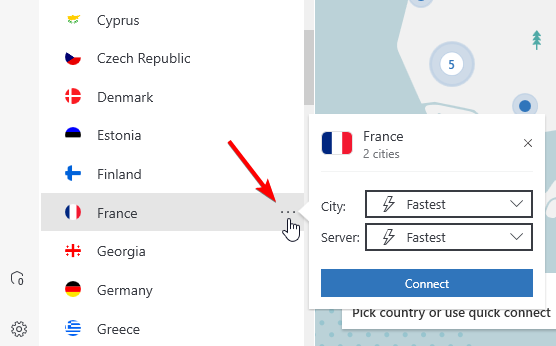
## NordVPN settings menu
In the Settings tab, you can set up the application to your liking. To open the settings menu, press on the cogwheel icon in the bottom left corner. 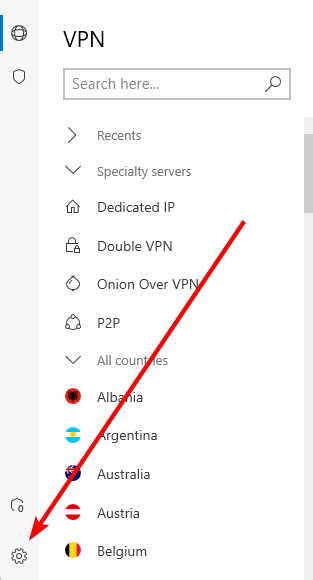
## General settings
* Launch at Windows startup makes NordVPN run automatically when you start your computer. Enabled by default.
* Launch the app minimized displays the NordVPN icon only in the Windows system tray when the computer starts (instead of opening the main window). Enabled by default.
* Show VPN connection status notifications shows Windows notifications each time you connect or disconnect from a server. Enabled by default.
* Threat Protection: block ads and malicious websites protects you from intrusive ads, malware sites, phishing links, and other threats.
* Select app language from the Language dropdown menu. You can select English, Spanish, French, or German.
* In the left sidebar, you can also access your account details. The Logout button is also at the bottom.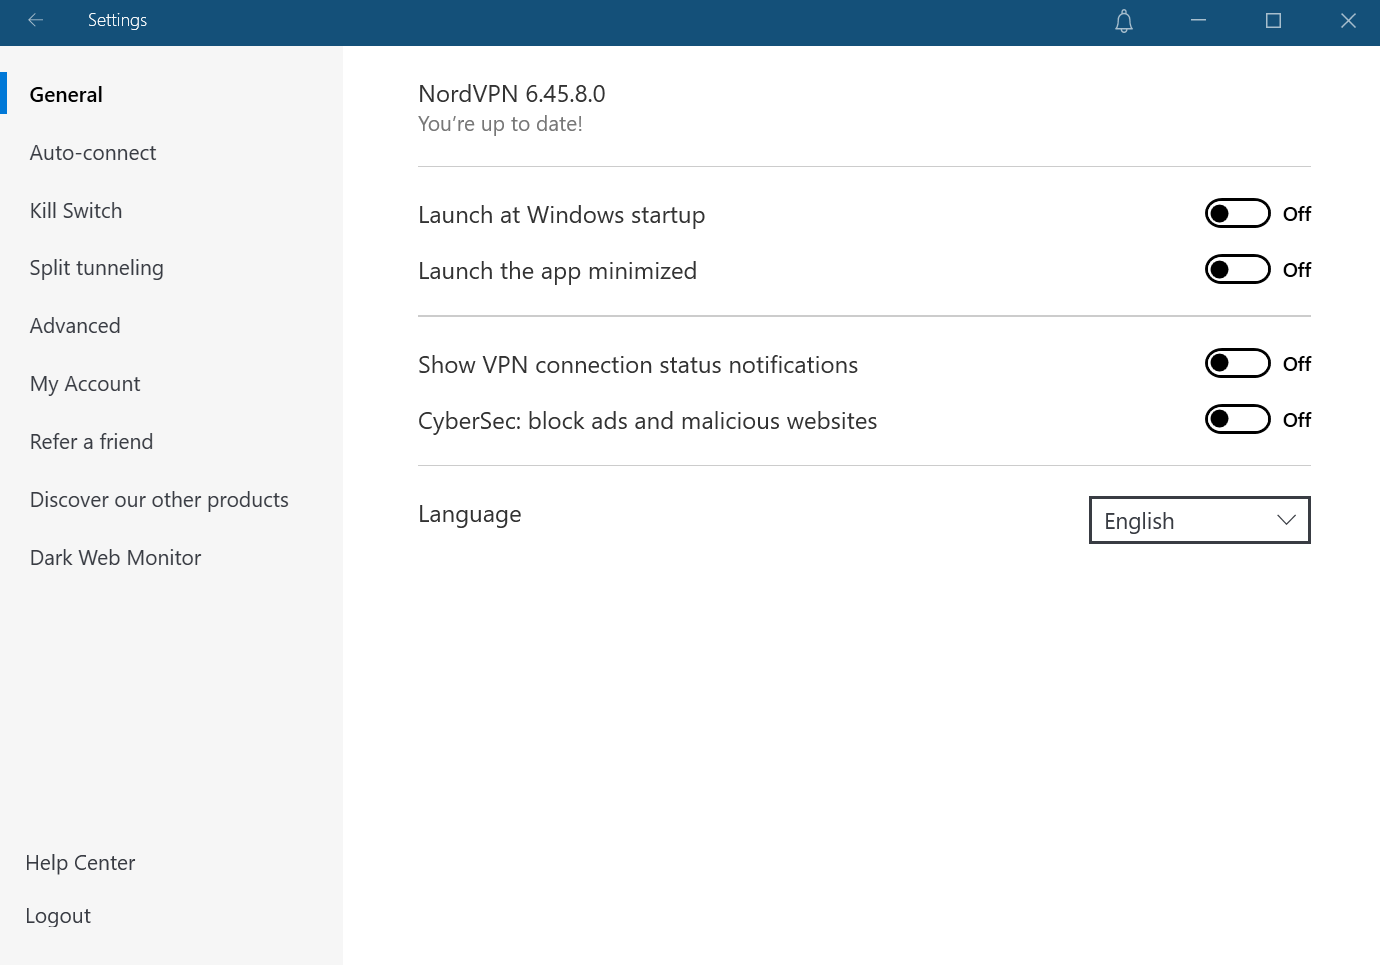
## Auto-connect settings
* Always when the app launches makes the app connect to a server automatically upon starting when using an Ethernet connection or Wi-Fi network. It does not apply to Trusted Wi-Fi networks. Disabled by default.
* Auto-connect on Wi-Fi makes the app connect to a server automatically when you connect to a network: Unsecure networks or Always. Disabled by default.Unsecure networks: connect to a server automatically when you connect to an unsecure Wi-Fi network. Unsecure wireless networks are networks without a password and/or networks with weak encryption. It only works while connecting to a new Wi-Fi network or switching the Wi-Fi network. It does not apply to an Ethernet connection and Trusted Wi-Fi networks. The setting allows you to disconnect after being auto-connected.Always: applies only to Wi-Fi networks. Make the app connect to a server automatically when using Wi-Fi that is not trusted. You will not be able to disconnect unless you trust your current Wi-Fi or disable auto-connect.
* Choose a VPN protocol and server automatically lets the app choose a VPN protocol and server automatically. Enabled by default.
* VPN protocol (visible after disabling the Choose a VPN protocol and server automatically option). UDP is mainly used for streaming and downloading. TCP is more reliable, but also a little slower, and is usually used for web browsing. NordLynx is used by default.
* Auto-connect to lets you select your preferred country or server type, which the app will automatically connect to. You will be able to select a specific city after you select a preferred country.
* Trusted Wi-Fi networks disables Auto-connect on specific Wi-Fi networks. For example, you can make an exception for your home Wi-Fi if you trust it.IMPORTANT NOTE: you will lose internet connectivity while connected to a Trusted Wi-Fi with enabled Internet Kill Switch.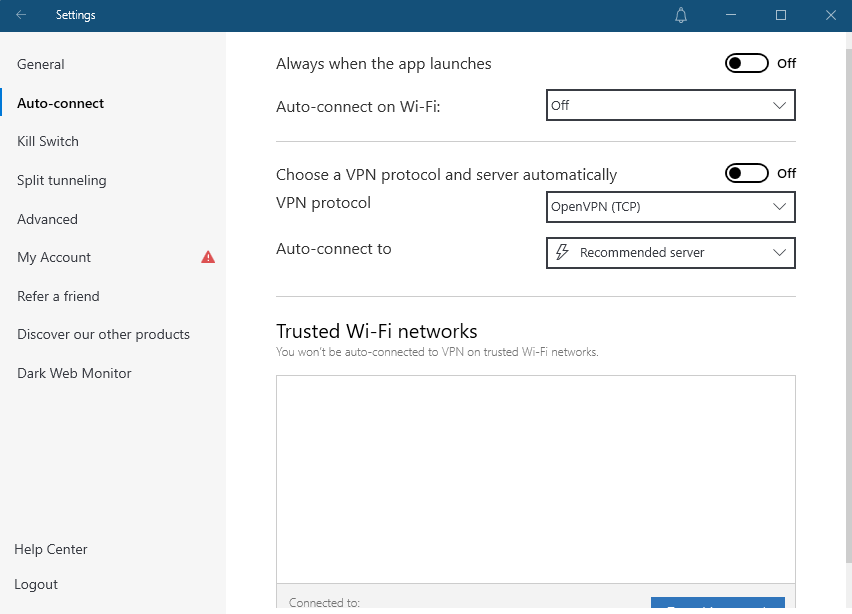
## Kill Switch
* Internet Kill Switch cuts off your internet connection when you’re disconnected from secure NordVPN servers. Disabled by default.
* App Kill Switch shuts down specified programs if you lose VPN connection. For example, if you add Skype to the list, NordVPN will close it whenever you disconnect. Since it takes a few seconds to reach a secure VPN server, this will prevent your data from leaking upon automatically reconnecting to the internet. Disabled by default.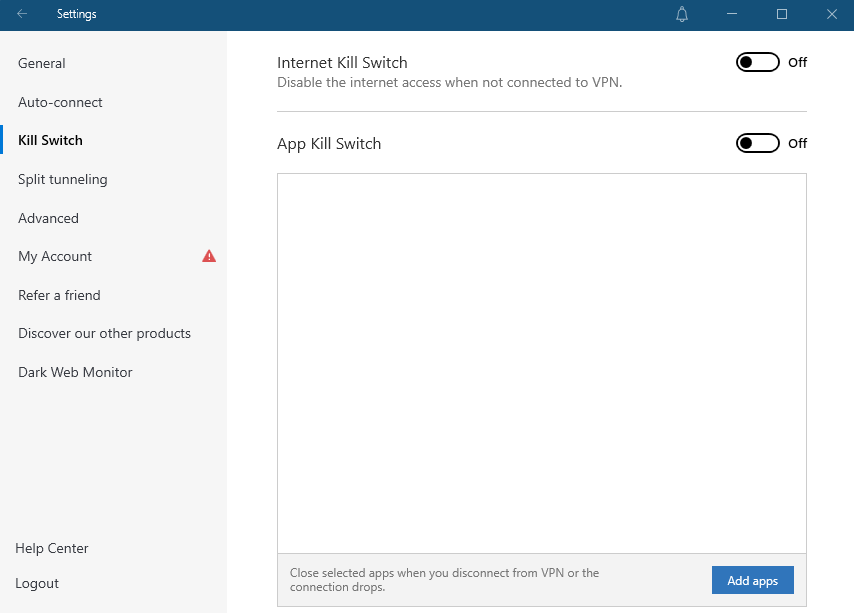
## Split Tunneling
* Split tunneling allows you to exclude applications from the VPN connection. In other words, the apps which you select to add into the split tunneling feature will allow them to stay unaffected by NordVPN.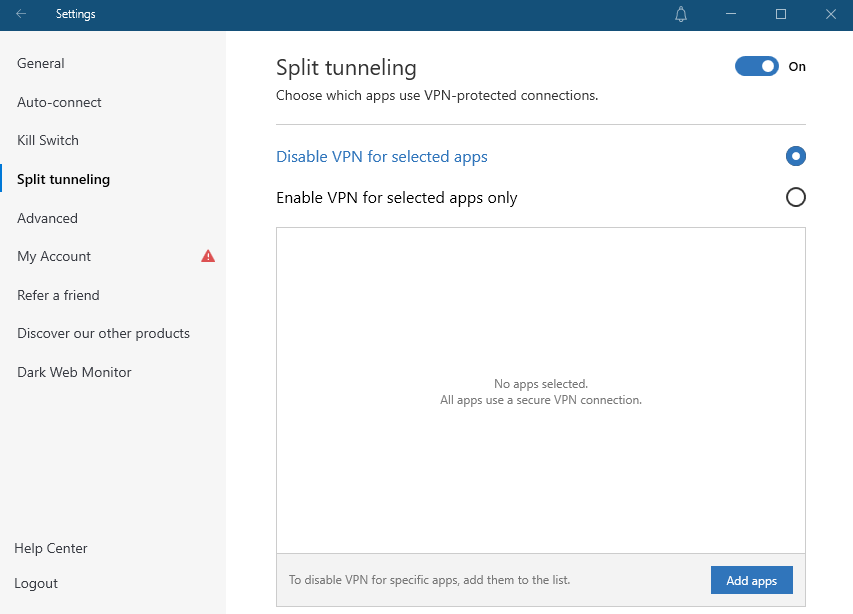
## Advanced settings
* Custom DNS lets you specify a particular DNS server for the NordVPN application.
* Obfuscated Servers enable you to bypass network restrictions, such as firewalls. This is recommended for countries with restricted network access.
* Invisibility on LAN makes your computer invisible to others on the same local area network (LAN). Keep in mind that once enabled, you will not be able to connect to devices on the same LAN, like printers. Disabled by default.
* Diagnostics runs the NordVPN diagnostics tool if you’re having technical issues. Collect the diagnostic data and provide the ticket ID to our support staff for further assistance. If the diagnostics tool does not give you a ticket ID, you can send the .zip file to our support staff instead.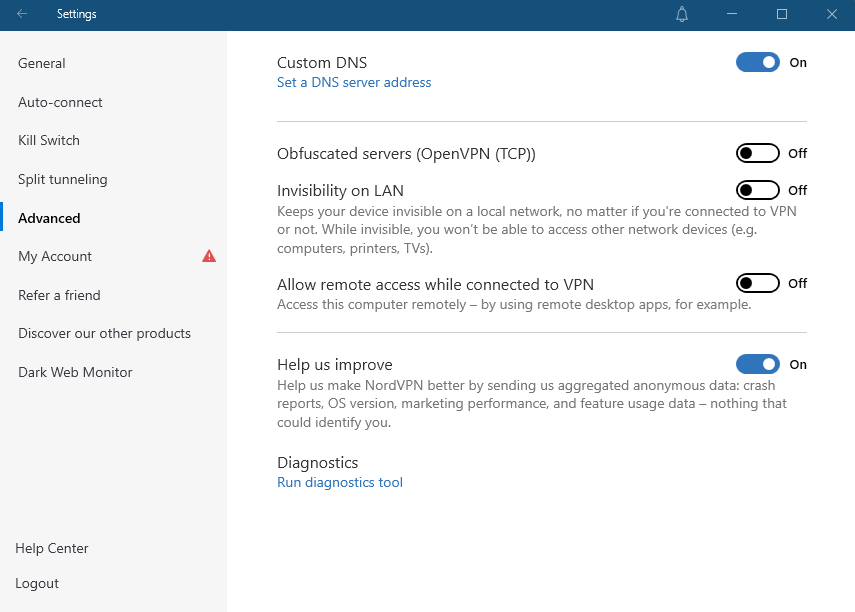
## My Account
* This section will provide you with the information about your subscription as well as an option to change your password and activate the Two-factor authentication. You can also download our application for other operating systems.
## Dark Web Monitor
* Become notified in case there is a leak of your information related to the email used with NordVPN. Read more about the feature in [our dedicated section](https://nordvpn.com/features/dark-web-monitor/). ",https://support.nordvpn.com/hc/en-us/articles/19441140326289-Installing-and-using-NordVPN-on-Windows-7-and-8-1
Installing and using NordVPN on Windows 10 and 11,"This guide will show you how you can set up the NordVPN application on your Windows 10 or Windows 11 device. If you need a guide on installing and using NordVPN on an older Windows system, follow the guide here.
Table of contents:
Downloading and installingSetting up the applicationChoosing between different servers
* [Connect to a specific server](https://support.nordvpn.com/hc/en-us/articles/19472023025169-Installing-and-using-NordVPN-on-Windows-10-and-11#specific%20servers)
* [Connect to a specific country](https://support.nordvpn.com/hc/en-us/articles/19472023025169-Installing-and-using-NordVPN-on-Windows-10-and-11#Specific%20country)
[Features]( settings menu](
* [General](
* [Connection](
* [Kill Switch](
* [Split Tunneling](
* [Profile](
* [Refer a friend](
* [Discover other Nord products](
## Downloading and installing the NordVPN app
1. [Download the NordVPN app](https://downloads.nordcdn.com/apps/windows/NordVPN/latest/NordVPNSetup.exe).
2. Go to your Downloads folder and double-click the NordVPNInstall file. 
3. A pop-up window may ask you if you allow the app to make changes to your device. Click Yes.
4. The installer window will open. Click Next.
5. Tick the boxes if you want shortcuts for the NordVPN app on your Desktop and/or the Start menu, then click Next and Install.
6. The installer will proceed with the installation process. Once it’s complete, you will be asked if you want to launch NordVPN right away. Click Finish to complete the setup.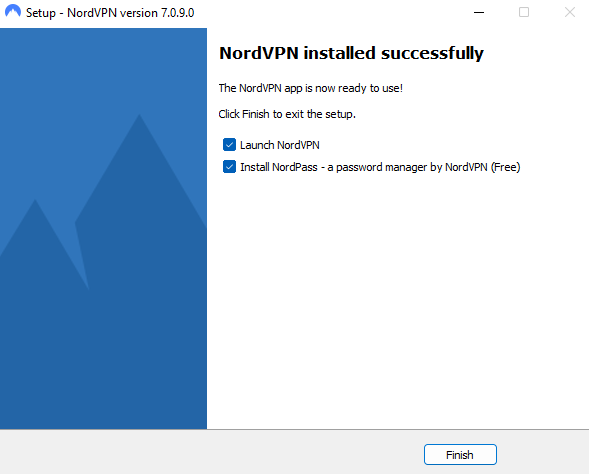
## Setting up and using NordVPN
1. Click on the NordVPN logo on your desktop, and after the app loads up, click Log In to continue.
2. Your browser will open up and load the Nord Account login page. First, enter your username or email address, press Continue, and then enter your password. If you do not have an account and an active subscription, click [here](https://support.nordvpn.com/Billing/Subscription/1088163062/How-to-purchase-a-NordVPN-subscription.htm) and learn how to get one.
3. To start using NordVPN straight away, you can press on Quick Connect, wait till you see the status change from Not connected to Connected, and you're good to go for a secure and private session! However, for a full understanding of what the NordVPN app offers, let's briefly go over what you can find on the main screen.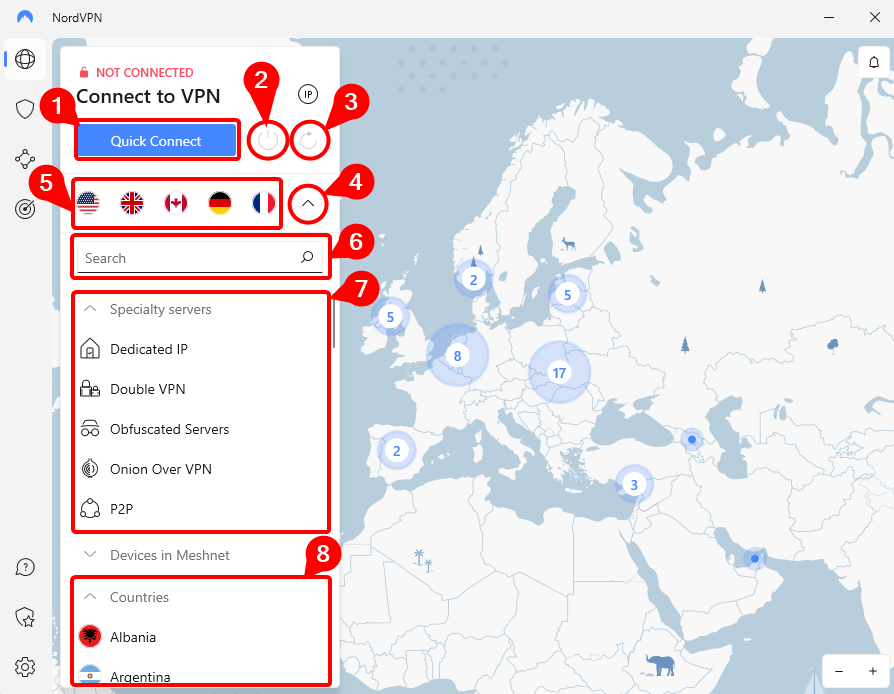
1. Quick Connect: this option automatically connects you to the fastest and closest NordVPN server.
2. Disconnect button: lets you disconnect from a NordVPN server.
3. Refresh button: this option refreshes your current connection and switches to a new recommended server.
4. Expander: arrow down will provide connection choice and a search bar for specific servers.
5. Recent connections: shows flags of the countries that you recently connected to.
6. Search bar: one of the ways you can connect to NordVPN servers. Use the search bar to find specific servers by typing in the name of the country, city, server number, or specialty server type. Learn more about [VPN servers.](https://nordvpn.com/servers/)
7. Specialty servers: NordVPN offers multiple categories of servers, each one with its unique benefits. We have a dedicated article explaining the different types in detail: What do the different server categories mean?
8. All countries: a list of countries you can connect to. Hovering over a country's name reveals additional options, such as specifying the city (if applicable) and server name.
## Features
On the left side menu, you can find all the additional features that NordVPN offers.
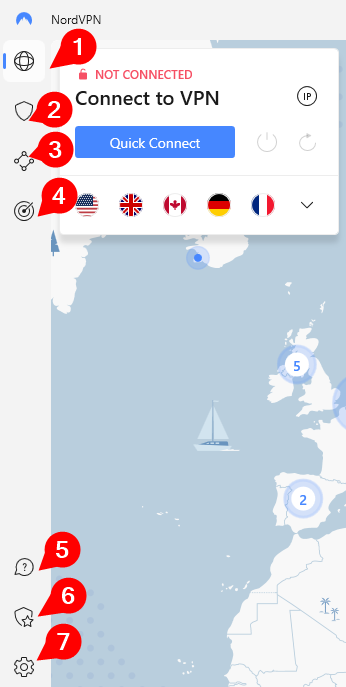
1. Main screen icon: this forwards you to the main application screen and helps you find your wanted location.
2. Threat Protection Pro™: it’s a special NordVPN feature that automatically blocks ads, trackers, and malicious URLs. When you visit a website known for scamming people, this feature displays an in-browser alert to warn you about possible fraud. Threat Protection Pro™ also scans downloads for malware and checks your apps for security vulnerabilities. Available with selected NordVPN plans, Threat Protection Pro™ can work without an active VPN connection. Learn about it [here](https://nordvpn.com/features/threat-protection/).
3. [Meshnet](https://nordvpn.com/meshnet/): this feature allows you to create a secure, private network for many devices located anywhere in the world, access them remotely, and send all your online traffic through another device.
4. Dark Web Monitor: scans the internet for any credential leaks associated with your registered NordVP e-mail address. To find more information about it click [here](https://support.nordvpn.com/General-info/1661437652/Using-the-Dark-Web-Monitor-feature.htm).
5. Contact us: gives a form to fill out and reach out to our customer support team.
6. Security score: recommend steps to follow to become fully protected online.
7. Settings: lets you change the general, subscription, and connection settings
## Choosing between different NordVPN servers
Using the search bar. You can connect to specific servers by typing in a category, region, or a specific server number with a hashtag (e.g. United States #4735) to find what you need.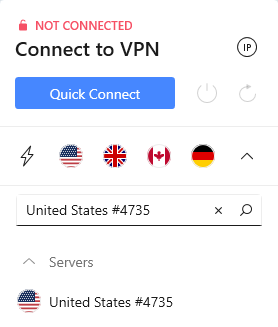Using the All Countries list or the Servers map. Click on the nodes on the map or on the specific country in the list to connect to the best server in the given location. Clicking on the three dots next to the country name reveals additional connection options, such as the ability to select a specific city.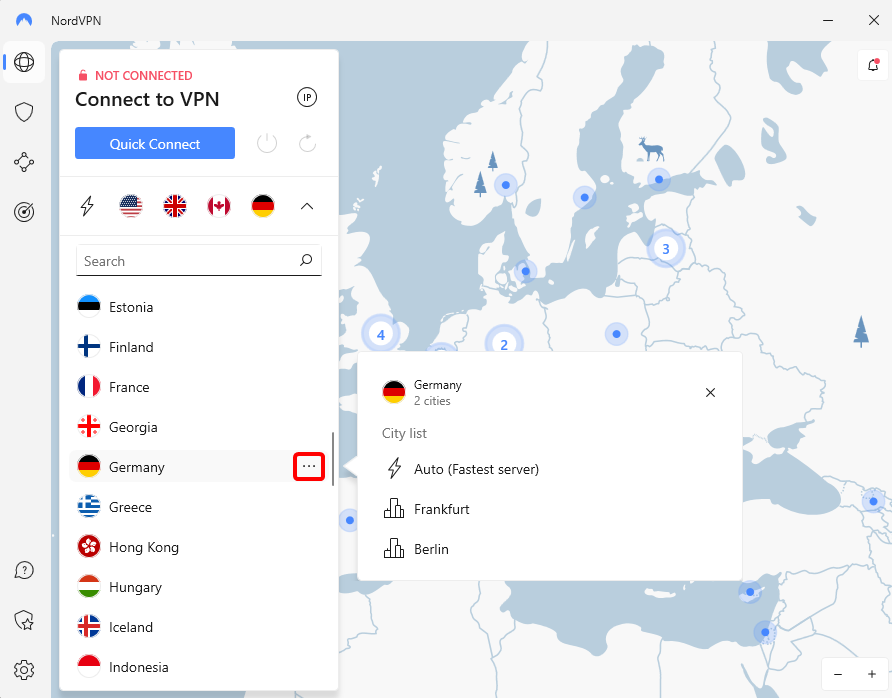
## NordVPN settings menu
In the Settings tab, you can set up the application to your liking. To open the settings menu, press on the cogwheel icon in the bottom left corner. 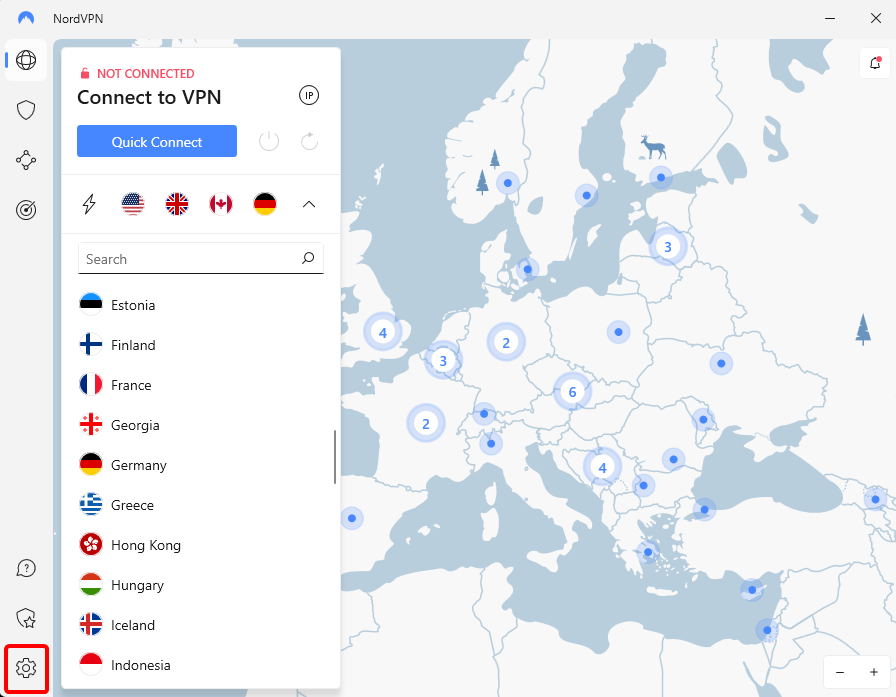After opening settings, you will be introduced to 7 different settings sections. Down below, you will find an explanation of each settings section.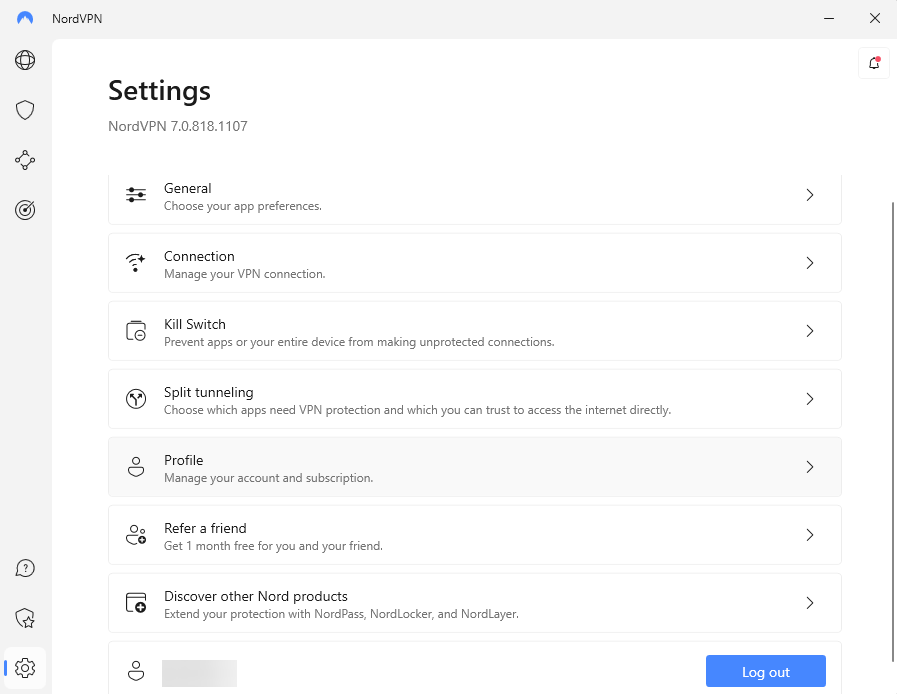
## General
* Launch at Windows startup makes NordVPN run automatically when you start your computer. Enabled by default.
* Launch the app minimized to the system tray displays the NordVPN icon only in the Windows system tray when the computer starts (instead of opening the main window). Enabled by default.
* Show VPN connection status notifications show Windows notifications each time you connect or disconnect from a server. Enabled by default.
* Appearance lets you choose your preferred theme for the NordVPN application.
* Language dropdown lets you select your preferred language of the NordVPN app.
* Help us improve by sending us aggregated anonymous data for future improvement analysis.
* Diagnostics run the NordVPN diagnostics tool if you’re having technical issues. Collect the diagnostic data and provide the ticket ID to our support staff for further assistance. If the diagnostics tool does not give you a ticket ID, you can send the .zip file to our support staff instead.
* Allow background processes to let the NordVPN application run after closing the app. 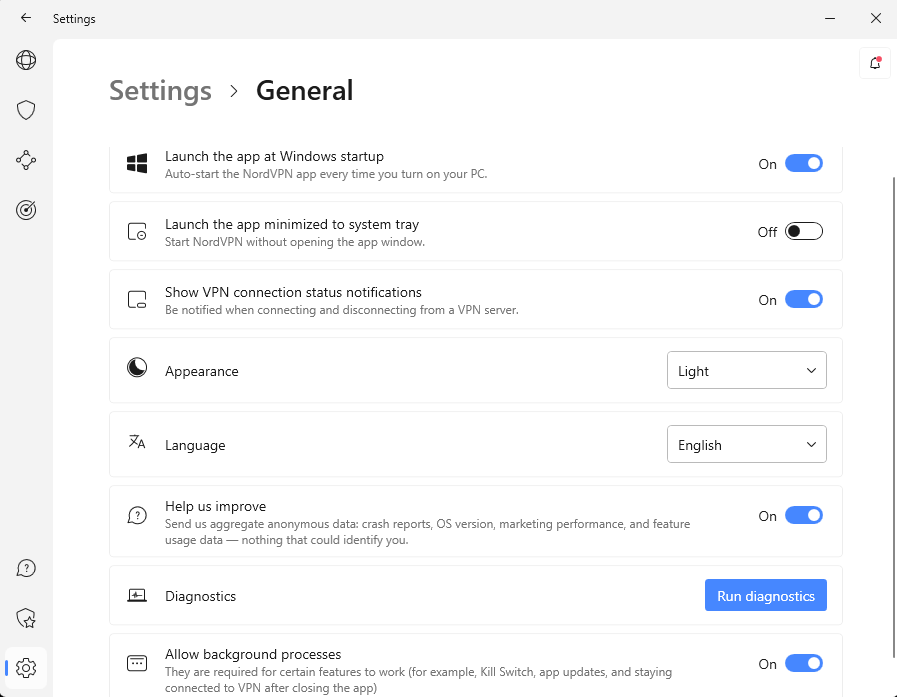
## Connection
* VPN protocol UDP is mainly used for streaming and downloading. TCP is more reliable but also a little slower and is usually used for web browsing. Nordlynx
* Auto-connect lets you select your preferred country or server type, which the app will automatically connect to. You will be able to select a specific city after you select a preferred country.On all networks: connects you automatically no matter what network you use.Wi-Fi networks: connect you automatically only when using a Wi-Fi network.On Ethernet: connects you automatically when using ethernet.
* Trusted Wi-Fi networks disable Auto-connect on specific Wi-Fi networks. For example, you can make an exception for your home Wi-Fi if you trust it.
* Quick connect on the app launch makes the app connect to a server automatically upon starting when using an Ethernet connection or Wi-Fi network. It does not apply to Trusted Wi-Fi networks. Disabled by default.
* Custom DNS lets you specify a particular DNS server for the NordVPN application.
* Invisibility on LAN makes your computer invisible to others on the same local area network (LAN). Remember that once enabled, you will not be able to connect to devices on the same LAN, like printers. Disabled by default.
* Allow remote access while connected to VPN to access your Windows device remotely. Disabled by default.IMPORTANT NOTE: you will lose internet connectivity while connected to a Trusted Wi-Fi with enabled Internet Kill Switch.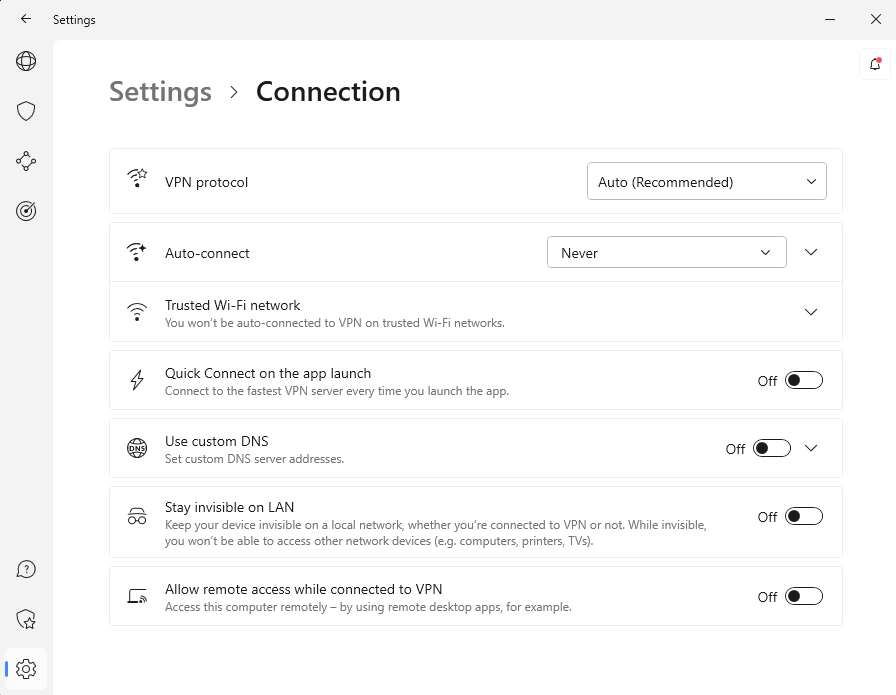
## Kill Switch
* Internet Kill Switch cuts off your internet connection when you’re disconnected from secure NordVPN servers. Disabled by default.
* App Kill Switch shuts down specified programs if you lose a VPN connection. For example, if you add Skype to the list, NordVPN will close it whenever you disconnect. Since it takes a few seconds to reach a secure VPN server, this will prevent your data from leaking upon automatically reconnecting to the internet. Disabled by default.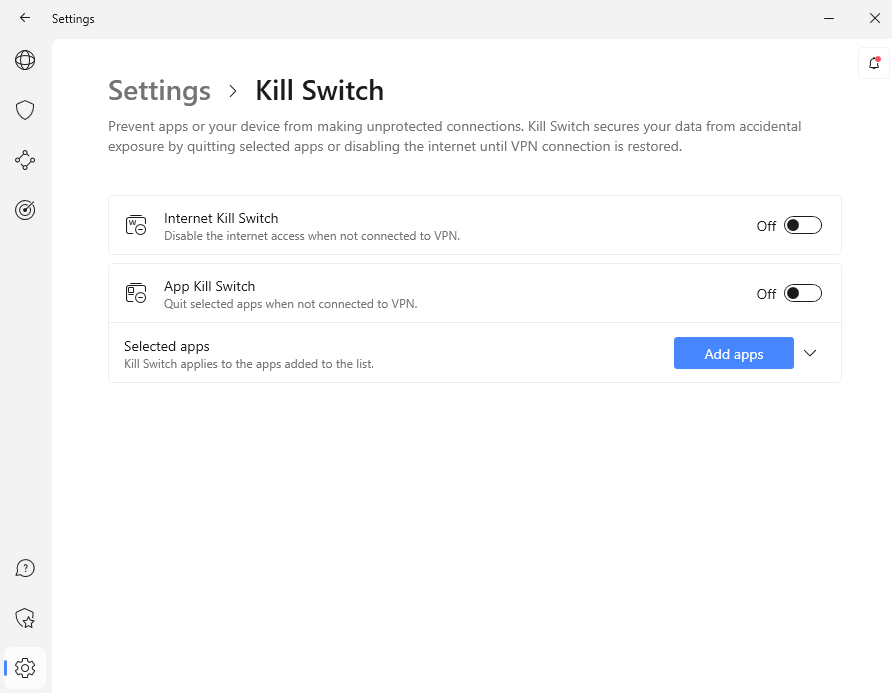
## Split Tunneling
* Split tunneling allows you to exclude applications from the VPN connection. In other words, the apps which you select to add into the split tunneling feature will allow them to stay unaffected by NordVPN. 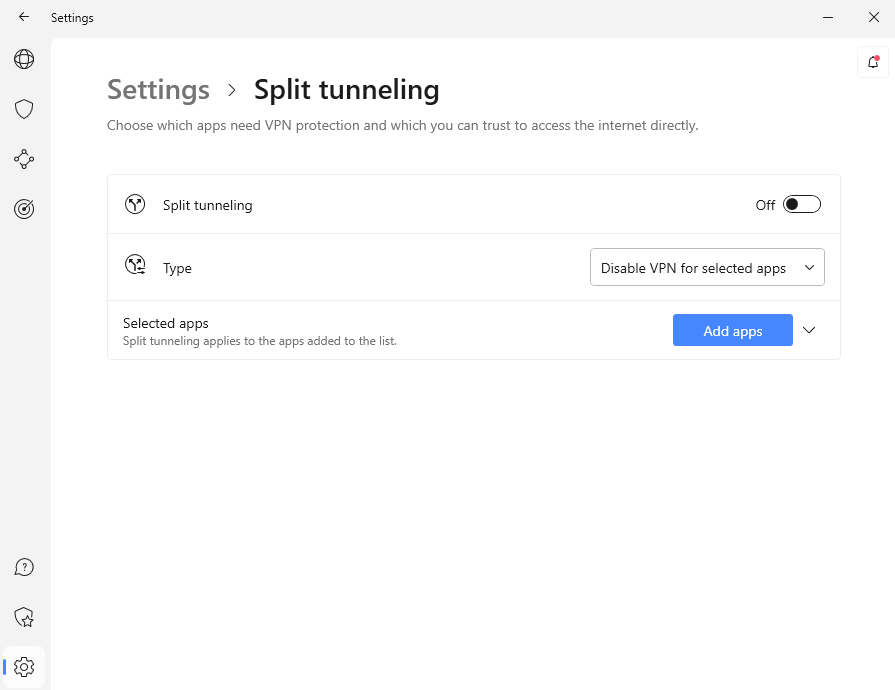
## Profile
* Subscription lets you manage your subscription, cancel its auto-renewal, or re-subscribe for the service.
* Multi-factor authentication (MFA) is a security feature that helps protect access to your account. When MFA is turned on, you must pass an extra step during the log-in process.
* Get NordVPN for all your devices and stay protected all the time.
## Refer a friend
* It provides you with your personal referral link that you can share with your friends and family and receive a reward for it.
## Discover other Nord products
* It offers you NordPass, NordLocker, and NordLayer services that will help you to stay fully protected at all times.",https://support.nordvpn.com/hc/en-us/articles/19472023025169-Installing-and-using-NordVPN-on-Windows-10-and-11
How to setup NordVPN on Android,"From October 17th, 2024, older applications will have a few function limitations. The issues can affect
Android applications version 7.9.2 and below. They can include not receiving notifications in the app and reduced Dark Web Monitoring and Meshnet functionality.To resolve the issue, please update your application to the latest version.
To begin using NordVPN on your Android device, all you need to do is to download the VPN for Android, sign in (or sign up), and then connect to a NordVPN server. As soon as you've successfully connected to a NordVPN server, your Android's internet connection will be secure and private.
To go through these steps with ease, check out the instructions we provide below. Additionally, you'll find the various ways in which you can adjust the NordVPN app for Android to suit your needs!
## Table of contents:
* How to download and install NordVPN for Android
* How to set up the NordVPN mobile app for Android
* How to use NordVPN Android app
* Choosing between different servers
* Adjusting VPN settings
* (Optional) Sideload the NordVPN app
## How to download and install NordVPN for Android
First, download NordVPN for Android and install the app on your Android device.
1. Open Play Store.
2. Enter NordVPN in the search bar and select the NordVPN app. Tap Install.
### How to set up the NordVPN mobile app for Android
1. Once you’ve installed the application, tap to open it.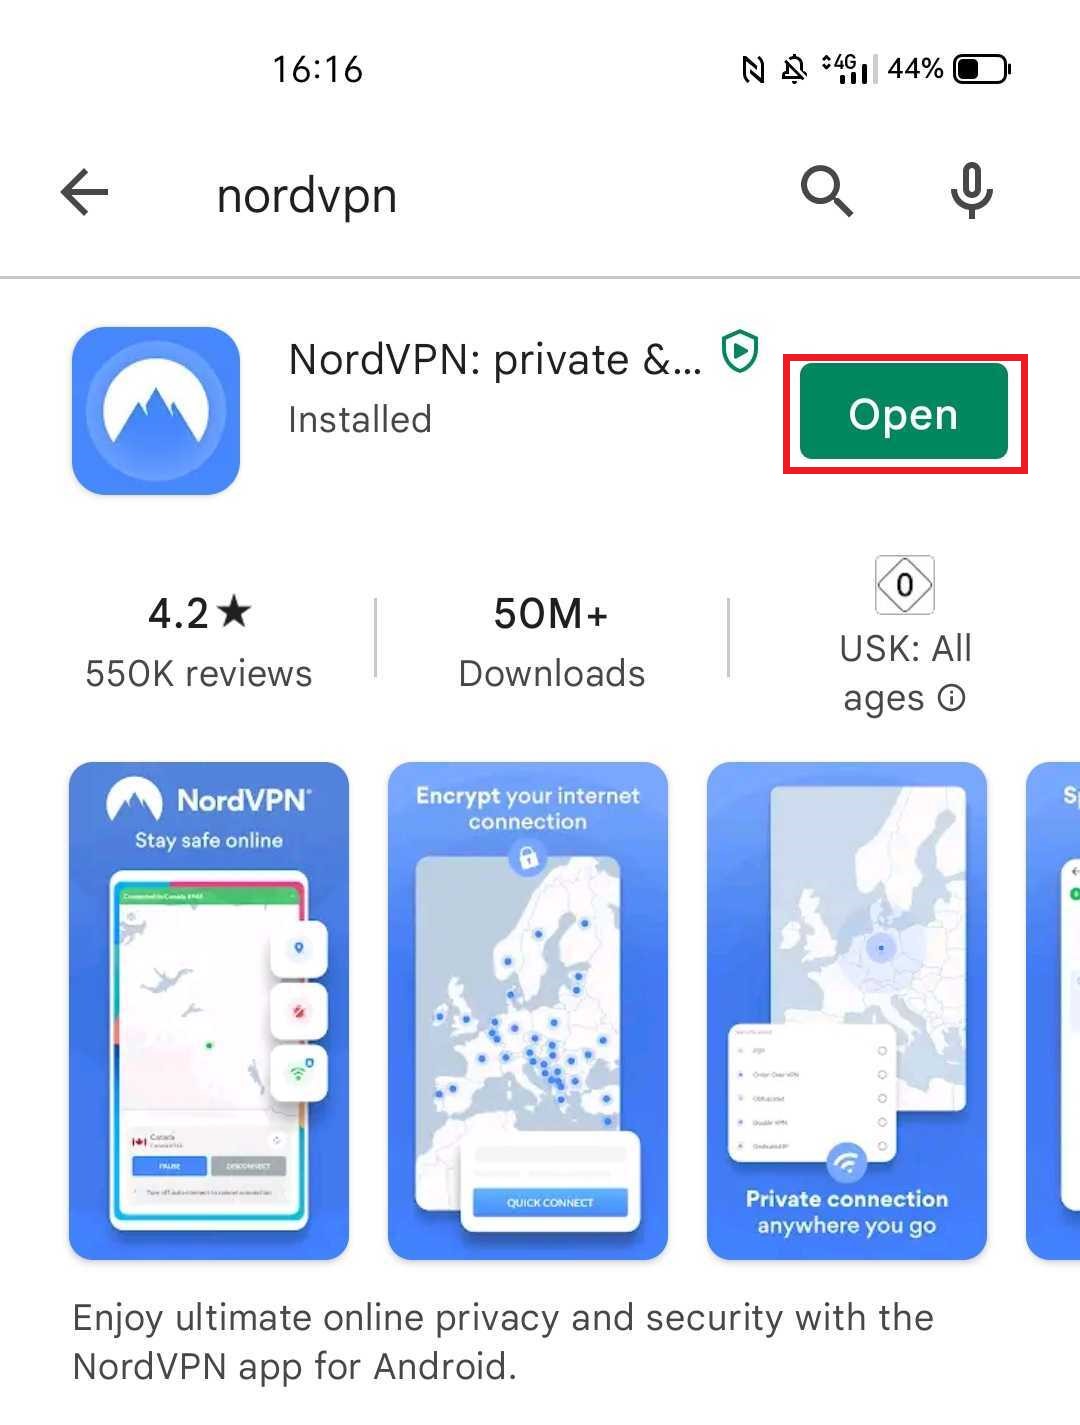
2. In the main menu, tap SIGN UP to create a new account or LOG IN if you already have one.
3. Pressing on any of the two buttons above will open your browser and take you to our Nord Account page, where you can either proceed with logging in or creating an account.Please note that in case you're signing up, you will be asked to get a subscription before you may begin using the service. 
### How to use NordVPN Android app
To make your connection to the internet secure and private, connect to a NordVPN server. This can be done in several ways: by pressing on the QUICK CONNECT button, clicking on a country name within the Country List, or finding a server through the search bar.Now you know how to set up a vpn on Android but there's a lot more NordVPN can offer to make your experience the best for you. Let's take a look at the different options and features that you can adjust according to your needs.Swipe up on the main screen to find all server options and features.
1. 1. Quick Connect: connect to the closest and least loaded server. This connection method is useful when the specifics of server location or other settings aren't as important as getting lighting-fast service.
2. Traffic routing: Traffic routing is one of the Meshnet features. It allows you to route all of your Internet traffic through your friends or your other device and use the IP address of that device to access the Internet.
3. Specialty servers: NordVPN offers a variety of different types of servers, each with unique benefits. Learn more about them in our dedicated article: What do the different server categories mean?
4. Search bar: use it to find specific servers. You can input the name of a country, city, server number, or even the name of the specialty category.
5. All countries list: another method for connecting - simply scroll through the list for the country you would like to connect to, and then on the country name when you find it.
6. [Meshnet](https://nordvpn.com/meshnet/): this feature allows you to create a secure, private network for many devices located anywhere in the world, access them remotely, and send all your online traffic through another device.
7. Notifications: here you can find all news about the latest updates and security tips.
8. Statistics and Settings: by clicking here you can find your connection statistics and by pressing this cogwheel icon you will open the settings menu. There's a separate section below that explains all of the options found there.
## Choosing between different servers
Connecting to a specific country: Swipe up to see the Country list. There, tap on the country you're looking for, and you will be automatically connected to a server in that location.
Alternatively, the pins on the world map signify where we have servers and the number of them in the country. Pressing on them will show you the exact city servers we have. You can tap on different pins without a number and connect to any desired city.Finally, you can also click on the search bar, and type in the country's name there.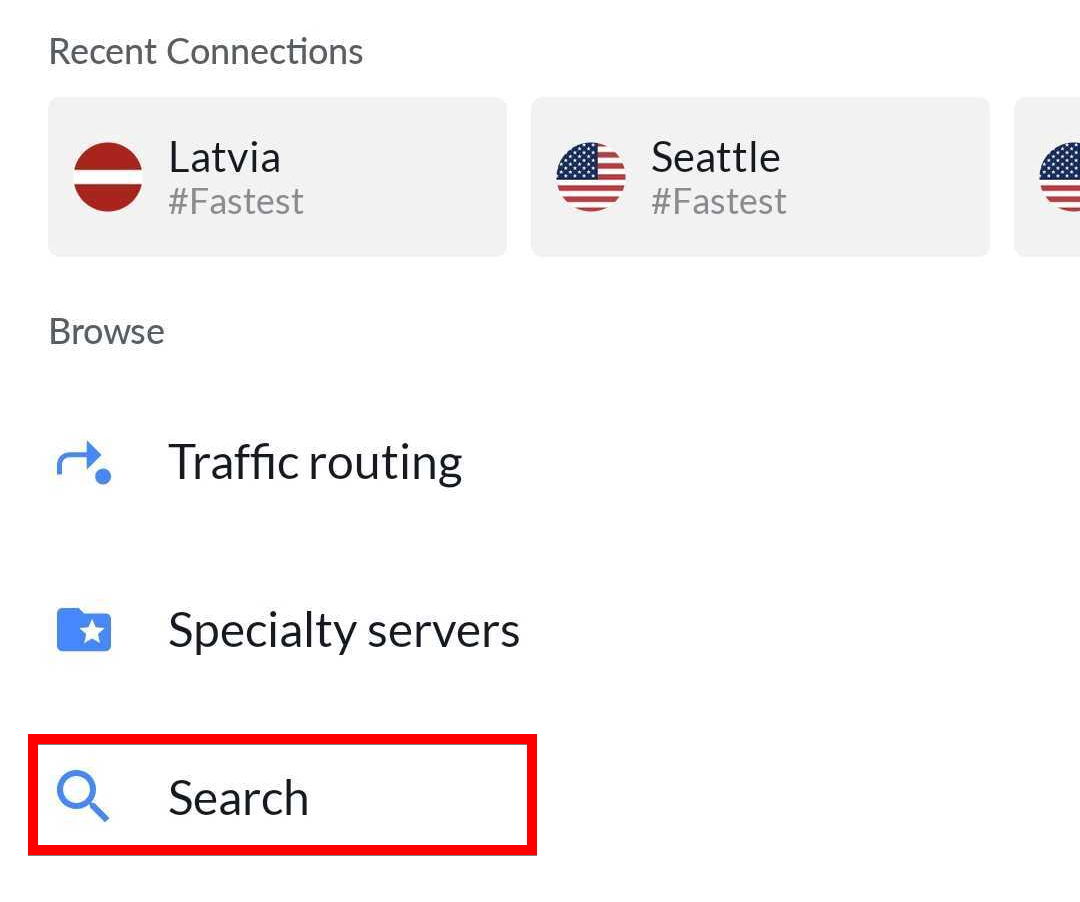
Connecting to a specific city: You can tap on the three dots next to a country to select a specific city.
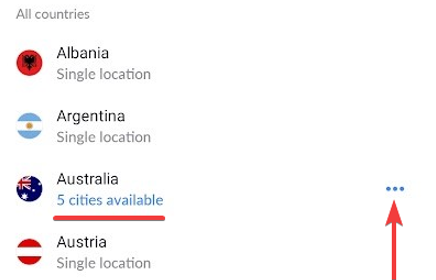
The search bar can help here, too. Type in the name of the city, and it will appear as long as we have VPN servers in it.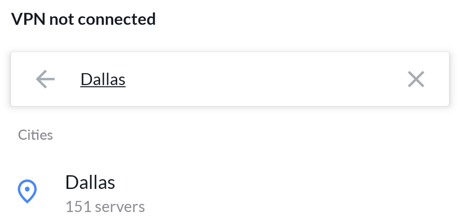
Connecting to a specific server: have a server number in mind that you want to reuse? Type it into the search bar, and you'll get it:
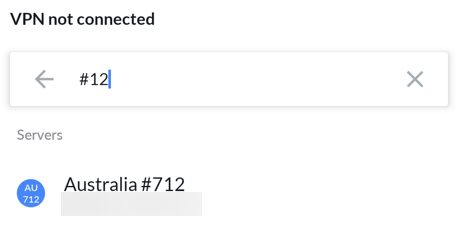
## Adjusting VPN settings
1. On the map screen, tap the user profile icon in the bottom right corner to access Account Statistics and Settings.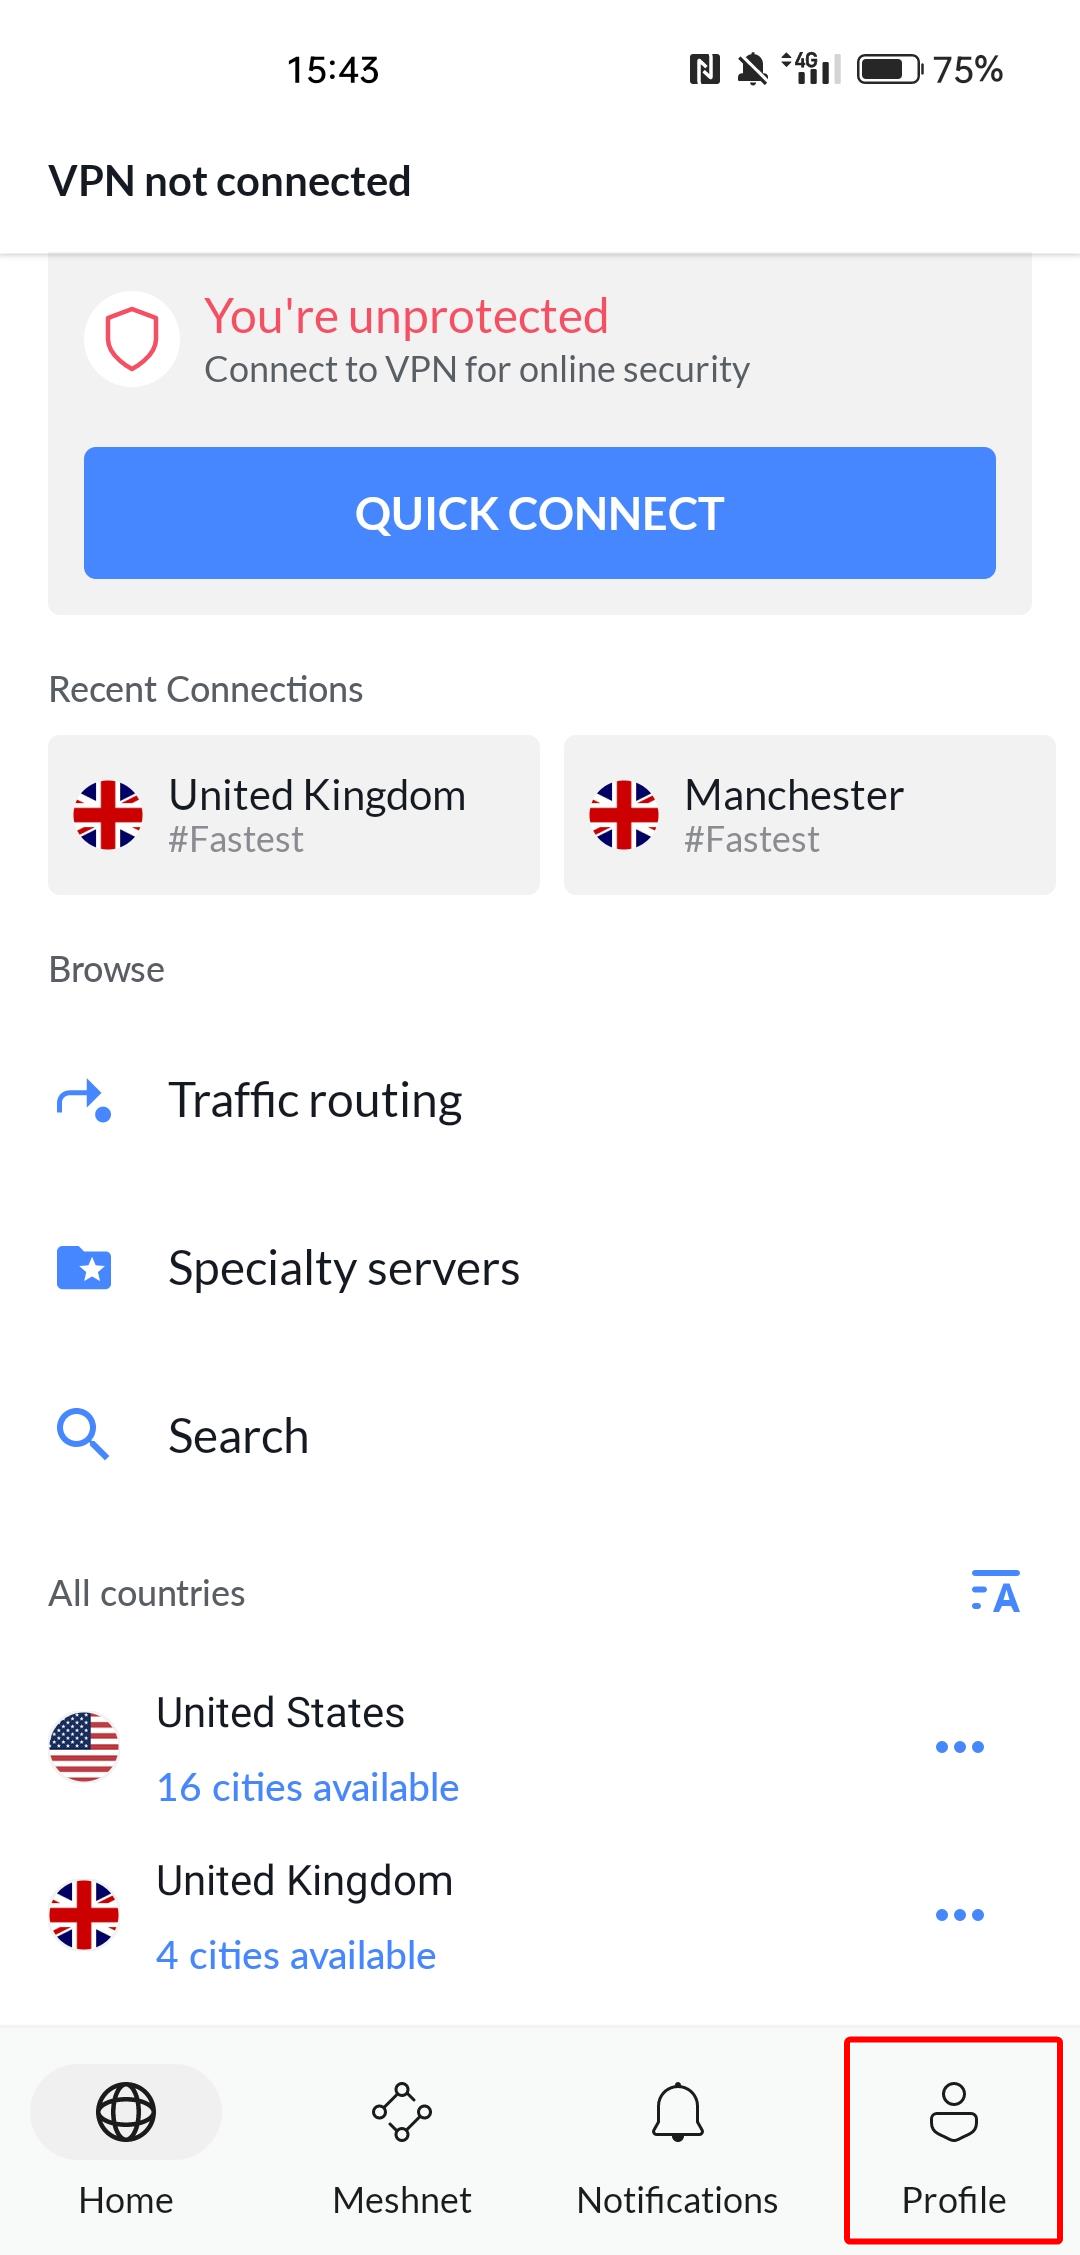
2. Tap on the gear icon at the top right corner to find all application settings. 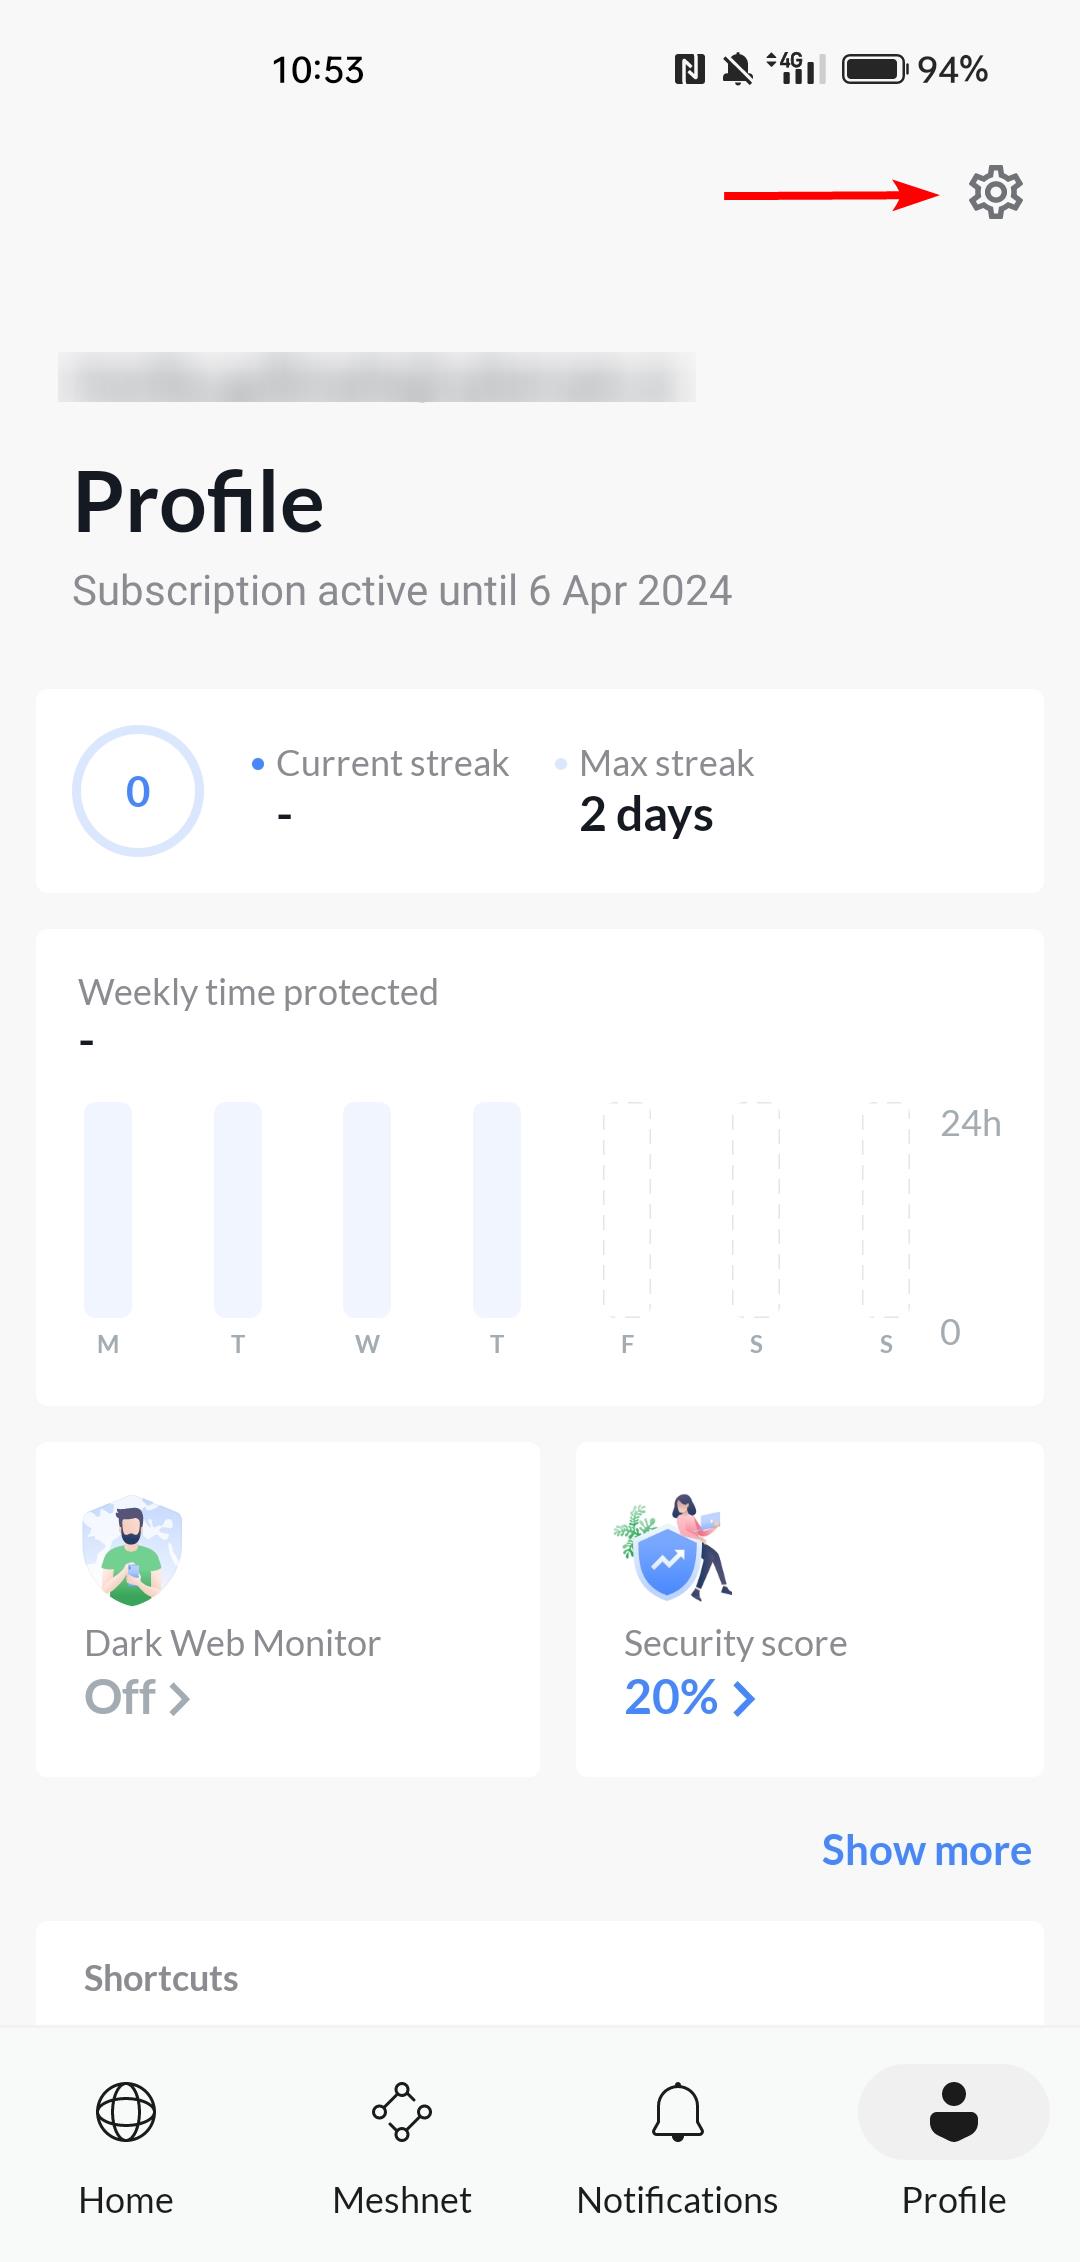
## VPN connection
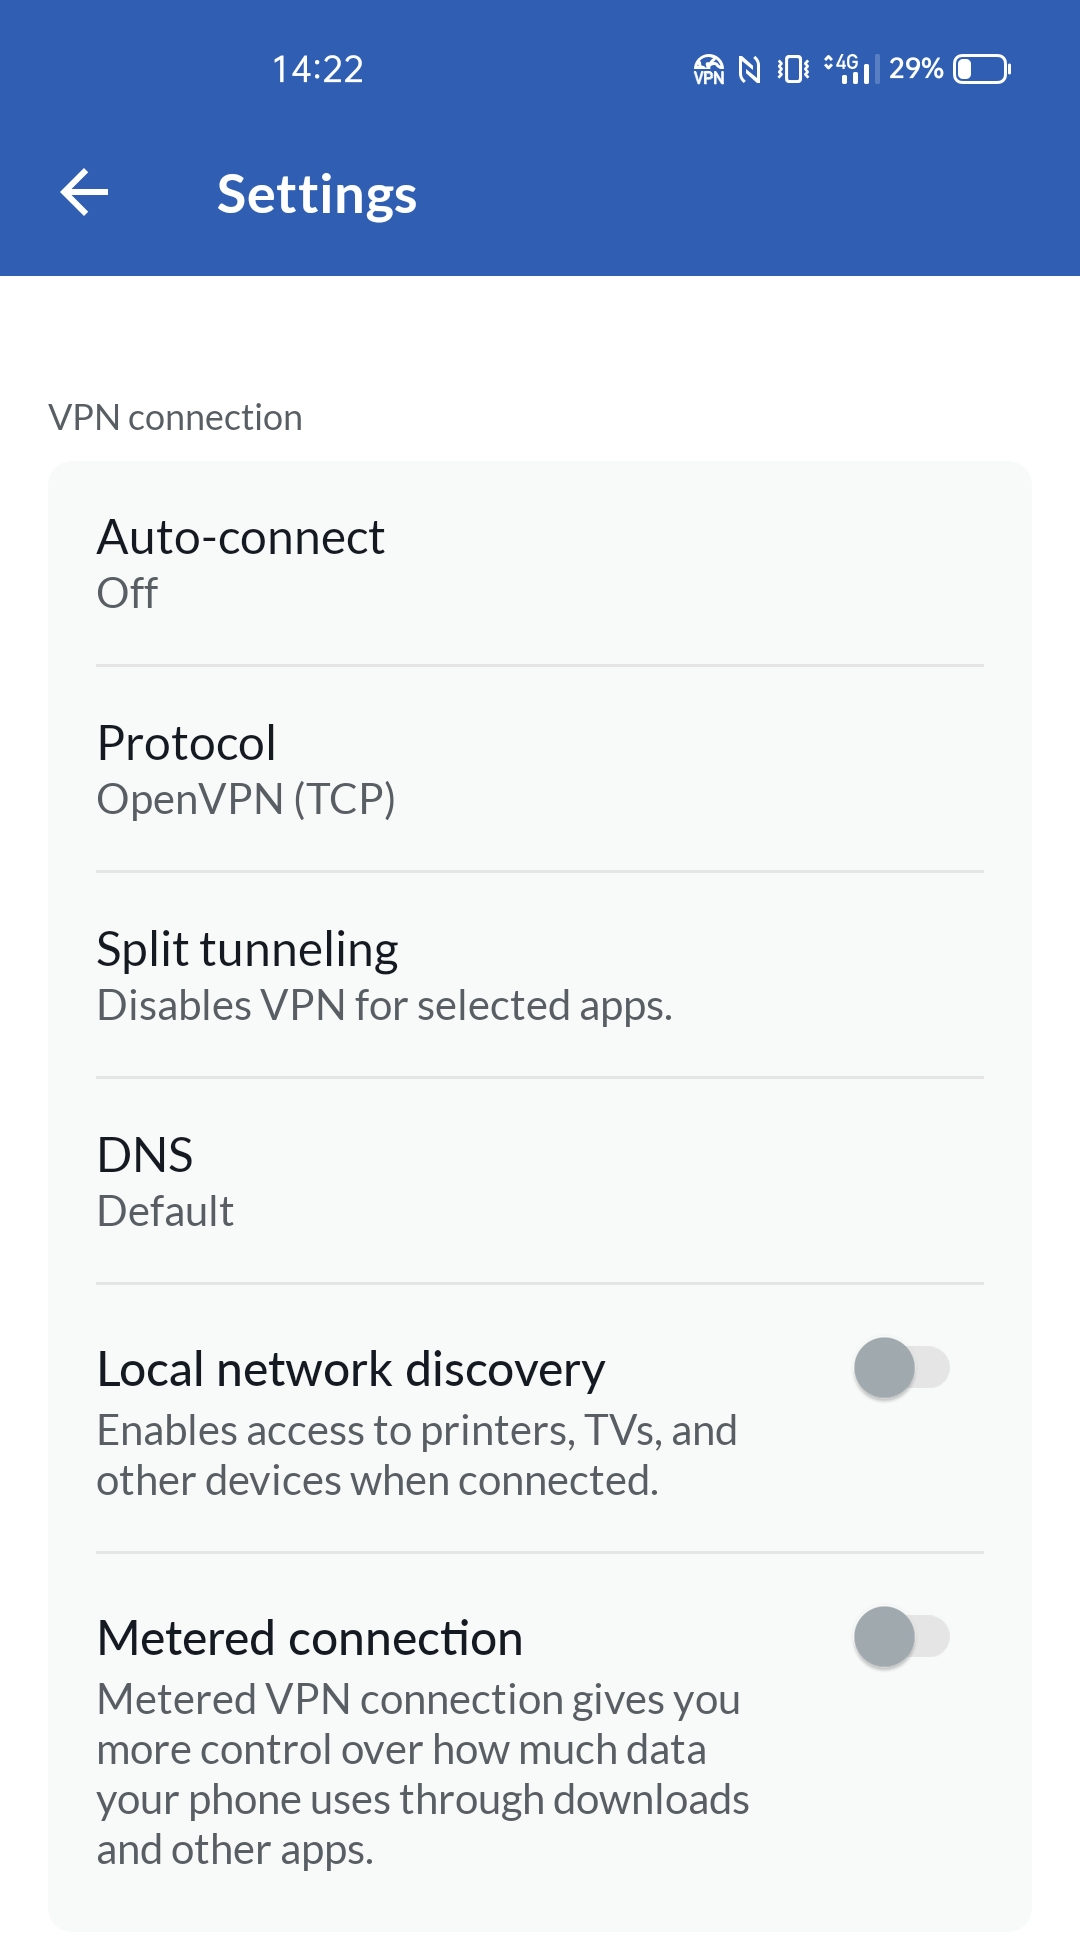Auto-connect: this option allows you to have the app automatically connect you to a VPN server the soonest there is access to the internet. Click here to learn more about this feature. Protocol: here you can switch between TCP, UDP, and NordLynx connection protocols. In short terms, the TCP protocol makes the connection slightly more stable, at the cost of speed. UDP, on the other hand, offers the opposite: a speedier, though less reliable connection. NordLynx has the best of both worlds, it provides speed and reliability.Split tunneling: this allows you to specify which apps go through the VPN connection. DNS: specifies a particular DNS server for the NordVPN app.Local network discovery: lets you stay invisible to devices on your local area network (LAN) when disabled.Metered connection: gives you more control over the data usage.
## Tools
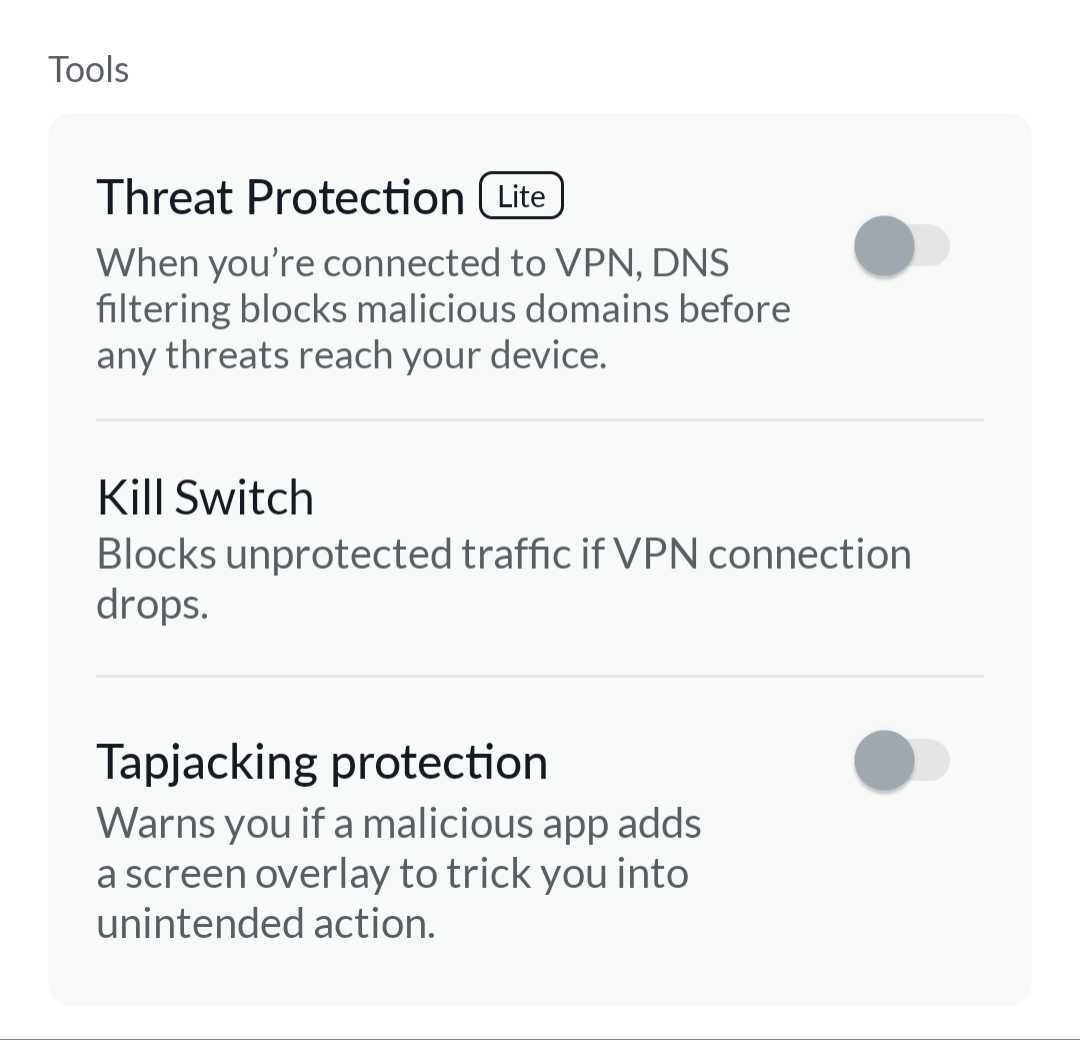
Threat Protection: blocks intrusive ads and malicious domains based on DNS filtering. You can enable this feature once you connect to one of the NordVPN's servers. It comes with all the NordVPN plans. Read more about [stopping intrusive ads with NordVPN's ad blocker](https://nordvpn.com/features/threat-protection/ad-blocker/) on our feature page.
Due to Google's policies, Threat Protection no longer blocks ads for NordVPN apps downloaded from the Google Play Store. However, it still protects you from malicious domains and trackers through DNS filtering. You can download the NordVPN app with ad-blocking functionality directly from our website.
Kill Switch: cuts off your internet connection when you’re disconnected from secure NordVPN servers.Tapjacking protection: keeps you safe from unintentional disconnects by requiring 2 steps to disable VPN.
## General
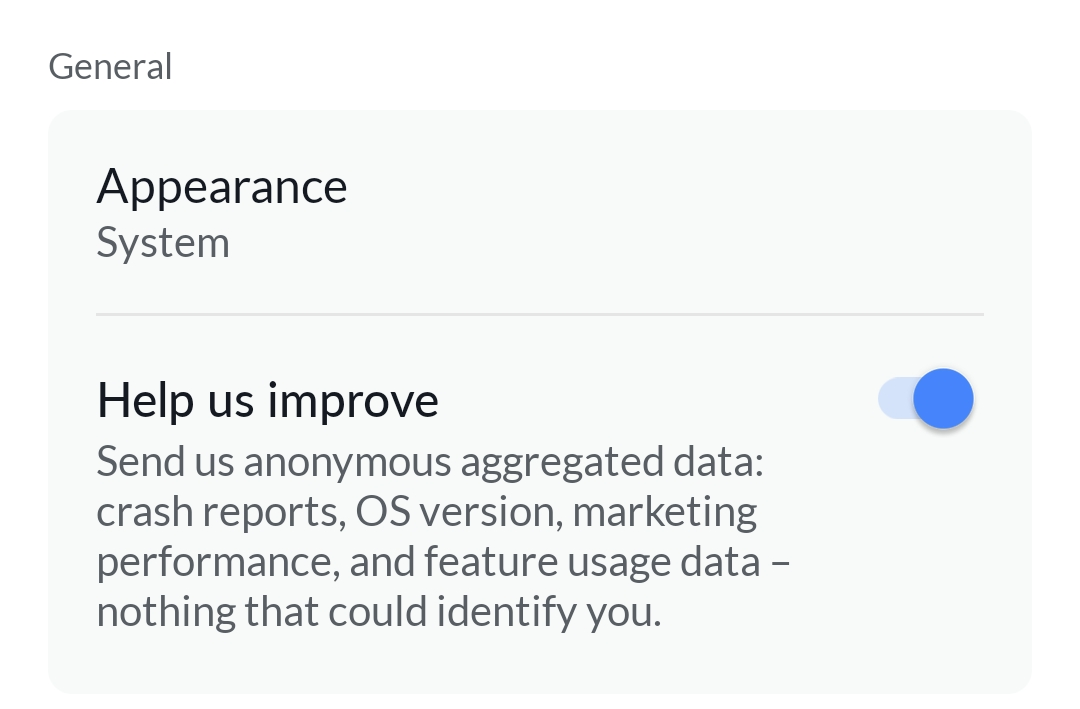Appearance: the go-to settings section for changing between light, dark and neutral display modes. Help us improve: by turning on this feature, you can share your anonymous data to help us improve in the future.
## Auto-connect
1. Select which networks NordVPN can use to automatically establish a VPN connection on Android: mobile networks, Wi-Fi and Ethernet, or Always (for any network).
2. If you choose to automatically connect to the Fastest available server, you will be able to choose one of the servers from your Recent Connections, one of the Specialty servers, or a server in a specific country.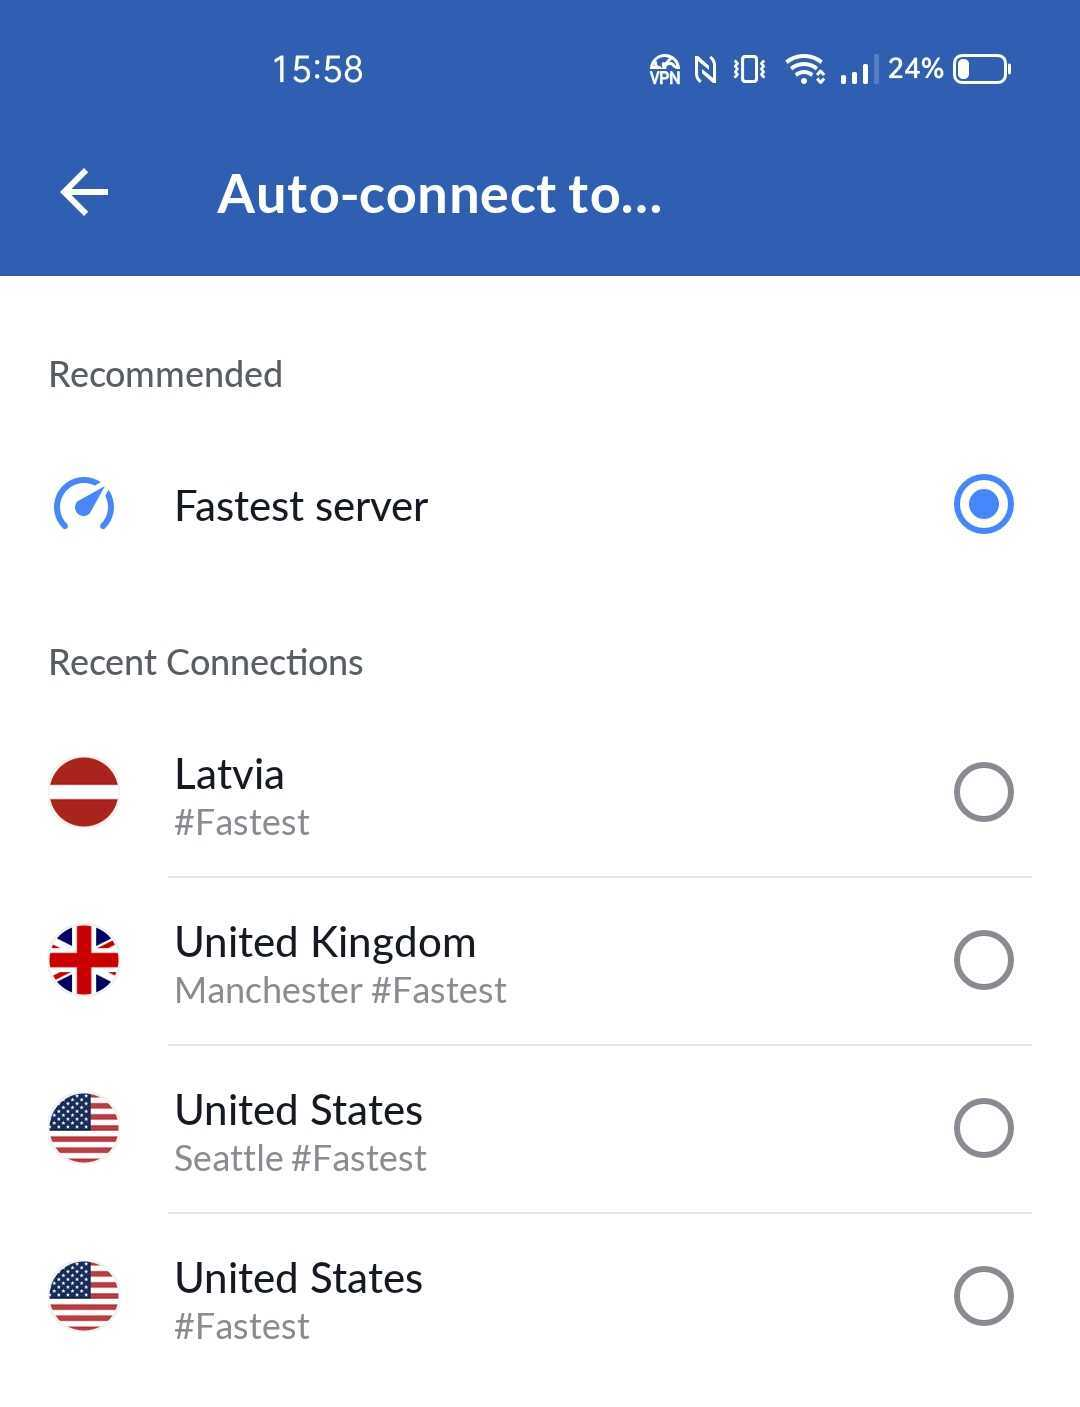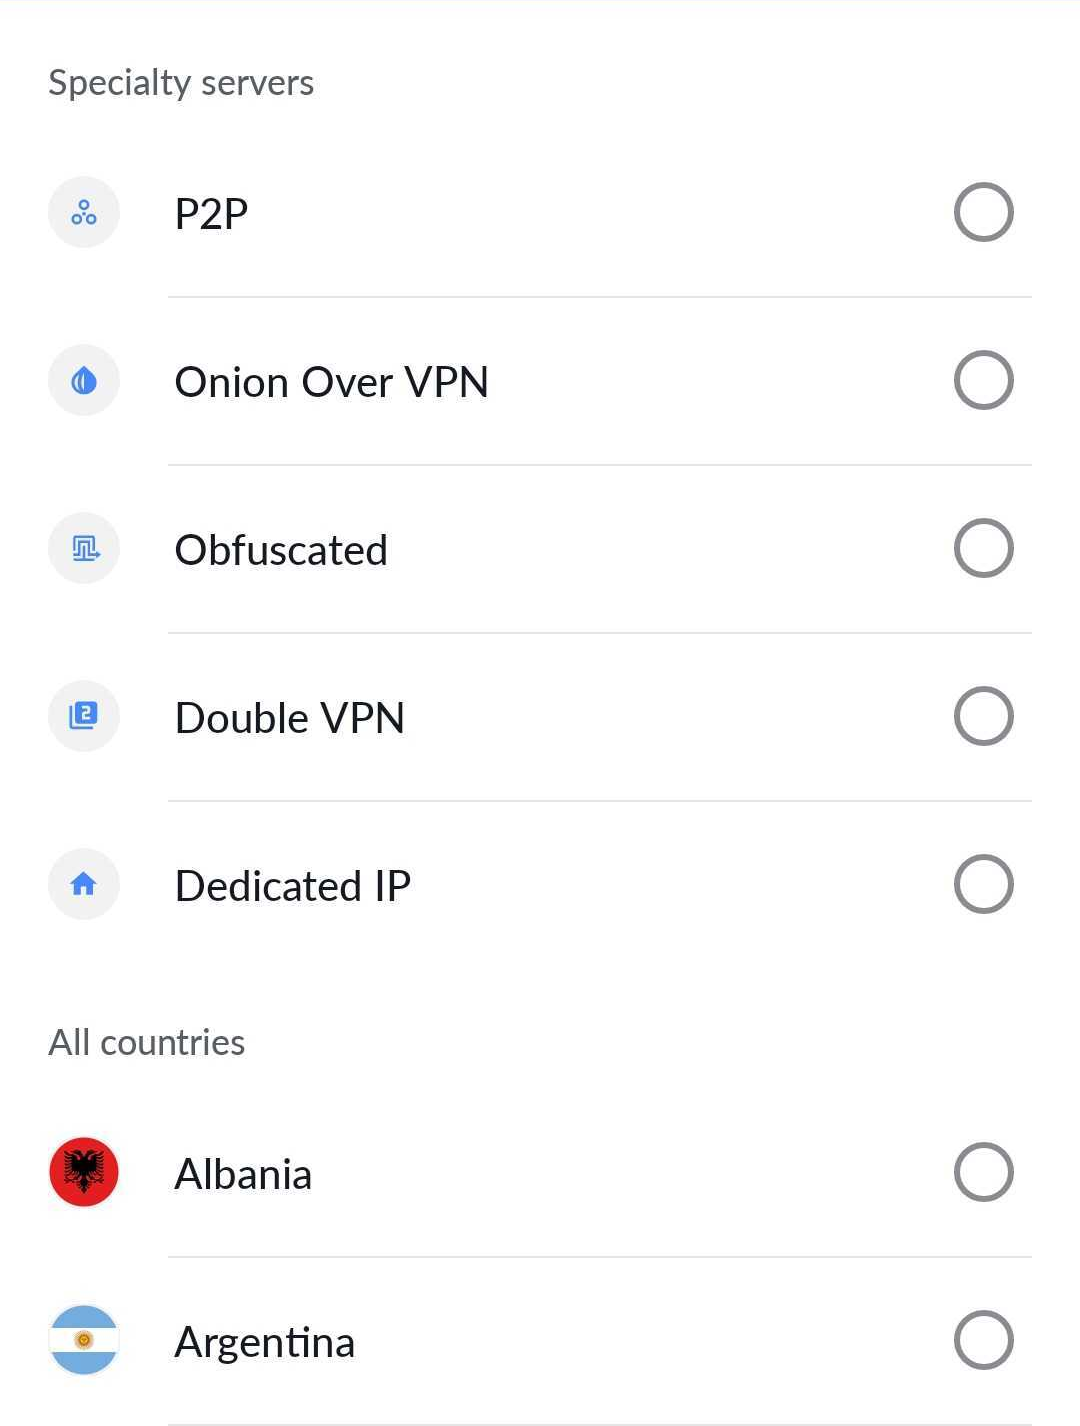Please note: a Trusted networks section is visible only on lower versions than Android 10. It allows you to disable Auto-Connect on specific Wi-Fi networks. For example, you can make an exception for your home Wi-Fi if you trust it. Later versions do not allow this feature due to security changes in the Android OS.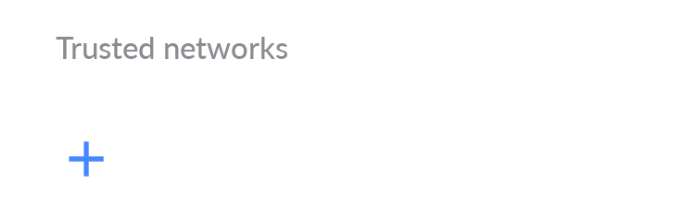
## (Optional) Sideload the NordVPN app
If you're unable to download NordVPN from the Google Play Store, you can get the .apk file here. These files allow users to bypass the Google Play Store if they are having technical issues.
To install the app, you will need to change the security settings on your device. Go to Settings > Security & Privacy > More Settings > Install unknown apps. Select the browser you used to download the NordVPN .apk file and enable Allow from this source.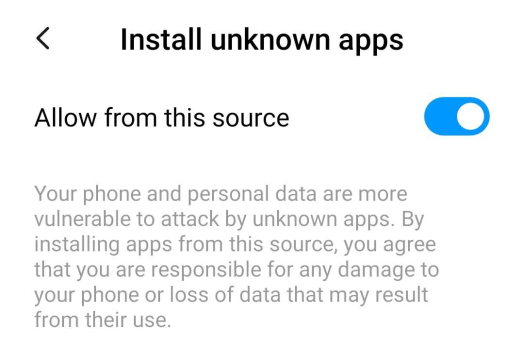On Android version 7.0 and below, you can find this option in Settings > Security > Unknown sources.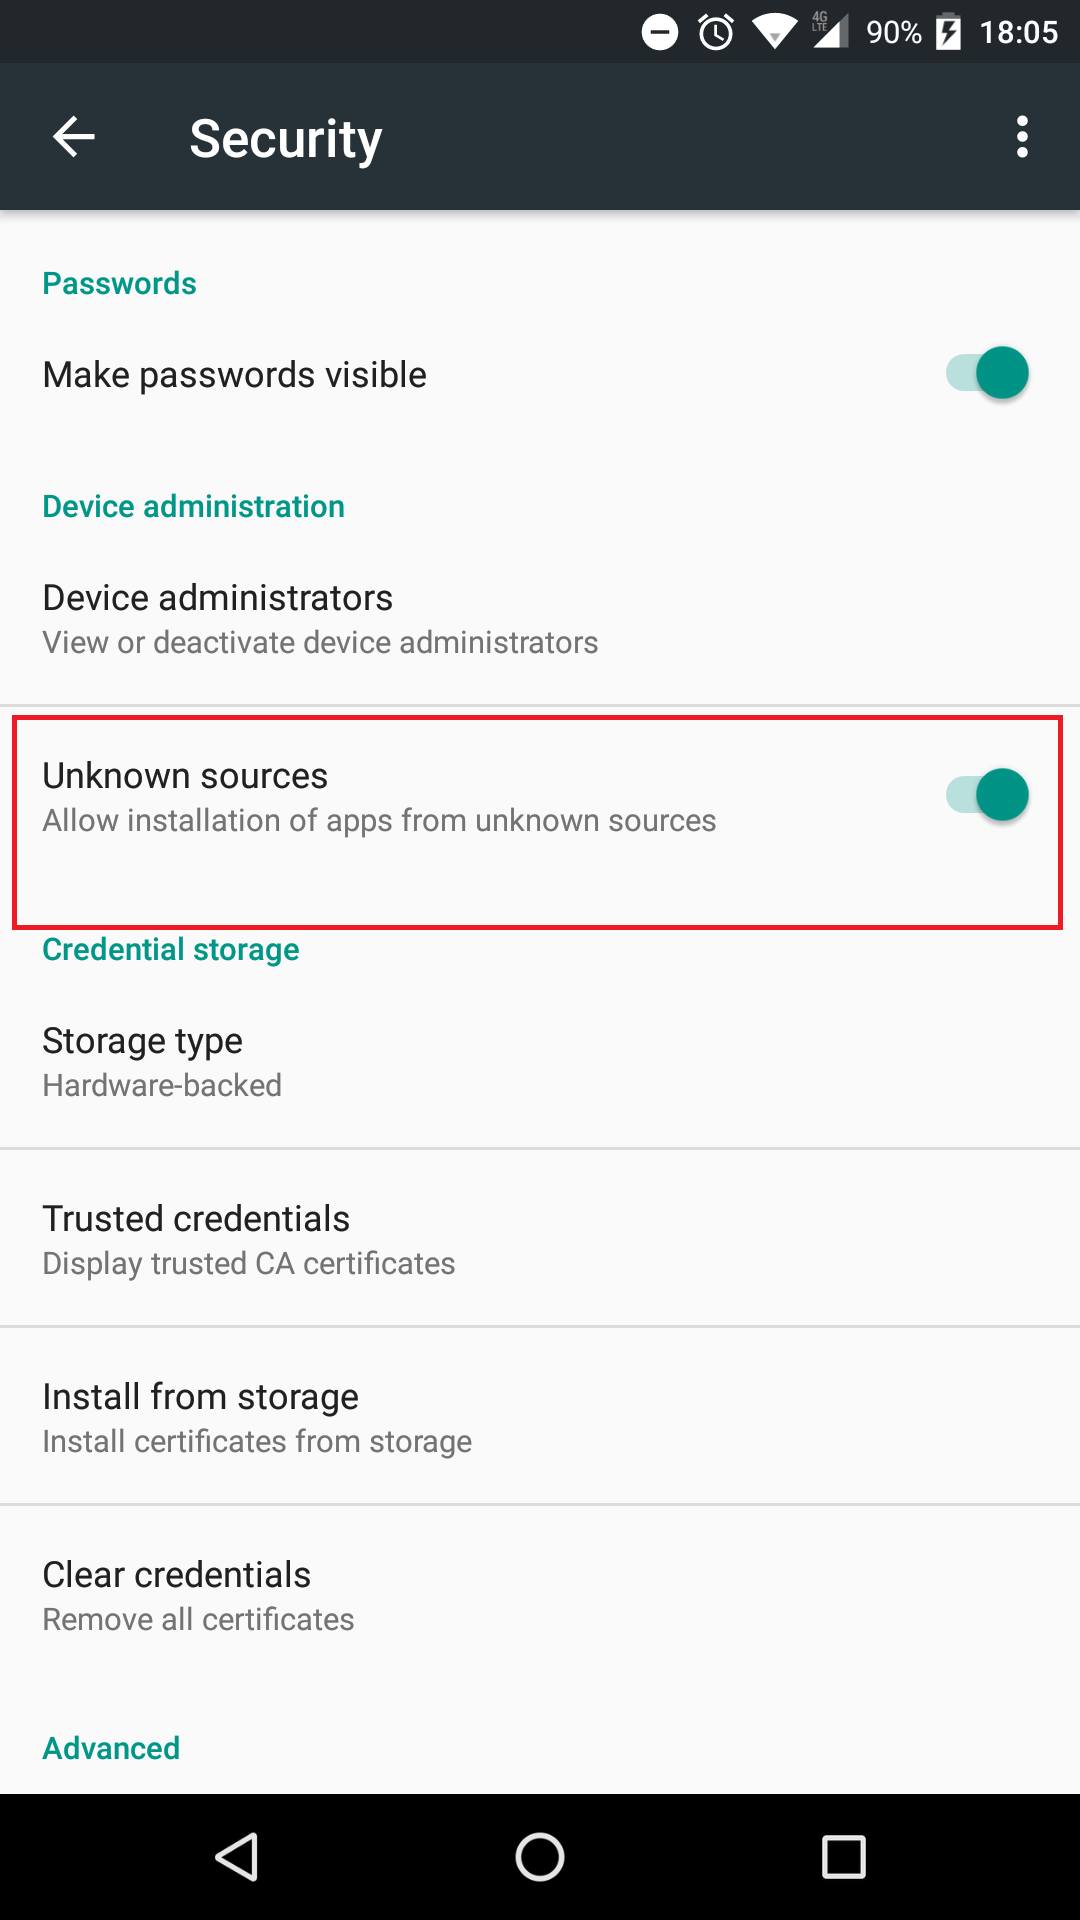
Looking for a tutorial on how to install and use NordVPN on Android TV? Read this article.",https://support.nordvpn.com/hc/en-us/related/click?data=BAh7CjobZGVzdGluYXRpb25fYXJ0aWNsZV9pZGwrCBGfx1KwEToYcmVmZXJyZXJfYXJ0aWNsZV9pZGwrCBHEuFZlEjoLbG9jYWxlSSIKZW4tdXMGOgZFVDoIdXJsSSJGL2hjL2VuLXVzL2FydGljbGVzLzE5NDQ5MDAwNzMwMzg1LUhvdy10by1zZXR1cC1Ob3JkVlBOLW9uLUFuZHJvaWQGOwhUOglyYW5raQg%3D--5df6c479af7e34315229bcb884c2a3f827ec1733
Installing NordVPN on macOS,"From October 17th, 2024, older applications will have a few function limitations. The issues can affect macOS applications version 8.27.2 and below. They can include not receiving notifications in the app and reduced Dark Web Monitoring and Meshnet functionality.To resolve the issue, please update your application to the latest version.NordVPN is compatible with Apple and features a native application that we recommend as the best way to connect to NordVPN servers. Even though we have two application versions, they both provide online security and features such as [Double VPN](https://nordvpn.com/features/double-vpn/), [Onion over VPN](https://nordvpn.com/features/onion-over-vpn/) servers, automated [Kill Switch](https://nordvpn.com/features/vpn-kill-switch/), [Meshnet](https://nordvpn.com/meshnet/), and the ability to connect using [NordLynx connection protocol](https://support.nordvpn.com/hc/en-us/articles/19564565879441-What-is-NordLynx).
Note: NordVPN supports macOS 11 Big Sur, macOS 12 Monterey, macOS 13 Ventura, and macOS Sanoma 14 and above.
## Instructions on how to install NordVPN on macOS
[NordVPN on macOS](https://nordvpn.com/download/mac/) has two different versions. The following articles contain installation instructions for both of them:
* [NordVPN application](https://support.nordvpn.com/hc/en-us/articles/19456281201041-Installing-NordVPN-application-on-macOS)
* [NordVPN (App Store) application](https://support.nordvpn.com/hc/en-us/articles/20492395403921-Installing-NordVPN-App-Store-version-on-macOS)
### What is the difference between the two versions?
* NordVPNThis version allows you to set specific preferences, such as customizing DNS servers or using Kill Switch to terminate particular apps instead of your entire internet connection. This app version can be sideloaded from our website and run on earlier versions of macOS (the most recent version is available only on macOS 11+). With NordVPN’s Plus and Ultimate plans, you also get [Threat Protection Pro™](https://nordvpn.com/features/threat-protection/) – a feature that automatically blocks ads, trackers, and malware URLs and scans downloads for malware.
* NordVPN (App Store)This version of the NordVPN application can be installed directly from the Apple App Store on macOS devices with firmware no older than 11. It also features the Kill-Switch, which cuts internet access if the VPN connection suddenly disconnects. This prevents your connection from any vulnerabilities if it drops without terminating app processes.
## How to use NordVPN on macOS
Connecting to NordVPN using the macOS app is easy:
1. Open the NordVPN macOS app;
2. If required, complete the login process;
3. Click on ""Quick connect"" or select a specific country from the map.
Now you're connected to the internet securely!",https://support.nordvpn.com/hc/en-us/articles/19445793501585-Installing-NordVPN-on-macOS
Installing NordVPN on Linux distributions,"In this article, we'll guide you through NordVPN installation and usage on Linux. We offer .deb and .rpm packages that are compatible with Debian, Ubuntu, Elementary OS, Linux Mint, Fedora, QubesOS, RHEL, CentOS, and openSUSE systems. The NordVPN native application is the recommended option for connecting to NordVPN servers on your Linux device. We designed it with your experience in mind, giving you features like auto-connect, automated Kill Switch, and Threat Protection.
## Table of contents:
* [Installing NordVPN on Linux](
* [Using NordVPN on Linux](
* [Logging in](
* [Account and settings](
* [Specialty servers](
* [Features and configurations](
* [LAN discovery and allowlists](
## Installing NordVPN on Linux
To start using the NordVPN application for Linux, you need to [download the NordVPN Linux client](https://nordvpn.com/download/linux/). You can do that in 2 ways:
1. By [downloading a Snap package](https://snapcraft.io/nordvpn).Snaps are app packages for desktop, cloud, and IoT that are easy to install, secure, cross-platform, and dependency-free. If you do not have Snap pre-installed, you may follow [Snap setup guides for various Linux distributions](https://snapcraft.io/docs/installing-snapd#:~:text=Zorin%20OS-,Without%20snap,-For%20distributions%20without).Please note that currently, we still do not support arm64, but our developers are working on this.
2. By working in the terminal:
1. Open the terminal;
2. Write the command below:
```
sh <(curl -sSf https://downloads.nordcdn.com/apps/linux/install.sh[](https://downloads.nordcdn.com/apps/linux/install.sh))
```
3. Following any on-screen instructions.
Note: If you do not have a curl package, evidenced by the fact that the above does not work, you can alternatively use this command:
```
sh <(wget -qO - https://downloads.nordcdn.com/apps/linux/install.sh)
```
Additionally, if you receive the following issue: Whoops! Permission denied accessing /run/nordvpn/nordvpnd.sock, all you need to do is write the following command:
```
sudo usermod -aG nordvpn $USER
```
and then reboot your device.
## Using NordVPN on Linux
After you have installed the NordVPN application, you can start using it!
Please note that in NordVPN Linux application version 3.18.4, network traffic from the LAN through a VPN-connected computer is blocked by default. To unblock LAN traffic, turn LAN discovery ON or add to the allowlist any subnet or IP traffic to be forwarded.
### Logging in
If you're using a Linux device without a graphical user interface, follow our guide on logging in to NordVPN on Linux devices without GUI.
If you're using a Linux device with a graphical user interface, you can start using it with the commands below:
1. Log in to your NordVPN account by using this command:
```
nordvpn login
```
2. Connect to a NordVPN server by using the command below:
```
nordvpn connect
```
### Account and settings
Here you can find the list of available NordVPN commands for Linux.
Access the NordVPN client settings:
---
```
nordvpn
```
Get an extensive explanation of all commands:
```
man nordvpn
```
See the list of available commands or help for a specific command:
```
nordvpn help
```
| or | ```
nordvpn h
```
Log in or log out:
```
nordvpn login
```
| or | ```
nordvpn logout
```
Connect to a recommended NordVPN server:
```
nordvpn connect
```
| or | ```
nordvpn c
```
Connect to a specific server (e.g. nordvpn connect uk715):
```
nordvpn connect
```
Disconnect from the VPN:
```
nordvpn disconnect
```
| or | ```
nordvpn d
```
See account information:
```
nordvpn account
```
Register a new user account:
```
nordvpn register
```
Rate your last connection quality (1-5):
```
nordvpn rate
```
See the current settings:
```
nordvpn settings
```
See the connection status:
```
nordvpn status
```
See the country list:
```
nordvpn countries
```
See the city list (e.g.: nordvpn cities united_states):
```
nordvpn cities
```
See a list of available server groups:
```
nordvpn groups
```
### Specialty servers
Connect to the closest Double VPN server:
---
```
nordvpn c double_vpn
```
Connect to a specific country using Double VPN servers:
```
nordvpn connect --group double_vpn
```
Connect to a P2P server:
---
```
nordvpn connect p2p
```
Connect to a specific country using P2P servers:
```
nordvpn connect --group p2p
```
Connect to a Dedicated IP server:
---
```
nordvpn connect Dedicated_IP
```
### Features and configurations
Set a configuration option:
---
```
nordvpn set
```
| or | ```
nordvpn s
```
Enable or disable Threat Protection:
```
nordvpn set threatprotectionlite on
```
| or | ```
nordvpn set threatprotectionlite off
```
Enable or disable Kill Switch:
```
nordvpn set killswitch on
```
| or | ```
nordvpn set killswitch off
```
Enable or disable auto-connect:
```
nordvpn set autoconnect on
```
| or | ```
nordvpn set autoconnect off
```
Set a specific server for automatic connection (e.g.: nordvpn set autoconnect on us2435):
```
nordvpn set autoconnect on
```
Enable or disable notifications:
```
nordvpn set notify on
```
| or | ```
nordvpn set notify off
```
Set custom DNS (you can set up a single DNS or two, just add spaces in between):
```
nordvpn set dns 1.1.1.1
```
| or | ```
nordvpn set dns 1.1.1.1 1.0.0.1
```
[Switch between UDP and TCP protocols](https://support.nordvpn.com/hc/en-us/articles/20465552867345-Switching-protocol-to-OpenVPN-UDP-or-TCP):
```
nordvpn set protocol udp
```
| or | ```
nordvpn set protocol tcp
```
Enable or disable [obfuscated servers](https://nordvpn.com/features/obfuscated-servers/):
```
nordvpn set obfuscate on
```
| or | ```
nordvpn set dobfuscate off
```
Set connection technology (OpenVPN or [NordLynx](https://nordvpn.com/blog/nordlynx-protocol-wireguard/)):
```
nordvpn set technology OpenVPN
```
| or | ```
nordvpn set technology NordLynx
```
Turn [Meshnet](https://nordvpn.com/meshnet/) on or off on your device:
```
nordvpn set meshnet on
```
| or | ```
nordvpn set meshnet off
```
To enable or disable the [post-quantum protection in NordVPN](https://support.nordvpn.com/hc/en-us/articles/30046321712529-NordVPN-Post-quantum-encryption-explained):
```
nordvpn set pq on
```
| or | ```
nordvpn set pq off
```
### LAN discovery and allowlists
Enable or disable LAN discovery:
---
```
nordvpn set lan-discovery enable
```
| or | ```
nordvpn set lan-discovery disable
```
Get more information on LAN discovery:
```
nordvpn set lan-discovery --help
```
Add or remove a rule to allowlist a specified incoming port (you can allowlist multiple ports — just separate their numbers with a space):
```
nordvpn whitelist add port
```
| or | ```
nordvpn whitelist remove port
```
Add or remove a rule to allowlist a specified subnet:
```
nordvpn whitelist add subnet
```
| or | ```
nordvpn whitelist remove subnet
```",https://support.nordvpn.com/hc/en-us/articles/19445292364689-Installing-and-using-NordVPN-on-Linux
How to setup NordVPN on Android,"From October 17th, 2024, older applications will have a few function limitations. The issues can affect
Android applications version 7.9.2 and below. They can include not receiving notifications in the app and reduced Dark Web Monitoring and Meshnet functionality.To resolve the issue, please update your application to the latest version.
To begin using NordVPN on your Android device, all you need to do is to download the VPN for Android, sign in (or sign up), and then connect to a NordVPN server. As soon as you've successfully connected to a NordVPN server, your Android's internet connection will be secure and private.
To go through these steps with ease, check out the instructions we provide below. Additionally, you'll find the various ways in which you can adjust the NordVPN app for Android to suit your needs!
## Table of contents:
* How to download and install NordVPN for Android
* How to set up the NordVPN mobile app for Android
* How to use NordVPN Android app
* Choosing between different servers
* Adjusting VPN settings
* (Optional) Sideload the NordVPN app
## How to download and install NordVPN for Android
First, download NordVPN for Android and install the app on your Android device.
1. Open Play Store.
2. Enter NordVPN in the search bar and select the NordVPN app. Tap Install.
### How to set up the NordVPN mobile app for Android
1. Once you’ve installed the application, tap to open it.
2. In the main menu, tap SIGN UP to create a new account or LOG IN if you already have one.
3. Pressing on any of the two buttons above will open your browser and take you to our Nord Account page, where you can either proceed with logging in or creating an account.Please note that in case you're signing up, you will be asked to get a subscription before you may begin using the service. 
### How to use NordVPN Android app
To make your connection to the internet secure and private, connect to a NordVPN server. This can be done in several ways: by pressing on the QUICK CONNECT button, clicking on a country name within the Country List, or finding a server through the search bar.Now you know how to set up a vpn on Android but there's a lot more NordVPN can offer to make your experience the best for you. Let's take a look at the different options and features that you can adjust according to your needs.Swipe up on the main screen to find all server options and features.
1. 1. Quick Connect: connect to the closest and least loaded server. This connection method is useful when the specifics of server location or other settings aren't as important as getting lighting-fast service.
2. Traffic routing: Traffic routing is one of the Meshnet features. It allows you to route all of your Internet traffic through your friends or your other device and use the IP address of that device to access the Internet.
3. Specialty servers: NordVPN offers a variety of different types of servers, each with unique benefits. Learn more about them in our dedicated article: What do the different server categories mean?
4. Search bar: use it to find specific servers. You can input the name of a country, city, server number, or even the name of the specialty category.
5. All countries list: another method for connecting - simply scroll through the list for the country you would like to connect to, and then on the country name when you find it.
6. [Meshnet](https://nordvpn.com/meshnet/): this feature allows you to create a secure, private network for many devices located anywhere in the world, access them remotely, and send all your online traffic through another device.
7. Notifications: here you can find all news about the latest updates and security tips.
8. Statistics and Settings: by clicking here you can find your connection statistics and by pressing this cogwheel icon you will open the settings menu. There's a separate section below that explains all of the options found there.
## Choosing between different servers
Connecting to a specific country: Swipe up to see the Country list. There, tap on the country you're looking for, and you will be automatically connected to a server in that location.

Alternatively, the pins on the world map signify where we have servers and the number of them in the country. Pressing on them will show you the exact city servers we have. You can tap on different pins without a number and connect to any desired city.Finally, you can also click on the search bar, and type in the country's name there.
Connecting to a specific city: You can tap on the three dots next to a country to select a specific city.

The search bar can help here, too. Type in the name of the city, and it will appear as long as we have VPN servers in it.
Connecting to a specific server: have a server number in mind that you want to reuse? Type it into the search bar, and you'll get it:

## Adjusting VPN settings
1. On the map screen, tap the user profile icon in the bottom right corner to access Account Statistics and Settings.
2. Tap on the gear icon at the top right corner to find all application settings. 
## VPN connection
Auto-connect: this option allows you to have the app automatically connect you to a VPN server the soonest there is access to the internet. Click here to learn more about this feature. Protocol: here you can switch between TCP, UDP, and NordLynx connection protocols. In short terms, the TCP protocol makes the connection slightly more stable, at the cost of speed. UDP, on the other hand, offers the opposite: a speedier, though less reliable connection. NordLynx has the best of both worlds, it provides speed and reliability.Split tunneling: this allows you to specify which apps go through the VPN connection. DNS: specifies a particular DNS server for the NordVPN app.Local network discovery: lets you stay invisible to devices on your local area network (LAN) when disabled.Metered connection: gives you more control over the data usage.
## Tools

Threat Protection: blocks intrusive ads and malicious domains based on DNS filtering. You can enable this feature once you connect to one of the NordVPN's servers. It comes with all the NordVPN plans. Read more about [stopping intrusive ads with NordVPN's ad blocker](https://nordvpn.com/features/threat-protection/ad-blocker/) on our feature page.
Due to Google's policies, Threat Protection no longer blocks ads for NordVPN apps downloaded from the Google Play Store. However, it still protects you from malicious domains and trackers through DNS filtering. You can download the NordVPN app with ad-blocking functionality directly from our website.
Kill Switch: cuts off your internet connection when you’re disconnected from secure NordVPN servers.Tapjacking protection: keeps you safe from unintentional disconnects by requiring 2 steps to disable VPN.
## General
Appearance: the go-to settings section for changing between light, dark and neutral display modes. Help us improve: by turning on this feature, you can share your anonymous data to help us improve in the future.
## Auto-connect
1. Select which networks NordVPN can use to automatically establish a VPN connection on Android: mobile networks, Wi-Fi and Ethernet, or Always (for any network).
2. If you choose to automatically connect to the Fastest available server, you will be able to choose one of the servers from your Recent Connections, one of the Specialty servers, or a server in a specific country.Please note: a Trusted networks section is visible only on lower versions than Android 10. It allows you to disable Auto-Connect on specific Wi-Fi networks. For example, you can make an exception for your home Wi-Fi if you trust it. Later versions do not allow this feature due to security changes in the Android OS.
## (Optional) Sideload the NordVPN app
If you're unable to download NordVPN from the Google Play Store, you can get the .apk file here. These files allow users to bypass the Google Play Store if they are having technical issues.
To install the app, you will need to change the security settings on your device. Go to Settings > Security & Privacy > More Settings > Install unknown apps. Select the browser you used to download the NordVPN .apk file and enable Allow from this source.On Android version 7.0 and below, you can find this option in Settings > Security > Unknown sources.
Looking for a tutorial on how to install and use NordVPN on Android TV? Read this article.",https://support.nordvpn.com/hc/en-us/articles/19449000730385-How-to-setup-NordVPN-on-Android
Installing the NordVPN app on iPhone or iPad,"This tutorial will teach you how to install and use [NordVPN on an iPhone and iPad](https://nordvpn.com/download/ios/).
## Table of contents:
* Downloading and setting up
* Connecting to servers
* [Profile information](
* [Settings](
## Downloading and setting up the app
1. Open the App Store.
2. Search for ""NordVPN.""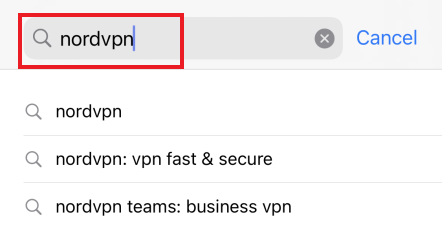Note: NordVPN may not appear in the App Store in certain regions with VPN restrictions. If that’s the case, follow our guide on downloading the NordVPN app for iPad and iPhone from such locations.
3. Tap the ""Download"" button.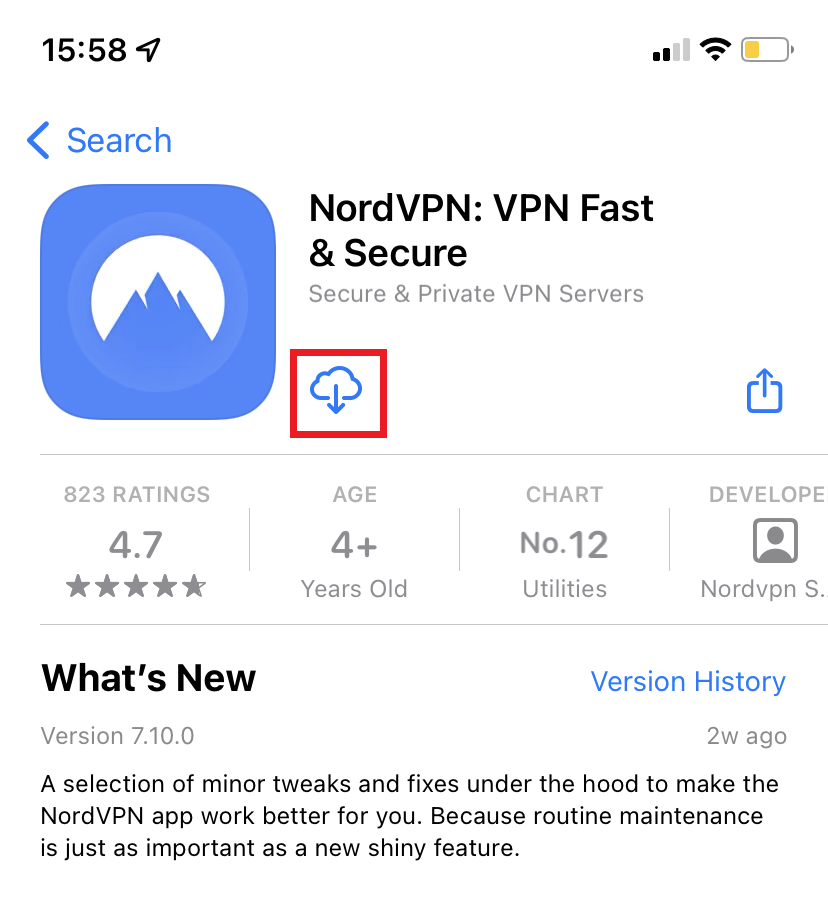
4. Once the download is finished, tap the ""Open"" button. 
5. The NordVPN app will ask if you want to register a new account. If you already have a NordVPN account, click Log in at the bottom of the screen. If you don't have an account, press Sign up to go to [Nord Account](https://nordaccount.com/signup/) for account creation. There, enter your email address and press Continue. Once you sign up, you will be brought back into the NordVPN app to pick your plan. 
6. Once you’re done, you will see a privacy notification. Click “Agree and continue.”
## Connecting to NordVPN servers
1. Once logged in, you will see a map and the Quick Connect button. Press this button to automatically connect to a server recommended by our smart algorithm based on your needs and preferences.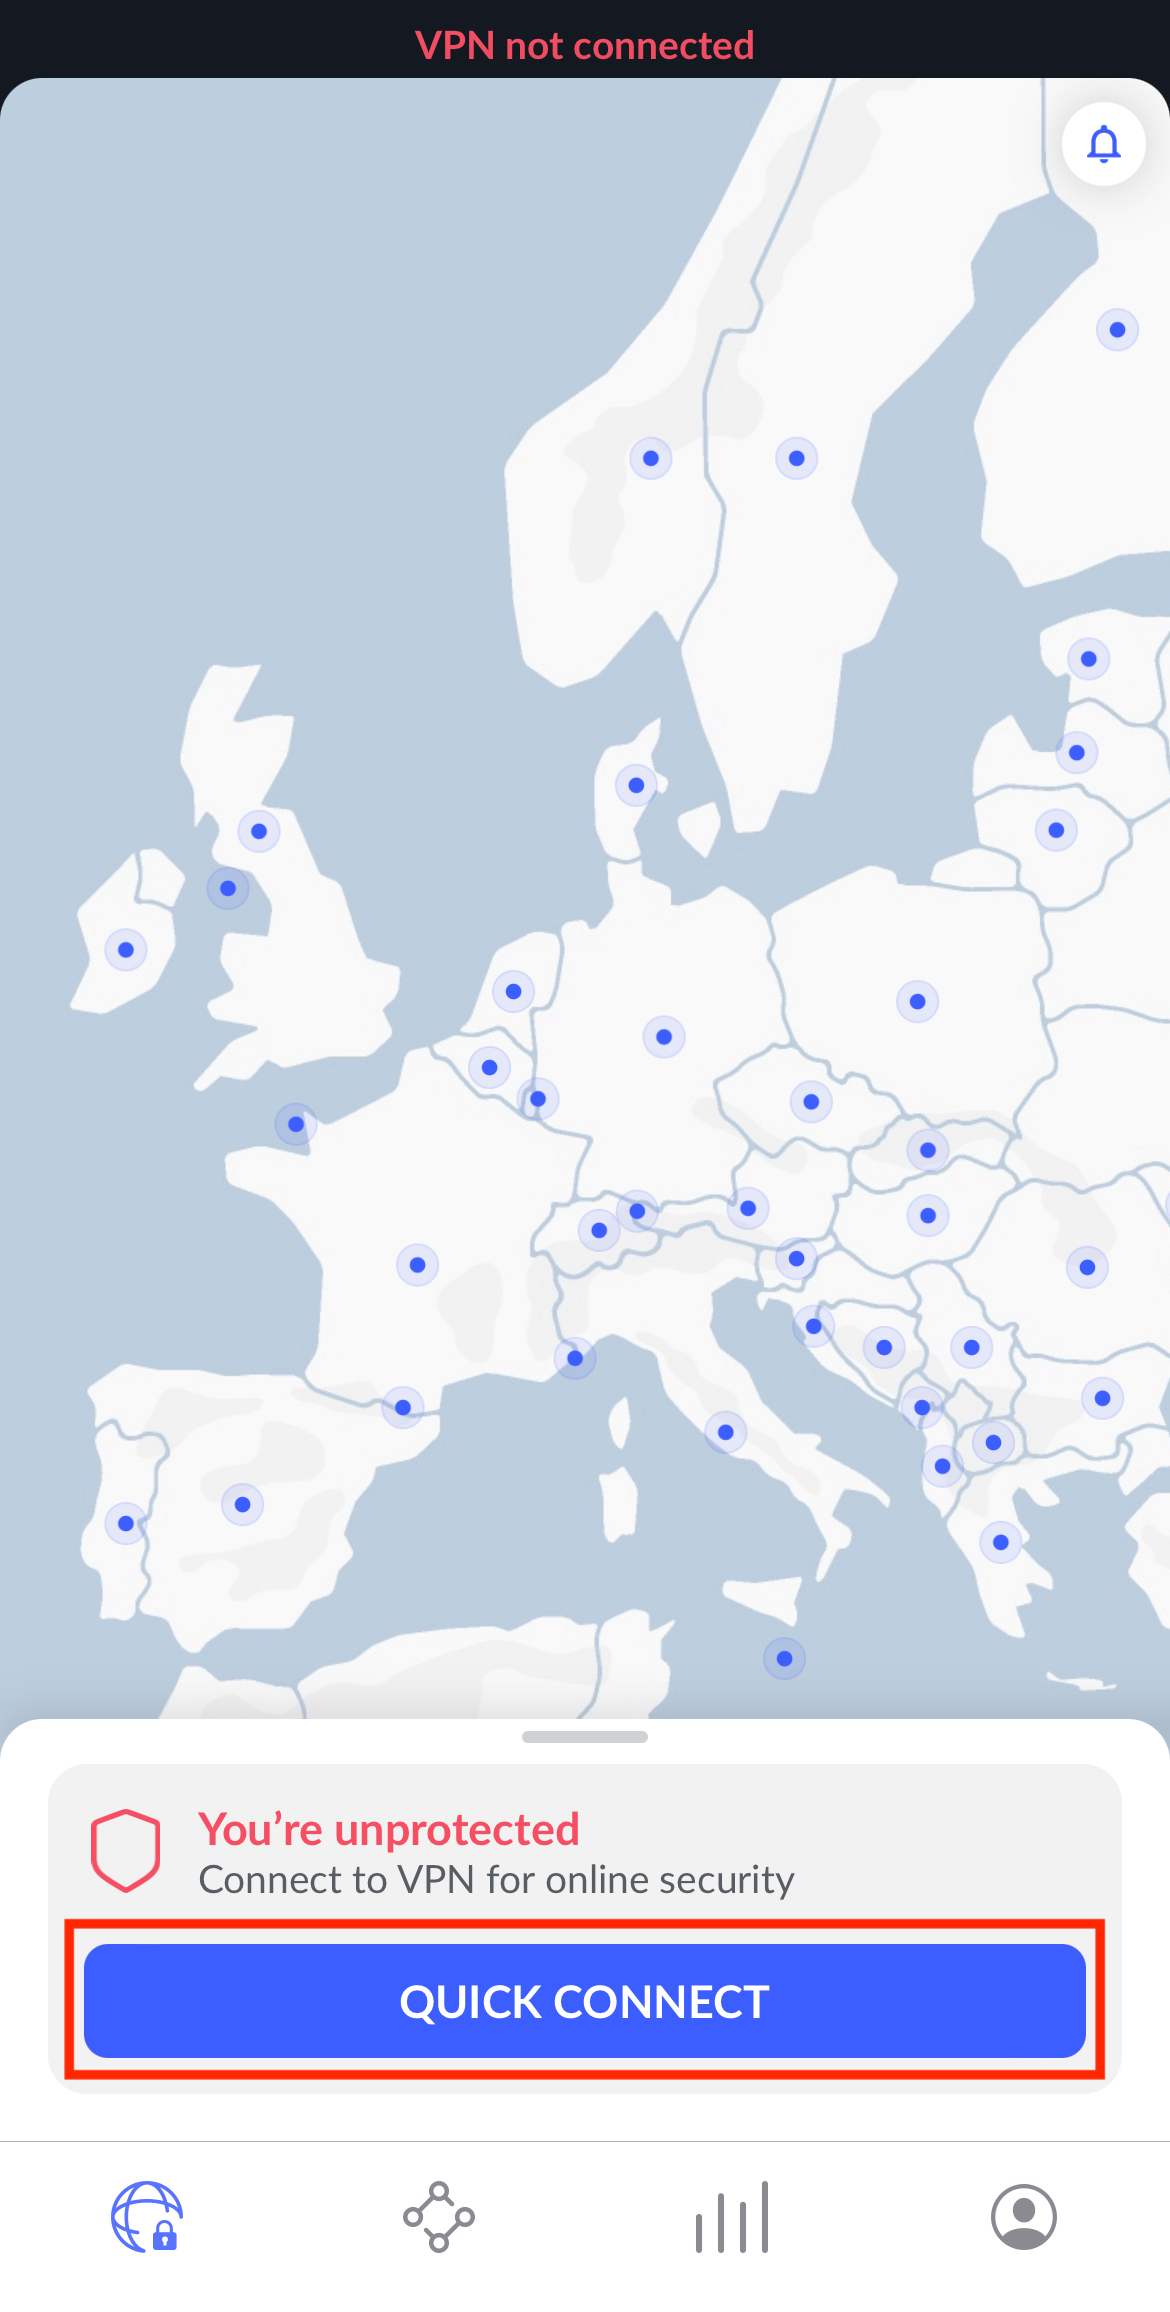
2. When connecting for the first time, you will be asked to allow NordVPN to add VPN configurations. This is a [standard warning message](https://nordvpn.com/blog/ios-filtering-traffic-vpn/) – VPN configurations are necessary for connecting to VPN servers. Since NordVPN is a respectable VPN service provider, tap Allow to continue.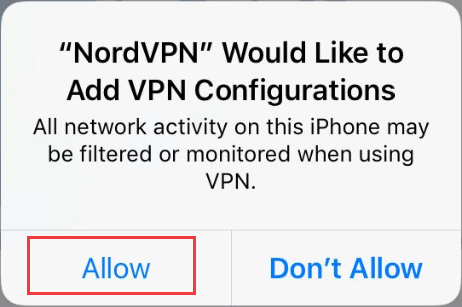
3. If you are using Touch ID, you will be asked to confirm your choice with your fingerprint.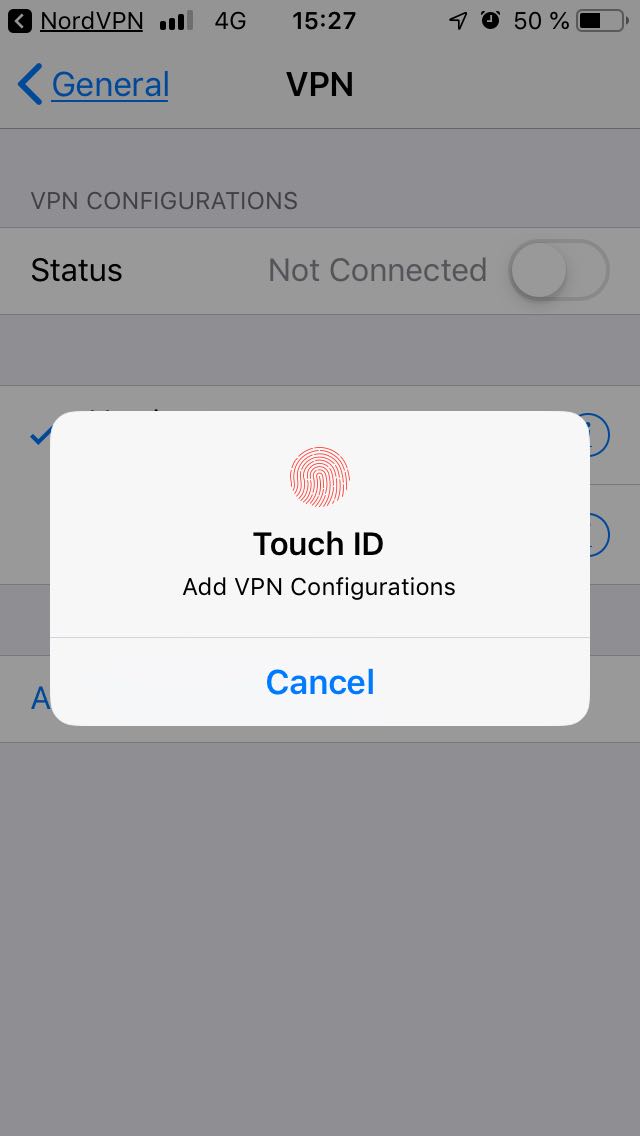
4. Once connected, you will see the “Connected to (country)” message above the map, and that country’s map pin will turn green. A VPN icon will also appear in the status bar along the upper edge of the screen. 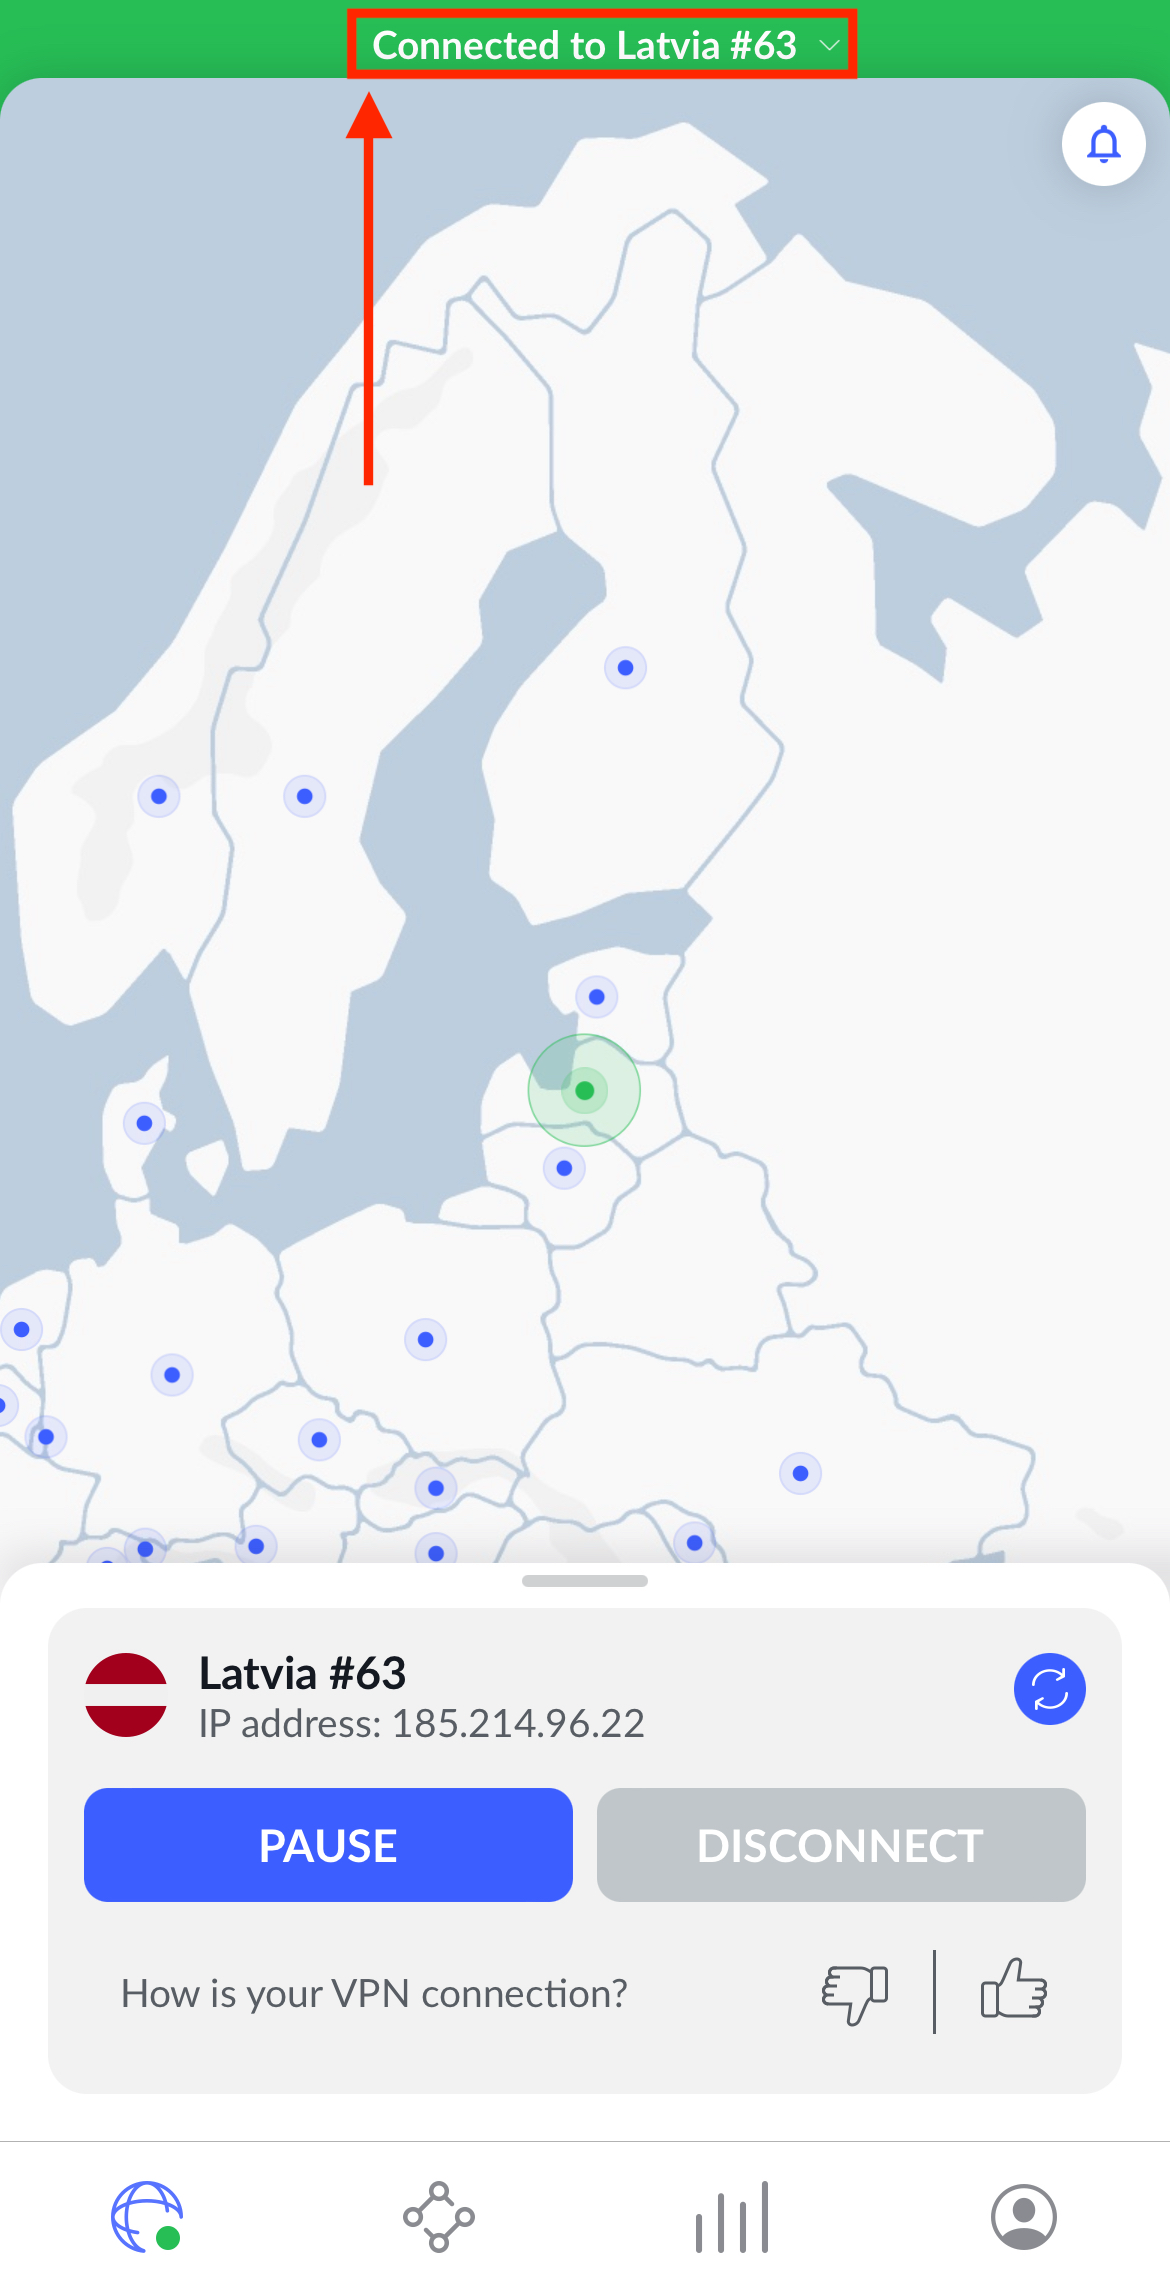
## Choosing between different servers
1. Tap a country pin and press Quick Connect to automatically connect to the best server for you in that country.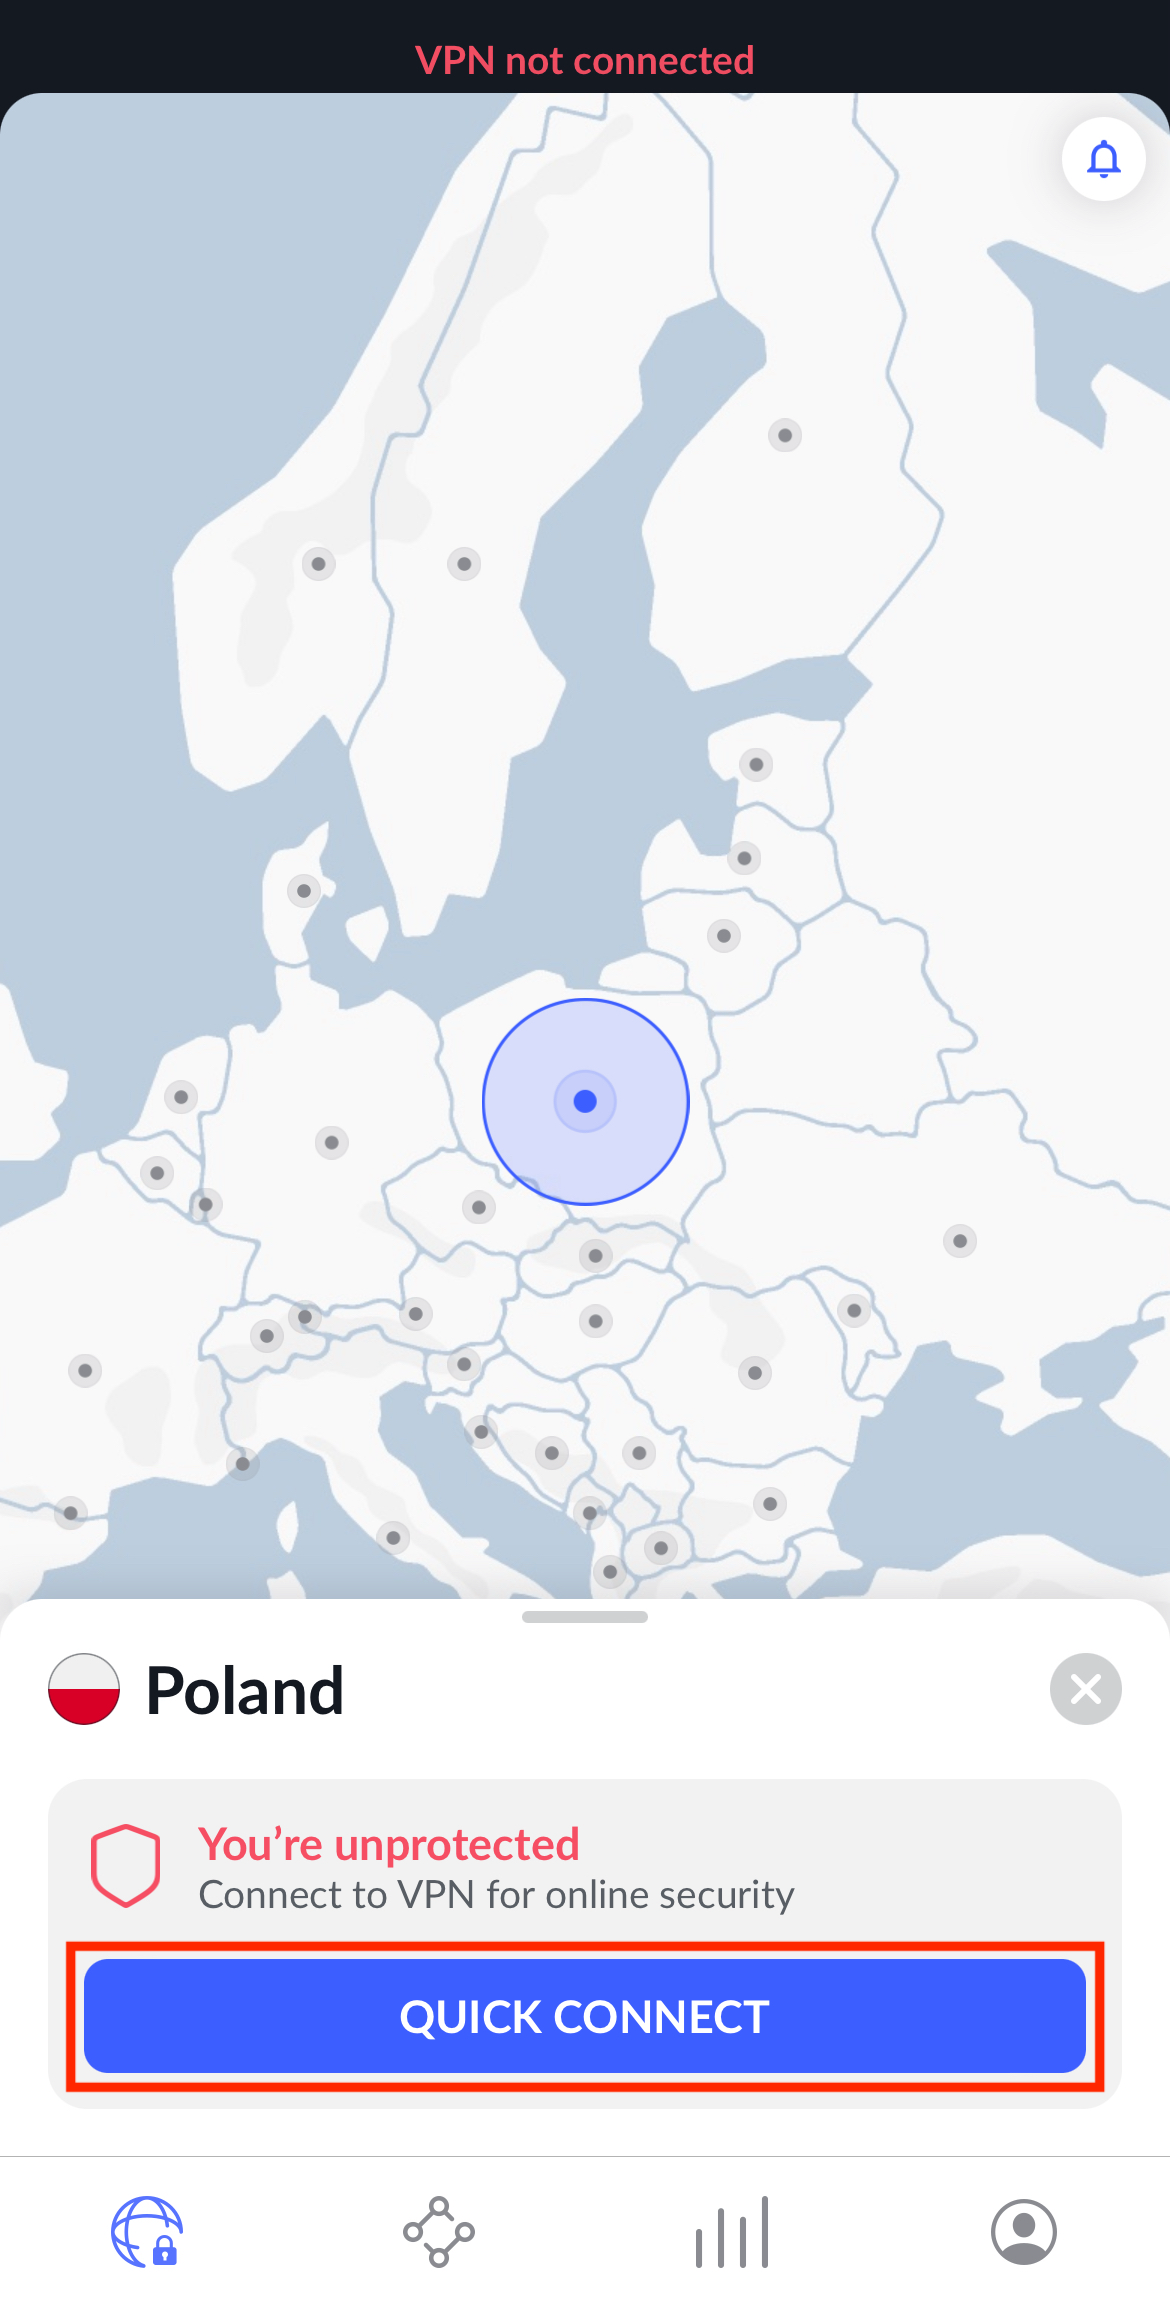
2. You can also view all available countries and specialty servers by swiping up from the bottom of the app when no country pin is selected. Then, tap on your chosen country to automatically connect to a server.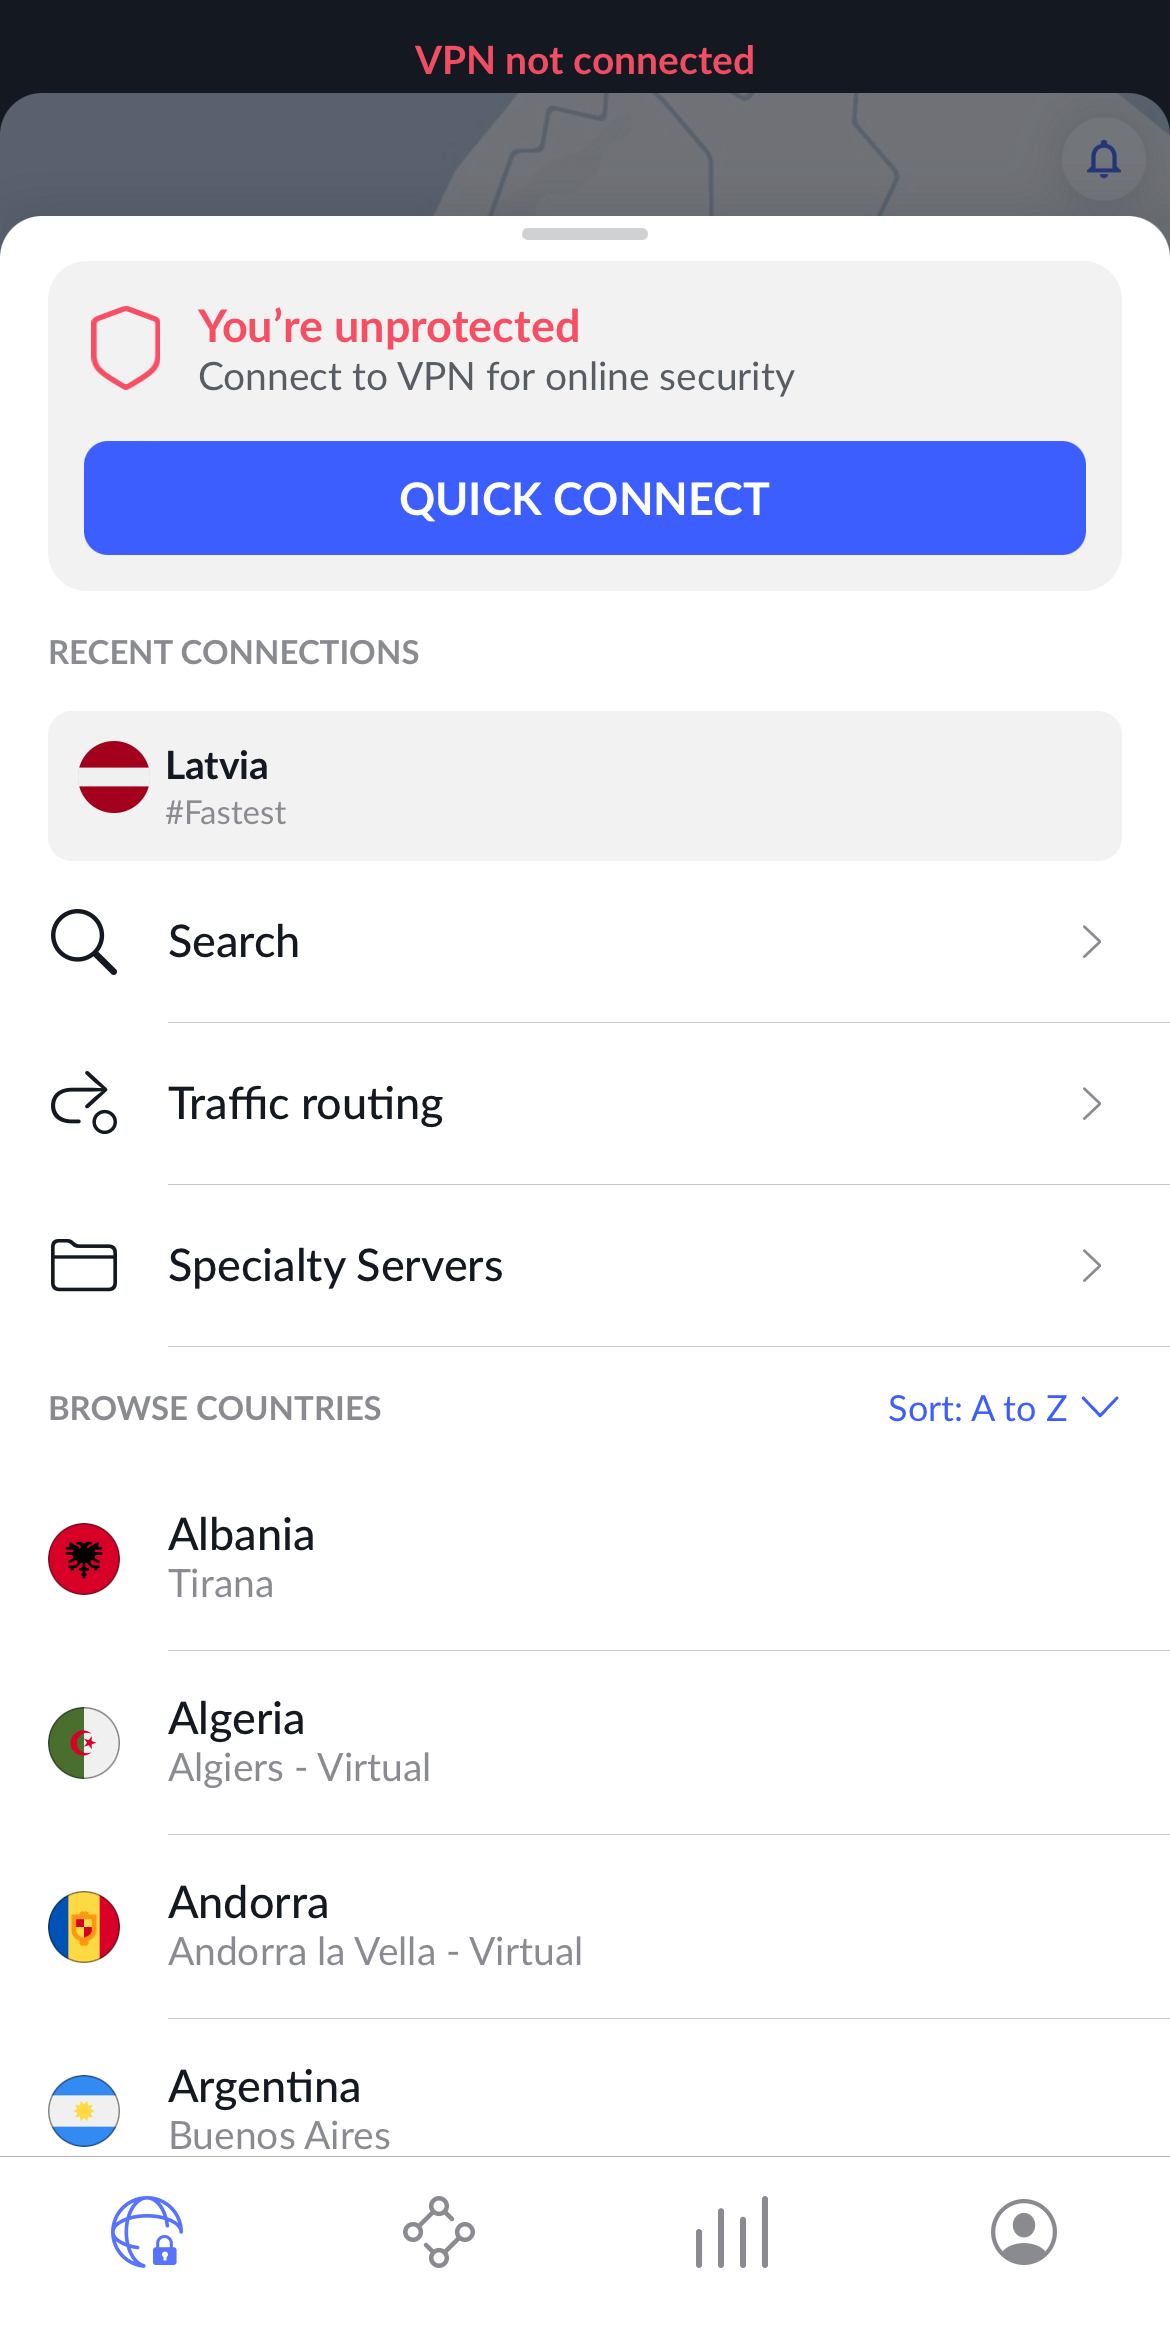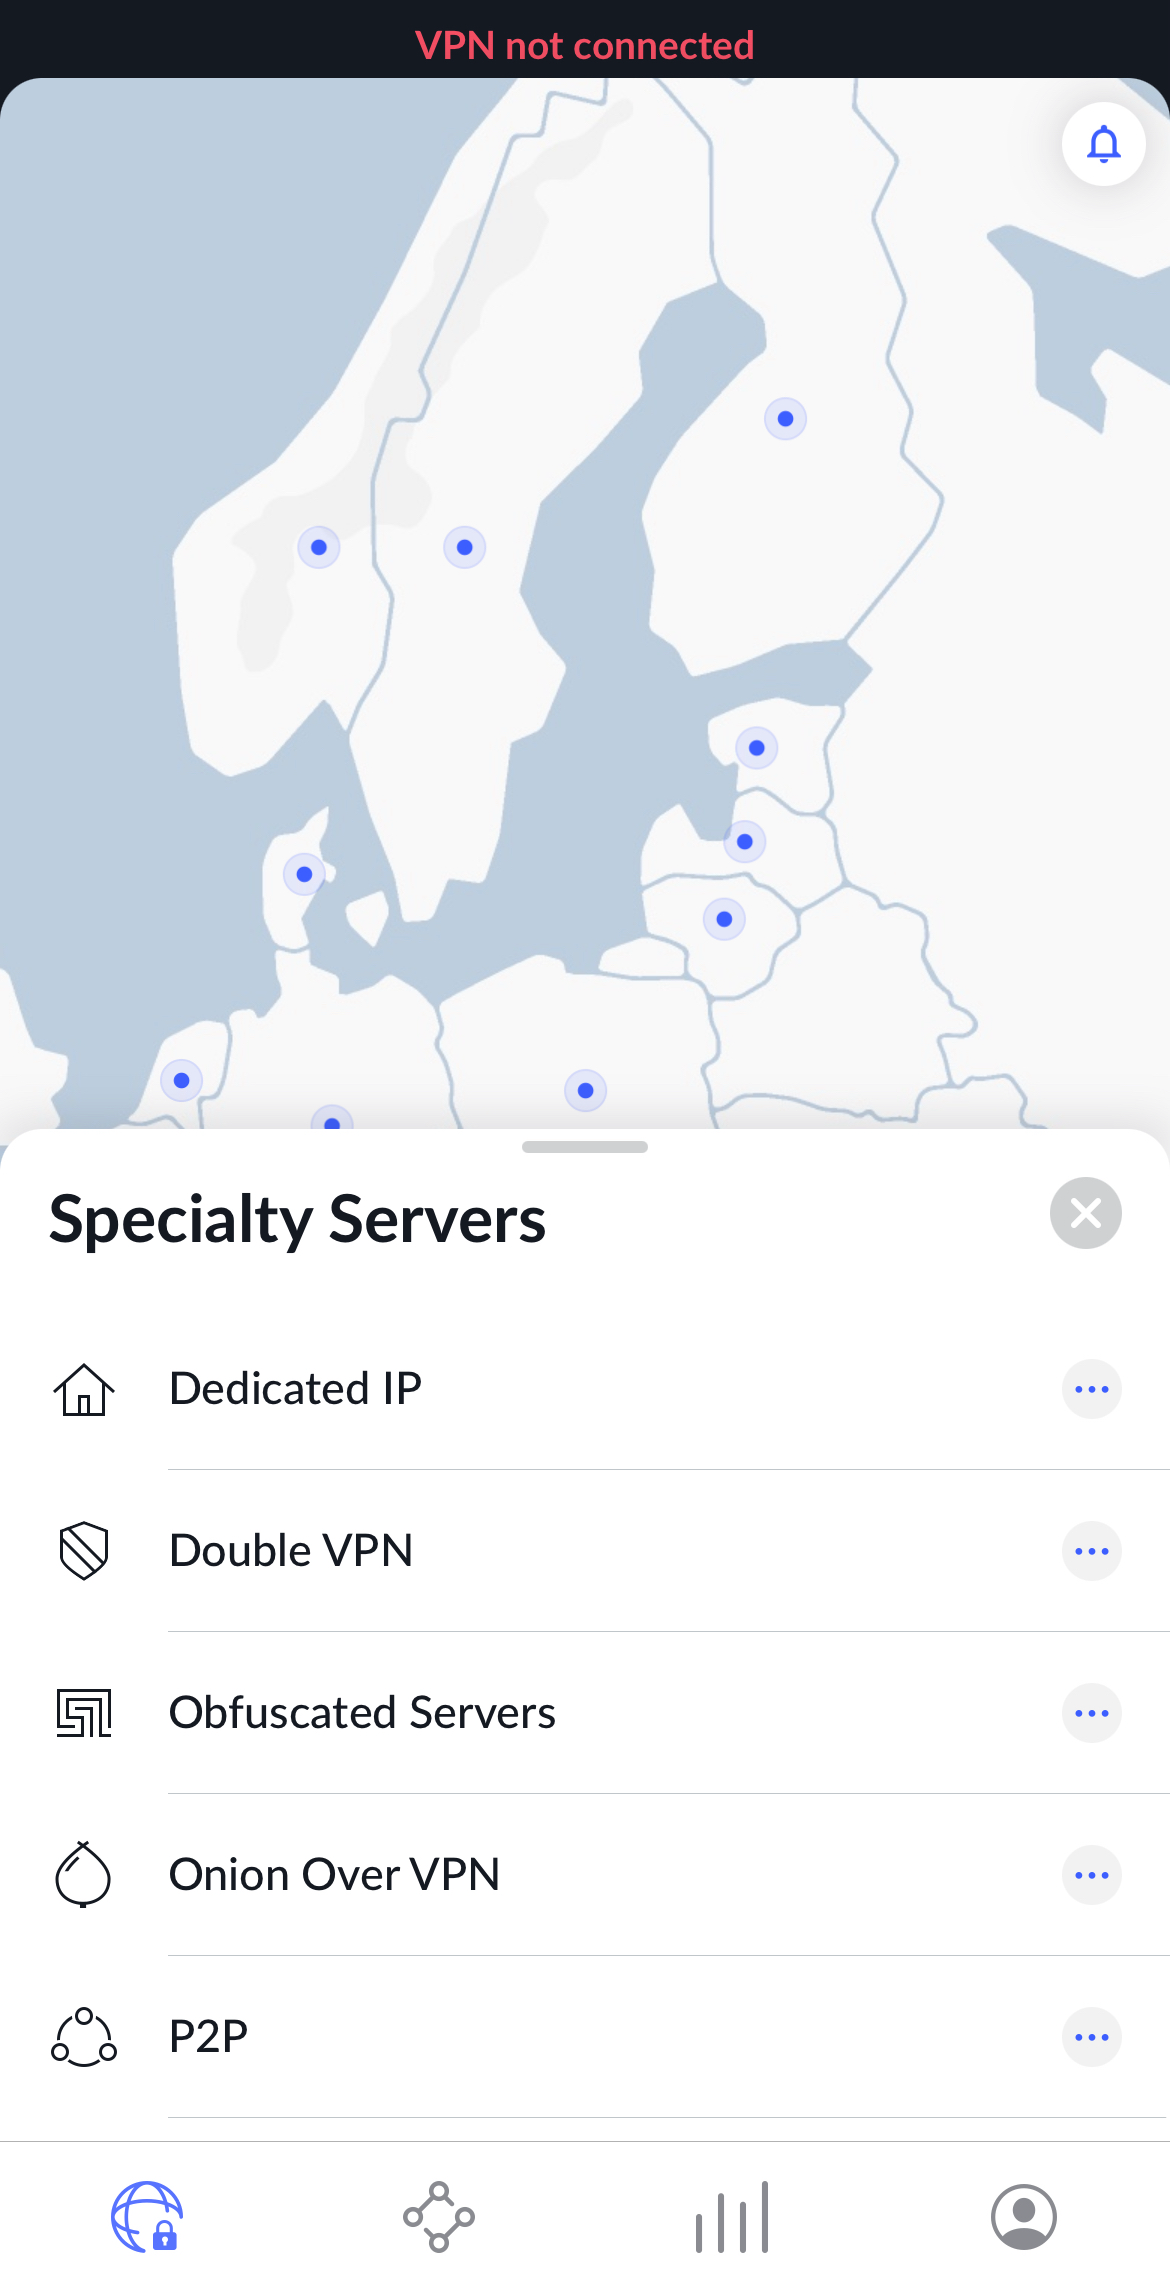
3. You can tap on the three dots next to a country's name to select a specific city. NordVPN will rank the available servers based on your needs.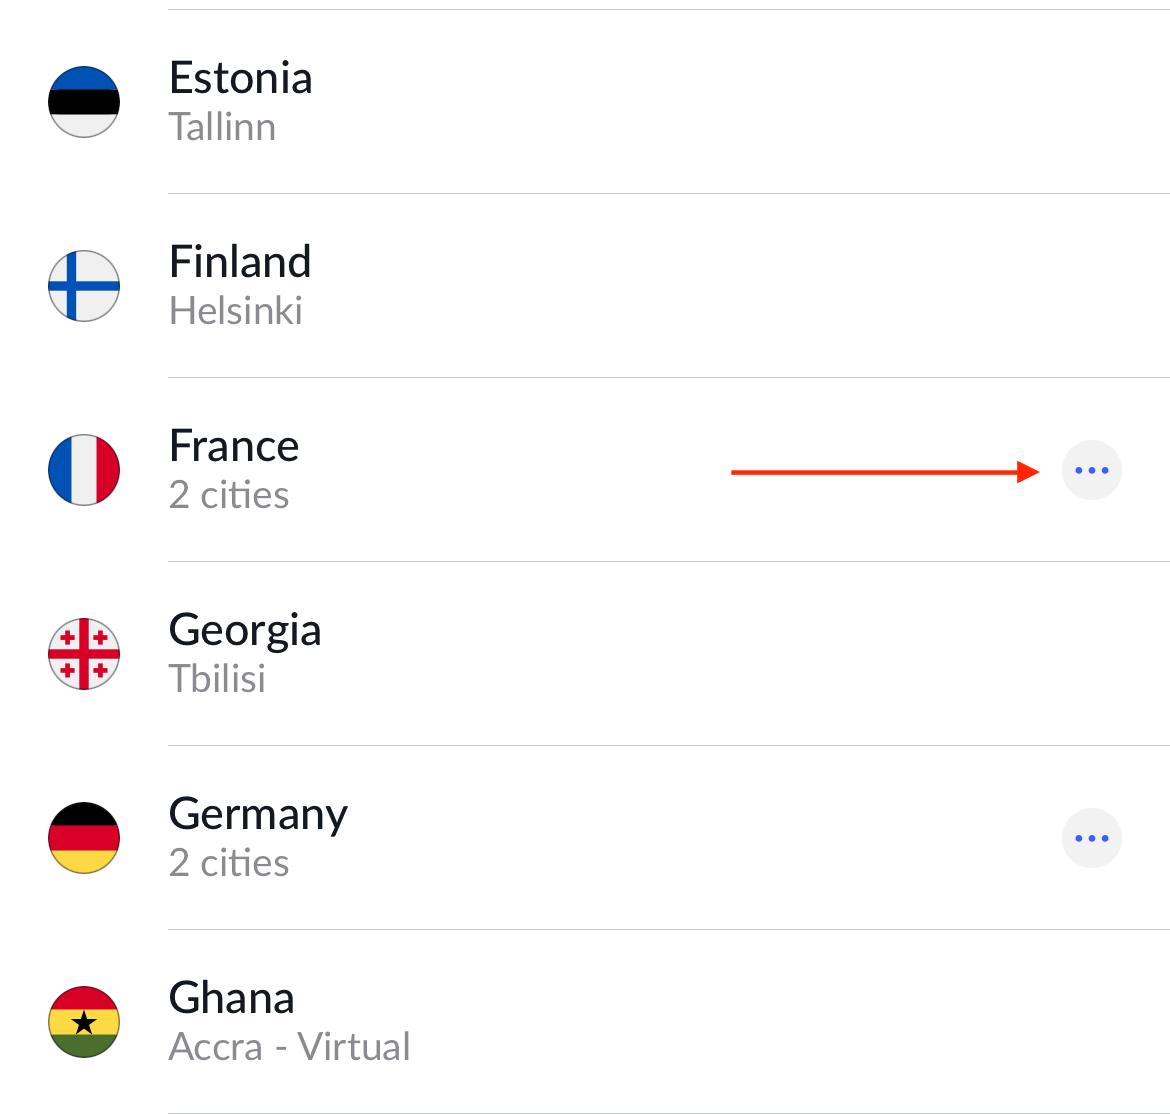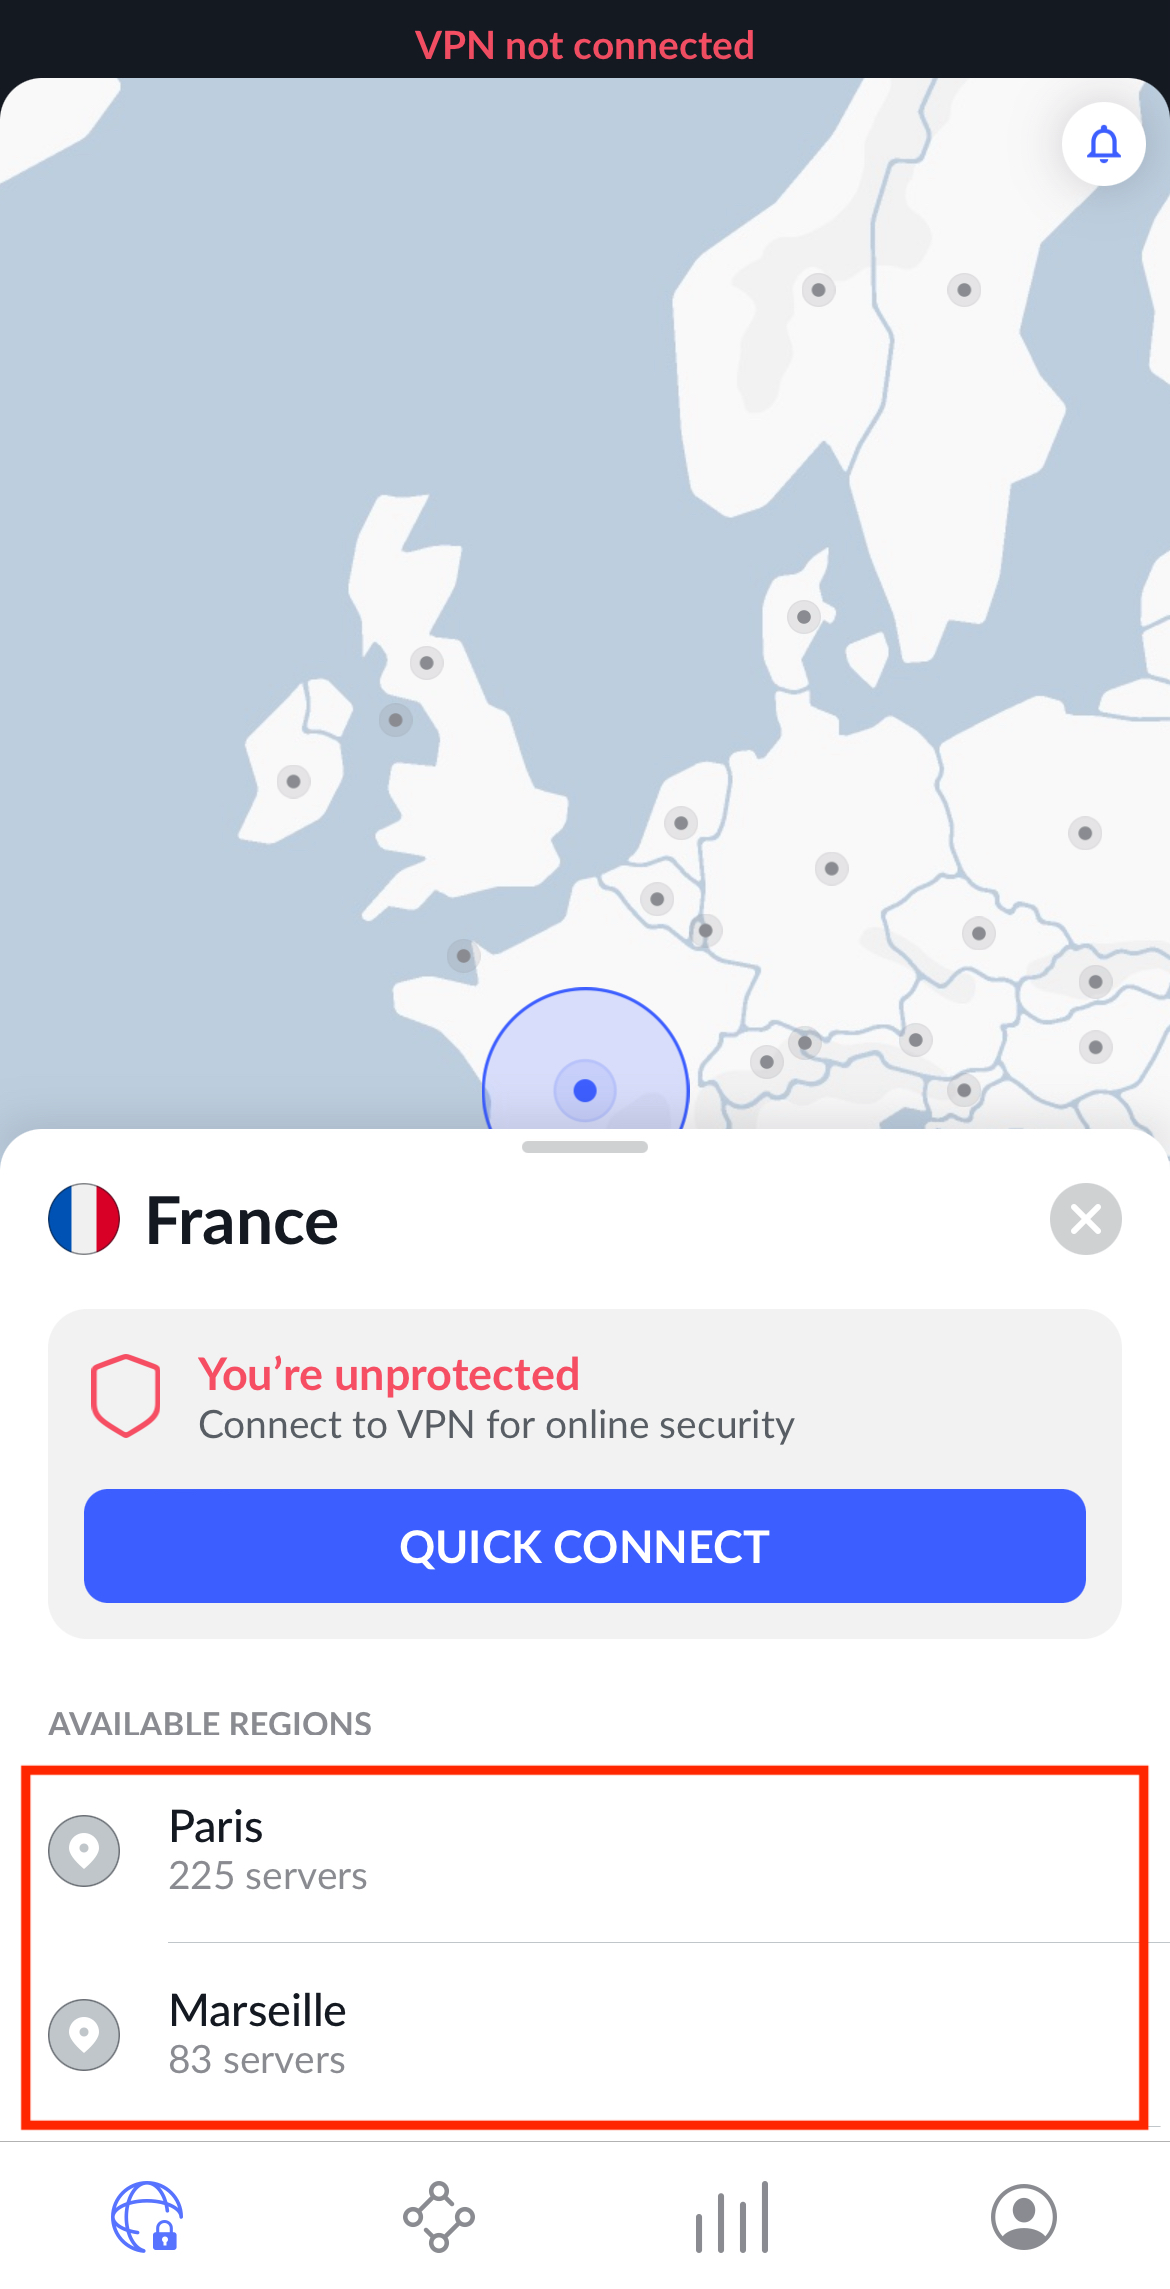
4. You can also tap ""Search"" to find a specific server using its server number.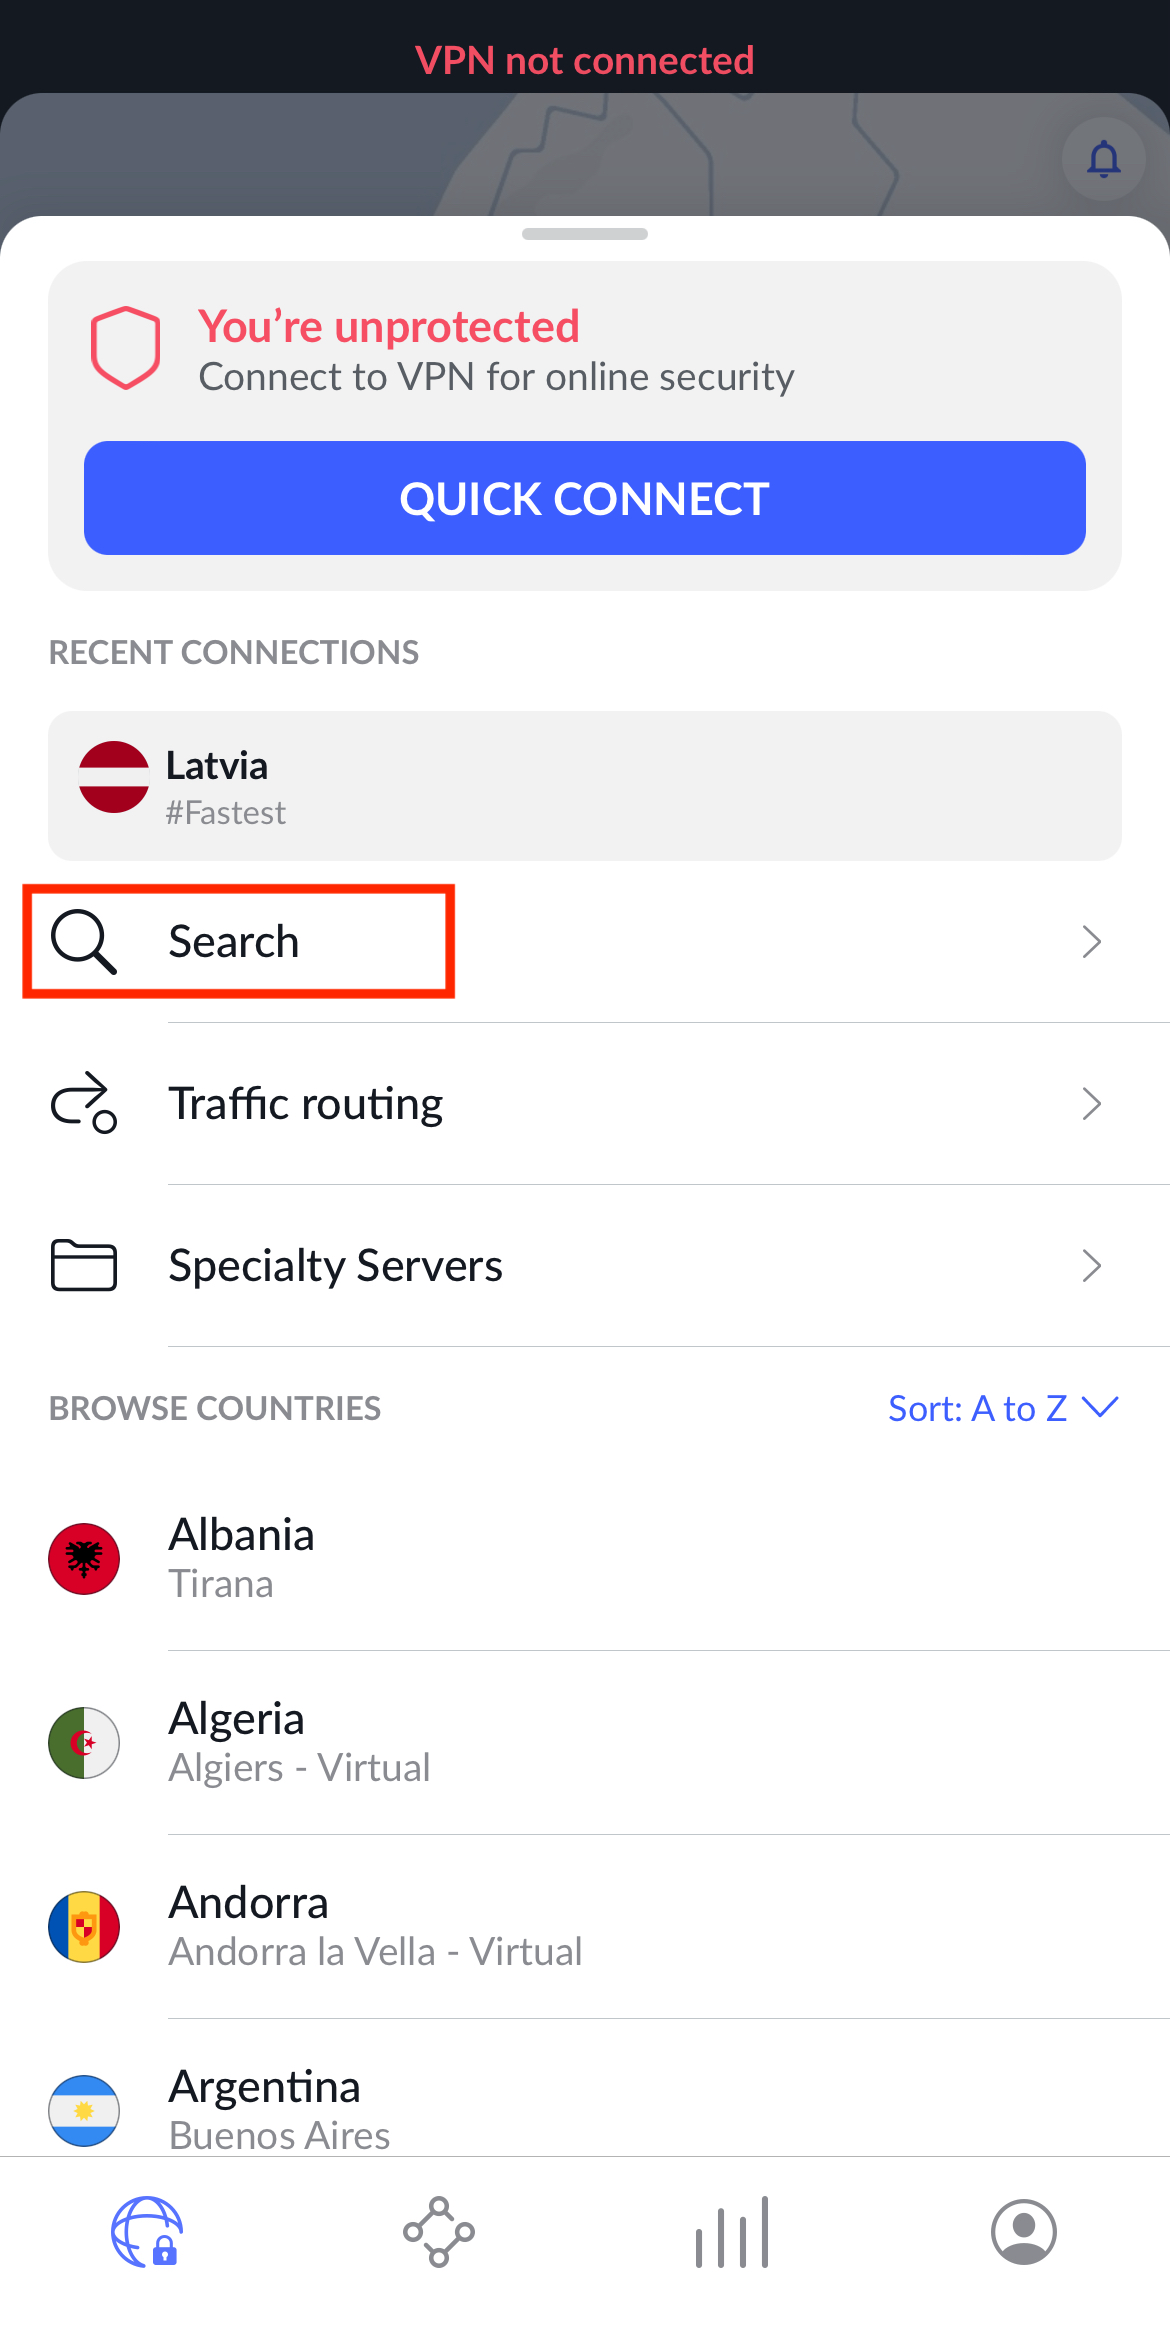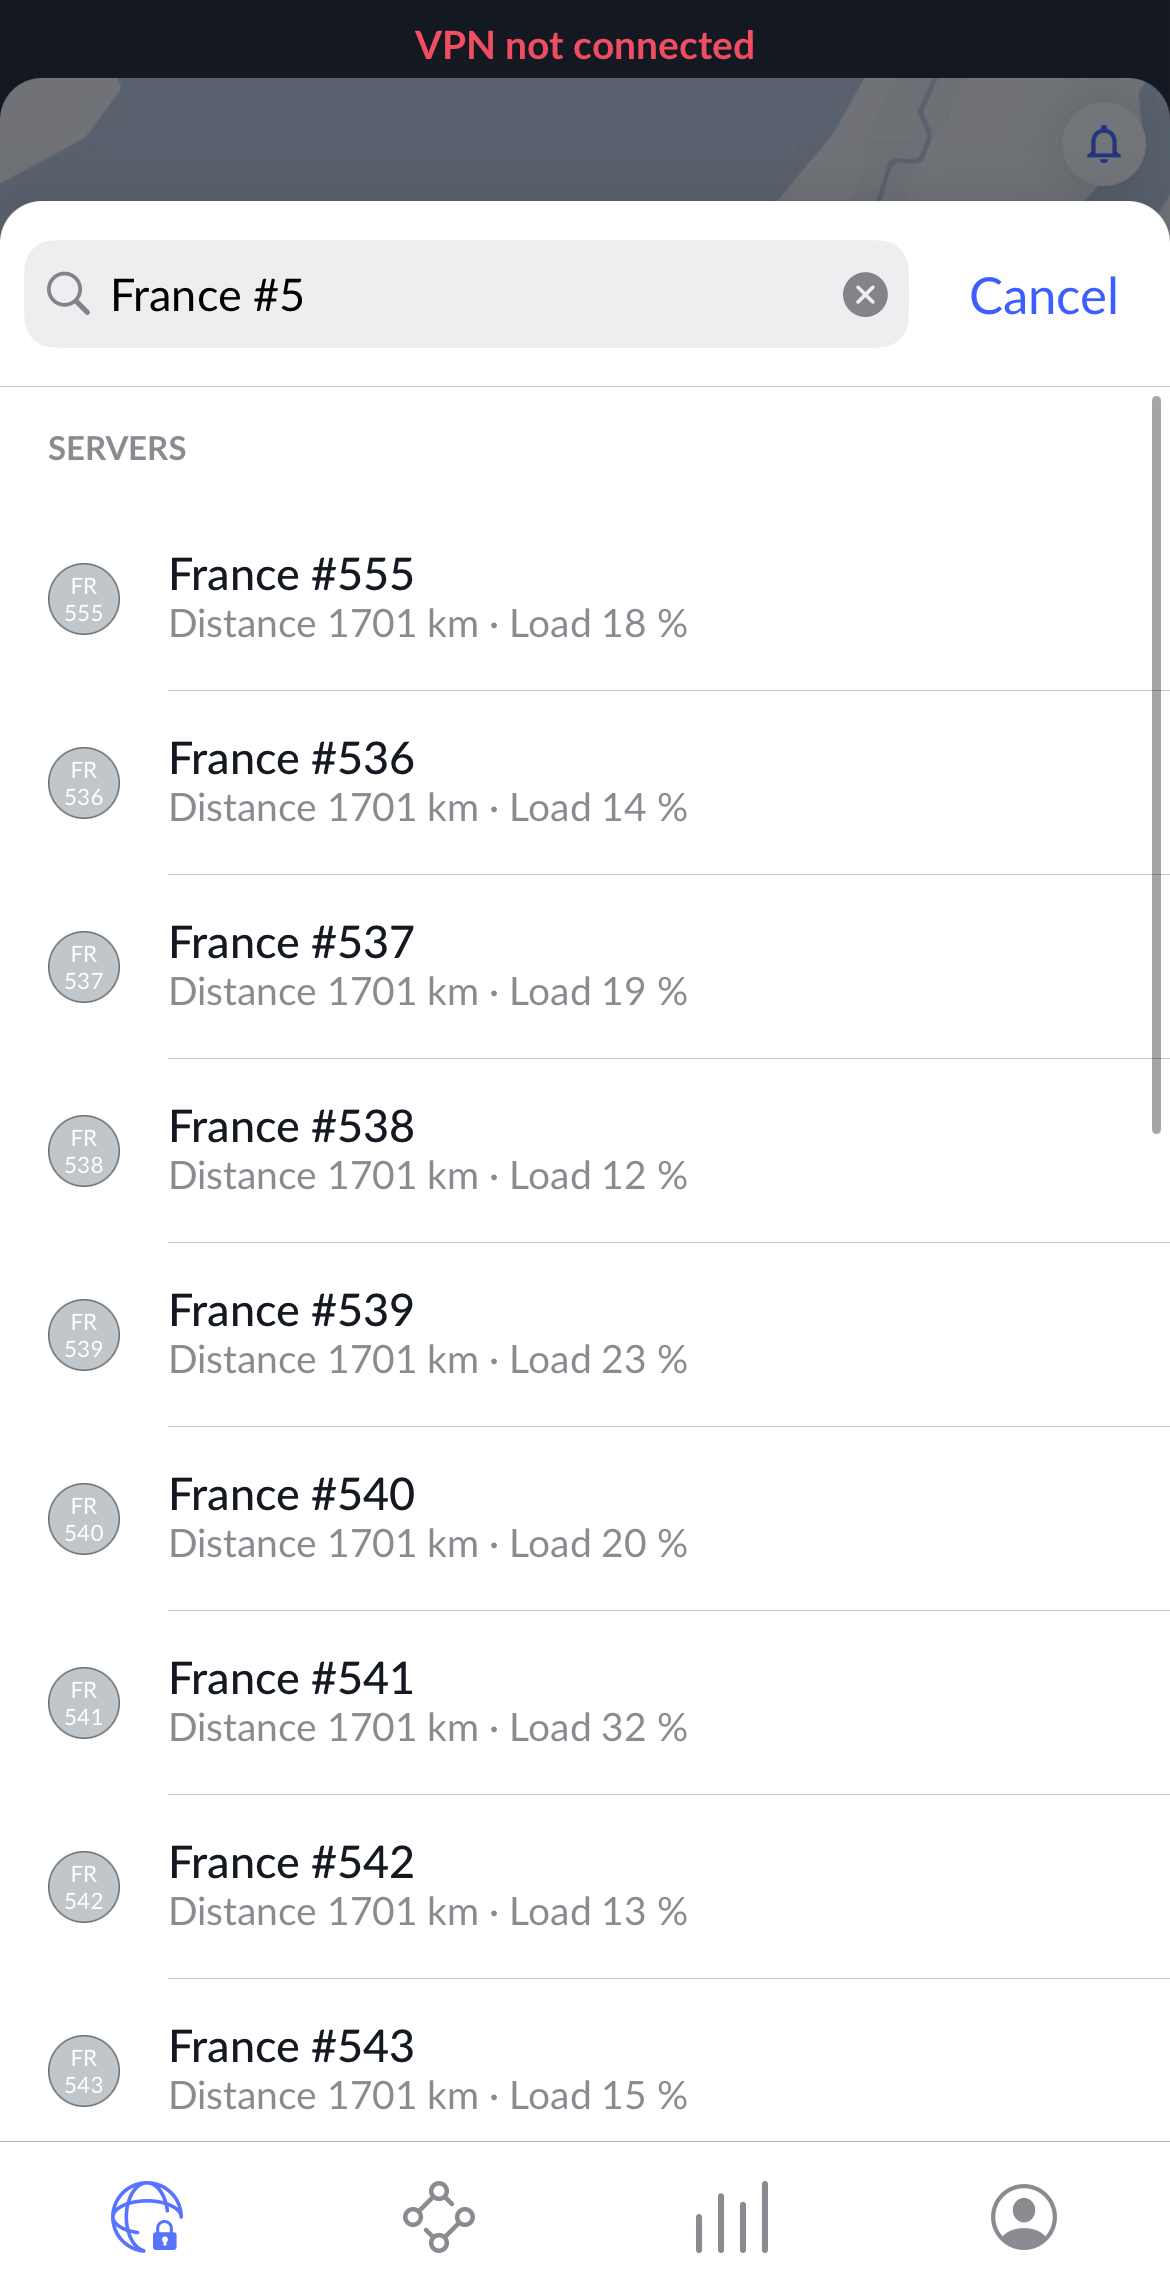
## Profile information
1. While on the map screen, you can tap the profile icon in the bottom-right corner to access your profile information, shortcuts, and settings.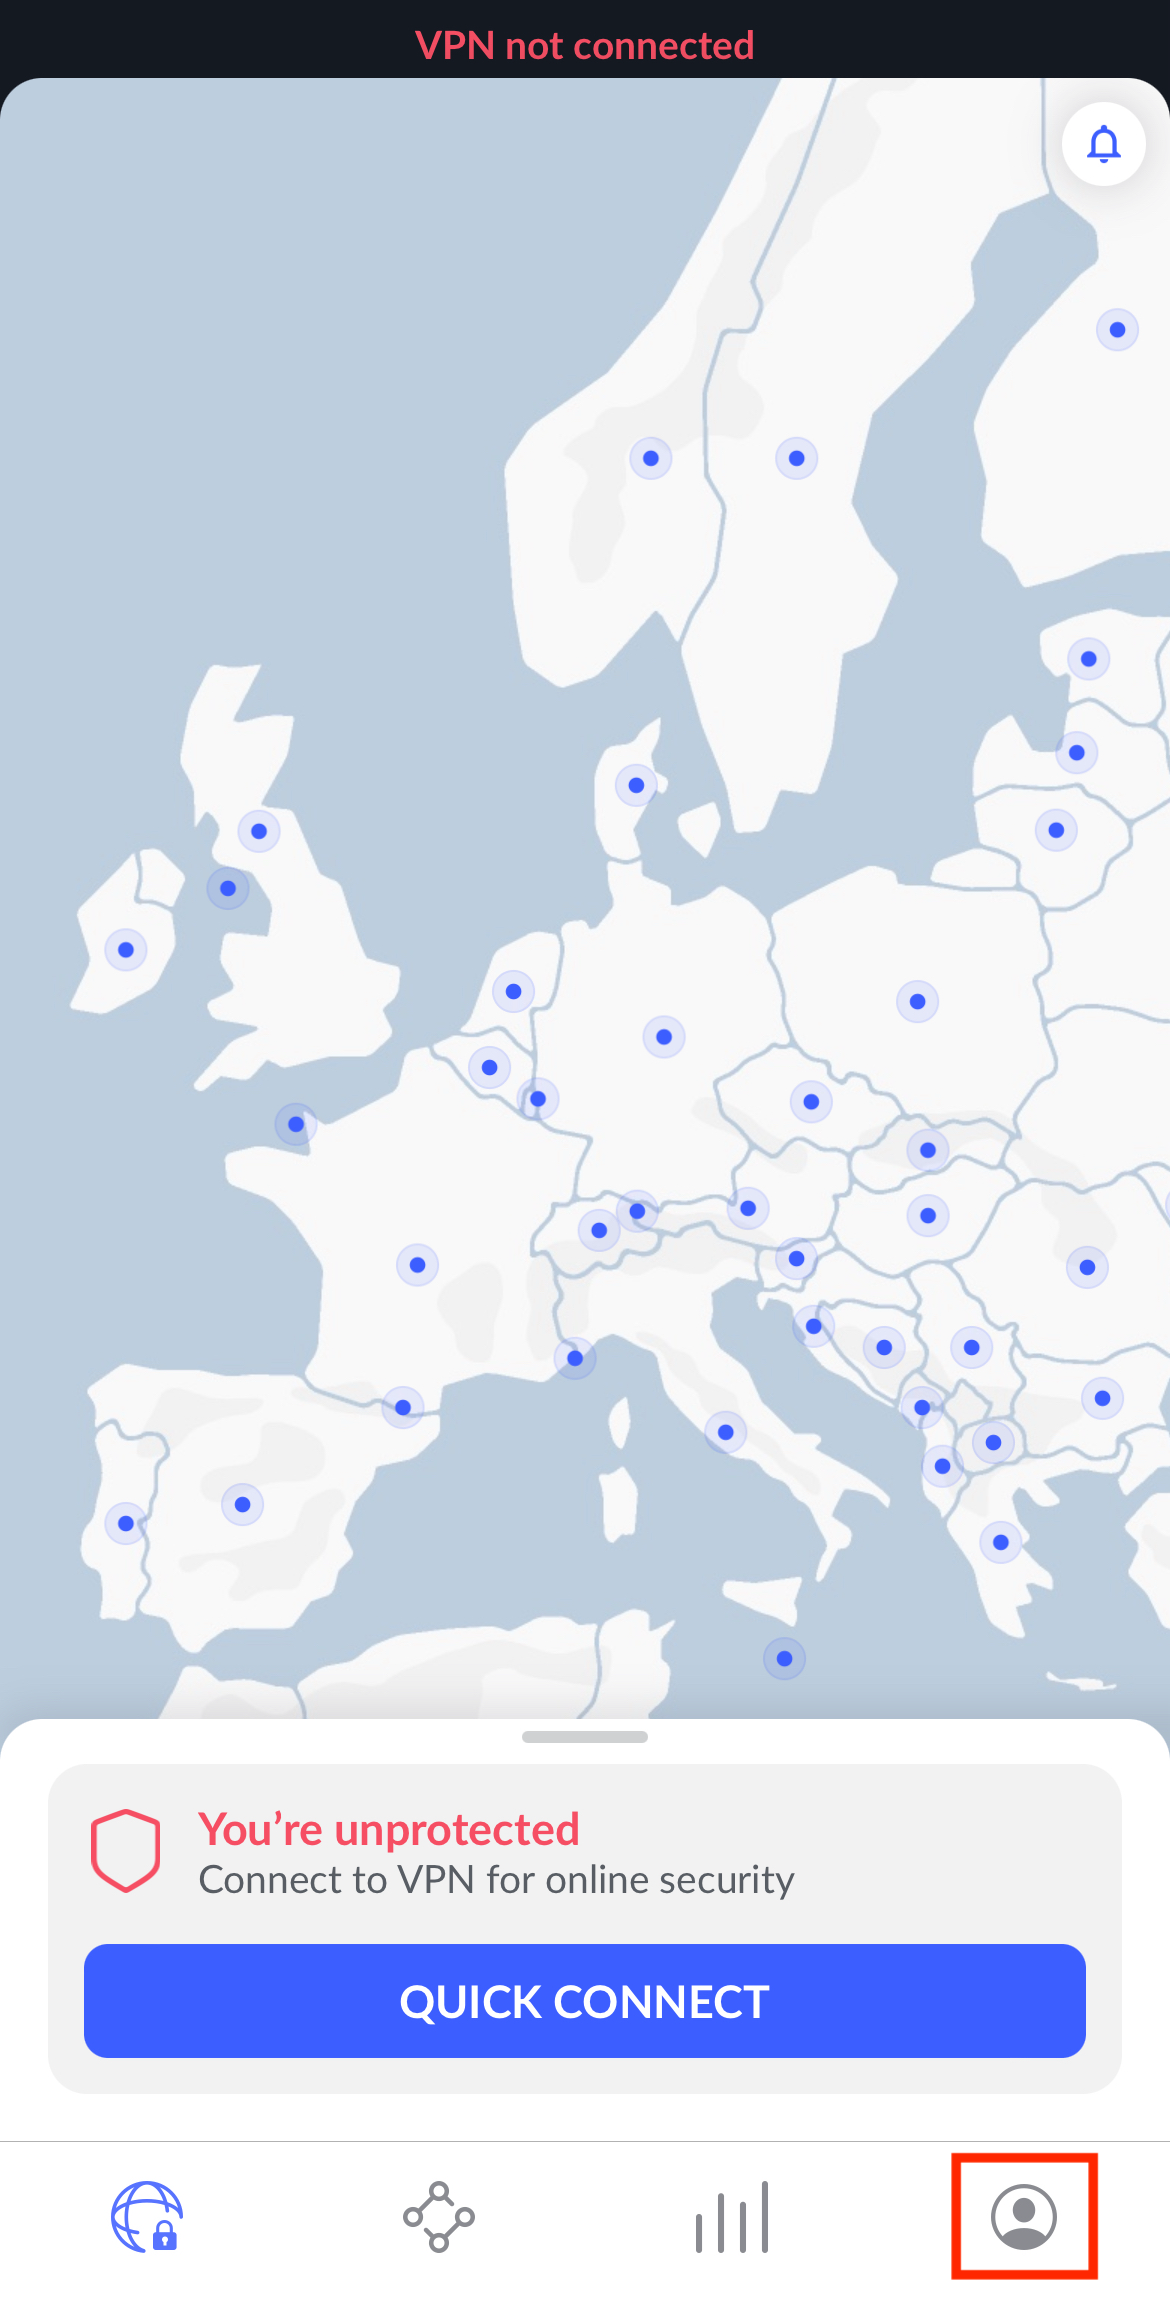
2. Here you will be able to see your subscription details (1), your security dashboard (2), shortcuts (3), settings (4), and Meshnet overview (5).
## Dark Web Monitor
Once enabled, this feature automatically scans the internet for any leaked credential associated with your registered NordVPN e-mail address. The NordVPN app will immediately notify you if Dark Web Monitor detects your credentials on underground websites. Read more about the feature's usefulness on our [Dark Web Monitor page](https://nordvpn.com/features/dark-web-monitor/).
## Security Score
These steps will tell you how to fully protect yourself with NordVPN.
## Threat Protection
This NordVPN feature blocks intrusive ads and malicious domains through DNS filtering. Keep in mind that you need to be connected to a NordVPN server and enable the [Threat Protection](https://nordvpn.com/features/threat-protection/) feature for it to work.
## Multi-Factor Authentication
Multi-factor authentication (MFA) is a security feature that helps protect access to your account. With MFA enabled, you must pass an extra security step (usually by supplying a code generated by an authenticator app) to log in to NordVPN. We offer detailed guidance on how to enable MFA for NordVPN.
## Meshnet
Meshnet is a new NordVPN feature that allows you to create a secure, private network for many devices located anywhere in the world, access them remotely, and send all your online traffic through another device.
## Settings
## VPN connection
## 
Protocol: Switch between Nordlynx, IKEv2, TCP, and UDP connection protocols. We have a detailed guide on which VPN protocol you should choose.Auto-connect: With auto-connect enabled, the NordVPN app will automatically connect you to NordVPN whenever your phone is on and connected to a Wi-Fi network. In the “Trusted Wi-Fi networks” section, you can disable auto-connect for specific networks. For example, you can make an exception for a trusted home Wi-Fi network.Reset VPN profile: Reset the VPN configuration on your device.
## General
Appearance: Choose your preferred application appearance, including switching to a dark theme.Notifications: Turn NordVPN app notifications on or off.Help us improve: Send us anonymous data to help improve our services.Siri shortcuts: Create specific Siri phrases to control the application hands-free.Subscription and privacy info: All your subscription-related information.Rate us on the App Store: Give our services a review on the App Store.Tell friends about NordVPN: Share information about our app with your friends and family.",https://support.nordvpn.com/hc/en-us/articles/19451338152849-Installing-the-NordVPN-app-on-iPhone-or-iPad
How to purchase a NordVPN subscription,"If you would like to purchase a NordVPN subscription and see the prices of the plans, visit the [NordVPN pricing page](https://nordvpn.com/pricing/). Once you have reached the pricing page, follow along to the steps below to purchase your NordVPN subscription:
## Purchasing the NordVPN subscription
To begin with your purchase, follow the steps below:
1. Choose the subscription period (2-year, 1-year, or Monthly):
2. Pick a security service package that suits your needs:
3. Type in your email address that you prefer to use with NordVPN services. 
4. Select a payment method: 
5. Fill in all the payment information to complete your purchase, and click on complete the purchase:
6. Check your registered NordVPN service email inbox and look for the purchase confirmation email.
In case you haven't received an activation email, check out our article on [what to do if you have not received an activation email](https://support.nordvpn.com/hc/en-us/articles/19744561174673-I-did-not-receive-an-activation-email).
If you ever have any questions, feel free to [contact us](https://support.nordvpn.com/hc/en-us/articles/19482416296593-How-can-I-reach-NordVPN-customer-support)",https://support.nordvpn.com/hc/en-us/articles/19478048190481-How-to-purchase-a-NordVPN-subscription
Connect to NordVPN using Linux Terminal,"Note: We have a separate set of instructions on how to set up the NordVPN application for Linux, and you can download NordVPN for Linux here.
Please note that since Linux has a lot of different distributions, the configuration interfaces may vary.
1. Open Terminal (keyboard shortcut: Ctrl + Alt + T).
2. Disable IPV6. Click here to learn how.
3. Only after disabling IPV6, install the OpenVPN client by entering:
* sudo apt-get install openvpnYou may be asked to enter your user password to confirm your identity.
4. Navigate to the OpenVPN configuration directory with the command:
* cd /etc/openvpn
5. Download the OpenVPN configuration files with the command:
* sudo wget https://downloads.nordcdn.com/configs/archives/servers/ovpn.zipIn case you get ERROR: The certificate of `nordvpn.com’ is not trusted., install the ca-certificates package with the command:
* sudo apt-get install ca-certificates
6. If you do not have the unzip package installed, download it by typing:
* sudo apt-get install unzip
7. Extract ovpn.zip with the command:
* sudo unzip ovpn.zip
8. Remove the files you will no longer use:
* sudo rm ovpn.zip
9. Enter the directory where the server configurations are located. These folders are named either ovpn_udp or ovpn_tcp:
* cd /etc/openvpn/ovpn_udp/
* cd /etc/openvpn/ovpn_tcp/
10. To see the list of all available servers, enter the following command:
* ls -al
11. Choose a server to connect to.For this tutorial, we used us2957.nordvpn.com, but you should connect to the server suggested to you at the [NordVPN server recommendation tool](https://my.nordaccount.com/dashboard/nordvpn/manual-configuration/server-recommendation/). You can find the server hostname right under the server title.
Follow the steps below to find the best server for your connection:
1. Log into your [Nord Account](https://my.nordaccount.com/), and click NordVPN.
2. Scroll down to Advanced Settings and click Set up NordVPN manually.
3. Select the Server recommendation tab. According to your location, the best server will be recommended.
4. By pressing Advanced filters you can further customize the recommended servers by selecting the Server type and the Security protocol.
In case you wish to select a specific server, follow these steps:
1. Under Set up NordVPN manually, select OpenVPN configuration files.
2. Find the server you wish to connect to by using the Search bar or by scrolling down and download it by clicking Download UDP or Download TCP.
1. Start OpenVPN with a chosen configuration by entering one of the following commands:
* sudo openvpn [file name]
* sudo openvpn us2957.nordvpn.com.udp.ovpn
* sudo openvpn /etc/openvpn/ovpn_udp/us2957.nordvpn.com.udp.ovpn
2. OpenVPN will ask you for your credentials. Enter your NordVPN service credentials.
1. You have successfully connected to VPN. To disconnect, open Terminal and press Ctrl + C on your keyboard.",https://support.nordvpn.com/hc/en-us/articles/20164827795345-Connect-to-NordVPN-using-Linux-Terminal
NordVPN Kill Switch: how does it work,"Kill Switch is a feature helping you prevent unprotected access to the internet when your traffic doesn't go through a NordVPN server.
The NordVPN apps employ a few different versions of Kill Switch:
### On Windows:
* The Internet Kill Switch feature in the Windows application has two operation modes:
1. Disable internet access when a VPN connection drops unexpectedly (default mode). With this mode selected, internet access is disabled only if an active VPN connection is lost due to an error or some other VPN connection related problem.
2. Disable internet access when you disconnect from VPN manually or the connection drops unexpectedly. This mode disables internet access whenever there is no active VPN connection.
### On iOS and macOS:
* The mobile version of Kill Switch in the iOS application as well as in the NordVPN (App store) version disables system-wide internet access if the VPN connection suddenly breaks off, thus protecting all the apps without terminating them. It will also try to reconnect you to the last server you were connected to. This feature is enabled by default and not visible in the app settings as a separate option.
* On macOS (NordVPN version), terminates the applications you specify if the VPN connection suddenly breaks off, preventing those applications from sending unprotected traffic to the internet.
### On Android:
* Kill Switch on Android version 8.0 or later works just like a system-wide Kill Switch, blocking any internet access when there is no VPN connection.Note: Due to technical limitations, the Kill Switch feature is not available on Amazon Fire TV Stick.
* Most devices (depending on the ROM) that run on Android version 7.0 or later have the Always-on VPN functionality, which prevents leaks if the VPN connection suddenly drops. To enable it, go to Settings > Connections > More connection settings > VPN. Tap the cog icon next to NordVPN and enable the Always-on VPN toggle switch.
## On Linux:
* The NordVPN client for Linux disables system-wide internet access if the VPN connection suddenly breaks off or you disconnect manually. You can enable NordVPN Kill Switch feature by typing the nordvpn set killswitch on command. If you want to disable Kill Switch, type the nordvpn set killswitch off command. You can find the current status of the Kill Switch feature by typing the nordvpn settings command.
Find more information on the [dedicated VPN Kill Switch feature page](https://nordvpn.com/features/vpn-kill-switch/), where we explain how you can use it.",https://support.nordvpn.com/hc/en-us/articles/19509682644369-NordVPN-Kill-Switch-how-does-it-work
What is Threat Protection Pro™ and Threat Protection?,"Threat Protection Pro™ is a feature that automatically blocks ads, trackers, and malicious URLs. When you visit a website known for scamming people, this feature displays an in-browser alert to warn you about possible fraud. Threat Protection Pro™ also scans downloads for malware and checks your apps for security vulnerabilities. You don't need an active VPN connection for Threat Protection Pro™ to work. Click here to learn more.
Threat Protection Pro™ is available on:
* Windows (You may also choose Threat Protection)
* macOS (You may also choose Threat Protection on the App Store NordVPN version)
Threat Protection is a feature that blocks ads, trackers, and unsafe domains based on DNS filtering. It only works when you're connected to one of the NordVPN's servers.
Threat Protection is available on:
* Android
* iOS
* Linux
* macOS
* Windows
* NordVPN Chrome Extension
* NordVPN Firefox Extension
* NordVPN Edge Extension
### What is the difference between Threat Protection Pro™ and Threat Protection?
The main differences between the two features are:
* Threat Protection Pro™ works without being connected to the VPN, but you must be connected to one of the NordVPN servers to use the Threat Protection feature.
* Windows and macOS devices support both Threat Protection Pro™ and Threat Protection features. Meanwhile, Android, iOS, and Linux devices and Chrome, Firefox, and Edge extensions support only Threat Protection.
* Threat Protection Pro™ deletes any malware-ridden file during download and blocks trackers, while Threat Protection doesn't.",https://support.nordvpn.com/hc/en-us/articles/19508765521425-What-is-Threat-Protection-Pro-and-Threat-Protection
Where does NordVPN have dedicated IP addresses?,NordVPN-dedicated IP addresses are offered in these regions:,https://support.nordvpn.com/hc/en-us/articles/19507808024209-Dedicated-NordVPN-IP-addresses
Dedicated NordVPN IP addresses,"When using NordVPN, your IP address changes to that of your VPN server. Normally, you share this IP address with other NordVPN users connected to the same server. However, if you purchase a NordVPN dedicated IP, you will get an IP address that belongs to you and you alone.
The advantages of a NordVPN dedicated IP addressNordVPN's dedicated IP allows you to bypass CAPTCHAs, easily access corporate networks, and avoid blocklists for IP addresses tainted by unscrupulous use. You can use the dedicated IP feature on up to 10 devices at the same time: simply connect with the [Open VPN (TCP)](https://support.nordvpn.com/hc/en-us/articles/20465552867345-Switching-protocol-to-OpenVPN-UDP-or-TCP) or [OpenVPN (UDP)](https://support.nordvpn.com/hc/en-us/articles/20465552867345-Switching-protocol-to-OpenVPN-UDP-or-TCP) protocol. You can also connect via the [NordLynx](https://support.nordvpn.com/hc/en-us/articles/19564565879441-What-is-NordLynx) protocol, however, it only supports one simultaneous connection. Dedicated IP is not available via tvOS, browser extension or the IKEv2 protocol.
## Where does NordVPN have dedicated IP addresses?
NordVPN-dedicated IP addresses are offered in these regions:
* The United States (Los Angeles, Dallas, New York, Chicago, Seattle, Miami)
* Germany (Frankfurt)
* The United Kingdom (London)
* The Netherlands (Amsterdam)
* France (Paris)
* Canada (Toronto)
* Japan (Tokyo)
* Italy (Milan)
* Sweden (Stockholm)
* Australia (Sydney)
* Hong Kong (Hong Kong)
* Switzerland (Zurich)
* Spain (Madrid)
* Belgium (Brussel)
* Denmark (Copenhagen)
* Poland (Warsaw)
* Portugal (Lisbon)
* South Africa (Johannesburg)
* Mexico
* Czech Republic (Prague)
Please note:
* If you are connecting from a country with internet restrictions, the dedicated IP address feature may fail to work as server accessibility from such regions is limited. Please consult our article on [how to connect from within a country with internet restrictions](https://support.nordvpn.com/hc/en-us/articles/19572011021457-Connecting-from-a-country-with-internet-restrictions) for more information.
* In case you wish to change your dedicated IP after a while, you may do that once per subscription. To change the dedicated IP, get in touch with NordVPN support.
Here is a list of tutorials showing you how to connect to your dedicated IP by NordVPN on different platforms:
* [Windows](https://support.nordvpn.com/hc/en-us/articles/20465449537681-How-to-connect-to-your-dedicated-IP-on-Windows)
* [Linux](https://support.nordvpn.com/hc/en-us/articles/19684336200081-How-to-connect-to-your-dedicated-IP-on-Linux)
* [macOS](https://support.nordvpn.com/hc/en-us/articles/19678530026641-How-to-connect-to-your-dedicated-IP-on-macOS)
* [iOS](https://support.nordvpn.com/hc/en-us/articles/19682095316625-How-to-connect-to-your-dedicated-IP-on-iOS)
* [Android](https://support.nordvpn.com/hc/en-us/articles/19682489581585-How-to-connect-to-your-dedicated-IP-on-Android)
You can test dedicated IP servers in the ""dedicated IP"" category in the application. The dedicated IP address you see in the application, would only connect you to a shared IP address. Once you make a purchase and get dedicated IP assigned, you would be able to connect to the specific server that would give you a static IP address that only you would be able to access.
If you wish to purchase a dedicated IP address in these regions, you can find a guide on how to do so here: [How to purchase a dedicated IP address.](https://support.nordvpn.com/hc/en-us/articles/19484196251921-How-to-purchase-a-Dedicated-IP-address)
Please be aware that if you purchase a NordVPN dedicated IP, your email will be linked to that IP address. For more information, please consult our Privacy Policy.",https://support.nordvpn.com/hc/en-us/articles/19507808024209-Dedicated-NordVPN-IP-addresses
Installing and using NordVPN on Windows 10 and 11,"This guide will show you how you can set up the NordVPN application on your Windows 10 or Windows 11 device. If you need a guide on installing and using NordVPN on an older Windows system, follow the guide here.
Table of contents:
Downloading and installingSetting up the applicationChoosing between different servers
* [Connect to a specific server](https://support.nordvpn.com/hc/en-us/related/click?data=BAh7CjobZGVzdGluYXRpb25fYXJ0aWNsZV9pZGwrCBH2A6%2B1EToYcmVmZXJyZXJfYXJ0aWNsZV9pZGwrCJFpIBV0EjoLbG9jYWxlSSIKZW4tdXMGOgZFVDoIdXJsSSJYL2hjL2VuLXVzL2FydGljbGVzLzE5NDcyMDIzMDI1MTY5LUluc3RhbGxpbmctYW5kLXVzaW5nLU5vcmRWUE4tb24tV2luZG93cy0xMC1hbmQtMTEGOwhUOglyYW5raQY%3D--3fb1c75ebc7eb6b1405c2d1cbd2d33240ba3bc9d#specific%20servers)
* [Connect to a specific country](https://support.nordvpn.com/hc/en-us/related/click?data=BAh7CjobZGVzdGluYXRpb25fYXJ0aWNsZV9pZGwrCBH2A6%2B1EToYcmVmZXJyZXJfYXJ0aWNsZV9pZGwrCJFpIBV0EjoLbG9jYWxlSSIKZW4tdXMGOgZFVDoIdXJsSSJYL2hjL2VuLXVzL2FydGljbGVzLzE5NDcyMDIzMDI1MTY5LUluc3RhbGxpbmctYW5kLXVzaW5nLU5vcmRWUE4tb24tV2luZG93cy0xMC1hbmQtMTEGOwhUOglyYW5raQY%3D--3fb1c75ebc7eb6b1405c2d1cbd2d33240ba3bc9d#Specific%20country)
[Features]( settings menu](
* [General](
* [Connection](
* [Kill Switch](
* [Split Tunneling](
* [Profile](
* [Refer a friend](
* [Discover other Nord products](
## Downloading and installing the NordVPN app
1. [Download the NordVPN app](https://downloads.nordcdn.com/apps/windows/NordVPN/latest/NordVPNSetup.exe).
2. Go to your Downloads folder and double-click the NordVPNInstall file. 
3. A pop-up window may ask you if you allow the app to make changes to your device. Click Yes.
4. The installer window will open. Click Next.
5. Tick the boxes if you want shortcuts for the NordVPN app on your Desktop and/or the Start menu, then click Next and Install.
6. The installer will proceed with the installation process. Once it’s complete, you will be asked if you want to launch NordVPN right away. Click Finish to complete the setup.
## Setting up and using NordVPN
1. Click on the NordVPN logo on your desktop, and after the app loads up, click Log In to continue.
2. Your browser will open up and load the Nord Account login page. First, enter your username or email address, press Continue, and then enter your password. If you do not have an account and an active subscription, click [here](https://support.nordvpn.com/Billing/Subscription/1088163062/How-to-purchase-a-NordVPN-subscription.htm) and learn how to get one.
3. To start using NordVPN straight away, you can press on Quick Connect, wait till you see the status change from Not connected to Connected, and you're good to go for a secure and private session! However, for a full understanding of what the NordVPN app offers, let's briefly go over what you can find on the main screen.
1. Quick Connect: this option automatically connects you to the fastest and closest NordVPN server.
2. Disconnect button: lets you disconnect from a NordVPN server.
3. Refresh button: this option refreshes your current connection and switches to a new recommended server.
4. Expander: arrow down will provide connection choice and a search bar for specific servers.
5. Recent connections: shows flags of the countries that you recently connected to.
6. Search bar: one of the ways you can connect to NordVPN servers. Use the search bar to find specific servers by typing in the name of the country, city, server number, or specialty server type. Learn more about [VPN servers.](https://nordvpn.com/servers/)
7. Specialty servers: NordVPN offers multiple categories of servers, each one with its unique benefits. We have a dedicated article explaining the different types in detail: What do the different server categories mean?
8. All countries: a list of countries you can connect to. Hovering over a country's name reveals additional options, such as specifying the city (if applicable) and server name.
## Features
On the left side menu, you can find all the additional features that NordVPN offers.

1. Main screen icon: this forwards you to the main application screen and helps you find your wanted location.
2. Threat Protection Pro™: it’s a special NordVPN feature that automatically blocks ads, trackers, and malicious URLs. When you visit a website known for scamming people, this feature displays an in-browser alert to warn you about possible fraud. Threat Protection Pro™ also scans downloads for malware and checks your apps for security vulnerabilities. Available with selected NordVPN plans, Threat Protection Pro™ can work without an active VPN connection. Learn about it [here](https://nordvpn.com/features/threat-protection/).
3. [Meshnet](https://nordvpn.com/meshnet/): this feature allows you to create a secure, private network for many devices located anywhere in the world, access them remotely, and send all your online traffic through another device.
4. Dark Web Monitor: scans the internet for any credential leaks associated with your registered NordVP e-mail address. To find more information about it click [here](https://support.nordvpn.com/General-info/1661437652/Using-the-Dark-Web-Monitor-feature.htm).
5. Contact us: gives a form to fill out and reach out to our customer support team.
6. Security score: recommend steps to follow to become fully protected online.
7. Settings: lets you change the general, subscription, and connection settings
## Choosing between different NordVPN servers
Using the search bar. You can connect to specific servers by typing in a category, region, or a specific server number with a hashtag (e.g. United States #4735) to find what you need.Using the All Countries list or the Servers map. Click on the nodes on the map or on the specific country in the list to connect to the best server in the given location. Clicking on the three dots next to the country name reveals additional connection options, such as the ability to select a specific city.
## NordVPN settings menu
In the Settings tab, you can set up the application to your liking. To open the settings menu, press on the cogwheel icon in the bottom left corner. After opening settings, you will be introduced to 7 different settings sections. Down below, you will find an explanation of each settings section.
## General
* Launch at Windows startup makes NordVPN run automatically when you start your computer. Enabled by default.
* Launch the app minimized to the system tray displays the NordVPN icon only in the Windows system tray when the computer starts (instead of opening the main window). Enabled by default.
* Show VPN connection status notifications show Windows notifications each time you connect or disconnect from a server. Enabled by default.
* Appearance lets you choose your preferred theme for the NordVPN application.
* Language dropdown lets you select your preferred language of the NordVPN app.
* Help us improve by sending us aggregated anonymous data for future improvement analysis.
* Diagnostics run the NordVPN diagnostics tool if you’re having technical issues. Collect the diagnostic data and provide the ticket ID to our support staff for further assistance. If the diagnostics tool does not give you a ticket ID, you can send the .zip file to our support staff instead.
* Allow background processes to let the NordVPN application run after closing the app. 
## Connection
* VPN protocol UDP is mainly used for streaming and downloading. TCP is more reliable but also a little slower and is usually used for web browsing. Nordlynx
* Auto-connect lets you select your preferred country or server type, which the app will automatically connect to. You will be able to select a specific city after you select a preferred country.On all networks: connects you automatically no matter what network you use.Wi-Fi networks: connect you automatically only when using a Wi-Fi network.On Ethernet: connects you automatically when using ethernet.
* Trusted Wi-Fi networks disable Auto-connect on specific Wi-Fi networks. For example, you can make an exception for your home Wi-Fi if you trust it.
* Quick connect on the app launch makes the app connect to a server automatically upon starting when using an Ethernet connection or Wi-Fi network. It does not apply to Trusted Wi-Fi networks. Disabled by default.
* Custom DNS lets you specify a particular DNS server for the NordVPN application.
* Invisibility on LAN makes your computer invisible to others on the same local area network (LAN). Remember that once enabled, you will not be able to connect to devices on the same LAN, like printers. Disabled by default.
* Allow remote access while connected to VPN to access your Windows device remotely. Disabled by default.IMPORTANT NOTE: you will lose internet connectivity while connected to a Trusted Wi-Fi with enabled Internet Kill Switch.
## Kill Switch
* Internet Kill Switch cuts off your internet connection when you’re disconnected from secure NordVPN servers. Disabled by default.
* App Kill Switch shuts down specified programs if you lose a VPN connection. For example, if you add Skype to the list, NordVPN will close it whenever you disconnect. Since it takes a few seconds to reach a secure VPN server, this will prevent your data from leaking upon automatically reconnecting to the internet. Disabled by default.
## Split Tunneling
* Split tunneling allows you to exclude applications from the VPN connection. In other words, the apps which you select to add into the split tunneling feature will allow them to stay unaffected by NordVPN. 
## Profile
* Subscription lets you manage your subscription, cancel its auto-renewal, or re-subscribe for the service.
* Multi-factor authentication (MFA) is a security feature that helps protect access to your account. When MFA is turned on, you must pass an extra step during the log-in process.
* Get NordVPN for all your devices and stay protected all the time.
## Refer a friend
* It provides you with your personal referral link that you can share with your friends and family and receive a reward for it.
## Discover other Nord products
* It offers you NordPass, NordLocker, and NordLayer services that will help you to stay fully protected at all times.",https://support.nordvpn.com/hc/en-us/related/click?data=BAh7CjobZGVzdGluYXRpb25fYXJ0aWNsZV9pZGwrCBH2A6%2B1EToYcmVmZXJyZXJfYXJ0aWNsZV9pZGwrCJFpIBV0EjoLbG9jYWxlSSIKZW4tdXMGOgZFVDoIdXJsSSJYL2hjL2VuLXVzL2FydGljbGVzLzE5NDcyMDIzMDI1MTY5LUluc3RhbGxpbmctYW5kLXVzaW5nLU5vcmRWUE4tb24tV2luZG93cy0xMC1hbmQtMTEGOwhUOglyYW5raQY%3D--3fb1c75ebc7eb6b1405c2d1cbd2d33240ba3bc9d
Which routers don’t support NordVPN,"On 1 December 2018, NordVPN’s servers stopped supporting L2TP/IPsec and PPTP connections. More about that in [this article](https://nordvpn.com/blog/l2tp-pptp-protocol-update/).
If you use any of the routers listed below with their native firmware, you will not be able to use them with our service:
* Arris
* Belkin
* Cisco
* D-Link
* Huawei
* Linksys (except [WRT32X/WRT32XB AC3200](https://www.linksys.com/support-article?articleNum=270535))
* Nighthawk range routers ([unless the router is using DumaOS](https://www.netgear.com/home/online-gaming/))
* [Netgear](https://support.nordvpn.com/hc/en-us/articles/20282781982481-Can-I-set-up-Netgear-router-with-VPN)
* TRENDnet
* Tenda
* TotoLink
* Ubee
* Orbi
* Spectrum
* Xfinity
* Eero
* Verizon
* AT&T
* FRITZ!Box
* Most ISP-provided routers that were mentioned above
You can install the following custom firmware on some of the aforementioned models to make them work:
* DD-WRT:
* Tomato:
* Padavan:
* OpenWRT:
* Merlin:
## Other tips for router connectivity:
* If your router supports the OpenVPN protocol, search our knowledge base for the name of its manufacturer. You should find a tutorial on how to set it up. You can also check our [router tutorials](https://support.nordvpn.com/hc/en-us/sections/19326876055569-Router) section under the Connectivity category. If you cannot find the setup guide for your router, [contact our customer support](https://support.nordvpn.com/hc/en-us/articles/19482416296593-How-can-I-reach-NordVPN-customer-support) for help.
* If you want a router with out-of-the-box security and anonymity that NordVPN provides, head over to our partners at [FlashRouters](https://nordvpn.com/flashrouters/). They offer pre-configured routers delivering top-notch security and performance.
* Here is our list of [recommended routers for NordVPN](https://support.nordvpn.com/hc/en-us/articles/20195707547025-Which-router-should-I-use-with-NordVPN).",https://support.nordvpn.com/hc/en-us/related/click?data=BAh7CjobZGVzdGluYXRpb25fYXJ0aWNsZV9pZGwrCBEC9%2F2IEjoYcmVmZXJyZXJfYXJ0aWNsZV9pZGwrCJFpIBV0EjoLbG9jYWxlSSIKZW4tdXMGOgZFVDoIdXJsSSJKL2hjL2VuLXVzL2FydGljbGVzLzIwMzc5NTg1Njc1NzkzLVdoaWNoLXJvdXRlcnMtZG9uLXQtc3VwcG9ydC1Ob3JkVlBOBjsIVDoJcmFua2kH--4ae15ef095882e930ee5a90817471876e049cdcb
How to download NordVPN software,"You can [download NordVPN](https://nordvpn.com/download/) for the following operating systems:
* [Android](https://nordvpn.com/download/android/)
* [Windows](https://nordvpn.com/download/windows/)
* [macOS](https://nordvpn.com/download/mac/)
* [iOS/iPhone/iPad](https://nordvpn.com/download/ios/)
* [Android TV](https://nordvpn.com/download/android-tv/)
* [Linux](https://nordvpn.com/download/linux/)
Other devices NordVPN can be used with:
* [Xbox](https://nordvpn.com/download/xbox/)
* [Playstation](https://nordvpn.com/download/playstation/)
* [Nintendo Switch](https://nordvpn.com/download/nintendo-switch/)
* [Fire TV Stick](https://nordvpn.com/download/firestick/)
* [Chromecast](https://nordvpn.com/download/chromecast/)
* [Raspberry Pi](https://nordvpn.com/download/raspberry-pi/)
* [Chromebook](https://nordvpn.com/download/chromebook/)
For instructions on how to set up NordVPN on your device, please have a look at our [NordVPN setup tutorials](https://support.nordvpn.com/hc/en-us/sections/19326474198929-NordVPN-setup-tutorials).
Note: To use the NordVPN app on any OS, you need an active NordVPN subscription. If you don’t have one yet, you can [purchase a NordVPN subscription on our website.](https://nordcheckout.com/?product_group=nordvpn&cart_id=c3ccda24-fa0c-49da-aa95-61271b511194)",https://support.nordvpn.com/hc/en-us/related/click?data=BAh7CjobZGVzdGluYXRpb25fYXJ0aWNsZV9pZGwrCJHDgDO4EToYcmVmZXJyZXJfYXJ0aWNsZV9pZGwrCJFpIBV0EjoLbG9jYWxlSSIKZW4tdXMGOgZFVDoIdXJsSSJHL2hjL2VuLXVzL2FydGljbGVzLzE5NDgyODM1NzMxMzQ1LUhvdy10by1kb3dubG9hZC1Ob3JkVlBOLXNvZnR3YXJlBjsIVDoJcmFua2kI--0a9602fce33c4bcf3bf87620a4d0ba6cb655e3c9
Which NordVPN protocol should I choose,"NordVPN supports several security encryption protocols to provide a VPN service. The security levels and purposes of these VPN protocols are different, but so are our customers’ needs. We encourage you to take a closer look at the strengths and weaknesses of each VPN protocol. While we want you to be able to choose freely, we also feel it’s our duty to advise you on what might suit you best.
1. OpenVPN
OpenVPN is a mature and robust piece of open-source software that enables us to provide a reliable and secure VPN service. It is a versatile VPN protocol that can be used on both TCP and UDP ports. OpenVPN supports a great number of strong encryption algorithms and ciphers: to ensure the protection of your data, we use AES-256-GCM with a 4096-bit DH key. If you are conscious about your security and are wondering what the most stable NordVPN protocol is, we recommend OpenVPN.
2. WireGuard (NordLynx) (Recommended by NordVPN and used by default in most of our apps)
WireGuard is the newest and fastest tunneling protocol, and the entire VPN industry is talking about it. It uses state-of-the-art cryptography that outshines the current leader, OpenVPN. However, it’s still considered experimental, so VPN providers need to look for new solutions (like NordLynx by NordVPN) to overcome WireGuard’s vulnerabilities.
Modern, extremely fast, and incredibly lean in its architecture, WireGuard is backed by thorough academic research. WireGuard consists of only 4,000 lines of code, making it easy to deploy, audit, and fix. To put it into perspective, OpenVPN runs on 400,000 lines of code, meaning that WireGuard makes up only 1% of OpenVPN’s massive architecture.
NordLynx is currently used by default in NordVPN apps. If you’re wondering which VPN protocol is best for gaming or other online speed-dependent activities, the answer is always NordLynx.
3. NordWhisper (Recommended by NordVPN to use for restrictive networks)
The latest protocol added to NordVPN and designed to overcome restrictive local network environments while ensuring your security. It is the ideal solution when dealing with filtered content on office or campus networks and Wi-Fi networks with security filtering found at airports, cafes, hotels, or conferences.
NordWhisper is not compatible with Meshnet, DIP, Obfuscated servers, Onion Over VPN, or P2P servers.
Learn [how to use NordWhisper on NordVPN](https://support.nordvpn.com/hc/en-us/articles/31528242519953-How-to-use-NordWhisper-on-NordVPN).",https://support.nordvpn.com/hc/en-us/related/click?data=BAh7CjobZGVzdGluYXRpb25fYXJ0aWNsZV9pZGwrCBF7%2BjG4EToYcmVmZXJyZXJfYXJ0aWNsZV9pZGwrCBF9OpB7EjoLbG9jYWxlSSIKZW4tdXMGOgZFVDoIdXJsSSJNL2hjL2VuLXVzL2FydGljbGVzLzE5NDgyODEwMTUzNzQ1LVdoaWNoLU5vcmRWUE4tcHJvdG9jb2wtc2hvdWxkLUktY2hvb3NlBjsIVDoJcmFua2kH--d98ed9cf51a66e29899c2d856524465f9fbd6ea4
"How do I know, if I have connected successfully","If you want to double-check whether your connection is secure after connecting to a NordVPN server, you can do so using either of the following methods:
* Go to [nordvpn.com](https://nordvpn.com/?_gl=1*1tc1o2r*_ga*ZmE4YzFhMjAtOTU5Yi00NDZlLTg0NTktYmM5ZjBlMzY1ZDE0*_ga_LEXMJ1N516*MTY5NzcxMDIwMS4yNzYuMS4xNjk3NzI1NTQyLjQ4LjAuMA..*_gcl_au*MTM4MTkxMTIwLjE2OTY5NDUwNTg.*FPAU*MTM4MTkxMTIwLjE2OTY5NDUwNTg.&_ga=2.119529354.2018442498.1697524322-fa8c1a20-959b-446e-8459-bc9f0e365d14). If the connection is successful, the bar at the top of the page should say that your status is Protected.
* Check what your IP address is [here](https://nordvpn.com/what-is-my-ip/). If the connection is successful, it should be different from the one assigned to you by your ISP.",https://support.nordvpn.com/hc/en-us/articles/19483050791825-How-do-I-know-if-I-have-connected-successfully
Should I choose NordVPN app or NordVPN extension?,"When purchasing a NordVPN subscription, you get access to the [NordVPN application](https://nordvpn.com/download/) for Windows, Android, macOS, iOS, and Linux OS devices. You also get access to the [NordVPN proxy extension](https://nordvpn.com/features/proxy-extension/) for your Chrome, Edge, and Firefox browsers. While both provide security and hide your online presence, they do have different additional benefits.
## NordVPN extension's main benefits:
* NordVPN's proxy extension does not ask for administrator rights for use.
* Secures only your browser traffic.
* Shorter setup than the application.
* The extension allows you to access blocked websites and streaming services without closing or minimizing your browser.
* You can choose websites you wish to exclude from the secure connection using the [Split Tunneling](https://nordvpn.com/features/split-tunneling/) feature.
## NordVPN application's main benefits:
* Has different server categories such as [Double VPN Servers](https://nordvpn.com/features/double-vpn/), [Obfuscated Servers](https://nordvpn.com/features/obfuscated-servers/), and [Dedicated IP](https://nordvpn.com/features/dedicated-ip/).
* Let's you choose between [OpenVPN and Nordlynx](https://support.nordvpn.com/hc/en-us/articles/19482810153745-Which-NordVPN-protocol-should-I-choose) connection protocols.
* You can prevent your device from making unprotected connections by using the [Kill Switch](https://support.nordvpn.com/hc/en-us/articles/19509682644369-NordVPN-Kill-Switch-how-does-it-work) feature.
* Offers a new secure communication between devices feature - [Meshnet](https://nordvpn.com/meshnet/).
* Prevent others from exploiting account information leaked to the dangerous dark web while using the [Dark Web Monitor](https://nordvpn.com/features/dark-web-monitor/) feature.
* Allows you to choose specific cities/regions.
Which product version you should use depends on your online security needs.",https://support.nordvpn.com/hc/en-us/related/click?data=BAh7CjobZGVzdGluYXRpb25fYXJ0aWNsZV9pZGwrCBF9OpB7EjoYcmVmZXJyZXJfYXJ0aWNsZV9pZGwrCJFpIBV0EjoLbG9jYWxlSSIKZW4tdXMGOgZFVDoIdXJsSSJXL2hjL2VuLXVzL2FydGljbGVzLzIwMzIxOTEwMDI5NTg1LVNob3VsZC1JLWNob29zZS1Ob3JkVlBOLWFwcC1vci1Ob3JkVlBOLWV4dGVuc2lvbgY7CFQ6CXJhbmtpCQ%3D%3D--ce76dd41130eb91f0a38855b67210a0e9b28fccc
"How many servers does NordVPN have, and where are they located?","NordVPN has over 7,000 servers in 118 countries around the world. In addition to standard VPN servers and locations, such as NordVPN Canada or NordVPN USA, you can choose servers optimized for specific purposes, such as P2P sharing or connecting from countries with internet restrictions. Learn more about different server categories and locations by [clicking here](https://support.nordvpn.com/hc/en-us/articles/19479130821521-Different-NordVPN-server-categories-explained).",https://support.nordvpn.com/hc/en-us/related/click?data=BAh7CjobZGVzdGluYXRpb25fYXJ0aWNsZV9pZGwrCJHbcPygEToYcmVmZXJyZXJfYXJ0aWNsZV9pZGwrCJFpIBV0EjoLbG9jYWxlSSIKZW4tdXMGOgZFVDoIdXJsSSJPL2hjL2VuLXVzL2FydGljbGVzLzE5MzgzMTI3Njk0MjI1LVdoZXJlLWNhbi1JLWZpbmQtdGhlLU5vcmRWUE4tc2VydmVyLWxpc3QGOwhUOglyYW5raQo%3D--22c5806ff17914d74320b3306590eef251d55ca7
Where can I find servers in the app?,"You can access the list of servers and countries in the app by navigating to the left-side menu on desktop devices. On mobile devices, simply scroll up to find this list.",https://support.nordvpn.com/hc/en-us/related/click?data=BAh7CjobZGVzdGluYXRpb25fYXJ0aWNsZV9pZGwrCJHbcPygEToYcmVmZXJyZXJfYXJ0aWNsZV9pZGwrCJFpIBV0EjoLbG9jYWxlSSIKZW4tdXMGOgZFVDoIdXJsSSJPL2hjL2VuLXVzL2FydGljbGVzLzE5MzgzMTI3Njk0MjI1LVdoZXJlLWNhbi1JLWZpbmQtdGhlLU5vcmRWUE4tc2VydmVyLWxpc3QGOwhUOglyYW5raQo%3D--22c5806ff17914d74320b3306590eef251d55ca7
Where can I find the NordVPN server list,"The list of NordVPN server locations and the protocols/services supported in each country (for example, USA, Canada) is available at .NordVPN also offers a recommended server picker, which will select the best server for you.
Follow the steps below to find the best server for your connection:
1. Log into your [Nord Account](https://my.nordaccount.com/), and click NordVPN.
2. Scroll down to Advanced Settings and click Set up NordVPN manually.
3. Select the Server recommendation tab. According to your location, the best server will be recommended.
4. By pressing Advanced filters you can further customize the recommended servers by selecting the Server type and the Security protocol.
In case you wish to select a specific server, follow these steps:
1. Under Set up NordVPN manually, select OpenVPN configuration files.
2. Find the server you wish to connect to by using the Search bar or by scrolling down and download it by clicking Download UDP or Download TCP.
3. When connecting to OpenVPN & IKEv2 manually, you're going to need to use the Username and Password from the Service credential tab.
## How many servers does NordVPN have, and where are they located?
NordVPN has over 7,000 servers in 118 countries around the world. In addition to standard VPN servers and locations, such as NordVPN Canada or NordVPN USA, you can choose servers optimized for specific purposes, such as P2P sharing or connecting from countries with internet restrictions. Learn more about different server categories and locations by [clicking here](https://support.nordvpn.com/hc/en-us/articles/19479130821521-Different-NordVPN-server-categories-explained).
## Where can I find servers in the app?
You can access the list of servers and countries in the app by navigating to the left-side menu on desktop devices. On mobile devices, simply scroll up to find this list.",https://support.nordvpn.com/hc/en-us/related/click?data=BAh7CjobZGVzdGluYXRpb25fYXJ0aWNsZV9pZGwrCJHbcPygEToYcmVmZXJyZXJfYXJ0aWNsZV9pZGwrCJFpIBV0EjoLbG9jYWxlSSIKZW4tdXMGOgZFVDoIdXJsSSJPL2hjL2VuLXVzL2FydGljbGVzLzE5MzgzMTI3Njk0MjI1LVdoZXJlLWNhbi1JLWZpbmQtdGhlLU5vcmRWUE4tc2VydmVyLWxpc3QGOwhUOglyYW5raQo%3D--22c5806ff17914d74320b3306590eef251d55ca7
Which NordVPN protocol should I choose,"NordVPN supports several security encryption protocols to provide a VPN service. The security levels and purposes of these VPN protocols are different, but so are our customers’ needs. We encourage you to take a closer look at the strengths and weaknesses of each VPN protocol. While we want you to be able to choose freely, we also feel it’s our duty to advise you on what might suit you best.
1. OpenVPN
OpenVPN is a mature and robust piece of open-source software that enables us to provide a reliable and secure VPN service. It is a versatile VPN protocol that can be used on both TCP and UDP ports. OpenVPN supports a great number of strong encryption algorithms and ciphers: to ensure the protection of your data, we use AES-256-GCM with a 4096-bit DH key. If you are conscious about your security and are wondering what the most stable NordVPN protocol is, we recommend OpenVPN.
2. WireGuard (NordLynx) (Recommended by NordVPN and used by default in most of our apps)
WireGuard is the newest and fastest tunneling protocol, and the entire VPN industry is talking about it. It uses state-of-the-art cryptography that outshines the current leader, OpenVPN. However, it’s still considered experimental, so VPN providers need to look for new solutions (like NordLynx by NordVPN) to overcome WireGuard’s vulnerabilities.
Modern, extremely fast, and incredibly lean in its architecture, WireGuard is backed by thorough academic research. WireGuard consists of only 4,000 lines of code, making it easy to deploy, audit, and fix. To put it into perspective, OpenVPN runs on 400,000 lines of code, meaning that WireGuard makes up only 1% of OpenVPN’s massive architecture.
NordLynx is currently used by default in NordVPN apps. If you’re wondering which VPN protocol is best for gaming or other online speed-dependent activities, the answer is always NordLynx.
3. NordWhisper (Recommended by NordVPN to use for restrictive networks)
The latest protocol added to NordVPN and designed to overcome restrictive local network environments while ensuring your security. It is the ideal solution when dealing with filtered content on office or campus networks and Wi-Fi networks with security filtering found at airports, cafes, hotels, or conferences.
NordWhisper is not compatible with Meshnet, DIP, Obfuscated servers, Onion Over VPN, or P2P servers.
Learn [how to use NordWhisper on NordVPN](https://support.nordvpn.com/hc/en-us/articles/31528242519953-How-to-use-NordWhisper-on-NordVPN).",https://support.nordvpn.com/hc/en-us/articles/19482810153745-Which-NordVPN-protocol-should-I-choose
Can I use NordVPN app and NordVPN extension simultaneously?,"It is not recommended to connect to both extension and app at the same time since it would create a double connection and can slow your traffic down.However, if you want to use the NordVPN browser extension and app at the same time, you could exclude your browser app (e.g Chrome, Firefox, Edge) from VPN traffic on Windows OS split tunneling feature, connect to VPN on the NordVPN App and NordVPN extension at the same time.",https://support.nordvpn.com/hc/en-us/related/click?data=BAh7CjobZGVzdGluYXRpb25fYXJ0aWNsZV9pZGwrCJHDMW57EjoYcmVmZXJyZXJfYXJ0aWNsZV9pZGwrCBF9OpB7EjoLbG9jYWxlSSIKZW4tdXMGOgZFVDoIdXJsSSJhL2hjL2VuLXVzL2FydGljbGVzLzIwMzIxMzM5MDMyNDY1LUNhbi1JLXVzZS1Ob3JkVlBOLWFwcC1hbmQtTm9yZFZQTi1leHRlbnNpb24tc2ltdWx0YW5lb3VzbHkGOwhUOglyYW5raQY%3D--607b68f137ca0991648de098eb891ce52275683e
How to start using NordVPN,"If you are interested in starting to use the NordVPN service but are unsure how to do so, this article will introduce you to the steps needed to begin using NordVPN today.
In this article we will cover:
* [Downloading NordVPN](
* [Installing NordVPN](
* [Purchasing a NordVPN plan](
* [Connecting to NordVPN](
* [Connecting to NordVPN on Linux](
* [Additional NordVPN features](
## Downloading NordVPN
To begin using NordVPN, you will first need to download the application for your respective device:
* Download the NordVPN application for Windows
* Download the NordVPN application for macOS
* Download the NordVPN application for Linux
* Download the NordVPN application for Android
* Download the NordVPN application for iOS
## Installing NordVPN
If you are not sure how to install and set up the application, choose the OS you're going to use and follow one of the guides below:
* Learn how to install NordVPN on Windows 7 and 8.1
* Learn how to install NordVPN on Windows 10 and 11
* Learn how to install NordVPN on macOS
* Learn how to install NordVPN on Linux
* Learn how to install NordVPN on Android
* Learn how to install NordVPN on iOS
Once the application has been set up, you need to purchase the desired plan.
## Purchasing a NordVPN plan
The following article will introduce you to [NordVPN Plans and Prices](https://support.nordvpn.com/hc/en-us/articles/19744251757841-Plans-and-prices-of-NordVPN-service). And if you're uncertain how to proceed with the purchase, read the article on [purchasing a NordVPN subscription](https://support.nordvpn.com/hc/en-us/articles/19478048190481-How-to-purchase-a-NordVPN-subscription).
Once you have an active subscription, you need to connect to NordVPN.
## Connecting to NordVPN
In order to connect to NordVPN, follow along below:
1. Use the quick connect button:Alternatively, you can use the dots on the map to connect to specific locations.
2. Click the dot in a country:Lastly, you may also use the search bar.
3. Type in the name of the country you would like to connect to:
### Connecting to NordVPN on Linux
To connect on a Linux device, you will need to type in the following commands :
```
nordvpn connect
```
```
nordvpn c
```
To connect to specific servers, use:
```
nordvpn connect
```
(eg. nordvpn connect uk715)
Follow our article on how to [connect to NordVPN using Linux Terminal](https://support.nordvpn.com/hc/en-us/articles/20164827795345-Connect-to-NordVPN-using-Linux-Terminal).
That's it! Now you can begin using the app and investigating the different features.
## Additional NordVPN features
Here you can find some articles covering NordVPN's features:
* [Different NordVPN server categories explained](https://support.nordvpn.com/hc/en-us/articles/19479130821521-Different-NordVPN-server-categories-explained)
* [NordVPN Kill Switch: how does it work](https://support.nordvpn.com/hc/en-us/articles/19509682644369-NordVPN-Kill-Switch-how-does-it-work)
* [What is Threat Protection Pro™ and Threat Protection?](https://support.nordvpn.com/hc/en-us/articles/19508765521425-What-is-Threat-Protection-Pro-and-Threat-Protection)
* [Dedicated NordVPN IP addresses](https://support.nordvpn.com/hc/en-us/articles/19507808024209-Dedicated-NordVPN-IP-addresses)",https://support.nordvpn.com/hc/en-us/related/click?data=BAh7CjobZGVzdGluYXRpb25fYXJ0aWNsZV9pZGwrCJFpIBV0EjoYcmVmZXJyZXJfYXJ0aWNsZV9pZGwrCBF9OpB7EjoLbG9jYWxlSSIKZW4tdXMGOgZFVDoIdXJsSSJBL2hjL2VuLXVzL2FydGljbGVzLzIwMjg5Nzc5OTUyMDE3LUhvdy10by1zdGFydC11c2luZy1Ob3JkVlBOBjsIVDoJcmFua2kI--dad715de4ed0f02daea56e50814ce4366d1779ce
How to reach NordVPN customer support?,"While we don't offer phone support, we have different options to contact NordVPN customer support available 24/7 and ready to help you!
## Help Center
First off, if you run into any issues using NordVPN - check out our Help Center that is available in 14 languages: English, German, French, Danish, Italian, Spanish, Norwegian, Swedish, Dutch, Japanese, Korean, Polish, Portuguese-Brazilian, Traditional Chinese.
You can change the language by scrolling down until you see the language change option and clicking on the language you prefer. This will ensure that you can look for information in a language comfortable for you.
After you have set the language you want to look information in, you can find solutions in the help center by either:
* Searching for information using Help Center's search bar, which will list out articles according to the keywords typed in the search query:
* Navigating to one of the categories available in the Help Center:
* [FAQ](https://support.nordvpn.com/hc/en-us/categories/200593301-FAQ) - in this category you'll find Frequently asked questions and NordVPN app setup tutorials;
* [General info](https://support.nordvpn.com/hc/en-us/categories/360000293597-General-info) - here, you'll be able to find information on NordVPN functionalities, features, and SmartPlay;
* [Billing](https://support.nordvpn.com/hc/en-us/categories/360000293617-Billing) - this category covers payment, subscription, and account management topics;
* [Connectivity](https://support.nordvpn.com/hc/en-us/categories/200614302-Connectivity) - the last category available covers troubleshooting articles, here you can find help regarding NordVPN connectivity, internet speed with NordVPN on, manual setups for routers and different OSes, proxies.
## Support agents
However, if you're looking for assistance on your specific case, you can reach out to our developed conversation bots or human customer support agents by:
* Chat
* Email
We have two teams to assist you:
* Customer Care & Billing Team: They can tell you about NordVPN, help set up your devices, make sure you can access streaming sites, and answer questions about dedicated IPs. As well as helpyou with your NordVPN subscription, account, or payments.
* Connection Team: They can assist with setting up NordVPN on your router, fixing advanced connectivity problems, and helping in places with internet restrictions.",https://support.nordvpn.com/hc/en-us/related/click?data=BAh7CjobZGVzdGluYXRpb25fYXJ0aWNsZV9pZGwrCJGygBq4EToYcmVmZXJyZXJfYXJ0aWNsZV9pZGwrCBF9OpB7EjoLbG9jYWxlSSIKZW4tdXMGOgZFVDoIdXJsSSJML2hjL2VuLXVzL2FydGljbGVzLzE5NDgyNDE2Mjk2NTkzLUhvdy10by1yZWFjaC1Ob3JkVlBOLWN1c3RvbWVyLXN1cHBvcnQGOwhUOglyYW5raQk%3D--600b7f303647c728c5be6ef628fb9168f33fdee9
How to get NordVPN cheaper,"The best NordVPN plans currently available are displayed on our [pricing page](https://nordvpn.com/pricing/). However, here are some additional deals:
* Student discount - NordVPN offers an additional discount for students and apprentices who are 18-26 years old.
* NordVPN coupons - here, you can find special monthly deals.
* Affiliate coupon codes - we recommend checking out if your favorite content creators are a part of our Affiliate Program, as they can provide you with special discount codes. Follow this guide to learn how to apply the NordVPN discount code.
* Referring a friend - with this opportunity, you can receive a month of NordVPN services for free for referring a friend.
* Occasional deals - NordVPN offers plenty of discounts and gifts to its customers throughout the year. Here, you can see where to find them and find out the best time to get them. For example, you can keep an eye out for special Cyber Monday or Black Friday VPN deals.",https://support.nordvpn.com/hc/en-us/related/click?data=BAh7CjobZGVzdGluYXRpb25fYXJ0aWNsZV9pZGwrCJG%2FhAG3EToYcmVmZXJyZXJfYXJ0aWNsZV9pZGwrCBF9OpB7EjoLbG9jYWxlSSIKZW4tdXMGOgZFVDoIdXJsSSJBL2hjL2VuLXVzL2FydGljbGVzLzE5NDc3NzAyMTY0MzY5LUhvdy10by1nZXQtTm9yZFZQTi1jaGVhcGVyBjsIVDoJcmFua2kK--776b54c014e475116d4d8e67802dbc219f9012b6
Different NordVPN server categories explained,"NordVPN has specialty servers that serve different purposes.
NordVPN server types:
* Standard servers
* Double VPN
* Onion over VPN
* Dedicated IP
* [Obfuscated servers](
## Standard servers
Regular NordVPN servers that offer the best connection speeds — ideal for everyday use. Whether you're browsing the internet at home or using public Wi-Fi networks while going out, standard servers provide security and privacy by encrypting your internet traffic and hiding your personal IP address.
The way standard NordVPN servers work is simple. When you connect to a [VPN server](https://nordvpn.com/servers/), all of your internet traffic is encrypted via [a certain VPN protocol](https://nordvpn.com/blog/protocols/). It is then sent through your ISP before reaching a NordVPN server. There, the traffic is decrypted and is then sent to its destination: a web page, banking app, etc.
[Here is an article that explains how a VPN works in detail.](https://nordvpn.com/what-is-a-vpn/#How-does-VPN-work)
## How to connect to a standard server
Choose from 3 options:
* Use the Quick Connect option (1).
* Select a server from the All countries list (2).
* Click on an icon on the server map (3).
## Double VPN
[Double VPN servers](https://nordvpn.com/features/double-vpn/) are specialized security and privacy solutions intended for journalists, political activists, informants, and anyone who wishes to be extra cautious.
The key benefit that separates Double VPN from standard servers is that your internet traffic is sent through two VPN servers instead of one, encrypting your data and disguising your personal IP address twice.
The additional layer of security comes in handy when traveling through countries with high levels of censorship and/or surveillance.
Here is how to connect to a Double VPN server:
To start using double VPN servers, open the specialty servers category in the NordVPN app and click on double VPN. You will be automatically connected to the fastest available server.

What to do if double VPN is missing from my specialty servers list?
If you do not see the Double VPN option in the specialty servers list, [switch to TCP or UDP OpenVPN protocol](https://support.nordvpn.com/hc/en-us/articles/20465552867345-Switching-protocol-to-OpenVPN-UDP-or-TCP).
Why does my connection feel slow using double VPN?
Your internet connection feels slow using double VPN because transferring internet traffic through a second server requires additional internet resources. For this reason, we do not recommend using Double VPN for simple, day-to-day activities. If you are still facing speed issues, here are some tips on how to make your VPN faster.
## Onion over VPN
[Onion Over VPN](https://nordvpn.com/features/onion-over-vpn/) is a feature that combines the benefits of using The Onion Router (Tor) with VPN tunneling. The result — an increased level of privacy, essential to those living or passing through countries with heavy surveillance.
When connected to an Onion over a VPN server, your internet traffic goes through one of our servers, passes through the Onion network, and only then reaches the internet.
Usually, you can access the Onion network only with The Onion Router (Tor) browser. With NordVPN, you don’t need to download a special browser. All you need to do is open the [NordVPN app](https://nordvpn.com/download/), head over to the specialty servers category, and connect to an Onion Over VPN server. Your internet traffic will then be routed through the Onion network — no additional applications are required.
Onion over VPN is missing from my specialty servers list
If this happens, please reach out to our support for assistance. [How can I reach NordVPN customer support?](https://support.nordvpn.com/hc/en-us/articles/19482416296593-How-can-I-reach-NordVPN-customer-support)
I can't access the Onion network through the Firefox browser.
Don't worry, we have the solution covered in this article: Firefox does not open .onion websites
## Dedicated IP
This category is for our clients who purchased their own dedicated IP addresses.
Dedicated IP servers function like standard servers, except that you're the only person who is able to access the IP address. When you connect to any other kind of server, your IP address is replaced with the server's IP. The server can be used by many other people, who will be sharing the server's IP address in hiding their personal one. Having people share the IP address may lead to a number of unpleasant inconveniences, solved by owning a dedicated IP address.
Some of the benefits of having sole access to an IP address include the possibility to bypass regular VPN blocklists, avoiding CAPTCHA requests, and more.
Dedicated IP is missing from my specialty servers list
If you do not see the dedicated IP option in the specialty servers list, [switch to the TCP, UDP OpenVPN](https://support.nordvpn.com/hc/en-us/articles/20465552867345), or NordLynx protocols. Dedicated IP is not available via browser extension, tvOS, or the IKEv2 protocol.
I've purchased a dedicated IP address, how do I set it up?
Here are tutorials on [how to connect to your dedicated IP by NordVPN on different platforms](https://support.nordvpn.com/hc/en-us/articles/19507808024209-Dedicated-NordVPN-IP-addresses).
## Obfuscated servers
Heavy internet restrictions and VPN blocks can be solved by connecting to [obfuscated servers](https://nordvpn.com/features/obfuscated-servers/#:~:text=Obfuscated%20servers%20are%20specialized%20VPN,even%20in%20heavily%20restrictive%20environments.&text=Therefore%2C%20tools%20that%20are%20meant,VPN%20traffic%20let%20it%20pass.).
These servers bypass VPN-blocking firewalls by using a complicated algorithm. To find out more information about the way obfuscated servers work, [visit our dedicated article](https://nordvpn.com/features/obfuscated-servers/#:~:text=How%20do%20obfuscated%20servers%20work%3F).
I don't see obfuscated servers in my specialty servers list
If you do not see the obfuscated servers in the specialty servers list, switch to TCP or UDP OpenVPN protocol.",https://support.nordvpn.com/hc/en-us/related/click?data=BAh7CjobZGVzdGluYXRpb25fYXJ0aWNsZV9pZGwrCJFTrFa3EToYcmVmZXJyZXJfYXJ0aWNsZV9pZGwrCJHbcPygEToLbG9jYWxlSSIKZW4tdXMGOgZFVDoIdXJsSSJUL2hjL2VuLXVzL2FydGljbGVzLzE5NDc5MTMwODIxNTIxLURpZmZlcmVudC1Ob3JkVlBOLXNlcnZlci1jYXRlZ29yaWVzLWV4cGxhaW5lZAY7CFQ6CXJhbmtpBg%3D%3D--45d1f3d9ef46eb97f61bb08a7153d986bc8cb65e
How to Set Up VPN on Asus Router,"Please note:
For a smooth experience, your router needs to be running OpenVPN 2.4.x. Here's how to [check the OpenVPN version](https://support.nordvpn.com/hc/en-us/articles/20466863277969). If you have a newer Asus WRT firmware, [check this guide](https://support.nordvpn.com/hc/en-us/articles/20286376420753) on how to connect to a VPN.
ASUS RT-AC66U (non-B1) and RT-N66U routers are not supported by NordVPN service.
## How to set up an OpenVPN connection with NordVPN on your Asus router:
1. Log into the control panel of your Asus VPN router by typing 192.168.1.1 in the address bar of your browser. In case the specified IP address does not work, try 192.168.50.1 instead. Alternatively, enter router.asus.com or asusrouter.com instead of the IP address into the address bar. A window will pop up, asking you to enter your username and password. Unless you have changed your credentials, the default username is admin, and the default password is admin (or no password).
2. After logging into the Control Panel, select VPN in the left sidebar menu.
3. Click on the VPN Client tab at the top of the page.
4. Click the Add profile button at the bottom of the page.
5. In the pop-up window, select the OpenVPN tab and fill in the fields:Description: Give the connection any name you like.Username: Your NordVPN service username.Password: Your NordVPN service password.Auto reconnection: Yes.
1. Download the OpenVPN client configuration files.
Follow the steps below to find the best server for your connection:
1. Log into your [Nord Account](https://my.nordaccount.com/), and click NordVPN.
2. Scroll down to Advanced Settings and click Set up NordVPN manually.
3. Select the Server recommendation tab. According to your location, the best server will be recommended.
4. By pressing Advanced filters you can further customize the recommended servers by selecting the Server type and the Security protocol.
In case you wish to select a specific server, follow these steps:
1. Under Set up NordVPN manually, select OpenVPN configuration files.
2. Find the server you wish to connect to by using the Search bar or by scrolling down and download it by clicking Download UDP or Download TCP.
3. When connecting to OpenVPN & IKEv2 manually, you're going to need to use the Username and Password from the Service credential tab.
1. After downloading the files, go back to the control panel of your router and click Choose File in the pop-up window.
2. Navigate to the configuration file you have just downloaded and click Open.
3. Click Upload. You should see the message Complete! when the file has been uploaded successfully.
4. Leave the “Import the CA file or edit the .ovpn file manually” box unchecked and click OK.
5. In the VPN Client tab, you will see the created connection. Click Activate to connect your router to NordVPN. Please note that you can create only one OpenVPN connection.
6. A blue checkmark should appear in the Connection Status column, indicating that you are now connected to the VPN on the Asus router.
7. Your IP address and protection status will be visible at the top of the [nordvpn.com](https://nordvpn.com/) page. Please make sure to refresh the webpage, as it might be loaded from the cache. If you still don't see it, [clear the browser cache](https://nordvpn.com/blog/how-to-clear-your-cache/).To disconnect from NordVPN, click on the Deactivate button, which appears instead of the Activate button in the Connection column.",https://support.nordvpn.com/hc/en-us/related/click?data=BAh7CjobZGVzdGluYXRpb25fYXJ0aWNsZV9pZGwrCJGiy%2BBdEjoYcmVmZXJyZXJfYXJ0aWNsZV9pZGwrCJHbcPygEToLbG9jYWxlSSIKZW4tdXMGOgZFVDoIdXJsSSJHL2hjL2VuLXVzL2FydGljbGVzLzIwMTk0NDEyNzAwMzA1LUhvdy10by1TZXQtVXAtVlBOLW9uLUFzdXMtUm91dGVyBjsIVDoJcmFua2kH--296c89cd5dec0b7e2eb3b357faf0ab08f72e0a31
Why Choose FlashRouters?,[FlashRouters](https://nordvpn.com/flashrouters/) offers some of the best routers for NordVPN pre-configured to deliver top-notch security and performance:,https://support.nordvpn.com/hc/en-us/related/click?data=BAh7CjobZGVzdGluYXRpb25fYXJ0aWNsZV9pZGwrCJFt%2BS1eEjoYcmVmZXJyZXJfYXJ0aWNsZV9pZGwrCJHbcPygEToLbG9jYWxlSSIKZW4tdXMGOgZFVDoIdXJsSSJNL2hjL2VuLXVzL2FydGljbGVzLzIwMTk1NzA3NTQ3MDI1LVdoaWNoLXJvdXRlci1zaG91bGQtSS11c2Utd2l0aC1Ob3JkVlBOBjsIVDoJcmFua2kI--fc48da610f76463f1866160c3e4c1d4112fcf3c5
Which router should I use with NordVPN?,"It's important that a router supports VPN configurations to use NordVPN; however, to maximize your NordVPN experience, a router that’s pre-configured for VPN use is key.
For example, FlashRouters offers a [wide range of NordVPN-compatible devices](https://nordvpn.com/flashrouters/) optimized for secure, high-speed connections right out of the box without having to configure or set up the routers.
For the best out-of-the-box router solution with extra safety, privacy, streaming capabilities, and an exclusive NordLynx integration, we recommend the [Privacy Hero 2](https://www.flashrouters.com/privacy-hero-nordvpn-router-by-flashrouters). This unique cloud-connected device also includes 1 year of NordVPN plus 1 year of Privacy Hero service, providing seamless security and performance for your home network.
## Why Choose FlashRouters?
[FlashRouters](https://nordvpn.com/flashrouters/) offers some of the best routers for NordVPN pre-configured to deliver top-notch security and performance:
* Top-Tier Security: Your entire network is shielded by NordVPN, keeping your online activity private and secure.
* Speed & Stability: Our devices are equipped with powerful processors and advanced WiFi technologies, ensuring fast and stable VPN connections.
* Plug-and-Play VPN Setup: Skip the headaches of manual configuration. FlashRouters comes pre-flashed and optimized for NordVPN compatibility.
* Ongoing Support: Need networking support assistance? Their expert support team is here to help with your setup and troubleshooting.
### More NordVPN Recommended Routers Options (OpenVPN Only)
Flashrouters also have a few models supporting only OpenVPN connection:
* [Next Gen WiFi 7](https://www.flashrouters.com/router-basics/wireless-be): These devices are significantly higher cost but offer NordVPN OpenVPN support.
* [Mesh VPN Routers](https://www.flashrouters.com/routers?fmr_use_case=344): Looking for more extensive VPN coverage? FlashRouters offers a wide array of heavily tested [Mesh WiFi Systems for NordVPN](https://www.flashrouters.com/routers?fmr_use_case=344).
* [AX3000 VPN Router](https://www.flashrouters.com/cudy-wr3000-vpn-router-by-flashrouters): If the lowest price is the main concern, this AX3000 is a popular economy device for OpenVPN.
## Configurable devices
You can also buy a router and configure it yourself. While many different routers are available from other manufacturers, the most commonly used are Asus routers, as most have a built-in OpenVPN client and require minimal effort to set up.
Some popular examples include the Asus RT-AX86U, RT-AX68U, and RT-AX88U (AX6000). However, these devices will not support NordLynx.
Most other routers require firmware flashing, which might be tricky and does not work on all platforms. If you want a legacy router that provides OpenVPN encryption, you can also find any router that supports the following custom firmware:
* DD-WRT:
* Tomato:
* OpenWRT:
* Merlin:
The next step will be to learn [how to set up NordVPN on your router](https://support.nordvpn.com/hc/en-us/articles/19426084718865-Setting-up-a-router-with-NordVPN).",https://support.nordvpn.com/hc/en-us/related/click?data=BAh7CjobZGVzdGluYXRpb25fYXJ0aWNsZV9pZGwrCJFt%2BS1eEjoYcmVmZXJyZXJfYXJ0aWNsZV9pZGwrCJHbcPygEToLbG9jYWxlSSIKZW4tdXMGOgZFVDoIdXJsSSJNL2hjL2VuLXVzL2FydGljbGVzLzIwMTk1NzA3NTQ3MDI1LVdoaWNoLXJvdXRlci1zaG91bGQtSS11c2Utd2l0aC1Ob3JkVlBOBjsIVDoJcmFua2kI--fc48da610f76463f1866160c3e4c1d4112fcf3c5
Connect to NordVPN using Linux Terminal,"Note: We have a separate set of instructions on how to set up the NordVPN application for Linux, and you can download NordVPN for Linux here.
Please note that since Linux has a lot of different distributions, the configuration interfaces may vary.
1. Open Terminal (keyboard shortcut: Ctrl + Alt + T).
2. Disable IPV6. Click here to learn how.
3. Only after disabling IPV6, install the OpenVPN client by entering:
* sudo apt-get install openvpnYou may be asked to enter your user password to confirm your identity.
4. Navigate to the OpenVPN configuration directory with the command:
* cd /etc/openvpn
5. Download the OpenVPN configuration files with the command:
* sudo wget https://downloads.nordcdn.com/configs/archives/servers/ovpn.zipIn case you get ERROR: The certificate of `nordvpn.com’ is not trusted., install the ca-certificates package with the command:
* sudo apt-get install ca-certificates
6. If you do not have the unzip package installed, download it by typing:
* sudo apt-get install unzip
7. Extract ovpn.zip with the command:
* sudo unzip ovpn.zip
8. Remove the files you will no longer use:
* sudo rm ovpn.zip
9. Enter the directory where the server configurations are located. These folders are named either ovpn_udp or ovpn_tcp:
* cd /etc/openvpn/ovpn_udp/
* cd /etc/openvpn/ovpn_tcp/
10. To see the list of all available servers, enter the following command:
* ls -al
11. Choose a server to connect to.For this tutorial, we used us2957.nordvpn.com, but you should connect to the server suggested to you at the [NordVPN server recommendation tool](https://my.nordaccount.com/dashboard/nordvpn/manual-configuration/server-recommendation/). You can find the server hostname right under the server title.
Follow the steps below to find the best server for your connection:
1. Log into your [Nord Account](https://my.nordaccount.com/), and click NordVPN.
2. Scroll down to Advanced Settings and click Set up NordVPN manually.
3. Select the Server recommendation tab. According to your location, the best server will be recommended.
4. By pressing Advanced filters you can further customize the recommended servers by selecting the Server type and the Security protocol.
In case you wish to select a specific server, follow these steps:
1. Under Set up NordVPN manually, select OpenVPN configuration files.
2. Find the server you wish to connect to by using the Search bar or by scrolling down and download it by clicking Download UDP or Download TCP.
1. Start OpenVPN with a chosen configuration by entering one of the following commands:
* sudo openvpn [file name]
* sudo openvpn us2957.nordvpn.com.udp.ovpn
* sudo openvpn /etc/openvpn/ovpn_udp/us2957.nordvpn.com.udp.ovpn
2. OpenVPN will ask you for your credentials. Enter your NordVPN service credentials.
1. You have successfully connected to VPN. To disconnect, open Terminal and press Ctrl + C on your keyboard.",https://support.nordvpn.com/hc/en-us/related/click?data=BAh7CjobZGVzdGluYXRpb25fYXJ0aWNsZV9pZGwrCJHPZf1WEjoYcmVmZXJyZXJfYXJ0aWNsZV9pZGwrCJHbcPygEToLbG9jYWxlSSIKZW4tdXMGOgZFVDoIdXJsSSJOL2hjL2VuLXVzL2FydGljbGVzLzIwMTY0ODI3Nzk1MzQ1LUNvbm5lY3QtdG8tTm9yZFZQTi11c2luZy1MaW51eC1UZXJtaW5hbAY7CFQ6CXJhbmtpCQ%3D%3D--5e2354624dce645f846435d6c50a1471ba43e24d
Connect to NordVPN (IKEv2/IPSec) on Windows,"The IKEv2/IPSec connection is one of the alternative methods to connect to NordVPN servers on your Windows PC. This is the preferred connection method among privacy enthusiasts because the IKEv2/IPSec security protocol is currently one of the most advanced on the market. That said, this manual setup lacks the additional features of the native NordVPN app and is a bit more complicated to set up.
Note: The Windows system configuration downgrades the cipher to the weaker 3DES-CBC encryption.Disclaimer: This connection method will require you to add the certificate to Trusted Root Authorities, which will apply to all certificates. This may put your system at the risk of an MITM attack if someone gets the private key of that certificate. While our private keys are completely secure and the chances of anything bad happening are very small, we recommend this connection method only if you cannot connect using our native app or other alternative way.To use this connection method, the only file you need to download and install is the NordVPN digital certificate. The connection application itself is already a part of Windows.
## Configuring the NordVPN digital certificate
1. Download the NordVPN certificate.Note: Your browser may try to save the file in its own certificate location or open it immediately. Make sure to download the file instead of just opening it. In Firefox, right-click the link above and select ""Save link as."" In Internet Explorer, select ""Save"" instead of ""Open.” Chrome will download the file correctly. Double-click the “root.cer” file that you have just downloaded.
2. Click ""Open.""
3. Click ""Install certificate.""
4. Select ""Local Machine"" and click ""Next.""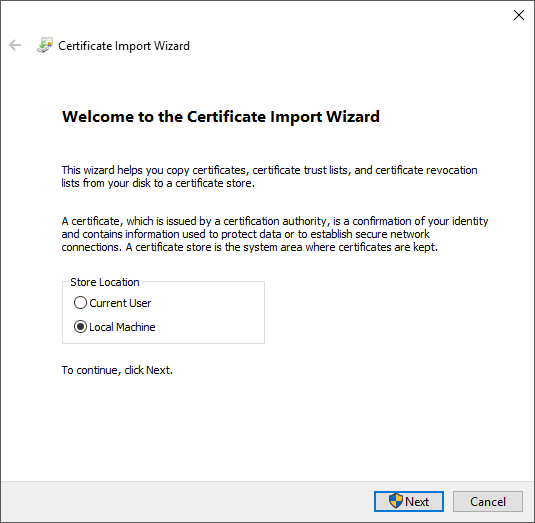
5. Select “Place all certificates in the following store” and click “Browse.”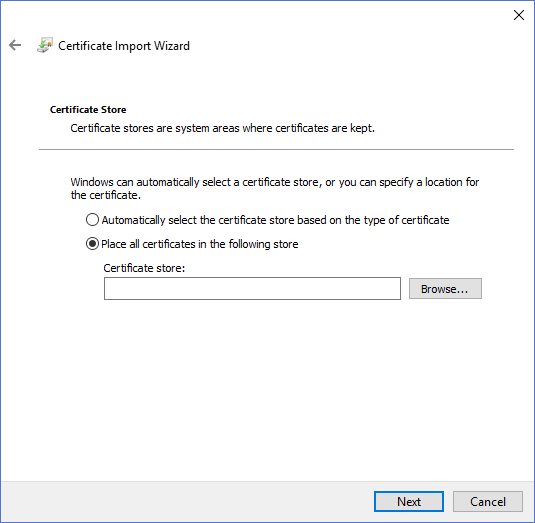
6. Select “Trusted root certification authorities.” Click “Ok” and then “Next.”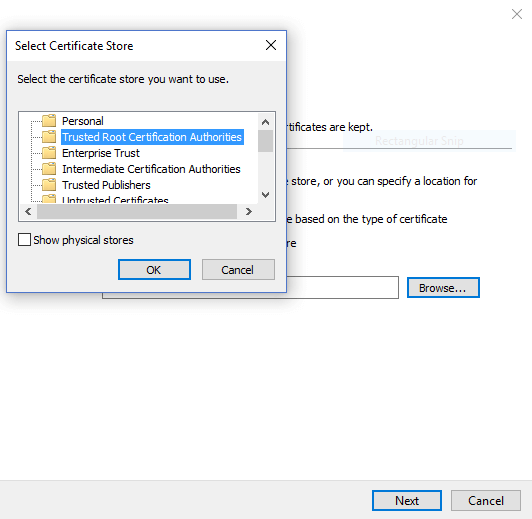
7. Click ""Finish.""
8. Click ""Ok"" in both the following windows.
9. Open the “Run” box by pressing the “Windows” key and the “R” key together on your keyboard. Type “certmgr.msc” in the “Run” box to open the certificates management tool.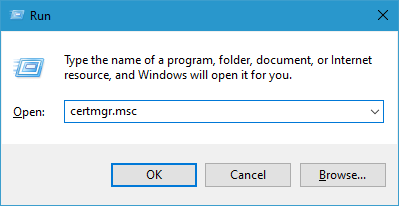
10. Go to “Trusted root certification authorities,” open “Certificates,” and find the “NordVPN Root CA” file.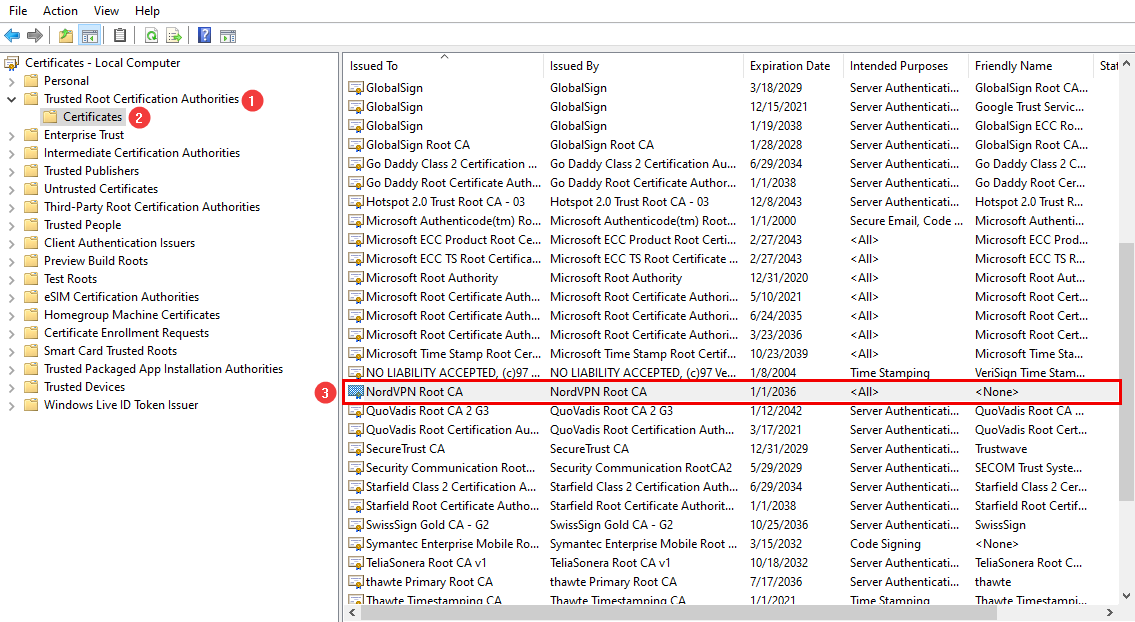
11. Right-click on the “NordVPN Root CA” file and select “Properties.”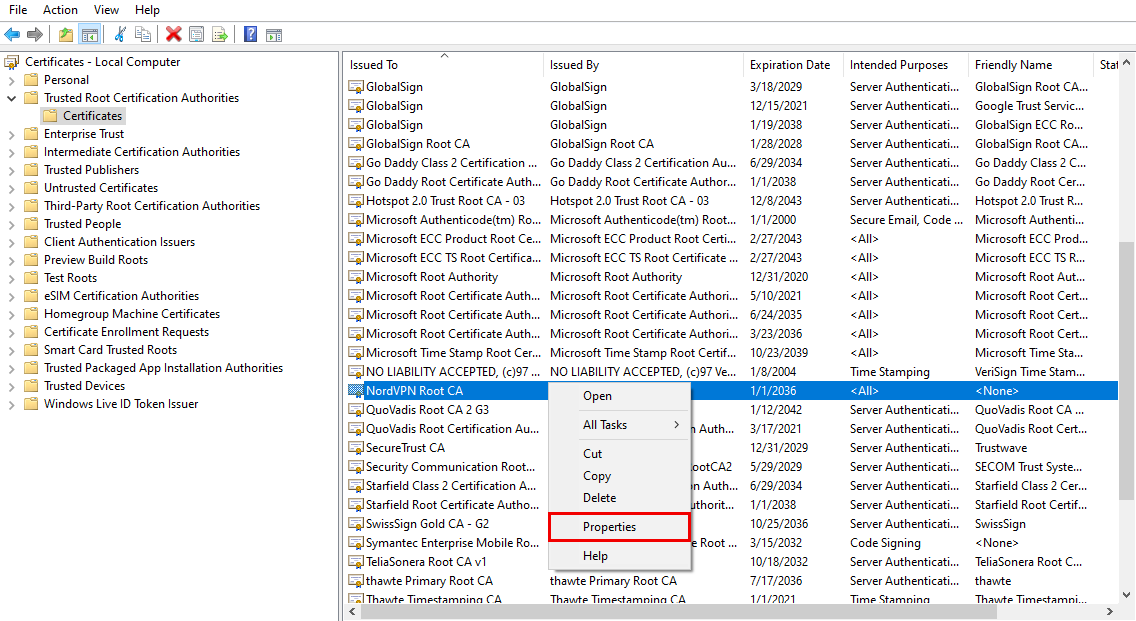
12. Check the “Enable only for the following purposes” option and uncheck all the boxes except for the “Server authentication” box.
## 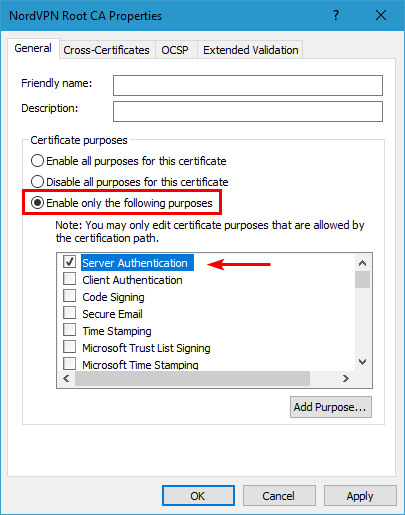
13. Click ""Ok"" and ""Apply.""
## Setting up a VPN connection:
1. 1. Open the Windows “Start” menu and type “control panel” in the search bar. In the search results, click on “Control panel.”
2. Open the “Network and Internet” section.
3. Click on “Network and sharing center.”
4. Click ""Set up a new connection or network.""
5. Click “Connect to a workplace” and hit “Next.”
6. If asked ""Do you want to use a connection that you already have?"", select “No, create a new connection” and click “Next.”
7. Click “Use my Internet connection (VPN).”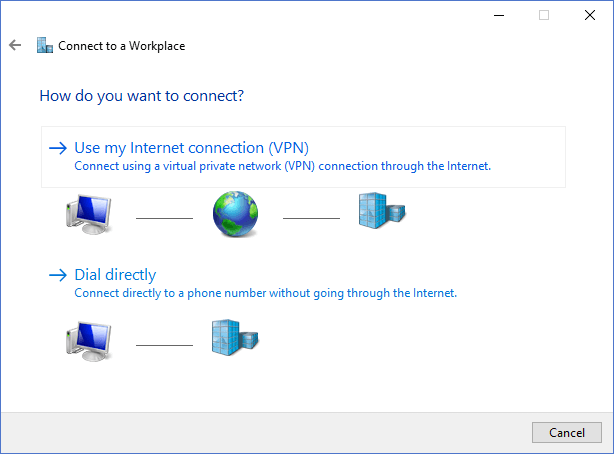
8. In the “Internet address” field, type the hostname of the server suggested to you in your NordAccount server recommendation tab.
Follow the steps below to find the best server for your connection:
1. Log into your [Nord Account](https://my.nordaccount.com/), and click NordVPN.
2. Scroll down to Advanced Settings and click Set up NordVPN manually.
3. Select the Server recommendation tab. According to your location, the best server will be recommended.
4. By pressing Advanced filters you can further customize the recommended servers by selecting the Server type and the Security protocol.
5. Under the server IP, next to Available protocols, select IKEv2/IPSec.
6. In the window that pops up, copy the server hostname and use it in your IKEv2 manual connection setup.
7. When connecting to IKEv2 manually, you're going to need to use the Username and Password from the Service credential tab.
1. 1. Open the “Network and sharing center” again and click “Change adapter settings.”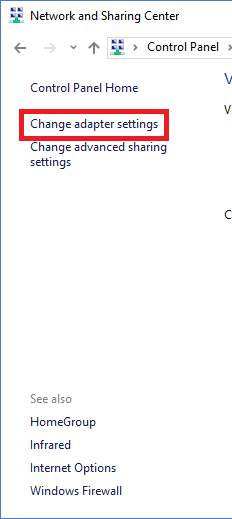
2. Right-click the adapter with the name you’ve just created, click “Properties,” and go to the “Security” tab.
3. Make sure the configuration is as follows:
Type of VPN: “IKEv2” Data encryption: “Require encryption (disconnect if server declines)” Authentication: “Use Extensible Authentication Protocol(EAP)” (select “EAP-MSCHAP v2” in the drop-down menu.)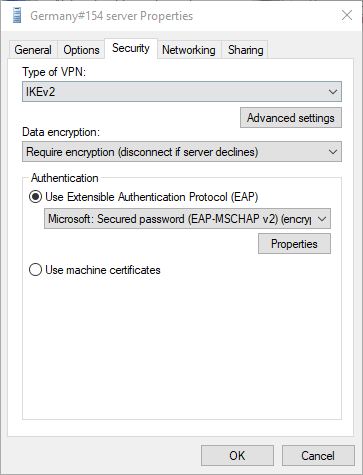
4. Open the “Networking” tab and uncheck the “Internet Protocol Version 6 (TCP/IPv6)” box.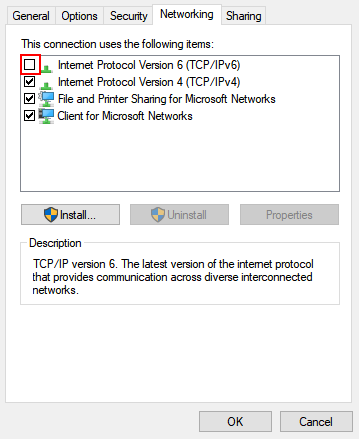
5. Click ""Ok.""
6. In the system tray located in the bottom-right corner of the screen, click on either the Wi-Fi or Ethernet connection icon and click “Network & internet settings.”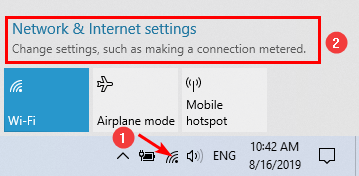
7. In the left sidebar of the settings, select “VPN,” find your created IKEv2 connection, and click on “Advanced options.”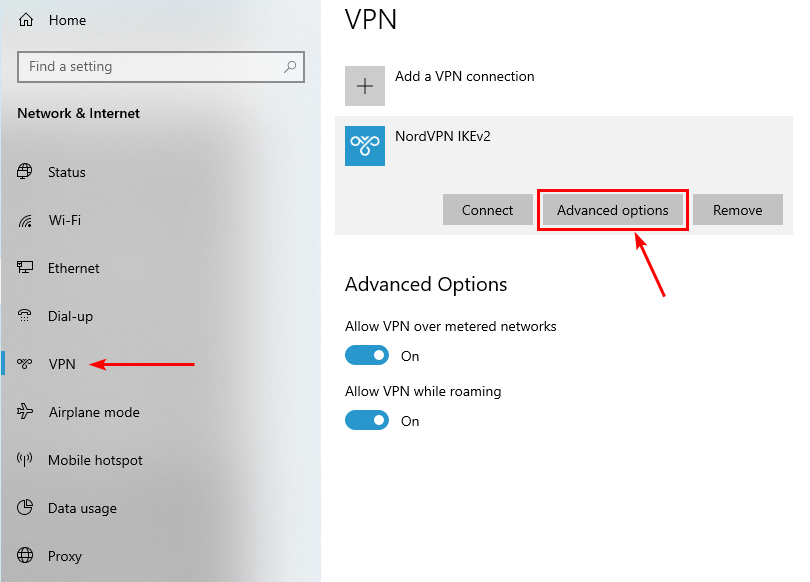
8. Click ""Edit"" and enter your NordVPN service username and password from the NordVPN manual setup Service Credentials tab.
1. 1. Paste the service credentials to the Username and password windows and save it.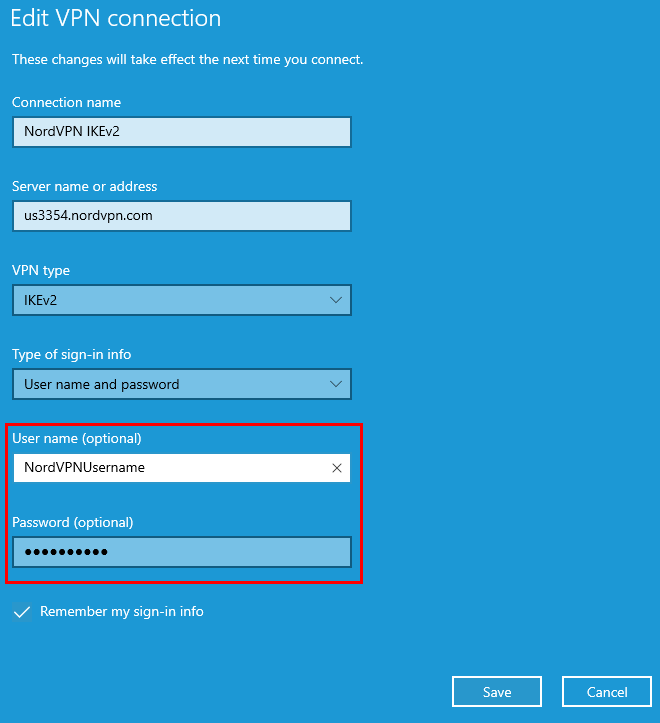
2. Click on the network icon again in the system tray in the bottom-right corner of the screen and click “Connect” under “NordVPN IKEv2.”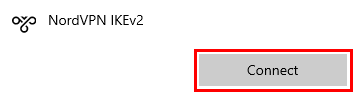
3. That’s it — you should now be connected.",https://support.nordvpn.com/hc/en-us/related/click?data=BAh7CjobZGVzdGluYXRpb25fYXJ0aWNsZV9pZGwrCJEZqUcdEjoYcmVmZXJyZXJfYXJ0aWNsZV9pZGwrCJHbcPygEToLbG9jYWxlSSIKZW4tdXMGOgZFVDoIdXJsSSJQL2hjL2VuLXVzL2FydGljbGVzLzE5OTE2OTY1NjE2MDE3LUNvbm5lY3QtdG8tTm9yZFZQTi1JS0V2Mi1JUFNlYy1vbi1XaW5kb3dzBjsIVDoJcmFua2kK--5f8e658f86257883b8f8abc0d3e9d2690e8e7fe4
Switching protocol to OpenVPN UDP or TCP,"Some NordVPN server categories, found under the specialty server section, are available only while using OpenVPN UDP or TCP protocols.
Currently, these categories are Double VPN and a part of our obfuscated Servers. This article contains a list of instructions on how to switch your connection protocol on various platforms.
* [Windows](https://support.nordvpn.com/hc/en-us/articles/19774135293969-Switching-protocol-to-OpenVPN-UDP-or-TCP-Windows)
* [Android](https://support.nordvpn.com/hc/en-us/articles/19973901502609-Switching-protocol-to-OpenVPN-UDP-or-TCP-Android)
* [macOS](https://support.nordvpn.com/hc/en-us/articles/19921436351505-Switching-protocol-to-OpenVPN-UDP-or-TCP-macOS)
* [iOS](https://support.nordvpn.com/hc/en-us/articles/20465699170321-Switching-connection-protocol-to-OpenVPN-UDP-or-TCP-iOS)
* [Linux](https://support.nordvpn.com/hc/en-us/articles/20465783529233-Switching-connection-protocol-to-OpenVPN-UDP-or-TCP-on-Linux)",https://support.nordvpn.com/hc/en-us/articles/20465552867345-Switching-protocol-to-OpenVPN-UDP-or-TCP
"What is MFA, and how to enable it","[Multi-factor authentication](https://nordvpn.com/blog/what-is-multi-factor-authentication/) (MFA) is a security mechanism used to verify the identity of a user by requiring the presentation of two or more authentication factors: password, PIN, token, USB security key, fingerprint, or facial recognition.
There are two MFA options for Nord Account:
* You may use authenticator applications to generate a code, such as [Google Authenticator](https://play.google.com/store/apps/details?id=com.google.android.apps.authenticator2&hl=en_US&gl=US), [Microsoft Authenticator](https://play.google.com/store/apps/details?id=com.azure.authenticator&hl=lt&gl=US), [Authy](https://play.google.com/store/apps/details?id=com.authy.authy&), or any other. Any one of those apps will create a code that you must enter whenever accessing Nord Account. The code changes every 30 seconds.
* A second option is to use a security key. It can be a Bluetooth, NFC, or USB security key that will hold a unique PIN and ensure effortless access only for you. Nord Account supports USB security keys certified by FIDO2. That includes the Security Key series, Yubikey 5 series, iePass FIDO K44, MultiPass FIDO K25, ePass FIDO NFC K9 and K35, BioPass FIDO K26 and K27, and others.
## How to enable MFA for your Nord Account?
1. Log into your [Nord Account](https://nordaccount.com/).
2. If you are using a desktop device, click on your account name in the top right corner and choose Account Settings. Switch to a Multi-factor authentication (MFA) section, and click on Manage MFA.On a mobile device, tap on the free line sign, scroll down to the bottom of the menu, where you find Account Settings, select Multi-factor authentication and tap on manage MFA.
3. On both, desktop and mobile, you will be asked to verify your email address. To do so, enter the verification code you have received to your NordVPN account associated email to verify it.
4. From there, select Set up next to the Authenticator app.
5. This action will generate your QR code and key. Open your mobile authentication application (such as Duo Mobile, Authy, etc.) and scan the QR code or manually enter the key. Once your account is saved in the authenticator application, return to the Nord Account website and click Continue.
6. Enter the MFA code generated by your mobile authentication application.
7. Before finishing the MFA setup, make sure to [save your backup codes](https://support.nordvpn.com/hc/en-us/articles/30047757775249-NordVPN-MFA-backup-codes) here. When done, click Continue.
### As another option, you can use a security key to add MFA feature.
1. Choose set up next to the Security key option in your Nord Account settings.
2. Follow the steps shown. Setup steps may differ depending on the security key.
3. Once you have finished the setup, a physical security key will be needed to log into your Nord Account.
4. In the end, you will be suggested to log out from all devices. We strongly recommend doing that so that all of your devices that are used with Nord Account would be instantly protected with MFA.",https://support.nordvpn.com/hc/en-us/articles/19442299167889-What-is-MFA-and-how-to-enable-it
How to reach NordVPN customer support?,"While we don't offer phone support, we have different options to contact NordVPN customer support available 24/7 and ready to help you!
## Help Center
First off, if you run into any issues using NordVPN - check out our Help Center that is available in 14 languages: English, German, French, Danish, Italian, Spanish, Norwegian, Swedish, Dutch, Japanese, Korean, Polish, Portuguese-Brazilian, Traditional Chinese.
You can change the language by scrolling down until you see the language change option and clicking on the language you prefer. This will ensure that you can look for information in a language comfortable for you.
After you have set the language you want to look information in, you can find solutions in the help center by either:
* Searching for information using Help Center's search bar, which will list out articles according to the keywords typed in the search query:
* Navigating to one of the categories available in the Help Center:
* [FAQ](https://support.nordvpn.com/hc/en-us/categories/200593301-FAQ) - in this category you'll find Frequently asked questions and NordVPN app setup tutorials;
* [General info](https://support.nordvpn.com/hc/en-us/categories/360000293597-General-info) - here, you'll be able to find information on NordVPN functionalities, features, and SmartPlay;
* [Billing](https://support.nordvpn.com/hc/en-us/categories/360000293617-Billing) - this category covers payment, subscription, and account management topics;
* [Connectivity](https://support.nordvpn.com/hc/en-us/categories/200614302-Connectivity) - the last category available covers troubleshooting articles, here you can find help regarding NordVPN connectivity, internet speed with NordVPN on, manual setups for routers and different OSes, proxies.
## Support agents
However, if you're looking for assistance on your specific case, you can reach out to our developed conversation bots or human customer support agents by:
* Chat
* Email
We have two teams to assist you:
* Customer Care & Billing Team: They can tell you about NordVPN, help set up your devices, make sure you can access streaming sites, and answer questions about dedicated IPs. As well as helpyou with your NordVPN subscription, account, or payments.
* Connection Team: They can assist with setting up NordVPN on your router, fixing advanced connectivity problems, and helping in places with internet restrictions.",https://support.nordvpn.com/hc/en-us/articles/19482416296593-How-can-I-reach-NordVPN-customer-support
Firefox does not open .onion websites,"If you are using Firefox while connected to our [Onion over VPN servers](https://nordvpn.com/features/onion-over-vpn/), you may be unable to open .onion websites, which are hosted on the Onion network. To enable your browser to open them, please follow these instructions:
1. Launch Firefox web browser, type about:config in the address bar and press Enter.
2. After clicking on the “I’ll be careful, I promise” button, proceed to Firefox advanced settings manager.
3. In the search box type network.dns.blockDotOnion to find the setting we need.
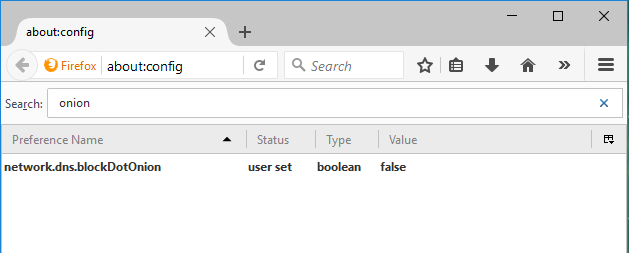
4. Make sure the value of this setting is set to false. If the value is true, then double-click on this setting to switch it back to false.
5. That’s it. Now Firefox will be able to open all sites that operate using the .onion top level domains.",https://support.nordvpn.com/hc/en-us/articles/20283644947089-Firefox-does-not-open-onion-websites
Switching protocol to OpenVPN UDP or TCP,"Some NordVPN server categories, found under the specialty server section, are available only while using OpenVPN UDP or TCP protocols.
Currently, these categories are Double VPN and a part of our obfuscated Servers. This article contains a list of instructions on how to switch your connection protocol on various platforms.
* [Windows](https://support.nordvpn.com/hc/en-us/articles/19774135293969-Switching-protocol-to-OpenVPN-UDP-or-TCP-Windows)
* [Android](https://support.nordvpn.com/hc/en-us/articles/19973901502609-Switching-protocol-to-OpenVPN-UDP-or-TCP-Android)
* [macOS](https://support.nordvpn.com/hc/en-us/articles/19921436351505-Switching-protocol-to-OpenVPN-UDP-or-TCP-macOS)
* [iOS](https://support.nordvpn.com/hc/en-us/articles/20465699170321-Switching-connection-protocol-to-OpenVPN-UDP-or-TCP-iOS)
* [Linux](https://support.nordvpn.com/hc/en-us/articles/20465783529233-Switching-connection-protocol-to-OpenVPN-UDP-or-TCP-on-Linux)",https://support.nordvpn.com/hc/en-us/articles/20465552867345
What is NordLynx,"[NordLynx](https://nordvpn.com/blog/nordlynx-protocol-wireguard/) is NordVPN’s revolutionary technology built around the WireGuard® VPN protocol. It helps you connect to NordVPN servers faster and improves your VPN connection speeds without compromising security or privacy.
NordLynx is much faster than OpenVPN and other VPN protocols, making it a clear upgrade for everyday security. In fact, NordLynx’s [speed test results](https://nordvpn.com/blog/nordlynx-protocol-wireguard/) are among the highest of all commercial VPNs.
To use NordLynx with the NordVPN app for your device, follow the tutorial for your OS below.
* [Linux](https://support.nordvpn.com/hc/en-us/articles/20398711101329-How-can-I-use-NordLynx-in-the-NordVPN-app-for-Linux)
* [Windows](https://support.nordvpn.com/hc/en-us/articles/19919637268625-Using-NordLynx-in-the-NordVPN-app-Windows)
* [iOS](https://support.nordvpn.com/hc/en-us/articles/20459436694801-How-can-I-use-NordLynx-in-the-NordVPN-app-for-iOS)
* [macOS](https://support.nordvpn.com/hc/en-us/articles/19925285940497-How-can-I-use-NordLynx-in-the-NordVPN-app-for-macOS)
* [Android](https://support.nordvpn.com/hc/en-us/articles/20465306064145-Using-NordLynx-in-the-NordVPN-app-for-Android)
If you want to eliminate NordLynx from your VPN connection, simply change to a [different VPN protocol](https://support.nordvpn.com/hc/en-us/articles/19482810153745-Which-NordVPN-protocol-should-I-choose) in your NordVPN settings.
Please be aware that the WireGuard protocol is still under development. While we are confident in our implementation, WireGuard itself may still contain some unresolved bugs, so use it with caution.
WireGuard is a registered trademark of Jason A. Donenfeld.",https://support.nordvpn.com/hc/en-us/articles/19564565879441-What-is-NordLynx
Switching protocol to OpenVPN UDP or TCP,"Some NordVPN server categories, found under the specialty server section, are available only while using OpenVPN UDP or TCP protocols.
Currently, these categories are Double VPN and a part of our obfuscated Servers. This article contains a list of instructions on how to switch your connection protocol on various platforms.
* [Windows](https://support.nordvpn.com/hc/en-us/articles/19774135293969-Switching-protocol-to-OpenVPN-UDP-or-TCP-Windows)
* [Android](https://support.nordvpn.com/hc/en-us/articles/19973901502609-Switching-protocol-to-OpenVPN-UDP-or-TCP-Android)
* [macOS](https://support.nordvpn.com/hc/en-us/articles/19921436351505-Switching-protocol-to-OpenVPN-UDP-or-TCP-macOS)
* [iOS](https://support.nordvpn.com/hc/en-us/articles/20465699170321-Switching-connection-protocol-to-OpenVPN-UDP-or-TCP-iOS)
* [Linux](https://support.nordvpn.com/hc/en-us/articles/20465783529233-Switching-connection-protocol-to-OpenVPN-UDP-or-TCP-on-Linux)",https://support.nordvpn.com/hc/en-us/related/click?data=BAh7CjobZGVzdGluYXRpb25fYXJ0aWNsZV9pZGwrCBFAAgKdEjoYcmVmZXJyZXJfYXJ0aWNsZV9pZGwrCJFTrFa3EToLbG9jYWxlSSIKZW4tdXMGOgZFVDoIdXJsSSJPL2hjL2VuLXVzL2FydGljbGVzLzIwNDY1NTUyODY3MzQ1LVN3aXRjaGluZy1wcm90b2NvbC10by1PcGVuVlBOLVVEUC1vci1UQ1AGOwhUOglyYW5raQY%3D--87433f69736afea1473ef26ea487ab34c85a2e4b
Does NordVPN have servers in the Philippines?,"NordVPN has virtual servers in the Philippines.
Physical servers usually have limited server infrastructure, whereas virtual servers are an optimal solution, providing speeds and connection quality equal to those of a physical server. Learn more by reading our [article on virtual servers](https://nordvpn.com/blog/new-nordvpn-virtual-servers/).",https://support.nordvpn.com/hc/en-us/articles/20912003363985-Does-NordVPN-have-servers-in-the-Philippines
How to start using NordVPN,"If you are interested in starting to use the NordVPN service but are unsure how to do so, this article will introduce you to the steps needed to begin using NordVPN today.
In this article we will cover:
* [Downloading NordVPN](
* [Installing NordVPN](
* [Purchasing a NordVPN plan](
* [Connecting to NordVPN](
* [Connecting to NordVPN on Linux](
* [Additional NordVPN features](
## Downloading NordVPN
To begin using NordVPN, you will first need to download the application for your respective device:
* Download the NordVPN application for Windows
* Download the NordVPN application for macOS
* Download the NordVPN application for Linux
* Download the NordVPN application for Android
* Download the NordVPN application for iOS
## Installing NordVPN
If you are not sure how to install and set up the application, choose the OS you're going to use and follow one of the guides below:
* Learn how to install NordVPN on Windows 7 and 8.1
* Learn how to install NordVPN on Windows 10 and 11
* Learn how to install NordVPN on macOS
* Learn how to install NordVPN on Linux
* Learn how to install NordVPN on Android
* Learn how to install NordVPN on iOS
Once the application has been set up, you need to purchase the desired plan.
## Purchasing a NordVPN plan
The following article will introduce you to [NordVPN Plans and Prices](https://support.nordvpn.com/hc/en-us/articles/19744251757841-Plans-and-prices-of-NordVPN-service). And if you're uncertain how to proceed with the purchase, read the article on [purchasing a NordVPN subscription](https://support.nordvpn.com/hc/en-us/articles/19478048190481-How-to-purchase-a-NordVPN-subscription).
Once you have an active subscription, you need to connect to NordVPN.
## Connecting to NordVPN
In order to connect to NordVPN, follow along below:
1. Use the quick connect button:Alternatively, you can use the dots on the map to connect to specific locations.
2. Click the dot in a country:Lastly, you may also use the search bar.
3. Type in the name of the country you would like to connect to:
### Connecting to NordVPN on Linux
To connect on a Linux device, you will need to type in the following commands :
```
nordvpn connect
```
```
nordvpn c
```
To connect to specific servers, use:
```
nordvpn connect
```
(eg. nordvpn connect uk715)
Follow our article on how to [connect to NordVPN using Linux Terminal](https://support.nordvpn.com/hc/en-us/articles/20164827795345-Connect-to-NordVPN-using-Linux-Terminal).
That's it! Now you can begin using the app and investigating the different features.
## Additional NordVPN features
Here you can find some articles covering NordVPN's features:
* [Different NordVPN server categories explained](https://support.nordvpn.com/hc/en-us/articles/19479130821521-Different-NordVPN-server-categories-explained)
* [NordVPN Kill Switch: how does it work](https://support.nordvpn.com/hc/en-us/articles/19509682644369-NordVPN-Kill-Switch-how-does-it-work)
* [What is Threat Protection Pro™ and Threat Protection?](https://support.nordvpn.com/hc/en-us/articles/19508765521425-What-is-Threat-Protection-Pro-and-Threat-Protection)
* [Dedicated NordVPN IP addresses](https://support.nordvpn.com/hc/en-us/articles/19507808024209-Dedicated-NordVPN-IP-addresses)",https://support.nordvpn.com/hc/en-us/related/click?data=BAh7CjobZGVzdGluYXRpb25fYXJ0aWNsZV9pZGwrCJFpIBV0EjoYcmVmZXJyZXJfYXJ0aWNsZV9pZGwrCJFTrFa3EToLbG9jYWxlSSIKZW4tdXMGOgZFVDoIdXJsSSJBL2hjL2VuLXVzL2FydGljbGVzLzIwMjg5Nzc5OTUyMDE3LUhvdy10by1zdGFydC11c2luZy1Ob3JkVlBOBjsIVDoJcmFua2kH--9ed6329f67269891497d84404c0e6691b3e1ed70
How to set up NordVPN with qBittorrent?,Configure your NordVPN qBittorrent proxy settings to use the qBittorrent client with the NordVPN proxy.,https://support.nordvpn.com/hc/en-us/related/click?data=BAh7CjobZGVzdGluYXRpb25fYXJ0aWNsZV9pZGwrCJFAdj1eEjoYcmVmZXJyZXJfYXJ0aWNsZV9pZGwrCJFTrFa3EToLbG9jYWxlSSIKZW4tdXMGOgZFVDoIdXJsSSJKL2hjL2VuLXVzL2FydGljbGVzLzIwMTk1OTY3Mzg1NzQ1LU5vcmRWUE4tcHJveHktc2V0dXAtZm9yLXFCaXR0b3JyZW50BjsIVDoJcmFua2kI--546a571fedb2d98c4c5b126a6bc6dee711b404e2
NordVPN proxy setup for qBittorrent,"NordVPN works with qBittorrent and most other peer-to-peer platforms, so usually there’s no need for a proxy.
If for some reason you cannot use the [NordVPN app](https://nordvpn.com/download/) but still want to access qBittorrent safely, set up a proxy for qBittorrent by connecting to [NordVPN servers](https://nordvpn.com/servers/).
Note that NordVPN service should never be used to bypass copyright regulations. NordVPN does not promote, condone, or endorse the use of the service for such purposes. For more details, please read the NordVPN [Terms of Service](https://my.nordaccount.com/legal/terms-of-service/).
## How to set up NordVPN with qBittorrent?
Configure your NordVPN qBittorrent proxy settings to use the qBittorrent client with the NordVPN proxy.
1. Open qBittorrent.
2. Navigate to the application preferences by clicking Tools > Options. Alternatively, press Alt + O on your keyboard.
3. Select Connection.
4. Locate the Proxy server section and fill in the following information:• Type: SOCKS5• Host: Address of the proxy server of your choiceChoose from this list of servers:amsterdam.nl.socks.nordhold.netatlanta.us.socks.nordhold.netdallas.us.socks.nordhold.netlos-angeles.us.socks.nordhold.netnl.socks.nordhold.netse.socks.nordhold.netstockholm.se.socks.nordhold.netus.socks.nordhold.netnew-york.us.socks.nordhold.netsan-francisco.us.socks.nordhold.netdetroit.us.socks.nordhold.net
* Port: 1080
* Select the Use proxy for peer connections and the Authentication checkboxes.
* Username: Your NordVPN service username
* Password: Your NordVPN service password
* You can find your NordVPN service credentials (service username and service password) in the [Nord Account dashboard](https://my.nordaccount.com/dashboard/nordvpn/):
1. Click Set up NordVPN manually.
2. You will receive a verification code in your email that you use for NordVPN services. Type the code in: 
3. Copy the credentials using the “Copy” buttons on the right:
1. Click Apply and OK to save the changes.
## How to check if your proxy setup is working
You’ve connected to a NordVPN server via SOCKS5 proxy. But just to be sure, let’s check whether it is working correctly.
1. Visit the [ipleak.net](https://ipleak.net/) website.
2. Scroll down to the Torrent Address detection section, click Activate, and click this Magnet Link.
3. A new window will show up, prompting you to open qBittorrent. Select Open qBittorrent.Important: keep ipleak.net open.
4. When qBittorrent is open, click OK to add the torrent.
5. While the torrent is downloading metadata, return to the ipleak website.
6. Under Torrent Address detection, you should see the IP address of your chosen proxy server.If no address is showing, click the Refresh button to update the results.
If you see the NordVPN server IP address, it means that qBittorrent is downloading files through the NordVPN SOCKS5 proxy server and your downloads are secured!",https://support.nordvpn.com/hc/en-us/related/click?data=BAh7CjobZGVzdGluYXRpb25fYXJ0aWNsZV9pZGwrCJFAdj1eEjoYcmVmZXJyZXJfYXJ0aWNsZV9pZGwrCJFTrFa3EToLbG9jYWxlSSIKZW4tdXMGOgZFVDoIdXJsSSJKL2hjL2VuLXVzL2FydGljbGVzLzIwMTk1OTY3Mzg1NzQ1LU5vcmRWUE4tcHJveHktc2V0dXAtZm9yLXFCaXR0b3JyZW50BjsIVDoJcmFua2kI--546a571fedb2d98c4c5b126a6bc6dee711b404e2
NordVPN proxy setup for BitTorrent,"When you connect to NordVPN’s servers, you can use BitTorrent and most other peer-to-peer platforms. But if you want to avoid using the [NordVPN app](https://nordvpn.com/download/), setting up a VPN proxy is the next best thing.
Note that NordVPN service should never be used to bypass copyright regulations. NordVPN does not promote, condone, or endorse the use of the service for such purposes. For more details, please read the NordVPN [Terms of Service](https://my.nordaccount.com/legal/terms-of-service/).
## How to set up NordVPN with BitTorrent
1. Open BitTorrent.
2. In the menu bar, click Option > Preferences. Alternatively, press Ctrl + P on your keyboard.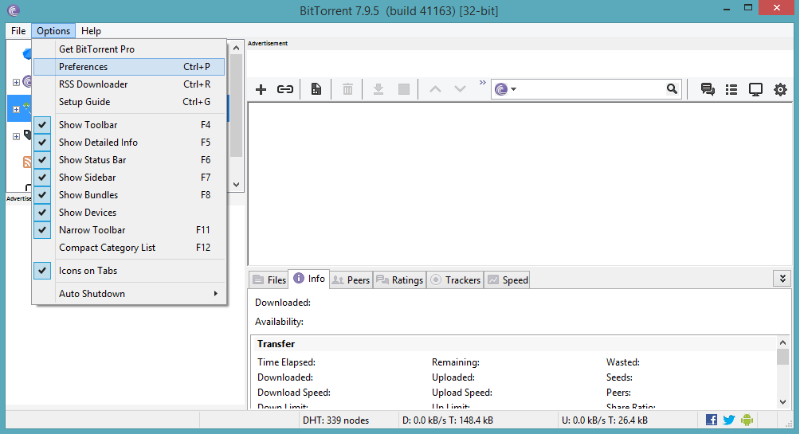
3. Select the Connection section.
4. Under Proxy Server, from the Type dropdown, select Socks5.
5. In the Proxy field, enter an address of a selected proxy server.Here is a list of servers you can choose from:amsterdam.nl.socks.nordhold.netatlanta.us.socks.nordhold.netdallas.us.socks.nordhold.netlos-angeles.us.socks.nordhold.netnl.socks.nordhold.netse.socks.nordhold.netstockholm.se.socks.nordhold.netus.socks.nordhold.netnew-york.us.socks.nordhold.netsan-francisco.us.socks.nordhold.netdetroit.us.socks.nordhold.net
6. In the Port field, type in 1080.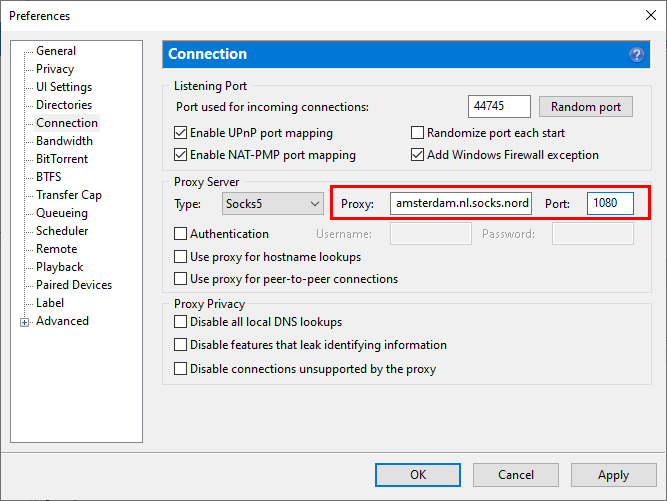
7. Select the following checkboxes:
* Authentication
* Use proxy for hostname lookups
* Use proxy for peer-to-peer connections
* Disable all local DNS lookups
* Disable features that leak identifying information
* Disable connections unsupported by the proxy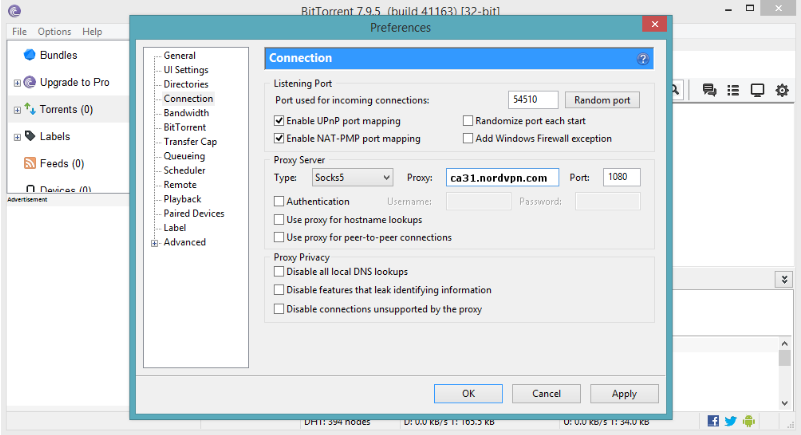
8. Enter your authentication details.Username: NordVPN service usernamePassword: NordVPN service password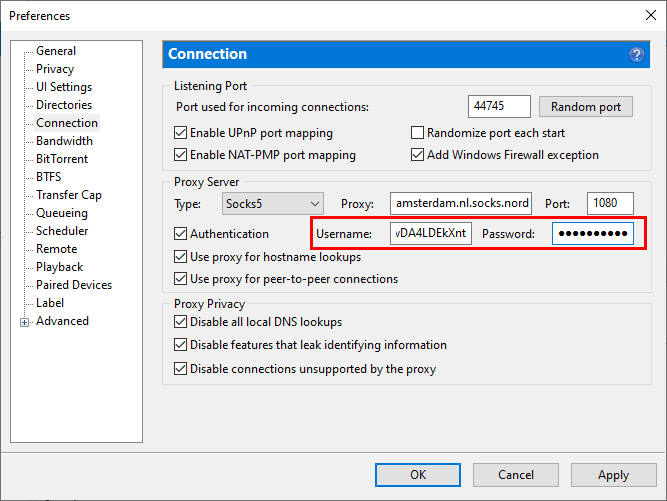You can find your NordVPN service credentials (service username and service password) in the [Nord Account dashboard](https://my.nordaccount.com/dashboard/nordvpn/):
1. Click Set up NordVPN manually.
2. You will receive a verification code in your email that you use for NordVPN services. Type the code in: 
3. Copy the credentials using the “Copy” buttons on the right: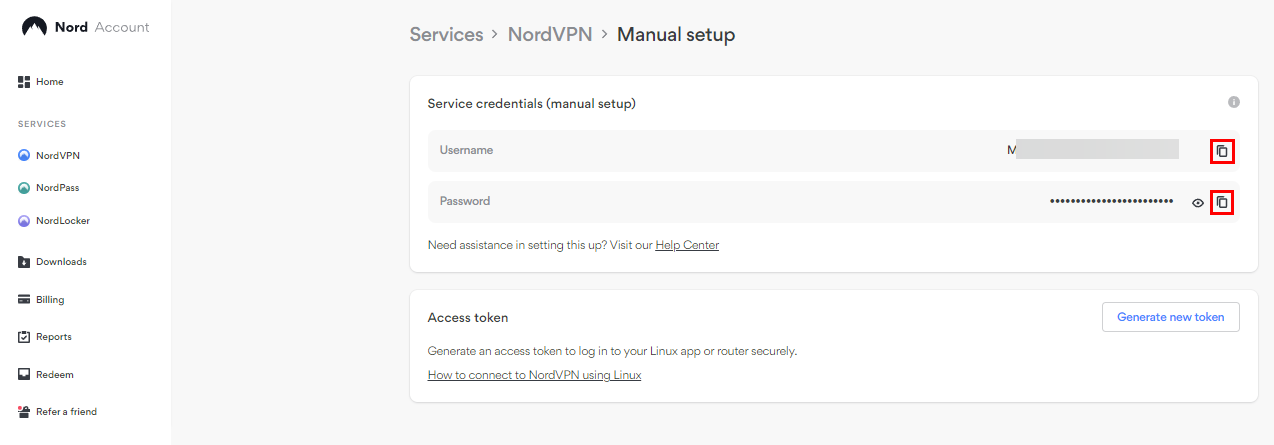
9. Click Apply and OK to save changes.
## How to check if your proxy setup is working
1. Visit the [ipleak.net](https://ipleak.net/) website.
2. Scroll down to the Torrent Address detection section, click Activate, and click this Magnet Link.
3. A new window will show up, prompting you to open BitTorrent. Select Open BitTorrent.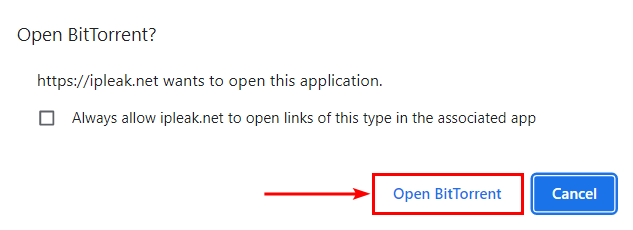Important: keep ipleak.net open.
4. Once BitTorrent opens, click OK to add the torrent.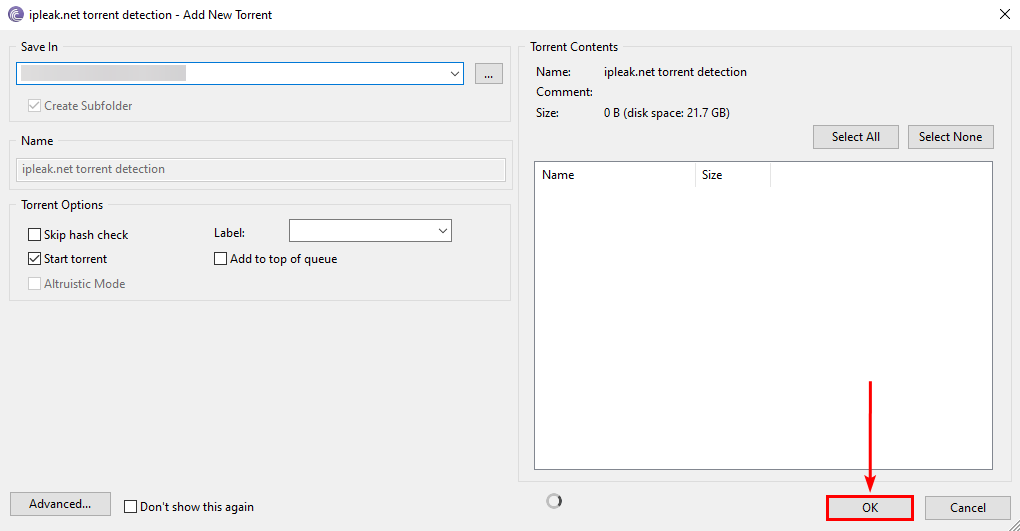
5. While the torrent is downloading metadata, return to the ipleak website.
6. Under Torrent Address detection, you should see the IP address of your chosen proxy server.If no address is showing, click the Refresh button to update the results.
You should find that BitTorrent is securely downloading files via the NordVPN SOCKS5 proxy server you selected.",https://support.nordvpn.com/hc/en-us/related/click?data=BAh7CjobZGVzdGluYXRpb25fYXJ0aWNsZV9pZGwrCJExIOacEjoYcmVmZXJyZXJfYXJ0aWNsZV9pZGwrCJFTrFa3EToLbG9jYWxlSSIKZW4tdXMGOgZFVDoIdXJsSSJJL2hjL2VuLXVzL2FydGljbGVzLzIwNDY1MDg1MDY3NjY1LU5vcmRWUE4tcHJveHktc2V0dXAtZm9yLUJpdFRvcnJlbnQGOwhUOglyYW5raQk%3D--1fd1083066cb742b8613ac61057df94886c5371b
Change your DNS servers on Windows,"Here's how you can change the DNS servers on...
* [Windows 7,8.1,10](https://support.nordvpn.com/Connectivity/Windows/1088041672/Change-your-DNS-servers-on-Windows.htm#Windows%207,8.1,10)
* [Windows 11](https://support.nordvpn.com/Connectivity/Windows/1088041672/Change-your-DNS-servers-on-Windows.htm#Windows%2011)
## Windows 7,8.1,10
1. Right-click the network icon (or the Wi-Fi icon if you are connected to Wi-Fi) in the taskbar notification area and select Network and Sharing Center.
2. Select Change adapter options.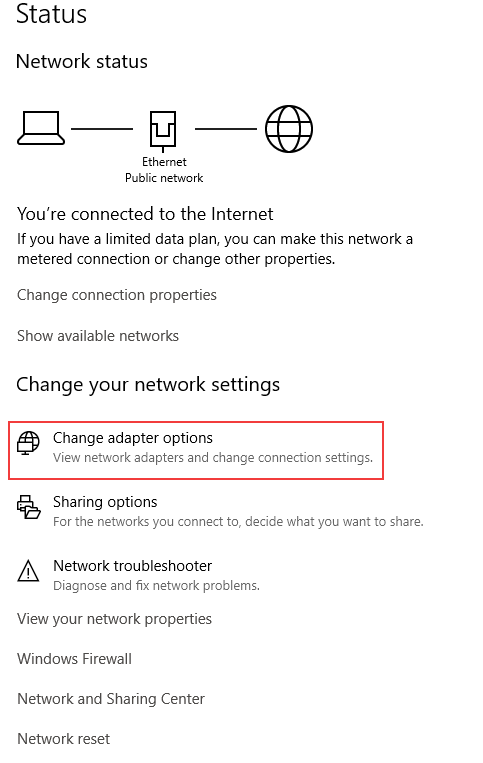
3. Right-click the TAP-NordVPN Windows adapter V9 and choose Properties.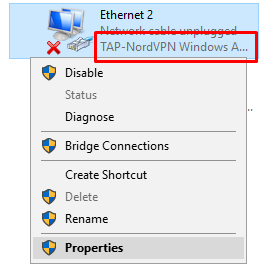
4. Select Internet Protocol Version 4 (TCP/IPv4) and click Properties.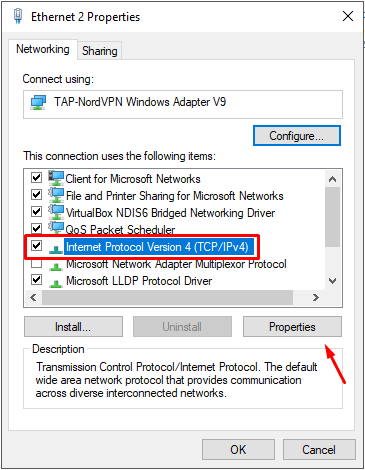
5. Select Use the following DNS server addresses and enter NordVPN's DNS addresses:Preferred DNS server: 103.86.96.100Alternate DNS server: 103.86.99.100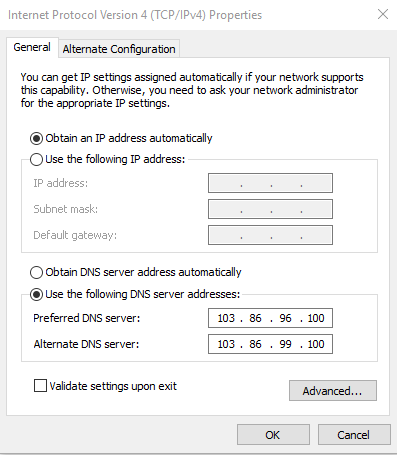
6. Repeat steps 3-5 for your physical network adapter, which will be called Ethernet or Wi-Fi (depending on which one you use).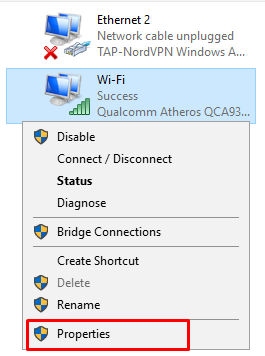
And you're done! The DNS servers should have now been successfully set.
## On Windows 11
1. At the bottom of your screen, find and press on the magnifying glass icon. 
2. A window with a search bar will appear. Type in ""Manage Network Adapter Settings"" and open the matching result.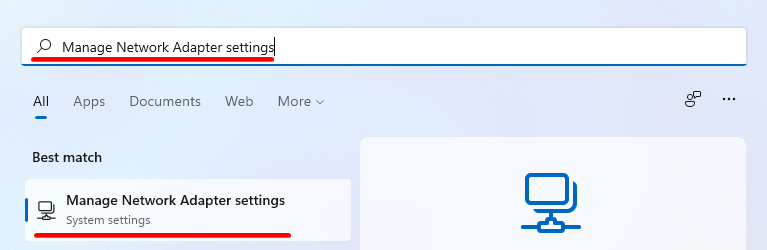
3. Find TAP-NordVPN Windows adapter V9, and click on it. More details will appear, including the option to ""View additional properties"". Press it. 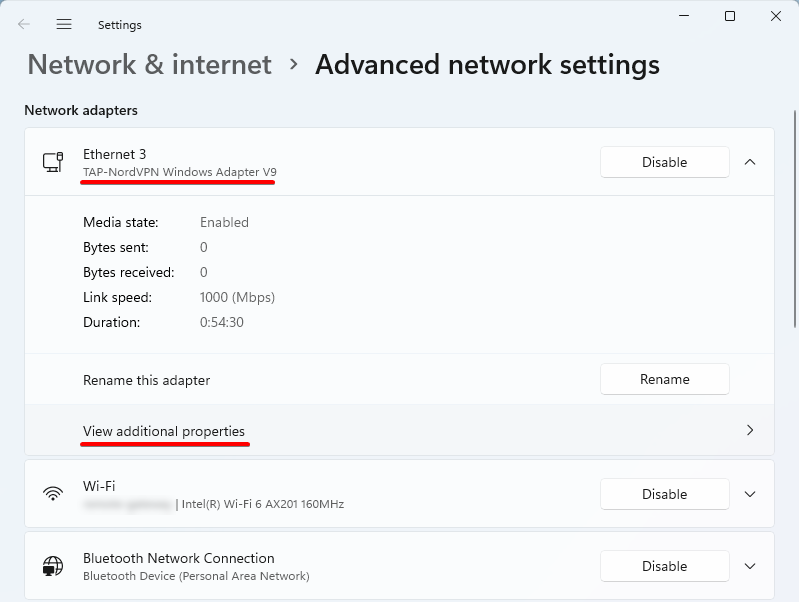
4. Next to ""DNS server assignment"" press the ""Edit"" button. 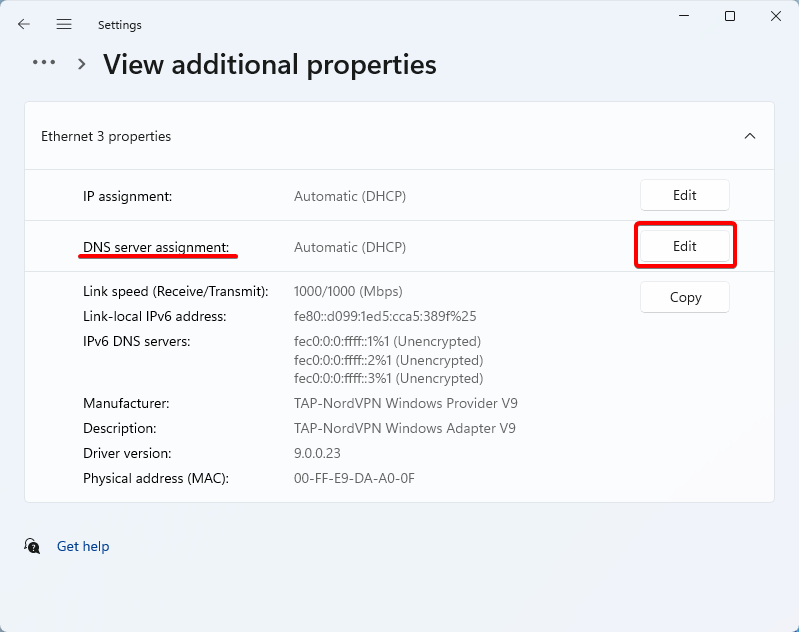
5. In the small pop-up box, select ""Manual"".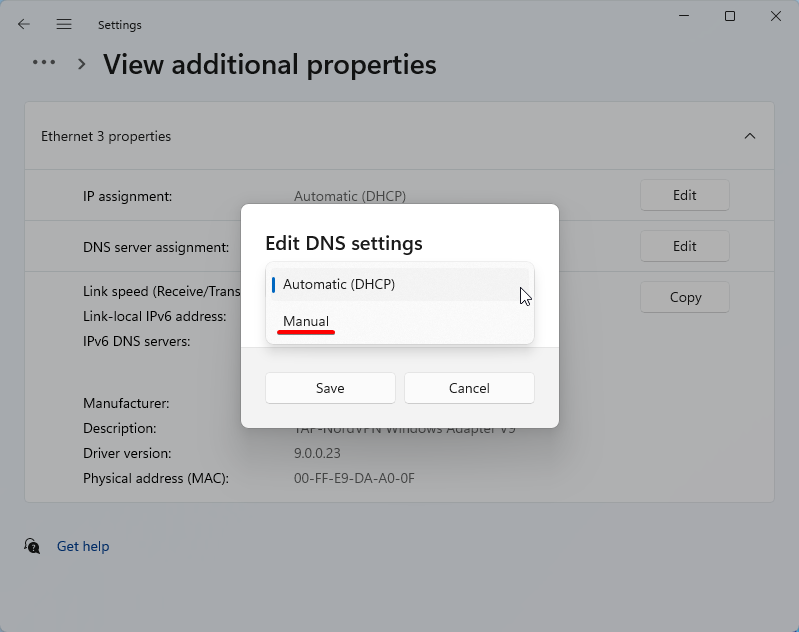
6. Now, adjust the settings as follows:IPv4 turned ONPreferred DNS: 103.86.96.100Alternate DNS: 103.86.99.100IPv6 turned OFFThen, press Save.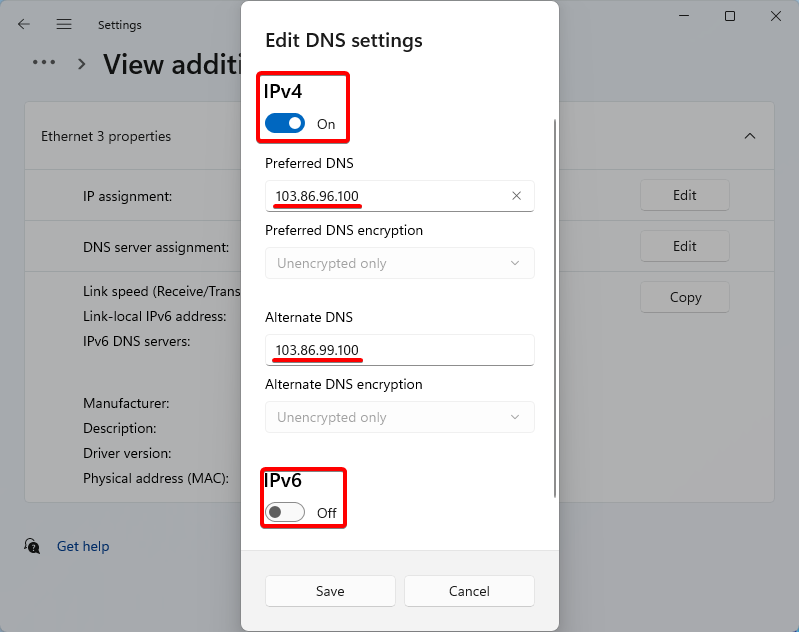7. Repeat steps 3-6 for your physical network adapter, which will be called Ethernet or Wi-Fi (depending on which one you use)",https://support.nordvpn.com/hc/en-us/related/click?data=BAh7CjobZGVzdGluYXRpb25fYXJ0aWNsZV9pZGwrCBF4VlwdEjoYcmVmZXJyZXJfYXJ0aWNsZV9pZGwrCJFTrFa3EToLbG9jYWxlSSIKZW4tdXMGOgZFVDoIdXJsSSJJL2hjL2VuLXVzL2FydGljbGVzLzE5OTE3MzEyNTIyMjU3LUNoYW5nZS15b3VyLUROUy1zZXJ2ZXJzLW9uLVdpbmRvd3MGOwhUOglyYW5raQo%3D--b7fbc921833e02f3e6d135b73855a92fe6acb3d4
GL.iNet setup with NordVPN,"This tutorial is designed to help you set up your GL.iNet with a VPN. We will explain how to connect the GL.iNet router to NordVPN using the OpenVPN protocol.
The following changes have to be made in the web configuration panel of your router, which you can access by entering the local IP of your router in your web browser. The local IPs are 192.168.1.1 or 192.168.0.1 by default on most routers. You can access these by opening http://192.168.1.1 or http://192.168.0.1 in your browser. The default IP, username, and password can also be found in the user manual of your router.
1. Firstly, you will have to download the OpenVPN manual connection files.
Follow the steps below to find the manual connection configuration files:
1. Log into your [Nord Account](https://my.nordaccount.com/), and click NordVPN.
2. Scroll down to Advanced Settings and click Set up NordVPN manually.
3. Select the OpenVPN configuration files tab.
4. Find the server you wish to connect to by using the Search bar or by scrolling down and download it by clicking Download UDP or Download TCP.
5. When connecting to OpenVPN & IKEv2 manually, you're going to need to use the Username and Password from the Service credential tab.
2. Access your device via the WebGUI. The GL.iNet IP address is 192.168.8.1 by default.
3. Once you are in the admin panel, go to “VPN” > “OpenVPN client” > “Add a new OpenVPN configuration.”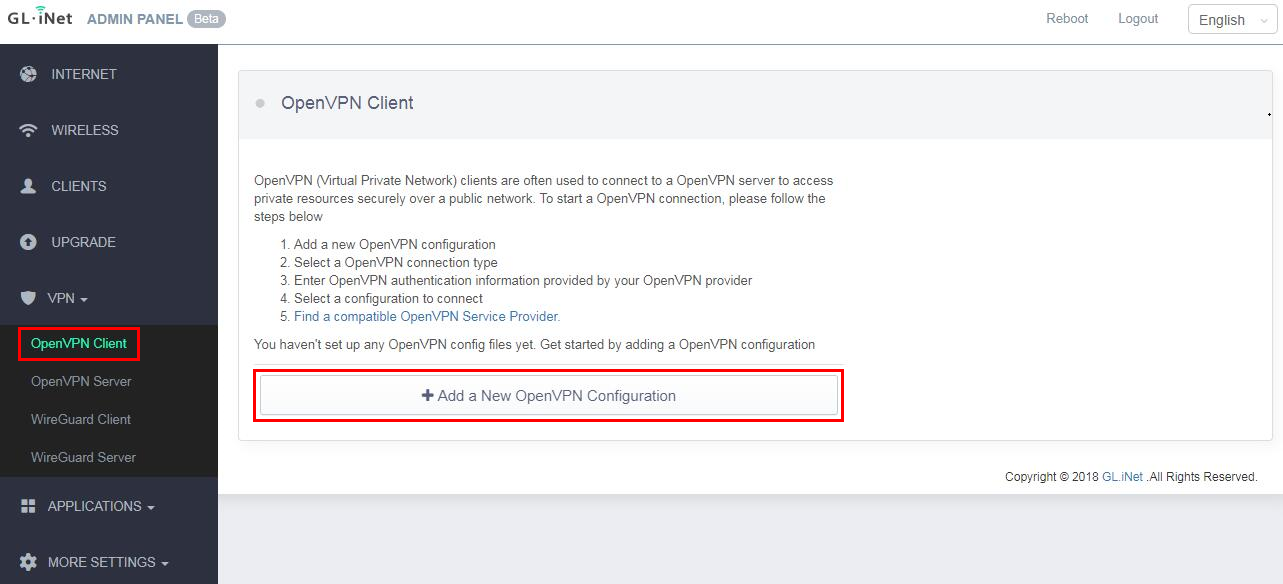
4. Upload the previously downloaded .ovpn file.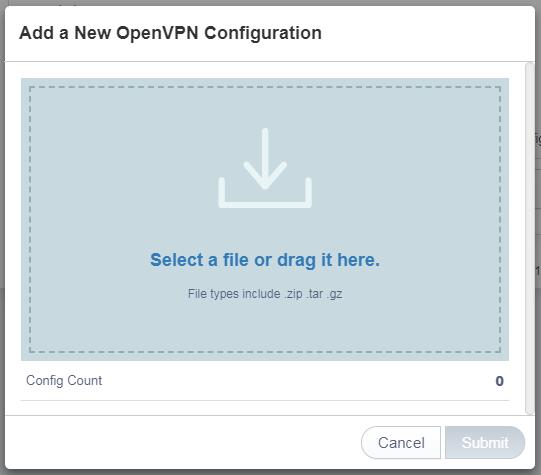
5. A new window will pop up, asking you to specify your NordVPN service credentials.
Paste your credentials and click ""Submit.""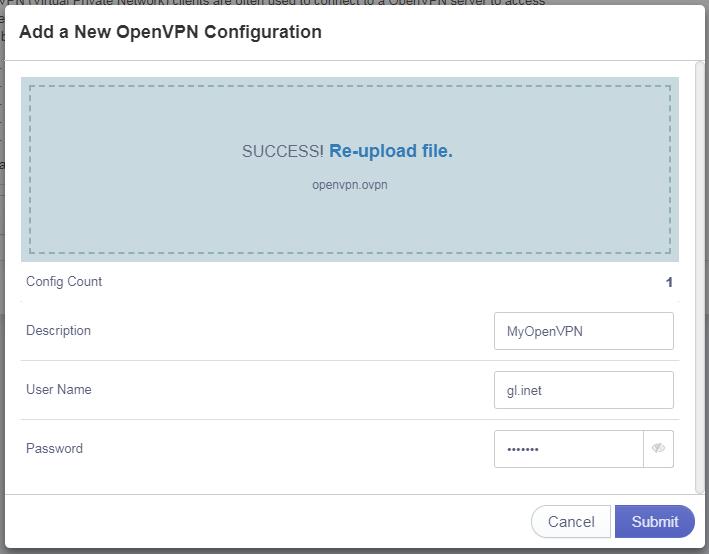
Follow the steps below to find the service credentials for manual connection setup:
1. Log into your [Nord Account](https://my.nordaccount.com/), click NordVPN, and, under Manual setup, click on Service credentials. Here you'll find the Username and Password needed to connect manually.
6. Click ""Connect"" to enable the OpenVPN connection.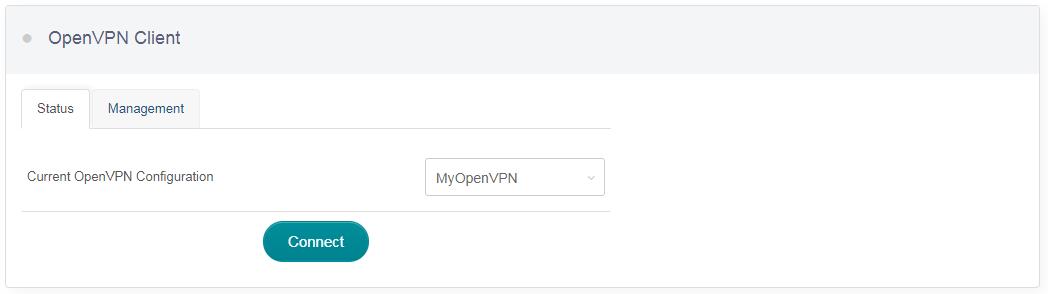
7. Once connected, you will see your connection status, including your new IP address as well as received and sent data.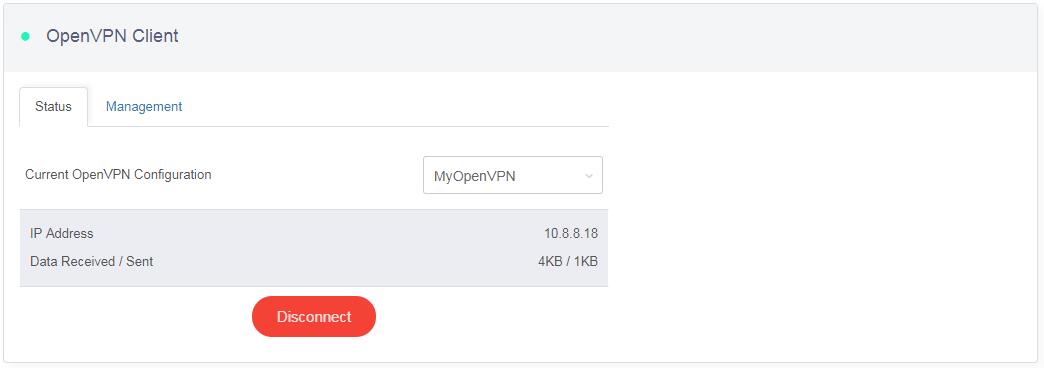
8. Congratulations! You are now connected to NordVPN.",https://support.nordvpn.com/hc/en-us/articles/20226926174225-GL-iNet-setup-with-NordVPN
How to Set Up VPN on Asus Router,"Please note:
For a smooth experience, your router needs to be running OpenVPN 2.4.x. Here's how to [check the OpenVPN version](https://support.nordvpn.com/hc/en-us/articles/20466863277969). If you have a newer Asus WRT firmware, [check this guide](https://support.nordvpn.com/hc/en-us/articles/20286376420753) on how to connect to a VPN.
ASUS RT-AC66U (non-B1) and RT-N66U routers are not supported by NordVPN service.
## How to set up an OpenVPN connection with NordVPN on your Asus router:
1. Log into the control panel of your Asus VPN router by typing 192.168.1.1 in the address bar of your browser. In case the specified IP address does not work, try 192.168.50.1 instead. Alternatively, enter router.asus.com or asusrouter.com instead of the IP address into the address bar. A window will pop up, asking you to enter your username and password. Unless you have changed your credentials, the default username is admin, and the default password is admin (or no password).
2. After logging into the Control Panel, select VPN in the left sidebar menu.
3. Click on the VPN Client tab at the top of the page.
4. Click the Add profile button at the bottom of the page.
5. In the pop-up window, select the OpenVPN tab and fill in the fields:Description: Give the connection any name you like.Username: Your NordVPN service username.Password: Your NordVPN service password.Auto reconnection: Yes.
1. Download the OpenVPN client configuration files.
Follow the steps below to find the best server for your connection:
1. Log into your [Nord Account](https://my.nordaccount.com/), and click NordVPN.
2. Scroll down to Advanced Settings and click Set up NordVPN manually.
3. Select the Server recommendation tab. According to your location, the best server will be recommended.
4. By pressing Advanced filters you can further customize the recommended servers by selecting the Server type and the Security protocol.
In case you wish to select a specific server, follow these steps:
1. Under Set up NordVPN manually, select OpenVPN configuration files.
2. Find the server you wish to connect to by using the Search bar or by scrolling down and download it by clicking Download UDP or Download TCP.
3. When connecting to OpenVPN & IKEv2 manually, you're going to need to use the Username and Password from the Service credential tab.
1. After downloading the files, go back to the control panel of your router and click Choose File in the pop-up window.
2. Navigate to the configuration file you have just downloaded and click Open.
3. Click Upload. You should see the message Complete! when the file has been uploaded successfully.
4. Leave the “Import the CA file or edit the .ovpn file manually” box unchecked and click OK.
5. In the VPN Client tab, you will see the created connection. Click Activate to connect your router to NordVPN. Please note that you can create only one OpenVPN connection.
6. A blue checkmark should appear in the Connection Status column, indicating that you are now connected to the VPN on the Asus router.
7. Your IP address and protection status will be visible at the top of the [nordvpn.com](https://nordvpn.com/) page. Please make sure to refresh the webpage, as it might be loaded from the cache. If you still don't see it, [clear the browser cache](https://nordvpn.com/blog/how-to-clear-your-cache/).To disconnect from NordVPN, click on the Deactivate button, which appears instead of the Activate button in the Connection column.",https://support.nordvpn.com/hc/en-us/articles/20194412700305-How-to-Set-Up-VPN-on-Asus-Router
Does NordVPN work on Android TV and Nvidia Shield?,"Yes, NordVPN works on Android TV and Nvidia Shield. You can follow the steps below about the installation process.",https://support.nordvpn.com/hc/en-us/articles/19928244437777-Installing-and-using-NordVPN-on-Android-TV-or-Nvidia-Shield
Installing and using NordVPN on Android TV or Nvidia Shield,"If you would like to use NordVPN on your Android TV or Nvidia Shield, this guide with assist you to correctly install the NordVPN app on these devices. This article will cover the following points:
* [Does NordVPN work on Android TV and Nvidia Shield?](
* [How to set up a VPN on Nvidia Shield and Android TV](
* [How to use a VPN on Nvidia Shield and Android TV](
## Does NordVPN work on Android TV and Nvidia Shield?
Yes, NordVPN works on Android TV and Nvidia Shield. You can follow the steps below about the installation process.
## How to set up a VPN on Nvidia Shield and Android TV
1. [ Download the NordVPN app for Android TV ](https://nordvpn.com/download/android-tv/) from our website and install it. You can also find NordVPN on the [ Google Play ](https://play.google.com/store/apps/details?id=com.nordvpn.android&hl=en)store.
2. Once the application has finished installing, open the NordVPN app. You will see the application's main menu. Select log in to use your existing NordVPN account or sign up to create a new one: 
* If you have clicked sign up, you will see a QR code. Scan it with your smartphone and wait for the Nord Account page to load. Once the page has loaded, complete the registration process: 
3. Log in to NordVPN on your TV with your account. Like in the screenshot below, you will receive a number for [ remote validation ](https://nordaccount.com/remote) on your phone, laptop, or PC. Alternatively, you can simply scan the QR code: 
4. You may be greeted with a few warning messages. These are default Android warning messages for VPN connections — it is safe to continue. In some cases, you may be required to mark a checkbox in the popup window. 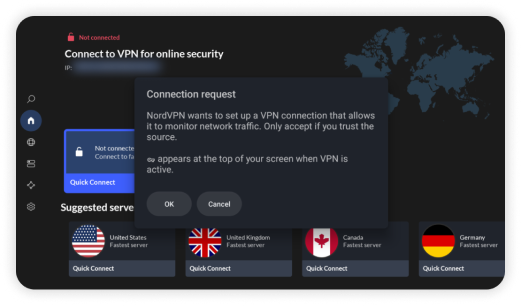 
## How to use a VPN on Nvidia Shield and Android TV
The NordVPN app is easy to use. In this section, we will explore how to connect to NordVPN servers on your Nvidia Shield or Android TV and go through the app’s settings.
1. Press quick connect on the main screen to let our smart algorithm automatically pick the best server for your needs: 
2. You can click any country button in the all countries section to quickly connect to a NordVPN server for the selected country: 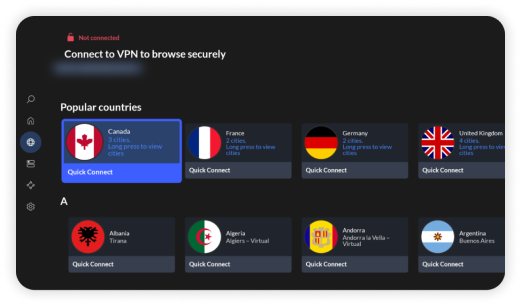
3. In the specialty servers section, you will find P2P, Obfuscated, Dedicated IP, Double VPN, and Onion Over VPN servers. 
4. In settings, you can check your subscription status, set up auto-connect, or select the settings sub-menu to control your NordVPN features (such as enabling/disabling Threat Protection, switching VPN protocols, enabling local network discovery, and setting up a custom DNS): 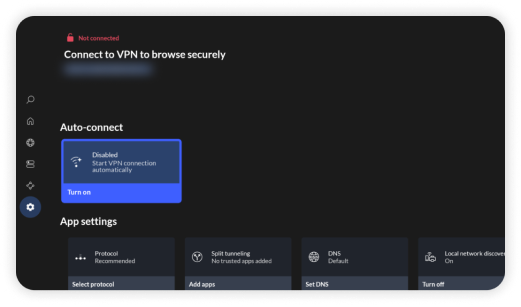 
5. The split tunneling section lets you choose which apps bypass your VPN connection: 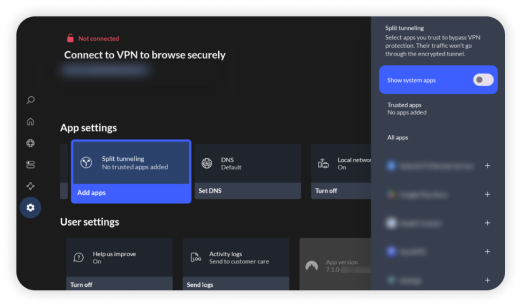
After following the guide above, you will be able to use NordVPN on your Android TV and your Nvidia Shield. If you experience any issues while installing NordVPN on these devices, feel free to [contact our support team ](https://nordvpn.com/contact-us/)for further assistance.",https://support.nordvpn.com/hc/en-us/articles/19928244437777-Installing-and-using-NordVPN-on-Android-TV-or-Nvidia-Shield
pfSense 2.4.4 VPN setup,"Please note: if you are using pfSense 2.4.5 you will need to follow this tutorial instead. Likewise, in case you have pfSense 2.5 use this tutorial instead.
## Here are the steps on how to set up OpenVPN on pfSense 2.4.4:
1. To set up VPN on pfSense 2.4.4, access your pfSense from your browser, then navigate to System > Certificate Manager > CAs. Select +Add.You should see this screen:
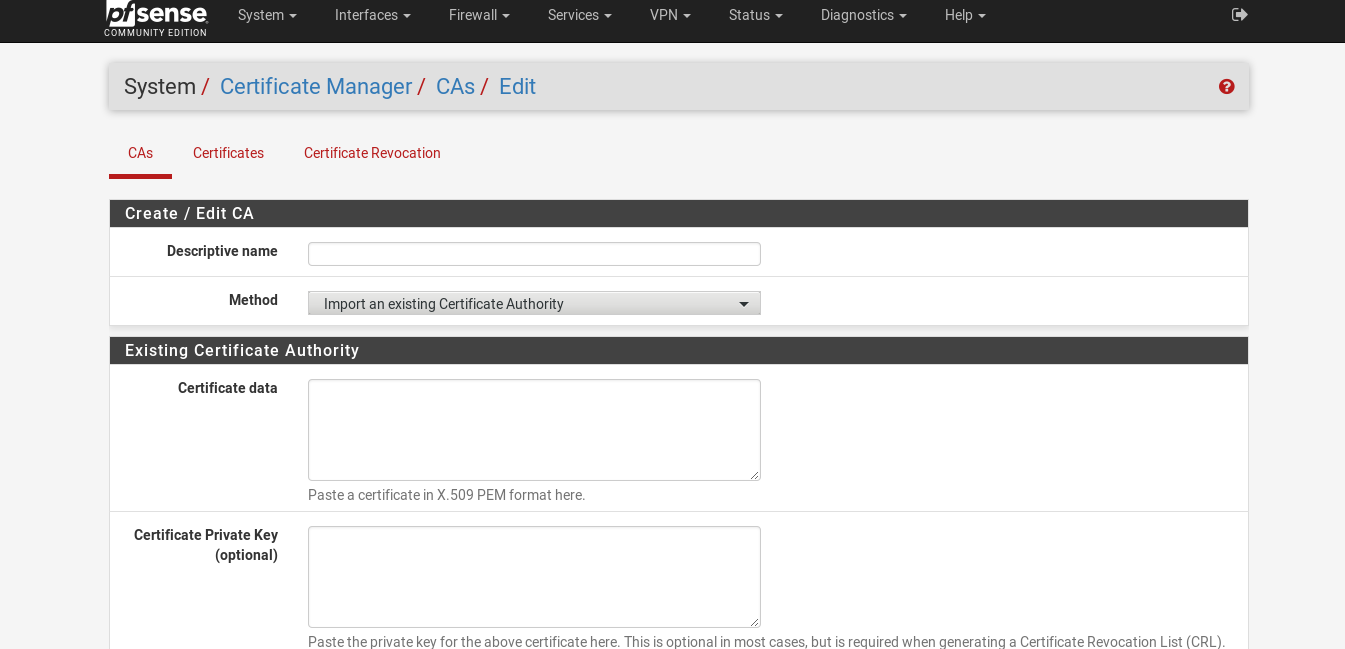2. For this tutorial, we will configure our pfSense to connect to a server in the Netherlands, but you should connect to a suggested server.
Follow the steps below to find the best server for your connection:
1. Log into your [Nord Account](https://my.nordaccount.com/), and click NordVPN.
2. Scroll down to Advanced Settings and click Set up NordVPN manually.
3. Select the Server recommendation tab. According to your location, the best server will be recommended.
4. By pressing Advanced filters you can further customize the recommended servers by selecting the Server type and the Security protocol.
In case you wish to select a specific server, follow these steps:
1. Under Set up NordVPN manually, select OpenVPN configuration files.
2. Find the server you wish to connect to by using the Search bar or by scrolling down and download it by clicking Download UDP or Download TCP.
3. When connecting to OpenVPN & IKEv2 manually, you're going to need to use the Username and Password from the Service credential tab.
Fill in the fields as follows:Descriptive Name: NordVPN_NL120_CA (we are using this name for the sake of this manual — you can use any name you like)Method: Import an existing Certificate AuthorityCertificate data:
```
-----BEGIN CERTIFICATE-----MIIFCjCCAvKgAwIBAgIBATANBgkqhkiG9w0BAQ0FADA5MQswCQYDVQQGEwJQQTEQMA4GA1UEChMHTm9yZFZQTjEYMBYGA1UEAxMPTm9yZFZQTiBSb290IENBMB4XDTE2MDEwMTAwMDAwMFoXDTM1MTIzMTIzNTk1OVowOTELMAkGA1UEBhMCUEExEDAOBgNVBAoTB05vcmRWUE4xGDAWBgNVBAMTD05vcmRWUE4gUm9vdCBDQTCCAiIwDQYJKoZIhvcNAQEBBQADggIPADCCAgoCggIBAMkr/BYhyo0F2upsIMXwC6QvkZps3NN2/eQFkfQIS1gql0aejsKsEnmY0Kaon8uZCTXPsRH1gQNgg5D2gixdd1mJUvV3dE3y9FJrXMoDkXdCGBodvKJyU6lcfEVF6/UxHcbBguZK9UtRHS9eJYm3rpL/5huQMCppX7kUeQ8dpCwd3iKITqwd1ZudDqsWaU0vqzC2H55IyaZ/5/TnCk31Q1UP6BksbbuRcwOVskEDsm6YoWDnn/IIzGOYnFJRzQH5jTz3j1QBvRIuQuBuvUkfhx1FEwhwZigrcxXuMP+QgM54kezgziJUaZcOM2zF3lvrwMvXDMfNeIoJABv9ljw969xQ8czQCU5lMVmA37ltv5Ec9U5hZuwk/9QO1Z+d/r6Jx0mlurS8gnCAKJgwa3kyZw6e4FZ8mYL4vpRRhPdvRTWCMJkeB4yBHyhxUmTRgJHm6YR3D6hcFAc9cQcTEl/I60tMdz33G6m0O42sQt/+AR3YCY/RusWVBJB/qNS94EtNtj8iaebCQW1jHAhvGmFILVR9lzD0EzWKHkvyWEjmUVRgCDd6Ne3eFRNS73gdv/C3l5boYySeu4exkEYVxVRn8DhCxs0MnkMHWFK6MyzXCCn+JnWFDYPfDKHvpff/kLDobtPBf+Lbch5wQy9quY27xaj0XwLyjOltpiSTLWae/Q4vAgMBAAGjHTAbMAwGA1UdEwQFMAMBAf8wCwYDVR0PBAQDAgEGMA0GCSqGSIb3DQEBDQUAA4ICAQC9fUL2sZPxIN2mD32VeNySTgZlCEdVmlq471o/bDMP4B8gnQesFRtXY2ZCjs50Jm73B2LViL9qlREmI6vE5IC8IsRBJSV4ce1WYxyXro5rmVg/k6a10rlsbK/eg//GHoJxDdXDOokLUSnxt7gk3QKpX6eCdh67p0PuWm/7WUJQxH2SDxsT9vB/iZriTIEe/ILoOQF0Aqp7AgNCcLcLAmbxXQkXYCCSB35Vp06u+eTWjG0/pyS5V14stGtw+fA0DJp5ZJV4eqJ5LqxMlYvEZ/qKTEdoCeaXv2QEmN6dVqjDoTAok0t5u4YRXzEVCfXAC3ocplNdtCA72wjFJcSbfif4BSC8bDACTXtnPC7nD0VndZLp+RiNLeiENhk0oTC+UVdSc+n2nJOzkCK0vYu0Ads4JGIB7g8IB3z2t9ICmsWrgnhdNdcOe15BincrGA8avQ1cWXsfIKEjbrnEuEk9b5jel6NfHtPKoHc9mDpRdNPISeVawDBM1mJChneHt59Nh8Gah74+TM1jBsw4fhJPvoc7Atcg740JErb904mZfkIEmojCVPhBHVQ9LHBAdM8qFI2kRK0IynOmAZhexlP/aT/kpEsEPyaZQlnBn3An1CRz8h0SPApL8PytggYKeQmRhl499+6jLxcZ2IegLfqq41dzIjwHwTMplg+1pKIOVojpWA==-----END CERTIFICATE-----
```
Press Save.3. Navigate to VPN > OpenVPN > Clients and press +Add.
4. Fill in the fields as follows:Disable this client: leave unchecked;Server mode: Peer to Peer (SSL/TLS);Protocol: UDP on IPv4 only (you can also use TCP in the case that you [experience issues with UDP](https://support.nordvpn.com/hc/en-us/articles/20347119467409-Issue-TLS-key-negotiation-failed-to-occur));Device mode: tun – Layer 3 Tunnel Mode;Interface: WAN;Local port: leave blank;Server host or address: the hostname of the server recommended to you (in our case, it’s nl120.nordvpn.com);Server port: 1194 (use 443 if you use TCP);Proxy host or address: leave blank;Proxy port: leave blank;Proxy Authentication: none;Description: Any name you like. We will use NordVPN.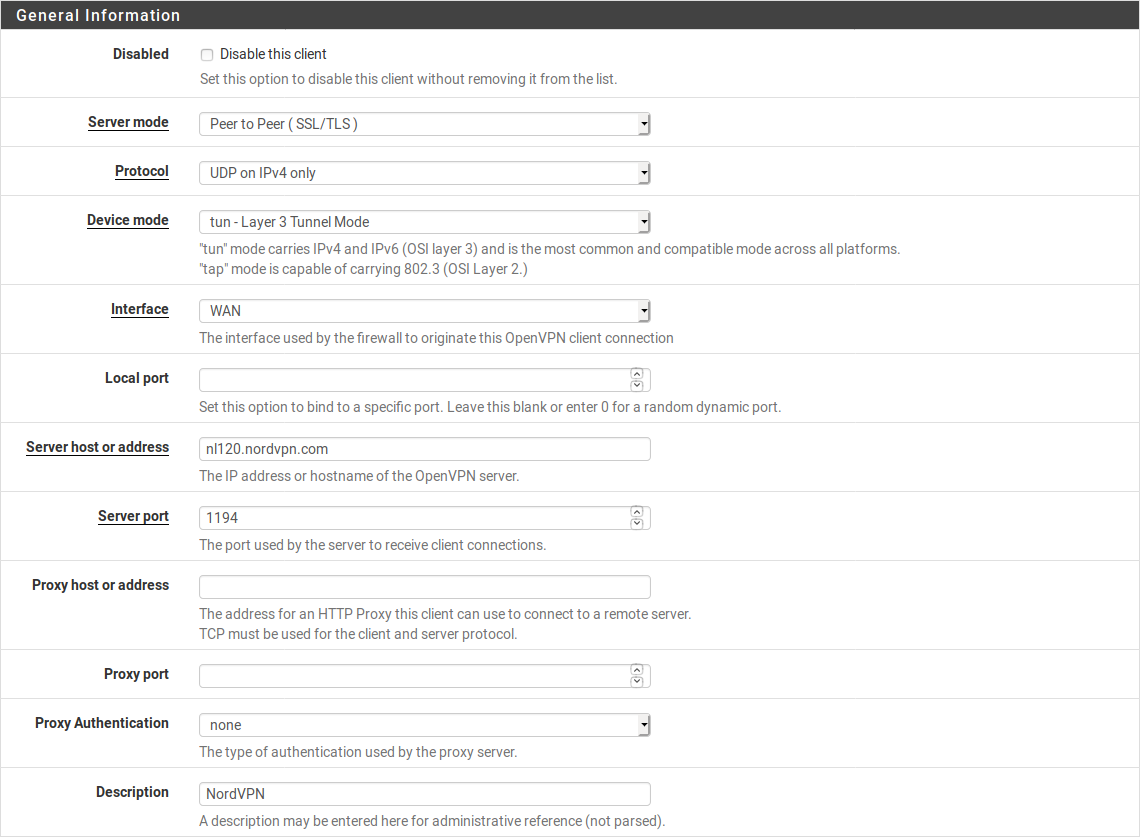USER AUTHENTICATION SETTINGSUsername: Your NordVPN service usernamePassword: Your NordVPN service password in both fields.You can find your NordVPN service credentials (service username and service password) in the [Nord Account dashboard.](https://my.nordaccount.com/dashboard/nordvpn/)
Follow the steps below to find the service credentials for manual connection setup:
1. Log into your [Nord Account](https://my.nordaccount.com/), click NordVPN, and, under Manual setup, click on Service credentials. Here you'll find the Username and Password needed to connect manually.
Authentication Retry: leave unchecked.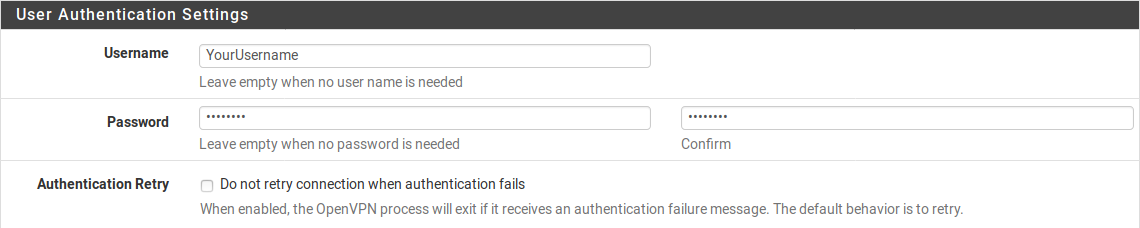CRYPTOGRAPHIC SETTINGSTLS Configuration: CheckTLS Key:
```
-----BEGIN OpenVPN Static key V1-----e685bdaf659a25a200e2b9e39e51ff030fc72cf1ce07232bd8b2be5e6c670143f51e937e670eee09d4f2ea5a6e4e69965db852c275351b86fc4ca892d78ae002d6f70d029bd79c4d1c26cf14e9588033cf639f8a74809f29f72b9d58f9b8f5fefc7938eade40e9fed6cb92184abb2cc10eb1a296df243b251df0643d53724cdb5a92a1d6cb817804c4a9319b57d53be580815bcfcb2df55018cc83fc43bc7ff82d51f9b88364776ee9d12fc85cc7ea5b9741c4f598c485316db066d52db4540e212e1518a9bd4828219e24b20d88f598a196c9de96012090e333519ae18d35099427e7b372d348d352dc4c85e18cd4b93f8a56ddb2e64eb67adfc9b337157ff4-----END OpenVPN Static key V1-----
```
TLS Key Usage Mode: TLS AuthenticationPeer certificate authority: NordVPN_NL120_CAPeer Certificate Revocation list: do not defineClient certificate: webConfigurator default (59f92214095d8) (Server: Yes, In Use) (note that the numbers on your machine could be different)Encryption Algorithm: AES-256-GCMEnable NCP: Check the boxNCP Algorithms: AES-256-GCM and AES-256-CBCAuth digest algorithm: SHA512 (512-bit)Hardware Crypto: No Hardware Crypto Acceleration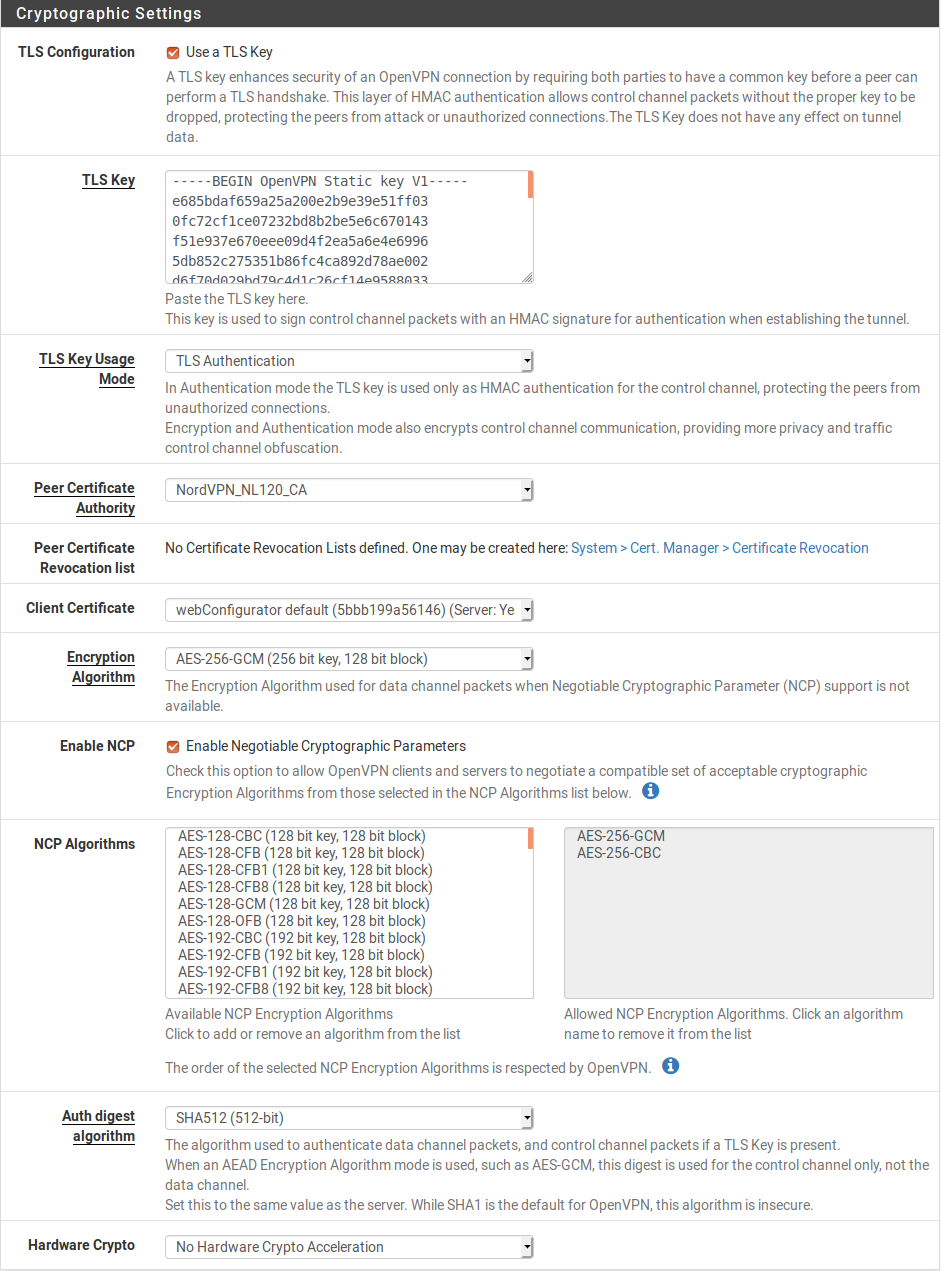TUNNEL SETTINGSIPv4 tunnel network: leave blankIPv6 tunnel network: leave blankIPv4 remote network(s): leave blankIPv6 remote network(s): leave blankLimit outgoing bandwidth: leave blankCompression: No LZO Compression [Legacy style,comp-lzo no]Topology: Subnet – One IP address per client in a common subnetType-of-service: leave uncheckedDon’t pull routes: leave uncheckedDon’t add/remove routes: check the boxADVANCED CONFIGURATIONCustom Options
tls-client;remote-random;tun-mtu 1500;tun-mtu-extra 32;mssfix 1450;persist-key;persist-tun;reneg-sec 0;remote-cert-tls server;
UDP FAST I/O: leave uncheckedSend/Receive Buffer: DefaultGateway creation: IPv4 onlyVerbosity level: 3 (recommended)5. Navigate to Interfaces > Interface Assignments and Add the NordVPN NL120 interface.6. Press on the OPT1 to the left of your assigned interface and fill in the following information:Enable: checkDescription: NordVPNMac Address: leave blankMTU: leave blankMSS: leave blank
Do not change anything else. Just scroll down to the bottom and press Save.
7. Navigate to Services -> DNS Resolver -> General SettingsEnable: check the boxListen port: leave as isEnable SSL/TLS Service: uncheckSSL/TLS Certificate: webConfigurator default (59f92214095d8) (Server: Yes, In Use) (note that the numbers on your machine could be different);SSL/TLS Listen Port: leave as isNetwork Interfaces: AllOutgoing Network Interfaces: NordVPNSystem Domains Local Zone Type: TransparentDNSSEC: uncheckDNS Query Forwarding: checkDHCP Registration: checkStatic DHCP: checkClick Save.
8. While in DNS Resolver, select Advanced Settings at the top and fill in the following:ADVANCED PRIVACY OPTIONS:Hide Identity: checkHide Version: checkADVANCED RESOLVER OPTIONS:Prefetch Support: checkPrefetch DNS Key Support: checkClick Save.
9. Navigate to Firewall > NAT > Outbound and select Manual Outbound NAT rule generation. Press Save. Four rules will appear. Leave all the rules untouched and add a new one.
1. Interface: NordVPN.
2. Source: your LAN subnet.
3. Click Save. At the end, it should look like this:
10. Navigate to Firewall > Rules > LAN and delete the IPv6 rule. Also, edit the IPv4 rule.
1. Press on Show Advanced Options
2. Change Gateway to NordVPN
3. Click Save.
Now it should look like this:
11. Go to System > General Setup and fill in the fields as follows:DNS Server 1: 103.86.96.100; noneDNS Server 2: 103.86.99.100; NordVPN_VPNV4-…Click Save.
12. Now navigate to Status > OpenVPN. The status and it should state that the service is “up”.
13. You can also check the connection log file under Status > System Logs > OpenVPN:
That’s it! pfsense VPN setup is complete, and you should now have a [VPN connection](https://nordvpn.com/what-is-a-vpn/). In case you woud like to setup selective VPN routing, click [here](https://support.nordvpn.com/hc/en-us/articles/20370642641169-pfSense-2-4-4-selective-Routing).",https://support.nordvpn.com/hc/en-us/related/click?data=BAh7CjobZGVzdGluYXRpb25fYXJ0aWNsZV9pZGwrCBEfFQiCEjoYcmVmZXJyZXJfYXJ0aWNsZV9pZGwrCJE74USdEjoLbG9jYWxlSSIKZW4tdXMGOgZFVDoIdXJsSSI%2BL2hjL2VuLXVzL2FydGljbGVzLzIwMzQ5NjkwNjUwMzg1LXBmU2Vuc2UtMi00LTQtVlBOLXNldHVwBjsIVDoJcmFua2kI--6607acd3ec166c4cfe809e3dc70a5dca44b054dc
How to set up NordVPN on Raspberry Pi with Kodi,"1. [Download](https://github.com/brianhornsby/script.openvpn/releases/download/v3.0.0/script.openvpn-3.0.0.zip) Kodi OpenVPN plugin on your Raspberry:
2. Transfer the .zip file you have downloaded to your Kodi device.
3. Once the .zip file is in the media centre, in Kodi go to System > Settings > Add-ons. Click on Install from zip file.
4. Use the Up and Down arrows to locate the folder where you have copied the .zip file and install it.
5. Wait a few seconds until you see a notification in the bottom-right corner of the window indicating that the Kodi OpenVPN add-on is enabled.
6. On your computer, create a new .txt file containing two lines. The first line is your username and the second is your password which you can find in your [Nord Account dashboard](https://my.nordaccount.com/dashboard/nordvpn/) under Service Credentials. For the sake of this tutorial, we have named the file nordvpnpass.txt.
1. Download the .ovpn configuration file of the server you want to connect to, to your computer.
Follow the steps below to find the best server for your connection:
1. Log into your [Nord Account](https://my.nordaccount.com/), and click NordVPN.
2. Scroll down to Advanced Settings and click Set up NordVPN manually.
3. Select the Server recommendation tab. According to your location, the best server will be recommended.
4. By pressing Advanced filters you can further customize the recommended servers by selecting the Server type and the Security protocol.
In case you wish to select a specific server, follow these steps:
1. Under Set up NordVPN manually, select OpenVPN configuration files.
2. Find the server you wish to connect to by using the Search bar or by scrolling down and download it by clicking Download UDP or Download TCP.
3. When connecting to OpenVPN & IKEv2 manually, you're going to need to use the Username and Password from the Service credential tab.
1. Open the file you have downloaded and edit the auth-user-pass line to contain the location where you want to store the nordvpnpass.txt file on your Kodi. It should look like this:auth-user-pass /location/of/nordvpnpass.txt
2. Move both files to your Raspberry Pi.
3. Open the OpenVPN add-on you have previously installed and use it to locate the .ovpn configuration file you have moved to your media center to connect to VPN.",https://support.nordvpn.com/hc/en-us/articles/19682480550033-How-to-set-up-NordVPN-on-Raspberry-Pi-with-Kodi
How can I use Kodi with NordVPN,"Note: You can encrypt your Kodi traffic by setting up the NordVPN app on Windows, macOS, Android, iOS, or Linux without configuring a VPN addon directly on Kodi.
To stay safe while enjoying your favorite content on Kodi, it is highly advisable to use it with additional security measures. To set up VPN for Kodi, you have to connect the device, that is running Kodi, to NordVPN servers.
Watch our video on how to set up NordVPN on Kodi or follow the instructions below:
## How to use Kodi with a VPN
Note: the following guide will assist only with Python 2.7 release.
1. Make sure OpenVPN is installed and accessible from the command line.
* If you’re running Kodi on LibreELEC and OpenELEC, OpenVPN should come preinstalled.
* If you are using Windows, follow our tutorial on how to install OpenVPN and put it on your command path.
2. Download the NordVPN add-on .zip file and add it to your Kodi device in one of two ways:a. Download the file to your computer, save it on a USB flash drive, then insert the flash drive into the Kodi device.b. Connect to Kodi from a different device via SSH.
3. After downloading NordVPN, open the Kodi interface. Select “Settings,” then “System settings,” then “Add-ons,” then switch “Unknown sources” ON.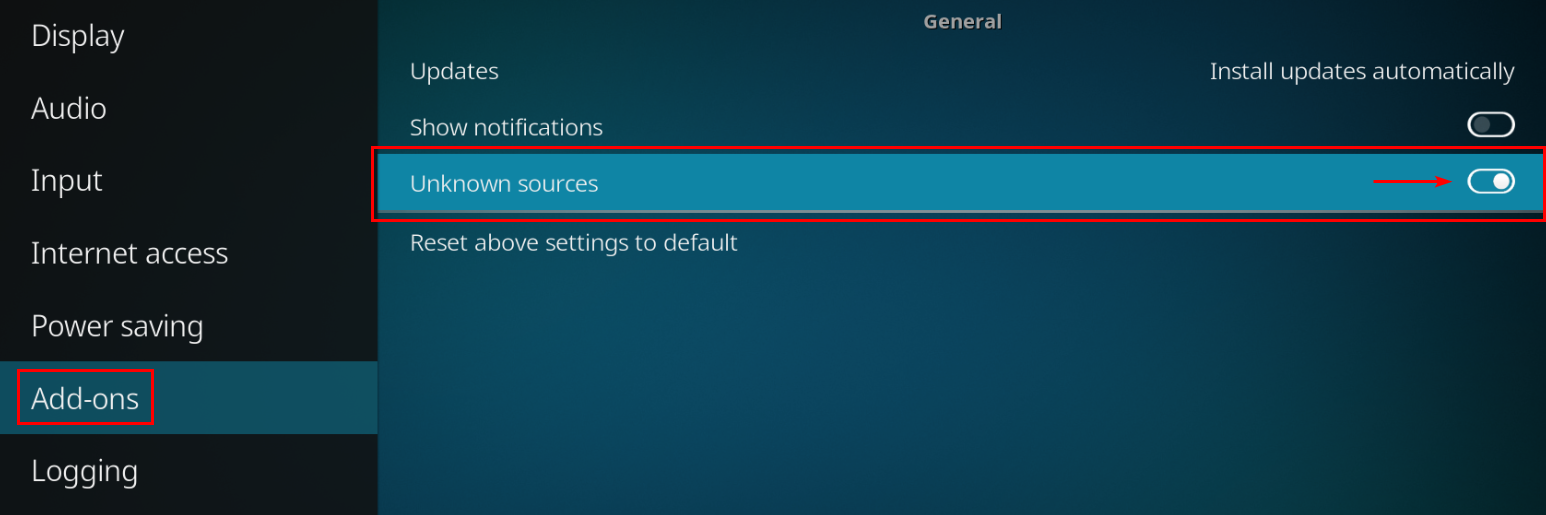
4. A warning message will pop up. You can safely click “Yes.”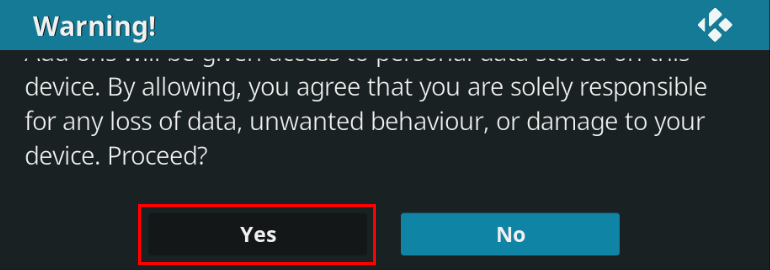
5. Go back to the home screen and click on “Add-ons.” In the “Add-ons” menu, click the “Package” button in the top-left corner and select “Install from zip file.” Depending on how you added the NordVPNSetup.zip file to your device in Step 2, navigate to it and select it.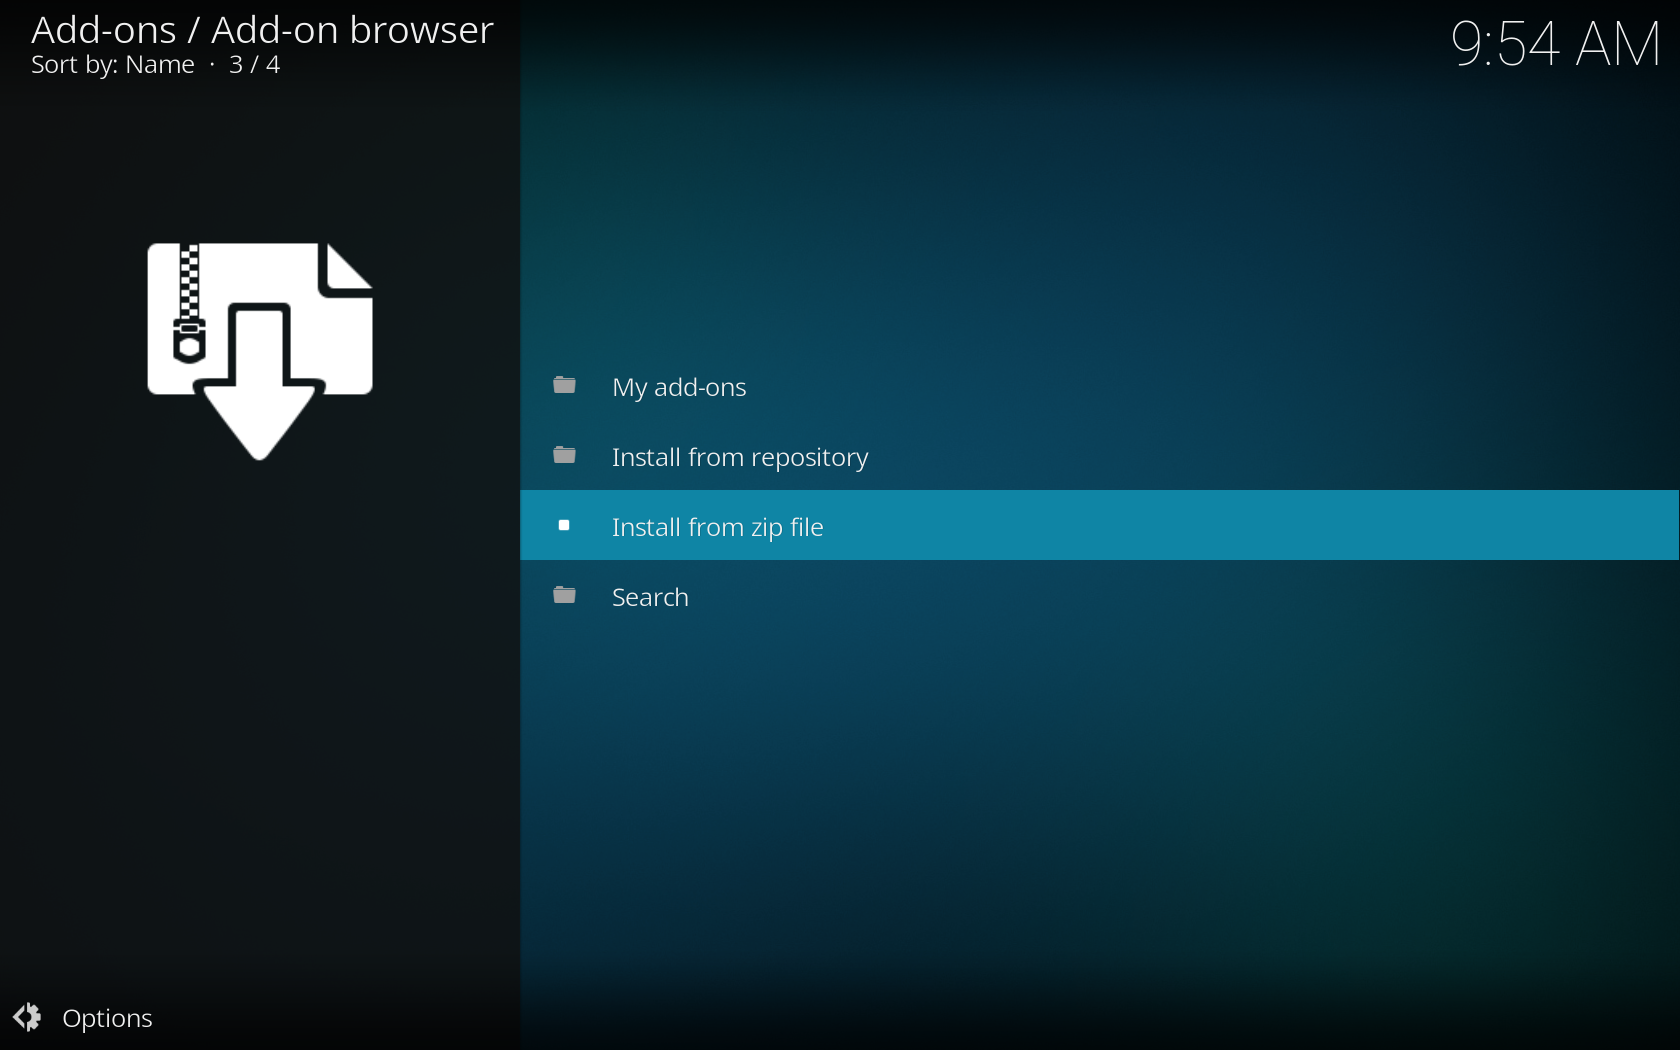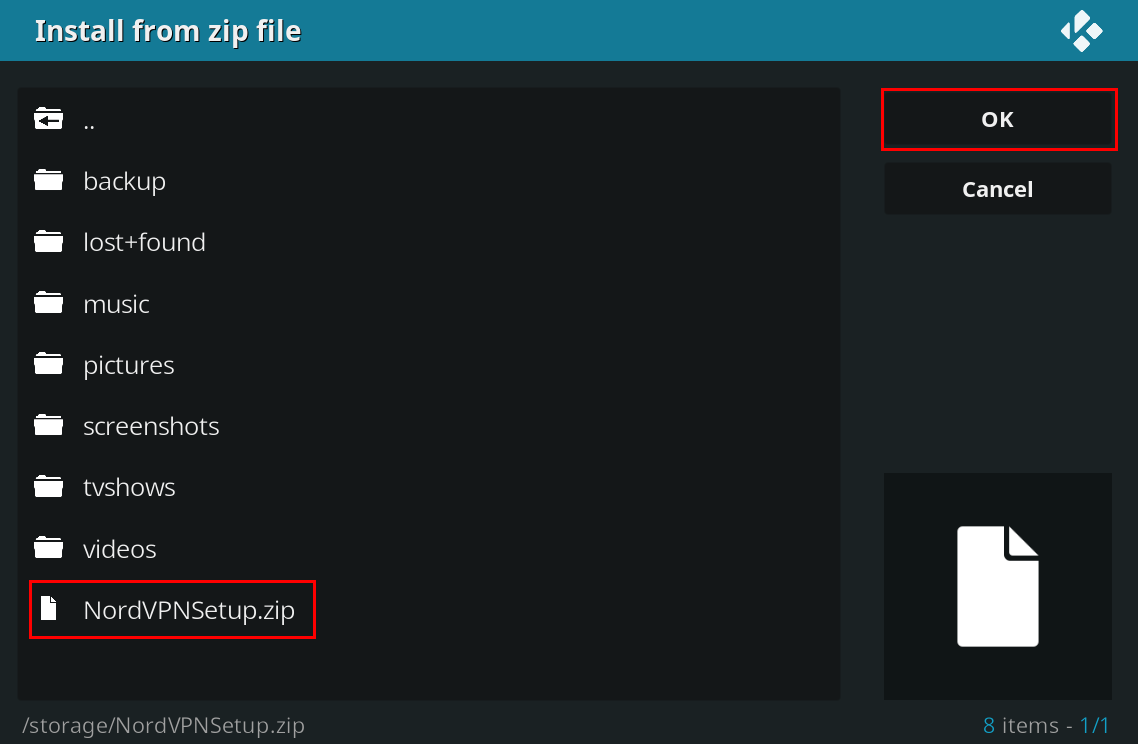
6. Once the installation is complete, you will see a prompt offering you to either run the VPN setup wizard or go to “Settings.” Select “Wizard.”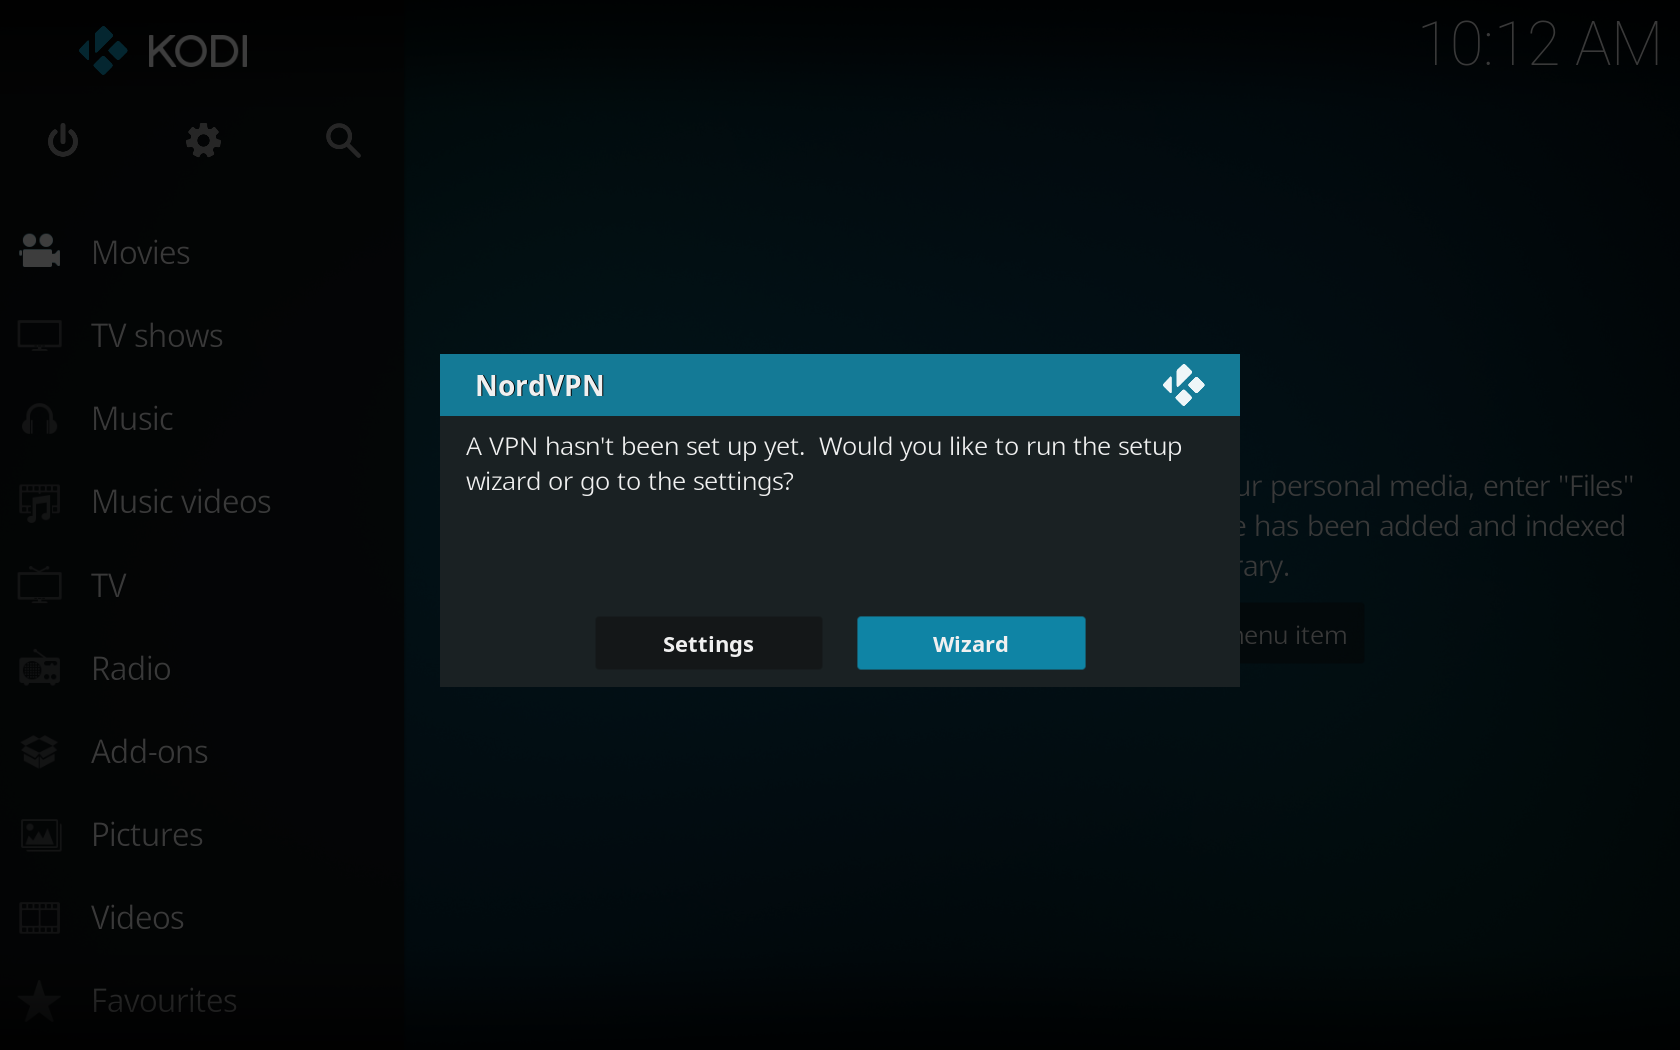
7. The NordVPN setup wizard will guide you through the process. You will be asked to enter your NordVPN account credentials.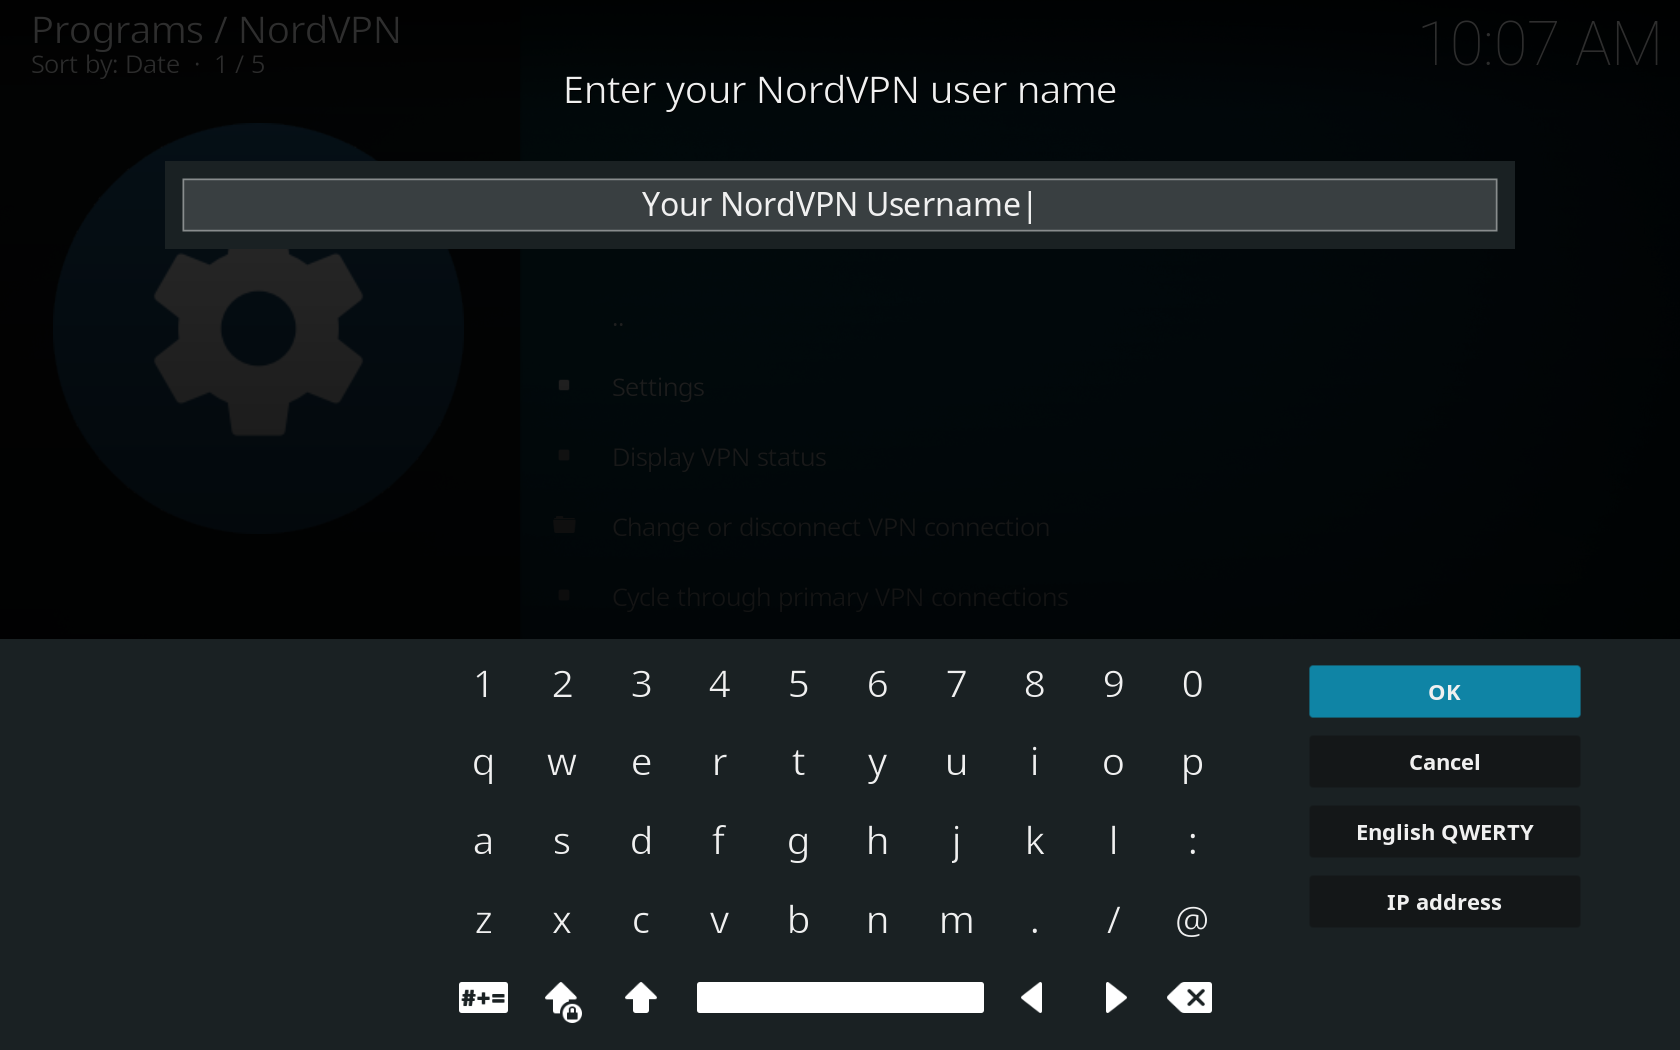
8. After you enter your credentials, you will be asked whether you want the VPN to connect automatically on startup. If you do, you will then need to select the country you want to connect to.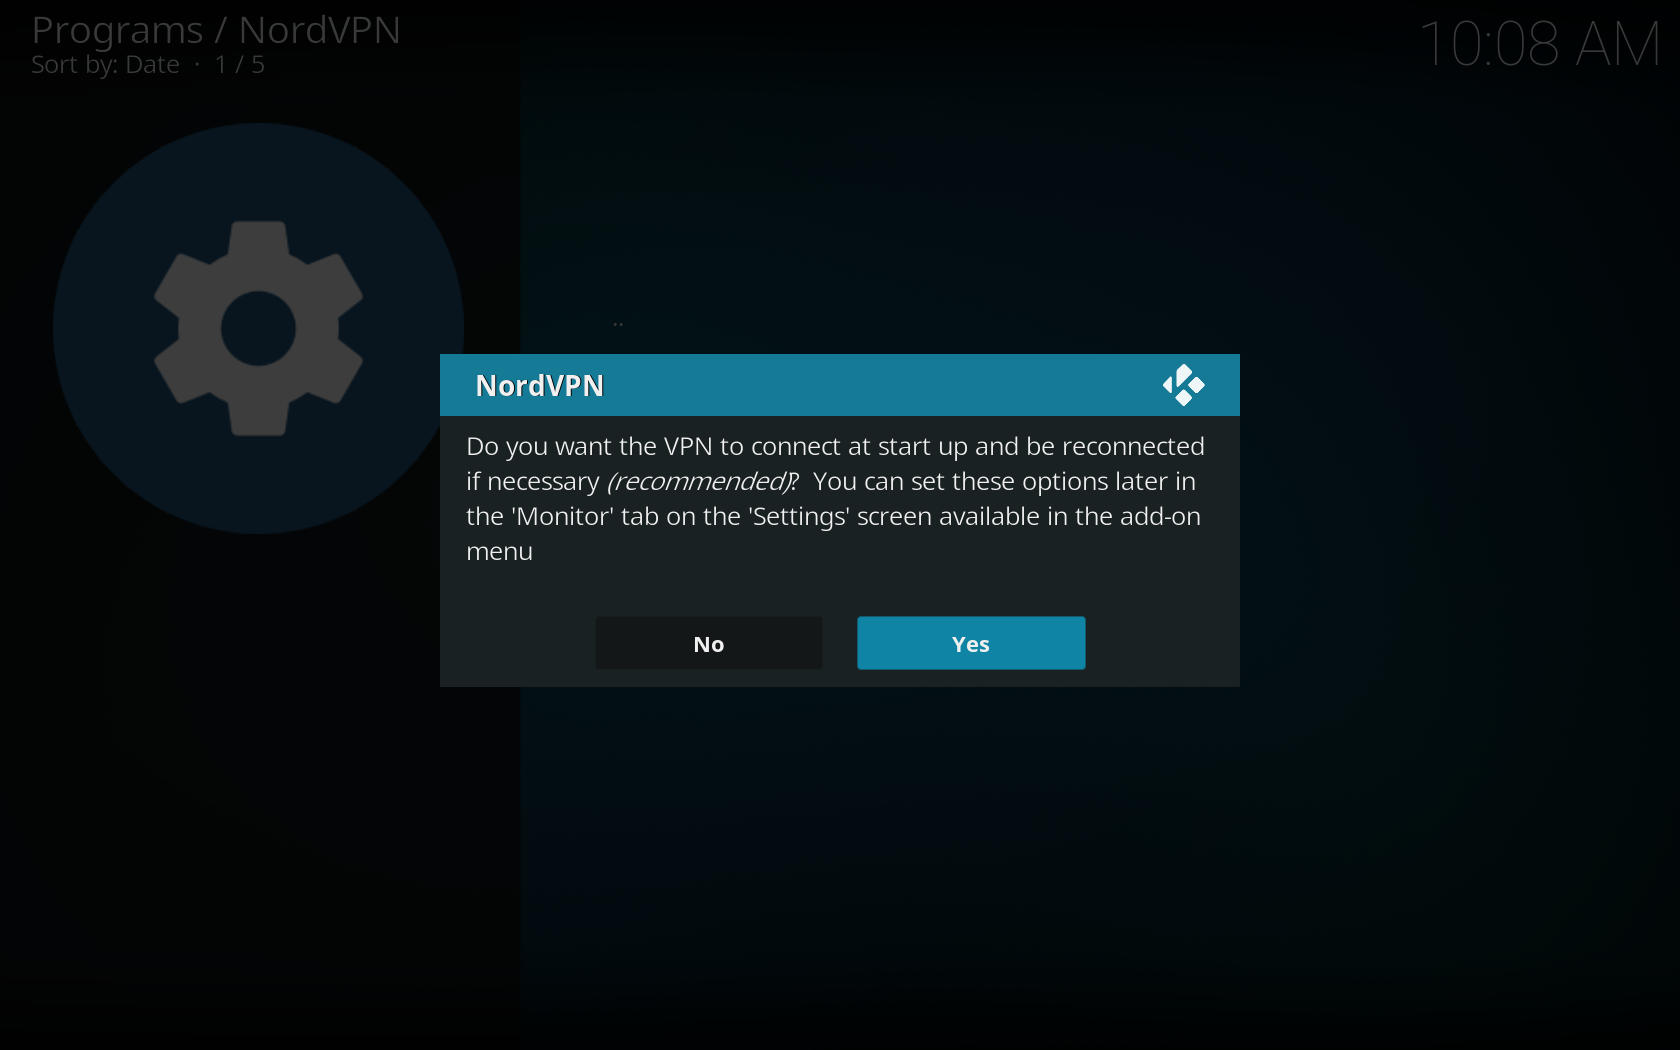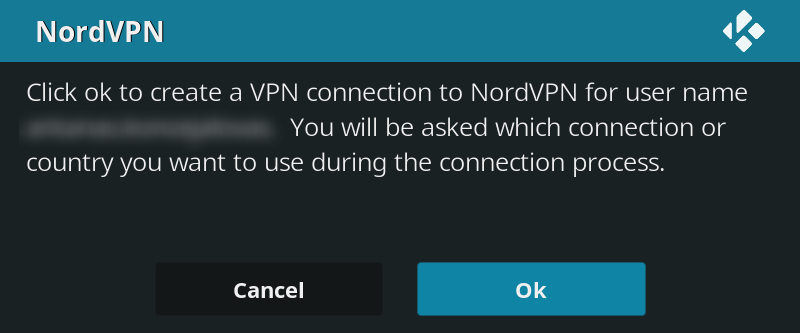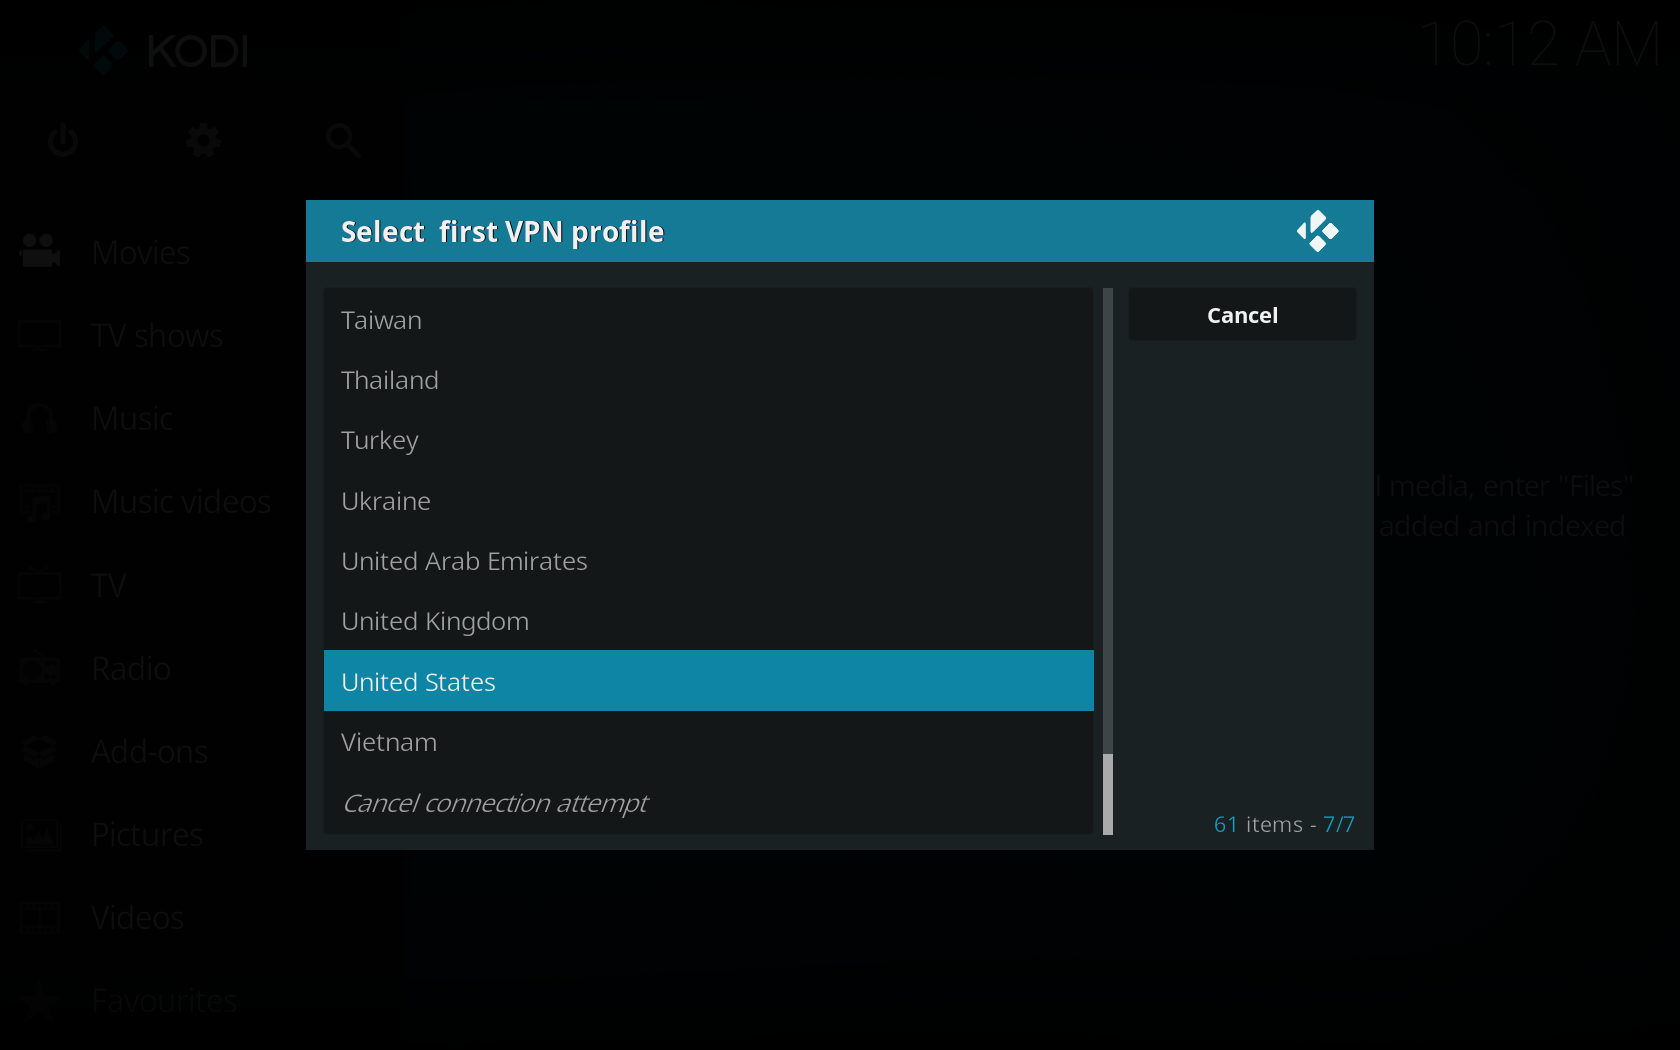
9. When you are done, you will be successfully connected to a VPN.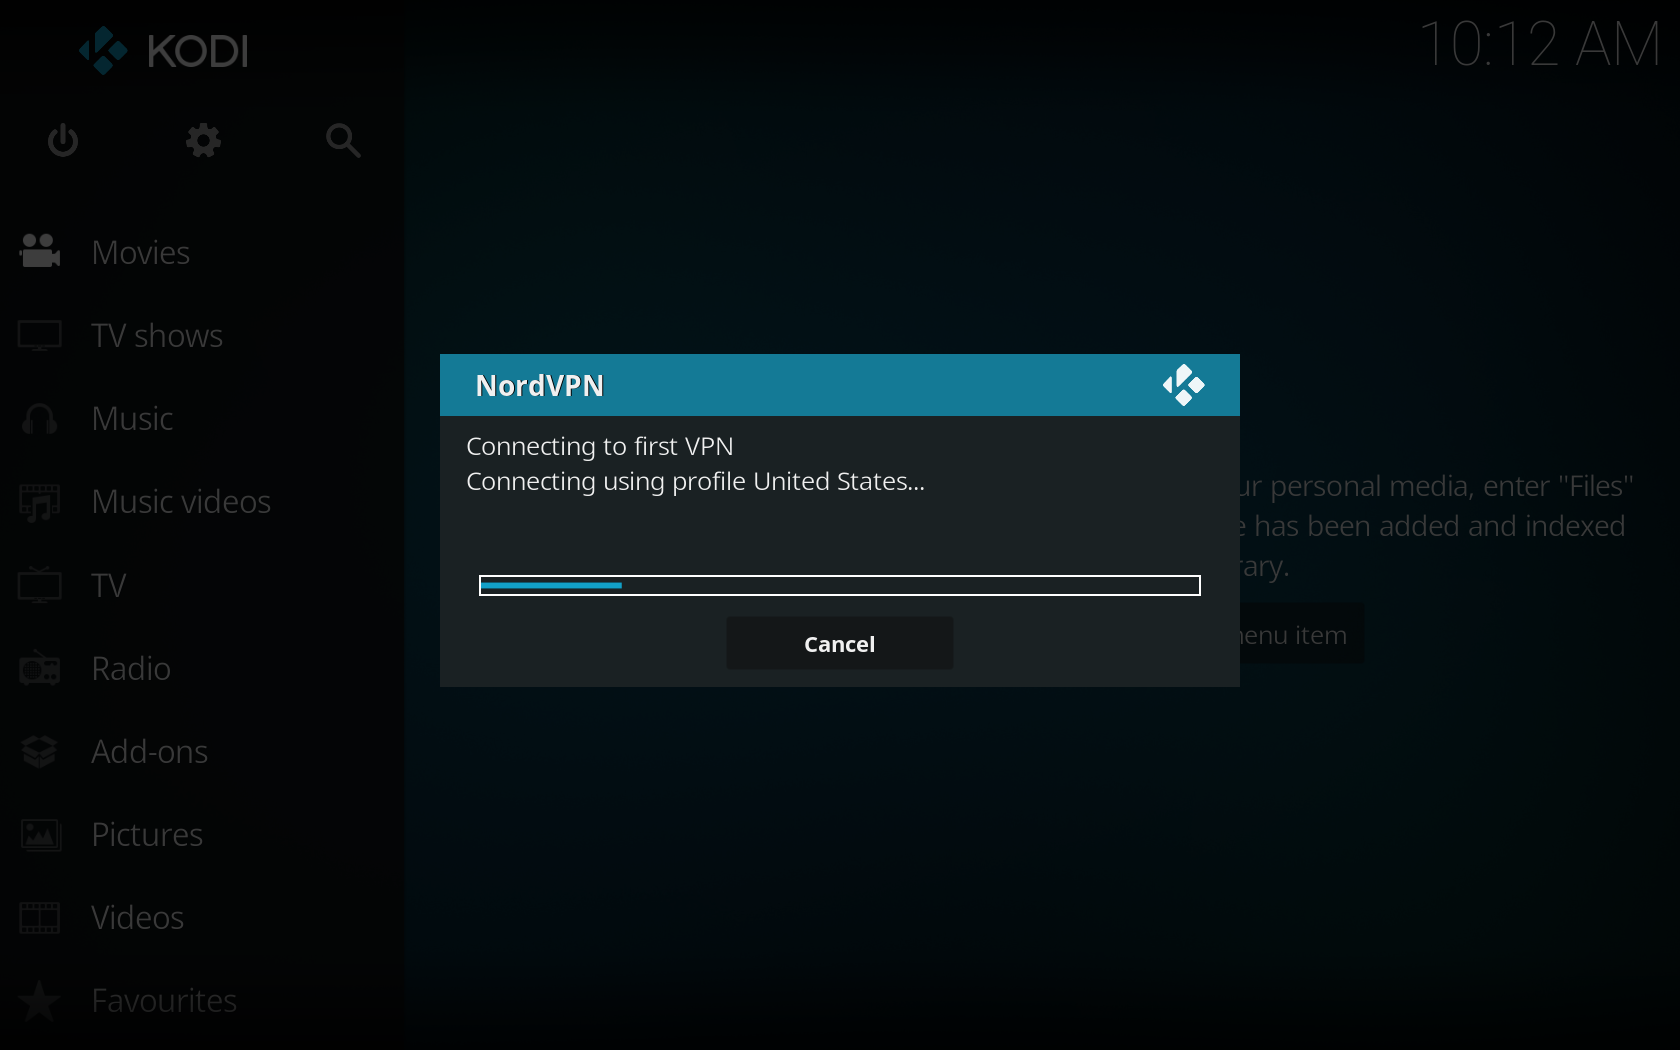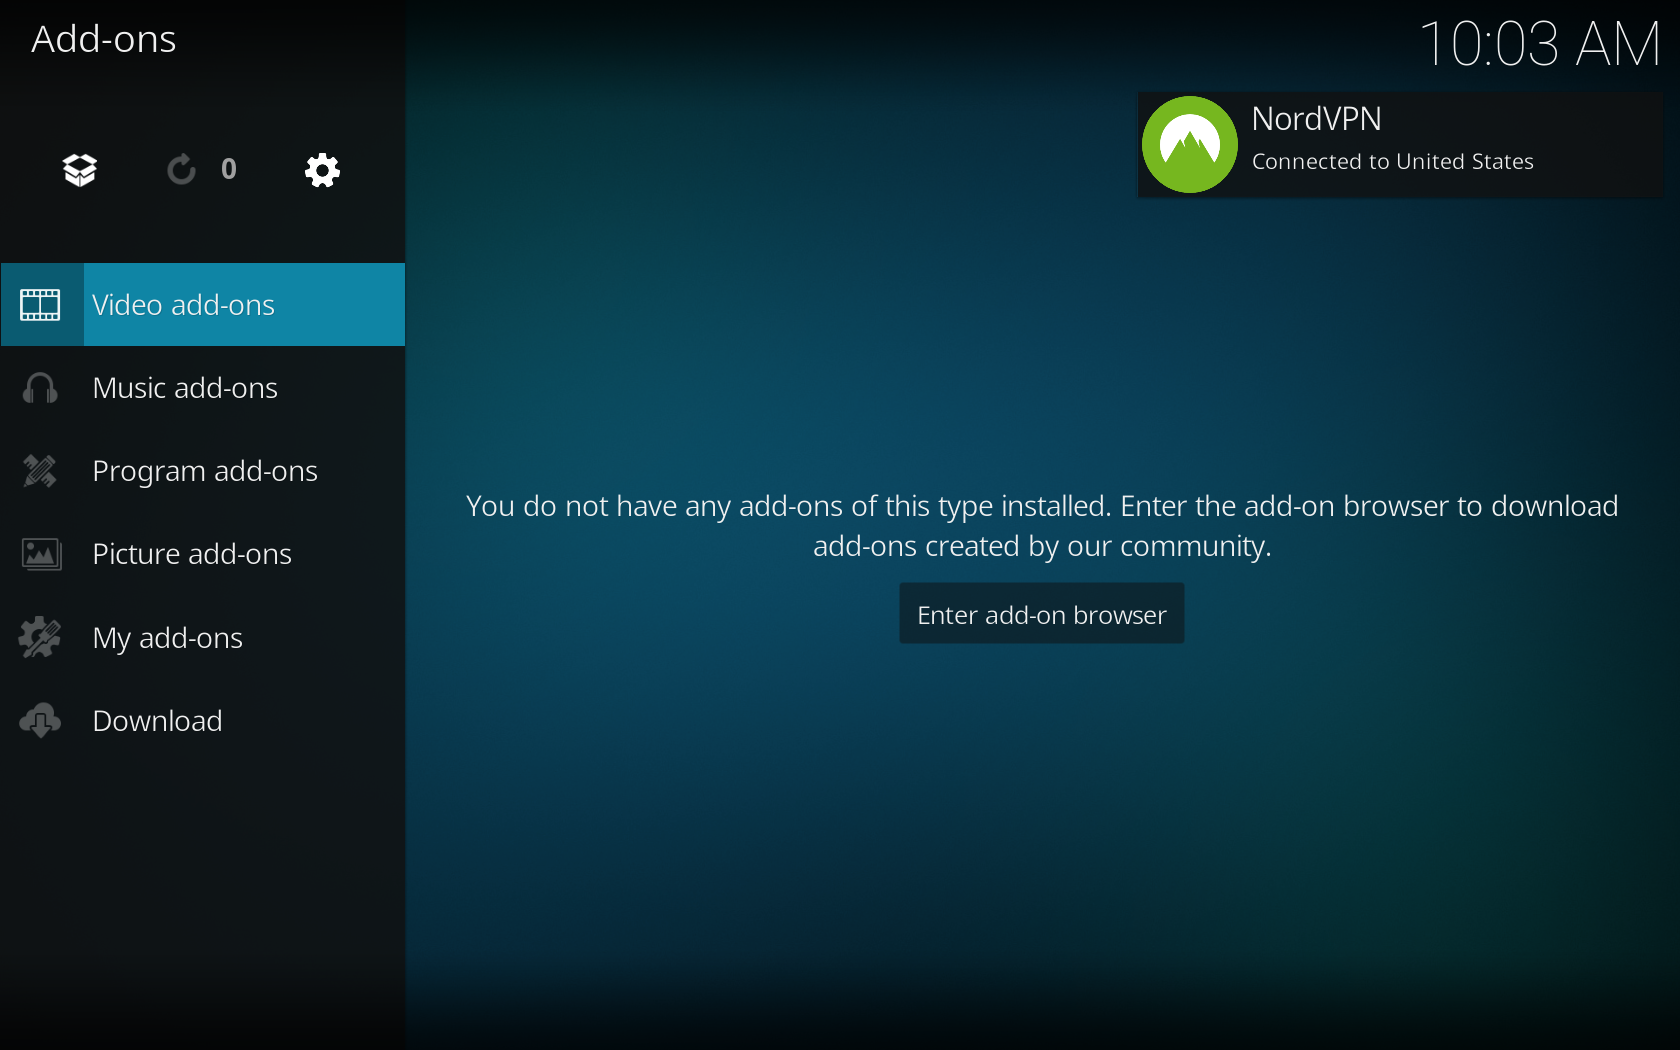
The NordVPN service should never be used to bypass copyright regulations. NordVPN does not promote, condone, or endorse the use of the service for such purposes. For more details, please read the NordVPN Terms of Service.",https://support.nordvpn.com/hc/en-us/articles/19563635506065-How-can-I-use-Kodi-with-NordVPN
Set up NordVPN on a Smart TV or Console,"There are a few [ways to set up a VPN for your Smart TV](https://nordvpn.com/blog/vpn-for-smart-tv/) or console. Picking the best method will depend on your specific device. Choose the relevant option from the list below:
* Setting up NordVPN connection on TVs
* [Android-based TVs and Android TV boxes](
* [Amazon Fire TV](
* [Apple TV](
* [Chromecast and Roku](
* [KODI extension](
* [Samsung TV](
* Setting up NordVPN connection on gaming consoles
* [Xbox](
* [PlayStation](
* [Nintendo Switch](
## Setting up NordVPN connection on TVs
Most smart TVs don’t support built-in VPN functionality, with the exception of Android-based TVs, but you can get a VPN on TV with an additional step. Try the connection methods listed below:
### Android-based TVs and Android TV boxes
* Download the native [NordVPN app for Android TV](https://nordvpn.com/download/android-tv/). Learn [how to use NordVPN for Android TV](https://support.nordvpn.com/hc/en-us/articles/19928244437777-Installing-and-using-NordVPN-on-Android-TV-or-Nvidia-Shield).
* [Set up SmartDNS on Android TV](https://support.nordvpn.com/hc/en-us/articles/19564451081873-How-to-Set-Up-SmartDNS-on-Apple-TV).
* [Set up a NordVPN on your router](https://support.nordvpn.com/hc/en-us/articles/19426084718865-Setting-up-a-router-with-NordVPN).
* [Share a wireless VPN connection](https://support.nordvpn.com/hc/en-us/articles/19916181239313-Share-a-wireless-VPN-connection-Windows) from your Windows PC.
* [Share a VPN connection through an Ethernet cable](https://support.nordvpn.com/hc/en-us/articles/19918886350097-Sharing-a-VPN-connection-through-an-Ethernet-cable) from your Windows PC.
### Amazon Fire TV
* Download the native [NordVPN app for Amazon devices](https://nordvpn.com/download/firestick/). Learn [how to install NordVPN on Amazon Fire devices](https://support.nordvpn.com/hc/en-us/articles/19453529667089-Installing-NordVPN-on-Amazon-Fire-devices).
* [Set up a NordVPN on your router](https://support.nordvpn.com/Connectivity/Router/1047409322/Setting-up-a-router-with-NordVPN.htm).
* [Share a wireless VPN connection](https://support.nordvpn.com/Connectivity/Windows/1088053522/Sharing-a-wireless-Virtual-Private-Network-connection-from-your-Windows-PC.htm) from your Windows PC.
### Apple TV
* Download the native [NordVPN app for Apple TV](https://nordvpn.com/download/apple-tv/).
* [Set up SmartDNS on Apple TV](https://support.nordvpn.com/hc/en-us/articles/19564451081873-How-to-Set-Up-SmartDNS-on-Apple-TV).
* [Set up a NordVPN on your router](https://support.nordvpn.com/Connectivity/Router/1047409322/Setting-up-a-router-with-NordVPN.htm).
* [Share a wireless VPN connection](https://support.nordvpn.com/Connectivity/Windows/1088053522/Sharing-a-wireless-Virtual-Private-Network-connection-from-your-Windows-PC.htm) from your Windows PC.
* [Share a VPN connection through an Ethernet cable](https://support.nordvpn.com/Connectivity/Windows/1047409882/Sharing-a-VPN-connection-through-an-Ethernet-cable.htm) from your Windows PC.
### Chromecast and Roku
* [Set up a NordVPN on your router](https://support.nordvpn.com/Connectivity/Router/1047409322/Setting-up-a-router-with-NordVPN.htm).
* [Share a wireless VPN connection](https://support.nordvpn.com/Connectivity/Windows/1088053522/Sharing-a-wireless-Virtual-Private-Network-connection-from-your-Windows-PC.htm) from your Windows PC.
### KODI extension
* [Set up a KODI extension on NordVPN](https://support.nordvpn.com/hc/en-us/articles/19563635506065-How-can-I-use-Kodi-with-NordVPN).
### Samsung TV
* [Set up a NordVPN on your router](https://support.nordvpn.com/Connectivity/Router/1047409322/Setting-up-a-router-with-NordVPN.htm).
* [Share VPN via a mobile hotspot on Windows 10](https://support.nordvpn.com/hc/en-us/articles/19748256261649-Share-VPN-via-a-mobile-hotspot-on-Windows-10).
* [Share a wireless VPN connection](https://support.nordvpn.com/Connectivity/Windows/1088053522/Sharing-a-wireless-Virtual-Private-Network-connection-from-your-Windows-PC.htm) from your Windows PC.
* [Share a VPN connection through an Ethernet cable](https://support.nordvpn.com/Connectivity/Windows/1047409882/Sharing-a-VPN-connection-through-an-Ethernet-cable.htm) from your Windows PC.
## Setting up NordVPN connection on gaming consoles
Video game consoles such as Xbox, Playstation, or Nintendo Switch do not support built-in VPN functionality, however, you can set up a VPN on your gaming console with a few additional steps.
### Xbox console
If you want to set up a [VPN on Xbox](https://nordvpn.com/download/xbox/), try this:
* [Install NordVPN on your router](https://nordvpn.com/blog/setup-vpn-router/) and connect your Xbox to the Wi-Fi.
* [Connect Xbox to your Windows PC](https://nordvpn.com/download/xbox/#:~:text=Connect%20Xbox%20to%20your%20Windows%20PC).
### Playstation console
If you want to set up a [VPN on PlayStation](https://nordvpn.com/download/playstation/), try this:
* [Install NordVPN on your router](https://nordvpn.com/blog/setup-vpn-router/) and connect your Playstation to the Wi-Fi.
* [Connect PlayStation to your Windows PC](https://nordvpn.com/download/playstation/#:~:text=Connect%20PlayStation%20to%20your%20Windows%20PC).
### Nintendo Switch console
If you want to set up a [VPN on a Nintendo Switch](https://nordvpn.com/download/nintendo-switch/), try this:
* Connect via mobile hotspot:
1. Install NordVPN to a device of your choice (laptop, smartphone, or tablet)
2. Connect to any NordVPN server.
3. [Set up a mobile hotspot](https://support.nordvpn.com/hc/en-us/articles/19748256261649-Share-VPN-via-a-mobile-hotspot-on-Windows-10).
4. Connect your Nintendo Switch to the hotspot.
* [Install NordVPN on your router](https://nordvpn.com/blog/setup-vpn-router/) and connect your Nintendo Switch to the Wi-Fi.
The NordVPN service should never be used to bypass copyright regulations. NordVPN does not promote, condone, or endorse the use of the service for such purposes. For more details, please read the NordVPN [Terms of Service](https://my.nordaccount.com/legal/terms-of-service/).",https://support.nordvpn.com/hc/en-us/articles/19482241203217-Set-up-NordVPN-on-a-Smart-TV-or-Console
Using NordVPN on Chromebook,"# Note: these connection methods may NOT work on some older Chromebook models.
There are two main connection methods you can use to secure your [Chromebook](https://nordvpn.com/download/chromebook/) with NordVPN:
1. Download and install the [NordVPN Android application](https://support.nordvpn.com/hc/en-us/articles/19449000730385-How-to-setup-NordVPN-on-Android).This is the recommended option as it will secure the entire online traffic on your device.
2. Download and install the [NordVPN Chrome extension](https://support.nordvpn.com/hc/en-us/articles/20349533941265-How-to-set-up-NordVPN-with-Chrome-extension).This is an alternative connection method. However, keep in mind that it will only secure traffic on the Chrome browser and will not protect your traffic outside Chrome.",https://support.nordvpn.com/hc/en-us/articles/19474957393169-Using-NordVPN-on-Chromebook
Installing NordVPN application on macOS,"The first step towards online security is setting up NordVPN correctly. Follow these simple steps to install the NordVPN app and connect to a VPN server.
Note: NordVPN supports macOS 11 Big Sur, macOS 12 Monterey, macOS 13 Ventura, and macOS Sanoma 14 and above.
Attention: If you encounter issues during the installation of NordVPN on macOS Ventura, please refer to the following guide for a possible solution: macOS Ventura Error: The Installation Failed.
* Downloading and installing the NordVPN app
* Setting up the NordVPN application
* Connecting to servers
* [Connecting to a specific server](
* [Connecting to a specific country](
* NordVPN features
* [Map](
* [Threat Protection Pro™](
* [Meshnet](
* [Dark Web Monitor](
* [Presets](
* [Statistics](
* [Settings](
* [Quick Help](
* NordVPN settings
* [General](
* [Auto-connect](
* [Kill Switch](
* [DNS](
* [Appearance](
* [Refer a friend](
* [Other Apps](
* [Account](
## Downloading and installing the NordVPN app
1. Download [NordVPN for macOS](https://nordvpn.com/download/mac/):Alternatively, [click here to download the latest macOS version](https://downloads.nordcdn.com/apps/macos/generic/NordVPN-OpenVPN/latest/NordVPN.pkg).
2. Navigate to the folder where you downloaded the NordVPN.pkg file and double-click on it to begin the installation:Note: Ensure the download file is saved locally on your device (e.g., downloads folder, desktop) and not within Dropbox or other file management/synchronization tools or special folders.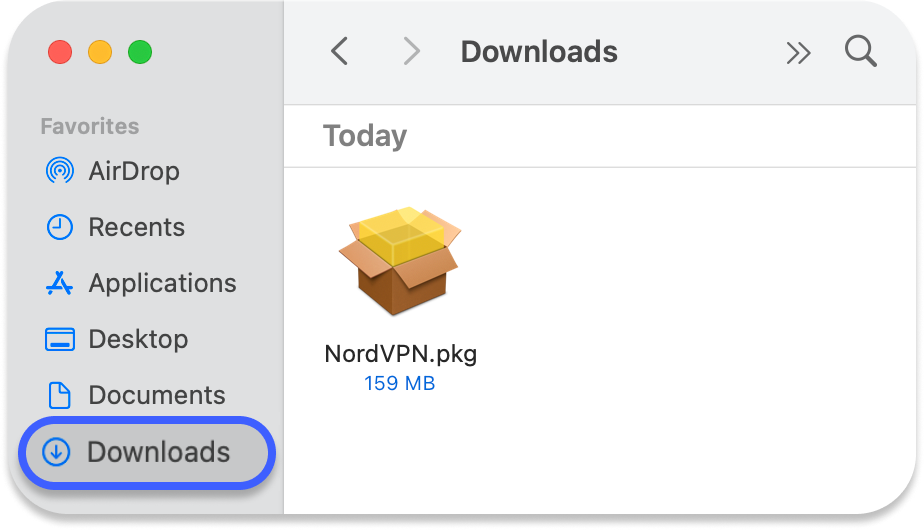
3. A new Install window will pop up, guiding you through the installation process. Choose to continue: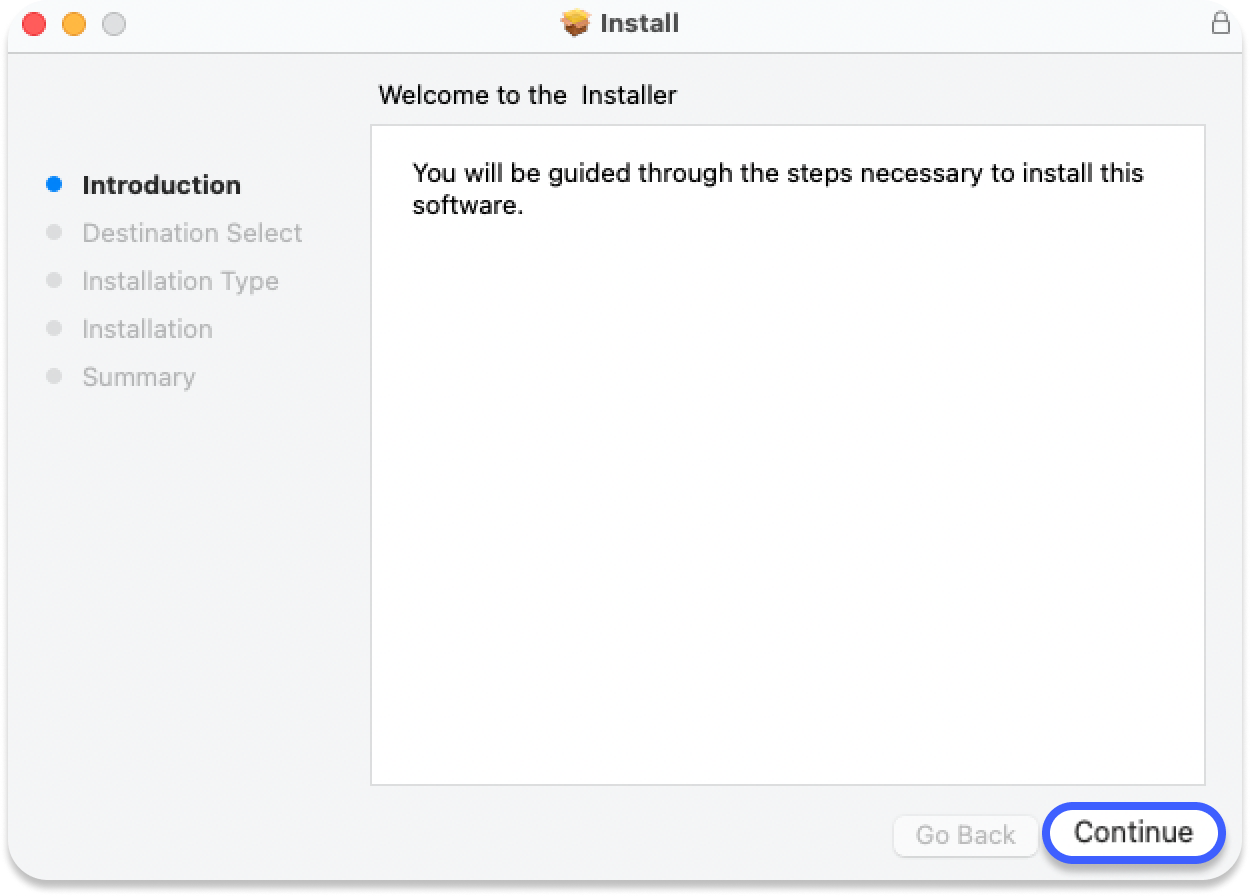
4. Click on install: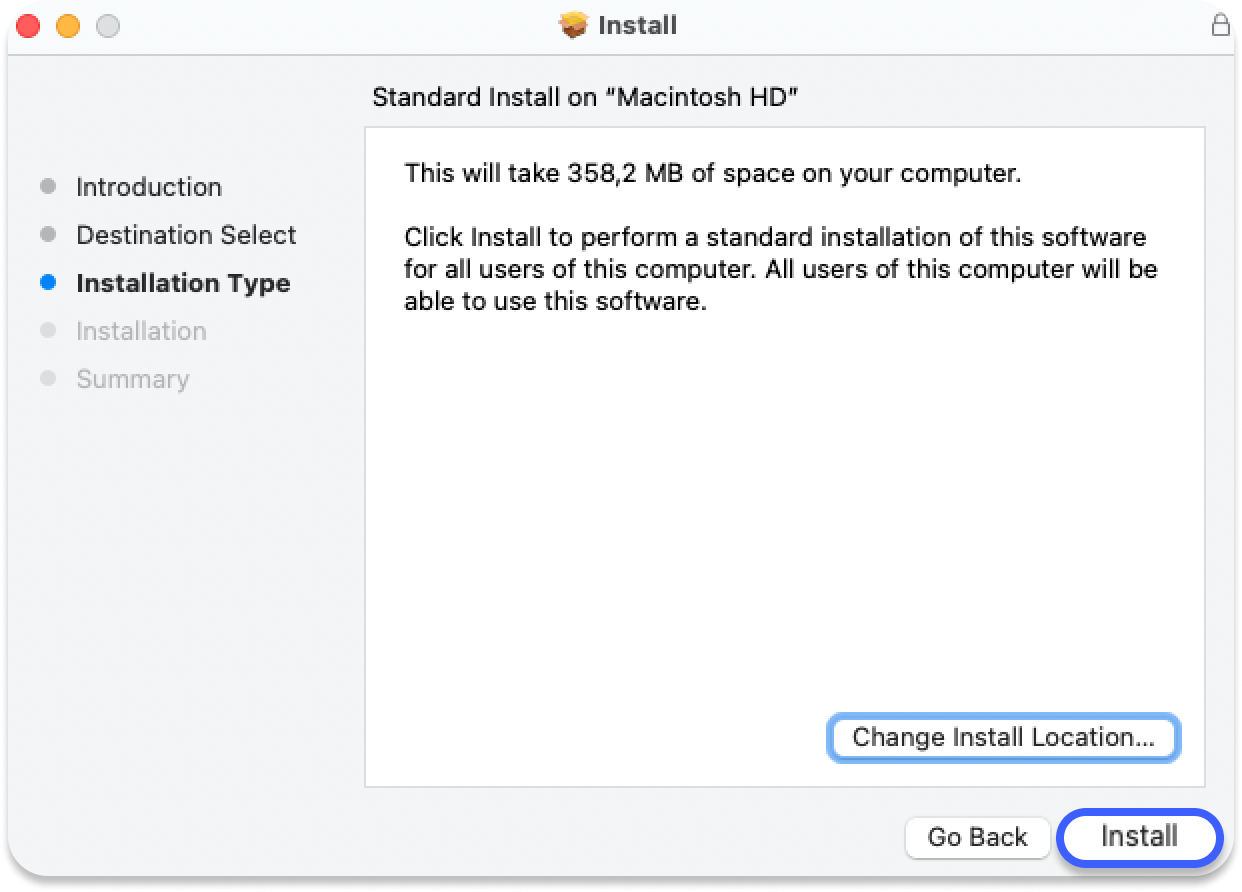
5. You will be asked for permission to install the installer, which is required to establish secure VPN tunnels. Enter your Mac's password and choose to install the software: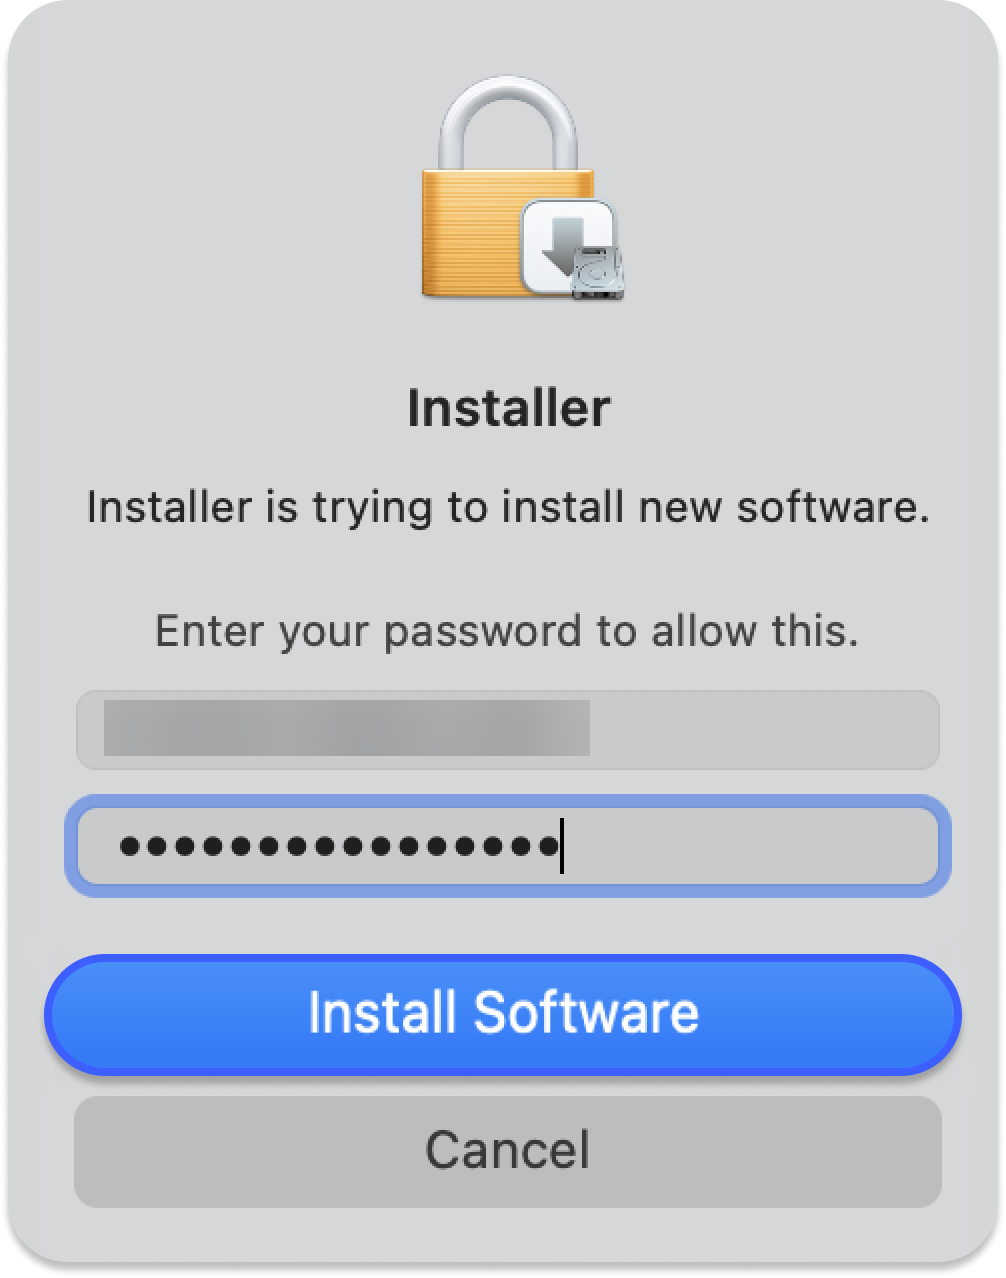You can also confirm it with a fingerprint: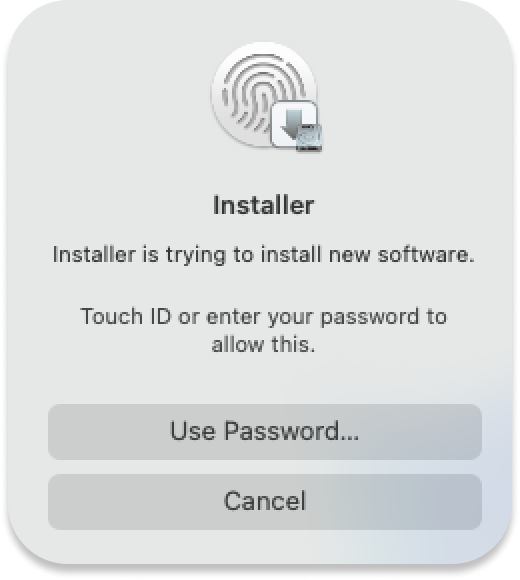
6. Give access to the installer to files in the Downloads folder by clicking ok in the new pop-up window: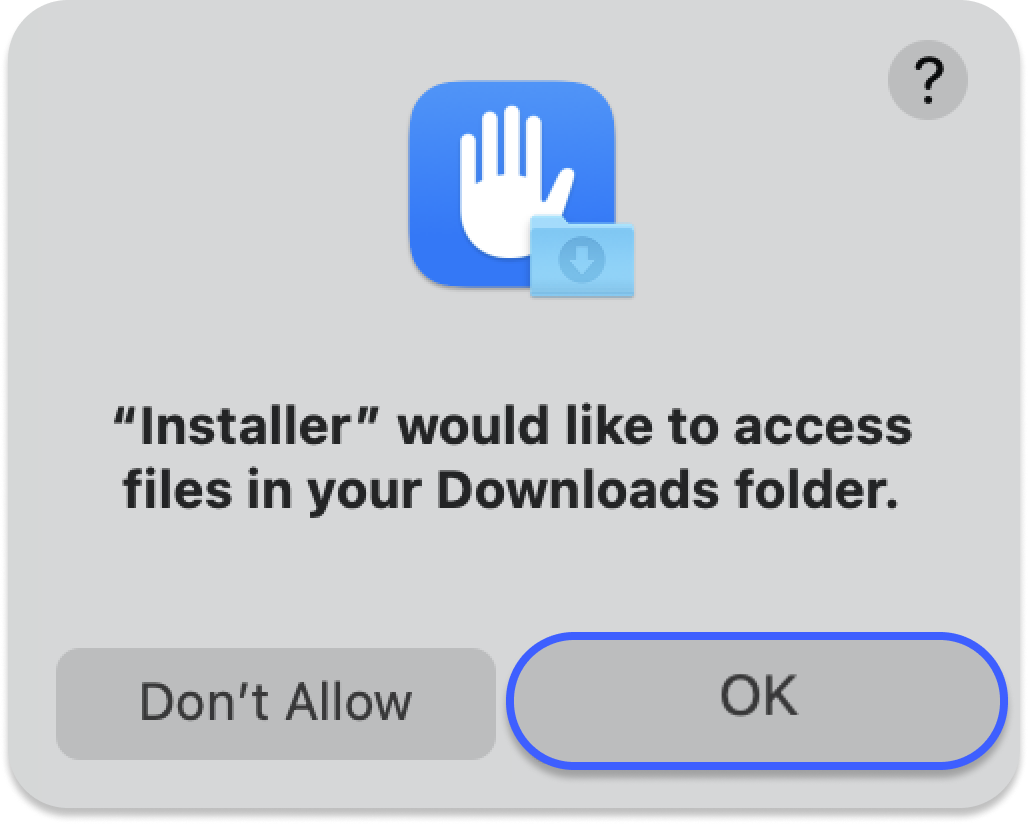
7. A message will confirm that the app was successfully installed. Close the window: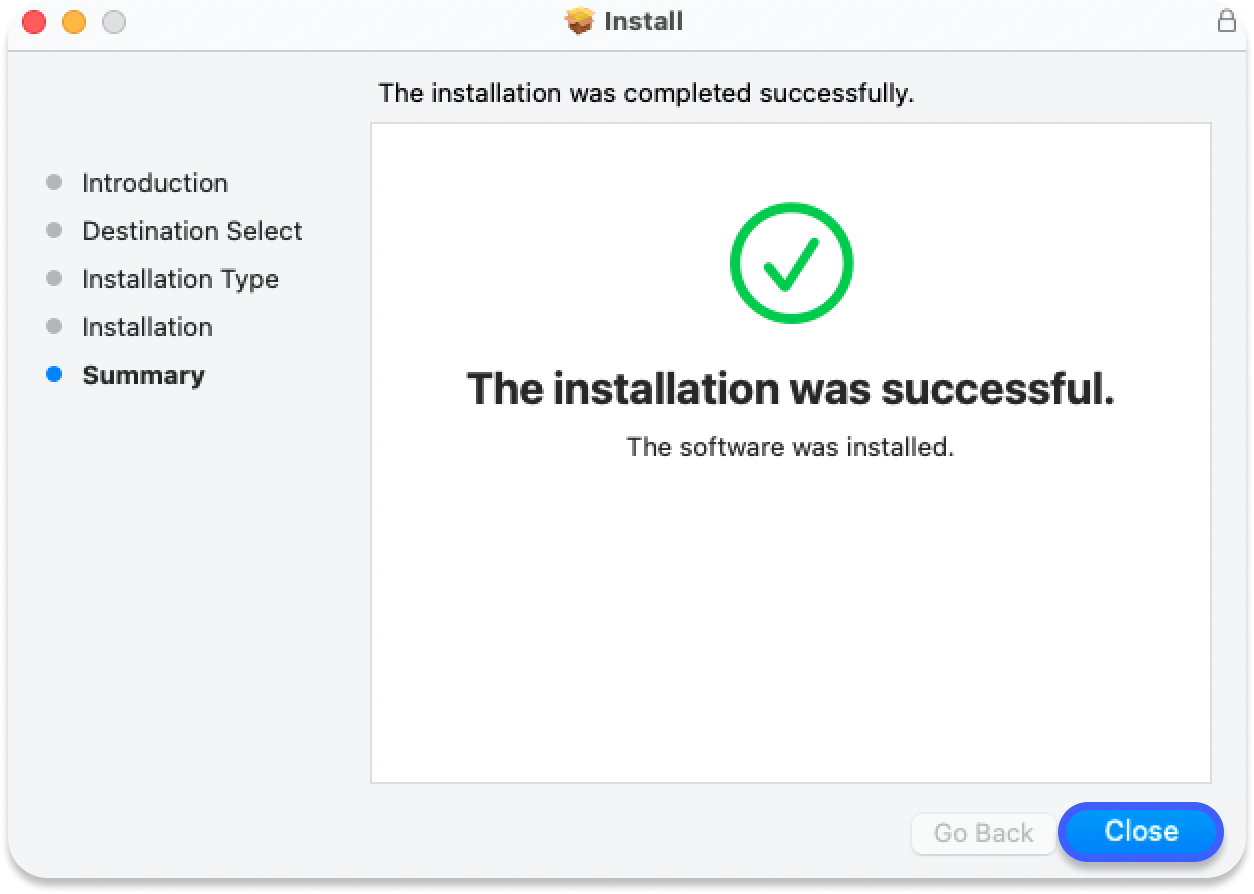
## Setting up and using the NordVPN application
1. Open your launchpad and click on the NordVPN icon: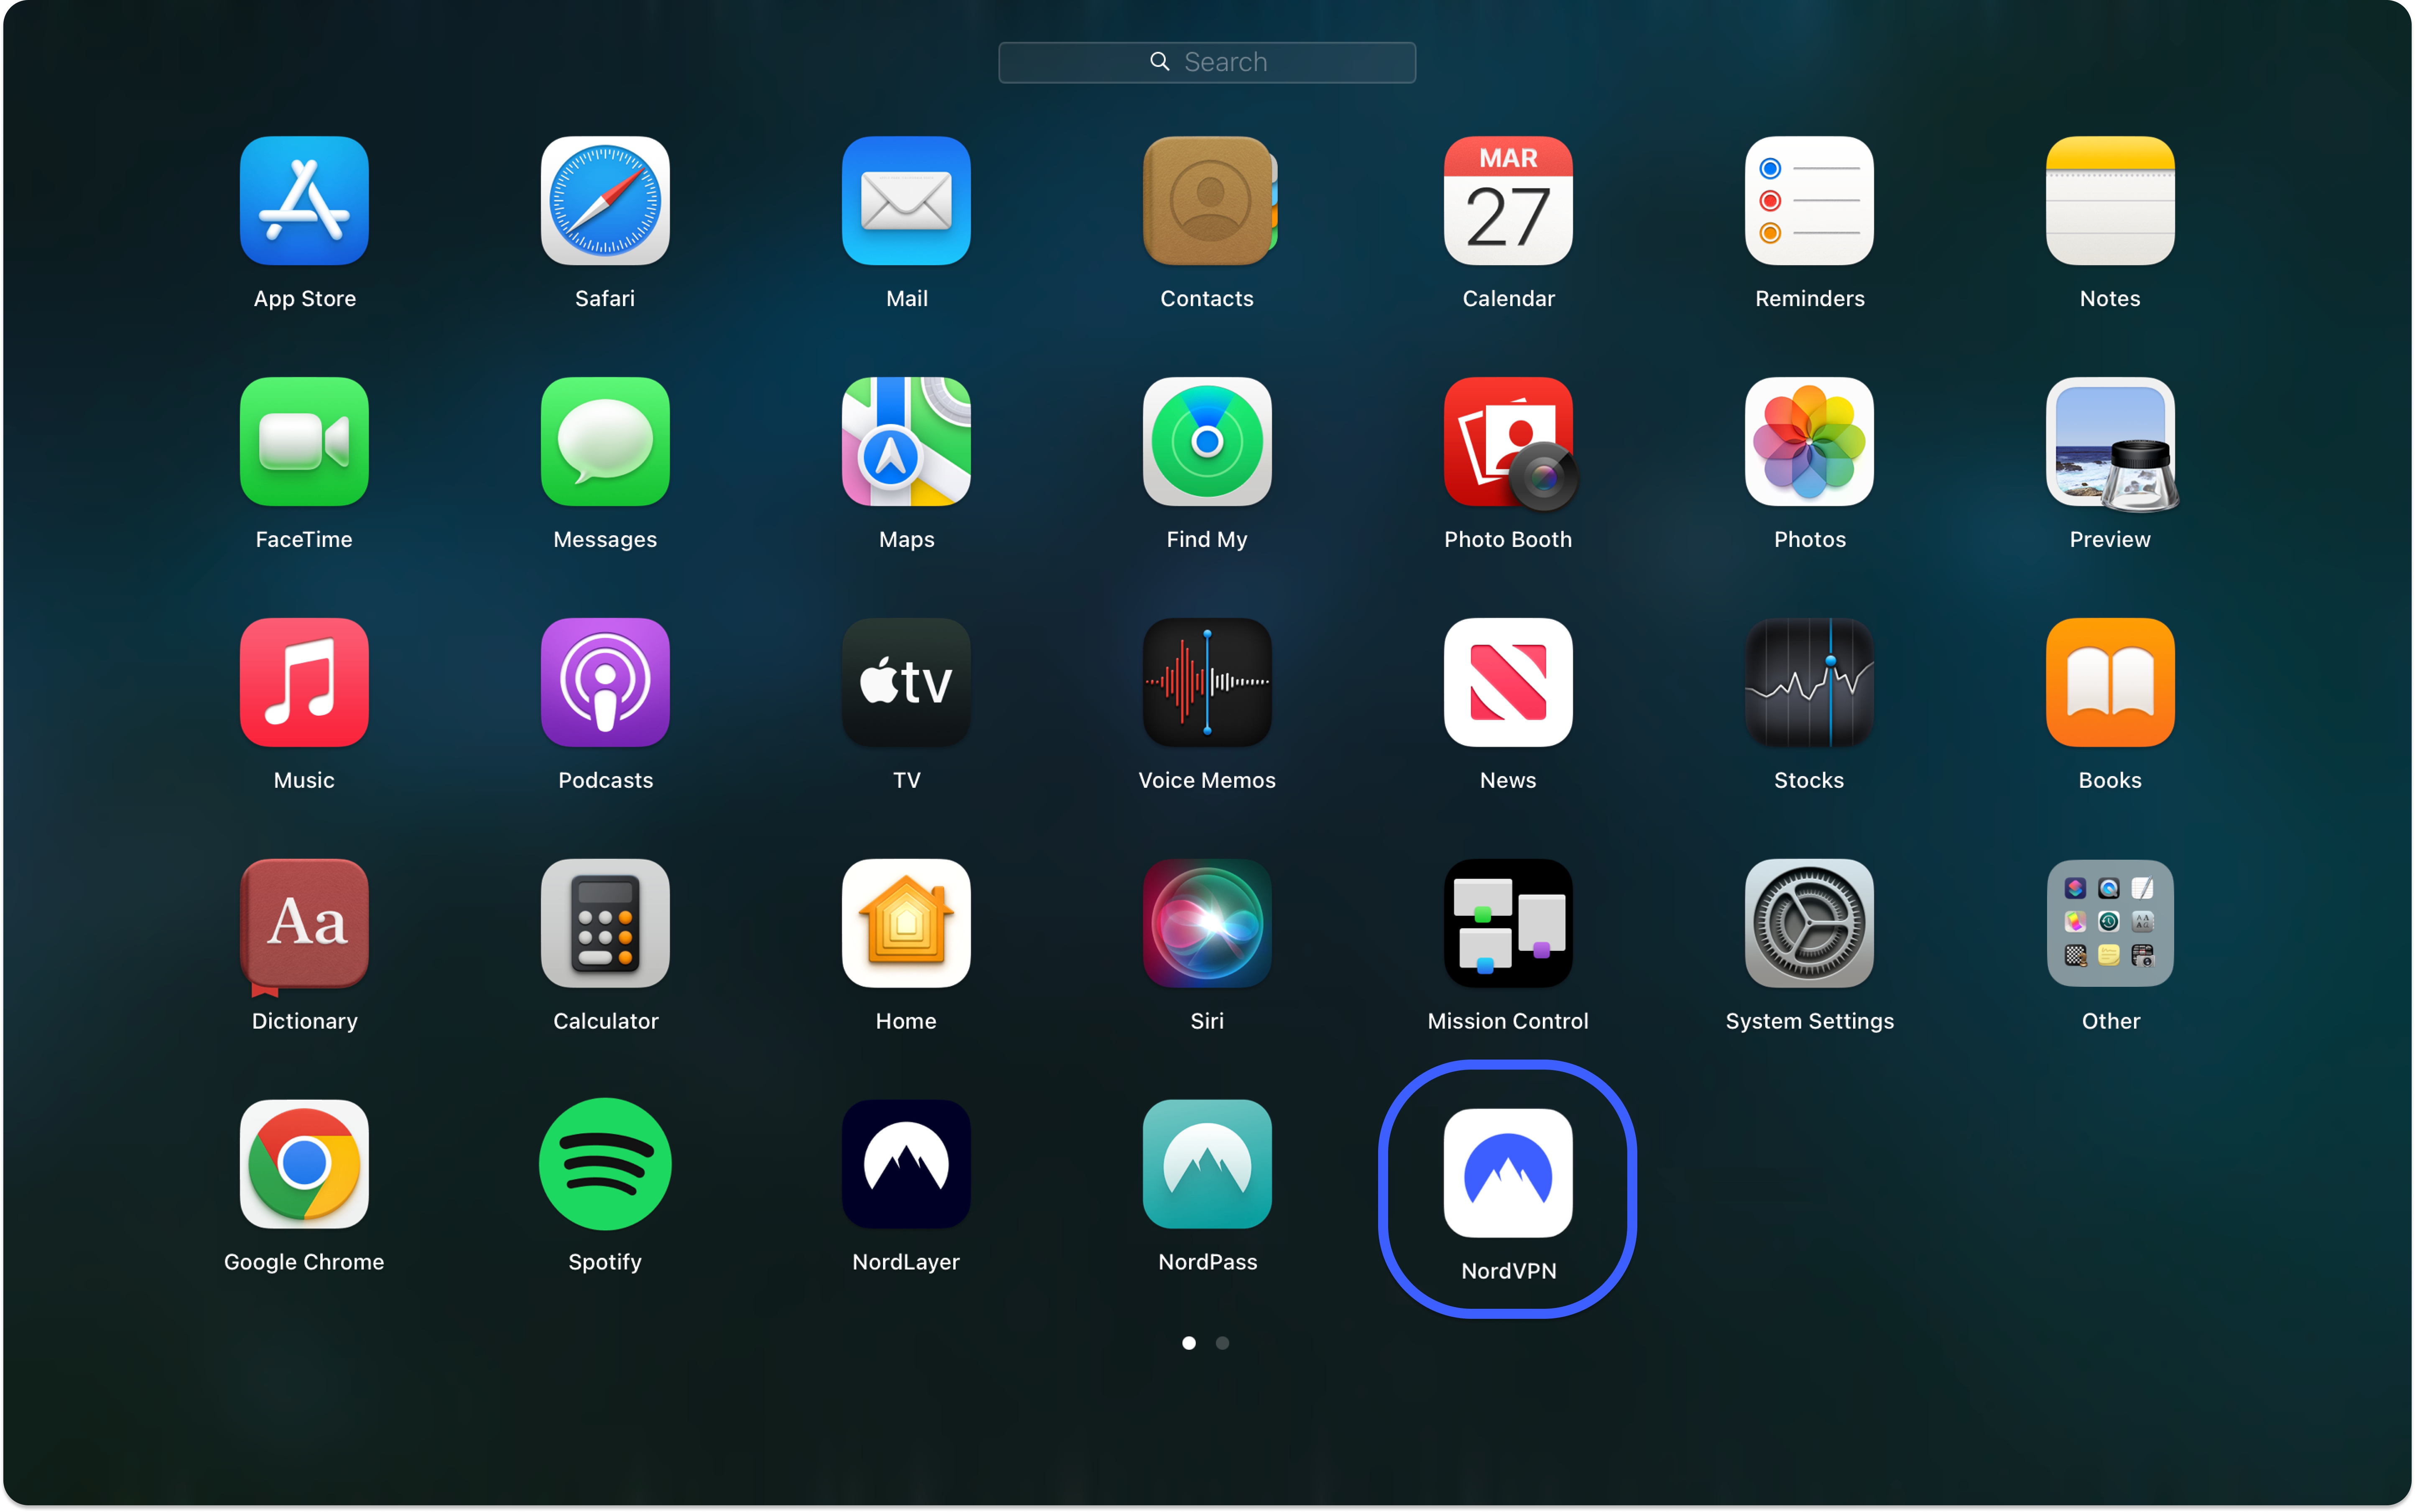
2. If you have a NordVPN account, click log In in the top-right corner of the screen and enter your email address and password. If you are a new user, click sign up at the top-right corner of the screen:
3. When logging in, you will be redirected to your Nord Account. Enter your registered email address and password. You can also sign in using your Google account or Apple ID or by entering a one-time login code:
4. If you are a new user, create a [Nord Account](https://my.nordaccount.com/) by entering your email address and other required information:
5. After completing the above steps, you will be prompted to open the NordVPN app. Agree to always allow Nord Account and grant access to the app:
6. After a successful login, you will be introduced to the main NordVPN application window:
## Connecting to servers
The Quick Connect button in the top-right corner will automatically connect you to a server recommended by our smart algorithm.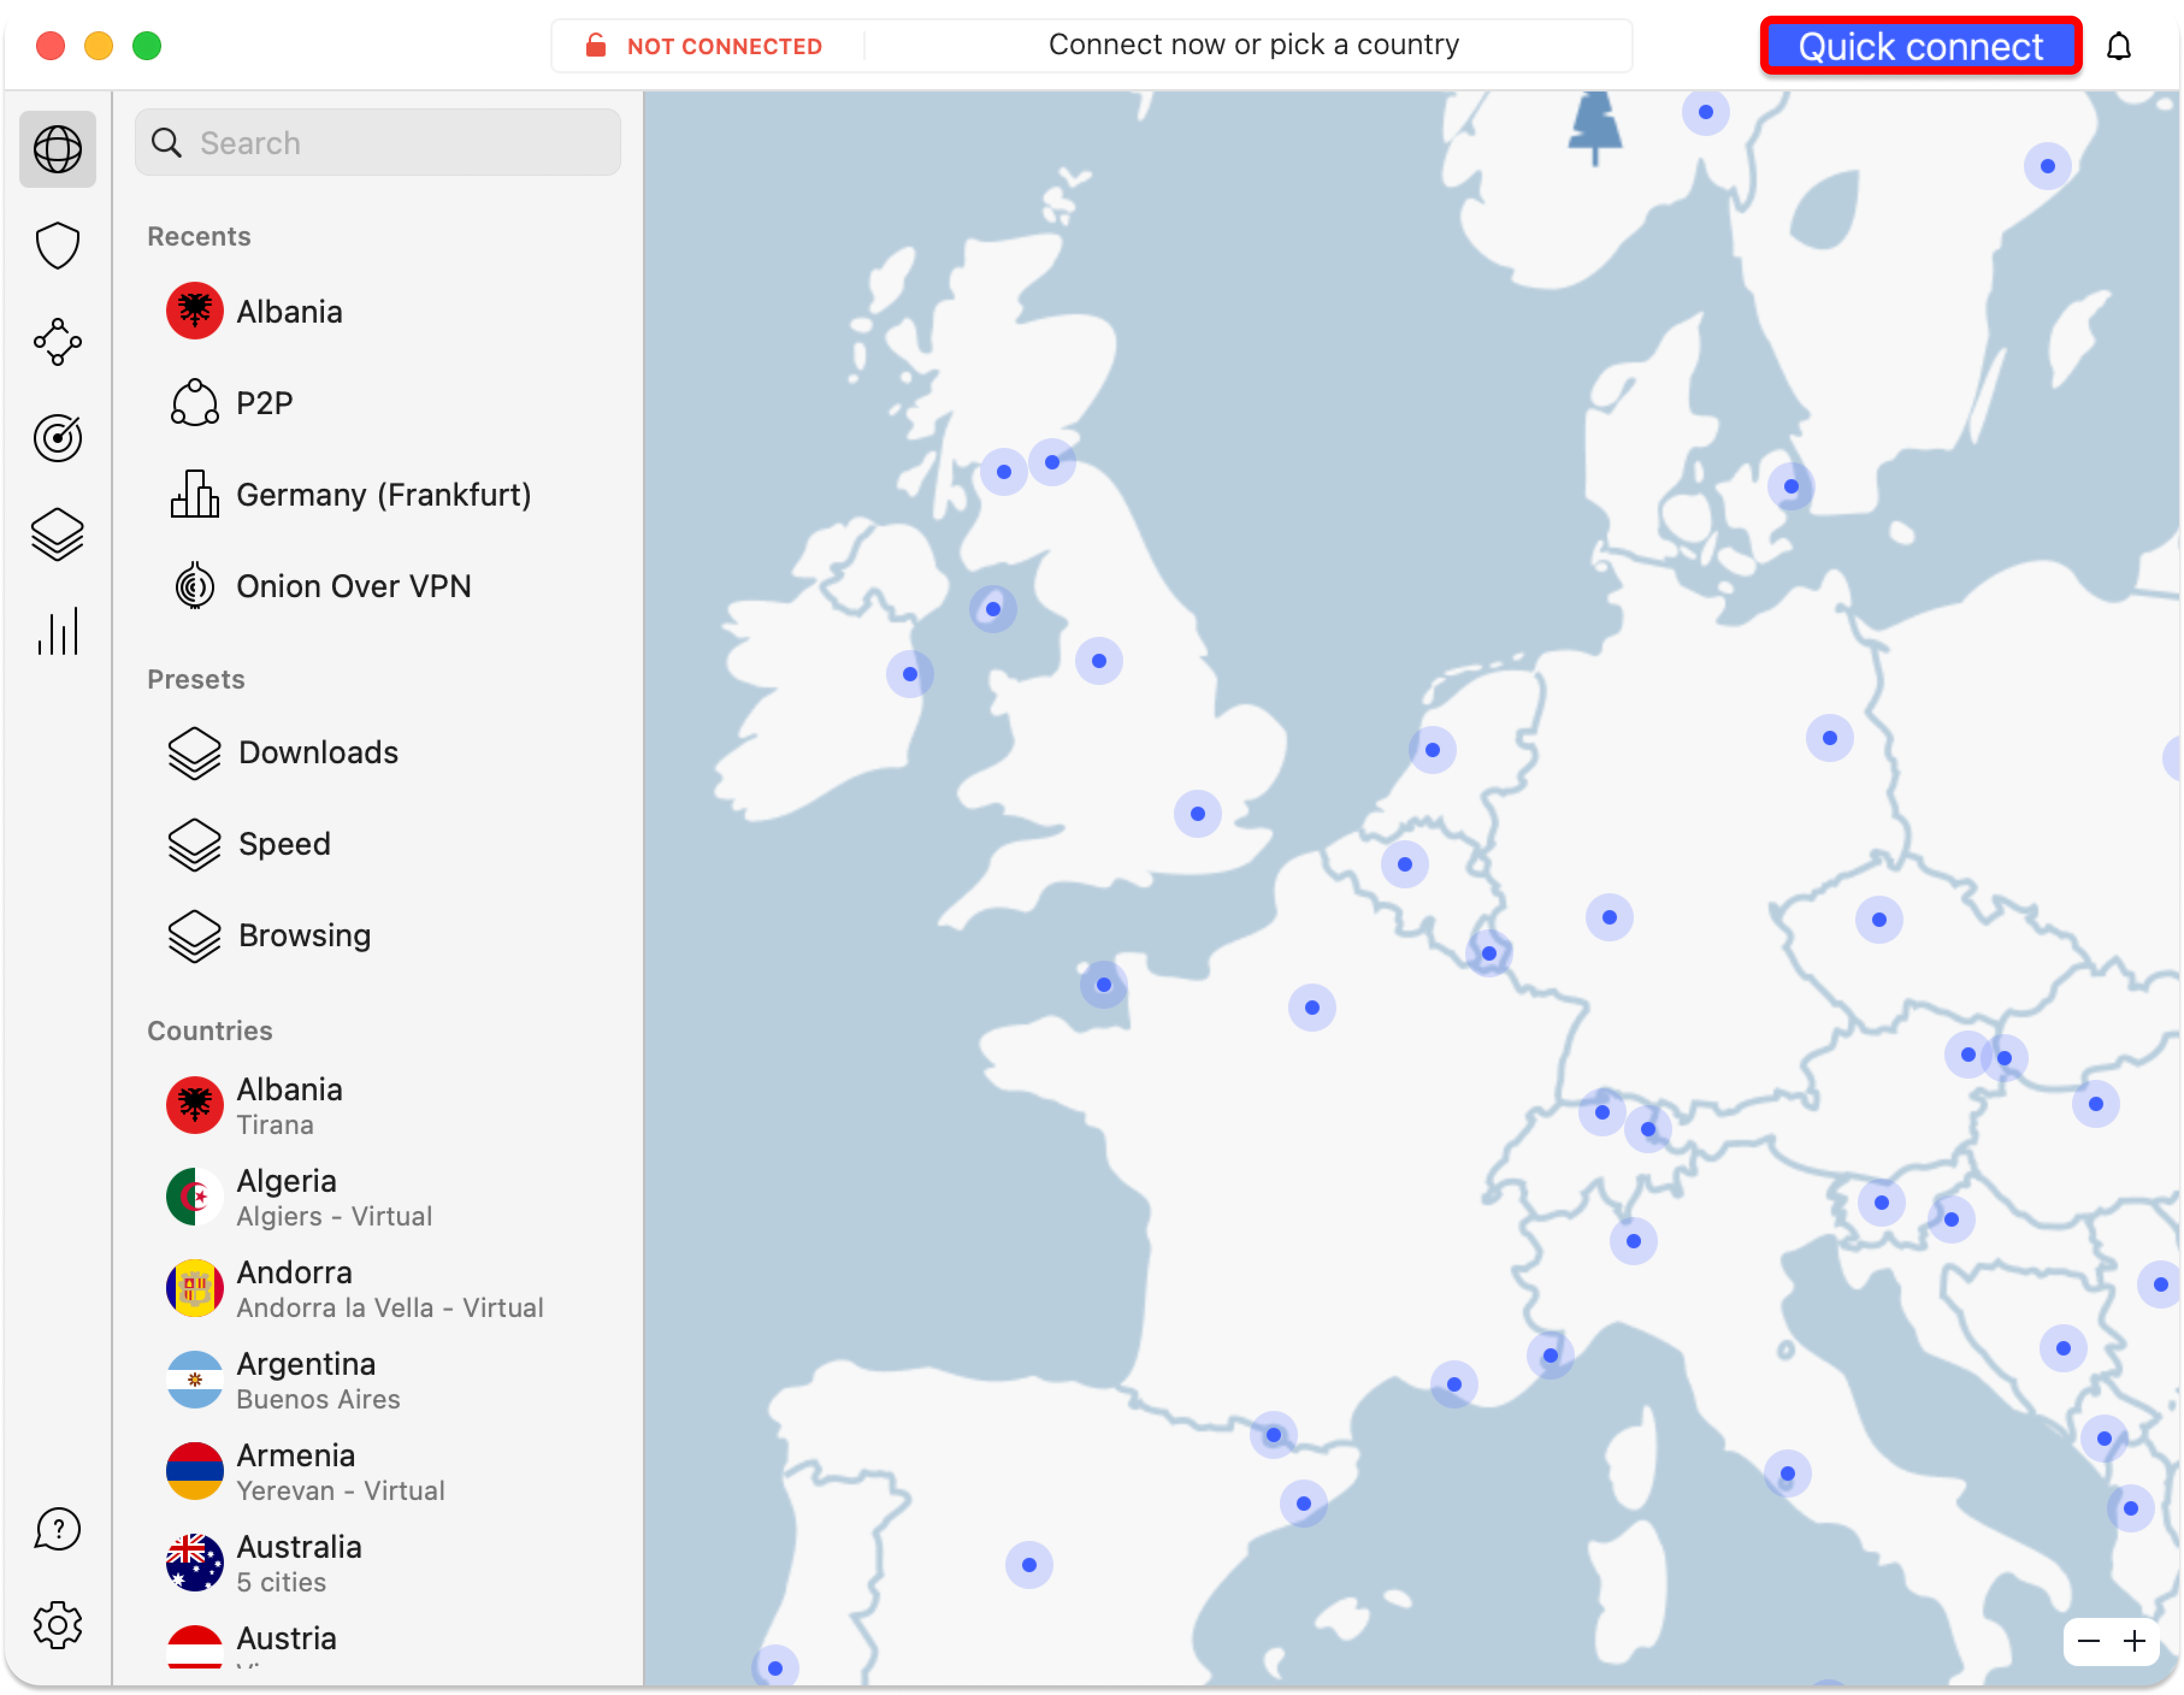
### Connecting to a specific server
To connect to a specific server, click on the Search field in the top-left corner of the app. Enter a country, a category, or a specific server number (e.g., Canada #1224) to find what you need.
### Connecting to a specific country
All servers in the left sidebar are sorted by country and specialty.To connect to a specialty server, hover over one of the categories under [Specialty Servers](https://support.nordvpn.com/hc/en-us/articles/19479130821521-Different-NordVPN-server-categories-explained), and click on the three-dot menu to select a country: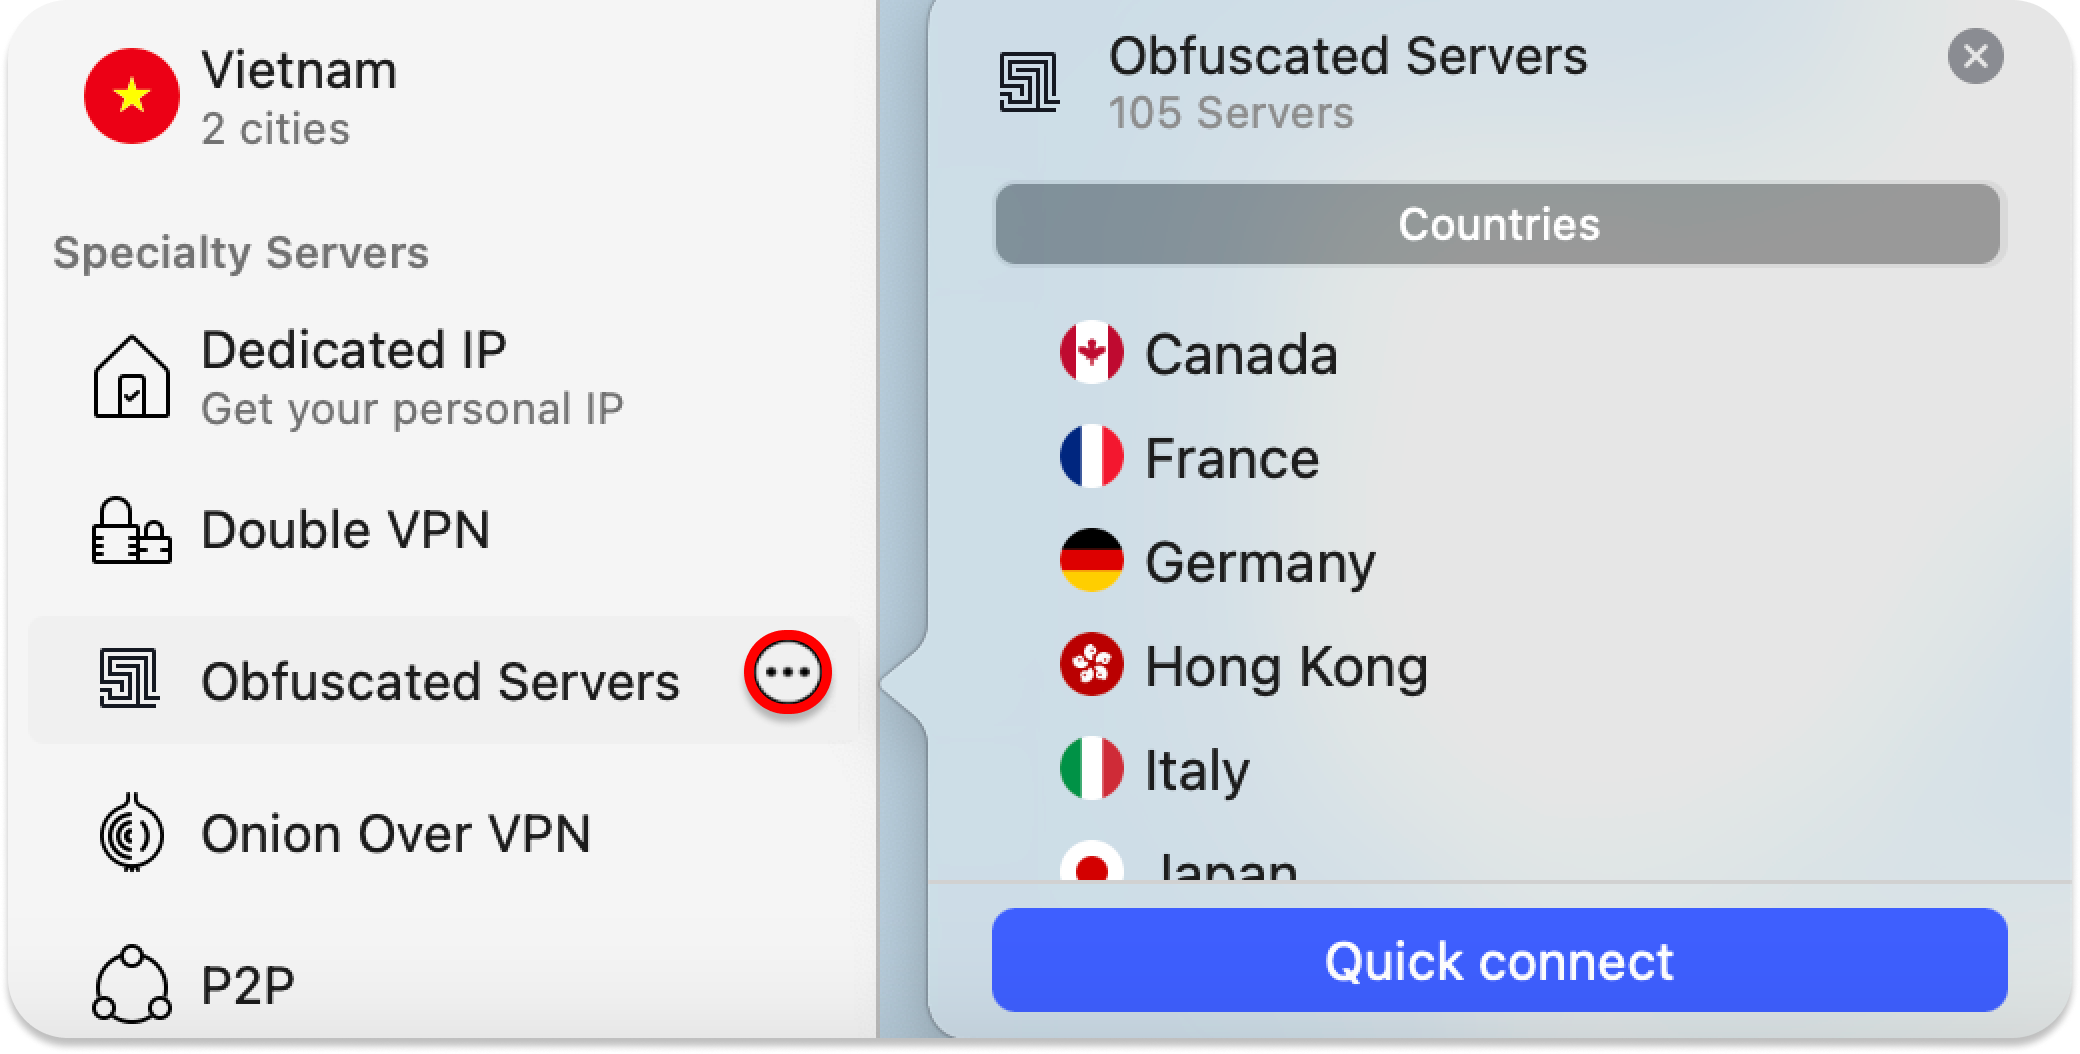
To connect to a specific country, simply click on it: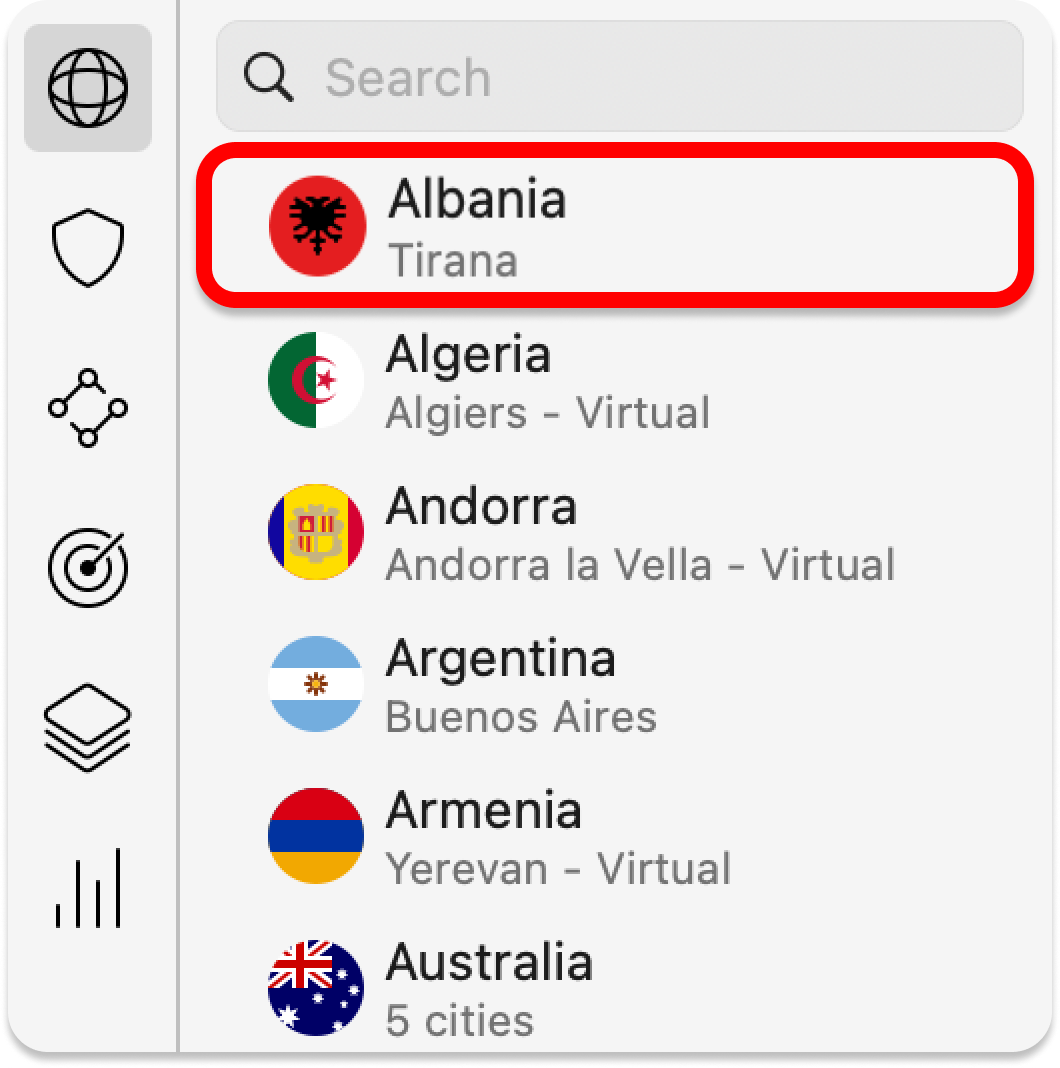
## NordVPN features
### Map
The map tab is the app’s home. Here, you can find and navigate NordVPN servers using the map, search bar, or specialty section.

### Threat Protection Pro™
Threat Protection Pro™ is a special NordVPN feature that automatically blocks ads, trackers, and malicious URLs. When you visit a website known for scamming people, this feature displays an in-browser alert to warn you about possible fraud. Threat Protection Pro™ also scans downloads for malware and checks your apps for security vulnerabilities. Available with selected NordVPN plans, this feature can work without an active VPN connection. [Learn more about Threat Protection Pro™](https://nordvpn.com/features/threat-protection/).
### 
If your NordVPN subscription doesn’t include Threat Protection Pro™, you can use the Threat Protection feature instead. It blocks intrusive ads and malicious domains based on DNS filtering and works whenever you’re connected to a VPN server. Threat Protection comes with all NordVPN plans.
### Meshnet
The [Meshnet](https://nordvpn.com/meshnet/) feature helps you to access devices over encrypted tunnels. [Learn more about Meshnet](https://meshnet.nordvpn.com/getting-started/meshnet-explained).

### Dark Web Monitor
[Dark Web Monitor](https://nordvpn.com/features/dark-web-monitor/) scans the internet for any credential leaks associated with your registered NordVPN e-mail address.

### Presets
Presets let you load a specified set of configurations, including server number, type, protocol, and more, at the click of a button! You’ll find many uses for this feature, like instantly loading a streaming service or a game with the necessary settings to experience a smooth session.
How to set up presets?
Start at the preferences page, as depicted above. You can either edit an existing preset or create a new one by pressing Add new.

In this example, we’ll add a new one by building it from scratch. After pressing Add new, you will see a menu with the settings you can use. First, give the preset a name. Next, select from available VPN protocols. If you change the default setting Use recommended, you’ll be able to alter the server type. Here you can set a specialty server or any regular one as your type:Depending on the server availability, you may also have the choice of selecting either a specific region:Finally, you can add either a web page or an app to the preset. It will be displayed under the preset name on the main screen:If you press Add link, a field will appear for the URL of the website you would like easy access to. After inserting the URL, press Enter to register it. When you set up the configuration, press Save preset, and it will be added to the main screen.
### Statistics
Statistics show you more information about your connection.
### Settings
The settings tab displays the app settings.

### Quick Help
Here you can find connection logs, be directed to our Help Center, and write an email to our customer support

## NordVPN settings
### General
The general tab has the following features:
* Auto launch when the computer starts — toggle to open the NordVPN app automatically every time you turn your device on.
* VPN Protocol — will let you choose from 3 different [connection protocols](https://support.nordvpn.com/hc/en-us/articles/19482810153745-Which-NordVPN-protocol-should-I-choose) (OpenVPN UDP, OpenVPN TCP, and NordLynx).
* Automatically check for updates — will check if you’re using the latest version of the NordVPN app.
* Help Us Improve — makes NordVPN better by sending us aggregated anonymous data.
### Auto-connect
The auto-connect tab features the following functions:
* When using an untrusted network— toggle to automatically connect to a network that is not added to a Trusted network list.
* Connect to — select a specific country from the list.
* The current network — shows the network you are currently connected to.
* Trusted network — you won't be automatically connected to a VPN while on a trusted Wi-Fi network.
### Kill Switch
[Kill Switch](https://nordvpn.com/features/vpn-kill-switch/) prevents unprotected access to the internet when your VPN connection accidentally drops.
### DNS
DNS ensures tighter security and privacy for your traffic. You can configure your device manually to use private NordVPN DNS servers.

### Appearance
Appearance settings let you add an application to your dock, menu bar, or both and choose between dark and light modes.
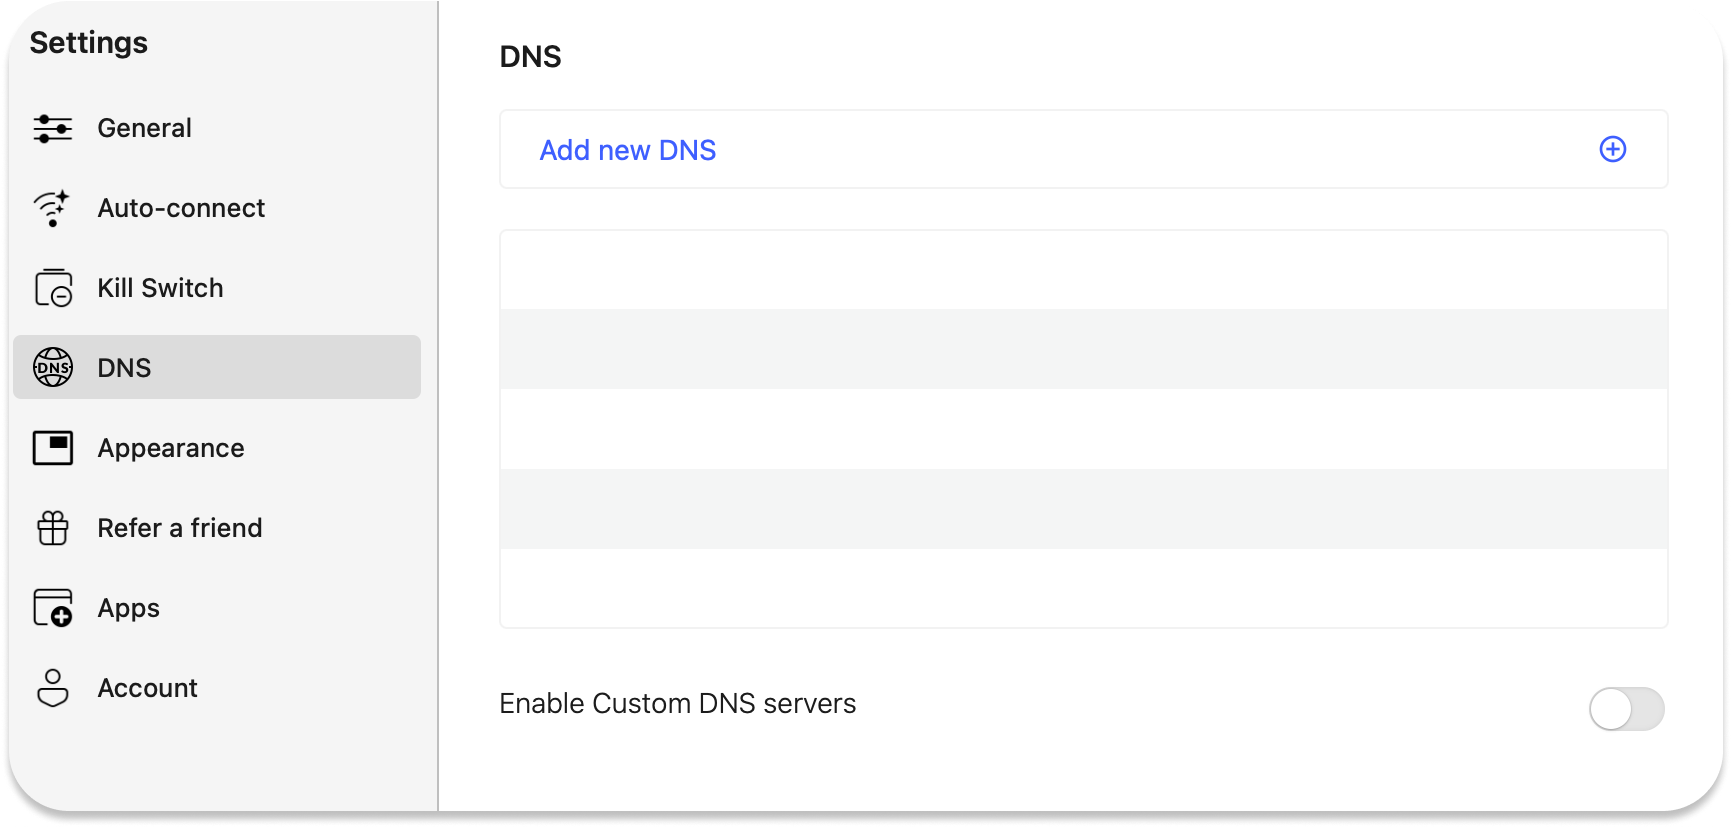
### Refer a friend
The Refer a Friend tab provides you with your personal referral link and instructions on how to refer NordVPN to your friends.
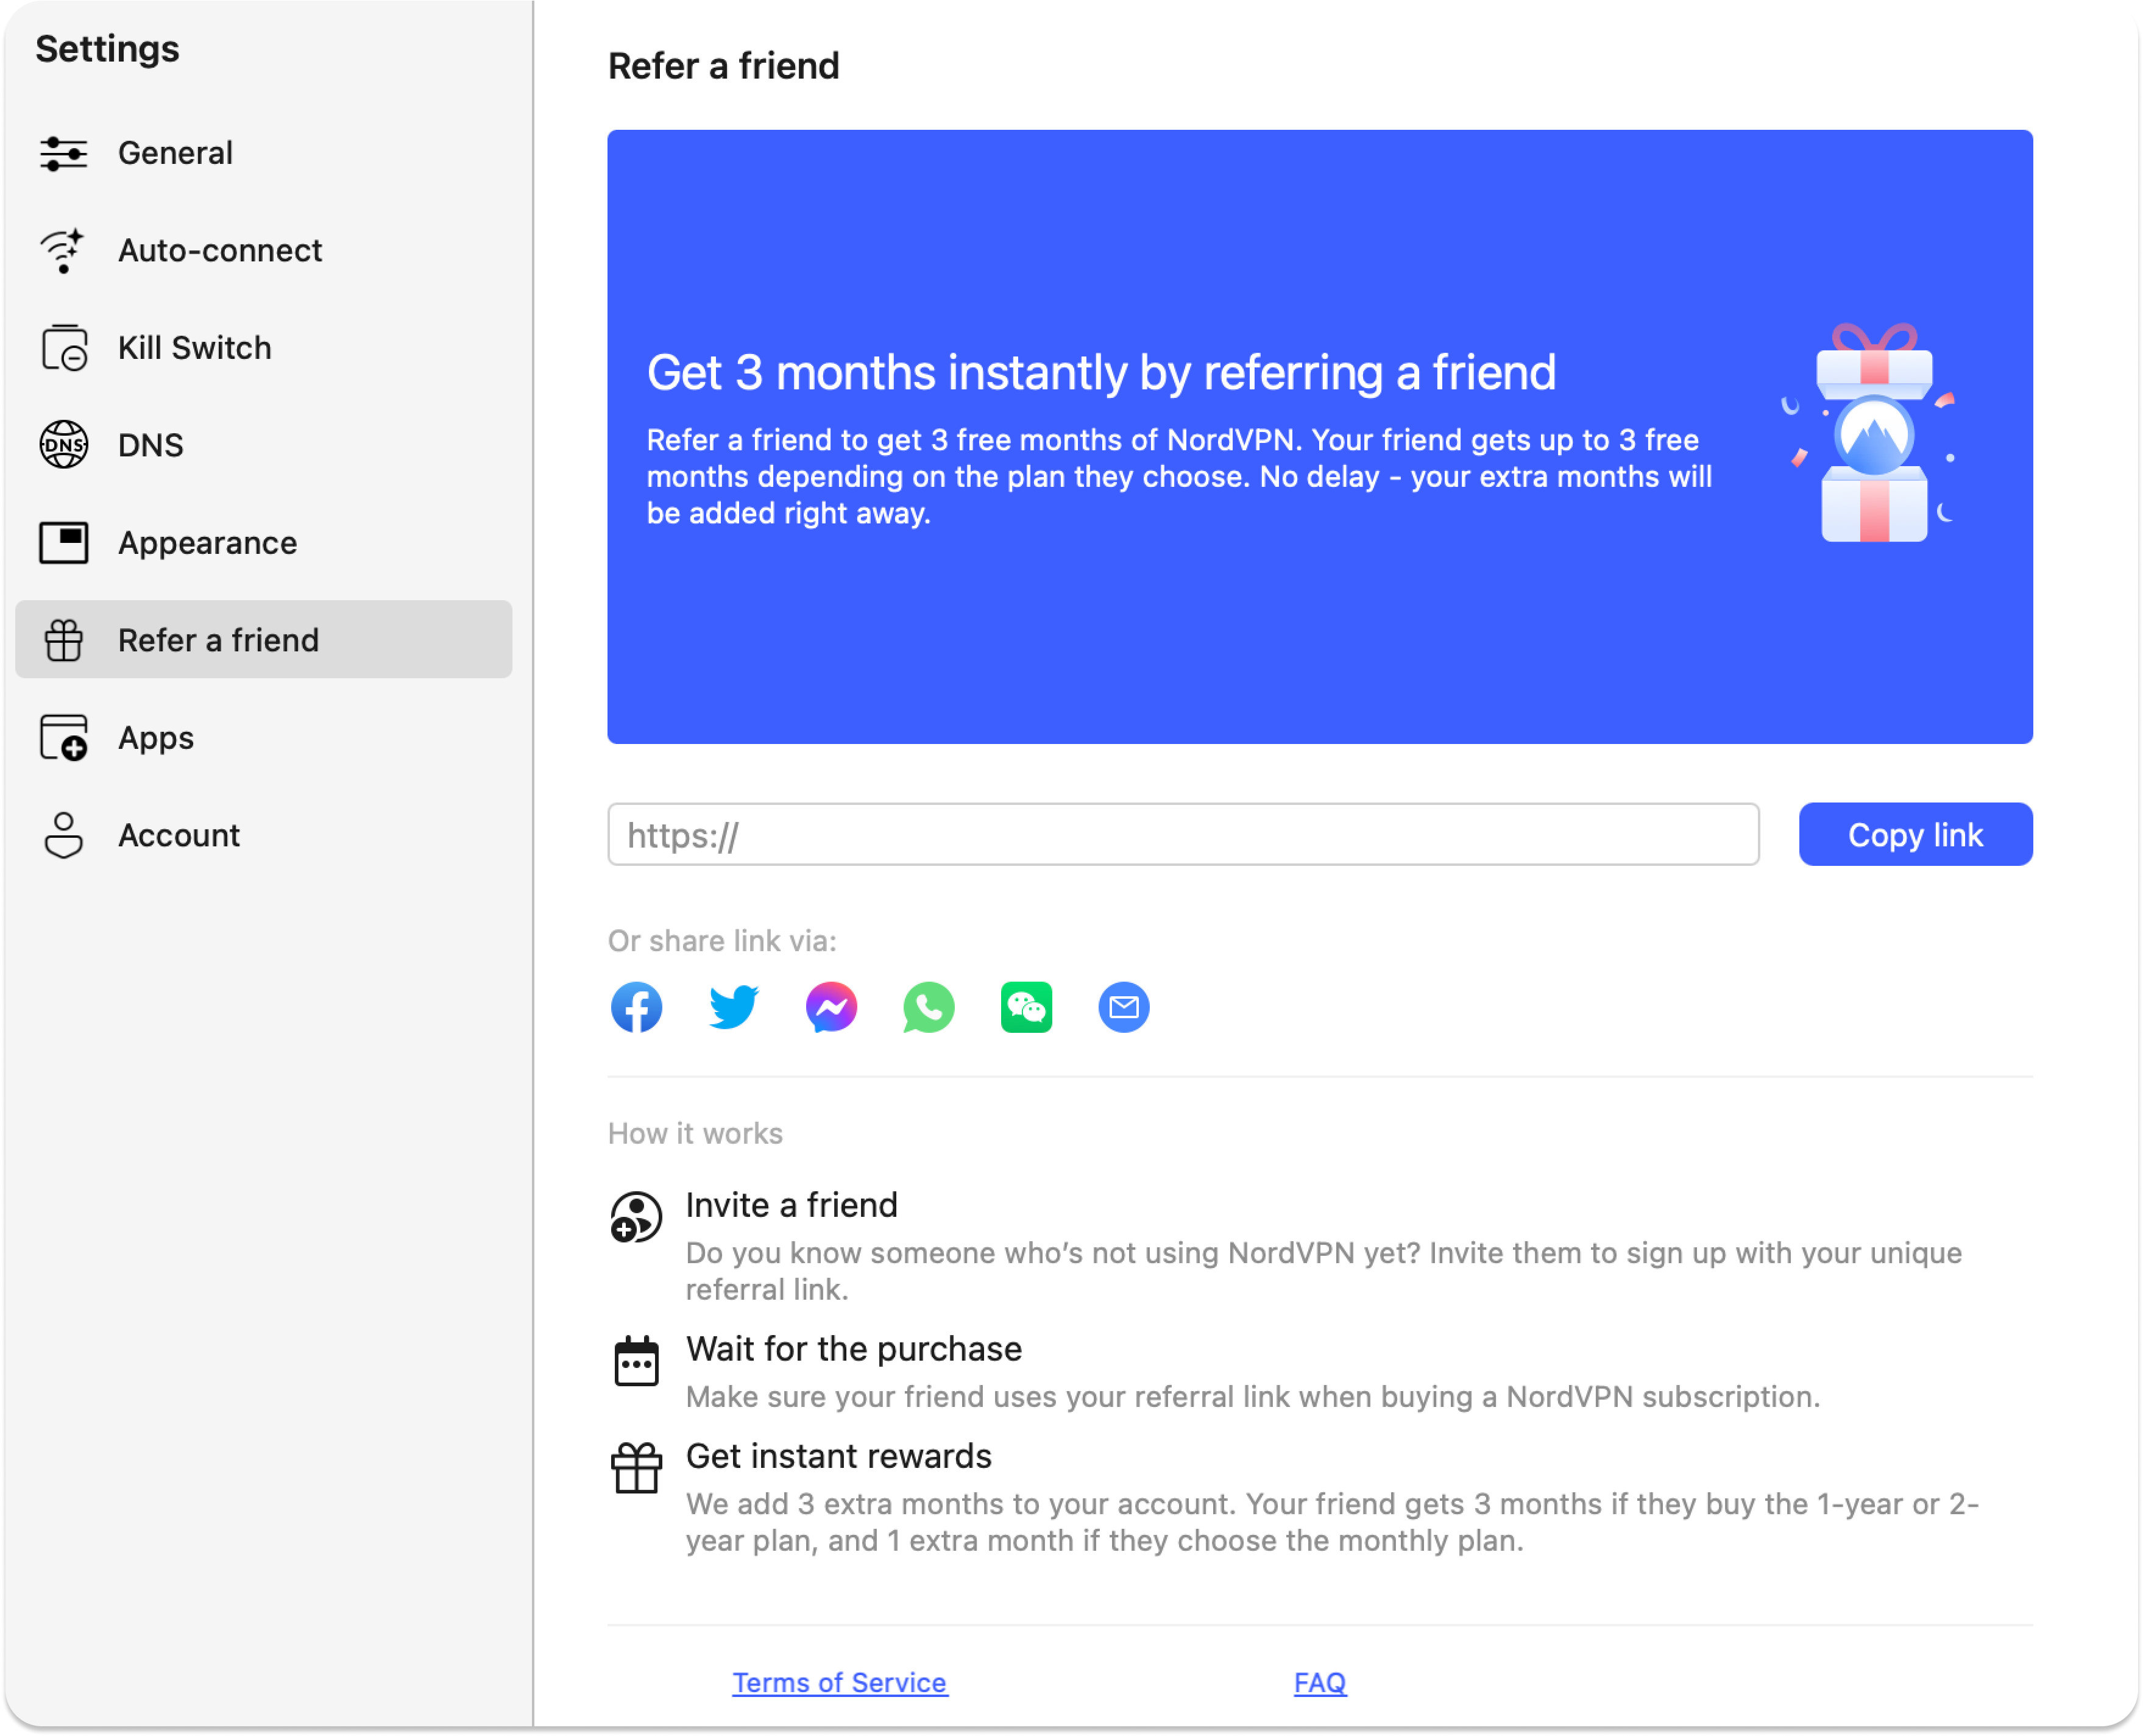
### Other Apps
The other Apps tab introduces other [Nord Security](https://nordsecurity.com/) products.
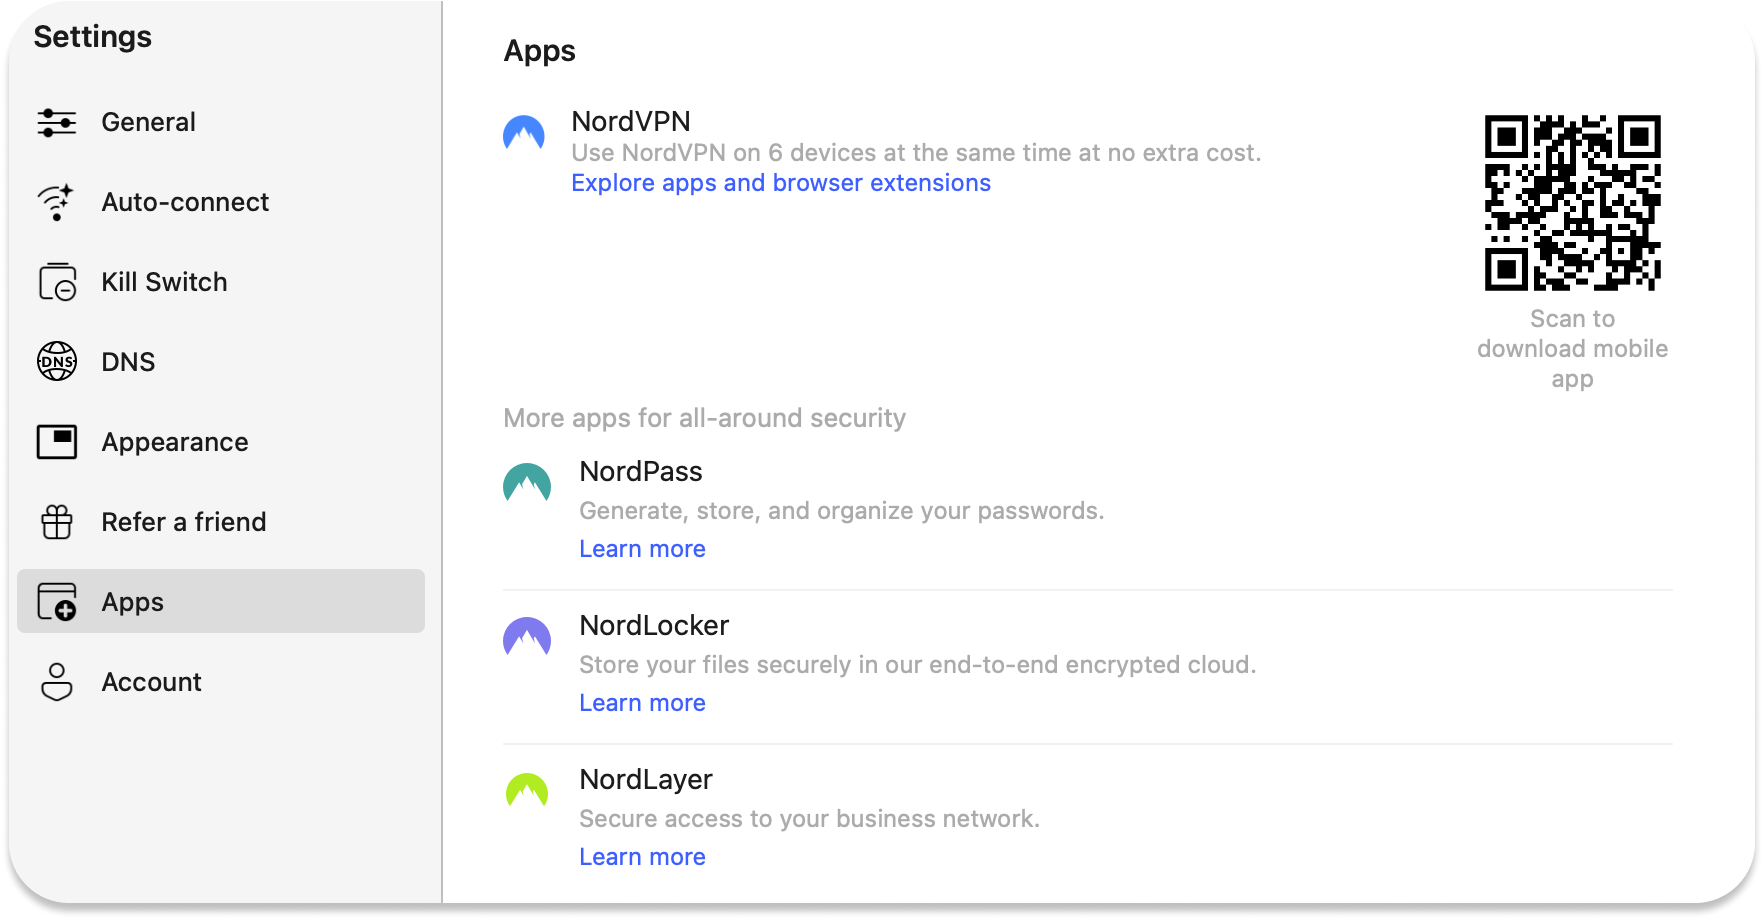
### Account
The account section shows your NordVPN profile and subscription information. Here, you’ll also find links to [NordVPN's Terms of Services](https://my.nordaccount.com/legal/terms-of-service/) and [Privacy Policy](https://my.nordaccount.com/legal/privacy-policy/).
",https://support.nordvpn.com/hc/en-us/articles/19456281201041-Installing-NordVPN-application-on-macOS
How to configure a Raspberry Pi,"You can set up NordVPN on a Raspberry Pi device using the OpenVPN or NordLynx protocols.
You can follow one of our Linux tutorials to do that:
1. Set up using NordVPN Linux(Debian) app.
2. Connect using the manual connection method.",https://support.nordvpn.com/hc/en-us/articles/19455204080913-How-to-configure-a-Raspberry-Pi
How do I use NordVPN on Amazon Fire Stick and other Amazon devices?,"The NordVPN app is easy to use. In this section, we will explore how to connect to NordVPN servers on your Amazon device and go through the app’s settings.",https://support.nordvpn.com/hc/en-us/articles/19453529667089-Installing-NordVPN-on-Amazon-Fire-devices
Installing NordVPN on Amazon Fire devices,"The NordVPN application for Amazon Fire devices is available for [download from the Amazon Appstore](https://nordvpn.com/download/android-tv/). However, while Amazon does not block NordVPN, keep in mind that the first-generation Amazon Fire Stick does not allow VPN connections. Other Amazon Fire devices support VPNs, including NordVPN.Here is our video tutorial on how to set up and use NordVPN on Amazon Fire devices:
If you prefer to follow written instructions, this text tutorial will also teach you how to install and use the NordVPN app on Amazon Fire devices.
First, you need to download and install the NordVPN application on your Amazon device.
1. Select the apps menu on your device’s home screen:
2. Open the Amazon Appstore:
3. Type NordVPN in the search bar and press get: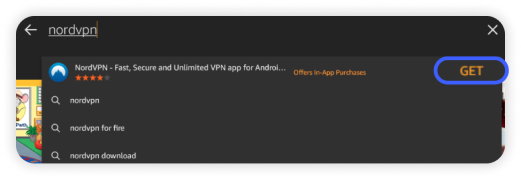
4. Press Download:
5. Once the application has been installed, press Open: 
6. You will see the main menu of the application. Select Log in to use your existing NordVPN account or Sign up if you need to create a new account:
7. If you have pressed Sign up, you will see a QR code. Scan it with your smartphone and wait for the Nord Account page to load. Once the page has loaded, complete the registration process: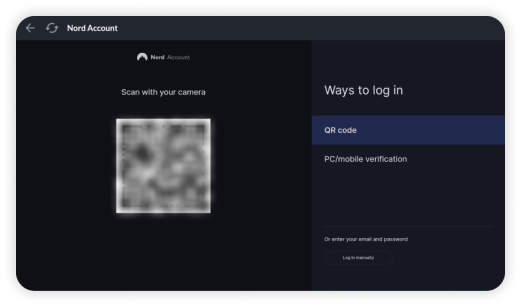
8. Log in to NordVPN on your TV with your account. As seen in the screenshot below, you will receive a number for [remote validation](https://nordaccount.com/remote) on your phone, laptop, or PC. Alternatively, you can simply scan the QR code: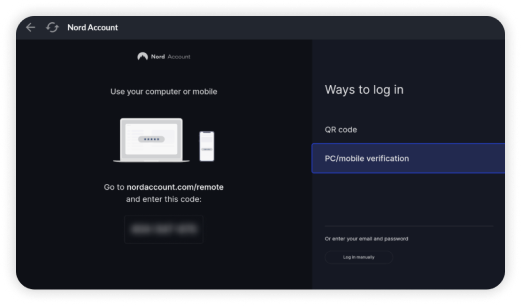
9. You may be greeted with a few warning messages. These are default Android/FireTV warning messages for VPN connections — it is safe to continue. In some cases, you may be required to mark a checkbox in the popup window: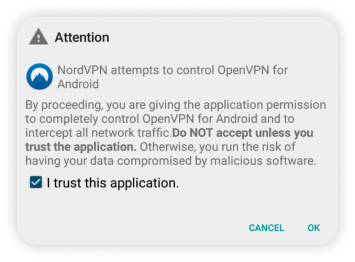
10. Your Amazon device setup is now complete.
## How do I use NordVPN on Amazon Fire Stick and other Amazon devices?
The NordVPN app is easy to use. In this section, we will explore how to connect to NordVPN servers on your Amazon device and go through the app’s settings.
1. Press quick connect on the main screen to let our smart algorithm automatically pick the best server for your needs: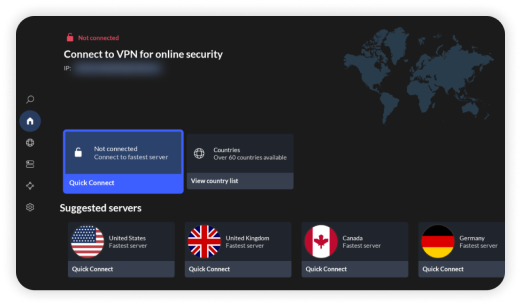
2. You can press any country button in the all countries section to quickly connect to a NordVPN server of the following country:
3. In the specialty servers section, you will find P2P, Obfuscated, Dedicated IP, Double VPN, and Onion Over VPN servers: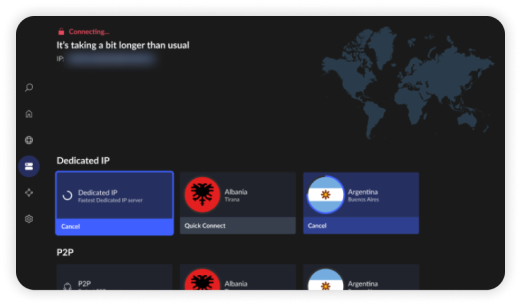
4. In the settings, you can check your subscription status, set up Auto-connect, enable or disable Threat Protection, switch VPN protocols, enable local network discovery, and set up Custom DNS: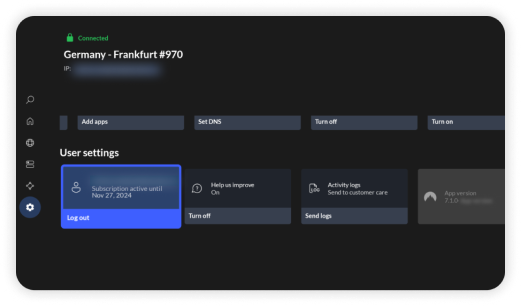
5. The split tunneling section lets you choose which apps bypass your VPN connection:
After following the guide above, you will be able to use NordVPN on your Amazon Fire devices. If you experience any issues while installing NordVPN, feel free to [contact our support team ](https://nordvpn.com/contact-us/)for further assistance.",https://support.nordvpn.com/hc/en-us/articles/19453529667089-Installing-NordVPN-on-Amazon-Fire-devices
What is Neagent,"Neagent or Network Extension Agent is necessary for the [IKEv2](https://nordvpn.com/blog/ikev2ipsec/) [protocol](https://nordvpn.com/blog/protocols/) based VPN app to operate properly. Accepting pop-up permission requests allows Neagent to receive VPN authentication data stored in the KeyChain system. Without this data, the macOS Network Extension can not establish a VPN connection.",https://support.nordvpn.com/hc/en-us/articles/19685620882449-What-is-Neagent
What is IKEv2,"IKEv2 (Internet Key Exchange version 2) is a VPN encryption protocol used to set up a Security Association in the IPsec protocol suite. IKEv2 connection method generates encryption keys and guarantees a safe data process between your device and the VPN server you’re connected to.
NordVPN uses NGE (Next Generation Encryption) in IKEv2/IPsec. The ciphers used to generate Phase1 keys are AES-256-GCM for encryption, coupled with SHA2-384 to ensure integrity, combined with PFS (Perfect Forward Secrecy) using 3072-bit Diffie Hellmann keys. IPsec then secures the tunnel between the client and server using the strong AES256.
You can set up an IKEv2 connection manually on different devices. Guides for different devices can be found here:
* [Windows 10](https://support.nordvpn.com/hc/en-us/articles/19916965616017-Connect-to-NordVPN-IKEv2-IPSec-on-Windows)
* [macOS](https://support.nordvpn.com/hc/en-us/articles/19921536696977-How-to-connect-to-NordVPN-with-IKEv2-IPSec-on-macOS)
* [Linux](https://support.nordvpn.com/hc/en-us/articles/20371023942289-How-to-connect-to-NordVPN-with-IKEv2-IPSec-on-Linux)
* [Android](https://support.nordvpn.com/hc/en-us/articles/20350995979793-Connecting-to-NordVPN-IKEv2-IPSec-on-Android)
* [iOS](https://support.nordvpn.com/hc/en-us/articles/20371657885329-How-to-connect-to-NordVPN-with-IKEv2-IPSec-on-iOS)",https://support.nordvpn.com/hc/en-us/articles/19685604677905-What-is-IKEv2
What is Nord Checkout?,"Nord Checkout is the unified payment system for all of our services, including [NordVPN](https://nordvpn.com/), [NordPass](https://nordpass.com/), [NordLocker](https://nordlocker.com/), and [NordProtect](https://nordprotect.com/).
It will eliminate the need for navigating back and forth between each product page and let you safely order our products without the need to navigate between different pages.",https://support.nordvpn.com/hc/en-us/articles/19685602129297-What-is-Nord-Checkout
What is NordVPN,"NordVPN is the gateway to a secure and private access to the internet. It works by enveloping all of your online activities in [a layer of encryption](https://nordvpn.com/features/next-generation-encryption/#:~:text=To%20guarantee%20the%20protection%20of,available%20for%20review%20and%20modification.), while also hiding information about [your virtual location](https://nordvpn.com/features/hide-ip/#:~:text=The%20best%20way%20to%20hide%20your%20IP%20address%20and%20mask%20your%20internet%20activity%20is%20by%20using%20NordVPN%20to%20encrypt%20your%20connection.%20For%20maximum%20protection%2C%20use%20NordVPN%20on%20all%20of%20your%20devices%2C%20including%20your%20smartphone%2C%20laptop%2C%20tablet%2C%20PC%2C%20and%20even%20your%20home%20router.). This way, you stay invisible to hackers, your ISP, governmental agencies and other prying eyes lurking throughout the net. At the same time, your data, such as your bank credentials, is [protected from potential attacks](https://nordvpn.com/blog/does-a-vpn-protect-you-from-hackers/#:~:text=So%20how%20does,the%20VPN%20server.).
## Why would you need NordVPN when...
...staying at home? It's true that there are fewer threats to your online security if you're using a personal, trusted network. However, your privacy is left vulnerable. Browser destinations, internet-using apps and other internet-related information is visible to your ISP. By connecting to a NordVPN server, the only footprint left of your activity is that, well, you've connected to one of our servers — that's it. Moreover, if you have to deal with internet throttling, NordVPN will come in handy.
...going out? Any time you stop by a café, library, shop, etc. you're likely to use a [publicly available Wi-Fi](https://nordvpn.com/blog/securing-public-wi-fi/). These are often targets for hackers, who perform attacks such as the infamously known [MITM (Man In The Middle)](https://nordvpn.com/blog/man-in-the-middle-attack/). In short, it means your connection can become intercepted and manipulated so as to extract sensitive information. This can be prevented by connecting a NordVPN server, as your internet traffic will be safely transferred over a VPN tunnel.
...travelling abroad? Although you may be enjoying unobstructed internet access in your home country, some governments impose heavy restrictions that can block a myriad of websites and services. Using a VPN can help you [avoid these restrictive measures](https://support.nordvpn.com/hc/en-us/articles/19572011021457-Connecting-from-a-country-with-internet-restrictions). Additionally, even if you do not face such issues at your point of destination, you may still begin longing for your favorite, geoblocked streaming service. [We'll help with this, too](https://nordvpn.com/blog/why-you-need-vpn-for-travel/#:~:text=Stream%20your%20favorite,of%20the%20planet.).
In case you'd like to see the full list of features NordVPN has to offer, check our page here: [List of NordVPN's features](https://nordvpn.com/features/).
How does NordVPN work?
1. [Download and install the NordVPN app](https://nordvpn.com/download/).
2. Open the app, then sign up or log in.
3. Connect to a server and check the [protected status](https://support.nordvpn.com/hc/en-us/articles/19483050791825-How-do-I-know-if-I-have-connected-successfully).
4. Done!
Of course, this is a simplified look at the process. If you're curious about learning how VPNs work, check out our dedicated article called: [What is a VPN?](https://nordvpn.com/what-is-a-vpn/)
Also, for a detailed set of instructions on how to set up, customize and adjust the app to better fit you, [visit our list of tutorials](https://support.nordvpn.com/hc/en-us/sections/19326474198929-NordVPN-setup-tutorials).",https://support.nordvpn.com/hc/en-us/articles/19685546104209-What-is-NordVPN
Who created NordVPN?,"Back in 2012, two best friends sought to create a tool for a safer and more accessible internet. Driven by the idea of internet freedom, Tom Okman and Eimantas Sabaliauskas created NordVPN. [Learn more about the history of NordVPN.](https://nordvpn.com/about-us/)",https://support.nordvpn.com/hc/en-us/articles/20911146148113-The-founders-and-owners-of-NordVPN
Who owns NordVPN?,NordVPN is owned and operated by nordvpn S.A. Check out our [Privacy Policy](https://my.nordaccount.com/legal/privacy-policy/) to learn more.,https://support.nordvpn.com/hc/en-us/articles/20911146148113-The-founders-and-owners-of-NordVPN
How to download NordVPN software,"You can [download NordVPN](https://nordvpn.com/download/) for the following operating systems:
* [Android](https://nordvpn.com/download/android/)
* [Windows](https://nordvpn.com/download/windows/)
* [macOS](https://nordvpn.com/download/mac/)
* [iOS/iPhone/iPad](https://nordvpn.com/download/ios/)
* [Android TV](https://nordvpn.com/download/android-tv/)
* [Linux](https://nordvpn.com/download/linux/)
Other devices NordVPN can be used with:
* [Xbox](https://nordvpn.com/download/xbox/)
* [Playstation](https://nordvpn.com/download/playstation/)
* [Nintendo Switch](https://nordvpn.com/download/nintendo-switch/)
* [Fire TV Stick](https://nordvpn.com/download/firestick/)
* [Chromecast](https://nordvpn.com/download/chromecast/)
* [Raspberry Pi](https://nordvpn.com/download/raspberry-pi/)
* [Chromebook](https://nordvpn.com/download/chromebook/)
For instructions on how to set up NordVPN on your device, please have a look at our [NordVPN setup tutorials](https://support.nordvpn.com/hc/en-us/sections/19326474198929-NordVPN-setup-tutorials).
Note: To use the NordVPN app on any OS, you need an active NordVPN subscription. If you don’t have one yet, you can [purchase a NordVPN subscription on our website.](https://nordcheckout.com/?product_group=nordvpn&cart_id=c3ccda24-fa0c-49da-aa95-61271b511194)",https://support.nordvpn.com/hc/en-us/articles/19482835731345-How-to-download-NordVPN-software
How can I change my registration email address,"To change the email address you registered your NordVPN account with, you need to fill out our email change request form. If you can’t open the form, please contact our support team.
Note: This change will apply to all Nord Security services, including NordLocker and NordPass.
Follow the instructions below to change your registered email address.
1. Open the NordVPN email change request form.
2. Fill in the fields indicated below. This information is required to ensure that no one makes unauthorized changes to your account.
* Account's current email: Enter the email address you currently use for NordVPN.
* Contact email (Optional): If you wish, you may provide a different email address for NordVPN support to contact you about the changes that you’re making.
* Amount paid: Type in the amount of money you paid the last time you made a payment to NordVPN.
* Method: Select the way you made your last payment (like credit card or PayPal) and enter any other required information.
* Payment date: Choose the exact date of your last payment.
* Desired email or username: Type in the new email address you want to use for your NordVPN account.
* Do you have a NordLocker or NordPass account?: Let us know if you also have an account for NordLocker or NordPass.
* Description (Optional): Add additional comments or requests for our support team.
* Attachments (Optional): Attach a picture of your last payment to help speed up the process.
1. Click the “Submit” button to finish.
Our support team will get in touch with you within 24 hours of your submission of the request. We will send a message to the email address currently registered with your NordVPN account (or to the “Contact email” if you filled out this field on the form.)",https://support.nordvpn.com/hc/en-us/articles/19482546152977-How-can-I-change-my-registration-email-address
How to reach NordVPN customer support?,"While we don't offer phone support, we have different options to contact NordVPN customer support available 24/7 and ready to help you!
## Help Center
First off, if you run into any issues using NordVPN - check out our Help Center that is available in 14 languages: English, German, French, Danish, Italian, Spanish, Norwegian, Swedish, Dutch, Japanese, Korean, Polish, Portuguese-Brazilian, Traditional Chinese.
You can change the language by scrolling down until you see the language change option and clicking on the language you prefer. This will ensure that you can look for information in a language comfortable for you.
After you have set the language you want to look information in, you can find solutions in the help center by either:
* Searching for information using Help Center's search bar, which will list out articles according to the keywords typed in the search query:
* Navigating to one of the categories available in the Help Center:
* [FAQ](https://support.nordvpn.com/hc/en-us/categories/200593301-FAQ) - in this category you'll find Frequently asked questions and NordVPN app setup tutorials;
* [General info](https://support.nordvpn.com/hc/en-us/categories/360000293597-General-info) - here, you'll be able to find information on NordVPN functionalities, features, and SmartPlay;
* [Billing](https://support.nordvpn.com/hc/en-us/categories/360000293617-Billing) - this category covers payment, subscription, and account management topics;
* [Connectivity](https://support.nordvpn.com/hc/en-us/categories/200614302-Connectivity) - the last category available covers troubleshooting articles, here you can find help regarding NordVPN connectivity, internet speed with NordVPN on, manual setups for routers and different OSes, proxies.
## Support agents
However, if you're looking for assistance on your specific case, you can reach out to our developed conversation bots or human customer support agents by:
* Chat
* Email
We have two teams to assist you:
* Customer Care & Billing Team: They can tell you about NordVPN, help set up your devices, make sure you can access streaming sites, and answer questions about dedicated IPs. As well as helpyou with your NordVPN subscription, account, or payments.
* Connection Team: They can assist with setting up NordVPN on your router, fixing advanced connectivity problems, and helping in places with internet restrictions.",https://support.nordvpn.com/hc/en-us/articles/19482416296593-How-to-reach-NordVPN-customer-support
Can NordVPN be used with multiple devices?,"A total of ten devices can be connected with one NordVPN account at the same time, enabling NordVPN account sharing within families. However, there is one condition. If you connect the devices to the same server, you have to choose different [VPN protocols](https://nordvpn.com/blog/protocols/) (TCP and UDP are different protocols, so you can [connect one device to TCP and another to UDP](https://support.nordvpn.com/hc/en-us/articles/20465552867345-Switching-protocol-to-OpenVPN-UDP-or-TCP) on the same server). That means that a total of five devices can be connected to one server at the same time: through HTTP proxy, SOCKS5, NordLynx, OpenVPN TCP, and OpenVPN UDP. If you have one more device, you can connect it to another server using any protocol.If you have even more devices, you can [set up your router with our VPN](https://nordvpn.com/blog/setup-vpn-router/). The router uses only one device slot, but all the devices connected to the network will be under VPN protection.In order to use NordVPN on your other devices, [download](https://nordvpn.com/download/) our application and log in to your NordVPN account.",https://support.nordvpn.com/hc/en-us/articles/19476515228305-How-many-devices-can-I-use-with-NordVPN
How many devices can I use with NordVPN?,"## Can NordVPN be used with multiple devices?
A total of ten devices can be connected with one NordVPN account at the same time, enabling NordVPN account sharing within families. However, there is one condition. If you connect the devices to the same server, you have to choose different [VPN protocols](https://nordvpn.com/blog/protocols/) (TCP and UDP are different protocols, so you can [connect one device to TCP and another to UDP](https://support.nordvpn.com/hc/en-us/articles/20465552867345-Switching-protocol-to-OpenVPN-UDP-or-TCP) on the same server). That means that a total of five devices can be connected to one server at the same time: through HTTP proxy, SOCKS5, NordLynx, OpenVPN TCP, and OpenVPN UDP. If you have one more device, you can connect it to another server using any protocol.If you have even more devices, you can [set up your router with our VPN](https://nordvpn.com/blog/setup-vpn-router/). The router uses only one device slot, but all the devices connected to the network will be under VPN protection.In order to use NordVPN on your other devices, [download](https://nordvpn.com/download/) our application and log in to your NordVPN account.",https://support.nordvpn.com/hc/en-us/articles/19476515228305-How-many-devices-can-I-use-with-NordVPN
JavaScript is disabled,"You need to have JavaScript enabled to access your [Nord Account](https://my.nordaccount.com/). If you’re getting an error that says “JavaScript is disabled,” and you're wondering how to fix that, you will need to manually enable JavaScript on your browser.
You can find steps on how to turn on JavaScript in your web browser from the list below:
* [Edge (Windows)](
* [Mozilla Firefox](
* [Safari](
* [Chrome](
* [“This site requires the use of scripts” warning](
## Edge (Windows 10 and Windows 11)
To enable JavaScript on Microsoft Edge, follow these steps:
1. Click the three-dot icon in the top-right corner to open the menu.
2. Select settings.
3. In the search bar on the left, type in “javascript” and press enter.
4. Click JavaScript under app permissions.
5. Toggle allowed (recommended) to enable JavaScript.
6. Restart your browser for the changes to take effect.
## Mozilla Firefox
JavaScript is a built-in component on Mozilla Firefox which is always enabled by default.If a website mentions that JavaScript is not functioning properly, there may be a few reasons:
* You have some content-blocking extensions active; You may need to turn off the extensions, which may be blocking JavaScript.
* Firefox Enhanced Tracking Protection is blocking the content. You may need to turn off the Firefox Enhanced Tracking Protection, which may stop JavaScript from functioning properly.
* Sometimes Firefox cache may also cause problems - clearing the Firefox cache may solve the problem.
* Some websites may use cookies, which may interrupt JavaScript functions. [Clearing Firefox's cookies](https://support.mozilla.org/en-US/kb/clear-cookies-and-site-data-firefox?redirectslug=delete-cookies-remove-info-websites-stored&redirectlocale=en-US) may help to restore the correct JavaScript functionality.
If you're using an older Mozilla Firefox version, you can enable JavaScript by following these steps:
1. Open Firefox settings:
1. On the Windows version of Firefox, click Tools and select Options.
2. On the macOS version of Firefox, click the Firefox drop-down list and select Preferences.
2. Navigate to the Content tab and check the Enable JavaScript box.
3. Restart your browser for the changes to take effect.
## Safari
To enable JavaScript on Safari, follow these steps:
1. In Safari, select settings and click the security icon.
2. Check the enable JavaScript box.
3. Restart your browser for the changes to take effect.
## Chrome
To enable JavaScript on Google Chrome, follow these steps:
1. In Google Chrome, click the three-dot icon in the top-right corner and select settings.
2. Click privacy and security in the sidebar.
3. Open site settings.
4. Scroll down to the content section and click JavaScript.
5. Under default behavior, click sites can use JavaScript.
6. Restart your browser for the changes to take effect.
## “This site requires the use of scripts” warning after enabling JavaScript
If you see a warning that “This site requires the use of scripts, which your browser does not currently allow” after enabling JavaScript on your browser, there might be a problem with your browser cache. Try [clearing your web browser cache](https://nordvpn.com/blog/how-to-clear-your-cache/) to delete cookies and any other website data, then restart your browser.",https://support.nordvpn.com/hc/en-us/articles/23459864871185-JavaScript-is-disabled
Discontinuation of the legacy API endpoints on NordVPN,"As part of our ongoing commitment to enhance infrastructure and improve security, we wish to notify you of the upcoming deprecation of certain API endpoints on all OSes. The affected endpoints are as follows:
https://nordvpn.com/api/server/statshttps://nordvpn.com/api/files/ziphttps://nordvpn.com/api/vpn/check/fullhttps://nordvpn.com/api/server
It is important to note that this modification will not impact the experience of users utilizing our NordVPN application obtained either directly from us or through officially recognized app stores. It should be emphasized that users who have created custom scripts or various integrations in a do-it-yourself approach may experience changes. These endpoints were not originally designed for such purposes.
To ensure a seamless transition, a range of deprecation methods will be implemented aimed at gradually decreasing the utilization of these specific API endpoints.
The deprecation process will commence on January 10, 2024, with a complete discontinuation of the legacy API endpoints scheduled for March 1, 2024. We appreciate your understanding and cooperation as we continue to strive for excellence in our services.",https://support.nordvpn.com/hc/en-us/articles/21586950310801-Discontinuation-of-the-legacy-API-endpoints-on-NordVPN
How to use NordVPN with Plex,"Plex is a media server that can be set up on a computer or NAS device. To access Plex, the computer and server must be in the same local subnet.
Accessing Plex remotely requires port-forwarding, which is unavailable with NordVPN servers. However, you can use NordVPN’s Meshnet feature to set up a secure local area network and connect devices directly. That way, you can access your Plex server from anywhere across the globe.",https://support.nordvpn.com/hc/en-us/articles/20972602406161-How-to-use-NordVPN-with-Plex
How to use NordVPN on gaming consoles,"Video gaming consoles do not support built-in VPN functionality. You can’t download NordVPN on PlayStation or Xbox, for example.
To set up your PS4, PS5, Xbox, or other gaming console with NordVPN, you can use one of these methods:
1. Set up NordVPN on your router.
2. Set up a VPN-protected hotspot and connect to that network on your gaming console.",https://support.nordvpn.com/hc/en-us/articles/20972465669393-How-to-use-NordVPN-on-gaming-consoles
How to use NordVPN with Roku,"Roku is a streaming device that plugs into your TV. It runs on Roku OS, which is not supported by NordVPN, so you can’t install the NordVPN app on Roku.
No worries! You can choose between two options when setting up NordVPN on Roku TV:
1. [Set up NordVPN on your router.](https://nordvpn.zendesk.com/hc/en-us/articles/19426084718865)
2. Set up a VPN-protected hotspot and connect to that network on your Roku device.",https://support.nordvpn.com/hc/en-us/articles/20972317093393-How-to-use-NordVPN-with-Roku
What to do if Amazon is not working with NordVPN,"If you can’t access Amazon with NordVPN, follow the steps below.
1. Connect to a different VPN server.
2. [Change the VPN protocol to OpenVPN UDP or TCP](https://support.nordvpn.com/hc/en-us/articles/20465552867345).
3. Do a [NordVPN DNS leak test](https://nordvpn.com/dns-leak-test/) while connected to our servers. If the results bring back your IP address, configure your device manually to use private NordVPN DNS servers.
4. [Clear your browser cache.](https://nordvpn.com/blog/how-to-clear-your-cache/)
5. Use a different browser or open Amazon in private browser mode.
6. Disable the [Threat Protection](https://support.nordvpn.com/hc/en-us/articles/19508765521425) feature. If you’re using Threat Protection Pro™, exclude Amazon from the blocked domains list. To do that, go to the Web protection tab in the Threat Protection Pro™ settings and choose to exclude Amazon from threat blocking.
7. Allowlist NordVPN in the settings of your antivirus if you are using one.",https://support.nordvpn.com/hc/en-us/articles/20968292007953-What-to-do-if-Amazon-is-not-working-with-NordVPN
What to do if YouTube TV is not working with NordVPN,"YouTube TV works only on desktop devices. To access YouTube TV, connect to one of NordVPN’s US servers.
If Youtube TV restricts your access while using NordVPN, follow the steps below.
1. [Clear your browser cache](https://nordvpn.com/blog/how-to-clear-your-cache/).
2. Use a different browser or open YouTube TV in a private browser mode.
3. Disable the [Threat Protection](https://support.nordvpn.com/hc/en-us/articles/19508765521425) feature. If you’re using Threat Protection Pro™, exclude YouTube TV from the blocked domains list. To do that, go to the Web protection tab in the Threat Protection Pro™ settings and choose to exclude YouTube TV from threat blocking.
4. Do a NordVPN DNS leak test while connected to our servers. If the results bring back your IP address, configure your device manually to use private NordVPN DNS servers.
5. Allowlist NordVPN in the settings of your antivirus if you are using one.
6. Connect to different US servers.
7. Emulate your location on Google Chrome:
* Once Google Chrome is opened, Press Ctrl + Shift + I to access Developer Tools.
* Select the three-dot menu icon in the top right of the pane.
* Scroll to More Tools and select Sensors.
* Switch your location.",https://support.nordvpn.com/hc/en-us/articles/20967087546513-What-to-do-if-YouTube-TV-is-not-working-with-NordVPN
The founders and owners of NordVPN,"This is a short introductory article on founders and owners of NordVPN. You’ll find a more comprehensive overview of the topic linked below.
## Who created NordVPN?
Back in 2012, two best friends sought to create a tool for a safer and more accessible internet. Driven by the idea of internet freedom, Tom Okman and Eimantas Sabaliauskas created NordVPN. [Learn more about the history of NordVPN.](https://nordvpn.com/about-us/)
## Who owns NordVPN?
NordVPN is owned and operated by nordvpn S.A. Check out our [Privacy Policy](https://my.nordaccount.com/legal/privacy-policy/) to learn more.",https://support.nordvpn.com/hc/en-us/articles/20911146148113-The-founders-and-owners-of-NordVPN
Why we have discontinued L2TP and PPTP protocols,"On December 1st, 2018 NordVPN’s servers stopped supporting L2TP/IPsec and PPTP connections.
NordVPN aims is to provide top-notch security and privacy standards to our customers. As the Internet and technology world rapidly advances and moves forward, we witness a tendency that users are shifting from using outdated, inconvenient encryption solutions to more advanced ones. L2TP and PPTP protocols are largely obsolete. Because they are so insecure, they have become incompatible with a key part of our core mission – to provide our users with industry-leading security.
You can read more about that on this article: ",https://support.nordvpn.com/hc/en-us/articles/20379483768209-Why-we-have-discontinued-L2TP-and-PPTP-protocols
Can not contact support,"If you need assistance with NordVPN services, you can contact our Customer Support team by clicking the Live Chat button at the bottom right of the screen. Note: Please ensure that you’ve accepted all or functionality cookies on our website for the Live Chat button to appear.If the chat doesn't appear after clicking the button, try turning off your ad-blocker for the NordVPN website and Help Center, as it tends to cause these issues. If you still cannot see it, we recommend trying a different browser.Alternatively, you can also contact us by filling out the request form, and we'll respond within 24 hours. Our team is committed to providing quick and accurate assistance, and we truly appreciate your patience.",https://support.nordvpn.com/hc/en-us/articles/20350219653009-Can-not-contact-support
I have signed up and have not received a password,"If you have signed up without entering your password in the registration form, you should've received a link in your inbox with which you can proceed to registration.
In case you are unable to find such letter in your mailbox, you can go ahead and reset your password:
1. Login to your Nord Account on this page: [my.nordaccount.com/](https://my.nordaccount.com/)
2. Click on Forgot your password? hyperlink:
3. Enter your Nord Account registration e-mail address and click Send Reset Link:
4. Check your registered email address and try to log in by opening [Nord Account](http://my.nordaccount.com/) once again.
Lastly, if neither of those solutions works, it could be that you have mistyped your email address initially, and in that case, we would suggest [contacting our support team](https://support.nordvpn.com/hc/en-us/articles/19482416296593-How-can-I-reach-NordVPN-customer-support) to locate your account.",https://support.nordvpn.com/hc/en-us/articles/20349306607505-I-have-signed-up-and-have-not-received-a-password
Resetting your application preferences,"Find the relevant instructions by selecting the operating system below.
* [Windows](https://support.nordvpn.com/hc/en-us/articles/20323582191505-Resetting-your-application-preferences#Windows)
* [macOS](https://support.nordvpn.com/hc/en-us/articles/20323582191505-Resetting-your-application-preferences#macOS)
* [Android](https://support.nordvpn.com/hc/en-us/articles/20323582191505-Resetting-your-application-preferences#Android)
* [Linux](https://support.nordvpn.com/hc/en-us/articles/20323582191505-Resetting-your-application-preferences#Linux)
To reset your preferences on the NordVPN [Windows](https://nordvpn.com/download/windows/) app, follow these steps:
1. Open NordVPN, and click on the gear:
2. Head to general:
3. Scroll down and click run diagnostics:
4. Click reset app:It may take up to a few minutes for the app to reset.
Your application preferences and settings will now be reset, and you will be asked to log back in.
To reset your NordVPN application settings on [macOS](https://nordvpn.com/download/mac/), follow these steps:
1. Close the NordVPN application completely by right-clicking the NordVPN in the Dock and selecting Quit:
2. Open the Terminal by pressing Command(⌘) + space bar and typing terminal in the search field:
3. In the Terminal, run these commands:If the application was downloaded from the [App Store](https://apps.apple.com/us/app/nordvpn-vpn-fast-secure/id905953485):
```
defaults delete com.nordvpn.osx-apple
```
If the application was downloaded directly from our [website](https://nordvpn.com/en-us/offer/download/mac/):
```
defaults delete com.nordvpn.macos
```
Your application preferences will now be reset.
To reset your NordVPN application settings on [Android](https://nordvpn.com/offer/download/android/?vpn=brand&nc=Search_-_Belgium_-_Brand+Generic_-_Phrase_-_EN_-_DMT_-_EUR&ns=google&nm=cpc&nt=nordvpn%20android&gad_source=1&gclid=Cj0KCQjw1um-BhDtARIsABjU5x5nKMAMfSYpwSgBIbtcGhZn3uFzM41Em4o4ibJfHtqlYWqrtZmgbkwaAu_qEALw_wcB), follow these steps:
1. Find the NordVPN app on your home screen, long-press the icon, and select app info:
2. A setting window will appear, select storage & cache:
3. Click clear storage:
4. A pop-up will appear, click delete:
Your app preferences have now been reset.
To reset your preferences on the NordVPN [Linux](https://nordvpn.com/download/linux/) app, follow these steps:
1. Press Ctrl + Alt + T to open the terminal.
2. Type the following command and press Enter:
```
sudo rm /var/lib/nordvpn/data/settings.dat
```
3. Next, type the following command and press Enter:
```
sudo rm -rf ~/.config/nordvpn
```
Your app preferences have now been reset.",https://support.nordvpn.com/hc/en-us/articles/20323582191505-Resetting-your-application-preferences
How to disconnect from NordVPN servers,"Follow the information below to learn how to disconnect from [NordVPN](https://nordvpn.com/what-is-a-vpn/) servers on :
* [Windows 7 and 8.1](
* [Windows 10 and 11](
* [Android](
* [macOS](
* [iOS](
* [Linux](
## On Windows 7 and 8.1:
1. Open the NordVPN application by clicking on the app icon.
2. Click on the button ""Disconnect"" at the bottom of the main app screen and confirm again disconnect by clicking on it in a drop-down menu.If you have the Auto-connection feature turned on, you will see a button ""Manage."" Click on Manage and then click on ""Disconnect.""Choose to disable auto-connect.After that, you will be successfully disconnected from a server.
## On Windows 10 and 11:
1. Open NordVPN application.
2. Click on the ""Disconnect"" button.
## On Android:
1. Open the NordVPN application by tapping on its icon.
2. Tap on the ""Disconnect"" button on the main screen of the app.
## On macOS:
1. Open NordVPN application.
2. Click on the ""Disconnect"" button.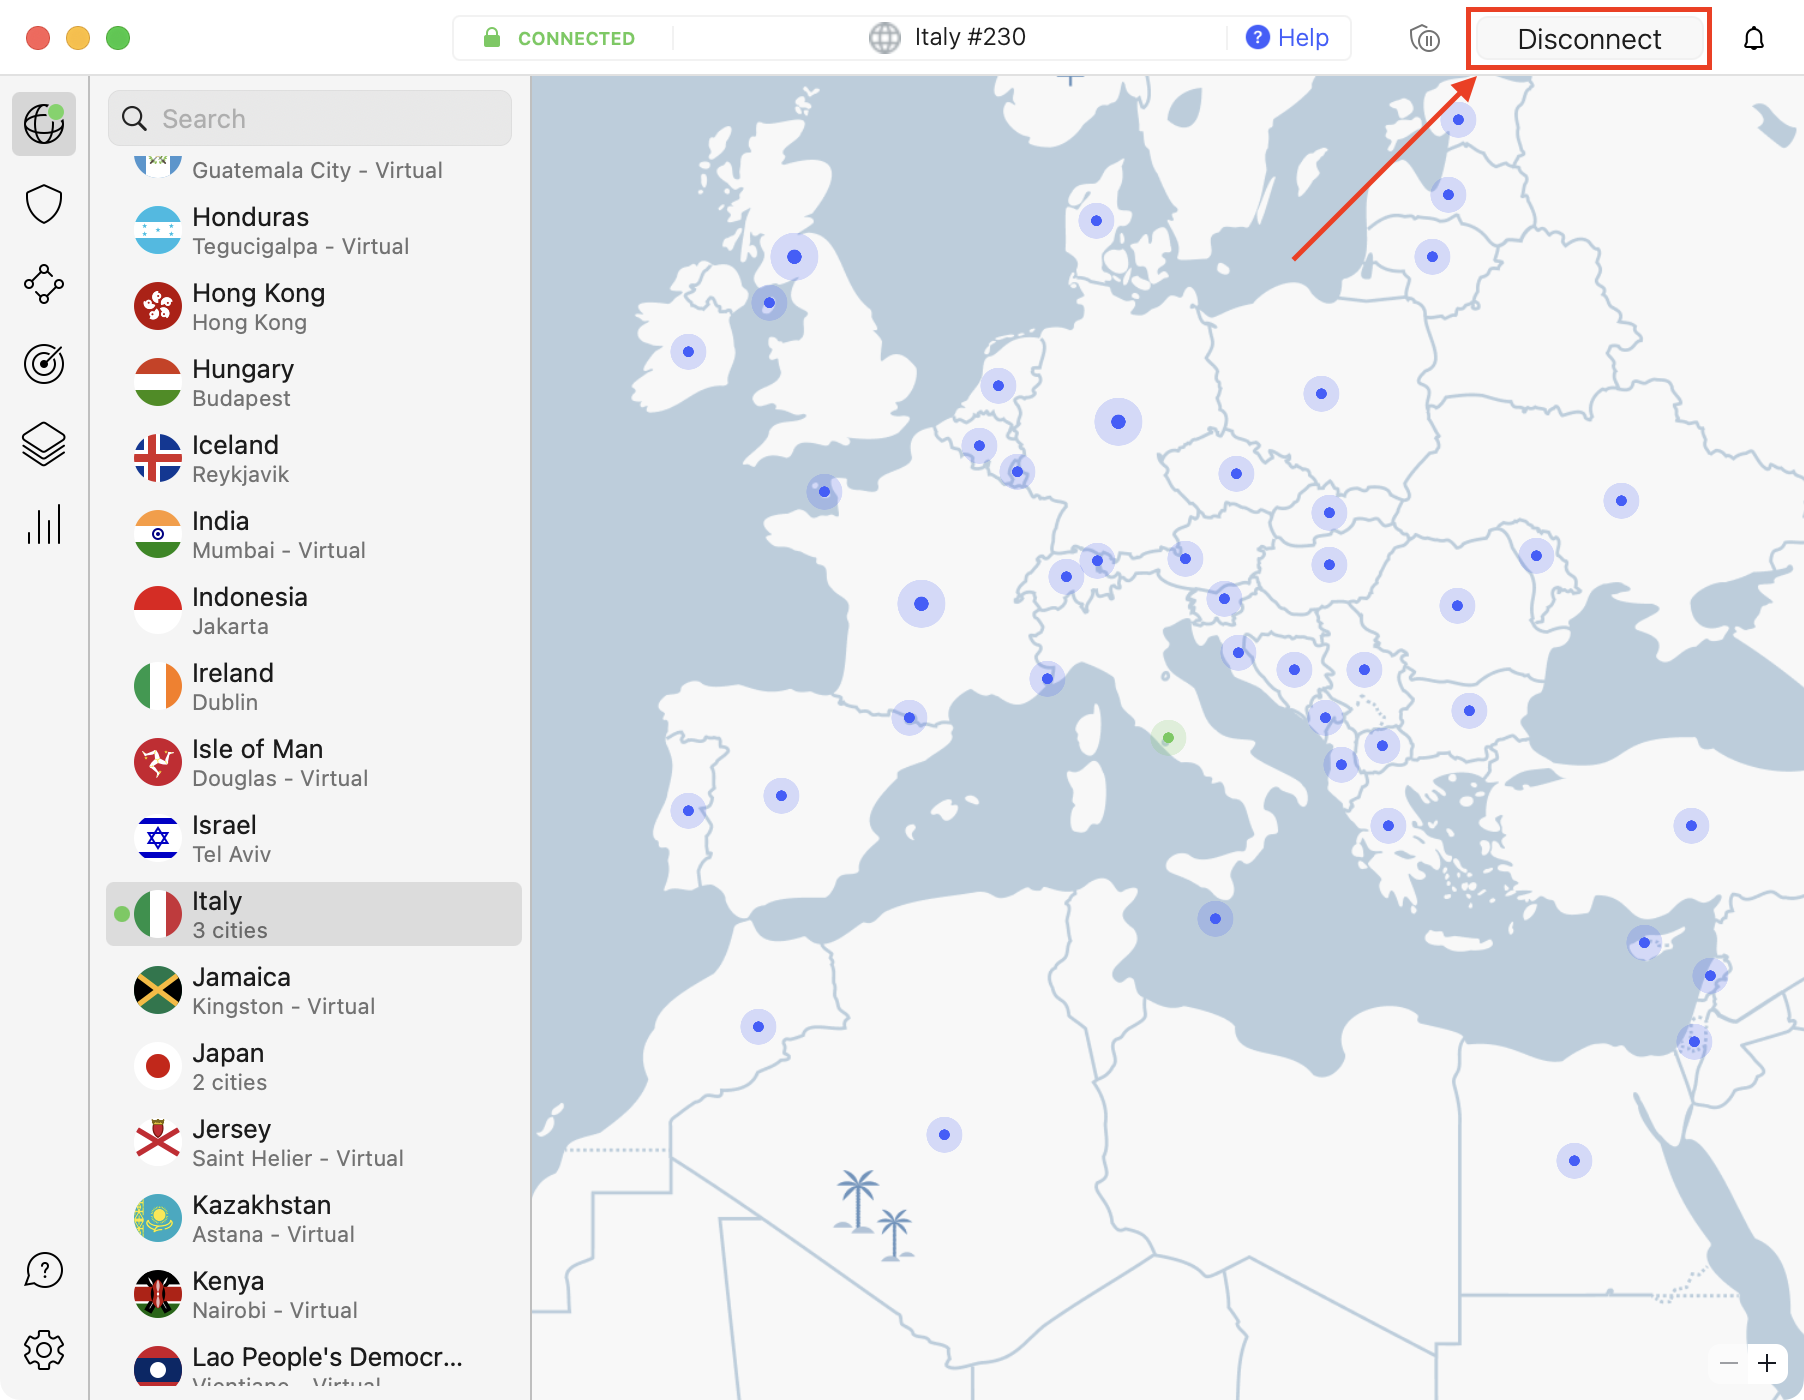
## On iOS:
1. Tap on the NordVPN application icon.
2. Choose ""Disconnect"" on the main screen.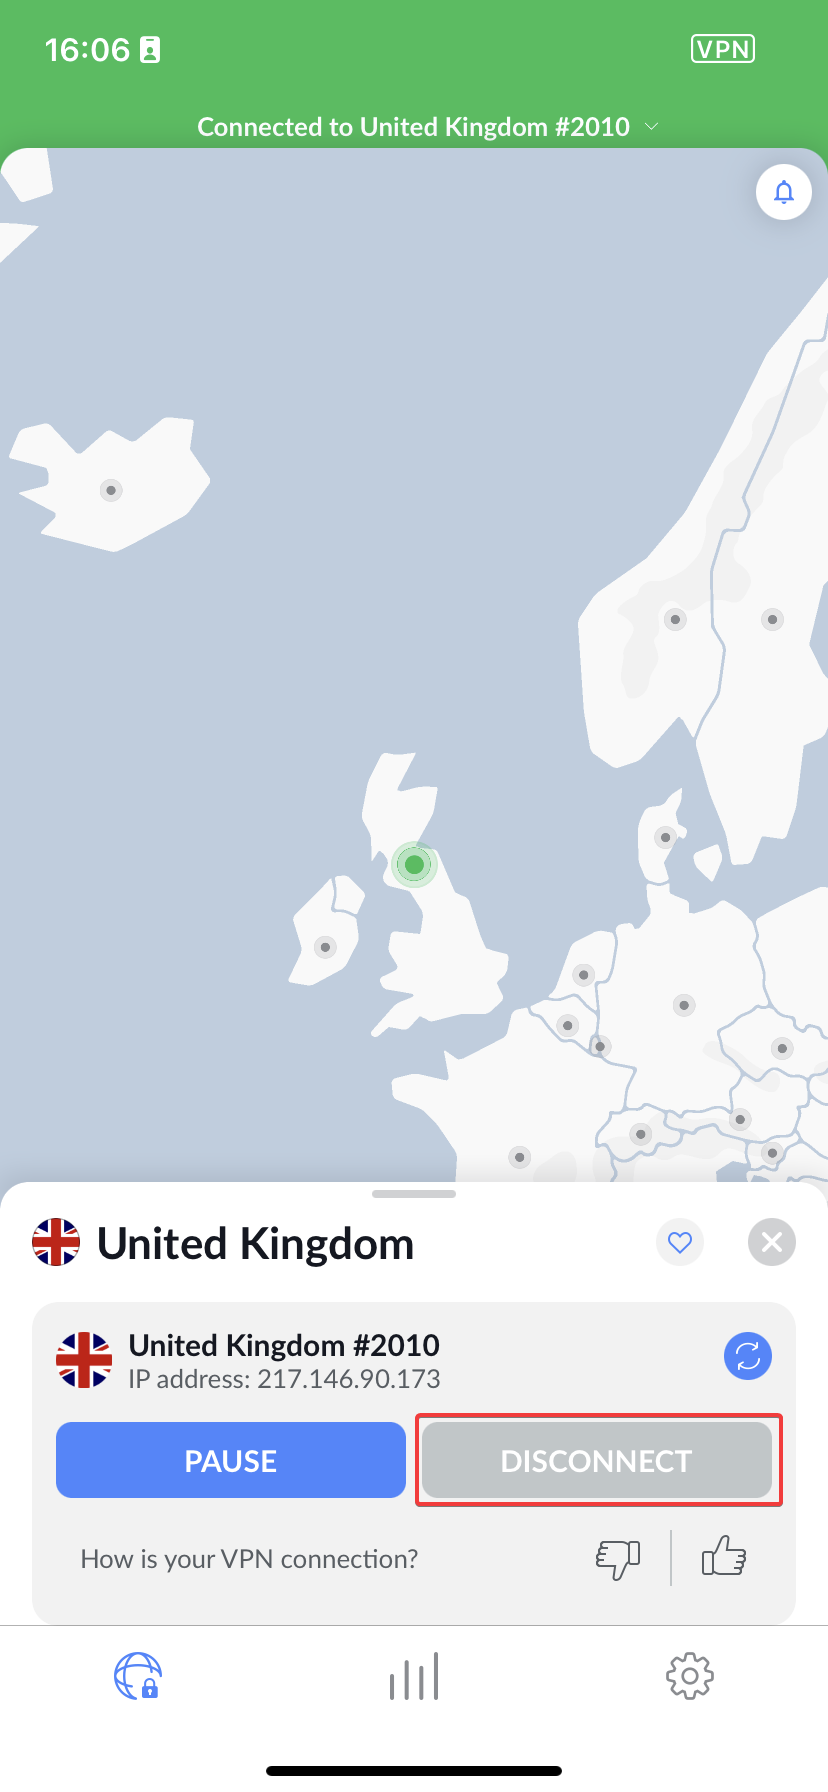
## On Linux:
1. Open the terminal using keyboard shortcuts, press Ctrl + Alt + T .
2. Enter the following command:nordvpn disconnect or nordvpn d",https://support.nordvpn.com/hc/en-us/articles/20315016492305-How-to-disconnect-from-NordVPN-servers
What is browser cache?,"A cache is a data store used to speed up the website loading process the next time you visit the same website. Because of the caching process, website content is presented to you faster than the first time. On the other hand, the browser cache gets full and may show you outdated information or slow down your browser. These temporary files mainly store copies of web pages, images, and media. Clearing them could fix any loading or formatting issues you encounter on websites. Check out our blog on [how to clear cache](https://nordvpn.com/blog/how-to-clear-your-cache/) if you wish to get more information on how to clear it.",https://support.nordvpn.com/hc/en-us/articles/20290215896593-Cache-and-cookies
What are website cookies?,"Cookies are files that store data to identify your interactions with a website you are visiting. They are intended to improve your browsing experience by remembering your preferences and behavior within a website. Cookies do not cause direct harm to your device or browser. However, in some cases, website cookies can be hijacked and provide access to your browsing sessions. If you wish to minimize the tracking and tracing of your data, check out our blog on [how to clear cookies](https://nordvpn.com/blog/clear-cookies/).",https://support.nordvpn.com/hc/en-us/articles/20290215896593-Cache-and-cookies
Does NordVPN affect cookies and cache?,"NordVPN creates a safe way for your internet connection, which prevents your [internet service provider (ISP)](https://support.nordvpn.com/hc/en-us/articles/19588855566097) from applying tracking headers and [super cookies](https://nordvpn.com/blog/super-cookies-going-global/) to follow your browsing activities. The caching process is in no way disrupted when using NordVPN.",https://support.nordvpn.com/hc/en-us/articles/20290215896593-Cache-and-cookies
Cache and cookies,"Cache and cookies play a key role in shaping how data is handled behind the scenes and how users interact with websites. They indeed help optimize performance and personalize user experiences, however, they also raise privacy concerns. In order to balance your convenience and data protection, managing these elements effectively is crucial.
This article will cover:
* [What is browser cache?](
* [What are website cookies?](
* [Does NordVPN affect cookies and cache?](
## What is browser cache?
A cache is a data store used to speed up the website loading process the next time you visit the same website. Because of the caching process, website content is presented to you faster than the first time. On the other hand, the browser cache gets full and may show you outdated information or slow down your browser. These temporary files mainly store copies of web pages, images, and media. Clearing them could fix any loading or formatting issues you encounter on websites. Check out our blog on [how to clear cache](https://nordvpn.com/blog/how-to-clear-your-cache/) if you wish to get more information on how to clear it.
## What are website cookies?
Cookies are files that store data to identify your interactions with a website you are visiting. They are intended to improve your browsing experience by remembering your preferences and behavior within a website. Cookies do not cause direct harm to your device or browser. However, in some cases, website cookies can be hijacked and provide access to your browsing sessions. If you wish to minimize the tracking and tracing of your data, check out our blog on [how to clear cookies](https://nordvpn.com/blog/clear-cookies/).
## Does NordVPN affect cookies and cache?
NordVPN creates a safe way for your internet connection, which prevents your [internet service provider (ISP)](https://support.nordvpn.com/hc/en-us/articles/19588855566097) from applying tracking headers and [super cookies](https://nordvpn.com/blog/super-cookies-going-global/) to follow your browsing activities. The caching process is in no way disrupted when using NordVPN.
If you have any additional questions, [submit a request to our customer success team](https://nordvpn.com/contact-us/).",https://support.nordvpn.com/hc/en-us/articles/20290215896593-Cache-and-cookies
Sponsorship and affiliate programs with NordVPN,"What is sponsorship, and how to get sponsored by NordVPN?
A sponsorship program with NordVPN will help you and your audience deepen their knowledge about cybersecurity and privacy. Additionally, you will be rewarded for publicly sharing your feedback and experience with the NordVPN product. Various YouTube videos, Twitch streams, and other content can be sponsored by NordVPN. To become a NordVPN sponsor, click [here](https://nordvpn.com/influencers/) and follow three simple steps.
Do I get instantly charged when I click on the NordVPN sponsorship link?
You will not be instantly charged when clicking on a NordVPN sponsorship link. The link will forward you to a [Nord Checkout](https://nordcheckout.com/products/) page with a special sponsorship code applied to finish your purchase.
What is an affiliate program, and how can I become a NordVPN affiliate?
With NordVPN's affiliate program, you can earn money by promoting NordVPN's service. Each customer you refer will increase your earnings depending on their chosen subscription plan. Find all the commission rates [here](https://nordvpn.com/affiliate/) and learn how to become an affiliate.",https://support.nordvpn.com/hc/en-us/articles/20285763640337-Sponsorship-and-affiliate-programs-with-NordVPN
NordVPN account generators,"You may have noticed many malicious websites online offering unlimited NordVPN service accounts at no cost. These sites typically provide a free service period for new customers; however, there are always online risks associated with using a free NordVPN account generator. Your account could be hacked, or personal information could be stolen.
If you are using an account generator to avoid paying, you are violating [NordVPN Terms and Service](https://my.nordaccount.com/legal/terms-of-service/), which can lead to an account suspension at any time.To stay secure online and get all NordVPN's benefits - purchase your subscription [here](https://nordvpn.com/pricing/). Our article on How to purchase a NordVPN subscription will guide you through the process.",https://support.nordvpn.com/hc/en-us/articles/20285289780241-NordVPN-account-generators
Internet shows a different server location,"Typically, if selecting a country/server to select to, you should appear as being in that country or location when verifying your location on IP geo-location websites, such as .
If you are appearing in other locations, you may be re-routed due to usage of Peer-to-Peer (P2P) traffic, such as Torrents, on servers that do not support P2P.
If that is not the case, or you are already trying to connect to a P2P-compatible server, you may be using a different VPN service in the background that might be running at your workplace, your Antivirus/Firewall, or web browser. Try turning off these services and see if the [IP address location](https://nordvpn.com/ip-lookup/) changes back.
Some websites may display an incorrect location due to outdated databases they use. It may take some time for third-party databases to update and show correct location.
If none of the above solutions address the issue you are experiencing, please [contact our customer support](https://support.nordvpn.com/hc/en-us/articles/19482416296593-How-can-I-reach-NordVPN-customer-support) for assistance.",https://support.nordvpn.com/hc/en-us/articles/20282655795729-Internet-shows-a-different-server-location
Speed and bandwidth,"NordVPN does not apply any speed or bandwidth limits, but using a VPN in itself can sometimes decrease your internet speed to a certain degree.
[When you are connected to a VPN,](https://nordvpn.com/) your connection speed depends on a number of factors, including the physical proximity of the server, its load, your original internet speed, the VPN protocol you are using, and more. If you are connected to the closest available server through OpenVPN UDP, you can expect around a 30% drop in speed. If that’s too slow, you can use the [NordLynx](https://support.nordvpn.com/hc/en-us/articles/19564565879441-What-is-NordLynx) protocol instead, which provides much better speed.
If you are experiencing any issues when connected to NordVPN, first check your internet speed without VPN to make sure you have no underlying issues with your internet connection. You can do so [on this website](https://www.speedtest.net/). If you have confirmed that the slower connection is related to the use of VPN, bear in mind that a slightly reduced internet speed is normal when your traffic goes through an encrypted [VPN tunnel](https://nordvpn.com/de/blog/vpn-tunnel/).
However, if the connection speed is reduced significantly, or if you notice that the performance is poorer than the one you usually have with the VPN, try the following tips for your device:
* [Tips to improve connection speed on Windows](https://support.nordvpn.com/hc/en-us/articles/20379736354961-Improve-connection-speed-on-Windows-with-NordVPN-app)
* [Tips to improve connection speed on macOS](https://support.nordvpn.com/hc/en-us/articles/20396667808657-Improve-connection-speed-on-macOS-with-NordVPN-app)
* [Tips to improve connection speed on Android](https://support.nordvpn.com/hc/en-us/articles/20379831991697-Improve-connection-speed-on-Android-with-NordVPN-app)
* [Tips to improve connection speed on iOS](https://support.nordvpn.com/hc/en-us/articles/20396465736849-Improve-connection-speed-on-iOS-with-NordVPN-app)",https://support.nordvpn.com/hc/en-us/articles/20282474570257-Speed-and-bandwidth
Why is my status Unprotected,"When you visit the [NordVPN.com](https://nordvpn.com/) website, your status at the top of the page may say you are Unprotected, like in the screenshot below:

This means that you are currently not connected to our servers.
If you are new to our service, we suggest downloading and installing our software from [here](https://nordvpn.com/download/). You can choose from a number of custom applications to connect to our servers and protect your traffic. Click below to see the specific cities and regions you may connect to.
* [United States](https://nordvpn.com/servers/usa/)
* [Canada](https://nordvpn.com/servers/canada/)
* [Australia](https://nordvpn.com/servers/australia/)
* [United Kingdom](https://nordvpn.com/servers/uk/)
* [Germany](https://nordvpn.com/servers/germany/)
* [France](https://nordvpn.com/servers/france/)
* [Netherlands](https://nordvpn.com/servers/netherlands/)
* [Italy](https://nordvpn.com/servers/italy/)
* [Japan](https://nordvpn.com/servers/japan/)
(Psst, even more servers can be found by [click here](https://nordvpn.com/servers/))
If the status at the top of the page still says Unprotected after you have connected to a NordVPN server, contact our support team using either the Email or Chat button below.",https://support.nordvpn.com/hc/en-us/articles/20282075701777-Why-is-my-status-Unprotected
What are the pros and cons of TCP and UDP,UDP is mainly used for online streaming and downloading. TCP is more reliable but also slightly slower than UDP and is mainly used for web browsing.You can watch our video for a more detailed explanation:,https://support.nordvpn.com/hc/en-us/articles/20280919698577-What-are-the-pros-and-cons-of-TCP-and-UDP
How Auto (Recommended) protocol works?,"When choosing a server while connected to ""Auto (Recommended)"" VPN protocol:",https://support.nordvpn.com/hc/en-us/articles/20279414082193-What-is-Auto-Recommended-protocol-on-Windows
Why choose Auto (Recommeded) protocol?,"Auto (Recommended) protocol finds the fastest connection to your wanted server, resulting in a smooth browsing and streaming experience. Moreover, when using other protocols, the app may ask you whether you agree to change the connection protocol to enable some of [NordVPN's features](https://nordvpn.com/features/) (for example, if you have set OpenVPN UDP in Connection Settings but wish to enable the Meshnet feature). When using the Auto (Recommended) protocol, the NordVPN app will not ask you such questions.",https://support.nordvpn.com/hc/en-us/articles/20279414082193-What-is-Auto-Recommended-protocol-on-Windows
What is Auto (Recommended) protocol on Windows,"[NordVPN](https://nordvpn.com/what-is-a-vpn/) offers its users four different VPN connection methods. One of the connection methods is Auto (Recommended). This article will explain how this connection protocol works and why it is recommended.
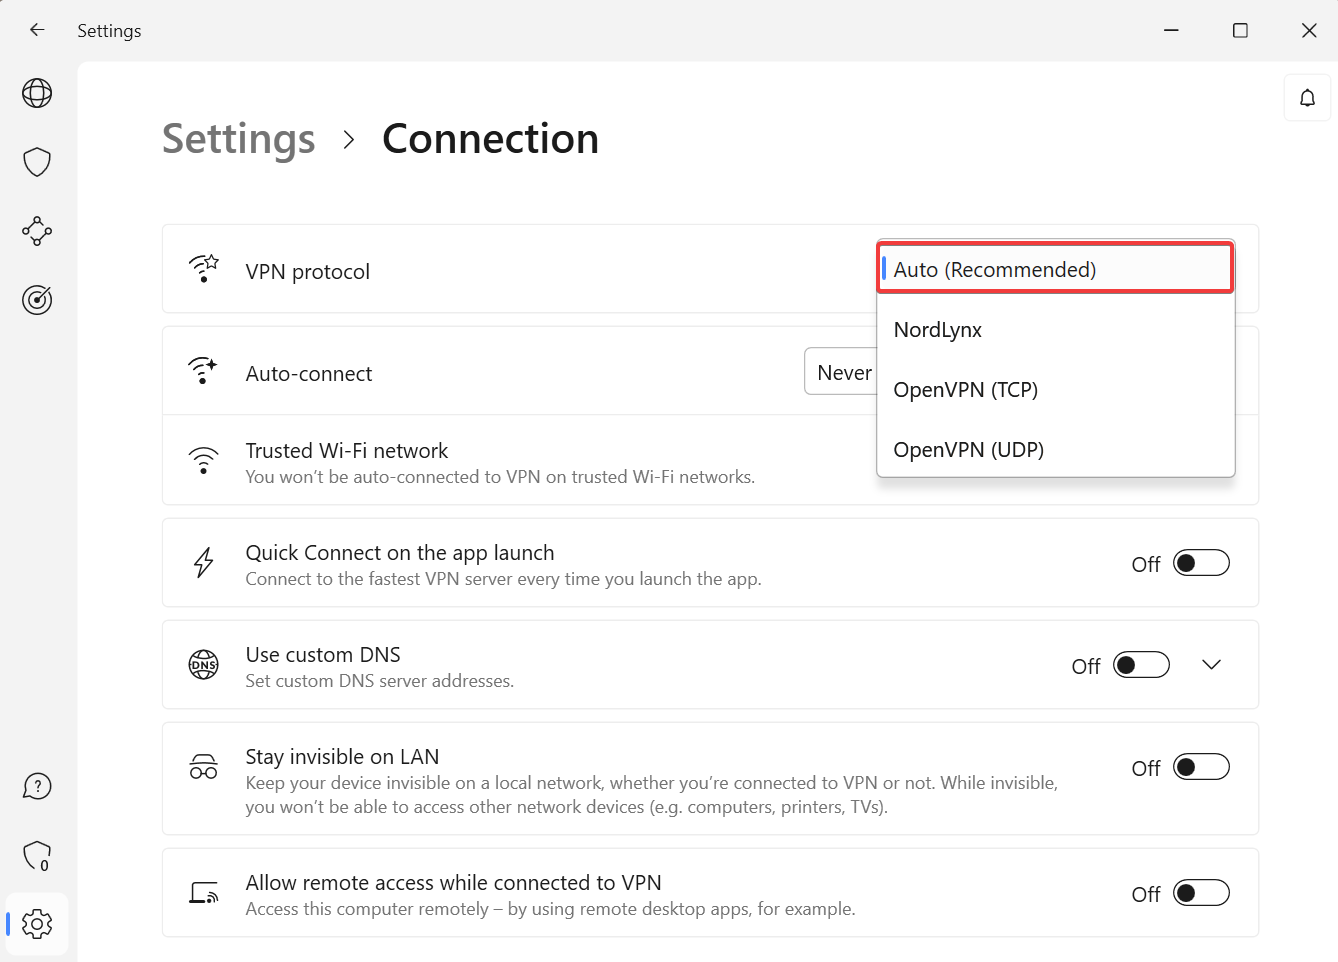
## How Auto (Recommended) protocol works?
When choosing a server while connected to ""Auto (Recommended)"" VPN protocol:
1. Click on the server that you would like to connect to;
2. ""Auto (Recommended)"" protocol checks the connection protocols that are available for that server (Nordlynx, OpenVPN (TCP) or OpenVPN (UDP));
3. Connects you successfully to a VPN server with the fastest available protocol.
## Why choose Auto (Recommeded) protocol?
Auto (Recommended) protocol finds the fastest connection to your wanted server, resulting in a smooth browsing and streaming experience. Moreover, when using other protocols, the app may ask you whether you agree to change the connection protocol to enable some of [NordVPN's features](https://nordvpn.com/features/) (for example, if you have set OpenVPN UDP in Connection Settings but wish to enable the Meshnet feature). When using the Auto (Recommended) protocol, the NordVPN app will not ask you such questions.",https://support.nordvpn.com/hc/en-us/articles/20279414082193-What-is-Auto-Recommended-protocol-on-Windows
What is Incogni,"Incogni is a personal data removal service that works to delete information about you held by data brokers and similar entities.
Many services collect sensitive details about you (such as your full name, phone number, email address, birth date, and location), which lets shady businesses profile you and exposes you to the risk of identity theft. Incogni petitions these services on your behalf to remove this information in accordance with the applicable data protection laws. You can learn how it all works on our [Incogni page](https://nordvpn.com/incogni/).
If you have any questions or requests related to Incogni, check out [Incogni’s support center](https://support.incogni.com/hc/en-us).",https://support.nordvpn.com/hc/en-us/articles/20228780938129-What-is-Incogni
List of NordVPN features,"In addition to the basic VPN service, NordVPN benefits include extra layers of functionality. Some of these add more protection, while others ensure ease of use.
Here is a list of [NordVPN features](https://nordvpn.com/features/) and their descriptions:
* [Next-generation encryption](https://nordvpn.com/features/next-generation-encryption/)
* [Strict no logs policy](https://nordvpn.com/features/strict-no-logs-policy/)
* [Threat Protection Pro™](https://nordvpn.com/features/threat-protection/)
* [Meshnet](https://meshnet.nordvpn.com/getting-started/meshnet-explained)
* [Dark Web Monitor](https://support.nordvpn.com/hc/en-us/articles/19681938685713-Using-the-Dark-Web-Monitor-feature)
* [DoubleVPN](https://nordvpn.com/features/double-vpn/)
* [Automatic Kill Switch](https://nordvpn.com/features/vpn-kill-switch/)
* [DNS leak protection](https://nordvpn.com/dns-leak-test/)
* [Onion Over VPN](https://nordvpn.com/features/onion-over-vpn/)
* [Streaming support](https://nordvpn.com/features/streaming/)
* [SmartPlay](https://nordvpn.com/features/streaming/smart-play/)
* [Lightning speed](https://nordvpn.com/features/high-speed-vpn/)
* [Secure up to 10 devices simultaneously](https://nordvpn.com/features/vpn-for-multiple-devices/)
* [Dedicated IP address](https://nordvpn.com/features/dedicated-ip/)
* [VPN apps for various devices](https://nordvpn.com/download/)
* [Browser proxy extensions](https://nordvpn.com/features/proxy-extension/)
* [24/7 customer support](https://nordvpn.com/features/customer-service/)",https://support.nordvpn.com/hc/en-us/articles/19559429814545-List-of-NordVPN-features
How can I get an Invoice for my company,"If you are looking for a guide on how to get a receipt, check this article: How can I get a receipt for my payment?
1. Log in to your account on the Nord Account page.
2. Navigate Billing History. Click the Invoice button under the Download column.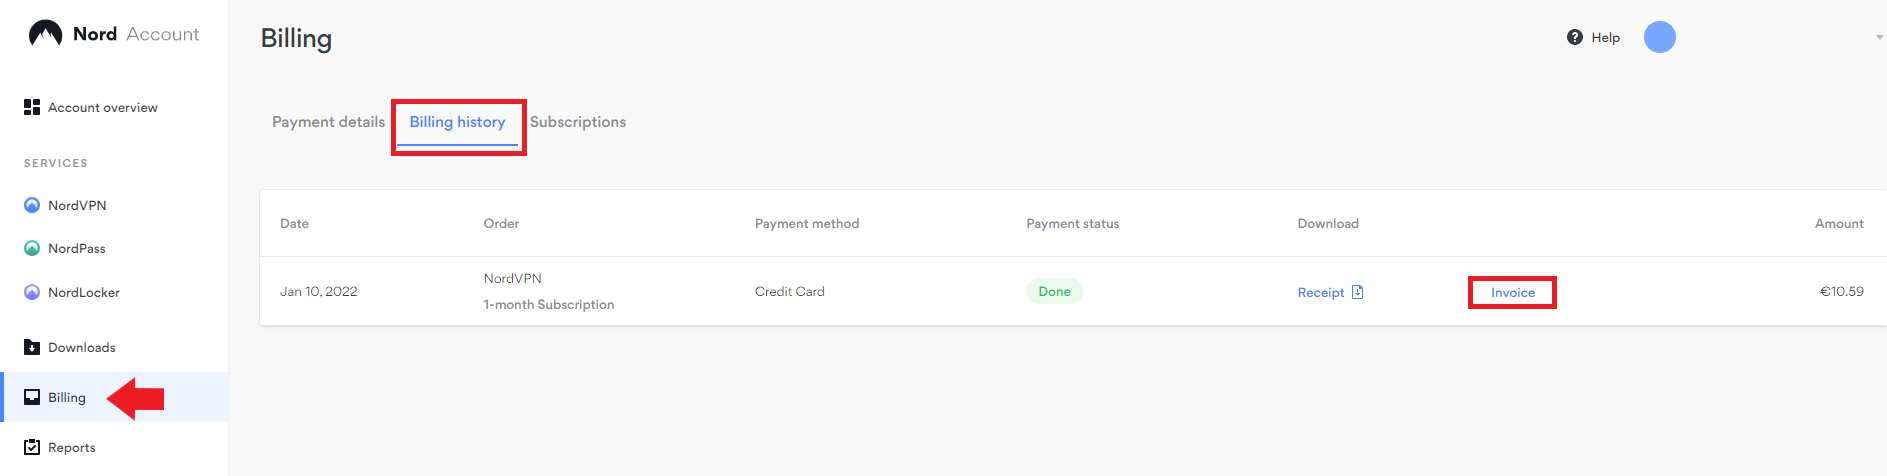
3. A window will pop-up, asking for additional information. Please input all the required information and click Generate Invoice.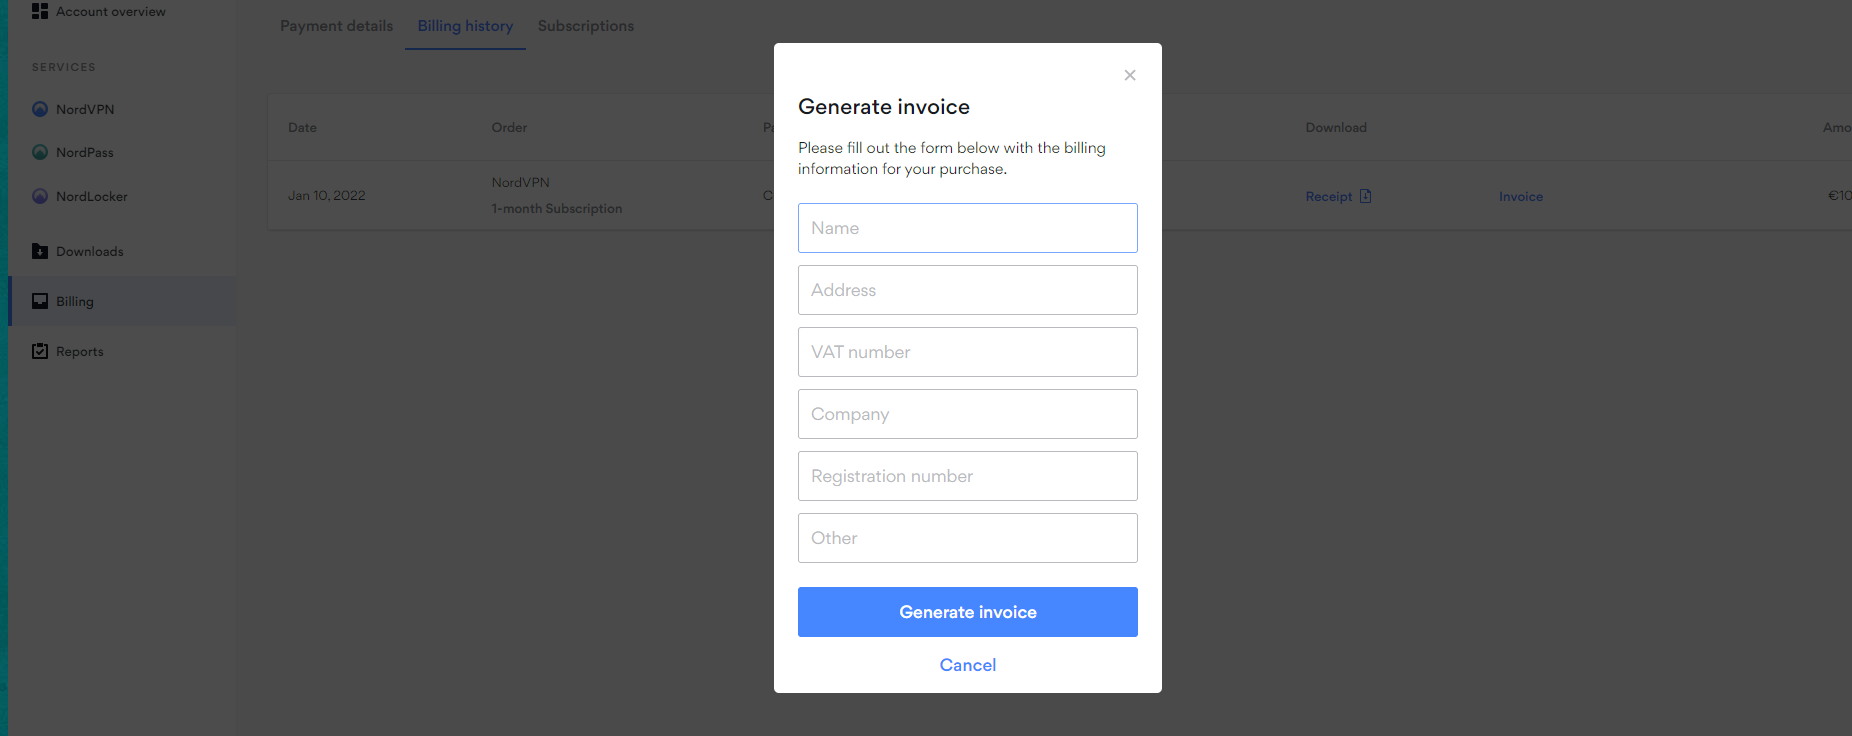
4. Wait until a PDF file icon pops up. Click on the Invoice highlight to download it.",https://support.nordvpn.com/hc/en-us/articles/19744005126801-How-can-I-get-an-Invoice-for-my-company
Onion Over VPN with NordVPN,"Onion Over VPN is a special category of NordVPN servers that lets users access the Tor (The Onion Router) network with increased privacy and without the need for a separate Tor browser.
## How Onion Over VPN works
When you connect to an Onion Over VPN server:
1. Your traffic is encrypted by the NordVPN client.
2. The encrypted traffic passes through a NordVPN server, which changes your IP address.
3. Private and secure, your traffic now reaches the Tor network, which adds its own encryption layers.
4. Your traffic is sent through three random Tor servers before it reaches its destination on the internet.
You can find more detailed information on our dedicated Onion Over VPN page.
## The benefits of Onion Over VPN
* Additional privacy. Anyone can run Tor servers, which may lead to your data being exposed to snoops. Onion Over VPN solves this problem by first routing your traffic through a NordVPN server to hide your IP address.
* No need for a special browser. Typically, you need to download and install a Tor browser to use the Tor network. With NordVPN, you only need to connect to an Onion Over VPN server — you can then use any browser you like.
To better understand the privacy concerns of accessing the Tor network without a VPN (and the general differences between Tor and VPN), check out the video below.
## How to use Onion Over VPN
1. Open the NordVPN app.
2. Find the ""Specialty servers"" category.
3. Press on “Onion Over VPN.” Wait until you've successfully connected.
4. Open your browser. You can now connect to Tor network websites.
If you are using Firefox, you'll need to follow a few more steps: Firefox does not open .onion websites.
If your browser doesn't open Onion websites after you connect to Onion Over VPN servers (or if you have any other issues related to Onion Over VPN servers), please reach out to our customer support for help (contact us).",https://support.nordvpn.com/hc/en-us/articles/19559254946833-Onion-Over-VPN-with-NordVPN
VPN for BBC: how to watch it securely,"With the rise of streaming services like BBC, many users turn to VPNs to access content safely and avoid regional restrictions. In this guide, we’ll cover the essentials of using a VPN for BBC streaming, offering useful tips to improve your experience and resolve any potential issues.
Table of contents:
* [Required NordVPN servers](
* [Troubleshooting steps](
## Required NordVPN servers
VPN provides the ability to bypass restrictions on BBC and also strengthens your security by encrypting your data, keeping your information safe from prying eyes and cyber threats. To securely stream content for BBC, we suggest connecting to [NordVPN servers](https://nordvpn.com/servers/) while using the BBC streaming platform:
* BBC iPlayer (UK): Connect to any [VPN server in the United Kingdom](https://nordvpn.com/servers/uk/).
* BBC US: Connect to any [VPN server in the United States](https://nordvpn.com/servers/usa/).
* BBC AU: Connect to any [NordVPN server in Australia](https://nordvpn.com/servers/).
## Troubleshooting steps
Streaming through a VPN can sometimes result in disruptions or difficulties accessing content, which can hinder the experience.
If you're encountering connection issues, consider trying these solutions to resolve them:
* Connect to a different server in the same region of your wished streaming content.
* Clear your browser’s cache or test a different browser on your device.
* [Change your DNS addresses to NordVPN's](https://support.nordvpn.com/hc/en-us/articles/19587726859793-What-are-NordVPN-DNS-server-addresses).
* Disable location services on your device.
If you're still experiencing issues, please review our [troubleshooting steps for streaming](https://support.nordvpn.com/hc/en-us/articles/19559968238097-Troubleshooting-steps-for-streaming). For more assistance on [streaming safely](https://nordvpn.com/features/streaming/) with a VPN for the BBC, [reach out to our support team](https://support.nordvpn.com/hc/en-us/articles/19482416296593-How-can-I-reach-NordVPN-customer-support).
Under certain circumstances, streaming content (using video on demand, online TV platforms, or other sources) that is only accessible outside your country of residence may be illegal. Always check if you have the legal authority to access the material you wish to stream.
The NordVPN service should never be used to bypass copyright or other regulations. NordVPN does not promote, induce, or otherwise facilitate the use of the service for such purposes. For more details, please read our[ General Terms of Service](https://my.nordaccount.com/legal/terms-of-service/) and[ the NordVPN Additional Terms](https://my.nordaccount.com/legal/terms-of-service/nordvpn/).",https://support.nordvpn.com/hc/en-us/articles/19560706992401-VPN-for-BBC-how-to-watch-it-securely
How to watch paid streaming services with NordVPN while traveling,"In many countries, there are censorship and other limitations on paid streaming services that affect travelers. NordVPN allows you to access such services securely while traveling without any additional configuration. You can read more about it here: [https://nordvpn.com/features/smart-play/](https://nordvpn.com/features/streaming/smart-play/). Here you can find specific articles on some paid streaming services:
* How to securely watch Hulu with NordVPN
* How to securely watch Amazon Prime with NordVPN
* How to securely watch BBC with NordVPN
* How to securely watch Disney Plus with NordVPN
* How to securely watch DAZN with NordVPN
In case you encounter any issues, be sure to check our article on troubleshooting streaming-related problems. You are also welcome to contact our support for assistance.
As you may be aware, streaming content (from video-on-demand or online TV platforms, etc.) that is only accessible in a country other than your country of residence might, under certain circumstances, be considered illegal. Please double-check the authorization or other justification for your actions with the material you are willing to stream before proceeding.
The NordVPN service should never be used to bypass copyright or other regulations. NordVPN does not promote, induce, or otherwise facilitate the use of the service for such purposes. For more details, please read General Terms of Service and NordVPN Additional Terms.",https://support.nordvpn.com/hc/en-us/articles/19560693763345-How-to-watch-paid-streaming-services-with-NordVPN-while-traveling
Troubleshooting steps for streaming,"Streaming issues like buffering, poor video quality, or interruptions while connected to NordVPN can disrupt your viewing experience. Whether the issue lies with your internet or device, multiple potential causes exist. This guide will walk you through common troubleshooting steps to quickly resolve these issues and restore a smooth streaming experience.
Table of contents:
* [Connection leakage troubleshooting](
* [Troubleshooting steps for various devices](
## Connection leakage troubleshooting
One possible challenge users encounter when troubleshooting streaming issues is a leaking connection. This sometimes occurs when part of their internet traffic bypasses the VPN, leaving sensitive data exposed or causing interruptions in their streaming experience.
If you're having issues with certain streaming services while using NordVPN, first check if your connection is protected by following these steps:
1. Ensure that your connection is set up correctly by checking whether your status says protected on [our website](https://nordvpn.com/):
2. If you are connected to one of our servers but your status says unprotected, proceed to the following steps to ensure your connection is secure. Stop any leaks from your connection by following these tutorials:
* * [WebRTC leak prevention](https://support.nordvpn.com/hc/en-us/articles/20318383008529-How-to-stop-WebRTC-leaks)
* [Disable IPv6](https://support.nordvpn.com/hc/en-us/articles/20350921723409-How-to-disable-IPv6)
## Troubleshooting steps for various devices
Technical issues can sometimes arise when streaming content due to various device-related factors. If your connection is secure and the issues persist, find your device in the tutorials below and follow the instructions. After each step, check if the issue is resolved. If not, proceed to the next step.
### For Windows, macOS, Linux devices
1. Try connecting to a different server of the region you would like to access the streaming service.
2. [Clear the cache of your browser.](https://nordvpn.com/blog/how-to-clear-your-cache/)
3. Try to use a different browser/incognito mode.
4. [Set up NordVPN DNS addresses](https://support.nordvpn.com/hc/en-us/articles/19587726859793-What-are-the-addresses-of-my-NordVPN-DNS-servers) to 103.86.99.100 and 103.86.96.100 on your device.
5. Test the streaming accessibility changes without using [Threat Protection or Threat Protection Pro™](https://support.nordvpn.com/hc/en-us/articles/19508765521425-What-is-Threat-Protection-Pro-and-Threat-Protection) if the features are enabled.
6. [Check](https://support.nordvpn.com/hc/en-us/articles/20290051742353-How-to-check-the-NordVPN-app-version) whether your NordVPN application is updated to the[ latest version](https://nordvpn.com/blog/category/service-updates/app-updates/).
7. As a last resort - try using the[ NordVPN extension](https://nordvpn.com/features/proxy-extension/) instead and access the streaming through your browser. Download the extension by clicking [here](https://support.nordvpn.com/hc/en-us/articles/20321833806865-How-to-set-up-the-NordVPN-browser-extension).
### For Android/iOS devices
1. Try connecting to a different server of the region you would like to access the streaming service.
2. If you are using a specific streaming service app, force stop it, clear the app cache, and restart it.
3. If you are accessing the streaming platform on a browser, [clear your browser's cache.](https://nordvpn.com/blog/how-to-clear-your-cache/)
4. [Set up NordVPN DNS addresses](https://support.nordvpn.com/hc/en-us/articles/19587726859793-What-are-the-addresses-of-my-NordVPN-DNS-servers) to 103.86.99.100 and 103.86.96.100 on your device.
5. Test the streaming accessibility changes without using [Threat Protection or Threat Protection Pro™](https://support.nordvpn.com/hc/en-us/articles/19508765521425-What-is-Threat-Protection-Pro-and-Threat-Protection) if the features are enabled.
### For Android TV boxes
1. Try connecting to a different server in the region where you would like to access the streaming service.
2. If you are using a specific streaming service app, force stop it, clear the app cache, and restart it, here are the steps:
1. Go to Settings > Preferences section > More settings > Apps.
2. Find the streaming service app and press on it.
3. Click the Force Stop button.
4. Click the Clear Cache button.
5. Restart the application.
3. [Set up NordVPN DNS addresses](https://support.nordvpn.com/hc/en-us/articles/20466230743569-Change-your-DNS-servers-on-Android-TV-with-NordVPN) to 103.86.99.100 and 103.86.96.100 on your device.
### For Amazon Fire TV devices
1. Try connecting to a different server of the region you would like to access the streaming service.
2. If you are using a specific streaming service app, force stop it, clear the app cache, and restart it:
1. Go to Settings > Applications > Manage Installed Applications.
2. Find the streaming service app and press on it.
3. Click the Force Stop button.
4. Click the Clear Cache button.
5. Restart the application.
3. [Set up NordVPN DNS addresses](https://support.nordvpn.com/hc/en-us/articles/20466230743569-Change-your-DNS-servers-on-Android-TV-with-NordVPN) to 103.86.99.100 and 103.86.96.100 on your device.
The NordVPN service should never be used to bypass copyright regulations. NordVPN does not promote, condone, or endorse the use of the service for such purposes. For more details, please read the NordVPN [Terms of Service](https://my.nordaccount.com/legal/terms-of-service/).
If you experience other issues or have additional questions, do not hesitate to [submit a request](https://support.nordvpn.com/hc/en-us/articles/19482416296593-How-to-reach-NordVPN-customer-support) to our customer success team.",https://support.nordvpn.com/hc/en-us/articles/19559968238097-Troubleshooting-steps-for-streaming
Cyber insurance benefits: additional FAQs,"You can find additional questions answered about cyber insurance in this article.
## Table of contents:
* [Ability to purchase additional coverage](https://support.nordvpn.com/hc/en-us/articles/20185997168529-Cyber-insurance-benefits-additional-FAQs#Ability%20to%20purchase%20additional%20coverage)
* [Who is the insurance benefits receiver](https://support.nordvpn.com/hc/en-us/articles/20185997168529-Cyber-insurance-benefits-additional-FAQs#Who%20is%20the%20insurance%20benefits%20receiver)
* [Waiting period](https://support.nordvpn.com/hc/en-us/articles/20185997168529-Cyber-insurance-benefits-additional-FAQs#Waiting%20period)
* [Cybersecurity practices that must be followed](https://support.nordvpn.com/hc/en-us/articles/20185997168529-Cyber-insurance-benefits-additional-FAQs#Cybersecurity%20practices%20that%20must%20be%20followed)
* [Secondary financial impacts coverage](https://support.nordvpn.com/hc/en-us/articles/20185997168529-Cyber-insurance-benefits-additional-FAQs#Secondary%20financial%20impacts%20coverage)
* [Reasons for getting your insurance benefits canceled or ceased](https://support.nordvpn.com/hc/en-us/articles/20185997168529-Cyber-insurance-benefits-additional-FAQs#Reasons%20for%20getting%20your%20insurance%20benefits%20canceled%20or%20ceased)
* [Policy renewal](https://support.nordvpn.com/hc/en-us/articles/20185997168529-Cyber-insurance-benefits-additional-FAQs#Policy%20renewal)
* [Contact direct](https://support.nordvpn.com/hc/en-us/articles/20185997168529-Cyber-insurance-benefits-additional-FAQs#Contact%20direct)
### Can I purchase additional coverage above the £5,000 limit?
No, you cannot purchase additional coverage above the £5,000 limit.
### Are family members or other individuals using my NordVPN account also covered under this policy?
No, these insurance benefits are only applicable to the owner of the NordVPN account who has purchased the NordVPN Ultimate bundle subscription.
### Is there a waiting period before the insurance benefits cover becomes active?
There is no waiting period. As soon as you have purchased a NordVPN Ultimate bundle subscription, you are covered by the insurance benefits.
### Are there any specific cybersecurity practices I need to follow to ensure my claim will be valid?
You are responsible for taking reasonable precautions to prevent losses due to cyber fraud. Such precautions include avoiding clicking on suspicious links and [verifying the identity](https://nordvpn.com/blog/identity-verification/) of their sender, e.g., checking the email address and/or phone number or verifying payee information with the bank before responding.
You must also comply with the terms and conditions of your bank or e-money account provider and follow any instructions given by them with regard to avoiding [fraud](https://nordvpn.com/blog/what-is-fraud/), such as never disclosing login details, PIN numbers, or [OTP (One-Time-Passcodes)](https://nordvpn.com/blog/one-time-password-explained/) to anyone.
If you have been a victim of cyber fraud, you must notify your bank or e-money account provider within 24 hours of you discovering the fraud, so they can make attempts to stop the transaction from going through or trace where the funds have gone.
If you have failed to adhere to any of the above, or if it is deemed that you have been unreasonably negligent, then your claim may be denied.
### In the case of a cyber scam, am I covered for any secondary financial impacts, like loss of investment gains?
No, the insurance benefits only cover funds transferred or transactions made by you directly in response to a cyber scam.
### In what circumstances might Chubb or NordVPN cancel or cease the insurance benefits cover?
Either the insurer (Chubb) or the group policyholder (NordVPN) may cancel or cease the insurance benefits for any of the following reasons:
* by mutual agreement between the two parties.
* if you, or anyone acting on your behalf, knowingly makes a claim which is in any way dishonest, false, or fraudulent.
You will be notified in the event of cancellation of these insurance benefits.
### How do I renew my policy, and will there be any change in terms upon renewal?
As long as you have an active NordVPN Ultimate bundle subscription, you need not take any additional action. The policy and the insurance benefits will continue, and there will be no changes to the terms of the policy upon renewal as long as the group policy between Chubb and NordVPN is valid. However, if there are any changes to the group policy or if the group policy is no longer valid, you will be notified at least 60 days in advance.
### Is there any way to reach out to someone if I have any additional questions?
If you have any additional questions about the insurance benefits, you can contact chubbcyberclaims@ie.sedgwick.com",https://support.nordvpn.com/hc/en-us/articles/20185997168529-Cyber-insurance-benefits-additional-FAQs
What information does NordVPN store?,"NordVPN does not log any of your activity online. The only information we keep about our users is their encrypted login credentials and billing information for refund procedures.
However, there is some information we need to keep:
* Your email address to send the latest NordVPN news and retrieve a forgotten password.
* A username to establish a VPN connection.
* Payment information. We store the transaction or order ID in case you request a refund. However, your account is not linked with any activity you have done when connected to a VPN. We would recommend you use CoinPayments for anonymous payments.
As per our [no-logs-policy](https://nordvpn.com/features/strict-no-logs-policy/), we would be unable to provide any relevant information in case of a valid court order.
The information mentioned above can be deleted once you remove your account. If you wish to do so, check out [how to delete your NordVPN account](https://support.nordvpn.com/hc/en-us/articles/19477434542865-How-to-delete-my-NordVPN-account).",https://support.nordvpn.com/hc/en-us/articles/19744151372945-What-information-does-NordVPN-store
I have been charged twice,"Please [contact our support team](https://support.nordvpn.com/hc/en-us/articles/19482416296593-How-can-I-reach-NordVPN-customer-support) and provide as much information about your payment as possible. We need it to have a better ability to identify your payments. The information that would help us:
* Payment type (credit card, CoinPayments, etc.)
* Payment date(s) - tell us your last 5 payment dates
* Transaction ID or payment number of your last 5 payments that you were provided.
* In some cases, we may ask you for a photo/screenshot proof of your transaction.",https://support.nordvpn.com/hc/en-us/articles/19744128147729-I-have-been-charged-twice
What should I do if I choose the wrong VAT country?,"You can [generate an invoice](https://support.nordvpn.com/hc/en-us/articles/19744005126801-How-can-I-get-an-Invoice-for-my-company) from your [NordAccount](https://my.nordaccount.com/) and then claim the tax return in your local tax office. Alternatively, our [support can issue a refund](https://support.nordvpn.com/hc/en-us/articles/19476991311121-What-is-your-money-back-policy) for your payment, and then you can re-subscribe to our service while selecting a country with a different VAT.",https://support.nordvpn.com/hc/en-us/articles/19743990111121-What-is-VAT-and-why-am-I-charged
"What is VAT, and why am I charged","VAT (Value Added Tax) is a tax that is added to goods and services, including digital services. We collect VAT on behalf of the country you select on the [checkout page](https://nordcheckout.com/?product_group=nordvpn&cart_id=2d53ba3b-8d07-4190-a795-f63fa287ffef) and use the EU VAT MOSS system which covers all European countries. We pay VAT quarterly to the respective countries as this is mandatory for online software sales.
You can see a VAT charge next to the price of the NordVPN service under the Order summary.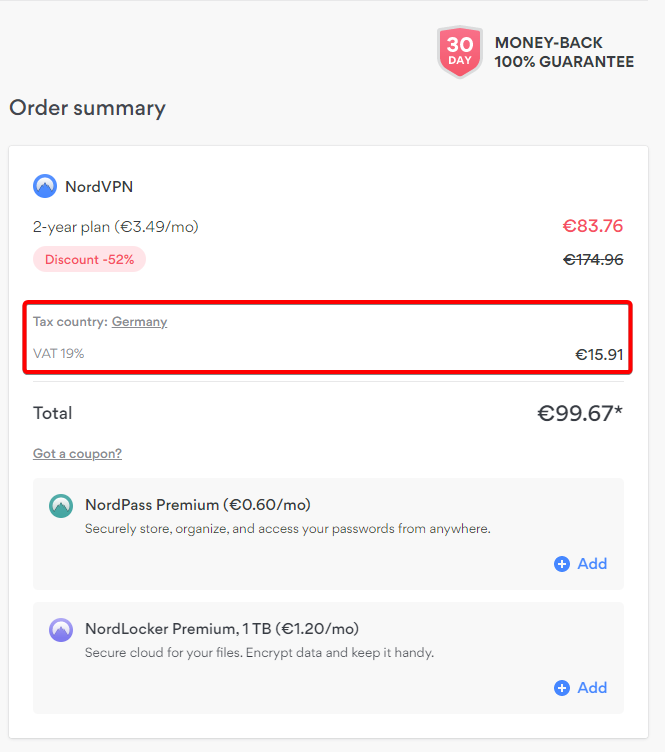
## What should I do if I choose the wrong VAT country?
You can [generate an invoice](https://support.nordvpn.com/hc/en-us/articles/19744005126801-How-can-I-get-an-Invoice-for-my-company) from your [NordAccount](https://my.nordaccount.com/) and then claim the tax return in your local tax office. Alternatively, our [support can issue a refund](https://support.nordvpn.com/hc/en-us/articles/19476991311121-What-is-your-money-back-policy) for your payment, and then you can re-subscribe to our service while selecting a country with a different VAT.",https://support.nordvpn.com/hc/en-us/articles/19743990111121-What-is-VAT-and-why-am-I-charged
I can't make a payment,"Payments may fail for various reasons. Here are a few tips you might find useful.
Credit Card
To avoid multiple charges or a temporary hold of funds, do not make repeated attempts to complete a purchase.
You may contact your credit card company – it is likely to have information about the failed transaction and the status of your account.
If you’ve tried to make a payment with a credit card, but your account is still not active, there are a few common causes:
* Insufficient funds. Check if your bank account has enough credit to make the payment.
* Incorrect information. The information you provide when paying must match the information on your credit card.
* Expired card. Check the expiration date of your card.
* Fraud detection. This usually happens when you try to make a payment while connected to a VPN or when using a proxy. Having an unusual IP address (such as an IP address of a country different from the one where your credit card was issued) may also be the cause.
* The transaction was declined by the issuing bank. You may want to contact your bank and allow future payments to NordVPN.
If you use a prepaid credit card, register it online before use. Contact the card issuer if you have trouble completing the registration.
CoinGate
Have you tried to make a payment with Crypto Currencies but your account is still inactive? Your transaction may not have been confirmed in the coin network yet – just give it more time.
Your transaction might also have timed out if you took too long to make the payment. In this case, [contact our support team](https://support.nordvpn.com/hc/en-us/articles/19482416296593-How-can-I-reach-NordVPN-customer-support), and we will be glad to help you.",https://support.nordvpn.com/hc/en-us/articles/19742025703313-I-can-t-make-a-payment
Why my NordVPN account is still inactive,"If you paid for the NordVPN service, but it still insists that you get a plan when you open the app, follow these steps:
1. Make sure you are logged in with the same E-Mail that you purchased a subscription.
2. Wait for a payment to be processed:
* Payments via credit card may take up to 40 minutes to be verified.
* Payments via iDeal (Netherlands) may take up to 40 minutes to be verified.
* Payments via CoinGate may take up to 1.5 hours to be verified.
If your account is still inactive after you've logged in with the same e-mail address and waited until your payment is processed - [Contact our support team](https://support.nordvpn.com/hc/en-us/articles/19482416296593-How-can-I-reach-NordVPN-customer-support)",https://support.nordvpn.com/hc/en-us/articles/19741669733393-Why-my-NordVPN-account-is-still-inactive
How to apply a NordVPN coupon code,"To apply a NordVPN discount code, follow these steps:
1. Go to our [pricing page.](https://nordvpn.com/pricing/)
2. Select a preferred plan.
3. Click do you have a promo code?: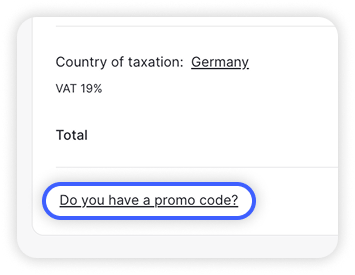
4. Enter the coupon code you have, and press apply: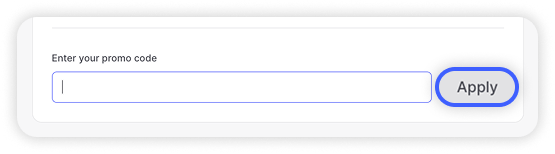Now you will have the deal corresponding to your [NordVPN coupon](https://nordvpn.com/coupon/) code applied to your purchase.
After clicking apply, your coupon code will be applied to your purchase.
NordVPN provides discounts during certain events, such as on [Black Friday](https://nordvpn.com/black-friday/) and [Cyber Monday](https://nordvpn.com/cyber-monday/). Make sure to regularly check out our main page for any active deals.",https://support.nordvpn.com/hc/en-us/articles/19686880595217-How-to-apply-a-NordVPN-coupon-code
Unauthorised use of Credit or Debit card,"NordVPN provides VPN services through subscriptions. If you see a suspicious charge from NordVPN or any Nord product on your card statement, contact customer support for help:
* Email: support@nordvpn.com
* Live chat: Click the chat bubble at the bottom-right of their website.
To help identify the payment, provide these details:
* First six and last four digits of the card
* Cardholder name
* Amount charged
* Date of the transaction
Sometimes, the charges might be due to a friend or family member using your card.",https://support.nordvpn.com/hc/en-us/articles/19685941574801-Unauthorised-use-of-Credit-or-Debit-card
How to purchase a dedicated IP address,"A NordVPN dedicated IP is an IP address that is assigned to a specific server. This means that the address is not shared with any other device or network. If you wish to get better connection speed, less Captcha requests, or an IP that is only accessible to you, a dedicated IP will help. In this article you will learn how to purchase a [NordVPN dedicated IP.](https://nordvpn.com/features/dedicated-ip/) If you wish to purchase a dedicated IP, you will need an active NordVPN subscription.
Important: If you purchase a dedicated IP from NordVPN, your email will be linked to that IP address. For more information, please consult our [Privacy Policy](https://my.nordaccount.com/legal/privacy-policy/nordvpn/).
## Table of contents:
* [How to get a dedicated IP address as a new NordVPN user](
* [How to get a dedicated IP address if you are an existing NordVPN user](
* [Purchasing a dedicated IP using your Nord Account](
* [Purchasing a dedicated IP using the NordVPN Windows app](
* [Purchasing a dedicated IP using the NordVPN macOS app](
* [Using a dedicated IP in countries with internet restrictions](
* [Frequently asked questions](
* [How many dedicated IPs can be used with one NordVPN account?](
* [How do you purchase additional dedicated IPs?](
* [What should you do after purchasing a dedicated IP?](
## How to get a dedicated IP address as a new NordVPN user
You can add a dedicated IP address at checkout when purchasing your first NordVPN subscription.
1. Go to the [NordVPN pricing page](https://nordvpn.com/pricing/).
2. Select your desired plan and its duration.
3. At the checkout, find dedicated IP under add extra services (optional) and click add.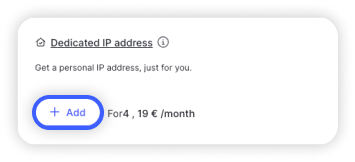
4. Complete the purchase and create your [Nord Account](https://my.nordaccount.com/).
5. Open your Nord Account and [set up your dedicated IP location](https://support.nordvpn.com/hc/en-us/articles/23189768691345-Setting-up-a-dedicated-IP-after-purchase).
## How to get a dedicated IP address if you are an existing NordVPN user
### Purchasing a dedicated IP using your Nord Account
If you already have an active NordVPN subscription, you can purchase our dedicated IP service by following these steps:
1. Log in to your [Nord Account](https://my.nordaccount.com/).
2. Go to the NordVPN tab: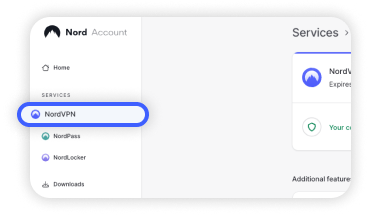
3. Select get dedicated IP.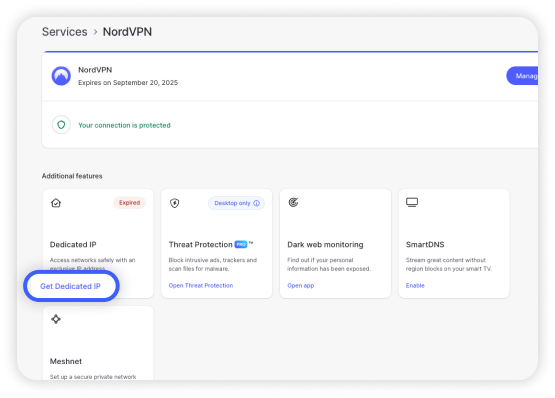
4. Choose the plan that best fits your needs.
5. Fill out all required payment information and select continue.
6. [Set up your dedicated IP in your Nord Account](https://support.nordvpn.com/hc/en-us/articles/23189768691345-Setting-up-a-dedicated-IP-after-purchase) dashboard.
### Purchasing a dedicated IP using the NordVPN Windows app
If you wish to purchase a dedicated IP using the [NordVPN application for Windows](https://nordvpn.com/download/windows/), follow these steps:
1. In the main screen of the Windows NordVPN app, open the specialty servers tab: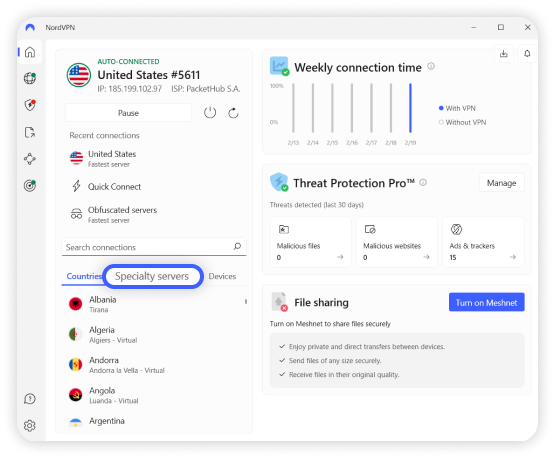
2. Click dedicated IP.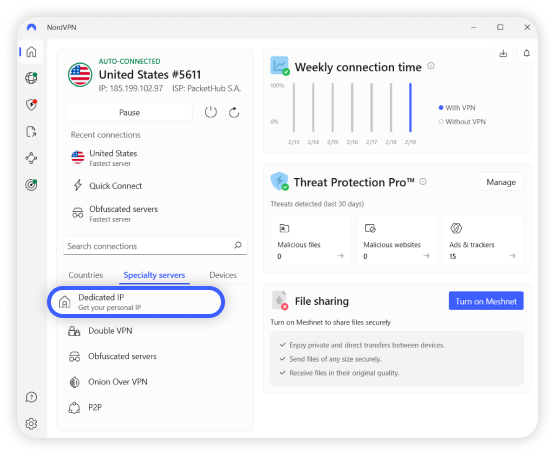
3. Click buy dedicated IP in the following screen. You will be taken to your Nord Account to select your desired dedicated IP plan.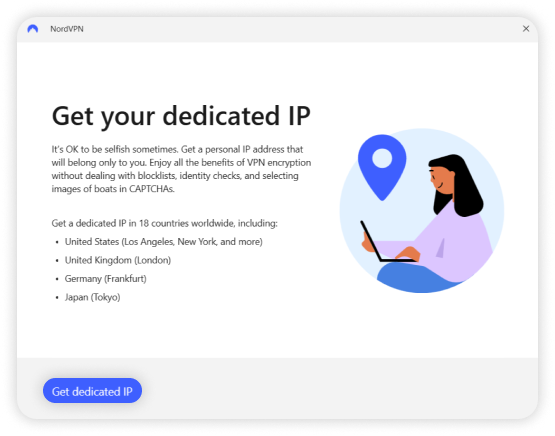
4. Fill out all of the required payment information and click continue.
5. [Set up your dedicated IP in your Nord Account](https://support.nordvpn.com/hc/en-us/articles/23189768691345-Setting-up-a-dedicated-IP-after-purchase) dashboard.
### Purchasing a dedicated IP using the NordVPN macOS app
You can only use this purchase method if you have [downloaded the NordVPN macOS app](https://nordvpn.com/download/mac/) from the NordVPN website. If you did not, you can still [purchase a dedicated IP using your Nord Account](
Follow these steps to purchase your dedicated IP:
1. Open your NordVPN app.
2. Scroll down to specialty servers and click dedicated IP: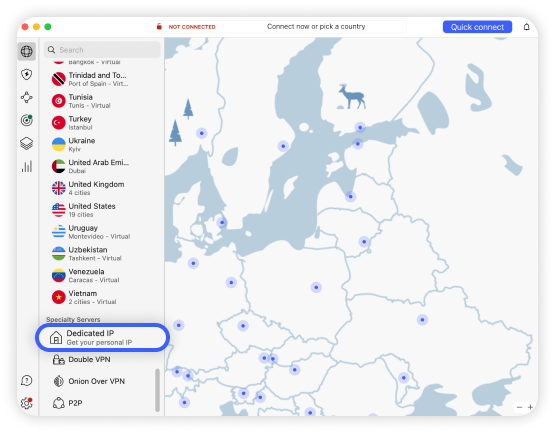
3. Click get dedicated IP in the following screen. You will be taken to your Nord Account to select your desired dedicated IP plan.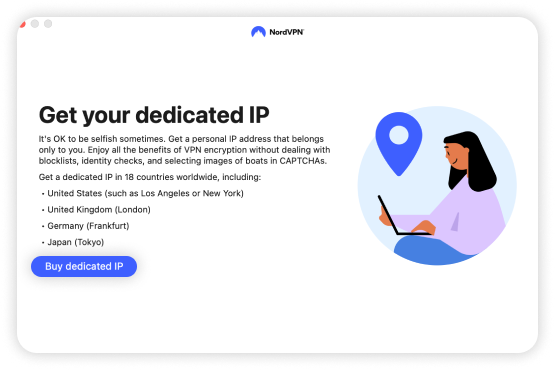
4. Fill out all of the required payment information and click continue.
5. [Set up your dedicated IP in your Nord Account](https://support.nordvpn.com/hc/en-us/articles/23189768691345-Setting-up-a-dedicated-IP-after-purchase) dashboard.
## Using a dedicated IP in countries with internet restrictions
Due to reduced service accessibility, you may have trouble getting your dedicated IP to work when connecting from countries with internet restrictions. Please consult our guide on [manual NordVPN dedicated IP server setup.](https://support.nordvpn.com/hc/en-us/articles/31386007399057-Manual-NordVPN-Dedicated-IP-server-setup)
## Frequently asked questions
### How many dedicated IPs can be used with one NordVPN account?
You may purchase any number of dedicated IP addresses, but keep in mind that your NordVPN account is limited to ten simultaneous connections.
### How do you purchase additional dedicated IPs?
You can purchase additional dedicated IP addresses using a special coupon code. This coupon will allow you to create a new NordVPN account while paying only for the dedicated IP feature. However, because you still need an active NordVPN subscription to use the dedicated IP, our customer service staff will help you transfer the dedicated IP address to your main account.
Here is what you need to do to purchase additional dedicated IP addresses:
1. Apply the coupon code “norddedicatedip” to your order, selecting the 1-year NordVPN plan.
2. Enter an email address for the temporary NordVPN account (different from your main one).
3. Complete the purchase. You should now have two NordVPN accounts.
4. [Contact our support team](https://support.nordvpn.com/hc/en-us/articles/19482416296593-How-can-I-reach-NordVPN-customer-support) and give them the email addresses of both of your NordVPN accounts, indicating which one is your main one.
5. Specify your [dedicated IP location](https://support.nordvpn.com/hc/en-us/articles/19507808024209-Dedicated-NordVPN-IP-addresses).
Note: After you specify your desired dedicated IP location, it may take up to three business days to set your NordVPN dedicated IP address. However, your dedicated IP subscription will begin to run at the date of purchase.
### What should you do after purchasing a dedicated IP?
You need to [set up your dedicated IP address in Nord Account](https://support.nordvpn.com/hc/en-us/articles/23189768691345-Setting-up-a-dedicated-IP-after-purchase) after purchase.",https://support.nordvpn.com/hc/en-us/articles/19484196251921-How-to-purchase-a-dedicated-IP-address
How to get NordVPN cheaper,"The best NordVPN plans currently available are displayed on our [pricing page](https://nordvpn.com/pricing/). However, here are some additional deals:
* Student discount - NordVPN offers an additional discount for students and apprentices who are 18-26 years old.
* NordVPN coupons - here, you can find special monthly deals.
* Affiliate coupon codes - we recommend checking out if your favorite content creators are a part of our Affiliate Program, as they can provide you with special discount codes. Follow this guide to learn how to apply the NordVPN discount code.
* Referring a friend - with this opportunity, you can receive a month of NordVPN services for free for referring a friend.
* Occasional deals - NordVPN offers plenty of discounts and gifts to its customers throughout the year. Here, you can see where to find them and find out the best time to get them. For example, you can keep an eye out for special Cyber Monday or Black Friday VPN deals.",https://support.nordvpn.com/hc/en-us/articles/19477702164369-How-to-get-NordVPN-cheaper
What is your money-back policy?,"Here is the refund and cancellation policy at the core of our 30-day money-back guarantee:
“...if you are not satisfied with our Services, you may cancel the Subscription and request a refund within 30 days following your purchase of our Services (“Money Back Guarantee”). Please note that Subscriptions may be refunded on the basis of the Money Back Guarantee only after the initial purchase. Once a Subscription is renewed, it cannot be refunded on the basis of the Money Back Guarantee, unless applicable law provides otherwise.”
This and other conditions of our service can be found in our [Terms of Service](https://my.nordaccount.com/legal/terms-of-service/).
Here are our instructions for [how to cancel](https://support.nordvpn.com/hc/en-us/articles/19556844985489-How-to-cancel-auto-renewal-for-your-subscription) automatic payment renewal.
## Requesting a refund
Previously, refunds could only be processed through our support team. We have now implemented an automated refund system that is more efficient, faster, and convenient for our customers to use. This change also improves our ability to gather feedback, allowing us to better understand issues and improve our service. As we continue to refine this new process, your feedback is welcomed to help us enhance it further.
To request a refund for your payment, contact our customer support team via live chat available in the bottom right corner of the page, and indicate you would like us to refund your payment.
1. You will receive a link to your Nord Account dashboard. Follow the link and verify it’s you who’s trying to access the account.
2. In the following window, you will see which payments are eligible for a refund. Such payments will have a Refund button available. To proceed, click on Refund.Please keep in mind that not all payments are eligible for refunds, and certain terms apply depending on where you bought the subscription:
* * Apple App Store: Subscriptions purchased via the Apple App Store are subject to Apple's refund policies. We're unable to issue refunds for payments made through the Apple App Store. For assistance, please reach out to Apple directly via Apple Support.
* Amazon Appstore: If you've purchased your subscription through the Amazon App Store, contact Amazon directly for assistance via Amazon Support.
* Google Play Store: Refunds for payments made through the Google Play Store can be requested through NordVPN’s customer support, provided they fall within the refund terms outlined above. Additionally, if the payment was made within the last 48 hours, you can request a refund directly from your Google Play account. For more details, visit Google Play Support.
* Retailers or resellers: If you've purchased a subscription outside the NordVPN website (e.g., physical store, online shop, or marketplace like BestBuy or StackSocial), please contact the retailer directly regarding the refund.
1. In the following window, select the reason for canceling the service and requesting a refund. Your feedback is invaluable because it helps us pinpoint areas for improvement and ensures a better experience for all our users.Once completed, click Submit and Continue. 
2. You will see your refund summary. You can confirm it by clicking Refund.
3. After submitting the request, you will receive a confirmation email saying that your refund has been ordered.
4. You should now see the refund status for your payment as Refund Processing. This means that your request has been received and is currently being processed. This process can take up to a few hours*.*Please note, that due to recent implementation, it may take up to 4 hours for a refund request to be processed.
5. Once the refund is complete, the refund status on your dashboard will change to Refunded, and you will receive a confirmation email. Please note that depending on your payment method, it may take up to 10 business days for the refund to reach your account. If there was an error or you have any other questions, please contact our customer support team directly.",https://support.nordvpn.com/hc/en-us/articles/19476991311121-What-is-your-money-back-policy
Does NordVPN charge all at once?,"Yes, all of our [subscription packages](https://nordvpn.com/pricing/) are paid upfront.
If you choose a long-term plan such as our 2-year or 1-year subscription plan - you will be charged the full price, which can be seen under the security package's title such as Complete, Plus, Standard.",https://support.nordvpn.com/hc/en-us/articles/19476182512273-Does-NordVPN-charge-all-at-once
How much will I need to pay upon renewal?,"At the end of your initial plan, your subscription will be renewed automatically and you will be charged the applicable renewal price for the service. You can find more information on renewal prices in our [subscription renewal pricing page](https://my.nordaccount.com/legal/pricing/).
The renewal price is subject to change, but you will be notified of any changes by email before your subscription is renewed.
You don’t need to renew your NordVPN subscription manually — unless you [cancel auto-renewal for your subscription](https://support.nordvpn.com/hc/en-us/articles/19556844985489-How-to-cancel-auto-renewal-for-your-subscription), it will be renewed automatically.",https://support.nordvpn.com/hc/en-us/articles/19477173269265-How-much-will-I-need-to-pay-upon-renewal
How to get connection logs on Windows,"When you troubleshoot with our customer support team, they may ask you to upload the connection log files of the NordVPN desktop application to help diagnose the issue. Below you can find the relevant tutorials on how to find and upload connection logs.
1. Open the NordVPN application and click on the Settings icon.
2. Go to Advanced settings and click Run Diagnostics Tool.
(On Windows 10 and 11)
1. Click on the gear icon to reach the settings
2. Go to General app settings.
3. Choose to Run Diagnostics tool.
## Collecting Diagnostics
1. In the NordVPN Diagnostics window, select Collect diagnostics and wait for the process to complete.
2. A message will pop up, notifying you what data the diagnostics will collect. You can safely click Continue. The user’s safety, anonymity, and security is our number one priority, and we guarantee that this information will be used only in order to help you.
3. Once the process is complete, you will receive a reference number, which you will have to specify to our support specialist in the live chat or in your email.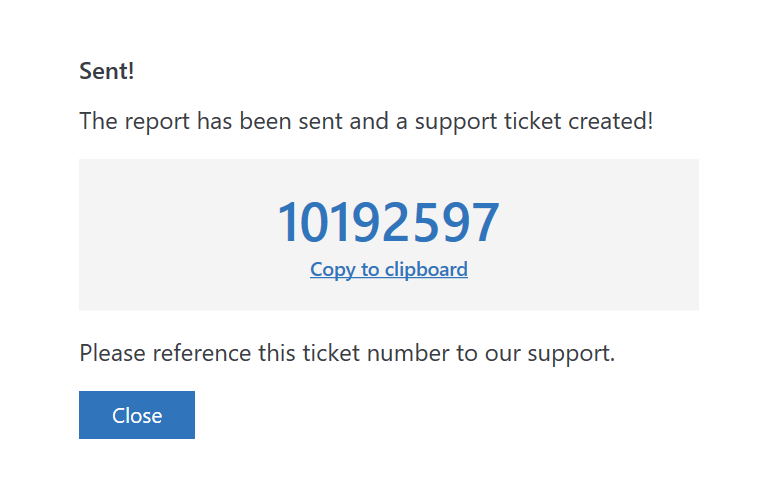In case the Diagnostics window says Failed to send diagnostics, you will need to provide the generated diagnostics report manually.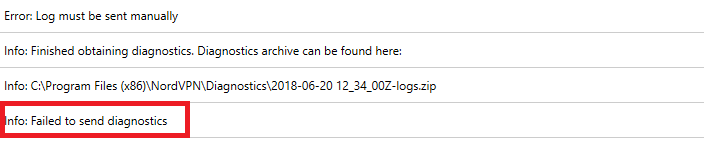File Explorer will automatically open the directory where the report has been saved. By default, diagnostic reports are saved at C:\Program Files\NordVPN\Diagnostics.You can forward the diagnostics report via email or attach it to the live chat by clicking on the paperclip button at the bottom left corner of the chat window. ",https://support.nordvpn.com/hc/en-us/articles/19920718445457-How-to-get-connection-logs-on-Windows
How to put OpenVPN on your command path on Windows,"Windows 10 and Windows 8
1. In Search, search for and then select: System (Control Panel)
2. Click the Advanced system settings link.
3. Click Environment Variables. In the section System Variables, find the PATH environment variable and select it. Click Edit. If the PATH environment variable does not exist, click New.
4. In the Edit System Variable (or New System Variable) window, specify the value of the bin folder in the OpenVPN installation location, by default, it is C:\Program Files\OpenVPN\bin. Click OK. Close all remaining windows by clicking OK.
5. Reopen Command prompt window, and run this command to check if OpenVPN works:openvpn --version.
Windows 7
1. From the desktop, right click the Computer icon.
2. Choose Properties from the context menu.
3. Click the Advanced system settings link.
4. Click Environment Variables. In the section System Variables, find the PATH environment variable and select it. Click Edit. If the PATH environment variable does not exist, click New.
5. In the Edit System Variable (or New System Variable) window, specify the value of the specify the value of the bin folder in the openvpn installation location, by default it is C:\Program Files\OpenVPN\bin. Click OK. Close all remaining windows by clicking OK.
6. Reopen Command prompt window, and run this command to check if openvpn works:openvpn --version",https://support.nordvpn.com/hc/en-us/articles/19920539475729-How-to-put-OpenVPN-on-your-command-path-on-Windows
Error: NordVPN TAP failed; code 1603,"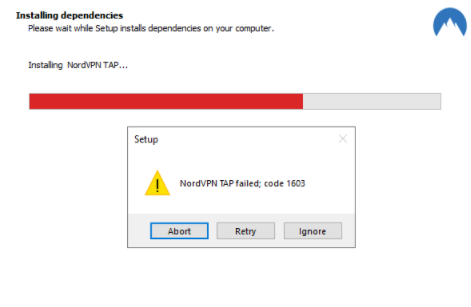
If you are getting an Error Code 1603 while trying to install the NordVPN TAP adapter, you should follow these steps to resolve the issue:
1. Go to Control Panel > Uninstall a Program / Programs and Features.
2. Locate the ""NordVPN network TAP"" click on it with the right mouse button, and choose ""Uninstall.""
3. Restart the computer.
4. Now install the TAP driver again according to your operating system: - Windows 7 - Windows 8 - Windows 10
5. Try to use the NordVPN application.
If the issue persists after following the steps above, try these instructions:
1. Open the Command Prompt using administrator privileges (you will find a tutorial on how to do that here: ).
2. Run the following command:sfc /scannow",https://support.nordvpn.com/hc/en-us/articles/19920449576593-Error-NordVPN-TAP-failed-code-1603
Printer related issues on Windows,"When there is an active VPN connection running on your Windows device, you may find that your wireless printer becomes unreachable. If that is the case, there are steps you can take to resolve this issue.
First, please make sure that the option 'Invisibility on LAN' is turned off. The option can be found in the settings menu, under the Advanced section.
On Windows 7 and 8.1:
1. Click on the gear icon to open app settings.
2. Make sure that the option 'Invisibility on LAN' is turned off. The option can be found in the settings menu, under the Advanced section.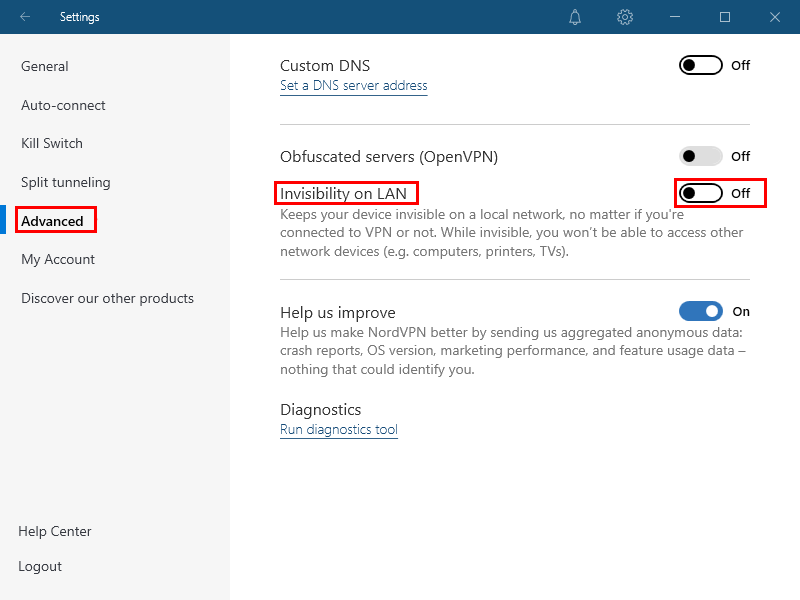
On Windows 11:
1. Open application settings by clicking on a gear icon in the left bottom corner.
2. Go to connection settings.
3. Make sure that the option 'Stay invisible on LAN' is turned off.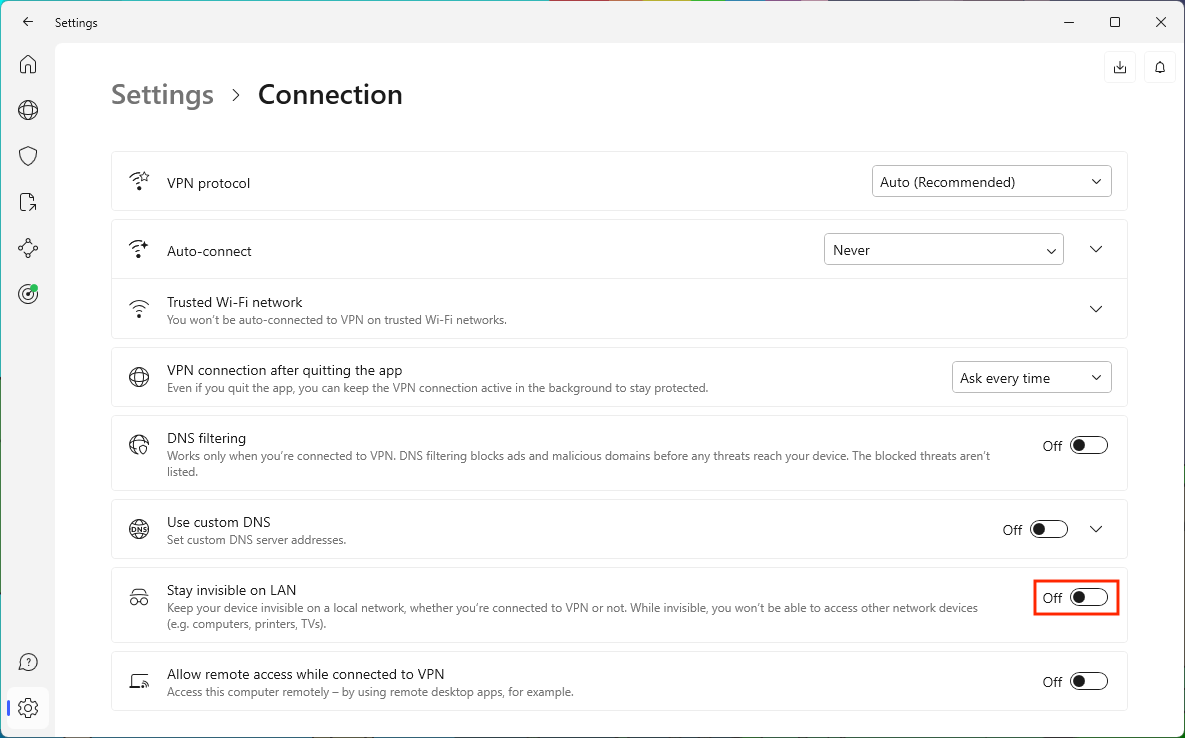
Does the problem persist? No worries, try this:
1. Locate the IP address of the printer. You should be able to find it written in the manual that came with the printer.
2. Now, open the Control Panel. This can be done by clicking on Start and typing ""Control Panel"" within the search.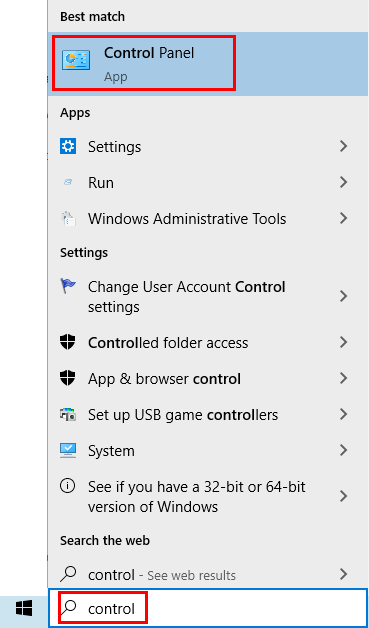
3. Inside Control Panel, navigate to Hardware and Sound.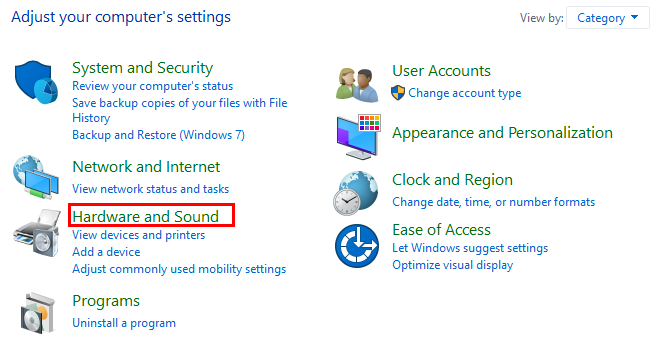
4. There you should see Devices and Printers. Click on it and select ""Add a printer"".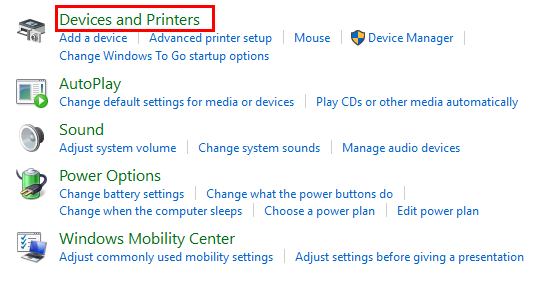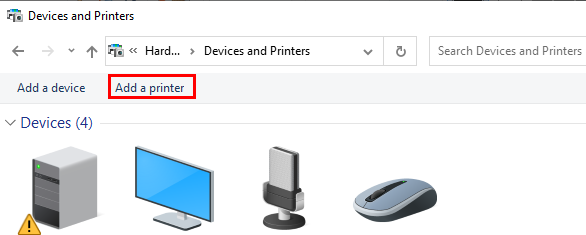
5. You will see a loading screen. Just below it, select ""The printer that I want isn't listed"".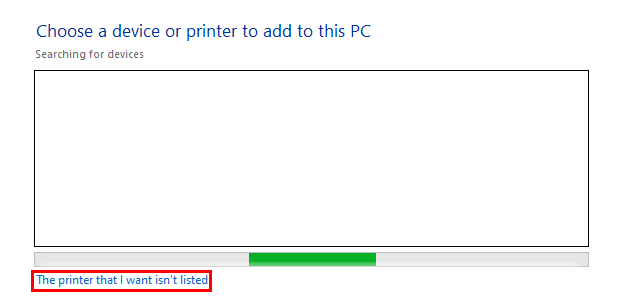
6. Check the circle next to ""Add a printer using a TCP/IP address or a hostname"".
7. Add the following settings:
Device type: Autodetect
Hostname or IP address: The IP address of the printer that was located during the first step.
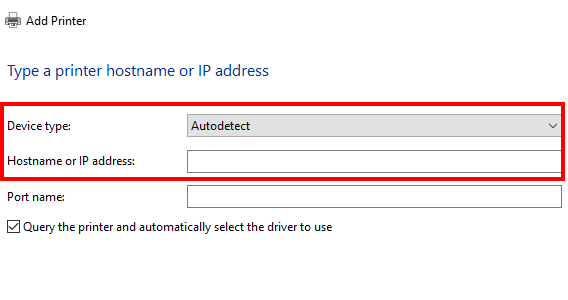
8. Finally, click Next and see if you can now reach your printer.
In the case that this solution does not help, please reach out to our customer support team via one of the buttons below (email/chat).",https://support.nordvpn.com/hc/en-us/articles/19920409516945-Printer-related-issues-on-Windows
How Does This Affect You?,"If our macOS client detects a potentially misconfigured network (i.e. one that hands out non-RFC1918 IP addresses), it will send you a notification. Upon receiving this alert, we will ask you to enable the 'Invisibility on LAN' feature, ensuring your VPN traffic remains private.",https://support.nordvpn.com/hc/en-us/articles/20225371443345-Staying-invisible-on-unsafe-local-networks-on-macOS
How to reach NordVPN customer support?,"While we don't offer phone support, we have different options to contact NordVPN customer support available 24/7 and ready to help you!
## Help Center
First off, if you run into any issues using NordVPN - check out our Help Center that is available in 14 languages: English, German, French, Danish, Italian, Spanish, Norwegian, Swedish, Dutch, Japanese, Korean, Polish, Portuguese-Brazilian, Traditional Chinese.
You can change the language by scrolling down until you see the language change option and clicking on the language you prefer. This will ensure that you can look for information in a language comfortable for you.
After you have set the language you want to look information in, you can find solutions in the help center by either:
* Searching for information using Help Center's search bar, which will list out articles according to the keywords typed in the search query:
* Navigating to one of the categories available in the Help Center:
* [FAQ](https://support.nordvpn.com/hc/en-us/categories/200593301-FAQ) - in this category you'll find Frequently asked questions and NordVPN app setup tutorials;
* [General info](https://support.nordvpn.com/hc/en-us/categories/360000293597-General-info) - here, you'll be able to find information on NordVPN functionalities, features, and SmartPlay;
* [Billing](https://support.nordvpn.com/hc/en-us/categories/360000293617-Billing) - this category covers payment, subscription, and account management topics;
* [Connectivity](https://support.nordvpn.com/hc/en-us/categories/200614302-Connectivity) - the last category available covers troubleshooting articles, here you can find help regarding NordVPN connectivity, internet speed with NordVPN on, manual setups for routers and different OSes, proxies.
## Support agents
However, if you're looking for assistance on your specific case, you can reach out to our developed conversation bots or human customer support agents by:
* Chat
* Email
We have two teams to assist you:
* Customer Care & Billing Team: They can tell you about NordVPN, help set up your devices, make sure you can access streaming sites, and answer questions about dedicated IPs. As well as helpyou with your NordVPN subscription, account, or payments.
* Connection Team: They can assist with setting up NordVPN on your router, fixing advanced connectivity problems, and helping in places with internet restrictions.",https://support.nordvpn.com/hc/en-us/related/click?data=BAh7CjobZGVzdGluYXRpb25fYXJ0aWNsZV9pZGwrCJGygBq4EToYcmVmZXJyZXJfYXJ0aWNsZV9pZGwrCBGwWaEXFToLbG9jYWxlSSIKZW4tdXMGOgZFVDoIdXJsSSJML2hjL2VuLXVzL2FydGljbGVzLzE5NDgyNDE2Mjk2NTkzLUhvdy10by1yZWFjaC1Ob3JkVlBOLWN1c3RvbWVyLXN1cHBvcnQGOwhUOglyYW5raQg%3D--fa940fa8e64e93e3fd103b0f20cadbed53b80793
Failed to reach NordLynx adapter,"If you receive a message such as ""Failed to reach NordLynx adapter"" or ""NordLynx Adapter cannot be reached"", here is what you need to do:
Reinstall the NordLynx/TUN network adapter.
1. Right-click on the start button and select Device Manager.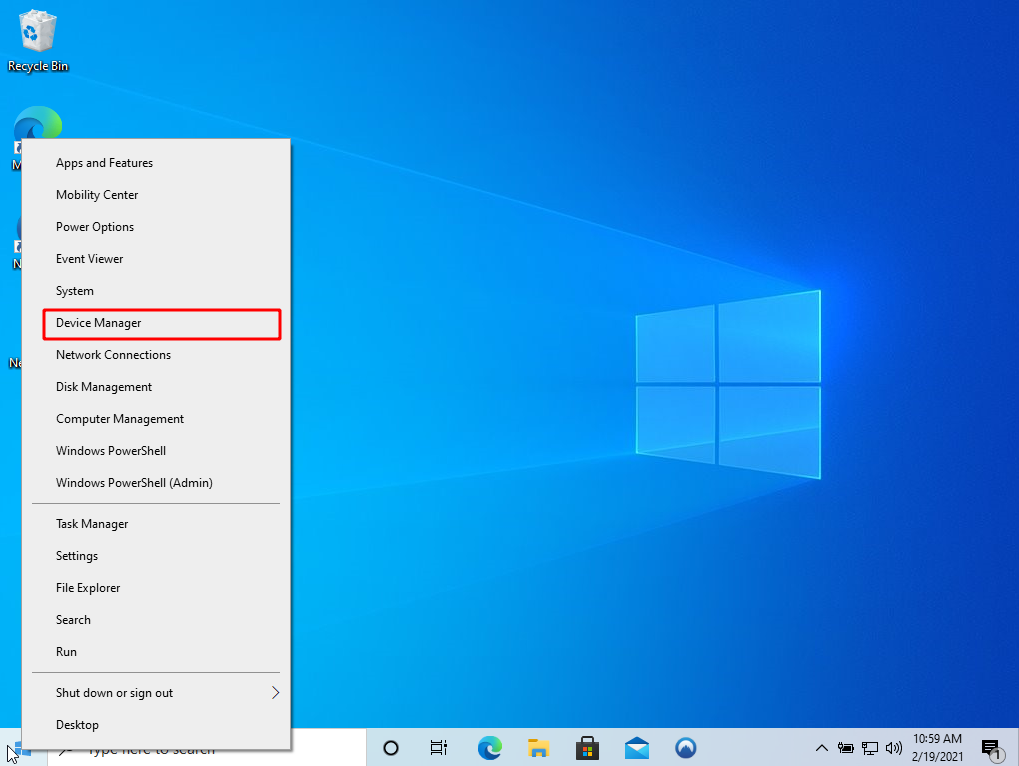
2. In Device Manager, open the Network Adapter section, right-click on NordLynx Tunnel and then Uninstall device. 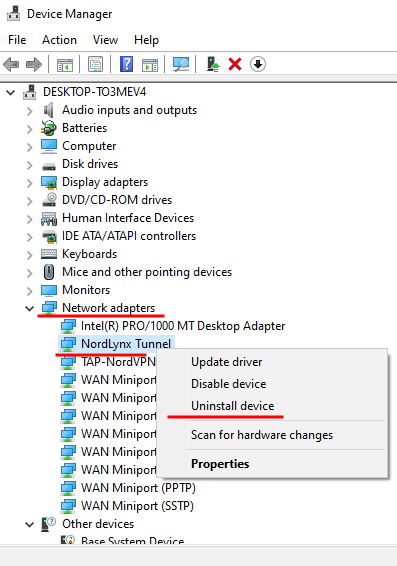
3. Now, open Control Panel (Win 7: press on the Start Button, and find it on the right side; Win 8.1+ click on the Start Button and type in 'Control Panel'). There, click on 'Uninstall a program' under the Programs section. 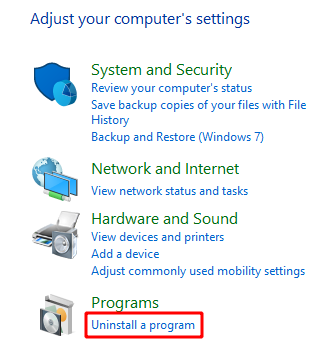
4. Find the NordVPN network TUN and uninstall it.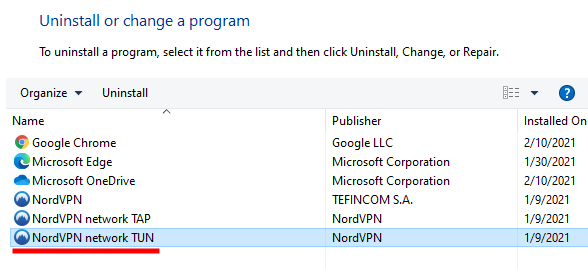
5. Afterward, reboot your device. When it's turned on once again, download the new TUN drivers from one of the links below and go through the setup. When this is done, try connecting.
Click here for Windows 7 or 8.1 TUN drivers.
Click here for Windows 10 TUN drivers.If this does not resolve your issue, please be sure to contact our support team: https://nordvpn.com/contact-us/",https://support.nordvpn.com/hc/en-us/articles/19919892467473-Failed-to-reach-NordLynx-adapter
Using NordLynx in the NordVPN app - Windows,"NordLynx is the technology we built around the WireGuard® protocol. It lets you experience WireGuard’s speed benefits without compromising your privacy.
## On Windows 7 and 8.1:
1. Install the [NordVPN app for Windows](https://nordvpn.com/download/windows/) and go to the application settings in the bottom left corner.
2. Select Auto-connect on the left side of the menu and make sure to turn off the ""Choose a VPN protocol and server automatically"" option. Afterward, click on the [VPN protocol](https://nordvpn.com/blog/protocols/) drop-down menu and select NordLynx.
## On Windows 10 and 11:
1. Click on a gear icon in the left bottom corner of the app.
2. Click on Connection settings.
3. Under VPN Protocol choose Nordlynx.
WireGuard is a registered trademark of Jason A. Donenfeld.",https://support.nordvpn.com/hc/en-us/articles/19919637268625-Using-NordLynx-in-the-NordVPN-app-Windows
TAP driver error when connecting to a VPN,"To make sure your issue is caused by the TAP driver, you can check the connectivity logs from the NordVPN app:
1. Open the NordVPN app.
2. Go to Settings -> Advanced -> Run Diagnostics Tool -> Click on Collect Diagnostics and complete the process.
3. Open the NordVPN app installation folder and find the Diagnostics folder. By default, it is located at C:\Program Files\NordVPN\
4. You will see a .zip folder with the date of the diagnostics. Example: 2020-07-14 15_24_30Z-logs.zip.
5. Double-click on the .zip folder and locate the service-XXXX-XX-XX.nwl file. Example: service-2020-07-14.nwl.
6. Double-click on the .nwl file, open it with your favorite text editor, and check for the errors below.
You may notice one of these error messages:
1. FATAL:All TAP-Windows adapters on this system are currently in use.Usually, restarting the TAP adapter helps in this case. To restart it, follow these steps:1. Go to Control Panel -> Network and Sharing Center -> Change Adapter Settings.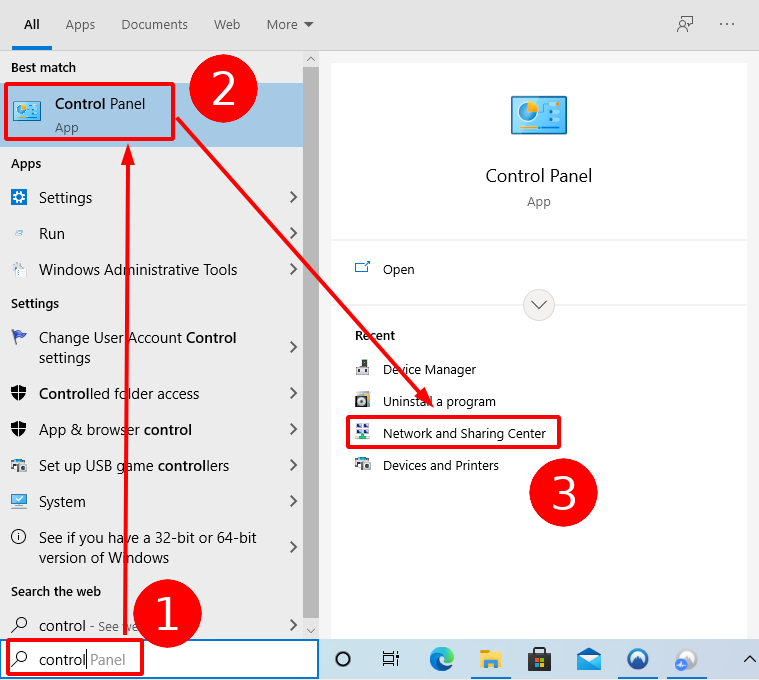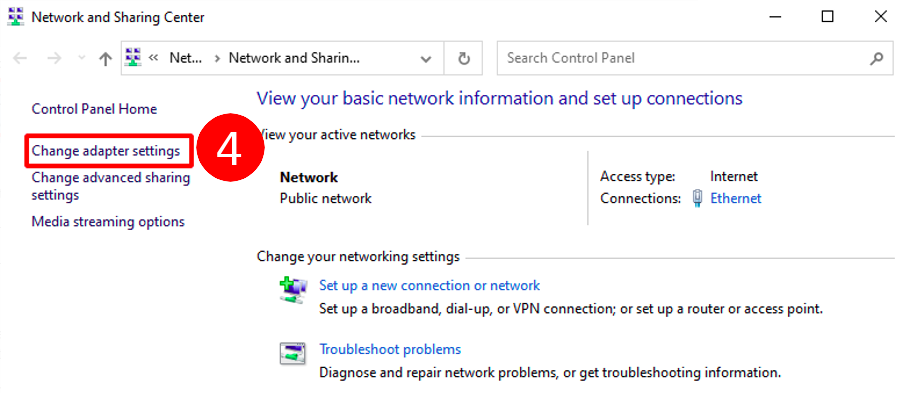2. One of the local area connections will have an under-name TAP-NordVPN Windows Adapter v9.3. Disable it and enable it again. Try to connect now.
2. FATAL:There are no TAP-Windows adapters on this system or FATAL: Blocking DNS failed.In this case, you should reinstall TAP drivers. You can download them here:Windows 7:Windows 10:",https://support.nordvpn.com/hc/en-us/articles/19919463833745-TAP-driver-error-when-connecting-to-a-VPN
Connect to NordVPN (Windows) with Command Prompt,"To connect to NordVPN app using the Command prompt, you must first navigate to the directory of NordVPN installation by entering the following command:cd ""C:\Program Files\NordVPN\""Change the directory if it is not in the default path.
After that, enter any of these commands:
1. nordvpn -cornordvpn --connect - Quick connect to VPN. Use additional arguments to connect to the wanted server:
* nordvpn -c -n ornordvpn -c --server-name - Connect to server by Name.Example: nordvpn -c -n ""United States #3710""
* nordvpn -c -g ornordvpn -c --group-name - Connect to best server in specified group (specialty server group name or country).Example: nordvpn -c -g ""United States"" (connect to a specific country)ornordvpn -c -g ""Dedicated IP"" (connect to a specific specialty server group)
1. nordvpn -d or nordvpn --disconnect - Disconnect from the VPN.",https://support.nordvpn.com/hc/en-us/articles/19919384880145-Connect-to-NordVPN-Windows-with-Command-Prompt
How to disable IPv6 on Windows,"Here's how you can disable IPv6 on...
* [Windows 7, 8.1, 10](https://support.nordvpn.com/Connectivity/Windows/1047410402/How-to-disable-IPv6-on-Windows.htm#Windows%207,%208.1,%2010)
* [Windows 11](https://support.nordvpn.com/Connectivity/Windows/1047410402/How-to-disable-IPv6-on-Windows.htm#Windows%2011)
## Windows 7, 8.1, 10
1. Right-click the network icon in the notification tray and select Open Network & Internet settings.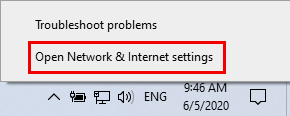
2. Open Network and Sharing Center.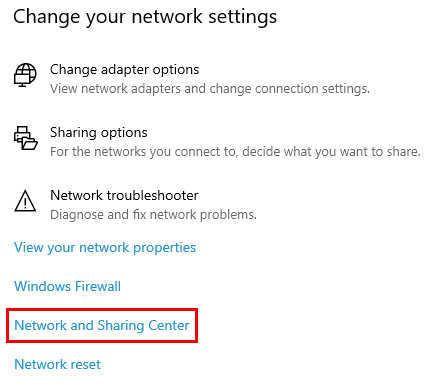
3. Click on your network adapter.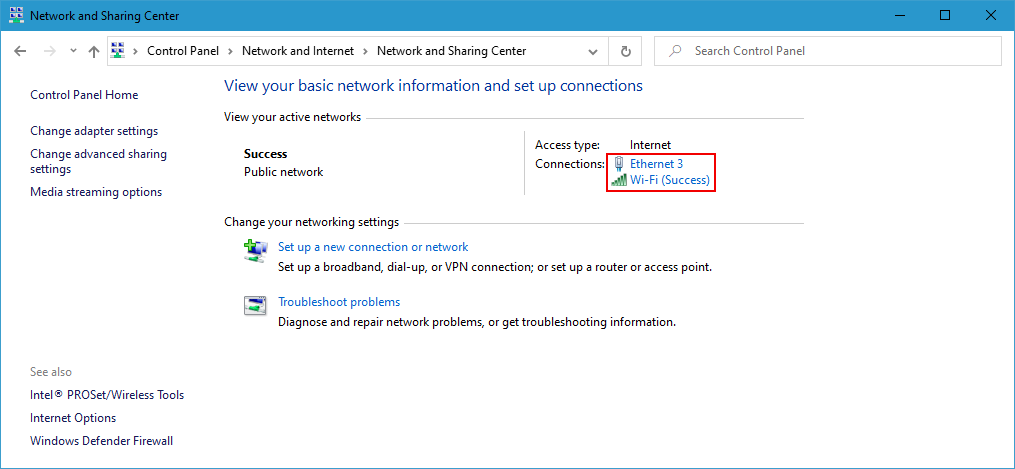
4. Click on Properties.
5. Uncheck Internet Protocol Version 6 (TCP/IPv6) on the list. After that, click OK and Close.
## Windows 11
1. At the bottom of your screen, find and press on the magnifying glass icon.

2. A window with a search bar will appear. Type in ""Network Connection"" and open the matching result.
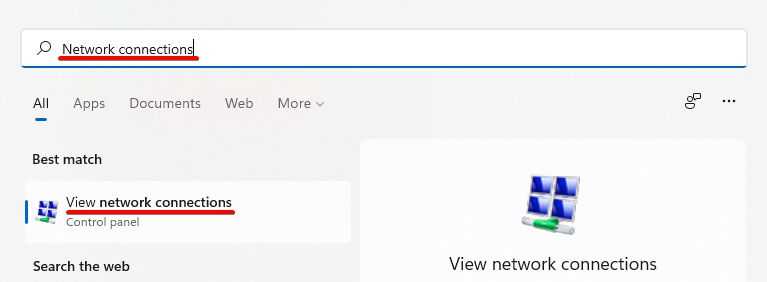
3. Find your network adapter, and right click on it. Then, press on Properties.
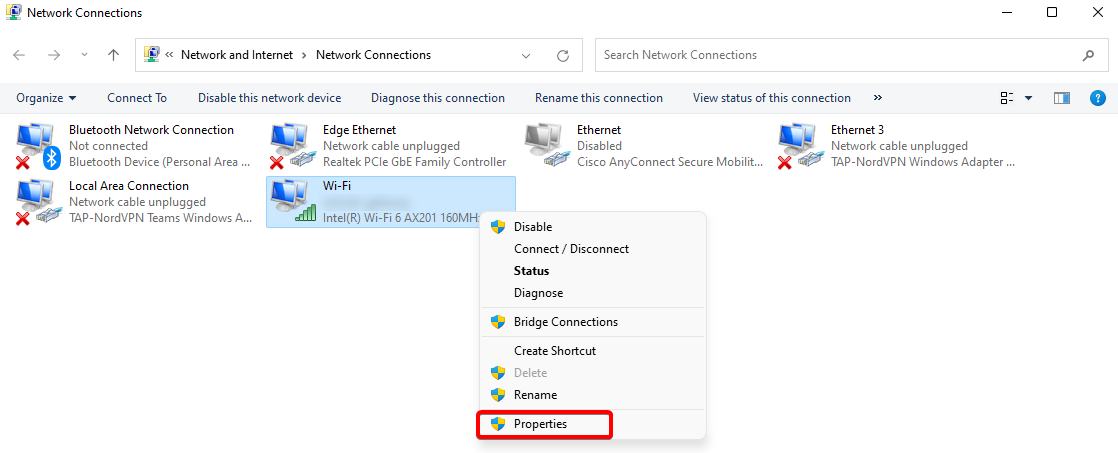
4. Find and uncheck Internet Protocol Version 6 (TCP/IPv6) on the list. After that, click OK and Close.
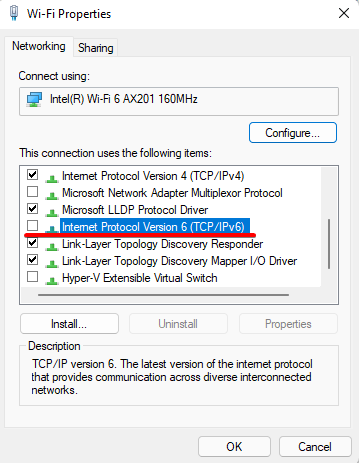",https://support.nordvpn.com/hc/en-us/articles/19919186892305-How-to-disable-IPv6-on-Windows
How to connect to NordVPN with IKEv2/IPSec on macOS,"Even though the [IKEv2/IPSec protocol is no longer supported on macOS](https://support.nordvpn.com/Connectivity/iOS/2023641872/IKEv2-IPSec-protocol-is-no-longer-supported-on-iOS-and-macOS.htm) on NordVPN 8.5.0 and newer app versions, this connection method can be used as one of the alternative ways to connect to NordVPN servers if you're unable to install the application.This setup lacks the additional features of the native NordVPN app and requires more steps to set up.For macOS versions Sierra (10.12), High Sierra (10.13), Mojave (10.14), Catalina (10.15), Big Sur (11), and Monterey (12), [please refer to the older macOS 10.12-12 section](https://support.nordvpn.com/hc/en-us/articles/19921536696977-How-to-connect-to-NordVPN-with-IKEv2-IPSec-on-macOS#macOS-10.12-12).If you're using macOS Ventura (13), follow the [macOS 13 section](https://support.nordvpn.com/hc/en-us/articles/19921536696977-How-to-connect-to-NordVPN-with-IKEv2-IPSec-on-macOS#macOS-13), and if you're using macOS Sonoma or later, check out the [macOS 14-15 section](https://support.nordvpn.com/hc/en-us/articles/19921536696977-How-to-connect-to-NordVPN-with-IKEv2-IPSec-on-macOS#macOS-14-15).
Choose your macOS version below:
* [macOS 14-15](https://support.nordvpn.com/hc/en-us/articles/19921536696977-How-to-connect-to-NordVPN-with-IKEv2-IPSec-on-macOS#macOS-14-15)
* [macOS 13](https://support.nordvpn.com/hc/en-us/articles/19921536696977-How-to-connect-to-NordVPN-with-IKEv2-IPSec-on-macOS#macOS-13)
* [macOS 10.12-12](https://support.nordvpn.com/hc/en-us/articles/19921536696977-How-to-connect-to-NordVPN-with-IKEv2-IPSec-on-macOS#macOS-10.12-12)
## Manual IKEv2 connection setup for macOS Sonoma and later
The following steps will guide you on how to set up a manual IKEv2 connection on your macOS Sonoma or later device.
1. First, download the NordVPN IKEv2 certificate to your macOS. The easiest way is to click [this link](https://downloads.nordcdn.com/certificates/root.der) on your macOS device.Once downloaded, open the certificate file in the Downloads folder.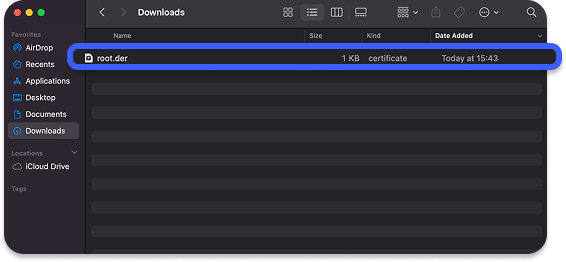
2. The Add Certificates window will appear. Click Add to add the certificate to the login keychain.
3. In the Keychain Access window, login keychains, right-click the NordVPN Root CA certificate, and select Get Info.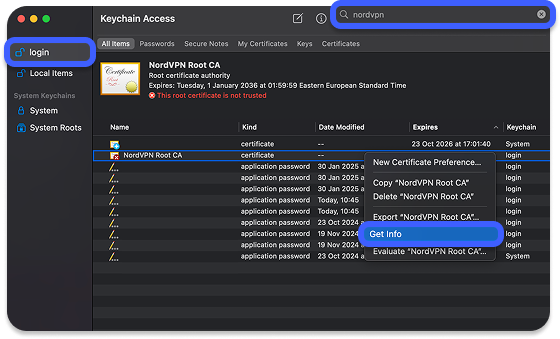If you're struggling to find the NordVPN Root CA certificate, use the search bar at the top right.
4. Select the Trust tab and set the IP Security (IPSec) and Extensible Authentication (EAP) fields to Always Trust. Leave all other fields as Never Trust. You will have to enter your Mac password or fingerprint to make these changes. Once done, close the keychain.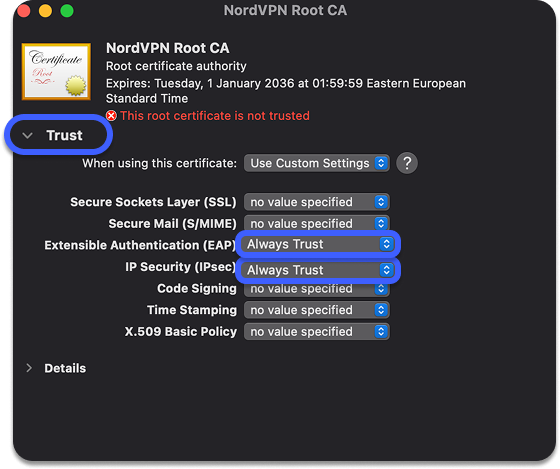
5. Click on the Apple logo in the upper-left corner of the screen and select System Preferences....
6. In the System Preferences, select VPN. Afterward, click Add VPN Configuration and select IKEv2...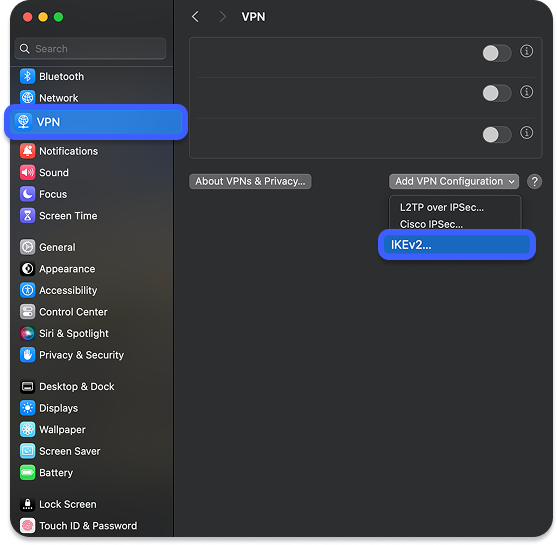
7. The settings for the new VPN connection will now be displayed. In the Server Address and Remote ID fields, type the server hostname of a NordVPN server.For the Authentication fields, select Username and fill in your NordVPN service username and password.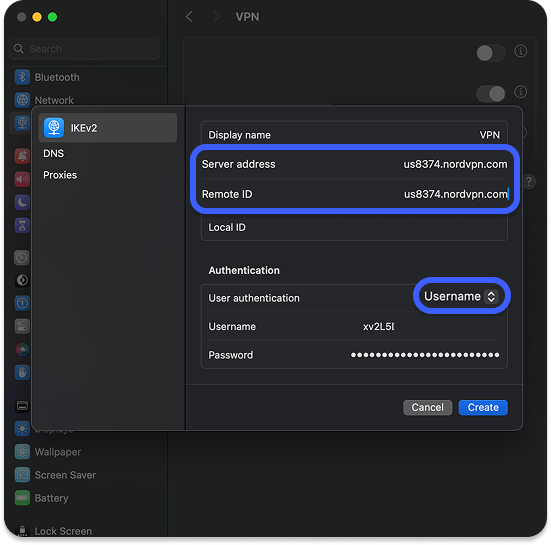For the sake of this tutorial, we used the hostname of server us8374.nordvpn.com, but you should connect to a server suggested to you.
Follow the steps below to find the best server for your connection:
1. Log into your [Nord Account](https://my.nordaccount.com/), and click NordVPN.
2. Scroll down to Advanced Settings and click Set up NordVPN manually.
3. Select the Server recommendation tab. According to your location, the best server will be recommended.
4. By pressing Advanced filters you can further customize the recommended servers by selecting the Server type and the Security protocol.
5. Under the server IP, next to Available protocols, select IKEv2/IPSec.
6. In the window that pops up, copy the server hostname and use it in your IKEv2 manual connection setup.
7. When connecting to IKEv2 manually, you're going to need to use the Username and Password from the Service credential tab.
8. After these steps, a VPN tab will appear below Network in the System Settings. After you click on it, you will see a VPN connection present. In order to connect to a VPN server, toggle the switch to the on position. To disconnect, complete the reverse action.
You should now be connected.
## Manual IKEv2 connection setup for macOS Ventura
The steps below will guide you on how to set up a manual IKEv2 connection on your macOS Ventura device.
1. First, download the NordVPN IKEv2 certificate to your macOS. The easiest way is to click [this link](https://downloads.nordcdn.com/certificates/root.der) on your macOS device.Once downloaded, open the certificate file in the Downloads folder.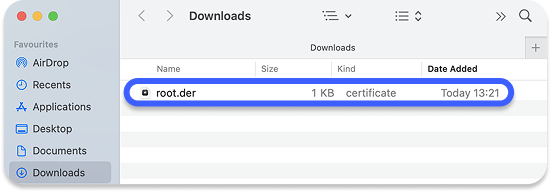
2. A Keychain Access window will open up. Locate the NordVPN Root CA within the login section. Right-click on it and select Get Info.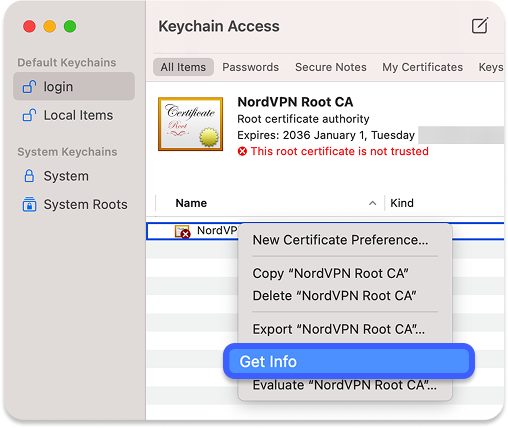
3. Under NordVPN Root CA, click on the Trust section and set the IP Security (IPSec) and Extensible Authentication (EAP) fields to Always Trust. Leave all other fields as Never Trust. You will have to enter your Mac password to make these changes. Once done, close the keychain.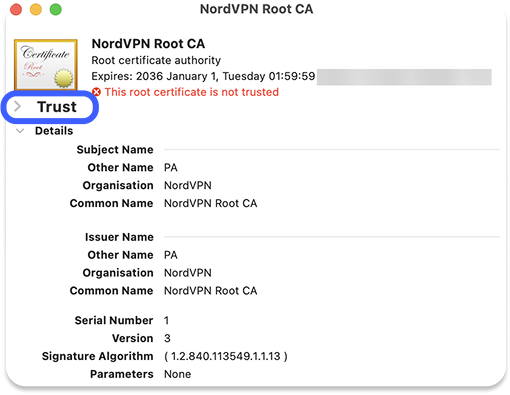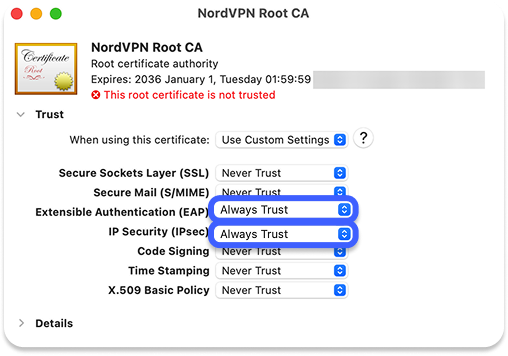
4. Click on the Apple logo in the upper-right corner of the screen and select System Settings....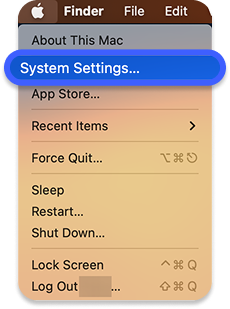
5. In the System Settings, click on Network.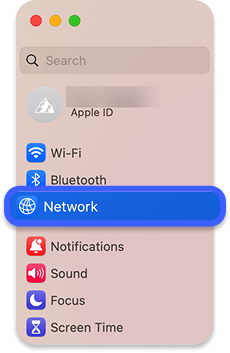
6. When the network tab opens, click on the arrow down icon in the lower-right corner (you must have administrator privileges) and then click on Add VPN Configuration. After that, click on IKEv2.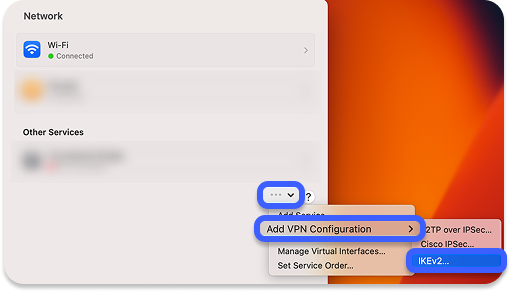
7. The settings for the new VPN connection will now be displayed. In the Server Address and Remote ID fields, type the server hostname of a NordVPN server.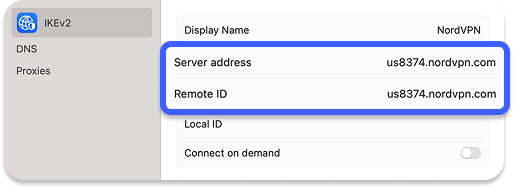For the sake of this tutorial, we used the hostname of server us8374.nordvpn.com, but you should connect to a server suggested to you.
Follow the steps below to find the best server for your connection:
1. Log into your [Nord Account](https://my.nordaccount.com/), and click NordVPN.
2. Scroll down to Advanced Settings and click Set up NordVPN manually.
3. Select the Server recommendation tab. According to your location, the best server will be recommended.
4. By pressing Advanced filters you can further customize the recommended servers by selecting the Server type and the Security protocol.
5. Under the server IP, next to Available protocols, select IKEv2/IPSec.
6. In the window that pops up, copy the server hostname and use it in your IKEv2 manual connection setup.
7. When connecting to IKEv2 manually, you're going to need to use the Username and Password from the Service credential tab.
1. Scroll down to Authentication and in the Type section select Username as the Authentication method. After that, type in your NordVPN service username and password. Click Create.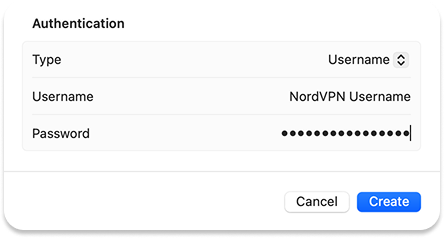
2. After these steps, a VPN tab will appear below Network in the System Settings. After you click on it, you will see a VPN connection present. In order to connect to a VPN server, click on a button next to it.
3. That’s it! You should now be connected. After clicking on VPN, you can connect to and disconnect from a VPN in the same VPN tab within the System Settings.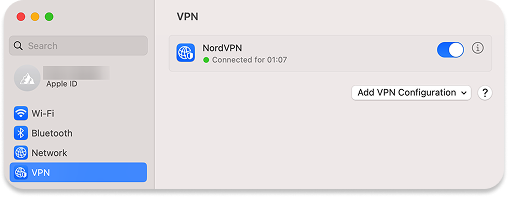
If you want to add different servers, you may also do it via the VPN tab. In order to do so, click on ""Add VPN Configuration"" and choose ""IKEv2"", afterward follow the same steps as before.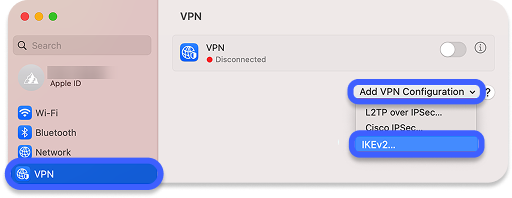
## Manual IKEv2 connection setup for older macOS versions
The steps below will guide you through setting up a manual IKEv2 connection on older macOS versions, such as Sierra (10.12), High Sierra (10.13), Mojave (10.14), Catalina (10.15), Big Sur (11), and Monterey (12). Although the steps may vary slightly throughout the different versions, the principle of the setup remains the same.
1. First, download the NordVPN IKEv2 certificate to your macOS. The easiest way is to click [this link](https://downloads.nordcdn.com/certificates/root.der) on your macOS device.Once downloaded, open the certificate file in the Downloads folder.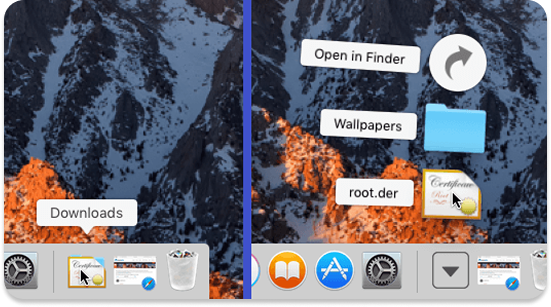
2. The Add Certificates window will appear. Click Add to add the certificate to the login keychain.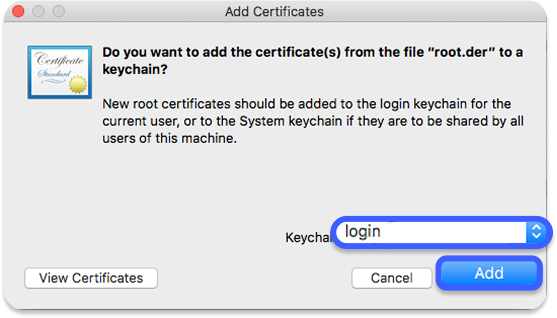
3. In the Keychain Access window, login keychains, right-click the NordVPN Root CA certificate, and select Get Info.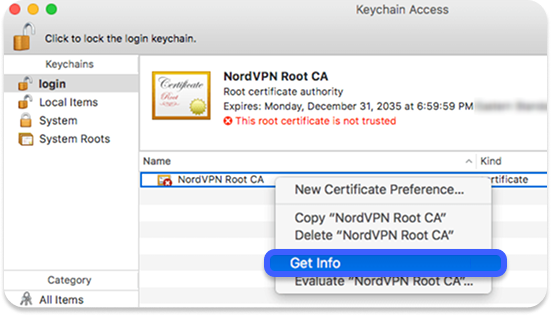
4. Set the IP Security (IPSec) and Extensible Authentication (EAP) fields to Always Trust. Leave all other fields as Never Trust. You will have to enter your Mac password to make these changes. Once done, close the keychain.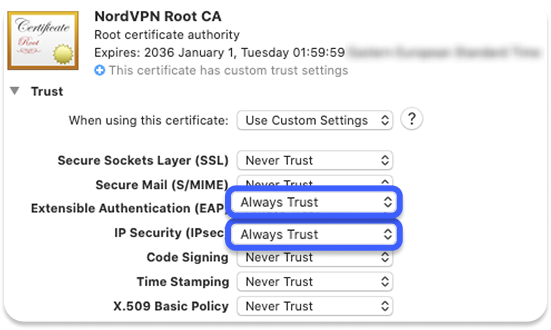
5. Click on the Apple logo in the upper-left corner of the screen and select System Preferences....
6. In the System Preferences, click on Network.
7. When the network window opens, click on the + icon in the lower-left corner (you must have administrator privileges).
8. A new window will pop up. Fill in the information as so:Interface: select VPN from the drop-down menu. VPN Type: select IKEv2.Service Name: type any name you want. We recommend that you name the service NordVPN (IKEv2).
9. After you have filled in the required fields, click Create: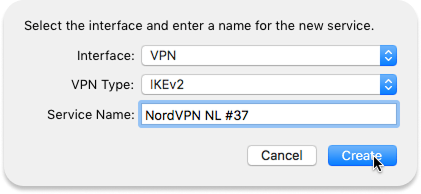
10. The settings for the new VPN connection will now be displayed. In the Server Address and Remote ID fields, type the hostname of a NordVPN server.For this tutorial, we used the hostname of server NL#37, but you should connect to a server suggested to you.
Follow the steps below to find the best server for your connection:
1. Log into your [Nord Account](https://my.nordaccount.com/), and click NordVPN.
2. Scroll down to Advanced Settings and click Set up NordVPN manually.
3. Select the Server recommendation tab. According to your location, the best server will be recommended.
4. By pressing Advanced filters you can further customize the recommended servers by selecting the Server type and the Security protocol.
5. Under the server IP, next to Available protocols, select IKEv2/IPSec.
6. In the window that pops up, copy the server hostname and use it in your IKEv2 manual connection setup.
7. When connecting to IKEv2 manually, you're going to need to use the Username and Password from the Service credential tab.
1. Click on Authentication Settings…. Select Username as the Authentication method, then type in your NordVPN service username and password. Click OK and then Apply.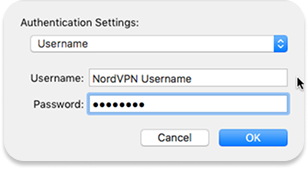
Follow the steps below to find the service credentials for manual connection setup:
1. Log into your [Nord Account](https://my.nordaccount.com/), click NordVPN, and, under Manual setup, click on Service credentials. Here you'll find the Username and Password needed to connect manually.
1. After you've set up authentication information, check the Show VPN status in menu bar box (optional), click Connect and then Apply.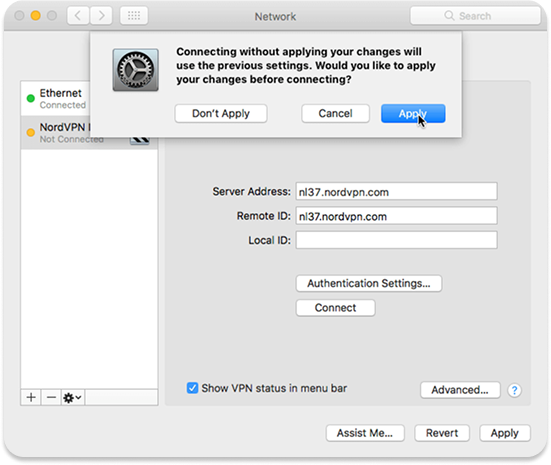
You should now be connected.
If you have checked the Show VPN status in menu bar box, you’ll be able to connect to your VPN from the status bar:
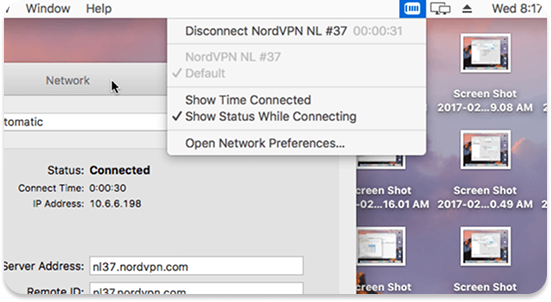",https://support.nordvpn.com/hc/en-us/articles/19921536696977-How-to-connect-to-NordVPN-with-IKEv2-IPSec-on-macOS
Connect to NordVPN with Firefox extension,"## Setting up NordVPN extension on Firefox
You can get the [VPN service for Firefox](https://nordvpn.com/download/firefox-extension/) from the [Firefox website for extensions](https://addons.mozilla.org/en-US/firefox/addon/nordvpn-proxy-extension/).
1. To install the extension click Add to Firefox.
2. Afterward, you will be prompted to grant permission for this application, click Add.
3. After that, you will be asked to allow the extension to run in a private window, check this and click ""Okay"". 
4. After the installation is finished NordVPN logo will appear on the Toolbar on the top right corner of the browser.
5. Click on the NordVPN logo and you will be prompted to sign in, use your NordVPN credentials to do so. 
## Using and customizing the NordVPN Firefox Extension
Let's look at how you can make the first connection and adjust the extension settings to suit your needs. 
1. Protected status: when you connect to a NordVPN server, this bar will confirm that your connection is successful by displaying the status as Protected.
2. Quick Connect: the fastest way to begin using the NordVPN extension. After pressing Quick Connect, you'll be immediately connected to a NordVPN server.
3. Search: whereas the Quick Connect option will decide on a server location for you, this option allows you to specify the country of the NordVPN server.
4. Settings: here, you can find your General, Connection, Security and privacy settings.General: in these settings, you can find your subscription information, application appearance, language preferences, and a function to import and export [split tunneling](https://support.nordvpn.com/hc/en-us/articles/20321703651985-Split-Tunneling-feature-on-NordVPN-extension) settings.Connection: when accessing connection settings, you can choose to automatically connect to NordVPN servers or add URLs that you wish to be excluded from the NordVPN connection.Security and privacy: enable the [WebRTC](https://support.nordvpn.com/hc/en-us/articles/20318383008529-How-to-stop-WebRTC-leaks) Leaks option and the [Threat Protection](https://support.nordvpn.com/General-info/Features/1047407402/What-are-Threat-Protection-and-Threat-Protection-Lite.htm) feature. Also, choose to turn on security warnings for suspicious websites.
5. Support Assistance: more information about the extension and live chat with an agent option can be found here.
6. Notifications: updates and news about the NordVPN extension.
7. Main extension window: If you click here, you can open the main extension window.
8. List of Recently Connected Countries: This section displays the countries to which you have established a recent connection. In case you haven't connected to any server yet, you will find recommendations for countries to connect to.",https://support.nordvpn.com/hc/en-us/related/click?data=BAh7CjobZGVzdGluYXRpb25fYXJ0aWNsZV9pZGwrCJGWbEKCEjoYcmVmZXJyZXJfYXJ0aWNsZV9pZGwrCBFx5xrLEToLbG9jYWxlSSIKZW4tdXMGOgZFVDoIdXJsSSJQL2hjL2VuLXVzL2FydGljbGVzLzIwMzUwNjY5NDYxMTM3LUNvbm5lY3QtdG8tTm9yZFZQTi13aXRoLUZpcmVmb3gtZXh0ZW5zaW9uBjsIVDoJcmFua2kJ--12b033a4ee95fa1f3469148b9b2dcf9d4efdad46
Adjusting your operating system configuration,"1. Add exceptions for NordVPN.exe, nordvpn-service.exe, and openvpn-service.exe in your [firewall](https://nordvpn.com/blog/what-is-a-firewall/).
If you are using the Windows firewall, add the following 6 rules.
* 3 outbound rules: one for ""nordvpn.exe"", one for ""nordvpn-service.exe"", and one for ""openvpn-nordvpn.exe""
* 3 inbound rules: one for ""nordvpn.exe"", one for ""nordvpn-service.exe"", and one for ""openvpn-nordvpn.exe""
Here is a guide on how to manage Windows firewall rules: If you use different [firewall](https://nordvpn.com/blog/what-is-nat-firewall/) software, the rules should be found in the application settings.
2. Add exceptions for NordVPN.exe, nordvpn-service.exe, and openvpn-nordvpn.exe in your antivirus application.You can usually find this option in the settings of the application.
3. Check if you have all the latest Windows updates installed on your machine, as some missing security updates might cause connection issues.[Click this link](https://support.microsoft.com/en-au/windows/update-windows-3c5ae7fc-9fb6-9af1-1984-b5e0412c556a) to see how you can check Windows for updates.
4. Change the configured DNS:
* Go to Control Panel > Network and sharing center > Change adapter settings
* One of the local area connections will have an under-name TAP-NordVPN Windows Adapter v9. Right-click on it and select Properties.
* In the list that appears, click on Internet Protocol Version 4 and then Properties.
* Select Use the following DNS addresses and add our DNS addresses: 103.86.96.100 and 103.86.99.100.
5. Flush your network stack:
Enter these commands in your administrator command prompt one by one (here is a [tutorial on how to launch the command prompt as an administrator](https://www.digitalcitizen.life/open-cmd/)):
ipconfig /releaseipconfig /flushdnsipconfig /renewnetsh winsock resetnetsh interface ipv4 resetnetsh interface ipv6 resetnetsh winsock reset catalognetsh int ipv4 reset reset.lognetsh int ipv6 reset reset.log
Restart your computer and check if the issue persists.",https://support.nordvpn.com/hc/en-us/articles/19918908485009-Adjusting-your-operating-system-configuration
Change your DNS servers on Windows,"Here's how you can change the DNS servers on...
* [Windows 7,8.1,10](https://support.nordvpn.com/Connectivity/Windows/1088041672/Change-your-DNS-servers-on-Windows.htm#Windows%207,8.1,10)
* [Windows 11](https://support.nordvpn.com/Connectivity/Windows/1088041672/Change-your-DNS-servers-on-Windows.htm#Windows%2011)
## Windows 7,8.1,10
1. Right-click the network icon (or the Wi-Fi icon if you are connected to Wi-Fi) in the taskbar notification area and select Network and Sharing Center.
2. Select Change adapter options.
3. Right-click the TAP-NordVPN Windows adapter V9 and choose Properties.
4. Select Internet Protocol Version 4 (TCP/IPv4) and click Properties.
5. Select Use the following DNS server addresses and enter NordVPN's DNS addresses:Preferred DNS server: 103.86.96.100Alternate DNS server: 103.86.99.100
6. Repeat steps 3-5 for your physical network adapter, which will be called Ethernet or Wi-Fi (depending on which one you use).
And you're done! The DNS servers should have now been successfully set.
## On Windows 11
1. At the bottom of your screen, find and press on the magnifying glass icon. 
2. A window with a search bar will appear. Type in ""Manage Network Adapter Settings"" and open the matching result.
3. Find TAP-NordVPN Windows adapter V9, and click on it. More details will appear, including the option to ""View additional properties"". Press it. 
4. Next to ""DNS server assignment"" press the ""Edit"" button. 
5. In the small pop-up box, select ""Manual"".
6. Now, adjust the settings as follows:IPv4 turned ONPreferred DNS: 103.86.96.100Alternate DNS: 103.86.99.100IPv6 turned OFFThen, press Save.7. Repeat steps 3-6 for your physical network adapter, which will be called Ethernet or Wi-Fi (depending on which one you use)",https://support.nordvpn.com/hc/en-us/articles/19917312522257-Change-your-DNS-servers-on-Windows
Connect to NordVPN (IKEv2/IPSec) on Windows,"The IKEv2/IPSec connection is one of the alternative methods to connect to NordVPN servers on your Windows PC. This is the preferred connection method among privacy enthusiasts because the IKEv2/IPSec security protocol is currently one of the most advanced on the market. That said, this manual setup lacks the additional features of the native NordVPN app and is a bit more complicated to set up.
Note: The Windows system configuration downgrades the cipher to the weaker 3DES-CBC encryption.Disclaimer: This connection method will require you to add the certificate to Trusted Root Authorities, which will apply to all certificates. This may put your system at the risk of an MITM attack if someone gets the private key of that certificate. While our private keys are completely secure and the chances of anything bad happening are very small, we recommend this connection method only if you cannot connect using our native app or other alternative way.To use this connection method, the only file you need to download and install is the NordVPN digital certificate. The connection application itself is already a part of Windows.
## Configuring the NordVPN digital certificate
1. Download the NordVPN certificate.Note: Your browser may try to save the file in its own certificate location or open it immediately. Make sure to download the file instead of just opening it. In Firefox, right-click the link above and select ""Save link as."" In Internet Explorer, select ""Save"" instead of ""Open.” Chrome will download the file correctly. Double-click the “root.cer” file that you have just downloaded.
2. Click ""Open.""
3. Click ""Install certificate.""
4. Select ""Local Machine"" and click ""Next.""
5. Select “Place all certificates in the following store” and click “Browse.”
6. Select “Trusted root certification authorities.” Click “Ok” and then “Next.”
7. Click ""Finish.""
8. Click ""Ok"" in both the following windows.
9. Open the “Run” box by pressing the “Windows” key and the “R” key together on your keyboard. Type “certmgr.msc” in the “Run” box to open the certificates management tool.
10. Go to “Trusted root certification authorities,” open “Certificates,” and find the “NordVPN Root CA” file.
11. Right-click on the “NordVPN Root CA” file and select “Properties.”
12. Check the “Enable only for the following purposes” option and uncheck all the boxes except for the “Server authentication” box.
## 
13. Click ""Ok"" and ""Apply.""
## Setting up a VPN connection:
1. 1. Open the Windows “Start” menu and type “control panel” in the search bar. In the search results, click on “Control panel.”
2. Open the “Network and Internet” section.
3. Click on “Network and sharing center.”
4. Click ""Set up a new connection or network.""
5. Click “Connect to a workplace” and hit “Next.”
6. If asked ""Do you want to use a connection that you already have?"", select “No, create a new connection” and click “Next.”
7. Click “Use my Internet connection (VPN).”
8. In the “Internet address” field, type the hostname of the server suggested to you in your NordAccount server recommendation tab.
Follow the steps below to find the best server for your connection:
1. Log into your [Nord Account](https://my.nordaccount.com/), and click NordVPN.
2. Scroll down to Advanced Settings and click Set up NordVPN manually.
3. Select the Server recommendation tab. According to your location, the best server will be recommended.
4. By pressing Advanced filters you can further customize the recommended servers by selecting the Server type and the Security protocol.
5. Under the server IP, next to Available protocols, select IKEv2/IPSec.
6. In the window that pops up, copy the server hostname and use it in your IKEv2 manual connection setup.
7. When connecting to IKEv2 manually, you're going to need to use the Username and Password from the Service credential tab.
1. 1. Open the “Network and sharing center” again and click “Change adapter settings.”
2. Right-click the adapter with the name you’ve just created, click “Properties,” and go to the “Security” tab.
3. Make sure the configuration is as follows:
Type of VPN: “IKEv2” Data encryption: “Require encryption (disconnect if server declines)” Authentication: “Use Extensible Authentication Protocol(EAP)” (select “EAP-MSCHAP v2” in the drop-down menu.)
4. Open the “Networking” tab and uncheck the “Internet Protocol Version 6 (TCP/IPv6)” box.
5. Click ""Ok.""
6. In the system tray located in the bottom-right corner of the screen, click on either the Wi-Fi or Ethernet connection icon and click “Network & internet settings.”
7. In the left sidebar of the settings, select “VPN,” find your created IKEv2 connection, and click on “Advanced options.”
8. Click ""Edit"" and enter your NordVPN service username and password from the NordVPN manual setup Service Credentials tab.
1. 1. Paste the service credentials to the Username and password windows and save it.
2. Click on the network icon again in the system tray in the bottom-right corner of the screen and click “Connect” under “NordVPN IKEv2.”
3. That’s it — you should now be connected.",https://support.nordvpn.com/hc/en-us/articles/19916965616017-Connect-to-NordVPN-IKEv2-IPSec-on-Windows
Switching protocol to OpenVPN UDP or TCP - Windows,"The NordVPN Windows app lets you fine-tune your VPN experience by selecting your VPN protocol. This tutorial teaches you how to change the NordVPN protocol to OpenVPN UDP or TCP. Before you begin, we encourage you to read our article on the [difference between TCP and UDP](https://nordvpn.com/blog/tcp-or-udp-which-is-better/).
## On Windows 7 and 8.1:
1. Open NordVPN the app and click on the cog (gear) icon in the bottom-left corner.
2. Click “Auto-connect” on the left side of the settings and make sure to disable ""Choose a VPN protocol and server automatically."" Next to “VPN protocol,” select “OpenVPN (UDP)” or “OpenVPN (TCP)” from the drop-down menu.
## On Windows 10 and 11:
1. Open NordVPN the app and click on the cog (gear) icon to access the app settings.
2. Click on “Connection.”
3. Under “VPN protocol,” select “OpenVPN (UDP)” or “OpenVPN (TCP)” from the drop-down menu.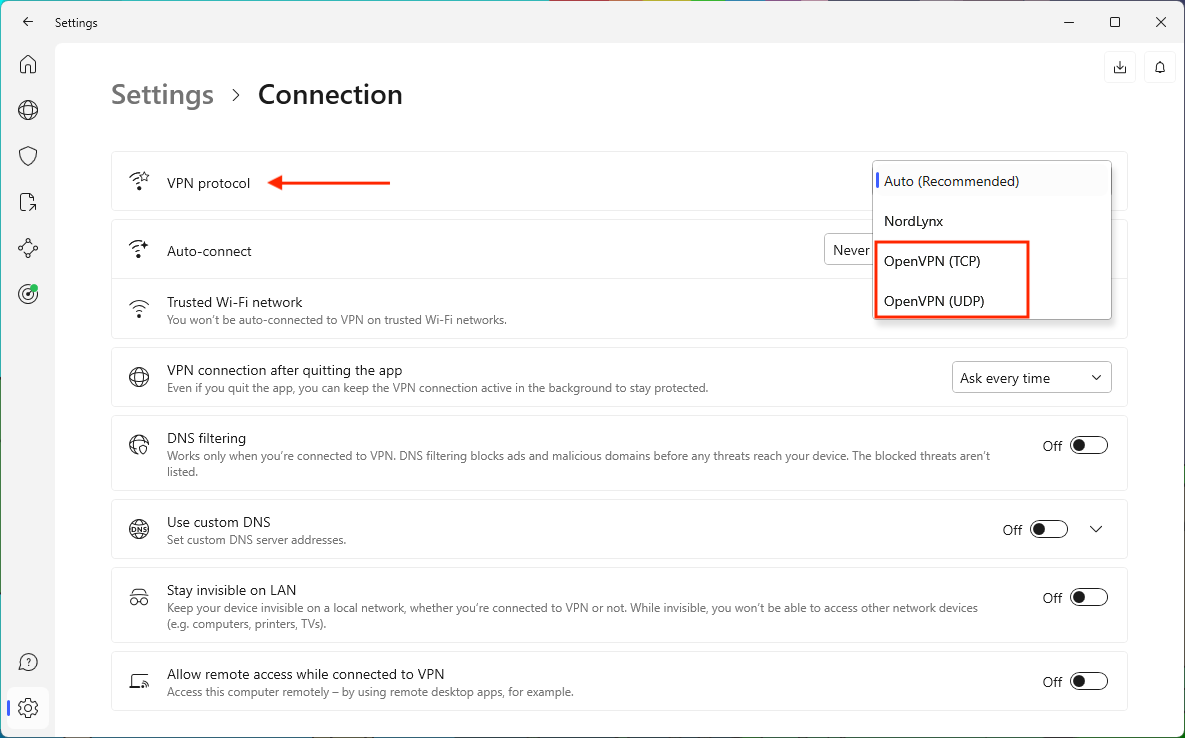",https://support.nordvpn.com/hc/en-us/articles/19774135293969-Switching-protocol-to-OpenVPN-UDP-or-TCP-Windows
How to set up a manual connection on Windows using OpenVPN,"The OpenVPN GUI application is an alternative option to connecting to NordVPN servers on your Windows PC. If you prefer manual connection and tinkering with open-source software, this is a good way of connecting to NordVPN. That said, it lacks the additional features of the [NordVPN native app](https://support.nordvpn.com/hc/en-us/articles/19441140326289-Installing-and-using-NordVPN-on-Windows-7-and-8-1), but it still uses the same VPN protocol — OpenVPN. It's also more complicated to set up, so here are instructions to guide you through the process.
1. [Download the OpenVPN GUI application](https://build.openvpn.net/downloads/releases/).Note: Make sure to choose the application version according to your Windows device version:For Windows 64-bit;For Windows ARM64;For Windows 32-bit.
2. Open the installation file and follow the instructions in the setup wizard.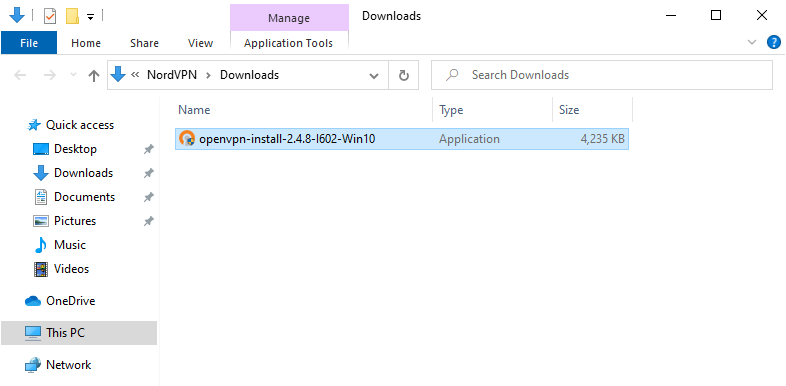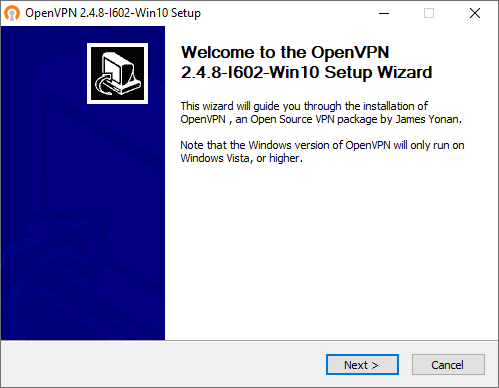
3. Once the application is installed, [download the NordVPN server configuration files](https://my.nordaccount.com/dashboard/nordvpn/manual-configuration/openvpn/). The OpenVPN app uses them to connect to specific NordVPN servers.
Follow the steps below to find the best server for your connection:
1. Log into your [Nord Account](https://my.nordaccount.com/), and click NordVPN.
2. Scroll down to Advanced Settings and click Set up NordVPN manually.
3. Select the Server recommendation tab. According to your location, the best server will be recommended.
4. By pressing Advanced filters you can further customize the recommended servers by selecting the Server type and the Security protocol.
In case you wish to select a specific server, follow these steps:
1. Under Set up NordVPN manually, select OpenVPN configuration files.
2. Find the server you wish to connect to by using the Search bar or by scrolling down and download it by clicking Download UDP or Download TCP.
3. When connecting to OpenVPN & IKEv2 manually, you're going to need to use the Username and Password from the Service credential tab.
1. Go to the folder where you downloaded the configuration files, select them all, then right-click and choose “Copy.”
2. Paste the configuration files to this directory:
```
C:\Program Files\OpenVPN\config\
```
5.1. To quickly find the OpenVPN\config\ folder, right-click the OpenVPN GUI shortcut on your desktop and select “Open file location.”5.2. Once you're there, click the parent OpenVPN folder in the address bar.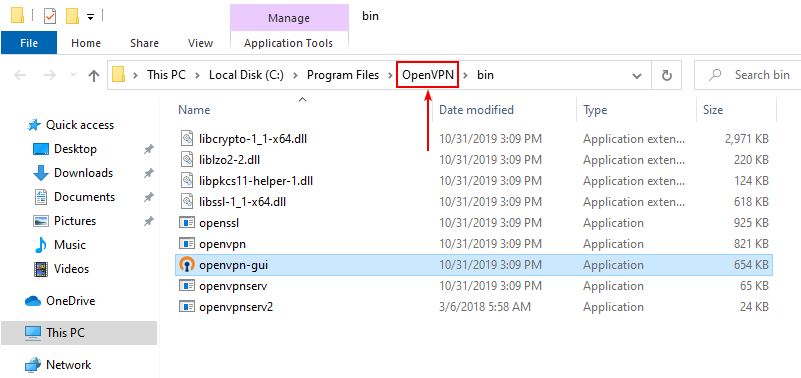Open the ""Config"" folder.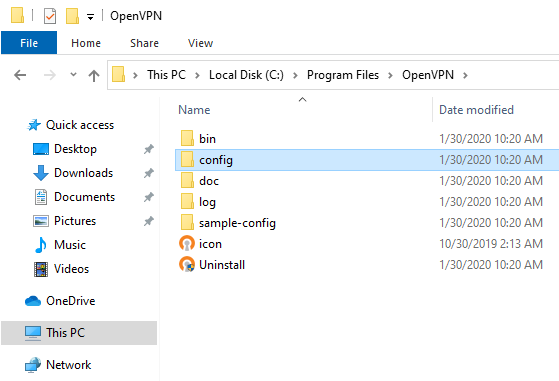5.3. Paste the copied configuration files in the folder by right-clicking anywhere in the folder and selecting ""Paste"":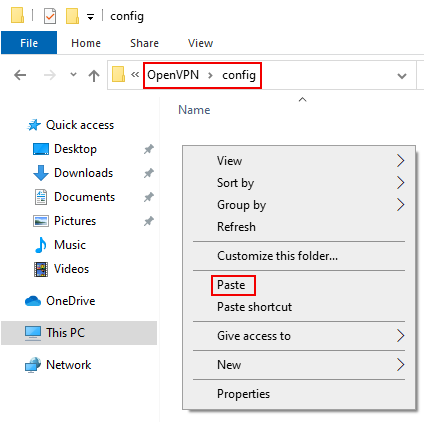Click ""Continue"" to allow the files to be extracted to the folder.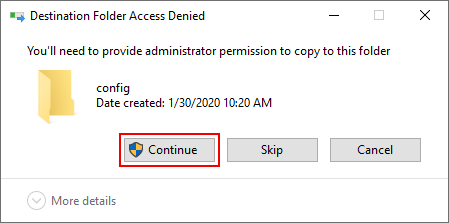Note: if you are using Windows 10, add an extra line in the configuration files to prevent possible DNS leaks:
To do that, open the downloaded .ovpn configuration file with any text editor and paste this line:block-outside-dnsSave the file before proceeding to the next step of this tutorial.
3. Now that the configuration files are in the proper folder for the application to detect them, open the OpenVPN GUI app by double-clicking the shortcut on your desktop.
4. Allow the application to make changes to your device because they are necessary for a VPN connection.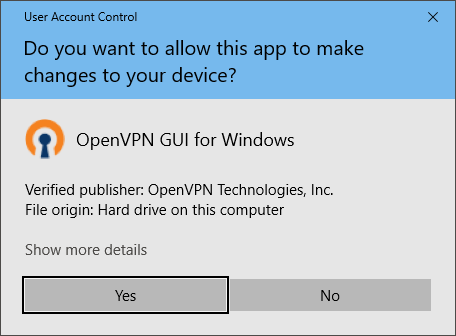
5. The application will start running in the system tray, which is the notification area next to your device’s clock:It might also be in the hidden system tray area: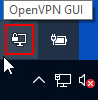
6. Right-click on the application icon, hover over one of the servers, and click “Connect.”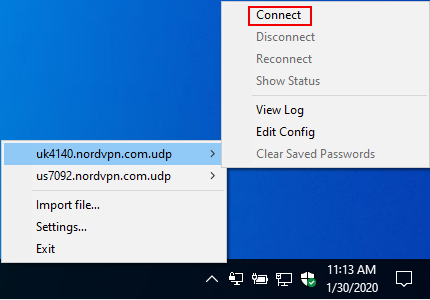
7. Enter your NordVPN service username and password, then click “OK.”
1. In a few seconds, the application will connect and close the window. The system tray icon will turn green and show your connection status when you hover over it.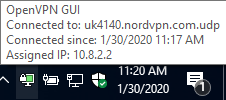
And that's it! You should be successfully connected. To disconnect, right-click on the application icon, hover over the server, and click “Disconnect.”",https://support.nordvpn.com/hc/en-us/articles/19749554331793-How-to-set-up-a-manual-connection-on-Windows-using-OpenVPN
Troubleshooting NordVPN connectivity on Windows,"There are several reasons why you may be having trouble connecting to NordVPN on your Windows device. These include issues with your account status, network settings, or app configuration. Here are some steps you can follow to troubleshoot.
* [Make sure your NordVPN account is active](https://support.nordvpn.com/hc/en-us/articles/19602526121489-Making-sure-your-account-is-active).
* Check if you’re using the[ latest NordVPN application version](https://nordvpn.com/blog/nordvpn-windows-release-notes/).
* To do so, open the app, click on Settings (the gear icon at the bottom) and you’ll see the app version at the top, right below the Settings headline.
* If you are using the older version, [uninstall the VPN app](https://nordvpn.com/blog/how-to-uninstall-a-vpn/) and [download the latest NordVPN version for Windows](https://nordvpn.com/download/windows/).
* Change the VPN protocol to Auto and try to Quick connect.
* To do so, open the app, click on Settings (the gear icon at the bottom), and select Connection – you'll find the option to change the connection protocol at the top of the screen. The connection process may take up to 3 minutes
* If you're still unable to connect, try switching to [NordWhisper](https://support.nordvpn.com/hc/en-us/articles/31528242519953-How-to-use-NordWhisper-on-NordVPN) or [OpenVPN UDP/TCP](https://support.nordvpn.com/hc/en-us/articles/19774135293969-Switching-protocol-to-OpenVPN-UDP-or-TCP-Windows) protocols and connecting to [Obfuscated servers](https://nordvpn.com/features/obfuscated-servers/), which you will find under Speciality servers.
* If that does not help, reset the application:
1. Click on the Settings (gear icon) in the bottom left corner.
2. Click General.
3. Scroll down until you see the Diagnostics section, and click Run diagnostics.
4. A new window will open. Select Reset app.
* The issue might lie in the configuration of your [Windows OS, its applications, and networks.](https://support.nordvpn.com/hc/en-us/articles/20164307373713-Common-Windows-application-issues)
After each step, check if the issue remains. In the case that the problems are still there, be sure to reach out to our support team for a quick solution by pressing on either the email or chat button bellow.",https://support.nordvpn.com/hc/en-us/articles/19748510235921-Troubleshooting-NordVPN-connectivity-on-Windows
NordVPN PASSWORD: Verification Failed: 'Auth',"Authentication or 'auth' failures on Windows happen for a number of reasons, either relating to the password itself or the device count you have been connected to.
* Try to change your password, log out from the NordVPN app, and then log back in. Change your password here: .
* If the issue persists, make sure you have no more than 10 devices connected simultaneously with one account. If yes, disconnect one of the devices.
If that does not help, reinstalling the application should:
1. Go to Control Panel > Uninstall a Program / Programs and Features.
2. Locate ""NordVPN"", ""NordVPN network TAP"" and ""NordVPN network TUN"" instances and remove them if they appear on the list.
3. Restart the computer.
4. Go to , download the NordVPN app, and go through the setup steps.",https://support.nordvpn.com/hc/en-us/articles/19624112901009-NordVPN-PASSWORD-Verification-Failed-Auth
Staying invisible on unsafe local networks on macOS,"If you received a message about a potentially unsafe network, your connection requires additional caution. The problem emerges in scenarios where a router assigns non-RFC1918 IP addresses for the local network. This might seem technical, but in simple terms, certain types of local network configurations can result in VPN traffic being unintentionally exposed.
## How Does This Affect You?
If our macOS client detects a potentially misconfigured network (i.e. one that hands out non-RFC1918 IP addresses), it will send you a notification. Upon receiving this alert, we will ask you to enable the 'Invisibility on LAN' feature, ensuring your VPN traffic remains private.
## How to enable the “Stay invisible on a local network” feature
Note: the feature is only available from NordVPN 8.8.3 app version.
When you connect to an unsafe network, NordVPN will send you a pop-up: Stay invisible on a local network. Choose Enable protection.
Alternatively, follow these steps:
1. Connect to a NordVPN server.
2. Access Settings.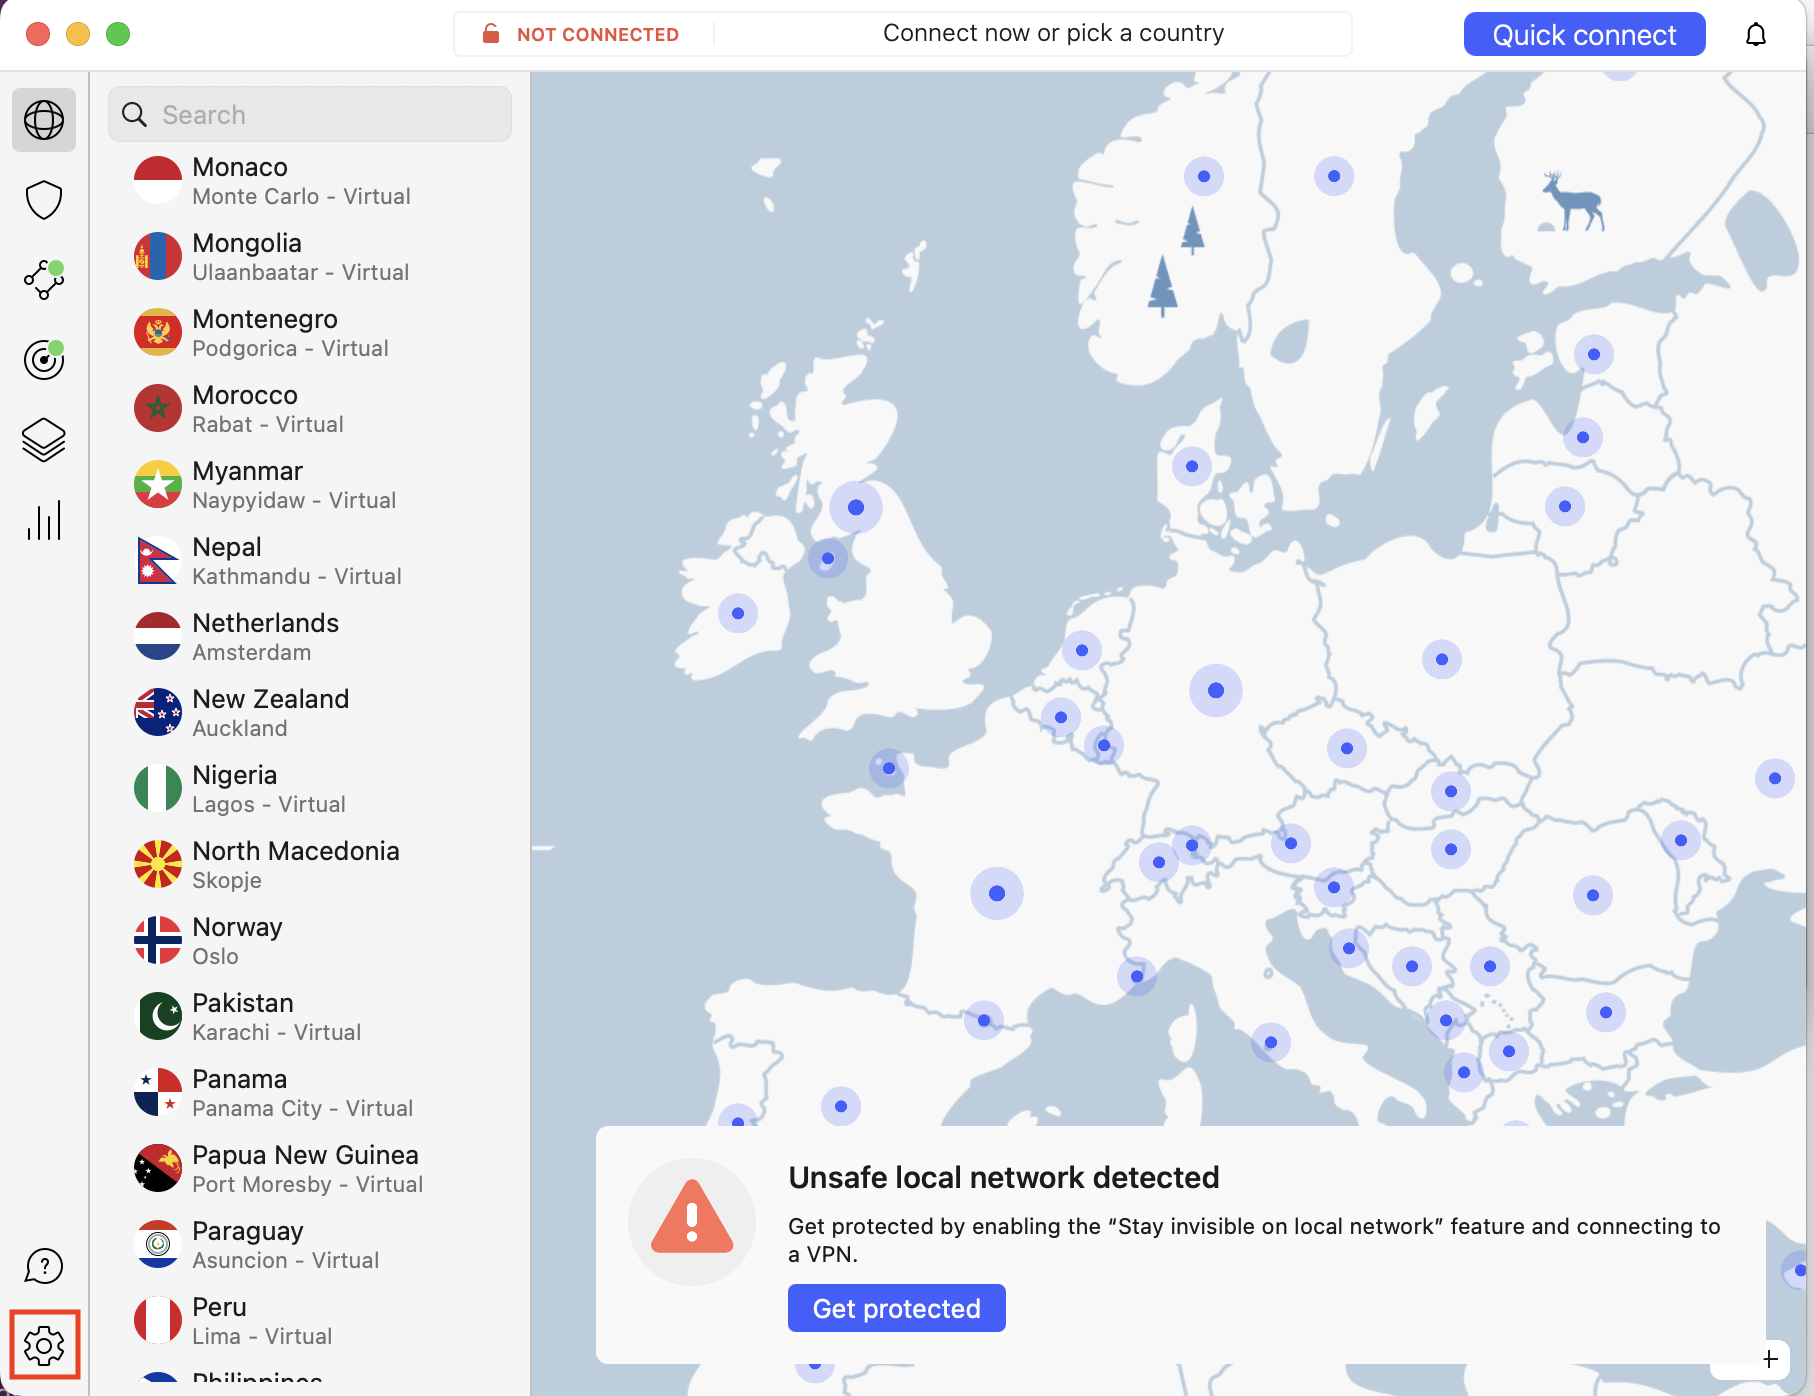
3. Choose General settings if you’re using the NordVPN version downloaded from .
4. Click to activate Stay invisible on a local network.
5. Reconnect to apply the new settings.Choose Kill Switch settings from the left side menu and activate Kill Switch (advanced) (if you’re using NordVPN’s App Store version).
6. A notification will appear, confirming that protection against unsafe local networks is active.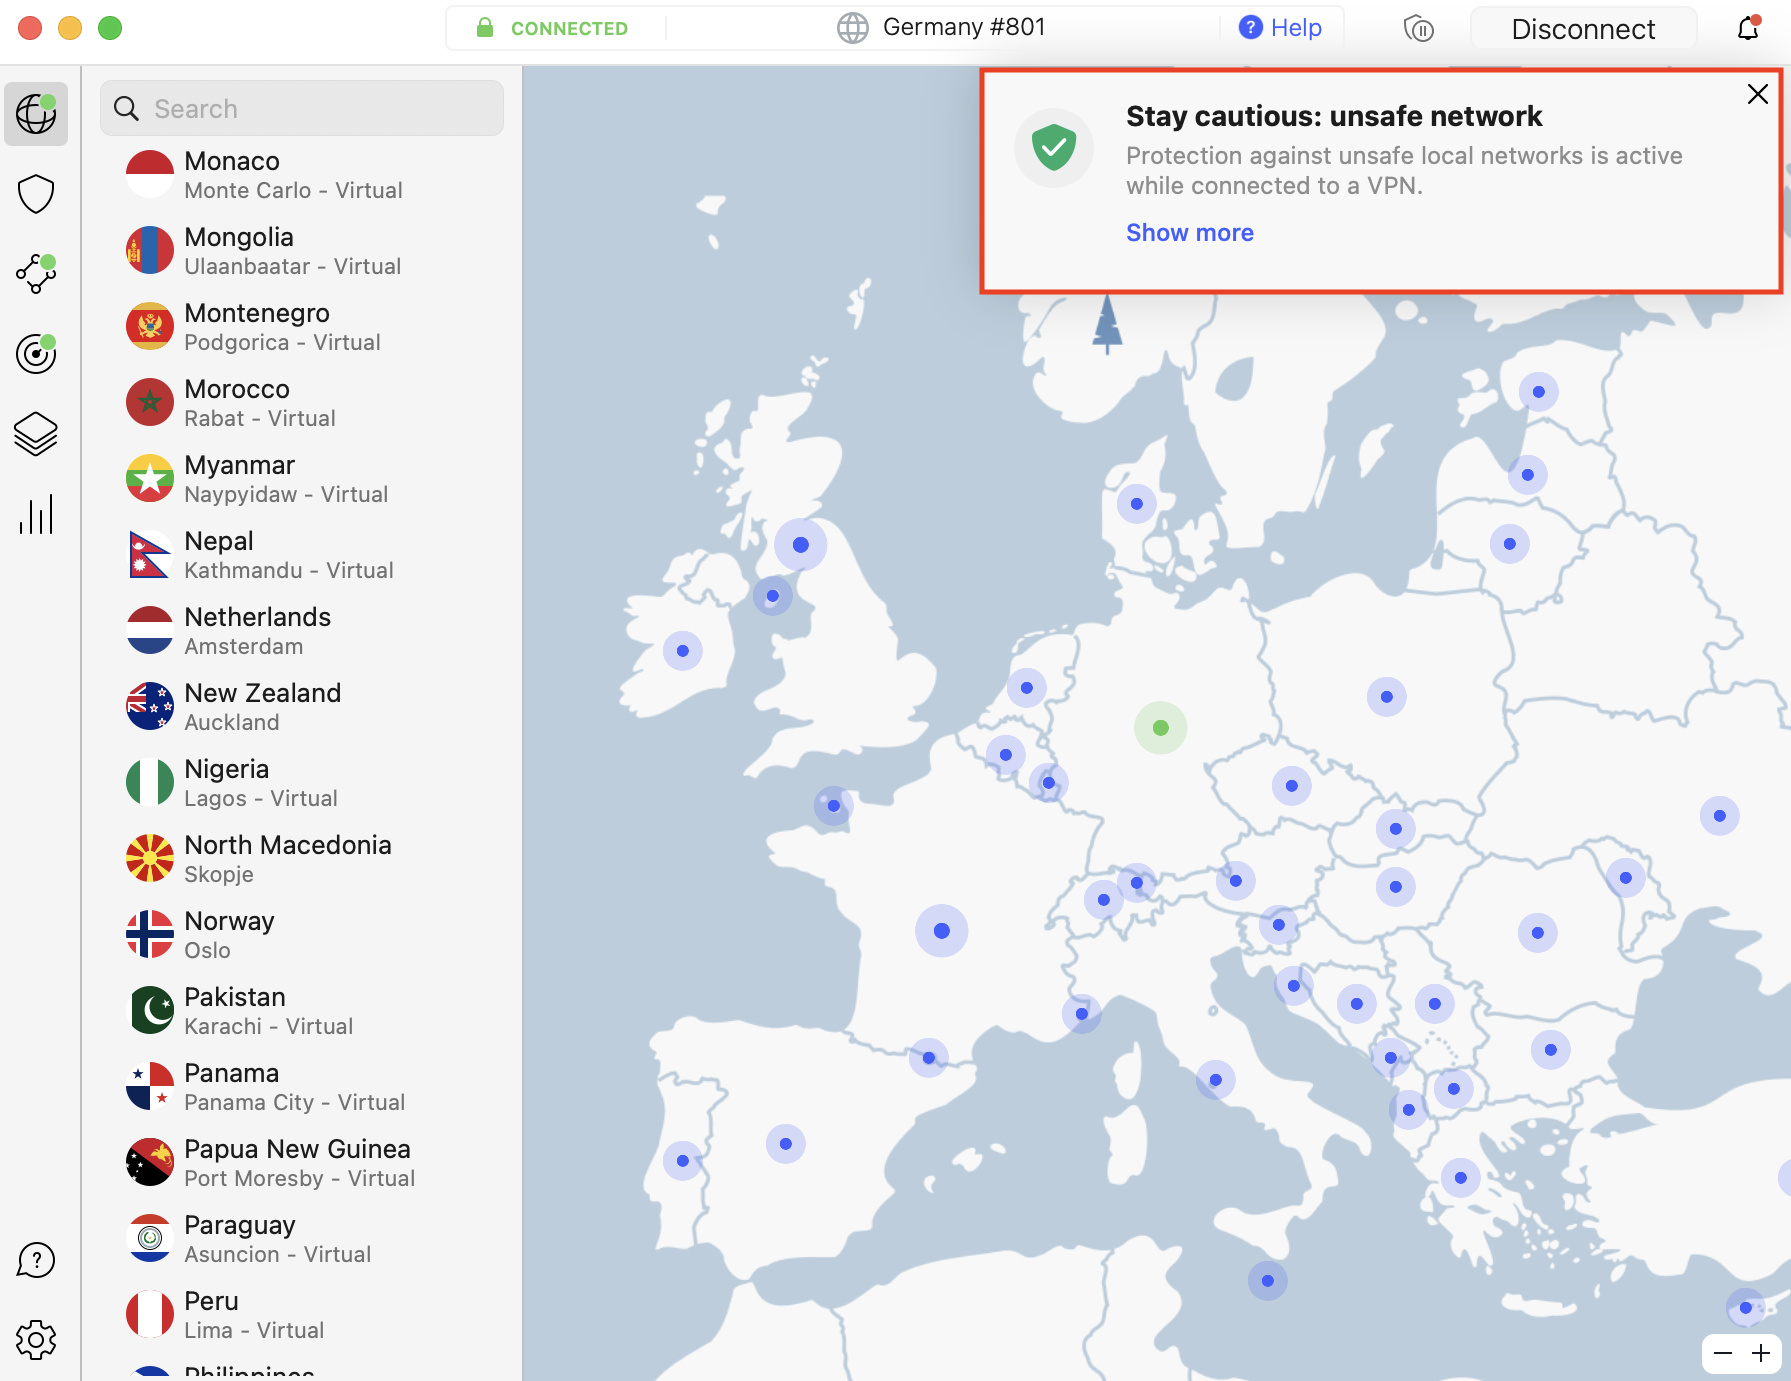",https://support.nordvpn.com/hc/en-us/articles/20225371443345-Staying-invisible-on-unsafe-local-networks-on-macOS
macOS Error: An unknown authentication error happened,"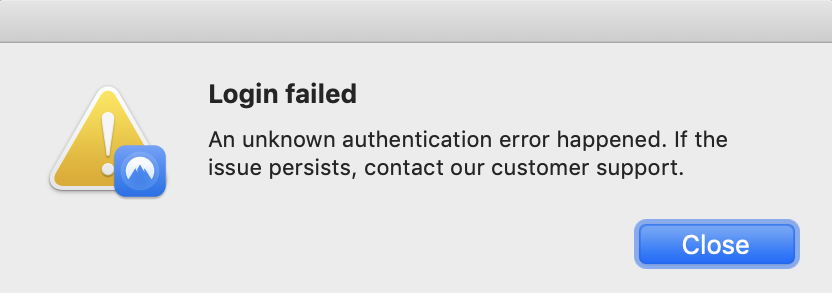
If you receive such an error, try following these steps:
1. Option + Command + Esc to force quit the NordVPN application.
2. Click on Launchpad and in a search field type ""Keychain Access"".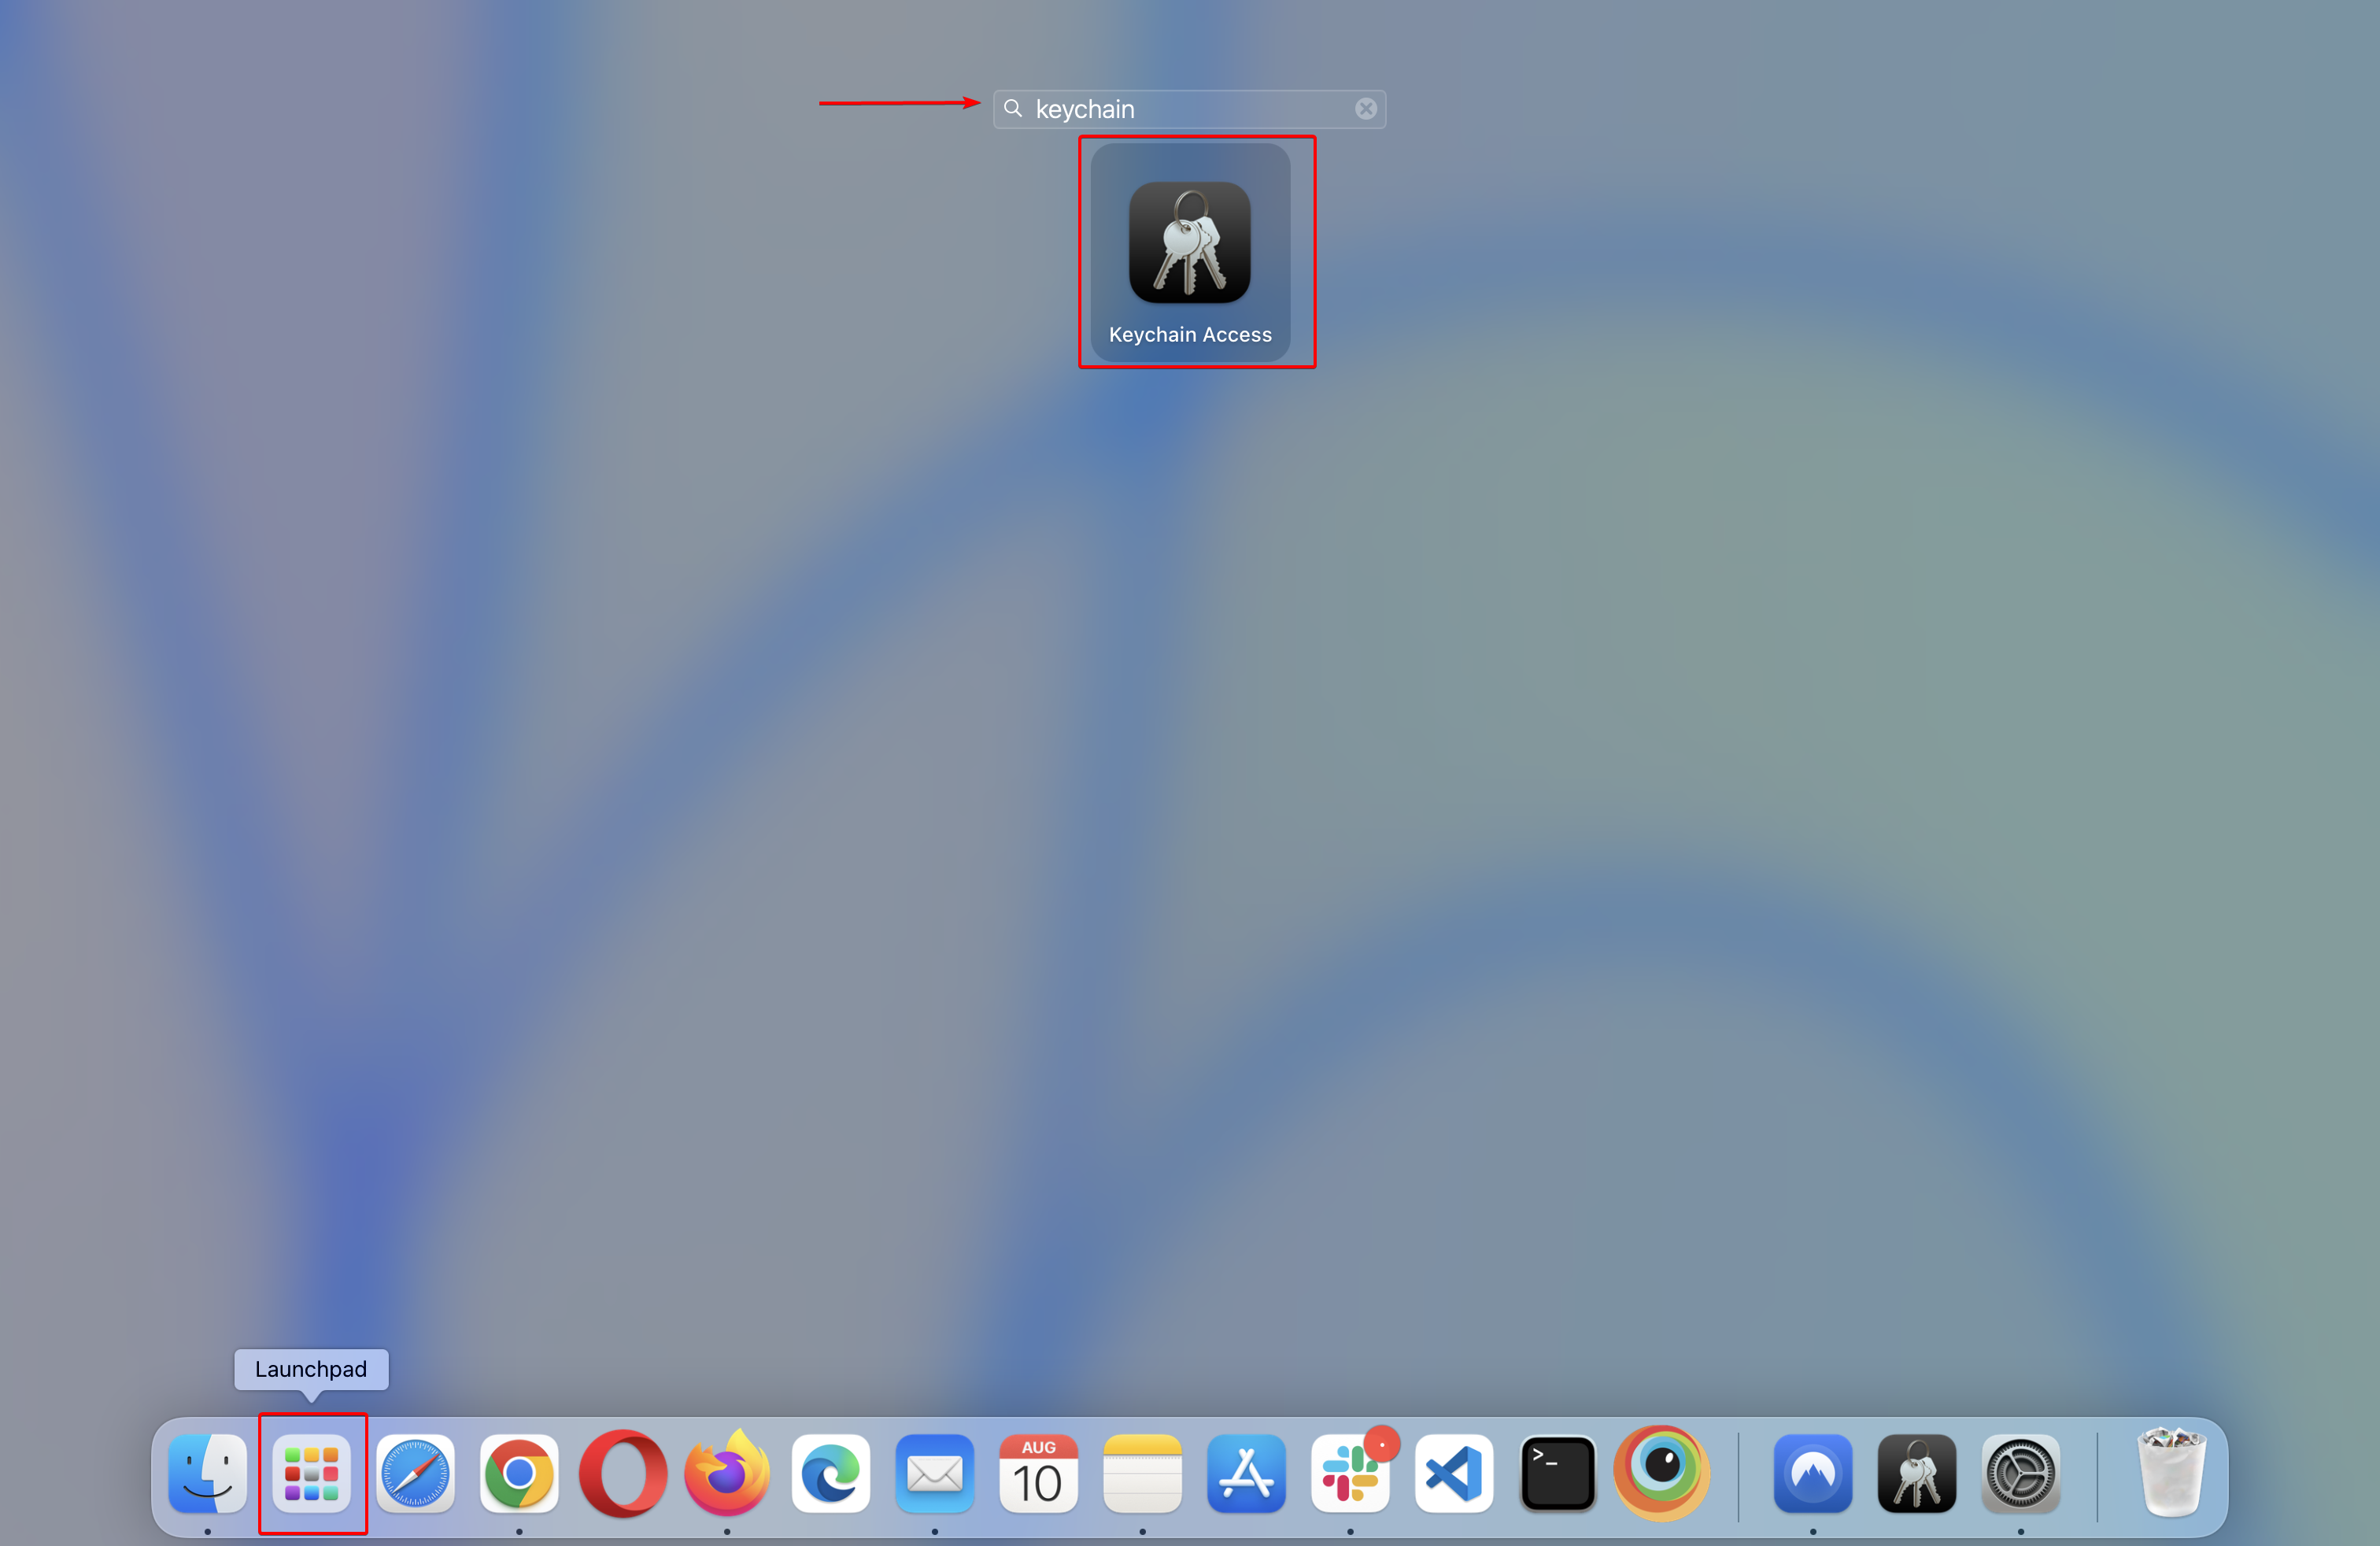
3. Select the ""login"" entry in the keychain (top left corner of the window).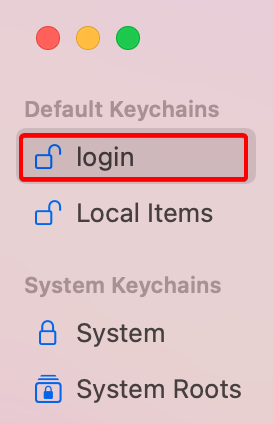
4. Right-click on the ""login"" keychain and choose Lock Keychain ""login"".
5. Then try unlocking it again.
6. You might need to enter your Mac login password afterward.
7. Relaunch the NordVPN application and try logging in again.
If you cannot unlock the keychain as recommended in the method above, try doing that over the terminal:
1. Open Launchpad and type ""Terminal"" in a search field.
2. After opening the terminal enter the following command:security lock-keychain
3. Run this single-line command to unlock the keychain:security unlock-keychain
4. Enter your macOS password and press the return button.
5. Try logging in again.",https://support.nordvpn.com/hc/en-us/articles/19925535264529-macOS-Error-An-unknown-authentication-error-happened
How to get connection logs on macOS,"You can export the connection log straight from the NordVPN application:
1. Click on the question mark icon at the bottom left of the map.
2. Click on Activity Logs, and you'll be directed to the folder where your logs are.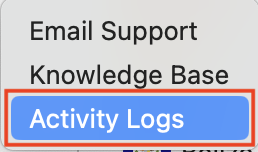
If you encounter any connection issues with the NordVPN app, select the latest connection logs and send them to our customer support for troubleshooting.",https://support.nordvpn.com/hc/en-us/articles/19925471008273-How-to-get-connection-logs-on-macOS
How can I use NordLynx in the NordVPN app for macOS?,"NordLynx is the technology we built around the WireGuard® protocol. It lets you experience WireGuard’s speed benefits without compromising your privacy.
1. [Install the NordVPN application](https://support.nordvpn.com/hc/en-us/articles/19445793501585-Installing-NordVPN-on-macOS).
2. Navigate to the app settings in the bottom left corner.
3. Select General.
4. In the [VPN Protocol](https://nordvpn.com/blog/protocols/) menu, select NordLynx.
WireGuard is a registered trademark of Jason A. Donenfeld.",https://support.nordvpn.com/hc/en-us/articles/19925285940497-How-can-I-use-NordLynx-in-the-NordVPN-app-for-macOS
Mac app authentication issue,"You may see this prompt after trying to connect to [NordVPN on macOS](https://nordvpn.com/download/mac/). If NordVPN asks for the authentication information, enter your Mac administrator password, and select Always Allow. Do it up to 5 times if the pop-up reappears.
If the pop-up still reappears, follow the steps below to resolve the issue:
Please cancel out the pop-up, and try switching the connection protocol to OpenVPN (TCP). It can be changed in the NordVPN application settings. Click [here](https://support.nordvpn.com/hc/en-us/articles/19921436351505-Switching-protocol-to-OpenVPN-UDP-or-TCP-macOS) for a guide on how to do it. After switching it, try to connect again.
In case the steps above do not help, try the following:
1. Go to the [Nord Account dashboard](https://my.nordaccount.com/dashboard/nordvpn/) page.
2. Find NordVPN service credentials in Dashboard > NordVPN.
3. Copy the service credentials password.
4. Paste it into the VPN Connection pop-up Password field.
5. Select OK.
6. You may be prompted with other pop-ups. Accept them. In case you are asked for the keychain password (e.g. neagent pop-up), enter your macOS administrator password and select Always Allow.",https://support.nordvpn.com/hc/en-us/articles/19925085925905-Mac-app-authentication-issue
How to disable IPv6 on macOS?,"In order to disable IPv6 on newer OS X versions, you will need to run a command through the Terminal application. Please note that any changes to the network preferences may revert this setting and the command may need to be run again.
1. Open Finder2. Click on Applications3. Click on Utilities Folder4. Double Click on the Terminal app5. Run the following command in the terminal window:
sudo networksetup -listallnetworkservices
This will list all of your network interfaces and their names.
6. Identify the network interface you are using, most commonly Ethernet or Wi-Fi. Use the following command in the terminal window to disable IPv6 on that interface. Please note that you may have to use quote marks to envelope the interface name. A few examples:
sudo networksetup -setv6off Ethernetsudo networksetup -setv6off Wi-Fi
You will be prompted to enter your OS X administrator password. Afterwards, IPv6 will be disabled.While usually not necessary, if you wish to re-enable IPv6 on your device, you can simply run this command in the terminal:
sudo networksetup -setv6automatic Wi-Fisudo networksetup -setv6automatic Ethernet",https://support.nordvpn.com/hc/en-us/articles/19924913336081-How-to-disable-IPv6-on-macOS
Manual connection setup with Tunnelblick on macOS,"Note: you can connect to obfuscated servers using TunnelBlick by downloading the configuration files for our obfuscated servers here.The Tunnelblick application is one of the alternative ways to connect to NordVPN servers on your Mac. This is a good option for those who prefer a manual connection and like tinkering with open-source software. That said, it lacks the additional features of the NordVPN app but still uses the same VPN protocol — OpenVPN. It's also a bit more complicated to set up. Below you will find a guide helping you to configure a manual connection with Tunnelblick on macOS.
1. Download Tunnelblick, a free and user-friendly app for managing OpenVPN connections on macOS.
2. Now you will need to download the .ovpn connection files.
Follow the steps below to find the best server for your connection:
1. Log into your [Nord Account](https://my.nordaccount.com/), and click NordVPN.
2. Scroll down to Advanced Settings and click Set up NordVPN manually.
3. Select the Server recommendation tab. According to your location, the best server will be recommended.
4. By pressing Advanced filters you can further customize the recommended servers by selecting the Server type and the Security protocol.
In case you wish to select a specific server, follow these steps:
1. Under Set up NordVPN manually, select OpenVPN configuration files.
2. Find the server you wish to connect to by using the Search bar or by scrolling down and download it by clicking Download UDP or Download TCP.
3. When connecting to OpenVPN & IKEv2 manually, you're going to need to use the Username and Password from the Service credential tab.
1. Navigate to your Downloads folder and double-click the Tunnelblick installation file you have just downloaded (it has a .dmg extension).
2. In the window that opens, double-click on the Tunnelblick icon.
3. A new dialogue box will pop up, asking you if you are sure you want to open the app. Click Open.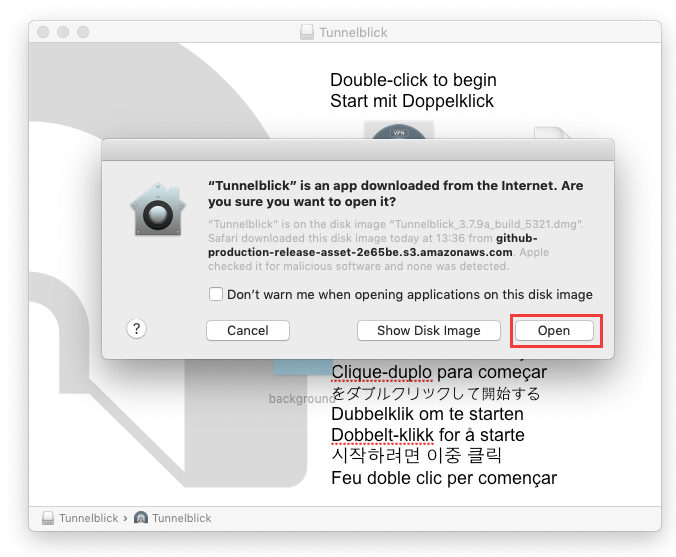
4. You will be asked to enter your Mac password. Enter it and click OK: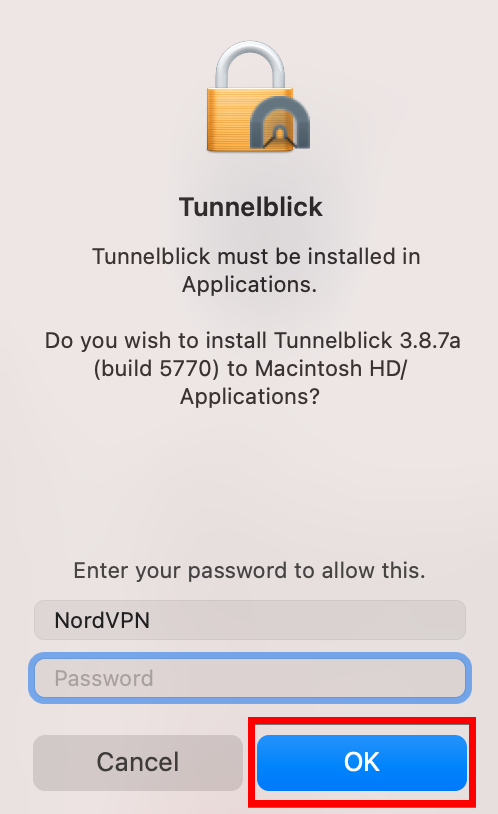
5. Once the installation is complete, you will see a pop-up notification asking you if you want to launch Tunnelblick now. (An administrator username and password will be required to secure Tunnelblick). Click Launch.Alternatively, you can click on the Tunnelblick icon in the status bar and select VPN details...: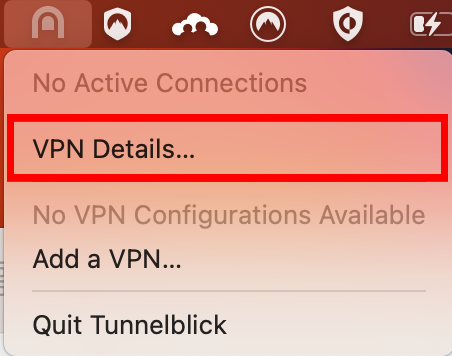
6. A new dialogue box will appear. Click Continue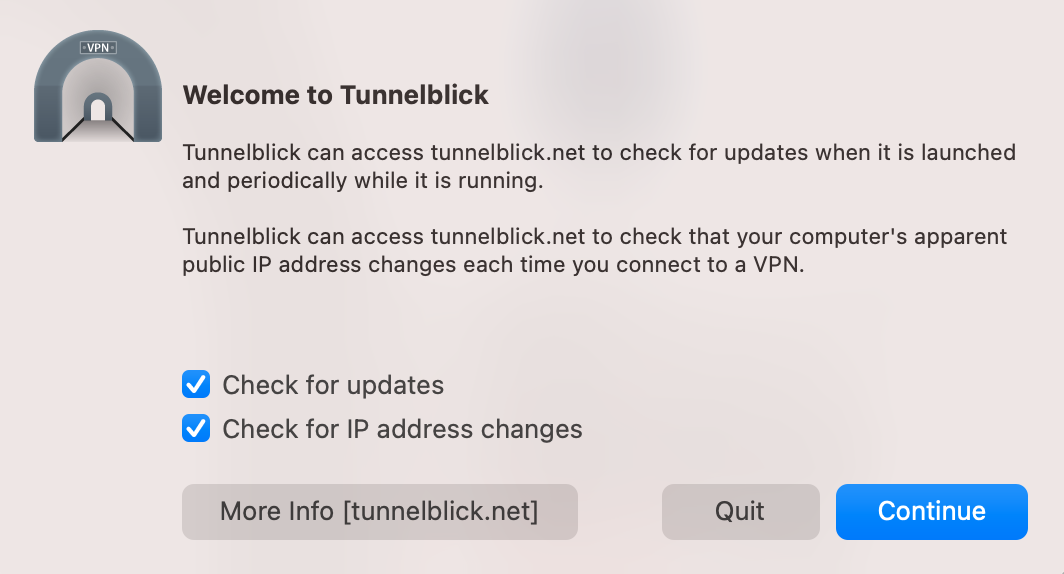
7. Another notification will pop up, instructing you how to import configuration files. Click OK.
8. Drag and drop the previously downloaded .ovpn file from your Downloads folder to the Configurations tab in Tunnelblick.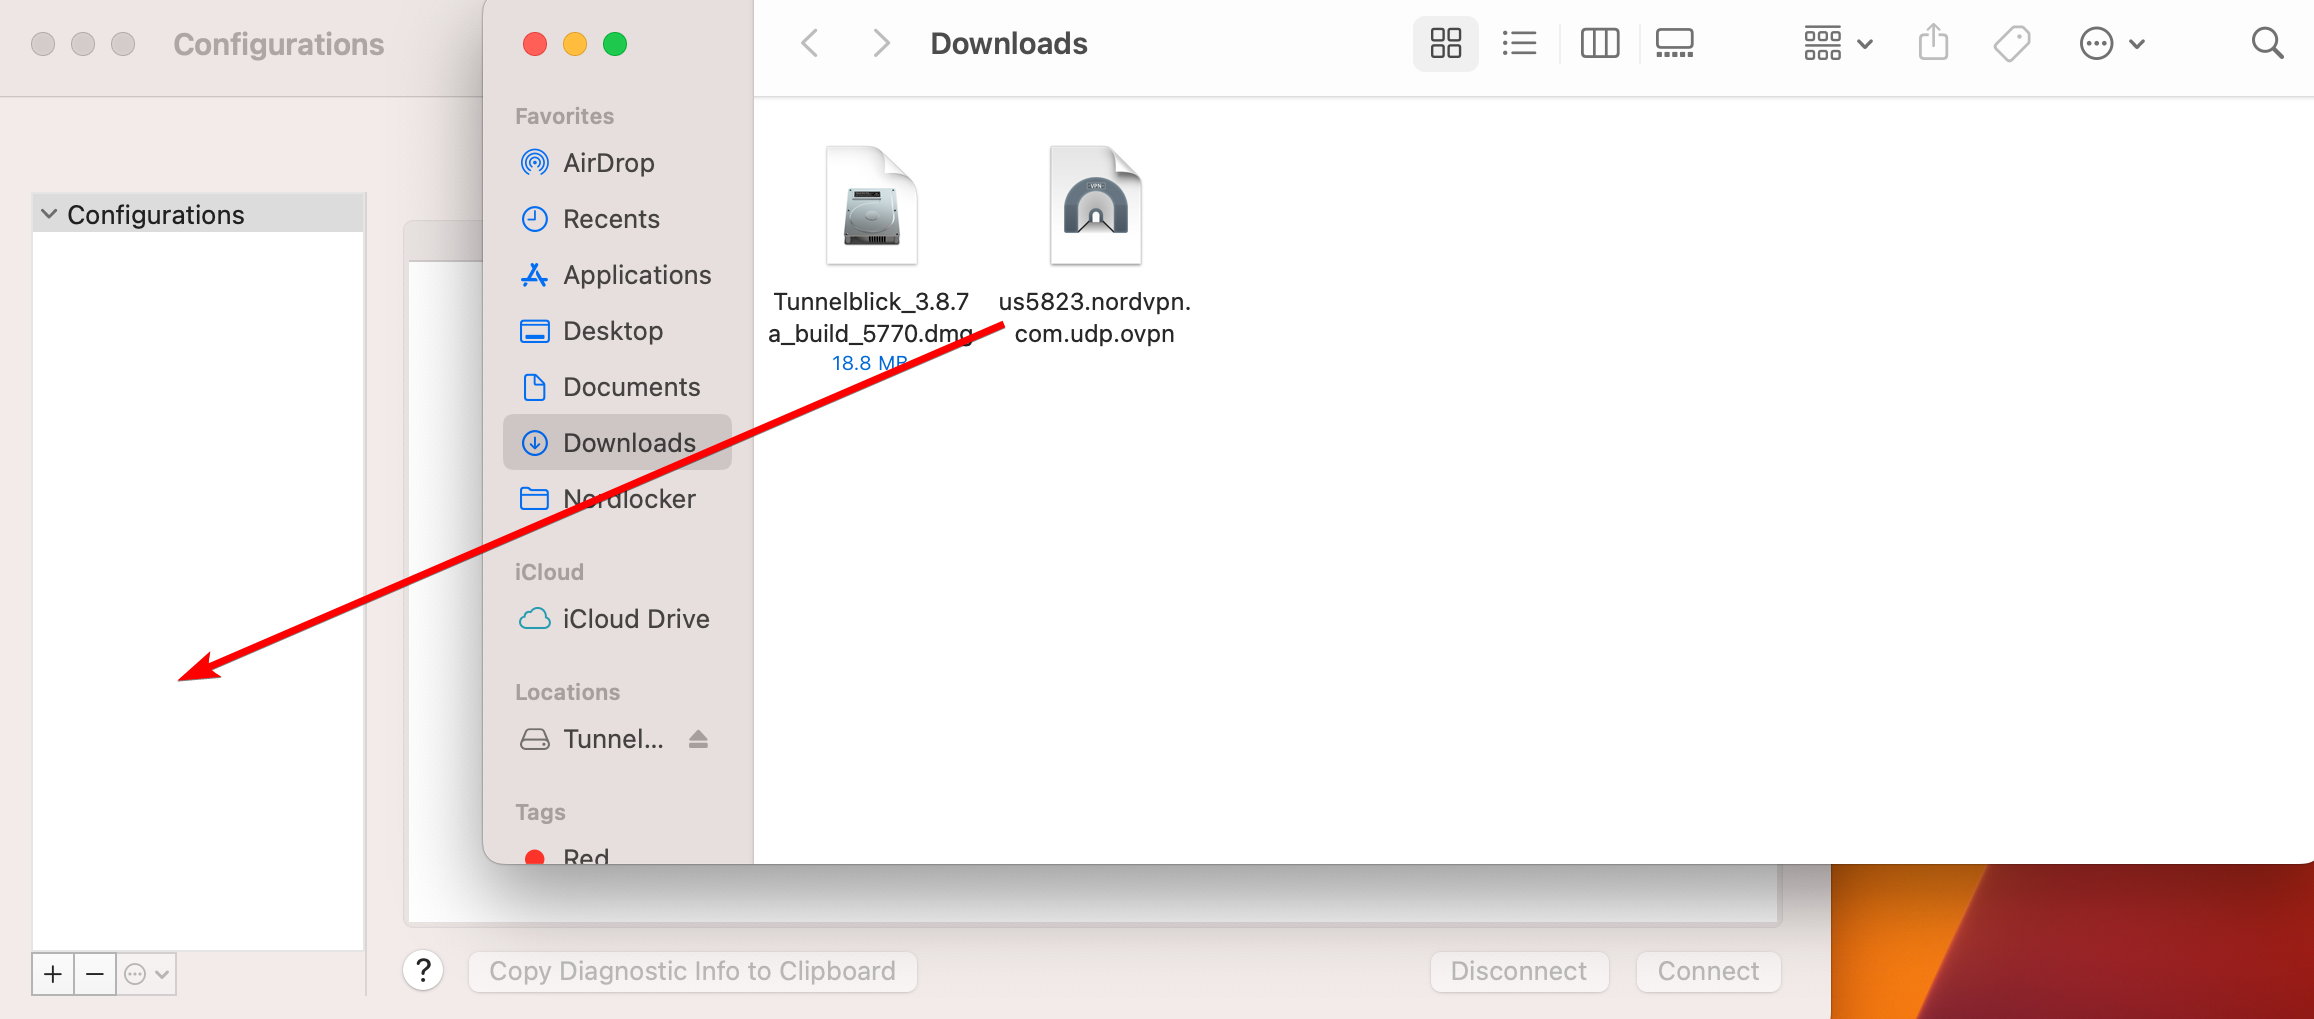
9. A pop-up will appear, asking you if you want to install the configuration profile for your current user only or for all users on your Mac. Select your preferred option.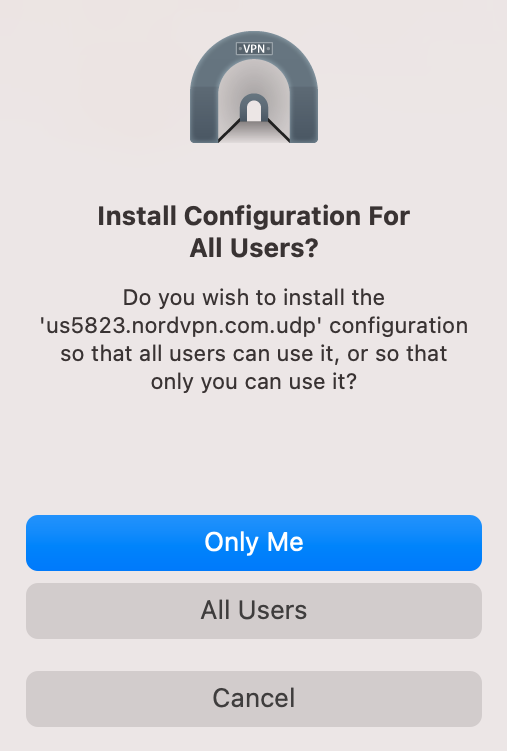You will be asked to enter your Mac password.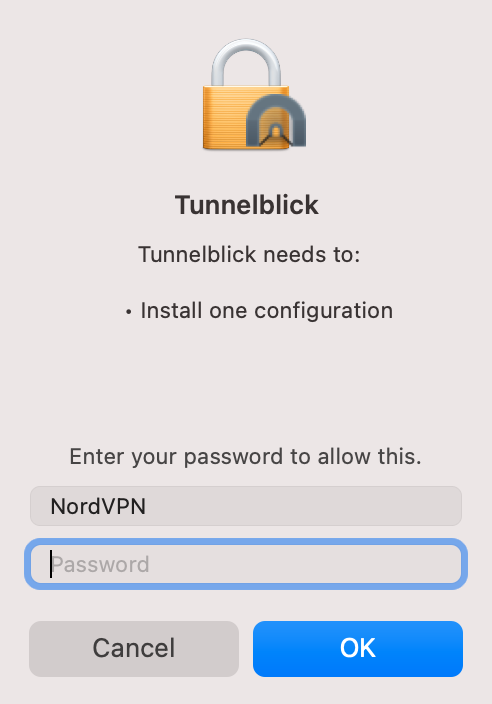
10. A warning will pop up. You can safely check the Do not warn about this again box and click OK.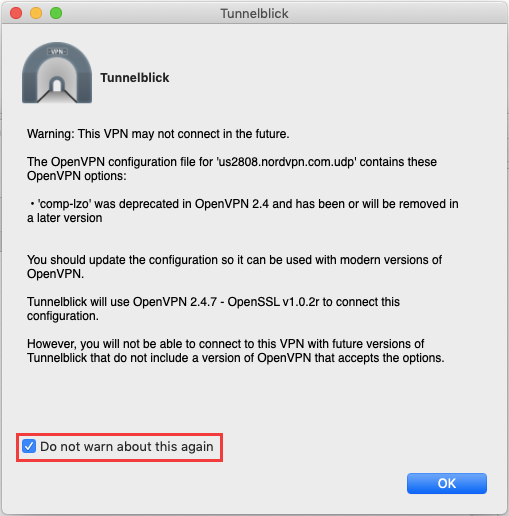
11. Select the server and click Connect.
12. Enter your NordVPN service credentials, mark the box Save in Keychain, and click OK.
Follow the steps below to find the service credentials for manual connection setup:
1. Log into your [Nord Account](https://my.nordaccount.com/), click NordVPN, and, under Manual setup, click on Service credentials. Here you'll find the Username and Password needed to connect manually.
1. That’s it! You are now connected to a VPN. To disconnect, click on the Tunnelblick icon in your status bar and select Disconnect in the drop-down menu.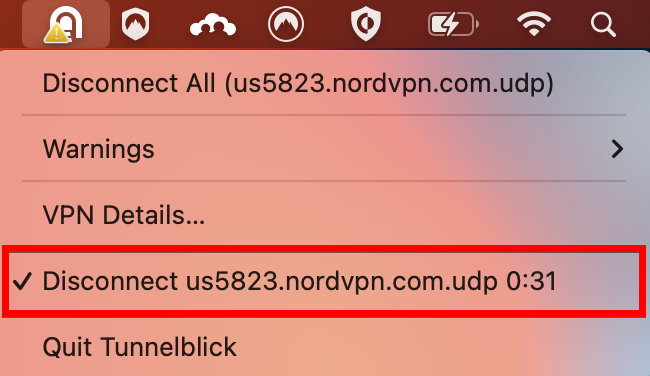",https://support.nordvpn.com/hc/en-us/articles/19924903986961-Manual-connection-setup-with-Tunnelblick-on-macOS
How to change your DNS servers on macOS,"You can manually configure [DNS servers](https://nordvpn.com/blog/what-is-dns-server/) in your macOS settings. We have a separate guide for [configuring DNS servers on devices using the latest macOS Ventura version](https://support.nordvpn.com/hc/en-us/articles/20285887299857-Change-your-DNS-servers-on-macOS-Ventura).
## Manual DNS server configuration
1. Go to “System preferences” and click on “Network.”
2. Select the network interface you are using and click “Advanced.”
3. Open the “DNS” tab and click the “+” button at the bottom, then add the NordVPN DNS server addresses:103.86.96.100103.86.99.100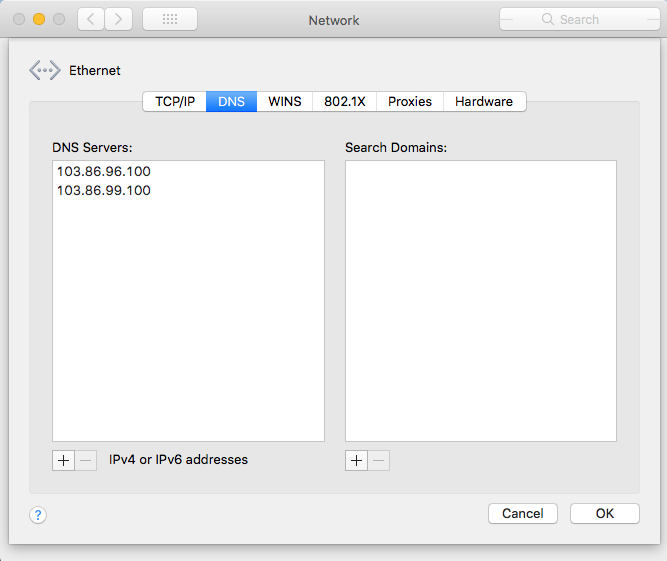
Congratulations! You have changed your macOS device’s DNS servers to those of NordVPN.",https://support.nordvpn.com/hc/en-us/articles/19921173364113-How-to-change-your-DNS-servers-on-macOS
How can I get NordVPN latest version on macOS?,"By following these three simple steps, you can start using the most up-to-date app version:",https://support.nordvpn.com/hc/en-us/articles/19920947756433-How-to-get-the-latest-NordVPN-app-version-on-macOS
Why should I get the latest version?,"For the best VPN connection quality and the latest NordVPN features, we recommend using the most recent NordVPN macOS version. You can [download this NordVPN version](https://nordvpn.com/download/mac/) for macOS 11 (Big Sur) and newer versions. For macOS 10.12 (macOS Sierra), 10.13 (macOS High Sierra), 10.14 (macOS Mojave) download [this version](https://downloads.nordcdn.com/apps/macos/generic/NordVPN-OpenVPN/7.13.0/NordVPN.pkg), and for 10.15 (macOS Catalina) download [this version](https://downloads.nordcdn.com/apps/macos/generic/NordVPN-OpenVPN/8.24.2/NordVPN.pkg), and enjoy the following features:",https://support.nordvpn.com/hc/en-us/articles/19920947756433-How-to-get-the-latest-NordVPN-app-version-on-macOS
How to get the latest NordVPN app version on macOS?,"## How can I get NordVPN latest version on macOS?
By following these three simple steps, you can start using the most up-to-date app version:
1. Uninstall the previous NordVPN applications as shown in this guide (you may have both versions installed, so make sure to delete them both): .
2. Download the latest application version.
3. Follow this guide to install the app:
## Why should I get the latest version?
For the best VPN connection quality and the latest NordVPN features, we recommend using the most recent NordVPN macOS version. You can [download this NordVPN version](https://nordvpn.com/download/mac/) for macOS 11 (Big Sur) and newer versions. For macOS 10.12 (macOS Sierra), 10.13 (macOS High Sierra), 10.14 (macOS Mojave) download [this version](https://downloads.nordcdn.com/apps/macos/generic/NordVPN-OpenVPN/7.13.0/NordVPN.pkg), and for 10.15 (macOS Catalina) download [this version](https://downloads.nordcdn.com/apps/macos/generic/NordVPN-OpenVPN/8.24.2/NordVPN.pkg), and enjoy the following features:
* [Threat Protection Pro™ or Threat Protection (availability varies by plan) ](https://nordvpn.com/features/threat-protection/)
* [App Kill Switch](https://nordvpn.com/features/vpn-kill-switch/)
* [Connection statistics](https://support.nordvpn.com/hc/en-us/articles/19456281201041-Installing-NordVPN-application-on-macOS)
* [Dark Mode](https://support.nordvpn.com/hc/en-us/articles/19445793501585-Installing-NordVPN-on-macOS)
* [Meshnet feature](https://meshnet.nordvpn.com/getting-started/meshnet-explained)
* [Manual DNS](https://support.nordvpn.com/hc/en-us/articles/19587726859793-What-are-the-addresses-of-my-NordVPN-DNS-servers)",https://support.nordvpn.com/hc/en-us/articles/19920947756433-How-to-get-the-latest-NordVPN-app-version-on-macOS
NordVPN not connecting on Mac,"There are several reasons why you may be having trouble connecting to [NordVPN on your macOS](https://nordvpn.com/download/mac/) device. These include issues with your account status or app configuration. Here's how you can troubleshoot your connection on macOS:
1. First, check for any [issues with your account](https://support.nordvpn.com/hc/en-us/articles/19602526121489-Making-sure-your-account-is-active).
2. Second, try [switching to the TCP](https://support.nordvpn.com/hc/en-us/articles/19921436351505-Switching-protocol-to-OpenVPN-UDP-or-TCP-macOS) connection protocol. Here's how:
1. Click on the gear icon at the bottom left corner of the app.
2. Select the General tab. Under VPN Protocol, select the OpenVPN (TCP) protocol.
3. If that doesn't help, try [changing your DNS servers](https://support.nordvpn.com/hc/en-us/articles/19921173364113-How-to-change-your-DNS-servers-on-macOS) to Cloudflare DNS (1.1.1.1 and 1.0.0.1) (Note: these DNS servers are not provided by NordVPN, so they should be used at your discretion).
4. Additionally, try using [Obfuscated Servers](https://nordvpn.com/features/obfuscated-servers/). You can locate the Obfuscated Servers under the Specialty Servers section after switching to the TCP protocol.
5. In case of a Keychain pop-up, type in your system password to connect.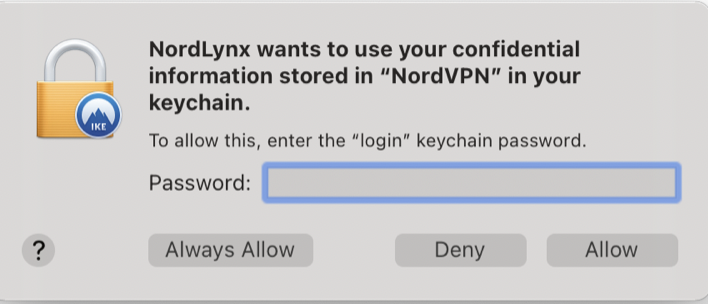If it does not disappear after clicking the ""Allow"" or if the ""Always allow"" button is not even clickable, please follow this guide to unlock the keychain.",https://support.nordvpn.com/hc/en-us/articles/19920758451345-NordVPN-not-connecting-on-Mac
How to connect to your dedicated IP on macOS,"A NordVPN dedicated IP is a unique IP address assigned solely to a specific server, ensuring it's not shared with any other device or network. With a NordVPN dedicated IP, you get improved connection speeds, reduced CAPTCHA requests, and enhanced security through exclusive accessibility.In this article, you will learn how to locate and connect to your [dedicated IP](https://nordvpn.com/features/dedicated-ip/) on macOS.
In order for you to be able to connect, first double-check if you have done the following:
1. Purchased a dedicated IP;
2. Set up the dedicated IP in your Nord Account.
## Connecting to your dedicated IP on macOS
If you have purchased a dedicated IP from NordVPN, and set it up in your Nord Account, you can proceed with connecting to it on your macOS device by following these steps:
1. Launch the NordVPN application.
2. Scroll down to specialty servers: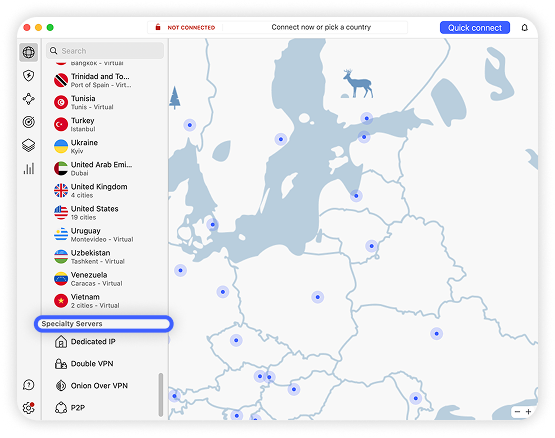
3. Hover over the dedicated IP, and click on the three-dot menu: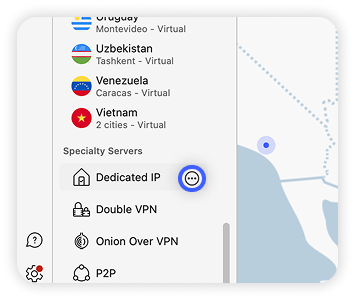
4. Click your dedicated IP server.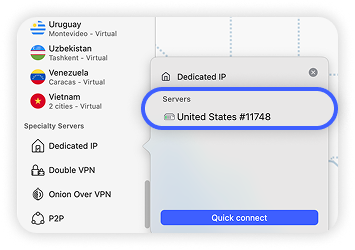
You may also use the search bar located in the top-left corner of the application window.
1. Type in your dedicated IP address: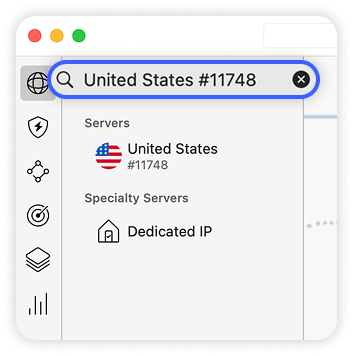
2. Click on your dedicated IP: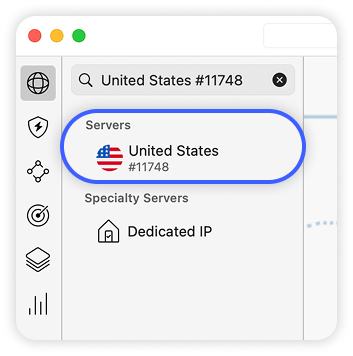
After completing the steps, you will be successfully connected to your dedicated IP. If you would like to check your connection, visit [NordVPN's DNS leak checker.](https://nordvpn.com/dns-leak-test/)
Please be aware that your email will be linked to that dedicated IP address.",https://support.nordvpn.com/hc/en-us/articles/19678530026641-How-to-connect-to-your-dedicated-IP-on-macOS
IKEv2/IPSec protocol is no longer supported on iOS and macOS,"We will begin dropping support for the IKEv2/IPSec connection protocol on our macOS and iOS applications from June 15, 2023.
Due to the way macOS and iOS work, connections based on the IKEv2/IPSec protocol are prone to data leakage outside the VPN tunnel under certain conditions. In addition, IKEv2/IPSec lacks development flexibility compared to other widely used protocols. Our customer security and privacy are our top priority, so considering these factors we’ve decided to discontinue support for the aforementioned protocol on our macOS and iOS applications.
Discontinuation of IKEv2/IPSec will take place starting from macOS 8.5.0 application version. Discontinuation on iOS will take place starting from the 8.10.1 version.
The IKEv2/IPSec protocol will not be accessible through future builds of macOS and iOS applications. The IKEv2/IPSec protocol remains available as an option for manual VPN connection setups.",https://support.nordvpn.com/hc/en-us/articles/20226405871761-IKEv2-IPSec-protocol-is-no-longer-supported-on-iOS-and-macOS
What is Keychain?,"[macOS Keychain](https://nordvpn.com/blog/what-is-keychain-on-mac-and-how-to-use-it/) is a built-in password management app. It stores your passwords, account information, VPN configurations, and authentication credentials so you have fewer things to remember and manage. When the [NordVPN app](https://nordvpn.com/download/) attempts to access these credentials or modify network settings, macOS may prompt you for your Keychain password to ensure security for the following reasons:
* System Security Measures – macOS protects sensitive data, such as VPN credentials and certificates, by storing them in the Keychain. When an app requests access, macOS requires user confirmation to prevent unauthorized access.
* First-Time Connection or After Updates – If it's your first time connecting or the app has been updated, macOS may request Keychain access again as a security check.
* Certificate Authentication – If your VPN uses certificates for authentication, macOS may prompt you to allow access to the stored certificate in your Keychain.
* Keychain Permissions Not Granted – If you previously denied Keychain access or have changed security settings, macOS will ask for permission again.
The Keychain pop-up may vary when using the NordVPN app. If it is blocked, you can enter your Mac user password and select Always Allow. When the pop-up appears again, you can do this up to five times. If, after entering the password, the Nordlynx (Nordlynxtelio) keychain pop-up appears, try to [switch to the Open VPN (TCP) or Open VPN (UDP) connection protocol](https://support.nordvpn.com/hc/en-us/articles/19921436351505-Switching-protocol-to-OpenVPN-UDP-or-TCP-macOS).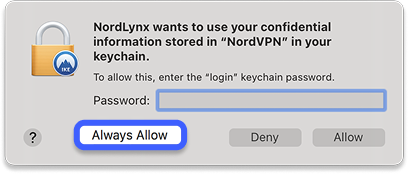If the Always Allow option does not help and the pop-up does not disappear, try the following:
1. Open Keychain Access. (Open macOS Launchpad and type in Keychain Access in a search field or in Finder > Applications > Utilities).
2. Select the login entry (upper left corner) in the Keychain window and right-click on it.
3. Click Lock keychain Login.
4. Then try to unlock it.
5. You may need to enter your Mac login password after that.
6. Try to connect to our servers once again.
If you are unable to make any changes in the suggested way, follow the following steps:
1. Open the Terminal (Finder > Applications -> Utilities -> Terminal or cmd+space).
2. Run this single-line command to lock the keychain:
```
security lock-keychain
```
3. Run this single-line command to unlock the keychain:
```
security unlock-keychain
```
You will be required to enter your Mac user password. Please note that its input will be hidden. After you enter the password, hit the Return button.",https://support.nordvpn.com/hc/en-us/articles/19624437630865-What-is-Keychain
How to disable IPv6 on Android (LTE),"This tutorial shows how you can disable IPv6 on Android when using mobile network.
Please bear in mind, the steps may slightly vary depending on the version of Android you're running.
1. Open the Settings menu of your Android phone.
2. Head into SIM cards & mobile networks section.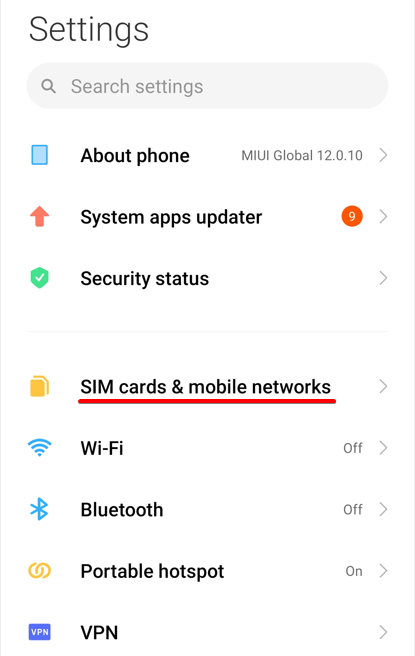
3. Click on one of the two SIM cards that you're currently using. This will open the SIM card settings menu.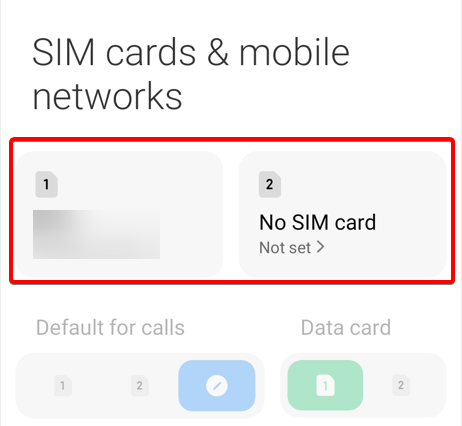
4. Find Access Point Names and click on it.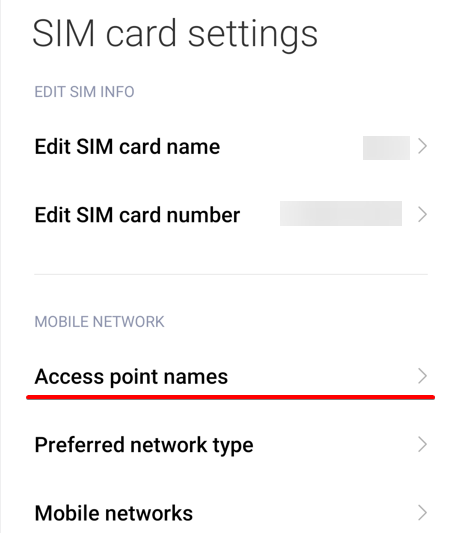
5. Next to the network you're using, press on the right-pointing arrow.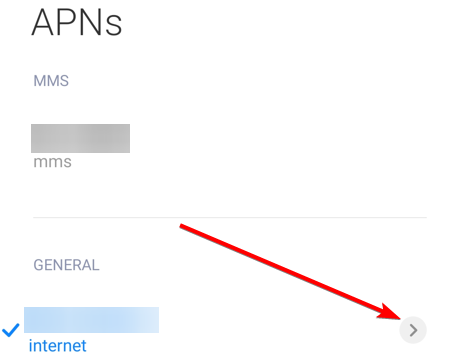
6. Scroll down to APN protocol and APN roaming protocol, and change both of their settings to IPv4.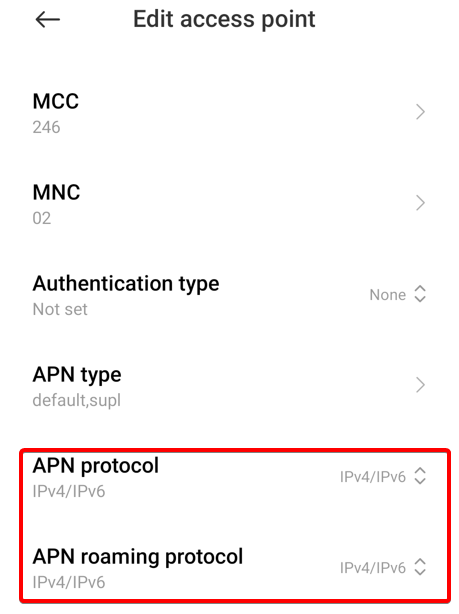
That's it. You've successfully turned off IPv6.",https://support.nordvpn.com/hc/en-us/articles/20323519060625-How-to-disable-IPv6-on-Android-LTE
Change your DNS servers on Android,"You can manually configure the DNS servers in your Android settings. Here’s how:
1. Open Settings on the device.
2. Select Wi-Fi.
3. Long press your Current network, then select Modify network.
4. Change IP settings to Static.
5. In the DNS 1 and DNS 2 fields that appeared, enter the following:DNS 1: 103.86.96.100DNS 2: 103.86.99.100
6. Press Save, disconnect from the network, and reconnect for the changes to take effect.",https://support.nordvpn.com/hc/en-us/articles/20041353789585-Change-your-DNS-servers-on-Android
Troubleshooting connectivity on Android,"There are several reasons why you may be having trouble connecting to [NordVPN on your Android](https://nordvpn.com/download/android/) device. These include issues with your account status, app configuration, or network settings. To troubleshoot, go through the following steps one by one.
* [Make sure your NordVPN account is active](https://support.nordvpn.com/hc/en-us/articles/19602526121489-Making-sure-your-account-is-active).
* [Check if your NordVPN app is up to date](https://nordvpn.com/blog/nordvpn-ios-release-notes/).
* To do so, open the app, tap on Profile in the bottom right corner, select Settings at the top right of the screen, and scroll down to the bottom of the screen.
* If you are using an older version, [reinstall the NordVPN app on your Android device.](https://support.nordvpn.com/hc/en-us/articles/29748627824273-How-to-re-install-NordVPN-on-Android)
* Stop any ongoing VPN connections, kill the NordVPN app, clear the app cache, restart it, and try to connect.
* Change mobile network – instead of Wi-Fi, try mobile data and vice versa.
* If you're using Quick connect, try connecting to a specific country server.
* If connecting to a specific server doesn't work, try other servers as well.
* Change the VPN connection protocol.
* Try switching to the [NordWhisper](https://support.nordvpn.com/hc/en-us/articles/31528242519953-How-to-use-NordWhisper-on-NordVPN) and [OpenVPN UDP/TCP](https://support.nordvpn.com/hc/en-us/articles/20465699170321-Switching-protocol-to-OpenVPN-UDP-or-TCP-iOS) protocols and connecting again.
* Try connecting to [Obfuscated servers](https://nordvpn.com/features/obfuscated-servers/) while using the OpenVPN UDP/TCP protocol.
* [Reinstall the NordVPN app on Android](https://support.nordvpn.com/hc/en-us/articles/29748627824273-How-to-re-install-NordVPN-on-Android).
* [Check your Android device configuration](https://support.nordvpn.com/hc/en-us/articles/19925722673297-Checking-your-device-configuration).
After each step, check if the issue remains. In the case that the problems are still there, be sure to reach out to our support team for a quick solution by pressing on either the email or chat button bellow.",https://support.nordvpn.com/hc/en-us/articles/20041281541777-Troubleshooting-connectivity-on-Android
Switching protocol to OpenVPN UDP or TCP - Android,"If you want to switch protocol to OpenVPN UDP or OpenVPN TCP on Android, follow these steps:
1. Open application Profile & Settings (bottom right corner).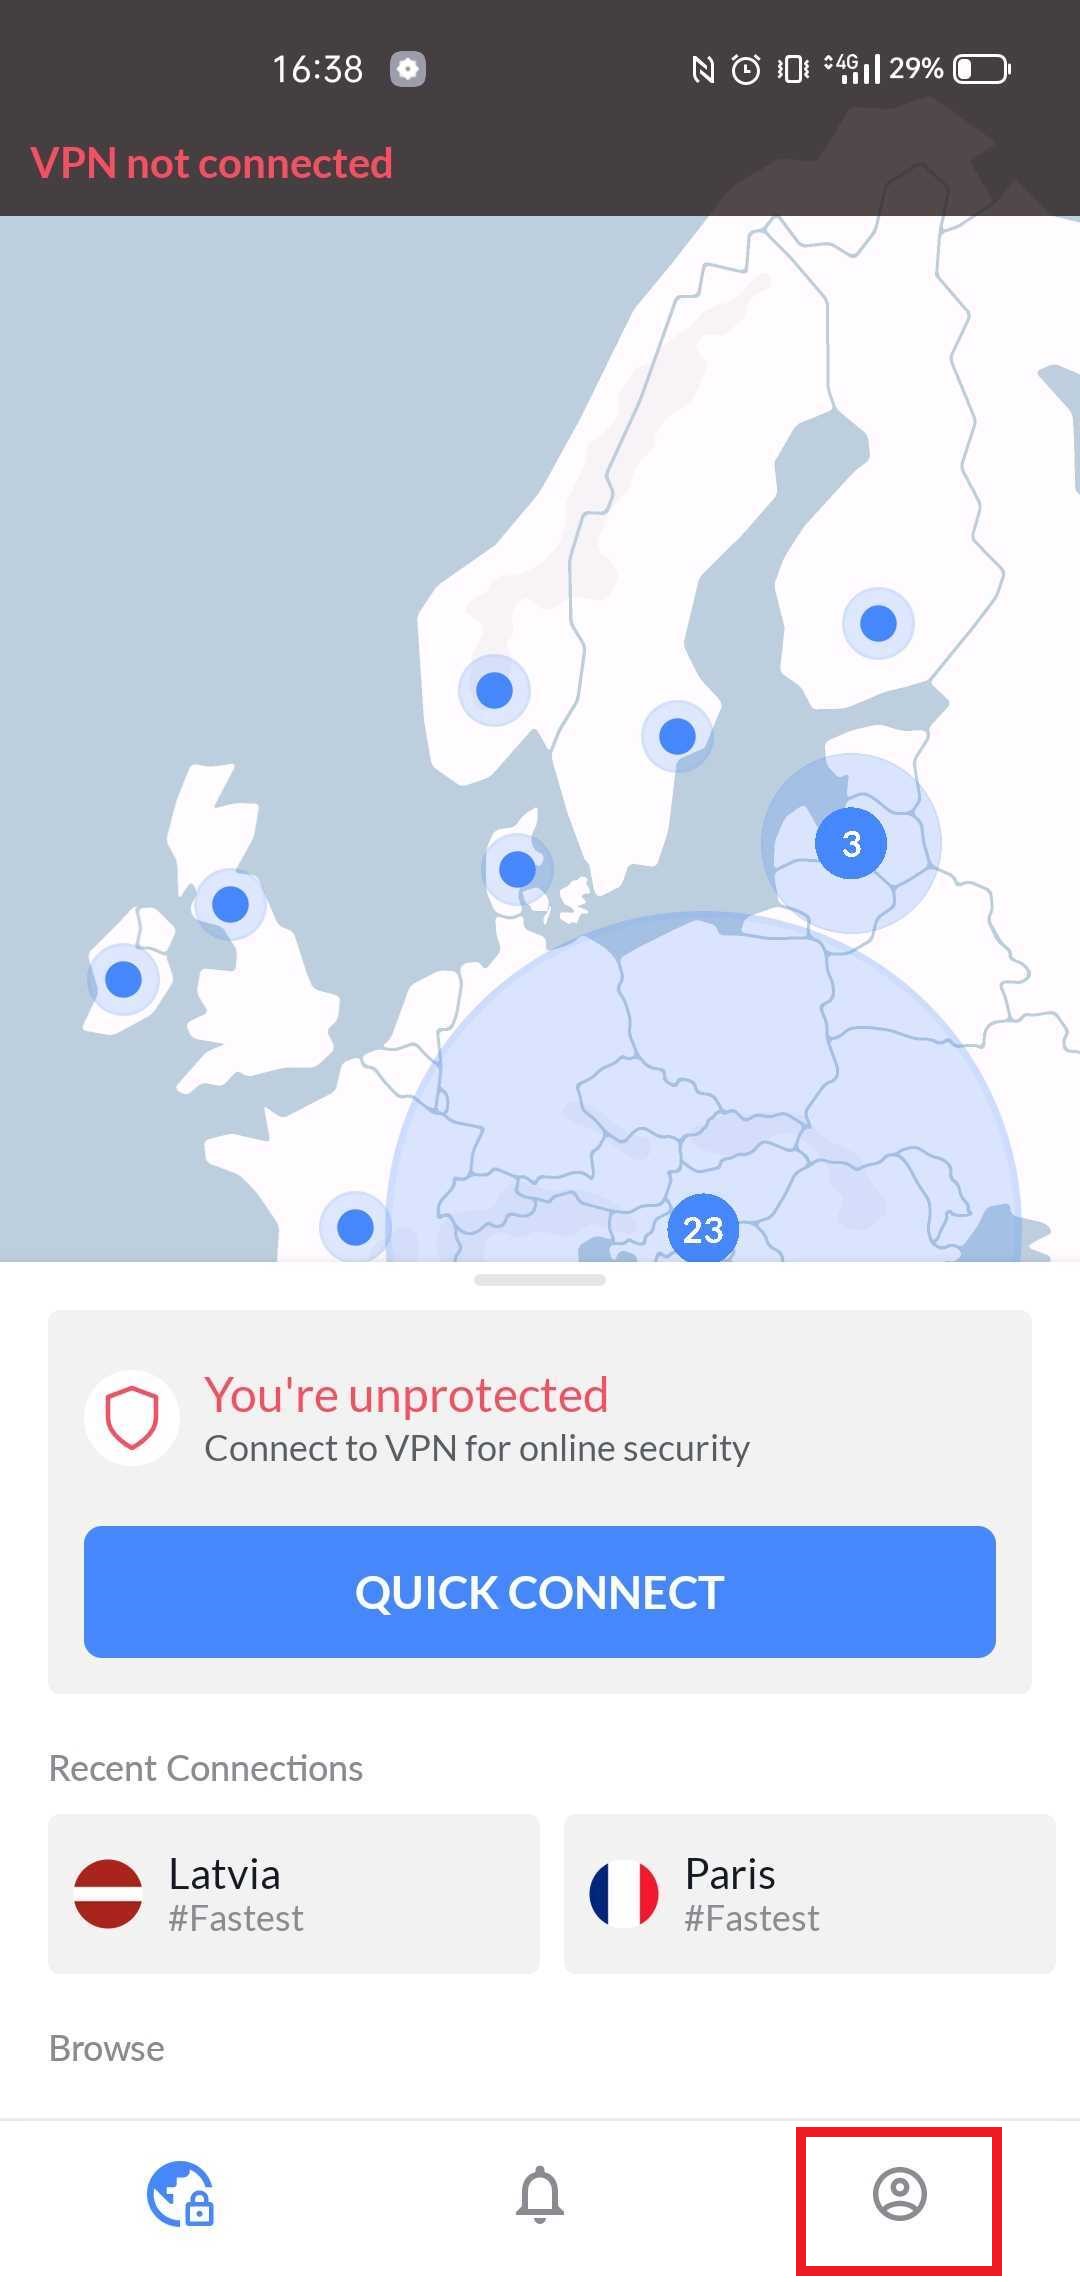
2. Tap on the gear icon in the top right corner.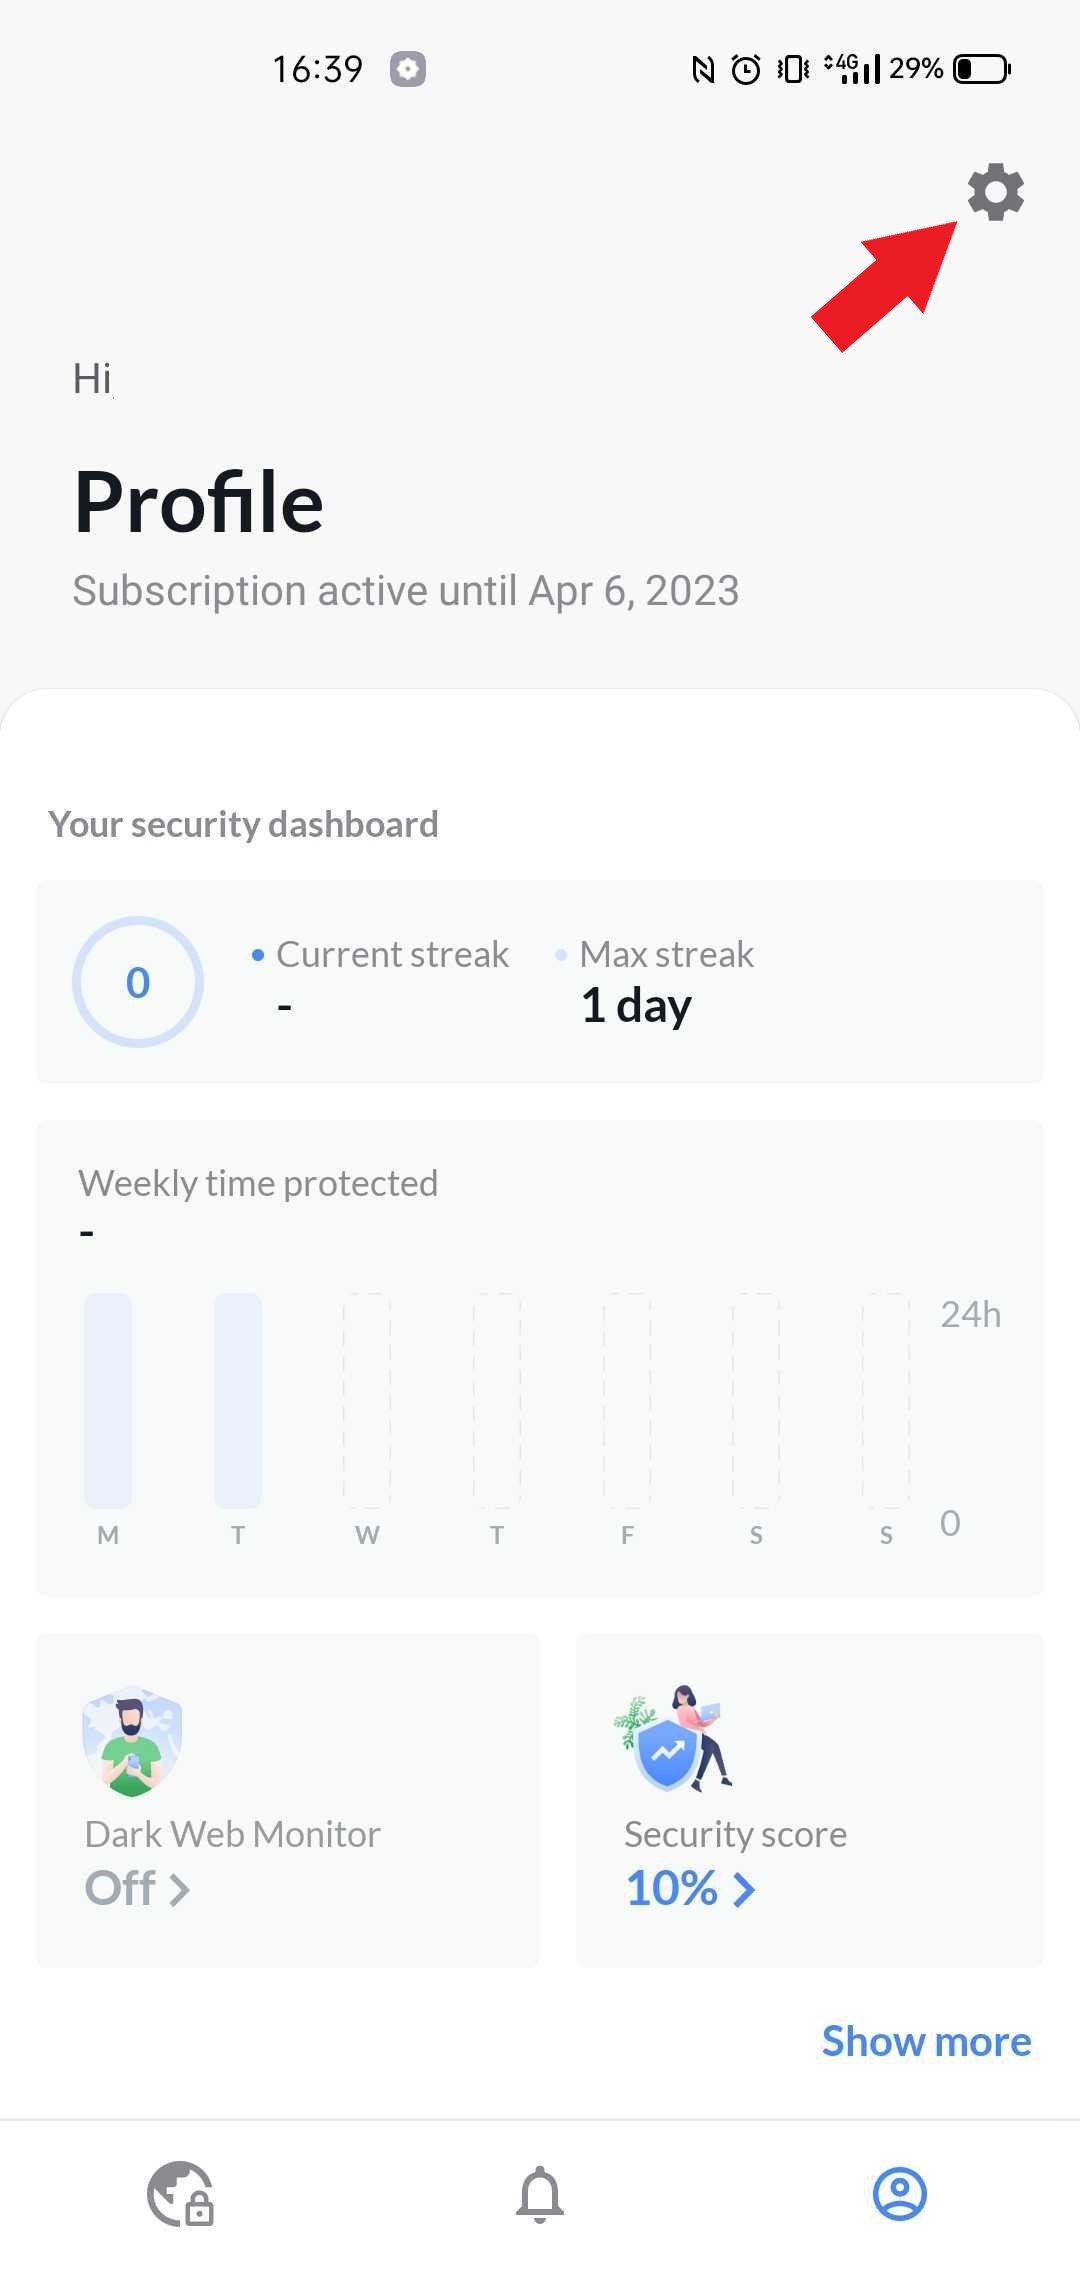
3. Select Protocol.
4. Choose OpenVPN (TCP) or OpenVPN(UDP).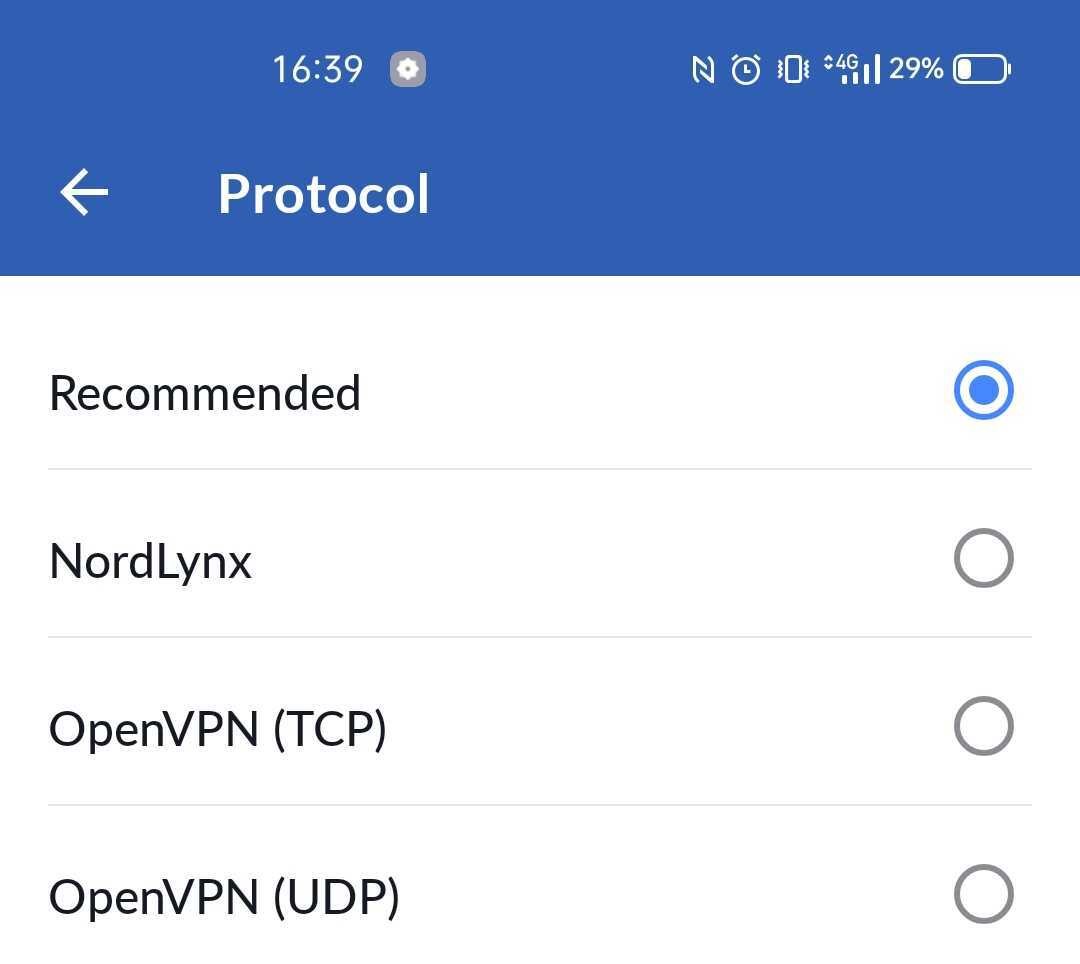",https://support.nordvpn.com/hc/en-us/articles/19973901502609-Switching-protocol-to-OpenVPN-UDP-or-TCP-Android
Manual OpenVPN setup on Android,"The OpenVPN Connect application can be used as an alternative way to connect to NordVPN servers on your [Android device](https://nordvpn.com/download/android/). Since this manual connection method is more complicated to set up, it is recommended for advanced Android users.
1. First, download the configuration files for a server via your NordAccount dashboard.
Follow the steps below to find the manual connection configuration files:
1. Log into your [Nord Account](https://my.nordaccount.com/), and click NordVPN.
2. Scroll down to Advanced Settings and click Set up NordVPN manually.
3. Select the OpenVPN configuration files tab.
4. Find the server you wish to connect to by using the Search bar or by scrolling down and download it by clicking Download UDP or Download TCP.
5. When connecting to OpenVPN & IKEv2 manually, you're going to need to use the Username and Password from the Service credential tab.
1. To install OpenVPN on your phone or tablet, first go to the Google Play Store.
2. In the search bar at the top of the screen, type “OpenVPN Connect” (without the quotation marks). Once you find the app, click “Install” to download it.
3. To begin using OpenVPN on Android, launch OpenVPN Connect from your home screen or app menu. In the following window, select “File.”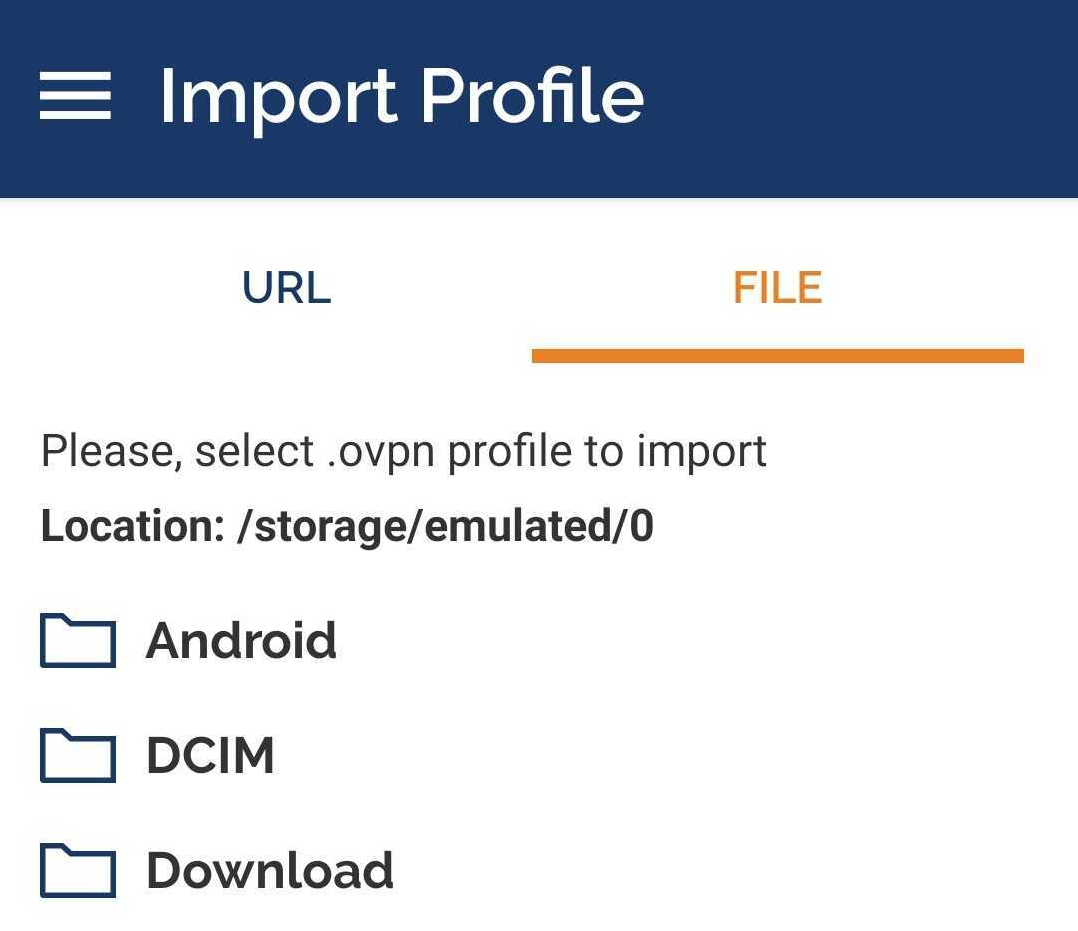
4. A window will pop up, asking you if you allow the app to access certain data on your device. Click ""Allow."" 
5. Navigate to the folder where you have downloaded the OpenVPN configuration file. It should be in the “Downloads” folder by default. Choose the files you want to import and press ""Import"" at the bottom.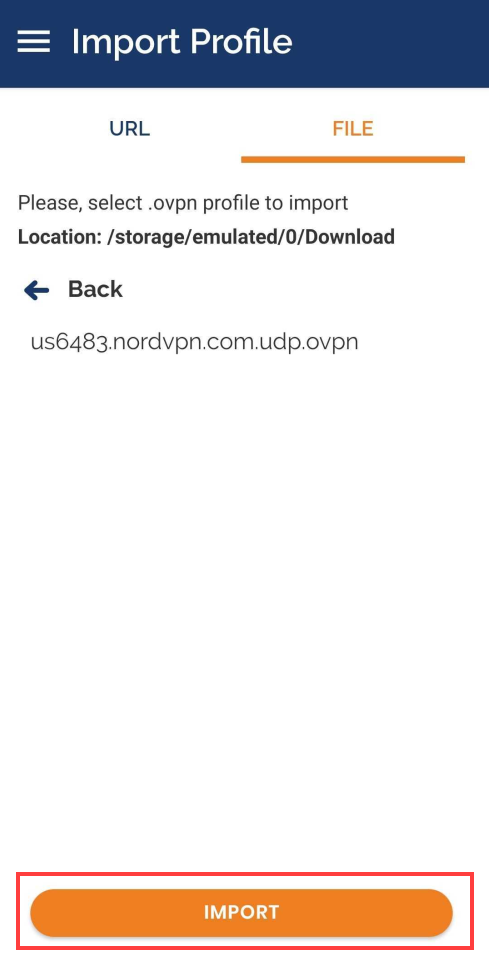
6. In the following window, type any title for the connection and enter your NordVPN service credentials. In the upper-right corner, press ""Add.""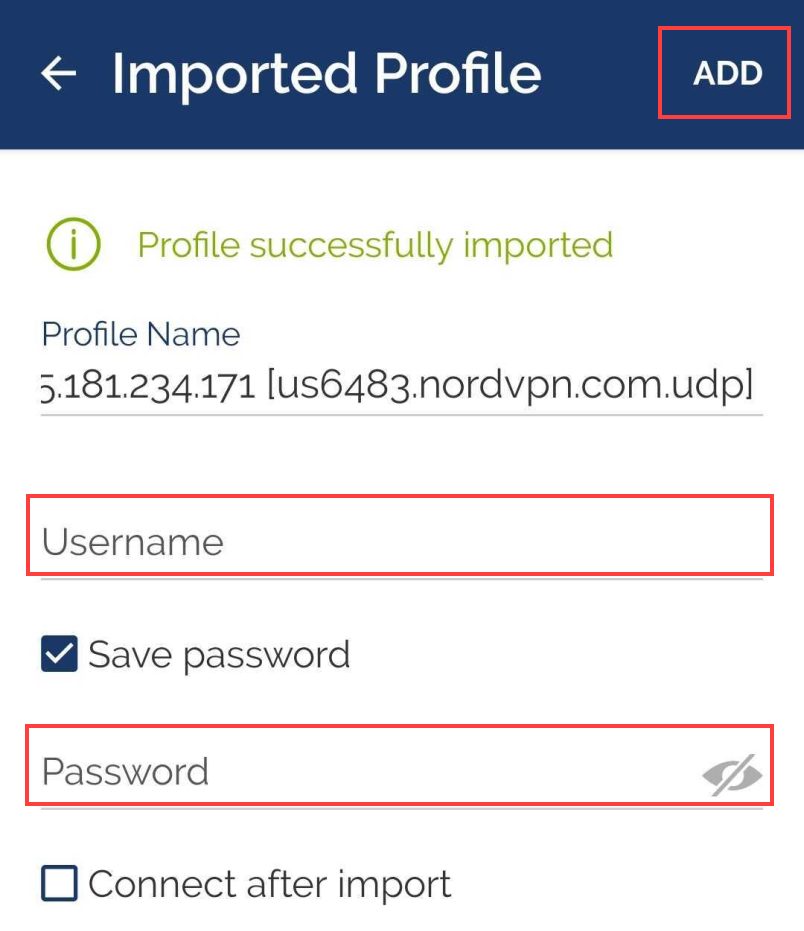You can find your NordVPN service credentials (username and password) through the [Nord Account dashboard](https://my.nordaccount.com/dashboard/nordvpn/):
Follow the steps below to find the service credentials for manual connection setup:
1. Log into your [Nord Account](https://my.nordaccount.com/), click NordVPN, and, under Manual setup, click on Service credentials. Here you'll find the Username and Password needed to connect manually.
1. Once you have successfully configured the connection, you can initiate it by tapping the toggle switch next to the OpenVPN profile.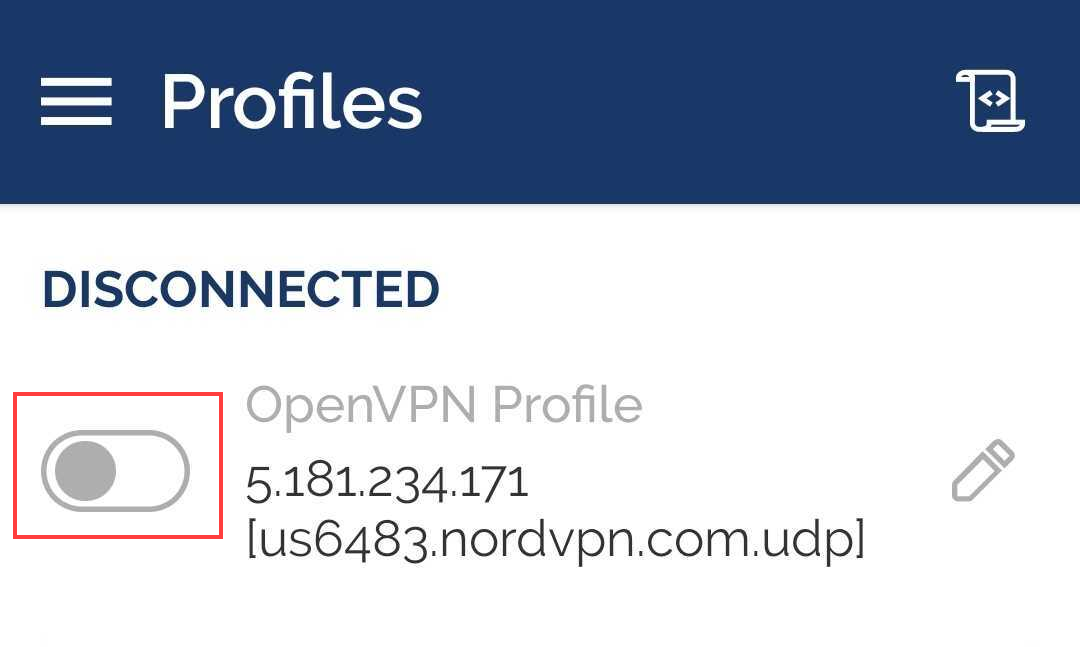
2. The application will ask you for the permissions necessary for the VPN connection. Click ""Ok.""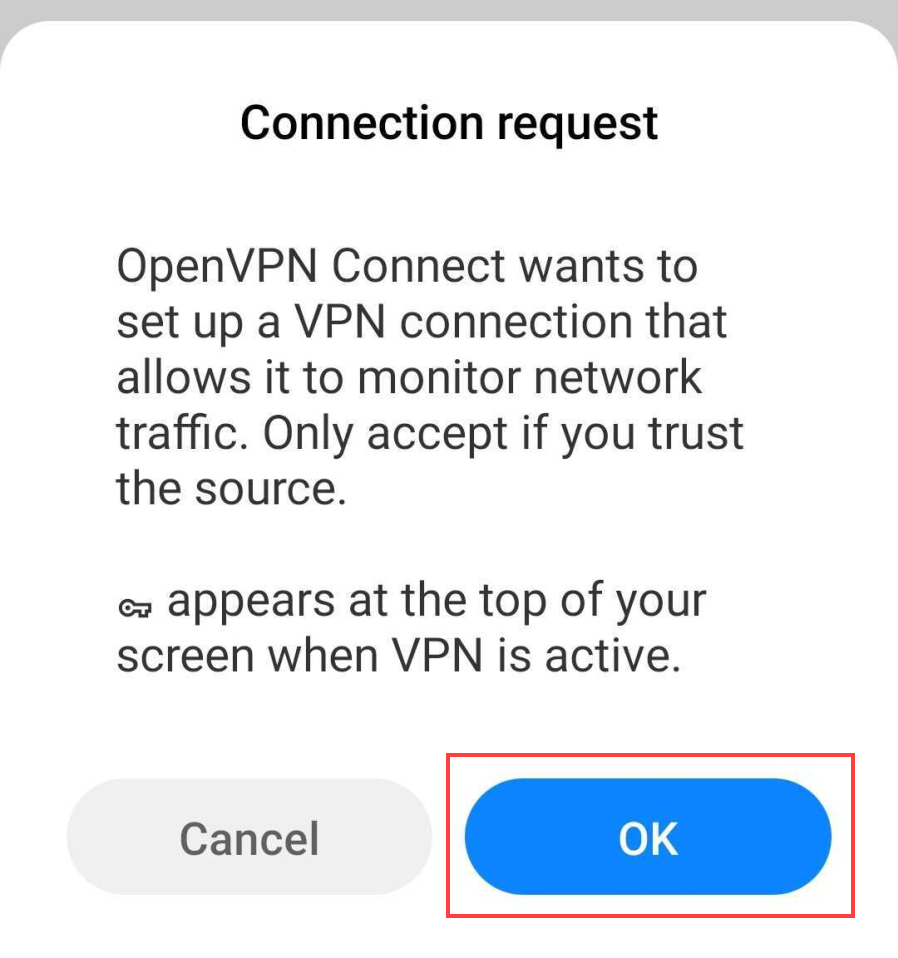
3. In the following prompt, tap ""Continue."" 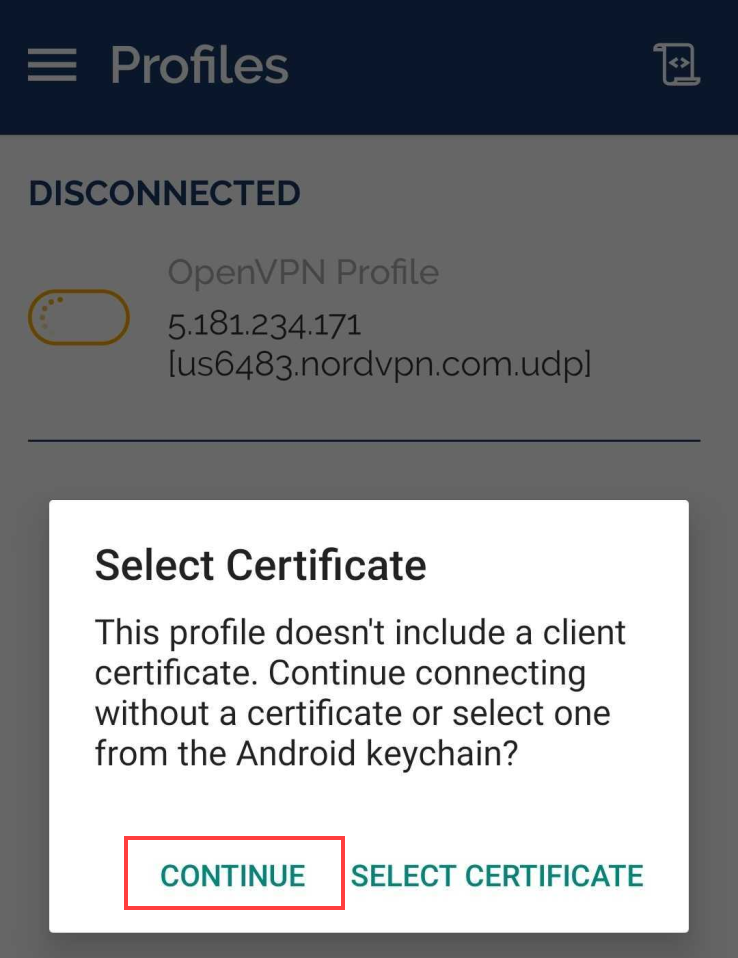
4. If the connection is successful, you will see a window similar to the one below displaying your connection stats, such as your current data throughput and connection duration.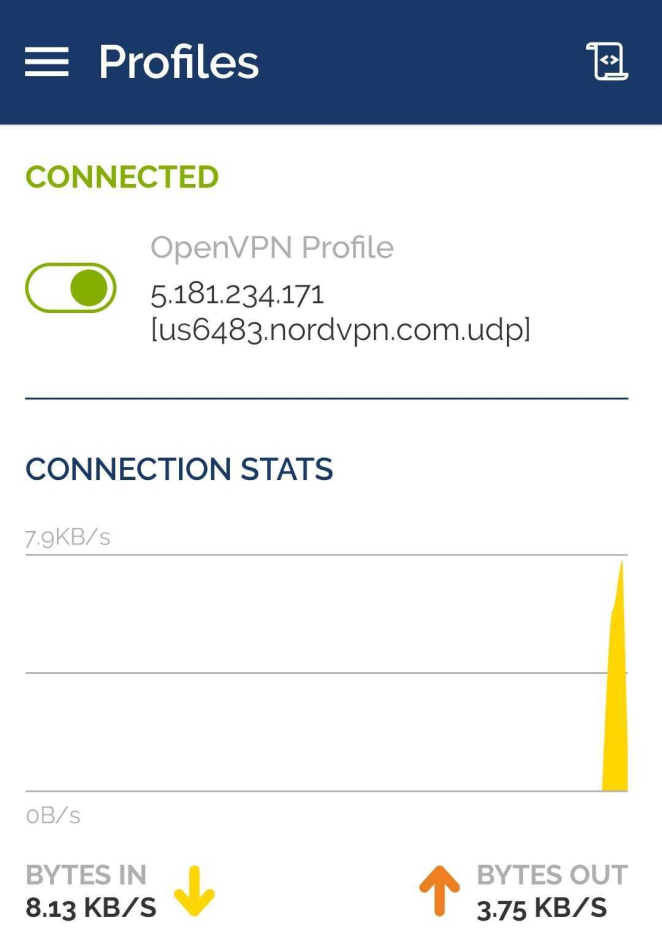
That’s it — enjoy privacy and security online.",https://support.nordvpn.com/hc/en-us/articles/19926132780689-Manual-OpenVPN-setup-on-Android
Checking your device configuration,"1. Add exceptions for the NordVPN app to your antivirus, cleaner, and power saver applications. Since NordVPN runs in the background when you are connected to VPN, these applications may interfere with its stability or might not let you connect at all.
2. Make sure you do not have any [firewall](https://nordvpn.com/blog/what-is-nat-firewall/) apps running. Firewall applications on Android devices use the same VPN interface as the NordVPN app, so it might not be able to connect while a firewall application is active on the same device.3. Try changing the [DNS](https://support.nordvpn.com/hc/en-us/articles/19442825306257-What-is-SmartDNS) servers:
* Open the device Settings.
* Go to Connections and select Wi-Fi.
* Click the cog icon next to your current network and select Advanced.
* Change IP settings to Static.
* In the DNS 1 and DNS 2 fields that appeared, enter the following IP addresses: 103.86.96.100 and 103.86.99.100.
* Press Save, disconnect from the network, and reconnect for changes to take effect.
4. Try resetting your network settings:
* Open the device Settings.
* Go to General management and select Reset.
* Tap Reset network settings.
* Press Reset settings.
* If you use a lock on your device, unlock it to proceed.
* Tap Reset settings again to reset all network settings.",https://support.nordvpn.com/hc/en-us/articles/19925722673297-Checking-your-device-configuration
How to connect to your dedicated IP on Android,"A NordVPN dedicated IP, is an IP address that is assigned to a specific server, ensuring it's not shared with any other device or network. With the NordVPN dedicated IP, you get improved connection speeds, and enhanced security through exclusive accessibility.
In this article, we will cover the process of connecting to your [dedicated IP](https://nordvpn.com/features/dedicated-ip/) on your Android device.
In order for you to be able to connect, first double-check if you have done the following:
1. Purchased a dedicated IP;
2. Set up the dedicated IP in your Nord Account.
## Connecting to your NordVPN dedicated IP on Android
If you've purchased the dedicated IP and set it up in Nord Account, you can connect to it on Android by following these steps:
1. Open your NordVPN app.
2. Scroll down to dedicated IP and tap it: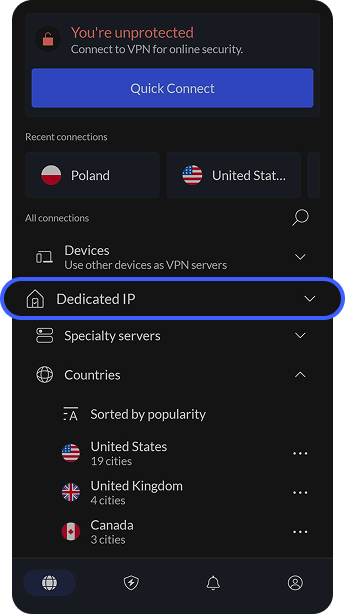
3. Select your dedicated IP: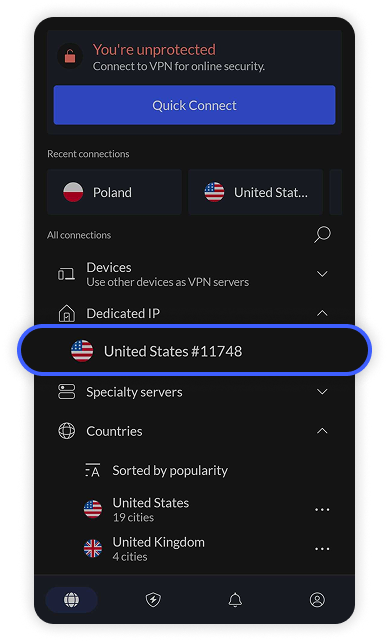
After following the steps, you will successfully be connected to your NordVPN dedicated IP. If you wish to check your connection, visit [NordVPN's DNS leak test page](https://nordvpn.com/dns-leak-test/).
Please be aware that your email will be linked to that dedicated IP address.",https://support.nordvpn.com/hc/en-us/articles/19682489581585-How-to-connect-to-your-dedicated-IP-on-Android
Troubleshooting connectivity on iOS,"There are several reasons why you may be having trouble connecting to [NordVPN on your iOS](https://nordvpn.com/download/ios/) device. These include issues with your account status, network settings, or app configuration. Here are some steps you can follow to troubleshoot.
* [Make sure your NordVPN account is active](https://support.nordvpn.com/hc/en-us/articles/19602526121489-Making-sure-your-account-is-active).
* [Check if your NordVPN app is up to date](https://nordvpn.com/blog/nordvpn-ios-release-notes/).
* To do so, open the app, tap on Profile in the bottom right corner, select Settings at the top right of the screen, and scroll down to the bottom of the screen.
* If you are using an older version, uninstall the NordVPN app and download the latest NordVPN version for iOS.
* Stop any ongoing VPN connections, kill the NordVPN app, restart it, and try to connect.
* Change mobile network – instead of Wi-Fi, try mobile data and vice versa.
* If you're using Quick connect, try connecting to a specific country server.
* If connecting to a specific server doesn't work, try other servers as well.
* Change the VPN connection protocol.
* Try switching to the [NordWhisper](https://support.nordvpn.com/hc/en-us/articles/31528242519953-How-to-use-NordWhisper-on-NordVPN) and [OpenVPN UDP/TCP](https://support.nordvpn.com/hc/en-us/articles/20465699170321-Switching-protocol-to-OpenVPN-UDP-or-TCP-iOS) protocols and connecting again.
* Try connecting to [Obfuscated servers](https://nordvpn.com/features/obfuscated-servers/) while using the OpenVPN UDP/TCP protocol.
* If that does not help, reset the application:
1. Tap on the Profile in the bottom right corner.
2. Select Settings (gear icon) at the top right of the screen.
3. Tap Reset VPN profile.
* Reinstall the NordVPN app. To do so, tap and hold the NordVPN icon and tap on the X icon in the upper-left corner. After the app has been uninstalled, [download and install NordVPN on your iPhone](https://support.nordvpn.com/hc/en-us/articles/19451338152849-Installing-the-NordVPN-app-on-iPhone-or-iPad) again.
* If you're using a Wi-Fi connection, try to [change your DNS servers](https://support.nordvpn.com/hc/en-us/articles/20398776567313-Change-your-DNS-servers-on-iOS).
After each step, check if the issue remains. In the case that the problems are still there, be sure to reach out to our support team for a quick solution by pressing on either the email or chat button bellow.",https://support.nordvpn.com/hc/en-us/articles/20397808850833-Troubleshooting-connectivity-on-iOS
Improve connection speed on iOS with NordVPN app,"If you are experiencing slow internet speed while connected to [NordVPN on iOS](https://nordvpn.com/download/ios/), try one of the following:
1. Make sure to use the latest version of NordVPN app. You can uinstall the app as shown in [this guide](https://support.nordvpn.com/hc/en-us/articles/19481023452561-How-to-uninstall-NordVPN-software) and install the latest version from our website by clicking [here](https://nordvpn.com/download/ios/).
2. Restart your device.
3. Switch to the [NordLynx](https://support.nordvpn.com/hc/en-us/articles/19564565879441-What-is-NordLynx) protocol.
4. If you are using Wi-Fi, switch to a mobile connection and vice versa.
5. Switch to a VPN closer to you geographically.
6. Try a different connection method/protocol on your device. You can find tutorials on various connection methods here: ",https://support.nordvpn.com/hc/en-us/articles/20396465736849-Improve-connection-speed-on-iOS-with-NordVPN-app
Creating an Apple ID to download the NordVPN iOS app,"In some cases, for example, if you are using the Apple ID registered in the country with VPN restrictions, you may not find the NordVPN iOS app on the Apple store.In order to bypass that, you can create a new Apple ID and [download the NordVPN iOS app](https://nordvpn.com/download/ios/).
1. On your iPhone or desktop computer, go to [https://appleid.apple.com/#!&page=signin](https://appleid.apple.com/#!&page=signin).
2. Click Create Your Apple ID. This will launch the Apple ID creation form.
3. Enter your details, choose the United States as your country (or any other country). Select your security questions and answers.
4. Enter the characters shown in the image, then tap Continue.
5. You will now receive a verification via email. Enter the verification code.
6. Next step you may complete both on the iPhone or the browser:Phone: Launch the App Store on your iPhone. Sign out of your current Apple ID and sign in again using your new Apple account.Browser: Sign in to your new Apple ID on [https://appleid.apple.com/#!&page=signin](https://appleid.apple.com/#!&page=signin)
7. Now in the Settings, you’ll have to change the Payment Method.On the iPhone, go to Settings → Apple ID → Payment & Shipping On the website, go to Payment & Shipping → Edit
8. Choose None as the mode of payment, then enter any foreign billing address and phone number (for example any Starbucks or other public location that provides both address and phone number online). Tap Next to continue.
9. You should now be able to download the NordVPN app:[https://apps.apple.com/us/app/vpn-fast-unlimited-nordvpn/id905953485](https://apps.apple.com/us/app/nordvpn-vpn-fast-secure/id905953485)
If you encounter any issues during the process, do not hesitate to contact our support team for assistance!",https://support.nordvpn.com/hc/en-us/articles/20373233073169-Creating-an-Apple-ID-to-download-the-NordVPN-iOS-app
How to connect to NordVPN with IKEv2/IPSec on iOS,"In this guide, we will cover how to set up an IKEv2 manual connection on an [iOS device (iPhone/iPad)](https://nordvpn.com/download/ios/).
Even though the [IKEv2/IPSec protocol is no longer supported on iOS](https://support.nordvpn.com/hc/en-us/articles/20226405871761-IKEv2-IPSec-protocol-is-no-longer-supported-on-iOS-and-macOS) on NordVPN 8.10.1 and newer app versions, this connection method can be used as one of the alternative ways to connect to NordVPN servers if you're unable to install the application.
This setup lacks the additional features of the native NordVPN app and requires more steps to set up.
## Manual connection setup
1. Download the NordVPN IKEv2 certificate to your device. You can do so by opening this link in Safari:
2. The certificate installation dialogue will appear. Tap Install in each step:
3. Once the certificate is installed, tap Done to complete the installation.3.1. On iOS 12.2 and later versions, after you download the certificate, you might see a pop-up saying ""Profile Downloaded - Review the profile in Settings app if you want to install it"".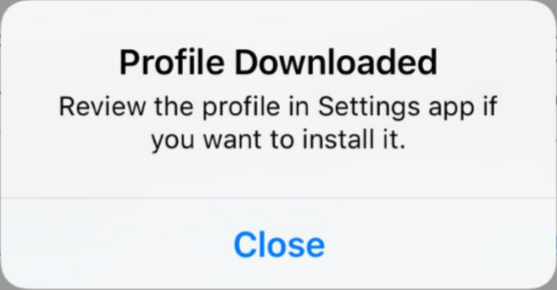3.2. Navigate to your device Settings > Profile Downloaded > NordVPN Root CA > Install > Trust.If you cannot see the Profile Downloaded button, go to Settings > General > Profiles. You should find the downloaded profile there.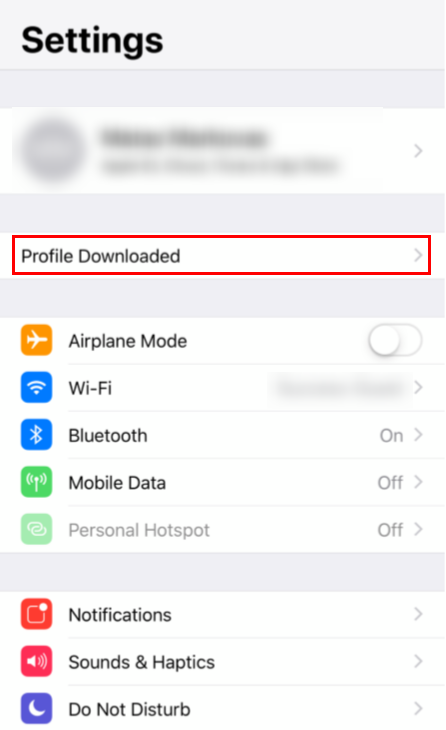
4. Now you have to determine which server to connect to. Go to . The tool will pick a server recommended for you. In our case, the recommended server is US #810 with the hostname us810.nordvpn.com. We will use this server as a reference in all further steps.
Follow the steps below to find the best server for your connection:
1. Log into your [Nord Account](https://my.nordaccount.com/), and click NordVPN.
2. Scroll down to Advanced Settings and click Set up NordVPN manually.
3. Select the Server recommendation tab. According to your location, the best server will be recommended.
4. By pressing Advanced filters you can further customize the recommended servers by selecting the Server type and the Security protocol.
5. Under the server IP, next to Available protocols, select IKEv2/IPSec.
6. In the window that pops up, copy the server hostname and use it in your IKEv2 manual connection setup.
7. When connecting to IKEv2 manually, you're going to need to use the Username and Password from the Service credential tab.
1. Go to Settings > General > VPN.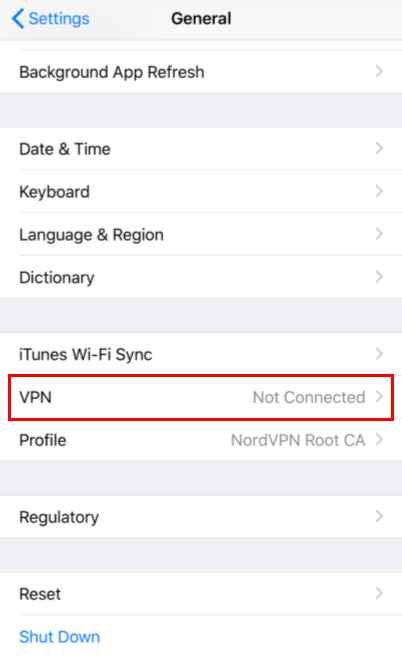Note: If you are using a newer version of iOS (15+) find the VPN setting section by the following pathway:General > VPN & Device Management > VPN
2. Tap on Add VPN Configuration...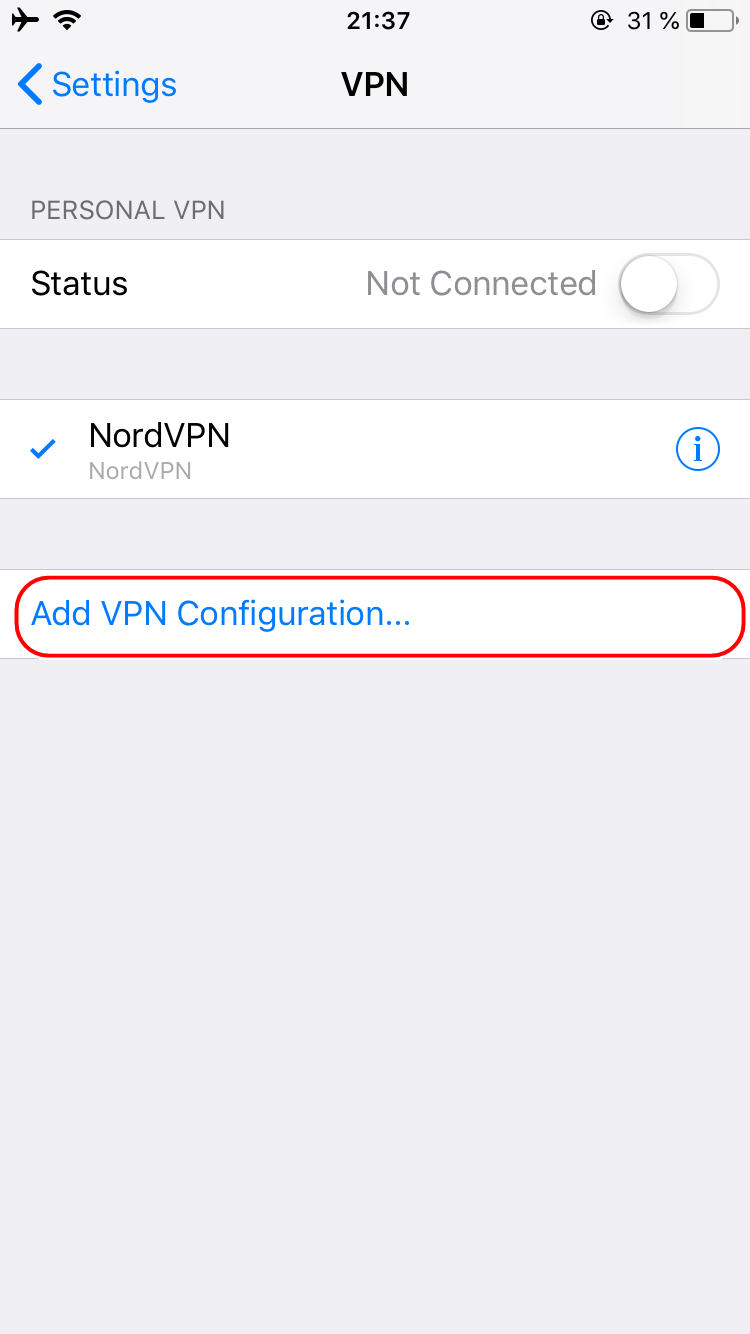
3. Fill the boxes as follows:Type: IKEv2Description: Any preferred name for the VPN connectionServer: The hostname of the server (see step 4)Remote ID: The same hostname as in the Server fieldLocal ID: Leave emptyUser Authentication: UsernameUsername: Your NordVPN service usernamePassword: Your NordVPN service passwordYou can find your NordVPN service credentials (username and password) through the [Nord Account dashboard](https://my.nordaccount.com/dashboard/nordvpn/):
Follow the steps below to find the service credentials for manual connection setup:
1. Log into your [Nord Account](https://my.nordaccount.com/), click NordVPN, and, under Manual setup, click on Service credentials. Here you'll find the Username and Password needed to connect manually.
Proxy: OffTap Done.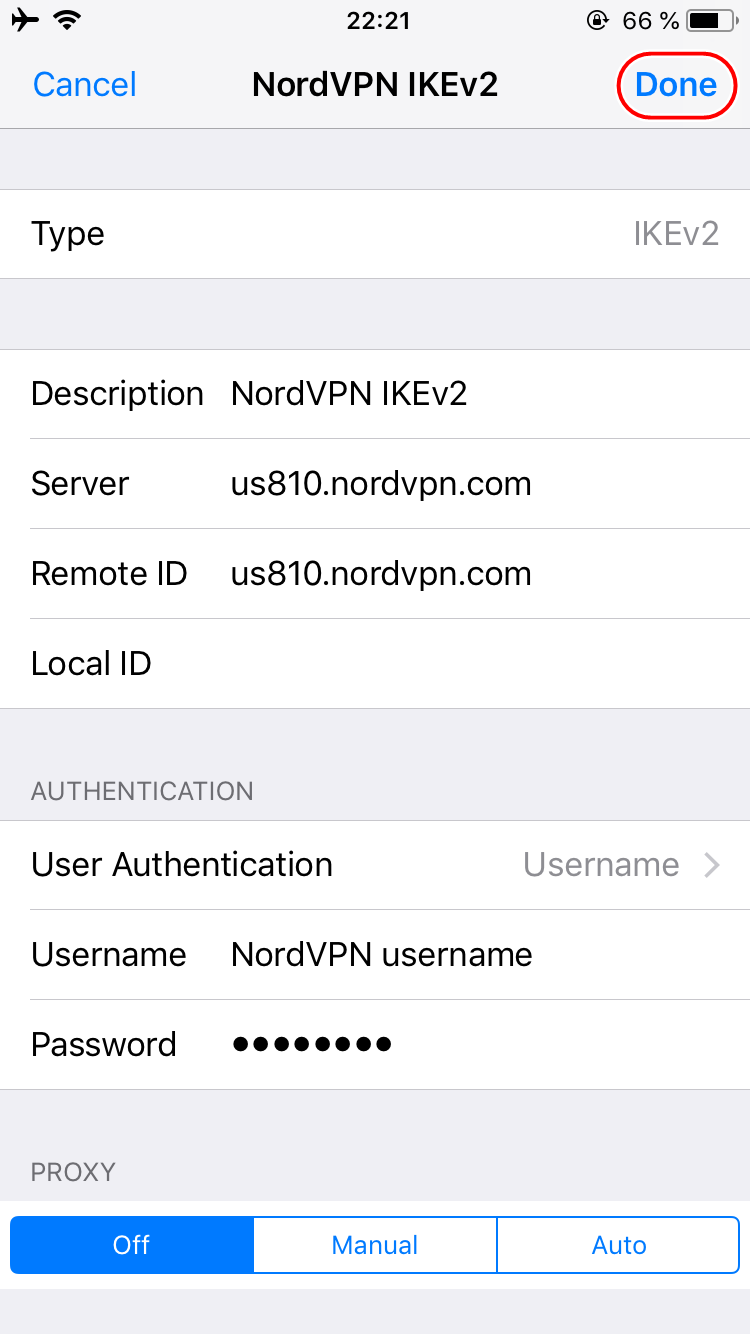
1. To enable the VPN, go back to the device Settings and click on the toggle switch next to VPN.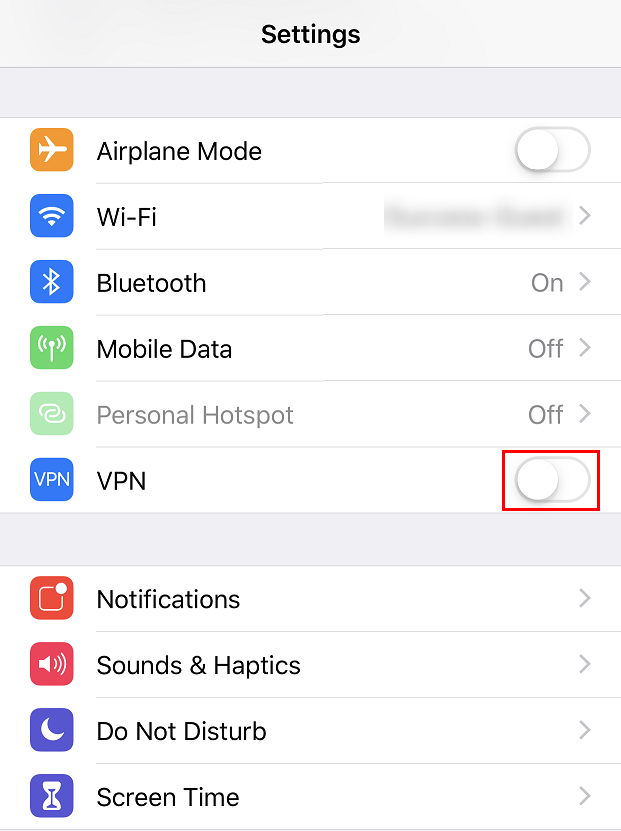",https://support.nordvpn.com/hc/en-us/articles/20371657885329-How-to-connect-to-NordVPN-with-IKEv2-IPSec-on-iOS
How to create and delete NordVPN Siri shortcuts on iOS,"Here’s how to [create Siri shortcuts]( which let you connect to NordVPN, and [how to delete them](
## Setting up Siri shortcuts
You can create Siri shortcuts in the NordVPN app in a few steps.
1. Open the NordVPN app on your phone and click on the profile icon in the lower-right corner.
2. Click on the gear icon in the upper-right corner. This will lead you to the settings menu.
3. Scroll down until you see the Siri shortcuts tab. Tap on it.
4. You’ll see two options: Quick connect and Disconnect. Choose the first option.
5. Set up the shortcut by typing the sentence you want Siri to recognize or by recording it with your own voice.In this example, you can see the sentence typed in.
6. Once you enter or record the sentence, it will be shown in bright black letters.Note: you can still edit the sentence by tapping it and rewriting or recording your voice again by clicking on Change Voice Phrase.Click Done. If your keyboard is visible, the button will be in the bottom-right corner (Example 1). If it is not, you’ll find it at the bottom center just above the Remove Shortcut phrase (Example 2).Example 1:Example 2:
## Deleting Siri shortcuts
Here’s how to delete Siri shortcuts.
1. Locate the Shortcuts app on your iOS device. You can find it by using the search bar in the App Library. Once you see the Shortcuts app — tap to open it.
2. In the Shortcuts app, you can locate all of the shortcuts you have created (please note that some shortcuts are created by default), edit, and delete them.Hold your finger on the shortcut you wish to delete until you see a table pop up underneath it:You’ll see various ways to interact with the shortcut. To delete it, click on the last option: Delete.
3. You’ll have to confirm the deletion — so tap Delete Shortcut once again.",https://support.nordvpn.com/hc/en-us/articles/20278320217873-How-to-create-and-delete-NordVPN-Siri-shortcuts-on-iOS
Installing NordVPN (App Store) version on macOS,"From October 17th, 2024, older applications will have a few function limitations. The issues can affect macOS applications version 8.27.2 and below. They can include not receiving notifications in the app and reduced Dark Web Monitoring and Meshnet functionality.To resolve the issue, please update your application to the latest version.
This article will help you set up the [NordVPN application on your Mac](https://nordvpn.com/download/mac/) and connect to a VPN server. Note: The NordVPN (App Store) app is compatible with macOS 11 and later versions.
## Table of contents:
* [Downloading and installing](
* [Setting up the application](
* [Connecting to servers](
* [NordVPN features menu](
* [NordVPN preference settings](
## Downloading and installing
1. Go to the [NordVPN app page in the App Store](https://apps.apple.com/us/app/nordvpn-vpn-fast-secure/id905953485#?platform=mac) or click download the App Store version of NordVPN on our downloads page:
2. Agree to Open App Store.
3. When the App Store launches, click on the blue Get button and choose to Install the app.
4. Once the download is finished, press the Open button.
## Setting up and using the application
1. Open your Launchpad and click on the NordVPN icon.
2. You can Log In or Sign Up in the top-right corner of the screen.
3. You will be redirected to your Nord Account. To log in, enter your registered email address and password. You can also sign in using your Google account or Apple ID or by entering a code. If you are a new user, you will need to create a [Nord Account](https://my.nordaccount.com/) by entering your email address and other required information.
4. After completing the above steps, you will be prompted to open the NordVPN app. Agree always to allow Nord Account and grant access to the app.
5. After a successful login, you will see the main NordVPN application window.Here, you can find NordVPN servers and navigate in the map itself, search bar, or specialty section.
## Connecting to servers
1. The Quick Connect button in the top-right corner will automatically connect you to a server.
2. To connect to a specific server, click on the Search field in the top-left corner of the app. Enter a country, a category, or a specific server number (e.g., Canada #1224) to find what you need.
3. All servers in the left sidebar are sorted by country and specialty.To connect to a specialty server, hover over one of the categories under [Specialty Servers](https://support.nordvpn.com/hc/en-us/articles/19479130821521-Different-NordVPN-server-categories-explained), and click on the three-dot menu to select a Country.
4. To connect to a specific country, click on it.
## NordVPN features menu
### Map

* Map - here, you can find and navigate NordVPN servers in the map itself, search bar, or specialty section
### Threat Protection Pro™/Threat Protection

* Threat Protection Pro™ is a special NordVPN feature that automatically blocks ads, trackers, and malicious URLs. When you visit a website known for scamming people, this feature displays an in-browser alert to warn you about possible fraud. Threat Protection Pro™ also scans downloads for malware and checks your apps for security vulnerabilities. Available with selected NordVPN plans, Threat Protection Pro™ can work without an active VPN connection. Learn more about[ Threat Protection Pro™](https://nordvpn.com/features/threat-protection/).If your NordVPN subscription doesn’t include Threat Protection Pro™, you can use the Threat Protection feature instead. It blocks intrusive ads and malicious domains based on DNS filtering and works whenever you’re connected to a VPN server. Threat Protection comes with all NordVPN plans.
### Meshnet

* The [Meshnet](https://nordvpn.com/meshnet/) feature helps you to access devices over encrypted tunnels. [Learn more about Meshnet](https://meshnet.nordvpn.com/getting-started/meshnet-explained).
### Dark Web Monitor

* [Dark Web Monitor](https://nordvpn.com/features/dark-web-monitor/) scans the internet for any credential leaks associated with your registered NordVPN e-mail address.
### Presets
Presets let you load up a specified set of configurations, including server number, type, protocol, and more. You can configure your settings to experience a smooth session, for e.g., so that a streaming service or a game loads up instantly!
#### How to set up presets?
Start at the preferences page. You can either edit an existing preset or create a new one by clicking Add new.Let's build it from scratch. After pressing Add new, you will see a menu with the settings you can use. Give the preset a name. Next, select from available VPN protocols. If you change the default setting Use recommended, you’ll be able to alter the server type. Here you can set a specialty server or any regular one as your type.Depending on the server availability, you may also have the choice of selecting a specific region.Finally, you can add either a web page or an app to the preset. It will be displayed under the preset name on the main screen. If you press Add link button, a field will appear for the URL of the website you would like easy access to. After inserting the URL, press Enter to register it. When you're done, press Save preset, and it will be added to the main screen.
### Statistics

* Statistics show you more information about your connection.
### Settings
To change application settings and find various features click on the gear icon at the bottom-left corner of the app:

* Settings tab displays the NordVPN app settings.
### Quick Help

* Here you can find your connection logs, a direct to our Help Center, or our customer support email.
## NordVPN settings
### General

* Launch the app on computer startup — toggle to open the NordVPN app automatically every time you turn your device on.
* VPN Protocol — this option will let you choose from 3 different [connection protocols](https://support.nordvpn.com/hc/en-us/articles/19482810153745-Which-NordVPN-protocol-should-I-choose) (OpenVPN UDP, OpenVPN TCP, and NordLynx).
* Help Us Improve — makes NordVPN better by sending us aggregated anonymous data.
### Auto-connect

* When using an untrusted network — toggle to automatically be connected to a VPN when you're connected to a network that is not added to a Trusted network list.
* Connect to — you can select a specific country from the list.
* The current network — shows the network you are currently connected to.
* Trusted network — you won't be automatically connected to a VPN while on a trusted Wi-Fi network.
### Kill Switch

* [Kill Switch](https://nordvpn.com/features/vpn-kill-switch/) prevents unprotected access to the internet when your VPN connection accidentally drops.
* Advanced Kill Switch is an additional layer of security that can be enabled to prevent WebRTC leaks. However, it functions separately from the system-wide Internet Kill Switch. Read [more information about Kill Switch](https://support.nordvpn.com/hc/en-us/articles/19509682644369-NordVPN-Kill-Switch-how-does-it-work).
* Stay invisible on a local network — this will let you [keep your device invisible on an unsafe local network](https://support.nordvpn.com/hc/en-us/articles/20225371443345-Staying-invisible-on-unsafe-local-networks-on-macOS).
### Appearance

* Appearance settings let you add an application to your dock and menu bar. Also, it lets you choose between dark and light modes.
### Other Apps

* Other Apps tab introduces other [Nord Security](https://nordsecurity.com/) products. As well as a scannable QR code that directly leads you to the NordVPN mobile app download.
### Account

* Account section shows your NordVPN profile and subscription information. Here you’ll also find links to [NordVPN Terms of Services](https://my.nordaccount.com/legal/terms-of-service/) and [Privacy Policy](https://my.nordaccount.com/legal/privacy-policy/).",https://support.nordvpn.com/hc/en-us/related/click?data=BAh7CjobZGVzdGluYXRpb25fYXJ0aWNsZV9pZGwrCJHa8kGjEjoYcmVmZXJyZXJfYXJ0aWNsZV9pZGwrCBFx5xrLEToLbG9jYWxlSSIKZW4tdXMGOgZFVDoIdXJsSSJUL2hjL2VuLXVzL2FydGljbGVzLzIwNDkyMzk1NDAzOTIxLUluc3RhbGxpbmctTm9yZFZQTi1BcHAtU3RvcmUtdmVyc2lvbi1vbi1tYWNPUwY7CFQ6CXJhbmtpCg%3D%3D--a10607312638c9f01e8ed07f966b266253fee39a
How to fix your NordVPN iOS connection,"If you’re having trouble connecting to [NordVPN on your iOS device](https://nordvpn.com/download/ios/), we have some tips for adjusting your connection configuration to help fix the problem. After following each set of instructions, check if the issue remains before you continue. Let’s begin:Reset your Wi-Fi network settings (only if using Wi-Fi):
* Tap Settings > General > Reset > Reset Network Settings. This also resets the Wi-Fi networks and passwords, cellular settings, and VPN and APN settings that you’ve used before.
* Launch the Settings app from the Home screen and navigate to Wi-Fi. On the right side of your wireless network field, tap on the i button to view the settings for the network.
* Tap Renew Lease at the bottom of the settings pane to reset your device’s [IP address](https://nordvpn.com/what-is-my-ip/) and to refresh your connection.
* Restart your phone.
Set the NordVPN DNS server addresses (only if using Wi-Fi):
* Open the Settings app;
* Tap on Wi-Fi. If it's switched off, turn it on;
* Pick a Wi-Fi network and tap on the blue “i” icon;
* Tap Configure DNS and select Manual;
* Tap Add Server and add these DNS addresses:103.86.96.100103.86.99.100
* Tap Save.
Switch between different servers:
* Try connecting to various countries or specific servers using the NordVPN app.
Reinstall the NordVPN app:
* Tap and hold the NordVPN icon and tap on the X icon in the upper-left corner. After the app has been uninstalled, [download and install NordVPN on your iPhone](https://support.nordvpn.com/hc/en-us/articles/19451338152849-Installing-the-NordVPN-app-on-iPhone-or-iPad) again.",https://support.nordvpn.com/hc/en-us/articles/20164009382673-How-to-fix-your-NordVPN-iOS-connection
How to connect to your dedicated IP on iOS,"A NordVPN dedicated IP is a unique IP address assigned solely to a specific server, ensuring it's not shared with any other device or network. With the NordVPN dedicated IP, you get improved connection speeds, reduced CAPTCHA requests, and enhanced security through exclusive accessibility.
In this tutorial, you will learn how to locate and connect to your purchased and assigned NordVPN dedicated IP.
The dedicated IP server category is available only with OpenVPN (UDP) and OpenVPN (TCP) protocols.
In order to connect, double-check if you have done the following:
1. Purchased a dedicated IP;
2. Set up the dedicated IP in your Nord Account.
## Connecting to your NordVPN dedicated IP on iOS
To connect to your NordVPN dedicated IP on your iOS device, follow along to the steps below:
1. Open your NordVPN app.
2. [Enable the OpenVPN (UDP) or ](https://support.nordvpn.com/Connectivity/iOS/1490186412/Switching-connection-protocol-to-OpenVPN-UDP-or-TCP-on-iOS.htm)OpenVPN (TCP) protocol.
3. In the homepage, scroll to specialty servers:
4. Tap dedicated IP:
5. Tap on your dedicated IP to connect: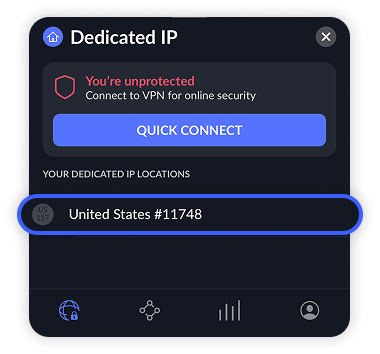
Alternatively, you can connect by typing in your dedicated IP address into the search bar. To get connected using this method, follow the steps below:
1. Type your dedicated IP into the search bar: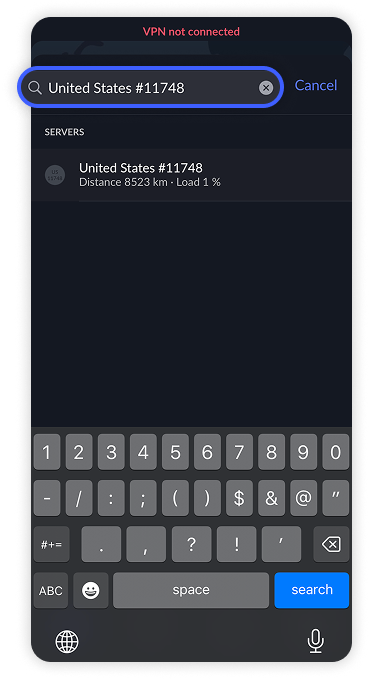
2. Tap your dedicated IP to connect: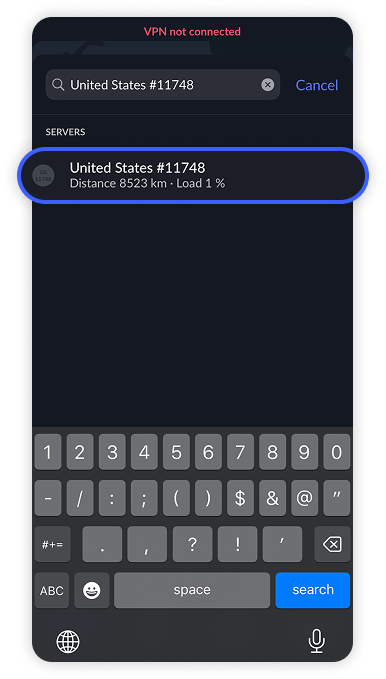
After completing the steps, you will have connected to your dedicated IP successfully. If you wish to test your connection, visit [NordVPN's DNS leak checker website](https://nordvpn.com/dns-leak-test/).
Please be aware that your email will be linked to that dedicated IP address.",https://support.nordvpn.com/hc/en-us/articles/19682095316625-How-to-connect-to-your-dedicated-IP-on-iOS
How to get connection logs on Linux,"In order to get the connection logs from the Linux application, open the terminal and type this command:
```
sudo journalctl -u nordvpnd > ~/Desktop/daemonlog.txt
```
You will find a new file daemonlog.txt on your desktop.
In case this command does not work, most probably your operating system does not use systemd, so please try to use the second command:
```
sudo cp /var/log/nordvpn/daemon.log ~/Desktop/daemonlog.txt
```
If this command does not work, too, our Linux application most probably had nothing to log and did not create a log file.
If you encounter an issue with connectivity in our [Linux application](https://support.nordvpn.com/hc/en-us/articles/19445292364689-Installing-and-using-NordVPN-on-Linux), please send us this file for further troubleshooting.",https://support.nordvpn.com/hc/en-us/articles/20379326742161-How-to-get-connection-logs-on-Linux
Linux IKEv2 MSCHAPv2 fix,"This is an alternative way to set up the ipsec.conf file (step 5 on our [main tutorial](https://support.nordvpn.com/hc/en-us/articles/20371023942289-How-to-connect-to-NordVPN-with-IKEv2-IPSec-on-Linux)) if you are experiencing issues connecting with IKEv2 on Linux and receiving the No config named 'NordVPN' error after running the ipsec up NordVPN command. Set up the ipsec.conf file manually by running the following commands in the terminal:
```
sudo susudo printf '%s\n\t' 'conn NordVPN' 'keyexchange=ikev2' 'dpdaction=clear' 'dpddelay=300' 'eap_identity=Username' 'leftauth=eap-mschapv2' 'left=%defaultroute' 'leftsourceip=%config' 'right=fi2.nordvpn.com' 'rightauth=pubkey' 'rightsubnet=0.0.0.0/0' 'rightid=%fi2.nordvpn.com' 'rightca=""C = PA, O = NordVPN, CN = NordVPN Root CA""' 'type=tunnel' 'auto=add' > /etc/ipsec.conf
```
Make sure to replace Username and server which is in our case fi2.nordvpn.com.After that, restart the ipsec:ipsec restartAnd start up the ipsec connection:
ipsec up NordVPN",https://support.nordvpn.com/hc/en-us/articles/20371936731665-Linux-IKEv2-MSCHAPv2-fix
How to connect to NordVPN with IKEv2/IPSec on Linux,"This guide utilizes the Strongswan packages to manage the IKEv2/IPSec connection on Linux.
Don’t want to manage the VPN setup manually? Download the [NordVPN app for Linux](https://nordvpn.com/download/linux/), where all you need to do is [install the app](https://support.nordvpn.com/hc/en-us/articles/19445292364689-Installing-and-using-NordVPN-on-Linux), log in, and pick the server you want.
This guide covers the basic Debian based guide, however, it should work the same on other distributions.
1. First, make sure you have all the dependencies on your device. You can do that by running the following command:sudo apt-get update && apt-get upgrade2. Get the following packages:sudo apt-get install strongswan-charon3. Edit the ipsec.secrets file with your NordVPN username and password.
(Please note: copy-pasting the command may lead to issues. It would be best to type out by hand)sudo nano /etc/ipsec.secrets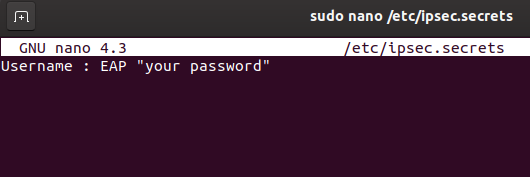4. Change Username with your NordVPN service username, and your password with your NordVPN service password. Your password has to be wrapped inside double-quotes. Notice the spaces after Username, after “:” and after EAP.
Follow the steps below to find the service credentials for manual connection setup:
1. Log into your [Nord Account](https://my.nordaccount.com/), click NordVPN, and, under Manual setup, click on Service credentials. Here you'll find the Username and Password needed to connect manually.
5. Once again, use the preferred text editor to enter /etc/ipsec.conf file. Do not forget root privileges since the file is write-protected from anyone except root.sudo nano /etc/ipsec.conf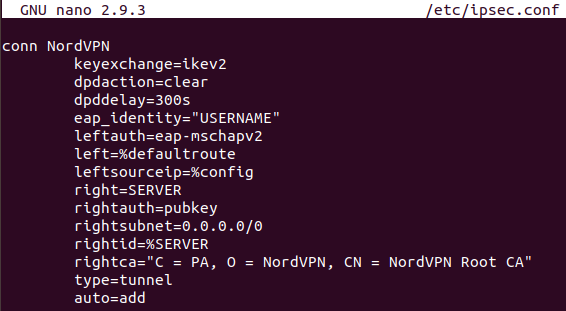6. The following config should be like this:conn NordVPN keyexchange=ikev2 dpdaction=clear dpddelay=300s eap_identity=""USERNAME"" leftauth=eap-mschapv2 left=%defaultroute leftsourceip=%config right=SERVER rightauth=pubkey rightsubnet=0.0.0.0/0 rightid=%SERVER rightca=""C = PA, O = NordVPN, CN = NordVPN Root CA"" type=tunnel auto=addChange SERVER to the hostname of the server you are going to use, and USERNAME to your NordVPN username.For this guide, we used the US #1019 server, but you should use the server recommended to you.
Follow the steps below to find the best server for your connection:
1. Log into your [Nord Account](https://my.nordaccount.com/), and click NordVPN.
2. Scroll down to Advanced Settings and click Set up NordVPN manually.
3. Select the Server recommendation tab. According to your location, the best server will be recommended.
4. By pressing Advanced filters you can further customize the recommended servers by selecting the Server type and the Security protocol.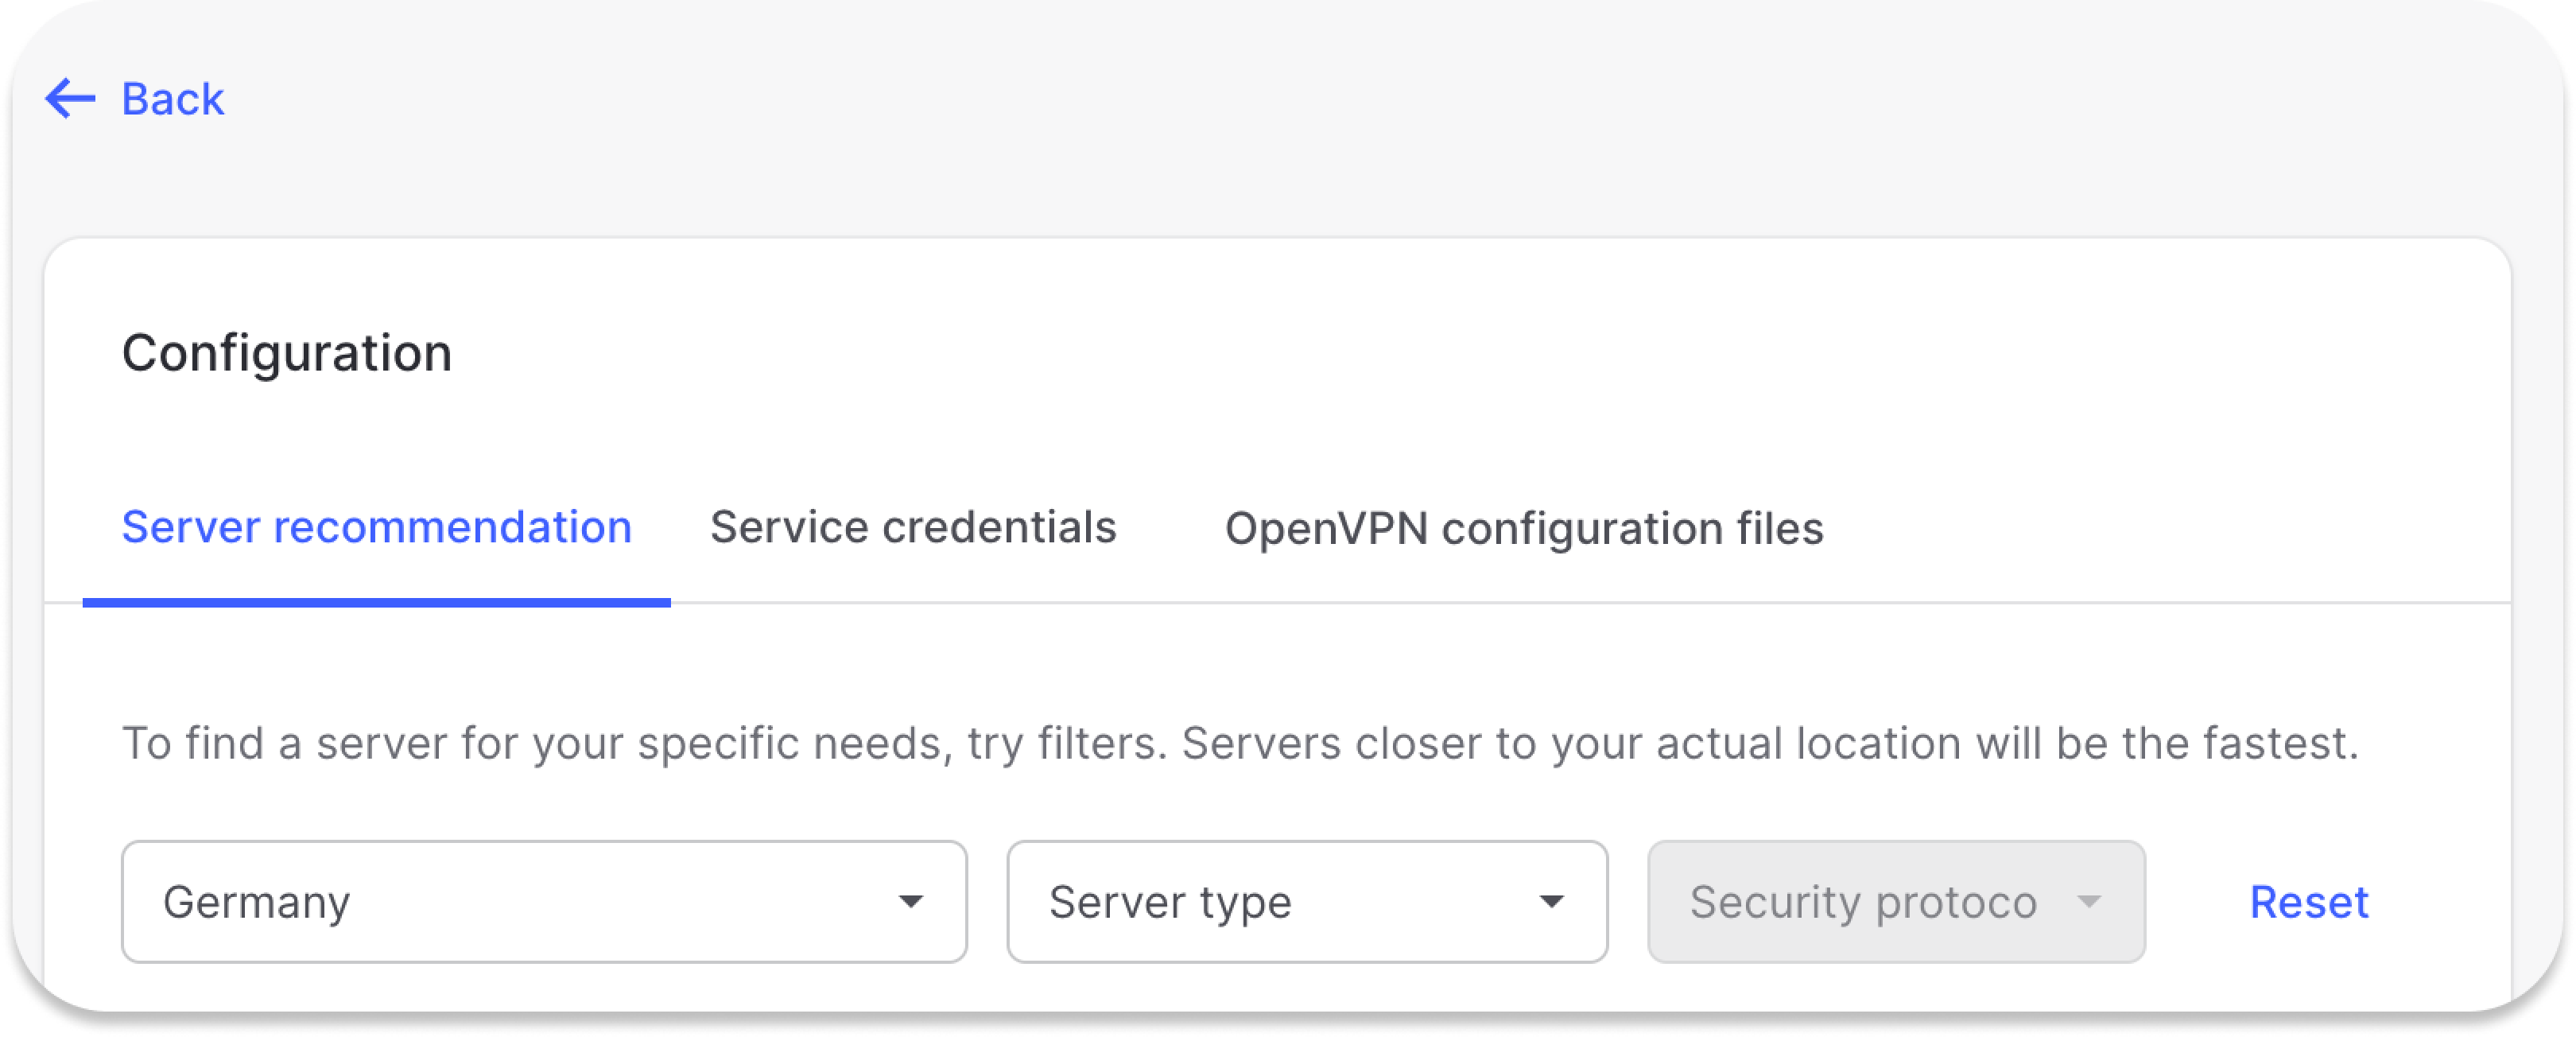
5. Under the server IP, next to Available protocols, select IKEv2/IPSec.
6. In the window that pops up, copy the server hostname and use it in your IKEv2 manual connection setup.
7. When connecting to IKEv2 manually, you're going to need to use the Username and Password from the Service credential tab.
right=us1019.nordvpn.com8. Enter /etc/strongswan.d/charon/constraints.conf file.sudo nano /etc/strongswan.d/charon/constraints.confInside the file change load = yes to load = no.9. Download the NordVPN RSA certificate.sudo wget https://downloads.nordcdn.com/certificates/root.pem -O /etc/ipsec.d/cacerts/NordVPN.pem10. Now let’s restart ipsec in order to reload all configuration files.sudo ipsec restartIf you’ve made any typos in /etc/ipsec.conf file you’ll be notified when service will be trying to start.11. After it’s done, you can connect by launching this command:sudo ipsec up NordVPNThis command should show the output “Connection NordVPN has been established successfully”.Note: if you are receiving No config named 'NordVPN' error after running the ipsec up NordVPN command, please refer to this article.12. To disconnect, simply type:sudo ipsec down NordVPN13. If you have any issues with the setup, you can get the logs at this location and send to our support: sudo cat /var/log/syslog",https://support.nordvpn.com/hc/en-us/articles/20371023942289-How-to-connect-to-NordVPN-with-IKEv2-IPSec-on-Linux
Connecting to NordVPN (Linux Network Manager),"To connect to NordVPN using the Linux Network Manager, follow these steps:
1. Download the [OpenVPN Configuration File Package](https://downloads.nordcdn.com/configs/archives/servers/ovpn.zip) and extract them into a folder of your choice.
2. Enter the following command to make sure that you have installed all of the available updates on your device system and OpenVPN network manager:sudo apt update && sudo apt full-upgrade -y && sudo apt install network-manager-openvpn-gnome -y
3. Click on the network selection button in the upper-right corner of the screen, press VPN off, and select VPN settings from the drop-down menu.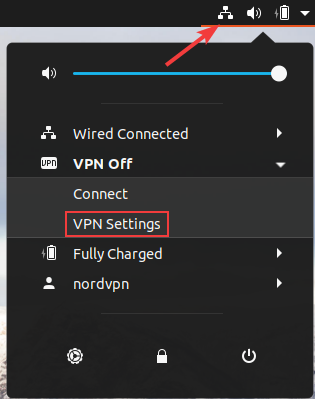
4. A configuration window will open. Press the + icon next to VPN.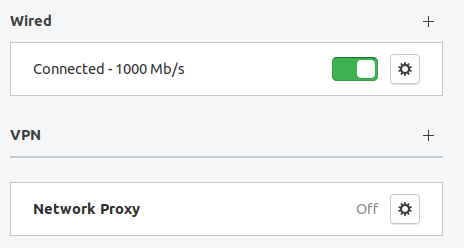
5. You will be prompted to choose a connection type. Select Import from file…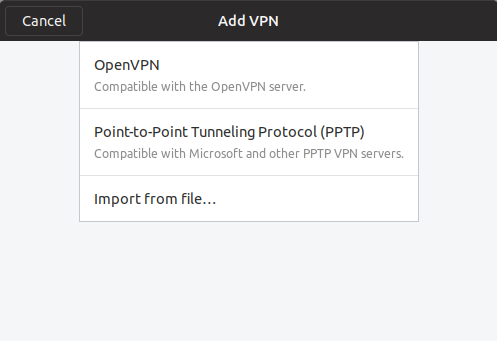
6. You will be asked to select a file you would like to import. Navigate to the folder where you have extracted the configuration files, select one of the files from the list, and click Open.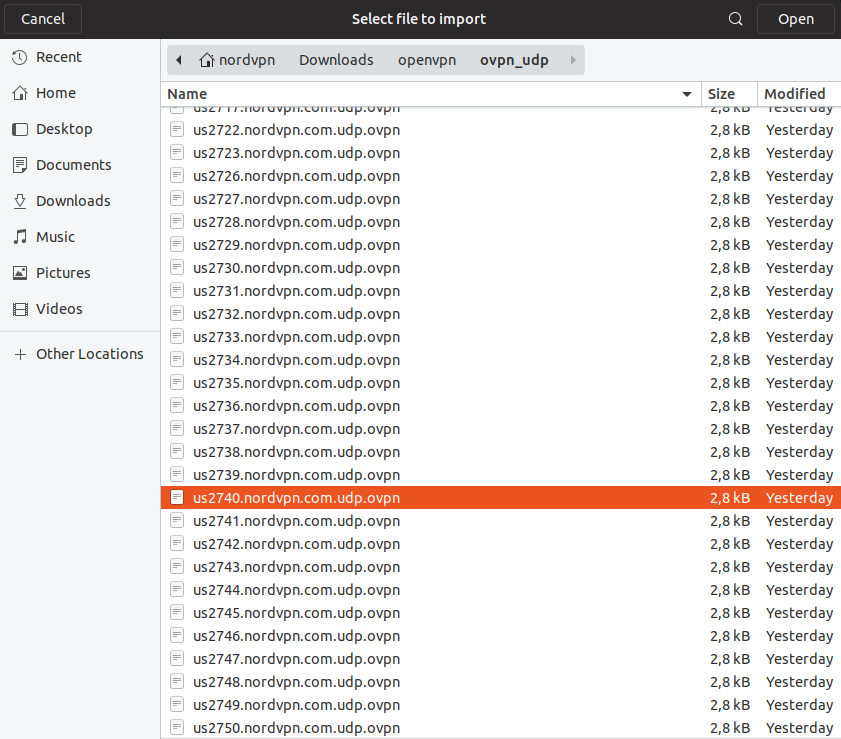
7. In the pop-up window, enter your NordVPN service username and password. Press Add.You can find your NordVPN service credentials (service username and service password) in the [Nord Account dashboard](https://my.nordaccount.com/dashboard/nordvpn/):
1. Click Set up NordVPN manually.
2. You will receive a verification code in your email that you use for NordVPN services. Type the code in: 
3. Copy the credentials using the Copy buttons on the right: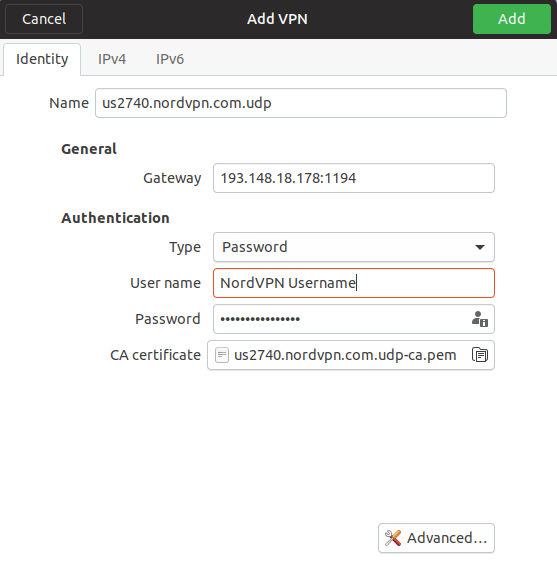
8. Now click on the toggle under the VPN section to connect to a NordVPN server. The toggle switch will turn green once connected.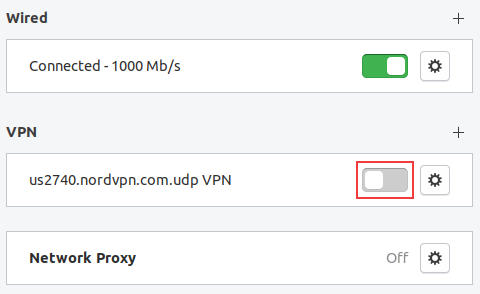",https://support.nordvpn.com/hc/en-us/articles/20347784574097-Connecting-to-NordVPN-Linux-Network-Manager
Troubleshooting steps for streaming,"Streaming issues like buffering, poor video quality, or interruptions while connected to NordVPN can disrupt your viewing experience. Whether the issue lies with your internet or device, multiple potential causes exist. This guide will walk you through common troubleshooting steps to quickly resolve these issues and restore a smooth streaming experience.
Table of contents:
* [Connection leakage troubleshooting](
* [Troubleshooting steps for various devices](
## Connection leakage troubleshooting
One possible challenge users encounter when troubleshooting streaming issues is a leaking connection. This sometimes occurs when part of their internet traffic bypasses the VPN, leaving sensitive data exposed or causing interruptions in their streaming experience.
If you're having issues with certain streaming services while using NordVPN, first check if your connection is protected by following these steps:
1. Ensure that your connection is set up correctly by checking whether your status says protected on [our website](https://nordvpn.com/):
2. If you are connected to one of our servers but your status says unprotected, proceed to the following steps to ensure your connection is secure. Stop any leaks from your connection by following these tutorials:
* * [WebRTC leak prevention](https://support.nordvpn.com/hc/en-us/articles/20318383008529-How-to-stop-WebRTC-leaks)
* [Disable IPv6](https://support.nordvpn.com/hc/en-us/articles/20350921723409-How-to-disable-IPv6)
## Troubleshooting steps for various devices
Technical issues can sometimes arise when streaming content due to various device-related factors. If your connection is secure and the issues persist, find your device in the tutorials below and follow the instructions. After each step, check if the issue is resolved. If not, proceed to the next step.
### For Windows, macOS, Linux devices
1. Try connecting to a different server of the region you would like to access the streaming service.
2. [Clear the cache of your browser.](https://nordvpn.com/blog/how-to-clear-your-cache/)
3. Try to use a different browser/incognito mode.
4. [Set up NordVPN DNS addresses](https://support.nordvpn.com/hc/en-us/articles/19587726859793-What-are-the-addresses-of-my-NordVPN-DNS-servers) to 103.86.99.100 and 103.86.96.100 on your device.
5. Test the streaming accessibility changes without using [Threat Protection or Threat Protection Pro™](https://support.nordvpn.com/hc/en-us/articles/19508765521425-What-is-Threat-Protection-Pro-and-Threat-Protection) if the features are enabled.
6. [Check](https://support.nordvpn.com/hc/en-us/articles/20290051742353-How-to-check-the-NordVPN-app-version) whether your NordVPN application is updated to the[ latest version](https://nordvpn.com/blog/category/service-updates/app-updates/).
7. As a last resort - try using the[ NordVPN extension](https://nordvpn.com/features/proxy-extension/) instead and access the streaming through your browser. Download the extension by clicking [here](https://support.nordvpn.com/hc/en-us/articles/20321833806865-How-to-set-up-the-NordVPN-browser-extension).
### For Android/iOS devices
1. Try connecting to a different server of the region you would like to access the streaming service.
2. If you are using a specific streaming service app, force stop it, clear the app cache, and restart it.
3. If you are accessing the streaming platform on a browser, [clear your browser's cache.](https://nordvpn.com/blog/how-to-clear-your-cache/)
4. [Set up NordVPN DNS addresses](https://support.nordvpn.com/hc/en-us/articles/19587726859793-What-are-the-addresses-of-my-NordVPN-DNS-servers) to 103.86.99.100 and 103.86.96.100 on your device.
5. Test the streaming accessibility changes without using [Threat Protection or Threat Protection Pro™](https://support.nordvpn.com/hc/en-us/articles/19508765521425-What-is-Threat-Protection-Pro-and-Threat-Protection) if the features are enabled.
### For Android TV boxes
1. Try connecting to a different server in the region where you would like to access the streaming service.
2. If you are using a specific streaming service app, force stop it, clear the app cache, and restart it, here are the steps:
1. Go to Settings > Preferences section > More settings > Apps.
2. Find the streaming service app and press on it.
3. Click the Force Stop button.
4. Click the Clear Cache button.
5. Restart the application.
3. [Set up NordVPN DNS addresses](https://support.nordvpn.com/hc/en-us/articles/20466230743569-Change-your-DNS-servers-on-Android-TV-with-NordVPN) to 103.86.99.100 and 103.86.96.100 on your device.
### For Amazon Fire TV devices
1. Try connecting to a different server of the region you would like to access the streaming service.
2. If you are using a specific streaming service app, force stop it, clear the app cache, and restart it:
1. Go to Settings > Applications > Manage Installed Applications.
2. Find the streaming service app and press on it.
3. Click the Force Stop button.
4. Click the Clear Cache button.
5. Restart the application.
3. [Set up NordVPN DNS addresses](https://support.nordvpn.com/hc/en-us/articles/20466230743569-Change-your-DNS-servers-on-Android-TV-with-NordVPN) to 103.86.99.100 and 103.86.96.100 on your device.
The NordVPN service should never be used to bypass copyright regulations. NordVPN does not promote, condone, or endorse the use of the service for such purposes. For more details, please read the NordVPN [Terms of Service](https://my.nordaccount.com/legal/terms-of-service/).
If you experience other issues or have additional questions, do not hesitate to [submit a request](https://support.nordvpn.com/hc/en-us/articles/19482416296593-How-to-reach-NordVPN-customer-support) to our customer success team.",https://support.nordvpn.com/hc/en-us/related/click?data=BAh7CjobZGVzdGluYXRpb25fYXJ0aWNsZV9pZGwrCBFq9SjKEToYcmVmZXJyZXJfYXJ0aWNsZV9pZGwrCJHcJQTLEToLbG9jYWxlSSIKZW4tdXMGOgZFVDoIdXJsSSJKL2hjL2VuLXVzL2FydGljbGVzLzE5NTU5OTY4MjM4MDk3LVRyb3VibGVzaG9vdGluZy1zdGVwcy1mb3Itc3RyZWFtaW5nBjsIVDoJcmFua2kG--c2c4c1b5e8d66a0a83def221b34b2af13e95bc82
Installing NordVPN application on macOS,"The first step towards online security is setting up NordVPN correctly. Follow these simple steps to install the NordVPN app and connect to a VPN server.
Note: NordVPN supports macOS 11 Big Sur, macOS 12 Monterey, macOS 13 Ventura, and macOS Sanoma 14 and above.
Attention: If you encounter issues during the installation of NordVPN on macOS Ventura, please refer to the following guide for a possible solution: macOS Ventura Error: The Installation Failed.
* Downloading and installing the NordVPN app
* Setting up the NordVPN application
* Connecting to servers
* [Connecting to a specific server](
* [Connecting to a specific country](
* NordVPN features
* [Map](
* [Threat Protection Pro™](
* [Meshnet](
* [Dark Web Monitor](
* [Presets](
* [Statistics](
* [Settings](
* [Quick Help](
* NordVPN settings
* [General](
* [Auto-connect](
* [Kill Switch](
* [DNS](
* [Appearance](
* [Refer a friend](
* [Other Apps](
* [Account](
## Downloading and installing the NordVPN app
1. Download [NordVPN for macOS](https://nordvpn.com/download/mac/):Alternatively, [click here to download the latest macOS version](https://downloads.nordcdn.com/apps/macos/generic/NordVPN-OpenVPN/latest/NordVPN.pkg).
2. Navigate to the folder where you downloaded the NordVPN.pkg file and double-click on it to begin the installation:Note: Ensure the download file is saved locally on your device (e.g., downloads folder, desktop) and not within Dropbox or other file management/synchronization tools or special folders.
3. A new Install window will pop up, guiding you through the installation process. Choose to continue:
4. Click on install:
5. You will be asked for permission to install the installer, which is required to establish secure VPN tunnels. Enter your Mac's password and choose to install the software:You can also confirm it with a fingerprint:
6. Give access to the installer to files in the Downloads folder by clicking ok in the new pop-up window:
7. A message will confirm that the app was successfully installed. Close the window:
## Setting up and using the NordVPN application
1. Open your launchpad and click on the NordVPN icon:
2. If you have a NordVPN account, click log In in the top-right corner of the screen and enter your email address and password. If you are a new user, click sign up at the top-right corner of the screen:
3. When logging in, you will be redirected to your Nord Account. Enter your registered email address and password. You can also sign in using your Google account or Apple ID or by entering a one-time login code:
4. If you are a new user, create a [Nord Account](https://my.nordaccount.com/) by entering your email address and other required information:
5. After completing the above steps, you will be prompted to open the NordVPN app. Agree to always allow Nord Account and grant access to the app:
6. After a successful login, you will be introduced to the main NordVPN application window:
## Connecting to servers
The Quick Connect button in the top-right corner will automatically connect you to a server recommended by our smart algorithm.
### Connecting to a specific server
To connect to a specific server, click on the Search field in the top-left corner of the app. Enter a country, a category, or a specific server number (e.g., Canada #1224) to find what you need.
### Connecting to a specific country
All servers in the left sidebar are sorted by country and specialty.To connect to a specialty server, hover over one of the categories under [Specialty Servers](https://support.nordvpn.com/hc/en-us/articles/19479130821521-Different-NordVPN-server-categories-explained), and click on the three-dot menu to select a country:
To connect to a specific country, simply click on it:
## NordVPN features
### Map
The map tab is the app’s home. Here, you can find and navigate NordVPN servers using the map, search bar, or specialty section.

### Threat Protection Pro™
Threat Protection Pro™ is a special NordVPN feature that automatically blocks ads, trackers, and malicious URLs. When you visit a website known for scamming people, this feature displays an in-browser alert to warn you about possible fraud. Threat Protection Pro™ also scans downloads for malware and checks your apps for security vulnerabilities. Available with selected NordVPN plans, this feature can work without an active VPN connection. [Learn more about Threat Protection Pro™](https://nordvpn.com/features/threat-protection/).
### 
If your NordVPN subscription doesn’t include Threat Protection Pro™, you can use the Threat Protection feature instead. It blocks intrusive ads and malicious domains based on DNS filtering and works whenever you’re connected to a VPN server. Threat Protection comes with all NordVPN plans.
### Meshnet
The [Meshnet](https://nordvpn.com/meshnet/) feature helps you to access devices over encrypted tunnels. [Learn more about Meshnet](https://meshnet.nordvpn.com/getting-started/meshnet-explained).

### Dark Web Monitor
[Dark Web Monitor](https://nordvpn.com/features/dark-web-monitor/) scans the internet for any credential leaks associated with your registered NordVPN e-mail address.

### Presets
Presets let you load a specified set of configurations, including server number, type, protocol, and more, at the click of a button! You’ll find many uses for this feature, like instantly loading a streaming service or a game with the necessary settings to experience a smooth session.
How to set up presets?
Start at the preferences page, as depicted above. You can either edit an existing preset or create a new one by pressing Add new.

In this example, we’ll add a new one by building it from scratch. After pressing Add new, you will see a menu with the settings you can use. First, give the preset a name. Next, select from available VPN protocols. If you change the default setting Use recommended, you’ll be able to alter the server type. Here you can set a specialty server or any regular one as your type:Depending on the server availability, you may also have the choice of selecting either a specific region:Finally, you can add either a web page or an app to the preset. It will be displayed under the preset name on the main screen:If you press Add link, a field will appear for the URL of the website you would like easy access to. After inserting the URL, press Enter to register it. When you set up the configuration, press Save preset, and it will be added to the main screen.
### Statistics
Statistics show you more information about your connection.

### Settings
The settings tab displays the app settings.

### Quick Help
Here you can find connection logs, be directed to our Help Center, and write an email to our customer support

## NordVPN settings
### General
The general tab has the following features:
* Auto launch when the computer starts — toggle to open the NordVPN app automatically every time you turn your device on.
* VPN Protocol — will let you choose from 3 different [connection protocols](https://support.nordvpn.com/hc/en-us/articles/19482810153745-Which-NordVPN-protocol-should-I-choose) (OpenVPN UDP, OpenVPN TCP, and NordLynx).
* Automatically check for updates — will check if you’re using the latest version of the NordVPN app.
* Help Us Improve — makes NordVPN better by sending us aggregated anonymous data.

### Auto-connect
The auto-connect tab features the following functions:
* When using an untrusted network— toggle to automatically connect to a network that is not added to a Trusted network list.
* Connect to — select a specific country from the list.
* The current network — shows the network you are currently connected to.
* Trusted network — you won't be automatically connected to a VPN while on a trusted Wi-Fi network.

### Kill Switch
[Kill Switch](https://nordvpn.com/features/vpn-kill-switch/) prevents unprotected access to the internet when your VPN connection accidentally drops.

### DNS
DNS ensures tighter security and privacy for your traffic. You can configure your device manually to use private NordVPN DNS servers.

### Appearance
Appearance settings let you add an application to your dock, menu bar, or both and choose between dark and light modes.

### Refer a friend
The Refer a Friend tab provides you with your personal referral link and instructions on how to refer NordVPN to your friends.

### Other Apps
The other Apps tab introduces other [Nord Security](https://nordsecurity.com/) products.

### Account
The account section shows your NordVPN profile and subscription information. Here, you’ll also find links to [NordVPN's Terms of Services](https://my.nordaccount.com/legal/terms-of-service/) and [Privacy Policy](https://my.nordaccount.com/legal/privacy-policy/).
",https://support.nordvpn.com/hc/en-us/related/click?data=BAh7CjobZGVzdGluYXRpb25fYXJ0aWNsZV9pZGwrCJHJugSyEToYcmVmZXJyZXJfYXJ0aWNsZV9pZGwrCBFlgFiBEjoLbG9jYWxlSSIKZW4tdXMGOgZFVDoIdXJsSSJOL2hjL2VuLXVzL2FydGljbGVzLzE5NDU2MjgxMjAxMDQxLUluc3RhbGxpbmctTm9yZFZQTi1hcHBsaWNhdGlvbi1vbi1tYWNPUwY7CFQ6CXJhbmtpBg%3D%3D--697f5e979e2da93467236a7838a318d91c091d9d
Temporary failure resolving repo.nordvpn.com,"When setting up NordVPN on Linux, you may come across the following issue:
```
Failed to fetch https://repo.nordvpn.com/deb/nordvpn/debian/pool/main/nordvpn_3.7.4_amd64.deb. Temporary failure resolving 'repo.nordvpn.comUnable to fetch some archives, maybe run apt-get update or try with --fix-missing?
```
In order to resolve this problem, individually type in the commands below, pressing enter after each one.
* sudo -i
* cd /etc/apt/sources.list.d
* echo ""deb https://repo.nordvpn.com/deb/nordvpn/debian stable main"" > nordvpn.list
* sudo apt-get update
* sudo apt-get install nordvpn
In case you're still unable to set up NordVPN, please make sure to [contact our support team](https://support.nordvpn.com/hc/en-us/articles/19482416296593-How-can-I-reach-NordVPN-customer-support).",https://support.nordvpn.com/hc/en-us/articles/20323859356689-Temporary-failure-resolving-repo-nordvpn-com
Linux GUI,"At this moment NordVPN Linux application does not have any graphical user interface and the application is used by entering the commands via the Linux terminal window.
Why do I see a NordVPN icon in the Taskbar Tray/Applications list? This icon is automatically generated by Linux whenever a successful installation of NordVPN has been established. Nevertheless, clicking it will not lead to a GUI.
In order to start using NordVPN on Linux, please follow this [guide](https://support.nordvpn.com/hc/en-us/articles/19445292364689-Installing-and-using-NordVPN-on-Linux).",https://support.nordvpn.com/hc/en-us/articles/20323322754065-Linux-GUI
Configuring Linux Ubuntu setup (Standard User),"These are the instructions to connect non-administrative account (newuser in this example) to VPN using Linux. The instructions were made using Ubuntu 16.04 LTS and connecting to US #311 server using [UDP protocol](https://nordvpn.com/blog/tcp-or-udp-which-is-better/). Before following these instructions, please make sure at least 1-7 steps of our [Linux tutorial](https://support.nordvpn.com/hc/en-us/articles/20164827795345-Connect-to-NordVPN-using-Linux-Terminal) has already been completed.
1. Login to your admin account:
2. Create a new file and name it US311_UDP.sh or however you prefer. For the sake of convenience we will create the file in ~/Documents/ folder;
3. Open the US311_UDP.sh file and enter these two lines:#!/bin/bashsudo openvpn /etc/openvpn/ovpn_udp/us311.nordvpn.com.udp.ovpnSave and close the file;
4. Open Terminal (Ctrl + Alt + T) and run sudovisudo command. Afterwards, you will be prompted your administrator password, please enter it.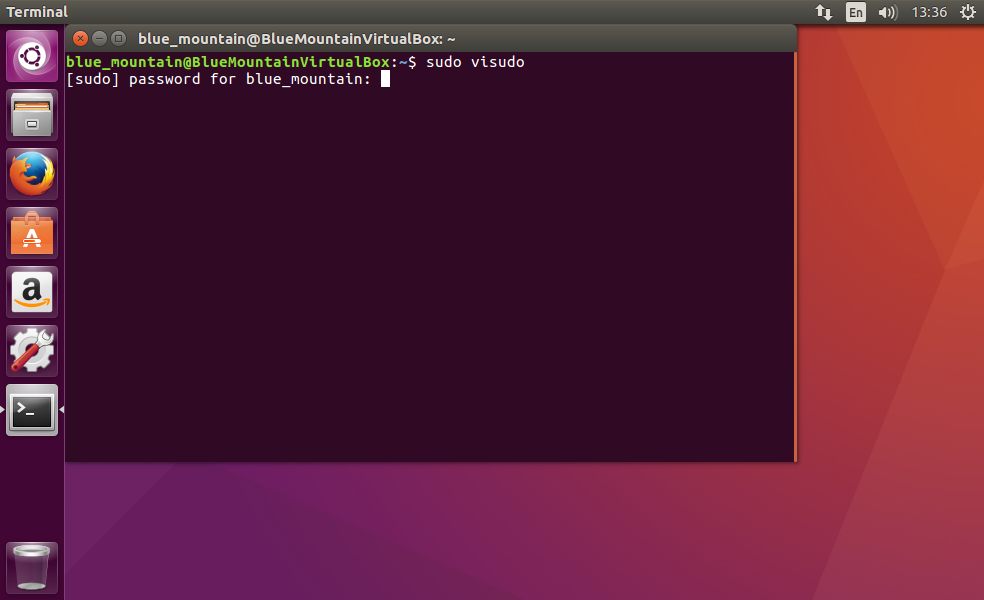It will open the /etc/sudoers.tmp file as shown below.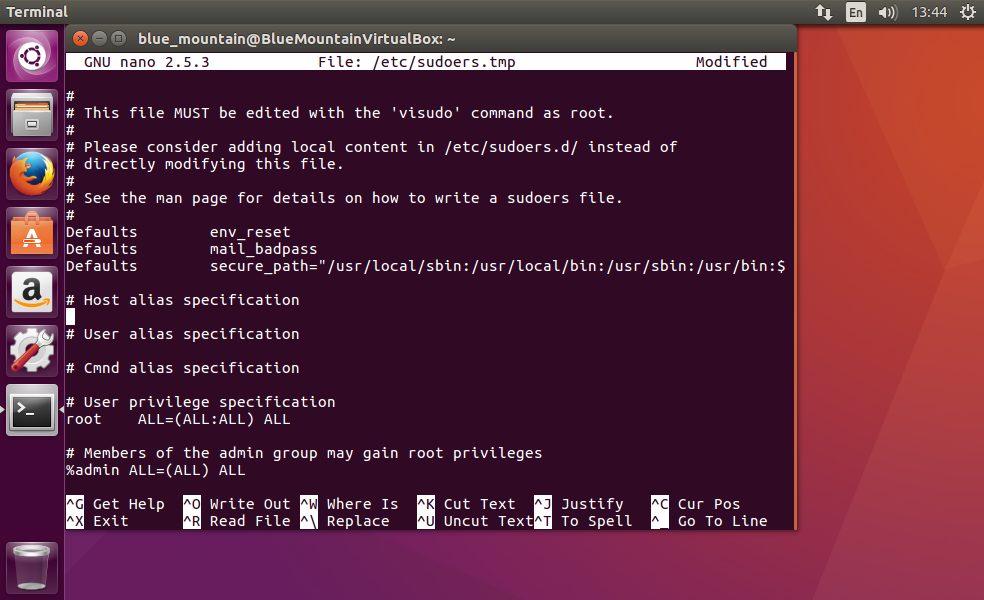
5. Using arrow keys navigate to the #Members of the admin group may gain root privileges and below the %admin ALL=(ALL) ALL entry type these three lines:newuser ALL=NOPASSWD: /home/blue_mountain/Documents/US311_UDP.shnewuser ALL=NOPASSWD: /usr/sbin/openvpnnewuser ALL=NOPASSWD: /etc/openvpn/ovpn_udp/us311.nordvpn.com.udp.ovpn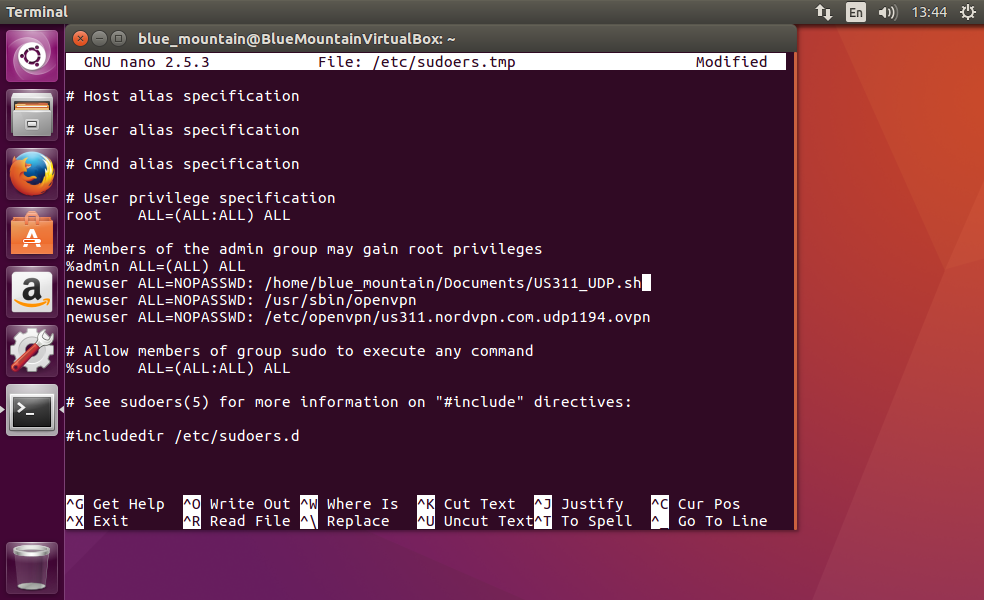
6. Press Ctrl + X to close the file. Shortly afterwards you will be asked to press Y in order to save changes you have made. You will be required to press Enter to complete the changes;
7. Access your standard user account:
8. Open Terminal (Ctrl + Alt + T) and run cd /home/blue_mountain/Documents command: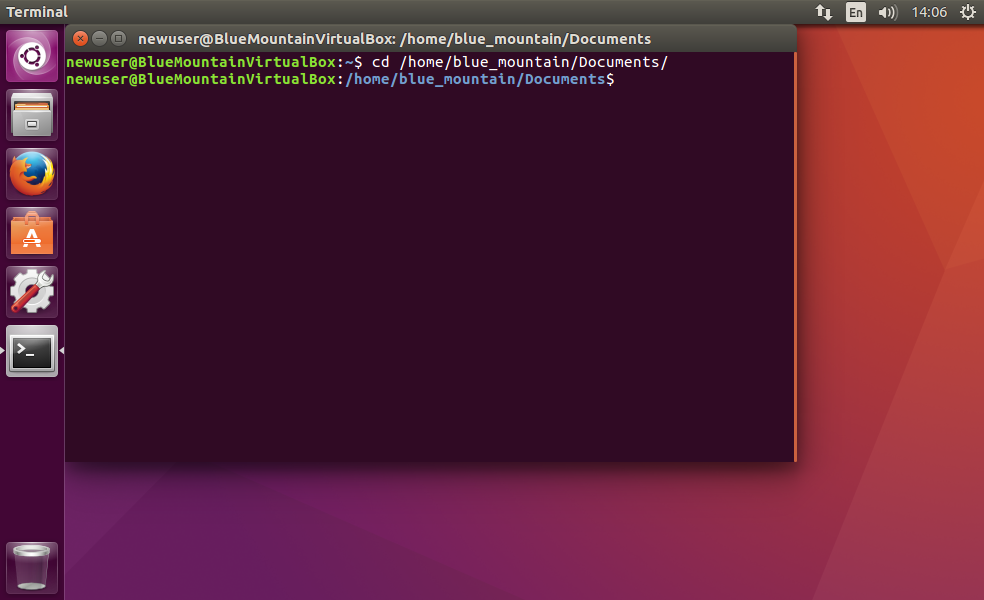
9. Now you can use sh US311_UDP.sh command to use the previously created script to connect to VPN, though you will be required to enter your NordVPN credentials;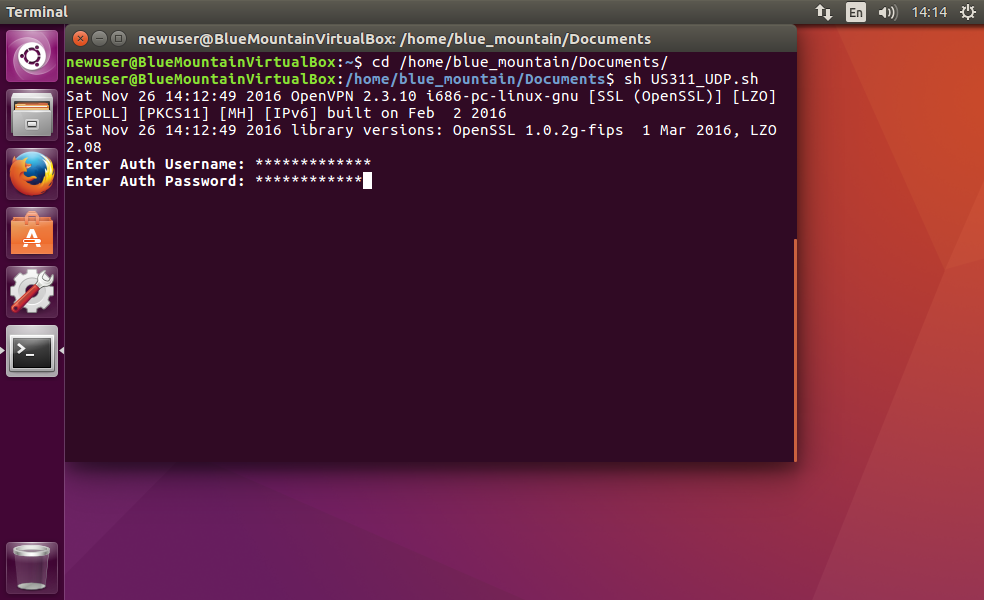
10. Wait for the VPN connection to be established. It is indicated by the Initialization Sequence Completed message.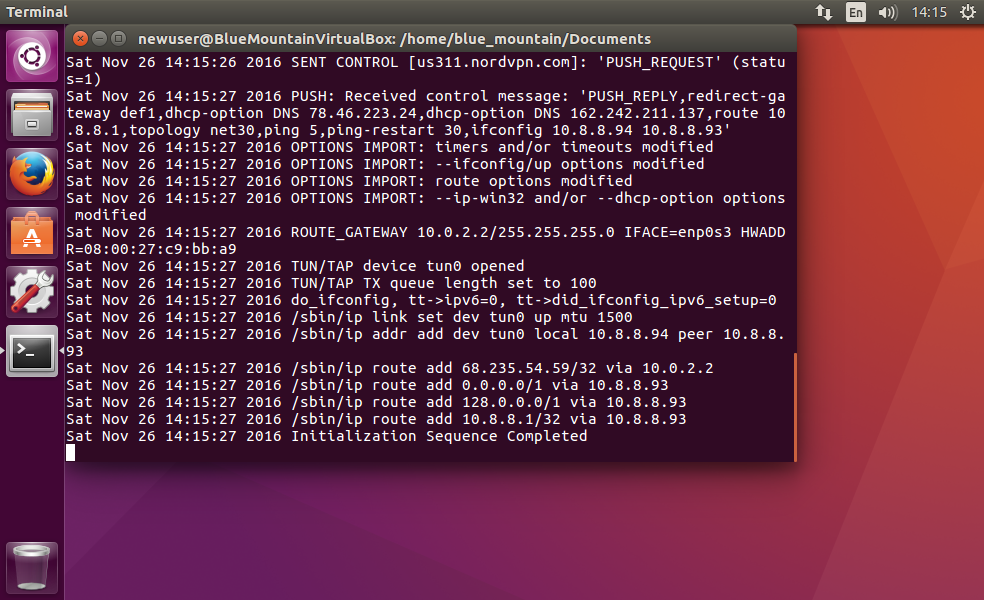",https://support.nordvpn.com/hc/en-us/articles/20309534114193-Configuring-Linux-Ubuntu-setup-Standard-User
What if the token number for NordVPN expires?,"If you lost your token number for NordVPN, or it expired, revoke your token by clicking the Revoke button:",https://support.nordvpn.com/hc/en-us/articles/20286980309265-How-to-use-a-token-with-NordVPN-on-Linux
How to use a token with NordVPN on Linux,"Here’s how to use a token to log in and log out of the NordVPN app on a Linux machine without a graphical user interface — and what to do if you lose your token.
Note: This login method is also suitable for headless (no GUI) devices.
## Logging in
If you need an alternative way to log in to the Linux application, use the following command:
```
nordvpn login --token
```
You’ll need to access the token number to use this login method.
### To access the token number:
1. Login to Nord Account: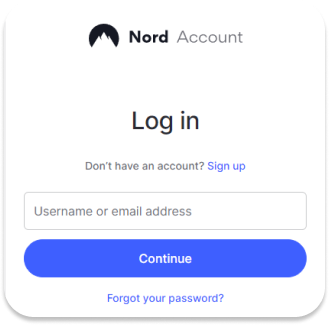
2. Click on NordVPN:
3. Scroll down until you see the advanced settings tab. Click get access token: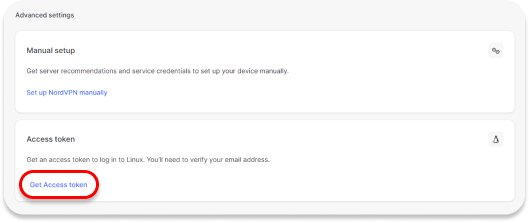
4. Verify your email by entering a code you receive to your registered e-mail.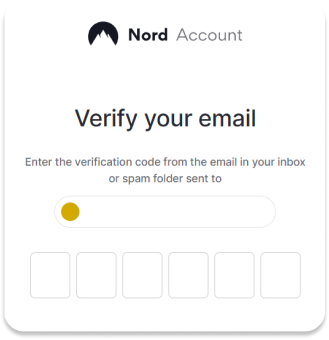
5. Click on generate new token tab.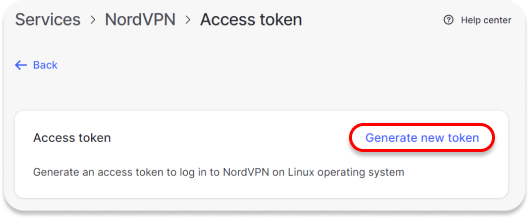You will be given two options:
* Create a temporary token, which will expire after 30 days.
* Create a token which will not expire. We recommend [enabling MFA](https://support.nordvpn.com/hc/en-us/articles/19442299167889-What-is-MFA-and-how-to-enable-it) if you choose this option.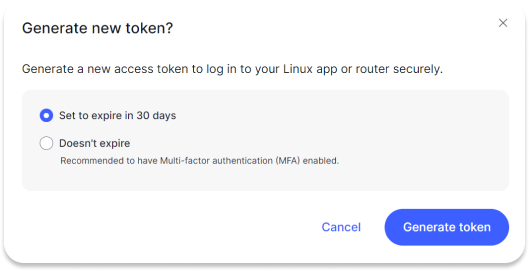
1. Click on Generate token.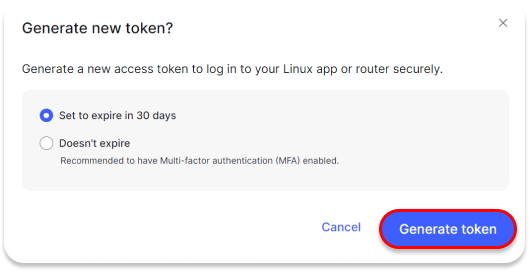
2. A window with a token number will pop up.Please note that the token number will only be shown once. Make sure you log in before you close the window.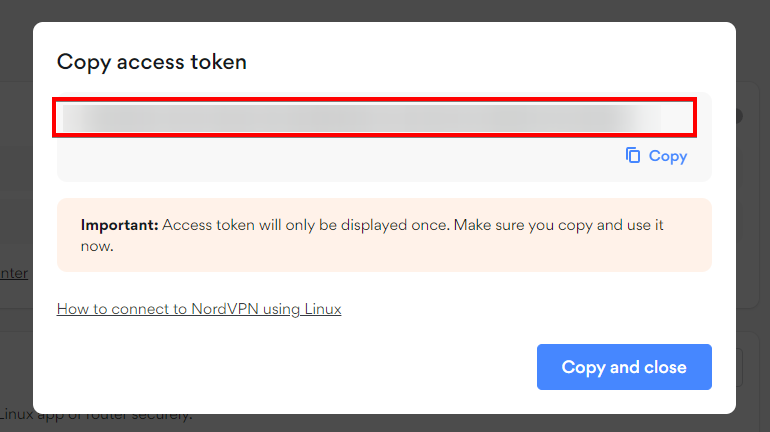
3. Once you copy the token number, paste it into the command:
```
nordvpn login --token your_token
```
## Logging out
* If you log out by using nordvpn logout command line, your token will expire, regardless of which token you created, and you won’t be able to log in again using it:
* If you want to re-use your token and do not want it to expire, use the nordvpn logout --persist-token command line: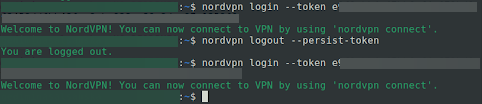
## What if the token number for NordVPN expires?
If you lost your token number for NordVPN, or it expired, revoke your token by clicking the Revoke button:",https://support.nordvpn.com/hc/en-us/articles/20286980309265-How-to-use-a-token-with-NordVPN-on-Linux
Linux start on boot manual connection,"This is a tutorial on how to start an OpenVPN connection when your Linux system boots.
Auto-connect OpenVPN via terminal
1. Create an auth.txt file inside the /etc/openvpn directory using the following command:
```
sudo gedit /etc/openvpn/auth.txt
```
Type in your NordVPN credentials (your username and password) on the separate lines in the file and save it.You can find your NordVPN service credentials (service username and service password) in the [Nord Account dashboard](https://my.nordaccount.com/dashboard/nordvpn/):
1. 1. Click Set up NordVPN manually.
2. You will receive a verification code in your email that you use for NordVPN services. Type the code in: 
3. Copy the credentials using the “Copy” buttons on the right:
2. Open the file you are using to establish a connection:
```
sudo gedit /etc/openvpn/openvpn_udp/de75.nordvpn.com.udp.ovpn
```
Change this line:
```
auth-user-pass
```
to
```
auth-user-pass auth.txt
```
Save the file and change its name:
```
sudo mv /etc/openvpn/openvpn_udp/de75.nordvpn.com.udp.ovpn /etc/openvpn/de75.conf
```
3. Edit the openvpn boot file using this command:
```
sudo gedit /etc/default/openvpn
```
When the text editor opens, add the following line above #AUTOSTART=""all"":
```
AUTOSTART=""de75""
```
Save the file and reboot your Linux device.
4. Once the device has rebooted, open the terminal and type in:
```
sudo traceroute 8.8.8.8
```
The first hop address should be 10.8.8.1, and on [ipleak.net](https://ipleak.net/) you should see the IP address of the German server you are connected to.
Auto-connect OpenVPN via Network Manager (Ubuntu)
First, set up the VPN connection using Network Manager.
Once the VPN connection is set up in the Network manager, edit your main network connection and select Automatically connect to VPN when using this connection. In the drop-down list, select the VPN connection you previously created.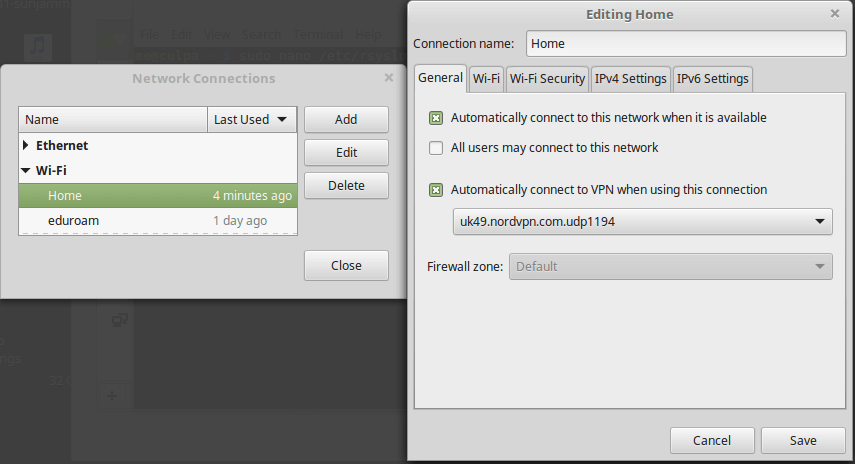",https://support.nordvpn.com/hc/en-us/articles/20285620014353-Linux-start-on-boot-manual-connection
pfSense setup with NordVPN,"What is pfSense, and how to use it with NordVPN?
pfSense is an open-source operating system that can be used as a router or firewall. To set up NordVPN on different versions of pfSense, you'll need to use the OpenVPN protocol. Follow these instructions to set up NordVPN on pfSense:
* [pfSense 2.4.4 setup with NordVPN](https://nordvpn.zendesk.com/hc/en-us/articles/20349690650385)
* [pfSense 2.4.5 setup with NordVPN](https://nordvpn.zendesk.com/hc/en-us/articles/20466674776977)
* [pfSense 2.5 Setup with NordVPN](https://nordvpn.zendesk.com/hc/en-us/articles/20382523899281)
Once you’re done, you’ll have a secure VPN pfSense connection.
Is OpenVPN on pfSense free?
Yes, setting it up pfSense with OpenVPN does not cost anything additional — you just need an active [NordVPN subscription](https://nordvpn.com/pricing/).
Is OpenVPN of pfSense secure?
Yes, OpenVPN is one of the safest protocols to use.
What version of OpenVPN does pfSense use?
pfSense uses OpenVPN version 2.4 and newer.",https://support.nordvpn.com/hc/en-us/articles/20285211284497-pfSense-setup-with-NordVPN
How to log in to NordVPN on Linux devices without a GUI,"To log in to NordVPN on your Linux machine without a graphical user interface, enter one of the following commands:
* nordvpn login command with the --token flag
* nordvpn login command with the --callback flag
When using the token login method, follow these steps:
1. Log in to [Nord Account](https://my.nordaccount.com/).
2. Find NordVPN under the Services menu.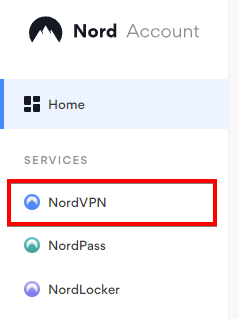
3. Locate the Access token tab down below.
4. Click on Generate new token.
5. Pick either token: one that expires in 30 days or one that doesn’t expire. Proceed to Generate token.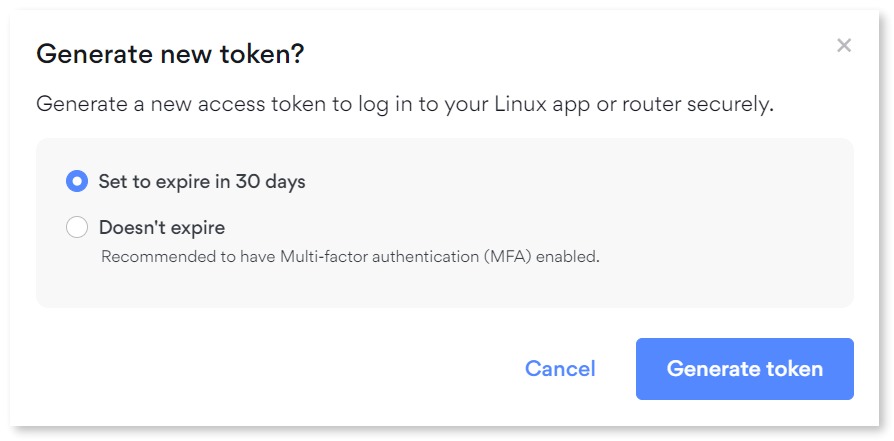
6. Click Copy and close.
7. On your Linux machine, run the command: nordvpn login --token and replace with the copied token.
For example:
```
nordvpn login --token 3fe460ksdnf415e45908cec9f9bdbadf7a456a6dfb35dc2c58xxxxx
```
If you choose the callback login method:
1. Run the command: nordvpn login.
2. You'll receive a URL. Open it on any device that supports a browser.
3. Finish the login process.
4. Right-click on the Continue button and copy the link address.
5. Run the command: ”nordvpn login --callback """" and replace with the copied link address.
For example:
```
nordvpn login --callback ""nordvpn://login?action=login&exchange_token=MGFlY2E1N
mE4YjM2NDM4NjUzN2VjOWIzYWM3ZTU3ZDliNDdiNzRjZTMwMjE5Yjk
zZTNhNTI3ZWZlOTIwMGJlOQ%3D%3D&status=done""
```",https://support.nordvpn.com/hc/en-us/articles/20226600447633-How-to-log-in-to-NordVPN-on-Linux-devices-without-a-GUI
Installing NordVPN on Linux distributions,"In this article, we'll guide you through NordVPN installation and usage on Linux. We offer .deb and .rpm packages that are compatible with Debian, Ubuntu, Elementary OS, Linux Mint, Fedora, QubesOS, RHEL, CentOS, and openSUSE systems. The NordVPN native application is the recommended option for connecting to NordVPN servers on your Linux device. We designed it with your experience in mind, giving you features like auto-connect, automated Kill Switch, and Threat Protection.
## Table of contents:
* [Installing NordVPN on Linux](
* [Using NordVPN on Linux](
* [Logging in](
* [Account and settings](
* [Specialty servers](
* [Features and configurations](
* [LAN discovery and allowlists](
## Installing NordVPN on Linux
To start using the NordVPN application for Linux, you need to [download the NordVPN Linux client](https://nordvpn.com/download/linux/). You can do that in 2 ways:
1. By [downloading a Snap package](https://snapcraft.io/nordvpn).Snaps are app packages for desktop, cloud, and IoT that are easy to install, secure, cross-platform, and dependency-free. If you do not have Snap pre-installed, you may follow [Snap setup guides for various Linux distributions](https://snapcraft.io/docs/installing-snapd#:~:text=Zorin%20OS-,Without%20snap,-For%20distributions%20without).Please note that currently, we still do not support arm64, but our developers are working on this.
2. By working in the terminal:
1. Open the terminal;
2. Write the command below:
```
sh <(curl -sSf https://downloads.nordcdn.com/apps/linux/install.sh[](https://downloads.nordcdn.com/apps/linux/install.sh))
```
3. Following any on-screen instructions.
Note: If you do not have a curl package, evidenced by the fact that the above does not work, you can alternatively use this command:
```
sh <(wget -qO - https://downloads.nordcdn.com/apps/linux/install.sh)
```
Additionally, if you receive the following issue: Whoops! Permission denied accessing /run/nordvpn/nordvpnd.sock, all you need to do is write the following command:
```
sudo usermod -aG nordvpn $USER
```
and then reboot your device.
## Using NordVPN on Linux
After you have installed the NordVPN application, you can start using it!
Please note that in NordVPN Linux application version 3.18.4, network traffic from the LAN through a VPN-connected computer is blocked by default. To unblock LAN traffic, turn LAN discovery ON or add to the allowlist any subnet or IP traffic to be forwarded.
### Logging in
If you're using a Linux device without a graphical user interface, follow our guide on logging in to NordVPN on Linux devices without GUI.
If you're using a Linux device with a graphical user interface, you can start using it with the commands below:
1. Log in to your NordVPN account by using this command:
```
nordvpn login
```
2. Connect to a NordVPN server by using the command below:
```
nordvpn connect
```
### Account and settings
Here you can find the list of available NordVPN commands for Linux.
Access the NordVPN client settings:
---
```
nordvpn
```
Get an extensive explanation of all commands:
```
man nordvpn
```
See the list of available commands or help for a specific command:
```
nordvpn help
```
| or | ```
nordvpn h
```
Log in or log out:
```
nordvpn login
```
| or | ```
nordvpn logout
```
Connect to a recommended NordVPN server:
```
nordvpn connect
```
| or | ```
nordvpn c
```
Connect to a specific server (e.g. nordvpn connect uk715):
```
nordvpn connect
```
Disconnect from the VPN:
```
nordvpn disconnect
```
| or | ```
nordvpn d
```
See account information:
```
nordvpn account
```
Register a new user account:
```
nordvpn register
```
Rate your last connection quality (1-5):
```
nordvpn rate
```
See the current settings:
```
nordvpn settings
```
See the connection status:
```
nordvpn status
```
See the country list:
```
nordvpn countries
```
See the city list (e.g.: nordvpn cities united_states):
```
nordvpn cities
```
See a list of available server groups:
```
nordvpn groups
```
### Specialty servers
Connect to the closest Double VPN server:
---
```
nordvpn c double_vpn
```
Connect to a specific country using Double VPN servers:
```
nordvpn connect --group double_vpn
```
Connect to a P2P server:
---
```
nordvpn connect p2p
```
Connect to a specific country using P2P servers:
```
nordvpn connect --group p2p
```
Connect to a Dedicated IP server:
---
```
nordvpn connect Dedicated_IP
```
### Features and configurations
Set a configuration option:
---
```
nordvpn set
```
| or | ```
nordvpn s
```
Enable or disable Threat Protection:
```
nordvpn set threatprotectionlite on
```
| or | ```
nordvpn set threatprotectionlite off
```
Enable or disable Kill Switch:
```
nordvpn set killswitch on
```
| or | ```
nordvpn set killswitch off
```
Enable or disable auto-connect:
```
nordvpn set autoconnect on
```
| or | ```
nordvpn set autoconnect off
```
Set a specific server for automatic connection (e.g.: nordvpn set autoconnect on us2435):
```
nordvpn set autoconnect on
```
Enable or disable notifications:
```
nordvpn set notify on
```
| or | ```
nordvpn set notify off
```
Set custom DNS (you can set up a single DNS or two, just add spaces in between):
```
nordvpn set dns 1.1.1.1
```
| or | ```
nordvpn set dns 1.1.1.1 1.0.0.1
```
[Switch between UDP and TCP protocols](https://support.nordvpn.com/hc/en-us/articles/20465552867345-Switching-protocol-to-OpenVPN-UDP-or-TCP):
```
nordvpn set protocol udp
```
| or | ```
nordvpn set protocol tcp
```
Enable or disable [obfuscated servers](https://nordvpn.com/features/obfuscated-servers/):
```
nordvpn set obfuscate on
```
| or | ```
nordvpn set dobfuscate off
```
Set connection technology (OpenVPN or [NordLynx](https://nordvpn.com/blog/nordlynx-protocol-wireguard/)):
```
nordvpn set technology OpenVPN
```
| or | ```
nordvpn set technology NordLynx
```
Turn [Meshnet](https://nordvpn.com/meshnet/) on or off on your device:
```
nordvpn set meshnet on
```
| or | ```
nordvpn set meshnet off
```
To enable or disable the [post-quantum protection in NordVPN](https://support.nordvpn.com/hc/en-us/articles/30046321712529-NordVPN-Post-quantum-encryption-explained):
```
nordvpn set pq on
```
| or | ```
nordvpn set pq off
```
### LAN discovery and allowlists
Enable or disable LAN discovery:
---
```
nordvpn set lan-discovery enable
```
| or | ```
nordvpn set lan-discovery disable
```
Get more information on LAN discovery:
```
nordvpn set lan-discovery --help
```
Add or remove a rule to allowlist a specified incoming port (you can allowlist multiple ports — just separate their numbers with a space):
```
nordvpn whitelist add port
```
| or | ```
nordvpn whitelist remove port
```
Add or remove a rule to allowlist a specified subnet:
```
nordvpn whitelist add subnet
```
| or | ```
nordvpn whitelist remove subnet
```",https://support.nordvpn.com/hc/en-us/articles/20196094470929-Installing-NordVPN-on-Linux-distributions
How to disable IPv6 on Linux,"While both internet service providers and IT experts caution users against disabling IPv6 on Linux devices permanently, it’s OK to turn the protocol off temporarily when troubleshooting network issues. In this article, we will teach you how to disable IPv6 on your Linux device.
### Red Hat-based distributions
Here's how to disable IPv6 on Linux if you’re running a Red Hat-based system:
1. Open the terminal window.
2. Change to the root user.
3. Type these commands: sysctl -w net.ipv6.conf.all.disable_ipv6=1sysctl -w net.ipv6.conf.default.disable_ipv6=1sysctl -w net.ipv6.conf.tun0.disable_ipv6=1
4. To re-enable IPv6, type these commands:sysctl -w net.ipv6.conf.all.disable_ipv6=0sysctl -w net.ipv6.conf.default.disable_ipv6=0sysctl -w net.ipv6.conf.tun0.disable_ipv6=0sysctl -p
### Debian-based distributions
Here's how to disable IPv6 on Linux if you’re running a Debian-based machine.
1. Open the terminal window.
2. Type this command:sudo nano /etc/sysctl.conf
3. Add the following at the bottom of the file:net.ipv6.conf.all.disable_ipv6 = 1net.ipv6.conf.default.disable_ipv6 = 1net.ipv6.conf.lo.disable_ipv6 = 1net.ipv6.conf.tun0.disable_ipv6 = 1
4. Save and close the file.
5. Reboot your device.
6. To re-enable IPv6, remove the above lines from /etc/sysctl.conf and reboot your device.",https://support.nordvpn.com/hc/en-us/articles/20164669224337-How-to-disable-IPv6-on-Linux
Change your DNS servers on Linux with NordVPN,"Note: when connected to a NordVPN server, [private DNS](https://nordvpn.com/blog/private-dns/) servers are used by default.
To use NordVPN’s private DNS servers on Linux when not connected to a NordVPN server, follow one of the two methods:
## Using Network Manager
1. Open Settings, then select either Network or Wi-Fi based on your network type.
2. Click the gear button and go to the IPv4 tab.
3. Next to DNS, disable the Automatic toggle.
4. In the DNS field enter 103.86.96.100 and 103.86.99.100 separated by a comma:
```
103.86.96.100,103.86.99.100
```
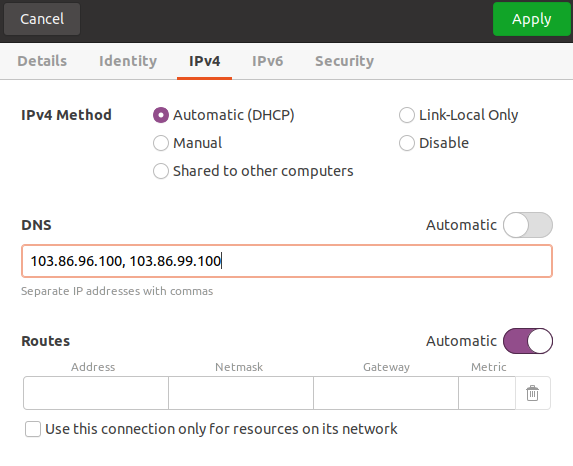
5. Click Apply.
6. Open Terminal and run the following command to restart the Network Manager daemon:
```
sudo systemctl restart NetworkManager
```
7. Enter your sudo password.
## Using the Terminal
1. Open the Terminal by pressing Ctrl + Alt + T on your keyboard, and run the following command:
```
sudo nano /etc/systemd/resolved.conf
```
2. Locate the DNS and FallbackDNS lines.
3. Uncomment the lines by removing the hash (#) symbols.
4. Enter the DNS addresses as follows:
```
DNS=103.86.96.100FallbackDNS=103.86.99.100
```
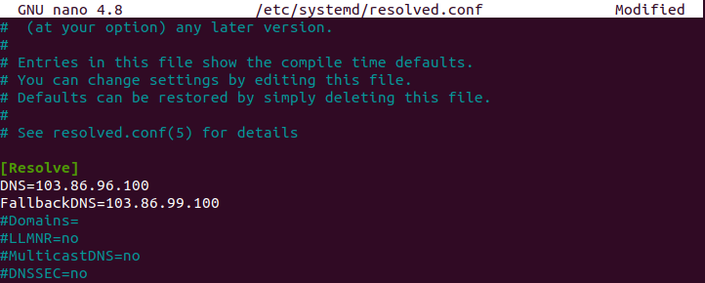
5. Press Ctrl + X, Y, and Enter keys to exit and save the changes.
6. Run the following command into your Linux machine to ensure that the network changes are applied:
```
sudo systemctl restart systemd-resolved
```
7. If requested, please enter your sudo password.",https://support.nordvpn.com/hc/en-us/articles/20094975629585-Change-your-DNS-servers-on-Linux-with-NordVPN
How to connect to your dedicated IP on Linux,"In this article we will cover how to connect to your [dedicated IP](https://nordvpn.com/features/dedicated-ip/) on Linux.
In order for you to be able to connect, first double-check if you have done the following:
1. Purchased a dedicated IP;
2. Set up the dedicated IP in your Nord Account.
NordVPN's dedicated IP, is a unique IP address and assigned solely to a specific server, meaning that only you have access to it. With a NordVPN dedicated IP, you get improved connection speeds, reduced CAPTCHA requests, and enhanced security through exclusive accessibility.
## Connecting to your NordVPN dedicated IP
If you've purchased the dedicated IP and set it up in Nord Account, you can connect to it on Linux by entering a command in the following format:
```
nordvpn connect country_code_server_number
```
It should look like this:
```
nordvpn connect us4955
```
Type the following command to disconnect:
```
nordvpn disconnect
```
Or:
```
nordvpn d
```
After entering the commands, you will be successfully connected to your NordVPN dedicated IP. If you wish to test your connection, visit [NordVPN's DNS leak test page](https://nordvpn.com/dns-leak-test/).
Please be aware that your email will be linked to that dedicated IP address.",https://support.nordvpn.com/hc/en-us/articles/19684336200081-How-to-connect-to-your-dedicated-IP-on-Linux
What is SmartDNS?,"SmartDNS is a technology that lets you access content on your smart TV that may not be available in your region. SmartDNS is integrated into [NordVPN SmartPlay](https://nordvpn.com/features/streaming/smart-play/), so you only need to have a [NordVPN subscription](https://nordvpn.com/pricing/) to access it. SmartDNS does not protect your devices the way a [VPN connection](https://nordvpn.com/what-is-a-vpn/) does — it simply provides access to streaming content. Keep in mind that it may not work with all of the streaming services you can access while connected to NordVPN.
Table of contents:
* [SmartDNS-supported streaming services](
* [How to enable the SmartDNS feature](
* [How to set up the SmartDNS feature on your device](
## SmartDNS-supported streaming services
The landscape of streaming entertainment offers a multitude of choices. To help you navigate these options, the following list presents the complete selection of SmartDNS-supported supported services:
* Amazon Prime (US region)
* Disney Plus (US region)
* Fox Now / Fox Sports Go / Fox News (US region)
* MAX (US region)
* Netflix Originals
* Paramount+
* Peacock TV
* Fubo TV
## How to enable the SmartDNS feature
The activation process is designed for simplicity, allowing you to quickly access region-locked content. Follow these steps to enable NordVPN's SmartDNS feature:
1. Allowlist [your original IP address](https://nordvpn.com/what-is-my-ip/) — the one you have when your VPN is switched off. Make sure to allowlist your IPv4 address, not IPv6, as we do not support IPv6 yet.
2. Disconnect from NordVPN (or any other VPN connection).
3. Log in to your NordAccount:
4. Then, select the NordVPN button located in the upper-left section on your dashboard:
5. Click the enable button on the SmartDNS tab:
6. Activate the SmartDNS feature by clicking on the activate SmartDNS button:Note: the activation can take up to 10 minutes. In the meantime, the status will be shown as pending.
## How to set up the SmartDNS feature on your device
NordVPN SmartDNS offers a simple setup process, allowing you to quickly configure your devices and access geo-restricted streaming content by adjusting a few network settings.
Here’s how to set up SmartDNS on NordVPN for the following devices:
* [SmartDNS on LG TV](https://support.nordvpn.com/hc/en-us/articles/19564250144273-Set-Up-SmartDNS-VPN-feature-on-LG-TV)
* [SmartDNS on Apple TV](https://support.nordvpn.com/hc/en-us/articles/19564451081873-How-to-Set-Up-SmartDNS-on-Apple-TV)
For instructions for other devices, use these [DNS servers](https://nordvpn.com/blog/what-is-dns-server/):
* Primary: 103.86.96.103
* Secondary (if available): 103.86.99.103
If you experience any issues or have additional questions, do not hesitate to [submit a request](https://support.nordvpn.com/hc/en-us/articles/19482416296593-How-to-reach-NordVPN-customer-support) to our customer success team.
The NordVPN service should never be used to bypass copyright regulations. NordVPN does not promote, condone, or endorse the use of the service for such purposes. For more details, please read the [NordVPN Terms of Service](https://my.nordaccount.com/legal/terms-of-service/).",https://support.nordvpn.com/hc/en-us/related/click?data=BAh7CjobZGVzdGluYXRpb25fYXJ0aWNsZV9pZGwrCJEgsuKuEToYcmVmZXJyZXJfYXJ0aWNsZV9pZGwrCJEuKDTLEToLbG9jYWxlSSIKZW4tdXMGOgZFVDoIdXJsSSI3L2hjL2VuLXVzL2FydGljbGVzLzE5NDQyODI1MzA2MjU3LVdoYXQtaXMtU21hcnRETlMGOwhUOglyYW5raQY%3D--428244c9d59968fde2a6ae9ec77a077b9628dd7f
How Does This Affect You?,"If our macOS client detects a potentially misconfigured network (i.e. one that hands out non-RFC1918 IP addresses), it will send you a notification. Upon receiving this alert, we will ask you to enable the 'Invisibility on LAN' feature, ensuring your VPN traffic remains private.",https://support.nordvpn.com/hc/en-us/related/click?data=BAh7CjobZGVzdGluYXRpb25fYXJ0aWNsZV9pZGwrCJGQFBZlEjoYcmVmZXJyZXJfYXJ0aWNsZV9pZGwrCBHNaCtlEjoLbG9jYWxlSSIKZW4tdXMGOgZFVDoIdXJsSSJaL2hjL2VuLXVzL2FydGljbGVzLzIwMjI1MzcxNDQzMzQ1LVN0YXlpbmctaW52aXNpYmxlLW9uLXVuc2FmZS1sb2NhbC1uZXR3b3Jrcy1vbi1tYWNPUwY7CFQ6CXJhbmtpCg%3D%3D--2d6265fac5bb3adb70040791b56a643bc50d9411
Unable to connect to a VPN with the browser extension,"If you’re unable to connect to NordVPN through [Chrome](https://nordvpn.com/download/chrome-extension/), [Edge](https://nordvpn.com/download/edge-extension/), or [Firefox browser](https://nordvpn.com/download/firefox-extension/) extensions, follow these tips to fix the issue:
1. Don’t connect more than ten devices to one NordVPN account. NordVPN allows you to establish ten simultaneous connections. If you’re past this number, the browser extension won’t allow you to connect. To solve this issue, disconnect from the VPN on one of your devices (or all devices in one go by [changing your password](https://support.nordvpn.com/hc/en-us/articles/19476698905617-How-can-I-change-my-NordVPN-password)). Afterward, manually connect up to ten devices of your choice.
2. Make sure to turn off other VPN service extensions or apps. Other extensions may interfere with the proxy settings necessary for the NordVPN extension to work.
3. Wait a little longer to establish a connection. If you’ve closed the VPN browser extension while you were connected to a VPN server, it may take longer to connect the next time you use it.
4. Refresh the extension by turning it off and on.
5. [Clear your browser cache](https://nordvpn.com/blog/how-to-clear-your-cache/) and delete cookies. Removing old data or resetting the settings may help solve your connection problems.
6. Make sure you are using the latest browser extension version.
7. Restart your computer.
8. Reinstall the browser extension.",https://support.nordvpn.com/hc/en-us/articles/20321119601937-Unable-to-connect-to-a-VPN-with-the-browser-extension
How to avoid login popup in NordVPN extension,"If you get a log-in Authentication Request or a proxy sign-in request while using the NordVPN browser extension. Please be aware that this is a native browser pop-up and it is not related to the login of the extension or server.
Here are the steps that may help you to close this pop-up:
1. Close the window by clicking ""Cancel"" and try to proceed with your connection.
2. Verify that you are still connected to the VPN by visiting:
3. If you get disconnected, please wait up to 10 minutes and try to connect again.
Here is how you can cancel the pop-up on Firefox Browser:
Here is how you can cancel the pop-up on Chrome Browser:
We are currently working on resolving this browser bug with Chrome/Edge/Firefox developers.",https://support.nordvpn.com/hc/en-us/articles/20315663868817-How-to-avoid-login-popup-in-NordVPN-extension
How can some websites know my real location?,"One of the main reasons why a browser can detect your location is a browser popup that asks you to share your location with a specific website. Once you click ""Allow"", unfortunately, the browser extension cannot hide the location anymore because it is out of proxy scope.
To change location permission, you can click on the lock sign again and, under the ""Location"" section, choose to disable it.
You may also check out our [blog post](https://nordvpn.com/blog/change-location-google-chrome/) that gives tips on how to change location-sharing services when using the Chrome browser.",https://support.nordvpn.com/hc/en-us/articles/20315254188177-How-can-some-websites-know-my-real-location
Connect to NordVPN with Edge Extension,"## Downloading the NordVPN Edge Extension
1. Open the Microsoft Edge browser.
2. Go to Edge Add-ons and enter ""NordVPN"" into the search bar (or simply click here).
3. On the NordVPN extension page, to the right, you'll find the button Get. Press on it. 
4. A window will appear explaining the permissions the extension will have. Continue by clicking Add extension.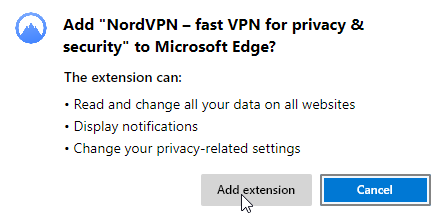
5. After the installation is finished, the NordVPN logo will appear on the toolbar in the top-right corner of the browser. Click on the NordVPN logo, and you will be prompted to either login or sign up using Nord Account.
## Using and customizing the NordVPN Edge Extension
Let's look at how you can make the first connection and adjust the extension settings to suit your needs.
1. Protected status: when you connect to a NordVPN server, this bar will confirm that your connection is successful by displaying the status as Protected.
2. Quick Connect: the fastest way to begin using the NordVPN extension. After pressing Quick Connect, you'll be immediately connected to a NordVPN server.
3. Search: whereas the Quick Connect option will decide on a server location for you, this option allows you to specify the country of the NordVPN server.
4. Settings: here, you can find your General, Connection, Security and privacy settings.General: in these settings, you can find your subscription information, application appearance, language preferences, and a function to import and export [split tunneling](https://support.nordvpn.com/hc/en-us/articles/20321703651985-Split-Tunneling-feature-on-NordVPN-extension) settings.Connection: when accessing connection settings, you can choose to automatically connect to NordVPN servers or add URLs that you wish to be excluded from the NordVPN connection.Security and privacy: here, enable the [WebRTC](https://support.nordvpn.com/hc/en-us/articles/20318383008529-How-to-stop-WebRTC-leaks) Leaks option and [Threat Protection](https://support.nordvpn.com/General-info/Features/1047407402/What-are-Threat-Protection-and-Threat-Protection-Lite.htm). Also, choose to turn on security warnings for suspicious websites.
5. Support Assistance: more information about the extension and live chat with an agent option can be found here.
6. Notifications: updates and news about the NordVPN extension.
7. Main extension window: If you click here, you can open the main extension window.
8. List of Recently Connected Countries: This section displays the countries to which you have established a recent connection. In case you haven't connected to any server yet, you will find recommendations for countries to connect to.",https://support.nordvpn.com/hc/en-us/articles/19627093939601-Connect-to-NordVPN-with-Edge-Extension
Which routers don’t support NordVPN,"On 1 December 2018, NordVPN’s servers stopped supporting L2TP/IPsec and PPTP connections. More about that in [this article](https://nordvpn.com/blog/l2tp-pptp-protocol-update/).
If you use any of the routers listed below with their native firmware, you will not be able to use them with our service:
* Arris
* Belkin
* Cisco
* D-Link
* Huawei
* Linksys (except [WRT32X/WRT32XB AC3200](https://www.linksys.com/support-article?articleNum=270535))
* Nighthawk range routers ([unless the router is using DumaOS](https://www.netgear.com/home/online-gaming/))
* [Netgear](https://support.nordvpn.com/hc/en-us/articles/20282781982481-Can-I-set-up-Netgear-router-with-VPN)
* TRENDnet
* Tenda
* TotoLink
* Ubee
* Orbi
* Spectrum
* Xfinity
* Eero
* Verizon
* AT&T
* FRITZ!Box
* Most ISP-provided routers that were mentioned above
You can install the following custom firmware on some of the aforementioned models to make them work:
* DD-WRT:
* Tomato:
* Padavan:
* OpenWRT:
* Merlin:
## Other tips for router connectivity:
* If your router supports the OpenVPN protocol, search our knowledge base for the name of its manufacturer. You should find a tutorial on how to set it up. You can also check our [router tutorials](https://support.nordvpn.com/hc/en-us/sections/19326876055569-Router) section under the Connectivity category. If you cannot find the setup guide for your router, [contact our customer support](https://support.nordvpn.com/hc/en-us/articles/19482416296593-How-can-I-reach-NordVPN-customer-support) for help.
* If you want a router with out-of-the-box security and anonymity that NordVPN provides, head over to our partners at [FlashRouters](https://nordvpn.com/flashrouters/). They offer pre-configured routers delivering top-notch security and performance.
* Here is our list of [recommended routers for NordVPN](https://support.nordvpn.com/hc/en-us/articles/20195707547025-Which-router-should-I-use-with-NordVPN).",https://support.nordvpn.com/hc/en-us/articles/20379585675793-Which-routers-don-t-support-NordVPN
Peplink / Pepwave setup with NordVPN,"These instructions were made in cooperation with one of our customers, to whom we are very much grateful for having spent their time and effort in helping us out. Here you can learn how to set up an OpenVPN connection with NordVPN on your Peplink / Pepwave router with firmware 8.1.1 or above (with an OpenVPN WAN license). A Balance series router from Peplink was used in the making of these steps.Note: To use OpenVPN as WAN connection on a Peplink / Pepwave router you will need to update to Firmware 8.1.1 and get an OpenVPN WAN license from your reseller (Product code: LIC-OPN-WAN)1. Log in to the web interface of your router. To do this open your preferred internet browser and enter the router’s address (It is 192.168.1.1 or 192.168.50.1 for the Balance or MAX series respectively). You will see a pop-up that will require you to enter a username and a password. By default, you can enter 'admin' into both the username and password fields.
2. Once you have logged in to the router's interface, click on Network in the top bar.in the Network section press on WAN in the left sidebar.

3. There, click on the OpenVPN WAN connection name to open the OpenVPN WAN settings.
4. Now you need to download the OpenVPN client configuration files.
Follow the steps below to find the manual connection configuration files:
1. Log into your [Nord Account](https://my.nordaccount.com/), and click NordVPN.
2. Scroll down to Advanced Settings and click Set up NordVPN manually.
3. Select the OpenVPN configuration files tab.
4. Find the server you wish to connect to by using the Search bar or by scrolling down and download it by clicking Download UDP or Download TCP.
5. When connecting to OpenVPN & IKEv2 manually, you're going to need to use the Username and Password from the Service credential tab.
5. Go back to the router interface and click on Choose File.

6.Select the configuration file you had downloaded and then press Open.
We recommend using UDP files as they are generally faster than TCP.
7. Now you need a NordVPN service credentials for the OpenVPN connection to work.
You can find your NordVPN service credentials (service username and service password) in the[ Nord Account dashboard](https://my.nordaccount.com/dashboard/nordvpn/):
1. Click Set up NordVPN manually.
2. You will receive a verification code in your email that you use for NordVPN services. Type the code in: 
3. Copy the credentials using the “Copy” buttons on the right:
8. Fill in the username and password field with the credentials that you just copied.

9. Now uncheck Obtain DNS server address automatically and check Use the following DNS server address(es). Afterwards, fill in the following DNS servers:103.86.96.100103.86.99.100
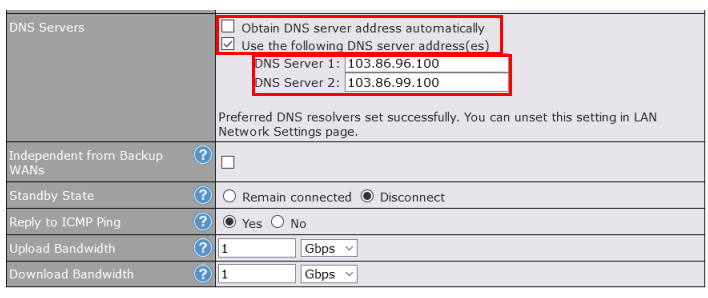
10. Under Physical Interface Settings next to “Uplink Connection Priority” you can set in which priority your physical WAN connections will be connected to the NordVPN OpenVPN servers.
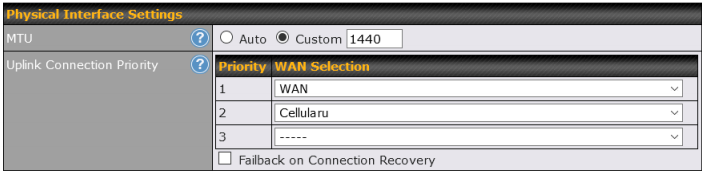
11. Make sure to check “Enable” and click on Save or Save and Apply on the bottom of the OpenVPN configuration window.
* On the Balance series router you will also need to click Apply changes in the top right when the WAN Settings are saved.
12. If you go back to the dashboard you will see that the OpenVPN WAN will start to connect with the NordVPN OpenVPN server.
13. To control what traffic should be routed over the OpenVPN connection you would need to create an Outbound Policy. You can find it under Network or Advanced for the Balance series or MAX series respectively. Press on Outbound policy in the left sidebar and click on Add Rule.
14. You can set up a simple priority rule with OpenVPN being with the highest priority.
To use a kill switch for when the OpenVPN disconnects, you will need to use enforce instead.
15. Make sure you drag the new rule to the top so that it is applied first. Then, click on Apply changes in the top right corner.",https://support.nordvpn.com/hc/en-us/articles/20375659316497-Peplink-Pepwave-setup-with-NordVPN
How to configure QNAP 4.2.1 NAS,"This is the tutorial on how to set up your Qnap NAS based on TS-112P version of the disk station using 4.2.1 (20160201) firmware version. The instructions were made for connection to the US #936 server. Note that if you connect to the other server, you need to name it in all the steps accordingly.
Connect to your Qnap control panel:
1. In order to connect your Qnap NAS device to VPN we will need to access its control panel. The easiest way to do that is using the Qfinder app provided together with Qnap NAS system. Please run the app and wait a few moments for the Qfinder to find the Qnap connected to your local network. A few moments after opening the app you it should list your NAS device. Double click on it in the list and its control panel will be opened in your default internet browser.
2. You will now be able to log in to your Qnap control panel.
3. In order to set up the VPN connection, you will need to use your administrator account.
Here is a tutorial on how to connect a QNAP NAS via OpenVPN:
1. Start by downloading the manual .ovpn files.
Follow the steps below to find the manual connection configuration files:
1. Log into your [Nord Account](https://my.nordaccount.com/), and click NordVPN.
2. Scroll down to Advanced Settings and click Set up NordVPN manually.
3. Select the OpenVPN configuration files tab.
4. Find the server you wish to connect to by using the Search bar or by scrolling down and download it by clicking Download UDP or Download TCP.
5. When connecting to OpenVPN & IKEv2 manually, you're going to need to use the Username and Password from the Service credential tab.
We will be connecting to US #936 server using UDP protocol. The contents of the file are as follows:
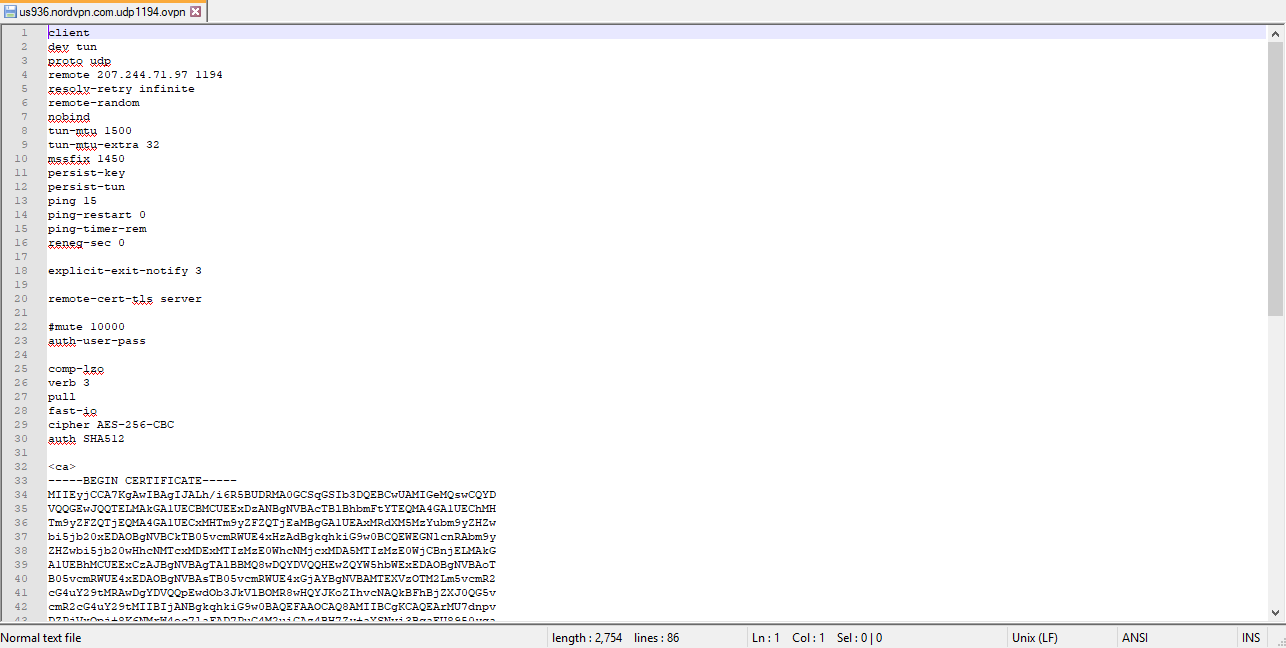If you want to connect to a different server, please change the line
remote 207.244.71.97 1194
to contain the IP address of the server you want to connect to. You also need to change the CA (text between """" and """" lines) and TLS (text between """" and """" lines) keys to these of the server you want to connect to.
You can find the IP addresses as well as CA and TLS keys of the server you want to connect in the .ovpn configuration files that can be downloaded from (note: the .ovpn file you download from the website cannot be used instead of the file we created, as they have slightly different content)2. Create a second text file with your username and password. We named the file ""nordvpnpass.txt"". Enter your username in the first line and password in the second line of the file:
NordVPN_UsernameNordVPN_Password
Follow the steps below to find the service credentials for manual connection setup:
1. Log into your [Nord Account](https://my.nordaccount.com/), click NordVPN, and, under Manual setup, click on Service credentials. Here you'll find the Username and Password needed to connect manually.
3. Access your QNAP user interface. Open the File Station on your QNAP, navigate to the /Download/ directory and create a new folder named ""VPN"" by clicking the ""+"" sign at the top of the window. You should now move the created .ovpn file (in our case, us936.nordvpn.com.udp.ovpn) and nordvpnpass.txt file you have created to this directory.
4. You also need to create another text file called ""ca.crt"" that has to contain the CA certificate of the server. You can copy the same certificate as used in the .ovpn configuration file. In our case, since we are connecting to US #936 server, our ca.crt file contains this information content
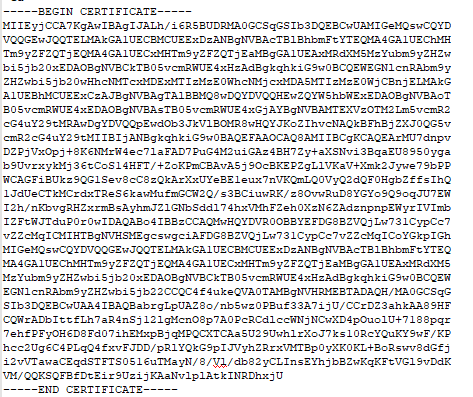
5. Access your QNAP user interface again and go to Control Panel -> Applications -> VPN Client.
6. In the VPN Client menu from the ""Add"" Drop down menu select ""OpenVPN"".
7. Fill out the OpenVPN client settings: 7.1 Enter ""US936UDP"" as a Profile Name. You can name the profile however you like, however it is most helpful to name it for the server and settings used;7.2 Type in the IP address of the server. You need to enter the same IP address as used in the ""remote"" line in step #1;7.3 Enter your NordVPN credentials;7.4 Change the Encryption to ""Highest (AES 256 bit)"";7.5 Upload the ca.crt file you have created earlier;7.6 Enable ""Allow other network devices in the same subnet to connect to the VPN through the NAS"".
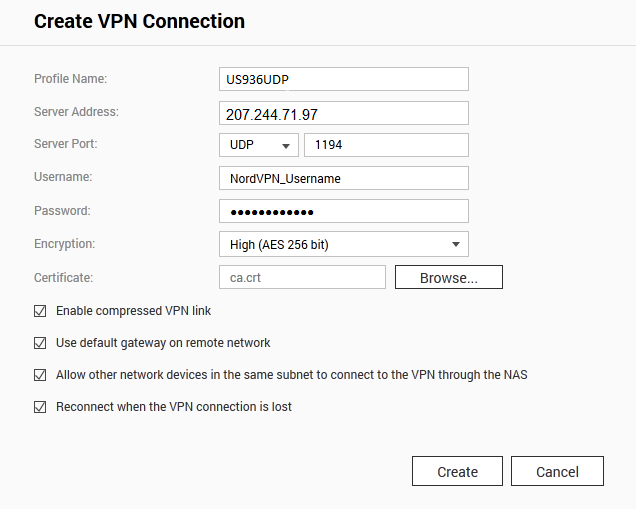
8. You will now need to connect to your QNAP disk station using SSH tunnel. For that you can use Putty, WinSCP (Windows) or Terminal (Mac OS X, Linux). In our cases we will be using Putty client for Windows (You can download Putty here ).In the ""Host Name (or IP address)"" field enter the local IP address of your QNAP (in our case, 192.168.1.60) and click ""Open"".
9. Enter the username and password of your QNAP administrator account.
10. Use this command to open the ""vpn_openvpn_client.sh"" file.
```
vi /etc/init.d/vpn_openvpn_client.sh
```
Then press ""A"".
Important!! Copying the text to the vi editor tends to leave out some of the first characters of the copy-pasted text. You may need to manually type in the missing part of the copied text.
Now you need to change the beginning of this file from
```
#!/bin/shVPN_CONF=""/etc/config/vpn.conf""VPN_NUM=""$2""VPN_CONF_S=1VPN_CONF_E=10
```
to
```
#!/bin/shOPENVPN=/usr/sbin/openvpnclientPIDFILE=""/var/run/openvpn.client.pid""OPENVPN_CONF=""/share/Download/VPN/us119udp.ovpn""OPENVPN_CONF_PATH=""/etc/openvpn""VPN_CONF=""/etc/config/vpn.conf""VPN_NUM=""$2""VPN_CLIENT=""OPENVPN_CLIENT""""${VPN_NUM}""MAX_VPN_INDEX=""255""
```
Once you complete editing the file press ""Esc"" and enter this command "":wq"". It will save all the changes you have made to the file.Also, restarting your QNAP disk station will reset all changes made to this file. Therefore, you will need to repeat this step after each QNAP restart to connect to VPN.
11. You can now connect to the VPN using this command:
```
openvpn --config /share/Download/VPN/us936.nordvpn.com.udp.ovpn
```
12. Executing the command will not generate any message in the Putty window. Therefore, you need to open the openvpn.log file in the /Download/VPN directory to confirm that you got connected to the VPN. The last line of the log file should be ""Initialization Sequence Completed""",https://support.nordvpn.com/hc/en-us/articles/20347010702097-How-to-configure-QNAP-4-2-1-NAS
How to configure Synology 5.1 NAS,"This is the tutorial on how to set up your Synology NAS based on DiskStation Manager (DSM) 5.1 version. The instructions were made for connection to the Swedish #3 server. Special thanks to @davmojo for providing these instructions.
1. Login to your Synology NAS control panel.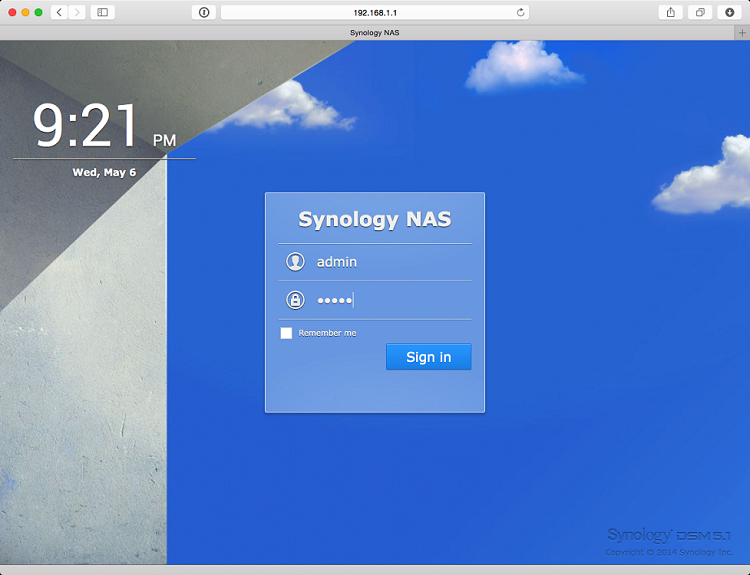
2. Go to Control Panel.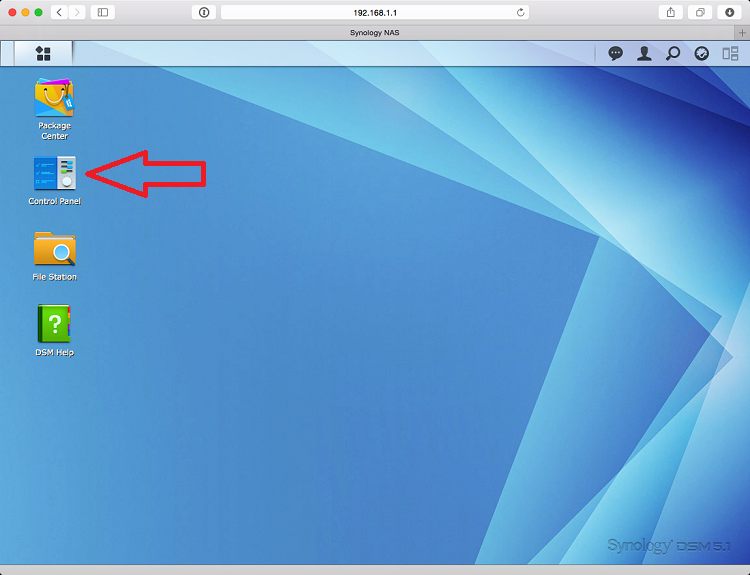
3. Go to Network.
4. Create a new VPN Profile.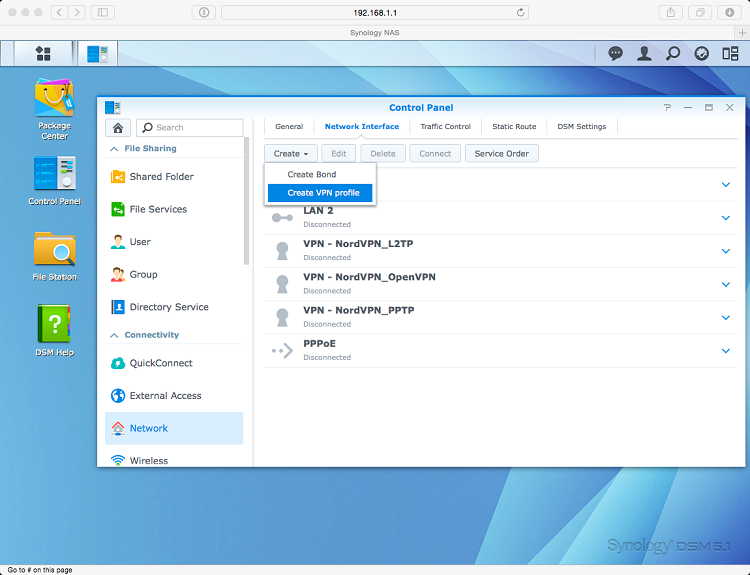
5. Choose OpenVPN option.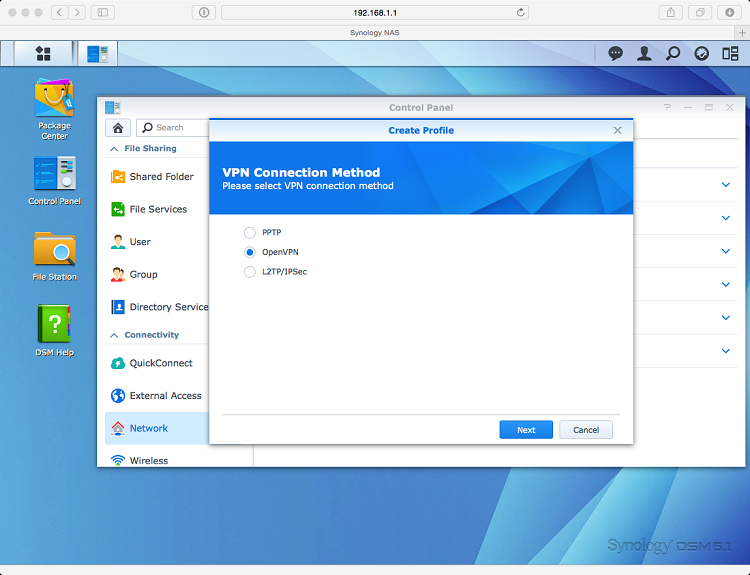
6. Download the latest CA certificates from this link and extract the package.
7. Return to your web browser and enter the following details:Profile Name – choose any name you like;Server Address – the NordVPN server hostname or IP address;User name – your NordVPN service username;Password – your NordVPN service password;You can find your NordVPN service credentials (service username and service password) in the [Nord Account dashboard](https://my.nordaccount.com/dashboard/nordvpn/):
1. Click Set up NordVPN manually.
2. You will receive a verification code in your email that you use for NordVPN services. Type the code in: 
3. Copy the credentials using the “Copy” buttons on the right:
Port – 1194 (recommended);Protocol – UDP (recommended);Cerificate – go to the folder where you have extracted the CA certificates and select the corresponding CA certificate to the server you will use.Click Next.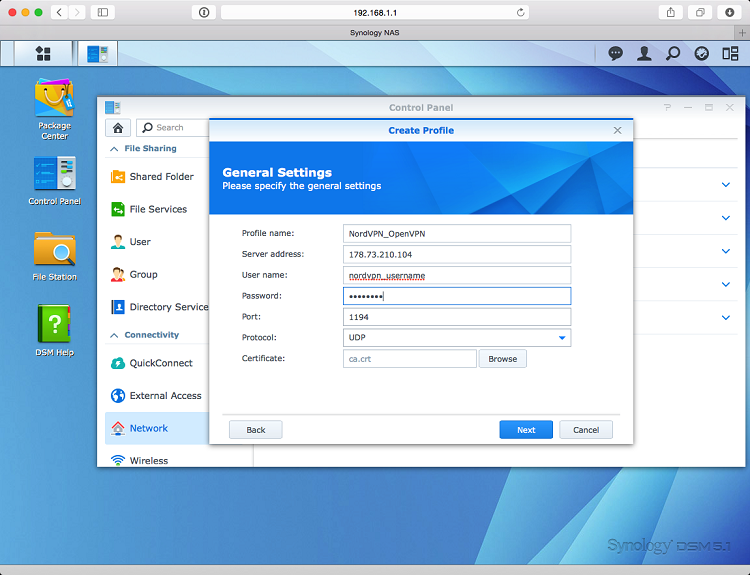
8. On the Advanced settings screen – enable all the options.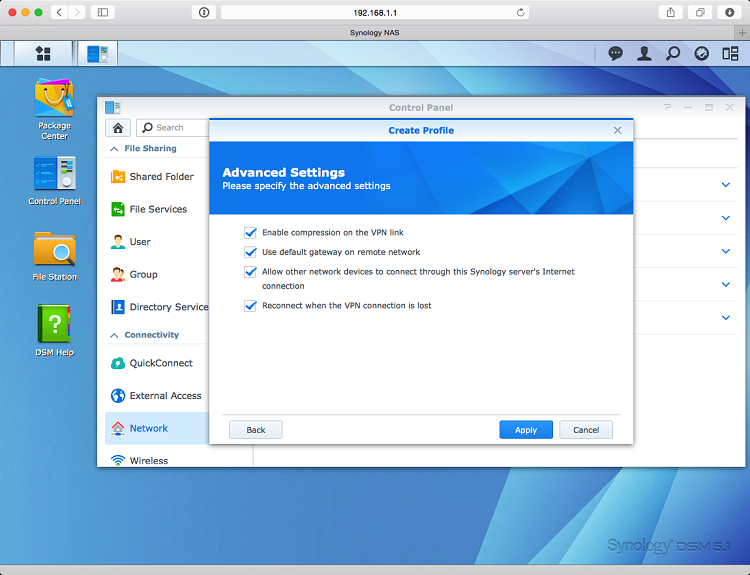
9. Click Apply and you will return to the Network Interface list.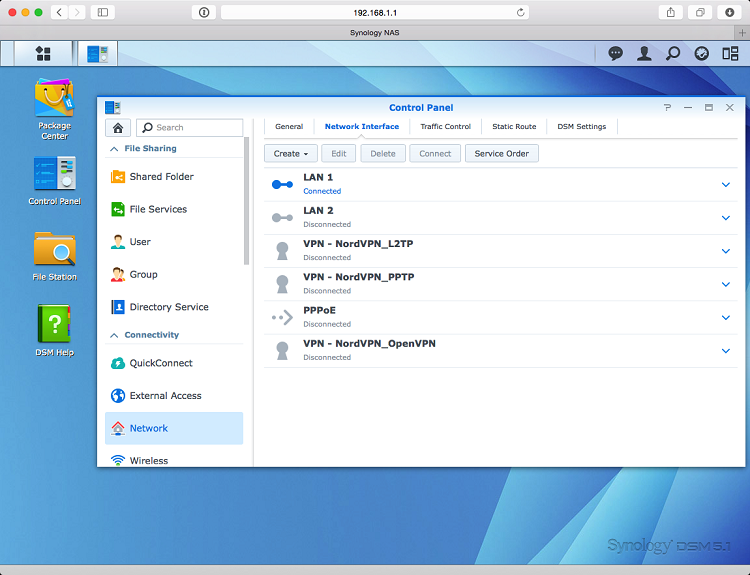
10. If you click the VPN Profile you have just created and click connect you will see the following error in red.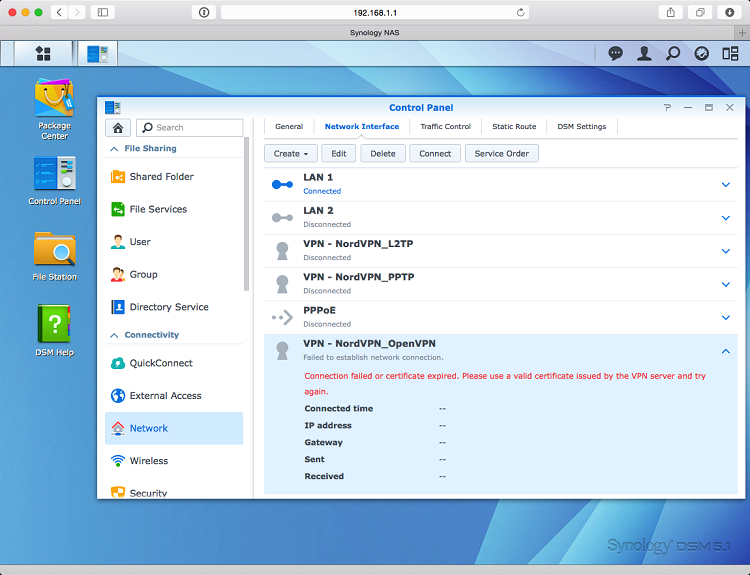
11. You will now need to manually edit the OpenVPN profile on your Synology NAS. To do so you need to SSH as root.Firstly enable SSH from the Terminal & SNMP option.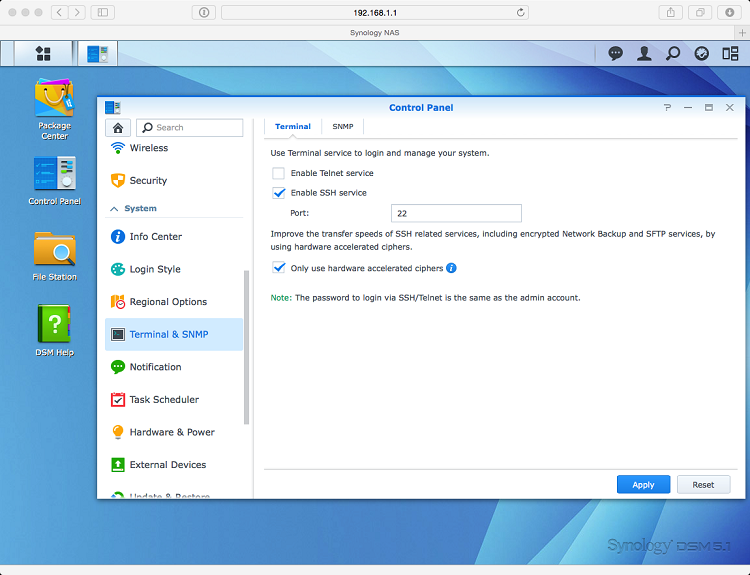
12. Now open your favorite terminal/ssh program (Mac OSX Terminal shown here) and type:ssh root@(ip of your synology).The root password is the password of your administrator user (you may have changed it when initializing your NAS).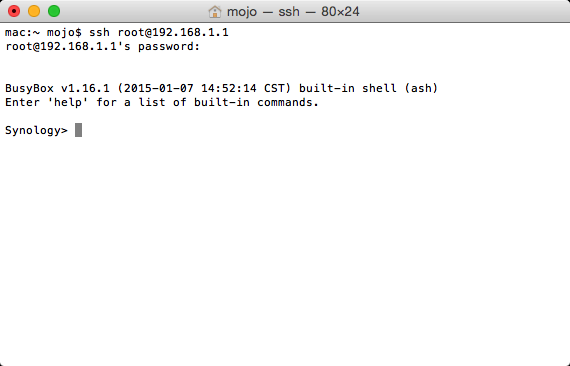
13. Now you need to change directories. Type and then press enter at the end of the line:cd /usr/syno/etc/synovpnclient/openvpnls -alIn the screenshot below you see three files:– ca_.crt is the certificate you have uploaded (ca.crt);– client_ is the file containing the OpenVPN configuration;– ovpnclient.conf contains the Synology setup for OpenVPN connections.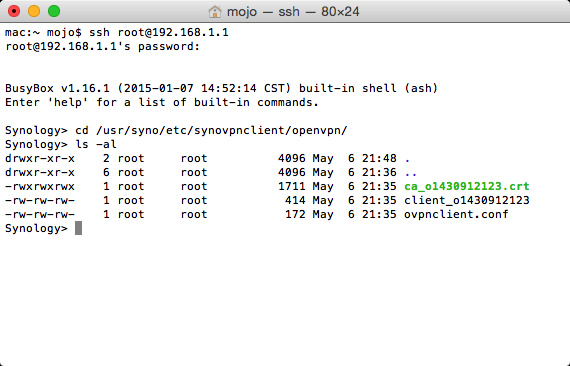
14. You need to create a new file which contains the tls-auth key.Using vi is the easiest way to do this. Type: (replace with the actual connection id)vi tls_auth_.key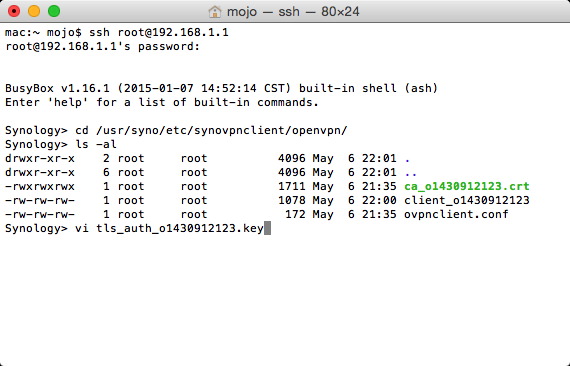
15. Return to the directory where you have extracted CA certificates. You can also see the TLS-AUTH.key files there. Select the corresponding TLS-AUTH.key file to the server you are setting up the connection with and open it with a text editor program. Copy all the text in the file.
16. Open the terminal window again. Press A and then paste the text you have copied from the TLS-auth.key file. It should look similar to the text below.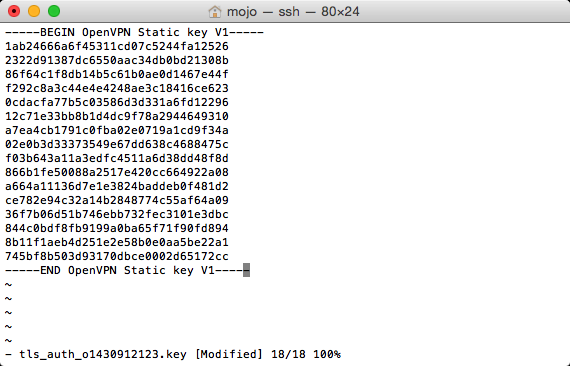
17. Press Escape and then type :wq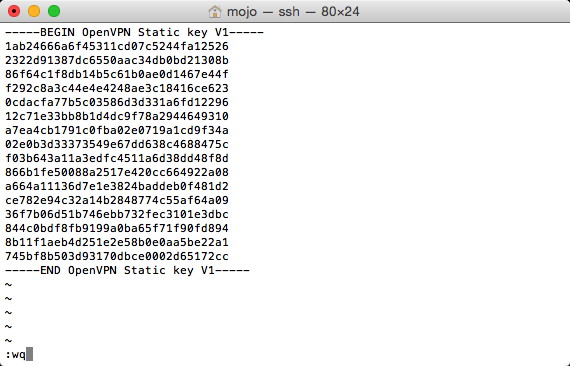
18. If you would list the content of the directory using ls -al command you should see something similar to the image below.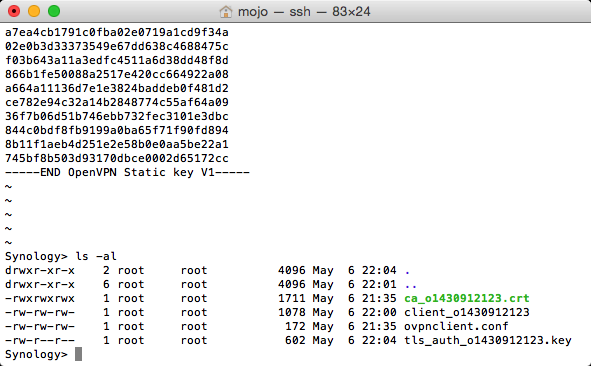
19. Now you need to finish the client_(connection_id) file. Using vi open the file and add the following, remember to replace the TLS-AUTH.key file with the name of the keyfile you have created earlier:cipher AES-256-CBCremote-cert-tls serverauth SHA512tls-auth tls_auth_o1430912123.key 1tun-mtu 1500tun-mtu-extra 32mssfix 1450persist-keypersist-tunping 15ping-restart 0ping-timer-remlog-append /volume1/tmp/NordVPN.log
It should look similar to the image below.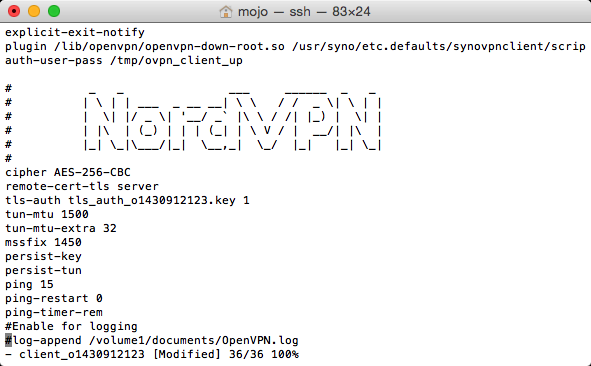
20. Save the file by pressing Escape, typing :wq
21. Return to your web browser window. Click Connect and you will see the Connecting sign. Please wait for up to 2 minutes.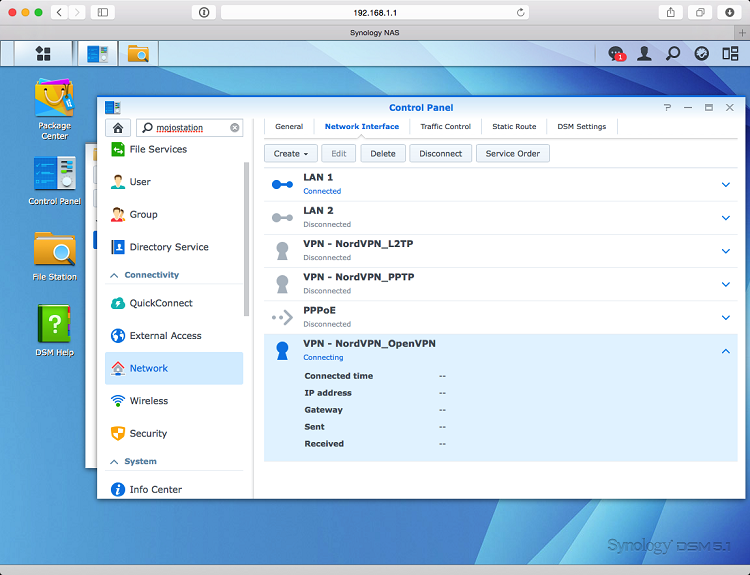
22. If everything is done properly you will be connected to VPN.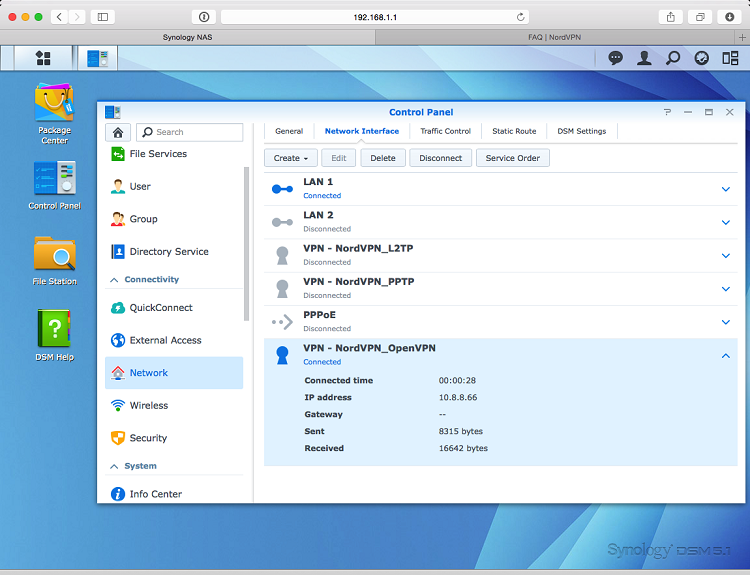
23. To disconnect simply click on Disconnect button in the Synology Network list.",https://support.nordvpn.com/hc/en-us/articles/20343522984337-How-to-configure-Synology-5-1-NAS
Sabai setup with NordVPN,"This tutorial explains how to connect your Sabai router to NordVPN using the OpenVPN protocol.
First things first, these changes are made in the web configuration panel of your router. You can access it by visiting the local IP of your router from your web browser. The two most common, default local IPs that most routers have are 192.168.1.1 or 192.168.0.1 - you can access these by opening [http://192.168.1.1](http://192.168.1.1/) or [http://192.168.0.1](http://192.168.0.1/admin/index.html#/home) in your browser. The default IP, username and password are listed in your router’s User Manual.
1. Access your Sabai router (default IP address of Sabai routers is: 192.168.199.1) 2. Once you access your router, press on Network which is in the top left corner and select OpenVPN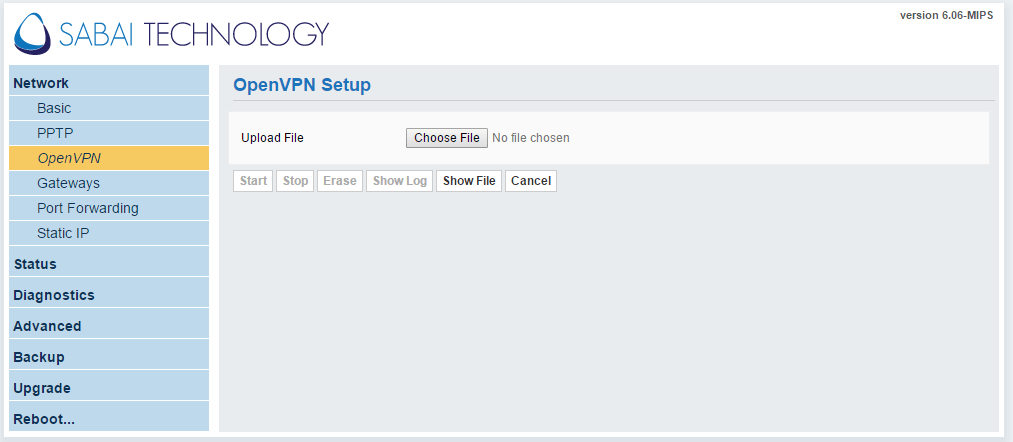3. Press Choose File and import one of our .ovpn server configuration files.
Follow the steps below to find the best server for your connection:
1. Log into your [Nord Account](https://my.nordaccount.com/), and click NordVPN.
2. Scroll down to Advanced Settings and click Set up NordVPN manually.
3. Select the Server recommendation tab. According to your location, the best server will be recommended.
4. By pressing Advanced filters you can further customize the recommended servers by selecting the Server type and the Security protocol.
In case you wish to select a specific server, follow these steps:
1. Under Set up NordVPN manually, select OpenVPN configuration files.
2. Find the server you wish to connect to by using the Search bar or by scrolling down and download it by clicking Download UDP or Download TCP.
4. Wait until the import process finishes. Click Show File and Edit.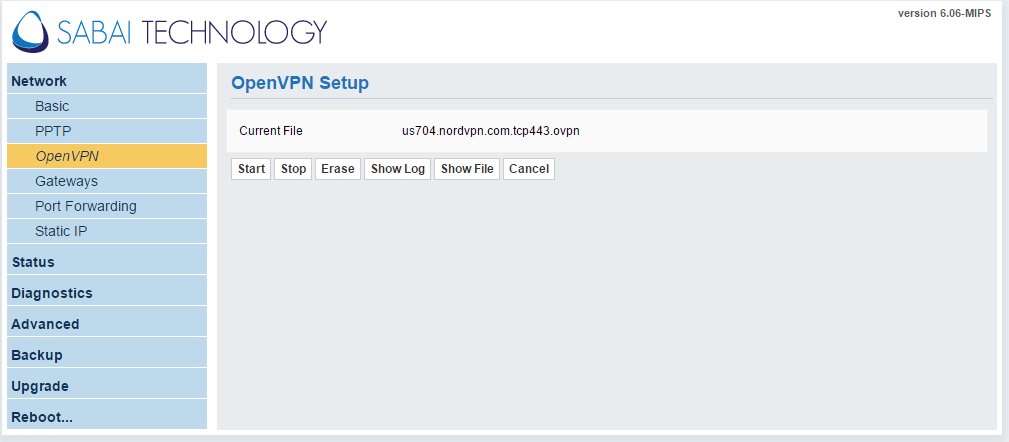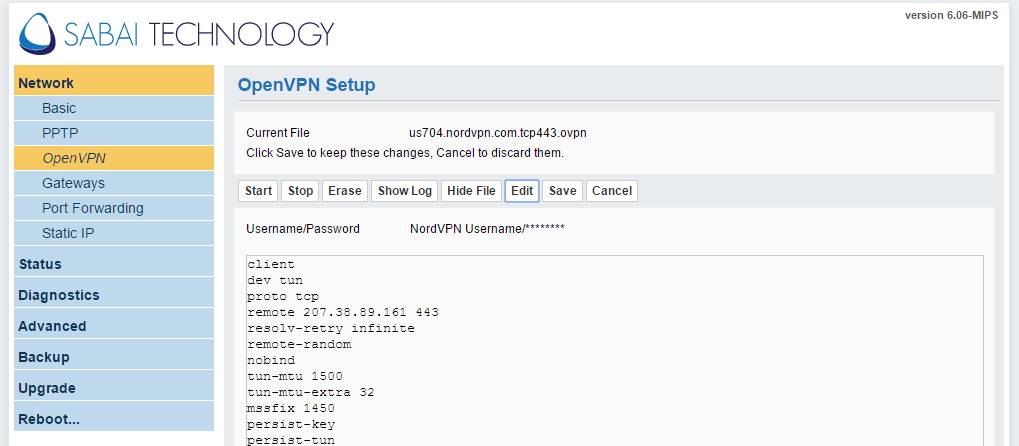5. Enter your NordVPN service credentials and click Done.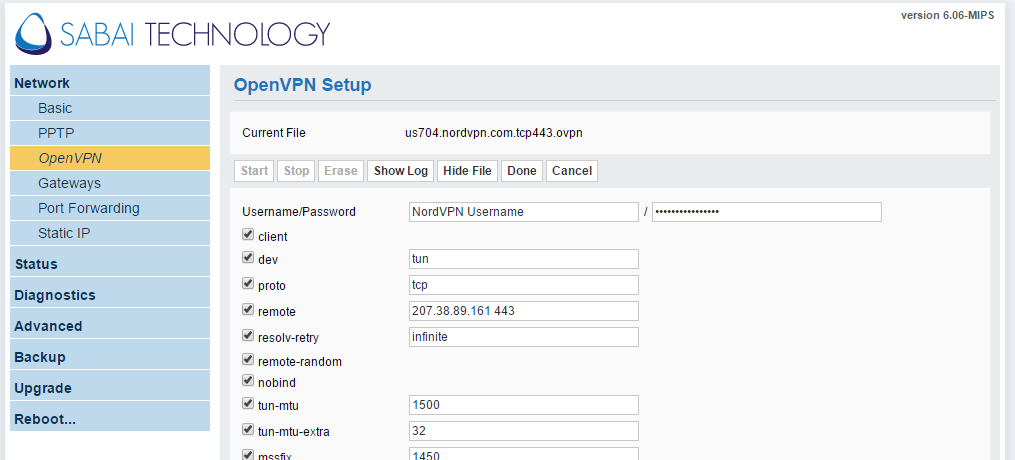
Follow the steps below to find the service credentials for manual connection setup:
1. Log into your [Nord Account](https://my.nordaccount.com/), click NordVPN, and, under Manual setup, click on Service credentials. Here you'll find the Username and Password needed to connect manually.
6. Press Start in order to connect to a VPN server.",https://support.nordvpn.com/hc/en-us/articles/20323512359697-Sabai-setup-with-NordVPN
NordVPN proxy setup on Deluge,"The simplest way to use Deluge securely is to connect to NordVPN before using it. However, when you can’t access the NordVPN app, setting up a NordVPN proxy is the next best thing.
Note that NordVPN service should never be used to bypass copyright regulations. NordVPN does not promote, condone, or endorse the use of the service for such purposes. For more details, please read the NordVPN [Terms of Service](https://my.nordaccount.com/legal/terms-of-service/).
## How to set up NordVPN with Deluge
1. Open Deluge.
2. Open Preferences.
* On Windows and Linux: click Edit > Preferences.
* On macOS: in the menu bar, click Deluge > Preferences.
3. Select the Proxy section.
4. From the Proxy dropdown menu, select Socks5 Auth.
5. Fill in the following information:
* Username: NordVPN service username
* Password: NordVPN service passwordYou can find your NordVPN service credentials (service username and service password) in the [Nord Account dashboard](https://my.nordaccount.com/dashboard/nordvpn/):
1. Click Set up NordVPN manually.
2. You will receive a verification code in your email that you use for NordVPN services. Type the code in: 
3. Copy the credentials using the “Copy” buttons on the right:
* Hostname: Address of a selected proxy server.Here is a list of servers you can choose from:amsterdam.nl.socks.nordhold.netatlanta.us.socks.nordhold.netdallas.us.socks.nordhold.netlos-angeles.us.socks.nordhold.netnl.socks.nordhold.netse.socks.nordhold.netstockholm.se.socks.nordhold.netus.socks.nordhold.netnew-york.us.socks.nordhold.netsan-francisco.us.socks.nordhold.netdetroit.us.socks.nordhold.net
* Port: 1080
6. Click Apply and OK to save changes.
## How to check if your proxy setup is working
1. Visit the [ipleak.net](https://ipleak.net/) website.
2. Scroll down to the Torrent Address detection section, click Activate, and click this Magnet Link.
3. A new window will show up, prompting you to open uTorrent. Select Open deluge.Important: keep ipleak.net open.
4. Once Deluge opens, click Add to add the torrent.
5. While the torrent is downloading metadata, return to the ipleak website.
6. Under Torrent Address detection, you should see the IP address of your chosen proxy server.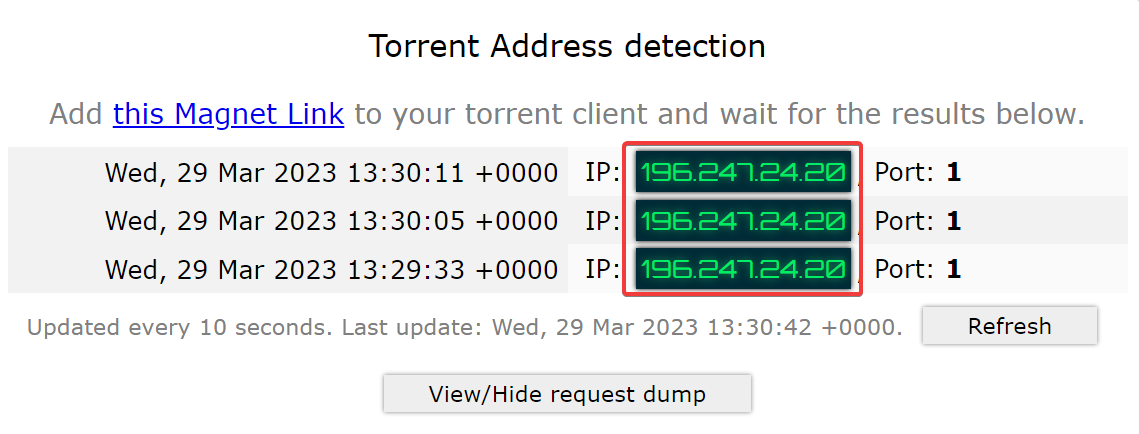If no address is showing, click the Refresh button to update the results.
If everything is working properly, you should see the IP address of the VPN server you selected. Deluge is now downloading files securely thanks to NordVPN SOCKS5 proxy server.",https://support.nordvpn.com/hc/en-us/articles/20341624031505-NordVPN-proxy-setup-on-Deluge
Does NordVPN support OpenWrt?,"Routers with OpenWRT firmware have been reported to support VPNs like NordVPN. However, please be aware that the following configuration has not been tested by NordVPN staff – it has been shared and tested by our wonderful customers instead. In particular, NordVPN would like to thank ulmwind, an active member of the OpenWRT community, for their continuous assistance in providing us with up-to-date OpenWRT instructions.",https://support.nordvpn.com/hc/en-us/articles/20340177222289-OpenWrt-setup-with-NordVPN
OpenWrt setup with NordVPN,"## Does NordVPN support OpenWrt?
Routers with OpenWRT firmware have been reported to support VPNs like NordVPN. However, please be aware that the following configuration has not been tested by NordVPN staff – it has been shared and tested by our wonderful customers instead. In particular, NordVPN would like to thank ulmwind, an active member of the OpenWRT community, for their continuous assistance in providing us with up-to-date OpenWRT instructions.
This article provides two OpenWrt setup guides:
* GUI interface instructions (simplified version)
* CLI instructions (more advanced)
If any issues arise, feel free to contact our support team for further help! This is an advanced tutorial, but it also provides some simpler instructions.
## GUI instructions
In this guide, we will show you how to set up a NordVPN connection on routers using OpenWrt firmware via the LuCI web interface.
1. Access the LuCI interface of your OpenWrt router by entering its local IP address into your internet browser and logging in. The default IP address is 192.168.1.1 and the username is root.By default, there is no password set up, so you may leave this slot empty, however, when you log in you will get a message to set up a password.In order to do so, click on System > Administration and you may set up a password there.
2. Once you have logged in, select the System tab and choose Software.
3. Click the “Update lists” button and wait for the process to finish and click “Dismiss”.
4. Install the following packages by typing in their name in the “Filter” field and clicking “Install…”.
1. openvpn-openssl
2. ip-full
3. luci-app-openvpn
5. Click “Save & Apply” and refresh the router page. Now you should see a new tab called VPN. Click on it and choose OpenVPN from the dropdown.
6. Now you need to download OpenVPN client configuration files. You can be connected to a recommended server via your NordAccount.
Follow the steps below to find the manual connection configuration files:
1. Log into your [Nord Account](https://my.nordaccount.com/), and click NordVPN.
2. Scroll down to Advanced Settings and click Set up NordVPN manually.
3. Select the OpenVPN configuration files tab.
4. Find the server you wish to connect to by using the Search bar or by scrolling down and download it by clicking Download UDP or Download TCP.
5. When connecting to OpenVPN & IKEv2 manually, you're going to need to use the Username and Password from the Service credential tab.
For the purpose of this guide, we will be using the us5104.nordvpn.com server.
1. Under the “OVPN configuration file upload” section name the VPN connection in the “Instance name” field (we have named it “nordvpn_us”.) After that, click on the “Choose File” button, locate the downloaded server file and click “Upload”.
2. In the “OpenVPN instances” section, click the “Edit” button next to the instance you have just created.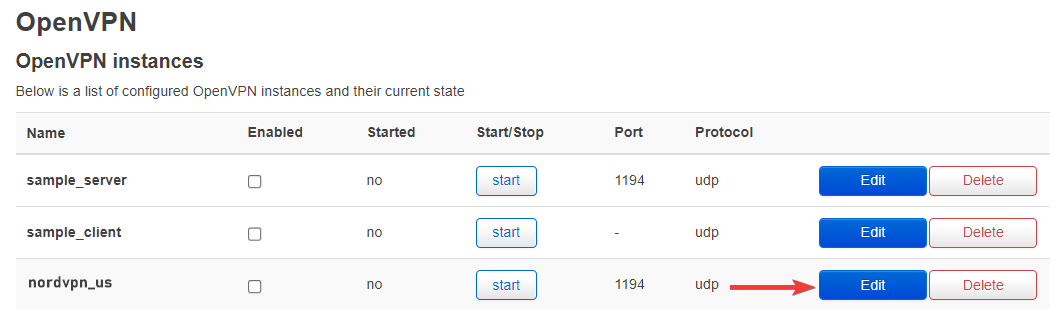
3. In the lower field, enter your NordVPN service credential username and password into separate lines.usernamepassword
You can find your NordVPN service credentials (service username and service password) in the [Nord Account dashboard](https://my.nordaccount.com/dashboard/nordvpn/):
Follow the steps below to find the service credentials for manual connection setup:
1. Log into your [Nord Account](https://my.nordaccount.com/), click NordVPN, and, under Manual setup, click on Service credentials. Here you'll find the Username and Password needed to connect manually.
1. Now, copy the path to the credentials file that is given right above the field containing the credentials and paste it next to the “auth-user-pass” line in the “Config file” section above.It should look like this: auth-user-pass /etc/openvpn/nordvpn_us.auth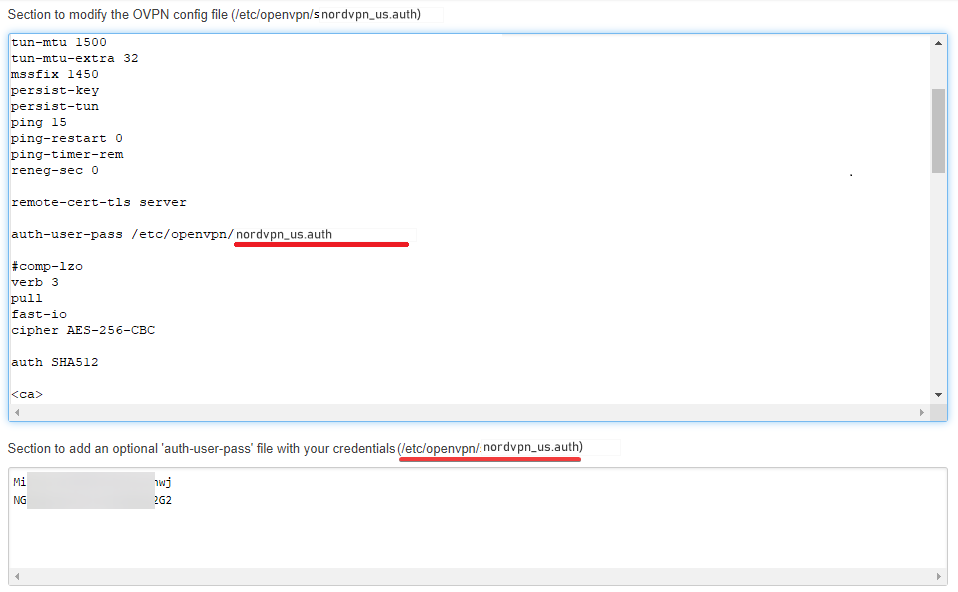
2. Click on the Save button at the bottom.
3. Click on the “Network” tab at the top of the page and choose “Interfaces“.
4. Select the “Add new interface…” button and name it “nordvpntun”.
5. Click on the “Protocol” dropdown menu and choose “Unmanaged”.
6. In the “Interface” dropdown, enter the name “tun0” at the bottom -- custom -- field and press the Enter key.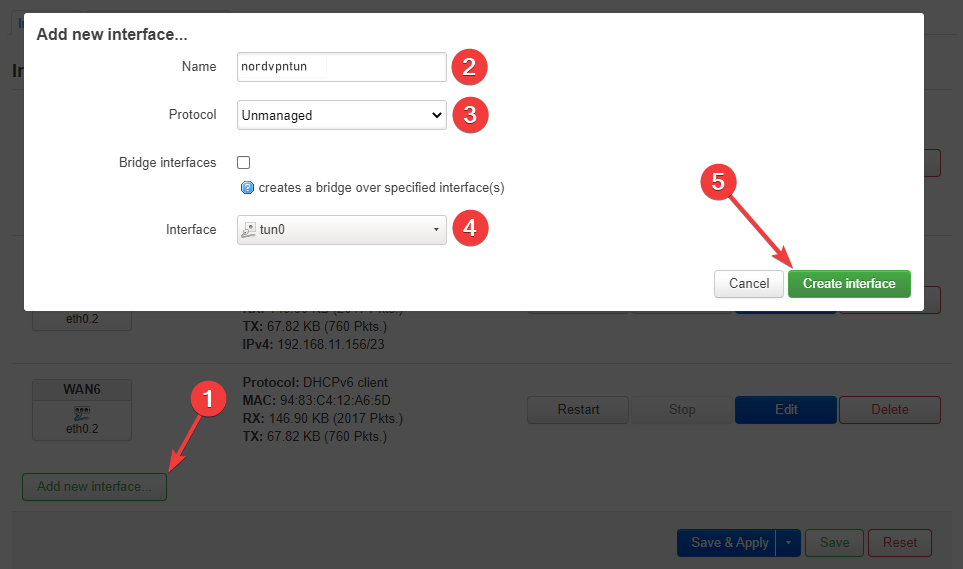
7. Click the “Create interface” and “Save” buttons.
8. Choose the “Network” tab at the top once more and head to the “Firewall” section.
9. Click the “Add” button and adjust it as follows:
1. Name it “vpnfirewall”;
2. Set the “Input” option as “Reject”;
3. Leave “Output” as “Accept” and “Forward” as “Reject”;
4. Check the “Masquerading” option;
5. Check the “MSS clamping” option;
6. From the “Covered Networks” dropdown menu choose “nordvpntun”;
7. In the “Allow forward from source zones” dropdown menu, choose “lan”;
8. Click the “Save” button.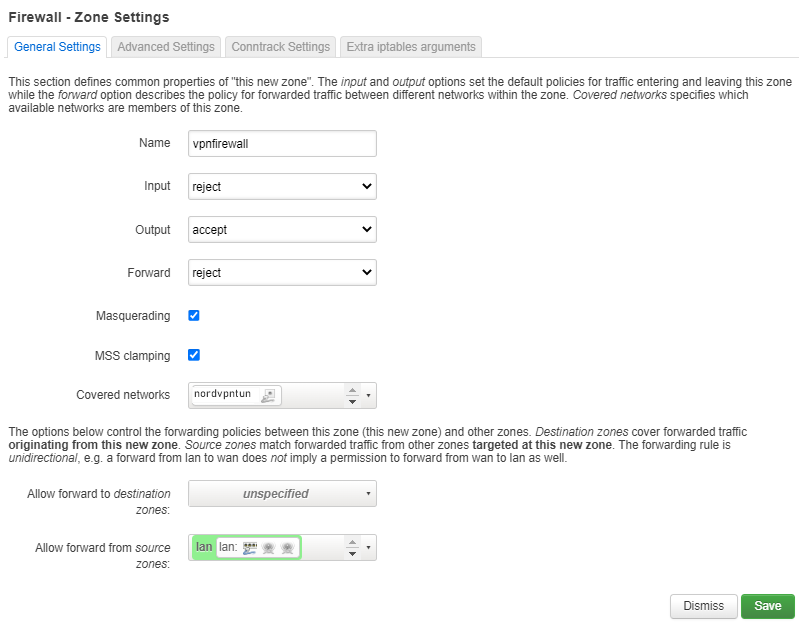
10. In the “Zones” section, find the zone named “lan”, and click on the “Edit” button.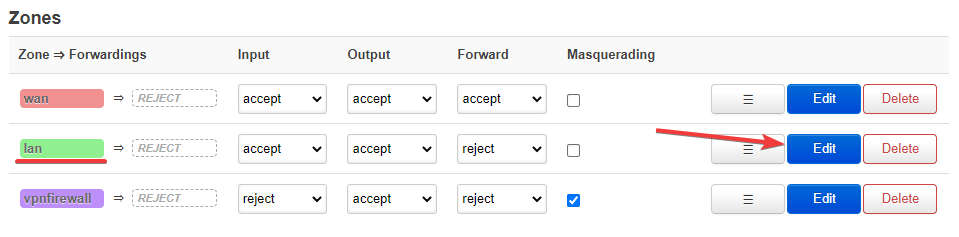
11. In the “Allow forward to destination zones” dropdown check the “nordvpntun” entry.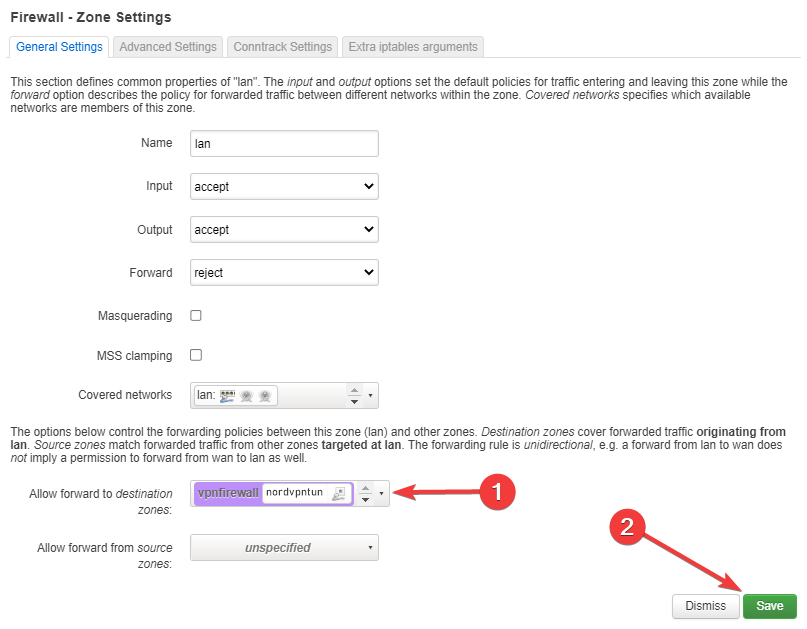
12. Once more, click “Network'' at the top of the page and then choose “DHCP and DNS” from the dropdown list.
13. In the “General Settings” tab, find the “DNS forwardings” option and enter NordVPN DNS addresses there. The addresses are: 103.86.96.100 and 103.86.99.100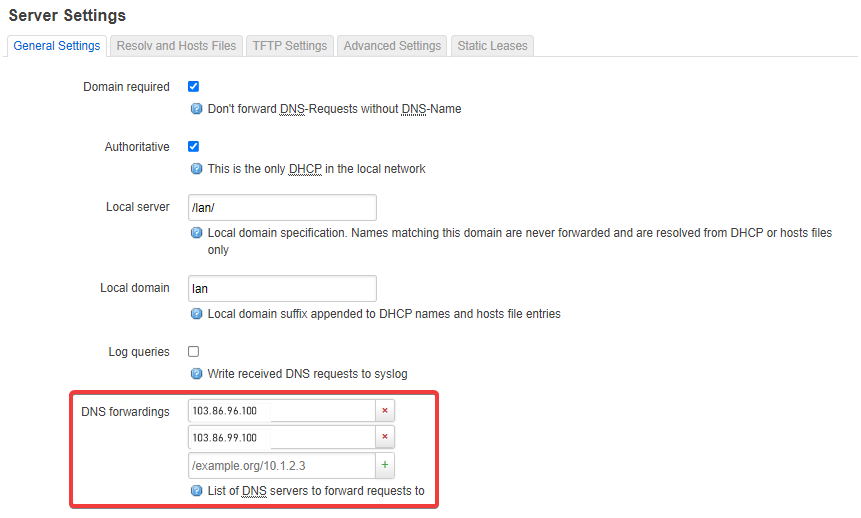
14. Go to the “Resolv and Hosts Files” tab, check the “Ignore resolve file” checkbox, and click the “Save & Apply” button.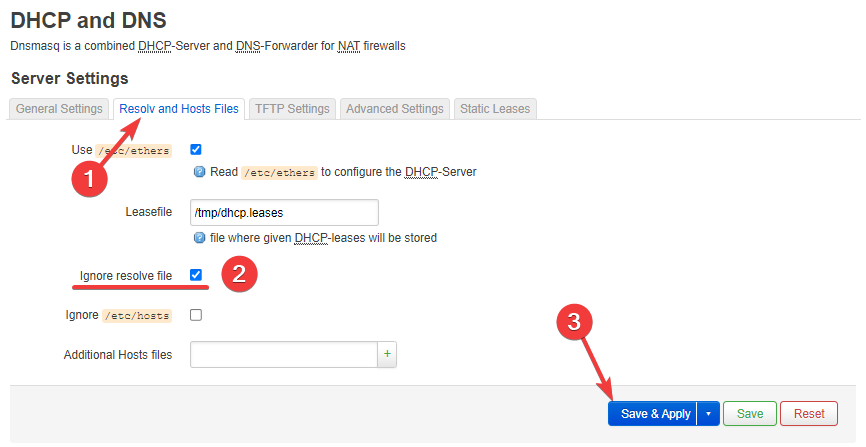
15. Lastly, please head back to the “VPN” > “OpenVPN” tab.
16. In the “OpenVPN instances” section, check the “Enable” option next to the NordVPN option in the list, and click the “Save & Apply” button.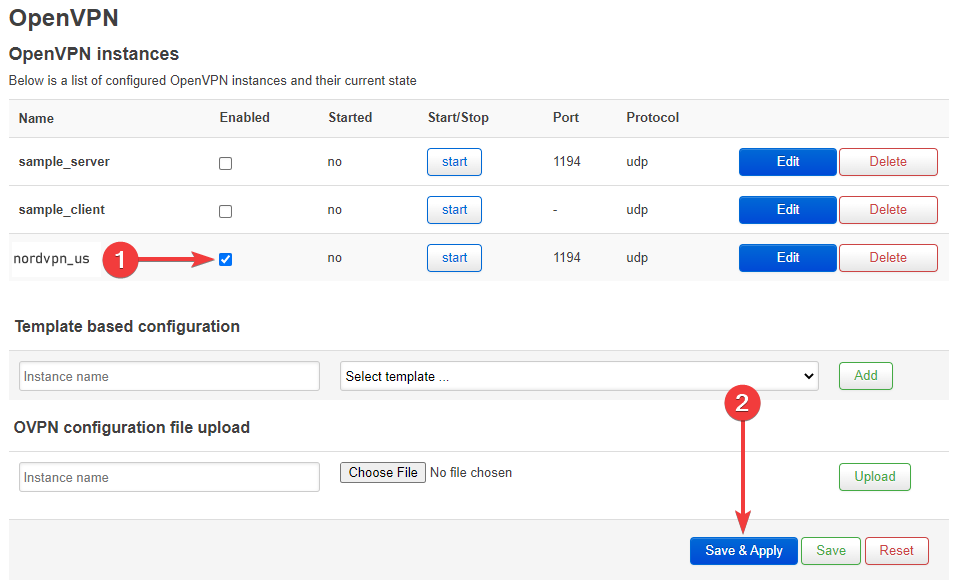
17. Click the “Start” button next to the created NordVPN instance to connect to the VPN server.
When you have followed these instructions, you should be connected using the configured connection. To check if you were successful, visit NordVPN’s homepage — the status at the top of the page should say “Protected”If you wish to disconnect the VPN connection, you can click on the “Stop” button next to the NordVPN option in the “VPN” > “OpenVPN” > “OpenVPN instances'' section.
## CLI instructions
If you're looking for a more advanced tutorial, follow this guide instead. To gain the benefits of a VPN on OpenWrt, you need a router with both OpenWrt firmware and an enabled OpenVPN client. The main page of the firmware is .
1. In order to start, you would need to access your router via SSH using its LAN IP address. By default, the IP address is set to 192.168.1.1 and the username is root, however, the IP address may differ if you changed any of the default values.
2. The OpenVPN package is not included in the firmware image by default. To install it, please run the following commands:opkg updateopkg install openvpn-opensslopkg install ip-fullAdditionally, you may install the LuCI component of the OpenVPN configuration, however, it is optional. You can do so by running this command:opkg install luci-app-openvpn
3. Once you have installed the OpenVPN package, you can make it launch automatically whenever the router starts by running this command:/etc/init.d/openvpn enable
4. Next, you will need to download the server configuration files.
Follow the steps below to find the manual connection configuration files:
1. Log into your [Nord Account](https://my.nordaccount.com/), and click NordVPN.
2. Scroll down to Advanced Settings and click Set up NordVPN manually.
3. Select the OpenVPN configuration files tab.
4. Find the server you wish to connect to by using the Search bar or by scrolling down and download it by clicking Download UDP or Download TCP.
5. When connecting to OpenVPN & IKEv2 manually, you're going to need to use the Username and Password from the Service credential tab.
1. For this guide, we used the server uk2054.nordvpn.com, however, you should use the server that the website suggests for you.To download a server file, choose the country where you wish to connect, click on “Show available protocols”, right-click on “Download config” for “OpenVPN TCP” or “OpenVPN UDP” and choose “Copy link address”.After that, return to your SSH session and run the following command:wget -P /etc/openvpn However, make sure to use the link you copied for your specific server file. This command will download the configuration file to the /etc/openvpn directory for easy access.Alternatively, you may download the server configuration file on a different machine and transfer it to the OpenWrt router using alternate methods, such as SCP or SFTP protocols.For older OpenWrt builds:You can simply download an archive here . In the downloaded archive, you will find the corresponding files with .crt and .key extensions. The files are specific for each VPN server.
2. The OpenVPN configuration for NordVPN requires you to enter your NordVPN service credential username and password every time OpenVPN starts. However, we will make some adjustments so the credentials would be provided automatically.First, to make the process easier, we will install the nano text editor by running the following command:opkg install nanoOtherwise, you may use the built-in vi text editor. For more information regarding text editors, please refer to this article: .Now, open the downloaded server configuration file using the nano text editor. In our case, the command would be:nano /etc/openvpn/uk2054.nordvpn.com.udp.ovpnAfter that, append the word “secret” (without quotation marks) to the string “auth-user-pass”. The resulting line should be:auth-user-pass secretNow, we need to create a new file named secret, where the NordVPN service credentials will be stored. To do so, run the following command:nano /etc/openvpn/secretIt will create the new file and open it using the nano text editor.In the first line of the file enter your NordVPN service username, and the second - NordVPN service password.
You can find your NordVPN service credentials (service username and service password) in the [Nord Account dashboard](https://my.nordaccount.com/dashboard/nordvpn/)
Follow the steps below to find the service credentials for manual connection setup:
1. Log into your [Nord Account](https://my.nordaccount.com/), click NordVPN, and, under Manual setup, click on Service credentials. Here you'll find the Username and Password needed to connect manually.
1. Configure OpenVPN using the downloaded configuration file in one of two ways:
1. Change the file’s extension from .ovpn to .conf, which will allow OpenVPN to find it automatically by its extension.To do so, you can use the mv command:mv /etc/openvpn/uk2054.nordvpn.com.udp.ovpn /etc/openvpn/uk2054.nordvpn.com.udp.conf
2. Specify the file name in “/etc/config/openvpn” by using the following “uci” commands:uci set openvpn.nordvpn=openvpnuci set openvpn.nordvpn.enabled='1'uci set openvpn.nordvpn.config='/etc/openvpn/uk2054.nordvpn.com.udp.ovpn'uci commit openvpnAfter that, the file “/etc/config/openvpn” should contain the following appended strings:config openvpn 'nordvpn'option enabled '1'option config '/etc/openvpn/uk2054.nordvpn.com.udp.ovpn'You can check by running this command:tail /etc/config/openvpnYou may also change the file’s extension from .ovpn to .conf and specify it in the file “/etc/config/openvpn” - in that case, however, OpenVPN will start with this configuration file just once.
2. Create a new network interface by running the following commands:uci set network.nordvpntun=interfaceuci set network.nordvpntun.proto='none'uci set network.nordvpntun.ifname='tun0'uci commit networkThe file “/etc/config/network” should contain the following appended strings, if everything was done properly:config interface 'nordvpntun'option proto 'none'option ifname 'tun0'It can be checked by using the tail /etc/config/network command.
3. Create a new firewall zone and add a forwarding rule from LAN to VPN by running the following commands:uci add firewall zoneuci set firewall.@zone[-1].name='vpnfirewall'uci set firewall.@zone[-1].input='REJECT'uci set firewall.@zone[-1].output='ACCEPT'uci set firewall.@zone[-1].forward='REJECT'uci set firewall.@zone[-1].masq='1'uci set firewall.@zone[-1].mtu_fix='1'uci add_list firewall.@zone[-1].network='nordvpntun'uci add firewall forwardinguci set firewall.@forwarding[-1].src='lan'uci set firewall.@forwarding[-1].dest='vpnfirewall'uci commit firewallIf done correctly, the file “/etc/config/firewall” should contain the following appended strings:config zoneoption name 'vpnfirewall'option input 'REJECT'option output 'ACCEPT'option forward 'REJECT'option masq '1'option mtu_fix '1'list network 'nordvpntun'config forwardingoption src 'lan'option dest 'vpnfirewall'You can check by running tail -13 /etc/config/firewall command. This will display the last 13 lines, which should contain the aforementioned strings.
4. Now you need to configure the DNS servers. The simplest approach is to use NordVPN DNS for the WAN interface of the router. To add NordVPN DNS, run the following commands:uci set network.wan.peerdns='0'uci del network.wan.dnsuci add_list network.wan.dns='103.86.96.100'uci add_list network.wan.dns='103.86.99.100'uci commitIf you receive an error message “uci: Entry not found” after running the uci del network.wan.dns command, you can disregard it.The file “/etc/config/network” should contain the section ‘wan’ with the three bottom strings appended:config interface 'wan'<...>option peerdns '0'list dns '103.86.96.100'list dns '103.86.99.100'You can check by running the cat /etc/config/network command and finding the ‘wan’ interface in the output.You can also add different DNS addresses, such as Google’s by running these commands:uci set network.wan.peerdns='0'uci del network.wan.dnsuci add_list network.wan.dns='8.8.8.8'uci add_list network.wan.dns='8.8.4.4'uci commitThe appended strings should be similar to the previous ones.
(Optional) To prevent traffic leakage in case the VPN tunnel disconnects, you can open the “/etc/firewall.user” file using a text editor and add the following content to it:# This file is interpreted as a shell script.
# Put your custom iptables rules here, and they will be executed with each firewall (re-)start
# Internal uci firewall chains are flushed and recreated on reload, so
# put custom rules into the root chains, e.g. INPUT or FORWARD, or into the
# special user chains, e.g. input_wan_rule or postrouting_lan_rule.
if (! ip a s tun0 up) && (! iptables -C forwarding_rule -j REJECT); then
iptables -I forwarding_rule -j REJECT
fi
Additionally, you should create a file called “99-prevent-leak” in the folder “/etc/hotplug.d/iface” by running nano /etc/hotplug.d/iface/99-prevent-leak and adding the following content to the file:#!/bin/sh
if [ ""$ACTION"" = ifup ] && (ip a s tun0 up) && (iptables -C forwarding_rule -j REJECT); then
iptables -D forwarding_rule -j REJECT
fi
if [ ""$ACTION"" = ifdown ] && (! ip a s tun0 up) && (! iptables -C forwarding_rule -j REJECT); then
iptables -I forwarding_rule -j REJECT
fi
In some cases, the OpenVPN connection can crash with a log output similar to “couldn’t resolve host…”. In this case, the VPN tunnel itself remains, however, the connection is lost. To reconnect to it automatically, first open the “/etc/rc.local” file using a text editor and add the following line:/etc/openvpn/reconnect.sh &
In addition, you need to create the “reconnect.sh” file in the “/etc/openvpn” directory. It can be done by running the nano /etc/openvpn/reconnect.sh command.
In the file, enter the following script contents:
#!/bin/sh
n=10
while sleep 50; do
t=$(ping -c $n 8.8.8.8 | grep -o -E '[0-9]+ packets r' | grep -o -E '[0-9]+')
if [ ""$t"" -eq 0 ]; then
/etc/init.d/openvpn restart
fi
done
When you have followed these instructions, you should be connected using the configured connection. To check if you were successful, visit NordVPN’s homepage — the status at the top of the page should say “Protected.”
If you wish to disconnect the VPN connection, run the following command:
service openvpn stop",https://support.nordvpn.com/hc/en-us/articles/20340177222289-OpenWrt-setup-with-NordVPN
How to configure IPFire firewall,"In order to configure IPFire firewall to connect to NordVPN, follow these steps:
1. Access your IPFire via command line as root.
2. Create and access the directory where all our configuration file will be stored:mkdir /etc/openvpncd /etc/openvpn
3. Download our configuration file from your NordAccount dashboard.
Follow the steps below to find the manual connection configuration files:
1. Log into your [Nord Account](https://my.nordaccount.com/), and click NordVPN.
2. Scroll down to Advanced Settings and click Set up NordVPN manually.
3. Select the OpenVPN configuration files tab.
4. Find the server you wish to connect to by using the Search bar or by scrolling down and download it by clicking Download UDP or Download TCP.
5. When connecting to OpenVPN & IKEv2 manually, you're going to need to use the Username and Password from the Service credential tab.
In this example, it is . To download a file, use wget command as in the example below:wget https://downloads.nordcdn.com/configs/files/ovpn_udp/servers/fr886.nordvpn.com.udp.ovpn
1. Add an additional rule to the routing table:iptables -t nat -A POSTROUTING -s 192.168.0.0/16 -o tun0 -j MASQUERADEThis rule will route all traffic from 192.168.0.0/16 network via the VPN tunnel. If you use different addresses - change them accordingly.
2. Start OpenVPN with a chosen configuration by entering sudo openvpn file_name. Example:sudo openvpn de686.nordvpn.com.udp.ovpn
3. Paste your NordVPN service username and password.You can find your NordVPN service credentials at the Nord Account [dashboard](https://my.nordaccount.com/dashboard/nordvpn/).
Follow the steps below to find the service credentials for manual connection setup:
1. Log into your [Nord Account](https://my.nordaccount.com/), click NordVPN, and, under Manual setup, click on Service credentials. Here you'll find the Username and Password needed to connect manually.
1. You will see this line if your connection is successful:Initialization Sequence Completed
* If you get this error:ERROR: Cannot open TUN/TAP dev /dev/net/tun: No such file or directory (errno=2)enter the following commands:mkdir -p /dev/netmknod /dev/net/tun c 10 200chmod 600 /dev/net/tuncat /dev/net/tun
* If you receive this message, it means your TUN/TAP device is not ready for use. Repeat steps 5 and 6.cat: /dev/net/tun: File descriptor in bad state",https://support.nordvpn.com/hc/en-us/articles/20339255258897-How-to-configure-IPFire-firewall
How to configure QNAP 4.4.2 NAS,"1. Access your QNAP and select QVPN Service -> VPN Client -> VPN Connection Profiles -> Add -> OpenVPN.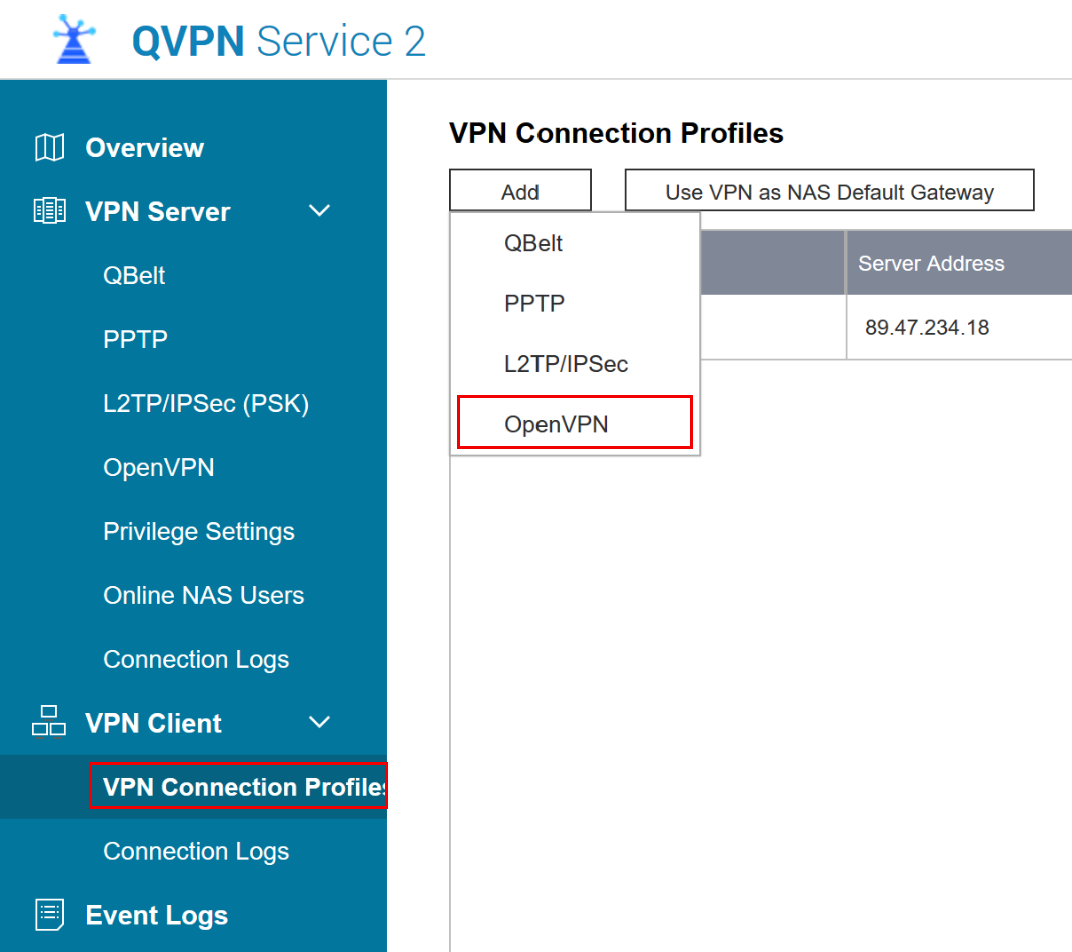
2. Import one of our .ovpn files by following the steps below:
Follow the steps below to find the manual connection configuration files:
1. Log into your [Nord Account](https://my.nordaccount.com/), and click NordVPN.
2. Scroll down to Advanced Settings and click Set up NordVPN manually.
3. Select the OpenVPN configuration files tab.
4. Find the server you wish to connect to by using the Search bar or by scrolling down and download it by clicking Download UDP or Download TCP.
5. When connecting to OpenVPN & IKEv2 manually, you're going to need to use the Username and Password from the Service credential tab.
3. Enter your NordVPN service credentials and click Apply: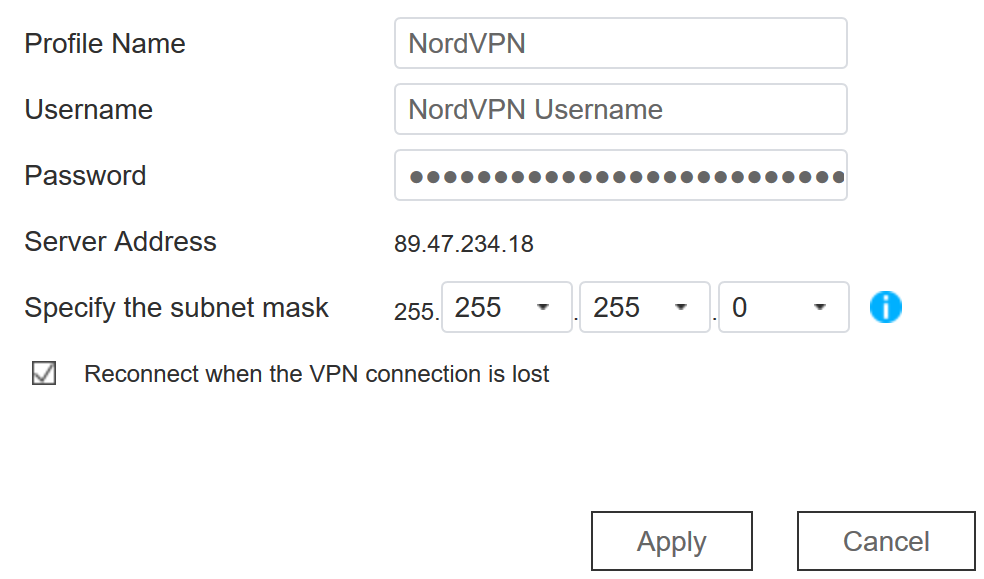You can find your NordVPN service credentials (service username and service password) in the Nord Account dashboard:
Follow the steps below to find the service credentials for manual connection setup:
1. Log into your [Nord Account](https://my.nordaccount.com/), click NordVPN, and, under Manual setup, click on Service credentials. Here you'll find the Username and Password needed to connect manually.
4. You should see the new connection visible. Select the profile and click Use VPN as NAS Default Gateway.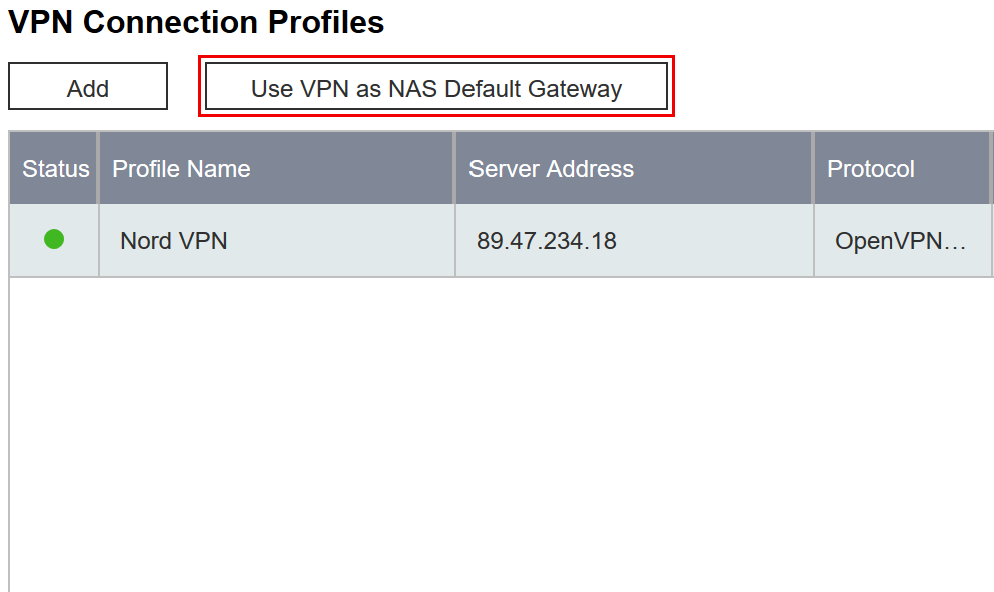
5. Click on an Enable VPN Gateway slider.
6. You should be connected to a VPN after a few moments.
Check whether the VPN connection is working:
1. Go to this website and copy the location of the magnet link. Do not close this page just yet.
2. Now open Download Station on your QNAP user interface and add a URL to your downloads list.
3. In the new window, paste the Magnet link you have copied earlier and click Next. In the next window, hit Apply without making any changes.
4. Now you can go back to the website you have copied your magnet link from and see what IP address your QNAP is using. It should show the IP address of the server you are connected to.",https://support.nordvpn.com/hc/en-us/articles/20324075012625-How-to-configure-QNAP-4-4-2-NAS
How to setup Endian firewall,"In order to connect your Endian Firewall to NordVPN you will have to configure your device according to the upcoming steps (otherwise you may experience [connectivity issues](https://support.nordvpn.com/hc/en-us/articles/20347119467409-Issue-TLS-key-negotiation-failed-to-occur)). By default you can’t configure NordVPN via the graphical interface, hence SSH will have to be used to make additional changes in your device's internal system.
1. Download our CA and TLS key files from this [link](https://downloads.nordcdn.com/configs/archives/certificates/servers.zip).
2. Access your Endian Firewall via SSH and type in the following line (as shown in the screenshot below):
nano /etc/openvpn/openvpnclient.conf.tmpl

3. Then press Enter and add these lines into the file (as shown in the screenshot below):
cipher AES-256-CBCtun-mtu 1500tun-mtu-extra 32mssfix 1450remote-cert-tls serverauth SHA512
4. Save and exit.
5. Login into your Endian Firewalls graphical interface via web browser and go to VPN -> OpenVPN client (Gw2Gw).
6. Click Add tunnel configuration and fill in the info according to the server you chose.
Follow the steps below to find the best server for your connection:
1. Log into your [Nord Account](https://my.nordaccount.com/), and click NordVPN.
2. Scroll down to Advanced Settings and click Set up NordVPN manually.
3. Select the Server recommendation tab. According to your location, the best server will be recommended.
4. By pressing Advanced filters you can further customize the recommended servers by selecting the Server type and the Security protocol.
In case you wish to select a specific server, follow these steps:
1. Under Set up NordVPN manually, select OpenVPN configuration files.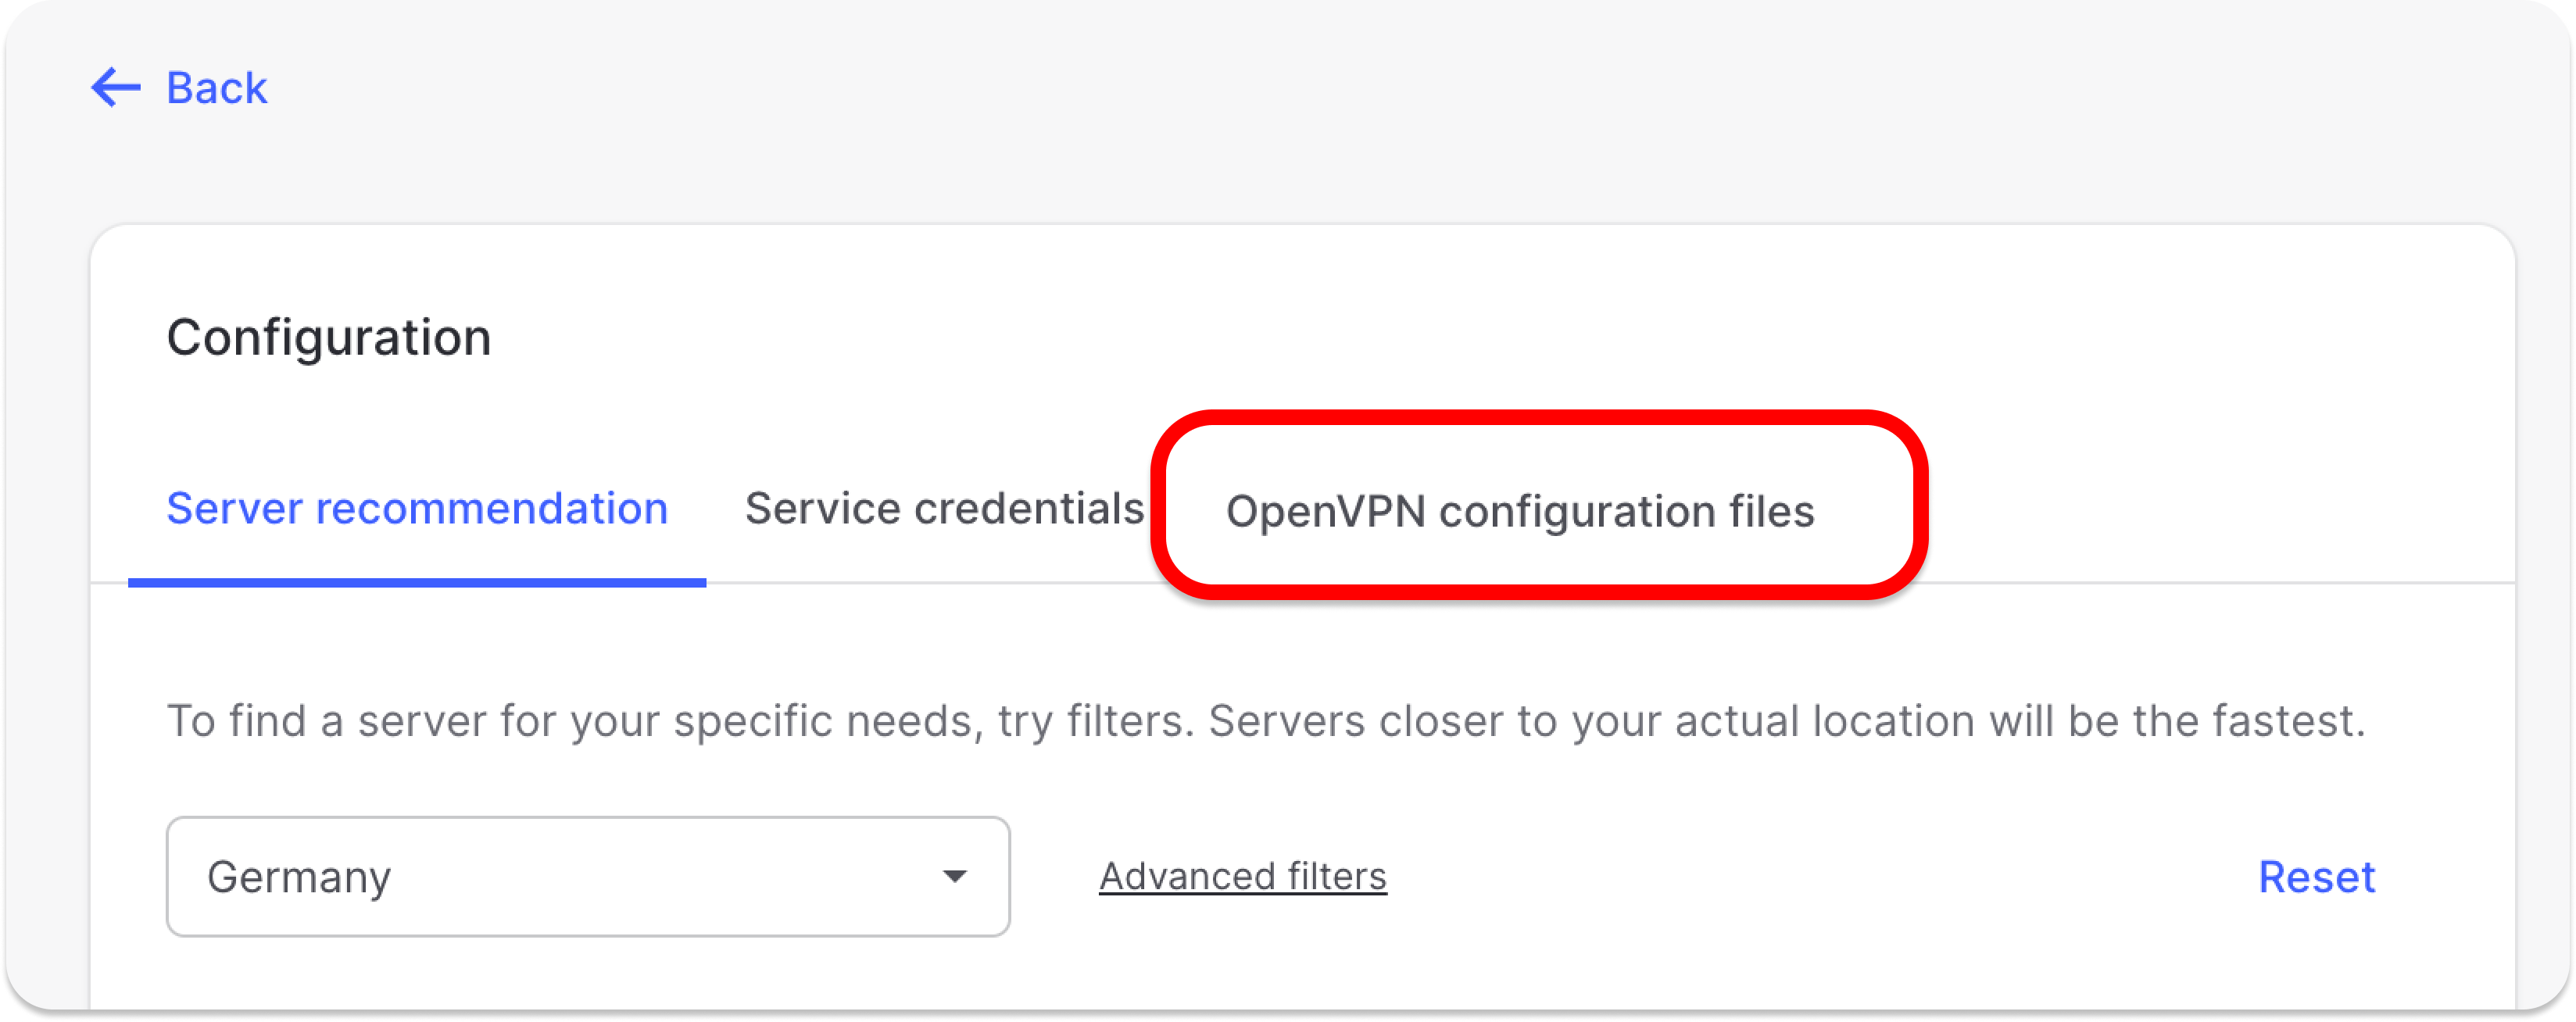
2. Find the server you wish to connect to by using the Search bar or by scrolling down and download it by clicking Download UDP or Download TCP.
3. When connecting to OpenVPN & IKEv2 manually, you're going to need to use the Username and Password from the Service credential tab.
Connection Name: NordVPN United States 936
Connect To: us936.nordvpn.comUpload Certificate: select the corresponding CA certificate file which in this case is us936_nordvpn_com_ca.crtUsername: Your NordVPN usernamePassword: Your NordVPN passwordClick AdvancedConnection Type: TUNNAT: enabledProtocol: UDP
7. Click Save and you will return to the main screen.
8. Then press on Pencil icon to the left of your created connection to edit the settings.
9. Then click Advanced Tunnel Configuration.
10. Add the corresponding TLS certificate. In this case us936_nordvpn_com_tls.key and change MD5 direction to 1.
11. Click Save and wait a few seconds for it to connect (you can verify this via the log file).
Congratulations, now you are successfully connected to NordVPN.",https://support.nordvpn.com/hc/en-us/articles/20323848378641-How-to-setup-Endian-firewall
Netduma setup with NordVPN,"First things first, these changes are made in the web configuration panel of your router. You can access it by visiting the local IP of your router from your web browser. The two most common, default local IPs that most routers have are 192.168.1.1 or 192.168.0.1 - you can access these by opening [http://192.168.1.1](http://192.168.1.1/) or [http://192.168.0.1](http://192.168.0.1/admin/index.html#/home) in your browser. The default IP, username and password are listed in your router’s User Manual.
1. Download our .ovpn configuration files from your NordAccount dashboard.
Follow the steps below to find the manual connection configuration files:
1. Log into your [Nord Account](https://my.nordaccount.com/), and click NordVPN.
2. Scroll down to Advanced Settings and click Set up NordVPN manually.
3. Select the OpenVPN configuration files tab.
4. Find the server you wish to connect to by using the Search bar or by scrolling down and download it by clicking Download UDP or Download TCP.
5. When connecting to OpenVPN & IKEv2 manually, you're going to need to use the Username and Password from the Service credential tab.
2. Open one of the files which corresponds to the server you will be connecting to.
3. Copy all of the content from that file.
4. Navigate to your routers VPN menu.
5. Paste the copied content into Config field.
6. Type in your NordVPN service username and password in the appropriate fields.
You can find your NordVPN service credentials (service username and service password) in the [Nord Account dashboard](https://my.nordaccount.com/dashboard/nordvpn/):
Follow the steps below to find the service credentials for manual connection setup:
1. Log into your [Nord Account](https://my.nordaccount.com/), click NordVPN, and, under Manual setup, click on Service credentials. Here you'll find the Username and Password needed to connect manually.
7. Check Enable, and click Apply.
8. If you run into any issues - please send us the whole connection log from VPN Log field.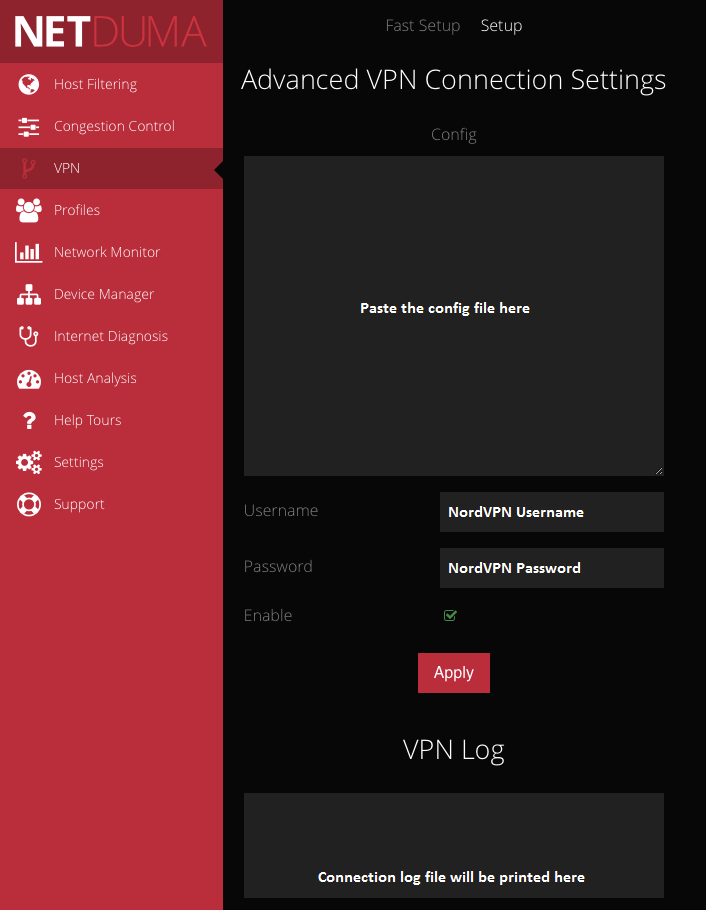",https://support.nordvpn.com/hc/en-us/articles/20323695823761-Netduma-setup-with-NordVPN
Padavan setup with NordVPN,"This tutorial explains how to connect your Padavan firmware router to NordVPN using the OpenVPN protocol.
First things first, these changes are made in the web configuration panel of your router. You can access it by visiting the local IP of your router from your web browser. The two most common, default local IPs that most routers have are 192.168.1.1 or 192.168.0.1 - you can access these by opening [http://192.168.1.1](http://192.168.1.1/) or [http://192.168.0.1](http://192.168.0.1/admin/index.html#/home) in your browser. The default IP, username and password are listed in your router’s User Manual.
1. Please access your router and navigate to VPN Client -> Settings tab.
2. Select Enable VPN Client and fill in the fields as follows:
Remote VPN Server (IP or DNS host): for the sake of the tutorial, we have used se22.nordvpn.com, but personally, you should connect automatically to the suggested server.
Follow the steps below to find the best server for your connection:
1. Log into your [Nord Account](https://my.nordaccount.com/), and click NordVPN.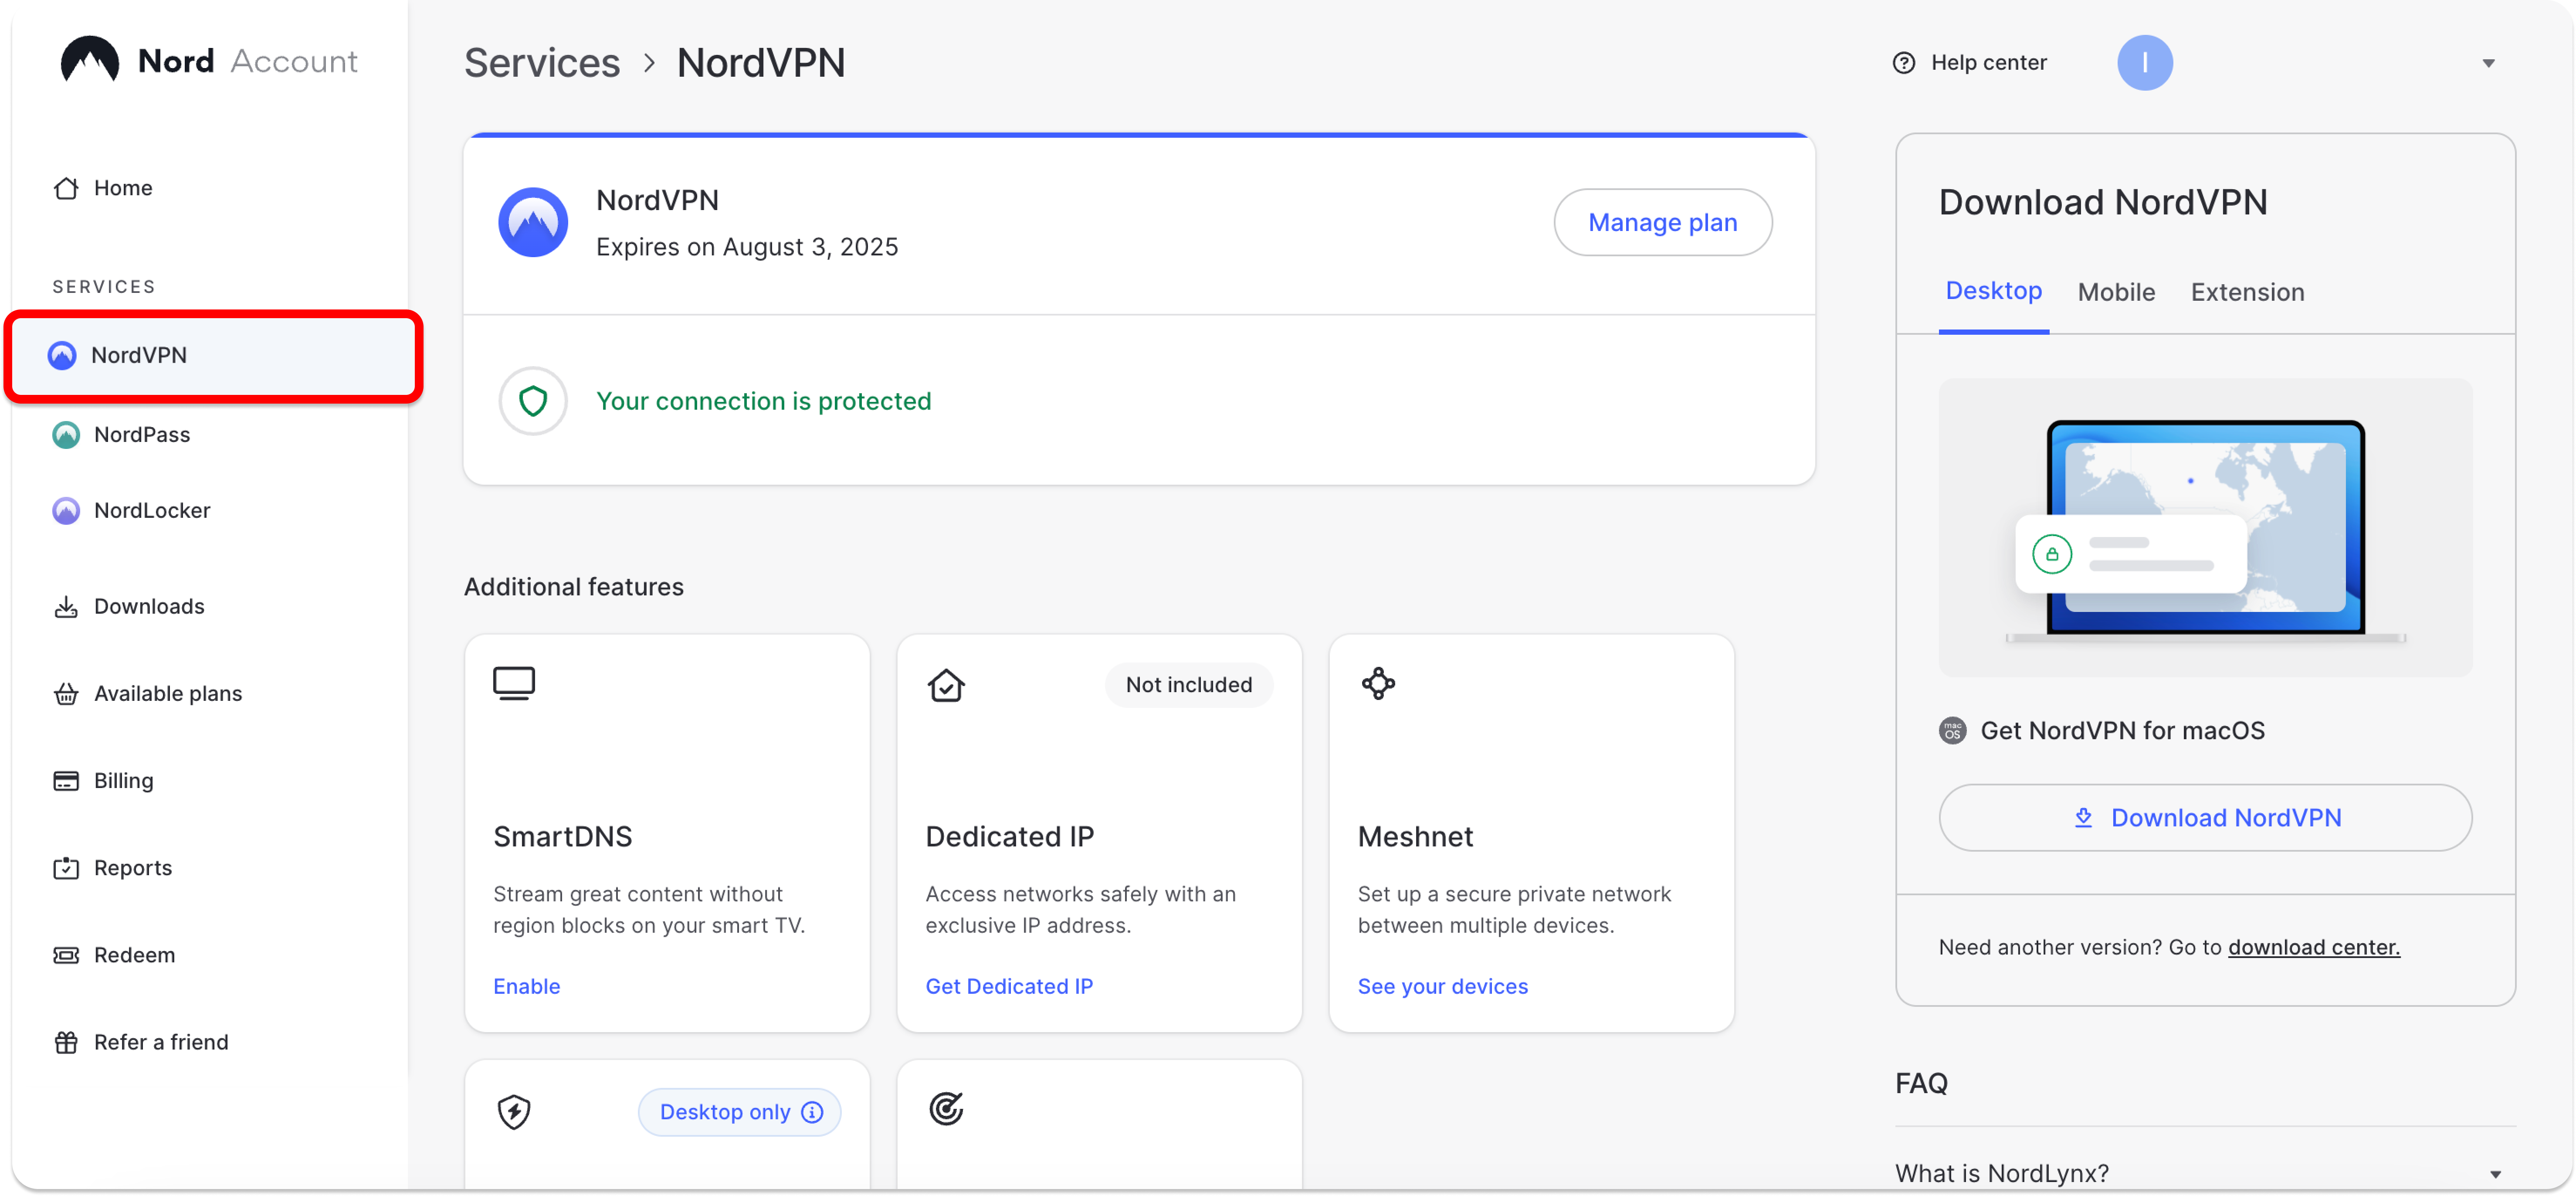
2. Scroll down to Advanced Settings and click Set up NordVPN manually.
3. Select the Server recommendation tab. According to your location, the best server will be recommended.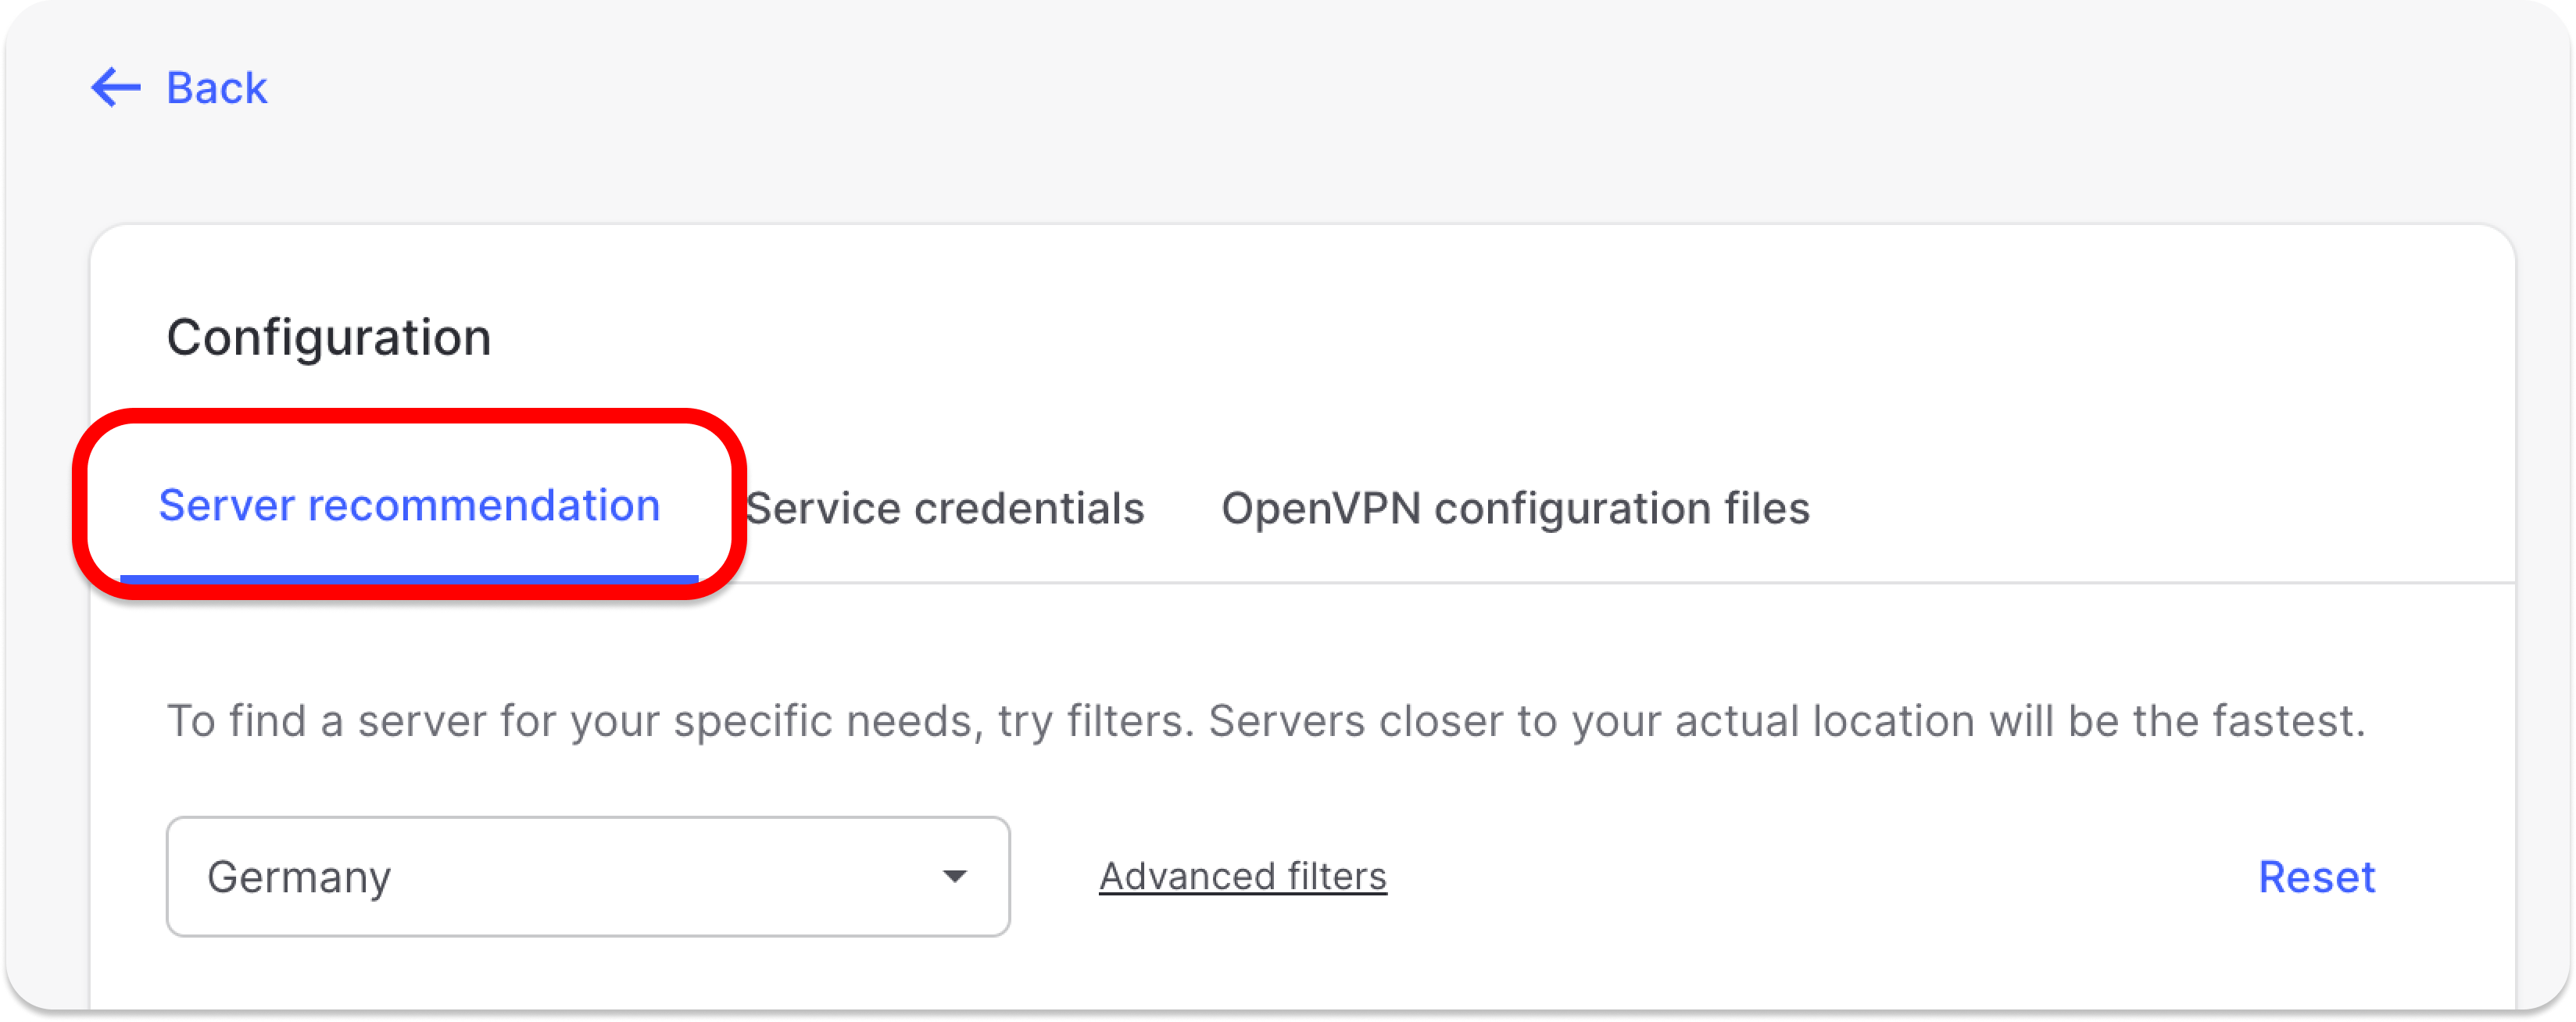
4. By pressing Advanced filters you can further customize the recommended servers by selecting the Server type and the Security protocol.
In case you wish to select a specific server, follow these steps:
1. Under Set up NordVPN manually, select OpenVPN configuration files.
2. Find the server you wish to connect to by using the Search bar or by scrolling down and download it by clicking Download UDP or Download TCP.
3. When connecting to OpenVPN & IKEv2 manually, you're going to need to use the Username and Password from the Service credential tab.
Login: Your NordVPN service usernamePassword: Your NordVPN service passwordAuthentication Algorithm: SHA-512Encryption Cipher Algorithm: AES-256-CBCEnable LZO for Data Compression: Disable
You can find your NordVPN service credentials (service username and service password) in the [Nord Account dashboard.](https://my.nordaccount.com/dashboard/nordvpn/)
Follow the steps below to find the service credentials for manual connection setup:
1. Log into your [Nord Account](https://my.nordaccount.com/), click NordVPN, and, under Manual setup, click on Service credentials. Here you'll find the Username and Password needed to connect manually.
Open the OpenVPN Extended Configuration menu and paste the following code block:
remote-cert-tls serverremote-randomnobindtun-mtu 1500tun-mtu-extra 32mssfix 1450persist-keypersist-tunping-timer-remreneg-sec 0# log /tmp/vpn.log### Syslog verbose levelverb 3mute 10

If you wish to use TCP protocol instead, change the Transport option to TCP, and Port to 443.
3. Press Apply and then select OpenVPN Certificates & Keys
Copy our servers CA certificate into ca.crt field and Static Key into ta.key field. You can download these certificates and keys using this link:
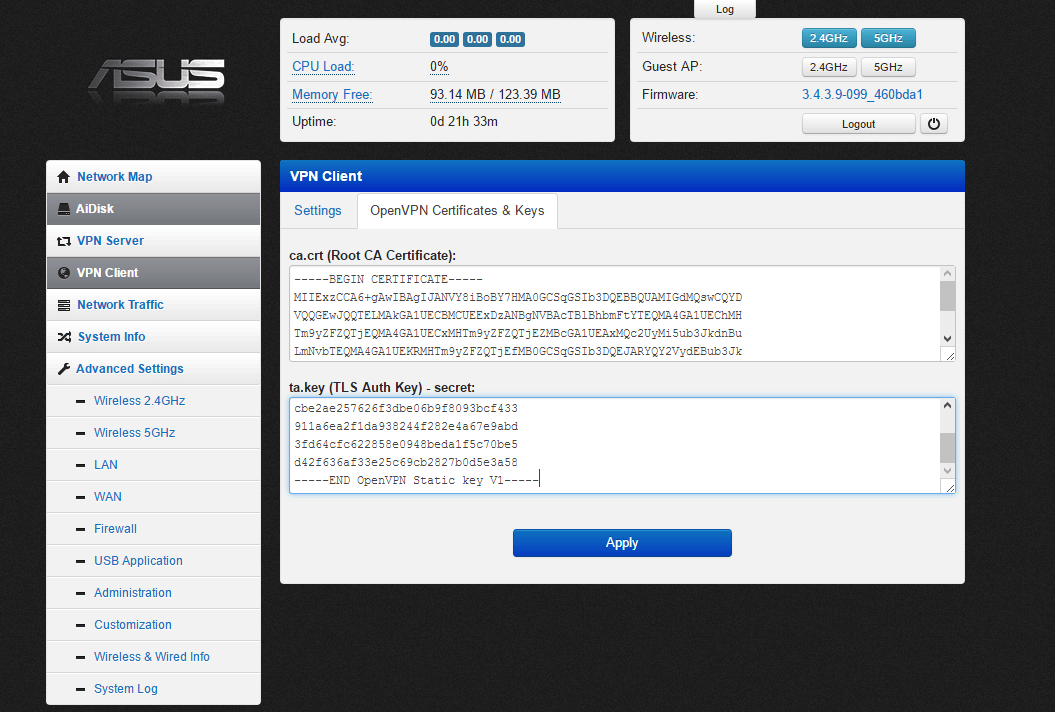
4. After connecting to our service you should make your changes permanent. You can do it in three ways:
• Run in console command ""mtd_storage.sh save"";• On the page Advanced Settings -> Administration -> Settings press button ""Commit"" to the right of the item ""Commit Internal Storage to Flash Memory Now"";• Reboot router by pressing the Reboot button to the right of ""Logout"" button.
5. You should also use NordVPN DNS servers to protect against DNS leaks. You can see the setting in the image below:
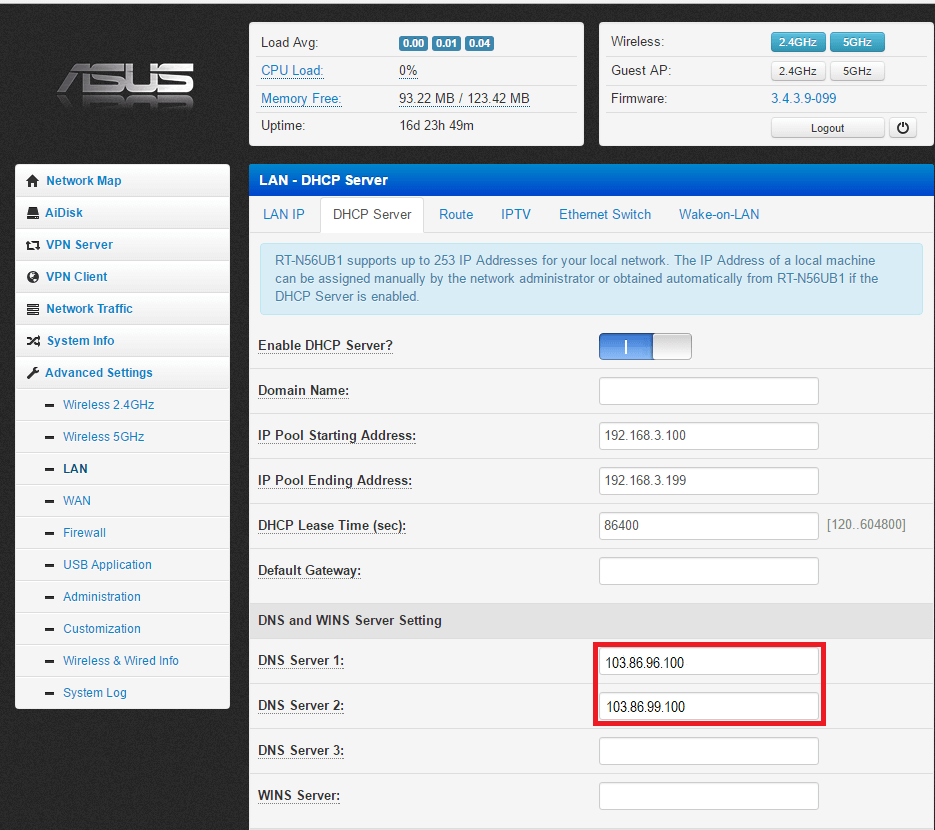",https://support.nordvpn.com/hc/en-us/articles/20323041135889-Padavan-setup-with-NordVPN
Can I set up Netgear router with VPN,"Netgear is one of the most popular router manufacturer brands. Netgear routers provide great Wi-Fi connection, however, these routers cannot perform as OpenVPN clients.
In case you have a Netgear router, check if your router supports DD-WRT firmware [here](https://wiki.dd-wrt.com/wiki/index.php/Supported_Devices#Netgear). If it does, you can flash your router with it. More information on how to install this firmware can be found [here](https://wiki.dd-wrt.com/wiki/index.php/Installation).
Note: If you decide to flash your router, you do so at your own risk. Flashing may potentially damage your router and void the warranty, so we cannot help you with the flashing process.
Once done, you can follow our tutorial on how to connect to the NordVPN service with [DD-WRT firmware](https://support.nordvpn.com/hc/en-us/articles/20308623061265-DD-WRT-setup-with-NordVPN).
If you run into any issues, make a screenshot of your router’s VPN configuration page along with the connection log, which can be found under the Status > OpenVPN tab, and send this information to us using the email or chat buttons below the article.
If you want an out-of-the-box solution that offers NordVPN’s security and privacy, head over to our partners at [FlashRouters](https://nordvpn.com/flashrouters/). They will provide you with a pre-configured router that will deliver top-notch security and performance.
To explore other options, find out which routers are compatible with NordVPN.",https://support.nordvpn.com/hc/en-us/articles/20282781982481-Can-I-set-up-Netgear-router-with-VPN
Why Choose FlashRouters?,[FlashRouters](https://nordvpn.com/flashrouters/) offers some of the best routers for NordVPN pre-configured to deliver top-notch security and performance:,https://support.nordvpn.com/hc/en-us/articles/20195707547025-Which-router-should-I-use-with-NordVPN
Which router should I use with NordVPN?,"It's important that a router supports VPN configurations to use NordVPN; however, to maximize your NordVPN experience, a router that’s pre-configured for VPN use is key.
For example, FlashRouters offers a [wide range of NordVPN-compatible devices](https://nordvpn.com/flashrouters/) optimized for secure, high-speed connections right out of the box without having to configure or set up the routers.
For the best out-of-the-box router solution with extra safety, privacy, streaming capabilities, and an exclusive NordLynx integration, we recommend the [Privacy Hero 2](https://www.flashrouters.com/privacy-hero-nordvpn-router-by-flashrouters). This unique cloud-connected device also includes 1 year of NordVPN plus 1 year of Privacy Hero service, providing seamless security and performance for your home network.
## Why Choose FlashRouters?
[FlashRouters](https://nordvpn.com/flashrouters/) offers some of the best routers for NordVPN pre-configured to deliver top-notch security and performance:
* Top-Tier Security: Your entire network is shielded by NordVPN, keeping your online activity private and secure.
* Speed & Stability: Our devices are equipped with powerful processors and advanced WiFi technologies, ensuring fast and stable VPN connections.
* Plug-and-Play VPN Setup: Skip the headaches of manual configuration. FlashRouters comes pre-flashed and optimized for NordVPN compatibility.
* Ongoing Support: Need networking support assistance? Their expert support team is here to help with your setup and troubleshooting.
### More NordVPN Recommended Routers Options (OpenVPN Only)
Flashrouters also have a few models supporting only OpenVPN connection:
* [Next Gen WiFi 7](https://www.flashrouters.com/router-basics/wireless-be): These devices are significantly higher cost but offer NordVPN OpenVPN support.
* [Mesh VPN Routers](https://www.flashrouters.com/routers?fmr_use_case=344): Looking for more extensive VPN coverage? FlashRouters offers a wide array of heavily tested [Mesh WiFi Systems for NordVPN](https://www.flashrouters.com/routers?fmr_use_case=344).
* [AX3000 VPN Router](https://www.flashrouters.com/cudy-wr3000-vpn-router-by-flashrouters): If the lowest price is the main concern, this AX3000 is a popular economy device for OpenVPN.
## Configurable devices
You can also buy a router and configure it yourself. While many different routers are available from other manufacturers, the most commonly used are Asus routers, as most have a built-in OpenVPN client and require minimal effort to set up.
Some popular examples include the Asus RT-AX86U, RT-AX68U, and RT-AX88U (AX6000). However, these devices will not support NordLynx.
Most other routers require firmware flashing, which might be tricky and does not work on all platforms. If you want a legacy router that provides OpenVPN encryption, you can also find any router that supports the following custom firmware:
* DD-WRT:
* Tomato:
* OpenWRT:
* Merlin:
The next step will be to learn [how to set up NordVPN on your router](https://support.nordvpn.com/hc/en-us/articles/19426084718865-Setting-up-a-router-with-NordVPN).",https://support.nordvpn.com/hc/en-us/articles/20195707547025-Which-router-should-I-use-with-NordVPN
Not sure if your router is supported and/or can't find it on the list above?,"First, see if you can find your router on our [list of unsupported routers](https://support.nordvpn.com/hc/en-us/articles/20379585675793-Which-routers-don-t-support-NordVPN).",https://support.nordvpn.com/hc/en-us/articles/19426084718865-Setting-up-a-router-with-NordVPN
Setting up a router with NordVPN,"The procedure of setting up NordVPN on your router will depend on your router’s firmware or manufacturer. If you can’t find the VPN router setup tutorial for your router’s firmware on the following list, continue scrolling down for further instructions. You may also check out our list of [router recommendations](https://support.nordvpn.com/hc/en-us/articles/20195707547025-Which-router-should-I-use-with-NordVPN).
Note: If your router was issued by your ISP, it probably does not support VPN configurations. If that is the case, there are routers that come pre-configured with NordVPN. Our partner FlashRouters offers a selection of powerful routers that come with NordVPN out of the box, including the [Privacy Hero](https://www.flashrouters.com/privacy-hero-nordvpn-router-by-flashrouters) with exclusive integration for NordLynx - the fastest VPN protocol.
## Setup tutorials for supported routers and firmware:
* [ASUS WRT](https://support.nordvpn.com/hc/en-us/articles/20286376420753-How-to-set-up-NordVPN-on-Asus-WRT-firmware) (native firmware)
* [ASUS Merlin](https://support.nordvpn.com/hc/en-us/articles/20319214011921-AsusWRT-Merlin-setup-with-NordVPN)
* [DD-WRT](https://support.nordvpn.com/hc/en-us/articles/20308623061265-DD-WRT-setup-with-NordVPN)
* [Privacy Hero](https://support.flashrouters.com/privacy-hero/vpn-setup-privacy-hero/privacy-hero-nordlynx-vpn-setup/)
* [Roqos](https://support.flashrouters.com/roqoscore/nordvpn-setup-on-roqos/)
* [Gl.iNET](https://support.nordvpn.com/hc/en-us/articles/20226926174225-GL-iNet-setup-with-NordVPN)
* [Mikrotik](https://support.nordvpn.com/hc/en-us/articles/20398642652561-MikroTik-IKEv2-setup-with-NordVPN)
* [NetDUMA](https://support.nordvpn.com/hc/en-us/articles/20323695823761-Netduma-setup-with-NordVPN)
* [OPNsense](https://support.nordvpn.com/hc/en-us/articles/20397569418129-OPNsense-21-setup-with-NordVPN)
* [OpenWRT](https://support.nordvpn.com/hc/en-us/articles/20340177222289-OpenWrt-setup-with-NordVPN)
* [Padavan](https://support.nordvpn.com/hc/en-us/articles/20323041135889-Padavan-setup-with-NordVPN)
* [Sabai](https://support.nordvpn.com/hc/en-us/articles/20323512359697-Sabai-setup-with-NordVPN)
* [Tomato](https://support.nordvpn.com/hc/en-us/articles/20317675285777-How-to-set-up-VPN-on-Tomato)
* [pfSense](https://support.nordvpn.com/hc/en-us/articles/20285211284497-pfSense-setup-with-NordVPN)
* [DrayTek](https://support.nordvpn.com/hc/en-us/articles/20397988815633-DrayTek-Vigor-IKEv2-setup-with-NordVPN)
* [EdgeRouter](https://support.nordvpn.com/hc/en-us/articles/20321386897041-EdgeRouter-and-Ubiquiti-setup-with-NordVPN)
* [TP-Link](https://support.nordvpn.com/hc/en-us/articles/20280525082001-Setting-up-TP-Link-with-NordVPN)
* Starlink (read more about how to use [VPN on Starlink](https://nordvpn.com/blog/starlink-vpn/))
## Not sure if your router is supported and/or can't find it on the list above?
First, see if you can find your router on our [list of unsupported routers](https://support.nordvpn.com/hc/en-us/articles/20379585675793-Which-routers-don-t-support-NordVPN).
If it’s not on there, check the user manual that came with your router (usually, manuals are available for download on the manufacturer’s website). Search the manual for any mentions of OpenVPN support. Your router must support the OpenVPN client in order to potentially support a NordVPN configuration. If you can’t find this information in the manual, consider contacting your router’s manufacturer.
If none of the tips mentioned above have helped you set up a connection, feel free to contact our support team!",https://support.nordvpn.com/hc/en-us/articles/19426084718865-Setting-up-a-router-with-NordVPN
NordVPN proxy setup for BitTorrent,"When you connect to NordVPN’s servers, you can use BitTorrent and most other peer-to-peer platforms. But if you want to avoid using the [NordVPN app](https://nordvpn.com/download/), setting up a VPN proxy is the next best thing.
Note that NordVPN service should never be used to bypass copyright regulations. NordVPN does not promote, condone, or endorse the use of the service for such purposes. For more details, please read the NordVPN [Terms of Service](https://my.nordaccount.com/legal/terms-of-service/).
## How to set up NordVPN with BitTorrent
1. Open BitTorrent.
2. In the menu bar, click Option > Preferences. Alternatively, press Ctrl + P on your keyboard.
3. Select the Connection section.
4. Under Proxy Server, from the Type dropdown, select Socks5.
5. In the Proxy field, enter an address of a selected proxy server.Here is a list of servers you can choose from:amsterdam.nl.socks.nordhold.netatlanta.us.socks.nordhold.netdallas.us.socks.nordhold.netlos-angeles.us.socks.nordhold.netnl.socks.nordhold.netse.socks.nordhold.netstockholm.se.socks.nordhold.netus.socks.nordhold.netnew-york.us.socks.nordhold.netsan-francisco.us.socks.nordhold.netdetroit.us.socks.nordhold.net
6. In the Port field, type in 1080.
7. Select the following checkboxes:
* Authentication
* Use proxy for hostname lookups
* Use proxy for peer-to-peer connections
* Disable all local DNS lookups
* Disable features that leak identifying information
* Disable connections unsupported by the proxy
8. Enter your authentication details.Username: NordVPN service usernamePassword: NordVPN service passwordYou can find your NordVPN service credentials (service username and service password) in the [Nord Account dashboard](https://my.nordaccount.com/dashboard/nordvpn/):
1. Click Set up NordVPN manually.
2. You will receive a verification code in your email that you use for NordVPN services. Type the code in: 
3. Copy the credentials using the “Copy” buttons on the right:
9. Click Apply and OK to save changes.
## How to check if your proxy setup is working
1. Visit the [ipleak.net](https://ipleak.net/) website.
2. Scroll down to the Torrent Address detection section, click Activate, and click this Magnet Link.
3. A new window will show up, prompting you to open BitTorrent. Select Open BitTorrent.Important: keep ipleak.net open.
4. Once BitTorrent opens, click OK to add the torrent.
5. While the torrent is downloading metadata, return to the ipleak website.
6. Under Torrent Address detection, you should see the IP address of your chosen proxy server.If no address is showing, click the Refresh button to update the results.
You should find that BitTorrent is securely downloading files via the NordVPN SOCKS5 proxy server you selected.",https://support.nordvpn.com/hc/en-us/articles/20465085067665-NordVPN-proxy-setup-for-BitTorrent
NordVPN proxy setup on Vuze,"NordVPN and Vuze is a great combination, with or without setting up a proxy. In fact, NordVPN works on most peer-to-peer platforms.
However, there may be cases where you just can’t use the [NordVPN app](https://nordvpn.com/download/). Here’s how to connect to [NordVPN servers](https://nordvpn.com/servers/) via a proxy to use Vuze securely.
Note that NordVPN service should never be used to bypass copyright regulations. NordVPN does not promote, condone, or endorse the use of the service for such purposes. For more details, please read the NordVPN [Terms of Service](https://my.nordaccount.com/legal/terms-of-service/).
## How to set up NordVPN with Vuze
1. Open Vuze.
2. In the menu bar, click Tools > Options. Alternatively, press Ctrl +, on your keyboard.
3. In the Mode section, select Advanced.
4. Open the Connection section.
* Under Peer sources, make sure only From a tracker is selected.
* Under Networks, make sure only Public IP network is selected.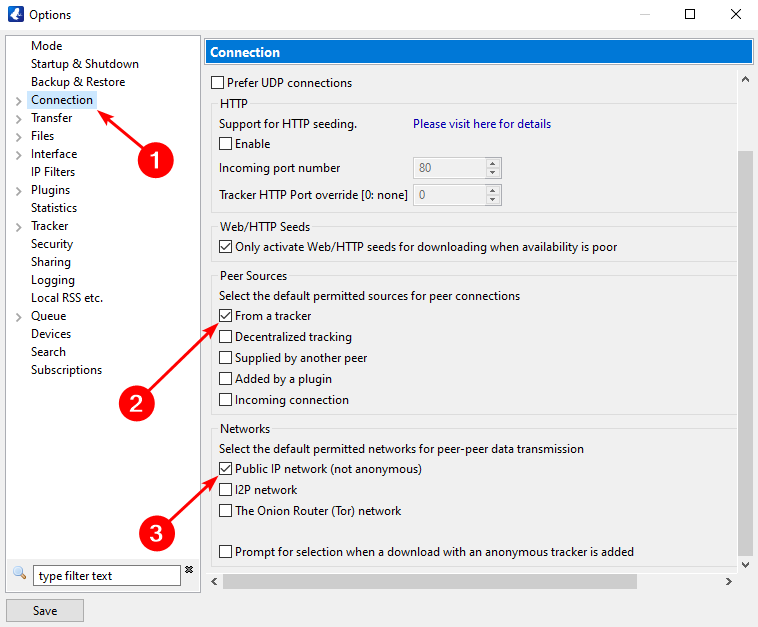
5. Expand the Connection section by double-clicking it or by clicking the dropdown arrow.
6. Head to the Proxy section.
7. Under Tracker communications, select the Enable proxying of tracker communications [restart required] and I have a SOCKS proxy checkboxes.
8. Enter the following information:
* Host: Address of a selected proxy server.Here is a list of servers you can choose from:amsterdam.nl.socks.nordhold.netatlanta.us.socks.nordhold.netdallas.us.socks.nordhold.netlos-angeles.us.socks.nordhold.netnl.socks.nordhold.netse.socks.nordhold.netstockholm.se.socks.nordhold.netus.socks.nordhold.netnew-york.us.socks.nordhold.netsan-francisco.us.socks.nordhold.netdetroit.us.socks.nordhold.net
* Port: 1080
* Username: NordVPN service username
* Password: NordVPN service password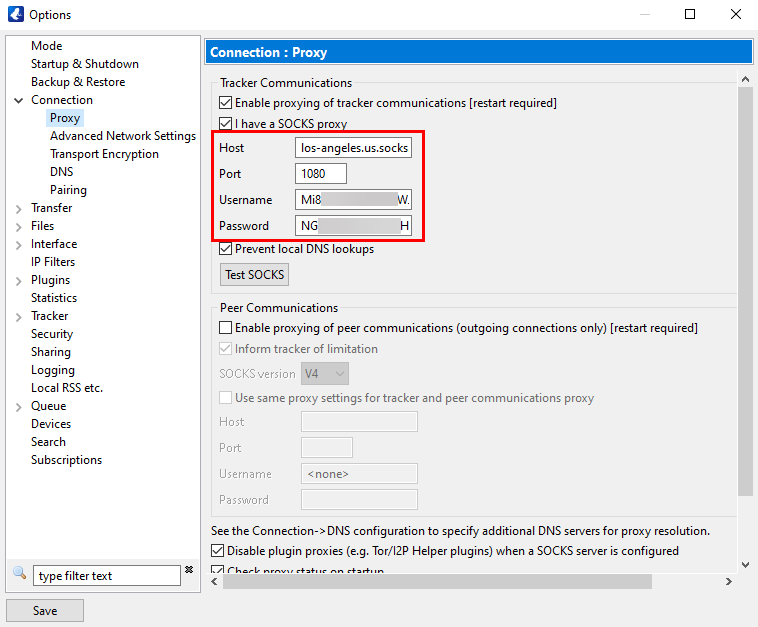You can find your NordVPN service credentials (service username and service password) in the [Nord Account dashboard](https://my.nordaccount.com/dashboard/nordvpn/):
1. Click Set up NordVPN manually.
2. You will receive a verification code in your email that you use for NordVPN services. Type the code in: 
3. Copy the credentials using the “Copy” buttons on the right:
## How to check if your proxy setup is working
1. Click Test SOCKS.
2. A Testing SOCKS connection window will appear. If the connection was successful, you should see the following result: Connection OK - supported version(s): 5.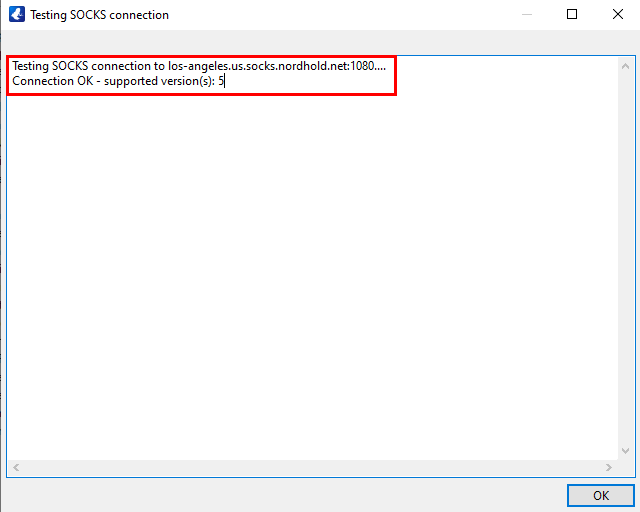
3. Click OK to close the testing window and Save to save your SOCKS5 configuration.
4. Close the Options menu and restart Vuze.Upon restarting, you should see a green indicator with SOCKS written next to it in the status bar. This indicator shows that the SOCKS5 connection is working properly.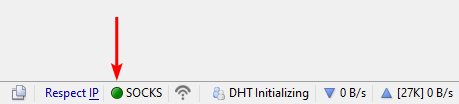",https://support.nordvpn.com/hc/en-us/articles/20458691129105-NordVPN-proxy-setup-on-Vuze
OPNsense 21 setup with NordVPN,"1. In order to setup OPNsense with OpenVPN please access your OPNsense via browser.
2. Navigate to System -> Trust -> Authorities and click on the +Add button.You should see this screen: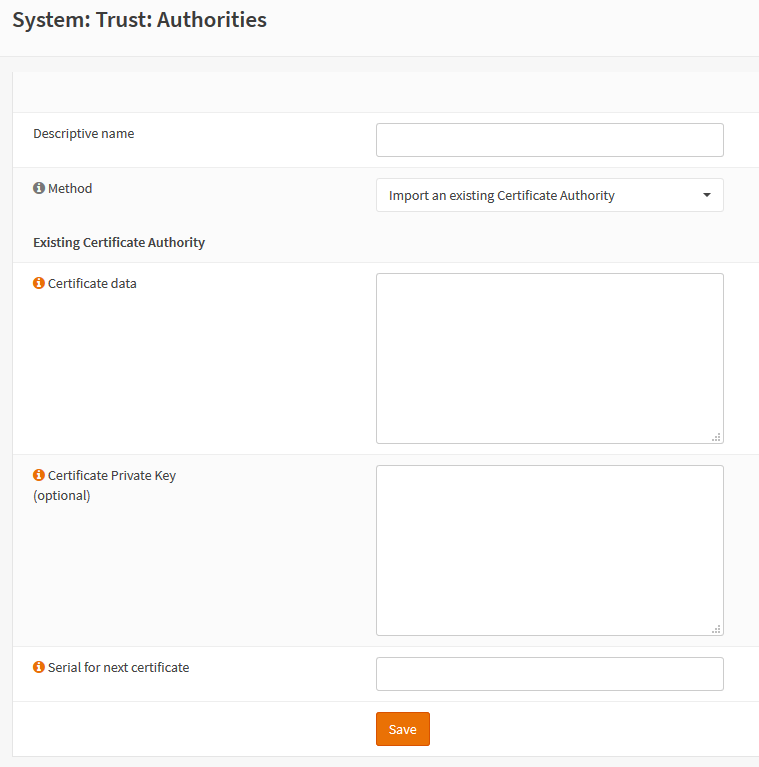
3. We will configure our OPNsense to connect to US 8561 server but you should connect to a server suggested to you at this page: [https://my.nordaccount.com/dashboard/nordvpn/manual-configuration/server-recommendation/](https://my.nordaccount.acom/dashboard/nordvpn/manual-configuration/server-recommendation/).
You can find the server hostname right under the server title.
Follow the steps below to find the best server for your connection:
1. Log into your [Nord Account](https://my.nordaccount.com/), and click NordVPN.
2. Scroll down to Advanced Settings and click Set up NordVPN manually.
3. Select the Server recommendation tab. According to your location, the best server will be recommended.
4. By pressing Advanced filters you can further customize the recommended servers by selecting the Server type and the Security protocol.
In case you wish to select a specific server, follow these steps:
1. Under Set up NordVPN manually, select OpenVPN configuration files.
2. Find the server you wish to connect to by using the Search bar or by scrolling down and download it by clicking Download UDP or Download TCP.
3. When connecting to OpenVPN & IKEv2 manually, you're going to need to use the Username and Password from the Service credential tab.
1. Press on + Add button. Then fill the fields out like this:Descriptive Name: NordVPN_US8561_CAMethod: Import an existing Certificate AuthorityCertificate data: paste the contents below
```
-----BEGIN CERTIFICATE-----MIIFCjCCAvKgAwIBAgIBATANBgkqhkiG9w0BAQ0FADA5MQswCQYDVQQGEwJQQTEQMA4GA1UEChMHTm9yZFZQTjEYMBYGA1UEAxMPTm9yZFZQTiBSb290IENBMB4XDTE2MDEwMTAwMDAwMFoXDTM1MTIzMTIzNTk1OVowOTELMAkGA1UEBhMCUEExEDAOBgNVBAoTB05vcmRWUE4xGDAWBgNVBAMTD05vcmRWUE4gUm9vdCBDQTCCAiIwDQYJKoZIhvcNAQEBBQADggIPADCCAgoCggIBAMkr/BYhyo0F2upsIMXwC6QvkZps3NN2/eQFkfQIS1gql0aejsKsEnmY0Kaon8uZCTXPsRH1gQNgg5D2gixdd1mJUvV3dE3y9FJrXMoDkXdCGBodvKJyU6lcfEVF6/UxHcbBguZK9UtRHS9eJYm3rpL/5huQMCppX7kUeQ8dpCwd3iKITqwd1ZudDqsWaU0vqzC2H55IyaZ/5/TnCk31Q1UP6BksbbuRcwOVskEDsm6YoWDnn/IIzGOYnFJRzQH5jTz3j1QBvRIuQuBuvUkfhx1FEwhwZigrcxXuMP+QgM54kezgziJUaZcOM2zF3lvrwMvXDMfNeIoJABv9ljw969xQ8czQCU5lMVmA37ltv5Ec9U5hZuwk/9QO1Z+d/r6Jx0mlurS8gnCAKJgwa3kyZw6e4FZ8mYL4vpRRhPdvRTWCMJkeB4yBHyhxUmTRgJHm6YR3D6hcFAc9cQcTEl/I60tMdz33G6m0O42sQt/+AR3YCY/RusWVBJB/qNS94EtNtj8iaebCQW1jHAhvGmFILVR9lzD0EzWKHkvyWEjmUVRgCDd6Ne3eFRNS73gdv/C3l5boYySeu4exkEYVxVRn8DhCxs0MnkMHWFK6MyzXCCn+JnWFDYPfDKHvpff/kLDobtPBf+Lbch5wQy9quY27xaj0XwLyjOltpiSTLWae/Q4vAgMBAAGjHTAbMAwGA1UdEwQFMAMBAf8wCwYDVR0PBAQDAgEGMA0GCSqGSIb3DQEBDQUAA4ICAQC9fUL2sZPxIN2mD32VeNySTgZlCEdVmlq471o/bDMP4B8gnQesFRtXY2ZCjs50Jm73B2LViL9qlREmI6vE5IC8IsRBJSV4ce1WYxyXro5rmVg/k6a10rlsbK/eg//GHoJxDdXDOokLUSnxt7gk3QKpX6eCdh67p0PuWm/7WUJQxH2SDxsT9vB/iZriTIEe/ILoOQF0Aqp7AgNCcLcLAmbxXQkXYCCSB35Vp06u+eTWjG0/pyS5V14stGtw+fA0DJp5ZJV4eqJ5LqxMlYvEZ/qKTEdoCeaXv2QEmN6dVqjDoTAok0t5u4YRXzEVCfXAC3ocplNdtCA72wjFJcSbfif4BSC8bDACTXtnPC7nD0VndZLp+RiNLeiENhk0oTC+UVdSc+n2nJOzkCK0vYu0Ads4JGIB7g8IB3z2t9ICmsWrgnhdNdcOe15BincrGA8avQ1cWXsfIKEjbrnEuEk9b5jel6NfHtPKoHc9mDpRdNPISeVawDBM1mJChneHt59Nh8Gah74+TM1jBsw4fhJPvoc7Atcg740JErb904mZfkIEmojCVPhBHVQ9LHBAdM8qFI2kRK0IynOmAZhexlP/aT/kpEsEPyaZQlnBn3An1CRz8h0SPApL8PytggYKeQmRhl499+6jLxcZ2IegLfqq41dzIjwHwTMplg+1pKIOVojpWA==-----END CERTIFICATE-----
```
Certificate Private Key: leave blank;Serial for next certificate: leave as it is by default;Press Save
2. Navigate to VPN -> OpenVPN -> Clients and press + Add button.
3. Fill in the fields:GENERAL INFORMATIONDisabled: leave unchecked.Description: Any name you like. We will use NordVPN_US8561.Server mode: Peer to Peer (SSL/TLS);Protocol: UDP4 (you can also use TCP4);Device mode: tun;Interface: any;Remote server:Host or address: us8561.nordvpn.com (change to the hostname of the server you are going to use);Port: 1194 (use 443 if you use TCP);Retry DNS resolution: check;Proxy host or address: leave blank;Proxy port: leave blank;Proxy Authentication: None;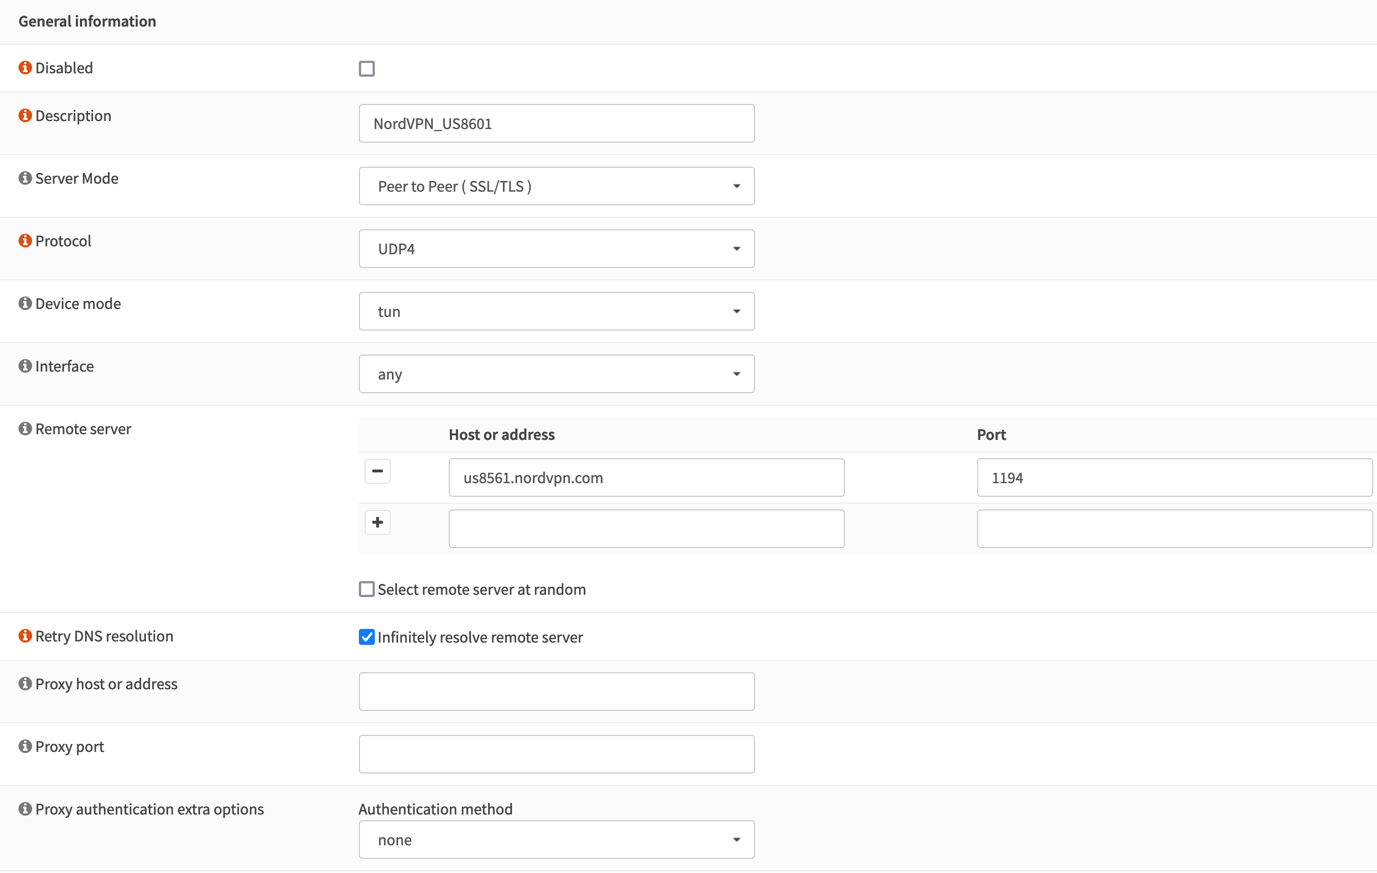USER AUTHENTICATION SETTINGSUser name/pass: fill in NordVPN service username and password;
Follow the steps below to find the service credentials for manual connection setup:
1. Log into your [Nord Account](https://my.nordaccount.com/), click NordVPN, and, under Manual setup, click on Service credentials. Here you'll find the Username and Password needed to connect manually.
Renegotiate time: leave blank;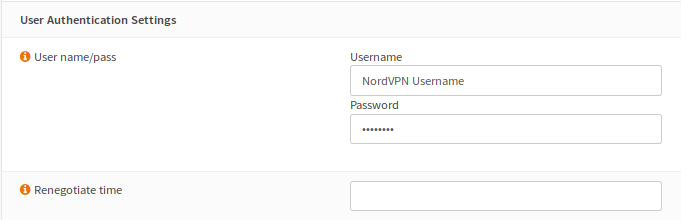CRYPTOGRAPHIC SETTINGS:TLS Authentication: Enabled - Authentication onlyTLS Shared Key: Paste the contents below
```
-----BEGIN OpenVPN Static key V1-----e685bdaf659a25a200e2b9e39e51ff030fc72cf1ce07232bd8b2be5e6c670143f51e937e670eee09d4f2ea5a6e4e69965db852c275351b86fc4ca892d78ae002d6f70d029bd79c4d1c26cf14e9588033cf639f8a74809f29f72b9d58f9b8f5fefc7938eade40e9fed6cb92184abb2cc10eb1a296df243b251df0643d53724cdb5a92a1d6cb817804c4a9319b57d53be580815bcfcb2df55018cc83fc43bc7ff82d51f9b88364776ee9d12fc85cc7ea5b9741c4f598c485316db066d52db4540e212e1518a9bd4828219e24b20d88f598a196c9de96012090e333519ae18d35099427e7b372d348d352dc4c85e18cd4b93f8a56ddb2e64eb67adfc9b337157ff4-----END OpenVPN Static key V1-----
```
Peer Certificate Authority: NordVPN_US8601_CA;Client Certificate: None (Username and Password required);Encryption Algorithm: AES-256-GCM;Auth Digest Algorithm: SHA512;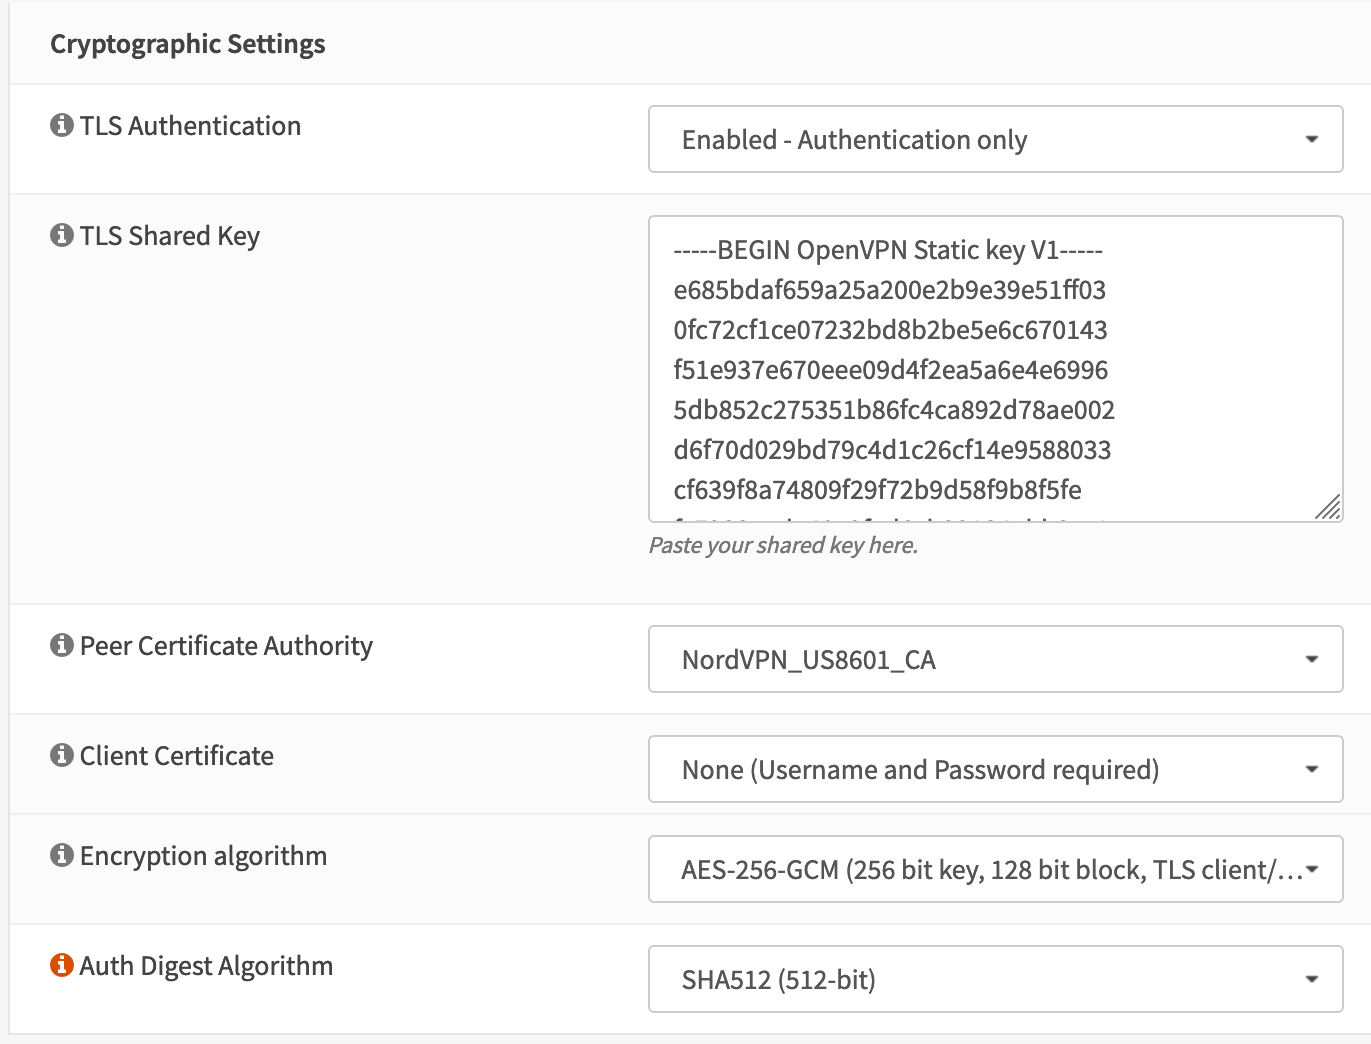TUNNEL SETTINGS:IPv4 tunnel network: leave blank;IPv6 tunnel network: leave blank;IPv4 remote network: leave blank;IPv6 remote network: leave blank;Limit outgoing bandwidth: leave blank;Compression: Legacy - Disabled LZO algorithm (--comp-lzo no)Type-of-service: leave unchecked;Don’t pull routes: leave unchecked;Don’t add/remove routes: check.ADVANCED CONFIGURATION:Advanced: paste the contents below
remote-random;tun-mtu 1500;tun-mtu-extra 32;mssfix 1450;persist-key;persist-tun;reneg-sec 0;remote-cert-tls server;
Verbosity level: 3 (recommended);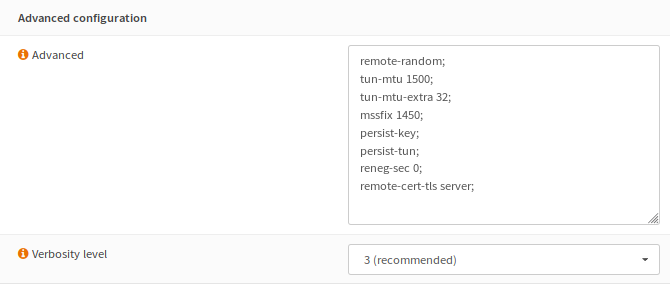Click Save.
1. Navigate to Interfaces -> Assignments and click on + near New Interface. By default, it is ovpnc1.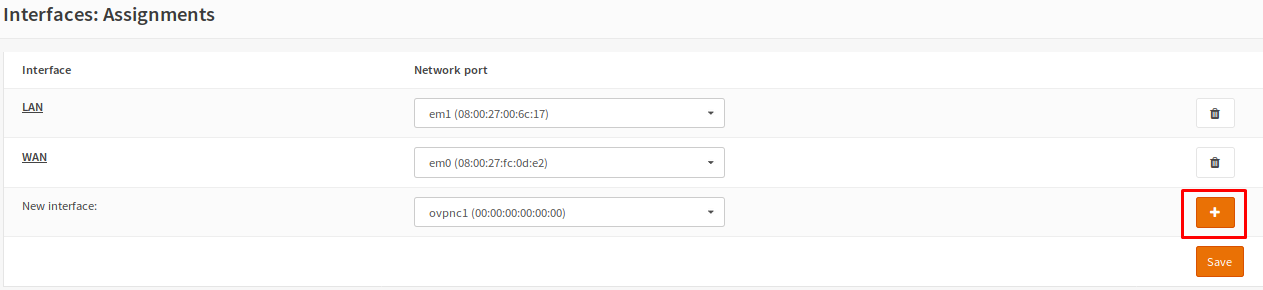
2. Click on the OPT1 to edit the interface.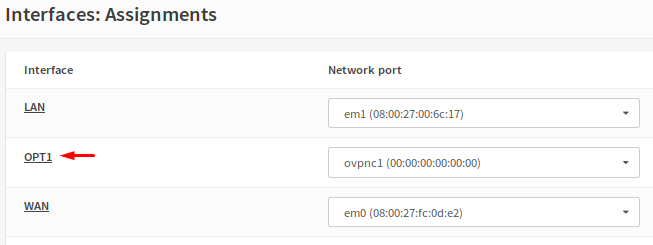
3. Click on the Enable Interface and do the following changes:Description: NordVPN (or anything you want);Block private networks: leave unchecked;Block bogon networks: leave unchecked;IPv4 Configuration Type: None;IPv6 Configuration Type: None;MAC address: leave blank;MTU: leave blank;MSS: leave blank;No changes required on the DHCP client configuration so just click on Save button.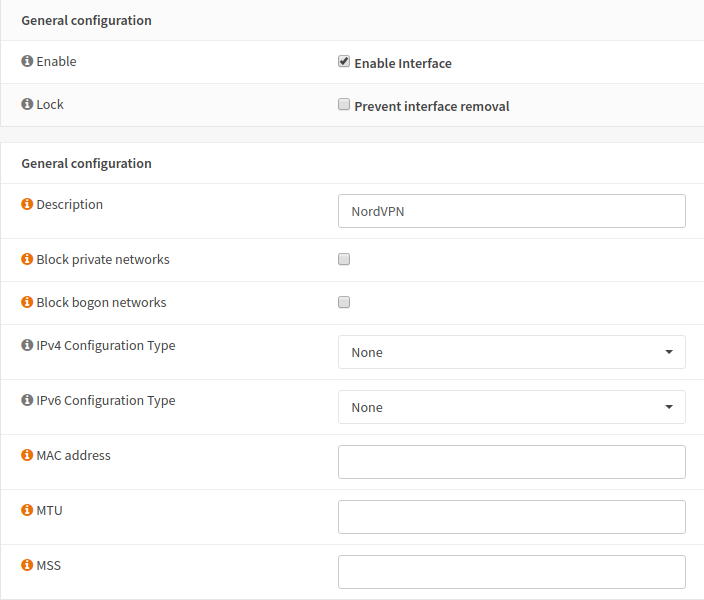Click on the Apply changes button.
4. Navigate to Services -> Unbound DNS -> General.Enable: check;Listen port: 53;Network Interfaces: All;DNSSEC: uncheck;DHCP Registration: check;DHCP Domain Override: leave blank;DHCP Static Mappings: check;IPv6 Link-local: unchecked;TXT Comment Support: leave unchecked;DNS Query Forwarding: check;Local Zone Type: Transparent;Custom options: leave blank;Outgoing Network Interfaces: NordVPN (or whatever you named your OpenVPN interface);WPAD Records: leave unchecked;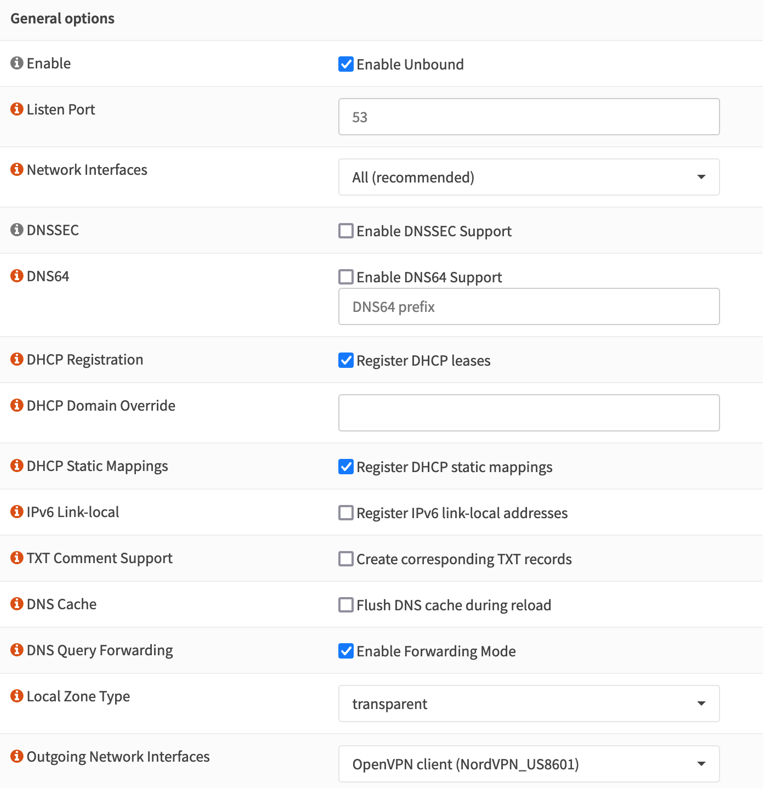Click Save and Apply changes.
5. Navigate to Services -> Unbound DNS -> Advanced and do the check the following options:Hide Identity: checkHide Version: checkPrefetch Support: checkPrefetch DNS Key Support: checkLeave anything else as it is by default, click Save, and Apply Settings.
6. Navigate to Firewall -> NAT -> Outbound, select Hybrid outbound NAT rule generation (automatically generated rules are applied after manual rules), click Save and Apply Changes.
7. Click on the +Add button on top, on the edit menu, select Interface as NordVPN. Leave anything else by as it is by default, click Save, and Apply Changes.
8. Navigate to Firewall -> Rules -> LAN and delete the IPv6 rule. After that, click on the edit button next to IPv4. Scroll down and under Advanced features, select Gateway as NORDVPN_VPN4. Click Save.Next, click +Add, change Source to LAN net and Destination to LAN Address, don't change anything else, Save and Apply Changes.
9. Navigate to System -> Settings -> General and do the following changes:Under Networking, check the Prefer IPv4 over IPv6;DNS servers:103.86.96.100, Use Gateway: none;103.86.99.100, Use Gateway: none.On DNS server options, uncheck Allow DNS server list to be overridden by DHCP/PPP on WANClick Save and Apply Changes.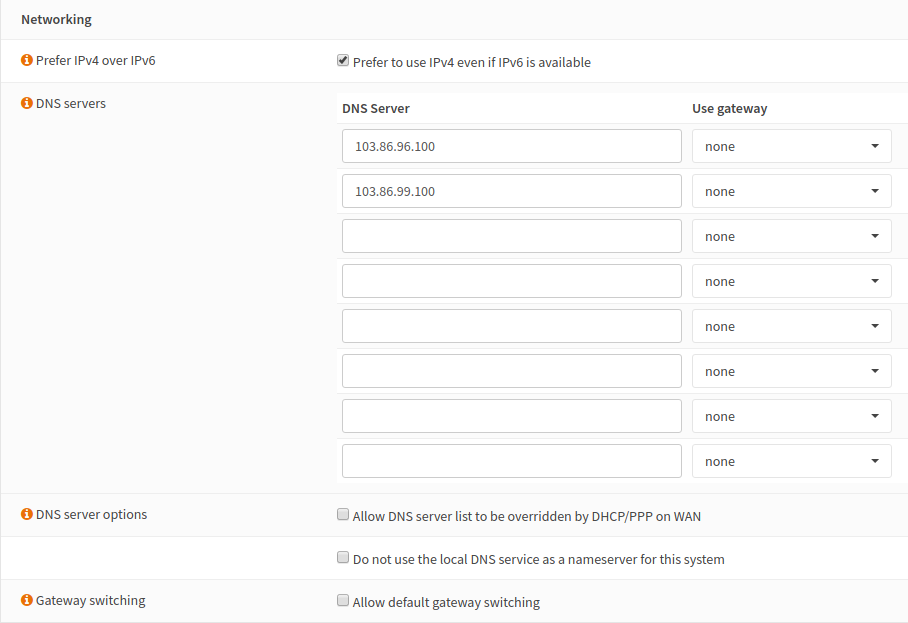
10. Navigate to System -> Gateways -> Single and do the following changes:Edit NORDVPN_VPN6 -> click DisabledSave and Apply Changes.
11. Now you can navigate to VPN -> OpenVPN -> Connection Status and it should state that the service is “up”:Restart the connection to assign the OpenVPN Virtual Address to the interfaces.
12. Navigate to Lobby -> Dashboard and confirm the NordVPN Interface has an IP Number
13. You can also check the connection log file under VPN -> OpenVPN -> Log File. If you encounter any connection issues, please send the log file to our [customer support](https://support.nordvpn.com/hc/en-us/articles/19482416296593-How-can-I-reach-NordVPN-customer-support) for the further support.",https://support.nordvpn.com/hc/en-us/articles/20397569418129-OPNsense-21-setup-with-NordVPN
How to provide connection logs of NordVPN apps,"In case of an issue with the connectivity using our applications, please provide us with the connection logs from the application and send to our support team for further troubleshooting.Here are the tutorials on how to provide the connection logs for different operating systems:
* [How to get connection logs on Windows](https://support.nordvpn.com/hc/en-us/articles/19920718445457-How-to-get-connection-logs-on-Windows)
* [How to get connection logs on macOS](https://support.nordvpn.com/hc/en-us/articles/19925471008273-How-to-get-connection-logs-on-macOS)
* [How to get connection logs on Android](https://support.nordvpn.com/hc/en-us/articles/20347328412945-How-to-get-connection-logs-on-Android)
* [How to get connection logs on iOS](https://support.nordvpn.com/hc/en-us/articles/20465912080785-How-to-get-connection-logs-on-iOS)
* [How to get connection logs on Linux](https://support.nordvpn.com/hc/en-us/articles/20379326742161-How-to-get-connection-logs-on-Linux)
* [How to get connection logs on NordVPN Browser Extension](https://support.nordvpn.com/hc/en-us/articles/29758845534993-How-to-get-connection-logs-from-the-NordVPN-Browser-Extension)",https://support.nordvpn.com/hc/en-us/articles/20379445229073-How-to-provide-connection-logs-of-NordVPN-apps
How to check the NordVPN app version,"In this article, you can find a step-by-step guide on how to locate the NordVPN app version on:
* [iOS](
* [Android](
* [macOS](
* [Windows](
* [Linux](
## iOS
1. When you open the NordVPN application, click on the profile icon in the bottom right corner.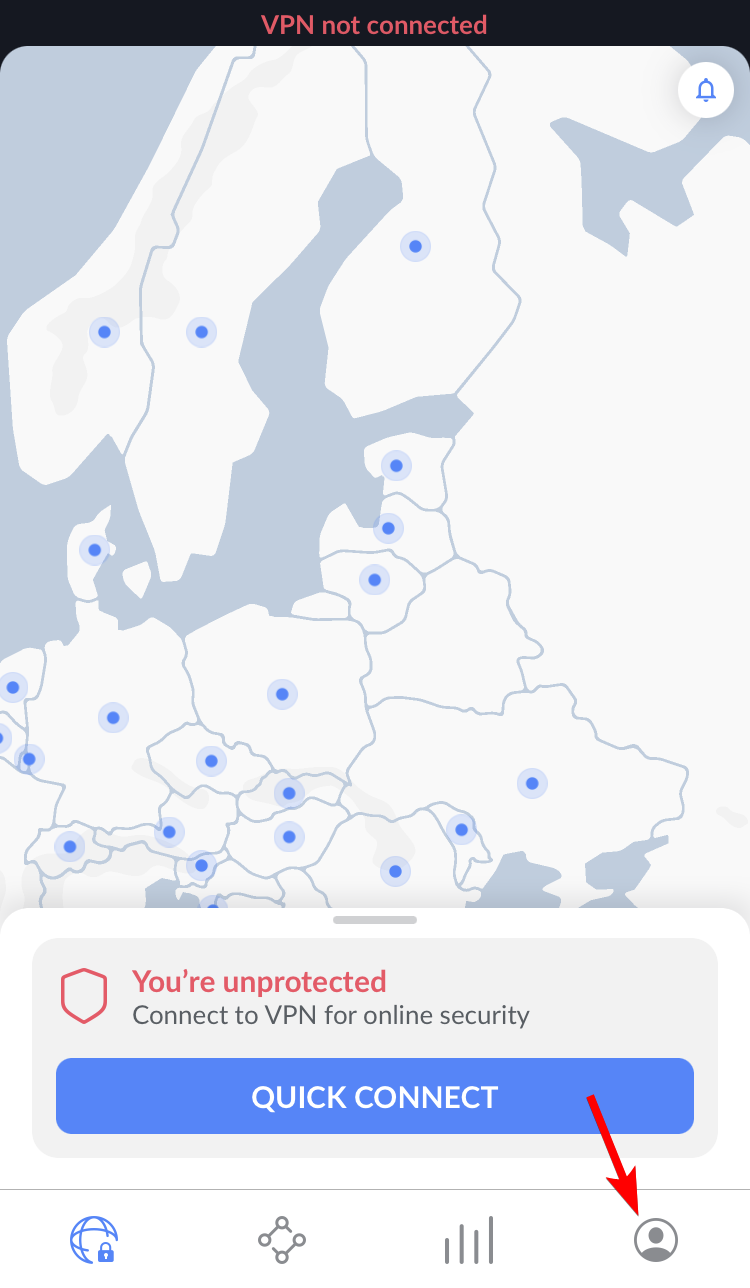
2. Then click the gear icon in the upper right corner.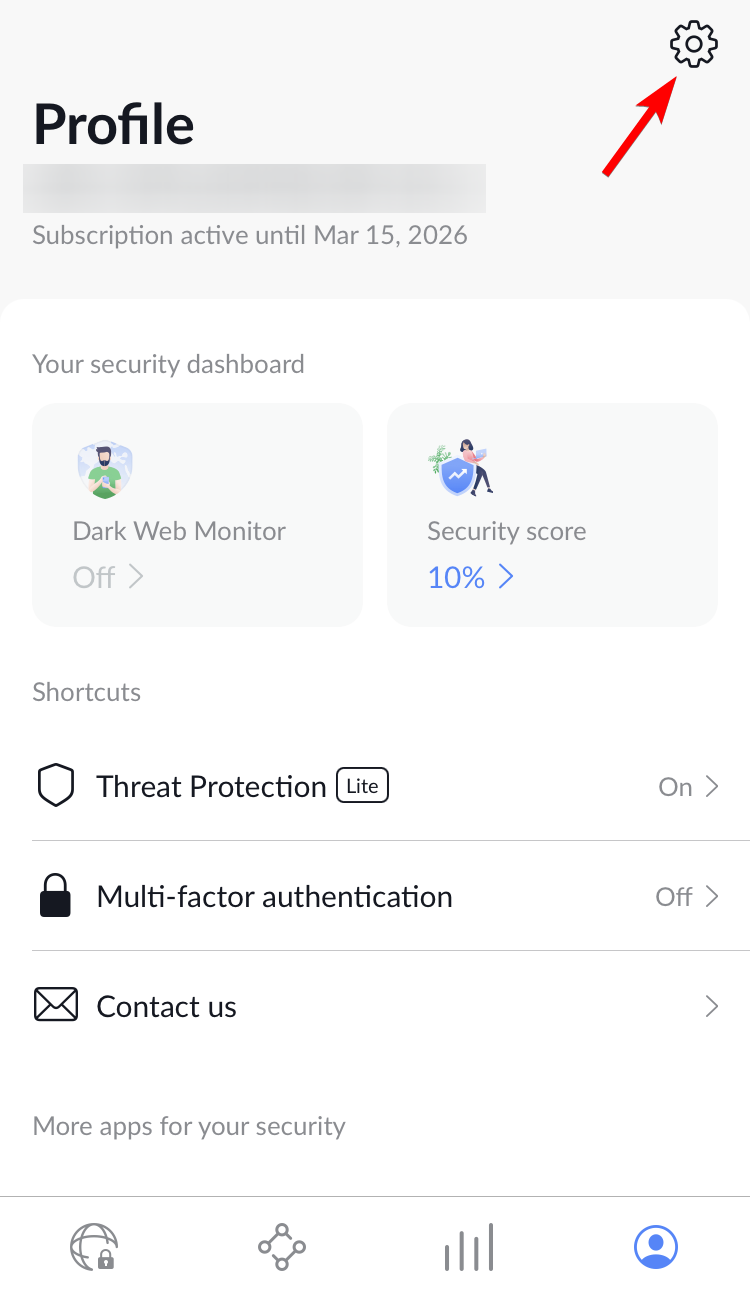
3. Scroll down, and you will find the application version just beneath the General tab.
## Android
1. In order to see your application version on your Android device, you need to go to your mobile device Settings and locate the NordVPN Application.
2. Tap on NordVPN to see the Application information. Scroll down, and you will find the application version at the bottom of the screen.
## MacOS
1. Open the application and click on the NordVPN button in the upper left corner next to the Apple icon.
2. Click on About NordVPN. A window will pop up that will have the version of the app portrayed just below the application icon and name.
## Windows
1. Click on the gear icon in the bottom left corner.
2. The version of the application will be displayed just above the general settings.
## Linux
The version of the application on the Linux app is shown on the upper left side if the terminal page. To get to it you only need to open the app and scroll to the top if needed.
However, you may find the version of the application in a different way with a few simple steps:
1. Click on Terminal next to the upper left corner and then go to New Window.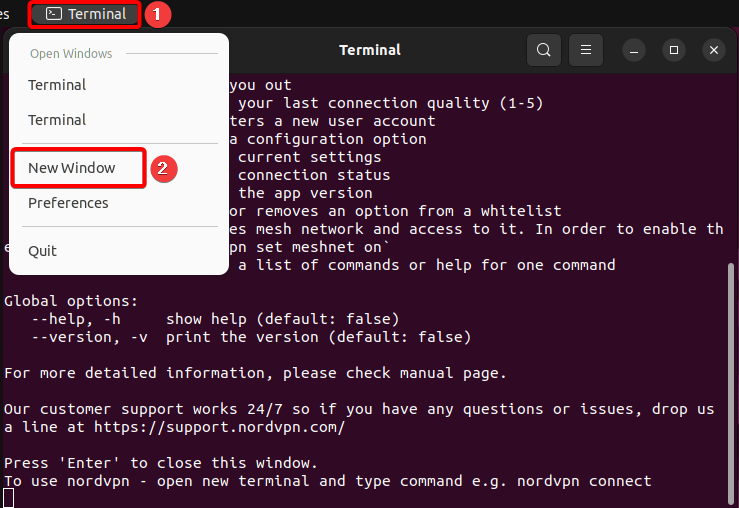
2. A new command terminal window will open. Type ""nordvpn version"" and press Enter. The version of the application will be written as the last thing after all of the portrayed text.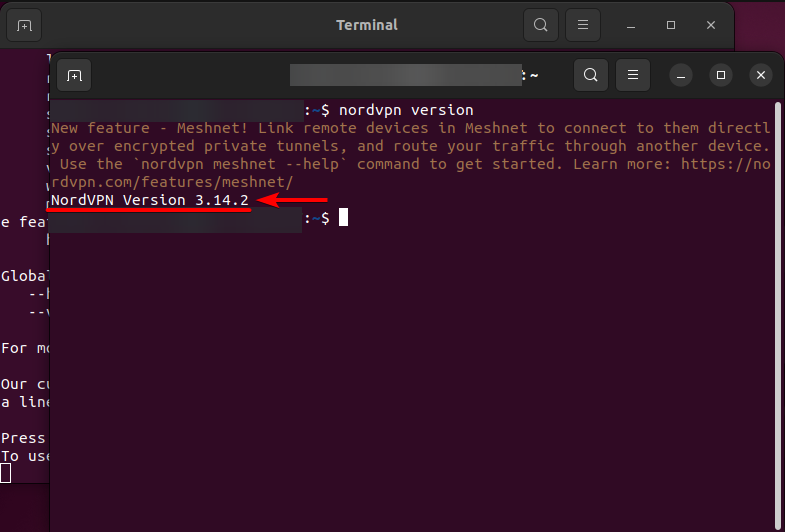",https://support.nordvpn.com/hc/en-us/articles/20290051742353-How-to-check-the-NordVPN-app-version
pfSense 2.4.4 selective Routing,"1. In order to setup pfSense selective routing, please set up OpenVPN first on your pfSense following our [tutorial](https://support.nordvpn.com/hc/en-us/articles/20349690650385-pfSense-2-4-4-VPN-setup).Note: On the Tunnel Settings, mark the checkbox on Don't pull routes option.
2. Once you have finished the tutorial, navigate to Firewall → NAT → Outbound. You will need to readjust Mappings according to the screenshot: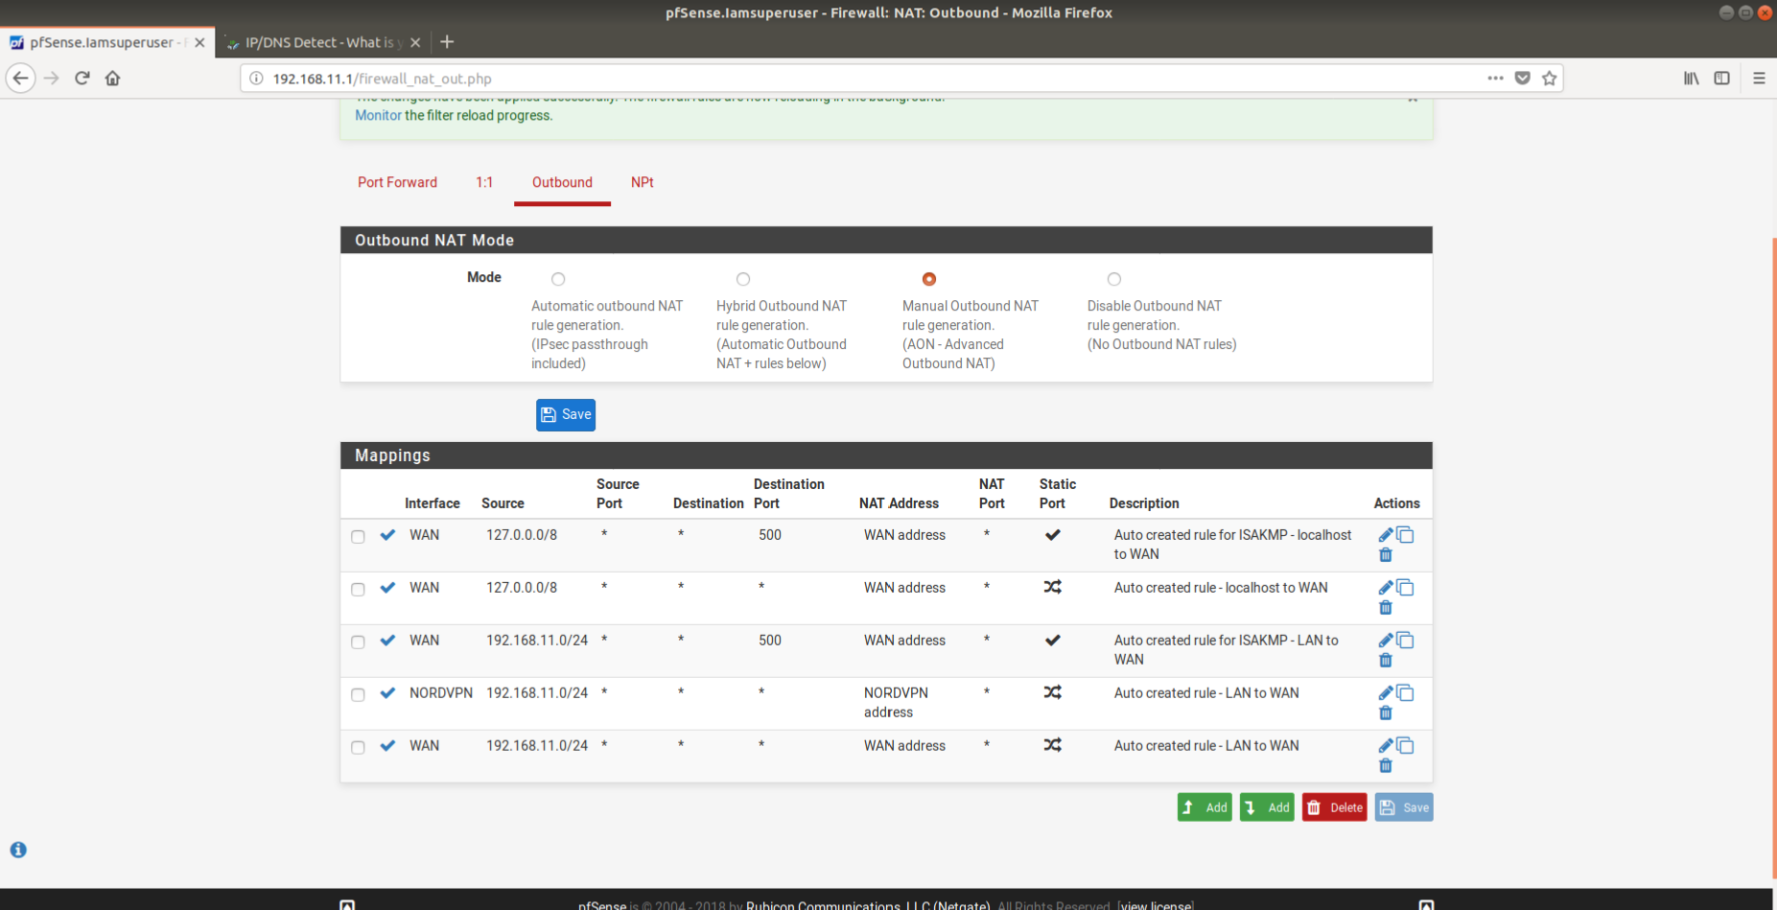
3. Navigate to Firewall → Rules → LAN.
1. Click to Add new interface. Change the following settings:Action: PassInterface: LANProtocol: AnySource: Single host or alias → device IP address you wish to exclude from VPN tunnel. (You can write a whole subnet, range of IP addresses as well)Gateway: WAN_DHCP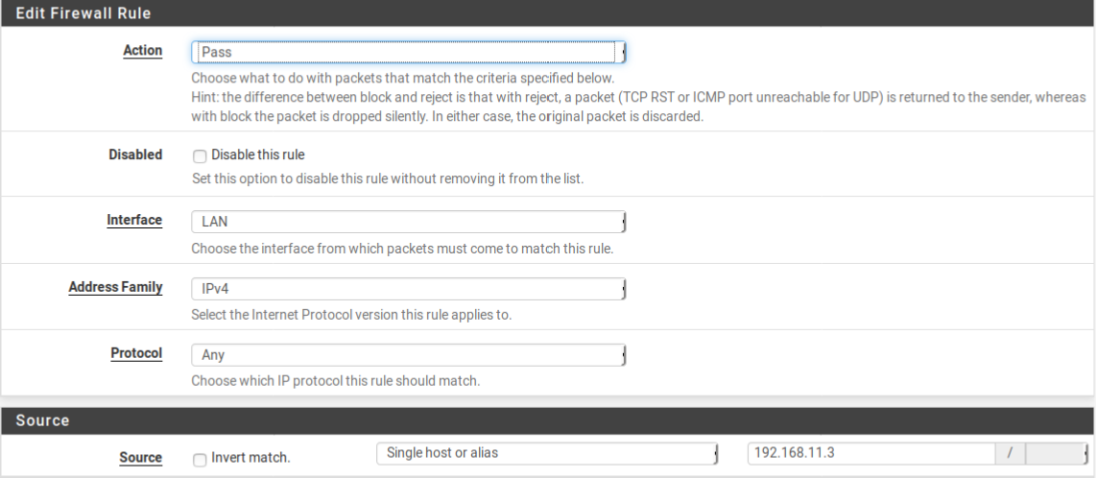Once you will save changes, your LAN rules should look similar to:Note: make sure this newly created rule is placed above any other rules.
4. Save and apply changes. You may also need to reset the firewall to apply all changes, which you can do by:
5. Navigate Diagnostics → States → Reset States → Check Reset the firewall state table → Reset.
6. That is it, you can check our [IP check](https://nordvpn.com/what-is-my-ip/) website to see whether your devices are routed through ISP connection and rest of them via VPN tunnel.",https://support.nordvpn.com/hc/en-us/articles/20370642641169-pfSense-2-4-4-selective-Routing
How to set up Western Digital My Cloud,"This is a tutorial on how to set up a WD My Cloud EX2 NAS with a NordVPN connection.
You need to make the following changes in the web settings of your Western Digital My Cloud NAS. Just enter the device's local IP address in your browser to access the web interface. The default IP, username, and password info can be found in the device's user manual.
To connect your WD My Cloud device to NordVPN, enable SSH on your device and perform the steps below while connected via SSH.
The instructions were made using WD My Cloud EX2 FW Version 2.30.165
1. Connect to the device by typing its IP address in your browser.
2. Navigate to Settings, click Network in the left sidebar, and enable SSH under Network Services:
3. A new SSH window will pop up. Select I accept, click OK, and enter your SSH password. Once done, SSH should be enabled:
4. Use an SSH application such as Bitvise SSH Client if you are on Windows. Specify your WD IP address in the Host field under the Server section. Under Authentication, fill in your device’s SSH credentials in the Username and Password fields. Click Login:
5. Once you have connected to your device, two new windows will open: the SFTP window where you can upload files to your device and the terminal.6. Download desired NordVPN server’s OpenVPN configuration files. For this example, we used UK files.
Follow the steps below to find the manual connection configuration files:
1. Log into your [Nord Account](https://my.nordaccount.com/), and click NordVPN.
2. Scroll down to Advanced Settings and click Set up NordVPN manually.
3. Select the OpenVPN configuration files tab.
4. Find the server you wish to connect to by using the Search bar or by scrolling down and download it by clicking Download UDP or Download TCP.
5. When connecting to OpenVPN & IKEv2 manually, you're going to need to use the Username and Password from the Service credential tab.
Once you have downloaded the files, go back to the control panel of your NAS and click Browse.
Drag and drop the OpenVPN configuration files into the SFTP window. In the terminal, type openvpn.bin filename. In case the openvpn.bin command doesn’t work, use the openvpn filename command. For example:
openvpn.bin uk180.nordvpn.com.udp1194.ovpnoropenvpn uk180.nordvpn.com.udp1194.ovpn
7. Press Enter in the terminal. You will be asked to enter your NordVPN service username and password.You can find your NordVPN service credentials (service username and service password) in the [Nord Account dashboard](https://my.nordaccount.com/dashboard/nordvpn/):
Follow the steps below to find the service credentials for manual connection setup:
1. Log into your [Nord Account](https://my.nordaccount.com/), click NordVPN, and, under Manual setup, click on Service credentials. Here you'll find the Username and Password needed to connect manually.
Once you see Initialization Sequence Completed, your device is connected to NordVPN.
",https://support.nordvpn.com/hc/en-us/articles/20369682113169-How-to-set-up-Western-Digital-My-Cloud
How to disable IPv6,"If you are having issues related to IPv6 leaking on your connection you can disable it on your device.To do so you can follow these guides:
* [Windows](https://support.nordvpn.com/hc/en-us/articles/19919186892305-How-to-disable-IPv6-on-Windows)
* [MacOS](https://support.nordvpn.com/hc/en-us/articles/19924913336081-How-to-disable-IPv6-on-macOS)
* [Linux](https://support.nordvpn.com/hc/en-us/articles/20164669224337-How-to-disable-IPv6-on-Linux)
* [Android](https://support.nordvpn.com/hc/en-us/articles/20323519060625-How-to-disable-IPv6-on-Android-LTE)",https://support.nordvpn.com/hc/en-us/articles/20350921723409-How-to-disable-IPv6
It says my username or password is incorrect,"There may be a few reasons causing this error:
* First, make sure you are using the [latest version of the application](https://nordvpn.com/download/).
* If that does not help, you may be using the wrong password. Follow these steps to reset your password:
1. Log in to your Nord Account here: 
2. Click on Forgot your password?
3. Enter the email address associated with your Nord Account and click Send Reset Link:",https://support.nordvpn.com/hc/en-us/articles/20350855634833-It-says-my-username-or-password-is-incorrect
pfSense 2.4.4 VPN setup,"Please note: if you are using pfSense 2.4.5 you will need to follow this tutorial instead. Likewise, in case you have pfSense 2.5 use this tutorial instead.
## Here are the steps on how to set up OpenVPN on pfSense 2.4.4:
1. To set up VPN on pfSense 2.4.4, access your pfSense from your browser, then navigate to System > Certificate Manager > CAs. Select +Add.You should see this screen:
2. For this tutorial, we will configure our pfSense to connect to a server in the Netherlands, but you should connect to a suggested server.
Follow the steps below to find the best server for your connection:
1. Log into your [Nord Account](https://my.nordaccount.com/), and click NordVPN.
2. Scroll down to Advanced Settings and click Set up NordVPN manually.
3. Select the Server recommendation tab. According to your location, the best server will be recommended.
4. By pressing Advanced filters you can further customize the recommended servers by selecting the Server type and the Security protocol.
In case you wish to select a specific server, follow these steps:
1. Under Set up NordVPN manually, select OpenVPN configuration files.
2. Find the server you wish to connect to by using the Search bar or by scrolling down and download it by clicking Download UDP or Download TCP.
3. When connecting to OpenVPN & IKEv2 manually, you're going to need to use the Username and Password from the Service credential tab.
Fill in the fields as follows:Descriptive Name: NordVPN_NL120_CA (we are using this name for the sake of this manual — you can use any name you like)Method: Import an existing Certificate AuthorityCertificate data:
```
-----BEGIN CERTIFICATE-----MIIFCjCCAvKgAwIBAgIBATANBgkqhkiG9w0BAQ0FADA5MQswCQYDVQQGEwJQQTEQMA4GA1UEChMHTm9yZFZQTjEYMBYGA1UEAxMPTm9yZFZQTiBSb290IENBMB4XDTE2MDEwMTAwMDAwMFoXDTM1MTIzMTIzNTk1OVowOTELMAkGA1UEBhMCUEExEDAOBgNVBAoTB05vcmRWUE4xGDAWBgNVBAMTD05vcmRWUE4gUm9vdCBDQTCCAiIwDQYJKoZIhvcNAQEBBQADggIPADCCAgoCggIBAMkr/BYhyo0F2upsIMXwC6QvkZps3NN2/eQFkfQIS1gql0aejsKsEnmY0Kaon8uZCTXPsRH1gQNgg5D2gixdd1mJUvV3dE3y9FJrXMoDkXdCGBodvKJyU6lcfEVF6/UxHcbBguZK9UtRHS9eJYm3rpL/5huQMCppX7kUeQ8dpCwd3iKITqwd1ZudDqsWaU0vqzC2H55IyaZ/5/TnCk31Q1UP6BksbbuRcwOVskEDsm6YoWDnn/IIzGOYnFJRzQH5jTz3j1QBvRIuQuBuvUkfhx1FEwhwZigrcxXuMP+QgM54kezgziJUaZcOM2zF3lvrwMvXDMfNeIoJABv9ljw969xQ8czQCU5lMVmA37ltv5Ec9U5hZuwk/9QO1Z+d/r6Jx0mlurS8gnCAKJgwa3kyZw6e4FZ8mYL4vpRRhPdvRTWCMJkeB4yBHyhxUmTRgJHm6YR3D6hcFAc9cQcTEl/I60tMdz33G6m0O42sQt/+AR3YCY/RusWVBJB/qNS94EtNtj8iaebCQW1jHAhvGmFILVR9lzD0EzWKHkvyWEjmUVRgCDd6Ne3eFRNS73gdv/C3l5boYySeu4exkEYVxVRn8DhCxs0MnkMHWFK6MyzXCCn+JnWFDYPfDKHvpff/kLDobtPBf+Lbch5wQy9quY27xaj0XwLyjOltpiSTLWae/Q4vAgMBAAGjHTAbMAwGA1UdEwQFMAMBAf8wCwYDVR0PBAQDAgEGMA0GCSqGSIb3DQEBDQUAA4ICAQC9fUL2sZPxIN2mD32VeNySTgZlCEdVmlq471o/bDMP4B8gnQesFRtXY2ZCjs50Jm73B2LViL9qlREmI6vE5IC8IsRBJSV4ce1WYxyXro5rmVg/k6a10rlsbK/eg//GHoJxDdXDOokLUSnxt7gk3QKpX6eCdh67p0PuWm/7WUJQxH2SDxsT9vB/iZriTIEe/ILoOQF0Aqp7AgNCcLcLAmbxXQkXYCCSB35Vp06u+eTWjG0/pyS5V14stGtw+fA0DJp5ZJV4eqJ5LqxMlYvEZ/qKTEdoCeaXv2QEmN6dVqjDoTAok0t5u4YRXzEVCfXAC3ocplNdtCA72wjFJcSbfif4BSC8bDACTXtnPC7nD0VndZLp+RiNLeiENhk0oTC+UVdSc+n2nJOzkCK0vYu0Ads4JGIB7g8IB3z2t9ICmsWrgnhdNdcOe15BincrGA8avQ1cWXsfIKEjbrnEuEk9b5jel6NfHtPKoHc9mDpRdNPISeVawDBM1mJChneHt59Nh8Gah74+TM1jBsw4fhJPvoc7Atcg740JErb904mZfkIEmojCVPhBHVQ9LHBAdM8qFI2kRK0IynOmAZhexlP/aT/kpEsEPyaZQlnBn3An1CRz8h0SPApL8PytggYKeQmRhl499+6jLxcZ2IegLfqq41dzIjwHwTMplg+1pKIOVojpWA==-----END CERTIFICATE-----
```
Press Save.3. Navigate to VPN > OpenVPN > Clients and press +Add.
4. Fill in the fields as follows:Disable this client: leave unchecked;Server mode: Peer to Peer (SSL/TLS);Protocol: UDP on IPv4 only (you can also use TCP in the case that you [experience issues with UDP](https://support.nordvpn.com/hc/en-us/articles/20347119467409-Issue-TLS-key-negotiation-failed-to-occur));Device mode: tun – Layer 3 Tunnel Mode;Interface: WAN;Local port: leave blank;Server host or address: the hostname of the server recommended to you (in our case, it’s nl120.nordvpn.com);Server port: 1194 (use 443 if you use TCP);Proxy host or address: leave blank;Proxy port: leave blank;Proxy Authentication: none;Description: Any name you like. We will use NordVPN.USER AUTHENTICATION SETTINGSUsername: Your NordVPN service usernamePassword: Your NordVPN service password in both fields.You can find your NordVPN service credentials (service username and service password) in the [Nord Account dashboard.](https://my.nordaccount.com/dashboard/nordvpn/)
Follow the steps below to find the service credentials for manual connection setup:
1. Log into your [Nord Account](https://my.nordaccount.com/), click NordVPN, and, under Manual setup, click on Service credentials. Here you'll find the Username and Password needed to connect manually.
Authentication Retry: leave unchecked.CRYPTOGRAPHIC SETTINGSTLS Configuration: CheckTLS Key:
```
-----BEGIN OpenVPN Static key V1-----e685bdaf659a25a200e2b9e39e51ff030fc72cf1ce07232bd8b2be5e6c670143f51e937e670eee09d4f2ea5a6e4e69965db852c275351b86fc4ca892d78ae002d6f70d029bd79c4d1c26cf14e9588033cf639f8a74809f29f72b9d58f9b8f5fefc7938eade40e9fed6cb92184abb2cc10eb1a296df243b251df0643d53724cdb5a92a1d6cb817804c4a9319b57d53be580815bcfcb2df55018cc83fc43bc7ff82d51f9b88364776ee9d12fc85cc7ea5b9741c4f598c485316db066d52db4540e212e1518a9bd4828219e24b20d88f598a196c9de96012090e333519ae18d35099427e7b372d348d352dc4c85e18cd4b93f8a56ddb2e64eb67adfc9b337157ff4-----END OpenVPN Static key V1-----
```
TLS Key Usage Mode: TLS AuthenticationPeer certificate authority: NordVPN_NL120_CAPeer Certificate Revocation list: do not defineClient certificate: webConfigurator default (59f92214095d8) (Server: Yes, In Use) (note that the numbers on your machine could be different)Encryption Algorithm: AES-256-GCMEnable NCP: Check the boxNCP Algorithms: AES-256-GCM and AES-256-CBCAuth digest algorithm: SHA512 (512-bit)Hardware Crypto: No Hardware Crypto AccelerationTUNNEL SETTINGSIPv4 tunnel network: leave blankIPv6 tunnel network: leave blankIPv4 remote network(s): leave blankIPv6 remote network(s): leave blankLimit outgoing bandwidth: leave blankCompression: No LZO Compression [Legacy style,comp-lzo no]Topology: Subnet – One IP address per client in a common subnetType-of-service: leave uncheckedDon’t pull routes: leave uncheckedDon’t add/remove routes: check the boxADVANCED CONFIGURATIONCustom Options
tls-client;remote-random;tun-mtu 1500;tun-mtu-extra 32;mssfix 1450;persist-key;persist-tun;reneg-sec 0;remote-cert-tls server;
UDP FAST I/O: leave uncheckedSend/Receive Buffer: DefaultGateway creation: IPv4 onlyVerbosity level: 3 (recommended)5. Navigate to Interfaces > Interface Assignments and Add the NordVPN NL120 interface.6. Press on the OPT1 to the left of your assigned interface and fill in the following information:Enable: checkDescription: NordVPNMac Address: leave blankMTU: leave blankMSS: leave blank
Do not change anything else. Just scroll down to the bottom and press Save.
7. Navigate to Services -> DNS Resolver -> General SettingsEnable: check the boxListen port: leave as isEnable SSL/TLS Service: uncheckSSL/TLS Certificate: webConfigurator default (59f92214095d8) (Server: Yes, In Use) (note that the numbers on your machine could be different);SSL/TLS Listen Port: leave as isNetwork Interfaces: AllOutgoing Network Interfaces: NordVPNSystem Domains Local Zone Type: TransparentDNSSEC: uncheckDNS Query Forwarding: checkDHCP Registration: checkStatic DHCP: checkClick Save.
8. While in DNS Resolver, select Advanced Settings at the top and fill in the following:ADVANCED PRIVACY OPTIONS:Hide Identity: checkHide Version: checkADVANCED RESOLVER OPTIONS:Prefetch Support: checkPrefetch DNS Key Support: checkClick Save.
9. Navigate to Firewall > NAT > Outbound and select Manual Outbound NAT rule generation. Press Save. Four rules will appear. Leave all the rules untouched and add a new one.
1. Interface: NordVPN.
2. Source: your LAN subnet.
3. Click Save. At the end, it should look like this:

10. Navigate to Firewall > Rules > LAN and delete the IPv6 rule. Also, edit the IPv4 rule.
1. Press on Show Advanced Options
2. Change Gateway to NordVPN
3. Click Save.
Now it should look like this:
11. Go to System > General Setup and fill in the fields as follows:DNS Server 1: 103.86.96.100; noneDNS Server 2: 103.86.99.100; NordVPN_VPNV4-…Click Save.
12. Now navigate to Status > OpenVPN. The status and it should state that the service is “up”.
13. You can also check the connection log file under Status > System Logs > OpenVPN:
That’s it! pfsense VPN setup is complete, and you should now have a [VPN connection](https://nordvpn.com/what-is-a-vpn/). In case you woud like to setup selective VPN routing, click [here](https://support.nordvpn.com/hc/en-us/articles/20370642641169-pfSense-2-4-4-selective-Routing).",https://support.nordvpn.com/hc/en-us/articles/20349690650385-pfSense-2-4-4-VPN-setup
How to get connection logs on Android,"You can send logs from your [NordVPN Android application](https://nordvpn.com/download/android/) by following these steps.
1. Open the application, and go to the user settings.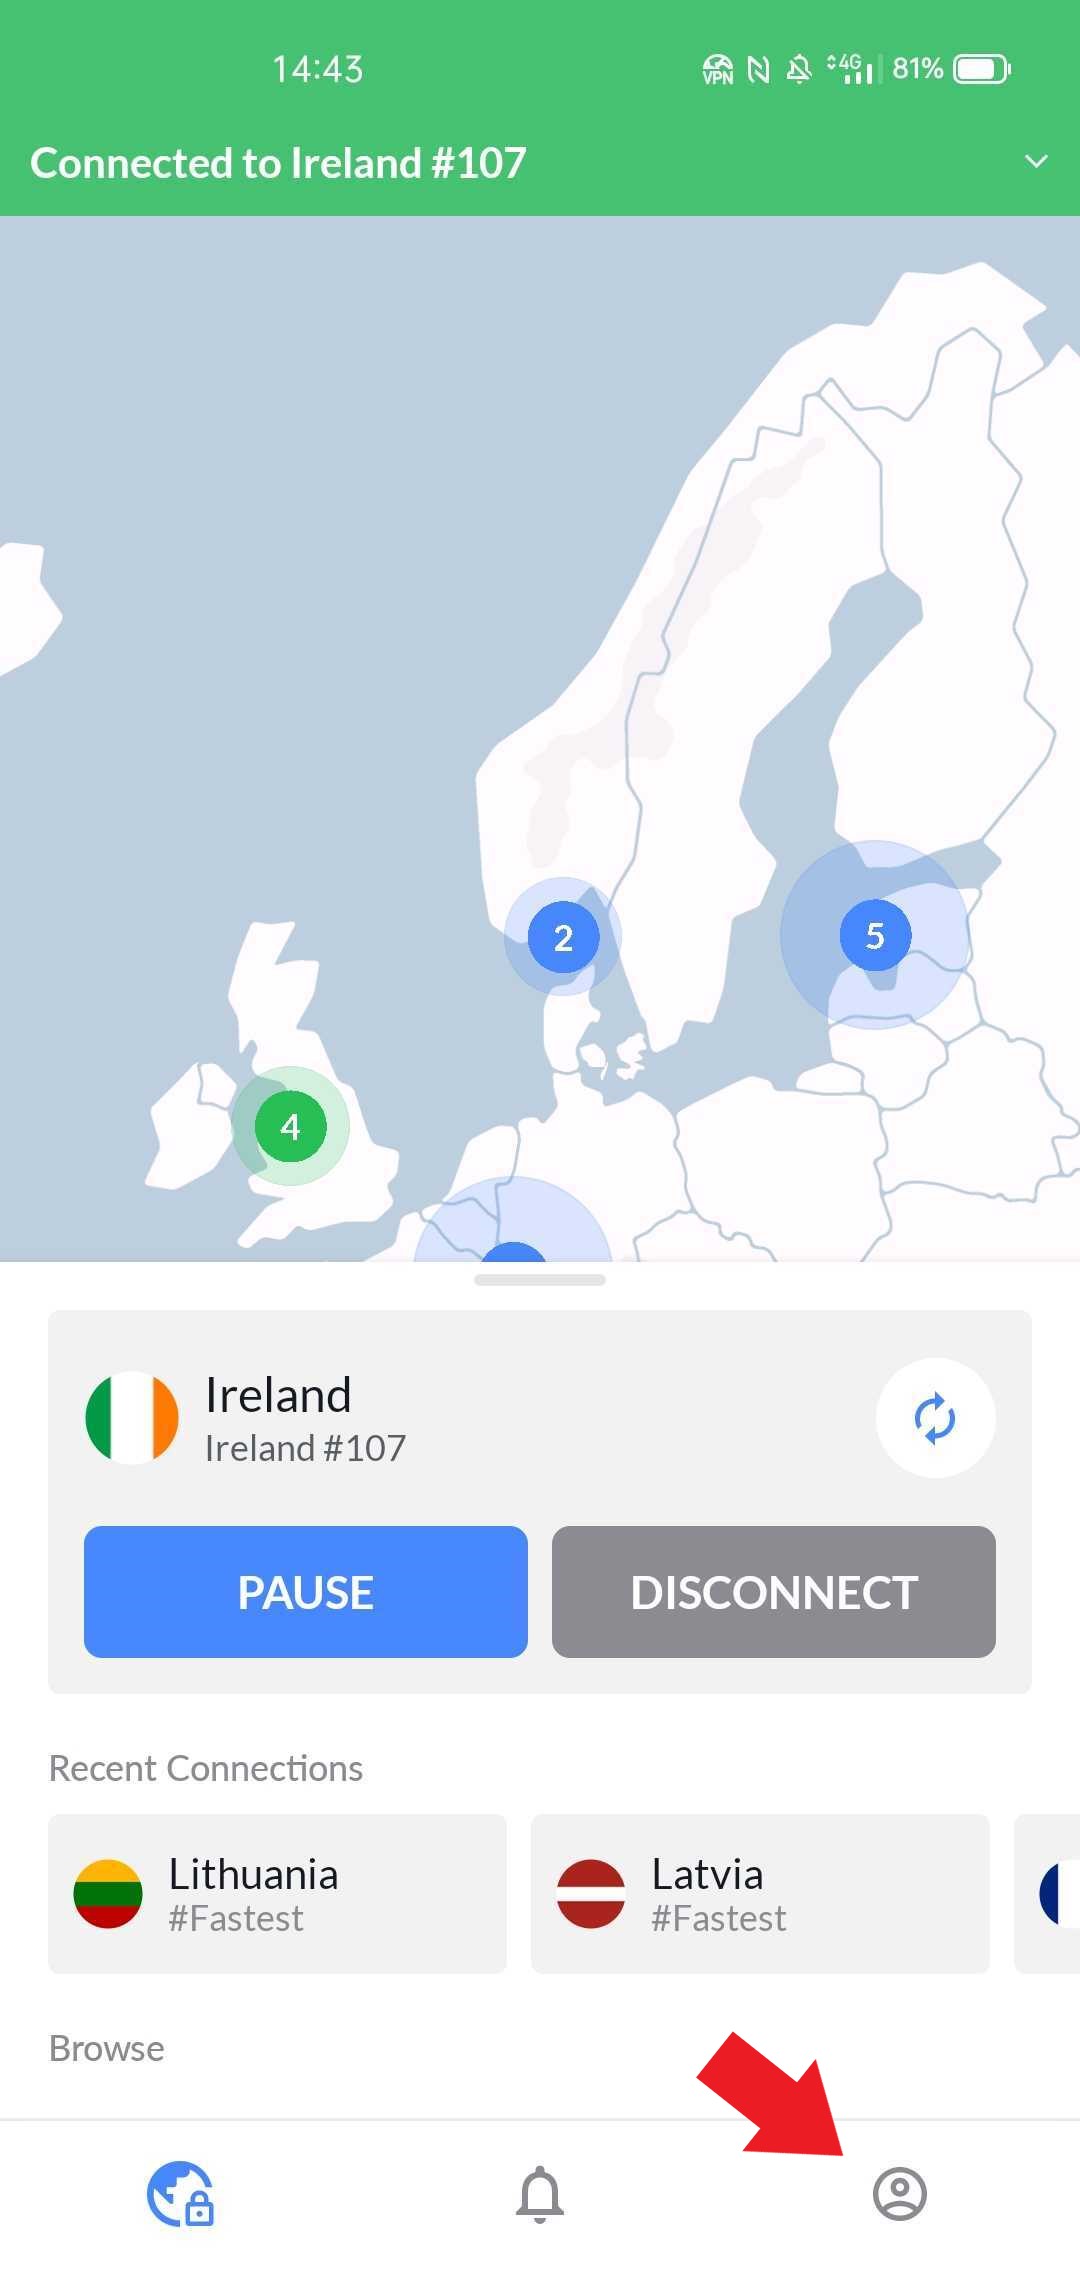
2. Scroll down to the bottom of the Profile window, select Help Center and tap on App logs.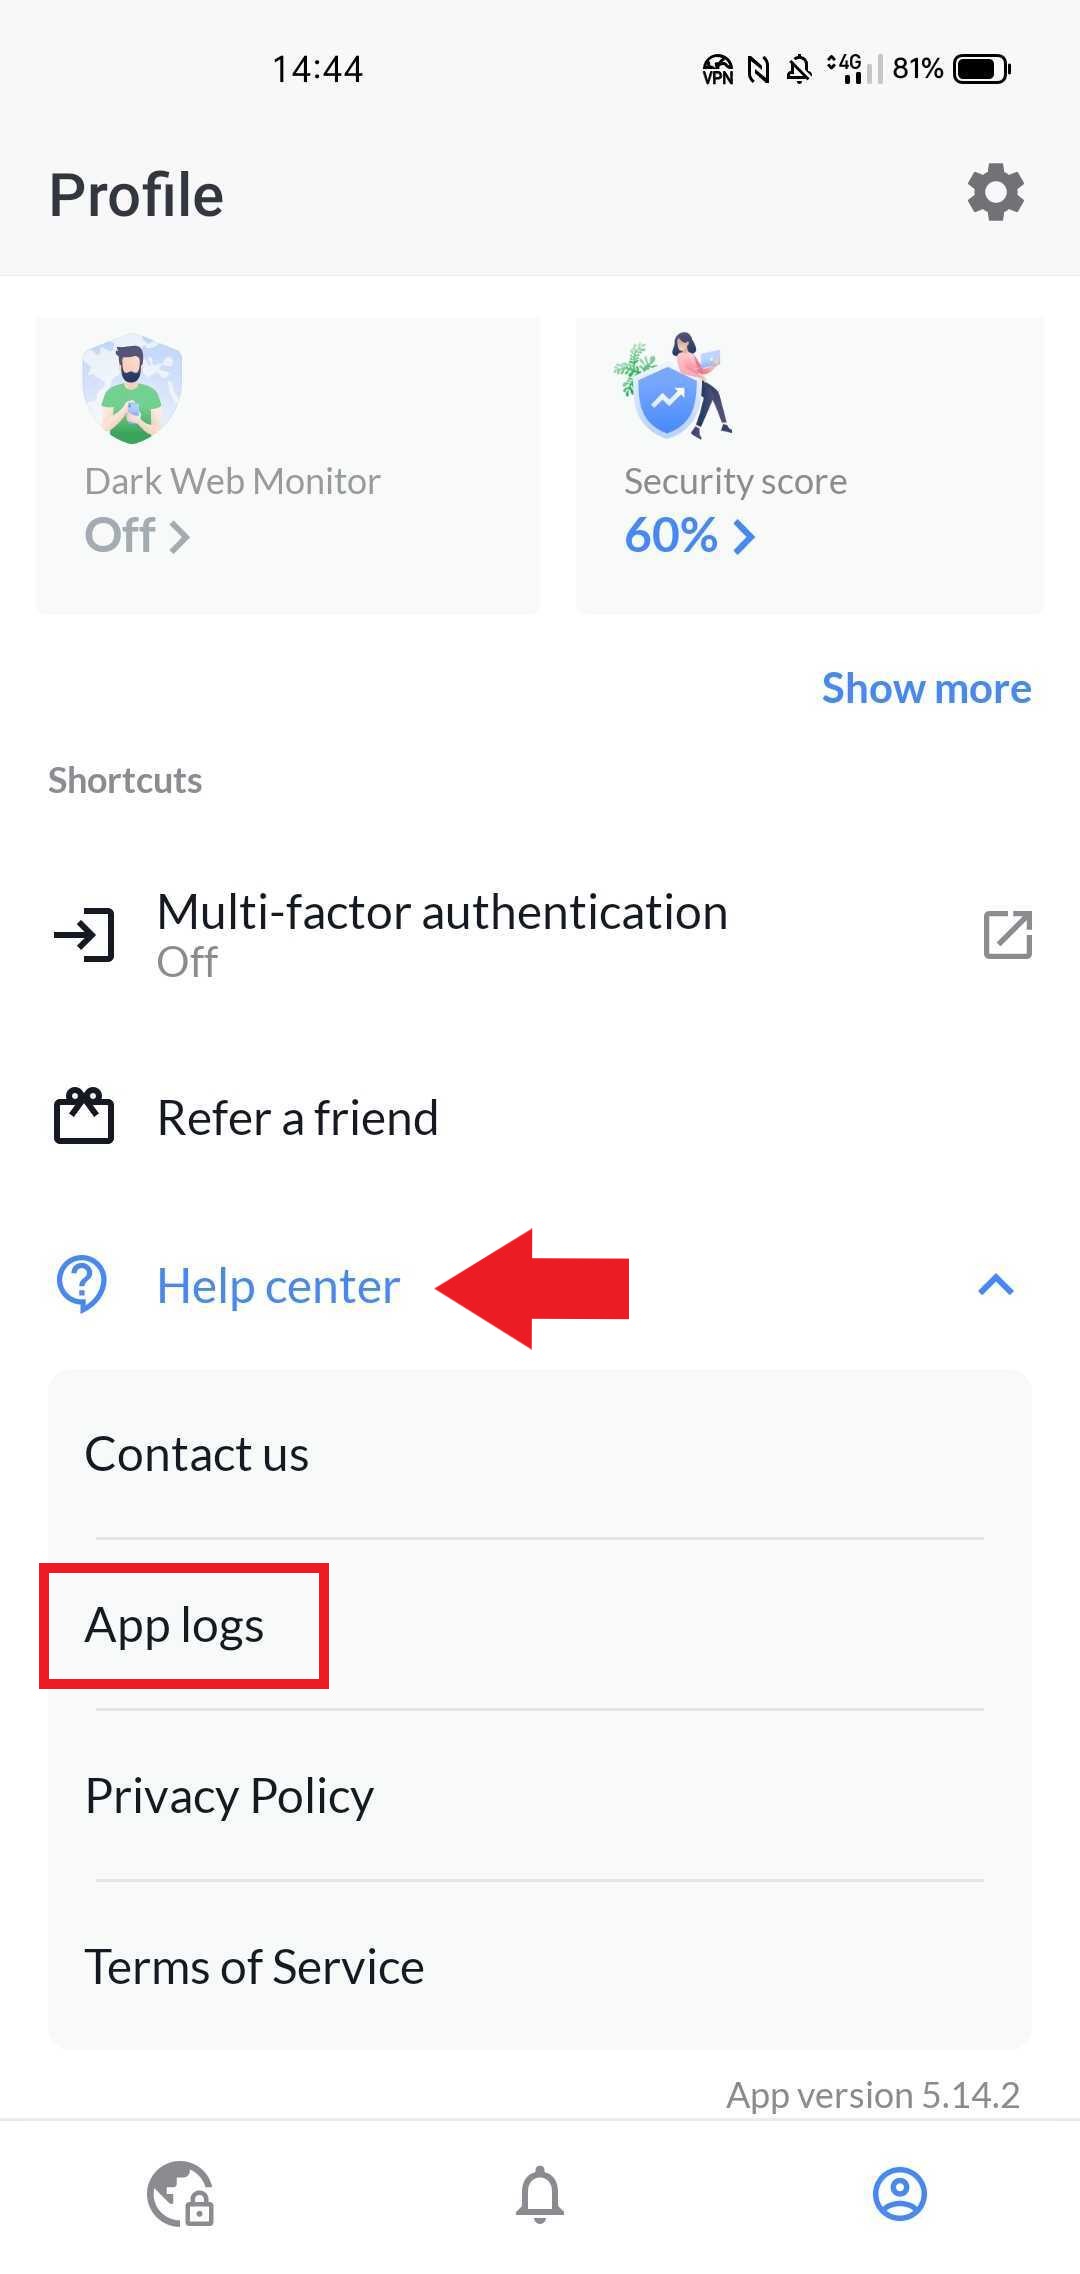
3. Now just tap on the SEND TO CUSTOMER CARE. You will get a reference number - please give it to our support agents via live chat or send it to our email at support@nordvpn.com.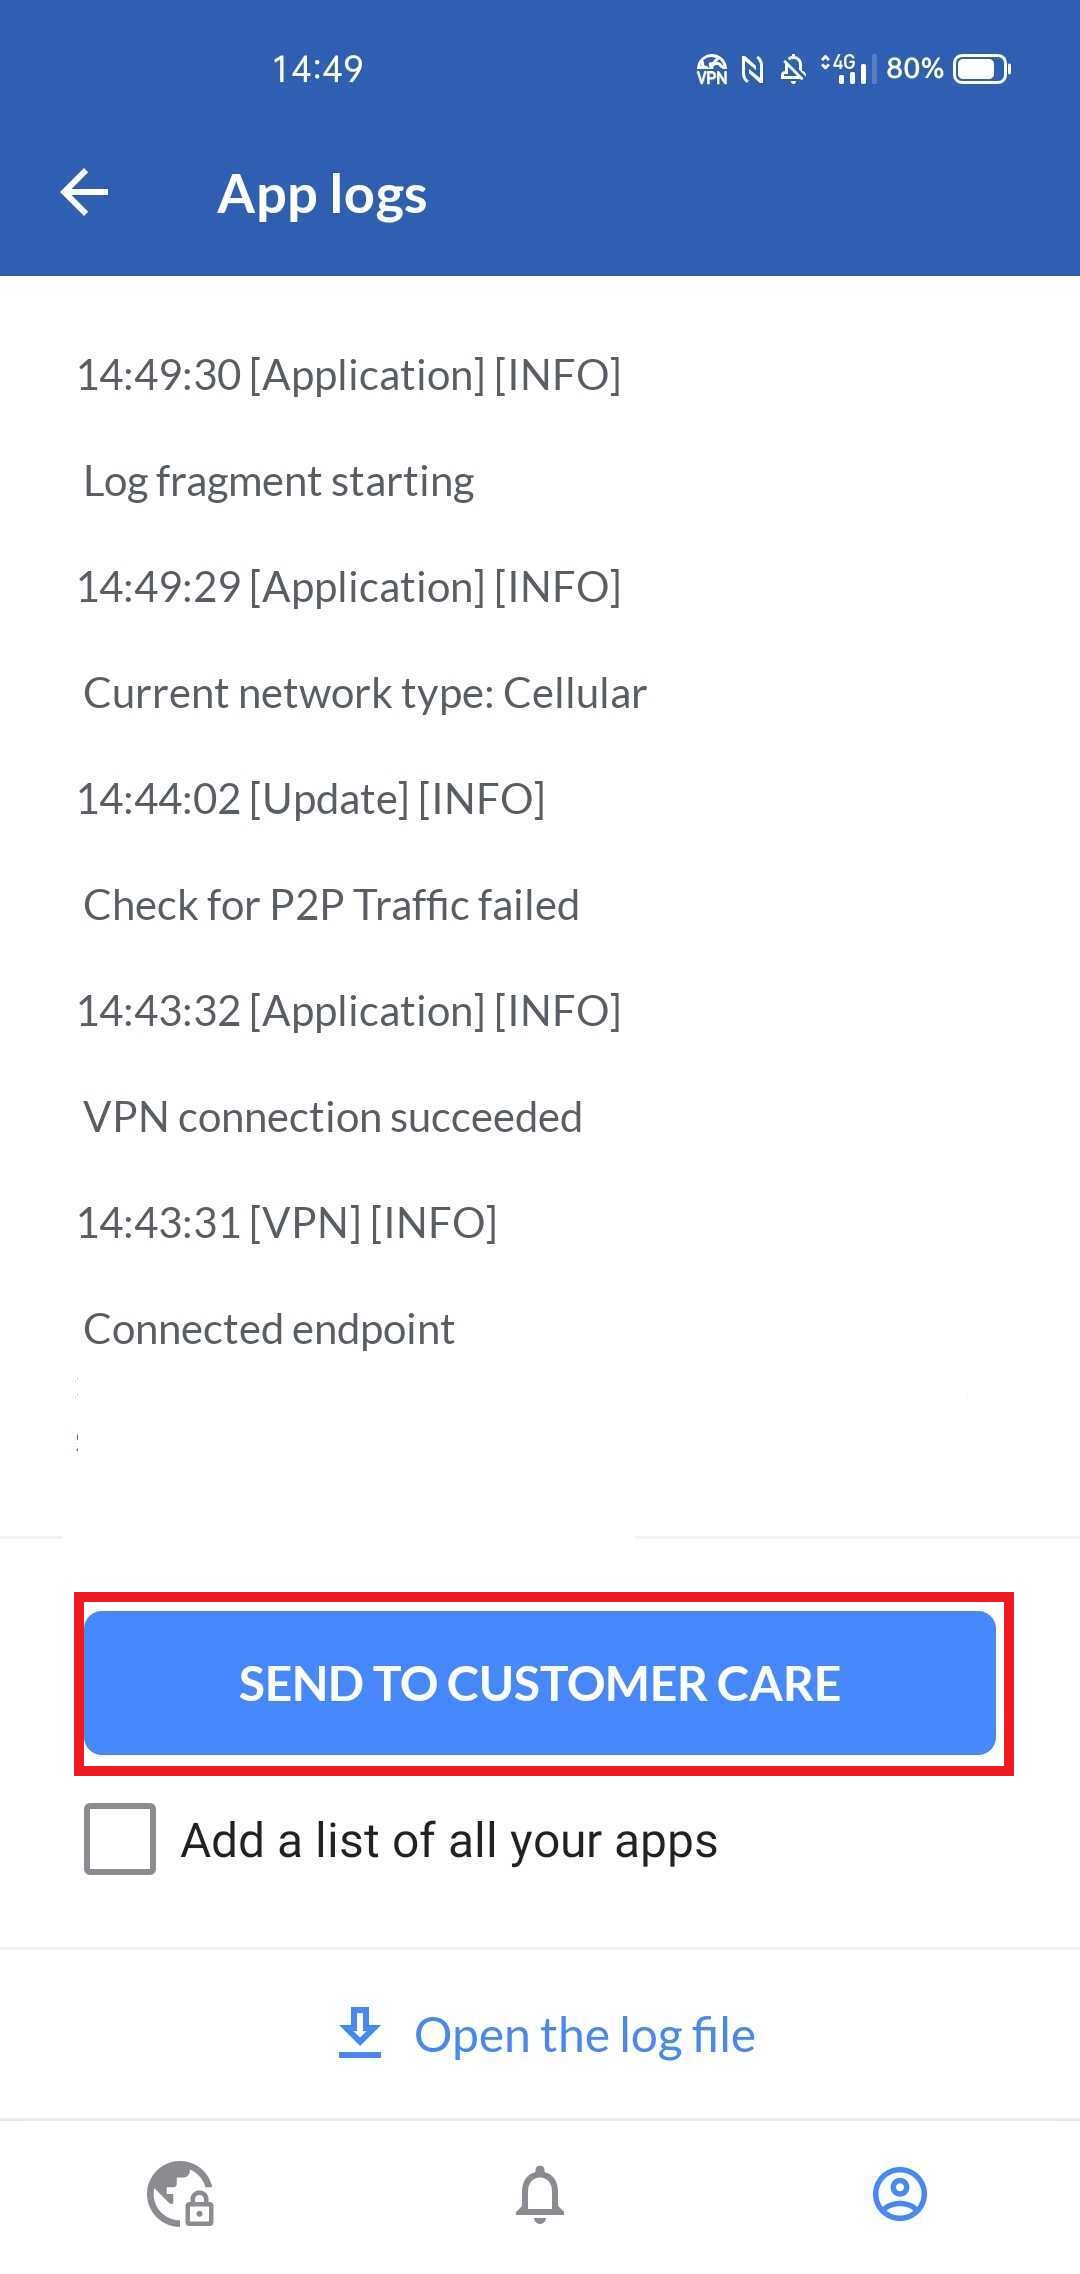",https://support.nordvpn.com/hc/en-us/articles/20347328412945-How-to-get-connection-logs-on-Android
Issue: TLS key negotiation failed to occur,"This issue (TLS key negotiation failed to occur within 60 seconds (check your network connectivity)) sometimes comes with UDP protocol. Please try to make a connection with TCP protocol in order to see whether here is a problem. Also, it could be that your firewall/ISP blocks your connection.",https://support.nordvpn.com/hc/en-us/articles/20347119467409-Issue-TLS-key-negotiation-failed-to-occur
How to stop WebRTC leaks,"Sometimes various browsers experience WebRTC Leaks which may cause the real IP address leak, even when using a VPN.
However, you can easily disable the WebRTC leaks using the NordVPN browser extension on top of the NordVPN app.
* Download and set up the NordVPN browser extension on the browser of your choice: [Chrome](https://support.nordvpn.com/hc/en-us/articles/20349533941265-How-to-set-up-NordVPN-with-Chrome-extension)/[Firefox](https://support.nordvpn.com/hc/en-us/articles/20350669461137-Connect-to-NordVPN-with-Firefox-extension)/[Edge](https://support.nordvpn.com/hc/en-us/articles/19627093939601-Connect-to-NordVPN-with-Edge-Extension).
* In the bottom-right corner of the extension's main screen, click on the settings button.
* You'll find the option to block WebRTC at the very top of the settings menu. Please note: do not connect to a server via the NordVPN browser extension in case you're already connected through the NordVPN app.
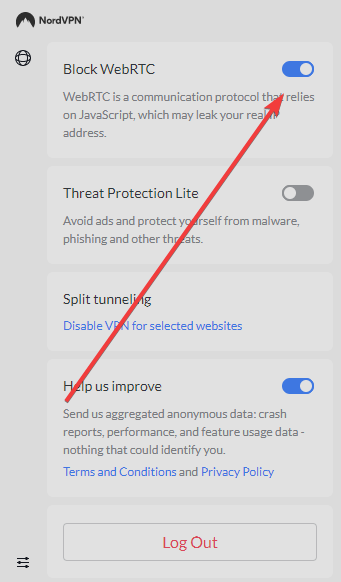
You can read more about WebRTC leaks in [our blog post](https://nordvpn.com/blog/webrtc/) and watch our video for more detailed information:",https://support.nordvpn.com/hc/en-us/articles/20318383008529-How-to-stop-WebRTC-leaks
Why use NordVPN DNS servers?,"DNS servers translate human-friendly domain names such as www.google.com into IP addresses like 192.168.1.1 so your device can connect to websites. When you type a website address, your device asks a DNS server for the IP address. If the server doesn’t know it, it looks it up from other servers. Changing DNS servers provides you with increased security as well as speed. With default DNS you may be subject to DNS hijacking. DNS hijacking is a cyberattack where attackers redirect or alter DNS settings to send users to fake websites or malicious servers. This can lead to phishing, malware infections, data theft, or blocking access to legitimate sites. It often occurs through router vulnerabilities or malware.",https://support.nordvpn.com/hc/en-us/related/click?data=BAh7CjobZGVzdGluYXRpb25fYXJ0aWNsZV9pZGwrCBFegJ%2FQEToYcmVmZXJyZXJfYXJ0aWNsZV9pZGwrCJEuKDTLEToLbG9jYWxlSSIKZW4tdXMGOgZFVDoIdXJsSSJML2hjL2VuLXVzL2FydGljbGVzLzE5NTg3NzI2ODU5NzkzLVdoYXQtYXJlLU5vcmRWUE4tRE5TLXNlcnZlci1hZGRyZXNzZXMGOwhUOglyYW5raQc%3D--f426e56e18f1209f4a7bc4a0d96a5744f3ac604c
"I get ""Invalid security certificate"" message","This certificate message is MITM (Man-in-the-middle) protection. If you get this message, it means that some new certificate/application has been found on your device that has access to device traffic ( for example, anti-virus applications that need to monitor traffic to block threats) and is trying to stop access to a website.
* As for how to view certificates, there can be numerous different ways (as the certificate is stored on the device), one of which is described here:
* Our [blog post](https://nordvpn.com/id/blog/what-you-should-know-about-web-certificates/#:~:text=What%20should%20you%20do%20if%20you%20see%20a%20certificate%20warning%3F) explains web certificates in more detail and what you should do if you see a certificate warning.
Here's how your screen may look with the error message: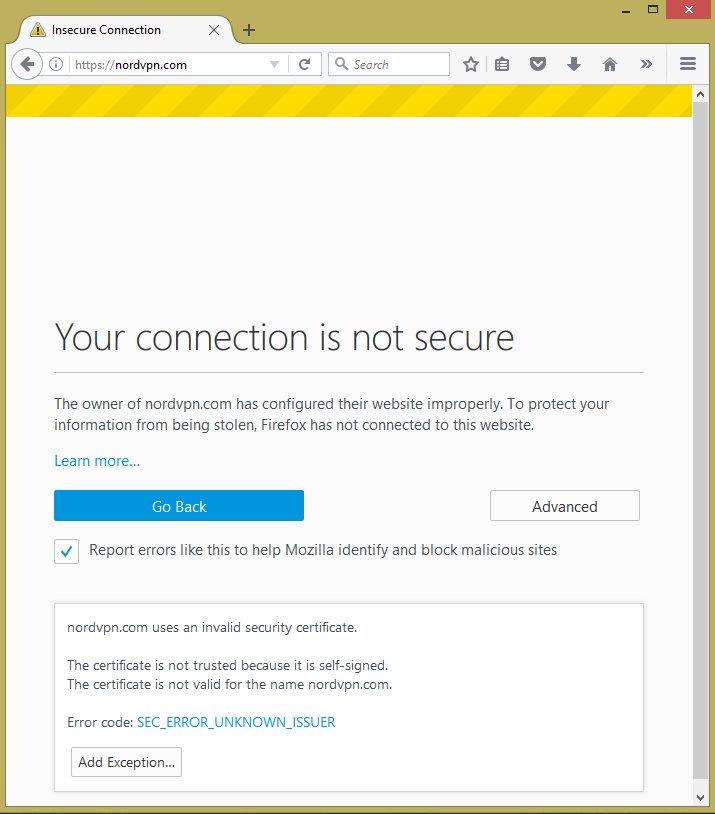Investigating further, we can see that it's clear that the certificate details have changed since it's being interfered with. In this case, it was a Cisco firewall and the website is safe to acces:
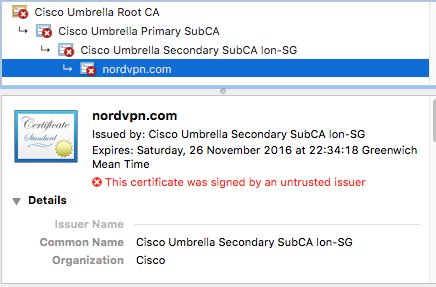",https://support.nordvpn.com/hc/en-us/articles/20285460922385-I-get-Invalid-security-certificate-message
What is the IPv6 leak?,"Most of the current websites support only IPv4, while there are quite a few internet service providers (ISPs) that support both IPv4 and IPv6.",https://support.nordvpn.com/hc/en-us/articles/20282567431185-How-to-avoid-an-IPv6-Leak-with-NordVPN
How does NordVPN protect you from IPv6 leaks?,NordVPN has integrated IPv6 leak protection. You can read more about it here: ,https://support.nordvpn.com/hc/en-us/articles/20282567431185-How-to-avoid-an-IPv6-Leak-with-NordVPN
How else can you protect yourself from IPv6 leak?,"You can disable IPv6 in your network completely by changing your router configuration. Each router is different but most have the ability to turn IPv6 completely off - in that case, you won't have to change anything in your devices.",https://support.nordvpn.com/hc/en-us/articles/20282567431185-How-to-avoid-an-IPv6-Leak-with-NordVPN
How to avoid an IPv6 Leak with NordVPN,"## What is the IPv6 leak?
Most of the current websites support only IPv4, while there are quite a few internet service providers (ISPs) that support both IPv4 and IPv6.
Here is a real-life example: your ISP is using both protocols and you are connecting to some website or service which supports only IPv4. This is where IPv6 leak may happen - the requests you are sending to that website or service will contain both your IPv4 and IPv6 IP addresses.
It can happen even if you are using a VPN but this is not the case with NordVPN.
## How does NordVPN protect you from IPv6 leaks?
NordVPN has integrated IPv6 leak protection. You can read more about it here:
Depending on your device and/or network, you can disable the usage of IPv6 altogether - in 99.9% cases it will have no extra effect on your internet usage - IPv6 adoption process is slow, and almost all services allow access through IPv4.
## How else can you protect yourself from IPv6 leak?
You can disable IPv6 in your network completely by changing your router configuration. Each router is different but most have the ability to turn IPv6 completely off - in that case, you won't have to change anything in your devices.
For information on how to disable it on your router, check your router's user manual. If you are not able to disable it on the network (for example, when using public networks), you can disable it on your device instead:
* [Windows](https://support.nordvpn.com/hc/en-us/articles/19919186892305-How-to-disable-IPv6-on-Windows)
* [macOS](https://support.nordvpn.com/hc/en-us/articles/19924913336081-How-to-disable-IPv6-on-macOS)
* [Linux](https://support.nordvpn.com/hc/en-us/articles/20164669224337-How-to-disable-IPv6-on-Linux)",https://support.nordvpn.com/hc/en-us/articles/20282567431185-How-to-avoid-an-IPv6-Leak-with-NordVPN
Why can't I send email messages,"In this article, you will learn what to do if you are unable to send or receive email messages with NordVPN.We will cover the following:
* [How to change SMTP ports for common mailing services](
* [Changing NordVPN settings](
## How to change SMTP ports for common mailing services
Simple Mail Transfer Protocol, otherwise known as [SMTP](https://nordvpn.com/blog/smtp/), is an application layer TCP/IP protocol that sends emails between networks. It sets the rules for delivering messages to a mail server, where they can be retrieved by an email client.Our service blocks traffic over the insecure port 25, however, most email providers allow this port to be changed; here is how to do so on the most common ones:
* [Mozilla Thunderbird](https://support.nordvpn.com/hc/en-us/articles/20281749016081-Why-can-t-I-send-email-messages#Mozilla-Thunderbird)
* [Microsoft Outlook](https://support.nordvpn.com/hc/en-us/articles/20281749016081-Why-can-t-I-send-email-messages#Microsoft-Outlook)
* [Apple Mail](https://support.nordvpn.com/hc/en-us/articles/20281749016081-Why-can-t-I-send-email-messages#Apple-Mail)
To change the SMTP port for Mozzila Thunderbird, follow the steps below:
1. Open the Thunderbird client.
2. Click the menu icon on the top-right
3. Select account settings.
4. Click edit SMTP server on the right of outgoing server(SMTP):
5. Change the Port to 465 or 587, and click ok.
The instructions below are for the old Outlook interface, as the ability to manually change SMTP port settings in the new interface has been disabled.
1. Open the Microsoft Outlook app.
2. Click file on the top-left.
3. Open account settings:
4. On the drop-down menu, select server settings.
5. A pop-up window should appear, make sure to select outgoing mail.
6. Change the port to 465 or 587, and click next.
7. You should see a window that your settings have been successfully saved:
Use the following steps to change the Apple Mail SMTP port:
1. Open Apple Mail
2. On the navigation menu choose mail and then settings.
3. Click accounts and select your mail provider
4. Head to server settings, and press outgoing mail account.
5. On the pop-up menu, choose edit SMTP server list.
## Changing NordVPN settings
Some settings within the NordVPN app may also interfere with your mailing application. In this case, here is what you can do:
* Disable the [Threat Protection Pro™](https://nordvpn.com/features/threat-protection/) or Threat Protection feature in the app settings.
* Switch to a different [NordVPN server](https://nordvpn.com/servers/). Your email provider may block access to its email services from known VPN server IP addresses.
* Change the [connection protocol to UDP/TCP](https://support.nordvpn.com/hc/en-us/articles/20465552867345-Switching-protocol-to-OpenVPN-UDP-or-TCP).
Note: Some email providers might not allow sending outgoing mail through email clients while connected to VPN. In this case, the only way to use mail service with our VPN is to use email through the browser on the mail service page.",https://support.nordvpn.com/hc/en-us/articles/20281749016081-Why-can-t-I-send-email-messages
How can I change my registration email address,"To change the email address you registered your NordVPN account with, you need to fill out our email change request form. If you can’t open the form, please contact our support team.
Note: This change will apply to all Nord Security services, including NordLocker and NordPass.
Follow the instructions below to change your registered email address.
1. Open the NordVPN email change request form.
2. Fill in the fields indicated below. This information is required to ensure that no one makes unauthorized changes to your account.
* Account's current email: Enter the email address you currently use for NordVPN.
* Contact email (Optional): If you wish, you may provide a different email address for NordVPN support to contact you about the changes that you’re making.
* Amount paid: Type in the amount of money you paid the last time you made a payment to NordVPN.
* Method: Select the way you made your last payment (like credit card or PayPal) and enter any other required information.
* Payment date: Choose the exact date of your last payment.
* Desired email or username: Type in the new email address you want to use for your NordVPN account.
* Do you have a NordLocker or NordPass account?: Let us know if you also have an account for NordLocker or NordPass.
* Description (Optional): Add additional comments or requests for our support team.
* Attachments (Optional): Attach a picture of your last payment to help speed up the process.
1. Click the “Submit” button to finish.
Our support team will get in touch with you within 24 hours of your submission of the request. We will send a message to the email address currently registered with your NordVPN account (or to the “Contact email” if you filled out this field on the form.)",https://support.nordvpn.com/hc/en-us/related/click?data=BAh7CjobZGVzdGluYXRpb25fYXJ0aWNsZV9pZGwrCBEmPiK4EToYcmVmZXJyZXJfYXJ0aWNsZV9pZGwrCJGPoP97EjoLbG9jYWxlSSIKZW4tdXMGOgZFVDoIdXJsSSJVL2hjL2VuLXVzL2FydGljbGVzLzE5NDgyNTQ2MTUyOTc3LUhvdy1jYW4tSS1jaGFuZ2UtbXktcmVnaXN0cmF0aW9uLWVtYWlsLWFkZHJlc3MGOwhUOglyYW5raQg%3D--c6042b6713d330a024029af2572bb841adb9d01e
Intel Killer Wi-Fi adapter not working with NordVPN,"In this article, we will troubleshoot connectivity issues with Intel Killer internet adapters.
The Killer NIC, developed by Killer Gaming (a subsidiary of Intel) minimizes lag, latency, and packet loss. However, some Windows computers that run this adapter can experience VPN connectivity issues. Here’s how to solve them.
## Adjustments for any network issues
If you can’t connect to NordVPN and have Killer Network Services installed, try disabling it.
If you're unsure whether you have the program installed, simply open your Start menu and search for Killer Control Centre.
1. Launch Killer Control Center;
2. Go to Settings (gear icon on the left side);
3. You'll see a toggle switch for Killer Prioritization Engine (formerly: Advanced Stream Detect). Turn the toggle switch OFF;
4. Check if you can connect to a NordVPN server.
## Adjustments for Ethernet connection issues
If you still cannot connect to NordVPN, follow these steps:
Disable Killer bandwidth control on Killer Ethernet Controller network:
1. Go to Control Panel > Network & Internet > Network and sharing center > Change adapter settings.
2. Right-click on the name of your adapter, e.g., Killer E2200 Gigabit Ethernet Controller.
3. Click Properties.
4. Disable Killer bandwidth control.
Check if you can connect to NordVPN after these steps.
## Adjustments requiring re-installation
If the previous steps do not work, your software’s version may be incompatible with VPN clients. Follow these steps:
1. Download the latest Killer Control Center for your specific network card, found here - [Support for Intel® Killer™ Wireless Products](https://support.killernetworking.com/software/) (scroll down until you see Latest Drivers & Software and choose according to your device).
2. Once you have the latest Killer Control Center, uninstall all Killer Performance Suite and Killer Drivers entries in your Apps & Features menu.
3. Restart your device.
4. Run the installer package that you just downloaded.
5. Restart your device once more.
Reconnect to a [VPN server](https://nordvpn.com/servers/) and check if connection stability improves.",https://support.nordvpn.com/hc/en-us/articles/20226287150609-Intel-Killer-Wi-Fi-adapter-not-working-with-NordVPN
What is an unsafe local network on iOS,"Invisibility on LAN feature has been released on iOS. It will effectively mitigate the issue, however please be aware that due to the improper implementation by Apple, turning it on may affect VPN connection stability.
If you received a message about a potentially unsafe network, your connection requires additional caution. The problem emerges in scenarios where a router assigns non-RFC1918 IP addresses for the local network. This might seem technical, but in simple terms, certain types of local network configurations can result in VPN traffic being unintentionally exposed. Note: this feature is only supported on 16+ OS versions
### What Does This Mean for You?
If you're using an iOS device on a network that hands out non-RFC1918 IP addresses (which our app will detect), you'll receive a warning. This doesn't automatically mean the network is harmful, but it's a sign to be extra cautious. If possible, we recommend not to use that network.If you have access to the router you are connected to, you can change your Local Area Network IP range. In order to do that, please follow the steps detailed in [checking and changing your WiFi configuration](https://support.nordvpn.com/hc/en-us/articles/20188826004369-Checking-and-changing-your-WiFi-configuration) article.
We're actively liaising with Apple, hoping for a fix as for now, there is no way for us to resolve the issue without breaking the application and resulting in various connection issues. Until then, please be attentive to any alerts from our app and consider disconnecting from networks flagged as potentially unsafe.
Thank you for trusting us with your online privacy. We are committed to ensuring your digital security and will continue to keep you updated on any further developments.",https://support.nordvpn.com/hc/en-us/articles/20225046536593-What-is-an-unsafe-local-network-on-iOS
Can't log into NordVPN,"You may struggle to log in to NordVPN for several reasons. Are you experiencing any of the following issues?
## Table of contents:
* The NordVPN app login makes me continue in the browser, but when I do, nothing happens in the app.
* I receive ""Error: 429 Too Many Requests.""
* I didn't receive my verification password after signing up.
* The password is incorrect.
* After logging in, the app asks me to log in again.
* NordVPN keeps logging me out.
* I get “error: rotating: transport rotator: ntp check failed” or “rotating: transport rotator: ptr timer is locked.”
### The NordVPN app login makes me continue in the browser, but when I do, nothing happens in the app.
To help solve this problem, try [resetting your NordVPN app preferences](https://support.nordvpn.com/hc/en-us/articles/20323582191505-Resetting-your-application-preferences).
If you are using Linux, try the callback login method:
1. Run the command: nordvpn login.
2. You'll receive a URL. Open it on any device that supports a browser, and finish the login process.
3. Right-click on the Continue button and copy the link address.
4. Run the command:
```
nordvpn login --callback """"
```
and replace with the copied link address.
For example:
```
nordvpn login --callback ""nordvpn://login?action=login&exchange_token=MGFlY2E1NmE4YjM2NDM4NjUzN2VjOWIzYWM3ZTU3ZDliNDdiNzRjZTMwMjE5YjkzZTNhNTI3ZWZlOTIwMGJlOQ%3D%3D&status=done""
```
### I receive the message ""Error: 429 Too Many Requests.""
Follow the steps in our article on how to deal with “Error: 429 Too Many Requests.”
### After signing up, I didn't receive my verification password.
Check your spam folder. If you can't find the email, please [contact our customer support team](https://support.nordvpn.com/hc/en-us/articles/19482416296593-How-can-I-reach-NordVPN-customer-support).
### It says that my password is incorrect.
Try resetting your password. If that doesn’t help, [uninstall the NordVPN app](https://support.nordvpn.com/hc/en-us/articles/19481023452561-How-to-uninstall-NordVPN-software), [download NordVPN](https://nordvpn.com/download/) once again, and see if you can sign in.
### I’m stuck in a NordVPN login loop. After logging in, the app asks me to log in again.
Try resetting your app preferences. If that doesn’t help, uninstall the NordVPN application, download NordVPN once again, and try signing in.
### NordVPN keeps logging me out.
Reset your app preferences or reinstall the NordVPN app. If the above doesn’t help, try changing the DNS addresses on your device. It’s worth noting that other VPN apps or antivirus software may interfere with your NordVPN connection.
### I get “error: rotating: transport rotator: ntp check failed” or “rotating: transport rotator: ptr timer is locked.”
1. Use one of the following commands to remove the app:
```
sudo apt --purge autoremove nordvpn*
```
or
```
sudo apt-get --purge autoremove nordvpn*
```
2. Install the app again on your Linux device.
If you'd like to learn more, check out our article on how the NordVPN sign-up and log-in process works.",https://support.nordvpn.com/hc/en-us/articles/20196171514257-Can-t-log-into-NordVPN
The NordVPN application does not open,"If you have the NordVPN application installed, but can’t get it to run, try the following to fix the issue:
1. Install the latest version of NordVPN. We have a handy [tutorial](https://support.nordvpn.com/hc/en-us/articles/19481023452561-How-to-uninstall-NordVPN-software) on how to uninstall the NordVPN application from your device. [This guide](https://support.nordvpn.com/hc/en-us/articles/19482835731345-How-to-download-NordVPN-software) helps you to install a new version.
2. Check the application tray (on Windows devices, it is usually located in the bottom-right corner of the screen) because the app might already be running there.
3. Try [resetting the NordVPN application](https://support.nordvpn.com/hc/en-us/articles/20323582191505-Resetting-your-application-preferences).
4. If you use antivirus software, add exceptions for the NordVPN app.
5. Restart your computer.",https://support.nordvpn.com/hc/en-us/articles/20195673374737-The-NordVPN-application-does-not-open
Checking and changing your WiFi configuration,"## Table of contents
* [Checking connected WiFi configuration](
* [Understanding if the WiFi configuration is correct](
* [Changing router settings](
## Checking connected WiFi configuration
When you are connected to WiFi, find the IP configuration of the network you are connected to. The important bits are the IP address and the subnet mask. In this case the IP addresses are local, not to be confused with public IP addresses.
Example on iOS:
Tap the i icon next to the connected WiFi and then scroll down to find the IP address info: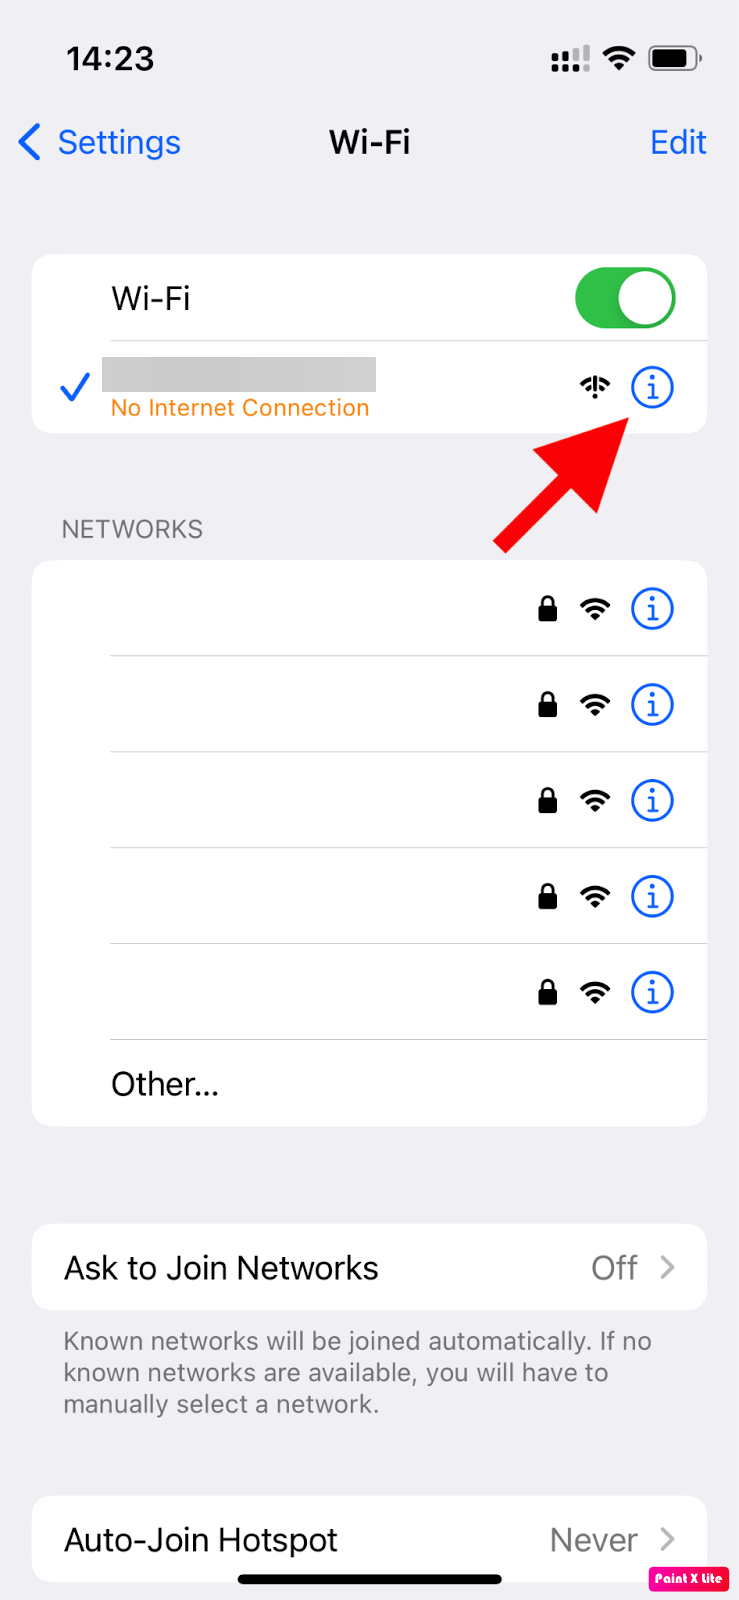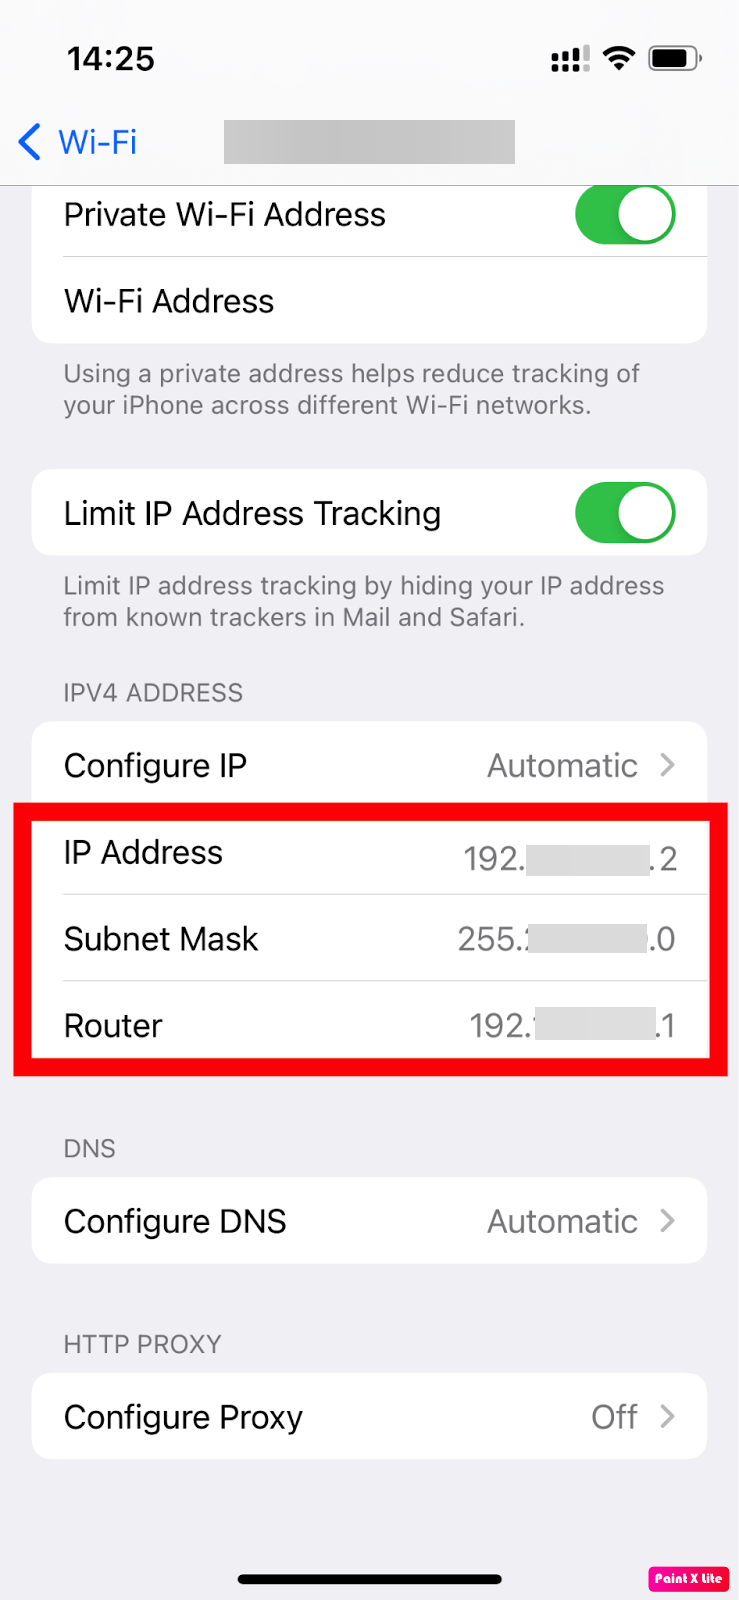
Example on macOS:
Open WiFi in System Settings, click Details next to the connected WiFi, then select TCP/IP: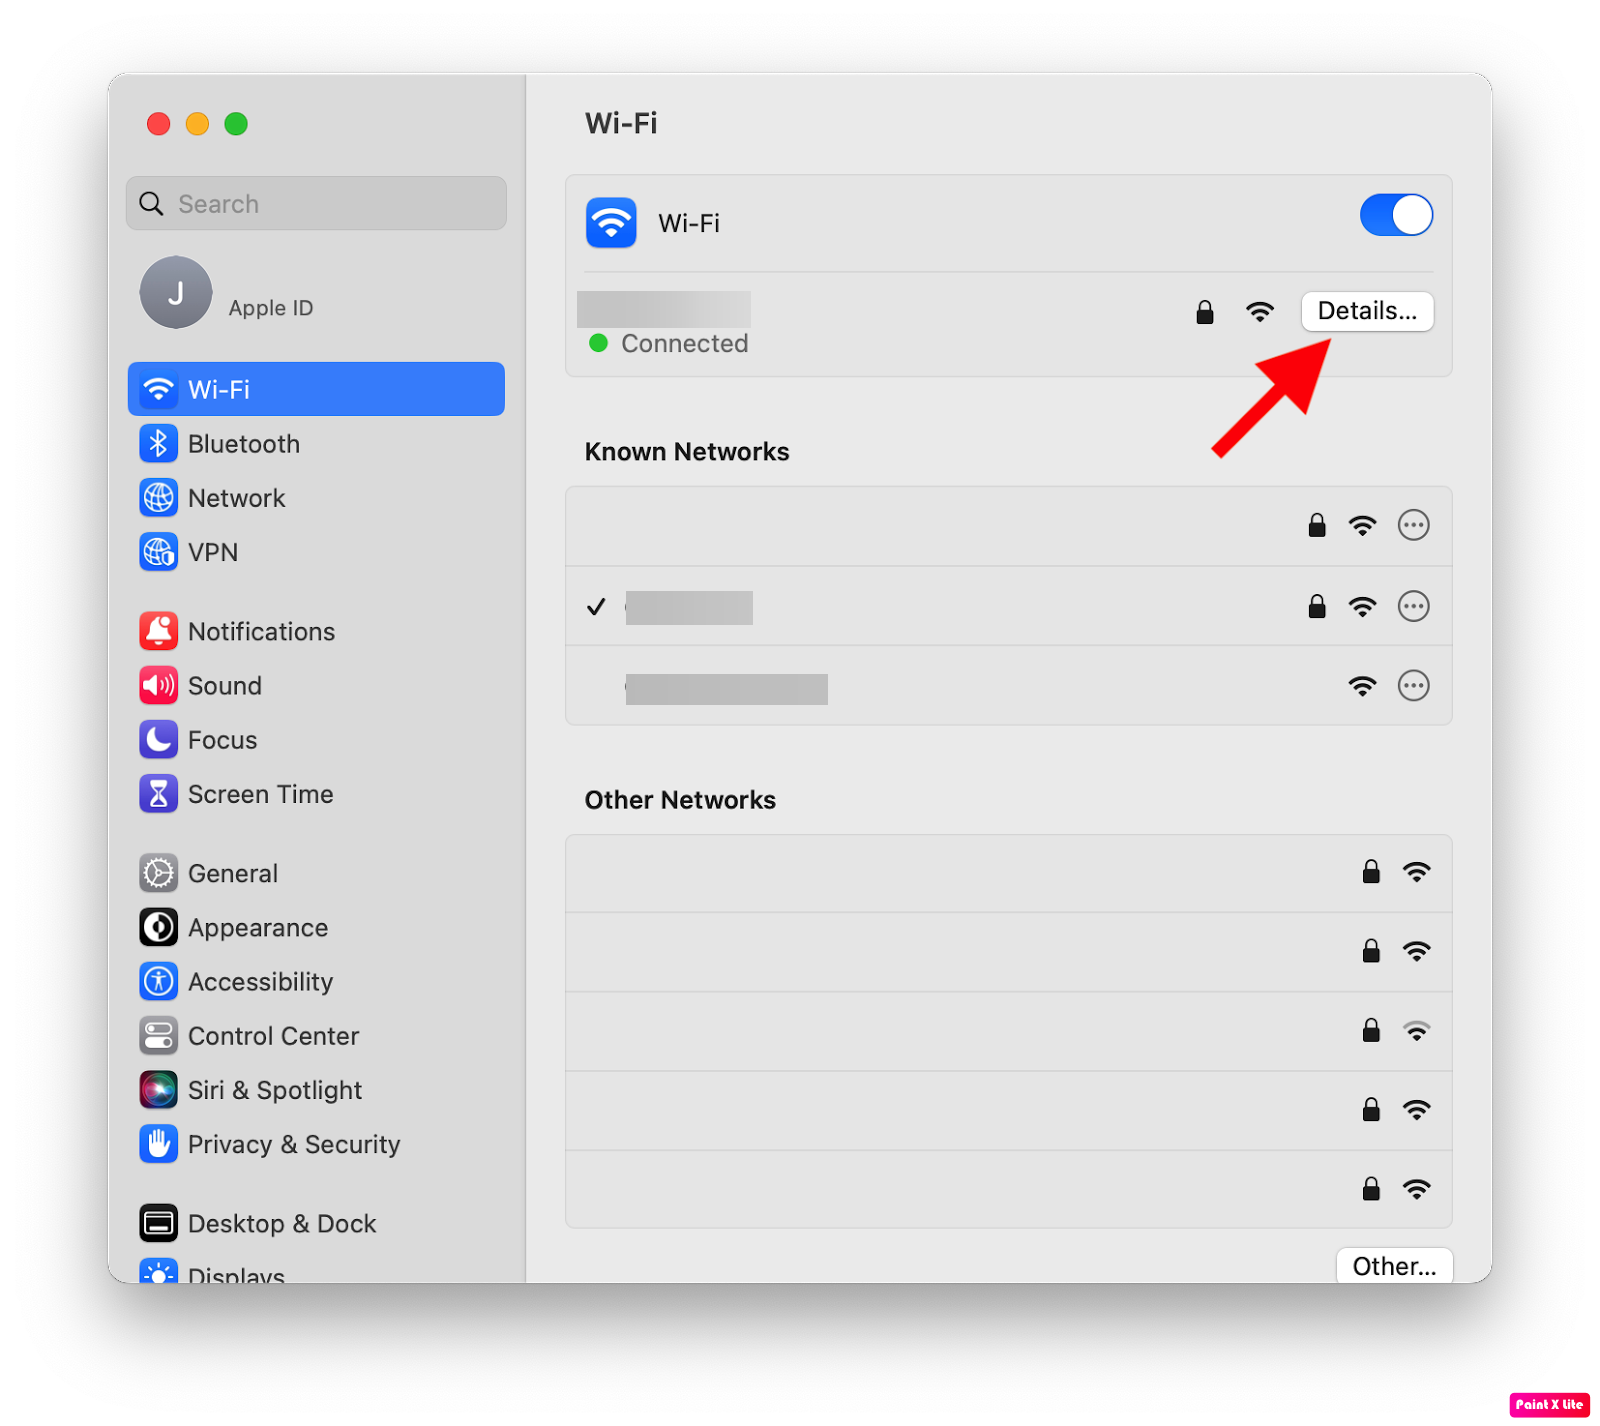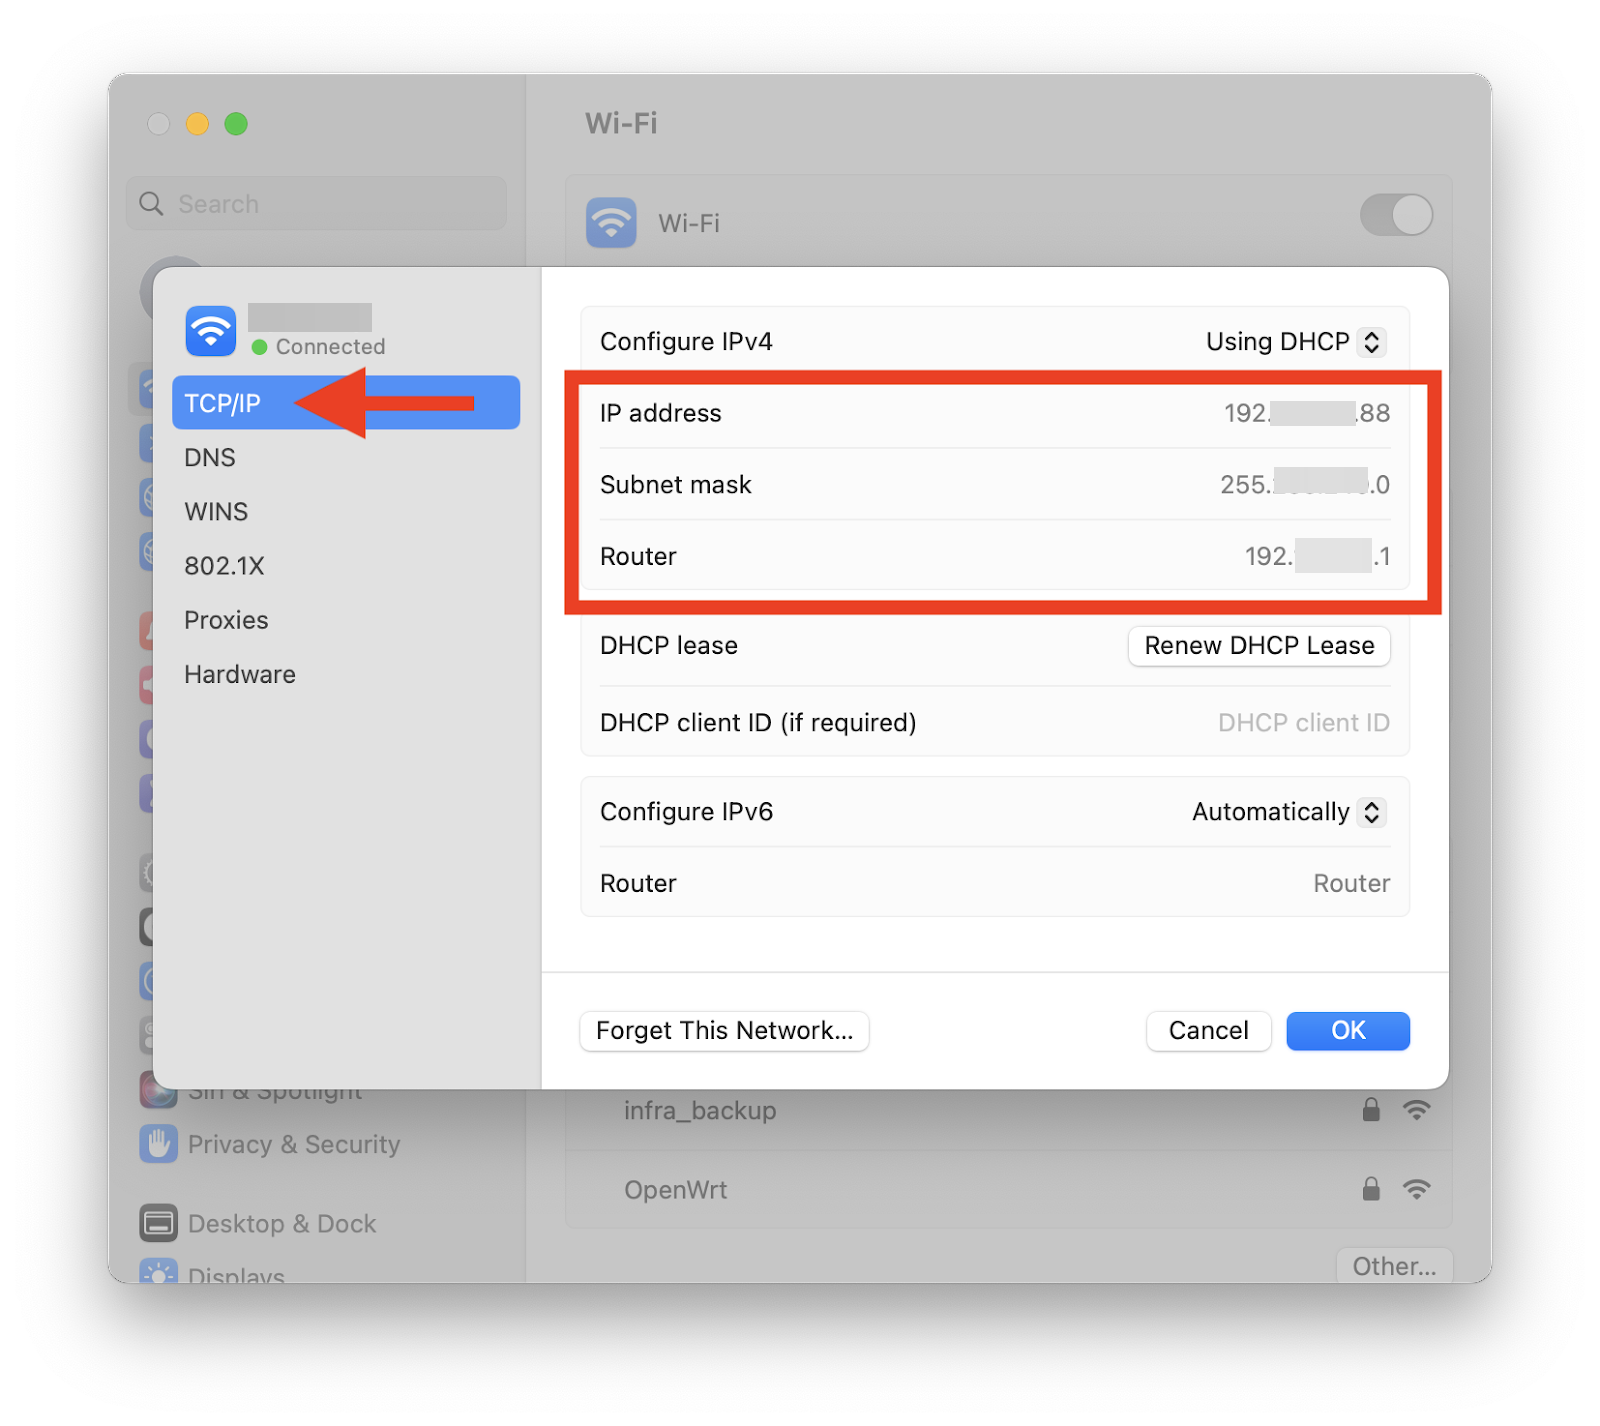
## Understanding if the WiFi configuration is correct
WiFi networks normally should use a standard local network configuration.
Both the IP address and the subnet mask should be within one of these three ranges:
IP Address | Subnet Mask
---|---
10.x.x.x | 255.x.x.x
172.16.x.x – 172.31.x.x | 255.240.x.x – 255.255.x.x
192.168.x.x | 255.255.x.x
Where x can be any number. Adapted from RFC 1918.
## Changing router settings
If you have found that your local network configuration is incorrect, follow these instructions.
Warning: changing these settings may cause your network setup to stop working. If you are not managing your network yourself, we advise you to contact your network administrator before changing these settings.
These instructions are general guidelines. Steps may differ based on the router manufacturer and software version.
1. Log in to your router
2. Find DHCP settings
The following parameters are a suggestion that should work in regular home network setups. If the network setup is more complicated, then these settings may not be suitable.
1. Make sure that DHCP is enabled
2. Set router IP to: 192.168.0.1
3. Set subnet mask to: 255.255.255.0
4. Set DHCP range to: 192.168.0.10 - 192.168.0.200
5. Save the settings
After saving the settings, the router configuration page will not work anymore, because the IP address is changed. You will need to use the new IP address (192.168.0.1) to connect and configure the router in the future.
Devices connected to this network may need to be reconnected.",https://support.nordvpn.com/hc/en-us/articles/20188826004369-Checking-and-changing-your-WiFi-configuration
Warning message: Server will go offline soon,"
If you receive the message that the server will go offline soon, this means that the server is being restarted or taken down for maintenance, and you should switch to another server if you want to keep the VPN connection.
The notification will disappear as soon as you switch to another server.",https://support.nordvpn.com/hc/en-us/articles/20188544464785-Warning-message-Server-will-go-offline-soon
Is NordVPN down?,"When a NordVPN server is down, it’s removed from the app’s server list. All NordVPN servers you see on the app should be online.",https://support.nordvpn.com/hc/en-us/articles/20164096978449-Unable-to-connect-to-NordVPN-servers
Unable to connect to NordVPN servers,"Several different factors may interfere with your NordVPN connection. Here’s what may help fix the problem.
## Operating system-specific NordVPN connection guides
If you are experiencing issues connecting on any of the operating systems below, try following these VPN troubleshooting guides:
* [Troubleshooting connectivity on Windows](https://support.nordvpn.com/hc/en-us/articles/19748510235921-Troubleshooting-NordVPN-connectivity-on-Windows)
* [Troubleshooting connectivity on Android](https://support.nordvpn.com/hc/en-us/articles/20041281541777-Troubleshooting-connectivity-on-Android)
* [Troubleshooting connectivity on iOS](https://support.nordvpn.com/hc/en-us/articles/20397808850833-Troubleshooting-connectivity-on-iOS)
* [Troubleshooting connectivity of Linux app](https://support.nordvpn.com/hc/en-us/articles/20398047039889-Troubleshooting-NordVPN-connectivity-issues-on-Linux)
* [Troubleshooting connectivity on macOS](https://support.nordvpn.com/hc/en-us/articles/19920758451345-NordVPN-not-connecting-on-Mac)
## General NordVPN connection tips
These tips may help if your NordVPN server is down or if NordVPN is stuck on “connecting”:
* If you can’t connect to a specific server, try a few different NordVPN servers. You can use the auto-connect feature or the NordVPN server locator tool to find the right server for you.
Follow the steps below to find the best server for your connection:
1. Log into your [Nord Account](https://my.nordaccount.com/), and click NordVPN.
2. Scroll down to Advanced Settings and click Set up NordVPN manually.
3. Select the Server recommendation tab. According to your location, the best server will be recommended.
4. By pressing Advanced filters you can further customize the recommended servers by selecting the Server type and the Security protocol.
In case you wish to select a specific server, follow these steps:
1. Under Set up NordVPN manually, select OpenVPN configuration files.
2. Find the server you wish to connect to by using the Search bar or by scrolling down and download it by clicking Download UDP or Download TCP.
3. When connecting to OpenVPN & IKEv2 manually, you're going to need to use the Username and Password from the Service credential tab.
* On the NordVPN app, log out of your account and log back in. Try connecting again.
* [Uninstall the app](https://support.nordvpn.com/hc/en-us/articles/19481023452561-How-to-uninstall-NordVPN-software), reboot your device, and [install the app again](https://support.nordvpn.com/hc/en-us/articles/20289779952017-How-to-start-using-NordVPN). Try connecting to a server now.
* Try using a different connection method/protocol for your device.
## Is NordVPN down?
When a NordVPN server is down, it’s removed from the app’s server list. All NordVPN servers you see on the app should be online.
If you can’t connect to a server and the solutions above don’t work, your device or network may be causing the problem. To check if that’s the case, try using NordVPN on a different device on the same network.
For example, if NordVPN doesn’t work on your Android phone, try using it on your PC. If both devices don’t connect, you may be experiencing network issues. If your PC connects successfully, you may need to reconfigure your phone.
## Connecting from a country with internet restrictions
If you can’t connect from a country with internet restrictions, you may find a solution in this article:
* [Connecting from a country with internet restrictions](https://support.nordvpn.com/hc/en-us/articles/19572011021457-Connecting-from-a-country-with-internet-restrictions).",https://support.nordvpn.com/hc/en-us/articles/20164096978449-Unable-to-connect-to-NordVPN-servers
What is your money-back policy?,"Here is the refund and cancellation policy at the core of our 30-day money-back guarantee:
“...if you are not satisfied with our Services, you may cancel the Subscription and request a refund within 30 days following your purchase of our Services (“Money Back Guarantee”). Please note that Subscriptions may be refunded on the basis of the Money Back Guarantee only after the initial purchase. Once a Subscription is renewed, it cannot be refunded on the basis of the Money Back Guarantee, unless applicable law provides otherwise.”
This and other conditions of our service can be found in our [Terms of Service](https://my.nordaccount.com/legal/terms-of-service/).
Here are our instructions for [how to cancel](https://support.nordvpn.com/hc/en-us/articles/19556844985489-How-to-cancel-auto-renewal-for-your-subscription) automatic payment renewal.
## Requesting a refund
Previously, refunds could only be processed through our support team. We have now implemented an automated refund system that is more efficient, faster, and convenient for our customers to use. This change also improves our ability to gather feedback, allowing us to better understand issues and improve our service. As we continue to refine this new process, your feedback is welcomed to help us enhance it further.
To request a refund for your payment, contact our customer support team via live chat available in the bottom right corner of the page, and indicate you would like us to refund your payment.
1. You will receive a link to your Nord Account dashboard. Follow the link and verify it’s you who’s trying to access the account.
2. In the following window, you will see which payments are eligible for a refund. Such payments will have a Refund button available. To proceed, click on Refund.Please keep in mind that not all payments are eligible for refunds, and certain terms apply depending on where you bought the subscription:
* * Apple App Store: Subscriptions purchased via the Apple App Store are subject to Apple's refund policies. We're unable to issue refunds for payments made through the Apple App Store. For assistance, please reach out to Apple directly via Apple Support.
* Amazon Appstore: If you've purchased your subscription through the Amazon App Store, contact Amazon directly for assistance via Amazon Support.
* Google Play Store: Refunds for payments made through the Google Play Store can be requested through NordVPN’s customer support, provided they fall within the refund terms outlined above. Additionally, if the payment was made within the last 48 hours, you can request a refund directly from your Google Play account. For more details, visit Google Play Support.
* Retailers or resellers: If you've purchased a subscription outside the NordVPN website (e.g., physical store, online shop, or marketplace like BestBuy or StackSocial), please contact the retailer directly regarding the refund.
1. In the following window, select the reason for canceling the service and requesting a refund. Your feedback is invaluable because it helps us pinpoint areas for improvement and ensures a better experience for all our users.Once completed, click Submit and Continue. 
2. You will see your refund summary. You can confirm it by clicking Refund.
3. After submitting the request, you will receive a confirmation email saying that your refund has been ordered.
4. You should now see the refund status for your payment as Refund Processing. This means that your request has been received and is currently being processed. This process can take up to a few hours*.*Please note, that due to recent implementation, it may take up to 4 hours for a refund request to be processed.
5. Once the refund is complete, the refund status on your dashboard will change to Refunded, and you will receive a confirmation email. Please note that depending on your payment method, it may take up to 10 business days for the refund to reach your account. If there was an error or you have any other questions, please contact our customer support team directly.",https://support.nordvpn.com/hc/en-us/related/click?data=BAh7CjobZGVzdGluYXRpb25fYXJ0aWNsZV9pZGwrCBH9Jde2EToYcmVmZXJyZXJfYXJ0aWNsZV9pZGwrCJGPoP97EjoLbG9jYWxlSSIKZW4tdXMGOgZFVDoIdXJsSSJFL2hjL2VuLXVzL2FydGljbGVzLzE5NDc2OTkxMzExMTIxLVdoYXQtaXMteW91ci1tb25leS1iYWNrLXBvbGljeQY7CFQ6CXJhbmtpCQ%3D%3D--b519cdeebba7eed6922c391c50c09865f4af9e9f
"What is a Nord Account, and how do you use it?","A Nord Account lets you easily manage all of your Nord Security services (including [NordVPN](https://nordvpn.com/pt-br/), [NordPass](https://nordpass.com/), and [NordLocker](https://nordlocker.com/)) from a single control panel.
### What can I do with a Nord Account?
1. Manage all of your Nord Security accounts in one place.
2. Use one login to sign in to all your Nord Security accounts.
3. Upgrade your service plans.
4. Cancel auto-renewal for your subscriptions.
If you have a NordVPN, NordPass, or NordLocker account, you’re automatically eligible for a [Nord Account](https://my.nordaccount.com/) and can start using it right away.
### Why use a Nord Account?
* No need for multiple accounts and passwords. Use your Nord Account credentials to easily sign in to all of your Nord Security accounts — you need just one email address and one password.
* Manage all services in one place. Once you sign in to your Nord Account, you’ll be able to view and extend your Nord Security subscriptions, cancel auto-renewal, see your billing history, download apps, and read the latest security reports.
* Simplify logins. A Nord Account lets you sign in to any of your Nord Security accounts with one click — simply look for the “Log in with Nord Account” button in Nord Security apps. Nord Accounts use the “OpenID Connect” standard for user authentication.
## Using a Nord Account
I’m a NordVPN user. What do I need to do?
Nothing! Your NordVPN account details automatically transfer to your Nord Account. Simply [sign in to your Nord Account](https://nordaccount.com/login/) to manage your Nord Security subscriptions and auto-renewals.
I want to get NordVPN. What do I need to do?
I use other Nord Security products and already have a Nord Account:
You can get NordVPN in three easy steps:
1. [Log in to your Nord Account](https://nordaccount.com/login/).
2. Go to the Dashboard, and under NordVPN, click Upgrade plan.
3. The checkout page will open. Select a plan and complete your payment.
Now, you can sign in to NordVPN with your Nord Account login.
I have never used Nord Security products:
You can subscribe to NordVPN and start using your new Nord Account in four easy steps:
1. [Choose a subscription plan](https://nordvpn.com/pricing/).
2. Fill in your details and complete your payment.
3. You will be sent a Nord Account registration link to the email address you signed up with. Click on the link and create a password.
4. [Download the NordVPN app](https://nordvpn.com/download/) and sign in with your Nord Account credentials.
I want to delete/close my Nord Account. How can I do it?
Follow the steps in our [article on how to delete or close your Nord Account](https://support.nordvpn.com/FAQ/1521982312/How-can-I-delete-my-NordVPN-account.htm).
I want a refund and/or to cancel auto-renewal for my subscription through my Nord Account.
* Follow our [guide on NordVPN’s money-back policy](https://support.nordvpn.com/hc/en-us/articles/19476991311121-What-is-your-money-back-policy) to get a refund for your purchase.
* Read our guide on [how to cancel auto-renewal for your subscription](https://support.nordvpn.com/hc/en-us/articles/19556844985489-How-to-cancel-a-subscription) through your Nord Account.
Manage all of your cybersecurity needs on one platform with your [Nord Account](https://my.nordaccount.com/dashboard/).",https://support.nordvpn.com/hc/en-us/articles/19571345334033-What-is-a-Nord-Account-and-how-do-you-use-it
How to set up secure cloud storage with NordLocker,"If you have purchased a bundle package with NordVPN, such as Ultra or Full, next to NordVPN service, you also receive NordLocker cloud storage service, which takes security to further heights! In this article, we will cover what you need to know to get started with NordLocker to use your purchased bundle to its full potential.
In this article, we will cover:
* [Accessing Nord Account](
* [What is NordLocker](
* [Why encrypt files?](
* [How to get started with NordLocker](
## Accessing Nord Account
When purchasing NordVPN or its bundles, you are automatically granted access to Nord Account. This account page lets you easily manage all of your Nord Security services from a single control panel.
Learn more when reading [our article on what Nord Account is and how to use it](https://support.nordvpn.com/hc/en-us/articles/19571345334033-What-is-a-Nord-Account-and-how-do-you-use-it).
## What is NordLocker
With the [Full and Complete bundles](https://nordvpn.com/pricing/), you will receive [NordLocker](https://nordlocker.com/), an easy-to-use file encryption tool that lets you store and share your data securely. [Learn more about what NordLocker is](https://support.nordlocker.com/hc/en-us/articles/360015151437-What-is-NordLocker).A Locker is NordLockers' encrypted folder. It contains your files and configuration data. No one apart from you can access the files you put in a Locker unless you give other people access.
[Learn how to grant other people access to your files on NordLocker](https://support.nordlocker.com/hc/en-us/articles/32188001657617-How-to-share-NordLocker-s-files-via-email-with-another-user).
### Why encrypt files?
Your computer contains a lot of sensitive data like photos of passports and IDs, scanned copies of legal documents, medical and tax information, personal notes, pictures, videos, and more. All of this information could be accessed by hackers if unprotected under additional security layers.
In cases when these files need to be shared with trustworthy people, you can do that safely thanks to [public-key cryptography](https://nordlocker.com/blog/public-key-encryption/).
## How to get started with NordLocker
By purchasing a NordVPN bundle that already includes NordLocker, you will simply need to proceed with logging in to the Web app and creating a Cloud password specifically for NordLocker. [Read NordLocker's article on how to get started](https://support.nordlocker.com/hc/en-us/articles/360015151437-What-is-NordLocker#:~:text=by%20NordLocker%27s%20encryption.-,Getting%20started%20with%20NordLocker,-To%20start%20using).
If you have any questions or wish to learn more, explore [NordLocker's Help Center](https://support.nordlocker.com/hc/en-us).",https://support.nordvpn.com/hc/en-us/related/click?data=BAh7CjobZGVzdGluYXRpb25fYXJ0aWNsZV9pZGwrCBF0SyhpHjoYcmVmZXJyZXJfYXJ0aWNsZV9pZGwrCBFx001wHjoLbG9jYWxlSSIKZW4tdXMGOgZFVDoIdXJsSSJZL2hjL2VuLXVzL2FydGljbGVzLzMzNDM2OTk2NDMyOTEzLUhvdy10by1zZXQtdXAtc2VjdXJlLWNsb3VkLXN0b3JhZ2Utd2l0aC1Ob3JkTG9ja2VyBjsIVDoJcmFua2kG--17c37dc5504f3a446d88167295c1ad38084ee564
How to get NordVPN with activation code,"To begin using NordVPN, you must activate your account using a [25-character “activation key”](https://my.nordaccount.com/activate/), which can be purchased from a physical or online retailer. This is the only method available for activating your account using the activation key.
To activate NordVPN with an activation key, follow the instructions below:
1. Enter your NordVPN activation code and your email address, then click Continue.
2. Check for the verification code in your email inbox.
3. Copy the verification code from the email we sent you and paste it into the box.
4. If you are a new NordVPN user, create a password for your Nord Account. Otherwise, type in your old password to log in.
5. Download the NordVPN app.
After you've set up your NordVPN account with the activation code and downloaded the app - you'll need to install it. Read our blog's article on [how to set up NordVPN](https://nordvpn.com/blog/how-to-set-up-a-vpn/).
If you experience any error when entering the activation code, please check [our article on common issues with activation codes](https://support.nordvpn.com/hc/en-us/articles/20286544549777-Common-issues-with-activation-codes).A useful reminder: Using a cracked version of NordVPN may lead to the loss of sensitive information, such as personal credentials. There is software online that promises one free access to ”cracked” NordVPN accounts. However, NordVPN serial cracks are most often chock-full of malware, adware intended to gain access to your credentials or devices, or other online threats. We recommend that you read about the [dangers of cracking programs](https://nordvpn.com/blog/crack/).",https://support.nordvpn.com/hc/en-us/related/click?data=BAh7CjobZGVzdGluYXRpb25fYXJ0aWNsZV9pZGwrCJEvyoDnEToYcmVmZXJyZXJfYXJ0aWNsZV9pZGwrCBFx001wHjoLbG9jYWxlSSIKZW4tdXMGOgZFVDoIdXJsSSJOL2hjL2VuLXVzL2FydGljbGVzLzE5Njg1OTk1ODUxNjY1LUhvdy10by1nZXQtTm9yZFZQTi13aXRoLWFjdGl2YXRpb24tY29kZQY7CFQ6CXJhbmtpBw%3D%3D--99b45e9e445f8c529a79fd09b8a10ebf3c009f53
Resetting your application preferences,"Find the relevant instructions by selecting the operating system below.
* [Windows](https://support.nordvpn.com/hc/en-us/related/click?data=BAh7CjobZGVzdGluYXRpb25fYXJ0aWNsZV9pZGwrCJGn5fN7EjoYcmVmZXJyZXJfYXJ0aWNsZV9pZGwrCBFx001wHjoLbG9jYWxlSSIKZW4tdXMGOgZFVDoIdXJsSSJNL2hjL2VuLXVzL2FydGljbGVzLzIwMzIzNTgyMTkxNTA1LVJlc2V0dGluZy15b3VyLWFwcGxpY2F0aW9uLXByZWZlcmVuY2VzBjsIVDoJcmFua2kI--db84a922be260ce3b52d42c73ba80aa954e8b9a7#Windows)
* [macOS](https://support.nordvpn.com/hc/en-us/related/click?data=BAh7CjobZGVzdGluYXRpb25fYXJ0aWNsZV9pZGwrCJGn5fN7EjoYcmVmZXJyZXJfYXJ0aWNsZV9pZGwrCBFx001wHjoLbG9jYWxlSSIKZW4tdXMGOgZFVDoIdXJsSSJNL2hjL2VuLXVzL2FydGljbGVzLzIwMzIzNTgyMTkxNTA1LVJlc2V0dGluZy15b3VyLWFwcGxpY2F0aW9uLXByZWZlcmVuY2VzBjsIVDoJcmFua2kI--db84a922be260ce3b52d42c73ba80aa954e8b9a7#macOS)
* [Android](https://support.nordvpn.com/hc/en-us/related/click?data=BAh7CjobZGVzdGluYXRpb25fYXJ0aWNsZV9pZGwrCJGn5fN7EjoYcmVmZXJyZXJfYXJ0aWNsZV9pZGwrCBFx001wHjoLbG9jYWxlSSIKZW4tdXMGOgZFVDoIdXJsSSJNL2hjL2VuLXVzL2FydGljbGVzLzIwMzIzNTgyMTkxNTA1LVJlc2V0dGluZy15b3VyLWFwcGxpY2F0aW9uLXByZWZlcmVuY2VzBjsIVDoJcmFua2kI--db84a922be260ce3b52d42c73ba80aa954e8b9a7#Android)
* [Linux](https://support.nordvpn.com/hc/en-us/related/click?data=BAh7CjobZGVzdGluYXRpb25fYXJ0aWNsZV9pZGwrCJGn5fN7EjoYcmVmZXJyZXJfYXJ0aWNsZV9pZGwrCBFx001wHjoLbG9jYWxlSSIKZW4tdXMGOgZFVDoIdXJsSSJNL2hjL2VuLXVzL2FydGljbGVzLzIwMzIzNTgyMTkxNTA1LVJlc2V0dGluZy15b3VyLWFwcGxpY2F0aW9uLXByZWZlcmVuY2VzBjsIVDoJcmFua2kI--db84a922be260ce3b52d42c73ba80aa954e8b9a7#Linux)
To reset your preferences on the NordVPN [Windows](https://nordvpn.com/download/windows/) app, follow these steps:
1. Open NordVPN, and click on the gear:
2. Head to general:
3. Scroll down and click run diagnostics:
4. Click reset app:It may take up to a few minutes for the app to reset.
Your application preferences and settings will now be reset, and you will be asked to log back in.
To reset your NordVPN application settings on [macOS](https://nordvpn.com/download/mac/), follow these steps:
1. Close the NordVPN application completely by right-clicking the NordVPN in the Dock and selecting Quit:
2. Open the Terminal by pressing Command(⌘) + space bar and typing terminal in the search field:
3. In the Terminal, run these commands:If the application was downloaded from the [App Store](https://apps.apple.com/us/app/nordvpn-vpn-fast-secure/id905953485):
```
defaults delete com.nordvpn.osx-apple
```
If the application was downloaded directly from our [website](https://nordvpn.com/en-us/offer/download/mac/):
```
defaults delete com.nordvpn.macos
```
Your application preferences will now be reset.
To reset your NordVPN application settings on [Android](https://nordvpn.com/offer/download/android/?vpn=brand&nc=Search_-_Belgium_-_Brand+Generic_-_Phrase_-_EN_-_DMT_-_EUR&ns=google&nm=cpc&nt=nordvpn%20android&gad_source=1&gclid=Cj0KCQjw1um-BhDtARIsABjU5x5nKMAMfSYpwSgBIbtcGhZn3uFzM41Em4o4ibJfHtqlYWqrtZmgbkwaAu_qEALw_wcB), follow these steps:
1. Find the NordVPN app on your home screen, long-press the icon, and select app info:
2. A setting window will appear, select storage & cache:
3. Click clear storage:
4. A pop-up will appear, click delete:
Your app preferences have now been reset.
To reset your preferences on the NordVPN [Linux](https://nordvpn.com/download/linux/) app, follow these steps:
1. Press Ctrl + Alt + T to open the terminal.
2. Type the following command and press Enter:
```
sudo rm /var/lib/nordvpn/data/settings.dat
```
3. Next, type the following command and press Enter:
```
sudo rm -rf ~/.config/nordvpn
```
Your app preferences have now been reset.",https://support.nordvpn.com/hc/en-us/related/click?data=BAh7CjobZGVzdGluYXRpb25fYXJ0aWNsZV9pZGwrCJGn5fN7EjoYcmVmZXJyZXJfYXJ0aWNsZV9pZGwrCBFx001wHjoLbG9jYWxlSSIKZW4tdXMGOgZFVDoIdXJsSSJNL2hjL2VuLXVzL2FydGljbGVzLzIwMzIzNTgyMTkxNTA1LVJlc2V0dGluZy15b3VyLWFwcGxpY2F0aW9uLXByZWZlcmVuY2VzBjsIVDoJcmFua2kI--db84a922be260ce3b52d42c73ba80aa954e8b9a7
I forgot my NordVPN password. What to do?,"1. Go to the Nord Account entry page: , and click on Log in to Nord Account. 
2. Click on Forgot your password? After that, enter your registered E-Mail address and click on Send Reset Link.
3. A password reset link will be automatically sent to your e-mail:
4. Go over to your e-mail account and use the password reset link to set a new NordVPN password. Afterward, you will be able to log in to our applications and connect to our servers.",https://support.nordvpn.com/hc/en-us/related/click?data=BAh7CjobZGVzdGluYXRpb25fYXJ0aWNsZV9pZGwrCBFo2XTZEToYcmVmZXJyZXJfYXJ0aWNsZV9pZGwrCBFx001wHjoLbG9jYWxlSSIKZW4tdXMGOgZFVDoIdXJsSSJOL2hjL2VuLXVzL2FydGljbGVzLzE5NjI1NjY1OTgwNDMzLUktZm9yZ290LW15LU5vcmRWUE4tcGFzc3dvcmQtV2hhdC10by1kbwY7CFQ6CXJhbmtpCQ%3D%3D--6a4953db371b5a03b34e7877eba4dd5d25805bc3
How to share a wireless NordVPN connection on Windows?,"If you have a device that is not able to connect to NordVPN directly, you can connect to your NordVPN via hotspot, Wi-Fi, or ethernet cable by using a Windows computer. To get started with sharing your NordVPN connection, choose the applicable section below:
* [Mobile hotspot Win10](https://support.nordvpn.com/hc/en-us/related/click?data=BAh7CjobZGVzdGluYXRpb25fYXJ0aWNsZV9pZGwrCBH6mgyDHToYcmVmZXJyZXJfYXJ0aWNsZV9pZGwrCBFx001wHjoLbG9jYWxlSSIKZW4tdXMGOgZFVDoIdXJsSSJcL2hjL2VuLXVzL2FydGljbGVzLzMyNDQ4Njg5NDA0NDMzLUhvdy10by1zaGFyZS1hLXdpcmVsZXNzLU5vcmRWUE4tY29ubmVjdGlvbi1vbi1XaW5kb3dzBjsIVDoJcmFua2kK--d8231be32e76df3637fc2319fca953642d919891#Mobile-hotspot-Win10)
* [Wi-Fi Win 7/8.1/10](https://support.nordvpn.com/hc/en-us/related/click?data=BAh7CjobZGVzdGluYXRpb25fYXJ0aWNsZV9pZGwrCBH6mgyDHToYcmVmZXJyZXJfYXJ0aWNsZV9pZGwrCBFx001wHjoLbG9jYWxlSSIKZW4tdXMGOgZFVDoIdXJsSSJcL2hjL2VuLXVzL2FydGljbGVzLzMyNDQ4Njg5NDA0NDMzLUhvdy10by1zaGFyZS1hLXdpcmVsZXNzLU5vcmRWUE4tY29ubmVjdGlvbi1vbi1XaW5kb3dzBjsIVDoJcmFua2kK--d8231be32e76df3637fc2319fca953642d919891#Wi-Fi-Win-7%2F8.1%2F10)
* [Ethernet](https://support.nordvpn.com/hc/en-us/related/click?data=BAh7CjobZGVzdGluYXRpb25fYXJ0aWNsZV9pZGwrCBH6mgyDHToYcmVmZXJyZXJfYXJ0aWNsZV9pZGwrCBFx001wHjoLbG9jYWxlSSIKZW4tdXMGOgZFVDoIdXJsSSJcL2hjL2VuLXVzL2FydGljbGVzLzMyNDQ4Njg5NDA0NDMzLUhvdy10by1zaGFyZS1hLXdpcmVsZXNzLU5vcmRWUE4tY29ubmVjdGlvbi1vbi1XaW5kb3dzBjsIVDoJcmFua2kK--d8231be32e76df3637fc2319fca953642d919891#Ethernet)
## Share a NordVPN connection via a mobile hotspot on Windows 10
NOTE: A mobile hotspot will NOT work with the NordLynx protocol. Make sure to enable the OpenVPN UDP/TCP protocol instead.
To set up a NordVPN connection using a mobile hotspot on Windows 10, follow the steps below:
1. Go to settings.
2. Click network & internet.
3. Click mobile hotspot.
4. Select share over Wi-Fi and enable mobile hotspot.
5. Go to settings.
6. Select network and Internet.
7. Scroll down to your NordVPN adapter and click edit.Please note: After adjusting the adapter, you will need to switch to a TCP or UDP protocol within the NordVPN app.
1. Open the sharing tab.
2. Check allow other network users to connect through this computer's internet connection.
3. Select your newly created hotspot from the dropdown menu.
4. Connect to the hotspot with the device that you would like to connect to NordVPN.
After completing these steps, your mobile hotspot will be configured to share the VPN connection with other devices. Make sure to test the connection and ensure that all connected devices are successfully using the shared VPN connection. You can check your connection in the [NordVPN DNS Leak Test](https://nordvpn.com/dns-leak-test/).
## Share a NordVPN connection via Wi-Fi from Windows 7/8.1/10
Note: Recent Intel Wireless Adapters don’t support the wireless hosted network feature on Windows 10. For more information, visit [Intel's support page](https://www.intel.com/content/www/us/en/support/articles/000023257/wireless.html).
To share a NordVPN connection via Wi-Fi on Windows 7/8.1/10 follow these steps:
1. Connect your Windows PC to your network via Wi-Fi.
2. Search Command Prompt in the Windows Search bar, right click it to run as administrator.
3. In Command Prompt, type the following:
```
netsh wlan show drivers
```
If the hosted network supported line says no, look for a newer version of your adapter drivers and install them.
4. Type in the following command:
```
netsh wlan set hostednetwork mode=allow ssid=NetworkName key=NetworkPassword
```
You should see something similar to this:
5. To activate this virtual network, type:
```
netsh wlan start hostednetwork
```
6. If you get the message “The hosted network couldn't be started. The group or resource is not in the correct state to perform the requested operation output” after performing netsh wlan start hostednetwork, try the following:Open the run window by pressing windows button + R.
7. Type in:
```
mmc devmgmt.msc
```
8. Once the device manager is open, navigate to Network Adapters and right-click microsoft hosted network virtual adapter.
9. Select enable.
10. Type the following command again:
```
netsh wlan start hostednetwork
```
11. Open the network and sharing Center by right-clicking the network icon in the system tray.
12. Click change adapter settings.
13. Right-click the TAP-NordVPN Windows Adapter V9 adapter.
14. Select properties.
15. Open the sharing tab.
16. Check allow other network users to connect through this computer’s Internet connection box.
17. Select the local area connection from the drop-down list.
18. Click ok.
19. Connect to one of our VPN servers in the NordVPN application.
To check the status of your virtual adapter, type the following:
```
netsh wlan show hostednetwork
```
To stop the virtual interface, type:
```
netsh wlan stop hostednetwork
```
After completing the steps, your NordVPN connection will successfully be shared via Wi-Fi.
## Sharing a NordVPN connection through an Ethernet cable
If you're using an Ethernet cable to connect your PC to the network, you'll need a second Ethernet port to share your NordVPN connection with another device.
Laptops should connect to the network via Wi-Fi, leaving their ethernet port free for the device without the NordVPN connection.
To share your NordVPN connection through an Ethernet cable, follow the steps below:
1. Open the network and sharing center by right-clicking the network icon in the system tray.
2. Click open network & internet settings.
3. Click change adapter options.
4. There should be at least three interfaces:
* Your internet connection
* The interface you will use to connect the device without a NordVPN connection
* The TAP adapter used by the NordVPN app to establish a NordVPN connection
1. Right-click the TAP-NordVPN Windows adapter.

1. Select properties.
2. Open the sharing tab.
3. Tick allow other network users to connect through this computer's internet connection.
4. Choose the network interface that you will share the connection with.
5. Click ok.
6. Switch to the UDP or TCP protocol in the NordVPN app.
7. Connect the desired device to your PC using an Ethernet cable.
8. Once you see the Ethernet interface trying to identify the connection, connect to NordVPN using the NordVPN app.
Once you have followed these steps, the NordVPN connection will be shared with the device.",https://support.nordvpn.com/hc/en-us/related/click?data=BAh7CjobZGVzdGluYXRpb25fYXJ0aWNsZV9pZGwrCBH6mgyDHToYcmVmZXJyZXJfYXJ0aWNsZV9pZGwrCBFx001wHjoLbG9jYWxlSSIKZW4tdXMGOgZFVDoIdXJsSSJcL2hjL2VuLXVzL2FydGljbGVzLzMyNDQ4Njg5NDA0NDMzLUhvdy10by1zaGFyZS1hLXdpcmVsZXNzLU5vcmRWUE4tY29ubmVjdGlvbi1vbi1XaW5kb3dzBjsIVDoJcmFua2kK--d8231be32e76df3637fc2319fca953642d919891
"What is a Nord Account, and how do you use it?","A Nord Account lets you easily manage all of your Nord Security services (including [NordVPN](https://nordvpn.com/pt-br/), [NordPass](https://nordpass.com/), and [NordLocker](https://nordlocker.com/)) from a single control panel.
### What can I do with a Nord Account?
1. Manage all of your Nord Security accounts in one place.
2. Use one login to sign in to all your Nord Security accounts.
3. Upgrade your service plans.
4. Cancel auto-renewal for your subscriptions.
If you have a NordVPN, NordPass, or NordLocker account, you’re automatically eligible for a [Nord Account](https://my.nordaccount.com/) and can start using it right away.
### Why use a Nord Account?
* No need for multiple accounts and passwords. Use your Nord Account credentials to easily sign in to all of your Nord Security accounts — you need just one email address and one password.
* Manage all services in one place. Once you sign in to your Nord Account, you’ll be able to view and extend your Nord Security subscriptions, cancel auto-renewal, see your billing history, download apps, and read the latest security reports.
* Simplify logins. A Nord Account lets you sign in to any of your Nord Security accounts with one click — simply look for the “Log in with Nord Account” button in Nord Security apps. Nord Accounts use the “OpenID Connect” standard for user authentication.
## Using a Nord Account
I’m a NordVPN user. What do I need to do?
Nothing! Your NordVPN account details automatically transfer to your Nord Account. Simply [sign in to your Nord Account](https://nordaccount.com/login/) to manage your Nord Security subscriptions and auto-renewals.
I want to get NordVPN. What do I need to do?
I use other Nord Security products and already have a Nord Account:
You can get NordVPN in three easy steps:
1. [Log in to your Nord Account](https://nordaccount.com/login/).
2. Go to the Dashboard, and under NordVPN, click Upgrade plan.
3. The checkout page will open. Select a plan and complete your payment.
Now, you can sign in to NordVPN with your Nord Account login.
I have never used Nord Security products:
You can subscribe to NordVPN and start using your new Nord Account in four easy steps:
1. [Choose a subscription plan](https://nordvpn.com/pricing/).
2. Fill in your details and complete your payment.
3. You will be sent a Nord Account registration link to the email address you signed up with. Click on the link and create a password.
4. [Download the NordVPN app](https://nordvpn.com/download/) and sign in with your Nord Account credentials.
I want to delete/close my Nord Account. How can I do it?
Follow the steps in our [article on how to delete or close your Nord Account](https://support.nordvpn.com/FAQ/1521982312/How-can-I-delete-my-NordVPN-account.htm).
I want a refund and/or to cancel auto-renewal for my subscription through my Nord Account.
* Follow our [guide on NordVPN’s money-back policy](https://support.nordvpn.com/hc/en-us/articles/19476991311121-What-is-your-money-back-policy) to get a refund for your purchase.
* Read our guide on [how to cancel auto-renewal for your subscription](https://support.nordvpn.com/hc/en-us/articles/19556844985489-How-to-cancel-a-subscription) through your Nord Account.
Manage all of your cybersecurity needs on one platform with your [Nord Account](https://my.nordaccount.com/dashboard/).",https://support.nordvpn.com/hc/en-us/related/click?data=BAh7CjobZGVzdGluYXRpb25fYXJ0aWNsZV9pZGwrCBEfFs%2FMEToYcmVmZXJyZXJfYXJ0aWNsZV9pZGwrCBF0SyhpHjoLbG9jYWxlSSIKZW4tdXMGOgZFVDoIdXJsSSJTL2hjL2VuLXVzL2FydGljbGVzLzE5NTcxMzQ1MzM0MDMzLVdoYXQtaXMtYS1Ob3JkLUFjY291bnQtYW5kLWhvdy1kby15b3UtdXNlLWl0BjsIVDoJcmFua2kG--b0ebfe94eb88cc8a108fadeed0cdbcfe847d5ad1
Installing NordVPN (App Store) version on macOS,"From October 17th, 2024, older applications will have a few function limitations. The issues can affect macOS applications version 8.27.2 and below. They can include not receiving notifications in the app and reduced Dark Web Monitoring and Meshnet functionality.To resolve the issue, please update your application to the latest version.
This article will help you set up the [NordVPN application on your Mac](https://nordvpn.com/download/mac/) and connect to a VPN server. Note: The NordVPN (App Store) app is compatible with macOS 11 and later versions.
## Table of contents:
* [Downloading and installing](
* [Setting up the application](
* [Connecting to servers](
* [NordVPN features menu](
* [NordVPN preference settings](
## Downloading and installing
1. Go to the [NordVPN app page in the App Store](https://apps.apple.com/us/app/nordvpn-vpn-fast-secure/id905953485#?platform=mac) or click download the App Store version of NordVPN on our downloads page:
2. Agree to Open App Store.
3. When the App Store launches, click on the blue Get button and choose to Install the app.
4. Once the download is finished, press the Open button.
## Setting up and using the application
1. Open your Launchpad and click on the NordVPN icon.
2. You can Log In or Sign Up in the top-right corner of the screen.
3. You will be redirected to your Nord Account. To log in, enter your registered email address and password. You can also sign in using your Google account or Apple ID or by entering a code. If you are a new user, you will need to create a [Nord Account](https://my.nordaccount.com/) by entering your email address and other required information.
4. After completing the above steps, you will be prompted to open the NordVPN app. Agree always to allow Nord Account and grant access to the app.
5. After a successful login, you will see the main NordVPN application window.Here, you can find NordVPN servers and navigate in the map itself, search bar, or specialty section.
## Connecting to servers
1. The Quick Connect button in the top-right corner will automatically connect you to a server.
2. To connect to a specific server, click on the Search field in the top-left corner of the app. Enter a country, a category, or a specific server number (e.g., Canada #1224) to find what you need.
3. All servers in the left sidebar are sorted by country and specialty.To connect to a specialty server, hover over one of the categories under [Specialty Servers](https://support.nordvpn.com/hc/en-us/articles/19479130821521-Different-NordVPN-server-categories-explained), and click on the three-dot menu to select a Country.
4. To connect to a specific country, click on it.
## NordVPN features menu
### Map

* Map - here, you can find and navigate NordVPN servers in the map itself, search bar, or specialty section
### Threat Protection Pro™/Threat Protection

* Threat Protection Pro™ is a special NordVPN feature that automatically blocks ads, trackers, and malicious URLs. When you visit a website known for scamming people, this feature displays an in-browser alert to warn you about possible fraud. Threat Protection Pro™ also scans downloads for malware and checks your apps for security vulnerabilities. Available with selected NordVPN plans, Threat Protection Pro™ can work without an active VPN connection. Learn more about[ Threat Protection Pro™](https://nordvpn.com/features/threat-protection/).If your NordVPN subscription doesn’t include Threat Protection Pro™, you can use the Threat Protection feature instead. It blocks intrusive ads and malicious domains based on DNS filtering and works whenever you’re connected to a VPN server. Threat Protection comes with all NordVPN plans.
### Meshnet

* The [Meshnet](https://nordvpn.com/meshnet/) feature helps you to access devices over encrypted tunnels. [Learn more about Meshnet](https://meshnet.nordvpn.com/getting-started/meshnet-explained).
### Dark Web Monitor

* [Dark Web Monitor](https://nordvpn.com/features/dark-web-monitor/) scans the internet for any credential leaks associated with your registered NordVPN e-mail address.
### Presets
Presets let you load up a specified set of configurations, including server number, type, protocol, and more. You can configure your settings to experience a smooth session, for e.g., so that a streaming service or a game loads up instantly!
#### How to set up presets?
Start at the preferences page. You can either edit an existing preset or create a new one by clicking Add new.Let's build it from scratch. After pressing Add new, you will see a menu with the settings you can use. Give the preset a name. Next, select from available VPN protocols. If you change the default setting Use recommended, you’ll be able to alter the server type. Here you can set a specialty server or any regular one as your type.Depending on the server availability, you may also have the choice of selecting a specific region.Finally, you can add either a web page or an app to the preset. It will be displayed under the preset name on the main screen. If you press Add link button, a field will appear for the URL of the website you would like easy access to. After inserting the URL, press Enter to register it. When you're done, press Save preset, and it will be added to the main screen.
### Statistics

* Statistics show you more information about your connection.
### Settings
To change application settings and find various features click on the gear icon at the bottom-left corner of the app:

* Settings tab displays the NordVPN app settings.
### Quick Help

* Here you can find your connection logs, a direct to our Help Center, or our customer support email.
## NordVPN settings
### General

* Launch the app on computer startup — toggle to open the NordVPN app automatically every time you turn your device on.
* VPN Protocol — this option will let you choose from 3 different [connection protocols](https://support.nordvpn.com/hc/en-us/articles/19482810153745-Which-NordVPN-protocol-should-I-choose) (OpenVPN UDP, OpenVPN TCP, and NordLynx).
* Help Us Improve — makes NordVPN better by sending us aggregated anonymous data.
### Auto-connect

* When using an untrusted network — toggle to automatically be connected to a VPN when you're connected to a network that is not added to a Trusted network list.
* Connect to — you can select a specific country from the list.
* The current network — shows the network you are currently connected to.
* Trusted network — you won't be automatically connected to a VPN while on a trusted Wi-Fi network.
### Kill Switch

* [Kill Switch](https://nordvpn.com/features/vpn-kill-switch/) prevents unprotected access to the internet when your VPN connection accidentally drops.
* Advanced Kill Switch is an additional layer of security that can be enabled to prevent WebRTC leaks. However, it functions separately from the system-wide Internet Kill Switch. Read [more information about Kill Switch](https://support.nordvpn.com/hc/en-us/articles/19509682644369-NordVPN-Kill-Switch-how-does-it-work).
* Stay invisible on a local network — this will let you [keep your device invisible on an unsafe local network](https://support.nordvpn.com/hc/en-us/articles/20225371443345-Staying-invisible-on-unsafe-local-networks-on-macOS).
### Appearance

* Appearance settings let you add an application to your dock and menu bar. Also, it lets you choose between dark and light modes.
### Other Apps

* Other Apps tab introduces other [Nord Security](https://nordsecurity.com/) products. As well as a scannable QR code that directly leads you to the NordVPN mobile app download.
### Account

* Account section shows your NordVPN profile and subscription information. Here you’ll also find links to [NordVPN Terms of Services](https://my.nordaccount.com/legal/terms-of-service/) and [Privacy Policy](https://my.nordaccount.com/legal/privacy-policy/).",https://support.nordvpn.com/hc/en-us/related/click?data=BAh7CjobZGVzdGluYXRpb25fYXJ0aWNsZV9pZGwrCJHa8kGjEjoYcmVmZXJyZXJfYXJ0aWNsZV9pZGwrCBEe9MByEjoLbG9jYWxlSSIKZW4tdXMGOgZFVDoIdXJsSSJUL2hjL2VuLXVzL2FydGljbGVzLzIwNDkyMzk1NDAzOTIxLUluc3RhbGxpbmctTm9yZFZQTi1BcHAtU3RvcmUtdmVyc2lvbi1vbi1tYWNPUwY7CFQ6CXJhbmtpCQ%3D%3D--4f7253d1a859b2142ab639a8966bdfe4bafa250f
Set up NordVPN on a Smart TV or Console,"There are a few [ways to set up a VPN for your Smart TV](https://nordvpn.com/blog/vpn-for-smart-tv/) or console. Picking the best method will depend on your specific device. Choose the relevant option from the list below:
* Setting up NordVPN connection on TVs
* [Android-based TVs and Android TV boxes](
* [Amazon Fire TV](
* [Apple TV](
* [Chromecast and Roku](
* [KODI extension](
* [Samsung TV](
* Setting up NordVPN connection on gaming consoles
* [Xbox](
* [PlayStation](
* [Nintendo Switch](
## Setting up NordVPN connection on TVs
Most smart TVs don’t support built-in VPN functionality, with the exception of Android-based TVs, but you can get a VPN on TV with an additional step. Try the connection methods listed below:
### Android-based TVs and Android TV boxes
* Download the native [NordVPN app for Android TV](https://nordvpn.com/download/android-tv/). Learn [how to use NordVPN for Android TV](https://support.nordvpn.com/hc/en-us/articles/19928244437777-Installing-and-using-NordVPN-on-Android-TV-or-Nvidia-Shield).
* [Set up SmartDNS on Android TV](https://support.nordvpn.com/hc/en-us/articles/19564451081873-How-to-Set-Up-SmartDNS-on-Apple-TV).
* [Set up a NordVPN on your router](https://support.nordvpn.com/hc/en-us/articles/19426084718865-Setting-up-a-router-with-NordVPN).
* [Share a wireless VPN connection](https://support.nordvpn.com/hc/en-us/articles/19916181239313-Share-a-wireless-VPN-connection-Windows) from your Windows PC.
* [Share a VPN connection through an Ethernet cable](https://support.nordvpn.com/hc/en-us/articles/19918886350097-Sharing-a-VPN-connection-through-an-Ethernet-cable) from your Windows PC.
### Amazon Fire TV
* Download the native [NordVPN app for Amazon devices](https://nordvpn.com/download/firestick/). Learn [how to install NordVPN on Amazon Fire devices](https://support.nordvpn.com/hc/en-us/articles/19453529667089-Installing-NordVPN-on-Amazon-Fire-devices).
* [Set up a NordVPN on your router](https://support.nordvpn.com/Connectivity/Router/1047409322/Setting-up-a-router-with-NordVPN.htm).
* [Share a wireless VPN connection](https://support.nordvpn.com/Connectivity/Windows/1088053522/Sharing-a-wireless-Virtual-Private-Network-connection-from-your-Windows-PC.htm) from your Windows PC.
### Apple TV
* Download the native [NordVPN app for Apple TV](https://nordvpn.com/download/apple-tv/).
* [Set up SmartDNS on Apple TV](https://support.nordvpn.com/hc/en-us/articles/19564451081873-How-to-Set-Up-SmartDNS-on-Apple-TV).
* [Set up a NordVPN on your router](https://support.nordvpn.com/Connectivity/Router/1047409322/Setting-up-a-router-with-NordVPN.htm).
* [Share a wireless VPN connection](https://support.nordvpn.com/Connectivity/Windows/1088053522/Sharing-a-wireless-Virtual-Private-Network-connection-from-your-Windows-PC.htm) from your Windows PC.
* [Share a VPN connection through an Ethernet cable](https://support.nordvpn.com/Connectivity/Windows/1047409882/Sharing-a-VPN-connection-through-an-Ethernet-cable.htm) from your Windows PC.
### Chromecast and Roku
* [Set up a NordVPN on your router](https://support.nordvpn.com/Connectivity/Router/1047409322/Setting-up-a-router-with-NordVPN.htm).
* [Share a wireless VPN connection](https://support.nordvpn.com/Connectivity/Windows/1088053522/Sharing-a-wireless-Virtual-Private-Network-connection-from-your-Windows-PC.htm) from your Windows PC.
### KODI extension
* [Set up a KODI extension on NordVPN](https://support.nordvpn.com/hc/en-us/articles/19563635506065-How-can-I-use-Kodi-with-NordVPN).
### Samsung TV
* [Set up a NordVPN on your router](https://support.nordvpn.com/Connectivity/Router/1047409322/Setting-up-a-router-with-NordVPN.htm).
* [Share VPN via a mobile hotspot on Windows 10](https://support.nordvpn.com/hc/en-us/articles/19748256261649-Share-VPN-via-a-mobile-hotspot-on-Windows-10).
* [Share a wireless VPN connection](https://support.nordvpn.com/Connectivity/Windows/1088053522/Sharing-a-wireless-Virtual-Private-Network-connection-from-your-Windows-PC.htm) from your Windows PC.
* [Share a VPN connection through an Ethernet cable](https://support.nordvpn.com/Connectivity/Windows/1047409882/Sharing-a-VPN-connection-through-an-Ethernet-cable.htm) from your Windows PC.
## Setting up NordVPN connection on gaming consoles
Video game consoles such as Xbox, Playstation, or Nintendo Switch do not support built-in VPN functionality, however, you can set up a VPN on your gaming console with a few additional steps.
### Xbox console
If you want to set up a [VPN on Xbox](https://nordvpn.com/download/xbox/), try this:
* [Install NordVPN on your router](https://nordvpn.com/blog/setup-vpn-router/) and connect your Xbox to the Wi-Fi.
* [Connect Xbox to your Windows PC](https://nordvpn.com/download/xbox/#:~:text=Connect%20Xbox%20to%20your%20Windows%20PC).
### Playstation console
If you want to set up a [VPN on PlayStation](https://nordvpn.com/download/playstation/), try this:
* [Install NordVPN on your router](https://nordvpn.com/blog/setup-vpn-router/) and connect your Playstation to the Wi-Fi.
* [Connect PlayStation to your Windows PC](https://nordvpn.com/download/playstation/#:~:text=Connect%20PlayStation%20to%20your%20Windows%20PC).
### Nintendo Switch console
If you want to set up a [VPN on a Nintendo Switch](https://nordvpn.com/download/nintendo-switch/), try this:
* Connect via mobile hotspot:
1. Install NordVPN to a device of your choice (laptop, smartphone, or tablet)
2. Connect to any NordVPN server.
3. [Set up a mobile hotspot](https://support.nordvpn.com/hc/en-us/articles/19748256261649-Share-VPN-via-a-mobile-hotspot-on-Windows-10).
4. Connect your Nintendo Switch to the hotspot.
* [Install NordVPN on your router](https://nordvpn.com/blog/setup-vpn-router/) and connect your Nintendo Switch to the Wi-Fi.
The NordVPN service should never be used to bypass copyright regulations. NordVPN does not promote, condone, or endorse the use of the service for such purposes. For more details, please read the NordVPN [Terms of Service](https://my.nordaccount.com/legal/terms-of-service/).",https://support.nordvpn.com/hc/en-us/related/click?data=BAh7CjobZGVzdGluYXRpb25fYXJ0aWNsZV9pZGwrCBH8EBC4EToYcmVmZXJyZXJfYXJ0aWNsZV9pZGwrCJEgsuKuEToLbG9jYWxlSSIKZW4tdXMGOgZFVDoIdXJsSSJOL2hjL2VuLXVzL2FydGljbGVzLzE5NDgyMjQxMjAzMjE3LVNldC11cC1Ob3JkVlBOLW9uLWEtU21hcnQtVFYtb3ItQ29uc29sZQY7CFQ6CXJhbmtpCA%3D%3D--ec7dbd497bf67a38e05c79f837cf124bc2589f44
How to start using NordVPN,"If you are interested in starting to use the NordVPN service but are unsure how to do so, this article will introduce you to the steps needed to begin using NordVPN today.
In this article we will cover:
* [Downloading NordVPN](
* [Installing NordVPN](
* [Purchasing a NordVPN plan](
* [Connecting to NordVPN](
* [Connecting to NordVPN on Linux](
* [Additional NordVPN features](
## Downloading NordVPN
To begin using NordVPN, you will first need to download the application for your respective device:
* Download the NordVPN application for Windows
* Download the NordVPN application for macOS
* Download the NordVPN application for Linux
* Download the NordVPN application for Android
* Download the NordVPN application for iOS
## Installing NordVPN
If you are not sure how to install and set up the application, choose the OS you're going to use and follow one of the guides below:
* Learn how to install NordVPN on Windows 7 and 8.1
* Learn how to install NordVPN on Windows 10 and 11
* Learn how to install NordVPN on macOS
* Learn how to install NordVPN on Linux
* Learn how to install NordVPN on Android
* Learn how to install NordVPN on iOS
Once the application has been set up, you need to purchase the desired plan.
## Purchasing a NordVPN plan
The following article will introduce you to [NordVPN Plans and Prices](https://support.nordvpn.com/hc/en-us/articles/19744251757841-Plans-and-prices-of-NordVPN-service). And if you're uncertain how to proceed with the purchase, read the article on [purchasing a NordVPN subscription](https://support.nordvpn.com/hc/en-us/articles/19478048190481-How-to-purchase-a-NordVPN-subscription).
Once you have an active subscription, you need to connect to NordVPN.
## Connecting to NordVPN
In order to connect to NordVPN, follow along below:
1. Use the quick connect button:Alternatively, you can use the dots on the map to connect to specific locations.
2. Click the dot in a country:Lastly, you may also use the search bar.
3. Type in the name of the country you would like to connect to:
### Connecting to NordVPN on Linux
To connect on a Linux device, you will need to type in the following commands :
```
nordvpn connect
```
```
nordvpn c
```
To connect to specific servers, use:
```
nordvpn connect
```
(eg. nordvpn connect uk715)
Follow our article on how to [connect to NordVPN using Linux Terminal](https://support.nordvpn.com/hc/en-us/articles/20164827795345-Connect-to-NordVPN-using-Linux-Terminal).
That's it! Now you can begin using the app and investigating the different features.
## Additional NordVPN features
Here you can find some articles covering NordVPN's features:
* [Different NordVPN server categories explained](https://support.nordvpn.com/hc/en-us/articles/19479130821521-Different-NordVPN-server-categories-explained)
* [NordVPN Kill Switch: how does it work](https://support.nordvpn.com/hc/en-us/articles/19509682644369-NordVPN-Kill-Switch-how-does-it-work)
* [What is Threat Protection Pro™ and Threat Protection?](https://support.nordvpn.com/hc/en-us/articles/19508765521425-What-is-Threat-Protection-Pro-and-Threat-Protection)
* [Dedicated NordVPN IP addresses](https://support.nordvpn.com/hc/en-us/articles/19507808024209-Dedicated-NordVPN-IP-addresses)",https://support.nordvpn.com/hc/en-us/related/click?data=BAh7CjobZGVzdGluYXRpb25fYXJ0aWNsZV9pZGwrCJFpIBV0EjoYcmVmZXJyZXJfYXJ0aWNsZV9pZGwrCBF0SyhpHjoLbG9jYWxlSSIKZW4tdXMGOgZFVDoIdXJsSSJBL2hjL2VuLXVzL2FydGljbGVzLzIwMjg5Nzc5OTUyMDE3LUhvdy10by1zdGFydC11c2luZy1Ob3JkVlBOBjsIVDoJcmFua2kH--f51cf0267889eab8d67007bff744ce092b005d06
What is NordPass?,"NordPass is a tool designed to help you manage your passwords securely and effortlessly. Created by NordSecurity, the same company behind NordVPN, NordPass allows you to store login details, autofill forms, keep private notes safe, and generate strong passwords. Like other NordSecurity products, NordPass integrates with your Nord Account for easy access and management.",https://support.nordvpn.com/hc/en-us/related/click?data=BAh7CjobZGVzdGluYXRpb25fYXJ0aWNsZV9pZGwrCBFx001wHjoYcmVmZXJyZXJfYXJ0aWNsZV9pZGwrCBF0SyhpHjoLbG9jYWxlSSIKZW4tdXMGOgZFVDoIdXJsSSJTL2hjL2VuLXVzL2FydGljbGVzLzMzNDY3NjkwODczMTA1LUhvdy10by1zZXQtdXAtcGFzc3dvcmQtbWFuYWdlci13aXRoLU5vcmRQYXNzBjsIVDoJcmFua2kI--97cfc759433edaec731552c061ddd22ed16b7814
What is Nord Account?,"With your Nord Account, you can easily manage all your Nord products, including NordVPN, NordPass, and NordLocker. Purchasing NordVPN or any bundle provides automatic access to a Nord Account. Guidance on how to access NordPass using your Nord Account is provided later in this article.",https://support.nordvpn.com/hc/en-us/related/click?data=BAh7CjobZGVzdGluYXRpb25fYXJ0aWNsZV9pZGwrCBFx001wHjoYcmVmZXJyZXJfYXJ0aWNsZV9pZGwrCBF0SyhpHjoLbG9jYWxlSSIKZW4tdXMGOgZFVDoIdXJsSSJTL2hjL2VuLXVzL2FydGljbGVzLzMzNDY3NjkwODczMTA1LUhvdy10by1zZXQtdXAtcGFzc3dvcmQtbWFuYWdlci13aXRoLU5vcmRQYXNzBjsIVDoJcmFua2kI--97cfc759433edaec731552c061ddd22ed16b7814
How to get started with NordPass?,The process to start with NordPass is detailed below.,https://support.nordvpn.com/hc/en-us/related/click?data=BAh7CjobZGVzdGluYXRpb25fYXJ0aWNsZV9pZGwrCBFx001wHjoYcmVmZXJyZXJfYXJ0aWNsZV9pZGwrCBF0SyhpHjoLbG9jYWxlSSIKZW4tdXMGOgZFVDoIdXJsSSJTL2hjL2VuLXVzL2FydGljbGVzLzMzNDY3NjkwODczMTA1LUhvdy10by1zZXQtdXAtcGFzc3dvcmQtbWFuYWdlci13aXRoLU5vcmRQYXNzBjsIVDoJcmFua2kI--97cfc759433edaec731552c061ddd22ed16b7814
How to set up password manager with NordPass,"If you've subscribed to a NordVPN Plus, Complete, or Ultra plan, you've got a bundle that includes the NordPass password manager. This guide will walk you through setting it up and securing your passwords.
In this article, we will cover:
* [What is NordPass?](
* [What is Nord Account?](
* [How to get started with NordPass?](
* [Installing NordPass](
* [Logging into NordPass](
## What is NordPass?
NordPass is a tool designed to help you manage your passwords securely and effortlessly. Created by NordSecurity, the same company behind NordVPN, NordPass allows you to store login details, autofill forms, keep private notes safe, and generate strong passwords. Like other NordSecurity products, NordPass integrates with your Nord Account for easy access and management.
## What is Nord Account?
With your Nord Account, you can easily manage all your Nord products, including NordVPN, NordPass, and NordLocker. Purchasing NordVPN or any bundle provides automatic access to a Nord Account. Guidance on how to access NordPass using your Nord Account is provided later in this article.
[Learn more about Nord Account and how to use it.](https://support.nordvpn.com/hc/en-us/articles/19571345334033-What-is-a-Nord-Account-and-how-do-you-use-it)
## How to get started with NordPass?
The process to start with NordPass is detailed below.
### Installing NordPass
Start securing your passwords with NordPass by choosing your preferred installation method:
* You can install the NordPass application directly on your device. [Installation guides for different operating systems are available. ](https://support.nordpass.com/hc/en-us/articles/360004799257-Installing-NordPass-desktop-application)
* Alternatively, for seamless browsing, install the NordPass browser extension – [learn how across various browsers.](https://support.nordpass.com/hc/en-us/articles/360010298318-Adding-the-NordPass-browser-extension)
* MacOS users also have the option to add the Safari NordPass extension. [Learn how to do that.](https://support.nordpass.com/hc/en-us/articles/360009942298-NordPass-Safari-extension-setup-for-macOS)
### Logging into NordPass
Once installed, open your NordPass application or browser extension and click Login with Nord Account. Enter your Nord Account credentials to log in, and you're all set!
Learn more about the password manager, and if you need any further assistance, visit [NordPass's Help Center](https://support.nordpass.com/hc/en-us).",https://support.nordvpn.com/hc/en-us/related/click?data=BAh7CjobZGVzdGluYXRpb25fYXJ0aWNsZV9pZGwrCBFx001wHjoYcmVmZXJyZXJfYXJ0aWNsZV9pZGwrCBF0SyhpHjoLbG9jYWxlSSIKZW4tdXMGOgZFVDoIdXJsSSJTL2hjL2VuLXVzL2FydGljbGVzLzMzNDY3NjkwODczMTA1LUhvdy10by1zZXQtdXAtcGFzc3dvcmQtbWFuYWdlci13aXRoLU5vcmRQYXNzBjsIVDoJcmFua2kI--97cfc759433edaec731552c061ddd22ed16b7814
What is your money-back policy?,"Here is the refund and cancellation policy at the core of our 30-day money-back guarantee:
“...if you are not satisfied with our Services, you may cancel the Subscription and request a refund within 30 days following your purchase of our Services (“Money Back Guarantee”). Please note that Subscriptions may be refunded on the basis of the Money Back Guarantee only after the initial purchase. Once a Subscription is renewed, it cannot be refunded on the basis of the Money Back Guarantee, unless applicable law provides otherwise.”
This and other conditions of our service can be found in our [Terms of Service](https://my.nordaccount.com/legal/terms-of-service/).
Here are our instructions for [how to cancel](https://support.nordvpn.com/hc/en-us/articles/19556844985489-How-to-cancel-auto-renewal-for-your-subscription) automatic payment renewal.
## Requesting a refund
Previously, refunds could only be processed through our support team. We have now implemented an automated refund system that is more efficient, faster, and convenient for our customers to use. This change also improves our ability to gather feedback, allowing us to better understand issues and improve our service. As we continue to refine this new process, your feedback is welcomed to help us enhance it further.
To request a refund for your payment, contact our customer support team via live chat available in the bottom right corner of the page, and indicate you would like us to refund your payment.
1. You will receive a link to your Nord Account dashboard. Follow the link and verify it’s you who’s trying to access the account.
2. In the following window, you will see which payments are eligible for a refund. Such payments will have a Refund button available. To proceed, click on Refund.Please keep in mind that not all payments are eligible for refunds, and certain terms apply depending on where you bought the subscription:
* * Apple App Store: Subscriptions purchased via the Apple App Store are subject to Apple's refund policies. We're unable to issue refunds for payments made through the Apple App Store. For assistance, please reach out to Apple directly via Apple Support.
* Amazon Appstore: If you've purchased your subscription through the Amazon App Store, contact Amazon directly for assistance via Amazon Support.
* Google Play Store: Refunds for payments made through the Google Play Store can be requested through NordVPN’s customer support, provided they fall within the refund terms outlined above. Additionally, if the payment was made within the last 48 hours, you can request a refund directly from your Google Play account. For more details, visit Google Play Support.
* Retailers or resellers: If you've purchased a subscription outside the NordVPN website (e.g., physical store, online shop, or marketplace like BestBuy or StackSocial), please contact the retailer directly regarding the refund.
1. In the following window, select the reason for canceling the service and requesting a refund. Your feedback is invaluable because it helps us pinpoint areas for improvement and ensures a better experience for all our users.Once completed, click Submit and Continue. 
2. You will see your refund summary. You can confirm it by clicking Refund.
3. After submitting the request, you will receive a confirmation email saying that your refund has been ordered.
4. You should now see the refund status for your payment as Refund Processing. This means that your request has been received and is currently being processed. This process can take up to a few hours*.*Please note, that due to recent implementation, it may take up to 4 hours for a refund request to be processed.
5. Once the refund is complete, the refund status on your dashboard will change to Refunded, and you will receive a confirmation email. Please note that depending on your payment method, it may take up to 10 business days for the refund to reach your account. If there was an error or you have any other questions, please contact our customer support team directly.",https://support.nordvpn.com/hc/en-us/related/click?data=BAh7CjobZGVzdGluYXRpb25fYXJ0aWNsZV9pZGwrCBH9Jde2EToYcmVmZXJyZXJfYXJ0aWNsZV9pZGwrCBF0SyhpHjoLbG9jYWxlSSIKZW4tdXMGOgZFVDoIdXJsSSJFL2hjL2VuLXVzL2FydGljbGVzLzE5NDc2OTkxMzExMTIxLVdoYXQtaXMteW91ci1tb25leS1iYWNrLXBvbGljeQY7CFQ6CXJhbmtpCQ%3D%3D--021ea4f94e4e6e107ff69f8d1366869365811c21
How to start using NordVPN dedicated IP,"If you are interested in using [NordVPN's dedicated IP](https://nordvpn.com/features/dedicated-ip/) but are unsure where to start, this article will introduce you to the steps needed to begin using it today.NordVPN's dedicated IP is an [IP address](https://nordvpn.com/what-is-my-ip/) assigned to a specific server and only available to the account it has been purchased for. This means that if you get a dedicated IP - it is not going to be shared amongst other users, which results in receiving better connection and less Captcha requests.
1. First, to be able to start using our dedicated IP, you have to purchase this service alongside an either a new NordVPN subscription or an existing one. To do that, check out our article on how to purchase a dedicated IP address.
2. After you have purchased it, you have to set up the dedicated IP, before you can start using it.
3. Choose the OS you're going to use it on and follow the guidelines in order to connect to your dedicated IP:
* [How to connect to your dedicated IP on Linux](https://support.nordvpn.com/hc/en-us/articles/19684336200081-How-to-connect-to-your-dedicated-IP-on-Linux)
* [How to connect to your dedicated IP on Windows](https://support.nordvpn.com/hc/en-us/articles/20465449537681-How-to-connect-to-your-dedicated-IP-on-Windows)
* [How to connect to your dedicated IP on macOS](https://support.nordvpn.com/hc/en-us/articles/19678530026641-How-to-connect-to-your-dedicated-IP-on-macOS)
* [How to connect to your dedicated IP on iOS](https://support.nordvpn.com/hc/en-us/articles/19682095316625-How-to-connect-to-your-dedicated-IP-on-iOS)
* [How to connect to your dedicated IP on Android](https://support.nordvpn.com/hc/en-us/articles/19682489581585-How-to-connect-to-your-dedicated-IP-on-Android)
That's it – now you can start enjoying the benefits of your dedicated IP.
If you do not see the dedicated IP option in the specialty servers list, [switch to the TCP, UDP OpenVPN](https://support.nordvpn.com/hc/en-us/articles/20465552867345), or NordLynx protocols. Make note that dedicated IP is not available via browser extension, tvOS, or the IKEv2 protocol.",https://support.nordvpn.com/hc/en-us/related/click?data=BAh7CjobZGVzdGluYXRpb25fYXJ0aWNsZV9pZGwrCJGs7%2FDbHToYcmVmZXJyZXJfYXJ0aWNsZV9pZGwrCBF0SyhpHjoLbG9jYWxlSSIKZW4tdXMGOgZFVDoIdXJsSSJOL2hjL2VuLXVzL2FydGljbGVzLzMyODMwNDc3MjgyNDQ5LUhvdy10by1zdGFydC11c2luZy1Ob3JkVlBOLWRlZGljYXRlZC1JUAY7CFQ6CXJhbmtpCg%3D%3D--111f0ad695fc306a644f14637307c554b39ca253
How to start using NordVPN,"If you are interested in starting to use the NordVPN service but are unsure how to do so, this article will introduce you to the steps needed to begin using NordVPN today.
In this article we will cover:
* [Downloading NordVPN](
* [Installing NordVPN](
* [Purchasing a NordVPN plan](
* [Connecting to NordVPN](
* [Connecting to NordVPN on Linux](
* [Additional NordVPN features](
## Downloading NordVPN
To begin using NordVPN, you will first need to download the application for your respective device:
* Download the NordVPN application for Windows
* Download the NordVPN application for macOS
* Download the NordVPN application for Linux
* Download the NordVPN application for Android
* Download the NordVPN application for iOS
## Installing NordVPN
If you are not sure how to install and set up the application, choose the OS you're going to use and follow one of the guides below:
* Learn how to install NordVPN on Windows 7 and 8.1
* Learn how to install NordVPN on Windows 10 and 11
* Learn how to install NordVPN on macOS
* Learn how to install NordVPN on Linux
* Learn how to install NordVPN on Android
* Learn how to install NordVPN on iOS
Once the application has been set up, you need to purchase the desired plan.
## Purchasing a NordVPN plan
The following article will introduce you to [NordVPN Plans and Prices](https://support.nordvpn.com/hc/en-us/articles/19744251757841-Plans-and-prices-of-NordVPN-service). And if you're uncertain how to proceed with the purchase, read the article on [purchasing a NordVPN subscription](https://support.nordvpn.com/hc/en-us/articles/19478048190481-How-to-purchase-a-NordVPN-subscription).
Once you have an active subscription, you need to connect to NordVPN.
## Connecting to NordVPN
In order to connect to NordVPN, follow along below:
1. Use the quick connect button:Alternatively, you can use the dots on the map to connect to specific locations.
2. Click the dot in a country:Lastly, you may also use the search bar.
3. Type in the name of the country you would like to connect to:
### Connecting to NordVPN on Linux
To connect on a Linux device, you will need to type in the following commands :
```
nordvpn connect
```
```
nordvpn c
```
To connect to specific servers, use:
```
nordvpn connect
```
(eg. nordvpn connect uk715)
Follow our article on how to [connect to NordVPN using Linux Terminal](https://support.nordvpn.com/hc/en-us/articles/20164827795345-Connect-to-NordVPN-using-Linux-Terminal).
That's it! Now you can begin using the app and investigating the different features.
## Additional NordVPN features
Here you can find some articles covering NordVPN's features:
* [Different NordVPN server categories explained](https://support.nordvpn.com/hc/en-us/articles/19479130821521-Different-NordVPN-server-categories-explained)
* [NordVPN Kill Switch: how does it work](https://support.nordvpn.com/hc/en-us/articles/19509682644369-NordVPN-Kill-Switch-how-does-it-work)
* [What is Threat Protection Pro™ and Threat Protection?](https://support.nordvpn.com/hc/en-us/articles/19508765521425-What-is-Threat-Protection-Pro-and-Threat-Protection)
* [Dedicated NordVPN IP addresses](https://support.nordvpn.com/hc/en-us/articles/19507808024209-Dedicated-NordVPN-IP-addresses)",https://support.nordvpn.com/hc/en-us/related/click?data=BAh7CjobZGVzdGluYXRpb25fYXJ0aWNsZV9pZGwrCJFpIBV0EjoYcmVmZXJyZXJfYXJ0aWNsZV9pZGwrCJHa8kGjEjoLbG9jYWxlSSIKZW4tdXMGOgZFVDoIdXJsSSJBL2hjL2VuLXVzL2FydGljbGVzLzIwMjg5Nzc5OTUyMDE3LUhvdy10by1zdGFydC11c2luZy1Ob3JkVlBOBjsIVDoJcmFua2kG--a3b25a163869f60a4260d96c78a92901681f433d
How to set up NordVPN with Chrome extension,"## How to set up the NordVPN Chrome extension
1. Download [VPN Chrome extension](https://nordvpn.com/download/chrome-extension/) form our website, or you can get it from [Google Chrome Web Store](https://chromewebstore.google.com/detail/nordvpn-vpn-proxy-for-pri/fjoaledfpmneenckfbpdfhkmimnjocfa).
2. Click on Add to Chrome button. 
3. Chrome might ask you if you want to add the extension. Click Add extension.
4. Then you will receive a NordVPN notification that the extension was added successfully.
5. After the installation is finished, the NordVPN logo will appear on the toolbar in the top-right corner of the browser. Click on the NordVPN logo and you will be prompted to either login or sign up using Nord Account.
## How to use and customize the NordVPN Chrome Extension
Now that you have a VPN for Chrome let's look at how you can make your first connection and adjust the extension settings to suit your needs.
1. Protected status: when you connect to a NordVPN server, this bar will confirm that your connection is successful by displaying the status as Protected.
2. Quick Connect: the fastest way to begin using the NordVPN extension. After pressing Quick Connect, you'll immediately connect to a NordVPN server.
3. Search: whereas the Quick Connect option will decide on a server location for you, this option allows you to specify the country of the NordVPN server.
4. Settings: here, you can find your General, Connection, Security and privacy settings. General: in these settings, you can find your subscription information, application appearance, language preferences, and a function to import and export [split tunneling](https://support.nordvpn.com/hc/en-us/articles/20321703651985-Split-Tunneling-feature-on-NordVPN-extension) settings.Connection: when accessing connection settings, you can choose to automatically connect to NordVPN servers or add URLs that you wish to be excluded from the NordVPN connection.Security and privacy: enable the [WebRTC](https://support.nordvpn.com/hc/en-us/articles/20318383008529-How-to-stop-WebRTC-leaks) Leaks option and the [Threat Protection](https://support.nordvpn.com/General-info/Features/1047407402/What-are-Threat-Protection-and-Threat-Protection-Lite.htm) feature. Also, choose to turn on security warnings for suspicious websites.
5. Support Assistance: more information about the extension and live chat with an agent option can be found here.
6. Notifications: updates and news about the NordVPN extension.
7. Main extension window: If you click here, you can open the main extension window.
8. List of Recently Connected Countries: This section displays the countries to which you have established a recent connection. In case you haven't connected to any server yet, you will find recommendations for countries to connect to.
And that's it! Enjoy browsing securely using your VPN for Chrome.",https://support.nordvpn.com/hc/en-us/related/click?data=BAh7CjobZGVzdGluYXRpb25fYXJ0aWNsZV9pZGwrCBHuvf6BEjoYcmVmZXJyZXJfYXJ0aWNsZV9pZGwrCJHa8kGjEjoLbG9jYWxlSSIKZW4tdXMGOgZFVDoIdXJsSSJSL2hjL2VuLXVzL2FydGljbGVzLzIwMzQ5NTMzOTQxMjY1LUhvdy10by1zZXQtdXAtTm9yZFZQTi13aXRoLUNocm9tZS1leHRlbnNpb24GOwhUOglyYW5raQc%3D--cf5b85c2c2389e0386572cf98e2beb9014c43be0
Not sure if your router is supported and/or can't find it on the list above?,"First, see if you can find your router on our [list of unsupported routers](https://support.nordvpn.com/hc/en-us/articles/20379585675793-Which-routers-don-t-support-NordVPN).",https://support.nordvpn.com/hc/en-us/related/click?data=BAh7CjobZGVzdGluYXRpb25fYXJ0aWNsZV9pZGwrCBEJ4fyqEToYcmVmZXJyZXJfYXJ0aWNsZV9pZGwrCJHa8kGjEjoLbG9jYWxlSSIKZW4tdXMGOgZFVDoIdXJsSSJHL2hjL2VuLXVzL2FydGljbGVzLzE5NDI2MDg0NzE4ODY1LVNldHRpbmctdXAtYS1yb3V0ZXItd2l0aC1Ob3JkVlBOBjsIVDoJcmFua2kI--a67ded12d8cc20694e688e712d5db7bc684e6b0d
Setting up a router with NordVPN,"The procedure of setting up NordVPN on your router will depend on your router’s firmware or manufacturer. If you can’t find the VPN router setup tutorial for your router’s firmware on the following list, continue scrolling down for further instructions. You may also check out our list of [router recommendations](https://support.nordvpn.com/hc/en-us/articles/20195707547025-Which-router-should-I-use-with-NordVPN).
Note: If your router was issued by your ISP, it probably does not support VPN configurations. If that is the case, there are routers that come pre-configured with NordVPN. Our partner FlashRouters offers a selection of powerful routers that come with NordVPN out of the box, including the [Privacy Hero](https://www.flashrouters.com/privacy-hero-nordvpn-router-by-flashrouters) with exclusive integration for NordLynx - the fastest VPN protocol.
## Setup tutorials for supported routers and firmware:
* [ASUS WRT](https://support.nordvpn.com/hc/en-us/articles/20286376420753-How-to-set-up-NordVPN-on-Asus-WRT-firmware) (native firmware)
* [ASUS Merlin](https://support.nordvpn.com/hc/en-us/articles/20319214011921-AsusWRT-Merlin-setup-with-NordVPN)
* [DD-WRT](https://support.nordvpn.com/hc/en-us/articles/20308623061265-DD-WRT-setup-with-NordVPN)
* [Privacy Hero](https://support.flashrouters.com/privacy-hero/vpn-setup-privacy-hero/privacy-hero-nordlynx-vpn-setup/)
* [Roqos](https://support.flashrouters.com/roqoscore/nordvpn-setup-on-roqos/)
* [Gl.iNET](https://support.nordvpn.com/hc/en-us/articles/20226926174225-GL-iNet-setup-with-NordVPN)
* [Mikrotik](https://support.nordvpn.com/hc/en-us/articles/20398642652561-MikroTik-IKEv2-setup-with-NordVPN)
* [NetDUMA](https://support.nordvpn.com/hc/en-us/articles/20323695823761-Netduma-setup-with-NordVPN)
* [OPNsense](https://support.nordvpn.com/hc/en-us/articles/20397569418129-OPNsense-21-setup-with-NordVPN)
* [OpenWRT](https://support.nordvpn.com/hc/en-us/articles/20340177222289-OpenWrt-setup-with-NordVPN)
* [Padavan](https://support.nordvpn.com/hc/en-us/articles/20323041135889-Padavan-setup-with-NordVPN)
* [Sabai](https://support.nordvpn.com/hc/en-us/articles/20323512359697-Sabai-setup-with-NordVPN)
* [Tomato](https://support.nordvpn.com/hc/en-us/articles/20317675285777-How-to-set-up-VPN-on-Tomato)
* [pfSense](https://support.nordvpn.com/hc/en-us/articles/20285211284497-pfSense-setup-with-NordVPN)
* [DrayTek](https://support.nordvpn.com/hc/en-us/articles/20397988815633-DrayTek-Vigor-IKEv2-setup-with-NordVPN)
* [EdgeRouter](https://support.nordvpn.com/hc/en-us/articles/20321386897041-EdgeRouter-and-Ubiquiti-setup-with-NordVPN)
* [TP-Link](https://support.nordvpn.com/hc/en-us/articles/20280525082001-Setting-up-TP-Link-with-NordVPN)
* Starlink (read more about how to use [VPN on Starlink](https://nordvpn.com/blog/starlink-vpn/))
## Not sure if your router is supported and/or can't find it on the list above?
First, see if you can find your router on our [list of unsupported routers](https://support.nordvpn.com/hc/en-us/articles/20379585675793-Which-routers-don-t-support-NordVPN).
If it’s not on there, check the user manual that came with your router (usually, manuals are available for download on the manufacturer’s website). Search the manual for any mentions of OpenVPN support. Your router must support the OpenVPN client in order to potentially support a NordVPN configuration. If you can’t find this information in the manual, consider contacting your router’s manufacturer.
If none of the tips mentioned above have helped you set up a connection, feel free to contact our support team!",https://support.nordvpn.com/hc/en-us/related/click?data=BAh7CjobZGVzdGluYXRpb25fYXJ0aWNsZV9pZGwrCBEJ4fyqEToYcmVmZXJyZXJfYXJ0aWNsZV9pZGwrCJHa8kGjEjoLbG9jYWxlSSIKZW4tdXMGOgZFVDoIdXJsSSJHL2hjL2VuLXVzL2FydGljbGVzLzE5NDI2MDg0NzE4ODY1LVNldHRpbmctdXAtYS1yb3V0ZXItd2l0aC1Ob3JkVlBOBjsIVDoJcmFua2kI--a67ded12d8cc20694e688e712d5db7bc684e6b0d
Invisibility on a local network: why we had to build a broken feature?,"Our goal at NordVPN is to provide our customers with intuitive experiences, ease of access, and the most advanced VPN features in the industry. We take pride in our continuous focus on security; however, sometimes, it comes with the cost of building a terrible feature. Here's why.
We recently found ourselves facing a Catch-22 situation, when, due to bugs in Apple's VPN API configuration, we had to choose to either sacrifice our users' experience with the app or, under certain scenarios, put a risk on their security or privacy. We believe such a choice should never occur in the first place, and we suspect that a global tech powerhouse often boasting about its focus on users' privacy understands this as well. As of yet, we are saddened by the fact that our pleas for Apple to implement the necessary fixes on their operating systems continue to be acknowledged yet bafflingly ignored.
Being limited in what we can do on our side, we decided to offer a feature that, while aiming to offer the best possible solution security-wise, radically differs from our vision of an intuitive and smooth experience users should expect from their cybersecurity provider.
Stay invisible on a local network feature is our way to mitigate the TunnelCrack and TunnelVision vulnerabilities present in the VPN industry. In the case of TunnelCrack, certain routers may be configured in a way where they leak VPN traffic when using non-RFC1918 IP addresses, which is an industry-wide issue and only applies to macOS and iOS platforms. TunnelVision attack, in general, is a network technique that uses an operating system's dynamic host configuration protocol (DHCP) to try to route the traffic outside of the VPN's tunnel.
For our macOS VPN clients, the “Stay invisible on a local network” feature automatically sets the appropriate API parameters and alerts users when connected to an unsafe network, mitigating the VPN traffic leak on macOS. We have also built an unsecured network detection feature that will detect non-RFC1918 IP ranges, notify about possible risks, and inform users to enable “Stay invisible on a local network.” On iOS, the app will also inform users when they connect to an unsecured network through push notifications and in-app messages. The feature was fully released by the beginning of August 2023.
In contrast, our iOS VPN clients present more considerable challenges due to issues within Apple's implementation of the API parameters. Notably, in iOS versions 14.2 and above, enabling the ""Stay invisible on a local network"" feature causes internet connections to crash under certain conditions. It also prevents our VPN application from receiving client updates, leading to user internet connection crashes when updates are released.
The NordVPN team hopes that this inevitably crude solution for an impossible situation will, for the time being, offer sufficient data privacy for our users and – at the same time – prompt Apple to implement the necessary changes faster.
What OS are impacted?
The TunnelCrack and TunnelVision vulnerabilities affect our macOS and iOS VPN clients, while our Android, Linux, and Windows clients were immune due to implemented mitigations.
NordVPN Linux and Windows applications can configure the OS's firewall to prevent any traffic from exiting the device except through the VPN tunnel.
What connectivity limitations are put in place when this feature is turned ON?
With the feature turned ON, users cannot access other network devices, such as computers, printers, or TVs. The feature also blocks AirDrop usage.
What experience-breaking effects can users expect?
Enabling the feature in iOS 16.4 and later versions can prevent the NordVPN application from receiving client updates, leading to crashes of the user's internet connection when updates are released. Once users are cut off from the internet, the only solution is a device restart.
How can users ensure the safety of their data in NordVPN apps?
NordVPN apps do not leak traffic under any known circumstances if the Stay invisible on a local network and Kill Switch features are enabled within the app settings menu. It’s important to note that the feature is only available to iOS versions 16 and above. Visual instructions on [how to enable the feature on iOS](https://support.nordvpn.com/hc/en-us/articles/20225046536593-What-is-an-unsafe-local-network-on-iOS) or how to enable this feature on macOS.
Does the feature protect users from TunnelVision utilizing Option 121, too?Yes, it does.
Can NordVPN provide a bug-free solution without Apple's input?
No. Unfortunately, the bugs that come with using our feature are beyond our control. Apple's team has confirmed the bugs' existence and gave no clear timeline for their resolution.
What else can users do to ensure a better experience using this feature?
We believe that sufficiently maintained digital security is a collective effort. While we will continue searching for better solutions within our capacity, we are adamant that Apple needs to address the urgent issues of significant bugs in their operating systems. We invite everyone who is not indifferent to user privacy and security issues to keep pressuring Apple to fix its shortcomings in VPN API service.",https://support.nordvpn.com/hc/en-us/related/click?data=BAh7CjobZGVzdGluYXRpb25fYXJ0aWNsZV9pZGwrCBF8VPDrFjoYcmVmZXJyZXJfYXJ0aWNsZV9pZGwrCJHa8kGjEjoLbG9jYWxlSSIKZW4tdXMGOgZFVDoIdXJsSSJrL2hjL2VuLXVzL2FydGljbGVzLzI1MjAyNjA1MTk0MjU3LUludmlzaWJpbGl0eS1vbi1hLWxvY2FsLW5ldHdvcmstd2h5LXdlLWhhZC10by1idWlsZC1hLWJyb2tlbi1mZWF0dXJlBjsIVDoJcmFua2kJ--f6d53c4fe60cc850559255379491882f50189d2f
"Set up MS Office, OneDrive or Adobe Cloud","If you are experiencing issues with accessing Microsoft services such as Microsoft Office, OneDrive, or Office 365 while connected to NordVPN on your Windows PC, please follow one of the troubleshooting methods below:
1. Disable Threat Protection Pro™ or Threat Protection (depending on which one you use) in the app settings.
2. [Change the DNS server addresses](https://support.nordvpn.com/hc/en-us/articles/19920692061969-Changing-DNS-server-addresses-for-MS-Office-OneDrive).",https://support.nordvpn.com/hc/en-us/related/click?data=BAh7CjobZGVzdGluYXRpb25fYXJ0aWNsZV9pZGwrCBHPDlOzFDoYcmVmZXJyZXJfYXJ0aWNsZV9pZGwrCJHa8kGjEjoLbG9jYWxlSSIKZW4tdXMGOgZFVDoIdXJsSSJPL2hjL2VuLXVzL2FydGljbGVzLzIyNzYwNDI1MTgwOTQ1LVNldC11cC1NUy1PZmZpY2UtT25lRHJpdmUtb3ItQWRvYmUtQ2xvdWQGOwhUOglyYW5raQo%3D--fc971a02c4134ff6c03f195b2dfc88434d04f54d
How to start using NordVPN,"If you are interested in starting to use the NordVPN service but are unsure how to do so, this article will introduce you to the steps needed to begin using NordVPN today.
In this article we will cover:
* [Downloading NordVPN](
* [Installing NordVPN](
* [Purchasing a NordVPN plan](
* [Connecting to NordVPN](
* [Connecting to NordVPN on Linux](
* [Additional NordVPN features](
## Downloading NordVPN
To begin using NordVPN, you will first need to download the application for your respective device:
* Download the NordVPN application for Windows
* Download the NordVPN application for macOS
* Download the NordVPN application for Linux
* Download the NordVPN application for Android
* Download the NordVPN application for iOS
## Installing NordVPN
If you are not sure how to install and set up the application, choose the OS you're going to use and follow one of the guides below:
* Learn how to install NordVPN on Windows 7 and 8.1
* Learn how to install NordVPN on Windows 10 and 11
* Learn how to install NordVPN on macOS
* Learn how to install NordVPN on Linux
* Learn how to install NordVPN on Android
* Learn how to install NordVPN on iOS
Once the application has been set up, you need to purchase the desired plan.
## Purchasing a NordVPN plan
The following article will introduce you to [NordVPN Plans and Prices](https://support.nordvpn.com/hc/en-us/articles/19744251757841-Plans-and-prices-of-NordVPN-service). And if you're uncertain how to proceed with the purchase, read the article on [purchasing a NordVPN subscription](https://support.nordvpn.com/hc/en-us/articles/19478048190481-How-to-purchase-a-NordVPN-subscription).
Once you have an active subscription, you need to connect to NordVPN.
## Connecting to NordVPN
In order to connect to NordVPN, follow along below:
1. Use the quick connect button:Alternatively, you can use the dots on the map to connect to specific locations.
2. Click the dot in a country:Lastly, you may also use the search bar.
3. Type in the name of the country you would like to connect to:
### Connecting to NordVPN on Linux
To connect on a Linux device, you will need to type in the following commands :
```
nordvpn connect
```
```
nordvpn c
```
To connect to specific servers, use:
```
nordvpn connect
```
(eg. nordvpn connect uk715)
Follow our article on how to [connect to NordVPN using Linux Terminal](https://support.nordvpn.com/hc/en-us/articles/20164827795345-Connect-to-NordVPN-using-Linux-Terminal).
That's it! Now you can begin using the app and investigating the different features.
## Additional NordVPN features
Here you can find some articles covering NordVPN's features:
* [Different NordVPN server categories explained](https://support.nordvpn.com/hc/en-us/articles/19479130821521-Different-NordVPN-server-categories-explained)
* [NordVPN Kill Switch: how does it work](https://support.nordvpn.com/hc/en-us/articles/19509682644369-NordVPN-Kill-Switch-how-does-it-work)
* [What is Threat Protection Pro™ and Threat Protection?](https://support.nordvpn.com/hc/en-us/articles/19508765521425-What-is-Threat-Protection-Pro-and-Threat-Protection)
* [Dedicated NordVPN IP addresses](https://support.nordvpn.com/hc/en-us/articles/19507808024209-Dedicated-NordVPN-IP-addresses)",https://support.nordvpn.com/hc/en-us/related/click?data=BAh7CjobZGVzdGluYXRpb25fYXJ0aWNsZV9pZGwrCJFpIBV0EjoYcmVmZXJyZXJfYXJ0aWNsZV9pZGwrCBHuvf6BEjoLbG9jYWxlSSIKZW4tdXMGOgZFVDoIdXJsSSJBL2hjL2VuLXVzL2FydGljbGVzLzIwMjg5Nzc5OTUyMDE3LUhvdy10by1zdGFydC11c2luZy1Ob3JkVlBOBjsIVDoJcmFua2kG--682ca0ec0ccc10774c37a2f36ffca9d978ee33d5
Connect to NordVPN with Firefox extension,"## Setting up NordVPN extension on Firefox
You can get the [VPN service for Firefox](https://nordvpn.com/download/firefox-extension/) from the [Firefox website for extensions](https://addons.mozilla.org/en-US/firefox/addon/nordvpn-proxy-extension/).
1. To install the extension click Add to Firefox.
2. Afterward, you will be prompted to grant permission for this application, click Add.
3. After that, you will be asked to allow the extension to run in a private window, check this and click ""Okay"". 
4. After the installation is finished NordVPN logo will appear on the Toolbar on the top right corner of the browser.
5. Click on the NordVPN logo and you will be prompted to sign in, use your NordVPN credentials to do so. 
## Using and customizing the NordVPN Firefox Extension
Let's look at how you can make the first connection and adjust the extension settings to suit your needs. 
1. Protected status: when you connect to a NordVPN server, this bar will confirm that your connection is successful by displaying the status as Protected.
2. Quick Connect: the fastest way to begin using the NordVPN extension. After pressing Quick Connect, you'll be immediately connected to a NordVPN server.
3. Search: whereas the Quick Connect option will decide on a server location for you, this option allows you to specify the country of the NordVPN server.
4. Settings: here, you can find your General, Connection, Security and privacy settings.General: in these settings, you can find your subscription information, application appearance, language preferences, and a function to import and export [split tunneling](https://support.nordvpn.com/hc/en-us/articles/20321703651985-Split-Tunneling-feature-on-NordVPN-extension) settings.Connection: when accessing connection settings, you can choose to automatically connect to NordVPN servers or add URLs that you wish to be excluded from the NordVPN connection.Security and privacy: enable the [WebRTC](https://support.nordvpn.com/hc/en-us/articles/20318383008529-How-to-stop-WebRTC-leaks) Leaks option and the [Threat Protection](https://support.nordvpn.com/General-info/Features/1047407402/What-are-Threat-Protection-and-Threat-Protection-Lite.htm) feature. Also, choose to turn on security warnings for suspicious websites.
5. Support Assistance: more information about the extension and live chat with an agent option can be found here.
6. Notifications: updates and news about the NordVPN extension.
7. Main extension window: If you click here, you can open the main extension window.
8. List of Recently Connected Countries: This section displays the countries to which you have established a recent connection. In case you haven't connected to any server yet, you will find recommendations for countries to connect to.",https://support.nordvpn.com/hc/en-us/related/click?data=BAh7CjobZGVzdGluYXRpb25fYXJ0aWNsZV9pZGwrCJGWbEKCEjoYcmVmZXJyZXJfYXJ0aWNsZV9pZGwrCBHuvf6BEjoLbG9jYWxlSSIKZW4tdXMGOgZFVDoIdXJsSSJQL2hjL2VuLXVzL2FydGljbGVzLzIwMzUwNjY5NDYxMTM3LUNvbm5lY3QtdG8tTm9yZFZQTi13aXRoLUZpcmVmb3gtZXh0ZW5zaW9uBjsIVDoJcmFua2kH--cf73dd7841540f1091fe85d1d490f899148f7ff5
VPN for Amazon Prime: how to watch it securely,"Amazon Prime provides a wealth of exclusive content, and to access it safely from any location, a VPN is an excellent choice. By using NordVPN, your connection is securely encrypted, safeguarding your data from hackers and unwanted surveillance. This article will show you how to access the Amazon Prime streaming service with NordVPN.
Table of contents:
* [Required NordVPN servers](
* [Troubleshooting steps](
## Required NordVPN servers
VPN not only allows you to overcome geo-restrictions on Amazon Prime, but it also protects your connection by encrypting your data. This keeps your information secure and private, safeguarding it from hackers and unwanted surveillance while you're streaming. While connected to [NordVPN servers](https://nordvpn.com/servers/), you can safely access Amazon Prime services in the following countries:
* United States
* Japan
* Canada
* United Kingdom
* Australia
* Italy
* France
* Germany
* New Zealand
* and others
Please note that you should only access Amazon Prime in the same region as is stated in the payment details of your Amazon Prime subscription. The terms and conditions of Amazon Prime do not allow you to change the region of your streaming library to one that is different from your billing address.
## Troubleshooting steps
Using a VPN for streaming can lead to several issues, like interruptions or difficulty accessing content, which can impact your overall experience.
If you're having trouble connecting, try these solutions to resolve the issue:
* Connect to a different server in the same region of your wished streaming content.
* Clear your browser’s cache or test a different browser on your device.
* [Change your DNS addresses to NordVPN's](https://support.nordvpn.com/hc/en-us/articles/19587726859793-What-are-NordVPN-DNS-server-addresses).
* Disable location services on your device.
If the above fails to resolve your issue, please check our troubleshooting steps for streaming. For any additional questions on how to [stream securely](https://nordvpn.com/features/streaming/) using a VPN for Amazon Prime, [contact our customer support](https://support.nordvpn.com/hc/en-us/articles/19482416296593-How-can-I-reach-NordVPN-customer-support).
Under certain circumstances, streaming content (using video on demand, online TV platforms, or other sources) that is only accessible outside your country of residence may be illegal. Always check if you have the legal authority to access the material you wish to stream.
The NordVPN service should never be used to bypass copyright or other regulations. NordVPN does not promote, induce, or otherwise facilitate the use of the service for such purposes. For more details, please read our [General Terms of Service](https://my.nordaccount.com/legal/terms-of-service/) and the [NordVPN Additional Terms](https://my.nordaccount.com/legal/terms-of-service/nordvpn/).",https://support.nordvpn.com/hc/en-us/related/click?data=BAh7CjobZGVzdGluYXRpb25fYXJ0aWNsZV9pZGwrCBHXhubKEToYcmVmZXJyZXJfYXJ0aWNsZV9pZGwrCJEgsuKuEToLbG9jYWxlSSIKZW4tdXMGOgZFVDoIdXJsSSJUL2hjL2VuLXVzL2FydGljbGVzLzE5NTYzMTQ4NjYyNTQ1LVZQTi1mb3ItQW1hem9uLVByaW1lLWhvdy10by13YXRjaC1pdC1zZWN1cmVseQY7CFQ6CXJhbmtpCQ%3D%3D--1682d502de2ae02ff3e5bed2870a54f9e309a98a
How to connect to your dedicated IP on Windows,"With a NordVPN dedicated IP, you get faster speeds, less CAPTCHA requests and increased security. NordVPN's dedicated IP is a unique IP that is assigned to a specific server, which ensures that you have your own private connection.
In this article, we will cover how to locate and connect to your [dedicated IP](https://nordvpn.com/features/dedicated-ip/) on Windows.
In order for you to be able to connect, first double-check if you have done the following:
1. Purchased a dedicated IP;
2. Set up the dedicated IP in Nord Account.
If these steps are done, you can move forward and connect to your dedicated IP in the NordVPN app on:
* [ Windows 7 and 8.1](
* [Windows 10 and 11](
For additional information, you can also read [our article about NordVPN's dedicated IP and how it works](https://support.nordvpn.com/hc/en-us/articles/19507808024209-Dedicated-NordVPN-IP-addresses).
## On Windows 7 and 8.1:
To connect to NordVPN dedicated IP on Windows 7 and 8.1, follow these steps:
1. Open the NordVPN application.
2. Go to the dedicated IP category on the left. 
3. Hover over dedicated IP, and click on the three-dot button:
4. Select fastest for your country and server, and click connect:
You may also use the search bar located in the top-left corner of the application window to connect to your dedicated IP:
1. Enter your dedicated IP country, and server number:
2. Tap your dedicated IP to connect:
## On Windows 10 and 11:
To connect to NordVPN dedicated IP on Windows 10 and 11, follow the steps below:
1. Open your NordVPN application.
2. Click specialty servers:
3. Hover over dedicated IP and click the three-dot menu:
4. Click connect.
You may also use the search bar located in the top-left corner of the application window to connect to your dedicated IP:
1. Type in your dedicated ip into the search bar:
2. Click your dedicated IP to connect:
After completing the steps, you will have connected to your dedicated IP successfully. If you wish to test your connection, visit [NordVPN's DNS leak checker website](https://nordvpn.com/dns-leak-test/).
Please be aware that your email will be linked to that dedicated IP address.",https://support.nordvpn.com/hc/en-us/related/click?data=BAh7CjobZGVzdGluYXRpb25fYXJ0aWNsZV9pZGwrCJGQ2fucEjoYcmVmZXJyZXJfYXJ0aWNsZV9pZGwrCBHuvf6BEjoLbG9jYWxlSSIKZW4tdXMGOgZFVDoIdXJsSSJVL2hjL2VuLXVzL2FydGljbGVzLzIwNDY1NDQ5NTM3NjgxLUhvdy10by1jb25uZWN0LXRvLXlvdXItZGVkaWNhdGVkLUlQLW9uLVdpbmRvd3MGOwhUOglyYW5raQg%3D--622815ce0939cc26840be1f69f705cbc733b37e1
Split Tunneling feature on NordVPN extension,"Split Tunneling in NordVPN proxy extension is a feature that allows you to split your browser traffic. If some websites do not work with a VPN or you simply do not want to have the traffic routed through a VPN you can bypass URLs and domains. In other words, it allows you to specify the URLs and domains you want to access with your real IP address and unencrypted traffic.",https://support.nordvpn.com/hc/en-us/related/click?data=BAh7CjobZGVzdGluYXRpb25fYXJ0aWNsZV9pZGwrCJFq7YN7EjoYcmVmZXJyZXJfYXJ0aWNsZV9pZGwrCBHuvf6BEjoLbG9jYWxlSSIKZW4tdXMGOgZFVDoIdXJsSSJTL2hjL2VuLXVzL2FydGljbGVzLzIwMzIxNzAzNjUxOTg1LVNwbGl0LVR1bm5lbGluZy1mZWF0dXJlLW9uLU5vcmRWUE4tZXh0ZW5zaW9uBjsIVDoJcmFua2kJ--e56a9083537fca484f5aa3eb0c03d089d3149768
Can my ISP see that I’m using NordVPN?,"When you connect to a [NordVPN server](https://nordvpn.com/servers/), your [ISP can see that you’re connected to an IP owned by a VPN service](https://nordvpn.com/blog/can-isp-see-vpn/). It might also know the time of your connection and the port your VPN protocol is using. Plus, the provider will see the amount of traffic traveling to and from your device.",https://support.nordvpn.com/hc/en-us/related/click?data=BAh7CjobZGVzdGluYXRpb25fYXJ0aWNsZV9pZGwrCBEPx%2BLQEToYcmVmZXJyZXJfYXJ0aWNsZV9pZGwrCBHuvf6BEjoLbG9jYWxlSSIKZW4tdXMGOgZFVDoIdXJsSSJPL2hjL2VuLXVzL2FydGljbGVzLzE5NTg4ODU1NTY2MDk3LVdoYXQtZG9lcy1JU1Atc2VlLXdoZW4tSS1tLXVzaW5nLU5vcmRWUE4GOwhUOglyYW5raQo%3D--b86e4bd8f1a304d547fda89559b89fbd5eb7ecae
What does NordVPN hide from my ISP?,"In essence, your service provider only knows that your actual online traffic is hidden from them. That means it loses access to the following information:",https://support.nordvpn.com/hc/en-us/related/click?data=BAh7CjobZGVzdGluYXRpb25fYXJ0aWNsZV9pZGwrCBEPx%2BLQEToYcmVmZXJyZXJfYXJ0aWNsZV9pZGwrCBHuvf6BEjoLbG9jYWxlSSIKZW4tdXMGOgZFVDoIdXJsSSJPL2hjL2VuLXVzL2FydGljbGVzLzE5NTg4ODU1NTY2MDk3LVdoYXQtZG9lcy1JU1Atc2VlLXdoZW4tSS1tLXVzaW5nLU5vcmRWUE4GOwhUOglyYW5raQo%3D--b86e4bd8f1a304d547fda89559b89fbd5eb7ecae
Why does the ISP still see some information?,"Your ISP still sees some information because your service provider connects you to the websites you want to visit. You send it a data package, which works as a request, and the ISP sends it to the correct destination. When you connect to NordVPN, you tell it to send that request to the VPN server.",https://support.nordvpn.com/hc/en-us/related/click?data=BAh7CjobZGVzdGluYXRpb25fYXJ0aWNsZV9pZGwrCBEPx%2BLQEToYcmVmZXJyZXJfYXJ0aWNsZV9pZGwrCBHuvf6BEjoLbG9jYWxlSSIKZW4tdXMGOgZFVDoIdXJsSSJPL2hjL2VuLXVzL2FydGljbGVzLzE5NTg4ODU1NTY2MDk3LVdoYXQtZG9lcy1JU1Atc2VlLXdoZW4tSS1tLXVzaW5nLU5vcmRWUE4GOwhUOglyYW5raQo%3D--b86e4bd8f1a304d547fda89559b89fbd5eb7ecae
What does ISP see when I’m using NordVPN?,"Can my internet service provider (ISP) track me down if I’m using NordVPN? Does NordVPN hide all online traffic from ISPs? These questions are commonly asked by people weighing their cybersecurity and online privacy options. In this article, we will explore what your ISP can see with NordVPN.
## Can my ISP see that I’m using NordVPN?
When you connect to a [NordVPN server](https://nordvpn.com/servers/), your [ISP can see that you’re connected to an IP owned by a VPN service](https://nordvpn.com/blog/can-isp-see-vpn/). It might also know the time of your connection and the port your VPN protocol is using. Plus, the provider will see the amount of traffic traveling to and from your device.
## What does NordVPN hide from my ISP?
In essence, your service provider only knows that your actual online traffic is hidden from them. That means it loses access to the following information:
* The websites you visit
* The specific web pages you browse and the time you spend there
* Your browsing and search history
* The files you download from or upload to unencrypted websites
* The info you type on unencrypted websites
## Why does the ISP still see some information?
Your ISP still sees some information because your service provider connects you to the websites you want to visit. You send it a data package, which works as a request, and the ISP sends it to the correct destination. When you connect to NordVPN, you tell it to send that request to the VPN server.
But from that point on, the VPN server takes over the package, and the ISP will never know its final destination.
To sum up, the ISP sees the following information when you use NordVPN:
* The IP address of the VPN server
* The timestamp of when you connected
* The port your VPN protocol is using
* The amount of data you’re sending or receiving
* Encrypted and unreadable data traveling between you and the VPN server
So use a [VPN to block ISP tracking](https://nordvpn.com/blog/isp-tracking/) and protect your privacy",https://support.nordvpn.com/hc/en-us/related/click?data=BAh7CjobZGVzdGluYXRpb25fYXJ0aWNsZV9pZGwrCBEPx%2BLQEToYcmVmZXJyZXJfYXJ0aWNsZV9pZGwrCBHuvf6BEjoLbG9jYWxlSSIKZW4tdXMGOgZFVDoIdXJsSSJPL2hjL2VuLXVzL2FydGljbGVzLzE5NTg4ODU1NTY2MDk3LVdoYXQtZG9lcy1JU1Atc2VlLXdoZW4tSS1tLXVzaW5nLU5vcmRWUE4GOwhUOglyYW5raQo%3D--b86e4bd8f1a304d547fda89559b89fbd5eb7ecae
Split Tunneling is not working on NordVPN,"Find out how to solve this issue below.
## The allowlisted app has no internet connection
If NordVPN’s split tunneling is blocking the internet access on an allowlisted application, follow these steps:
* Reset the application. [Find the reset instructions](https://nordvpn.zendesk.com/hc/en-us/articles/20323582191505) in this article.
* Reinstall the NordVPN application.
* In case you are using any antivirus software, allowlist the NordVPN app in the settings of your antivirus app. By default, NordVPN is located in C:\Program Files\NordVPN.
* Reset the network. Keep in mind that this also resets Wi-Fi networks and passwords, VPN, and APN settings you’ve used before. Here is how you can do that:
1. Open the NordVPN app, go to Settings, and open the General section.
2. Find Diagnostics and click on Run Diagnostics Tool. Then, select Network Flush.
3. Lastly, wait for the commands to finish running and restart your computer.
## The allowlisted app is still routed through a VPN
If you have added the application to the allowlist and it is still routed through a VPN, please [contact NordVPN customer support](https://nordvpn.zendesk.com/hc/en-us/articles/19482416296593).",https://support.nordvpn.com/hc/en-us/related/click?data=BAh7CjobZGVzdGluYXRpb25fYXJ0aWNsZV9pZGwrCJHIlTcFEzoYcmVmZXJyZXJfYXJ0aWNsZV9pZGwrCBEe9MByEjoLbG9jYWxlSSIKZW4tdXMGOgZFVDoIdXJsSSJQL2hjL2VuLXVzL2FydGljbGVzLzIwOTEzMTI4MzI3MzEzLVNwbGl0LVR1bm5lbGluZy1pcy1ub3Qtd29ya2luZy1vbi1Ob3JkVlBOBjsIVDoJcmFua2kK--318136d462bdca0095ef05ec0cc1f43a4954672b
Manual OpenVPN connection setup on iOS 15,"Note: The OpenVPN app supports only 15 and newer versions of iOS.
Please follow these OpenVPN setup instructions on your [iOS 15 device](https://nordvpn.com/download/ios/):
1. Go to the App Store on your iPhone/iPad.
2. Tap on Search bar.
3. Enter ""openvpn connect"" in the search bar.
4. Find the OpenVPN Connect application and tap on its installation button.
5. Once the app is installed, download the .ovpn configuration file. You may also use [NordVPN server recommendation tool](https://my.nordaccount.com/dashboard/nordvpn/manual-configuration/server-recommendation/).
Follow the steps below to find the manual connection configuration files:
1. Log into your [Nord Account](https://my.nordaccount.com/), and click NordVPN.
2. Scroll down to Advanced Settings and click Set up NordVPN manually.
3. Select the OpenVPN configuration files tab.
4. Find the server you wish to connect to by using the Search bar or by scrolling down and download it by clicking Download UDP or Download TCP.
5. When connecting to OpenVPN & IKEv2 manually, you're going to need to use the Username and Password from the Service credential tab.
1. When the configuration is downloaded, select the Downloads button in the top right corner. After that, click on the downloaded configuration.
2. When the downloaded configuration opens up, select Share button in the top right corner.
3. In the Share sheet, tap Copy to OpenVPN button.
4. Inside the OpenVPN application, select File and tap Add to add the imported configuration.
5. You will get a pop-up asking for permission to add OpenVPN to your VPN configurations. Click Allow.
6. Enter your NordVPN service credentials.
Follow the steps below to find the service credentials for manual connection setup:
1. Log into your [Nord Account](https://my.nordaccount.com/), click NordVPN, and, under Manual setup, click on Service credentials. Here you'll find the Username and Password needed to connect manually.
1. Tap on the switch of the imported configuration to connect to a VPN server.
2. To change a server, tap on the slider button to disconnect. Tap on another imported profile to connect to the other server.
3. To disconnect, tap on the same button you used to connect.",https://support.nordvpn.com/hc/en-us/related/click?data=BAh7CjobZGVzdGluYXRpb25fYXJ0aWNsZV9pZGwrCBFiLo6bEjoYcmVmZXJyZXJfYXJ0aWNsZV9pZGwrCBHS5seBEjoLbG9jYWxlSSIKZW4tdXMGOgZFVDoIdXJsSSJQL2hjL2VuLXVzL2FydGljbGVzLzIwNDU5MzE0NjM1MjgxLU1hbnVhbC1PcGVuVlBOLWNvbm5lY3Rpb24tc2V0dXAtb24taU9TLTE1BjsIVDoJcmFua2kG--f6fd2443bd3aee6519fecf50e315b93f7171e3b3
How to connect to NordVPN with IKEv2/IPSec on iOS,"In this guide, we will cover how to set up an IKEv2 manual connection on an [iOS device (iPhone/iPad)](https://nordvpn.com/download/ios/).
Even though the [IKEv2/IPSec protocol is no longer supported on iOS](https://support.nordvpn.com/hc/en-us/articles/20226405871761-IKEv2-IPSec-protocol-is-no-longer-supported-on-iOS-and-macOS) on NordVPN 8.10.1 and newer app versions, this connection method can be used as one of the alternative ways to connect to NordVPN servers if you're unable to install the application.
This setup lacks the additional features of the native NordVPN app and requires more steps to set up.
## Manual connection setup
1. Download the NordVPN IKEv2 certificate to your device. You can do so by opening this link in Safari:
2. The certificate installation dialogue will appear. Tap Install in each step:
3. Once the certificate is installed, tap Done to complete the installation.3.1. On iOS 12.2 and later versions, after you download the certificate, you might see a pop-up saying ""Profile Downloaded - Review the profile in Settings app if you want to install it"".3.2. Navigate to your device Settings > Profile Downloaded > NordVPN Root CA > Install > Trust.If you cannot see the Profile Downloaded button, go to Settings > General > Profiles. You should find the downloaded profile there.
4. Now you have to determine which server to connect to. Go to . The tool will pick a server recommended for you. In our case, the recommended server is US #810 with the hostname us810.nordvpn.com. We will use this server as a reference in all further steps.
Follow the steps below to find the best server for your connection:
1. Log into your [Nord Account](https://my.nordaccount.com/), and click NordVPN.
2. Scroll down to Advanced Settings and click Set up NordVPN manually.
3. Select the Server recommendation tab. According to your location, the best server will be recommended.
4. By pressing Advanced filters you can further customize the recommended servers by selecting the Server type and the Security protocol.
5. Under the server IP, next to Available protocols, select IKEv2/IPSec.
6. In the window that pops up, copy the server hostname and use it in your IKEv2 manual connection setup.
7. When connecting to IKEv2 manually, you're going to need to use the Username and Password from the Service credential tab.
1. Go to Settings > General > VPN.Note: If you are using a newer version of iOS (15+) find the VPN setting section by the following pathway:General > VPN & Device Management > VPN
2. Tap on Add VPN Configuration...
3. Fill the boxes as follows:Type: IKEv2Description: Any preferred name for the VPN connectionServer: The hostname of the server (see step 4)Remote ID: The same hostname as in the Server fieldLocal ID: Leave emptyUser Authentication: UsernameUsername: Your NordVPN service usernamePassword: Your NordVPN service passwordYou can find your NordVPN service credentials (username and password) through the [Nord Account dashboard](https://my.nordaccount.com/dashboard/nordvpn/):
Follow the steps below to find the service credentials for manual connection setup:
1. Log into your [Nord Account](https://my.nordaccount.com/), click NordVPN, and, under Manual setup, click on Service credentials. Here you'll find the Username and Password needed to connect manually.
Proxy: OffTap Done.
1. To enable the VPN, go back to the device Settings and click on the toggle switch next to VPN.",https://support.nordvpn.com/hc/en-us/related/click?data=BAh7CjobZGVzdGluYXRpb25fYXJ0aWNsZV9pZGwrCJGGbiWHEjoYcmVmZXJyZXJfYXJ0aWNsZV9pZGwrCBHS5seBEjoLbG9jYWxlSSIKZW4tdXMGOgZFVDoIdXJsSSJYL2hjL2VuLXVzL2FydGljbGVzLzIwMzcxNjU3ODg1MzI5LUhvdy10by1jb25uZWN0LXRvLU5vcmRWUE4td2l0aC1JS0V2Mi1JUFNlYy1vbi1pT1MGOwhUOglyYW5raQc%3D--56664c8a16a142dc020ca5a202ab44d70f634c0f
Installing the NordVPN app on iPhone or iPad,"This tutorial will teach you how to install and use [NordVPN on an iPhone and iPad](https://nordvpn.com/download/ios/).
## Table of contents:
* Downloading and setting up
* Connecting to servers
* [Profile information](
* [Settings](
## Downloading and setting up the app
1. Open the App Store.
2. Search for ""NordVPN.""Note: NordVPN may not appear in the App Store in certain regions with VPN restrictions. If that’s the case, follow our guide on downloading the NordVPN app for iPad and iPhone from such locations.
3. Tap the ""Download"" button.
4. Once the download is finished, tap the ""Open"" button. 
5. The NordVPN app will ask if you want to register a new account. If you already have a NordVPN account, click Log in at the bottom of the screen. If you don't have an account, press Sign up to go to [Nord Account](https://nordaccount.com/signup/) for account creation. There, enter your email address and press Continue. Once you sign up, you will be brought back into the NordVPN app to pick your plan. 
6. Once you’re done, you will see a privacy notification. Click “Agree and continue.”
## Connecting to NordVPN servers
1. Once logged in, you will see a map and the Quick Connect button. Press this button to automatically connect to a server recommended by our smart algorithm based on your needs and preferences.
2. When connecting for the first time, you will be asked to allow NordVPN to add VPN configurations. This is a [standard warning message](https://nordvpn.com/blog/ios-filtering-traffic-vpn/) – VPN configurations are necessary for connecting to VPN servers. Since NordVPN is a respectable VPN service provider, tap Allow to continue.
3. If you are using Touch ID, you will be asked to confirm your choice with your fingerprint.
4. Once connected, you will see the “Connected to (country)” message above the map, and that country’s map pin will turn green. A VPN icon will also appear in the status bar along the upper edge of the screen. 
## Choosing between different servers
1. Tap a country pin and press Quick Connect to automatically connect to the best server for you in that country.
2. You can also view all available countries and specialty servers by swiping up from the bottom of the app when no country pin is selected. Then, tap on your chosen country to automatically connect to a server.
3. You can tap on the three dots next to a country's name to select a specific city. NordVPN will rank the available servers based on your needs.
4. You can also tap ""Search"" to find a specific server using its server number.
## Profile information
1. While on the map screen, you can tap the profile icon in the bottom-right corner to access your profile information, shortcuts, and settings.
2. Here you will be able to see your subscription details (1), your security dashboard (2), shortcuts (3), settings (4), and Meshnet overview (5).
## Dark Web Monitor
Once enabled, this feature automatically scans the internet for any leaked credential associated with your registered NordVPN e-mail address. The NordVPN app will immediately notify you if Dark Web Monitor detects your credentials on underground websites. Read more about the feature's usefulness on our [Dark Web Monitor page](https://nordvpn.com/features/dark-web-monitor/).
## Security Score
These steps will tell you how to fully protect yourself with NordVPN.
## Threat Protection
This NordVPN feature blocks intrusive ads and malicious domains through DNS filtering. Keep in mind that you need to be connected to a NordVPN server and enable the [Threat Protection](https://nordvpn.com/features/threat-protection/) feature for it to work.
## Multi-Factor Authentication
Multi-factor authentication (MFA) is a security feature that helps protect access to your account. With MFA enabled, you must pass an extra security step (usually by supplying a code generated by an authenticator app) to log in to NordVPN. We offer detailed guidance on how to enable MFA for NordVPN.
## Meshnet
Meshnet is a new NordVPN feature that allows you to create a secure, private network for many devices located anywhere in the world, access them remotely, and send all your online traffic through another device.
## Settings
## VPN connection
## 
Protocol: Switch between Nordlynx, IKEv2, TCP, and UDP connection protocols. We have a detailed guide on which VPN protocol you should choose.Auto-connect: With auto-connect enabled, the NordVPN app will automatically connect you to NordVPN whenever your phone is on and connected to a Wi-Fi network. In the “Trusted Wi-Fi networks” section, you can disable auto-connect for specific networks. For example, you can make an exception for a trusted home Wi-Fi network.Reset VPN profile: Reset the VPN configuration on your device.
## General
Appearance: Choose your preferred application appearance, including switching to a dark theme.Notifications: Turn NordVPN app notifications on or off.Help us improve: Send us anonymous data to help improve our services.Siri shortcuts: Create specific Siri phrases to control the application hands-free.Subscription and privacy info: All your subscription-related information.Rate us on the App Store: Give our services a review on the App Store.Tell friends about NordVPN: Share information about our app with your friends and family.",https://support.nordvpn.com/hc/en-us/related/click?data=BAh7CjobZGVzdGluYXRpb25fYXJ0aWNsZV9pZGwrCJHbGd6wEToYcmVmZXJyZXJfYXJ0aWNsZV9pZGwrCBHS5seBEjoLbG9jYWxlSSIKZW4tdXMGOgZFVDoIdXJsSSJTL2hjL2VuLXVzL2FydGljbGVzLzE5NDUxMzM4MTUyODQ5LUluc3RhbGxpbmctdGhlLU5vcmRWUE4tYXBwLW9uLWlQaG9uZS1vci1pUGFkBjsIVDoJcmFua2kI--c1e372856b272687f955991d16e927938ddb3562
How to set up a manual connection on Windows using OpenVPN,"The OpenVPN GUI application is an alternative option to connecting to NordVPN servers on your Windows PC. If you prefer manual connection and tinkering with open-source software, this is a good way of connecting to NordVPN. That said, it lacks the additional features of the [NordVPN native app](https://support.nordvpn.com/hc/en-us/articles/19441140326289-Installing-and-using-NordVPN-on-Windows-7-and-8-1), but it still uses the same VPN protocol — OpenVPN. It's also more complicated to set up, so here are instructions to guide you through the process.
1. [Download the OpenVPN GUI application](https://build.openvpn.net/downloads/releases/).Note: Make sure to choose the application version according to your Windows device version:For Windows 64-bit;For Windows ARM64;For Windows 32-bit.
2. Open the installation file and follow the instructions in the setup wizard.
3. Once the application is installed, [download the NordVPN server configuration files](https://my.nordaccount.com/dashboard/nordvpn/manual-configuration/openvpn/). The OpenVPN app uses them to connect to specific NordVPN servers.
Follow the steps below to find the best server for your connection:
1. Log into your [Nord Account](https://my.nordaccount.com/), and click NordVPN.
2. Scroll down to Advanced Settings and click Set up NordVPN manually.
3. Select the Server recommendation tab. According to your location, the best server will be recommended.
4. By pressing Advanced filters you can further customize the recommended servers by selecting the Server type and the Security protocol.
In case you wish to select a specific server, follow these steps:
1. Under Set up NordVPN manually, select OpenVPN configuration files.
2. Find the server you wish to connect to by using the Search bar or by scrolling down and download it by clicking Download UDP or Download TCP.
3. When connecting to OpenVPN & IKEv2 manually, you're going to need to use the Username and Password from the Service credential tab.
1. Go to the folder where you downloaded the configuration files, select them all, then right-click and choose “Copy.”
2. Paste the configuration files to this directory:
```
C:\Program Files\OpenVPN\config\
```
5.1. To quickly find the OpenVPN\config\ folder, right-click the OpenVPN GUI shortcut on your desktop and select “Open file location.”5.2. Once you're there, click the parent OpenVPN folder in the address bar.Open the ""Config"" folder.5.3. Paste the copied configuration files in the folder by right-clicking anywhere in the folder and selecting ""Paste"":Click ""Continue"" to allow the files to be extracted to the folder.Note: if you are using Windows 10, add an extra line in the configuration files to prevent possible DNS leaks:
To do that, open the downloaded .ovpn configuration file with any text editor and paste this line:block-outside-dnsSave the file before proceeding to the next step of this tutorial.
3. Now that the configuration files are in the proper folder for the application to detect them, open the OpenVPN GUI app by double-clicking the shortcut on your desktop.
4. Allow the application to make changes to your device because they are necessary for a VPN connection.
5. The application will start running in the system tray, which is the notification area next to your device’s clock:It might also be in the hidden system tray area:
6. Right-click on the application icon, hover over one of the servers, and click “Connect.”
7. Enter your NordVPN service username and password, then click “OK.”
1. In a few seconds, the application will connect and close the window. The system tray icon will turn green and show your connection status when you hover over it.
And that's it! You should be successfully connected. To disconnect, right-click on the application icon, hover over the server, and click “Disconnect.”",https://support.nordvpn.com/hc/en-us/related/click?data=BAh7CjobZGVzdGluYXRpb25fYXJ0aWNsZV9pZGwrCJGgK032EToYcmVmZXJyZXJfYXJ0aWNsZV9pZGwrCBHS5seBEjoLbG9jYWxlSSIKZW4tdXMGOgZFVDoIdXJsSSJhL2hjL2VuLXVzL2FydGljbGVzLzE5NzQ5NTU0MzMxNzkzLUhvdy10by1zZXQtdXAtYS1tYW51YWwtY29ubmVjdGlvbi1vbi1XaW5kb3dzLXVzaW5nLU9wZW5WUE4GOwhUOglyYW5raQk%3D--7bb909b0c752d5ab8f61254aae0bddc77ac2b150
Installing NordVPN (App Store) version on macOS,"From October 17th, 2024, older applications will have a few function limitations. The issues can affect macOS applications version 8.27.2 and below. They can include not receiving notifications in the app and reduced Dark Web Monitoring and Meshnet functionality.To resolve the issue, please update your application to the latest version.
This article will help you set up the [NordVPN application on your Mac](https://nordvpn.com/download/mac/) and connect to a VPN server. Note: The NordVPN (App Store) app is compatible with macOS 11 and later versions.
## Table of contents:
* [Downloading and installing](
* [Setting up the application](
* [Connecting to servers](
* [NordVPN features menu](
* [NordVPN preference settings](
## Downloading and installing
1. Go to the [NordVPN app page in the App Store](https://apps.apple.com/us/app/nordvpn-vpn-fast-secure/id905953485#?platform=mac) or click download the App Store version of NordVPN on our downloads page:
2. Agree to Open App Store.
3. When the App Store launches, click on the blue Get button and choose to Install the app.
4. Once the download is finished, press the Open button.
## Setting up and using the application
1. Open your Launchpad and click on the NordVPN icon.
2. You can Log In or Sign Up in the top-right corner of the screen.
3. You will be redirected to your Nord Account. To log in, enter your registered email address and password. You can also sign in using your Google account or Apple ID or by entering a code. If you are a new user, you will need to create a [Nord Account](https://my.nordaccount.com/) by entering your email address and other required information.
4. After completing the above steps, you will be prompted to open the NordVPN app. Agree always to allow Nord Account and grant access to the app.
5. After a successful login, you will see the main NordVPN application window.Here, you can find NordVPN servers and navigate in the map itself, search bar, or specialty section.
## Connecting to servers
1. The Quick Connect button in the top-right corner will automatically connect you to a server.
2. To connect to a specific server, click on the Search field in the top-left corner of the app. Enter a country, a category, or a specific server number (e.g., Canada #1224) to find what you need.
3. All servers in the left sidebar are sorted by country and specialty.To connect to a specialty server, hover over one of the categories under [Specialty Servers](https://support.nordvpn.com/hc/en-us/articles/19479130821521-Different-NordVPN-server-categories-explained), and click on the three-dot menu to select a Country.
4. To connect to a specific country, click on it.
## NordVPN features menu
### Map

* Map - here, you can find and navigate NordVPN servers in the map itself, search bar, or specialty section
### Threat Protection Pro™/Threat Protection

* Threat Protection Pro™ is a special NordVPN feature that automatically blocks ads, trackers, and malicious URLs. When you visit a website known for scamming people, this feature displays an in-browser alert to warn you about possible fraud. Threat Protection Pro™ also scans downloads for malware and checks your apps for security vulnerabilities. Available with selected NordVPN plans, Threat Protection Pro™ can work without an active VPN connection. Learn more about[ Threat Protection Pro™](https://nordvpn.com/features/threat-protection/).If your NordVPN subscription doesn’t include Threat Protection Pro™, you can use the Threat Protection feature instead. It blocks intrusive ads and malicious domains based on DNS filtering and works whenever you’re connected to a VPN server. Threat Protection comes with all NordVPN plans.
### Meshnet

* The [Meshnet](https://nordvpn.com/meshnet/) feature helps you to access devices over encrypted tunnels. [Learn more about Meshnet](https://meshnet.nordvpn.com/getting-started/meshnet-explained).
### Dark Web Monitor

* [Dark Web Monitor](https://nordvpn.com/features/dark-web-monitor/) scans the internet for any credential leaks associated with your registered NordVPN e-mail address.
### Presets
Presets let you load up a specified set of configurations, including server number, type, protocol, and more. You can configure your settings to experience a smooth session, for e.g., so that a streaming service or a game loads up instantly!
#### How to set up presets?
Start at the preferences page. You can either edit an existing preset or create a new one by clicking Add new.Let's build it from scratch. After pressing Add new, you will see a menu with the settings you can use. Give the preset a name. Next, select from available VPN protocols. If you change the default setting Use recommended, you’ll be able to alter the server type. Here you can set a specialty server or any regular one as your type.Depending on the server availability, you may also have the choice of selecting a specific region.Finally, you can add either a web page or an app to the preset. It will be displayed under the preset name on the main screen. If you press Add link button, a field will appear for the URL of the website you would like easy access to. After inserting the URL, press Enter to register it. When you're done, press Save preset, and it will be added to the main screen.
### Statistics

* Statistics show you more information about your connection.
### Settings
To change application settings and find various features click on the gear icon at the bottom-left corner of the app:

* Settings tab displays the NordVPN app settings.
### Quick Help

* Here you can find your connection logs, a direct to our Help Center, or our customer support email.
## NordVPN settings
### General

* Launch the app on computer startup — toggle to open the NordVPN app automatically every time you turn your device on.
* VPN Protocol — this option will let you choose from 3 different [connection protocols](https://support.nordvpn.com/hc/en-us/articles/19482810153745-Which-NordVPN-protocol-should-I-choose) (OpenVPN UDP, OpenVPN TCP, and NordLynx).
* Help Us Improve — makes NordVPN better by sending us aggregated anonymous data.
### Auto-connect

* When using an untrusted network — toggle to automatically be connected to a VPN when you're connected to a network that is not added to a Trusted network list.
* Connect to — you can select a specific country from the list.
* The current network — shows the network you are currently connected to.
* Trusted network — you won't be automatically connected to a VPN while on a trusted Wi-Fi network.
### Kill Switch

* [Kill Switch](https://nordvpn.com/features/vpn-kill-switch/) prevents unprotected access to the internet when your VPN connection accidentally drops.
* Advanced Kill Switch is an additional layer of security that can be enabled to prevent WebRTC leaks. However, it functions separately from the system-wide Internet Kill Switch. Read [more information about Kill Switch](https://support.nordvpn.com/hc/en-us/articles/19509682644369-NordVPN-Kill-Switch-how-does-it-work).
* Stay invisible on a local network — this will let you [keep your device invisible on an unsafe local network](https://support.nordvpn.com/hc/en-us/articles/20225371443345-Staying-invisible-on-unsafe-local-networks-on-macOS).
### Appearance

* Appearance settings let you add an application to your dock and menu bar. Also, it lets you choose between dark and light modes.
### Other Apps

* Other Apps tab introduces other [Nord Security](https://nordsecurity.com/) products. As well as a scannable QR code that directly leads you to the NordVPN mobile app download.
### Account

* Account section shows your NordVPN profile and subscription information. Here you’ll also find links to [NordVPN Terms of Services](https://my.nordaccount.com/legal/terms-of-service/) and [Privacy Policy](https://my.nordaccount.com/legal/privacy-policy/).",https://support.nordvpn.com/hc/en-us/related/click?data=BAh7CjobZGVzdGluYXRpb25fYXJ0aWNsZV9pZGwrCJHa8kGjEjoYcmVmZXJyZXJfYXJ0aWNsZV9pZGwrCBHS5seBEjoLbG9jYWxlSSIKZW4tdXMGOgZFVDoIdXJsSSJUL2hjL2VuLXVzL2FydGljbGVzLzIwNDkyMzk1NDAzOTIxLUluc3RhbGxpbmctTm9yZFZQTi1BcHAtU3RvcmUtdmVyc2lvbi1vbi1tYWNPUwY7CFQ6CXJhbmtpCg%3D%3D--09ed0041c9809643188f21839ad0b56bafdae25e
Setting up TP-Link with NordVPN,"Do you want to use NordVPN with more than ten devices at the same time? Or set up a VPN connection on your router? Then an OpenVPN connection is a go-to choice.You can set up a NordVPN connection on TP-Link routers that have OpenVPN client settings available. For a complete list of compatible routers, please refer to [TP-Link documentation](https://community.tp-link.com/en/home/forum/topic/272492).
If your router is compatible with NordVPN, log in to the control panel of your TP-Link router. It can usually be accessed using one of the following IP addresses via an internet browser:192.168.0.1 or 192.168.1.1
1. Navigate to Advanced > VPN Client.
2. Enable VPN Client, then save the settings.
3. In the Server List section, click Add, and a new profile configuration window should show up.
4. In the pop-up window, fill in the available fields as follows:Description: NordVPN (or any name you choose)VPN Type: OpenVPNUsername: your NordVPN service usernamePassword: your NordVPN service password
5. You can find your NordVPN service credentials (service username and password) in the Nord Account dashboard: [https://my.nordaccount.com/login/.](https://my.nordaccount.com/login/)
Follow the steps below to find the service credentials for manual connection setup:
1. Log into your [Nord Account](https://my.nordaccount.com/), click NordVPN, and, under Manual setup, click on Service credentials. Here you'll find the Username and Password needed to connect manually.
1. Paste credentials to the router interface profile window.
2. Download OpenVPN client configuration files.
Follow the steps below to find the best server for your connection:
1. Log into your [Nord Account](https://my.nordaccount.com/), and click NordVPN.
2. Scroll down to Advanced Settings and click Set up NordVPN manually.
3. Select the Server recommendation tab. According to your location, the best server will be recommended.
4. By pressing Advanced filters you can further customize the recommended servers by selecting the Server type and the Security protocol.
In case you wish to select a specific server, follow these steps:
1. Under Set up NordVPN manually, select OpenVPN configuration files.
2. Find the server you wish to connect to by using the Search bar or by scrolling down and download it by clicking Download UDP or Download TCP.
1. After downloading the files, go back to the control panel of your router and click Browse in the pop-up window.
2. Navigate to the configuration file you’ve just downloaded and click Open.
3. Save the configured settings by clicking the Save button.In the Server List, enable the newly created NordVPN connection.In the Device List section, click on the Add button.
4. Choose the devices you wish to use the VPN connection on and click the OK button.
5. Enable VPN Access for the added devices by clicking on the slider.
Now, all of the devices that you have added to the Device List will have access to the VPN connection. To add any new devices, repeat steps 11 and 12.",https://support.nordvpn.com/hc/en-us/related/click?data=BAh7CjobZGVzdGluYXRpb25fYXJ0aWNsZV9pZGwrCJFNfu1xEjoYcmVmZXJyZXJfYXJ0aWNsZV9pZGwrCBFt0ZN6EjoLbG9jYWxlSSIKZW4tdXMGOgZFVDoIdXJsSSJGL2hjL2VuLXVzL2FydGljbGVzLzIwMjgwNTI1MDgyMDAxLVNldHRpbmctdXAtVFAtTGluay13aXRoLU5vcmRWUE4GOwhUOglyYW5raQY%3D--9efe47ca0a82a7cb57a8a5ef1c3751174903f0f1
Which routers don’t support NordVPN,"On 1 December 2018, NordVPN’s servers stopped supporting L2TP/IPsec and PPTP connections. More about that in [this article](https://nordvpn.com/blog/l2tp-pptp-protocol-update/).
If you use any of the routers listed below with their native firmware, you will not be able to use them with our service:
* Arris
* Belkin
* Cisco
* D-Link
* Huawei
* Linksys (except [WRT32X/WRT32XB AC3200](https://www.linksys.com/support-article?articleNum=270535))
* Nighthawk range routers ([unless the router is using DumaOS](https://www.netgear.com/home/online-gaming/))
* [Netgear](https://support.nordvpn.com/hc/en-us/articles/20282781982481-Can-I-set-up-Netgear-router-with-VPN)
* TRENDnet
* Tenda
* TotoLink
* Ubee
* Orbi
* Spectrum
* Xfinity
* Eero
* Verizon
* AT&T
* FRITZ!Box
* Most ISP-provided routers that were mentioned above
You can install the following custom firmware on some of the aforementioned models to make them work:
* DD-WRT:
* Tomato:
* Padavan:
* OpenWRT:
* Merlin:
## Other tips for router connectivity:
* If your router supports the OpenVPN protocol, search our knowledge base for the name of its manufacturer. You should find a tutorial on how to set it up. You can also check our [router tutorials](https://support.nordvpn.com/hc/en-us/sections/19326876055569-Router) section under the Connectivity category. If you cannot find the setup guide for your router, [contact our customer support](https://support.nordvpn.com/hc/en-us/articles/19482416296593-How-can-I-reach-NordVPN-customer-support) for help.
* If you want a router with out-of-the-box security and anonymity that NordVPN provides, head over to our partners at [FlashRouters](https://nordvpn.com/flashrouters/). They offer pre-configured routers delivering top-notch security and performance.
* Here is our list of [recommended routers for NordVPN](https://support.nordvpn.com/hc/en-us/articles/20195707547025-Which-router-should-I-use-with-NordVPN).",https://support.nordvpn.com/hc/en-us/related/click?data=BAh7CjobZGVzdGluYXRpb25fYXJ0aWNsZV9pZGwrCBEC9%2F2IEjoYcmVmZXJyZXJfYXJ0aWNsZV9pZGwrCBFt0ZN6EjoLbG9jYWxlSSIKZW4tdXMGOgZFVDoIdXJsSSJKL2hjL2VuLXVzL2FydGljbGVzLzIwMzc5NTg1Njc1NzkzLVdoaWNoLXJvdXRlcnMtZG9uLXQtc3VwcG9ydC1Ob3JkVlBOBjsIVDoJcmFua2kH--a150048520a63a621d419f4eeb2e1f4f48f3615c
EdgeRouter and Ubiquiti setup with NordVPN,"EdgeRouter routers with EdgeOS firmware version 2.0.9 and later support long passwords and can be used to establish a connection to our servers using the [OpenVPN protocol](https://support.nordvpn.com/hc/en-us/articles/19683394518161-OpenVPN-connection-on-NordVPN). If you are using an older version of the firmware, please update it before following this guide. Instructions on how to update the router firmware can be found on the [official Ubiquiti website](https://help.ui.com/hc/en-us/articles/205146110-EdgeRouter-How-to-Upgrade-the-EdgeOS-Firmware).
Here are the instructions on how to set up an OpenVPN connection to NordVPN servers on EdgeRouter via SSH:
1. Create a new file on your computer and call it ""nordvpnauth.txt. ""Open it and type in your NordVPN service username in the first line and NordVPN service password in the second line:usernamepasswordYou can find your NordVPN service credentials (service username and service password) in the [Nord Account dashboard](https://my.nordaccount.com/dashboard/nordvpn/):
Follow the steps below to find the service credentials for manual connection setup:
1. Log into your [Nord Account](https://my.nordaccount.com/), click NordVPN, and, under Manual setup, click on Service credentials. Here you'll find the Username and Password needed to connect manually.
2. Go to your NordAccount dashboard to download your manual connection configuration files:
Follow the steps below to find the best server for your connection:
1. Log into your [Nord Account](https://my.nordaccount.com/), and click NordVPN.
2. Scroll down to Advanced Settings and click Set up NordVPN manually.
3. Select the Server recommendation tab. According to your location, the best server will be recommended.
4. By pressing Advanced filters you can further customize the recommended servers by selecting the Server type and the Security protocol.
In case you wish to select a specific server, follow these steps:
1. Under Set up NordVPN manually, select OpenVPN configuration files.
2. Find the server you wish to connect to by using the Search bar or by scrolling down and download it by clicking Download UDP or Download TCP.
3. Open the downloaded server configuration file (for example, “de978.nordvpn.com.udp1194.ovpn”) and make the following changes:
Your configured file should look like this:
clientdev tunproto udpremote 5.180.62.90 1194resolv-retry infiniteremote-randomnobindtun-mtu 1500tun-mtu-extra 32mssfix 1450persist-keypersist-tunping 15ping-restart 0ping-timer-remreneg-sec 0comp-lzo no remote-cert-tls server auth-user-pass /config/openvpn/nordvpnauth.txtroute-nopull verb 3pullfast-iocipher AES-256-CBCauth SHA512-----BEGIN CERTIFICATE-----MIIFCjCCAvKgAwIBAgIBATANBgkqhkiG9w0BAQ0FADA5MQswCQYDVQQGEwJQQTEQMA4GA1UEChMHTm9yZFZQTjEYMBYGA1UEAxMPTm9yZFZQTiBSb290IENBMB4XDTE2MDEwMTAwMDAwMFoXDTM1MTIzMTIzNTk1OVowOTELMAkGA1UEBhMCUEExEDAOBgNVBAoTB05vcmRWUE4xGDAWBgNVBAMTD05vcmRWUE4gUm9vdCBDQTCCAiIwDQYJKoZIhvcNAQEBBQADggIPADCCAgoCggIBAMkr/BYhyo0F2upsIMXwC6QvkZps3NN2/eQFkfQIS1gql0aejsKsEnmY0Kaon8uZCTXPsRH1gQNgg5D2gixdd1mJUvV3dE3y9FJrXMoDkXdCGBodvKJyU6lcfEVF6/UxHcbBguZK9UtRHS9eJYm3rpL/5huQMCppX7kUeQ8dpCwd3iKITqwd1ZudDqsWaU0vqzC2H55IyaZ/5/TnCk31Q1UP6BksbbuRcwOVskEDsm6YoWDnn/IIzGOYnFJRzQH5jTz3j1QBvRIuQuBuvUkfhx1FEwhwZigrcxXuMP+QgM54kezgziJUaZcOM2zF3lvrwMvXDMfNeIoJABv9ljw969xQ8czQCU5lMVmA37ltv5Ec9U5hZuwk/9QO1Z+d/r6Jx0mlurS8gnCAKJgwa3kyZw6e4FZ8mYL4vpRRhPdvRTWCMJkeB4yBHyhxUmTRgJHm6YR3D6hcFAc9cQcTEl/I60tMdz33G6m0O42sQt/+AR3YCY/RusWVBJB/qNS94EtNtj8iaebCQW1jHAhvGmFILVR9lzD0EzWKHkvyWEjmUVRgCDd6Ne3eFRNS73gdv/C3l5boYySeu4exkEYVxVRn8DhCxs0MnkMHWFK6MyzXCCn+JnWFDYPfDKHvpff/kLDobtPBf+Lbch5wQy9quY27xaj0XwLyjOltpiSTLWae/Q4vAgMBAAGjHTAbMAwGA1UdEwQFMAMBAf8wCwYDVR0PBAQDAgEGMA0GCSqGSIb3DQEBDQUAA4ICAQC9fUL2sZPxIN2mD32VeNySTgZlCEdVmlq471o/bDMP4B8gnQesFRtXY2ZCjs50Jm73B2LViL9qlREmI6vE5IC8IsRBJSV4ce1WYxyXro5rmVg/k6a10rlsbK/eg//GHoJxDdXDOokLUSnxt7gk3QKpX6eCdh67p0PuWm/7WUJQxH2SDxsT9vB/iZriTIEe/ILoOQF0Aqp7AgNCcLcLAmbxXQkXYCCSB35Vp06u+eTWjG0/pyS5V14stGtw+fA0DJp5ZJV4eqJ5LqxMlYvEZ/qKTEdoCeaXv2QEmN6dVqjDoTAok0t5u4YRXzEVCfXAC3ocplNdtCA72wjFJcSbfif4BSC8bDACTXtnPC7nD0VndZLp+RiNLeiENhk0oTC+UVdSc+n2nJOzkCK0vYu0Ads4JGIB7g8IB3z2t9ICmsWrgnhdNdcOe15BincrGA8avQ1cWXsfIKEjbrnEuEk9b5jel6NfHtPKoHc9mDpRdNPISeVawDBM1mJChneHt59Nh8Gah74+TM1jBsw4fhJPvoc7Atcg740JErb904mZfkIEmojCVPhBHVQ9LHBAdM8qFI2kRK0IynOmAZhexlP/aT/kpEsEPyaZQlnBn3An1CRz8h0SPApL8PytggYKeQmRhl499+6jLxcZ2IegLfqq41dzIjwHwTMplg+1pKIOVojpWA==-----END CERTIFICATE-----key-direction 1## 2048 bit OpenVPN static key#-----BEGIN OpenVPN Static key V1-----e685bdaf659a25a200e2b9e39e51ff030fc72cf1ce07232bd8b2be5e6c670143f51e937e670eee09d4f2ea5a6e4e69965db852c275351b86fc4ca892d78ae002d6f70d029bd79c4d1c26cf14e9588033cf639f8a74809f29f72b9d58f9b8f5fefc7938eade40e9fed6cb92184abb2cc10eb1a296df243b251df0643d53724cdb5a92a1d6cb817804c4a9319b57d53be580815bcfcb2df55018cc83fc43bc7ff82d51f9b88364776ee9d12fc85cc7ea5b9741c4f598c485316db066d52db4540e212e1518a9bd4828219e24b20d88f598a196c9de96012090e333519ae18d35099427e7b372d348d352dc4c85e18cd4b93f8a56ddb2e64eb67adfc9b337157ff4-----END OpenVPN Static key V1-----
---
4. Now, access your EdgeMax router via SSH:
5. Then perform these commands:sudo -icd /config/mkdir openvpnchmod 770 openvpn
6. If you're using Linux, disconnect from SSH and copy the created “nordvpnauth.txt” and the downloaded “.ovpn” (in this case “de978.nordvpn.com.udp.ovpn”) files into your EdgeMax router's “/config/openvpn” directory via SCP:scp nordvpnauth.txt ubnt@routersIPaddress:/config/openvpnscp de978.nordvpn.com.udp1194.ovpn ubnt@routersIPaddress:/config/openvpnTo copy these files into the EdgeRouter while using Windows, upload them via SFTP. The default port for the SFTP connection is 22:
7. Use SSH again to connect to your router and run the following commands (adjusting some lines according to your network and file names):configureset interfaces openvpn vtun0 config-file /config/openvpn/de978.nordvpn.com.udp.ovpnset interfaces openvpn vtun0 description 'OpenVPN VPN tunnel'commitset service nat rule 5000 description 'OpenVPN Clients'set service nat rule 5000 log disableset service nat rule 5000 outbound-interface vtun0set service nat rule 5000 source address 192.168.1.0/24set service nat rule 5000 type masqueradecommitset protocols static table 1 interface-route 0.0.0.0/0 next-hop-interface vtun0set firewall modify SOURCE_ROUTE rule 10 description 'traffic from 192.168.1.0/24 to vtun0'set firewall modify SOURCE_ROUTE rule 10 source address 192.168.1.0/24set firewall modify SOURCE_ROUTE rule 10 modify table 1set interfaces ethernet eth1 firewall in modify SOURCE_ROUTEcommitsave
Note: The last command can also be “ethernet eth2,” depending on which slot is used for the LAN cable, or “switch switch0” if you are using a switch interface.
If you are using a different subnet (or want to set up the connection for specific devices only), modify 192.168.1.0/24 on all lines to your values.
8. To check the connection log, type in:run show logScroll down until you see “Initialization sequence completed.” That means your router has successfully connected to our service. You can also check our [“What is my IP?” page](https://nordvpn.com/what-is-my-ip/) to see if you are connected to NordVPN.
Additional notes:
* Change the line “auth-user-pass” to “auth-user-pass /config/openvpn/nordvpnauth.txt” (without the quotation marks.)
* After “auth-user-pass /config/openvpn/nordvpnauth.txt,” insert a new line with “route-nopull” (again, without the quotation marks.)
* Save the file.
* For UNIX-like machines, use the command “ssh ubnt@routersIPaddress” (no quotation marks) and enter your EdgeRouter password.
* For Windows devices, [download this app](https://www.bitvise.com/ssh-client-download).
* To disable a VPN, use the following commands:configureset interfaces openvpn vtun0 disablecommitsave
* To re-enable a VPN after disabling it, use the following commands:configuredelete interfaces openvpn vtun0 disablecommitsave
* To change your VPN server, simply upload a new file to your router (as described in step 6) and use the following commands:configureset interfaces openvpn vtun0 config-file /config/openvpn/new_file.ovpncommitsave",https://support.nordvpn.com/hc/en-us/related/click?data=BAh7CjobZGVzdGluYXRpb25fYXJ0aWNsZV9pZGwrCJEeDHF7EjoYcmVmZXJyZXJfYXJ0aWNsZV9pZGwrCBFt0ZN6EjoLbG9jYWxlSSIKZW4tdXMGOgZFVDoIdXJsSSJRL2hjL2VuLXVzL2FydGljbGVzLzIwMzIxMzg2ODk3MDQxLUVkZ2VSb3V0ZXItYW5kLVViaXF1aXRpLXNldHVwLXdpdGgtTm9yZFZQTgY7CFQ6CXJhbmtpCA%3D%3D--b550f3a2ad2031b1d71fe24da97d62567d710748
Installing NordVPN (App Store) version on macOS,"From October 17th, 2024, older applications will have a few function limitations. The issues can affect macOS applications version 8.27.2 and below. They can include not receiving notifications in the app and reduced Dark Web Monitoring and Meshnet functionality.To resolve the issue, please update your application to the latest version.
This article will help you set up the [NordVPN application on your Mac](https://nordvpn.com/download/mac/) and connect to a VPN server. Note: The NordVPN (App Store) app is compatible with macOS 11 and later versions.
## Table of contents:
* [Downloading and installing](
* [Setting up the application](
* [Connecting to servers](
* [NordVPN features menu](
* [NordVPN preference settings](
## Downloading and installing
1. Go to the [NordVPN app page in the App Store](https://apps.apple.com/us/app/nordvpn-vpn-fast-secure/id905953485#?platform=mac) or click download the App Store version of NordVPN on our downloads page:
2. Agree to Open App Store.
3. When the App Store launches, click on the blue Get button and choose to Install the app.
4. Once the download is finished, press the Open button.
## Setting up and using the application
1. Open your Launchpad and click on the NordVPN icon.
2. You can Log In or Sign Up in the top-right corner of the screen.
3. You will be redirected to your Nord Account. To log in, enter your registered email address and password. You can also sign in using your Google account or Apple ID or by entering a code. If you are a new user, you will need to create a [Nord Account](https://my.nordaccount.com/) by entering your email address and other required information.
4. After completing the above steps, you will be prompted to open the NordVPN app. Agree always to allow Nord Account and grant access to the app.
5. After a successful login, you will see the main NordVPN application window.Here, you can find NordVPN servers and navigate in the map itself, search bar, or specialty section.
## Connecting to servers
1. The Quick Connect button in the top-right corner will automatically connect you to a server.
2. To connect to a specific server, click on the Search field in the top-left corner of the app. Enter a country, a category, or a specific server number (e.g., Canada #1224) to find what you need.
3. All servers in the left sidebar are sorted by country and specialty.To connect to a specialty server, hover over one of the categories under [Specialty Servers](https://support.nordvpn.com/hc/en-us/articles/19479130821521-Different-NordVPN-server-categories-explained), and click on the three-dot menu to select a Country.
4. To connect to a specific country, click on it.
## NordVPN features menu
### Map

* Map - here, you can find and navigate NordVPN servers in the map itself, search bar, or specialty section
### Threat Protection Pro™/Threat Protection

* Threat Protection Pro™ is a special NordVPN feature that automatically blocks ads, trackers, and malicious URLs. When you visit a website known for scamming people, this feature displays an in-browser alert to warn you about possible fraud. Threat Protection Pro™ also scans downloads for malware and checks your apps for security vulnerabilities. Available with selected NordVPN plans, Threat Protection Pro™ can work without an active VPN connection. Learn more about[ Threat Protection Pro™](https://nordvpn.com/features/threat-protection/).If your NordVPN subscription doesn’t include Threat Protection Pro™, you can use the Threat Protection feature instead. It blocks intrusive ads and malicious domains based on DNS filtering and works whenever you’re connected to a VPN server. Threat Protection comes with all NordVPN plans.
### Meshnet

* The [Meshnet](https://nordvpn.com/meshnet/) feature helps you to access devices over encrypted tunnels. [Learn more about Meshnet](https://meshnet.nordvpn.com/getting-started/meshnet-explained).
### Dark Web Monitor

* [Dark Web Monitor](https://nordvpn.com/features/dark-web-monitor/) scans the internet for any credential leaks associated with your registered NordVPN e-mail address.
### Presets
Presets let you load up a specified set of configurations, including server number, type, protocol, and more. You can configure your settings to experience a smooth session, for e.g., so that a streaming service or a game loads up instantly!
#### How to set up presets?
Start at the preferences page. You can either edit an existing preset or create a new one by clicking Add new.Let's build it from scratch. After pressing Add new, you will see a menu with the settings you can use. Give the preset a name. Next, select from available VPN protocols. If you change the default setting Use recommended, you’ll be able to alter the server type. Here you can set a specialty server or any regular one as your type.Depending on the server availability, you may also have the choice of selecting a specific region.Finally, you can add either a web page or an app to the preset. It will be displayed under the preset name on the main screen. If you press Add link button, a field will appear for the URL of the website you would like easy access to. After inserting the URL, press Enter to register it. When you're done, press Save preset, and it will be added to the main screen.
### Statistics

* Statistics show you more information about your connection.
### Settings
To change application settings and find various features click on the gear icon at the bottom-left corner of the app:

* Settings tab displays the NordVPN app settings.
### Quick Help

* Here you can find your connection logs, a direct to our Help Center, or our customer support email.
## NordVPN settings
### General

* Launch the app on computer startup — toggle to open the NordVPN app automatically every time you turn your device on.
* VPN Protocol — this option will let you choose from 3 different [connection protocols](https://support.nordvpn.com/hc/en-us/articles/19482810153745-Which-NordVPN-protocol-should-I-choose) (OpenVPN UDP, OpenVPN TCP, and NordLynx).
* Help Us Improve — makes NordVPN better by sending us aggregated anonymous data.
### Auto-connect

* When using an untrusted network — toggle to automatically be connected to a VPN when you're connected to a network that is not added to a Trusted network list.
* Connect to — you can select a specific country from the list.
* The current network — shows the network you are currently connected to.
* Trusted network — you won't be automatically connected to a VPN while on a trusted Wi-Fi network.
### Kill Switch

* [Kill Switch](https://nordvpn.com/features/vpn-kill-switch/) prevents unprotected access to the internet when your VPN connection accidentally drops.
* Advanced Kill Switch is an additional layer of security that can be enabled to prevent WebRTC leaks. However, it functions separately from the system-wide Internet Kill Switch. Read [more information about Kill Switch](https://support.nordvpn.com/hc/en-us/articles/19509682644369-NordVPN-Kill-Switch-how-does-it-work).
* Stay invisible on a local network — this will let you [keep your device invisible on an unsafe local network](https://support.nordvpn.com/hc/en-us/articles/20225371443345-Staying-invisible-on-unsafe-local-networks-on-macOS).
### Appearance

* Appearance settings let you add an application to your dock and menu bar. Also, it lets you choose between dark and light modes.
### Other Apps

* Other Apps tab introduces other [Nord Security](https://nordsecurity.com/) products. As well as a scannable QR code that directly leads you to the NordVPN mobile app download.
### Account

* Account section shows your NordVPN profile and subscription information. Here you’ll also find links to [NordVPN Terms of Services](https://my.nordaccount.com/legal/terms-of-service/) and [Privacy Policy](https://my.nordaccount.com/legal/privacy-policy/).",https://support.nordvpn.com/hc/en-us/related/click?data=BAh7CjobZGVzdGluYXRpb25fYXJ0aWNsZV9pZGwrCJHa8kGjEjoYcmVmZXJyZXJfYXJ0aWNsZV9pZGwrCBFt0ZN6EjoLbG9jYWxlSSIKZW4tdXMGOgZFVDoIdXJsSSJUL2hjL2VuLXVzL2FydGljbGVzLzIwNDkyMzk1NDAzOTIxLUluc3RhbGxpbmctTm9yZFZQTi1BcHAtU3RvcmUtdmVyc2lvbi1vbi1tYWNPUwY7CFQ6CXJhbmtpCQ%3D%3D--d5acd1f4bd8c3132c5fb7b7e594b032488fc3146
How can I change compatibility mode?,"1. Locate the NordVPN folder within your computer. To do so, click on file explorer (the folder icon).",https://support.nordvpn.com/hc/en-us/related/click?data=BAh7CjobZGVzdGluYXRpb25fYXJ0aWNsZV9pZGwrCBHGTF1zEjoYcmVmZXJyZXJfYXJ0aWNsZV9pZGwrCBHEuFZlEjoLbG9jYWxlSSIKZW4tdXMGOgZFVDoIdXJsSSJ6L2hjL2VuLXVzL2FydGljbGVzLzIwMjg2Njk1ODUxNTM3LUVycm9yLVRoaXMtcHJvZ3JhbS1kb2VzLW5vdC1zdXBwb3J0LXRoZS12ZXJzaW9uLW9mLVdpbmRvd3MteW91ci1jb21wdXRlci1pcy1ydW5uaW5nBjsIVDoJcmFua2kG--6e605706310e600f6adb8bc14b8ef6aef8993a84
How to configure AsusTor 2.7.1 and above,"This guide was created using ASUSTOR ADM 4.2.1.DGE2
Follow these steps to set up a NordVPN connection on your ASUSTOR NAS:
1. Log in to your NAS using an internet browser.
2. Open Settings and select the Network section.
3. Switch to the Network interface tab and click Add > Create VPN.
4. In the Add VPN configuration window, select OpenVPN and click Next.
5. Select Import configuration files from the OpenVPN provider and click Next.
6. Fill in the following information:
* Name: NordVPN
* Account: Your NordVPN service username
* Password: Your NordVPN service passwordFind your NordVPN credentials on your [Nord Account dashboard](https://my.ndaccount.com/).
Follow the steps below to find the service credentials for manual connection setup:
1. Log into your [Nord Account](https://my.nordaccount.com/), click NordVPN, and, under Manual setup, click on Service credentials. Here you'll find the Username and Password needed to connect manually.
1. Download the desired NordVPN server’s OpenVPN Configuration files.
Follow the steps below to find the best server for your connection:
1. Log into your [Nord Account](https://my.nordaccount.com/), and click NordVPN.
2. Scroll down to Advanced Settings and click Set up NordVPN manually.
3. Select the Server recommendation tab. According to your location, the best server will be recommended.
4. By pressing Advanced filters you can further customize the recommended servers by selecting the Server type and the Security protocol.
In case you wish to select a specific server, follow these steps:
1. Under Set up NordVPN manually, select OpenVPN configuration files.
2. Find the server you wish to connect to by using the Search bar or by scrolling down and download it by clicking Download UDP or Download TCP.
Here, you are also able to find the NordVPN service credentials.
Follow the steps below to find the service credentials for manual connection setup:
1. Log into your [Nord Account](https://my.nordaccount.com/), click NordVPN, and, under Manual setup, click on Service credentials. Here you'll find the Username and Password needed to connect manually.
1. Next to Import file(s), click Expand and Add.
2. Select your downloaded server configuration file and click Open.
3. Paste the credentials together with the chosen server and click Finish.
When the new network interface is created, select it and click Action > Connect. Now your NAS is connected to a NordVPN server.",https://support.nordvpn.com/hc/en-us/related/click?data=BAh7CjobZGVzdGluYXRpb25fYXJ0aWNsZV9pZGwrCBGfCmDpEzoYcmVmZXJyZXJfYXJ0aWNsZV9pZGwrCBFt0ZN6EjoLbG9jYWxlSSIKZW4tdXMGOgZFVDoIdXJsSSJPL2hjL2VuLXVzL2FydGljbGVzLzIxODkzMDU5NjE2NTI5LUhvdy10by1jb25maWd1cmUtQXN1c1Rvci0yLTctMS1hbmQtYWJvdmUGOwhUOglyYW5raQo%3D--73bf38cad18ca7730dbde435a1b069e3811e88a1
DD-WRT setup with FlashRouters Privacy app,"You can set up a VPN on your router easily with [FlashRouters](https://nordvpn.com/flashrouters/).
### DD-WRT firmware build requirements
The minimum required DD-WRT build version for the FlashRouters Privacy App is 02-10-2020-r42335. You can download the latest DD-WRT firmware build for your router model [here](https://support.flashrouters.com/dd-wrt/dd-wrt-features/i-want-to-upgrade-the-dd-wrt-firmware-of-my-flashrouter/).
#### Officially supported routers:
* Asus RT-AC5300
* Asus RT-AC56U
* Asus RT-AC66U
* Asus RT-AC68U
* Linksys WRT1200AC
* Linksys WRT1900AC
* Linksys WRT1900ACv2
* Linksys WRT1900ACS
* Linksys WRT3200ACM
* Linksys WRT32X
* Netgear R6300v2
* Netgear R6400v2
* Netgear R7000
* Netgear R7800
* Netgear R8000
* Netgear R8500
* Netgear R9000
Contact the FlashRouters support if you are uncertain about the model of your router or you can’t find it in the list above.
### How to Install the FlashRouters Privacy App
1. Make sure the router is connected to the internet.
2. Go to Administration > Commands, then copy and paste the following line:
```
curl --silent --retry 3 https://api.flashroutersapp.com/api/v1.0/ddwrt/group/privacy/provider/NordVPN/install | sh
```
3. Click Run Commands.
4. You should see an Installation Successful message.
### How to access the FlashRouters Privacy App
There are a few ways to access the FlashRouters Privacy App:
1. Go to [flashroutersapp.com](https://flashroutersapp.com/)
2. In the DD-WRT settings, go to Status > MyPage
3. Directly at
### How to connect to NordVPN
1. Make sure you are on the Connect page in the FlashRouters App and enter your NordVPN account username and password.
You can find your NordVPN service credentials (service username and service password) in the [Nord Account dashboard](https://my.nordaccount.com/dashboard/nordvpn/):
1. Click Set up NordVPN manually.
2. You will receive a verification code in your email that you use for NordVPN services. Type the code in: 
3. Copy the credentials using the “Copy” buttons on the right:
2. Select a [NordVPN server](https://nordvpn.com/servers/):
* You can scroll through the server dropdown list or type the desired server in the search bar.
* Sort servers by country closest to you.
* Sort servers by least loaded country.
3. Click Connect.
### Using Auto-Connect and Global Kill Switch
1. Check the Auto-Connect box to make FlashRouter connect to NordVPN automatically upon reboot.
2. Check Global Kill Switch to kill internet connection if the VPN disconnects unexpectedly.
### Using the Options page
1. Device Renaming
2. Policy Routing for Devices:
* Default - Connected to VPN
* Kill-Switch - [Kill Switch](https://nordvpn.com/features/vpn-kill-switch/) per device (Global Kill Switch must be disabled)
* VPN-bypass - device connects directly to the ISP
3. Policy Routing for Websites and Host IPs:
### Simple Setup
DNS Servers: Enter any custom DNS servers from a trusted source like Google and OpenDNS, or the NordVPN DNS servers: 103.86.96.100 and 103.86.99.100.Wi-Fi 2.4 GHz: View and/or edit your FlashRouter 2.4 GHz Wi-Fi network SSID or Password. When you click Apply, your router will automatically reboot, and the 2.4 GHz Wi-Fi network information will be updated.Wi-Fi 5.0 GHz: View and/or edit your FlashRouter 5.0 GHz Wi-Fi network SSID or Password. When you click Apply, your router will automatically reboot, and the 5.0 GHz Wi-Fi network information will be updated.Note: If you have a tri-band router, another Wi-Fi 5 GHz section will be in this area.Remember: After changing the Wi-Fi information, you will need to rejoin the network to regain access to your router and the FlashRouters App.Back to DD-WRT: Click if you would like to change additional settings within the DD-WRT firmware GUI.Configure VPN: All done? Move on to the VPN setup in the FlashRouters Privacy App. More information is available [here](https://support.flashrouters.com/dd-wrt/fr-dd-wrt-privacy-app-features/fr-privacy-app-simple-setup-page-changing-basic-router-settings/).
If you have any issues with the FlashRouters App, please contact the FlashRouters support via [this form](https://www.flashrouters.com/contact/).",https://support.nordvpn.com/hc/en-us/related/click?data=BAh7CjobZGVzdGluYXRpb25fYXJ0aWNsZV9pZGwrCJF%2Fik6cEjoYcmVmZXJyZXJfYXJ0aWNsZV9pZGwrCBFxQ3h4EjoLbG9jYWxlSSIKZW4tdXMGOgZFVDoIdXJsSSJRL2hjL2VuLXVzL2FydGljbGVzLzIwNDYyNTQxODk3NjE3LURELVdSVC1zZXR1cC13aXRoLUZsYXNoUm91dGVycy1Qcml2YWN5LWFwcAY7CFQ6CXJhbmtpBg%3D%3D--737facfc47d9c5fb2b6440ce4d5ec33b03da7f5e
Not sure if your router is supported and/or can't find it on the list above?,"First, see if you can find your router on our [list of unsupported routers](https://support.nordvpn.com/hc/en-us/articles/20379585675793-Which-routers-don-t-support-NordVPN).",https://support.nordvpn.com/hc/en-us/related/click?data=BAh7CjobZGVzdGluYXRpb25fYXJ0aWNsZV9pZGwrCBEJ4fyqEToYcmVmZXJyZXJfYXJ0aWNsZV9pZGwrCBFxQ3h4EjoLbG9jYWxlSSIKZW4tdXMGOgZFVDoIdXJsSSJHL2hjL2VuLXVzL2FydGljbGVzLzE5NDI2MDg0NzE4ODY1LVNldHRpbmctdXAtYS1yb3V0ZXItd2l0aC1Ob3JkVlBOBjsIVDoJcmFua2kH--dbec3d704039e4a25e0f2682b2588b502dbdd273
Setting up a router with NordVPN,"The procedure of setting up NordVPN on your router will depend on your router’s firmware or manufacturer. If you can’t find the VPN router setup tutorial for your router’s firmware on the following list, continue scrolling down for further instructions. You may also check out our list of [router recommendations](https://support.nordvpn.com/hc/en-us/articles/20195707547025-Which-router-should-I-use-with-NordVPN).
Note: If your router was issued by your ISP, it probably does not support VPN configurations. If that is the case, there are routers that come pre-configured with NordVPN. Our partner FlashRouters offers a selection of powerful routers that come with NordVPN out of the box, including the [Privacy Hero](https://www.flashrouters.com/privacy-hero-nordvpn-router-by-flashrouters) with exclusive integration for NordLynx - the fastest VPN protocol.
## Setup tutorials for supported routers and firmware:
* [ASUS WRT](https://support.nordvpn.com/hc/en-us/articles/20286376420753-How-to-set-up-NordVPN-on-Asus-WRT-firmware) (native firmware)
* [ASUS Merlin](https://support.nordvpn.com/hc/en-us/articles/20319214011921-AsusWRT-Merlin-setup-with-NordVPN)
* [DD-WRT](https://support.nordvpn.com/hc/en-us/articles/20308623061265-DD-WRT-setup-with-NordVPN)
* [Privacy Hero](https://support.flashrouters.com/privacy-hero/vpn-setup-privacy-hero/privacy-hero-nordlynx-vpn-setup/)
* [Roqos](https://support.flashrouters.com/roqoscore/nordvpn-setup-on-roqos/)
* [Gl.iNET](https://support.nordvpn.com/hc/en-us/articles/20226926174225-GL-iNet-setup-with-NordVPN)
* [Mikrotik](https://support.nordvpn.com/hc/en-us/articles/20398642652561-MikroTik-IKEv2-setup-with-NordVPN)
* [NetDUMA](https://support.nordvpn.com/hc/en-us/articles/20323695823761-Netduma-setup-with-NordVPN)
* [OPNsense](https://support.nordvpn.com/hc/en-us/articles/20397569418129-OPNsense-21-setup-with-NordVPN)
* [OpenWRT](https://support.nordvpn.com/hc/en-us/articles/20340177222289-OpenWrt-setup-with-NordVPN)
* [Padavan](https://support.nordvpn.com/hc/en-us/articles/20323041135889-Padavan-setup-with-NordVPN)
* [Sabai](https://support.nordvpn.com/hc/en-us/articles/20323512359697-Sabai-setup-with-NordVPN)
* [Tomato](https://support.nordvpn.com/hc/en-us/articles/20317675285777-How-to-set-up-VPN-on-Tomato)
* [pfSense](https://support.nordvpn.com/hc/en-us/articles/20285211284497-pfSense-setup-with-NordVPN)
* [DrayTek](https://support.nordvpn.com/hc/en-us/articles/20397988815633-DrayTek-Vigor-IKEv2-setup-with-NordVPN)
* [EdgeRouter](https://support.nordvpn.com/hc/en-us/articles/20321386897041-EdgeRouter-and-Ubiquiti-setup-with-NordVPN)
* [TP-Link](https://support.nordvpn.com/hc/en-us/articles/20280525082001-Setting-up-TP-Link-with-NordVPN)
* Starlink (read more about how to use [VPN on Starlink](https://nordvpn.com/blog/starlink-vpn/))
## Not sure if your router is supported and/or can't find it on the list above?
First, see if you can find your router on our [list of unsupported routers](https://support.nordvpn.com/hc/en-us/articles/20379585675793-Which-routers-don-t-support-NordVPN).
If it’s not on there, check the user manual that came with your router (usually, manuals are available for download on the manufacturer’s website). Search the manual for any mentions of OpenVPN support. Your router must support the OpenVPN client in order to potentially support a NordVPN configuration. If you can’t find this information in the manual, consider contacting your router’s manufacturer.
If none of the tips mentioned above have helped you set up a connection, feel free to contact our support team!",https://support.nordvpn.com/hc/en-us/related/click?data=BAh7CjobZGVzdGluYXRpb25fYXJ0aWNsZV9pZGwrCBEJ4fyqEToYcmVmZXJyZXJfYXJ0aWNsZV9pZGwrCBFxQ3h4EjoLbG9jYWxlSSIKZW4tdXMGOgZFVDoIdXJsSSJHL2hjL2VuLXVzL2FydGljbGVzLzE5NDI2MDg0NzE4ODY1LVNldHRpbmctdXAtYS1yb3V0ZXItd2l0aC1Ob3JkVlBOBjsIVDoJcmFua2kH--dbec3d704039e4a25e0f2682b2588b502dbdd273
How to Set Up VPN on Asus Router,"Please note:
For a smooth experience, your router needs to be running OpenVPN 2.4.x. Here's how to [check the OpenVPN version](https://support.nordvpn.com/hc/en-us/articles/20466863277969). If you have a newer Asus WRT firmware, [check this guide](https://support.nordvpn.com/hc/en-us/articles/20286376420753) on how to connect to a VPN.
ASUS RT-AC66U (non-B1) and RT-N66U routers are not supported by NordVPN service.
## How to set up an OpenVPN connection with NordVPN on your Asus router:
1. Log into the control panel of your Asus VPN router by typing 192.168.1.1 in the address bar of your browser. In case the specified IP address does not work, try 192.168.50.1 instead. Alternatively, enter router.asus.com or asusrouter.com instead of the IP address into the address bar. A window will pop up, asking you to enter your username and password. Unless you have changed your credentials, the default username is admin, and the default password is admin (or no password).
2. After logging into the Control Panel, select VPN in the left sidebar menu.
3. Click on the VPN Client tab at the top of the page.
4. Click the Add profile button at the bottom of the page.
5. In the pop-up window, select the OpenVPN tab and fill in the fields:Description: Give the connection any name you like.Username: Your NordVPN service username.Password: Your NordVPN service password.Auto reconnection: Yes.
1. Download the OpenVPN client configuration files.
Follow the steps below to find the best server for your connection:
1. Log into your [Nord Account](https://my.nordaccount.com/), and click NordVPN.
2. Scroll down to Advanced Settings and click Set up NordVPN manually.
3. Select the Server recommendation tab. According to your location, the best server will be recommended.
4. By pressing Advanced filters you can further customize the recommended servers by selecting the Server type and the Security protocol.
In case you wish to select a specific server, follow these steps:
1. Under Set up NordVPN manually, select OpenVPN configuration files.
2. Find the server you wish to connect to by using the Search bar or by scrolling down and download it by clicking Download UDP or Download TCP.
3. When connecting to OpenVPN & IKEv2 manually, you're going to need to use the Username and Password from the Service credential tab.
1. After downloading the files, go back to the control panel of your router and click Choose File in the pop-up window.
2. Navigate to the configuration file you have just downloaded and click Open.
3. Click Upload. You should see the message Complete! when the file has been uploaded successfully.
4. Leave the “Import the CA file or edit the .ovpn file manually” box unchecked and click OK.
5. In the VPN Client tab, you will see the created connection. Click Activate to connect your router to NordVPN. Please note that you can create only one OpenVPN connection.
6. A blue checkmark should appear in the Connection Status column, indicating that you are now connected to the VPN on the Asus router.
7. Your IP address and protection status will be visible at the top of the [nordvpn.com](https://nordvpn.com/) page. Please make sure to refresh the webpage, as it might be loaded from the cache. If you still don't see it, [clear the browser cache](https://nordvpn.com/blog/how-to-clear-your-cache/).To disconnect from NordVPN, click on the Deactivate button, which appears instead of the Activate button in the Connection column.",https://support.nordvpn.com/hc/en-us/related/click?data=BAh7CjobZGVzdGluYXRpb25fYXJ0aWNsZV9pZGwrCJGiy%2BBdEjoYcmVmZXJyZXJfYXJ0aWNsZV9pZGwrCBFxQ3h4EjoLbG9jYWxlSSIKZW4tdXMGOgZFVDoIdXJsSSJHL2hjL2VuLXVzL2FydGljbGVzLzIwMTk0NDEyNzAwMzA1LUhvdy10by1TZXQtVXAtVlBOLW9uLUFzdXMtUm91dGVyBjsIVDoJcmFua2kI--60ec31e51064205ff5203b6fb27df0d9ce71a381
Why Choose FlashRouters?,[FlashRouters](https://nordvpn.com/flashrouters/) offers some of the best routers for NordVPN pre-configured to deliver top-notch security and performance:,https://support.nordvpn.com/hc/en-us/related/click?data=BAh7CjobZGVzdGluYXRpb25fYXJ0aWNsZV9pZGwrCJFt%2BS1eEjoYcmVmZXJyZXJfYXJ0aWNsZV9pZGwrCBFxQ3h4EjoLbG9jYWxlSSIKZW4tdXMGOgZFVDoIdXJsSSJNL2hjL2VuLXVzL2FydGljbGVzLzIwMTk1NzA3NTQ3MDI1LVdoaWNoLXJvdXRlci1zaG91bGQtSS11c2Utd2l0aC1Ob3JkVlBOBjsIVDoJcmFua2kJ--dcdaaa044177c97a8d4f861ef8e5b388de5d74eb
Which router should I use with NordVPN?,"It's important that a router supports VPN configurations to use NordVPN; however, to maximize your NordVPN experience, a router that’s pre-configured for VPN use is key.
For example, FlashRouters offers a [wide range of NordVPN-compatible devices](https://nordvpn.com/flashrouters/) optimized for secure, high-speed connections right out of the box without having to configure or set up the routers.
For the best out-of-the-box router solution with extra safety, privacy, streaming capabilities, and an exclusive NordLynx integration, we recommend the [Privacy Hero 2](https://www.flashrouters.com/privacy-hero-nordvpn-router-by-flashrouters). This unique cloud-connected device also includes 1 year of NordVPN plus 1 year of Privacy Hero service, providing seamless security and performance for your home network.
## Why Choose FlashRouters?
[FlashRouters](https://nordvpn.com/flashrouters/) offers some of the best routers for NordVPN pre-configured to deliver top-notch security and performance:
* Top-Tier Security: Your entire network is shielded by NordVPN, keeping your online activity private and secure.
* Speed & Stability: Our devices are equipped with powerful processors and advanced WiFi technologies, ensuring fast and stable VPN connections.
* Plug-and-Play VPN Setup: Skip the headaches of manual configuration. FlashRouters comes pre-flashed and optimized for NordVPN compatibility.
* Ongoing Support: Need networking support assistance? Their expert support team is here to help with your setup and troubleshooting.
### More NordVPN Recommended Routers Options (OpenVPN Only)
Flashrouters also have a few models supporting only OpenVPN connection:
* [Next Gen WiFi 7](https://www.flashrouters.com/router-basics/wireless-be): These devices are significantly higher cost but offer NordVPN OpenVPN support.
* [Mesh VPN Routers](https://www.flashrouters.com/routers?fmr_use_case=344): Looking for more extensive VPN coverage? FlashRouters offers a wide array of heavily tested [Mesh WiFi Systems for NordVPN](https://www.flashrouters.com/routers?fmr_use_case=344).
* [AX3000 VPN Router](https://www.flashrouters.com/cudy-wr3000-vpn-router-by-flashrouters): If the lowest price is the main concern, this AX3000 is a popular economy device for OpenVPN.
## Configurable devices
You can also buy a router and configure it yourself. While many different routers are available from other manufacturers, the most commonly used are Asus routers, as most have a built-in OpenVPN client and require minimal effort to set up.
Some popular examples include the Asus RT-AX86U, RT-AX68U, and RT-AX88U (AX6000). However, these devices will not support NordLynx.
Most other routers require firmware flashing, which might be tricky and does not work on all platforms. If you want a legacy router that provides OpenVPN encryption, you can also find any router that supports the following custom firmware:
* DD-WRT:
* Tomato:
* OpenWRT:
* Merlin:
The next step will be to learn [how to set up NordVPN on your router](https://support.nordvpn.com/hc/en-us/articles/19426084718865-Setting-up-a-router-with-NordVPN).",https://support.nordvpn.com/hc/en-us/related/click?data=BAh7CjobZGVzdGluYXRpb25fYXJ0aWNsZV9pZGwrCJFt%2BS1eEjoYcmVmZXJyZXJfYXJ0aWNsZV9pZGwrCBFxQ3h4EjoLbG9jYWxlSSIKZW4tdXMGOgZFVDoIdXJsSSJNL2hjL2VuLXVzL2FydGljbGVzLzIwMTk1NzA3NTQ3MDI1LVdoaWNoLXJvdXRlci1zaG91bGQtSS11c2Utd2l0aC1Ob3JkVlBOBjsIVDoJcmFua2kJ--dcdaaa044177c97a8d4f861ef8e5b388de5d74eb
Setting up TP-Link with NordVPN,"Do you want to use NordVPN with more than ten devices at the same time? Or set up a VPN connection on your router? Then an OpenVPN connection is a go-to choice.You can set up a NordVPN connection on TP-Link routers that have OpenVPN client settings available. For a complete list of compatible routers, please refer to [TP-Link documentation](https://community.tp-link.com/en/home/forum/topic/272492).
If your router is compatible with NordVPN, log in to the control panel of your TP-Link router. It can usually be accessed using one of the following IP addresses via an internet browser:192.168.0.1 or 192.168.1.1
1. Navigate to Advanced > VPN Client.
2. Enable VPN Client, then save the settings.
3. In the Server List section, click Add, and a new profile configuration window should show up.
4. In the pop-up window, fill in the available fields as follows:Description: NordVPN (or any name you choose)VPN Type: OpenVPNUsername: your NordVPN service usernamePassword: your NordVPN service password
5. You can find your NordVPN service credentials (service username and password) in the Nord Account dashboard: [https://my.nordaccount.com/login/.](https://my.nordaccount.com/login/)
Follow the steps below to find the service credentials for manual connection setup:
1. Log into your [Nord Account](https://my.nordaccount.com/), click NordVPN, and, under Manual setup, click on Service credentials. Here you'll find the Username and Password needed to connect manually.
1. Paste credentials to the router interface profile window.
2. Download OpenVPN client configuration files.
Follow the steps below to find the best server for your connection:
1. Log into your [Nord Account](https://my.nordaccount.com/), and click NordVPN.
2. Scroll down to Advanced Settings and click Set up NordVPN manually.
3. Select the Server recommendation tab. According to your location, the best server will be recommended.
4. By pressing Advanced filters you can further customize the recommended servers by selecting the Server type and the Security protocol.
In case you wish to select a specific server, follow these steps:
1. Under Set up NordVPN manually, select OpenVPN configuration files.
2. Find the server you wish to connect to by using the Search bar or by scrolling down and download it by clicking Download UDP or Download TCP.
1. After downloading the files, go back to the control panel of your router and click Browse in the pop-up window.
2. Navigate to the configuration file you’ve just downloaded and click Open.
3. Save the configured settings by clicking the Save button.In the Server List, enable the newly created NordVPN connection.In the Device List section, click on the Add button.
4. Choose the devices you wish to use the VPN connection on and click the OK button.
5. Enable VPN Access for the added devices by clicking on the slider.
Now, all of the devices that you have added to the Device List will have access to the VPN connection. To add any new devices, repeat steps 11 and 12.",https://support.nordvpn.com/hc/en-us/related/click?data=BAh7CjobZGVzdGluYXRpb25fYXJ0aWNsZV9pZGwrCJFNfu1xEjoYcmVmZXJyZXJfYXJ0aWNsZV9pZGwrCBFxQ3h4EjoLbG9jYWxlSSIKZW4tdXMGOgZFVDoIdXJsSSJGL2hjL2VuLXVzL2FydGljbGVzLzIwMjgwNTI1MDgyMDAxLVNldHRpbmctdXAtVFAtTGluay13aXRoLU5vcmRWUE4GOwhUOglyYW5raQo%3D--0c4751ece2f0391fa0eaf5f69309492461810cdf
Not sure if your router is supported and/or can't find it on the list above?,"First, see if you can find your router on our [list of unsupported routers](https://support.nordvpn.com/hc/en-us/articles/20379585675793-Which-routers-don-t-support-NordVPN).",https://support.nordvpn.com/hc/en-us/related/click?data=BAh7CjobZGVzdGluYXRpb25fYXJ0aWNsZV9pZGwrCBEJ4fyqEToYcmVmZXJyZXJfYXJ0aWNsZV9pZGwrCJFNfu1xEjoLbG9jYWxlSSIKZW4tdXMGOgZFVDoIdXJsSSJHL2hjL2VuLXVzL2FydGljbGVzLzE5NDI2MDg0NzE4ODY1LVNldHRpbmctdXAtYS1yb3V0ZXItd2l0aC1Ob3JkVlBOBjsIVDoJcmFua2kG--3aa505a1270f85d3a643a85b35a088b540414005
Setting up a router with NordVPN,"The procedure of setting up NordVPN on your router will depend on your router’s firmware or manufacturer. If you can’t find the VPN router setup tutorial for your router’s firmware on the following list, continue scrolling down for further instructions. You may also check out our list of [router recommendations](https://support.nordvpn.com/hc/en-us/articles/20195707547025-Which-router-should-I-use-with-NordVPN).
Note: If your router was issued by your ISP, it probably does not support VPN configurations. If that is the case, there are routers that come pre-configured with NordVPN. Our partner FlashRouters offers a selection of powerful routers that come with NordVPN out of the box, including the [Privacy Hero](https://www.flashrouters.com/privacy-hero-nordvpn-router-by-flashrouters) with exclusive integration for NordLynx - the fastest VPN protocol.
## Setup tutorials for supported routers and firmware:
* [ASUS WRT](https://support.nordvpn.com/hc/en-us/articles/20286376420753-How-to-set-up-NordVPN-on-Asus-WRT-firmware) (native firmware)
* [ASUS Merlin](https://support.nordvpn.com/hc/en-us/articles/20319214011921-AsusWRT-Merlin-setup-with-NordVPN)
* [DD-WRT](https://support.nordvpn.com/hc/en-us/articles/20308623061265-DD-WRT-setup-with-NordVPN)
* [Privacy Hero](https://support.flashrouters.com/privacy-hero/vpn-setup-privacy-hero/privacy-hero-nordlynx-vpn-setup/)
* [Roqos](https://support.flashrouters.com/roqoscore/nordvpn-setup-on-roqos/)
* [Gl.iNET](https://support.nordvpn.com/hc/en-us/articles/20226926174225-GL-iNet-setup-with-NordVPN)
* [Mikrotik](https://support.nordvpn.com/hc/en-us/articles/20398642652561-MikroTik-IKEv2-setup-with-NordVPN)
* [NetDUMA](https://support.nordvpn.com/hc/en-us/articles/20323695823761-Netduma-setup-with-NordVPN)
* [OPNsense](https://support.nordvpn.com/hc/en-us/articles/20397569418129-OPNsense-21-setup-with-NordVPN)
* [OpenWRT](https://support.nordvpn.com/hc/en-us/articles/20340177222289-OpenWrt-setup-with-NordVPN)
* [Padavan](https://support.nordvpn.com/hc/en-us/articles/20323041135889-Padavan-setup-with-NordVPN)
* [Sabai](https://support.nordvpn.com/hc/en-us/articles/20323512359697-Sabai-setup-with-NordVPN)
* [Tomato](https://support.nordvpn.com/hc/en-us/articles/20317675285777-How-to-set-up-VPN-on-Tomato)
* [pfSense](https://support.nordvpn.com/hc/en-us/articles/20285211284497-pfSense-setup-with-NordVPN)
* [DrayTek](https://support.nordvpn.com/hc/en-us/articles/20397988815633-DrayTek-Vigor-IKEv2-setup-with-NordVPN)
* [EdgeRouter](https://support.nordvpn.com/hc/en-us/articles/20321386897041-EdgeRouter-and-Ubiquiti-setup-with-NordVPN)
* [TP-Link](https://support.nordvpn.com/hc/en-us/articles/20280525082001-Setting-up-TP-Link-with-NordVPN)
* Starlink (read more about how to use [VPN on Starlink](https://nordvpn.com/blog/starlink-vpn/))
## Not sure if your router is supported and/or can't find it on the list above?
First, see if you can find your router on our [list of unsupported routers](https://support.nordvpn.com/hc/en-us/articles/20379585675793-Which-routers-don-t-support-NordVPN).
If it’s not on there, check the user manual that came with your router (usually, manuals are available for download on the manufacturer’s website). Search the manual for any mentions of OpenVPN support. Your router must support the OpenVPN client in order to potentially support a NordVPN configuration. If you can’t find this information in the manual, consider contacting your router’s manufacturer.
If none of the tips mentioned above have helped you set up a connection, feel free to contact our support team!",https://support.nordvpn.com/hc/en-us/related/click?data=BAh7CjobZGVzdGluYXRpb25fYXJ0aWNsZV9pZGwrCBEJ4fyqEToYcmVmZXJyZXJfYXJ0aWNsZV9pZGwrCJFNfu1xEjoLbG9jYWxlSSIKZW4tdXMGOgZFVDoIdXJsSSJHL2hjL2VuLXVzL2FydGljbGVzLzE5NDI2MDg0NzE4ODY1LVNldHRpbmctdXAtYS1yb3V0ZXItd2l0aC1Ob3JkVlBOBjsIVDoJcmFua2kG--3aa505a1270f85d3a643a85b35a088b540414005
Error: This program does not support the version of Windows your computer is running,"If you are using a supported Windows Operating System version (Windows 10 64-bit, or Windows 11) for our application and you still receive an error ""This program does not support the version of Windows your computer is running."" try changing the compatibility mode of your settings.If you are using older Windows Operating System version, such as Windows 7, Windows 8.1, or Windows 10 32-bit, make sure to use our [legacy version of the app](https://support.nordvpn.com/hc/en-us/articles/19441140326289-Installing-and-using-NordVPN-on-Windows-7-and-8-1).
## How can I change compatibility mode?
1. Locate the NordVPN folder within your computer. To do so, click on file explorer (the folder icon).
2. Then click on the link bar ar type in C:\Program Files\NordVPN
3. Find the NordVPN file and right-click on it. A window will open up, there choose properties and left-click on this option.
4. A new window will pop up. Go to the Compatability tab.
5. Run this program compatibility mode for: should be disabled. If you can see a checkmark next to it - remove it by right-clicking on the check-box and pressing apply in the lower right corner.
6. Try to update NordVPN application once again.",https://support.nordvpn.com/hc/en-us/related/click?data=BAh7CjobZGVzdGluYXRpb25fYXJ0aWNsZV9pZGwrCBHGTF1zEjoYcmVmZXJyZXJfYXJ0aWNsZV9pZGwrCBHEuFZlEjoLbG9jYWxlSSIKZW4tdXMGOgZFVDoIdXJsSSJ6L2hjL2VuLXVzL2FydGljbGVzLzIwMjg2Njk1ODUxNTM3LUVycm9yLVRoaXMtcHJvZ3JhbS1kb2VzLW5vdC1zdXBwb3J0LXRoZS12ZXJzaW9uLW9mLVdpbmRvd3MteW91ci1jb21wdXRlci1pcy1ydW5uaW5nBjsIVDoJcmFua2kG--6e605706310e600f6adb8bc14b8ef6aef8993a84
Which routers don’t support NordVPN,"On 1 December 2018, NordVPN’s servers stopped supporting L2TP/IPsec and PPTP connections. More about that in [this article](https://nordvpn.com/blog/l2tp-pptp-protocol-update/).
If you use any of the routers listed below with their native firmware, you will not be able to use them with our service:
* Arris
* Belkin
* Cisco
* D-Link
* Huawei
* Linksys (except [WRT32X/WRT32XB AC3200](https://www.linksys.com/support-article?articleNum=270535))
* Nighthawk range routers ([unless the router is using DumaOS](https://www.netgear.com/home/online-gaming/))
* [Netgear](https://support.nordvpn.com/hc/en-us/articles/20282781982481-Can-I-set-up-Netgear-router-with-VPN)
* TRENDnet
* Tenda
* TotoLink
* Ubee
* Orbi
* Spectrum
* Xfinity
* Eero
* Verizon
* AT&T
* FRITZ!Box
* Most ISP-provided routers that were mentioned above
You can install the following custom firmware on some of the aforementioned models to make them work:
* DD-WRT:
* Tomato:
* Padavan:
* OpenWRT:
* Merlin:
## Other tips for router connectivity:
* If your router supports the OpenVPN protocol, search our knowledge base for the name of its manufacturer. You should find a tutorial on how to set it up. You can also check our [router tutorials](https://support.nordvpn.com/hc/en-us/sections/19326876055569-Router) section under the Connectivity category. If you cannot find the setup guide for your router, [contact our customer support](https://support.nordvpn.com/hc/en-us/articles/19482416296593-How-can-I-reach-NordVPN-customer-support) for help.
* If you want a router with out-of-the-box security and anonymity that NordVPN provides, head over to our partners at [FlashRouters](https://nordvpn.com/flashrouters/). They offer pre-configured routers delivering top-notch security and performance.
* Here is our list of [recommended routers for NordVPN](https://support.nordvpn.com/hc/en-us/articles/20195707547025-Which-router-should-I-use-with-NordVPN).",https://support.nordvpn.com/hc/en-us/related/click?data=BAh7CjobZGVzdGluYXRpb25fYXJ0aWNsZV9pZGwrCBEC9%2F2IEjoYcmVmZXJyZXJfYXJ0aWNsZV9pZGwrCJFNfu1xEjoLbG9jYWxlSSIKZW4tdXMGOgZFVDoIdXJsSSJKL2hjL2VuLXVzL2FydGljbGVzLzIwMzc5NTg1Njc1NzkzLVdoaWNoLXJvdXRlcnMtZG9uLXQtc3VwcG9ydC1Ob3JkVlBOBjsIVDoJcmFua2kH--dd7f68a4c696cde1b6f94531c9a63f69270f780c
Why Choose FlashRouters?,[FlashRouters](https://nordvpn.com/flashrouters/) offers some of the best routers for NordVPN pre-configured to deliver top-notch security and performance:,https://support.nordvpn.com/hc/en-us/related/click?data=BAh7CjobZGVzdGluYXRpb25fYXJ0aWNsZV9pZGwrCJFt%2BS1eEjoYcmVmZXJyZXJfYXJ0aWNsZV9pZGwrCJFNfu1xEjoLbG9jYWxlSSIKZW4tdXMGOgZFVDoIdXJsSSJNL2hjL2VuLXVzL2FydGljbGVzLzIwMTk1NzA3NTQ3MDI1LVdoaWNoLXJvdXRlci1zaG91bGQtSS11c2Utd2l0aC1Ob3JkVlBOBjsIVDoJcmFua2kI--8a51ca980482759cc9479a997a77a08db992b7db
Which router should I use with NordVPN?,"It's important that a router supports VPN configurations to use NordVPN; however, to maximize your NordVPN experience, a router that’s pre-configured for VPN use is key.
For example, FlashRouters offers a [wide range of NordVPN-compatible devices](https://nordvpn.com/flashrouters/) optimized for secure, high-speed connections right out of the box without having to configure or set up the routers.
For the best out-of-the-box router solution with extra safety, privacy, streaming capabilities, and an exclusive NordLynx integration, we recommend the [Privacy Hero 2](https://www.flashrouters.com/privacy-hero-nordvpn-router-by-flashrouters). This unique cloud-connected device also includes 1 year of NordVPN plus 1 year of Privacy Hero service, providing seamless security and performance for your home network.
## Why Choose FlashRouters?
[FlashRouters](https://nordvpn.com/flashrouters/) offers some of the best routers for NordVPN pre-configured to deliver top-notch security and performance:
* Top-Tier Security: Your entire network is shielded by NordVPN, keeping your online activity private and secure.
* Speed & Stability: Our devices are equipped with powerful processors and advanced WiFi technologies, ensuring fast and stable VPN connections.
* Plug-and-Play VPN Setup: Skip the headaches of manual configuration. FlashRouters comes pre-flashed and optimized for NordVPN compatibility.
* Ongoing Support: Need networking support assistance? Their expert support team is here to help with your setup and troubleshooting.
### More NordVPN Recommended Routers Options (OpenVPN Only)
Flashrouters also have a few models supporting only OpenVPN connection:
* [Next Gen WiFi 7](https://www.flashrouters.com/router-basics/wireless-be): These devices are significantly higher cost but offer NordVPN OpenVPN support.
* [Mesh VPN Routers](https://www.flashrouters.com/routers?fmr_use_case=344): Looking for more extensive VPN coverage? FlashRouters offers a wide array of heavily tested [Mesh WiFi Systems for NordVPN](https://www.flashrouters.com/routers?fmr_use_case=344).
* [AX3000 VPN Router](https://www.flashrouters.com/cudy-wr3000-vpn-router-by-flashrouters): If the lowest price is the main concern, this AX3000 is a popular economy device for OpenVPN.
## Configurable devices
You can also buy a router and configure it yourself. While many different routers are available from other manufacturers, the most commonly used are Asus routers, as most have a built-in OpenVPN client and require minimal effort to set up.
Some popular examples include the Asus RT-AX86U, RT-AX68U, and RT-AX88U (AX6000). However, these devices will not support NordLynx.
Most other routers require firmware flashing, which might be tricky and does not work on all platforms. If you want a legacy router that provides OpenVPN encryption, you can also find any router that supports the following custom firmware:
* DD-WRT:
* Tomato:
* OpenWRT:
* Merlin:
The next step will be to learn [how to set up NordVPN on your router](https://support.nordvpn.com/hc/en-us/articles/19426084718865-Setting-up-a-router-with-NordVPN).",https://support.nordvpn.com/hc/en-us/related/click?data=BAh7CjobZGVzdGluYXRpb25fYXJ0aWNsZV9pZGwrCJFt%2BS1eEjoYcmVmZXJyZXJfYXJ0aWNsZV9pZGwrCJFNfu1xEjoLbG9jYWxlSSIKZW4tdXMGOgZFVDoIdXJsSSJNL2hjL2VuLXVzL2FydGljbGVzLzIwMTk1NzA3NTQ3MDI1LVdoaWNoLXJvdXRlci1zaG91bGQtSS11c2Utd2l0aC1Ob3JkVlBOBjsIVDoJcmFua2kI--8a51ca980482759cc9479a997a77a08db992b7db
GL.iNet setup with NordVPN,"This tutorial is designed to help you set up your GL.iNet with a VPN. We will explain how to connect the GL.iNet router to NordVPN using the OpenVPN protocol.
The following changes have to be made in the web configuration panel of your router, which you can access by entering the local IP of your router in your web browser. The local IPs are 192.168.1.1 or 192.168.0.1 by default on most routers. You can access these by opening http://192.168.1.1 or http://192.168.0.1 in your browser. The default IP, username, and password can also be found in the user manual of your router.
1. Firstly, you will have to download the OpenVPN manual connection files.
Follow the steps below to find the manual connection configuration files:
1. Log into your [Nord Account](https://my.nordaccount.com/), and click NordVPN.
2. Scroll down to Advanced Settings and click Set up NordVPN manually.
3. Select the OpenVPN configuration files tab.
4. Find the server you wish to connect to by using the Search bar or by scrolling down and download it by clicking Download UDP or Download TCP.
5. When connecting to OpenVPN & IKEv2 manually, you're going to need to use the Username and Password from the Service credential tab.
2. Access your device via the WebGUI. The GL.iNet IP address is 192.168.8.1 by default.
3. Once you are in the admin panel, go to “VPN” > “OpenVPN client” > “Add a new OpenVPN configuration.”
4. Upload the previously downloaded .ovpn file.
5. A new window will pop up, asking you to specify your NordVPN service credentials.
Paste your credentials and click ""Submit.""
Follow the steps below to find the service credentials for manual connection setup:
1. Log into your [Nord Account](https://my.nordaccount.com/), click NordVPN, and, under Manual setup, click on Service credentials. Here you'll find the Username and Password needed to connect manually.
6. Click ""Connect"" to enable the OpenVPN connection.
7. Once connected, you will see your connection status, including your new IP address as well as received and sent data.
8. Congratulations! You are now connected to NordVPN.",https://support.nordvpn.com/hc/en-us/related/click?data=BAh7CjobZGVzdGluYXRpb25fYXJ0aWNsZV9pZGwrCBHgv3JlEjoYcmVmZXJyZXJfYXJ0aWNsZV9pZGwrCJFNfu1xEjoLbG9jYWxlSSIKZW4tdXMGOgZFVDoIdXJsSSJBL2hjL2VuLXVzL2FydGljbGVzLzIwMjI2OTI2MTc0MjI1LUdMLWlOZXQtc2V0dXAtd2l0aC1Ob3JkVlBOBjsIVDoJcmFua2kJ--0e218230a48c5e968def384d3ff270cb04af3574
MikroTik IKEv2 setup with NordVPN,"MikroTik routers support many VPN services, including NordVPN. In particular, MikroTik routers with RouterOS version 6.45 and later let you establish an IKEv2 EAP [VPN tunnel](https://nordvpn.com/blog/vpn-tunnel/) to a NordVPN server. This tutorial explains how you can connect to a VPN on your MicroTik router.
1. Open the terminal in your RouterOS settings.
2. Install the NordVPN root certificate by running the following commands:/tool fetch url=""https://downloads.nordcdn.com/certificates/root.der""/certificate import file-name=root.der
3. Connect to the NordVPN server to find out the hostname of the [recommended server](https://my.nordaccount.com/dashboard/nordvpn/manual-configuration/server-recommendation/). For our example, we used ""nl125.nordvpn.com.""
Follow the steps below to find the best server for your connection:
1. Log into your [Nord Account](https://my.nordaccount.com/), and click NordVPN.
2. Scroll down to Advanced Settings and click Set up NordVPN manually.
3. Select the Server recommendation tab. According to your location, the best server will be recommended.
4. By pressing Advanced filters you can further customize the recommended servers by selecting the Server type and the Security protocol.
5. Under the server IP, next to Available protocols, select IKEv2/IPSec.
6. In the window that pops up, copy the server hostname and use it in your IKEv2 manual connection setup.
7. When connecting to IKEv2 manually, you're going to need to use the Username and Password from the Service credential tab.
8. Now you have to set up the IPsec tunnel. We recommend creating a separate profile and proposal configuration to avoid interfering with existing or future IPsec configuration:/ip ipsec profileadd name=NordVPN/ip ipsec proposaladd name=NordVPN pfs-group=noneWhile it is possible to use the default policy template, it is better to create a new policy group and template to separate this configuration from other IPsec configurations./ip ipsec policy group add name=NordVPN/ip ipsec policy add dst-address=0.0.0.0/0 group=NordVPN proposal=NordVPN src-address=0.0.0.0/0 template=yes
9. Create a new “mode config” entry with “responder=no” (no quotation marks) that will request configuration parameters from the server:/ip ipsec mode-configadd name=NordVPN responder=no
10. Create peer and identity configurations. Enter your NordVPN credentials in the username and password parameters:/ip ipsec peeradd address=nl125.nordvpn.com exchange-mode=ike2 name=NordVPN profile=NordVPN/ip ipsec identityadd auth-method=eap certificate="""" eap-methods=eap-mschapv2 generate-policy=port-strict mode-config=NordVPN peer=NordVPN policy-template-group=NordVPN username=YourNordVPNServiceUsername password=YourNordVPNServicePassword
11. You can find your NordVPN service credentials (service username and service password) in the [Nord Account dashboard.](https://my.nordaccount.com/dashboard/nordvpn/)
Follow the steps below to find the service credentials for manual connection setup:
1. Log into your [Nord Account](https://my.nordaccount.com/), click NordVPN, and, under Manual setup, click on Service credentials. Here you'll find the Username and Password needed to connect manually.
2. Now choose what to send over the VPN tunnel. In this example, we have the local network “192.168.88.0/24” behind the router, and we want all traffic from this network to be sent through the tunnel. First, we have to make a new “IP/Firewall/Address” list that consists of our local network./ip firewall address-listadd address=192.168.88.0/24 list=localAssign the newly created ""IP/Firewall/Address"" list to the ""mode-config"" configuration:/ip ipsec mode-configset [ find name=NordVPN ] src-address-list=local
3. Verify that the correct source NAT rule is dynamically generated when the tunnel is established./ip firewall nat print",https://support.nordvpn.com/hc/en-us/related/click?data=BAh7CjobZGVzdGluYXRpb25fYXJ0aWNsZV9pZGwrCJFl2W2NEjoYcmVmZXJyZXJfYXJ0aWNsZV9pZGwrCJFNfu1xEjoLbG9jYWxlSSIKZW4tdXMGOgZFVDoIdXJsSSJIL2hjL2VuLXVzL2FydGljbGVzLzIwMzk4NjQyNjUyNTYxLU1pa3JvVGlrLUlLRXYyLXNldHVwLXdpdGgtTm9yZFZQTgY7CFQ6CXJhbmtpCg%3D%3D--42495d5c95541f64fd2f5465f0e112b3ebab21c7
How to enable MFA for your Nord Account?,1. Log into your [Nord Account](https://nordaccount.com/).,https://support.nordvpn.com/hc/en-us/related/click?data=BAh7CjobZGVzdGluYXRpb25fYXJ0aWNsZV9pZGwrCJHkVcOuEToYcmVmZXJyZXJfYXJ0aWNsZV9pZGwrCJGPoP97EjoLbG9jYWxlSSIKZW4tdXMGOgZFVDoIdXJsSSJHL2hjL2VuLXVzL2FydGljbGVzLzE5NDQyMjk5MTY3ODg5LVdoYXQtaXMtTUZBLWFuZC1ob3ctdG8tZW5hYmxlLWl0BjsIVDoJcmFua2kG--42a323c54a4a9b33cb5fa6499d71bdcdd6923fdd
"What is MFA, and how to enable it","[Multi-factor authentication](https://nordvpn.com/blog/what-is-multi-factor-authentication/) (MFA) is a security mechanism used to verify the identity of a user by requiring the presentation of two or more authentication factors: password, PIN, token, USB security key, fingerprint, or facial recognition.
There are two MFA options for Nord Account:
* You may use authenticator applications to generate a code, such as [Google Authenticator](https://play.google.com/store/apps/details?id=com.google.android.apps.authenticator2&hl=en_US&gl=US), [Microsoft Authenticator](https://play.google.com/store/apps/details?id=com.azure.authenticator&hl=lt&gl=US), [Authy](https://play.google.com/store/apps/details?id=com.authy.authy&), or any other. Any one of those apps will create a code that you must enter whenever accessing Nord Account. The code changes every 30 seconds.
* A second option is to use a security key. It can be a Bluetooth, NFC, or USB security key that will hold a unique PIN and ensure effortless access only for you. Nord Account supports USB security keys certified by FIDO2. That includes the Security Key series, Yubikey 5 series, iePass FIDO K44, MultiPass FIDO K25, ePass FIDO NFC K9 and K35, BioPass FIDO K26 and K27, and others.
## How to enable MFA for your Nord Account?
1. Log into your [Nord Account](https://nordaccount.com/).
2. If you are using a desktop device, click on your account name in the top right corner and choose Account Settings. Switch to a Multi-factor authentication (MFA) section, and click on Manage MFA.On a mobile device, tap on the free line sign, scroll down to the bottom of the menu, where you find Account Settings, select Multi-factor authentication and tap on manage MFA.
3. On both, desktop and mobile, you will be asked to verify your email address. To do so, enter the verification code you have received to your NordVPN account associated email to verify it.
4. From there, select Set up next to the Authenticator app.
5. This action will generate your QR code and key. Open your mobile authentication application (such as Duo Mobile, Authy, etc.) and scan the QR code or manually enter the key. Once your account is saved in the authenticator application, return to the Nord Account website and click Continue.
6. Enter the MFA code generated by your mobile authentication application.
7. Before finishing the MFA setup, make sure to [save your backup codes](https://support.nordvpn.com/hc/en-us/articles/30047757775249-NordVPN-MFA-backup-codes) here. When done, click Continue.
### As another option, you can use a security key to add MFA feature.
1. Choose set up next to the Security key option in your Nord Account settings.
2. Follow the steps shown. Setup steps may differ depending on the security key.
3. Once you have finished the setup, a physical security key will be needed to log into your Nord Account.
4. In the end, you will be suggested to log out from all devices. We strongly recommend doing that so that all of your devices that are used with Nord Account would be instantly protected with MFA.",https://support.nordvpn.com/hc/en-us/related/click?data=BAh7CjobZGVzdGluYXRpb25fYXJ0aWNsZV9pZGwrCJHkVcOuEToYcmVmZXJyZXJfYXJ0aWNsZV9pZGwrCJGPoP97EjoLbG9jYWxlSSIKZW4tdXMGOgZFVDoIdXJsSSJHL2hjL2VuLXVzL2FydGljbGVzLzE5NDQyMjk5MTY3ODg5LVdoYXQtaXMtTUZBLWFuZC1ob3ctdG8tZW5hYmxlLWl0BjsIVDoJcmFua2kG--42a323c54a4a9b33cb5fa6499d71bdcdd6923fdd
NordVPN MFA backup codes,"NordVPN MFA backup codes are necessary to log into your account in case you have lost access to your account login authentication means.
When setting up MFA on your account initially, you are presented with these backup codes alongside the option to copy or print them.
We highly recommend saving the backup codes in cloud storage or even owning a physical copy in a hidden location.
You can also gain access to your backup codes when in your Account settings.
1. In Account settings > Multi-factor authentication (MFA), click on Manage MFA.
2. Verify your email – you should receive a one time use code in the inbox of the email associated with your Nord Account.
3. Press view code to view your backup codes – here you will also be able to regenerate, copy or print your backup codes if needed.",https://support.nordvpn.com/hc/en-us/related/click?data=BAh7CjobZGVzdGluYXRpb25fYXJ0aWNsZV9pZGwrCJGx7QlUGzoYcmVmZXJyZXJfYXJ0aWNsZV9pZGwrCJGPoP97EjoLbG9jYWxlSSIKZW4tdXMGOgZFVDoIdXJsSSI%2FL2hjL2VuLXVzL2FydGljbGVzLzMwMDQ3NzU3Nzc1MjQ5LU5vcmRWUE4tTUZBLWJhY2t1cC1jb2RlcwY7CFQ6CXJhbmtpBw%3D%3D--729d3c5cdae2fa9b70b8d5e16054e4b9f4779a17
How to start using NordVPN,"If you are interested in starting to use the NordVPN service but are unsure how to do so, this article will introduce you to the steps needed to begin using NordVPN today.
In this article we will cover:
* [Downloading NordVPN](
* [Installing NordVPN](
* [Purchasing a NordVPN plan](
* [Connecting to NordVPN](
* [Connecting to NordVPN on Linux](
* [Additional NordVPN features](
## Downloading NordVPN
To begin using NordVPN, you will first need to download the application for your respective device:
* Download the NordVPN application for Windows
* Download the NordVPN application for macOS
* Download the NordVPN application for Linux
* Download the NordVPN application for Android
* Download the NordVPN application for iOS
## Installing NordVPN
If you are not sure how to install and set up the application, choose the OS you're going to use and follow one of the guides below:
* Learn how to install NordVPN on Windows 7 and 8.1
* Learn how to install NordVPN on Windows 10 and 11
* Learn how to install NordVPN on macOS
* Learn how to install NordVPN on Linux
* Learn how to install NordVPN on Android
* Learn how to install NordVPN on iOS
Once the application has been set up, you need to purchase the desired plan.
## Purchasing a NordVPN plan
The following article will introduce you to [NordVPN Plans and Prices](https://support.nordvpn.com/hc/en-us/articles/19744251757841-Plans-and-prices-of-NordVPN-service). And if you're uncertain how to proceed with the purchase, read the article on [purchasing a NordVPN subscription](https://support.nordvpn.com/hc/en-us/articles/19478048190481-How-to-purchase-a-NordVPN-subscription).
Once you have an active subscription, you need to connect to NordVPN.
## Connecting to NordVPN
In order to connect to NordVPN, follow along below:
1. Use the quick connect button:Alternatively, you can use the dots on the map to connect to specific locations.
2. Click the dot in a country:Lastly, you may also use the search bar.
3. Type in the name of the country you would like to connect to:
### Connecting to NordVPN on Linux
To connect on a Linux device, you will need to type in the following commands :
```
nordvpn connect
```
```
nordvpn c
```
To connect to specific servers, use:
```
nordvpn connect
```
(eg. nordvpn connect uk715)
Follow our article on how to [connect to NordVPN using Linux Terminal](https://support.nordvpn.com/hc/en-us/articles/20164827795345-Connect-to-NordVPN-using-Linux-Terminal).
That's it! Now you can begin using the app and investigating the different features.
## Additional NordVPN features
Here you can find some articles covering NordVPN's features:
* [Different NordVPN server categories explained](https://support.nordvpn.com/hc/en-us/articles/19479130821521-Different-NordVPN-server-categories-explained)
* [NordVPN Kill Switch: how does it work](https://support.nordvpn.com/hc/en-us/articles/19509682644369-NordVPN-Kill-Switch-how-does-it-work)
* [What is Threat Protection Pro™ and Threat Protection?](https://support.nordvpn.com/hc/en-us/articles/19508765521425-What-is-Threat-Protection-Pro-and-Threat-Protection)
* [Dedicated NordVPN IP addresses](https://support.nordvpn.com/hc/en-us/articles/19507808024209-Dedicated-NordVPN-IP-addresses)",https://support.nordvpn.com/hc/en-us/related/click?data=BAh7CjobZGVzdGluYXRpb25fYXJ0aWNsZV9pZGwrCJFpIBV0EjoYcmVmZXJyZXJfYXJ0aWNsZV9pZGwrCJGPoP97EjoLbG9jYWxlSSIKZW4tdXMGOgZFVDoIdXJsSSJBL2hjL2VuLXVzL2FydGljbGVzLzIwMjg5Nzc5OTUyMDE3LUhvdy10by1zdGFydC11c2luZy1Ob3JkVlBOBjsIVDoJcmFua2kK--b688d17e3044c787195a0fe156a5d7940f183300
How to set up dedicated IP,"NordVPN’s Dedicated IP feature provides a unique, static IP address that ensures reliable access and improved privacy. Unlike shared IPs, this one is solely yours, making it perfect for services that require a fixed IP. Learn more about [dedicated IP](https://nordvpn.com/features/dedicated-ip/) on our website.If you have purchased a dedicated IP, you can easily set it up through your NordVPN account by following these steps:
1. Log in to your Nord Account:
2. Once logged in, select the NordVPN button located in the upper-left section on your dashboard:
3. If your dedicated IP is not yet ready to use, you will see a setup required warning in the dedicated IP tab:
4. Click the set up dedicated IP button:
5. Press the preferred IP address location drop-down menu:
6. Next, select you wanted dedicated IP location from the drop-down menu:
7. When you select your preferred location, click the set up dedicated IP button:
8. You will be assigned an IP address in the country that you’ve chosen:
9. You should now see your assigned IP address in the dedicated IP tab:
Once this is done, you have successfully set up the NordVPN dedicated IP. You can now proceed with connecting to a dedicated IP on your device:
* Connect to a dedicated IP server on Windows
* Connect to a dedicated IP server on Linux
* Connect to a dedicated IP server on macOS
* Connect to a dedicated IP server on iOS
* Connect to a dedicated IP server on Android
If you experience any issues or have additional questions, do not hesitate to submit a request to our customer success team.",https://support.nordvpn.com/hc/en-us/related/click?data=BAh7CjobZGVzdGluYXRpb25fYXJ0aWNsZV9pZGwrCBECcjS7EjoYcmVmZXJyZXJfYXJ0aWNsZV9pZGwrCBEe9MByEjoLbG9jYWxlSSIKZW4tdXMGOgZFVDoIdXJsSSJBL2hjL2VuLXVzL2FydGljbGVzLzIwNTk1MjQ4MDcxMTg1LUhvdy10by1zZXQtdXAtZGVkaWNhdGVkLUlQBjsIVDoJcmFua2kG--b09f62f59da22d07918e55ac5dac165e700e32b3
Which routers don’t support NordVPN,"On 1 December 2018, NordVPN’s servers stopped supporting L2TP/IPsec and PPTP connections. More about that in [this article](https://nordvpn.com/blog/l2tp-pptp-protocol-update/).
If you use any of the routers listed below with their native firmware, you will not be able to use them with our service:
* Arris
* Belkin
* Cisco
* D-Link
* Huawei
* Linksys (except [WRT32X/WRT32XB AC3200](https://www.linksys.com/support-article?articleNum=270535))
* Nighthawk range routers ([unless the router is using DumaOS](https://www.netgear.com/home/online-gaming/))
* [Netgear](https://support.nordvpn.com/hc/en-us/articles/20282781982481-Can-I-set-up-Netgear-router-with-VPN)
* TRENDnet
* Tenda
* TotoLink
* Ubee
* Orbi
* Spectrum
* Xfinity
* Eero
* Verizon
* AT&T
* FRITZ!Box
* Most ISP-provided routers that were mentioned above
You can install the following custom firmware on some of the aforementioned models to make them work:
* DD-WRT:
* Tomato:
* Padavan:
* OpenWRT:
* Merlin:
## Other tips for router connectivity:
* If your router supports the OpenVPN protocol, search our knowledge base for the name of its manufacturer. You should find a tutorial on how to set it up. You can also check our [router tutorials](https://support.nordvpn.com/hc/en-us/sections/19326876055569-Router) section under the Connectivity category. If you cannot find the setup guide for your router, [contact our customer support](https://support.nordvpn.com/hc/en-us/articles/19482416296593-How-can-I-reach-NordVPN-customer-support) for help.
* If you want a router with out-of-the-box security and anonymity that NordVPN provides, head over to our partners at [FlashRouters](https://nordvpn.com/flashrouters/). They offer pre-configured routers delivering top-notch security and performance.
* Here is our list of [recommended routers for NordVPN](https://support.nordvpn.com/hc/en-us/articles/20195707547025-Which-router-should-I-use-with-NordVPN).",https://support.nordvpn.com/hc/en-us/related/click?data=BAh7CjobZGVzdGluYXRpb25fYXJ0aWNsZV9pZGwrCBEC9%2F2IEjoYcmVmZXJyZXJfYXJ0aWNsZV9pZGwrCBEe9MByEjoLbG9jYWxlSSIKZW4tdXMGOgZFVDoIdXJsSSJKL2hjL2VuLXVzL2FydGljbGVzLzIwMzc5NTg1Njc1NzkzLVdoaWNoLXJvdXRlcnMtZG9uLXQtc3VwcG9ydC1Ob3JkVlBOBjsIVDoJcmFua2kH--9ce7e226ce769c76facc7c398b305f1f5ff23ba2
What OpenVPN ports does NordVPN use?,"With NordVPN, you can connect via OpenVPN both over TCP and UDP.",https://support.nordvpn.com/hc/en-us/related/click?data=BAh7CjobZGVzdGluYXRpb25fYXJ0aWNsZV9pZGwrCJH8vOXmEToYcmVmZXJyZXJfYXJ0aWNsZV9pZGwrCBEe9MByEjoLbG9jYWxlSSIKZW4tdXMGOgZFVDoIdXJsSSJEL2hjL2VuLXVzL2FydGljbGVzLzE5NjgzMzk0NTE4MTYxLU9wZW5WUE4tY29ubmVjdGlvbi1vbi1Ob3JkVlBOBjsIVDoJcmFua2kI--2c2d32cd23e5998f4f67cda947e423a2c82f4e13
How do I manually set up OpenVPN with NordVPN?,You can set up an OpenVPN connection manually on different devices with NordVPN. Here’s how:,https://support.nordvpn.com/hc/en-us/related/click?data=BAh7CjobZGVzdGluYXRpb25fYXJ0aWNsZV9pZGwrCJH8vOXmEToYcmVmZXJyZXJfYXJ0aWNsZV9pZGwrCBEe9MByEjoLbG9jYWxlSSIKZW4tdXMGOgZFVDoIdXJsSSJEL2hjL2VuLXVzL2FydGljbGVzLzE5NjgzMzk0NTE4MTYxLU9wZW5WUE4tY29ubmVjdGlvbi1vbi1Ob3JkVlBOBjsIVDoJcmFua2kI--2c2d32cd23e5998f4f67cda947e423a2c82f4e13
OpenVPN connection on NordVPN,"OpenVPN is an open-source VPN protocol that makes use of virtual private network (VPN) techniques to establish safe site-to-site or point-to-point connections. NordVPN service uses this protocol for a successful VPN connection.
## What OpenVPN ports does NordVPN use?
With NordVPN, you can connect via OpenVPN both over TCP and UDP.
For OpenVPN TCP connections, use port 443.For OpenVPN UDP connections, use port 1194.
For more information, please read our article on the differences between TCP and UDP.
## How do I manually set up OpenVPN with NordVPN?
You can set up an OpenVPN connection manually on different devices with NordVPN. Here’s how:
* Setup OpenVPN for Windows
* Setup OpenVPN for MacOS
* Setup OpenVPN for Linux by using Terminal
* Setup OpenVPN for Linux by using Network Manager
* Setup OpenVPN for Android
* Setup OpenVPN for iOS
* Setup OpenVPN for Raspberry Pi",https://support.nordvpn.com/hc/en-us/related/click?data=BAh7CjobZGVzdGluYXRpb25fYXJ0aWNsZV9pZGwrCJH8vOXmEToYcmVmZXJyZXJfYXJ0aWNsZV9pZGwrCBEe9MByEjoLbG9jYWxlSSIKZW4tdXMGOgZFVDoIdXJsSSJEL2hjL2VuLXVzL2FydGljbGVzLzE5NjgzMzk0NTE4MTYxLU9wZW5WUE4tY29ubmVjdGlvbi1vbi1Ob3JkVlBOBjsIVDoJcmFua2kI--2c2d32cd23e5998f4f67cda947e423a2c82f4e13
What is a jailbroken device,"### What does the term mean?
Jailbreaking refers to bypassing of certain device restrictions. These restrictions are set by the manufacturer, usually in order to increase the security and the reliability of their devices. For instance, Apple restricts the ability of its customers when it comes to downloading applications from outside the Apple App Store. In order to sideload applications, which is to download them from an unofficial source, users must first jailbreak their iOS devices. By doing so, root access is gained, meaning that users can modify the needed files and directories that are otherwise hidden.
Essentially, jailbreaking provides greater control over one's device. However, additional freedom comes at a risk to security as well as privacy. One example stems from potential malware that can be downloaded from insecure sources. Unlike the Apple App Store where apps are thoroughly checked, there is no guarantee that the apps from outside will be safe. In the case that they indeed possess malware, your credentials and other personal information could be stolen without your knowledge.
### How can I know if my device is jailbroken, and can NordVPN protect me if it is?
First of all, the iOS version of the NordVPN application comes with a system that automatically detects whether or not your device could be jailbroken. If it is, you will be greeted with the following message:

Additionally, you can also find the jailbreak indication by scrolling to the bottom of the Settings menu:

If you suspect that your device may have malware or spyware installed, we do not recommend installing and using NordVPN. This is because your credentials may be stolen by malicious applications. Additionally, although NordVPN encrypts your connection to the internet, as well as protects your privacy online, it cannot prevent damage from downloading the above-mentioned files.",https://support.nordvpn.com/hc/en-us/related/click?data=BAh7CjobZGVzdGluYXRpb25fYXJ0aWNsZV9pZGwrCBFz%2FhudEjoYcmVmZXJyZXJfYXJ0aWNsZV9pZGwrCBHEuFZlEjoLbG9jYWxlSSIKZW4tdXMGOgZFVDoIdXJsSSJCL2hjL2VuLXVzL2FydGljbGVzLzIwNDY1OTg4ODI1ODczLVdoYXQtaXMtYS1qYWlsYnJva2VuLWRldmljZQY7CFQ6CXJhbmtpCQ%3D%3D--5d6bec5b3c6d709a4cf93a3c02f003096092a413
Which routers don’t support NordVPN,"On 1 December 2018, NordVPN’s servers stopped supporting L2TP/IPsec and PPTP connections. More about that in [this article](https://nordvpn.com/blog/l2tp-pptp-protocol-update/).
If you use any of the routers listed below with their native firmware, you will not be able to use them with our service:
* Arris
* Belkin
* Cisco
* D-Link
* Huawei
* Linksys (except [WRT32X/WRT32XB AC3200](https://www.linksys.com/support-article?articleNum=270535))
* Nighthawk range routers ([unless the router is using DumaOS](https://www.netgear.com/home/online-gaming/))
* [Netgear](https://support.nordvpn.com/hc/en-us/articles/20282781982481-Can-I-set-up-Netgear-router-with-VPN)
* TRENDnet
* Tenda
* TotoLink
* Ubee
* Orbi
* Spectrum
* Xfinity
* Eero
* Verizon
* AT&T
* FRITZ!Box
* Most ISP-provided routers that were mentioned above
You can install the following custom firmware on some of the aforementioned models to make them work:
* DD-WRT:
* Tomato:
* Padavan:
* OpenWRT:
* Merlin:
## Other tips for router connectivity:
* If your router supports the OpenVPN protocol, search our knowledge base for the name of its manufacturer. You should find a tutorial on how to set it up. You can also check our [router tutorials](https://support.nordvpn.com/hc/en-us/sections/19326876055569-Router) section under the Connectivity category. If you cannot find the setup guide for your router, [contact our customer support](https://support.nordvpn.com/hc/en-us/articles/19482416296593-How-can-I-reach-NordVPN-customer-support) for help.
* If you want a router with out-of-the-box security and anonymity that NordVPN provides, head over to our partners at [FlashRouters](https://nordvpn.com/flashrouters/). They offer pre-configured routers delivering top-notch security and performance.
* Here is our list of [recommended routers for NordVPN](https://support.nordvpn.com/hc/en-us/articles/20195707547025-Which-router-should-I-use-with-NordVPN).",https://support.nordvpn.com/hc/en-us/related/click?data=BAh7CjobZGVzdGluYXRpb25fYXJ0aWNsZV9pZGwrCBEC9%2F2IEjoYcmVmZXJyZXJfYXJ0aWNsZV9pZGwrCBHEuFZlEjoLbG9jYWxlSSIKZW4tdXMGOgZFVDoIdXJsSSJKL2hjL2VuLXVzL2FydGljbGVzLzIwMzc5NTg1Njc1NzkzLVdoaWNoLXJvdXRlcnMtZG9uLXQtc3VwcG9ydC1Ob3JkVlBOBjsIVDoJcmFua2kK--e1e6af940c9a9e6ebed43ee288952f1633d2cd82
Common issues with activation codes,"Activation codes let you create a prepaid NordVPN account, extend an existing subscription, or even give NordVPN as a gift to others. To get started, follow our guide on [how to use a NordVPN activation code](https://support.nordvpn.com/hc/en-us/articles/19685995851665-How-to-get-NordVPN-with-activation-code).
This article addresses the most common issues that users have encountered when trying to apply activation codes.
Wrong email address
Before you apply the activation code, please double-check the email address you provided. The activation code will be applied to the email address you specify immediately, even if it is incorrect. If you mistakenly enter an email address that is not tied to your Nord Account, please [contact our customer support team](https://nordvpn.com/contact-us/) for assistance.
Ambiguous symbols
It is easy to confuse the letter “O” (capital “o”) for “0” (zero) and the letter “I” (capital “i”) for “l” (lowercase “L”). Try replacing these ambiguous symbols with their lookalikes if you’ve entered the rest of the code correctly.
This issue only affects older NordVPN activation codes, because we have stopped using ambiguous symbols to avoid confusion.
Code already activated
Any given activation code can only be used once. If you’ve applied that activation code to extend your subscription at some point in the past, any further attempts will end in error.
You can check the status of your subscription by logging in to [Nord Account](https://my.nordaccount.com/). If you can’t remember your Nord Account credentials, use our handy password recovery tool.
Activating multiple codes
Each NordVPN activation code must be applied separately. If you have multiple activation codes, simply repeat the [activation process](https://support.nordvpn.com/hc/en-us/articles/19685995851665-How-to-get-NordVPN-with-activation-code) for each one.",https://support.nordvpn.com/hc/en-us/related/click?data=BAh7CjobZGVzdGluYXRpb25fYXJ0aWNsZV9pZGwrCJEXSFRzEjoYcmVmZXJyZXJfYXJ0aWNsZV9pZGwrCJEvyoDnEToLbG9jYWxlSSIKZW4tdXMGOgZFVDoIdXJsSSJKL2hjL2VuLXVzL2FydGljbGVzLzIwMjg2NTQ0NTQ5Nzc3LUNvbW1vbi1pc3N1ZXMtd2l0aC1hY3RpdmF0aW9uLWNvZGVzBjsIVDoJcmFua2kG--8de4ffcacc8b9e956910c6b114d9a2b10f8ab921
How to apply a NordVPN coupon code,"To apply a NordVPN discount code, follow these steps:
1. Go to our [pricing page.](https://nordvpn.com/pricing/)
2. Select a preferred plan.
3. Click do you have a promo code?:
4. Enter the coupon code you have, and press apply:Now you will have the deal corresponding to your [NordVPN coupon](https://nordvpn.com/coupon/) code applied to your purchase.
After clicking apply, your coupon code will be applied to your purchase.
NordVPN provides discounts during certain events, such as on [Black Friday](https://nordvpn.com/black-friday/) and [Cyber Monday](https://nordvpn.com/cyber-monday/). Make sure to regularly check out our main page for any active deals.",https://support.nordvpn.com/hc/en-us/related/click?data=BAh7CjobZGVzdGluYXRpb25fYXJ0aWNsZV9pZGwrCBFNhrXnEToYcmVmZXJyZXJfYXJ0aWNsZV9pZGwrCJEvyoDnEToLbG9jYWxlSSIKZW4tdXMGOgZFVDoIdXJsSSJJL2hjL2VuLXVzL2FydGljbGVzLzE5Njg2ODgwNTk1MjE3LUhvdy10by1hcHBseS1hLU5vcmRWUE4tY291cG9uLWNvZGUGOwhUOglyYW5raQc%3D--00b8b0befdfdb3b4d545d4e17318d975f6649cc0
How to use NordVPN on gaming consoles,"Video gaming consoles do not support built-in VPN functionality. You can’t download NordVPN on PlayStation or Xbox, for example.
To set up your PS4, PS5, Xbox, or other gaming console with NordVPN, you can use one of these methods:
1. Set up NordVPN on your router.
2. Set up a VPN-protected hotspot and connect to that network on your gaming console.",https://support.nordvpn.com/hc/en-us/related/click?data=BAh7CjobZGVzdGluYXRpb25fYXJ0aWNsZV9pZGwrCBHFXQgTEzoYcmVmZXJyZXJfYXJ0aWNsZV9pZGwrCJEgsuKuEToLbG9jYWxlSSIKZW4tdXMGOgZFVDoIdXJsSSJML2hjL2VuLXVzL2FydGljbGVzLzIwOTcyNDY1NjY5MzkzLUhvdy10by11c2UtTm9yZFZQTi1vbi1nYW1pbmctY29uc29sZXMGOwhUOglyYW5raQo%3D--ea702add7ad1da409a426940c5b7526ff4b73ff5
What is your money-back policy?,"Here is the refund and cancellation policy at the core of our 30-day money-back guarantee:
“...if you are not satisfied with our Services, you may cancel the Subscription and request a refund within 30 days following your purchase of our Services (“Money Back Guarantee”). Please note that Subscriptions may be refunded on the basis of the Money Back Guarantee only after the initial purchase. Once a Subscription is renewed, it cannot be refunded on the basis of the Money Back Guarantee, unless applicable law provides otherwise.”
This and other conditions of our service can be found in our [Terms of Service](https://my.nordaccount.com/legal/terms-of-service/).
Here are our instructions for [how to cancel](https://support.nordvpn.com/hc/en-us/articles/19556844985489-How-to-cancel-auto-renewal-for-your-subscription) automatic payment renewal.
## Requesting a refund
Previously, refunds could only be processed through our support team. We have now implemented an automated refund system that is more efficient, faster, and convenient for our customers to use. This change also improves our ability to gather feedback, allowing us to better understand issues and improve our service. As we continue to refine this new process, your feedback is welcomed to help us enhance it further.
To request a refund for your payment, contact our customer support team via live chat available in the bottom right corner of the page, and indicate you would like us to refund your payment.
1. You will receive a link to your Nord Account dashboard. Follow the link and verify it’s you who’s trying to access the account.
2. In the following window, you will see which payments are eligible for a refund. Such payments will have a Refund button available. To proceed, click on Refund.Please keep in mind that not all payments are eligible for refunds, and certain terms apply depending on where you bought the subscription:
* * Apple App Store: Subscriptions purchased via the Apple App Store are subject to Apple's refund policies. We're unable to issue refunds for payments made through the Apple App Store. For assistance, please reach out to Apple directly via Apple Support.
* Amazon Appstore: If you've purchased your subscription through the Amazon App Store, contact Amazon directly for assistance via Amazon Support.
* Google Play Store: Refunds for payments made through the Google Play Store can be requested through NordVPN’s customer support, provided they fall within the refund terms outlined above. Additionally, if the payment was made within the last 48 hours, you can request a refund directly from your Google Play account. For more details, visit Google Play Support.
* Retailers or resellers: If you've purchased a subscription outside the NordVPN website (e.g., physical store, online shop, or marketplace like BestBuy or StackSocial), please contact the retailer directly regarding the refund.
1. In the following window, select the reason for canceling the service and requesting a refund. Your feedback is invaluable because it helps us pinpoint areas for improvement and ensures a better experience for all our users.Once completed, click Submit and Continue. 
2. You will see your refund summary. You can confirm it by clicking Refund.
3. After submitting the request, you will receive a confirmation email saying that your refund has been ordered.
4. You should now see the refund status for your payment as Refund Processing. This means that your request has been received and is currently being processed. This process can take up to a few hours*.*Please note, that due to recent implementation, it may take up to 4 hours for a refund request to be processed.
5. Once the refund is complete, the refund status on your dashboard will change to Refunded, and you will receive a confirmation email. Please note that depending on your payment method, it may take up to 10 business days for the refund to reach your account. If there was an error or you have any other questions, please contact our customer support team directly.",https://support.nordvpn.com/hc/en-us/related/click?data=BAh7CjobZGVzdGluYXRpb25fYXJ0aWNsZV9pZGwrCBH9Jde2EToYcmVmZXJyZXJfYXJ0aWNsZV9pZGwrCJE8dFhcEjoLbG9jYWxlSSIKZW4tdXMGOgZFVDoIdXJsSSJFL2hjL2VuLXVzL2FydGljbGVzLzE5NDc2OTkxMzExMTIxLVdoYXQtaXMteW91ci1tb25leS1iYWNrLXBvbGljeQY7CFQ6CXJhbmtpBg%3D%3D--f6b1daca04d3a066f0dbd75b9791f4e3050feeae
How to start using NordVPN,"If you are interested in starting to use the NordVPN service but are unsure how to do so, this article will introduce you to the steps needed to begin using NordVPN today.
In this article we will cover:
* [Downloading NordVPN](
* [Installing NordVPN](
* [Purchasing a NordVPN plan](
* [Connecting to NordVPN](
* [Connecting to NordVPN on Linux](
* [Additional NordVPN features](
## Downloading NordVPN
To begin using NordVPN, you will first need to download the application for your respective device:
* Download the NordVPN application for Windows
* Download the NordVPN application for macOS
* Download the NordVPN application for Linux
* Download the NordVPN application for Android
* Download the NordVPN application for iOS
## Installing NordVPN
If you are not sure how to install and set up the application, choose the OS you're going to use and follow one of the guides below:
* Learn how to install NordVPN on Windows 7 and 8.1
* Learn how to install NordVPN on Windows 10 and 11
* Learn how to install NordVPN on macOS
* Learn how to install NordVPN on Linux
* Learn how to install NordVPN on Android
* Learn how to install NordVPN on iOS
Once the application has been set up, you need to purchase the desired plan.
## Purchasing a NordVPN plan
The following article will introduce you to [NordVPN Plans and Prices](https://support.nordvpn.com/hc/en-us/articles/19744251757841-Plans-and-prices-of-NordVPN-service). And if you're uncertain how to proceed with the purchase, read the article on [purchasing a NordVPN subscription](https://support.nordvpn.com/hc/en-us/articles/19478048190481-How-to-purchase-a-NordVPN-subscription).
Once you have an active subscription, you need to connect to NordVPN.
## Connecting to NordVPN
In order to connect to NordVPN, follow along below:
1. Use the quick connect button:Alternatively, you can use the dots on the map to connect to specific locations.
2. Click the dot in a country:Lastly, you may also use the search bar.
3. Type in the name of the country you would like to connect to:
### Connecting to NordVPN on Linux
To connect on a Linux device, you will need to type in the following commands :
```
nordvpn connect
```
```
nordvpn c
```
To connect to specific servers, use:
```
nordvpn connect
```
(eg. nordvpn connect uk715)
Follow our article on how to [connect to NordVPN using Linux Terminal](https://support.nordvpn.com/hc/en-us/articles/20164827795345-Connect-to-NordVPN-using-Linux-Terminal).
That's it! Now you can begin using the app and investigating the different features.
## Additional NordVPN features
Here you can find some articles covering NordVPN's features:
* [Different NordVPN server categories explained](https://support.nordvpn.com/hc/en-us/articles/19479130821521-Different-NordVPN-server-categories-explained)
* [NordVPN Kill Switch: how does it work](https://support.nordvpn.com/hc/en-us/articles/19509682644369-NordVPN-Kill-Switch-how-does-it-work)
* [What is Threat Protection Pro™ and Threat Protection?](https://support.nordvpn.com/hc/en-us/articles/19508765521425-What-is-Threat-Protection-Pro-and-Threat-Protection)
* [Dedicated NordVPN IP addresses](https://support.nordvpn.com/hc/en-us/articles/19507808024209-Dedicated-NordVPN-IP-addresses)",https://support.nordvpn.com/hc/en-us/related/click?data=BAh7CjobZGVzdGluYXRpb25fYXJ0aWNsZV9pZGwrCJFpIBV0EjoYcmVmZXJyZXJfYXJ0aWNsZV9pZGwrCJEvyoDnEToLbG9jYWxlSSIKZW4tdXMGOgZFVDoIdXJsSSJBL2hjL2VuLXVzL2FydGljbGVzLzIwMjg5Nzc5OTUyMDE3LUhvdy10by1zdGFydC11c2luZy1Ob3JkVlBOBjsIVDoJcmFua2kI--da573a013a59436b499e0ea1fae6281090335575
What to do if I lose my MFA access?,"If you’re experiencing temporary trouble accessing your MFA device, you can use one of your backup codes to log in to your Nord Account. However, if you've lost your MFA device, you will need to fill out the MFA reset request form to remove your Nord Account’s current MFA settings.
Follow these instructions to reset the MFA settings of your Nord Account:
1. Open the MFA reset request form.
2. Fill in the fields indicated below. This information is required to make sure that no one makes unauthorized changes to your account.
* Account's current email: Enter the email address you currently use for NordVPN.
* Amount paid: Type in the amount of money you paid the last time you made a payment to NordVPN.
* Method: Select the way you made your last payment (like credit card or PayPal) and enter any other required information.
* Payment date: Choose the exact date of your last payment.
* Do you have a NordLocker or NordPass account?: Let us know if you also have an account for NordLocker or NordPass.
* Description (Optional): Add additional comments or requests for our support team.
* Attachments (Optional): Attach a picture of your last payment to help speed up the process.
1. Click the “Submit” button to finish.
Our customer support team will contact you by email once your Nord Account MFA settings have been successfully reset.",https://support.nordvpn.com/hc/en-us/related/click?data=BAh7CjobZGVzdGluYXRpb25fYXJ0aWNsZV9pZGwrCJGPoP97EjoYcmVmZXJyZXJfYXJ0aWNsZV9pZGwrCJEvyoDnEToLbG9jYWxlSSIKZW4tdXMGOgZFVDoIdXJsSSJJL2hjL2VuLXVzL2FydGljbGVzLzIwMzIzNzc4OTg5OTY5LVdoYXQtdG8tZG8taWYtSS1sb3NlLW15LU1GQS1hY2Nlc3MGOwhUOglyYW5raQk%3D--1de60647113efda859fa4dfcc13f4000910ebb01
Installing NordVPN (App Store) version on macOS,"From October 17th, 2024, older applications will have a few function limitations. The issues can affect macOS applications version 8.27.2 and below. They can include not receiving notifications in the app and reduced Dark Web Monitoring and Meshnet functionality.To resolve the issue, please update your application to the latest version.
This article will help you set up the [NordVPN application on your Mac](https://nordvpn.com/download/mac/) and connect to a VPN server. Note: The NordVPN (App Store) app is compatible with macOS 11 and later versions.
## Table of contents:
* [Downloading and installing](
* [Setting up the application](
* [Connecting to servers](
* [NordVPN features menu](
* [NordVPN preference settings](
## Downloading and installing
1. Go to the [NordVPN app page in the App Store](https://apps.apple.com/us/app/nordvpn-vpn-fast-secure/id905953485#?platform=mac) or click download the App Store version of NordVPN on our downloads page:
2. Agree to Open App Store.
3. When the App Store launches, click on the blue Get button and choose to Install the app.
4. Once the download is finished, press the Open button.
## Setting up and using the application
1. Open your Launchpad and click on the NordVPN icon.
2. You can Log In or Sign Up in the top-right corner of the screen.
3. You will be redirected to your Nord Account. To log in, enter your registered email address and password. You can also sign in using your Google account or Apple ID or by entering a code. If you are a new user, you will need to create a [Nord Account](https://my.nordaccount.com/) by entering your email address and other required information.
4. After completing the above steps, you will be prompted to open the NordVPN app. Agree always to allow Nord Account and grant access to the app.
5. After a successful login, you will see the main NordVPN application window.Here, you can find NordVPN servers and navigate in the map itself, search bar, or specialty section.
## Connecting to servers
1. The Quick Connect button in the top-right corner will automatically connect you to a server.
2. To connect to a specific server, click on the Search field in the top-left corner of the app. Enter a country, a category, or a specific server number (e.g., Canada #1224) to find what you need.
3. All servers in the left sidebar are sorted by country and specialty.To connect to a specialty server, hover over one of the categories under [Specialty Servers](https://support.nordvpn.com/hc/en-us/articles/19479130821521-Different-NordVPN-server-categories-explained), and click on the three-dot menu to select a Country.
4. To connect to a specific country, click on it.
## NordVPN features menu
### Map

* Map - here, you can find and navigate NordVPN servers in the map itself, search bar, or specialty section
### Threat Protection Pro™/Threat Protection

* Threat Protection Pro™ is a special NordVPN feature that automatically blocks ads, trackers, and malicious URLs. When you visit a website known for scamming people, this feature displays an in-browser alert to warn you about possible fraud. Threat Protection Pro™ also scans downloads for malware and checks your apps for security vulnerabilities. Available with selected NordVPN plans, Threat Protection Pro™ can work without an active VPN connection. Learn more about[ Threat Protection Pro™](https://nordvpn.com/features/threat-protection/).If your NordVPN subscription doesn’t include Threat Protection Pro™, you can use the Threat Protection feature instead. It blocks intrusive ads and malicious domains based on DNS filtering and works whenever you’re connected to a VPN server. Threat Protection comes with all NordVPN plans.
### Meshnet

* The [Meshnet](https://nordvpn.com/meshnet/) feature helps you to access devices over encrypted tunnels. [Learn more about Meshnet](https://meshnet.nordvpn.com/getting-started/meshnet-explained).
### Dark Web Monitor

* [Dark Web Monitor](https://nordvpn.com/features/dark-web-monitor/) scans the internet for any credential leaks associated with your registered NordVPN e-mail address.
### Presets
Presets let you load up a specified set of configurations, including server number, type, protocol, and more. You can configure your settings to experience a smooth session, for e.g., so that a streaming service or a game loads up instantly!
#### How to set up presets?
Start at the preferences page. You can either edit an existing preset or create a new one by clicking Add new.Let's build it from scratch. After pressing Add new, you will see a menu with the settings you can use. Give the preset a name. Next, select from available VPN protocols. If you change the default setting Use recommended, you’ll be able to alter the server type. Here you can set a specialty server or any regular one as your type.Depending on the server availability, you may also have the choice of selecting a specific region.Finally, you can add either a web page or an app to the preset. It will be displayed under the preset name on the main screen. If you press Add link button, a field will appear for the URL of the website you would like easy access to. After inserting the URL, press Enter to register it. When you're done, press Save preset, and it will be added to the main screen.
### Statistics

* Statistics show you more information about your connection.
### Settings
To change application settings and find various features click on the gear icon at the bottom-left corner of the app:

* Settings tab displays the NordVPN app settings.
### Quick Help

* Here you can find your connection logs, a direct to our Help Center, or our customer support email.
## NordVPN settings
### General

* Launch the app on computer startup — toggle to open the NordVPN app automatically every time you turn your device on.
* VPN Protocol — this option will let you choose from 3 different [connection protocols](https://support.nordvpn.com/hc/en-us/articles/19482810153745-Which-NordVPN-protocol-should-I-choose) (OpenVPN UDP, OpenVPN TCP, and NordLynx).
* Help Us Improve — makes NordVPN better by sending us aggregated anonymous data.
### Auto-connect

* When using an untrusted network — toggle to automatically be connected to a VPN when you're connected to a network that is not added to a Trusted network list.
* Connect to — you can select a specific country from the list.
* The current network — shows the network you are currently connected to.
* Trusted network — you won't be automatically connected to a VPN while on a trusted Wi-Fi network.
### Kill Switch

* [Kill Switch](https://nordvpn.com/features/vpn-kill-switch/) prevents unprotected access to the internet when your VPN connection accidentally drops.
* Advanced Kill Switch is an additional layer of security that can be enabled to prevent WebRTC leaks. However, it functions separately from the system-wide Internet Kill Switch. Read [more information about Kill Switch](https://support.nordvpn.com/hc/en-us/articles/19509682644369-NordVPN-Kill-Switch-how-does-it-work).
* Stay invisible on a local network — this will let you [keep your device invisible on an unsafe local network](https://support.nordvpn.com/hc/en-us/articles/20225371443345-Staying-invisible-on-unsafe-local-networks-on-macOS).
### Appearance

* Appearance settings let you add an application to your dock and menu bar. Also, it lets you choose between dark and light modes.
### Other Apps

* Other Apps tab introduces other [Nord Security](https://nordsecurity.com/) products. As well as a scannable QR code that directly leads you to the NordVPN mobile app download.
### Account

* Account section shows your NordVPN profile and subscription information. Here you’ll also find links to [NordVPN Terms of Services](https://my.nordaccount.com/legal/terms-of-service/) and [Privacy Policy](https://my.nordaccount.com/legal/privacy-policy/).",https://support.nordvpn.com/hc/en-us/related/click?data=BAh7CjobZGVzdGluYXRpb25fYXJ0aWNsZV9pZGwrCJHa8kGjEjoYcmVmZXJyZXJfYXJ0aWNsZV9pZGwrCJEvyoDnEToLbG9jYWxlSSIKZW4tdXMGOgZFVDoIdXJsSSJUL2hjL2VuLXVzL2FydGljbGVzLzIwNDkyMzk1NDAzOTIxLUluc3RhbGxpbmctTm9yZFZQTi1BcHAtU3RvcmUtdmVyc2lvbi1vbi1tYWNPUwY7CFQ6CXJhbmtpCg%3D%3D--5de229f96485a302bef6d1e458da4710fa4f8caf
Does NordVPN accept prepaid cards,"We accept most prepaid cards, as long as they contain all the information a regular credit card has. A prepaid card has to be registered online with an address and a name. It is explained by the prepaid card user's guide.
All prepaid Visa cards are known to work, as well as, some others. Some prepaid cards apply conversion fees (around 3-5%) which are not included in our pricing.
If you have issues while making a payment, make sure your card allows international and recurring payments. We also recommend clearing your browser cache and disable any ad-blocking, privacy or security browser extensions.",https://support.nordvpn.com/hc/en-us/articles/19483295444625-Does-NordVPN-accept-prepaid-cards
Does NordVPN accept prepaid cards,"We accept most prepaid cards, as long as they contain all the information a regular credit card has. A prepaid card has to be registered online with an address and a name. It is explained by the prepaid card user's guide.
All prepaid Visa cards are known to work, as well as, some others. Some prepaid cards apply conversion fees (around 3-5%) which are not included in our pricing.
If you have issues while making a payment, make sure your card allows international and recurring payments. We also recommend clearing your browser cache and disable any ad-blocking, privacy or security browser extensions.",https://support.nordvpn.com/hc/en-us/related/click?data=BAh7CjobZGVzdGluYXRpb25fYXJ0aWNsZV9pZGwrCJFu5064EToYcmVmZXJyZXJfYXJ0aWNsZV9pZGwrCJGZF3TnEToLbG9jYWxlSSIKZW4tdXMGOgZFVDoIdXJsSSJIL2hjL2VuLXVzL2FydGljbGVzLzE5NDgzMjk1NDQ0NjI1LURvZXMtTm9yZFZQTi1hY2NlcHQtcHJlcGFpZC1jYXJkcwY7CFQ6CXJhbmtpBg%3D%3D--7aec49195146db55f852b114b3dfe70f0dc96c4f
I can't make a payment,"Payments may fail for various reasons. Here are a few tips you might find useful.
Credit Card
To avoid multiple charges or a temporary hold of funds, do not make repeated attempts to complete a purchase.
You may contact your credit card company – it is likely to have information about the failed transaction and the status of your account.
If you’ve tried to make a payment with a credit card, but your account is still not active, there are a few common causes:
* Insufficient funds. Check if your bank account has enough credit to make the payment.
* Incorrect information. The information you provide when paying must match the information on your credit card.
* Expired card. Check the expiration date of your card.
* Fraud detection. This usually happens when you try to make a payment while connected to a VPN or when using a proxy. Having an unusual IP address (such as an IP address of a country different from the one where your credit card was issued) may also be the cause.
* The transaction was declined by the issuing bank. You may want to contact your bank and allow future payments to NordVPN.
If you use a prepaid credit card, register it online before use. Contact the card issuer if you have trouble completing the registration.
CoinGate
Have you tried to make a payment with Crypto Currencies but your account is still inactive? Your transaction may not have been confirmed in the coin network yet – just give it more time.
Your transaction might also have timed out if you took too long to make the payment. In this case, [contact our support team](https://support.nordvpn.com/hc/en-us/articles/19482416296593-How-can-I-reach-NordVPN-customer-support), and we will be glad to help you.",https://support.nordvpn.com/hc/en-us/related/click?data=BAh7CjobZGVzdGluYXRpb25fYXJ0aWNsZV9pZGwrCJHfbYz0EToYcmVmZXJyZXJfYXJ0aWNsZV9pZGwrCJGZF3TnEToLbG9jYWxlSSIKZW4tdXMGOgZFVDoIdXJsSSI9L2hjL2VuLXVzL2FydGljbGVzLzE5NzQyMDI1NzAzMzEzLUktY2FuLXQtbWFrZS1hLXBheW1lbnQGOwhUOglyYW5raQc%3D--82ee51cc0cd31d6f67087db0450b7bb0715bf5a1
How to cancel auto-renewal for your subscription,"If your subscription was purchased via the Google Play Store, Apple App Store, or Amazon App Store and you wish to cancel it, follow the respective articles below:
* Cancelling your [Google Play Store NordVPN subscription](https://support.google.com/googleplay/answer/7018481)
* Cancelling your [Apple App Store NordVPN subscription](https://support.apple.com/en-lamr/118428)
* Cancelling your [Amazon App Store NordVPN subscription](https://www.amazonforum.com/s/question/0D54P00007IG0CkSAL/amazon-appstore-subscriptions)
## Cancelling your NordVPN subscription
If you have purchased your subscription directly from NordVPN and wish for your subscription to no longer renew at the subsequent billing date, you may cancel your subscription via your [Nord Account](https://my.nordaccount.com/).
You can follow the same steps to cancel your NordPass, NordLocker, Dedicated IP, or bundle subscription services.
To cancel the automatic renewal of your NordVPN subscription, follow the steps below:
1. Log in to your [Nord Account](https://my.nordaccount.com/)
2. Open the billing tab:
3. Click cancel next to auto-renewal:
4. Select cancel auto-renewal:
5. Your auto-renewal status will now change to off:
You will receive a confirmation email to your registered email account if your subscription cancellation is successful:
If you wish to receive a refund, please read [our article on NordVPN's refund policy](https://support.nordvpn.com/hc/en-us/articles/19476991311121-What-is-your-money-back-policy).",https://support.nordvpn.com/hc/en-us/related/click?data=BAh7CjobZGVzdGluYXRpb25fYXJ0aWNsZV9pZGwrCJFczG7JEToYcmVmZXJyZXJfYXJ0aWNsZV9pZGwrCJGZF3TnEToLbG9jYWxlSSIKZW4tdXMGOgZFVDoIdXJsSSJXL2hjL2VuLXVzL2FydGljbGVzLzE5NTU2ODQ0OTg1NDg5LUhvdy10by1jYW5jZWwtYXV0by1yZW5ld2FsLWZvci15b3VyLXN1YnNjcmlwdGlvbgY7CFQ6CXJhbmtpCA%3D%3D--f13fcc126bf2ce76733093fec86611a3ac8c00a2
How much will I need to pay upon renewal?,"At the end of your initial plan, your subscription will be renewed automatically and you will be charged the applicable renewal price for the service. You can find more information on renewal prices in our [subscription renewal pricing page](https://my.nordaccount.com/legal/pricing/).
The renewal price is subject to change, but you will be notified of any changes by email before your subscription is renewed.
You don’t need to renew your NordVPN subscription manually — unless you [cancel auto-renewal for your subscription](https://support.nordvpn.com/hc/en-us/articles/19556844985489-How-to-cancel-auto-renewal-for-your-subscription), it will be renewed automatically.",https://support.nordvpn.com/hc/en-us/related/click?data=BAh7CjobZGVzdGluYXRpb25fYXJ0aWNsZV9pZGwrCBFz%2FuG2EToYcmVmZXJyZXJfYXJ0aWNsZV9pZGwrCJGZF3TnEToLbG9jYWxlSSIKZW4tdXMGOgZFVDoIdXJsSSJPL2hjL2VuLXVzL2FydGljbGVzLzE5NDc3MTczMjY5MjY1LUhvdy1tdWNoLXdpbGwtSS1uZWVkLXRvLXBheS11cG9uLXJlbmV3YWwGOwhUOglyYW5raQk%3D--ebfad3128c7935e74be599bb82cd32f6d60a8755
Does NordVPN charge all at once?,"Yes, all of our [subscription packages](https://nordvpn.com/pricing/) are paid upfront.
If you choose a long-term plan such as our 2-year or 1-year subscription plan - you will be charged the full price, which can be seen under the security package's title such as Complete, Plus, Standard.",https://support.nordvpn.com/hc/en-us/related/click?data=BAh7CjobZGVzdGluYXRpb25fYXJ0aWNsZV9pZGwrCJGy8Ka2EToYcmVmZXJyZXJfYXJ0aWNsZV9pZGwrCJGZF3TnEToLbG9jYWxlSSIKZW4tdXMGOgZFVDoIdXJsSSJGL2hjL2VuLXVzL2FydGljbGVzLzE5NDc2MTgyNTEyMjczLURvZXMtTm9yZFZQTi1jaGFyZ2UtYWxsLWF0LW9uY2UGOwhUOglyYW5raQo%3D--6398653f8dc421dbd4278c90b426c9cf90574c77
How to set up dedicated IP,"NordVPN’s Dedicated IP feature provides a unique, static IP address that ensures reliable access and improved privacy. Unlike shared IPs, this one is solely yours, making it perfect for services that require a fixed IP. Learn more about [dedicated IP](https://nordvpn.com/features/dedicated-ip/) on our website.If you have purchased a dedicated IP, you can easily set it up through your NordVPN account by following these steps:
1. Log in to your Nord Account:
2. Once logged in, select the NordVPN button located in the upper-left section on your dashboard:
3. If your dedicated IP is not yet ready to use, you will see a setup required warning in the dedicated IP tab:
4. Click the set up dedicated IP button:
5. Press the preferred IP address location drop-down menu:
6. Next, select you wanted dedicated IP location from the drop-down menu:
7. When you select your preferred location, click the set up dedicated IP button:
8. You will be assigned an IP address in the country that you’ve chosen:
9. You should now see your assigned IP address in the dedicated IP tab:
Once this is done, you have successfully set up the NordVPN dedicated IP. You can now proceed with connecting to a dedicated IP on your device:
* Connect to a dedicated IP server on Windows
* Connect to a dedicated IP server on Linux
* Connect to a dedicated IP server on macOS
* Connect to a dedicated IP server on iOS
* Connect to a dedicated IP server on Android
If you experience any issues or have additional questions, do not hesitate to submit a request to our customer success team.",https://support.nordvpn.com/hc/en-us/related/click?data=BAh7CjobZGVzdGluYXRpb25fYXJ0aWNsZV9pZGwrCBECcjS7EjoYcmVmZXJyZXJfYXJ0aWNsZV9pZGwrCJGs7%2FDbHToLbG9jYWxlSSIKZW4tdXMGOgZFVDoIdXJsSSJBL2hjL2VuLXVzL2FydGljbGVzLzIwNTk1MjQ4MDcxMTg1LUhvdy10by1zZXQtdXAtZGVkaWNhdGVkLUlQBjsIVDoJcmFua2kG--d063477fdf13e275157437378267ab9230b8f11a
How to connect to your dedicated IP on Windows,"With a NordVPN dedicated IP, you get faster speeds, less CAPTCHA requests and increased security. NordVPN's dedicated IP is a unique IP that is assigned to a specific server, which ensures that you have your own private connection.
In this article, we will cover how to locate and connect to your [dedicated IP](https://nordvpn.com/features/dedicated-ip/) on Windows.
In order for you to be able to connect, first double-check if you have done the following:
1. Purchased a dedicated IP;
2. Set up the dedicated IP in Nord Account.
If these steps are done, you can move forward and connect to your dedicated IP in the NordVPN app on:
* [ Windows 7 and 8.1](
* [Windows 10 and 11](
For additional information, you can also read [our article about NordVPN's dedicated IP and how it works](https://support.nordvpn.com/hc/en-us/articles/19507808024209-Dedicated-NordVPN-IP-addresses).
## On Windows 7 and 8.1:
To connect to NordVPN dedicated IP on Windows 7 and 8.1, follow these steps:
1. Open the NordVPN application.
2. Go to the dedicated IP category on the left. 
3. Hover over dedicated IP, and click on the three-dot button:
4. Select fastest for your country and server, and click connect:
You may also use the search bar located in the top-left corner of the application window to connect to your dedicated IP:
1. Enter your dedicated IP country, and server number:
2. Tap your dedicated IP to connect:
## On Windows 10 and 11:
To connect to NordVPN dedicated IP on Windows 10 and 11, follow the steps below:
1. Open your NordVPN application.
2. Click specialty servers:
3. Hover over dedicated IP and click the three-dot menu:
4. Click connect.
You may also use the search bar located in the top-left corner of the application window to connect to your dedicated IP:
1. Type in your dedicated ip into the search bar:
2. Click your dedicated IP to connect:
After completing the steps, you will have connected to your dedicated IP successfully. If you wish to test your connection, visit [NordVPN's DNS leak checker website](https://nordvpn.com/dns-leak-test/).
Please be aware that your email will be linked to that dedicated IP address.",https://support.nordvpn.com/hc/en-us/related/click?data=BAh7CjobZGVzdGluYXRpb25fYXJ0aWNsZV9pZGwrCJGQ2fucEjoYcmVmZXJyZXJfYXJ0aWNsZV9pZGwrCJGs7%2FDbHToLbG9jYWxlSSIKZW4tdXMGOgZFVDoIdXJsSSJVL2hjL2VuLXVzL2FydGljbGVzLzIwNDY1NDQ5NTM3NjgxLUhvdy10by1jb25uZWN0LXRvLXlvdXItZGVkaWNhdGVkLUlQLW9uLVdpbmRvd3MGOwhUOglyYW5raQc%3D--1d5ca78bfc3534e42c919309f7264ba0f08d1b7a
How to purchase a dedicated IP address,"A NordVPN dedicated IP is an IP address that is assigned to a specific server. This means that the address is not shared with any other device or network. If you wish to get better connection speed, less Captcha requests, or an IP that is only accessible to you, a dedicated IP will help. In this article you will learn how to purchase a [NordVPN dedicated IP.](https://nordvpn.com/features/dedicated-ip/) If you wish to purchase a dedicated IP, you will need an active NordVPN subscription.
Important: If you purchase a dedicated IP from NordVPN, your email will be linked to that IP address. For more information, please consult our [Privacy Policy](https://my.nordaccount.com/legal/privacy-policy/nordvpn/).
## Table of contents:
* [How to get a dedicated IP address as a new NordVPN user](
* [How to get a dedicated IP address if you are an existing NordVPN user](
* [Purchasing a dedicated IP using your Nord Account](
* [Purchasing a dedicated IP using the NordVPN Windows app](
* [Purchasing a dedicated IP using the NordVPN macOS app](
* [Using a dedicated IP in countries with internet restrictions](
* [Frequently asked questions](
* [How many dedicated IPs can be used with one NordVPN account?](
* [How do you purchase additional dedicated IPs?](
* [What should you do after purchasing a dedicated IP?](
## How to get a dedicated IP address as a new NordVPN user
You can add a dedicated IP address at checkout when purchasing your first NordVPN subscription.
1. Go to the [NordVPN pricing page](https://nordvpn.com/pricing/).
2. Select your desired plan and its duration.
3. At the checkout, find dedicated IP under add extra services (optional) and click add.
4. Complete the purchase and create your [Nord Account](https://my.nordaccount.com/).
5. Open your Nord Account and [set up your dedicated IP location](https://support.nordvpn.com/hc/en-us/articles/23189768691345-Setting-up-a-dedicated-IP-after-purchase).
## How to get a dedicated IP address if you are an existing NordVPN user
### Purchasing a dedicated IP using your Nord Account
If you already have an active NordVPN subscription, you can purchase our dedicated IP service by following these steps:
1. Log in to your [Nord Account](https://my.nordaccount.com/).
2. Go to the NordVPN tab:
3. Select get dedicated IP.
4. Choose the plan that best fits your needs.
5. Fill out all required payment information and select continue.
6. [Set up your dedicated IP in your Nord Account](https://support.nordvpn.com/hc/en-us/articles/23189768691345-Setting-up-a-dedicated-IP-after-purchase) dashboard.
### Purchasing a dedicated IP using the NordVPN Windows app
If you wish to purchase a dedicated IP using the [NordVPN application for Windows](https://nordvpn.com/download/windows/), follow these steps:
1. In the main screen of the Windows NordVPN app, open the specialty servers tab:
2. Click dedicated IP.
3. Click buy dedicated IP in the following screen. You will be taken to your Nord Account to select your desired dedicated IP plan.
4. Fill out all of the required payment information and click continue.
5. [Set up your dedicated IP in your Nord Account](https://support.nordvpn.com/hc/en-us/articles/23189768691345-Setting-up-a-dedicated-IP-after-purchase) dashboard.
### Purchasing a dedicated IP using the NordVPN macOS app
You can only use this purchase method if you have [downloaded the NordVPN macOS app](https://nordvpn.com/download/mac/) from the NordVPN website. If you did not, you can still [purchase a dedicated IP using your Nord Account](
Follow these steps to purchase your dedicated IP:
1. Open your NordVPN app.
2. Scroll down to specialty servers and click dedicated IP:
3. Click get dedicated IP in the following screen. You will be taken to your Nord Account to select your desired dedicated IP plan.
4. Fill out all of the required payment information and click continue.
5. [Set up your dedicated IP in your Nord Account](https://support.nordvpn.com/hc/en-us/articles/23189768691345-Setting-up-a-dedicated-IP-after-purchase) dashboard.
## Using a dedicated IP in countries with internet restrictions
Due to reduced service accessibility, you may have trouble getting your dedicated IP to work when connecting from countries with internet restrictions. Please consult our guide on [manual NordVPN dedicated IP server setup.](https://support.nordvpn.com/hc/en-us/articles/31386007399057-Manual-NordVPN-Dedicated-IP-server-setup)
## Frequently asked questions
### How many dedicated IPs can be used with one NordVPN account?
You may purchase any number of dedicated IP addresses, but keep in mind that your NordVPN account is limited to ten simultaneous connections.
### How do you purchase additional dedicated IPs?
You can purchase additional dedicated IP addresses using a special coupon code. This coupon will allow you to create a new NordVPN account while paying only for the dedicated IP feature. However, because you still need an active NordVPN subscription to use the dedicated IP, our customer service staff will help you transfer the dedicated IP address to your main account.
Here is what you need to do to purchase additional dedicated IP addresses:
1. Apply the coupon code “norddedicatedip” to your order, selecting the 1-year NordVPN plan.
2. Enter an email address for the temporary NordVPN account (different from your main one).
3. Complete the purchase. You should now have two NordVPN accounts.
4. [Contact our support team](https://support.nordvpn.com/hc/en-us/articles/19482416296593-How-can-I-reach-NordVPN-customer-support) and give them the email addresses of both of your NordVPN accounts, indicating which one is your main one.
5. Specify your [dedicated IP location](https://support.nordvpn.com/hc/en-us/articles/19507808024209-Dedicated-NordVPN-IP-addresses).
Note: After you specify your desired dedicated IP location, it may take up to three business days to set your NordVPN dedicated IP address. However, your dedicated IP subscription will begin to run at the date of purchase.
### What should you do after purchasing a dedicated IP?
You need to [set up your dedicated IP address in Nord Account](https://support.nordvpn.com/hc/en-us/articles/23189768691345-Setting-up-a-dedicated-IP-after-purchase) after purchase.",https://support.nordvpn.com/hc/en-us/related/click?data=BAh7CjobZGVzdGluYXRpb25fYXJ0aWNsZV9pZGwrCBGpmIS4EToYcmVmZXJyZXJfYXJ0aWNsZV9pZGwrCJGs7%2FDbHToLbG9jYWxlSSIKZW4tdXMGOgZFVDoIdXJsSSJNL2hjL2VuLXVzL2FydGljbGVzLzE5NDg0MTk2MjUxOTIxLUhvdy10by1wdXJjaGFzZS1hLWRlZGljYXRlZC1JUC1hZGRyZXNzBjsIVDoJcmFua2kI--811a5f0a3770a93162e772415d1496e1dc072ffb
I have just paid. Will I be charged again,"Any payment method other than CoinPayments, prepaid and gift cards, will create an ongoing subscription. It will automatically charge you after your NordVPN account expires.",https://support.nordvpn.com/hc/en-us/related/click?data=BAh7CjobZGVzdGluYXRpb25fYXJ0aWNsZV9pZGwrCJFBdCH1EToYcmVmZXJyZXJfYXJ0aWNsZV9pZGwrCBFBeVJcEjoLbG9jYWxlSSIKZW4tdXMGOgZFVDoIdXJsSSJPL2hjL2VuLXVzL2FydGljbGVzLzE5NzQ0NTI1OTI2ODAxLUktaGF2ZS1qdXN0LXBhaWQtV2lsbC1JLWJlLWNoYXJnZWQtYWdhaW4GOwhUOglyYW5raQo%3D--343a1f7805554c15f6a6f7347000441f651404c7
How to connect to your dedicated IP on macOS,"A NordVPN dedicated IP is a unique IP address assigned solely to a specific server, ensuring it's not shared with any other device or network. With a NordVPN dedicated IP, you get improved connection speeds, reduced CAPTCHA requests, and enhanced security through exclusive accessibility.In this article, you will learn how to locate and connect to your [dedicated IP](https://nordvpn.com/features/dedicated-ip/) on macOS.
In order for you to be able to connect, first double-check if you have done the following:
1. Purchased a dedicated IP;
2. Set up the dedicated IP in your Nord Account.
## Connecting to your dedicated IP on macOS
If you have purchased a dedicated IP from NordVPN, and set it up in your Nord Account, you can proceed with connecting to it on your macOS device by following these steps:
1. Launch the NordVPN application.
2. Scroll down to specialty servers:
3. Hover over the dedicated IP, and click on the three-dot menu:
4. Click your dedicated IP server.
You may also use the search bar located in the top-left corner of the application window.
1. Type in your dedicated IP address:
2. Click on your dedicated IP:
After completing the steps, you will be successfully connected to your dedicated IP. If you would like to check your connection, visit [NordVPN's DNS leak checker.](https://nordvpn.com/dns-leak-test/)
Please be aware that your email will be linked to that dedicated IP address.",https://support.nordvpn.com/hc/en-us/related/click?data=BAh7CjobZGVzdGluYXRpb25fYXJ0aWNsZV9pZGwrCJG8ysPlEToYcmVmZXJyZXJfYXJ0aWNsZV9pZGwrCJGs7%2FDbHToLbG9jYWxlSSIKZW4tdXMGOgZFVDoIdXJsSSJTL2hjL2VuLXVzL2FydGljbGVzLzE5Njc4NTMwMDI2NjQxLUhvdy10by1jb25uZWN0LXRvLXlvdXItZGVkaWNhdGVkLUlQLW9uLW1hY09TBjsIVDoJcmFua2kJ--579d72057e16f72b0684680b87b3b328ffbde614
How to connect to your dedicated IP on iOS,"A NordVPN dedicated IP is a unique IP address assigned solely to a specific server, ensuring it's not shared with any other device or network. With the NordVPN dedicated IP, you get improved connection speeds, reduced CAPTCHA requests, and enhanced security through exclusive accessibility.
In this tutorial, you will learn how to locate and connect to your purchased and assigned NordVPN dedicated IP.
The dedicated IP server category is available only with OpenVPN (UDP) and OpenVPN (TCP) protocols.
In order to connect, double-check if you have done the following:
1. Purchased a dedicated IP;
2. Set up the dedicated IP in your Nord Account.
## Connecting to your NordVPN dedicated IP on iOS
To connect to your NordVPN dedicated IP on your iOS device, follow along to the steps below:
1. Open your NordVPN app.
2. [Enable the OpenVPN (UDP) or ](https://support.nordvpn.com/Connectivity/iOS/1490186412/Switching-connection-protocol-to-OpenVPN-UDP-or-TCP-on-iOS.htm)OpenVPN (TCP) protocol.
3. In the homepage, scroll to specialty servers:
4. Tap dedicated IP:
5. Tap on your dedicated IP to connect:
Alternatively, you can connect by typing in your dedicated IP address into the search bar. To get connected using this method, follow the steps below:
1. Type your dedicated IP into the search bar:
2. Tap your dedicated IP to connect:
After completing the steps, you will have connected to your dedicated IP successfully. If you wish to test your connection, visit [NordVPN's DNS leak checker website](https://nordvpn.com/dns-leak-test/).
Please be aware that your email will be linked to that dedicated IP address.",https://support.nordvpn.com/hc/en-us/related/click?data=BAh7CjobZGVzdGluYXRpb25fYXJ0aWNsZV9pZGwrCJG%2BTJjmEToYcmVmZXJyZXJfYXJ0aWNsZV9pZGwrCJGs7%2FDbHToLbG9jYWxlSSIKZW4tdXMGOgZFVDoIdXJsSSJRL2hjL2VuLXVzL2FydGljbGVzLzE5NjgyMDk1MzE2NjI1LUhvdy10by1jb25uZWN0LXRvLXlvdXItZGVkaWNhdGVkLUlQLW9uLWlPUwY7CFQ6CXJhbmtpCg%3D%3D--5ff363f0aaf3e1acf48b33c3f3d309f6f992b53b
Which NordVPN protocol should I choose,"NordVPN supports several security encryption protocols to provide a VPN service. The security levels and purposes of these VPN protocols are different, but so are our customers’ needs. We encourage you to take a closer look at the strengths and weaknesses of each VPN protocol. While we want you to be able to choose freely, we also feel it’s our duty to advise you on what might suit you best.
1. OpenVPN
OpenVPN is a mature and robust piece of open-source software that enables us to provide a reliable and secure VPN service. It is a versatile VPN protocol that can be used on both TCP and UDP ports. OpenVPN supports a great number of strong encryption algorithms and ciphers: to ensure the protection of your data, we use AES-256-GCM with a 4096-bit DH key. If you are conscious about your security and are wondering what the most stable NordVPN protocol is, we recommend OpenVPN.
2. WireGuard (NordLynx) (Recommended by NordVPN and used by default in most of our apps)
WireGuard is the newest and fastest tunneling protocol, and the entire VPN industry is talking about it. It uses state-of-the-art cryptography that outshines the current leader, OpenVPN. However, it’s still considered experimental, so VPN providers need to look for new solutions (like NordLynx by NordVPN) to overcome WireGuard’s vulnerabilities.
Modern, extremely fast, and incredibly lean in its architecture, WireGuard is backed by thorough academic research. WireGuard consists of only 4,000 lines of code, making it easy to deploy, audit, and fix. To put it into perspective, OpenVPN runs on 400,000 lines of code, meaning that WireGuard makes up only 1% of OpenVPN’s massive architecture.
NordLynx is currently used by default in NordVPN apps. If you’re wondering which VPN protocol is best for gaming or other online speed-dependent activities, the answer is always NordLynx.
3. NordWhisper (Recommended by NordVPN to use for restrictive networks)
The latest protocol added to NordVPN and designed to overcome restrictive local network environments while ensuring your security. It is the ideal solution when dealing with filtered content on office or campus networks and Wi-Fi networks with security filtering found at airports, cafes, hotels, or conferences.
NordWhisper is not compatible with Meshnet, DIP, Obfuscated servers, Onion Over VPN, or P2P servers.
Learn [how to use NordWhisper on NordVPN](https://support.nordvpn.com/hc/en-us/articles/31528242519953-How-to-use-NordWhisper-on-NordVPN).",https://support.nordvpn.com/hc/en-us/related/click?data=BAh7CjobZGVzdGluYXRpb25fYXJ0aWNsZV9pZGwrCBF7%2BjG4EToYcmVmZXJyZXJfYXJ0aWNsZV9pZGwrCJEfsr2sHDoLbG9jYWxlSSIKZW4tdXMGOgZFVDoIdXJsSSJNL2hjL2VuLXVzL2FydGljbGVzLzE5NDgyODEwMTUzNzQ1LVdoaWNoLU5vcmRWUE4tcHJvdG9jb2wtc2hvdWxkLUktY2hvb3NlBjsIVDoJcmFua2kG--f737680be1217572c268a4a33c6919fdfa26ca2c
NordVPN Post-quantum encryption explained,"Post-quantum encryption protects your VPN connection against potential quantum computer attacks. Currently, this encryption works with the NordLynx protocol only, therefore post-quantum encryption will be disabled when you use a dedicated IP, other protocols, Obfuscated servers or Meshnet.
NordVPN Post-quantum encryption is available on [Linux]( [Windows]( [Android]( [iOS](https://support.nordvpn.com/hc/en-us/related/click?data=BAh7CjobZGVzdGluYXRpb25fYXJ0aWNsZV9pZGwrCJEdVbRTGzoYcmVmZXJyZXJfYXJ0aWNsZV9pZGwrCJEfsr2sHDoLbG9jYWxlSSIKZW4tdXMGOgZFVDoIdXJsSSJQL2hjL2VuLXVzL2FydGljbGVzLzMwMDQ2MzIxNzEyNTI5LU5vcmRWUE4tUG9zdC1xdWFudHVtLWVuY3J5cHRpb24tZXhwbGFpbmVkBjsIVDoJcmFua2kH--79319871c6bf03a2f280abb5f947ef15d68d1d36#01JKQJSPN00W572Y1VHYZZCQJ7), [tvOS](https://support.nordvpn.com/hc/en-us/related/click?data=BAh7CjobZGVzdGluYXRpb25fYXJ0aWNsZV9pZGwrCJEdVbRTGzoYcmVmZXJyZXJfYXJ0aWNsZV9pZGwrCJEfsr2sHDoLbG9jYWxlSSIKZW4tdXMGOgZFVDoIdXJsSSJQL2hjL2VuLXVzL2FydGljbGVzLzMwMDQ2MzIxNzEyNTI5LU5vcmRWUE4tUG9zdC1xdWFudHVtLWVuY3J5cHRpb24tZXhwbGFpbmVkBjsIVDoJcmFua2kH--79319871c6bf03a2f280abb5f947ef15d68d1d36#01JKQN5BSNHG9BX6PV8EEQ6C49), and [Android TV](https://support.nordvpn.com/hc/en-us/related/click?data=BAh7CjobZGVzdGluYXRpb25fYXJ0aWNsZV9pZGwrCJEdVbRTGzoYcmVmZXJyZXJfYXJ0aWNsZV9pZGwrCJEfsr2sHDoLbG9jYWxlSSIKZW4tdXMGOgZFVDoIdXJsSSJQL2hjL2VuLXVzL2FydGljbGVzLzMwMDQ2MzIxNzEyNTI5LU5vcmRWUE4tUG9zdC1xdWFudHVtLWVuY3J5cHRpb24tZXhwbGFpbmVkBjsIVDoJcmFua2kH--79319871c6bf03a2f280abb5f947ef15d68d1d36#01JKQNJQSTDV2R7VQ5881RCP7Q).
## On Linux:
To enable or disable the post-quantum protection in NordVPN on your Linux machine, run one of the following commands:
```
nordvpn set pq on/off
```
or
```
nordvpn set post-quantum on/off
```
NordVPN post-quantum protection is the recommended option for connecting to NordVPN servers on your Linux device.
## On Windows:
To enable the post-quantum protection on your Windows machine, follow these steps:
1. Open the settings menu.
2. Click on Connections.
3. Scroll down to Post-quantum encryption and enable it.After you’ve done these steps - Post-quantum encryption will be enabled on your Windows device.
## On macOS:
To enable the post-quantum protection on your macOS device, follow these steps:
1. Open the settings menu in the NordVPN app.
2. In the general tab, enable Post-quantum encryption toggle.
## On Android:
To enable post-quantum protection on your Android device, follow these steps:
1. Tap on the Profile icon in the bottom navigation bar.
2. Head over to the Settings section.
3. Enable Post-quantum encryption toggle.
## On iOS:
To enable post-quantum protection on your iOS device, follow these steps:
1. Tap on the Profile icon in the bottom navigation bar.
2. Select Settings at the top right.
3. Enable the Post-quantum encryption toggle.
## On tvOS:
To enable post-quantum protection on your tvOS device, follow these steps:
1. Open Settings and turn on Post-quantum encryption.
## On Android TV:
Enable post-quantum protection on your Android TV device by following these steps:
1. Open Settings on the left-hand side menu and turn on Post-quantum encryption under App settings.
## Compatibility of post-quantum NordVPN
Although post-quantum encryption enhances security, there are some limits to how VPNs function:
* OpenVPN Protocol: As of right now, post-quantum protection is only compatible with the NordLynx technology and does not support OpenVPN. If you try to enable post-quantum protection with OpenVPN, the following error will display:""Post-quantum encryption is unavailable with OpenVPN. Switch to NordLynx to activate post-quantum protection""
* Meshnet Feature: Meshnet, which turns on private connections across devices, is incompatible with post-quantum protection. If both features are active, the following error will display:""Post-quantum VPN and Meshnet are not compatible. Please disable one feature to use the other.""
* Dedicated IPs: Dedicated IP addresses do not support post-quantum protection. If you want to connect to a dedicated IP while post-quantum protection is enabled, you will need to disable the post-quantum feature first.
Using post-quantum protection means taking better precautions to secure your data for the future. NordVPN will continue to develop post-quantum security functionality to allow your digital privacy to remain safe now and in the future.",https://support.nordvpn.com/hc/en-us/related/click?data=BAh7CjobZGVzdGluYXRpb25fYXJ0aWNsZV9pZGwrCJEdVbRTGzoYcmVmZXJyZXJfYXJ0aWNsZV9pZGwrCJEfsr2sHDoLbG9jYWxlSSIKZW4tdXMGOgZFVDoIdXJsSSJQL2hjL2VuLXVzL2FydGljbGVzLzMwMDQ2MzIxNzEyNTI5LU5vcmRWUE4tUG9zdC1xdWFudHVtLWVuY3J5cHRpb24tZXhwbGFpbmVkBjsIVDoJcmFua2kH--79319871c6bf03a2f280abb5f947ef15d68d1d36
What is Split Tunneling and how to use it?,"[Split tunneling](https://nordvpn.com/features/split-tunneling/) is an option that allows you to have a specific part of your internet connection to be rerouted outside of the VPN. You may find it useful for situations where a VPN connection may be unnecessary, for instance, when dealing with a trusted application.
NordVPN split tunneling is currently available on Windows 7 and 8.1, Windows 10 and 11, Android, and [Android TV](https://support.nordvpn.com/hc/en-us/related/click?data=BAh7CjobZGVzdGluYXRpb25fYXJ0aWNsZV9pZGwrCBGCMNXXEToYcmVmZXJyZXJfYXJ0aWNsZV9pZGwrCJEfsr2sHDoLbG9jYWxlSSIKZW4tdXMGOgZFVDoIdXJsSSJQL2hjL2VuLXVzL2FydGljbGVzLzE5NjE4NjkyMzY2ODY1LVdoYXQtaXMtU3BsaXQtVHVubmVsaW5nLWFuZC1ob3ctdG8tdXNlLWl0BjsIVDoJcmFua2kI--98632cb8a53b69c8801fa499d090e08331312a6c#Android%20TV).
## On Windows 7 & 8.1:
1. Open the settings menu. 
2. Head down to the Split tunneling section, turn it ON, and then press Add apps. 
## On Windows 10 & 11:
1. Click on a gear icon in the left-bottom corner.
2. Choose Split Tunneling settings.
3. Turn the feature on and choose to add apps.Experiencing issues?Look here, and you'll find the latest updates concerning known issues and how to resolve them.At the moment, it is known that when the split tunneling feature is used, some services still appear to be affected by the VPN. This is related to the fact that although your real IP address does get routed through the excluded application, the DNS servers provided by NordVPN are still in effect, which may cause an issue. We are currently working to resolve this problem.
## On Android:
1. Tap on the profile icon and open the settings menu by tapping on Settings.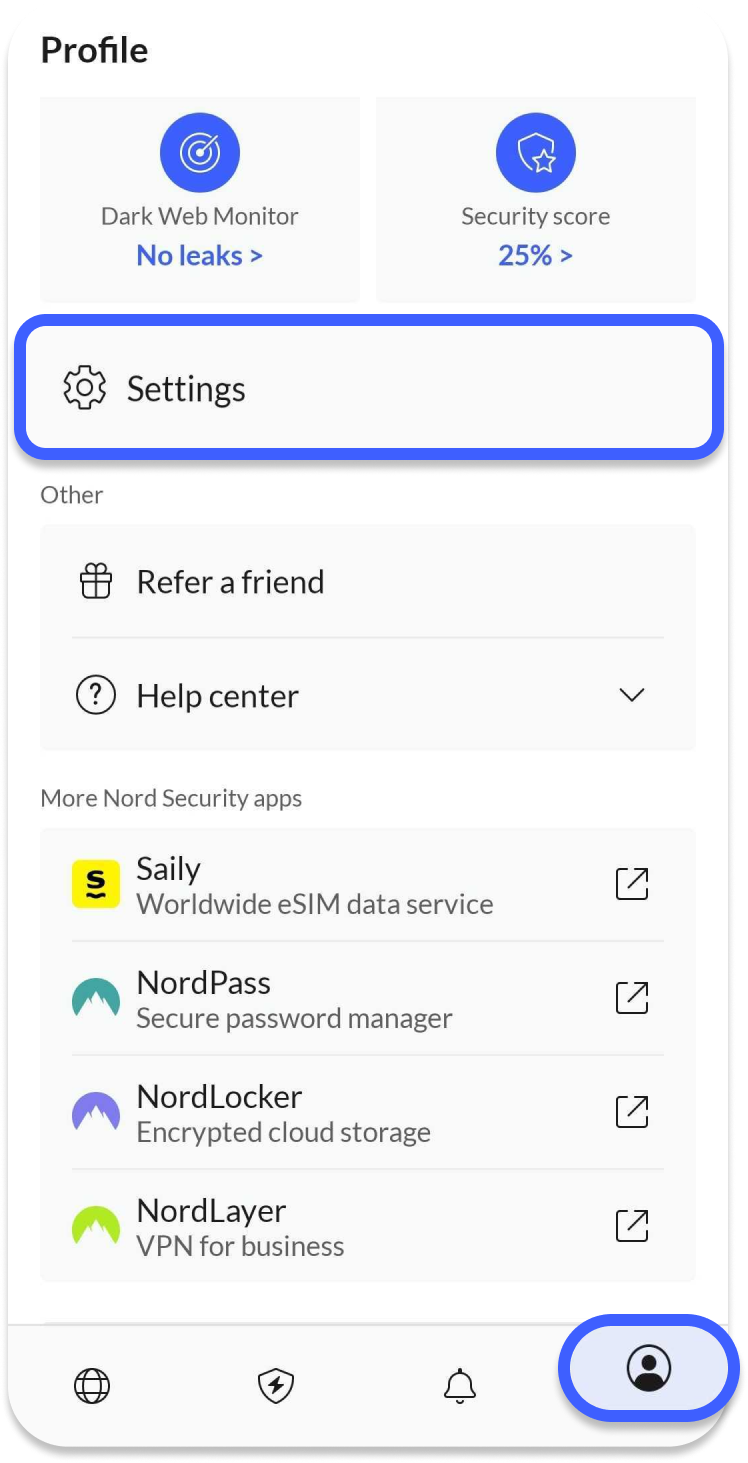
2. Head over to the VPN connection settings and choose the Split tunneling option.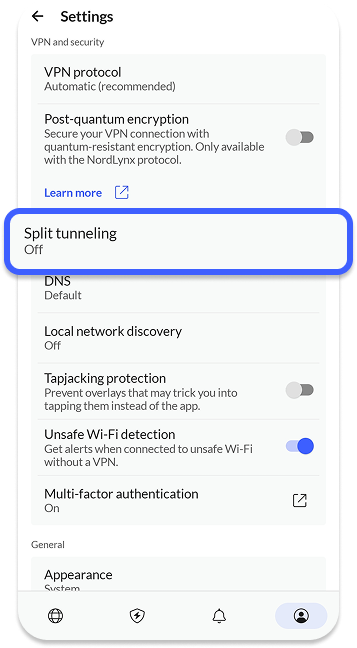
3. Toggle the switch to the ON position.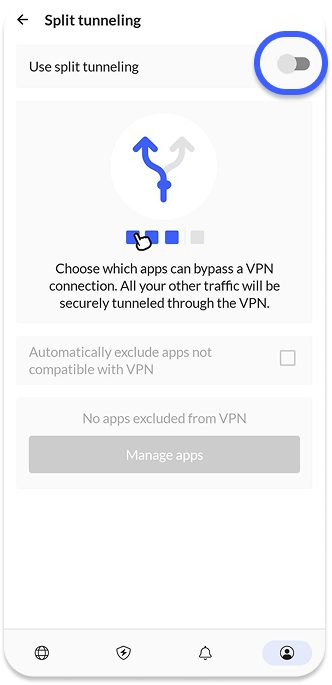
4. Select the apps you wish to not be affected by the VPN connection.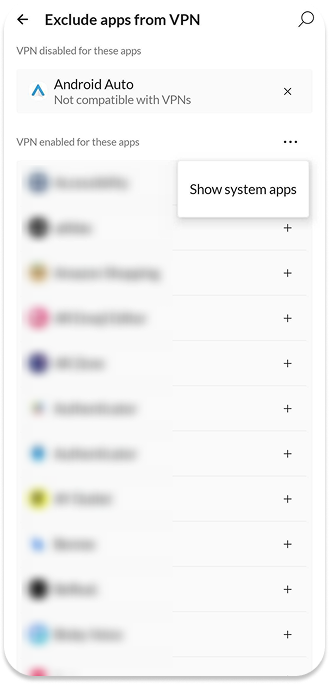
## On Android TV:
1. After you open the NordVPN app, select Settings, and, under App settings, choose Add apps next to Split tunneling. 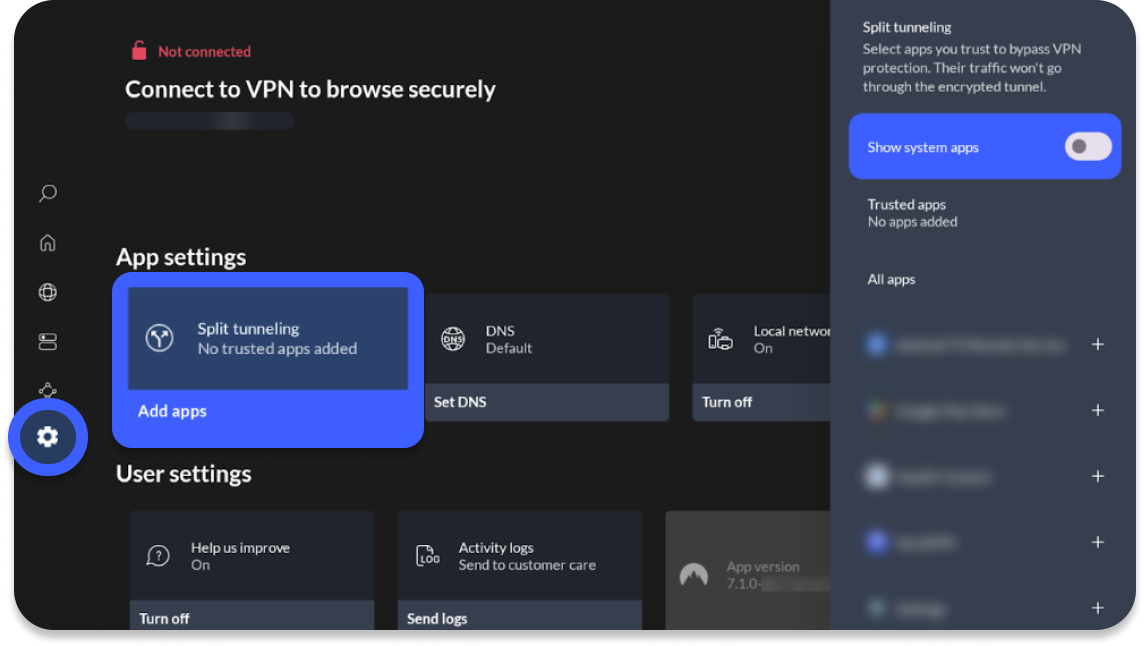Once you select the apps of your choice, they will appear under Trusted apps.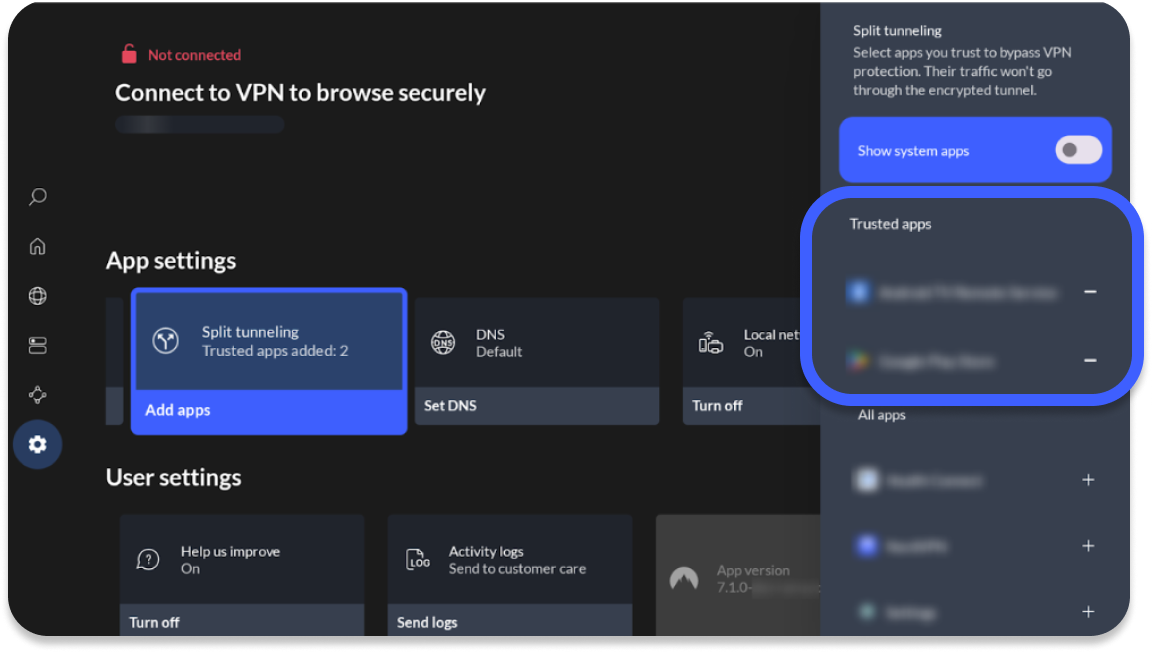",https://support.nordvpn.com/hc/en-us/related/click?data=BAh7CjobZGVzdGluYXRpb25fYXJ0aWNsZV9pZGwrCBGCMNXXEToYcmVmZXJyZXJfYXJ0aWNsZV9pZGwrCJEfsr2sHDoLbG9jYWxlSSIKZW4tdXMGOgZFVDoIdXJsSSJQL2hjL2VuLXVzL2FydGljbGVzLzE5NjE4NjkyMzY2ODY1LVdoYXQtaXMtU3BsaXQtVHVubmVsaW5nLWFuZC1ob3ctdG8tdXNlLWl0BjsIVDoJcmFua2kI--98632cb8a53b69c8801fa499d090e08331312a6c
Does NordVPN support OpenWrt?,"Routers with OpenWRT firmware have been reported to support VPNs like NordVPN. However, please be aware that the following configuration has not been tested by NordVPN staff – it has been shared and tested by our wonderful customers instead. In particular, NordVPN would like to thank ulmwind, an active member of the OpenWRT community, for their continuous assistance in providing us with up-to-date OpenWRT instructions.",https://support.nordvpn.com/hc/en-us/related/click?data=BAh7CjobZGVzdGluYXRpb25fYXJ0aWNsZV9pZGwrCJG6CdF%2FEjoYcmVmZXJyZXJfYXJ0aWNsZV9pZGwrCJEfsr2sHDoLbG9jYWxlSSIKZW4tdXMGOgZFVDoIdXJsSSJBL2hjL2VuLXVzL2FydGljbGVzLzIwMzQwMTc3MjIyMjg5LU9wZW5XcnQtc2V0dXAtd2l0aC1Ob3JkVlBOBjsIVDoJcmFua2kJ--f800db088c36826b86f96d6361909fd108a468cc
OpenWrt setup with NordVPN,"## Does NordVPN support OpenWrt?
Routers with OpenWRT firmware have been reported to support VPNs like NordVPN. However, please be aware that the following configuration has not been tested by NordVPN staff – it has been shared and tested by our wonderful customers instead. In particular, NordVPN would like to thank ulmwind, an active member of the OpenWRT community, for their continuous assistance in providing us with up-to-date OpenWRT instructions.
This article provides two OpenWrt setup guides:
* GUI interface instructions (simplified version)
* CLI instructions (more advanced)
If any issues arise, feel free to contact our support team for further help! This is an advanced tutorial, but it also provides some simpler instructions.
## GUI instructions
In this guide, we will show you how to set up a NordVPN connection on routers using OpenWrt firmware via the LuCI web interface.
1. Access the LuCI interface of your OpenWrt router by entering its local IP address into your internet browser and logging in. The default IP address is 192.168.1.1 and the username is root.By default, there is no password set up, so you may leave this slot empty, however, when you log in you will get a message to set up a password.In order to do so, click on System > Administration and you may set up a password there.
2. Once you have logged in, select the System tab and choose Software.
3. Click the “Update lists” button and wait for the process to finish and click “Dismiss”.
4. Install the following packages by typing in their name in the “Filter” field and clicking “Install…”.
1. openvpn-openssl
2. ip-full
3. luci-app-openvpn
5. Click “Save & Apply” and refresh the router page. Now you should see a new tab called VPN. Click on it and choose OpenVPN from the dropdown.
6. Now you need to download OpenVPN client configuration files. You can be connected to a recommended server via your NordAccount.
Follow the steps below to find the manual connection configuration files:
1. Log into your [Nord Account](https://my.nordaccount.com/), and click NordVPN.
2. Scroll down to Advanced Settings and click Set up NordVPN manually.
3. Select the OpenVPN configuration files tab.
4. Find the server you wish to connect to by using the Search bar or by scrolling down and download it by clicking Download UDP or Download TCP.
5. When connecting to OpenVPN & IKEv2 manually, you're going to need to use the Username and Password from the Service credential tab.
For the purpose of this guide, we will be using the us5104.nordvpn.com server.
1. Under the “OVPN configuration file upload” section name the VPN connection in the “Instance name” field (we have named it “nordvpn_us”.) After that, click on the “Choose File” button, locate the downloaded server file and click “Upload”.
2. In the “OpenVPN instances” section, click the “Edit” button next to the instance you have just created.
3. In the lower field, enter your NordVPN service credential username and password into separate lines.usernamepassword
You can find your NordVPN service credentials (service username and service password) in the [Nord Account dashboard](https://my.nordaccount.com/dashboard/nordvpn/):
Follow the steps below to find the service credentials for manual connection setup:
1. Log into your [Nord Account](https://my.nordaccount.com/), click NordVPN, and, under Manual setup, click on Service credentials. Here you'll find the Username and Password needed to connect manually.
1. Now, copy the path to the credentials file that is given right above the field containing the credentials and paste it next to the “auth-user-pass” line in the “Config file” section above.It should look like this: auth-user-pass /etc/openvpn/nordvpn_us.auth
2. Click on the Save button at the bottom.
3. Click on the “Network” tab at the top of the page and choose “Interfaces“.
4. Select the “Add new interface…” button and name it “nordvpntun”.
5. Click on the “Protocol” dropdown menu and choose “Unmanaged”.
6. In the “Interface” dropdown, enter the name “tun0” at the bottom -- custom -- field and press the Enter key.
7. Click the “Create interface” and “Save” buttons.
8. Choose the “Network” tab at the top once more and head to the “Firewall” section.
9. Click the “Add” button and adjust it as follows:
1. Name it “vpnfirewall”;
2. Set the “Input” option as “Reject”;
3. Leave “Output” as “Accept” and “Forward” as “Reject”;
4. Check the “Masquerading” option;
5. Check the “MSS clamping” option;
6. From the “Covered Networks” dropdown menu choose “nordvpntun”;
7. In the “Allow forward from source zones” dropdown menu, choose “lan”;
8. Click the “Save” button.
10. In the “Zones” section, find the zone named “lan”, and click on the “Edit” button.
11. In the “Allow forward to destination zones” dropdown check the “nordvpntun” entry.
12. Once more, click “Network'' at the top of the page and then choose “DHCP and DNS” from the dropdown list.
13. In the “General Settings” tab, find the “DNS forwardings” option and enter NordVPN DNS addresses there. The addresses are: 103.86.96.100 and 103.86.99.100
14. Go to the “Resolv and Hosts Files” tab, check the “Ignore resolve file” checkbox, and click the “Save & Apply” button.
15. Lastly, please head back to the “VPN” > “OpenVPN” tab.
16. In the “OpenVPN instances” section, check the “Enable” option next to the NordVPN option in the list, and click the “Save & Apply” button.
17. Click the “Start” button next to the created NordVPN instance to connect to the VPN server.
When you have followed these instructions, you should be connected using the configured connection. To check if you were successful, visit NordVPN’s homepage — the status at the top of the page should say “Protected”If you wish to disconnect the VPN connection, you can click on the “Stop” button next to the NordVPN option in the “VPN” > “OpenVPN” > “OpenVPN instances'' section.
## CLI instructions
If you're looking for a more advanced tutorial, follow this guide instead. To gain the benefits of a VPN on OpenWrt, you need a router with both OpenWrt firmware and an enabled OpenVPN client. The main page of the firmware is .
1. In order to start, you would need to access your router via SSH using its LAN IP address. By default, the IP address is set to 192.168.1.1 and the username is root, however, the IP address may differ if you changed any of the default values.
2. The OpenVPN package is not included in the firmware image by default. To install it, please run the following commands:opkg updateopkg install openvpn-opensslopkg install ip-fullAdditionally, you may install the LuCI component of the OpenVPN configuration, however, it is optional. You can do so by running this command:opkg install luci-app-openvpn
3. Once you have installed the OpenVPN package, you can make it launch automatically whenever the router starts by running this command:/etc/init.d/openvpn enable
4. Next, you will need to download the server configuration files.
Follow the steps below to find the manual connection configuration files:
1. Log into your [Nord Account](https://my.nordaccount.com/), and click NordVPN.
2. Scroll down to Advanced Settings and click Set up NordVPN manually.
3. Select the OpenVPN configuration files tab.
4. Find the server you wish to connect to by using the Search bar or by scrolling down and download it by clicking Download UDP or Download TCP.
5. When connecting to OpenVPN & IKEv2 manually, you're going to need to use the Username and Password from the Service credential tab.
1. For this guide, we used the server uk2054.nordvpn.com, however, you should use the server that the website suggests for you.To download a server file, choose the country where you wish to connect, click on “Show available protocols”, right-click on “Download config” for “OpenVPN TCP” or “OpenVPN UDP” and choose “Copy link address”.After that, return to your SSH session and run the following command:wget -P /etc/openvpn However, make sure to use the link you copied for your specific server file. This command will download the configuration file to the /etc/openvpn directory for easy access.Alternatively, you may download the server configuration file on a different machine and transfer it to the OpenWrt router using alternate methods, such as SCP or SFTP protocols.For older OpenWrt builds:You can simply download an archive here . In the downloaded archive, you will find the corresponding files with .crt and .key extensions. The files are specific for each VPN server.
2. The OpenVPN configuration for NordVPN requires you to enter your NordVPN service credential username and password every time OpenVPN starts. However, we will make some adjustments so the credentials would be provided automatically.First, to make the process easier, we will install the nano text editor by running the following command:opkg install nanoOtherwise, you may use the built-in vi text editor. For more information regarding text editors, please refer to this article: .Now, open the downloaded server configuration file using the nano text editor. In our case, the command would be:nano /etc/openvpn/uk2054.nordvpn.com.udp.ovpnAfter that, append the word “secret” (without quotation marks) to the string “auth-user-pass”. The resulting line should be:auth-user-pass secretNow, we need to create a new file named secret, where the NordVPN service credentials will be stored. To do so, run the following command:nano /etc/openvpn/secretIt will create the new file and open it using the nano text editor.In the first line of the file enter your NordVPN service username, and the second - NordVPN service password.
You can find your NordVPN service credentials (service username and service password) in the [Nord Account dashboard](https://my.nordaccount.com/dashboard/nordvpn/)
Follow the steps below to find the service credentials for manual connection setup:
1. Log into your [Nord Account](https://my.nordaccount.com/), click NordVPN, and, under Manual setup, click on Service credentials. Here you'll find the Username and Password needed to connect manually.
1. Configure OpenVPN using the downloaded configuration file in one of two ways:
1. Change the file’s extension from .ovpn to .conf, which will allow OpenVPN to find it automatically by its extension.To do so, you can use the mv command:mv /etc/openvpn/uk2054.nordvpn.com.udp.ovpn /etc/openvpn/uk2054.nordvpn.com.udp.conf
2. Specify the file name in “/etc/config/openvpn” by using the following “uci” commands:uci set openvpn.nordvpn=openvpnuci set openvpn.nordvpn.enabled='1'uci set openvpn.nordvpn.config='/etc/openvpn/uk2054.nordvpn.com.udp.ovpn'uci commit openvpnAfter that, the file “/etc/config/openvpn” should contain the following appended strings:config openvpn 'nordvpn'option enabled '1'option config '/etc/openvpn/uk2054.nordvpn.com.udp.ovpn'You can check by running this command:tail /etc/config/openvpnYou may also change the file’s extension from .ovpn to .conf and specify it in the file “/etc/config/openvpn” - in that case, however, OpenVPN will start with this configuration file just once.
2. Create a new network interface by running the following commands:uci set network.nordvpntun=interfaceuci set network.nordvpntun.proto='none'uci set network.nordvpntun.ifname='tun0'uci commit networkThe file “/etc/config/network” should contain the following appended strings, if everything was done properly:config interface 'nordvpntun'option proto 'none'option ifname 'tun0'It can be checked by using the tail /etc/config/network command.
3. Create a new firewall zone and add a forwarding rule from LAN to VPN by running the following commands:uci add firewall zoneuci set firewall.@zone[-1].name='vpnfirewall'uci set firewall.@zone[-1].input='REJECT'uci set firewall.@zone[-1].output='ACCEPT'uci set firewall.@zone[-1].forward='REJECT'uci set firewall.@zone[-1].masq='1'uci set firewall.@zone[-1].mtu_fix='1'uci add_list firewall.@zone[-1].network='nordvpntun'uci add firewall forwardinguci set firewall.@forwarding[-1].src='lan'uci set firewall.@forwarding[-1].dest='vpnfirewall'uci commit firewallIf done correctly, the file “/etc/config/firewall” should contain the following appended strings:config zoneoption name 'vpnfirewall'option input 'REJECT'option output 'ACCEPT'option forward 'REJECT'option masq '1'option mtu_fix '1'list network 'nordvpntun'config forwardingoption src 'lan'option dest 'vpnfirewall'You can check by running tail -13 /etc/config/firewall command. This will display the last 13 lines, which should contain the aforementioned strings.
4. Now you need to configure the DNS servers. The simplest approach is to use NordVPN DNS for the WAN interface of the router. To add NordVPN DNS, run the following commands:uci set network.wan.peerdns='0'uci del network.wan.dnsuci add_list network.wan.dns='103.86.96.100'uci add_list network.wan.dns='103.86.99.100'uci commitIf you receive an error message “uci: Entry not found” after running the uci del network.wan.dns command, you can disregard it.The file “/etc/config/network” should contain the section ‘wan’ with the three bottom strings appended:config interface 'wan'<...>option peerdns '0'list dns '103.86.96.100'list dns '103.86.99.100'You can check by running the cat /etc/config/network command and finding the ‘wan’ interface in the output.You can also add different DNS addresses, such as Google’s by running these commands:uci set network.wan.peerdns='0'uci del network.wan.dnsuci add_list network.wan.dns='8.8.8.8'uci add_list network.wan.dns='8.8.4.4'uci commitThe appended strings should be similar to the previous ones.
(Optional) To prevent traffic leakage in case the VPN tunnel disconnects, you can open the “/etc/firewall.user” file using a text editor and add the following content to it:# This file is interpreted as a shell script.
# Put your custom iptables rules here, and they will be executed with each firewall (re-)start
# Internal uci firewall chains are flushed and recreated on reload, so
# put custom rules into the root chains, e.g. INPUT or FORWARD, or into the
# special user chains, e.g. input_wan_rule or postrouting_lan_rule.
if (! ip a s tun0 up) && (! iptables -C forwarding_rule -j REJECT); then
iptables -I forwarding_rule -j REJECT
fi
Additionally, you should create a file called “99-prevent-leak” in the folder “/etc/hotplug.d/iface” by running nano /etc/hotplug.d/iface/99-prevent-leak and adding the following content to the file:#!/bin/sh
if [ ""$ACTION"" = ifup ] && (ip a s tun0 up) && (iptables -C forwarding_rule -j REJECT); then
iptables -D forwarding_rule -j REJECT
fi
if [ ""$ACTION"" = ifdown ] && (! ip a s tun0 up) && (! iptables -C forwarding_rule -j REJECT); then
iptables -I forwarding_rule -j REJECT
fi
In some cases, the OpenVPN connection can crash with a log output similar to “couldn’t resolve host…”. In this case, the VPN tunnel itself remains, however, the connection is lost. To reconnect to it automatically, first open the “/etc/rc.local” file using a text editor and add the following line:/etc/openvpn/reconnect.sh &
In addition, you need to create the “reconnect.sh” file in the “/etc/openvpn” directory. It can be done by running the nano /etc/openvpn/reconnect.sh command.
In the file, enter the following script contents:
#!/bin/sh
n=10
while sleep 50; do
t=$(ping -c $n 8.8.8.8 | grep -o -E '[0-9]+ packets r' | grep -o -E '[0-9]+')
if [ ""$t"" -eq 0 ]; then
/etc/init.d/openvpn restart
fi
done
When you have followed these instructions, you should be connected using the configured connection. To check if you were successful, visit NordVPN’s homepage — the status at the top of the page should say “Protected.”
If you wish to disconnect the VPN connection, run the following command:
service openvpn stop",https://support.nordvpn.com/hc/en-us/related/click?data=BAh7CjobZGVzdGluYXRpb25fYXJ0aWNsZV9pZGwrCJG6CdF%2FEjoYcmVmZXJyZXJfYXJ0aWNsZV9pZGwrCJEfsr2sHDoLbG9jYWxlSSIKZW4tdXMGOgZFVDoIdXJsSSJBL2hjL2VuLXVzL2FydGljbGVzLzIwMzQwMTc3MjIyMjg5LU9wZW5XcnQtc2V0dXAtd2l0aC1Ob3JkVlBOBjsIVDoJcmFua2kJ--f800db088c36826b86f96d6361909fd108a468cc
Dedicated IP: Renewal and cancellation,"If you want to renew your dedicated IP service or cancel auto-renewal for your dedicated IP subscription, the steps you need to take depend on how you purchased the dedicated IP service.
## You bought the dedicated IP in your Nord Account
If you have purchased a dedicated IP in your [Nord Account](https://my.nordaccount.com/), the service will be renewed automatically. It makes no difference if you bought the dedicated IP as a standalone service or got it with a VPN bundle.
If you no longer want a particular dedicated IP anymore, you can[ cancel auto-renewal for your subscription in your Nord Account](https://support.nordvpn.com/hc/en-us/articles/19556844985489-How-to-cancel-a-subscription). Please note that this is not a refund, as outlined in[ NordVPN’s refund policy](https://support.nordvpn.com/hc/en-us/articles/19476991311121-What-is-your-money-back-policy).
## You bought the dedicated IP using a coupon code
Dedicated IP services purchased using a coupon code are not subject to auto-renewal. To renew your dedicated IP addresses, you will need to manually[ buy the dedicated IP service](https://support.nordvpn.com/hc/en-us/articles/19484196251921-How-to-purchase-a-dedicated-IP-address).
When your dedicated IP subscription is about to expire, we will send a reminder about renewal to your registered Nord Account email address.",https://support.nordvpn.com/hc/en-us/related/click?data=BAh7CjobZGVzdGluYXRpb25fYXJ0aWNsZV9pZGwrCBGwWaEXFToYcmVmZXJyZXJfYXJ0aWNsZV9pZGwrCJEfsr2sHDoLbG9jYWxlSSIKZW4tdXMGOgZFVDoIdXJsSSJML2hjL2VuLXVzL2FydGljbGVzLzIzMTkxMjM1NDQwNjU3LURlZGljYXRlZC1JUC1SZW5ld2FsLWFuZC1jYW5jZWxsYXRpb24GOwhUOglyYW5raQo%3D--9da89e1675b0f79cb96b88cffd9706487e68e5d8
How to enable MFA for your Nord Account?,1. Log into your [Nord Account](https://nordaccount.com/).,https://support.nordvpn.com/hc/en-us/articles/19442299167889-What-is-MFA-and-how-to-enable-it
What to do if I lose my MFA access?,"If you’re experiencing temporary trouble accessing your MFA device, you can use one of your backup codes to log in to your Nord Account. However, if you've lost your MFA device, you will need to fill out the MFA reset request form to remove your Nord Account’s current MFA settings.
Follow these instructions to reset the MFA settings of your Nord Account:
1. Open the MFA reset request form.
2. Fill in the fields indicated below. This information is required to make sure that no one makes unauthorized changes to your account.
* Account's current email: Enter the email address you currently use for NordVPN.
* Amount paid: Type in the amount of money you paid the last time you made a payment to NordVPN.
* Method: Select the way you made your last payment (like credit card or PayPal) and enter any other required information.
* Payment date: Choose the exact date of your last payment.
* Do you have a NordLocker or NordPass account?: Let us know if you also have an account for NordLocker or NordPass.
* Description (Optional): Add additional comments or requests for our support team.
* Attachments (Optional): Attach a picture of your last payment to help speed up the process.
1. Click the “Submit” button to finish.
Our customer support team will contact you by email once your Nord Account MFA settings have been successfully reset.",https://support.nordvpn.com/hc/en-us/related/click?data=BAh7CjobZGVzdGluYXRpb25fYXJ0aWNsZV9pZGwrCJGPoP97EjoYcmVmZXJyZXJfYXJ0aWNsZV9pZGwrCJGx7QlUGzoLbG9jYWxlSSIKZW4tdXMGOgZFVDoIdXJsSSJJL2hjL2VuLXVzL2FydGljbGVzLzIwMzIzNzc4OTg5OTY5LVdoYXQtdG8tZG8taWYtSS1sb3NlLW15LU1GQS1hY2Nlc3MGOwhUOglyYW5raQY%3D--8dc7d3aa328dc6ea1712051f3d2d32c048135d79
How to enable MFA for your Nord Account?,1. Log into your [Nord Account](https://nordaccount.com/).,https://support.nordvpn.com/hc/en-us/related/click?data=BAh7CjobZGVzdGluYXRpb25fYXJ0aWNsZV9pZGwrCJHkVcOuEToYcmVmZXJyZXJfYXJ0aWNsZV9pZGwrCJGx7QlUGzoLbG9jYWxlSSIKZW4tdXMGOgZFVDoIdXJsSSJHL2hjL2VuLXVzL2FydGljbGVzLzE5NDQyMjk5MTY3ODg5LVdoYXQtaXMtTUZBLWFuZC1ob3ctdG8tZW5hYmxlLWl0BjsIVDoJcmFua2kH--7c67256a3dc159ce615dae8612317363aa9144d5
"What is MFA, and how to enable it","[Multi-factor authentication](https://nordvpn.com/blog/what-is-multi-factor-authentication/) (MFA) is a security mechanism used to verify the identity of a user by requiring the presentation of two or more authentication factors: password, PIN, token, USB security key, fingerprint, or facial recognition.
There are two MFA options for Nord Account:
* You may use authenticator applications to generate a code, such as [Google Authenticator](https://play.google.com/store/apps/details?id=com.google.android.apps.authenticator2&hl=en_US&gl=US), [Microsoft Authenticator](https://play.google.com/store/apps/details?id=com.azure.authenticator&hl=lt&gl=US), [Authy](https://play.google.com/store/apps/details?id=com.authy.authy&), or any other. Any one of those apps will create a code that you must enter whenever accessing Nord Account. The code changes every 30 seconds.
* A second option is to use a security key. It can be a Bluetooth, NFC, or USB security key that will hold a unique PIN and ensure effortless access only for you. Nord Account supports USB security keys certified by FIDO2. That includes the Security Key series, Yubikey 5 series, iePass FIDO K44, MultiPass FIDO K25, ePass FIDO NFC K9 and K35, BioPass FIDO K26 and K27, and others.
## How to enable MFA for your Nord Account?
1. Log into your [Nord Account](https://nordaccount.com/).
2. If you are using a desktop device, click on your account name in the top right corner and choose Account Settings. Switch to a Multi-factor authentication (MFA) section, and click on Manage MFA.On a mobile device, tap on the free line sign, scroll down to the bottom of the menu, where you find Account Settings, select Multi-factor authentication and tap on manage MFA.
3. On both, desktop and mobile, you will be asked to verify your email address. To do so, enter the verification code you have received to your NordVPN account associated email to verify it.
4. From there, select Set up next to the Authenticator app.
5. This action will generate your QR code and key. Open your mobile authentication application (such as Duo Mobile, Authy, etc.) and scan the QR code or manually enter the key. Once your account is saved in the authenticator application, return to the Nord Account website and click Continue.
6. Enter the MFA code generated by your mobile authentication application.
7. Before finishing the MFA setup, make sure to [save your backup codes](https://support.nordvpn.com/hc/en-us/articles/30047757775249-NordVPN-MFA-backup-codes) here. When done, click Continue.
### As another option, you can use a security key to add MFA feature.
1. Choose set up next to the Security key option in your Nord Account settings.
2. Follow the steps shown. Setup steps may differ depending on the security key.
3. Once you have finished the setup, a physical security key will be needed to log into your Nord Account.
4. In the end, you will be suggested to log out from all devices. We strongly recommend doing that so that all of your devices that are used with Nord Account would be instantly protected with MFA.",https://support.nordvpn.com/hc/en-us/related/click?data=BAh7CjobZGVzdGluYXRpb25fYXJ0aWNsZV9pZGwrCJHkVcOuEToYcmVmZXJyZXJfYXJ0aWNsZV9pZGwrCJGx7QlUGzoLbG9jYWxlSSIKZW4tdXMGOgZFVDoIdXJsSSJHL2hjL2VuLXVzL2FydGljbGVzLzE5NDQyMjk5MTY3ODg5LVdoYXQtaXMtTUZBLWFuZC1ob3ctdG8tZW5hYmxlLWl0BjsIVDoJcmFua2kH--7c67256a3dc159ce615dae8612317363aa9144d5
How to reach NordVPN customer support?,"While we don't offer phone support, we have different options to contact NordVPN customer support available 24/7 and ready to help you!
## Help Center
First off, if you run into any issues using NordVPN - check out our Help Center that is available in 14 languages: English, German, French, Danish, Italian, Spanish, Norwegian, Swedish, Dutch, Japanese, Korean, Polish, Portuguese-Brazilian, Traditional Chinese.
You can change the language by scrolling down until you see the language change option and clicking on the language you prefer. This will ensure that you can look for information in a language comfortable for you.
After you have set the language you want to look information in, you can find solutions in the help center by either:
* Searching for information using Help Center's search bar, which will list out articles according to the keywords typed in the search query:
* Navigating to one of the categories available in the Help Center:
* [FAQ](https://support.nordvpn.com/hc/en-us/categories/200593301-FAQ) - in this category you'll find Frequently asked questions and NordVPN app setup tutorials;
* [General info](https://support.nordvpn.com/hc/en-us/categories/360000293597-General-info) - here, you'll be able to find information on NordVPN functionalities, features, and SmartPlay;
* [Billing](https://support.nordvpn.com/hc/en-us/categories/360000293617-Billing) - this category covers payment, subscription, and account management topics;
* [Connectivity](https://support.nordvpn.com/hc/en-us/categories/200614302-Connectivity) - the last category available covers troubleshooting articles, here you can find help regarding NordVPN connectivity, internet speed with NordVPN on, manual setups for routers and different OSes, proxies.
## Support agents
However, if you're looking for assistance on your specific case, you can reach out to our developed conversation bots or human customer support agents by:
* Chat
* Email
We have two teams to assist you:
* Customer Care & Billing Team: They can tell you about NordVPN, help set up your devices, make sure you can access streaming sites, and answer questions about dedicated IPs. As well as helpyou with your NordVPN subscription, account, or payments.
* Connection Team: They can assist with setting up NordVPN on your router, fixing advanced connectivity problems, and helping in places with internet restrictions.",https://support.nordvpn.com/hc/en-us/related/click?data=BAh7CjobZGVzdGluYXRpb25fYXJ0aWNsZV9pZGwrCJGygBq4EToYcmVmZXJyZXJfYXJ0aWNsZV9pZGwrCJGx7QlUGzoLbG9jYWxlSSIKZW4tdXMGOgZFVDoIdXJsSSJML2hjL2VuLXVzL2FydGljbGVzLzE5NDgyNDE2Mjk2NTkzLUhvdy10by1yZWFjaC1Ob3JkVlBOLWN1c3RvbWVyLXN1cHBvcnQGOwhUOglyYW5raQg%3D--702811293428ba932c8770b0b9a68af6c9c83194
How to re-install NordVPN on Android,"To reinstall NordVPN on your Android device and ensure you have the latest version for the best experience, follow these steps.
1. Open the Settings app on your phone and select Apps or Apps & Notifications (the selection may vary depending on your phone type).
2. After opening the Apps settings, you may also need to press Manage Apps (this may vary depending on your phone type).
3. After opening Manage apps (or just Apps, depending on your phone model), search for or scroll down to find and tap the NordVPN app.
4. Tap Uninstall and confirm app deletion.
5. Once uninstalled, download the latest NordVPN app version from [Google Play](https://play.google.com/store/apps/details?id=com.nordvpn.android&hl=en&pli=1) or our website, where you’ll also find setup instructions.",https://support.nordvpn.com/hc/en-us/related/click?data=BAh7CjobZGVzdGluYXRpb25fYXJ0aWNsZV9pZGwrCJHeZGQOGzoYcmVmZXJyZXJfYXJ0aWNsZV9pZGwrCJGx7QlUGzoLbG9jYWxlSSIKZW4tdXMGOgZFVDoIdXJsSSJLL2hjL2VuLXVzL2FydGljbGVzLzI5NzQ4NjI3ODI0MjczLUhvdy10by1yZS1pbnN0YWxsLU5vcmRWUE4tb24tQW5kcm9pZAY7CFQ6CXJhbmtpCQ%3D%3D--fd696f13c5598a064fa518706a1a0fb437854ab4
What to do if you’re unable to redeem NordVPN service from Revolut?,"If you are not able to redeem your NordVPN coupon, or your subscription does not get activated, please make sure that the following is in order:",https://support.nordvpn.com/hc/en-us/related/click?data=BAh7CjobZGVzdGluYXRpb25fYXJ0aWNsZV9pZGwrCJEobdndGzoYcmVmZXJyZXJfYXJ0aWNsZV9pZGwrCJGx7QlUGzoLbG9jYWxlSSIKZW4tdXMGOgZFVDoIdXJsSSJTL2hjL2VuLXVzL2FydGljbGVzLzMwNjM5NjQ5NTMyMDQ5LUhvdy10by1yZWRlZW0tYS1SZXZvbHV0LU5vcmRWUE4tc3Vic2NyaXB0aW9uBjsIVDoJcmFua2kK--c4c2c050adc8eda1f617dafcec496cdf4ab923d8
How to redeem a Revolut NordVPN subscription,"In this article you will learn how to redeem your NordVPN subscription gifted from Revolut.
In order to be eligible for a NordVPN subscription, you must have a Premium, Metal, or Ultra plan with Revolut.
Follow the steps below to redeem your subscription:
1. Open your Revolut app.
2. Tap your profile icon in the top-left corner.
3. Select Your plan.
4. Scroll down to your benefits, and tap See all
5. Tap NordVPN and follow the instructions.
Once you have followed these steps, you should have redeemed your NordVPN subscription successfully.
## What to do if you’re unable to redeem NordVPN service from Revolut?
If you are not able to redeem your NordVPN coupon, or your subscription does not get activated, please make sure that the following is in order:
* Your Revolut subscription is active.
* If you have changed your Revolut plan, make sure to re-activate your NordVPN services.
* Check for any spelling mistakes in the NordVPN coupon.
If you are still encountering issues, please contact our [customer support team](https://support.nordvpn.com/hc/en-us/requests/new?ticket_form_id=21068086896145).",https://support.nordvpn.com/hc/en-us/related/click?data=BAh7CjobZGVzdGluYXRpb25fYXJ0aWNsZV9pZGwrCJEobdndGzoYcmVmZXJyZXJfYXJ0aWNsZV9pZGwrCJGx7QlUGzoLbG9jYWxlSSIKZW4tdXMGOgZFVDoIdXJsSSJTL2hjL2VuLXVzL2FydGljbGVzLzMwNjM5NjQ5NTMyMDQ5LUhvdy10by1yZWRlZW0tYS1SZXZvbHV0LU5vcmRWUE4tc3Vic2NyaXB0aW9uBjsIVDoJcmFua2kK--c4c2c050adc8eda1f617dafcec496cdf4ab923d8
What payment methods does NordVPN accept,"You can pay with a credit card, cryptocurrency, PayPal, Sofort, prepaid (debit) card, and many more payment methods. You can also make a payment through iTunes or Google Pay.
If you want to pay in cash, you can purchase a NordVPN subscription in a retail store.
Once you’ve checked out NordVPN’s plans and prices, you can find out which payment methods are available to you at the checkout page. Simply click “Continue to payment” to see how you can pay for your purchase.",https://support.nordvpn.com/hc/en-us/related/click?data=BAh7CjobZGVzdGluYXRpb25fYXJ0aWNsZV9pZGwrCJGZF3TnEToYcmVmZXJyZXJfYXJ0aWNsZV9pZGwrCJGcZ06wFjoLbG9jYWxlSSIKZW4tdXMGOgZFVDoIdXJsSSJPL2hjL2VuLXVzL2FydGljbGVzLzE5Njg1NzgyODIxMjY1LVdoYXQtcGF5bWVudC1tZXRob2RzLWRvZXMtTm9yZFZQTi1hY2NlcHQGOwhUOglyYW5raQY%3D--177177e66a8001d44919d8450eb274f3dd241f7b
How to cancel auto-renewal for your subscription,"If your subscription was purchased via the Google Play Store, Apple App Store, or Amazon App Store and you wish to cancel it, follow the respective articles below:
* Cancelling your [Google Play Store NordVPN subscription](https://support.google.com/googleplay/answer/7018481)
* Cancelling your [Apple App Store NordVPN subscription](https://support.apple.com/en-lamr/118428)
* Cancelling your [Amazon App Store NordVPN subscription](https://www.amazonforum.com/s/question/0D54P00007IG0CkSAL/amazon-appstore-subscriptions)
## Cancelling your NordVPN subscription
If you have purchased your subscription directly from NordVPN and wish for your subscription to no longer renew at the subsequent billing date, you may cancel your subscription via your [Nord Account](https://my.nordaccount.com/).
You can follow the same steps to cancel your NordPass, NordLocker, Dedicated IP, or bundle subscription services.
To cancel the automatic renewal of your NordVPN subscription, follow the steps below:
1. Log in to your [Nord Account](https://my.nordaccount.com/)
2. Open the billing tab:
3. Click cancel next to auto-renewal:
4. Select cancel auto-renewal:
5. Your auto-renewal status will now change to off:
You will receive a confirmation email to your registered email account if your subscription cancellation is successful:
If you wish to receive a refund, please read [our article on NordVPN's refund policy](https://support.nordvpn.com/hc/en-us/articles/19476991311121-What-is-your-money-back-policy).",https://support.nordvpn.com/hc/en-us/related/click?data=BAh7CjobZGVzdGluYXRpb25fYXJ0aWNsZV9pZGwrCJFczG7JEToYcmVmZXJyZXJfYXJ0aWNsZV9pZGwrCJGcZ06wFjoLbG9jYWxlSSIKZW4tdXMGOgZFVDoIdXJsSSJXL2hjL2VuLXVzL2FydGljbGVzLzE5NTU2ODQ0OTg1NDg5LUhvdy10by1jYW5jZWwtYXV0by1yZW5ld2FsLWZvci15b3VyLXN1YnNjcmlwdGlvbgY7CFQ6CXJhbmtpBw%3D%3D--6428baf6f3c2797433eb48c0989fbdbfe493d030
How can I get a receipt for my payment,"If you are looking for information on how to generate an Invoice for your payment, please check this article instead: [How can I get an Invoice for my company?](https://support.nordvpn.com/hc/en-us/articles/19744005126801-How-can-I-get-an-Invoice-for-my-company)
1. Log in to your account on the [Nord Account](https://my.nordaccount.com/) page.
2. Navigate to Billing History.
3. Click the Receipt button under the Download column.
4. Wait until a PDF file icon pops-up. Click on the Receipt highlight to download it.",https://support.nordvpn.com/hc/en-us/related/click?data=BAh7CjobZGVzdGluYXRpb25fYXJ0aWNsZV9pZGwrCBF41iyHEjoYcmVmZXJyZXJfYXJ0aWNsZV9pZGwrCJGcZ06wFjoLbG9jYWxlSSIKZW4tdXMGOgZFVDoIdXJsSSJNL2hjL2VuLXVzL2FydGljbGVzLzIwMzcxNzgyMTM3ODczLUhvdy1jYW4tSS1nZXQtYS1yZWNlaXB0LWZvci1teS1wYXltZW50BjsIVDoJcmFua2kI--86f058912732e929f7ab20470d112414746aebae
What is NordPass?,"NordPass is a tool designed to help you manage your passwords securely and effortlessly. Created by NordSecurity, the same company behind NordVPN, NordPass allows you to store login details, autofill forms, keep private notes safe, and generate strong passwords. Like other NordSecurity products, NordPass integrates with your Nord Account for easy access and management.",https://support.nordvpn.com/hc/en-us/related/click?data=BAh7CjobZGVzdGluYXRpb25fYXJ0aWNsZV9pZGwrCBFx001wHjoYcmVmZXJyZXJfYXJ0aWNsZV9pZGwrCJGcZ06wFjoLbG9jYWxlSSIKZW4tdXMGOgZFVDoIdXJsSSJTL2hjL2VuLXVzL2FydGljbGVzLzMzNDY3NjkwODczMTA1LUhvdy10by1zZXQtdXAtcGFzc3dvcmQtbWFuYWdlci13aXRoLU5vcmRQYXNzBjsIVDoJcmFua2kJ--6b6d2017c92aefcd61130b938ef62149417c4092
What is Nord Account?,"With your Nord Account, you can easily manage all your Nord products, including NordVPN, NordPass, and NordLocker. Purchasing NordVPN or any bundle provides automatic access to a Nord Account. Guidance on how to access NordPass using your Nord Account is provided later in this article.",https://support.nordvpn.com/hc/en-us/related/click?data=BAh7CjobZGVzdGluYXRpb25fYXJ0aWNsZV9pZGwrCBFx001wHjoYcmVmZXJyZXJfYXJ0aWNsZV9pZGwrCJGcZ06wFjoLbG9jYWxlSSIKZW4tdXMGOgZFVDoIdXJsSSJTL2hjL2VuLXVzL2FydGljbGVzLzMzNDY3NjkwODczMTA1LUhvdy10by1zZXQtdXAtcGFzc3dvcmQtbWFuYWdlci13aXRoLU5vcmRQYXNzBjsIVDoJcmFua2kJ--6b6d2017c92aefcd61130b938ef62149417c4092
How to get started with NordPass?,The process to start with NordPass is detailed below.,https://support.nordvpn.com/hc/en-us/related/click?data=BAh7CjobZGVzdGluYXRpb25fYXJ0aWNsZV9pZGwrCBFx001wHjoYcmVmZXJyZXJfYXJ0aWNsZV9pZGwrCJGcZ06wFjoLbG9jYWxlSSIKZW4tdXMGOgZFVDoIdXJsSSJTL2hjL2VuLXVzL2FydGljbGVzLzMzNDY3NjkwODczMTA1LUhvdy10by1zZXQtdXAtcGFzc3dvcmQtbWFuYWdlci13aXRoLU5vcmRQYXNzBjsIVDoJcmFua2kJ--6b6d2017c92aefcd61130b938ef62149417c4092
How to set up password manager with NordPass,"If you've subscribed to a NordVPN Plus, Complete, or Ultra plan, you've got a bundle that includes the NordPass password manager. This guide will walk you through setting it up and securing your passwords.
In this article, we will cover:
* [What is NordPass?](
* [What is Nord Account?](
* [How to get started with NordPass?](
* [Installing NordPass](
* [Logging into NordPass](
## What is NordPass?
NordPass is a tool designed to help you manage your passwords securely and effortlessly. Created by NordSecurity, the same company behind NordVPN, NordPass allows you to store login details, autofill forms, keep private notes safe, and generate strong passwords. Like other NordSecurity products, NordPass integrates with your Nord Account for easy access and management.
## What is Nord Account?
With your Nord Account, you can easily manage all your Nord products, including NordVPN, NordPass, and NordLocker. Purchasing NordVPN or any bundle provides automatic access to a Nord Account. Guidance on how to access NordPass using your Nord Account is provided later in this article.
[Learn more about Nord Account and how to use it.](https://support.nordvpn.com/hc/en-us/articles/19571345334033-What-is-a-Nord-Account-and-how-do-you-use-it)
## How to get started with NordPass?
The process to start with NordPass is detailed below.
### Installing NordPass
Start securing your passwords with NordPass by choosing your preferred installation method:
* You can install the NordPass application directly on your device. [Installation guides for different operating systems are available. ](https://support.nordpass.com/hc/en-us/articles/360004799257-Installing-NordPass-desktop-application)
* Alternatively, for seamless browsing, install the NordPass browser extension – [learn how across various browsers.](https://support.nordpass.com/hc/en-us/articles/360010298318-Adding-the-NordPass-browser-extension)
* MacOS users also have the option to add the Safari NordPass extension. [Learn how to do that.](https://support.nordpass.com/hc/en-us/articles/360009942298-NordPass-Safari-extension-setup-for-macOS)
### Logging into NordPass
Once installed, open your NordPass application or browser extension and click Login with Nord Account. Enter your Nord Account credentials to log in, and you're all set!
Learn more about the password manager, and if you need any further assistance, visit [NordPass's Help Center](https://support.nordpass.com/hc/en-us).",https://support.nordvpn.com/hc/en-us/related/click?data=BAh7CjobZGVzdGluYXRpb25fYXJ0aWNsZV9pZGwrCBFx001wHjoYcmVmZXJyZXJfYXJ0aWNsZV9pZGwrCJGcZ06wFjoLbG9jYWxlSSIKZW4tdXMGOgZFVDoIdXJsSSJTL2hjL2VuLXVzL2FydGljbGVzLzMzNDY3NjkwODczMTA1LUhvdy10by1zZXQtdXAtcGFzc3dvcmQtbWFuYWdlci13aXRoLU5vcmRQYXNzBjsIVDoJcmFua2kJ--6b6d2017c92aefcd61130b938ef62149417c4092
How to cancel auto-renewal for your subscription,"If your subscription was purchased via the Google Play Store, Apple App Store, or Amazon App Store and you wish to cancel it, follow the respective articles below:
* Cancelling your [Google Play Store NordVPN subscription](https://support.google.com/googleplay/answer/7018481)
* Cancelling your [Apple App Store NordVPN subscription](https://support.apple.com/en-lamr/118428)
* Cancelling your [Amazon App Store NordVPN subscription](https://www.amazonforum.com/s/question/0D54P00007IG0CkSAL/amazon-appstore-subscriptions)
## Cancelling your NordVPN subscription
If you have purchased your subscription directly from NordVPN and wish for your subscription to no longer renew at the subsequent billing date, you may cancel your subscription via your [Nord Account](https://my.nordaccount.com/).
You can follow the same steps to cancel your NordPass, NordLocker, Dedicated IP, or bundle subscription services.
To cancel the automatic renewal of your NordVPN subscription, follow the steps below:
1. Log in to your [Nord Account](https://my.nordaccount.com/)
2. Open the billing tab:
3. Click cancel next to auto-renewal:
4. Select cancel auto-renewal:
5. Your auto-renewal status will now change to off:
You will receive a confirmation email to your registered email account if your subscription cancellation is successful:
If you wish to receive a refund, please read [our article on NordVPN's refund policy](https://support.nordvpn.com/hc/en-us/articles/19476991311121-What-is-your-money-back-policy).",https://support.nordvpn.com/hc/en-us/related/click?data=BAh7CjobZGVzdGluYXRpb25fYXJ0aWNsZV9pZGwrCJFczG7JEToYcmVmZXJyZXJfYXJ0aWNsZV9pZGwrCBGwWaEXFToLbG9jYWxlSSIKZW4tdXMGOgZFVDoIdXJsSSJXL2hjL2VuLXVzL2FydGljbGVzLzE5NTU2ODQ0OTg1NDg5LUhvdy10by1jYW5jZWwtYXV0by1yZW5ld2FsLWZvci15b3VyLXN1YnNjcmlwdGlvbgY7CFQ6CXJhbmtpBw%3D%3D--4c16e1e0f20d796bdbf97e7407480047f6462788
Dedicated IP: Renewal and cancellation,"If you want to renew your dedicated IP service or cancel auto-renewal for your dedicated IP subscription, the steps you need to take depend on how you purchased the dedicated IP service.
## You bought the dedicated IP in your Nord Account
If you have purchased a dedicated IP in your [Nord Account](https://my.nordaccount.com/), the service will be renewed automatically. It makes no difference if you bought the dedicated IP as a standalone service or got it with a VPN bundle.
If you no longer want a particular dedicated IP anymore, you can[ cancel auto-renewal for your subscription in your Nord Account](https://support.nordvpn.com/hc/en-us/articles/19556844985489-How-to-cancel-a-subscription). Please note that this is not a refund, as outlined in[ NordVPN’s refund policy](https://support.nordvpn.com/hc/en-us/articles/19476991311121-What-is-your-money-back-policy).
## You bought the dedicated IP using a coupon code
Dedicated IP services purchased using a coupon code are not subject to auto-renewal. To renew your dedicated IP addresses, you will need to manually[ buy the dedicated IP service](https://support.nordvpn.com/hc/en-us/articles/19484196251921-How-to-purchase-a-dedicated-IP-address).
When your dedicated IP subscription is about to expire, we will send a reminder about renewal to your registered Nord Account email address.",https://support.nordvpn.com/hc/en-us/related/click?data=BAh7CjobZGVzdGluYXRpb25fYXJ0aWNsZV9pZGwrCBGwWaEXFToYcmVmZXJyZXJfYXJ0aWNsZV9pZGwrCJGBHmLTHToLbG9jYWxlSSIKZW4tdXMGOgZFVDoIdXJsSSJML2hjL2VuLXVzL2FydGljbGVzLzIzMTkxMjM1NDQwNjU3LURlZGljYXRlZC1JUC1SZW5ld2FsLWFuZC1jYW5jZWxsYXRpb24GOwhUOglyYW5raQY%3D--dacb47004ba98225b39de2ecd75fd620418d3820
How to stop WebRTC leaks,"Sometimes various browsers experience WebRTC Leaks which may cause the real IP address leak, even when using a VPN.
However, you can easily disable the WebRTC leaks using the NordVPN browser extension on top of the NordVPN app.
* Download and set up the NordVPN browser extension on the browser of your choice: [Chrome](https://support.nordvpn.com/hc/en-us/articles/20349533941265-How-to-set-up-NordVPN-with-Chrome-extension)/[Firefox](https://support.nordvpn.com/hc/en-us/articles/20350669461137-Connect-to-NordVPN-with-Firefox-extension)/[Edge](https://support.nordvpn.com/hc/en-us/articles/19627093939601-Connect-to-NordVPN-with-Edge-Extension).
* In the bottom-right corner of the extension's main screen, click on the settings button.
* You'll find the option to block WebRTC at the very top of the settings menu. Please note: do not connect to a server via the NordVPN browser extension in case you're already connected through the NordVPN app.

You can read more about WebRTC leaks in [our blog post](https://nordvpn.com/blog/webrtc/) and watch our video for more detailed information:",https://support.nordvpn.com/hc/en-us/related/click?data=BAh7CjobZGVzdGluYXRpb25fYXJ0aWNsZV9pZGwrCBFrAL56EjoYcmVmZXJyZXJfYXJ0aWNsZV9pZGwrCJGBHmLTHToLbG9jYWxlSSIKZW4tdXMGOgZFVDoIdXJsSSI%2FL2hjL2VuLXVzL2FydGljbGVzLzIwMzE4MzgzMDA4NTI5LUhvdy10by1zdG9wLVdlYlJUQy1sZWFrcwY7CFQ6CXJhbmtpBw%3D%3D--862ce716c0c3b928a6e44eee9d567bf292713713
Plans and prices of NordVPN service,"In this article, you will learn about Nord subscription plan options. [NordVPN subscription plan prices](https://nordvpn.com/pricing/) are regularly updated on our website.
You can purchase NordVPN plans directly from the App Store or [Google Play Store](https://play.google.com/store/apps/details?id=com.nordvpn.android&hl=en), or from the Nord pricing page, where you’ll find all available options.
## Subscription plans
On the [NordPVN pricing page](https://nordvpn.com/pricing/#compare-plans-desktop) you’ll find the available options:
* [Basic](https://support.nordvpn.com/hc/en-us/related/click?data=BAh7CjobZGVzdGluYXRpb25fYXJ0aWNsZV9pZGwrCBHFHBH1EToYcmVmZXJyZXJfYXJ0aWNsZV9pZGwrCJGBHmLTHToLbG9jYWxlSSIKZW4tdXMGOgZFVDoIdXJsSSJKL2hjL2VuLXVzL2FydGljbGVzLzE5NzQ0MjUxNzU3ODQxLVBsYW5zLWFuZC1wcmljZXMtb2YtTm9yZFZQTi1zZXJ2aWNlBjsIVDoJcmFua2kI--836dd8b04f6056c360f5ec0016c6bea30fb1be22#Basic)
* [Plus](https://support.nordvpn.com/hc/en-us/related/click?data=BAh7CjobZGVzdGluYXRpb25fYXJ0aWNsZV9pZGwrCBHFHBH1EToYcmVmZXJyZXJfYXJ0aWNsZV9pZGwrCJGBHmLTHToLbG9jYWxlSSIKZW4tdXMGOgZFVDoIdXJsSSJKL2hjL2VuLXVzL2FydGljbGVzLzE5NzQ0MjUxNzU3ODQxLVBsYW5zLWFuZC1wcmljZXMtb2YtTm9yZFZQTi1zZXJ2aWNlBjsIVDoJcmFua2kI--836dd8b04f6056c360f5ec0016c6bea30fb1be22#Plus)
* [Complete](https://support.nordvpn.com/hc/en-us/related/click?data=BAh7CjobZGVzdGluYXRpb25fYXJ0aWNsZV9pZGwrCBHFHBH1EToYcmVmZXJyZXJfYXJ0aWNsZV9pZGwrCJGBHmLTHToLbG9jYWxlSSIKZW4tdXMGOgZFVDoIdXJsSSJKL2hjL2VuLXVzL2FydGljbGVzLzE5NzQ0MjUxNzU3ODQxLVBsYW5zLWFuZC1wcmljZXMtb2YtTm9yZFZQTi1zZXJ2aWNlBjsIVDoJcmFua2kI--836dd8b04f6056c360f5ec0016c6bea30fb1be22#Complete)
* [Ultra](https://support.nordvpn.com/hc/en-us/related/click?data=BAh7CjobZGVzdGluYXRpb25fYXJ0aWNsZV9pZGwrCBHFHBH1EToYcmVmZXJyZXJfYXJ0aWNsZV9pZGwrCJGBHmLTHToLbG9jYWxlSSIKZW4tdXMGOgZFVDoIdXJsSSJKL2hjL2VuLXVzL2FydGljbGVzLzE5NzQ0MjUxNzU3ODQxLVBsYW5zLWFuZC1wcmljZXMtb2YtTm9yZFZQTi1zZXJ2aWNlBjsIVDoJcmFua2kI--836dd8b04f6056c360f5ec0016c6bea30fb1be22#Ultra)
With this plan you'll get:
* [VPN features](https://support.nordvpn.com/hc/en-us/articles/19559429814545-List-of-NordVPN-features)Secure, high-speed VPNThreat Protection10 devices secured at once
* [30-day money-back guarantee](https://support.nordvpn.com/hc/en-us/articles/19476991311121-What-is-your-money-back-policy)
This plan focuses on core security and privacy, making it a great choice for users who only need reliable VPN protection.
With this plan you'll get:
* [VPN features](https://support.nordvpn.com/hc/en-us/articles/19559429814545-List-of-NordVPN-features)Secure, high-speed VPNThreat Protection10 devices secured at once
* Threat Protection Pro™Anti-malware protectionAdvanced browsing protectionAd and tracker blocker
* [Password management]( password managerData breach scanner
* [30-day money-back guarantee](https://support.nordvpn.com/hc/en-us/articles/19476991311121-What-is-your-money-back-policy)
This plan provides a well-rounded security suite, combining VPN protection with advanced tools to protect your online activities.
With this plan you'll get:
* [VPN features](https://support.nordvpn.com/hc/en-us/articles/19559429814545-List-of-NordVPN-features)Secure, high-speed VPNThreat Protection10 devices secured at once
* Threat Protection Pro™Anti-malware protectionAdvanced browsing protectionAd and tracker blocker
* [Password management]( password managerData breach scanner
* [Secure cloud storage](https://support.nordvpn.com/hc/en-us/articles/33436996432913-How-to-set-up-secure-cloud-storage-with-NordLocker)1 TB of encrypted cloud storage
* [30-day money-back guarantee](https://support.nordvpn.com/hc/en-us/articles/19476991311121-What-is-your-money-back-policy)
This plan is perfect for those who want complete online security, privacy, and secure cloud storage in one package.
With this plan you'll get:
* [VPN features](https://support.nordvpn.com/hc/en-us/articles/19559429814545-List-of-NordVPN-features)Secure, high-speed VPNThreat Protection10 devices secured at once
* Threat Protection Pro™Anti-malware protectionAdvanced browsing protectionAd and tracker blocker
* [Password management]( password managerData breach scanner
* [Secure cloud storage](https://support.nordvpn.com/hc/en-us/articles/33436996432913-How-to-set-up-secure-cloud-storage-with-NordLocker)1 TB of encrypted cloud storage
* IncogniPersonal data removal tool
* [30-day money-back guarantee](https://support.nordvpn.com/hc/en-us/articles/19476991311121-What-is-your-money-back-policy)
This plan is ideal for users who want maximum security, privacy, and data protection, including the ability to remove personal data from online sources.
## FAQs
How do I get a NordVPN subscription?
If you’re trying to subscribe to NordVPN, follow our handy guide on [how to get a subscription](https://support.nordvpn.com/hc/en-us/articles/19478048190481-How-to-purchase-a-NordVPN-subscription).
What subscription plans does NordVPN offer?
NordVPN currently offers 2-year, 1-year, and 1-month subscription plans.
Can I pay for a NordVPN subscription in monthly installments?
You can pay monthly by selecting NordVPN’s 1-month plan. NordVPN’s 2-year and 1-year plans must be [paid for in full](https://support.nordvpn.com/hc/en-us/articles/19476182512273-Does-NordVPN-charge-all-at-once) at purchase.
Does NordVPN have a family plan?
Yes, NordVPN now offers a [Family Plan](https://nordvpn.com/pricing/family-site/). It includes the same [subscription options]( Plus, Complete, and Ultra—each with the same features and benefits. The key difference is that the Family Plan allows you to create up to five separate accounts.
Do you offer discounts or coupons for NordVPN plans?
Yes — we have an extensive guide on [how to get NordVPN cheaper.](https://support.nordvpn.com/hc/en-us/articles/19477702164369-How-to-get-NordVPN-cheaper) You can also find our special [monthly deals](https://nordvpn.com/coupon/?nv_tri=TC_4672000958802338_1740990944276&nv_trs=1743145761762_1743150468731_38_251&_gl=1*fomogl*_gcl_aw*R0NMLjE3NDMwODcyNjguQ2p3S0NBanc3cE9fQmhBbEVpd0E0cE1RdkZvWHk2UWEtS0pFOTNOYkk4SWhTY2VhOVJGbGdFaldOTkZxTUxwcXUtNWlCTzQ0ODNXQTFSb0NmOElRQXZEX0J3RQ..*_gcl_au*MTk3MjQ4MjMyLjE3NDA5OTMyMzQ.*FPAU*MTk3MjQ4MjMyLjE3NDA5OTMyMzQ.*_ga*MTc2ODgyMjcxMy4xNzQwOTkwOTQ1*_ga_LEXMJ1N516*MTc0MzE0NTcwMi40Mi4xLjE3NDMxNTAzOTUuMjUuMC4w&_ga=2.254984456.1665114719.1742821287-1768822713.1740990945).
What is your money-back guarantee and how do I cancel?
To learn more about our money-back guarantee, check out [our refund policy](https://support.nordvpn.com/hc/en-us/articles/19476991311121-What-is-your-money-back-policy). If you wish to cancel your subscription, [follow our cancellation guide](https://support.nordvpn.com/hc/en-us/articles/19556844985489-How-to-cancel-auto-renewal-for-your-subscription).",https://support.nordvpn.com/hc/en-us/related/click?data=BAh7CjobZGVzdGluYXRpb25fYXJ0aWNsZV9pZGwrCBHFHBH1EToYcmVmZXJyZXJfYXJ0aWNsZV9pZGwrCJGBHmLTHToLbG9jYWxlSSIKZW4tdXMGOgZFVDoIdXJsSSJKL2hjL2VuLXVzL2FydGljbGVzLzE5NzQ0MjUxNzU3ODQxLVBsYW5zLWFuZC1wcmljZXMtb2YtTm9yZFZQTi1zZXJ2aWNlBjsIVDoJcmFua2kI--836dd8b04f6056c360f5ec0016c6bea30fb1be22
NordVPN Proxy servers explained,"In computer networks, a [proxy server](https://nordvpn.com/blog/proxy-server/) acts as an intermediary for queries from internet users seeking resources from other servers. In almost all cases, a proxy server does not have any encryption and works only on a browser. Meanwhile, a [VPN](https://nordvpn.com/) has strong encryption, especially if it is OpenVPN, and it encrypts all your internet traffic entirely.
## NordVPN proxy servers
A proxy server serves various purposes, such as ensuring anonymity, speeding up internet access through caching, saving bandwidth, logging usage, scanning for malware, bypassing restrictions, and enforcing access policies. It can also help bypass filters, parental controls, and cross-domain restrictions for accessing external content.
[NordVPN’s browser extensions](https://nordvpn.com/features/proxy-extension/) use proxy servers to route your browser’s traffic, giving you a different IP address and masking your real one, ensuring your data’s security and encryption. That being said, using the NordVPN app is still more secure, as it encrypts all of your data, not just the browser’s.
## SOCKS5 proxy
SOCKS is an internet protocol used by proxy servers to route network packets between clients and servers, operating at Layer 5 of the OSI model. [SOCKS5](https://nordvpn.com/blog/socks5-proxy/), used by NordVPN proxy servers, supports both TCP and UDP traffic, provides authentication for authorized access, and handles connections at a lower level than HTTP proxies, making it highly versatile for various network tasks.
## Proxy setup guides
Follow the guides below to set up a proxy connection in the application of your choice.
* [qBittorrent](https://support.nordvpn.com/hc/en-us/articles/20195967385745-NordVPN-proxy-setup-for-qBittorrent)
* [Bittorrent](https://support.nordvpn.com/hc/en-us/articles/20465085067665-NordVPN-proxy-setup-for-BitTorrent)
* [uTorrent](https://support.nordvpn.com/hc/en-us/articles/19449763497489-NordVPN-proxy-setup-for-uTorrent)
* [Vuze](https://support.nordvpn.com/hc/en-us/articles/20458691129105-NordVPN-proxy-setup-on-Vuze)
* [Deluge](https://support.nordvpn.com/hc/en-us/articles/20341624031505-NordVPN-proxy-setup-on-Deluge)
Additionally, keep in mind that NordVPN service should never be used to bypass copyright regulations. NordVPN does not promote, condone, or endorse the use of the service for such purposes. For more details, please read the NordVPN Terms of Service.",https://support.nordvpn.com/hc/en-us/related/click?data=BAh7CjobZGVzdGluYXRpb25fYXJ0aWNsZV9pZGwrCBHP1FvnEToYcmVmZXJyZXJfYXJ0aWNsZV9pZGwrCJGBHmLTHToLbG9jYWxlSSIKZW4tdXMGOgZFVDoIdXJsSSJGL2hjL2VuLXVzL2FydGljbGVzLzE5Njg1Mzc1NzkwODY1LU5vcmRWUE4tUHJveHktc2VydmVycy1leHBsYWluZWQGOwhUOglyYW5raQk%3D--f4b2747aa8f3baa8b6e9fa5df482f7d17b7e8fc0
VPN for BBC: how to watch it securely,"With the rise of streaming services like BBC, many users turn to VPNs to access content safely and avoid regional restrictions. In this guide, we’ll cover the essentials of using a VPN for BBC streaming, offering useful tips to improve your experience and resolve any potential issues.
Table of contents:
* [Required NordVPN servers](
* [Troubleshooting steps](
## Required NordVPN servers
VPN provides the ability to bypass restrictions on BBC and also strengthens your security by encrypting your data, keeping your information safe from prying eyes and cyber threats. To securely stream content for BBC, we suggest connecting to [NordVPN servers](https://nordvpn.com/servers/) while using the BBC streaming platform:
* BBC iPlayer (UK): Connect to any [VPN server in the United Kingdom](https://nordvpn.com/servers/uk/).
* BBC US: Connect to any [VPN server in the United States](https://nordvpn.com/servers/usa/).
* BBC AU: Connect to any [NordVPN server in Australia](https://nordvpn.com/servers/).
## Troubleshooting steps
Streaming through a VPN can sometimes result in disruptions or difficulties accessing content, which can hinder the experience.
If you're encountering connection issues, consider trying these solutions to resolve them:
* Connect to a different server in the same region of your wished streaming content.
* Clear your browser’s cache or test a different browser on your device.
* [Change your DNS addresses to NordVPN's](https://support.nordvpn.com/hc/en-us/articles/19587726859793-What-are-NordVPN-DNS-server-addresses).
* Disable location services on your device.
If you're still experiencing issues, please review our [troubleshooting steps for streaming](https://support.nordvpn.com/hc/en-us/articles/19559968238097-Troubleshooting-steps-for-streaming). For more assistance on [streaming safely](https://nordvpn.com/features/streaming/) with a VPN for the BBC, [reach out to our support team](https://support.nordvpn.com/hc/en-us/articles/19482416296593-How-can-I-reach-NordVPN-customer-support).
Under certain circumstances, streaming content (using video on demand, online TV platforms, or other sources) that is only accessible outside your country of residence may be illegal. Always check if you have the legal authority to access the material you wish to stream.
The NordVPN service should never be used to bypass copyright or other regulations. NordVPN does not promote, induce, or otherwise facilitate the use of the service for such purposes. For more details, please read our[ General Terms of Service](https://my.nordaccount.com/legal/terms-of-service/) and[ the NordVPN Additional Terms](https://my.nordaccount.com/legal/terms-of-service/nordvpn/).",https://support.nordvpn.com/hc/en-us/related/click?data=BAh7CjobZGVzdGluYXRpb25fYXJ0aWNsZV9pZGwrCBHp%2FVTKEToYcmVmZXJyZXJfYXJ0aWNsZV9pZGwrCJGBHmLTHToLbG9jYWxlSSIKZW4tdXMGOgZFVDoIdXJsSSJLL2hjL2VuLXVzL2FydGljbGVzLzE5NTYwNzA2OTkyNDAxLVZQTi1mb3ItQkJDLWhvdy10by13YXRjaC1pdC1zZWN1cmVseQY7CFQ6CXJhbmtpCg%3D%3D--1e36a62c27c91da21012a56c92fd00deead9f42e
How to cancel auto-renewal for your subscription,"If your subscription was purchased via the Google Play Store, Apple App Store, or Amazon App Store and you wish to cancel it, follow the respective articles below:
* Cancelling your [Google Play Store NordVPN subscription](https://support.google.com/googleplay/answer/7018481)
* Cancelling your [Apple App Store NordVPN subscription](https://support.apple.com/en-lamr/118428)
* Cancelling your [Amazon App Store NordVPN subscription](https://www.amazonforum.com/s/question/0D54P00007IG0CkSAL/amazon-appstore-subscriptions)
## Cancelling your NordVPN subscription
If you have purchased your subscription directly from NordVPN and wish for your subscription to no longer renew at the subsequent billing date, you may cancel your subscription via your [Nord Account](https://my.nordaccount.com/).
You can follow the same steps to cancel your NordPass, NordLocker, Dedicated IP, or bundle subscription services.
To cancel the automatic renewal of your NordVPN subscription, follow the steps below:
1. Log in to your [Nord Account](https://my.nordaccount.com/)
2. Open the billing tab:
3. Click cancel next to auto-renewal:
4. Select cancel auto-renewal:
5. Your auto-renewal status will now change to off:
You will receive a confirmation email to your registered email account if your subscription cancellation is successful:
If you wish to receive a refund, please read [our article on NordVPN's refund policy](https://support.nordvpn.com/hc/en-us/articles/19476991311121-What-is-your-money-back-policy).",https://support.nordvpn.com/hc/en-us/articles/19556844985489-How-to-cancel-a-subscription
What is your money-back policy?,"Here is the refund and cancellation policy at the core of our 30-day money-back guarantee:
“...if you are not satisfied with our Services, you may cancel the Subscription and request a refund within 30 days following your purchase of our Services (“Money Back Guarantee”). Please note that Subscriptions may be refunded on the basis of the Money Back Guarantee only after the initial purchase. Once a Subscription is renewed, it cannot be refunded on the basis of the Money Back Guarantee, unless applicable law provides otherwise.”
This and other conditions of our service can be found in our [Terms of Service](https://my.nordaccount.com/legal/terms-of-service/).
Here are our instructions for [how to cancel](https://support.nordvpn.com/hc/en-us/articles/19556844985489-How-to-cancel-auto-renewal-for-your-subscription) automatic payment renewal.
## Requesting a refund
Previously, refunds could only be processed through our support team. We have now implemented an automated refund system that is more efficient, faster, and convenient for our customers to use. This change also improves our ability to gather feedback, allowing us to better understand issues and improve our service. As we continue to refine this new process, your feedback is welcomed to help us enhance it further.
To request a refund for your payment, contact our customer support team via live chat available in the bottom right corner of the page, and indicate you would like us to refund your payment.
1. You will receive a link to your Nord Account dashboard. Follow the link and verify it’s you who’s trying to access the account.
2. In the following window, you will see which payments are eligible for a refund. Such payments will have a Refund button available. To proceed, click on Refund.Please keep in mind that not all payments are eligible for refunds, and certain terms apply depending on where you bought the subscription:
* * Apple App Store: Subscriptions purchased via the Apple App Store are subject to Apple's refund policies. We're unable to issue refunds for payments made through the Apple App Store. For assistance, please reach out to Apple directly via Apple Support.
* Amazon Appstore: If you've purchased your subscription through the Amazon App Store, contact Amazon directly for assistance via Amazon Support.
* Google Play Store: Refunds for payments made through the Google Play Store can be requested through NordVPN’s customer support, provided they fall within the refund terms outlined above. Additionally, if the payment was made within the last 48 hours, you can request a refund directly from your Google Play account. For more details, visit Google Play Support.
* Retailers or resellers: If you've purchased a subscription outside the NordVPN website (e.g., physical store, online shop, or marketplace like BestBuy or StackSocial), please contact the retailer directly regarding the refund.
1. In the following window, select the reason for canceling the service and requesting a refund. Your feedback is invaluable because it helps us pinpoint areas for improvement and ensures a better experience for all our users.Once completed, click Submit and Continue. 
2. You will see your refund summary. You can confirm it by clicking Refund.
3. After submitting the request, you will receive a confirmation email saying that your refund has been ordered.
4. You should now see the refund status for your payment as Refund Processing. This means that your request has been received and is currently being processed. This process can take up to a few hours*.*Please note, that due to recent implementation, it may take up to 4 hours for a refund request to be processed.
5. Once the refund is complete, the refund status on your dashboard will change to Refunded, and you will receive a confirmation email. Please note that depending on your payment method, it may take up to 10 business days for the refund to reach your account. If there was an error or you have any other questions, please contact our customer support team directly.",https://support.nordvpn.com/hc/en-us/related/click?data=BAh7CjobZGVzdGluYXRpb25fYXJ0aWNsZV9pZGwrCBH9Jde2EToYcmVmZXJyZXJfYXJ0aWNsZV9pZGwrCBGwWaEXFToLbG9jYWxlSSIKZW4tdXMGOgZFVDoIdXJsSSJFL2hjL2VuLXVzL2FydGljbGVzLzE5NDc2OTkxMzExMTIxLVdoYXQtaXMteW91ci1tb25leS1iYWNrLXBvbGljeQY7CFQ6CXJhbmtpBg%3D%3D--17ddb973214c28ade78ea5500b19427171a64f94
Does NordVPN have a free trial,"NordVPN does not offer a free trial for purchases made on its website, but we do provide our customers with a [30-day money-back guarantee](https://nordvpn.com/risk-free-vpn/) to try out our services: ""Every customer is eligible for a refund, as long as their initial payment is not older than 30 days.""
This and other conditions of our service can be found in our [Terms of Service](https://my.nordaccount.com/legal/terms-of-service/).
A free trial is available for Android users that download our [VPN for Android from Google Play](https://play.google.com/store/apps/details?id=com.nordvpn.android&hl=en&gl=US). This trial is organized by Google Play itself and follows its Terms of Service.
Please keep in mind that we only allow one free trial per customer, so make sure you log into your NordVPN account when ordering a subscription. You can cancel the free Android trial (and avoid being charged) on Google Play.
If you have any questions regarding the trial, [contact the Google Play Store directly](https://support.google.com/store#topic=3237699&contact=1).",https://support.nordvpn.com/hc/en-us/related/click?data=BAh7CjobZGVzdGluYXRpb25fYXJ0aWNsZV9pZGwrCJE%2FADT1EToYcmVmZXJyZXJfYXJ0aWNsZV9pZGwrCBGwWaEXFToLbG9jYWxlSSIKZW4tdXMGOgZFVDoIdXJsSSJFL2hjL2VuLXVzL2FydGljbGVzLzE5NzQ0ODM3MDkxMjE3LURvZXMtTm9yZFZQTi1oYXZlLWEtZnJlZS10cmlhbAY7CFQ6CXJhbmtpCQ%3D%3D--c2ea744dc5b3d67e79335403f5a86d934793f7e0
How much will I need to pay upon renewal?,"At the end of your initial plan, your subscription will be renewed automatically and you will be charged the applicable renewal price for the service. You can find more information on renewal prices in our [subscription renewal pricing page](https://my.nordaccount.com/legal/pricing/).
The renewal price is subject to change, but you will be notified of any changes by email before your subscription is renewed.
You don’t need to renew your NordVPN subscription manually — unless you [cancel auto-renewal for your subscription](https://support.nordvpn.com/hc/en-us/articles/19556844985489-How-to-cancel-auto-renewal-for-your-subscription), it will be renewed automatically.",https://support.nordvpn.com/hc/en-us/related/click?data=BAh7CjobZGVzdGluYXRpb25fYXJ0aWNsZV9pZGwrCBFz%2FuG2EToYcmVmZXJyZXJfYXJ0aWNsZV9pZGwrCBGwWaEXFToLbG9jYWxlSSIKZW4tdXMGOgZFVDoIdXJsSSJPL2hjL2VuLXVzL2FydGljbGVzLzE5NDc3MTczMjY5MjY1LUhvdy1tdWNoLXdpbGwtSS1uZWVkLXRvLXBheS11cG9uLXJlbmV3YWwGOwhUOglyYW5raQo%3D--a99a2ae85df299c11f23a38525d3ff768ba42ded
How to connect to your dedicated IP on Windows,"With a NordVPN dedicated IP, you get faster speeds, less CAPTCHA requests and increased security. NordVPN's dedicated IP is a unique IP that is assigned to a specific server, which ensures that you have your own private connection.
In this article, we will cover how to locate and connect to your [dedicated IP](https://nordvpn.com/features/dedicated-ip/) on Windows.
In order for you to be able to connect, first double-check if you have done the following:
1. Purchased a dedicated IP;
2. Set up the dedicated IP in Nord Account.
If these steps are done, you can move forward and connect to your dedicated IP in the NordVPN app on:
* [ Windows 7 and 8.1](
* [Windows 10 and 11](
For additional information, you can also read [our article about NordVPN's dedicated IP and how it works](https://support.nordvpn.com/hc/en-us/articles/19507808024209-Dedicated-NordVPN-IP-addresses).
## On Windows 7 and 8.1:
To connect to NordVPN dedicated IP on Windows 7 and 8.1, follow these steps:
1. Open the NordVPN application.
2. Go to the dedicated IP category on the left. 
3. Hover over dedicated IP, and click on the three-dot button:
4. Select fastest for your country and server, and click connect:
You may also use the search bar located in the top-left corner of the application window to connect to your dedicated IP:
1. Enter your dedicated IP country, and server number:
2. Tap your dedicated IP to connect:
## On Windows 10 and 11:
To connect to NordVPN dedicated IP on Windows 10 and 11, follow the steps below:
1. Open your NordVPN application.
2. Click specialty servers:
3. Hover over dedicated IP and click the three-dot menu:
4. Click connect.
You may also use the search bar located in the top-left corner of the application window to connect to your dedicated IP:
1. Type in your dedicated ip into the search bar:
2. Click your dedicated IP to connect:
After completing the steps, you will have connected to your dedicated IP successfully. If you wish to test your connection, visit [NordVPN's DNS leak checker website](https://nordvpn.com/dns-leak-test/).
Please be aware that your email will be linked to that dedicated IP address.",https://support.nordvpn.com/hc/en-us/related/click?data=BAh7CjobZGVzdGluYXRpb25fYXJ0aWNsZV9pZGwrCJGQ2fucEjoYcmVmZXJyZXJfYXJ0aWNsZV9pZGwrCBECcjS7EjoLbG9jYWxlSSIKZW4tdXMGOgZFVDoIdXJsSSJVL2hjL2VuLXVzL2FydGljbGVzLzIwNDY1NDQ5NTM3NjgxLUhvdy10by1jb25uZWN0LXRvLXlvdXItZGVkaWNhdGVkLUlQLW9uLVdpbmRvd3MGOwhUOglyYW5raQY%3D--83dfe5aac2d9afac12022bf1d4e254ed9d0319d5
Where does NordVPN have dedicated IP addresses?,NordVPN-dedicated IP addresses are offered in these regions:,https://support.nordvpn.com/hc/en-us/related/click?data=BAh7CjobZGVzdGluYXRpb25fYXJ0aWNsZV9pZGwrCJG29wO%2BEToYcmVmZXJyZXJfYXJ0aWNsZV9pZGwrCBECcjS7EjoLbG9jYWxlSSIKZW4tdXMGOgZFVDoIdXJsSSJFL2hjL2VuLXVzL2FydGljbGVzLzE5NTA3ODA4MDI0MjA5LURlZGljYXRlZC1Ob3JkVlBOLUlQLWFkZHJlc3NlcwY7CFQ6CXJhbmtpBw%3D%3D--cc2c3a920aa9cfc5c8f978b1632d18934bbbb6e3
Dedicated NordVPN IP addresses,"When using NordVPN, your IP address changes to that of your VPN server. Normally, you share this IP address with other NordVPN users connected to the same server. However, if you purchase a NordVPN dedicated IP, you will get an IP address that belongs to you and you alone.
The advantages of a NordVPN dedicated IP addressNordVPN's dedicated IP allows you to bypass CAPTCHAs, easily access corporate networks, and avoid blocklists for IP addresses tainted by unscrupulous use. You can use the dedicated IP feature on up to 10 devices at the same time: simply connect with the [Open VPN (TCP)](https://support.nordvpn.com/hc/en-us/articles/20465552867345-Switching-protocol-to-OpenVPN-UDP-or-TCP) or [OpenVPN (UDP)](https://support.nordvpn.com/hc/en-us/articles/20465552867345-Switching-protocol-to-OpenVPN-UDP-or-TCP) protocol. You can also connect via the [NordLynx](https://support.nordvpn.com/hc/en-us/articles/19564565879441-What-is-NordLynx) protocol, however, it only supports one simultaneous connection. Dedicated IP is not available via tvOS, browser extension or the IKEv2 protocol.
## Where does NordVPN have dedicated IP addresses?
NordVPN-dedicated IP addresses are offered in these regions:
* The United States (Los Angeles, Dallas, New York, Chicago, Seattle, Miami)
* Germany (Frankfurt)
* The United Kingdom (London)
* The Netherlands (Amsterdam)
* France (Paris)
* Canada (Toronto)
* Japan (Tokyo)
* Italy (Milan)
* Sweden (Stockholm)
* Australia (Sydney)
* Hong Kong (Hong Kong)
* Switzerland (Zurich)
* Spain (Madrid)
* Belgium (Brussel)
* Denmark (Copenhagen)
* Poland (Warsaw)
* Portugal (Lisbon)
* South Africa (Johannesburg)
* Mexico
* Czech Republic (Prague)
Please note:
* If you are connecting from a country with internet restrictions, the dedicated IP address feature may fail to work as server accessibility from such regions is limited. Please consult our article on [how to connect from within a country with internet restrictions](https://support.nordvpn.com/hc/en-us/articles/19572011021457-Connecting-from-a-country-with-internet-restrictions) for more information.
* In case you wish to change your dedicated IP after a while, you may do that once per subscription. To change the dedicated IP, get in touch with NordVPN support.
Here is a list of tutorials showing you how to connect to your dedicated IP by NordVPN on different platforms:
* [Windows](https://support.nordvpn.com/hc/en-us/articles/20465449537681-How-to-connect-to-your-dedicated-IP-on-Windows)
* [Linux](https://support.nordvpn.com/hc/en-us/articles/19684336200081-How-to-connect-to-your-dedicated-IP-on-Linux)
* [macOS](https://support.nordvpn.com/hc/en-us/articles/19678530026641-How-to-connect-to-your-dedicated-IP-on-macOS)
* [iOS](https://support.nordvpn.com/hc/en-us/articles/19682095316625-How-to-connect-to-your-dedicated-IP-on-iOS)
* [Android](https://support.nordvpn.com/hc/en-us/articles/19682489581585-How-to-connect-to-your-dedicated-IP-on-Android)
You can test dedicated IP servers in the ""dedicated IP"" category in the application. The dedicated IP address you see in the application, would only connect you to a shared IP address. Once you make a purchase and get dedicated IP assigned, you would be able to connect to the specific server that would give you a static IP address that only you would be able to access.
If you wish to purchase a dedicated IP address in these regions, you can find a guide on how to do so here: [How to purchase a dedicated IP address.](https://support.nordvpn.com/hc/en-us/articles/19484196251921-How-to-purchase-a-Dedicated-IP-address)
Please be aware that if you purchase a NordVPN dedicated IP, your email will be linked to that IP address. For more information, please consult our Privacy Policy.",https://support.nordvpn.com/hc/en-us/related/click?data=BAh7CjobZGVzdGluYXRpb25fYXJ0aWNsZV9pZGwrCJG29wO%2BEToYcmVmZXJyZXJfYXJ0aWNsZV9pZGwrCBECcjS7EjoLbG9jYWxlSSIKZW4tdXMGOgZFVDoIdXJsSSJFL2hjL2VuLXVzL2FydGljbGVzLzE5NTA3ODA4MDI0MjA5LURlZGljYXRlZC1Ob3JkVlBOLUlQLWFkZHJlc3NlcwY7CFQ6CXJhbmtpBw%3D%3D--cc2c3a920aa9cfc5c8f978b1632d18934bbbb6e3
How to connect to your dedicated IP on macOS,"A NordVPN dedicated IP is a unique IP address assigned solely to a specific server, ensuring it's not shared with any other device or network. With a NordVPN dedicated IP, you get improved connection speeds, reduced CAPTCHA requests, and enhanced security through exclusive accessibility.In this article, you will learn how to locate and connect to your [dedicated IP](https://nordvpn.com/features/dedicated-ip/) on macOS.
In order for you to be able to connect, first double-check if you have done the following:
1. Purchased a dedicated IP;
2. Set up the dedicated IP in your Nord Account.
## Connecting to your dedicated IP on macOS
If you have purchased a dedicated IP from NordVPN, and set it up in your Nord Account, you can proceed with connecting to it on your macOS device by following these steps:
1. Launch the NordVPN application.
2. Scroll down to specialty servers:
3. Hover over the dedicated IP, and click on the three-dot menu:
4. Click your dedicated IP server.
You may also use the search bar located in the top-left corner of the application window.
1. Type in your dedicated IP address:
2. Click on your dedicated IP:
After completing the steps, you will be successfully connected to your dedicated IP. If you would like to check your connection, visit [NordVPN's DNS leak checker.](https://nordvpn.com/dns-leak-test/)
Please be aware that your email will be linked to that dedicated IP address.",https://support.nordvpn.com/hc/en-us/related/click?data=BAh7CjobZGVzdGluYXRpb25fYXJ0aWNsZV9pZGwrCJG8ysPlEToYcmVmZXJyZXJfYXJ0aWNsZV9pZGwrCBECcjS7EjoLbG9jYWxlSSIKZW4tdXMGOgZFVDoIdXJsSSJTL2hjL2VuLXVzL2FydGljbGVzLzE5Njc4NTMwMDI2NjQxLUhvdy10by1jb25uZWN0LXRvLXlvdXItZGVkaWNhdGVkLUlQLW9uLW1hY09TBjsIVDoJcmFua2kI--264159386b6fa658b6eb9e239079c5b484b46185
Cyber insurance benefits: subscription and cancellation,"This article covers common questions relating to your cyber insurance benefits subscription and its cancellation.
### How do I cancel my cyber insurance benefits?
Your cyber insurance benefits will end when you cancel your NordVPN Ultimate bundle subscription.
### Will my insurance benefits still be valid if I move abroad?
The insurance benefits are currently only available to customers residing in the UK, US, SE, DE, FR, IT, NL. Hence, it will be available only if you move to one of these countries.",https://support.nordvpn.com/hc/en-us/related/click?data=BAh7CjobZGVzdGluYXRpb25fYXJ0aWNsZV9pZGwrCJE8dFhcEjoYcmVmZXJyZXJfYXJ0aWNsZV9pZGwrCBEZYkVcEjoLbG9jYWxlSSIKZW4tdXMGOgZFVDoIdXJsSSJdL2hjL2VuLXVzL2FydGljbGVzLzIwMTg3ODMwMzAzODg5LUN5YmVyLWluc3VyYW5jZS1iZW5lZml0cy1zdWJzY3JpcHRpb24tYW5kLWNhbmNlbGxhdGlvbgY7CFQ6CXJhbmtpBg%3D%3D--be2706752a02b547e35ea84a3c1fd960b22f6e61
How to connect to your dedicated IP on iOS,"A NordVPN dedicated IP is a unique IP address assigned solely to a specific server, ensuring it's not shared with any other device or network. With the NordVPN dedicated IP, you get improved connection speeds, reduced CAPTCHA requests, and enhanced security through exclusive accessibility.
In this tutorial, you will learn how to locate and connect to your purchased and assigned NordVPN dedicated IP.
The dedicated IP server category is available only with OpenVPN (UDP) and OpenVPN (TCP) protocols.
In order to connect, double-check if you have done the following:
1. Purchased a dedicated IP;
2. Set up the dedicated IP in your Nord Account.
## Connecting to your NordVPN dedicated IP on iOS
To connect to your NordVPN dedicated IP on your iOS device, follow along to the steps below:
1. Open your NordVPN app.
2. [Enable the OpenVPN (UDP) or ](https://support.nordvpn.com/Connectivity/iOS/1490186412/Switching-connection-protocol-to-OpenVPN-UDP-or-TCP-on-iOS.htm)OpenVPN (TCP) protocol.
3. In the homepage, scroll to specialty servers:
4. Tap dedicated IP:
5. Tap on your dedicated IP to connect:
Alternatively, you can connect by typing in your dedicated IP address into the search bar. To get connected using this method, follow the steps below:
1. Type your dedicated IP into the search bar:
2. Tap your dedicated IP to connect:
After completing the steps, you will have connected to your dedicated IP successfully. If you wish to test your connection, visit [NordVPN's DNS leak checker website](https://nordvpn.com/dns-leak-test/).
Please be aware that your email will be linked to that dedicated IP address.",https://support.nordvpn.com/hc/en-us/related/click?data=BAh7CjobZGVzdGluYXRpb25fYXJ0aWNsZV9pZGwrCJG%2BTJjmEToYcmVmZXJyZXJfYXJ0aWNsZV9pZGwrCBECcjS7EjoLbG9jYWxlSSIKZW4tdXMGOgZFVDoIdXJsSSJRL2hjL2VuLXVzL2FydGljbGVzLzE5NjgyMDk1MzE2NjI1LUhvdy10by1jb25uZWN0LXRvLXlvdXItZGVkaWNhdGVkLUlQLW9uLWlPUwY7CFQ6CXJhbmtpCQ%3D%3D--9eae85c363931a2973bd5a1e768c73e399dd86fe
How to connect to your dedicated IP on Linux,"In this article we will cover how to connect to your [dedicated IP](https://nordvpn.com/features/dedicated-ip/) on Linux.
In order for you to be able to connect, first double-check if you have done the following:
1. Purchased a dedicated IP;
2. Set up the dedicated IP in your Nord Account.
NordVPN's dedicated IP, is a unique IP address and assigned solely to a specific server, meaning that only you have access to it. With a NordVPN dedicated IP, you get improved connection speeds, reduced CAPTCHA requests, and enhanced security through exclusive accessibility.
## Connecting to your NordVPN dedicated IP
If you've purchased the dedicated IP and set it up in Nord Account, you can connect to it on Linux by entering a command in the following format:
```
nordvpn connect country_code_server_number
```
It should look like this:
```
nordvpn connect us4955
```
Type the following command to disconnect:
```
nordvpn disconnect
```
Or:
```
nordvpn d
```
After entering the commands, you will be successfully connected to your NordVPN dedicated IP. If you wish to test your connection, visit [NordVPN's DNS leak test page](https://nordvpn.com/dns-leak-test/).
Please be aware that your email will be linked to that dedicated IP address.",https://support.nordvpn.com/hc/en-us/related/click?data=BAh7CjobZGVzdGluYXRpb25fYXJ0aWNsZV9pZGwrCJHp3R3nEToYcmVmZXJyZXJfYXJ0aWNsZV9pZGwrCBECcjS7EjoLbG9jYWxlSSIKZW4tdXMGOgZFVDoIdXJsSSJTL2hjL2VuLXVzL2FydGljbGVzLzE5Njg0MzM2MjAwMDgxLUhvdy10by1jb25uZWN0LXRvLXlvdXItZGVkaWNhdGVkLUlQLW9uLUxpbnV4BjsIVDoJcmFua2kK--1ac36d53a6815085e50a4477a17975d1c68fc0c3
Installing NordVPN on Linux distributions,"In this article, we'll guide you through NordVPN installation and usage on Linux. We offer .deb and .rpm packages that are compatible with Debian, Ubuntu, Elementary OS, Linux Mint, Fedora, QubesOS, RHEL, CentOS, and openSUSE systems. The NordVPN native application is the recommended option for connecting to NordVPN servers on your Linux device. We designed it with your experience in mind, giving you features like auto-connect, automated Kill Switch, and Threat Protection.
## Table of contents:
* [Installing NordVPN on Linux](
* [Using NordVPN on Linux](
* [Logging in](
* [Account and settings](
* [Specialty servers](
* [Features and configurations](
* [LAN discovery and allowlists](
## Installing NordVPN on Linux
To start using the NordVPN application for Linux, you need to [download the NordVPN Linux client](https://nordvpn.com/download/linux/). You can do that in 2 ways:
1. By [downloading a Snap package](https://snapcraft.io/nordvpn).Snaps are app packages for desktop, cloud, and IoT that are easy to install, secure, cross-platform, and dependency-free. If you do not have Snap pre-installed, you may follow [Snap setup guides for various Linux distributions](https://snapcraft.io/docs/installing-snapd#:~:text=Zorin%20OS-,Without%20snap,-For%20distributions%20without).Please note that currently, we still do not support arm64, but our developers are working on this.
2. By working in the terminal:
1. Open the terminal;
2. Write the command below:
```
sh <(curl -sSf https://downloads.nordcdn.com/apps/linux/install.sh[](https://downloads.nordcdn.com/apps/linux/install.sh))
```
3. Following any on-screen instructions.
Note: If you do not have a curl package, evidenced by the fact that the above does not work, you can alternatively use this command:
```
sh <(wget -qO - https://downloads.nordcdn.com/apps/linux/install.sh)
```
Additionally, if you receive the following issue: Whoops! Permission denied accessing /run/nordvpn/nordvpnd.sock, all you need to do is write the following command:
```
sudo usermod -aG nordvpn $USER
```
and then reboot your device.
## Using NordVPN on Linux
After you have installed the NordVPN application, you can start using it!
Please note that in NordVPN Linux application version 3.18.4, network traffic from the LAN through a VPN-connected computer is blocked by default. To unblock LAN traffic, turn LAN discovery ON or add to the allowlist any subnet or IP traffic to be forwarded.
### Logging in
If you're using a Linux device without a graphical user interface, follow our guide on logging in to NordVPN on Linux devices without GUI.
If you're using a Linux device with a graphical user interface, you can start using it with the commands below:
1. Log in to your NordVPN account by using this command:
```
nordvpn login
```
2. Connect to a NordVPN server by using the command below:
```
nordvpn connect
```
### Account and settings
Here you can find the list of available NordVPN commands for Linux.
Access the NordVPN client settings:
---
```
nordvpn
```
Get an extensive explanation of all commands:
```
man nordvpn
```
See the list of available commands or help for a specific command:
```
nordvpn help
```
| or | ```
nordvpn h
```
Log in or log out:
```
nordvpn login
```
| or | ```
nordvpn logout
```
Connect to a recommended NordVPN server:
```
nordvpn connect
```
| or | ```
nordvpn c
```
Connect to a specific server (e.g. nordvpn connect uk715):
```
nordvpn connect
```
Disconnect from the VPN:
```
nordvpn disconnect
```
| or | ```
nordvpn d
```
See account information:
```
nordvpn account
```
Register a new user account:
```
nordvpn register
```
Rate your last connection quality (1-5):
```
nordvpn rate
```
See the current settings:
```
nordvpn settings
```
See the connection status:
```
nordvpn status
```
See the country list:
```
nordvpn countries
```
See the city list (e.g.: nordvpn cities united_states):
```
nordvpn cities
```
See a list of available server groups:
```
nordvpn groups
```
### Specialty servers
Connect to the closest Double VPN server:
---
```
nordvpn c double_vpn
```
Connect to a specific country using Double VPN servers:
```
nordvpn connect --group double_vpn
```
Connect to a P2P server:
---
```
nordvpn connect p2p
```
Connect to a specific country using P2P servers:
```
nordvpn connect --group p2p
```
Connect to a Dedicated IP server:
---
```
nordvpn connect Dedicated_IP
```
### Features and configurations
Set a configuration option:
---
```
nordvpn set
```
| or | ```
nordvpn s
```
Enable or disable Threat Protection:
```
nordvpn set threatprotectionlite on
```
| or | ```
nordvpn set threatprotectionlite off
```
Enable or disable Kill Switch:
```
nordvpn set killswitch on
```
| or | ```
nordvpn set killswitch off
```
Enable or disable auto-connect:
```
nordvpn set autoconnect on
```
| or | ```
nordvpn set autoconnect off
```
Set a specific server for automatic connection (e.g.: nordvpn set autoconnect on us2435):
```
nordvpn set autoconnect on
```
Enable or disable notifications:
```
nordvpn set notify on
```
| or | ```
nordvpn set notify off
```
Set custom DNS (you can set up a single DNS or two, just add spaces in between):
```
nordvpn set dns 1.1.1.1
```
| or | ```
nordvpn set dns 1.1.1.1 1.0.0.1
```
[Switch between UDP and TCP protocols](https://support.nordvpn.com/hc/en-us/articles/20465552867345-Switching-protocol-to-OpenVPN-UDP-or-TCP):
```
nordvpn set protocol udp
```
| or | ```
nordvpn set protocol tcp
```
Enable or disable [obfuscated servers](https://nordvpn.com/features/obfuscated-servers/):
```
nordvpn set obfuscate on
```
| or | ```
nordvpn set dobfuscate off
```
Set connection technology (OpenVPN or [NordLynx](https://nordvpn.com/blog/nordlynx-protocol-wireguard/)):
```
nordvpn set technology OpenVPN
```
| or | ```
nordvpn set technology NordLynx
```
Turn [Meshnet](https://nordvpn.com/meshnet/) on or off on your device:
```
nordvpn set meshnet on
```
| or | ```
nordvpn set meshnet off
```
To enable or disable the [post-quantum protection in NordVPN](https://support.nordvpn.com/hc/en-us/articles/30046321712529-NordVPN-Post-quantum-encryption-explained):
```
nordvpn set pq on
```
| or | ```
nordvpn set pq off
```
### LAN discovery and allowlists
Enable or disable LAN discovery:
---
```
nordvpn set lan-discovery enable
```
| or | ```
nordvpn set lan-discovery disable
```
Get more information on LAN discovery:
```
nordvpn set lan-discovery --help
```
Add or remove a rule to allowlist a specified incoming port (you can allowlist multiple ports — just separate their numbers with a space):
```
nordvpn whitelist add port
```
| or | ```
nordvpn whitelist remove port
```
Add or remove a rule to allowlist a specified subnet:
```
nordvpn whitelist add subnet
```
| or | ```
nordvpn whitelist remove subnet
```",https://support.nordvpn.com/hc/en-us/related/click?data=BAh7CjobZGVzdGluYXRpb25fYXJ0aWNsZV9pZGwrCBFrCUVeEjoYcmVmZXJyZXJfYXJ0aWNsZV9pZGwrCJHX7XGNEjoLbG9jYWxlSSIKZW4tdXMGOgZFVDoIdXJsSSJQL2hjL2VuLXVzL2FydGljbGVzLzIwMTk2MDk0NDcwOTI5LUluc3RhbGxpbmctTm9yZFZQTi1vbi1MaW51eC1kaXN0cmlidXRpb25zBjsIVDoJcmFua2kG--1c56b2547d0b6e6cfccb7066fc41c7b3614001ac
What is NordLynx,"[NordLynx](https://nordvpn.com/blog/nordlynx-protocol-wireguard/) is NordVPN’s revolutionary technology built around the WireGuard® VPN protocol. It helps you connect to NordVPN servers faster and improves your VPN connection speeds without compromising security or privacy.
NordLynx is much faster than OpenVPN and other VPN protocols, making it a clear upgrade for everyday security. In fact, NordLynx’s [speed test results](https://nordvpn.com/blog/nordlynx-protocol-wireguard/) are among the highest of all commercial VPNs.
To use NordLynx with the NordVPN app for your device, follow the tutorial for your OS below.
* [Linux](https://support.nordvpn.com/hc/en-us/articles/20398711101329-How-can-I-use-NordLynx-in-the-NordVPN-app-for-Linux)
* [Windows](https://support.nordvpn.com/hc/en-us/articles/19919637268625-Using-NordLynx-in-the-NordVPN-app-Windows)
* [iOS](https://support.nordvpn.com/hc/en-us/articles/20459436694801-How-can-I-use-NordLynx-in-the-NordVPN-app-for-iOS)
* [macOS](https://support.nordvpn.com/hc/en-us/articles/19925285940497-How-can-I-use-NordLynx-in-the-NordVPN-app-for-macOS)
* [Android](https://support.nordvpn.com/hc/en-us/articles/20465306064145-Using-NordLynx-in-the-NordVPN-app-for-Android)
If you want to eliminate NordLynx from your VPN connection, simply change to a [different VPN protocol](https://support.nordvpn.com/hc/en-us/articles/19482810153745-Which-NordVPN-protocol-should-I-choose) in your NordVPN settings.
Please be aware that the WireGuard protocol is still under development. While we are confident in our implementation, WireGuard itself may still contain some unresolved bugs, so use it with caution.
WireGuard is a registered trademark of Jason A. Donenfeld.",https://support.nordvpn.com/hc/en-us/related/click?data=BAh7CjobZGVzdGluYXRpb25fYXJ0aWNsZV9pZGwrCJHa%2FzrLEToYcmVmZXJyZXJfYXJ0aWNsZV9pZGwrCJHX7XGNEjoLbG9jYWxlSSIKZW4tdXMGOgZFVDoIdXJsSSI3L2hjL2VuLXVzL2FydGljbGVzLzE5NTY0NTY1ODc5NDQxLVdoYXQtaXMtTm9yZEx5bngGOwhUOglyYW5raQc%3D--67984d54d429e37de0c38bd7e8c01c5c60259278
Does NordVPN support OpenWrt?,"Routers with OpenWRT firmware have been reported to support VPNs like NordVPN. However, please be aware that the following configuration has not been tested by NordVPN staff – it has been shared and tested by our wonderful customers instead. In particular, NordVPN would like to thank ulmwind, an active member of the OpenWRT community, for their continuous assistance in providing us with up-to-date OpenWRT instructions.",https://support.nordvpn.com/hc/en-us/related/click?data=BAh7CjobZGVzdGluYXRpb25fYXJ0aWNsZV9pZGwrCJG6CdF%2FEjoYcmVmZXJyZXJfYXJ0aWNsZV9pZGwrCJHX7XGNEjoLbG9jYWxlSSIKZW4tdXMGOgZFVDoIdXJsSSJBL2hjL2VuLXVzL2FydGljbGVzLzIwMzQwMTc3MjIyMjg5LU9wZW5XcnQtc2V0dXAtd2l0aC1Ob3JkVlBOBjsIVDoJcmFua2kI--6835ac68b2cd4022b1cfe8be107e9bd7f35f7f6b
OpenWrt setup with NordVPN,"## Does NordVPN support OpenWrt?
Routers with OpenWRT firmware have been reported to support VPNs like NordVPN. However, please be aware that the following configuration has not been tested by NordVPN staff – it has been shared and tested by our wonderful customers instead. In particular, NordVPN would like to thank ulmwind, an active member of the OpenWRT community, for their continuous assistance in providing us with up-to-date OpenWRT instructions.
This article provides two OpenWrt setup guides:
* GUI interface instructions (simplified version)
* CLI instructions (more advanced)
If any issues arise, feel free to contact our support team for further help! This is an advanced tutorial, but it also provides some simpler instructions.
## GUI instructions
In this guide, we will show you how to set up a NordVPN connection on routers using OpenWrt firmware via the LuCI web interface.
1. Access the LuCI interface of your OpenWrt router by entering its local IP address into your internet browser and logging in. The default IP address is 192.168.1.1 and the username is root.By default, there is no password set up, so you may leave this slot empty, however, when you log in you will get a message to set up a password.In order to do so, click on System > Administration and you may set up a password there.
2. Once you have logged in, select the System tab and choose Software.
3. Click the “Update lists” button and wait for the process to finish and click “Dismiss”.
4. Install the following packages by typing in their name in the “Filter” field and clicking “Install…”.
1. openvpn-openssl
2. ip-full
3. luci-app-openvpn
5. Click “Save & Apply” and refresh the router page. Now you should see a new tab called VPN. Click on it and choose OpenVPN from the dropdown.
6. Now you need to download OpenVPN client configuration files. You can be connected to a recommended server via your NordAccount.
Follow the steps below to find the manual connection configuration files:
1. Log into your [Nord Account](https://my.nordaccount.com/), and click NordVPN.
2. Scroll down to Advanced Settings and click Set up NordVPN manually.
3. Select the OpenVPN configuration files tab.
4. Find the server you wish to connect to by using the Search bar or by scrolling down and download it by clicking Download UDP or Download TCP.
5. When connecting to OpenVPN & IKEv2 manually, you're going to need to use the Username and Password from the Service credential tab.
For the purpose of this guide, we will be using the us5104.nordvpn.com server.
1. Under the “OVPN configuration file upload” section name the VPN connection in the “Instance name” field (we have named it “nordvpn_us”.) After that, click on the “Choose File” button, locate the downloaded server file and click “Upload”.
2. In the “OpenVPN instances” section, click the “Edit” button next to the instance you have just created.
3. In the lower field, enter your NordVPN service credential username and password into separate lines.usernamepassword
You can find your NordVPN service credentials (service username and service password) in the [Nord Account dashboard](https://my.nordaccount.com/dashboard/nordvpn/):
Follow the steps below to find the service credentials for manual connection setup:
1. Log into your [Nord Account](https://my.nordaccount.com/), click NordVPN, and, under Manual setup, click on Service credentials. Here you'll find the Username and Password needed to connect manually.
1. Now, copy the path to the credentials file that is given right above the field containing the credentials and paste it next to the “auth-user-pass” line in the “Config file” section above.It should look like this: auth-user-pass /etc/openvpn/nordvpn_us.auth
2. Click on the Save button at the bottom.
3. Click on the “Network” tab at the top of the page and choose “Interfaces“.
4. Select the “Add new interface…” button and name it “nordvpntun”.
5. Click on the “Protocol” dropdown menu and choose “Unmanaged”.
6. In the “Interface” dropdown, enter the name “tun0” at the bottom -- custom -- field and press the Enter key.
7. Click the “Create interface” and “Save” buttons.
8. Choose the “Network” tab at the top once more and head to the “Firewall” section.
9. Click the “Add” button and adjust it as follows:
1. Name it “vpnfirewall”;
2. Set the “Input” option as “Reject”;
3. Leave “Output” as “Accept” and “Forward” as “Reject”;
4. Check the “Masquerading” option;
5. Check the “MSS clamping” option;
6. From the “Covered Networks” dropdown menu choose “nordvpntun”;
7. In the “Allow forward from source zones” dropdown menu, choose “lan”;
8. Click the “Save” button.
10. In the “Zones” section, find the zone named “lan”, and click on the “Edit” button.
11. In the “Allow forward to destination zones” dropdown check the “nordvpntun” entry.
12. Once more, click “Network'' at the top of the page and then choose “DHCP and DNS” from the dropdown list.
13. In the “General Settings” tab, find the “DNS forwardings” option and enter NordVPN DNS addresses there. The addresses are: 103.86.96.100 and 103.86.99.100
14. Go to the “Resolv and Hosts Files” tab, check the “Ignore resolve file” checkbox, and click the “Save & Apply” button.
15. Lastly, please head back to the “VPN” > “OpenVPN” tab.
16. In the “OpenVPN instances” section, check the “Enable” option next to the NordVPN option in the list, and click the “Save & Apply” button.
17. Click the “Start” button next to the created NordVPN instance to connect to the VPN server.
When you have followed these instructions, you should be connected using the configured connection. To check if you were successful, visit NordVPN’s homepage — the status at the top of the page should say “Protected”If you wish to disconnect the VPN connection, you can click on the “Stop” button next to the NordVPN option in the “VPN” > “OpenVPN” > “OpenVPN instances'' section.
## CLI instructions
If you're looking for a more advanced tutorial, follow this guide instead. To gain the benefits of a VPN on OpenWrt, you need a router with both OpenWrt firmware and an enabled OpenVPN client. The main page of the firmware is .
1. In order to start, you would need to access your router via SSH using its LAN IP address. By default, the IP address is set to 192.168.1.1 and the username is root, however, the IP address may differ if you changed any of the default values.
2. The OpenVPN package is not included in the firmware image by default. To install it, please run the following commands:opkg updateopkg install openvpn-opensslopkg install ip-fullAdditionally, you may install the LuCI component of the OpenVPN configuration, however, it is optional. You can do so by running this command:opkg install luci-app-openvpn
3. Once you have installed the OpenVPN package, you can make it launch automatically whenever the router starts by running this command:/etc/init.d/openvpn enable
4. Next, you will need to download the server configuration files.
Follow the steps below to find the manual connection configuration files:
1. Log into your [Nord Account](https://my.nordaccount.com/), and click NordVPN.
2. Scroll down to Advanced Settings and click Set up NordVPN manually.
3. Select the OpenVPN configuration files tab.
4. Find the server you wish to connect to by using the Search bar or by scrolling down and download it by clicking Download UDP or Download TCP.
5. When connecting to OpenVPN & IKEv2 manually, you're going to need to use the Username and Password from the Service credential tab.
1. For this guide, we used the server uk2054.nordvpn.com, however, you should use the server that the website suggests for you.To download a server file, choose the country where you wish to connect, click on “Show available protocols”, right-click on “Download config” for “OpenVPN TCP” or “OpenVPN UDP” and choose “Copy link address”.After that, return to your SSH session and run the following command:wget -P /etc/openvpn However, make sure to use the link you copied for your specific server file. This command will download the configuration file to the /etc/openvpn directory for easy access.Alternatively, you may download the server configuration file on a different machine and transfer it to the OpenWrt router using alternate methods, such as SCP or SFTP protocols.For older OpenWrt builds:You can simply download an archive here . In the downloaded archive, you will find the corresponding files with .crt and .key extensions. The files are specific for each VPN server.
2. The OpenVPN configuration for NordVPN requires you to enter your NordVPN service credential username and password every time OpenVPN starts. However, we will make some adjustments so the credentials would be provided automatically.First, to make the process easier, we will install the nano text editor by running the following command:opkg install nanoOtherwise, you may use the built-in vi text editor. For more information regarding text editors, please refer to this article: .Now, open the downloaded server configuration file using the nano text editor. In our case, the command would be:nano /etc/openvpn/uk2054.nordvpn.com.udp.ovpnAfter that, append the word “secret” (without quotation marks) to the string “auth-user-pass”. The resulting line should be:auth-user-pass secretNow, we need to create a new file named secret, where the NordVPN service credentials will be stored. To do so, run the following command:nano /etc/openvpn/secretIt will create the new file and open it using the nano text editor.In the first line of the file enter your NordVPN service username, and the second - NordVPN service password.
You can find your NordVPN service credentials (service username and service password) in the [Nord Account dashboard](https://my.nordaccount.com/dashboard/nordvpn/)
Follow the steps below to find the service credentials for manual connection setup:
1. Log into your [Nord Account](https://my.nordaccount.com/), click NordVPN, and, under Manual setup, click on Service credentials. Here you'll find the Username and Password needed to connect manually.
1. Configure OpenVPN using the downloaded configuration file in one of two ways:
1. Change the file’s extension from .ovpn to .conf, which will allow OpenVPN to find it automatically by its extension.To do so, you can use the mv command:mv /etc/openvpn/uk2054.nordvpn.com.udp.ovpn /etc/openvpn/uk2054.nordvpn.com.udp.conf
2. Specify the file name in “/etc/config/openvpn” by using the following “uci” commands:uci set openvpn.nordvpn=openvpnuci set openvpn.nordvpn.enabled='1'uci set openvpn.nordvpn.config='/etc/openvpn/uk2054.nordvpn.com.udp.ovpn'uci commit openvpnAfter that, the file “/etc/config/openvpn” should contain the following appended strings:config openvpn 'nordvpn'option enabled '1'option config '/etc/openvpn/uk2054.nordvpn.com.udp.ovpn'You can check by running this command:tail /etc/config/openvpnYou may also change the file’s extension from .ovpn to .conf and specify it in the file “/etc/config/openvpn” - in that case, however, OpenVPN will start with this configuration file just once.
2. Create a new network interface by running the following commands:uci set network.nordvpntun=interfaceuci set network.nordvpntun.proto='none'uci set network.nordvpntun.ifname='tun0'uci commit networkThe file “/etc/config/network” should contain the following appended strings, if everything was done properly:config interface 'nordvpntun'option proto 'none'option ifname 'tun0'It can be checked by using the tail /etc/config/network command.
3. Create a new firewall zone and add a forwarding rule from LAN to VPN by running the following commands:uci add firewall zoneuci set firewall.@zone[-1].name='vpnfirewall'uci set firewall.@zone[-1].input='REJECT'uci set firewall.@zone[-1].output='ACCEPT'uci set firewall.@zone[-1].forward='REJECT'uci set firewall.@zone[-1].masq='1'uci set firewall.@zone[-1].mtu_fix='1'uci add_list firewall.@zone[-1].network='nordvpntun'uci add firewall forwardinguci set firewall.@forwarding[-1].src='lan'uci set firewall.@forwarding[-1].dest='vpnfirewall'uci commit firewallIf done correctly, the file “/etc/config/firewall” should contain the following appended strings:config zoneoption name 'vpnfirewall'option input 'REJECT'option output 'ACCEPT'option forward 'REJECT'option masq '1'option mtu_fix '1'list network 'nordvpntun'config forwardingoption src 'lan'option dest 'vpnfirewall'You can check by running tail -13 /etc/config/firewall command. This will display the last 13 lines, which should contain the aforementioned strings.
4. Now you need to configure the DNS servers. The simplest approach is to use NordVPN DNS for the WAN interface of the router. To add NordVPN DNS, run the following commands:uci set network.wan.peerdns='0'uci del network.wan.dnsuci add_list network.wan.dns='103.86.96.100'uci add_list network.wan.dns='103.86.99.100'uci commitIf you receive an error message “uci: Entry not found” after running the uci del network.wan.dns command, you can disregard it.The file “/etc/config/network” should contain the section ‘wan’ with the three bottom strings appended:config interface 'wan'<...>option peerdns '0'list dns '103.86.96.100'list dns '103.86.99.100'You can check by running the cat /etc/config/network command and finding the ‘wan’ interface in the output.You can also add different DNS addresses, such as Google’s by running these commands:uci set network.wan.peerdns='0'uci del network.wan.dnsuci add_list network.wan.dns='8.8.8.8'uci add_list network.wan.dns='8.8.4.4'uci commitThe appended strings should be similar to the previous ones.
(Optional) To prevent traffic leakage in case the VPN tunnel disconnects, you can open the “/etc/firewall.user” file using a text editor and add the following content to it:# This file is interpreted as a shell script.
# Put your custom iptables rules here, and they will be executed with each firewall (re-)start
# Internal uci firewall chains are flushed and recreated on reload, so
# put custom rules into the root chains, e.g. INPUT or FORWARD, or into the
# special user chains, e.g. input_wan_rule or postrouting_lan_rule.
if (! ip a s tun0 up) && (! iptables -C forwarding_rule -j REJECT); then
iptables -I forwarding_rule -j REJECT
fi
Additionally, you should create a file called “99-prevent-leak” in the folder “/etc/hotplug.d/iface” by running nano /etc/hotplug.d/iface/99-prevent-leak and adding the following content to the file:#!/bin/sh
if [ ""$ACTION"" = ifup ] && (ip a s tun0 up) && (iptables -C forwarding_rule -j REJECT); then
iptables -D forwarding_rule -j REJECT
fi
if [ ""$ACTION"" = ifdown ] && (! ip a s tun0 up) && (! iptables -C forwarding_rule -j REJECT); then
iptables -I forwarding_rule -j REJECT
fi
In some cases, the OpenVPN connection can crash with a log output similar to “couldn’t resolve host…”. In this case, the VPN tunnel itself remains, however, the connection is lost. To reconnect to it automatically, first open the “/etc/rc.local” file using a text editor and add the following line:/etc/openvpn/reconnect.sh &
In addition, you need to create the “reconnect.sh” file in the “/etc/openvpn” directory. It can be done by running the nano /etc/openvpn/reconnect.sh command.
In the file, enter the following script contents:
#!/bin/sh
n=10
while sleep 50; do
t=$(ping -c $n 8.8.8.8 | grep -o -E '[0-9]+ packets r' | grep -o -E '[0-9]+')
if [ ""$t"" -eq 0 ]; then
/etc/init.d/openvpn restart
fi
done
When you have followed these instructions, you should be connected using the configured connection. To check if you were successful, visit NordVPN’s homepage — the status at the top of the page should say “Protected.”
If you wish to disconnect the VPN connection, run the following command:
service openvpn stop",https://support.nordvpn.com/hc/en-us/related/click?data=BAh7CjobZGVzdGluYXRpb25fYXJ0aWNsZV9pZGwrCJG6CdF%2FEjoYcmVmZXJyZXJfYXJ0aWNsZV9pZGwrCJHX7XGNEjoLbG9jYWxlSSIKZW4tdXMGOgZFVDoIdXJsSSJBL2hjL2VuLXVzL2FydGljbGVzLzIwMzQwMTc3MjIyMjg5LU9wZW5XcnQtc2V0dXAtd2l0aC1Ob3JkVlBOBjsIVDoJcmFua2kI--6835ac68b2cd4022b1cfe8be107e9bd7f35f7f6b
How to build the NordVPN Docker image,"Docker is a tool for easy deployment and management of applications in lightweight containers. Setting up NordVPN on a Docker container will secure your internet connection and protect your online privacy of other Docker containers as well.
## Setting up the Docker environment
To build the NordVPN Docker image on Linux, you will first need to set up the Docker environment:
1. [Install the Docker engine on Linux](https://docs.docker.com/engine/install/ubuntu/).
2. Once you have Docker installed, go to the terminal.
3. Create a new directory for your image using this command:
```
mkdir
```
4. Go to the created directory:
```
cd
```
5. Create a Dockerfile:
```
touch Dockerfile
```
6. Go to the file with your preferred text editor. In this example, we use nano.
```
nano Dockerfile
```
7. Copy and paste the following script into the file:
```
FROM ubuntu:24.04RUN apt-get update && \
apt-get install -y --no-install-recommends wget apt-transport-https ca-certificates && \
apt-get install -y --no-install-recommends wget apt-transport-https ca-certificates && \ wget -qO /etc/apt/trusted.gpg.d/nordvpn_public.asc https://repo.nordvpn.com/gpg/nordvpn_public.asc && \ echo ""deb https://repo.nordvpn.com/deb/nordvpn/debian stable main"" > /etc/apt/sources.list.d/nordvpn.list && \ apt-get update && \ apt-get install -y --no-install-recommends nordvpn && \ apt-get clean && \ rm -rf /var/lib/apt/lists/*ENTRYPOINT /etc/init.d/nordvpn start && sleep 5 && /bin/bash -c ""$@""CMD bash
```
8. Click Ctrl + X, then Y, and finally, Enter to save and exit.
Now, you've successfully set up a Docker environment for further NordVPN Docker image building.
## Building the NordVPN Docker image
After you have set up the environment in Docker, make sure you’re in the same directory you have just created, which stores the Dockerfile. Once you’re certain you’re in the correct directory, you can proceed with building the NordVPN Docker image by following these steps:
1. Build the image with this command (add your desired image name):
```
sudo docker build -t .
```
Note: Do not forget the dot at the end of the command line.
2. Run the image:
```
sudo docker run -it --hostname mycontainer --cap-add=NET_ADMIN --sysctl net.ipv6.conf.all.disable_ipv6=0
```
Explanation:-it - instructs Docker to allocate a pseudo-TTY connected to the container’s stdin; creating an interactive bash shell in the container;--cap-add - needed to successfully run the NordVPN Daemon and connect to our servers;--sysctl net.ipv6.conf.all.disable_ipv6=0 - [disables IPv6 traffic on Linux](https://support.nordvpn.com/hc/en-us/articles/20164669224337-How-to-disable-IPv6-on-Linux) for the NordVPN container, making sure that there are no leaks after connecting to our servers.--hostname - the hostname for your container. The flag should be used to prevent Meshnet hostname from changing after restarting the Docker container.
3. [Login to NordVPN using a token](https://support.nordvpn.com/hc/en-us/articles/20286980309265-How-to-use-a-token-with-NordVPN-on-Linux) method:
```
nordvpn login --token
```
After the steps are done, you have successfully set up NordVPN Docker image.
For more detailed information on how to use Docker, check the Docker documentation.",https://support.nordvpn.com/hc/en-us/related/click?data=BAh7CjobZGVzdGluYXRpb25fYXJ0aWNsZV9pZGwrCJEVbRGdEjoYcmVmZXJyZXJfYXJ0aWNsZV9pZGwrCJHX7XGNEjoLbG9jYWxlSSIKZW4tdXMGOgZFVDoIdXJsSSJML2hjL2VuLXVzL2FydGljbGVzLzIwNDY1ODExNTI3MDU3LUhvdy10by1idWlsZC10aGUtTm9yZFZQTi1Eb2NrZXItaW1hZ2UGOwhUOglyYW5raQk%3D--6711279a4656f76c5615c7a1955f4f3ae2196c4f
What if the token number for NordVPN expires?,"If you lost your token number for NordVPN, or it expired, revoke your token by clicking the Revoke button:",https://support.nordvpn.com/hc/en-us/related/click?data=BAh7CjobZGVzdGluYXRpb25fYXJ0aWNsZV9pZGwrCBFBQW5zEjoYcmVmZXJyZXJfYXJ0aWNsZV9pZGwrCJHX7XGNEjoLbG9jYWxlSSIKZW4tdXMGOgZFVDoIdXJsSSJPL2hjL2VuLXVzL2FydGljbGVzLzIwMjg2OTgwMzA5MjY1LUhvdy10by11c2UtYS10b2tlbi13aXRoLU5vcmRWUE4tb24tTGludXgGOwhUOglyYW5raQo%3D--d714149122b142fde342f5861c57b782b49fe454
Cyber insurance benefits: insurance claims process,"This article will answer questions about the cyber insurance claims process.
## Table of contents:
* [Filing a claim due to a cyber scam or an online shopping fraud](https://support.nordvpn.com/hc/en-us/related/click?data=BAh7CjobZGVzdGluYXRpb25fYXJ0aWNsZV9pZGwrCJE42vlbEjoYcmVmZXJyZXJfYXJ0aWNsZV9pZGwrCJG67PpbEjoLbG9jYWxlSSIKZW4tdXMGOgZFVDoIdXJsSSJYL2hjL2VuLXVzL2FydGljbGVzLzIwMTg2MjQzMTUyMDE3LUN5YmVyLWluc3VyYW5jZS1iZW5lZml0cy1pbnN1cmFuY2UtY2xhaW1zLXByb2Nlc3MGOwhUOglyYW5raQY%3D--82b178517aeacf2a9edd7d03e9b5e8ad32d6bf17#Filing%20a%20claim%20due%20to%20a%20cyber%20scam%20or%20an%20online%20shopping%20fraud)
* [Unable to file a claim via NordVPN account](https://support.nordvpn.com/hc/en-us/related/click?data=BAh7CjobZGVzdGluYXRpb25fYXJ0aWNsZV9pZGwrCJE42vlbEjoYcmVmZXJyZXJfYXJ0aWNsZV9pZGwrCJG67PpbEjoLbG9jYWxlSSIKZW4tdXMGOgZFVDoIdXJsSSJYL2hjL2VuLXVzL2FydGljbGVzLzIwMTg2MjQzMTUyMDE3LUN5YmVyLWluc3VyYW5jZS1iZW5lZml0cy1pbnN1cmFuY2UtY2xhaW1zLXByb2Nlc3MGOwhUOglyYW5raQY%3D--82b178517aeacf2a9edd7d03e9b5e8ad32d6bf17#Unable%20to%20file%20a%20claim%20via%20NordVPN%20account)
* [Documentation needed to access a claim](https://support.nordvpn.com/hc/en-us/related/click?data=BAh7CjobZGVzdGluYXRpb25fYXJ0aWNsZV9pZGwrCJE42vlbEjoYcmVmZXJyZXJfYXJ0aWNsZV9pZGwrCJG67PpbEjoLbG9jYWxlSSIKZW4tdXMGOgZFVDoIdXJsSSJYL2hjL2VuLXVzL2FydGljbGVzLzIwMTg2MjQzMTUyMDE3LUN5YmVyLWluc3VyYW5jZS1iZW5lZml0cy1pbnN1cmFuY2UtY2xhaW1zLXByb2Nlc3MGOwhUOglyYW5raQY%3D--82b178517aeacf2a9edd7d03e9b5e8ad32d6bf17#Documentation%20needed%20to%20access%20a%20claim)
* [Covered and possible to claim budget](https://support.nordvpn.com/hc/en-us/related/click?data=BAh7CjobZGVzdGluYXRpb25fYXJ0aWNsZV9pZGwrCJE42vlbEjoYcmVmZXJyZXJfYXJ0aWNsZV9pZGwrCJG67PpbEjoLbG9jYWxlSSIKZW4tdXMGOgZFVDoIdXJsSSJYL2hjL2VuLXVzL2FydGljbGVzLzIwMTg2MjQzMTUyMDE3LUN5YmVyLWluc3VyYW5jZS1iZW5lZml0cy1pbnN1cmFuY2UtY2xhaW1zLXByb2Nlc3MGOwhUOglyYW5raQY%3D--82b178517aeacf2a9edd7d03e9b5e8ad32d6bf17#Covered%20and%20possible%20to%20claim%20budget)
* [Claim process length and updates](https://support.nordvpn.com/hc/en-us/related/click?data=BAh7CjobZGVzdGluYXRpb25fYXJ0aWNsZV9pZGwrCJE42vlbEjoYcmVmZXJyZXJfYXJ0aWNsZV9pZGwrCJG67PpbEjoLbG9jYWxlSSIKZW4tdXMGOgZFVDoIdXJsSSJYL2hjL2VuLXVzL2FydGljbGVzLzIwMTg2MjQzMTUyMDE3LUN5YmVyLWluc3VyYW5jZS1iZW5lZml0cy1pbnN1cmFuY2UtY2xhaW1zLXByb2Nlc3MGOwhUOglyYW5raQY%3D--82b178517aeacf2a9edd7d03e9b5e8ad32d6bf17#Claim%20process%20length%20and%20updates)
### How do I file a claim in the event of a cyber scam or online shopping fraud?
The easiest way to file a claim is via your NordVPN account. Simply log in and select “Cyber insurance” on your account home page. Next, select the “File a claim” button, and from there, you will be asked to select which insurance benefit your claim relates to. You will then be prompted to enter some contact information and details about the incident and follow the remaining steps to completion.
### What do I do if I am unable to file the claim via my NordVPN account?
Alternatively, you can submit your claim to chubbcyberclaims@ie.sedgwick.com, entering “NordVPN claims” in the subject line, providing your name, address, email address, and phone number, a description of the incident, and attaching any supporting documentation.
### What documentation is required to support a claim?
The following supporting documents will be required to assess any claims:
#### For claims under scam loss recovery, supporting documentation includes:
* A bank statement showing evidence of bank transfers relating to the incident
* A copy of the police report/crime reference number obtained after reporting the incident to Action Fraud via www.actionfraud.police.uk
* A copy of any chat communication, SMS, call logs, email, website, or other method of digital communication that led to the incident or request for funds
* A copy of any chat communication, SMS, call logs, email, website, or other method of digital communication showing reasonable attempts to recover the funds back from the third party
* Any additional supporting documents proving that you are the victim of fraud
#### For claims under online shopping fraud recovery, supporting documentation includes:
* A bank statement showing evidence of purchase relating to the incident
* A copy of the police report/crime reference number obtained after reporting the incident to Action Fraud via www.actionfraud.police.uk
* A copy of any chat communication, SMS, call logs, email, website, or other method of digital communication showing reasonable attempts to recover the funds back from the vendor
* Any additional supporting documents proving that you are the victim of fraud
You can attach the supporting documents in the online portal once you are redirected via the “File a claim” button on your NordVPN account, so make sure you have them ready to have as quick handling of your claim as possible.
### What is the maximum amount I can claim?
The maximum amount you can claim under the insurance benefits in total is £5,000 within a 12-month period.
### How long does the claim process typically take, and how will I be updated on the status of my claim?
After submitting a claim, you should receive an acknowledgment email within 1 hour confirming your submission. Please allow for up to 7 business days for us to process your claim. You may be contacted for further information, so please look out for communications to help us process your claim as quickly as possible. Once a claim is approved, payment to your account will typically take 3-5 business days. Please note that we will only make claim payments to a bank account registered in your name in the United Kingdom.",https://support.nordvpn.com/hc/en-us/related/click?data=BAh7CjobZGVzdGluYXRpb25fYXJ0aWNsZV9pZGwrCJE42vlbEjoYcmVmZXJyZXJfYXJ0aWNsZV9pZGwrCJG67PpbEjoLbG9jYWxlSSIKZW4tdXMGOgZFVDoIdXJsSSJYL2hjL2VuLXVzL2FydGljbGVzLzIwMTg2MjQzMTUyMDE3LUN5YmVyLWluc3VyYW5jZS1iZW5lZml0cy1pbnN1cmFuY2UtY2xhaW1zLXByb2Nlc3MGOwhUOglyYW5raQY%3D--82b178517aeacf2a9edd7d03e9b5e8ad32d6bf17
How to use a token with NordVPN on Linux,"Here’s how to use a token to log in and log out of the NordVPN app on a Linux machine without a graphical user interface — and what to do if you lose your token.
Note: This login method is also suitable for headless (no GUI) devices.
## Logging in
If you need an alternative way to log in to the Linux application, use the following command:
```
nordvpn login --token
```
You’ll need to access the token number to use this login method.
### To access the token number:
1. Login to Nord Account:
2. Click on NordVPN:
3. Scroll down until you see the advanced settings tab. Click get access token:
4. Verify your email by entering a code you receive to your registered e-mail.
5. Click on generate new token tab.You will be given two options:
* Create a temporary token, which will expire after 30 days.
* Create a token which will not expire. We recommend [enabling MFA](https://support.nordvpn.com/hc/en-us/articles/19442299167889-What-is-MFA-and-how-to-enable-it) if you choose this option.
1. Click on Generate token.
2. A window with a token number will pop up.Please note that the token number will only be shown once. Make sure you log in before you close the window.
3. Once you copy the token number, paste it into the command:
```
nordvpn login --token your_token
```
## Logging out
* If you log out by using nordvpn logout command line, your token will expire, regardless of which token you created, and you won’t be able to log in again using it:
* If you want to re-use your token and do not want it to expire, use the nordvpn logout --persist-token command line:
## What if the token number for NordVPN expires?
If you lost your token number for NordVPN, or it expired, revoke your token by clicking the Revoke button:",https://support.nordvpn.com/hc/en-us/related/click?data=BAh7CjobZGVzdGluYXRpb25fYXJ0aWNsZV9pZGwrCBFBQW5zEjoYcmVmZXJyZXJfYXJ0aWNsZV9pZGwrCJHX7XGNEjoLbG9jYWxlSSIKZW4tdXMGOgZFVDoIdXJsSSJPL2hjL2VuLXVzL2FydGljbGVzLzIwMjg2OTgwMzA5MjY1LUhvdy10by11c2UtYS10b2tlbi13aXRoLU5vcmRWUE4tb24tTGludXgGOwhUOglyYW5raQo%3D--d714149122b142fde342f5861c57b782b49fe454
Can I use NordVPN on Synology NAS?,"Yes, Synology DiskStation Manager 6.1 and later versions support NordVPN. This article explains what you need to do in order to set up NordVPN on your device. We also have instructions on [how to set up a VPN on Synology 5.1 NAS](https://support.nordvpn.com/hc/en-us/articles/20343522984337-How-to-configure-Synology-5-1-NAS).",https://support.nordvpn.com/hc/en-us/related/click?data=BAh7CjobZGVzdGluYXRpb25fYXJ0aWNsZV9pZGwrCBGmAg9eEjoYcmVmZXJyZXJfYXJ0aWNsZV9pZGwrCJHPMG5xEjoLbG9jYWxlSSIKZW4tdXMGOgZFVDoIdXJsSSJOL2hjL2VuLXVzL2FydGljbGVzLzIwMTk1MTg4MDU3NjE3LUhvdy10by1zZXQtdXAtYS1WUE4tb24tU3lub2xvZ3ktNi0xLU5BUwY7CFQ6CXJhbmtpBg%3D%3D--dd11993213a47eac36439849c8e188e9597e8b24
How to set up a VPN on Synology 6.1 NAS,"## Can I use NordVPN on Synology NAS?
Yes, Synology DiskStation Manager 6.1 and later versions support NordVPN. This article explains what you need to do in order to set up NordVPN on your device. We also have instructions on [how to set up a VPN on Synology 5.1 NAS](https://support.nordvpn.com/hc/en-us/articles/20343522984337-How-to-configure-Synology-5-1-NAS).
## Downloading configuration files
To set up NordVPN on Synology 6.1 NAS, you'll first need to download the OpenVPN configuration files for the server you want.
Follow the steps below to find the manual connection configuration files:
1. Log into your [Nord Account](https://my.nordaccount.com/), and click NordVPN.
2. Scroll down to Advanced Settings and click Set up NordVPN manually.
3. Select the OpenVPN configuration files tab.
4. Find the server you wish to connect to by using the Search bar or by scrolling down and download it by clicking Download UDP or Download TCP.
5. When connecting to OpenVPN & IKEv2 manually, you're going to need to use the Username and Password from the Service credential tab.
## VPN on Synology setup instructions
1. Log in to Synology and click on “Control Panel.”
2. Go to “Network.”
3. Go to “Network interface,” click “Create,” and pick “Create VPN profile.”
4. Select “OpenVPN (via importing a .ovpn file)” and click “Next.” 
5. Complete the fields as explained below:Profile name: Can be anything, but for convenience we'll name it ""NordVPN.""Username: NordVPN service credentials.Password: NordVPN service credentials.
Follow the steps below to find the service credentials for manual connection setup:
1. Log into your [Nord Account](https://my.nordaccount.com/), click NordVPN, and, under Manual setup, click on Service credentials. Here you'll find the Username and Password needed to connect manually.
Import .ovpn file: Use the file you have downloaded in the [downloading configuration files]( section.CA certificate:1) First, download the [list of certificates](https://downloads.nordcdn.com/configs/archives/certificates/servers.zip) and find the certificate with the same number as the server you've downloaded in the downloading configuration files section. 2) Back in the “Create profile” screen, press “Browse” to the right of the CA certificate field to manually add the appropriate ca.crt file
1. Select all options and click ""Apply.""
2. Select the created profile and click ""Connect.""The status of this profile will change to ""Connected"" when the connection is established.
If you have any issues while trying to establish the connection, open the .ovpn configuration file on your computer and add this line:
```
log-append /var/log/NordVPN.log
```
Import the edited .ovpn file again into Synology and try connecting again. Afterward, send us the “NordVPN.log” file from the “/var/log/” directory.",https://support.nordvpn.com/hc/en-us/related/click?data=BAh7CjobZGVzdGluYXRpb25fYXJ0aWNsZV9pZGwrCBGmAg9eEjoYcmVmZXJyZXJfYXJ0aWNsZV9pZGwrCJHPMG5xEjoLbG9jYWxlSSIKZW4tdXMGOgZFVDoIdXJsSSJOL2hjL2VuLXVzL2FydGljbGVzLzIwMTk1MTg4MDU3NjE3LUhvdy10by1zZXQtdXAtYS1WUE4tb24tU3lub2xvZ3ktNi0xLU5BUwY7CFQ6CXJhbmtpBg%3D%3D--dd11993213a47eac36439849c8e188e9597e8b24
How to connect to your dedicated IP on Windows,"With a NordVPN dedicated IP, you get faster speeds, less CAPTCHA requests and increased security. NordVPN's dedicated IP is a unique IP that is assigned to a specific server, which ensures that you have your own private connection.
In this article, we will cover how to locate and connect to your [dedicated IP](https://nordvpn.com/features/dedicated-ip/) on Windows.
In order for you to be able to connect, first double-check if you have done the following:
1. Purchased a dedicated IP;
2. Set up the dedicated IP in Nord Account.
If these steps are done, you can move forward and connect to your dedicated IP in the NordVPN app on:
* [ Windows 7 and 8.1](
* [Windows 10 and 11](
For additional information, you can also read [our article about NordVPN's dedicated IP and how it works](https://support.nordvpn.com/hc/en-us/articles/19507808024209-Dedicated-NordVPN-IP-addresses).
## On Windows 7 and 8.1:
To connect to NordVPN dedicated IP on Windows 7 and 8.1, follow these steps:
1. Open the NordVPN application.
2. Go to the dedicated IP category on the left. 
3. Hover over dedicated IP, and click on the three-dot button:
4. Select fastest for your country and server, and click connect:
You may also use the search bar located in the top-left corner of the application window to connect to your dedicated IP:
1. Enter your dedicated IP country, and server number:
2. Tap your dedicated IP to connect:
## On Windows 10 and 11:
To connect to NordVPN dedicated IP on Windows 10 and 11, follow the steps below:
1. Open your NordVPN application.
2. Click specialty servers:
3. Hover over dedicated IP and click the three-dot menu:
4. Click connect.
You may also use the search bar located in the top-left corner of the application window to connect to your dedicated IP:
1. Type in your dedicated ip into the search bar:
2. Click your dedicated IP to connect:
After completing the steps, you will have connected to your dedicated IP successfully. If you wish to test your connection, visit [NordVPN's DNS leak checker website](https://nordvpn.com/dns-leak-test/).
Please be aware that your email will be linked to that dedicated IP address.",https://support.nordvpn.com/hc/en-us/related/click?data=BAh7CjobZGVzdGluYXRpb25fYXJ0aWNsZV9pZGwrCJGQ2fucEjoYcmVmZXJyZXJfYXJ0aWNsZV9pZGwrCJHPMG5xEjoLbG9jYWxlSSIKZW4tdXMGOgZFVDoIdXJsSSJVL2hjL2VuLXVzL2FydGljbGVzLzIwNDY1NDQ5NTM3NjgxLUhvdy10by1jb25uZWN0LXRvLXlvdXItZGVkaWNhdGVkLUlQLW9uLVdpbmRvd3MGOwhUOglyYW5raQc%3D--25da59dde2703dc75a9b0d870e14dc40951b9f39
Connecting to NordVPN (Linux Network Manager),"To connect to NordVPN using the Linux Network Manager, follow these steps:
1. Download the [OpenVPN Configuration File Package](https://downloads.nordcdn.com/configs/archives/servers/ovpn.zip) and extract them into a folder of your choice.
2. Enter the following command to make sure that you have installed all of the available updates on your device system and OpenVPN network manager:sudo apt update && sudo apt full-upgrade -y && sudo apt install network-manager-openvpn-gnome -y
3. Click on the network selection button in the upper-right corner of the screen, press VPN off, and select VPN settings from the drop-down menu.
4. A configuration window will open. Press the + icon next to VPN.
5. You will be prompted to choose a connection type. Select Import from file…
6. You will be asked to select a file you would like to import. Navigate to the folder where you have extracted the configuration files, select one of the files from the list, and click Open.
7. In the pop-up window, enter your NordVPN service username and password. Press Add.You can find your NordVPN service credentials (service username and service password) in the [Nord Account dashboard](https://my.nordaccount.com/dashboard/nordvpn/):
1. Click Set up NordVPN manually.
2. You will receive a verification code in your email that you use for NordVPN services. Type the code in: 
3. Copy the credentials using the Copy buttons on the right:
8. Now click on the toggle under the VPN section to connect to a NordVPN server. The toggle switch will turn green once connected.",https://support.nordvpn.com/hc/en-us/related/click?data=BAh7CjobZGVzdGluYXRpb25fYXJ0aWNsZV9pZGwrCJG0eJaBEjoYcmVmZXJyZXJfYXJ0aWNsZV9pZGwrCJHPMG5xEjoLbG9jYWxlSSIKZW4tdXMGOgZFVDoIdXJsSSJSL2hjL2VuLXVzL2FydGljbGVzLzIwMzQ3Nzg0NTc0MDk3LUNvbm5lY3RpbmctdG8tTm9yZFZQTi1MaW51eC1OZXR3b3JrLU1hbmFnZXIGOwhUOglyYW5raQg%3D--662bb87644963824aa6800432496c4ad064de73e
How to build the NordVPN Docker image,"Docker is a tool for easy deployment and management of applications in lightweight containers. Setting up NordVPN on a Docker container will secure your internet connection and protect your online privacy of other Docker containers as well.
## Setting up the Docker environment
To build the NordVPN Docker image on Linux, you will first need to set up the Docker environment:
1. [Install the Docker engine on Linux](https://docs.docker.com/engine/install/ubuntu/).
2. Once you have Docker installed, go to the terminal.
3. Create a new directory for your image using this command:
```
mkdir
```
4. Go to the created directory:
```
cd
```
5. Create a Dockerfile:
```
touch Dockerfile
```
6. Go to the file with your preferred text editor. In this example, we use nano.
```
nano Dockerfile
```
7. Copy and paste the following script into the file:
```
FROM ubuntu:24.04RUN apt-get update && \
apt-get install -y --no-install-recommends wget apt-transport-https ca-certificates && \
apt-get install -y --no-install-recommends wget apt-transport-https ca-certificates && \ wget -qO /etc/apt/trusted.gpg.d/nordvpn_public.asc https://repo.nordvpn.com/gpg/nordvpn_public.asc && \ echo ""deb https://repo.nordvpn.com/deb/nordvpn/debian stable main"" > /etc/apt/sources.list.d/nordvpn.list && \ apt-get update && \ apt-get install -y --no-install-recommends nordvpn && \ apt-get clean && \ rm -rf /var/lib/apt/lists/*ENTRYPOINT /etc/init.d/nordvpn start && sleep 5 && /bin/bash -c ""$@""CMD bash
```
8. Click Ctrl + X, then Y, and finally, Enter to save and exit.
Now, you've successfully set up a Docker environment for further NordVPN Docker image building.
## Building the NordVPN Docker image
After you have set up the environment in Docker, make sure you’re in the same directory you have just created, which stores the Dockerfile. Once you’re certain you’re in the correct directory, you can proceed with building the NordVPN Docker image by following these steps:
1. Build the image with this command (add your desired image name):
```
sudo docker build -t .
```
Note: Do not forget the dot at the end of the command line.
2. Run the image:
```
sudo docker run -it --hostname mycontainer --cap-add=NET_ADMIN --sysctl net.ipv6.conf.all.disable_ipv6=0
```
Explanation:-it - instructs Docker to allocate a pseudo-TTY connected to the container’s stdin; creating an interactive bash shell in the container;--cap-add - needed to successfully run the NordVPN Daemon and connect to our servers;--sysctl net.ipv6.conf.all.disable_ipv6=0 - [disables IPv6 traffic on Linux](https://support.nordvpn.com/hc/en-us/articles/20164669224337-How-to-disable-IPv6-on-Linux) for the NordVPN container, making sure that there are no leaks after connecting to our servers.--hostname - the hostname for your container. The flag should be used to prevent Meshnet hostname from changing after restarting the Docker container.
3. [Login to NordVPN using a token](https://support.nordvpn.com/hc/en-us/articles/20286980309265-How-to-use-a-token-with-NordVPN-on-Linux) method:
```
nordvpn login --token
```
After the steps are done, you have successfully set up NordVPN Docker image.
For more detailed information on how to use Docker, check the Docker documentation.",https://support.nordvpn.com/hc/en-us/related/click?data=BAh7CjobZGVzdGluYXRpb25fYXJ0aWNsZV9pZGwrCJEVbRGdEjoYcmVmZXJyZXJfYXJ0aWNsZV9pZGwrCJHPMG5xEjoLbG9jYWxlSSIKZW4tdXMGOgZFVDoIdXJsSSJML2hjL2VuLXVzL2FydGljbGVzLzIwNDY1ODExNTI3MDU3LUhvdy10by1idWlsZC10aGUtTm9yZFZQTi1Eb2NrZXItaW1hZ2UGOwhUOglyYW5raQk%3D--61cdc9894c5efe46c086df1e37888b8d3528286b
What payment methods does NordVPN accept,"You can pay with a credit card, cryptocurrency, PayPal, Sofort, prepaid (debit) card, and many more payment methods. You can also make a payment through iTunes or Google Pay.
If you want to pay in cash, you can purchase a NordVPN subscription in a retail store.
Once you’ve checked out NordVPN’s plans and prices, you can find out which payment methods are available to you at the checkout page. Simply click “Continue to payment” to see how you can pay for your purchase.",https://support.nordvpn.com/hc/en-us/related/click?data=BAh7CjobZGVzdGluYXRpb25fYXJ0aWNsZV9pZGwrCJGZF3TnEToYcmVmZXJyZXJfYXJ0aWNsZV9pZGwrCBEmsyz1EToLbG9jYWxlSSIKZW4tdXMGOgZFVDoIdXJsSSJPL2hjL2VuLXVzL2FydGljbGVzLzE5Njg1NzgyODIxMjY1LVdoYXQtcGF5bWVudC1tZXRob2RzLWRvZXMtTm9yZFZQTi1hY2NlcHQGOwhUOglyYW5raQg%3D--16caccc5c27d471c513a7544295e585996ca3d77
How to log in to NordVPN on Linux devices without a GUI,"To log in to NordVPN on your Linux machine without a graphical user interface, enter one of the following commands:
* nordvpn login command with the --token flag
* nordvpn login command with the --callback flag
When using the token login method, follow these steps:
1. Log in to [Nord Account](https://my.nordaccount.com/).
2. Find NordVPN under the Services menu.
3. Locate the Access token tab down below.
4. Click on Generate new token.
5. Pick either token: one that expires in 30 days or one that doesn’t expire. Proceed to Generate token.
6. Click Copy and close.
7. On your Linux machine, run the command: nordvpn login --token and replace with the copied token.
For example:
```
nordvpn login --token 3fe460ksdnf415e45908cec9f9bdbadf7a456a6dfb35dc2c58xxxxx
```
If you choose the callback login method:
1. Run the command: nordvpn login.
2. You'll receive a URL. Open it on any device that supports a browser.
3. Finish the login process.
4. Right-click on the Continue button and copy the link address.
5. Run the command: ”nordvpn login --callback """" and replace with the copied link address.
For example:
```
nordvpn login --callback ""nordvpn://login?action=login&exchange_token=MGFlY2E1N
mE4YjM2NDM4NjUzN2VjOWIzYWM3ZTU3ZDliNDdiNzRjZTMwMjE5Yjk
zZTNhNTI3ZWZlOTIwMGJlOQ%3D%3D&status=done""
```",https://support.nordvpn.com/hc/en-us/related/click?data=BAh7CjobZGVzdGluYXRpb25fYXJ0aWNsZV9pZGwrCJGuVV9lEjoYcmVmZXJyZXJfYXJ0aWNsZV9pZGwrCJHPMG5xEjoLbG9jYWxlSSIKZW4tdXMGOgZFVDoIdXJsSSJeL2hjL2VuLXVzL2FydGljbGVzLzIwMjI2NjAwNDQ3NjMzLUhvdy10by1sb2ctaW4tdG8tTm9yZFZQTi1vbi1MaW51eC1kZXZpY2VzLXdpdGhvdXQtYS1HVUkGOwhUOglyYW5raQo%3D--a6539011e5a79dcf24aef1e163886a6865159739
Why use NordVPN DNS servers?,"DNS servers translate human-friendly domain names such as www.google.com into IP addresses like 192.168.1.1 so your device can connect to websites. When you type a website address, your device asks a DNS server for the IP address. If the server doesn’t know it, it looks it up from other servers. Changing DNS servers provides you with increased security as well as speed. With default DNS you may be subject to DNS hijacking. DNS hijacking is a cyberattack where attackers redirect or alter DNS settings to send users to fake websites or malicious servers. This can lead to phishing, malware infections, data theft, or blocking access to legitimate sites. It often occurs through router vulnerabilities or malware.",https://support.nordvpn.com/hc/en-us/articles/19587726859793-What-are-NordVPN-DNS-server-addresses
What are NordVPN DNS server addresses?,"NordVPN offers private DNS in its apps, which ensures tighter security and privacy for your traffic. The NordVPN native applications automatically use NordVPN's DNS servers when connected to VPN. This prevents DNS leaks during your VPN connection, ensuring that your NordVPN private DNS requests are safe.
NordVPN's DNS server addresses are 103.86.96.100 and 103.86.99.100. [Learn how to change NordVPN DNS servers ]( on it later).
## Why use NordVPN DNS servers?
DNS servers translate human-friendly domain names such as www.google.com into IP addresses like 192.168.1.1 so your device can connect to websites. When you type a website address, your device asks a DNS server for the IP address. If the server doesn’t know it, it looks it up from other servers. Changing DNS servers provides you with increased security as well as speed. With default DNS you may be subject to DNS hijacking. DNS hijacking is a cyberattack where attackers redirect or alter DNS settings to send users to fake websites or malicious servers. This can lead to phishing, malware infections, data theft, or blocking access to legitimate sites. It often occurs through router vulnerabilities or malware.
## How to change NordVPN DNS servers
You can configure your device manually to use private NordVPN DNS servers. This is handy when you are connecting to NordVPN from a non-native app (for example, third-party OpenVPN clients) or if there are any issues setting up the DNS addresses in the NordVPN app. You can alternatively use other preferred DNS servers.Here are tutorials on how to manually set up NordVPN DNS server connections on your operating system:Windows: Change your DNS servers on WindowsmacOS: Change your DNS servers on macOSLinux: Change your DNS servers on LinuxAndroid: Change your DNS servers on AndroidiOS: Change your DNS servers on iOS",https://support.nordvpn.com/hc/en-us/articles/19587726859793-What-are-NordVPN-DNS-server-addresses
Why Choose FlashRouters?,[FlashRouters](https://nordvpn.com/flashrouters/) offers some of the best routers for NordVPN pre-configured to deliver top-notch security and performance:,https://support.nordvpn.com/hc/en-us/related/click?data=BAh7CjobZGVzdGluYXRpb25fYXJ0aWNsZV9pZGwrCJFt%2BS1eEjoYcmVmZXJyZXJfYXJ0aWNsZV9pZGwrCJHBwctyEjoLbG9jYWxlSSIKZW4tdXMGOgZFVDoIdXJsSSJNL2hjL2VuLXVzL2FydGljbGVzLzIwMTk1NzA3NTQ3MDI1LVdoaWNoLXJvdXRlci1zaG91bGQtSS11c2Utd2l0aC1Ob3JkVlBOBjsIVDoJcmFua2kG--0b5d6e5dfb2ea13ce177da640c13992a1629b11f
Which router should I use with NordVPN?,"It's important that a router supports VPN configurations to use NordVPN; however, to maximize your NordVPN experience, a router that’s pre-configured for VPN use is key.
For example, FlashRouters offers a [wide range of NordVPN-compatible devices](https://nordvpn.com/flashrouters/) optimized for secure, high-speed connections right out of the box without having to configure or set up the routers.
For the best out-of-the-box router solution with extra safety, privacy, streaming capabilities, and an exclusive NordLynx integration, we recommend the [Privacy Hero 2](https://www.flashrouters.com/privacy-hero-nordvpn-router-by-flashrouters). This unique cloud-connected device also includes 1 year of NordVPN plus 1 year of Privacy Hero service, providing seamless security and performance for your home network.
## Why Choose FlashRouters?
[FlashRouters](https://nordvpn.com/flashrouters/) offers some of the best routers for NordVPN pre-configured to deliver top-notch security and performance:
* Top-Tier Security: Your entire network is shielded by NordVPN, keeping your online activity private and secure.
* Speed & Stability: Our devices are equipped with powerful processors and advanced WiFi technologies, ensuring fast and stable VPN connections.
* Plug-and-Play VPN Setup: Skip the headaches of manual configuration. FlashRouters comes pre-flashed and optimized for NordVPN compatibility.
* Ongoing Support: Need networking support assistance? Their expert support team is here to help with your setup and troubleshooting.
### More NordVPN Recommended Routers Options (OpenVPN Only)
Flashrouters also have a few models supporting only OpenVPN connection:
* [Next Gen WiFi 7](https://www.flashrouters.com/router-basics/wireless-be): These devices are significantly higher cost but offer NordVPN OpenVPN support.
* [Mesh VPN Routers](https://www.flashrouters.com/routers?fmr_use_case=344): Looking for more extensive VPN coverage? FlashRouters offers a wide array of heavily tested [Mesh WiFi Systems for NordVPN](https://www.flashrouters.com/routers?fmr_use_case=344).
* [AX3000 VPN Router](https://www.flashrouters.com/cudy-wr3000-vpn-router-by-flashrouters): If the lowest price is the main concern, this AX3000 is a popular economy device for OpenVPN.
## Configurable devices
You can also buy a router and configure it yourself. While many different routers are available from other manufacturers, the most commonly used are Asus routers, as most have a built-in OpenVPN client and require minimal effort to set up.
Some popular examples include the Asus RT-AX86U, RT-AX68U, and RT-AX88U (AX6000). However, these devices will not support NordLynx.
Most other routers require firmware flashing, which might be tricky and does not work on all platforms. If you want a legacy router that provides OpenVPN encryption, you can also find any router that supports the following custom firmware:
* DD-WRT:
* Tomato:
* OpenWRT:
* Merlin:
The next step will be to learn [how to set up NordVPN on your router](https://support.nordvpn.com/hc/en-us/articles/19426084718865-Setting-up-a-router-with-NordVPN).",https://support.nordvpn.com/hc/en-us/related/click?data=BAh7CjobZGVzdGluYXRpb25fYXJ0aWNsZV9pZGwrCJFt%2BS1eEjoYcmVmZXJyZXJfYXJ0aWNsZV9pZGwrCJHBwctyEjoLbG9jYWxlSSIKZW4tdXMGOgZFVDoIdXJsSSJNL2hjL2VuLXVzL2FydGljbGVzLzIwMTk1NzA3NTQ3MDI1LVdoaWNoLXJvdXRlci1zaG91bGQtSS11c2Utd2l0aC1Ob3JkVlBOBjsIVDoJcmFua2kG--0b5d6e5dfb2ea13ce177da640c13992a1629b11f
Which routers don’t support NordVPN,"On 1 December 2018, NordVPN’s servers stopped supporting L2TP/IPsec and PPTP connections. More about that in [this article](https://nordvpn.com/blog/l2tp-pptp-protocol-update/).
If you use any of the routers listed below with their native firmware, you will not be able to use them with our service:
* Arris
* Belkin
* Cisco
* D-Link
* Huawei
* Linksys (except [WRT32X/WRT32XB AC3200](https://www.linksys.com/support-article?articleNum=270535))
* Nighthawk range routers ([unless the router is using DumaOS](https://www.netgear.com/home/online-gaming/))
* [Netgear](https://support.nordvpn.com/hc/en-us/articles/20282781982481-Can-I-set-up-Netgear-router-with-VPN)
* TRENDnet
* Tenda
* TotoLink
* Ubee
* Orbi
* Spectrum
* Xfinity
* Eero
* Verizon
* AT&T
* FRITZ!Box
* Most ISP-provided routers that were mentioned above
You can install the following custom firmware on some of the aforementioned models to make them work:
* DD-WRT:
* Tomato:
* Padavan:
* OpenWRT:
* Merlin:
## Other tips for router connectivity:
* If your router supports the OpenVPN protocol, search our knowledge base for the name of its manufacturer. You should find a tutorial on how to set it up. You can also check our [router tutorials](https://support.nordvpn.com/hc/en-us/sections/19326876055569-Router) section under the Connectivity category. If you cannot find the setup guide for your router, [contact our customer support](https://support.nordvpn.com/hc/en-us/articles/19482416296593-How-can-I-reach-NordVPN-customer-support) for help.
* If you want a router with out-of-the-box security and anonymity that NordVPN provides, head over to our partners at [FlashRouters](https://nordvpn.com/flashrouters/). They offer pre-configured routers delivering top-notch security and performance.
* Here is our list of [recommended routers for NordVPN](https://support.nordvpn.com/hc/en-us/articles/20195707547025-Which-router-should-I-use-with-NordVPN).",https://support.nordvpn.com/hc/en-us/related/click?data=BAh7CjobZGVzdGluYXRpb25fYXJ0aWNsZV9pZGwrCBEC9%2F2IEjoYcmVmZXJyZXJfYXJ0aWNsZV9pZGwrCJHBwctyEjoLbG9jYWxlSSIKZW4tdXMGOgZFVDoIdXJsSSJKL2hjL2VuLXVzL2FydGljbGVzLzIwMzc5NTg1Njc1NzkzLVdoaWNoLXJvdXRlcnMtZG9uLXQtc3VwcG9ydC1Ob3JkVlBOBjsIVDoJcmFua2kH--9d744ac852607850b65d98dc42e1a502834b31c3
Dedicated NordVPN IP addresses,"When using NordVPN, your IP address changes to that of your VPN server. Normally, you share this IP address with other NordVPN users connected to the same server. However, if you purchase a NordVPN dedicated IP, you will get an IP address that belongs to you and you alone.
The advantages of a NordVPN dedicated IP addressNordVPN's dedicated IP allows you to bypass CAPTCHAs, easily access corporate networks, and avoid blocklists for IP addresses tainted by unscrupulous use. You can use the dedicated IP feature on up to 10 devices at the same time: simply connect with the [Open VPN (TCP)](https://support.nordvpn.com/hc/en-us/articles/20465552867345-Switching-protocol-to-OpenVPN-UDP-or-TCP) or [OpenVPN (UDP)](https://support.nordvpn.com/hc/en-us/articles/20465552867345-Switching-protocol-to-OpenVPN-UDP-or-TCP) protocol. You can also connect via the [NordLynx](https://support.nordvpn.com/hc/en-us/articles/19564565879441-What-is-NordLynx) protocol, however, it only supports one simultaneous connection. Dedicated IP is not available via tvOS, browser extension or the IKEv2 protocol.
## Where does NordVPN have dedicated IP addresses?
NordVPN-dedicated IP addresses are offered in these regions:
* The United States (Los Angeles, Dallas, New York, Chicago, Seattle, Miami)
* Germany (Frankfurt)
* The United Kingdom (London)
* The Netherlands (Amsterdam)
* France (Paris)
* Canada (Toronto)
* Japan (Tokyo)
* Italy (Milan)
* Sweden (Stockholm)
* Australia (Sydney)
* Hong Kong (Hong Kong)
* Switzerland (Zurich)
* Spain (Madrid)
* Belgium (Brussel)
* Denmark (Copenhagen)
* Poland (Warsaw)
* Portugal (Lisbon)
* South Africa (Johannesburg)
* Mexico
* Czech Republic (Prague)
Please note:
* If you are connecting from a country with internet restrictions, the dedicated IP address feature may fail to work as server accessibility from such regions is limited. Please consult our article on [how to connect from within a country with internet restrictions](https://support.nordvpn.com/hc/en-us/articles/19572011021457-Connecting-from-a-country-with-internet-restrictions) for more information.
* In case you wish to change your dedicated IP after a while, you may do that once per subscription. To change the dedicated IP, get in touch with NordVPN support.
Here is a list of tutorials showing you how to connect to your dedicated IP by NordVPN on different platforms:
* [Windows](https://support.nordvpn.com/hc/en-us/articles/20465449537681-How-to-connect-to-your-dedicated-IP-on-Windows)
* [Linux](https://support.nordvpn.com/hc/en-us/articles/19684336200081-How-to-connect-to-your-dedicated-IP-on-Linux)
* [macOS](https://support.nordvpn.com/hc/en-us/articles/19678530026641-How-to-connect-to-your-dedicated-IP-on-macOS)
* [iOS](https://support.nordvpn.com/hc/en-us/articles/19682095316625-How-to-connect-to-your-dedicated-IP-on-iOS)
* [Android](https://support.nordvpn.com/hc/en-us/articles/19682489581585-How-to-connect-to-your-dedicated-IP-on-Android)
You can test dedicated IP servers in the ""dedicated IP"" category in the application. The dedicated IP address you see in the application, would only connect you to a shared IP address. Once you make a purchase and get dedicated IP assigned, you would be able to connect to the specific server that would give you a static IP address that only you would be able to access.
If you wish to purchase a dedicated IP address in these regions, you can find a guide on how to do so here: [How to purchase a dedicated IP address.](https://support.nordvpn.com/hc/en-us/articles/19484196251921-How-to-purchase-a-Dedicated-IP-address)
Please be aware that if you purchase a NordVPN dedicated IP, your email will be linked to that IP address. For more information, please consult our Privacy Policy.",https://support.nordvpn.com/hc/en-us/related/click?data=BAh7CjobZGVzdGluYXRpb25fYXJ0aWNsZV9pZGwrCJG29wO%2BEToYcmVmZXJyZXJfYXJ0aWNsZV9pZGwrCBHfwQ%2BdEjoLbG9jYWxlSSIKZW4tdXMGOgZFVDoIdXJsSSJFL2hjL2VuLXVzL2FydGljbGVzLzE5NTA3ODA4MDI0MjA5LURlZGljYXRlZC1Ob3JkVlBOLUlQLWFkZHJlc3NlcwY7CFQ6CXJhbmtpCQ%3D%3D--e0dd5c3a744abbaed5cfbd2a18f7819a71113f5a
How to start using NordVPN,"If you are interested in starting to use the NordVPN service but are unsure how to do so, this article will introduce you to the steps needed to begin using NordVPN today.
In this article we will cover:
* [Downloading NordVPN](
* [Installing NordVPN](
* [Purchasing a NordVPN plan](
* [Connecting to NordVPN](
* [Connecting to NordVPN on Linux](
* [Additional NordVPN features](
## Downloading NordVPN
To begin using NordVPN, you will first need to download the application for your respective device:
* Download the NordVPN application for Windows
* Download the NordVPN application for macOS
* Download the NordVPN application for Linux
* Download the NordVPN application for Android
* Download the NordVPN application for iOS
## Installing NordVPN
If you are not sure how to install and set up the application, choose the OS you're going to use and follow one of the guides below:
* Learn how to install NordVPN on Windows 7 and 8.1
* Learn how to install NordVPN on Windows 10 and 11
* Learn how to install NordVPN on macOS
* Learn how to install NordVPN on Linux
* Learn how to install NordVPN on Android
* Learn how to install NordVPN on iOS
Once the application has been set up, you need to purchase the desired plan.
## Purchasing a NordVPN plan
The following article will introduce you to [NordVPN Plans and Prices](https://support.nordvpn.com/hc/en-us/articles/19744251757841-Plans-and-prices-of-NordVPN-service). And if you're uncertain how to proceed with the purchase, read the article on [purchasing a NordVPN subscription](https://support.nordvpn.com/hc/en-us/articles/19478048190481-How-to-purchase-a-NordVPN-subscription).
Once you have an active subscription, you need to connect to NordVPN.
## Connecting to NordVPN
In order to connect to NordVPN, follow along below:
1. Use the quick connect button:Alternatively, you can use the dots on the map to connect to specific locations.
2. Click the dot in a country:Lastly, you may also use the search bar.
3. Type in the name of the country you would like to connect to:
### Connecting to NordVPN on Linux
To connect on a Linux device, you will need to type in the following commands :
```
nordvpn connect
```
```
nordvpn c
```
To connect to specific servers, use:
```
nordvpn connect
```
(eg. nordvpn connect uk715)
Follow our article on how to [connect to NordVPN using Linux Terminal](https://support.nordvpn.com/hc/en-us/articles/20164827795345-Connect-to-NordVPN-using-Linux-Terminal).
That's it! Now you can begin using the app and investigating the different features.
## Additional NordVPN features
Here you can find some articles covering NordVPN's features:
* [Different NordVPN server categories explained](https://support.nordvpn.com/hc/en-us/articles/19479130821521-Different-NordVPN-server-categories-explained)
* [NordVPN Kill Switch: how does it work](https://support.nordvpn.com/hc/en-us/articles/19509682644369-NordVPN-Kill-Switch-how-does-it-work)
* [What is Threat Protection Pro™ and Threat Protection?](https://support.nordvpn.com/hc/en-us/articles/19508765521425-What-is-Threat-Protection-Pro-and-Threat-Protection)
* [Dedicated NordVPN IP addresses](https://support.nordvpn.com/hc/en-us/articles/19507808024209-Dedicated-NordVPN-IP-addresses)",https://support.nordvpn.com/hc/en-us/related/click?data=BAh7CjobZGVzdGluYXRpb25fYXJ0aWNsZV9pZGwrCJFpIBV0EjoYcmVmZXJyZXJfYXJ0aWNsZV9pZGwrCJHBwctyEjoLbG9jYWxlSSIKZW4tdXMGOgZFVDoIdXJsSSJBL2hjL2VuLXVzL2FydGljbGVzLzIwMjg5Nzc5OTUyMDE3LUhvdy10by1zdGFydC11c2luZy1Ob3JkVlBOBjsIVDoJcmFua2kI--b853281cbb4de5eac8c2a74a09682a681835fbb1
VPN for DAZN: how to watch it securely,"DAZN features a wide array of exclusive content, and to access it securely from anywhere, using a VPN is the ideal solution. NordVPN provides top-notch encryption, ensuring your data is safe from hackers and surveillance. This guide will walk you through the process of streaming DAZN safely with NordVPN.
Table of contents:
* [Required NordVPN servers](
* [Troubleshooting steps](
## Required NordVPN servers
A VPN lets you bypass geographic restrictions on DAZN while safeguarding your connection with encryption. This shields your personal data, keeping it private and secure from hackers and external surveillance during your streaming sessions.
Connect to the following countries to securely access DAZN:
* Italy
* United States
* Germany
* Spain
* Japan
* Brazil
* Canada
* others
For detailed inquiries about other specific DAZN locations, please reach out to our support team directly.
Please note that when traveling abroad, you can only access the DAZN region linked to your subscription's billing address, allowing you to watch free and globally licensed content but preventing access to local paid content. However, for more specific information on the topic, we recommend contacting the providing service's support team.
## Troubleshooting steps
Using a VPN while streaming might cause certain problems that can interrupt your experience.
If you're having trouble, follow these steps:
1. Clear your browser's cache or test a different browser on your device.
2. Change your DNS addresses to NordVPN’s.
3. Disable location services on your device.
If the steps above don't fix the problem, check out our [troubleshooting guide for streaming](https://nordvpn.com/features/streaming/). For additional help with [streaming securely](https://nordvpn.com/features/streaming/) on DAZN using a VPN, don't hesitate to [contact our customer support team](https://support.nordvpn.com/hc/en-us/articles/19482416296593-How-can-I-reach-NordVPN-customer-support).
As you may be aware, streaming content (from video-on-demand or online TV platforms, etc.) that is only accessible in a country other than your country of residence might, under certain circumstances, be considered illegal. Please double-check the authorization or other justification for your actions with the material you are willing to stream before proceeding.
The NordVPN service should never be used to bypass copyright or other regulations. NordVPN does not promote, induce, or otherwise facilitate the use of the service for such purposes. For more details, please read General Terms of Service and NordVPN Additional Terms.",https://support.nordvpn.com/hc/en-us/related/click?data=BAh7CjobZGVzdGluYXRpb25fYXJ0aWNsZV9pZGwrCJFr%2Bx3LEToYcmVmZXJyZXJfYXJ0aWNsZV9pZGwrCJHBwctyEjoLbG9jYWxlSSIKZW4tdXMGOgZFVDoIdXJsSSJML2hjL2VuLXVzL2FydGljbGVzLzE5NTY0MDc5MDQ5NjE3LVZQTi1mb3ItREFaTi1ob3ctdG8td2F0Y2gtaXQtc2VjdXJlbHkGOwhUOglyYW5raQk%3D--9f30bfef631ad3d0cc7f8d7c690501fdec44bb0e
How to use NordVPN on gaming consoles,"Video gaming consoles do not support built-in VPN functionality. You can’t download NordVPN on PlayStation or Xbox, for example.
To set up your PS4, PS5, Xbox, or other gaming console with NordVPN, you can use one of these methods:
1. Set up NordVPN on your router.
2. Set up a VPN-protected hotspot and connect to that network on your gaming console.",https://support.nordvpn.com/hc/en-us/related/click?data=BAh7CjobZGVzdGluYXRpb25fYXJ0aWNsZV9pZGwrCBHFXQgTEzoYcmVmZXJyZXJfYXJ0aWNsZV9pZGwrCJHBwctyEjoLbG9jYWxlSSIKZW4tdXMGOgZFVDoIdXJsSSJML2hjL2VuLXVzL2FydGljbGVzLzIwOTcyNDY1NjY5MzkzLUhvdy10by11c2UtTm9yZFZQTi1vbi1nYW1pbmctY29uc29sZXMGOwhUOglyYW5raQo%3D--a75554b7451bb15ae7091723b3b547529373d8ee
Why use NordVPN DNS servers?,"DNS servers translate human-friendly domain names such as www.google.com into IP addresses like 192.168.1.1 so your device can connect to websites. When you type a website address, your device asks a DNS server for the IP address. If the server doesn’t know it, it looks it up from other servers. Changing DNS servers provides you with increased security as well as speed. With default DNS you may be subject to DNS hijacking. DNS hijacking is a cyberattack where attackers redirect or alter DNS settings to send users to fake websites or malicious servers. This can lead to phishing, malware infections, data theft, or blocking access to legitimate sites. It often occurs through router vulnerabilities or malware.",https://support.nordvpn.com/hc/en-us/articles/19587726859793-What-are-the-addresses-of-my-NordVPN-DNS-servers
What are NordVPN DNS server addresses?,"NordVPN offers private DNS in its apps, which ensures tighter security and privacy for your traffic. The NordVPN native applications automatically use NordVPN's DNS servers when connected to VPN. This prevents DNS leaks during your VPN connection, ensuring that your NordVPN private DNS requests are safe.
NordVPN's DNS server addresses are 103.86.96.100 and 103.86.99.100. [Learn how to change NordVPN DNS servers ]( on it later).
## Why use NordVPN DNS servers?
DNS servers translate human-friendly domain names such as www.google.com into IP addresses like 192.168.1.1 so your device can connect to websites. When you type a website address, your device asks a DNS server for the IP address. If the server doesn’t know it, it looks it up from other servers. Changing DNS servers provides you with increased security as well as speed. With default DNS you may be subject to DNS hijacking. DNS hijacking is a cyberattack where attackers redirect or alter DNS settings to send users to fake websites or malicious servers. This can lead to phishing, malware infections, data theft, or blocking access to legitimate sites. It often occurs through router vulnerabilities or malware.
## How to change NordVPN DNS servers
You can configure your device manually to use private NordVPN DNS servers. This is handy when you are connecting to NordVPN from a non-native app (for example, third-party OpenVPN clients) or if there are any issues setting up the DNS addresses in the NordVPN app. You can alternatively use other preferred DNS servers.Here are tutorials on how to manually set up NordVPN DNS server connections on your operating system:Windows: Change your DNS servers on WindowsmacOS: Change your DNS servers on macOSLinux: Change your DNS servers on LinuxAndroid: Change your DNS servers on AndroidiOS: Change your DNS servers on iOS",https://support.nordvpn.com/hc/en-us/articles/19587726859793-What-are-the-addresses-of-my-NordVPN-DNS-servers
How to set up NordVPN with Chrome extension,"## How to set up the NordVPN Chrome extension
1. Download [VPN Chrome extension](https://nordvpn.com/download/chrome-extension/) form our website, or you can get it from [Google Chrome Web Store](https://chromewebstore.google.com/detail/nordvpn-vpn-proxy-for-pri/fjoaledfpmneenckfbpdfhkmimnjocfa).
2. Click on Add to Chrome button. 
3. Chrome might ask you if you want to add the extension. Click Add extension.
4. Then you will receive a NordVPN notification that the extension was added successfully.
5. After the installation is finished, the NordVPN logo will appear on the toolbar in the top-right corner of the browser. Click on the NordVPN logo and you will be prompted to either login or sign up using Nord Account.
## How to use and customize the NordVPN Chrome Extension
Now that you have a VPN for Chrome let's look at how you can make your first connection and adjust the extension settings to suit your needs.
1. Protected status: when you connect to a NordVPN server, this bar will confirm that your connection is successful by displaying the status as Protected.
2. Quick Connect: the fastest way to begin using the NordVPN extension. After pressing Quick Connect, you'll immediately connect to a NordVPN server.
3. Search: whereas the Quick Connect option will decide on a server location for you, this option allows you to specify the country of the NordVPN server.
4. Settings: here, you can find your General, Connection, Security and privacy settings. General: in these settings, you can find your subscription information, application appearance, language preferences, and a function to import and export [split tunneling](https://support.nordvpn.com/hc/en-us/articles/20321703651985-Split-Tunneling-feature-on-NordVPN-extension) settings.Connection: when accessing connection settings, you can choose to automatically connect to NordVPN servers or add URLs that you wish to be excluded from the NordVPN connection.Security and privacy: enable the [WebRTC](https://support.nordvpn.com/hc/en-us/articles/20318383008529-How-to-stop-WebRTC-leaks) Leaks option and the [Threat Protection](https://support.nordvpn.com/General-info/Features/1047407402/What-are-Threat-Protection-and-Threat-Protection-Lite.htm) feature. Also, choose to turn on security warnings for suspicious websites.
5. Support Assistance: more information about the extension and live chat with an agent option can be found here.
6. Notifications: updates and news about the NordVPN extension.
7. Main extension window: If you click here, you can open the main extension window.
8. List of Recently Connected Countries: This section displays the countries to which you have established a recent connection. In case you haven't connected to any server yet, you will find recommendations for countries to connect to.
And that's it! Enjoy browsing securely using your VPN for Chrome.",https://support.nordvpn.com/hc/en-us/related/click?data=BAh7CjobZGVzdGluYXRpb25fYXJ0aWNsZV9pZGwrCBHuvf6BEjoYcmVmZXJyZXJfYXJ0aWNsZV9pZGwrCJFr%2Bx3LEToLbG9jYWxlSSIKZW4tdXMGOgZFVDoIdXJsSSJSL2hjL2VuLXVzL2FydGljbGVzLzIwMzQ5NTMzOTQxMjY1LUhvdy10by1zZXQtdXAtTm9yZFZQTi13aXRoLUNocm9tZS1leHRlbnNpb24GOwhUOglyYW5raQY%3D--70f6249d9311ea3cde21d4d14d9a24fbbba8727e
Troubleshooting steps for streaming,"Streaming issues like buffering, poor video quality, or interruptions while connected to NordVPN can disrupt your viewing experience. Whether the issue lies with your internet or device, multiple potential causes exist. This guide will walk you through common troubleshooting steps to quickly resolve these issues and restore a smooth streaming experience.
Table of contents:
* [Connection leakage troubleshooting](
* [Troubleshooting steps for various devices](
## Connection leakage troubleshooting
One possible challenge users encounter when troubleshooting streaming issues is a leaking connection. This sometimes occurs when part of their internet traffic bypasses the VPN, leaving sensitive data exposed or causing interruptions in their streaming experience.
If you're having issues with certain streaming services while using NordVPN, first check if your connection is protected by following these steps:
1. Ensure that your connection is set up correctly by checking whether your status says protected on [our website](https://nordvpn.com/):
2. If you are connected to one of our servers but your status says unprotected, proceed to the following steps to ensure your connection is secure. Stop any leaks from your connection by following these tutorials:
* * [WebRTC leak prevention](https://support.nordvpn.com/hc/en-us/articles/20318383008529-How-to-stop-WebRTC-leaks)
* [Disable IPv6](https://support.nordvpn.com/hc/en-us/articles/20350921723409-How-to-disable-IPv6)
## Troubleshooting steps for various devices
Technical issues can sometimes arise when streaming content due to various device-related factors. If your connection is secure and the issues persist, find your device in the tutorials below and follow the instructions. After each step, check if the issue is resolved. If not, proceed to the next step.
### For Windows, macOS, Linux devices
1. Try connecting to a different server of the region you would like to access the streaming service.
2. [Clear the cache of your browser.](https://nordvpn.com/blog/how-to-clear-your-cache/)
3. Try to use a different browser/incognito mode.
4. [Set up NordVPN DNS addresses](https://support.nordvpn.com/hc/en-us/articles/19587726859793-What-are-the-addresses-of-my-NordVPN-DNS-servers) to 103.86.99.100 and 103.86.96.100 on your device.
5. Test the streaming accessibility changes without using [Threat Protection or Threat Protection Pro™](https://support.nordvpn.com/hc/en-us/articles/19508765521425-What-is-Threat-Protection-Pro-and-Threat-Protection) if the features are enabled.
6. [Check](https://support.nordvpn.com/hc/en-us/articles/20290051742353-How-to-check-the-NordVPN-app-version) whether your NordVPN application is updated to the[ latest version](https://nordvpn.com/blog/category/service-updates/app-updates/).
7. As a last resort - try using the[ NordVPN extension](https://nordvpn.com/features/proxy-extension/) instead and access the streaming through your browser. Download the extension by clicking [here](https://support.nordvpn.com/hc/en-us/articles/20321833806865-How-to-set-up-the-NordVPN-browser-extension).
### For Android/iOS devices
1. Try connecting to a different server of the region you would like to access the streaming service.
2. If you are using a specific streaming service app, force stop it, clear the app cache, and restart it.
3. If you are accessing the streaming platform on a browser, [clear your browser's cache.](https://nordvpn.com/blog/how-to-clear-your-cache/)
4. [Set up NordVPN DNS addresses](https://support.nordvpn.com/hc/en-us/articles/19587726859793-What-are-the-addresses-of-my-NordVPN-DNS-servers) to 103.86.99.100 and 103.86.96.100 on your device.
5. Test the streaming accessibility changes without using [Threat Protection or Threat Protection Pro™](https://support.nordvpn.com/hc/en-us/articles/19508765521425-What-is-Threat-Protection-Pro-and-Threat-Protection) if the features are enabled.
### For Android TV boxes
1. Try connecting to a different server in the region where you would like to access the streaming service.
2. If you are using a specific streaming service app, force stop it, clear the app cache, and restart it, here are the steps:
1. Go to Settings > Preferences section > More settings > Apps.
2. Find the streaming service app and press on it.
3. Click the Force Stop button.
4. Click the Clear Cache button.
5. Restart the application.
3. [Set up NordVPN DNS addresses](https://support.nordvpn.com/hc/en-us/articles/20466230743569-Change-your-DNS-servers-on-Android-TV-with-NordVPN) to 103.86.99.100 and 103.86.96.100 on your device.
### For Amazon Fire TV devices
1. Try connecting to a different server of the region you would like to access the streaming service.
2. If you are using a specific streaming service app, force stop it, clear the app cache, and restart it:
1. Go to Settings > Applications > Manage Installed Applications.
2. Find the streaming service app and press on it.
3. Click the Force Stop button.
4. Click the Clear Cache button.
5. Restart the application.
3. [Set up NordVPN DNS addresses](https://support.nordvpn.com/hc/en-us/articles/20466230743569-Change-your-DNS-servers-on-Android-TV-with-NordVPN) to 103.86.99.100 and 103.86.96.100 on your device.
The NordVPN service should never be used to bypass copyright regulations. NordVPN does not promote, condone, or endorse the use of the service for such purposes. For more details, please read the NordVPN [Terms of Service](https://my.nordaccount.com/legal/terms-of-service/).
If you experience other issues or have additional questions, do not hesitate to [submit a request](https://support.nordvpn.com/hc/en-us/articles/19482416296593-How-to-reach-NordVPN-customer-support) to our customer success team.",https://support.nordvpn.com/hc/en-us/related/click?data=BAh7CjobZGVzdGluYXRpb25fYXJ0aWNsZV9pZGwrCBFq9SjKEToYcmVmZXJyZXJfYXJ0aWNsZV9pZGwrCJFr%2Bx3LEToLbG9jYWxlSSIKZW4tdXMGOgZFVDoIdXJsSSJKL2hjL2VuLXVzL2FydGljbGVzLzE5NTU5OTY4MjM4MDk3LVRyb3VibGVzaG9vdGluZy1zdGVwcy1mb3Itc3RyZWFtaW5nBjsIVDoJcmFua2kH--8a45548a69d61f0756a36ebfe5a44255d3a030b3
VPN for Amazon Prime: how to watch it securely,"Amazon Prime provides a wealth of exclusive content, and to access it safely from any location, a VPN is an excellent choice. By using NordVPN, your connection is securely encrypted, safeguarding your data from hackers and unwanted surveillance. This article will show you how to access the Amazon Prime streaming service with NordVPN.
Table of contents:
* [Required NordVPN servers](
* [Troubleshooting steps](
## Required NordVPN servers
VPN not only allows you to overcome geo-restrictions on Amazon Prime, but it also protects your connection by encrypting your data. This keeps your information secure and private, safeguarding it from hackers and unwanted surveillance while you're streaming. While connected to [NordVPN servers](https://nordvpn.com/servers/), you can safely access Amazon Prime services in the following countries:
* United States
* Japan
* Canada
* United Kingdom
* Australia
* Italy
* France
* Germany
* New Zealand
* and others
Please note that you should only access Amazon Prime in the same region as is stated in the payment details of your Amazon Prime subscription. The terms and conditions of Amazon Prime do not allow you to change the region of your streaming library to one that is different from your billing address.
## Troubleshooting steps
Using a VPN for streaming can lead to several issues, like interruptions or difficulty accessing content, which can impact your overall experience.
If you're having trouble connecting, try these solutions to resolve the issue:
* Connect to a different server in the same region of your wished streaming content.
* Clear your browser’s cache or test a different browser on your device.
* [Change your DNS addresses to NordVPN's](https://support.nordvpn.com/hc/en-us/articles/19587726859793-What-are-NordVPN-DNS-server-addresses).
* Disable location services on your device.
If the above fails to resolve your issue, please check our troubleshooting steps for streaming. For any additional questions on how to [stream securely](https://nordvpn.com/features/streaming/) using a VPN for Amazon Prime, [contact our customer support](https://support.nordvpn.com/hc/en-us/articles/19482416296593-How-can-I-reach-NordVPN-customer-support).
Under certain circumstances, streaming content (using video on demand, online TV platforms, or other sources) that is only accessible outside your country of residence may be illegal. Always check if you have the legal authority to access the material you wish to stream.
The NordVPN service should never be used to bypass copyright or other regulations. NordVPN does not promote, induce, or otherwise facilitate the use of the service for such purposes. For more details, please read our [General Terms of Service](https://my.nordaccount.com/legal/terms-of-service/) and the [NordVPN Additional Terms](https://my.nordaccount.com/legal/terms-of-service/nordvpn/).",https://support.nordvpn.com/hc/en-us/related/click?data=BAh7CjobZGVzdGluYXRpb25fYXJ0aWNsZV9pZGwrCBHXhubKEToYcmVmZXJyZXJfYXJ0aWNsZV9pZGwrCJFr%2Bx3LEToLbG9jYWxlSSIKZW4tdXMGOgZFVDoIdXJsSSJUL2hjL2VuLXVzL2FydGljbGVzLzE5NTYzMTQ4NjYyNTQ1LVZQTi1mb3ItQW1hem9uLVByaW1lLWhvdy10by13YXRjaC1pdC1zZWN1cmVseQY7CFQ6CXJhbmtpCA%3D%3D--b172bd072365d2f52977595ee42658293a5e8d75
VPN for BBC: how to watch it securely,"With the rise of streaming services like BBC, many users turn to VPNs to access content safely and avoid regional restrictions. In this guide, we’ll cover the essentials of using a VPN for BBC streaming, offering useful tips to improve your experience and resolve any potential issues.
Table of contents:
* [Required NordVPN servers](
* [Troubleshooting steps](
## Required NordVPN servers
VPN provides the ability to bypass restrictions on BBC and also strengthens your security by encrypting your data, keeping your information safe from prying eyes and cyber threats. To securely stream content for BBC, we suggest connecting to [NordVPN servers](https://nordvpn.com/servers/) while using the BBC streaming platform:
* BBC iPlayer (UK): Connect to any [VPN server in the United Kingdom](https://nordvpn.com/servers/uk/).
* BBC US: Connect to any [VPN server in the United States](https://nordvpn.com/servers/usa/).
* BBC AU: Connect to any [NordVPN server in Australia](https://nordvpn.com/servers/).
## Troubleshooting steps
Streaming through a VPN can sometimes result in disruptions or difficulties accessing content, which can hinder the experience.
If you're encountering connection issues, consider trying these solutions to resolve them:
* Connect to a different server in the same region of your wished streaming content.
* Clear your browser’s cache or test a different browser on your device.
* [Change your DNS addresses to NordVPN's](https://support.nordvpn.com/hc/en-us/articles/19587726859793-What-are-NordVPN-DNS-server-addresses).
* Disable location services on your device.
If you're still experiencing issues, please review our [troubleshooting steps for streaming](https://support.nordvpn.com/hc/en-us/articles/19559968238097-Troubleshooting-steps-for-streaming). For more assistance on [streaming safely](https://nordvpn.com/features/streaming/) with a VPN for the BBC, [reach out to our support team](https://support.nordvpn.com/hc/en-us/articles/19482416296593-How-can-I-reach-NordVPN-customer-support).
Under certain circumstances, streaming content (using video on demand, online TV platforms, or other sources) that is only accessible outside your country of residence may be illegal. Always check if you have the legal authority to access the material you wish to stream.
The NordVPN service should never be used to bypass copyright or other regulations. NordVPN does not promote, induce, or otherwise facilitate the use of the service for such purposes. For more details, please read our[ General Terms of Service](https://my.nordaccount.com/legal/terms-of-service/) and[ the NordVPN Additional Terms](https://my.nordaccount.com/legal/terms-of-service/nordvpn/).",https://support.nordvpn.com/hc/en-us/related/click?data=BAh7CjobZGVzdGluYXRpb25fYXJ0aWNsZV9pZGwrCBHp%2FVTKEToYcmVmZXJyZXJfYXJ0aWNsZV9pZGwrCJFr%2Bx3LEToLbG9jYWxlSSIKZW4tdXMGOgZFVDoIdXJsSSJLL2hjL2VuLXVzL2FydGljbGVzLzE5NTYwNzA2OTkyNDAxLVZQTi1mb3ItQkJDLWhvdy10by13YXRjaC1pdC1zZWN1cmVseQY7CFQ6CXJhbmtpCQ%3D%3D--32425748e61b4f039a77c03b5d4171c522ec19a0
Why Choose FlashRouters?,[FlashRouters](https://nordvpn.com/flashrouters/) offers some of the best routers for NordVPN pre-configured to deliver top-notch security and performance:,https://support.nordvpn.com/hc/en-us/related/click?data=BAh7CjobZGVzdGluYXRpb25fYXJ0aWNsZV9pZGwrCJFt%2BS1eEjoYcmVmZXJyZXJfYXJ0aWNsZV9pZGwrCBEmsyz1EToLbG9jYWxlSSIKZW4tdXMGOgZFVDoIdXJsSSJNL2hjL2VuLXVzL2FydGljbGVzLzIwMTk1NzA3NTQ3MDI1LVdoaWNoLXJvdXRlci1zaG91bGQtSS11c2Utd2l0aC1Ob3JkVlBOBjsIVDoJcmFua2kJ--a090ee7f884d0288609b837cffb79dd01c791770
Dedicated IP: Renewal and cancellation,"If you want to renew your dedicated IP service or cancel auto-renewal for your dedicated IP subscription, the steps you need to take depend on how you purchased the dedicated IP service.
## You bought the dedicated IP in your Nord Account
If you have purchased a dedicated IP in your [Nord Account](https://my.nordaccount.com/), the service will be renewed automatically. It makes no difference if you bought the dedicated IP as a standalone service or got it with a VPN bundle.
If you no longer want a particular dedicated IP anymore, you can[ cancel auto-renewal for your subscription in your Nord Account](https://support.nordvpn.com/hc/en-us/articles/19556844985489-How-to-cancel-a-subscription). Please note that this is not a refund, as outlined in[ NordVPN’s refund policy](https://support.nordvpn.com/hc/en-us/articles/19476991311121-What-is-your-money-back-policy).
## You bought the dedicated IP using a coupon code
Dedicated IP services purchased using a coupon code are not subject to auto-renewal. To renew your dedicated IP addresses, you will need to manually[ buy the dedicated IP service](https://support.nordvpn.com/hc/en-us/articles/19484196251921-How-to-purchase-a-dedicated-IP-address).
When your dedicated IP subscription is about to expire, we will send a reminder about renewal to your registered Nord Account email address.",https://support.nordvpn.com/hc/en-us/related/click?data=BAh7CjobZGVzdGluYXRpb25fYXJ0aWNsZV9pZGwrCBGwWaEXFToYcmVmZXJyZXJfYXJ0aWNsZV9pZGwrCJFr%2Bx3LEToLbG9jYWxlSSIKZW4tdXMGOgZFVDoIdXJsSSJML2hjL2VuLXVzL2FydGljbGVzLzIzMTkxMjM1NDQwNjU3LURlZGljYXRlZC1JUC1SZW5ld2FsLWFuZC1jYW5jZWxsYXRpb24GOwhUOglyYW5raQo%3D--9e88308ed40b6c05e5d359d479f440e5435b276d
Troubleshooting steps for streaming,"Streaming issues like buffering, poor video quality, or interruptions while connected to NordVPN can disrupt your viewing experience. Whether the issue lies with your internet or device, multiple potential causes exist. This guide will walk you through common troubleshooting steps to quickly resolve these issues and restore a smooth streaming experience.
Table of contents:
* [Connection leakage troubleshooting](
* [Troubleshooting steps for various devices](
## Connection leakage troubleshooting
One possible challenge users encounter when troubleshooting streaming issues is a leaking connection. This sometimes occurs when part of their internet traffic bypasses the VPN, leaving sensitive data exposed or causing interruptions in their streaming experience.
If you're having issues with certain streaming services while using NordVPN, first check if your connection is protected by following these steps:
1. Ensure that your connection is set up correctly by checking whether your status says protected on [our website](https://nordvpn.com/):
2. If you are connected to one of our servers but your status says unprotected, proceed to the following steps to ensure your connection is secure. Stop any leaks from your connection by following these tutorials:
* * [WebRTC leak prevention](https://support.nordvpn.com/hc/en-us/articles/20318383008529-How-to-stop-WebRTC-leaks)
* [Disable IPv6](https://support.nordvpn.com/hc/en-us/articles/20350921723409-How-to-disable-IPv6)
## Troubleshooting steps for various devices
Technical issues can sometimes arise when streaming content due to various device-related factors. If your connection is secure and the issues persist, find your device in the tutorials below and follow the instructions. After each step, check if the issue is resolved. If not, proceed to the next step.
### For Windows, macOS, Linux devices
1. Try connecting to a different server of the region you would like to access the streaming service.
2. [Clear the cache of your browser.](https://nordvpn.com/blog/how-to-clear-your-cache/)
3. Try to use a different browser/incognito mode.
4. [Set up NordVPN DNS addresses](https://support.nordvpn.com/hc/en-us/articles/19587726859793-What-are-the-addresses-of-my-NordVPN-DNS-servers) to 103.86.99.100 and 103.86.96.100 on your device.
5. Test the streaming accessibility changes without using [Threat Protection or Threat Protection Pro™](https://support.nordvpn.com/hc/en-us/articles/19508765521425-What-is-Threat-Protection-Pro-and-Threat-Protection) if the features are enabled.
6. [Check](https://support.nordvpn.com/hc/en-us/articles/20290051742353-How-to-check-the-NordVPN-app-version) whether your NordVPN application is updated to the[ latest version](https://nordvpn.com/blog/category/service-updates/app-updates/).
7. As a last resort - try using the[ NordVPN extension](https://nordvpn.com/features/proxy-extension/) instead and access the streaming through your browser. Download the extension by clicking [here](https://support.nordvpn.com/hc/en-us/articles/20321833806865-How-to-set-up-the-NordVPN-browser-extension).
### For Android/iOS devices
1. Try connecting to a different server of the region you would like to access the streaming service.
2. If you are using a specific streaming service app, force stop it, clear the app cache, and restart it.
3. If you are accessing the streaming platform on a browser, [clear your browser's cache.](https://nordvpn.com/blog/how-to-clear-your-cache/)
4. [Set up NordVPN DNS addresses](https://support.nordvpn.com/hc/en-us/articles/19587726859793-What-are-the-addresses-of-my-NordVPN-DNS-servers) to 103.86.99.100 and 103.86.96.100 on your device.
5. Test the streaming accessibility changes without using [Threat Protection or Threat Protection Pro™](https://support.nordvpn.com/hc/en-us/articles/19508765521425-What-is-Threat-Protection-Pro-and-Threat-Protection) if the features are enabled.
### For Android TV boxes
1. Try connecting to a different server in the region where you would like to access the streaming service.
2. If you are using a specific streaming service app, force stop it, clear the app cache, and restart it, here are the steps:
1. Go to Settings > Preferences section > More settings > Apps.
2. Find the streaming service app and press on it.
3. Click the Force Stop button.
4. Click the Clear Cache button.
5. Restart the application.
3. [Set up NordVPN DNS addresses](https://support.nordvpn.com/hc/en-us/articles/20466230743569-Change-your-DNS-servers-on-Android-TV-with-NordVPN) to 103.86.99.100 and 103.86.96.100 on your device.
### For Amazon Fire TV devices
1. Try connecting to a different server of the region you would like to access the streaming service.
2. If you are using a specific streaming service app, force stop it, clear the app cache, and restart it:
1. Go to Settings > Applications > Manage Installed Applications.
2. Find the streaming service app and press on it.
3. Click the Force Stop button.
4. Click the Clear Cache button.
5. Restart the application.
3. [Set up NordVPN DNS addresses](https://support.nordvpn.com/hc/en-us/articles/20466230743569-Change-your-DNS-servers-on-Android-TV-with-NordVPN) to 103.86.99.100 and 103.86.96.100 on your device.
The NordVPN service should never be used to bypass copyright regulations. NordVPN does not promote, condone, or endorse the use of the service for such purposes. For more details, please read the NordVPN [Terms of Service](https://my.nordaccount.com/legal/terms-of-service/).
If you experience other issues or have additional questions, do not hesitate to [submit a request](https://support.nordvpn.com/hc/en-us/articles/19482416296593-How-to-reach-NordVPN-customer-support) to our customer success team.",https://support.nordvpn.com/hc/en-us/related/click?data=BAh7CjobZGVzdGluYXRpb25fYXJ0aWNsZV9pZGwrCBFq9SjKEToYcmVmZXJyZXJfYXJ0aWNsZV9pZGwrCJGIGx%2FLEToLbG9jYWxlSSIKZW4tdXMGOgZFVDoIdXJsSSJKL2hjL2VuLXVzL2FydGljbGVzLzE5NTU5OTY4MjM4MDk3LVRyb3VibGVzaG9vdGluZy1zdGVwcy1mb3Itc3RyZWFtaW5nBjsIVDoJcmFua2kG--3b1d65623e8866f09f8eb97468cd0ee69414f257
VPN for MAX: watch it securely,"Max has become a go-to platform for many, but accessing its full content library can be tricky due to geo-restrictions. If you're looking to enhance your streaming experience and unlock more content, using a VPN is a smart solution. In this guide, we’ll show you how to set up a VPN for Max, with tips to help you get the most out of your viewing experience.
Table of contents:
* [Required NordVPN servers](
* [Troubleshooting steps](
## Required NordVPN servers
A VPN does more than just help you get around geo-blocks on MAX; it also encrypts your connection, keeping your data secure. This added layer of protection ensures your personal information remains safe from hackers and anyone trying to spy while you stream.
To securely access MAX, simply connect to any NordVPN server, ensuring a safe and reliable experience. Viewing streaming content from a specific region requires selecting a VPN server in the designated country. For example, to access MAX United States region - connect to any [NordVPN US server](https://nordvpn.com/servers/usa/). For detailed inquiries about other specific supported MAX locations, please reach out to our support team directly.
## Troubleshooting steps
When you stream while using a VPN, you may encounter certain challenges that can hinder the experience.
If you are experiencing any issues, follow these steps:
1. [Clear your browser's cache](https://nordvpn.com/blog/how-to-clear-your-cache/) or test a different browser on your device.
2. [Change your DNS addresses to NordVPN’s](https://support.nordvpn.com/hc/en-us/articles/19587726859793-What-are-the-addresses-of-my-NordVPN-DNS-servers).
3. Disable location services on your device.
If you're still experiencing issues, take a look at our [troubleshooting steps for streaming](https://support.nordvpn.com/hc/en-us/articles/19559968238097-Troubleshooting-steps-for-streaming). For additional assistance on [streaming safely](https://nordvpn.com/features/streaming/) with a VPN for the MAX, [reach out to our support team](https://support.nordvpn.com/hc/en-us/articles/19482416296593-How-can-I-reach-NordVPN-customer-support).
Under certain circumstances, streaming content (using video on demand, online TV platforms, or other sources) that is only accessible outside your country of residence may be illegal. Always check if you have the legal authority to access the material you wish to stream.
The NordVPN service should never be used to bypass copyright regulations. NordVPN does not promote, condone, or endorse the use of the service for such purposes. For more details, please read the NordVPN Terms of Service.",https://support.nordvpn.com/hc/en-us/related/click?data=BAh7CjobZGVzdGluYXRpb25fYXJ0aWNsZV9pZGwrCBFx5xrLEToYcmVmZXJyZXJfYXJ0aWNsZV9pZGwrCJGIGx%2FLEToLbG9jYWxlSSIKZW4tdXMGOgZFVDoIdXJsSSJEL2hjL2VuLXVzL2FydGljbGVzLzE5NTY0MDI3NDA4NjU3LVZQTi1mb3ItTUFYLXdhdGNoLWl0LXNlY3VyZWx5BjsIVDoJcmFua2kH--7723ac9e4946ace2f47b0867abf7fd6b5f59497a
Installing NordVPN on Linux distributions,"In this article, we'll guide you through NordVPN installation and usage on Linux. We offer .deb and .rpm packages that are compatible with Debian, Ubuntu, Elementary OS, Linux Mint, Fedora, QubesOS, RHEL, CentOS, and openSUSE systems. The NordVPN native application is the recommended option for connecting to NordVPN servers on your Linux device. We designed it with your experience in mind, giving you features like auto-connect, automated Kill Switch, and Threat Protection.
## Table of contents:
* [Installing NordVPN on Linux](
* [Using NordVPN on Linux](
* [Logging in](
* [Account and settings](
* [Specialty servers](
* [Features and configurations](
* [LAN discovery and allowlists](
## Installing NordVPN on Linux
To start using the NordVPN application for Linux, you need to [download the NordVPN Linux client](https://nordvpn.com/download/linux/). You can do that in 2 ways:
1. By [downloading a Snap package](https://snapcraft.io/nordvpn).Snaps are app packages for desktop, cloud, and IoT that are easy to install, secure, cross-platform, and dependency-free. If you do not have Snap pre-installed, you may follow [Snap setup guides for various Linux distributions](https://snapcraft.io/docs/installing-snapd#:~:text=Zorin%20OS-,Without%20snap,-For%20distributions%20without).Please note that currently, we still do not support arm64, but our developers are working on this.
2. By working in the terminal:
1. Open the terminal;
2. Write the command below:
```
sh <(curl -sSf https://downloads.nordcdn.com/apps/linux/install.sh[](https://downloads.nordcdn.com/apps/linux/install.sh))
```
3. Following any on-screen instructions.
Note: If you do not have a curl package, evidenced by the fact that the above does not work, you can alternatively use this command:
```
sh <(wget -qO - https://downloads.nordcdn.com/apps/linux/install.sh)
```
Additionally, if you receive the following issue: Whoops! Permission denied accessing /run/nordvpn/nordvpnd.sock, all you need to do is write the following command:
```
sudo usermod -aG nordvpn $USER
```
and then reboot your device.
## Using NordVPN on Linux
After you have installed the NordVPN application, you can start using it!
Please note that in NordVPN Linux application version 3.18.4, network traffic from the LAN through a VPN-connected computer is blocked by default. To unblock LAN traffic, turn LAN discovery ON or add to the allowlist any subnet or IP traffic to be forwarded.
### Logging in
If you're using a Linux device without a graphical user interface, follow our guide on logging in to NordVPN on Linux devices without GUI.
If you're using a Linux device with a graphical user interface, you can start using it with the commands below:
1. Log in to your NordVPN account by using this command:
```
nordvpn login
```
2. Connect to a NordVPN server by using the command below:
```
nordvpn connect
```
### Account and settings
Here you can find the list of available NordVPN commands for Linux.
Access the NordVPN client settings:
---
```
nordvpn
```
Get an extensive explanation of all commands:
```
man nordvpn
```
See the list of available commands or help for a specific command:
```
nordvpn help
```
| or | ```
nordvpn h
```
Log in or log out:
```
nordvpn login
```
| or | ```
nordvpn logout
```
Connect to a recommended NordVPN server:
```
nordvpn connect
```
| or | ```
nordvpn c
```
Connect to a specific server (e.g. nordvpn connect uk715):
```
nordvpn connect
```
Disconnect from the VPN:
```
nordvpn disconnect
```
| or | ```
nordvpn d
```
See account information:
```
nordvpn account
```
Register a new user account:
```
nordvpn register
```
Rate your last connection quality (1-5):
```
nordvpn rate
```
See the current settings:
```
nordvpn settings
```
See the connection status:
```
nordvpn status
```
See the country list:
```
nordvpn countries
```
See the city list (e.g.: nordvpn cities united_states):
```
nordvpn cities
```
See a list of available server groups:
```
nordvpn groups
```
### Specialty servers
Connect to the closest Double VPN server:
---
```
nordvpn c double_vpn
```
Connect to a specific country using Double VPN servers:
```
nordvpn connect --group double_vpn
```
Connect to a P2P server:
---
```
nordvpn connect p2p
```
Connect to a specific country using P2P servers:
```
nordvpn connect --group p2p
```
Connect to a Dedicated IP server:
---
```
nordvpn connect Dedicated_IP
```
### Features and configurations
Set a configuration option:
---
```
nordvpn set
```
| or | ```
nordvpn s
```
Enable or disable Threat Protection:
```
nordvpn set threatprotectionlite on
```
| or | ```
nordvpn set threatprotectionlite off
```
Enable or disable Kill Switch:
```
nordvpn set killswitch on
```
| or | ```
nordvpn set killswitch off
```
Enable or disable auto-connect:
```
nordvpn set autoconnect on
```
| or | ```
nordvpn set autoconnect off
```
Set a specific server for automatic connection (e.g.: nordvpn set autoconnect on us2435):
```
nordvpn set autoconnect on
```
Enable or disable notifications:
```
nordvpn set notify on
```
| or | ```
nordvpn set notify off
```
Set custom DNS (you can set up a single DNS or two, just add spaces in between):
```
nordvpn set dns 1.1.1.1
```
| or | ```
nordvpn set dns 1.1.1.1 1.0.0.1
```
[Switch between UDP and TCP protocols](https://support.nordvpn.com/hc/en-us/articles/20465552867345-Switching-protocol-to-OpenVPN-UDP-or-TCP):
```
nordvpn set protocol udp
```
| or | ```
nordvpn set protocol tcp
```
Enable or disable [obfuscated servers](https://nordvpn.com/features/obfuscated-servers/):
```
nordvpn set obfuscate on
```
| or | ```
nordvpn set dobfuscate off
```
Set connection technology (OpenVPN or [NordLynx](https://nordvpn.com/blog/nordlynx-protocol-wireguard/)):
```
nordvpn set technology OpenVPN
```
| or | ```
nordvpn set technology NordLynx
```
Turn [Meshnet](https://nordvpn.com/meshnet/) on or off on your device:
```
nordvpn set meshnet on
```
| or | ```
nordvpn set meshnet off
```
To enable or disable the [post-quantum protection in NordVPN](https://support.nordvpn.com/hc/en-us/articles/30046321712529-NordVPN-Post-quantum-encryption-explained):
```
nordvpn set pq on
```
| or | ```
nordvpn set pq off
```
### LAN discovery and allowlists
Enable or disable LAN discovery:
---
```
nordvpn set lan-discovery enable
```
| or | ```
nordvpn set lan-discovery disable
```
Get more information on LAN discovery:
```
nordvpn set lan-discovery --help
```
Add or remove a rule to allowlist a specified incoming port (you can allowlist multiple ports — just separate their numbers with a space):
```
nordvpn whitelist add port
```
| or | ```
nordvpn whitelist remove port
```
Add or remove a rule to allowlist a specified subnet:
```
nordvpn whitelist add subnet
```
| or | ```
nordvpn whitelist remove subnet
```",https://support.nordvpn.com/hc/en-us/related/click?data=BAh7CjobZGVzdGluYXRpb25fYXJ0aWNsZV9pZGwrCBFrCUVeEjoYcmVmZXJyZXJfYXJ0aWNsZV9pZGwrCJGIGx%2FLEToLbG9jYWxlSSIKZW4tdXMGOgZFVDoIdXJsSSJQL2hjL2VuLXVzL2FydGljbGVzLzIwMTk2MDk0NDcwOTI5LUluc3RhbGxpbmctTm9yZFZQTi1vbi1MaW51eC1kaXN0cmlidXRpb25zBjsIVDoJcmFua2kI--8e252dad05ff49353301094ce029bb87a8abdf46
Switching protocol to OpenVPN UDP or TCP,"Some NordVPN server categories, found under the specialty server section, are available only while using OpenVPN UDP or TCP protocols.
Currently, these categories are Double VPN and a part of our obfuscated Servers. This article contains a list of instructions on how to switch your connection protocol on various platforms.
* [Windows](https://support.nordvpn.com/hc/en-us/articles/19774135293969-Switching-protocol-to-OpenVPN-UDP-or-TCP-Windows)
* [Android](https://support.nordvpn.com/hc/en-us/articles/19973901502609-Switching-protocol-to-OpenVPN-UDP-or-TCP-Android)
* [macOS](https://support.nordvpn.com/hc/en-us/articles/19921436351505-Switching-protocol-to-OpenVPN-UDP-or-TCP-macOS)
* [iOS](https://support.nordvpn.com/hc/en-us/articles/20465699170321-Switching-connection-protocol-to-OpenVPN-UDP-or-TCP-iOS)
* [Linux](https://support.nordvpn.com/hc/en-us/articles/20465783529233-Switching-connection-protocol-to-OpenVPN-UDP-or-TCP-on-Linux)",https://support.nordvpn.com/hc/en-us/related/click?data=BAh7CjobZGVzdGluYXRpb25fYXJ0aWNsZV9pZGwrCBFAAgKdEjoYcmVmZXJyZXJfYXJ0aWNsZV9pZGwrCJGIGx%2FLEToLbG9jYWxlSSIKZW4tdXMGOgZFVDoIdXJsSSJPL2hjL2VuLXVzL2FydGljbGVzLzIwNDY1NTUyODY3MzQ1LVN3aXRjaGluZy1wcm90b2NvbC10by1PcGVuVlBOLVVEUC1vci1UQ1AGOwhUOglyYW5raQk%3D--733155cd1ce0d0de8502d51f14bcba2c1d740c87
VPN for DAZN: how to watch it securely,"DAZN features a wide array of exclusive content, and to access it securely from anywhere, using a VPN is the ideal solution. NordVPN provides top-notch encryption, ensuring your data is safe from hackers and surveillance. This guide will walk you through the process of streaming DAZN safely with NordVPN.
Table of contents:
* [Required NordVPN servers](
* [Troubleshooting steps](
## Required NordVPN servers
A VPN lets you bypass geographic restrictions on DAZN while safeguarding your connection with encryption. This shields your personal data, keeping it private and secure from hackers and external surveillance during your streaming sessions.
Connect to the following countries to securely access DAZN:
* Italy
* United States
* Germany
* Spain
* Japan
* Brazil
* Canada
* others
For detailed inquiries about other specific DAZN locations, please reach out to our support team directly.
Please note that when traveling abroad, you can only access the DAZN region linked to your subscription's billing address, allowing you to watch free and globally licensed content but preventing access to local paid content. However, for more specific information on the topic, we recommend contacting the providing service's support team.
## Troubleshooting steps
Using a VPN while streaming might cause certain problems that can interrupt your experience.
If you're having trouble, follow these steps:
1. Clear your browser's cache or test a different browser on your device.
2. Change your DNS addresses to NordVPN’s.
3. Disable location services on your device.
If the steps above don't fix the problem, check out our [troubleshooting guide for streaming](https://nordvpn.com/features/streaming/). For additional help with [streaming securely](https://nordvpn.com/features/streaming/) on DAZN using a VPN, don't hesitate to [contact our customer support team](https://support.nordvpn.com/hc/en-us/articles/19482416296593-How-can-I-reach-NordVPN-customer-support).
As you may be aware, streaming content (from video-on-demand or online TV platforms, etc.) that is only accessible in a country other than your country of residence might, under certain circumstances, be considered illegal. Please double-check the authorization or other justification for your actions with the material you are willing to stream before proceeding.
The NordVPN service should never be used to bypass copyright or other regulations. NordVPN does not promote, induce, or otherwise facilitate the use of the service for such purposes. For more details, please read General Terms of Service and NordVPN Additional Terms.",https://support.nordvpn.com/hc/en-us/related/click?data=BAh7CjobZGVzdGluYXRpb25fYXJ0aWNsZV9pZGwrCJFr%2Bx3LEToYcmVmZXJyZXJfYXJ0aWNsZV9pZGwrCJGIGx%2FLEToLbG9jYWxlSSIKZW4tdXMGOgZFVDoIdXJsSSJML2hjL2VuLXVzL2FydGljbGVzLzE5NTY0MDc5MDQ5NjE3LVZQTi1mb3ItREFaTi1ob3ctdG8td2F0Y2gtaXQtc2VjdXJlbHkGOwhUOglyYW5raQo%3D--091a65ac85b05f564983368d818882cb63912acb
How to set up NordVPN with Chrome extension,"## How to set up the NordVPN Chrome extension
1. Download [VPN Chrome extension](https://nordvpn.com/download/chrome-extension/) form our website, or you can get it from [Google Chrome Web Store](https://chromewebstore.google.com/detail/nordvpn-vpn-proxy-for-pri/fjoaledfpmneenckfbpdfhkmimnjocfa).
2. Click on Add to Chrome button. 
3. Chrome might ask you if you want to add the extension. Click Add extension.
4. Then you will receive a NordVPN notification that the extension was added successfully.
5. After the installation is finished, the NordVPN logo will appear on the toolbar in the top-right corner of the browser. Click on the NordVPN logo and you will be prompted to either login or sign up using Nord Account.
## How to use and customize the NordVPN Chrome Extension
Now that you have a VPN for Chrome let's look at how you can make your first connection and adjust the extension settings to suit your needs.
1. Protected status: when you connect to a NordVPN server, this bar will confirm that your connection is successful by displaying the status as Protected.
2. Quick Connect: the fastest way to begin using the NordVPN extension. After pressing Quick Connect, you'll immediately connect to a NordVPN server.
3. Search: whereas the Quick Connect option will decide on a server location for you, this option allows you to specify the country of the NordVPN server.
4. Settings: here, you can find your General, Connection, Security and privacy settings. General: in these settings, you can find your subscription information, application appearance, language preferences, and a function to import and export [split tunneling](https://support.nordvpn.com/hc/en-us/articles/20321703651985-Split-Tunneling-feature-on-NordVPN-extension) settings.Connection: when accessing connection settings, you can choose to automatically connect to NordVPN servers or add URLs that you wish to be excluded from the NordVPN connection.Security and privacy: enable the [WebRTC](https://support.nordvpn.com/hc/en-us/articles/20318383008529-How-to-stop-WebRTC-leaks) Leaks option and the [Threat Protection](https://support.nordvpn.com/General-info/Features/1047407402/What-are-Threat-Protection-and-Threat-Protection-Lite.htm) feature. Also, choose to turn on security warnings for suspicious websites.
5. Support Assistance: more information about the extension and live chat with an agent option can be found here.
6. Notifications: updates and news about the NordVPN extension.
7. Main extension window: If you click here, you can open the main extension window.
8. List of Recently Connected Countries: This section displays the countries to which you have established a recent connection. In case you haven't connected to any server yet, you will find recommendations for countries to connect to.
And that's it! Enjoy browsing securely using your VPN for Chrome.",https://support.nordvpn.com/hc/en-us/related/click?data=BAh7CjobZGVzdGluYXRpb25fYXJ0aWNsZV9pZGwrCBHuvf6BEjoYcmVmZXJyZXJfYXJ0aWNsZV9pZGwrCBFx5xrLEToLbG9jYWxlSSIKZW4tdXMGOgZFVDoIdXJsSSJSL2hjL2VuLXVzL2FydGljbGVzLzIwMzQ5NTMzOTQxMjY1LUhvdy10by1zZXQtdXAtTm9yZFZQTi13aXRoLUNocm9tZS1leHRlbnNpb24GOwhUOglyYW5raQY%3D--b32d27b06d385726b40814f84219c585798108c5
How to watch paid streaming services with NordVPN while traveling,"In many countries, there are censorship and other limitations on paid streaming services that affect travelers. NordVPN allows you to access such services securely while traveling without any additional configuration. You can read more about it here: [https://nordvpn.com/features/smart-play/](https://nordvpn.com/features/streaming/smart-play/). Here you can find specific articles on some paid streaming services:
* How to securely watch Hulu with NordVPN
* How to securely watch Amazon Prime with NordVPN
* How to securely watch BBC with NordVPN
* How to securely watch Disney Plus with NordVPN
* How to securely watch DAZN with NordVPN
In case you encounter any issues, be sure to check our article on troubleshooting streaming-related problems. You are also welcome to contact our support for assistance.
As you may be aware, streaming content (from video-on-demand or online TV platforms, etc.) that is only accessible in a country other than your country of residence might, under certain circumstances, be considered illegal. Please double-check the authorization or other justification for your actions with the material you are willing to stream before proceeding.
The NordVPN service should never be used to bypass copyright or other regulations. NordVPN does not promote, induce, or otherwise facilitate the use of the service for such purposes. For more details, please read General Terms of Service and NordVPN Additional Terms.",https://support.nordvpn.com/hc/en-us/related/click?data=BAh7CjobZGVzdGluYXRpb25fYXJ0aWNsZV9pZGwrCBENNFTKEToYcmVmZXJyZXJfYXJ0aWNsZV9pZGwrCBFx5xrLEToLbG9jYWxlSSIKZW4tdXMGOgZFVDoIdXJsSSJoL2hjL2VuLXVzL2FydGljbGVzLzE5NTYwNjkzNzYzMzQ1LUhvdy10by13YXRjaC1wYWlkLXN0cmVhbWluZy1zZXJ2aWNlcy13aXRoLU5vcmRWUE4td2hpbGUtdHJhdmVsaW5nBjsIVDoJcmFua2kH--a9e99402a70abbe8732690fe432bca74c2844a6a
VPN for Disney Plus: how to watch it securely,"With the growing popularity of streaming services like Disney+, many users are turning to VPNs to access content securely and bypass geo-restrictions. This guide will walk you through the essentials of using a VPN for streaming Disney+, offering tips to improve your experience and troubleshoot any common issues.
Table of contents:
* [Required NordVPN servers](
* [Troubleshooting steps](
## Required NordVPN servers
Connect to NordVPN servers to ensure your online security while enjoying Disney+. This will provide you with robust data protection, allowing you to stream your favorite content with confidence and peace of mind.
To access Disney+ securely using NordVPN, connect to one of our VPN servers in the following regions:
* United States
* Canada
* Mexico
* Brazil
* United Kingdom
* France
* Germany
* Japan
* South Africa
* and many others
If you have any questions about other specific Disney+ locations, contact our support team directly.
## Troubleshooting steps
Streaming with a VPN can occasionally lead to some issues that might disrupt your experience.
If you are experiencing issues while using a VPN for Disney+, try the following:
* [Clear your browser’s cache](https://nordvpn.com/blog/how-to-clear-your-cache/).
* Connect to another VPN server in the same region.
* Change your device’s DNS addresses to NordVPN’s DNS servers.
If the suggestions above don’t resolve your problem, please consult our [streaming troubleshooting guide](https://support.nordvpn.com/hc/en-us/articles/19559968238097-Troubleshooting-steps-for-streaming). If you have any other questions about [securely streaming](https://nordvpn.com/features/streaming/) with a VPN, don’t hesitate to [contact customer support](https://support.nordvpn.com/hc/en-us/articles/19482416296593-How-can-I-reach-NordVPN-customer-support).
Under certain circumstances, streaming content (using video on demand, online TV platforms, or other sources) that is only accessible outside your country of residence may be illegal. Always check if you have the legal authority to access the material you wish to stream.
The NordVPN service should never be used to bypass copyright or other regulations. NordVPN does not promote, induce, or otherwise facilitate the use of the service for such purposes. For more details, please read our [General Terms of Service](https://my.nordaccount.com/legal/terms-of-service/) and[ the NordVPN Additional Terms](https://my.nordaccount.com/legal/terms-of-service/nordvpn/).",https://support.nordvpn.com/hc/en-us/related/click?data=BAh7CjobZGVzdGluYXRpb25fYXJ0aWNsZV9pZGwrCJHcJQTLEToYcmVmZXJyZXJfYXJ0aWNsZV9pZGwrCBFx5xrLEToLbG9jYWxlSSIKZW4tdXMGOgZFVDoIdXJsSSJTL2hjL2VuLXVzL2FydGljbGVzLzE5NTYzNjQ1NjIzNDQxLVZQTi1mb3ItRGlzbmV5LVBsdXMtaG93LXRvLXdhdGNoLWl0LXNlY3VyZWx5BjsIVDoJcmFua2kI--707c465429943fc5dff1f6a23fc60f00f5d91c7e
Change your DNS servers on Android TV with NordVPN,"Note: when you’re connected to a NordVPN server, NordVPN’s private DNS servers are used by default.
To use NordVPN’s [DNS servers](https://nordvpn.com/blog/what-is-dns/) on Android TV when not connected to a NordVPN server, follow these steps:
1. Open Settings on your Android TV. They are usually designated by a cogwheel icon.
2. Head to Network and Internet and write down the [IP address](https://nordvpn.com/what-is-my-ip/) (marked “1” in the picture below).Select IP settings (marked “2” in the picture below).
3. In IP settings, switch to Static.
4. Enter the IP address from step 2.
5. [Find your gateway (router IP) address](https://nordvpn.com/blog/find-router-ip-address/) and enter it in the appropriate field.
6. Make sure the Network prefix length is 24 — change it if necessary.
7. Enter the first DNS address: 103.86.96.100
8. Enter the second DNS address: 103.86.99.100
Android TV is now configured to use [private DNS](https://nordvpn.com/blog/private-dns/) servers instead of your ISP's default DNS servers.",https://support.nordvpn.com/hc/en-us/related/click?data=BAh7CjobZGVzdGluYXRpb25fYXJ0aWNsZV9pZGwrCBHSaSqdEjoYcmVmZXJyZXJfYXJ0aWNsZV9pZGwrCJHcJQTLEToLbG9jYWxlSSIKZW4tdXMGOgZFVDoIdXJsSSJZL2hjL2VuLXVzL2FydGljbGVzLzIwNDY2MjMwNzQzNTY5LUNoYW5nZS15b3VyLUROUy1zZXJ2ZXJzLW9uLUFuZHJvaWQtVFYtd2l0aC1Ob3JkVlBOBjsIVDoJcmFua2kH--95c716430c418c71ac94fb8811386454a5647116
What is your money-back policy?,"Here is the refund and cancellation policy at the core of our 30-day money-back guarantee:
“...if you are not satisfied with our Services, you may cancel the Subscription and request a refund within 30 days following your purchase of our Services (“Money Back Guarantee”). Please note that Subscriptions may be refunded on the basis of the Money Back Guarantee only after the initial purchase. Once a Subscription is renewed, it cannot be refunded on the basis of the Money Back Guarantee, unless applicable law provides otherwise.”
This and other conditions of our service can be found in our [Terms of Service](https://my.nordaccount.com/legal/terms-of-service/).
Here are our instructions for [how to cancel](https://support.nordvpn.com/hc/en-us/articles/19556844985489-How-to-cancel-auto-renewal-for-your-subscription) automatic payment renewal.
## Requesting a refund
Previously, refunds could only be processed through our support team. We have now implemented an automated refund system that is more efficient, faster, and convenient for our customers to use. This change also improves our ability to gather feedback, allowing us to better understand issues and improve our service. As we continue to refine this new process, your feedback is welcomed to help us enhance it further.
To request a refund for your payment, contact our customer support team via live chat available in the bottom right corner of the page, and indicate you would like us to refund your payment.
1. You will receive a link to your Nord Account dashboard. Follow the link and verify it’s you who’s trying to access the account.
2. In the following window, you will see which payments are eligible for a refund. Such payments will have a Refund button available. To proceed, click on Refund.Please keep in mind that not all payments are eligible for refunds, and certain terms apply depending on where you bought the subscription:
* * Apple App Store: Subscriptions purchased via the Apple App Store are subject to Apple's refund policies. We're unable to issue refunds for payments made through the Apple App Store. For assistance, please reach out to Apple directly via Apple Support.
* Amazon Appstore: If you've purchased your subscription through the Amazon App Store, contact Amazon directly for assistance via Amazon Support.
* Google Play Store: Refunds for payments made through the Google Play Store can be requested through NordVPN’s customer support, provided they fall within the refund terms outlined above. Additionally, if the payment was made within the last 48 hours, you can request a refund directly from your Google Play account. For more details, visit Google Play Support.
* Retailers or resellers: If you've purchased a subscription outside the NordVPN website (e.g., physical store, online shop, or marketplace like BestBuy or StackSocial), please contact the retailer directly regarding the refund.
1. In the following window, select the reason for canceling the service and requesting a refund. Your feedback is invaluable because it helps us pinpoint areas for improvement and ensures a better experience for all our users.Once completed, click Submit and Continue. 
2. You will see your refund summary. You can confirm it by clicking Refund.
3. After submitting the request, you will receive a confirmation email saying that your refund has been ordered.
4. You should now see the refund status for your payment as Refund Processing. This means that your request has been received and is currently being processed. This process can take up to a few hours*.*Please note, that due to recent implementation, it may take up to 4 hours for a refund request to be processed.
5. Once the refund is complete, the refund status on your dashboard will change to Refunded, and you will receive a confirmation email. Please note that depending on your payment method, it may take up to 10 business days for the refund to reach your account. If there was an error or you have any other questions, please contact our customer support team directly.",https://support.nordvpn.com/hc/en-us/related/click?data=BAh7CjobZGVzdGluYXRpb25fYXJ0aWNsZV9pZGwrCBH9Jde2EToYcmVmZXJyZXJfYXJ0aWNsZV9pZGwrCJHcJQTLEToLbG9jYWxlSSIKZW4tdXMGOgZFVDoIdXJsSSJFL2hjL2VuLXVzL2FydGljbGVzLzE5NDc2OTkxMzExMTIxLVdoYXQtaXMteW91ci1tb25leS1iYWNrLXBvbGljeQY7CFQ6CXJhbmtpCA%3D%3D--b1faae52e6521960da1705189be338a53e144741
Change your DNS servers on iOS,"You can manually configure the DNS servers in your iOS settings. Here is how:
1. Open Settings;
2. Tap on Wi-Fi. If it's switched off, turn it on;
3. Pick a Wi-Fi network and tap on the blue i icon;
4. Tap Configure DNS and select Manual;
5. Tap Add Server and add these DNS addresses:103.86.96.100103.86.99.100
6. Tap Save.",https://support.nordvpn.com/hc/en-us/related/click?data=BAh7CjobZGVzdGluYXRpb25fYXJ0aWNsZV9pZGwrCBHG1HWNEjoYcmVmZXJyZXJfYXJ0aWNsZV9pZGwrCJHcJQTLEToLbG9jYWxlSSIKZW4tdXMGOgZFVDoIdXJsSSJFL2hjL2VuLXVzL2FydGljbGVzLzIwMzk4Nzc2NTY3MzEzLUNoYW5nZS15b3VyLUROUy1zZXJ2ZXJzLW9uLWlPUwY7CFQ6CXJhbmtpCQ%3D%3D--b4b1d9d6a2865b3af26c219aa0ac76971443042a
Which routers don’t support NordVPN,"On 1 December 2018, NordVPN’s servers stopped supporting L2TP/IPsec and PPTP connections. More about that in [this article](https://nordvpn.com/blog/l2tp-pptp-protocol-update/).
If you use any of the routers listed below with their native firmware, you will not be able to use them with our service:
* Arris
* Belkin
* Cisco
* D-Link
* Huawei
* Linksys (except [WRT32X/WRT32XB AC3200](https://www.linksys.com/support-article?articleNum=270535))
* Nighthawk range routers ([unless the router is using DumaOS](https://www.netgear.com/home/online-gaming/))
* [Netgear](https://support.nordvpn.com/hc/en-us/articles/20282781982481-Can-I-set-up-Netgear-router-with-VPN)
* TRENDnet
* Tenda
* TotoLink
* Ubee
* Orbi
* Spectrum
* Xfinity
* Eero
* Verizon
* AT&T
* FRITZ!Box
* Most ISP-provided routers that were mentioned above
You can install the following custom firmware on some of the aforementioned models to make them work:
* DD-WRT:
* Tomato:
* Padavan:
* OpenWRT:
* Merlin:
## Other tips for router connectivity:
* If your router supports the OpenVPN protocol, search our knowledge base for the name of its manufacturer. You should find a tutorial on how to set it up. You can also check our [router tutorials](https://support.nordvpn.com/hc/en-us/sections/19326876055569-Router) section under the Connectivity category. If you cannot find the setup guide for your router, [contact our customer support](https://support.nordvpn.com/hc/en-us/articles/19482416296593-How-can-I-reach-NordVPN-customer-support) for help.
* If you want a router with out-of-the-box security and anonymity that NordVPN provides, head over to our partners at [FlashRouters](https://nordvpn.com/flashrouters/). They offer pre-configured routers delivering top-notch security and performance.
* Here is our list of [recommended routers for NordVPN](https://support.nordvpn.com/hc/en-us/articles/20195707547025-Which-router-should-I-use-with-NordVPN).",https://support.nordvpn.com/hc/en-us/related/click?data=BAh7CjobZGVzdGluYXRpb25fYXJ0aWNsZV9pZGwrCBEC9%2F2IEjoYcmVmZXJyZXJfYXJ0aWNsZV9pZGwrCJHcJQTLEToLbG9jYWxlSSIKZW4tdXMGOgZFVDoIdXJsSSJKL2hjL2VuLXVzL2FydGljbGVzLzIwMzc5NTg1Njc1NzkzLVdoaWNoLXJvdXRlcnMtZG9uLXQtc3VwcG9ydC1Ob3JkVlBOBjsIVDoJcmFua2kK--fd75e3b38bdb76129e6b601cb85b645646f882ab
Troubleshooting steps for streaming,"Streaming issues like buffering, poor video quality, or interruptions while connected to NordVPN can disrupt your viewing experience. Whether the issue lies with your internet or device, multiple potential causes exist. This guide will walk you through common troubleshooting steps to quickly resolve these issues and restore a smooth streaming experience.
Table of contents:
* [Connection leakage troubleshooting](
* [Troubleshooting steps for various devices](
## Connection leakage troubleshooting
One possible challenge users encounter when troubleshooting streaming issues is a leaking connection. This sometimes occurs when part of their internet traffic bypasses the VPN, leaving sensitive data exposed or causing interruptions in their streaming experience.
If you're having issues with certain streaming services while using NordVPN, first check if your connection is protected by following these steps:
1. Ensure that your connection is set up correctly by checking whether your status says protected on [our website](https://nordvpn.com/):
2. If you are connected to one of our servers but your status says unprotected, proceed to the following steps to ensure your connection is secure. Stop any leaks from your connection by following these tutorials:
* * [WebRTC leak prevention](https://support.nordvpn.com/hc/en-us/articles/20318383008529-How-to-stop-WebRTC-leaks)
* [Disable IPv6](https://support.nordvpn.com/hc/en-us/articles/20350921723409-How-to-disable-IPv6)
## Troubleshooting steps for various devices
Technical issues can sometimes arise when streaming content due to various device-related factors. If your connection is secure and the issues persist, find your device in the tutorials below and follow the instructions. After each step, check if the issue is resolved. If not, proceed to the next step.
### For Windows, macOS, Linux devices
1. Try connecting to a different server of the region you would like to access the streaming service.
2. [Clear the cache of your browser.](https://nordvpn.com/blog/how-to-clear-your-cache/)
3. Try to use a different browser/incognito mode.
4. [Set up NordVPN DNS addresses](https://support.nordvpn.com/hc/en-us/articles/19587726859793-What-are-the-addresses-of-my-NordVPN-DNS-servers) to 103.86.99.100 and 103.86.96.100 on your device.
5. Test the streaming accessibility changes without using [Threat Protection or Threat Protection Pro™](https://support.nordvpn.com/hc/en-us/articles/19508765521425-What-is-Threat-Protection-Pro-and-Threat-Protection) if the features are enabled.
6. [Check](https://support.nordvpn.com/hc/en-us/articles/20290051742353-How-to-check-the-NordVPN-app-version) whether your NordVPN application is updated to the[ latest version](https://nordvpn.com/blog/category/service-updates/app-updates/).
7. As a last resort - try using the[ NordVPN extension](https://nordvpn.com/features/proxy-extension/) instead and access the streaming through your browser. Download the extension by clicking [here](https://support.nordvpn.com/hc/en-us/articles/20321833806865-How-to-set-up-the-NordVPN-browser-extension).
### For Android/iOS devices
1. Try connecting to a different server of the region you would like to access the streaming service.
2. If you are using a specific streaming service app, force stop it, clear the app cache, and restart it.
3. If you are accessing the streaming platform on a browser, [clear your browser's cache.](https://nordvpn.com/blog/how-to-clear-your-cache/)
4. [Set up NordVPN DNS addresses](https://support.nordvpn.com/hc/en-us/articles/19587726859793-What-are-the-addresses-of-my-NordVPN-DNS-servers) to 103.86.99.100 and 103.86.96.100 on your device.
5. Test the streaming accessibility changes without using [Threat Protection or Threat Protection Pro™](https://support.nordvpn.com/hc/en-us/articles/19508765521425-What-is-Threat-Protection-Pro-and-Threat-Protection) if the features are enabled.
### For Android TV boxes
1. Try connecting to a different server in the region where you would like to access the streaming service.
2. If you are using a specific streaming service app, force stop it, clear the app cache, and restart it, here are the steps:
1. Go to Settings > Preferences section > More settings > Apps.
2. Find the streaming service app and press on it.
3. Click the Force Stop button.
4. Click the Clear Cache button.
5. Restart the application.
3. [Set up NordVPN DNS addresses](https://support.nordvpn.com/hc/en-us/articles/20466230743569-Change-your-DNS-servers-on-Android-TV-with-NordVPN) to 103.86.99.100 and 103.86.96.100 on your device.
### For Amazon Fire TV devices
1. Try connecting to a different server of the region you would like to access the streaming service.
2. If you are using a specific streaming service app, force stop it, clear the app cache, and restart it:
1. Go to Settings > Applications > Manage Installed Applications.
2. Find the streaming service app and press on it.
3. Click the Force Stop button.
4. Click the Clear Cache button.
5. Restart the application.
3. [Set up NordVPN DNS addresses](https://support.nordvpn.com/hc/en-us/articles/20466230743569-Change-your-DNS-servers-on-Android-TV-with-NordVPN) to 103.86.99.100 and 103.86.96.100 on your device.
The NordVPN service should never be used to bypass copyright regulations. NordVPN does not promote, condone, or endorse the use of the service for such purposes. For more details, please read the NordVPN [Terms of Service](https://my.nordaccount.com/legal/terms-of-service/).
If you experience other issues or have additional questions, do not hesitate to [submit a request](https://support.nordvpn.com/hc/en-us/articles/19482416296593-How-to-reach-NordVPN-customer-support) to our customer success team.",https://support.nordvpn.com/hc/en-us/related/click?data=BAh7CjobZGVzdGluYXRpb25fYXJ0aWNsZV9pZGwrCBFq9SjKEToYcmVmZXJyZXJfYXJ0aWNsZV9pZGwrCBHXhubKEToLbG9jYWxlSSIKZW4tdXMGOgZFVDoIdXJsSSJKL2hjL2VuLXVzL2FydGljbGVzLzE5NTU5OTY4MjM4MDk3LVRyb3VibGVzaG9vdGluZy1zdGVwcy1mb3Itc3RyZWFtaW5nBjsIVDoJcmFua2kG--84243d8d74e556418a892435e4b1aea6ba074c87
What to do if Amazon is not working with NordVPN,"If you can’t access Amazon with NordVPN, follow the steps below.
1. Connect to a different VPN server.
2. [Change the VPN protocol to OpenVPN UDP or TCP](https://support.nordvpn.com/hc/en-us/articles/20465552867345).
3. Do a [NordVPN DNS leak test](https://nordvpn.com/dns-leak-test/) while connected to our servers. If the results bring back your IP address, configure your device manually to use private NordVPN DNS servers.
4. [Clear your browser cache.](https://nordvpn.com/blog/how-to-clear-your-cache/)
5. Use a different browser or open Amazon in private browser mode.
6. Disable the [Threat Protection](https://support.nordvpn.com/hc/en-us/articles/19508765521425) feature. If you’re using Threat Protection Pro™, exclude Amazon from the blocked domains list. To do that, go to the Web protection tab in the Threat Protection Pro™ settings and choose to exclude Amazon from threat blocking.
7. Allowlist NordVPN in the settings of your antivirus if you are using one.",https://support.nordvpn.com/hc/en-us/related/click?data=BAh7CjobZGVzdGluYXRpb25fYXJ0aWNsZV9pZGwrCBHAmA8SEzoYcmVmZXJyZXJfYXJ0aWNsZV9pZGwrCBHXhubKEToLbG9jYWxlSSIKZW4tdXMGOgZFVDoIdXJsSSJXL2hjL2VuLXVzL2FydGljbGVzLzIwOTY4MjkyMDA3OTUzLVdoYXQtdG8tZG8taWYtQW1hem9uLWlzLW5vdC13b3JraW5nLXdpdGgtTm9yZFZQTgY7CFQ6CXJhbmtpBw%3D%3D--a1162af8f4687b0f83106ab988b2ffaf1a3b5871
VPN for Disney Plus: how to watch it securely,"With the growing popularity of streaming services like Disney+, many users are turning to VPNs to access content securely and bypass geo-restrictions. This guide will walk you through the essentials of using a VPN for streaming Disney+, offering tips to improve your experience and troubleshoot any common issues.
Table of contents:
* [Required NordVPN servers](
* [Troubleshooting steps](
## Required NordVPN servers
Connect to NordVPN servers to ensure your online security while enjoying Disney+. This will provide you with robust data protection, allowing you to stream your favorite content with confidence and peace of mind.
To access Disney+ securely using NordVPN, connect to one of our VPN servers in the following regions:
* United States
* Canada
* Mexico
* Brazil
* United Kingdom
* France
* Germany
* Japan
* South Africa
* and many others
If you have any questions about other specific Disney+ locations, contact our support team directly.
## Troubleshooting steps
Streaming with a VPN can occasionally lead to some issues that might disrupt your experience.
If you are experiencing issues while using a VPN for Disney+, try the following:
* [Clear your browser’s cache](https://nordvpn.com/blog/how-to-clear-your-cache/).
* Connect to another VPN server in the same region.
* Change your device’s DNS addresses to NordVPN’s DNS servers.
If the suggestions above don’t resolve your problem, please consult our [streaming troubleshooting guide](https://support.nordvpn.com/hc/en-us/articles/19559968238097-Troubleshooting-steps-for-streaming). If you have any other questions about [securely streaming](https://nordvpn.com/features/streaming/) with a VPN, don’t hesitate to [contact customer support](https://support.nordvpn.com/hc/en-us/articles/19482416296593-How-can-I-reach-NordVPN-customer-support).
Under certain circumstances, streaming content (using video on demand, online TV platforms, or other sources) that is only accessible outside your country of residence may be illegal. Always check if you have the legal authority to access the material you wish to stream.
The NordVPN service should never be used to bypass copyright or other regulations. NordVPN does not promote, induce, or otherwise facilitate the use of the service for such purposes. For more details, please read our [General Terms of Service](https://my.nordaccount.com/legal/terms-of-service/) and[ the NordVPN Additional Terms](https://my.nordaccount.com/legal/terms-of-service/nordvpn/).",https://support.nordvpn.com/hc/en-us/related/click?data=BAh7CjobZGVzdGluYXRpb25fYXJ0aWNsZV9pZGwrCJHcJQTLEToYcmVmZXJyZXJfYXJ0aWNsZV9pZGwrCBHXhubKEToLbG9jYWxlSSIKZW4tdXMGOgZFVDoIdXJsSSJTL2hjL2VuLXVzL2FydGljbGVzLzE5NTYzNjQ1NjIzNDQxLVZQTi1mb3ItRGlzbmV5LVBsdXMtaG93LXRvLXdhdGNoLWl0LXNlY3VyZWx5BjsIVDoJcmFua2kI--1e439a8f9f62bedb668b00e9850f5931dd5628f2
How to reach NordVPN customer support?,"While we don't offer phone support, we have different options to contact NordVPN customer support available 24/7 and ready to help you!
## Help Center
First off, if you run into any issues using NordVPN - check out our Help Center that is available in 14 languages: English, German, French, Danish, Italian, Spanish, Norwegian, Swedish, Dutch, Japanese, Korean, Polish, Portuguese-Brazilian, Traditional Chinese.
You can change the language by scrolling down until you see the language change option and clicking on the language you prefer. This will ensure that you can look for information in a language comfortable for you.
After you have set the language you want to look information in, you can find solutions in the help center by either:
* Searching for information using Help Center's search bar, which will list out articles according to the keywords typed in the search query:
* Navigating to one of the categories available in the Help Center:
* [FAQ](https://support.nordvpn.com/hc/en-us/categories/200593301-FAQ) - in this category you'll find Frequently asked questions and NordVPN app setup tutorials;
* [General info](https://support.nordvpn.com/hc/en-us/categories/360000293597-General-info) - here, you'll be able to find information on NordVPN functionalities, features, and SmartPlay;
* [Billing](https://support.nordvpn.com/hc/en-us/categories/360000293617-Billing) - this category covers payment, subscription, and account management topics;
* [Connectivity](https://support.nordvpn.com/hc/en-us/categories/200614302-Connectivity) - the last category available covers troubleshooting articles, here you can find help regarding NordVPN connectivity, internet speed with NordVPN on, manual setups for routers and different OSes, proxies.
## Support agents
However, if you're looking for assistance on your specific case, you can reach out to our developed conversation bots or human customer support agents by:
* Chat
* Email
We have two teams to assist you:
* Customer Care & Billing Team: They can tell you about NordVPN, help set up your devices, make sure you can access streaming sites, and answer questions about dedicated IPs. As well as helpyou with your NordVPN subscription, account, or payments.
* Connection Team: They can assist with setting up NordVPN on your router, fixing advanced connectivity problems, and helping in places with internet restrictions.",https://support.nordvpn.com/hc/en-us/related/click?data=BAh7CjobZGVzdGluYXRpb25fYXJ0aWNsZV9pZGwrCJGygBq4EToYcmVmZXJyZXJfYXJ0aWNsZV9pZGwrCBHXhubKEToLbG9jYWxlSSIKZW4tdXMGOgZFVDoIdXJsSSJML2hjL2VuLXVzL2FydGljbGVzLzE5NDgyNDE2Mjk2NTkzLUhvdy10by1yZWFjaC1Ob3JkVlBOLWN1c3RvbWVyLXN1cHBvcnQGOwhUOglyYW5raQk%3D--0c449e3c05483a963f3bd304891915a11a53a08e
Installing NordVPN on macOS,"From October 17th, 2024, older applications will have a few function limitations. The issues can affect macOS applications version 8.27.2 and below. They can include not receiving notifications in the app and reduced Dark Web Monitoring and Meshnet functionality.To resolve the issue, please update your application to the latest version.NordVPN is compatible with Apple and features a native application that we recommend as the best way to connect to NordVPN servers. Even though we have two application versions, they both provide online security and features such as [Double VPN](https://nordvpn.com/features/double-vpn/), [Onion over VPN](https://nordvpn.com/features/onion-over-vpn/) servers, automated [Kill Switch](https://nordvpn.com/features/vpn-kill-switch/), [Meshnet](https://nordvpn.com/meshnet/), and the ability to connect using [NordLynx connection protocol](https://support.nordvpn.com/hc/en-us/articles/19564565879441-What-is-NordLynx).
Note: NordVPN supports macOS 11 Big Sur, macOS 12 Monterey, macOS 13 Ventura, and macOS Sanoma 14 and above.
## Instructions on how to install NordVPN on macOS
[NordVPN on macOS](https://nordvpn.com/download/mac/) has two different versions. The following articles contain installation instructions for both of them:
* [NordVPN application](https://support.nordvpn.com/hc/en-us/articles/19456281201041-Installing-NordVPN-application-on-macOS)
* [NordVPN (App Store) application](https://support.nordvpn.com/hc/en-us/articles/20492395403921-Installing-NordVPN-App-Store-version-on-macOS)
### What is the difference between the two versions?
* NordVPNThis version allows you to set specific preferences, such as customizing DNS servers or using Kill Switch to terminate particular apps instead of your entire internet connection. This app version can be sideloaded from our website and run on earlier versions of macOS (the most recent version is available only on macOS 11+). With NordVPN’s Plus and Ultimate plans, you also get [Threat Protection Pro™](https://nordvpn.com/features/threat-protection/) – a feature that automatically blocks ads, trackers, and malware URLs and scans downloads for malware.
* NordVPN (App Store)This version of the NordVPN application can be installed directly from the Apple App Store on macOS devices with firmware no older than 11. It also features the Kill-Switch, which cuts internet access if the VPN connection suddenly disconnects. This prevents your connection from any vulnerabilities if it drops without terminating app processes.
## How to use NordVPN on macOS
Connecting to NordVPN using the macOS app is easy:
1. Open the NordVPN macOS app;
2. If required, complete the login process;
3. Click on ""Quick connect"" or select a specific country from the map.
Now you're connected to the internet securely!",https://support.nordvpn.com/hc/en-us/related/click?data=BAh7CjobZGVzdGluYXRpb25fYXJ0aWNsZV9pZGwrCJExnZOvEToYcmVmZXJyZXJfYXJ0aWNsZV9pZGwrCBHXhubKEToLbG9jYWxlSSIKZW4tdXMGOgZFVDoIdXJsSSJCL2hjL2VuLXVzL2FydGljbGVzLzE5NDQ1NzkzNTAxNTg1LUluc3RhbGxpbmctTm9yZFZQTi1vbi1tYWNPUwY7CFQ6CXJhbmtpCg%3D%3D--504f49fb5037288edaa8c49511726427f1c0e663
What are NordVPN DNS server addresses?,"NordVPN offers private DNS in its apps, which ensures tighter security and privacy for your traffic. The NordVPN native applications automatically use NordVPN's DNS servers when connected to VPN. This prevents DNS leaks during your VPN connection, ensuring that your NordVPN private DNS requests are safe.
NordVPN's DNS server addresses are 103.86.96.100 and 103.86.99.100. [Learn how to change NordVPN DNS servers ]( on it later).
## Why use NordVPN DNS servers?
DNS servers translate human-friendly domain names such as www.google.com into IP addresses like 192.168.1.1 so your device can connect to websites. When you type a website address, your device asks a DNS server for the IP address. If the server doesn’t know it, it looks it up from other servers. Changing DNS servers provides you with increased security as well as speed. With default DNS you may be subject to DNS hijacking. DNS hijacking is a cyberattack where attackers redirect or alter DNS settings to send users to fake websites or malicious servers. This can lead to phishing, malware infections, data theft, or blocking access to legitimate sites. It often occurs through router vulnerabilities or malware.
## How to change NordVPN DNS servers
You can configure your device manually to use private NordVPN DNS servers. This is handy when you are connecting to NordVPN from a non-native app (for example, third-party OpenVPN clients) or if there are any issues setting up the DNS addresses in the NordVPN app. You can alternatively use other preferred DNS servers.Here are tutorials on how to manually set up NordVPN DNS server connections on your operating system:Windows: Change your DNS servers on WindowsmacOS: Change your DNS servers on macOSLinux: Change your DNS servers on LinuxAndroid: Change your DNS servers on AndroidiOS: Change your DNS servers on iOS",https://support.nordvpn.com/hc/en-us/related/click?data=BAh7CjobZGVzdGluYXRpb25fYXJ0aWNsZV9pZGwrCBFegJ%2FQEToYcmVmZXJyZXJfYXJ0aWNsZV9pZGwrCJEuKDTLEToLbG9jYWxlSSIKZW4tdXMGOgZFVDoIdXJsSSJML2hjL2VuLXVzL2FydGljbGVzLzE5NTg3NzI2ODU5NzkzLVdoYXQtYXJlLU5vcmRWUE4tRE5TLXNlcnZlci1hZGRyZXNzZXMGOwhUOglyYW5raQc%3D--f426e56e18f1209f4a7bc4a0d96a5744f3ac604c
Does NordVPN work on Android TV and Nvidia Shield?,"Yes, NordVPN works on Android TV and Nvidia Shield. You can follow the steps below about the installation process.",https://support.nordvpn.com/hc/en-us/related/click?data=BAh7CjobZGVzdGluYXRpb25fYXJ0aWNsZV9pZGwrCBFD7ucfEjoYcmVmZXJyZXJfYXJ0aWNsZV9pZGwrCJEuKDTLEToLbG9jYWxlSSIKZW4tdXMGOgZFVDoIdXJsSSJiL2hjL2VuLXVzL2FydGljbGVzLzE5OTI4MjQ0NDM3Nzc3LUluc3RhbGxpbmctYW5kLXVzaW5nLU5vcmRWUE4tb24tQW5kcm9pZC1UVi1vci1OdmlkaWEtU2hpZWxkBjsIVDoJcmFua2kI--b9f2067aac7d0dade5260f81e79acff59a71fde5
Installing and using NordVPN on Android TV or Nvidia Shield,"If you would like to use NordVPN on your Android TV or Nvidia Shield, this guide with assist you to correctly install the NordVPN app on these devices. This article will cover the following points:
* [Does NordVPN work on Android TV and Nvidia Shield?](
* [How to set up a VPN on Nvidia Shield and Android TV](
* [How to use a VPN on Nvidia Shield and Android TV](
## Does NordVPN work on Android TV and Nvidia Shield?
Yes, NordVPN works on Android TV and Nvidia Shield. You can follow the steps below about the installation process.
## How to set up a VPN on Nvidia Shield and Android TV
1. [ Download the NordVPN app for Android TV ](https://nordvpn.com/download/android-tv/) from our website and install it. You can also find NordVPN on the [ Google Play ](https://play.google.com/store/apps/details?id=com.nordvpn.android&hl=en)store.
2. Once the application has finished installing, open the NordVPN app. You will see the application's main menu. Select log in to use your existing NordVPN account or sign up to create a new one: 
* If you have clicked sign up, you will see a QR code. Scan it with your smartphone and wait for the Nord Account page to load. Once the page has loaded, complete the registration process: 
3. Log in to NordVPN on your TV with your account. Like in the screenshot below, you will receive a number for [ remote validation ](https://nordaccount.com/remote) on your phone, laptop, or PC. Alternatively, you can simply scan the QR code: 
4. You may be greeted with a few warning messages. These are default Android warning messages for VPN connections — it is safe to continue. In some cases, you may be required to mark a checkbox in the popup window.  
## How to use a VPN on Nvidia Shield and Android TV
The NordVPN app is easy to use. In this section, we will explore how to connect to NordVPN servers on your Nvidia Shield or Android TV and go through the app’s settings.
1. Press quick connect on the main screen to let our smart algorithm automatically pick the best server for your needs: 
2. You can click any country button in the all countries section to quickly connect to a NordVPN server for the selected country: 
3. In the specialty servers section, you will find P2P, Obfuscated, Dedicated IP, Double VPN, and Onion Over VPN servers. 
4. In settings, you can check your subscription status, set up auto-connect, or select the settings sub-menu to control your NordVPN features (such as enabling/disabling Threat Protection, switching VPN protocols, enabling local network discovery, and setting up a custom DNS):  
5. The split tunneling section lets you choose which apps bypass your VPN connection: 
After following the guide above, you will be able to use NordVPN on your Android TV and your Nvidia Shield. If you experience any issues while installing NordVPN on these devices, feel free to [contact our support team ](https://nordvpn.com/contact-us/)for further assistance.",https://support.nordvpn.com/hc/en-us/related/click?data=BAh7CjobZGVzdGluYXRpb25fYXJ0aWNsZV9pZGwrCBFD7ucfEjoYcmVmZXJyZXJfYXJ0aWNsZV9pZGwrCJEuKDTLEToLbG9jYWxlSSIKZW4tdXMGOgZFVDoIdXJsSSJiL2hjL2VuLXVzL2FydGljbGVzLzE5OTI4MjQ0NDM3Nzc3LUluc3RhbGxpbmctYW5kLXVzaW5nLU5vcmRWUE4tb24tQW5kcm9pZC1UVi1vci1OdmlkaWEtU2hpZWxkBjsIVDoJcmFua2kI--b9f2067aac7d0dade5260f81e79acff59a71fde5
Change your DNS servers on Android TV with NordVPN,"Note: when you’re connected to a NordVPN server, NordVPN’s private DNS servers are used by default.
To use NordVPN’s [DNS servers](https://nordvpn.com/blog/what-is-dns/) on Android TV when not connected to a NordVPN server, follow these steps:
1. Open Settings on your Android TV. They are usually designated by a cogwheel icon.
2. Head to Network and Internet and write down the [IP address](https://nordvpn.com/what-is-my-ip/) (marked “1” in the picture below).Select IP settings (marked “2” in the picture below).
3. In IP settings, switch to Static.
4. Enter the IP address from step 2.
5. [Find your gateway (router IP) address](https://nordvpn.com/blog/find-router-ip-address/) and enter it in the appropriate field.
6. Make sure the Network prefix length is 24 — change it if necessary.
7. Enter the first DNS address: 103.86.96.100
8. Enter the second DNS address: 103.86.99.100
Android TV is now configured to use [private DNS](https://nordvpn.com/blog/private-dns/) servers instead of your ISP's default DNS servers.",https://support.nordvpn.com/hc/en-us/related/click?data=BAh7CjobZGVzdGluYXRpb25fYXJ0aWNsZV9pZGwrCBHSaSqdEjoYcmVmZXJyZXJfYXJ0aWNsZV9pZGwrCJEuKDTLEToLbG9jYWxlSSIKZW4tdXMGOgZFVDoIdXJsSSJZL2hjL2VuLXVzL2FydGljbGVzLzIwNDY2MjMwNzQzNTY5LUNoYW5nZS15b3VyLUROUy1zZXJ2ZXJzLW9uLUFuZHJvaWQtVFYtd2l0aC1Ob3JkVlBOBjsIVDoJcmFua2kJ--2eed474e5a28d305485dec96003435b330e20200
What to do if YouTube TV is not working with NordVPN,"YouTube TV works only on desktop devices. To access YouTube TV, connect to one of NordVPN’s US servers.
If Youtube TV restricts your access while using NordVPN, follow the steps below.
1. [Clear your browser cache](https://nordvpn.com/blog/how-to-clear-your-cache/).
2. Use a different browser or open YouTube TV in a private browser mode.
3. Disable the [Threat Protection](https://support.nordvpn.com/hc/en-us/articles/19508765521425) feature. If you’re using Threat Protection Pro™, exclude YouTube TV from the blocked domains list. To do that, go to the Web protection tab in the Threat Protection Pro™ settings and choose to exclude YouTube TV from threat blocking.
4. Do a NordVPN DNS leak test while connected to our servers. If the results bring back your IP address, configure your device manually to use private NordVPN DNS servers.
5. Allowlist NordVPN in the settings of your antivirus if you are using one.
6. Connect to different US servers.
7. Emulate your location on Google Chrome:
* Once Google Chrome is opened, Press Ctrl + Shift + I to access Developer Tools.
* Select the three-dot menu icon in the top right of the pane.
* Scroll to More Tools and select Sensors.
* Switch your location.",https://support.nordvpn.com/hc/en-us/related/click?data=BAh7CjobZGVzdGluYXRpb25fYXJ0aWNsZV9pZGwrCJEgzscREzoYcmVmZXJyZXJfYXJ0aWNsZV9pZGwrCJEuKDTLEToLbG9jYWxlSSIKZW4tdXMGOgZFVDoIdXJsSSJbL2hjL2VuLXVzL2FydGljbGVzLzIwOTY3MDg3NTQ2NTEzLVdoYXQtdG8tZG8taWYtWW91VHViZS1UVi1pcy1ub3Qtd29ya2luZy13aXRoLU5vcmRWUE4GOwhUOglyYW5raQo%3D--2074ae80d31e7102b1f7872012031133a5c2ffdc
What is SmartDNS?,"SmartDNS is a technology that lets you access content on your smart TV that may not be available in your region. SmartDNS is integrated into [NordVPN SmartPlay](https://nordvpn.com/features/streaming/smart-play/), so you only need to have a [NordVPN subscription](https://nordvpn.com/pricing/) to access it. SmartDNS does not protect your devices the way a [VPN connection](https://nordvpn.com/what-is-a-vpn/) does — it simply provides access to streaming content. Keep in mind that it may not work with all of the streaming services you can access while connected to NordVPN.
Table of contents:
* [SmartDNS-supported streaming services](
* [How to enable the SmartDNS feature](
* [How to set up the SmartDNS feature on your device](
## SmartDNS-supported streaming services
The landscape of streaming entertainment offers a multitude of choices. To help you navigate these options, the following list presents the complete selection of SmartDNS-supported supported services:
* Amazon Prime (US region)
* Disney Plus (US region)
* Fox Now / Fox Sports Go / Fox News (US region)
* MAX (US region)
* Netflix Originals
* Paramount+
* Peacock TV
* Fubo TV
## How to enable the SmartDNS feature
The activation process is designed for simplicity, allowing you to quickly access region-locked content. Follow these steps to enable NordVPN's SmartDNS feature:
1. Allowlist [your original IP address](https://nordvpn.com/what-is-my-ip/) — the one you have when your VPN is switched off. Make sure to allowlist your IPv4 address, not IPv6, as we do not support IPv6 yet.
2. Disconnect from NordVPN (or any other VPN connection).
3. Log in to your NordAccount:
4. Then, select the NordVPN button located in the upper-left section on your dashboard:
5. Click the enable button on the SmartDNS tab:
6. Activate the SmartDNS feature by clicking on the activate SmartDNS button:Note: the activation can take up to 10 minutes. In the meantime, the status will be shown as pending.
## How to set up the SmartDNS feature on your device
NordVPN SmartDNS offers a simple setup process, allowing you to quickly configure your devices and access geo-restricted streaming content by adjusting a few network settings.
Here’s how to set up SmartDNS on NordVPN for the following devices:
* [SmartDNS on LG TV](https://support.nordvpn.com/hc/en-us/articles/19564250144273-Set-Up-SmartDNS-VPN-feature-on-LG-TV)
* [SmartDNS on Apple TV](https://support.nordvpn.com/hc/en-us/articles/19564451081873-How-to-Set-Up-SmartDNS-on-Apple-TV)
For instructions for other devices, use these [DNS servers](https://nordvpn.com/blog/what-is-dns-server/):
* Primary: 103.86.96.103
* Secondary (if available): 103.86.99.103
If you experience any issues or have additional questions, do not hesitate to [submit a request](https://support.nordvpn.com/hc/en-us/articles/19482416296593-How-to-reach-NordVPN-customer-support) to our customer success team.
The NordVPN service should never be used to bypass copyright regulations. NordVPN does not promote, condone, or endorse the use of the service for such purposes. For more details, please read the [NordVPN Terms of Service](https://my.nordaccount.com/legal/terms-of-service/).",https://support.nordvpn.com/hc/en-us/related/click?data=BAh7CjobZGVzdGluYXRpb25fYXJ0aWNsZV9pZGwrCJEgsuKuEToYcmVmZXJyZXJfYXJ0aWNsZV9pZGwrCBEeLijLEToLbG9jYWxlSSIKZW4tdXMGOgZFVDoIdXJsSSI3L2hjL2VuLXVzL2FydGljbGVzLzE5NDQyODI1MzA2MjU3LVdoYXQtaXMtU21hcnRETlMGOwhUOglyYW5raQY%3D--8c673f4ca009b0237bce148c66d670a3ce099171
Set up NordVPN on a Smart TV or Console,"There are a few [ways to set up a VPN for your Smart TV](https://nordvpn.com/blog/vpn-for-smart-tv/) or console. Picking the best method will depend on your specific device. Choose the relevant option from the list below:
* Setting up NordVPN connection on TVs
* [Android-based TVs and Android TV boxes](
* [Amazon Fire TV](
* [Apple TV](
* [Chromecast and Roku](
* [KODI extension](
* [Samsung TV](
* Setting up NordVPN connection on gaming consoles
* [Xbox](
* [PlayStation](
* [Nintendo Switch](
## Setting up NordVPN connection on TVs
Most smart TVs don’t support built-in VPN functionality, with the exception of Android-based TVs, but you can get a VPN on TV with an additional step. Try the connection methods listed below:
### Android-based TVs and Android TV boxes
* Download the native [NordVPN app for Android TV](https://nordvpn.com/download/android-tv/). Learn [how to use NordVPN for Android TV](https://support.nordvpn.com/hc/en-us/articles/19928244437777-Installing-and-using-NordVPN-on-Android-TV-or-Nvidia-Shield).
* [Set up SmartDNS on Android TV](https://support.nordvpn.com/hc/en-us/articles/19564451081873-How-to-Set-Up-SmartDNS-on-Apple-TV).
* [Set up a NordVPN on your router](https://support.nordvpn.com/hc/en-us/articles/19426084718865-Setting-up-a-router-with-NordVPN).
* [Share a wireless VPN connection](https://support.nordvpn.com/hc/en-us/articles/19916181239313-Share-a-wireless-VPN-connection-Windows) from your Windows PC.
* [Share a VPN connection through an Ethernet cable](https://support.nordvpn.com/hc/en-us/articles/19918886350097-Sharing-a-VPN-connection-through-an-Ethernet-cable) from your Windows PC.
### Amazon Fire TV
* Download the native [NordVPN app for Amazon devices](https://nordvpn.com/download/firestick/). Learn [how to install NordVPN on Amazon Fire devices](https://support.nordvpn.com/hc/en-us/articles/19453529667089-Installing-NordVPN-on-Amazon-Fire-devices).
* [Set up a NordVPN on your router](https://support.nordvpn.com/Connectivity/Router/1047409322/Setting-up-a-router-with-NordVPN.htm).
* [Share a wireless VPN connection](https://support.nordvpn.com/Connectivity/Windows/1088053522/Sharing-a-wireless-Virtual-Private-Network-connection-from-your-Windows-PC.htm) from your Windows PC.
### Apple TV
* Download the native [NordVPN app for Apple TV](https://nordvpn.com/download/apple-tv/).
* [Set up SmartDNS on Apple TV](https://support.nordvpn.com/hc/en-us/articles/19564451081873-How-to-Set-Up-SmartDNS-on-Apple-TV).
* [Set up a NordVPN on your router](https://support.nordvpn.com/Connectivity/Router/1047409322/Setting-up-a-router-with-NordVPN.htm).
* [Share a wireless VPN connection](https://support.nordvpn.com/Connectivity/Windows/1088053522/Sharing-a-wireless-Virtual-Private-Network-connection-from-your-Windows-PC.htm) from your Windows PC.
* [Share a VPN connection through an Ethernet cable](https://support.nordvpn.com/Connectivity/Windows/1047409882/Sharing-a-VPN-connection-through-an-Ethernet-cable.htm) from your Windows PC.
### Chromecast and Roku
* [Set up a NordVPN on your router](https://support.nordvpn.com/Connectivity/Router/1047409322/Setting-up-a-router-with-NordVPN.htm).
* [Share a wireless VPN connection](https://support.nordvpn.com/Connectivity/Windows/1088053522/Sharing-a-wireless-Virtual-Private-Network-connection-from-your-Windows-PC.htm) from your Windows PC.
### KODI extension
* [Set up a KODI extension on NordVPN](https://support.nordvpn.com/hc/en-us/articles/19563635506065-How-can-I-use-Kodi-with-NordVPN).
### Samsung TV
* [Set up a NordVPN on your router](https://support.nordvpn.com/Connectivity/Router/1047409322/Setting-up-a-router-with-NordVPN.htm).
* [Share VPN via a mobile hotspot on Windows 10](https://support.nordvpn.com/hc/en-us/articles/19748256261649-Share-VPN-via-a-mobile-hotspot-on-Windows-10).
* [Share a wireless VPN connection](https://support.nordvpn.com/Connectivity/Windows/1088053522/Sharing-a-wireless-Virtual-Private-Network-connection-from-your-Windows-PC.htm) from your Windows PC.
* [Share a VPN connection through an Ethernet cable](https://support.nordvpn.com/Connectivity/Windows/1047409882/Sharing-a-VPN-connection-through-an-Ethernet-cable.htm) from your Windows PC.
## Setting up NordVPN connection on gaming consoles
Video game consoles such as Xbox, Playstation, or Nintendo Switch do not support built-in VPN functionality, however, you can set up a VPN on your gaming console with a few additional steps.
### Xbox console
If you want to set up a [VPN on Xbox](https://nordvpn.com/download/xbox/), try this:
* [Install NordVPN on your router](https://nordvpn.com/blog/setup-vpn-router/) and connect your Xbox to the Wi-Fi.
* [Connect Xbox to your Windows PC](https://nordvpn.com/download/xbox/#:~:text=Connect%20Xbox%20to%20your%20Windows%20PC).
### Playstation console
If you want to set up a [VPN on PlayStation](https://nordvpn.com/download/playstation/), try this:
* [Install NordVPN on your router](https://nordvpn.com/blog/setup-vpn-router/) and connect your Playstation to the Wi-Fi.
* [Connect PlayStation to your Windows PC](https://nordvpn.com/download/playstation/#:~:text=Connect%20PlayStation%20to%20your%20Windows%20PC).
### Nintendo Switch console
If you want to set up a [VPN on a Nintendo Switch](https://nordvpn.com/download/nintendo-switch/), try this:
* Connect via mobile hotspot:
1. Install NordVPN to a device of your choice (laptop, smartphone, or tablet)
2. Connect to any NordVPN server.
3. [Set up a mobile hotspot](https://support.nordvpn.com/hc/en-us/articles/19748256261649-Share-VPN-via-a-mobile-hotspot-on-Windows-10).
4. Connect your Nintendo Switch to the hotspot.
* [Install NordVPN on your router](https://nordvpn.com/blog/setup-vpn-router/) and connect your Nintendo Switch to the Wi-Fi.
The NordVPN service should never be used to bypass copyright regulations. NordVPN does not promote, condone, or endorse the use of the service for such purposes. For more details, please read the NordVPN [Terms of Service](https://my.nordaccount.com/legal/terms-of-service/).",https://support.nordvpn.com/hc/en-us/related/click?data=BAh7CjobZGVzdGluYXRpb25fYXJ0aWNsZV9pZGwrCBH8EBC4EToYcmVmZXJyZXJfYXJ0aWNsZV9pZGwrCBEeLijLEToLbG9jYWxlSSIKZW4tdXMGOgZFVDoIdXJsSSJOL2hjL2VuLXVzL2FydGljbGVzLzE5NDgyMjQxMjAzMjE3LVNldC11cC1Ob3JkVlBOLW9uLWEtU21hcnQtVFYtb3ItQ29uc29sZQY7CFQ6CXJhbmtpBw%3D%3D--66cd5b11b743c00b918c4d5a90c536eb93d5c4ce
Not sure if your router is supported and/or can't find it on the list above?,"First, see if you can find your router on our [list of unsupported routers](https://support.nordvpn.com/hc/en-us/articles/20379585675793-Which-routers-don-t-support-NordVPN).",https://support.nordvpn.com/hc/en-us/related/click?data=BAh7CjobZGVzdGluYXRpb25fYXJ0aWNsZV9pZGwrCBEJ4fyqEToYcmVmZXJyZXJfYXJ0aWNsZV9pZGwrCBEeLijLEToLbG9jYWxlSSIKZW4tdXMGOgZFVDoIdXJsSSJHL2hjL2VuLXVzL2FydGljbGVzLzE5NDI2MDg0NzE4ODY1LVNldHRpbmctdXAtYS1yb3V0ZXItd2l0aC1Ob3JkVlBOBjsIVDoJcmFua2kI--525e4b45b2578a2159c3939a44772825bfc73f66
Setting up a router with NordVPN,"The procedure of setting up NordVPN on your router will depend on your router’s firmware or manufacturer. If you can’t find the VPN router setup tutorial for your router’s firmware on the following list, continue scrolling down for further instructions. You may also check out our list of [router recommendations](https://support.nordvpn.com/hc/en-us/articles/20195707547025-Which-router-should-I-use-with-NordVPN).
Note: If your router was issued by your ISP, it probably does not support VPN configurations. If that is the case, there are routers that come pre-configured with NordVPN. Our partner FlashRouters offers a selection of powerful routers that come with NordVPN out of the box, including the [Privacy Hero](https://www.flashrouters.com/privacy-hero-nordvpn-router-by-flashrouters) with exclusive integration for NordLynx - the fastest VPN protocol.
## Setup tutorials for supported routers and firmware:
* [ASUS WRT](https://support.nordvpn.com/hc/en-us/articles/20286376420753-How-to-set-up-NordVPN-on-Asus-WRT-firmware) (native firmware)
* [ASUS Merlin](https://support.nordvpn.com/hc/en-us/articles/20319214011921-AsusWRT-Merlin-setup-with-NordVPN)
* [DD-WRT](https://support.nordvpn.com/hc/en-us/articles/20308623061265-DD-WRT-setup-with-NordVPN)
* [Privacy Hero](https://support.flashrouters.com/privacy-hero/vpn-setup-privacy-hero/privacy-hero-nordlynx-vpn-setup/)
* [Roqos](https://support.flashrouters.com/roqoscore/nordvpn-setup-on-roqos/)
* [Gl.iNET](https://support.nordvpn.com/hc/en-us/articles/20226926174225-GL-iNet-setup-with-NordVPN)
* [Mikrotik](https://support.nordvpn.com/hc/en-us/articles/20398642652561-MikroTik-IKEv2-setup-with-NordVPN)
* [NetDUMA](https://support.nordvpn.com/hc/en-us/articles/20323695823761-Netduma-setup-with-NordVPN)
* [OPNsense](https://support.nordvpn.com/hc/en-us/articles/20397569418129-OPNsense-21-setup-with-NordVPN)
* [OpenWRT](https://support.nordvpn.com/hc/en-us/articles/20340177222289-OpenWrt-setup-with-NordVPN)
* [Padavan](https://support.nordvpn.com/hc/en-us/articles/20323041135889-Padavan-setup-with-NordVPN)
* [Sabai](https://support.nordvpn.com/hc/en-us/articles/20323512359697-Sabai-setup-with-NordVPN)
* [Tomato](https://support.nordvpn.com/hc/en-us/articles/20317675285777-How-to-set-up-VPN-on-Tomato)
* [pfSense](https://support.nordvpn.com/hc/en-us/articles/20285211284497-pfSense-setup-with-NordVPN)
* [DrayTek](https://support.nordvpn.com/hc/en-us/articles/20397988815633-DrayTek-Vigor-IKEv2-setup-with-NordVPN)
* [EdgeRouter](https://support.nordvpn.com/hc/en-us/articles/20321386897041-EdgeRouter-and-Ubiquiti-setup-with-NordVPN)
* [TP-Link](https://support.nordvpn.com/hc/en-us/articles/20280525082001-Setting-up-TP-Link-with-NordVPN)
* Starlink (read more about how to use [VPN on Starlink](https://nordvpn.com/blog/starlink-vpn/))
## Not sure if your router is supported and/or can't find it on the list above?
First, see if you can find your router on our [list of unsupported routers](https://support.nordvpn.com/hc/en-us/articles/20379585675793-Which-routers-don-t-support-NordVPN).
If it’s not on there, check the user manual that came with your router (usually, manuals are available for download on the manufacturer’s website). Search the manual for any mentions of OpenVPN support. Your router must support the OpenVPN client in order to potentially support a NordVPN configuration. If you can’t find this information in the manual, consider contacting your router’s manufacturer.
If none of the tips mentioned above have helped you set up a connection, feel free to contact our support team!",https://support.nordvpn.com/hc/en-us/related/click?data=BAh7CjobZGVzdGluYXRpb25fYXJ0aWNsZV9pZGwrCBEJ4fyqEToYcmVmZXJyZXJfYXJ0aWNsZV9pZGwrCBEeLijLEToLbG9jYWxlSSIKZW4tdXMGOgZFVDoIdXJsSSJHL2hjL2VuLXVzL2FydGljbGVzLzE5NDI2MDg0NzE4ODY1LVNldHRpbmctdXAtYS1yb3V0ZXItd2l0aC1Ob3JkVlBOBjsIVDoJcmFua2kI--525e4b45b2578a2159c3939a44772825bfc73f66
How to Set Up SmartDNS on Apple TV,"[Smart DNS](https://support.nordvpn.com/hc/en-us/articles/19442825306257-What-is-SmartDNS) technology works by automatically switching your [DNS servers](https://nordvpn.com/blog/what-is-dns-server/) (which provide IP addresses for your devices to connect to) whenever you try to access unavailable content. This is especially useful if you want to access legitimate subscriptions from your home country when you’re away.
To enable NordVPN’s smart DNS on your Apple TV, follow these steps:
1. On the device you're currently using, ensure that you're connected to the same network as your Apple TV.(For example, if your Apple TV is connected to “Wi-Fi_123,” then connect your current device to the same Wi-Fi).
2. Now, [open your Nord Account and log in](https://my.nordaccount.com/dashboard/). Afterward, in the “Services” section, click on NordVPN.
3. In the “Smart DNS” category, press the “Activate” button.This will allowlist your [IP address](https://nordvpn.com/what-is-my-ip/) and allow you to use smart DNS on the network that your Apple TV is connected to. (The next steps could vary based on the model of your Apple TV.)
4. On your Apple TV, navigate to “General” and select “Network.”
5. Click on “Wi-Fi” at the top and select the network you allowlist in step 3.
6. Select “Configure DNS” and choose “Manual.”
7. Enter our smart DNS server addresses:Primary DNS: 103.86.99.103Secondary DNS (if available): 103.86.96.103",https://support.nordvpn.com/hc/en-us/related/click?data=BAh7CjobZGVzdGluYXRpb25fYXJ0aWNsZV9pZGwrCJEuKDTLEToYcmVmZXJyZXJfYXJ0aWNsZV9pZGwrCBEeLijLEToLbG9jYWxlSSIKZW4tdXMGOgZFVDoIdXJsSSJJL2hjL2VuLXVzL2FydGljbGVzLzE5NTY0NDUxMDgxODczLUhvdy10by1TZXQtVXAtU21hcnRETlMtb24tQXBwbGUtVFYGOwhUOglyYW5raQk%3D--80d00d7d5bf59677d5dd066c440ede8b399c5b71
Which routers don’t support NordVPN,"On 1 December 2018, NordVPN’s servers stopped supporting L2TP/IPsec and PPTP connections. More about that in [this article](https://nordvpn.com/blog/l2tp-pptp-protocol-update/).
If you use any of the routers listed below with their native firmware, you will not be able to use them with our service:
* Arris
* Belkin
* Cisco
* D-Link
* Huawei
* Linksys (except [WRT32X/WRT32XB AC3200](https://www.linksys.com/support-article?articleNum=270535))
* Nighthawk range routers ([unless the router is using DumaOS](https://www.netgear.com/home/online-gaming/))
* [Netgear](https://support.nordvpn.com/hc/en-us/articles/20282781982481-Can-I-set-up-Netgear-router-with-VPN)
* TRENDnet
* Tenda
* TotoLink
* Ubee
* Orbi
* Spectrum
* Xfinity
* Eero
* Verizon
* AT&T
* FRITZ!Box
* Most ISP-provided routers that were mentioned above
You can install the following custom firmware on some of the aforementioned models to make them work:
* DD-WRT:
* Tomato:
* Padavan:
* OpenWRT:
* Merlin:
## Other tips for router connectivity:
* If your router supports the OpenVPN protocol, search our knowledge base for the name of its manufacturer. You should find a tutorial on how to set it up. You can also check our [router tutorials](https://support.nordvpn.com/hc/en-us/sections/19326876055569-Router) section under the Connectivity category. If you cannot find the setup guide for your router, [contact our customer support](https://support.nordvpn.com/hc/en-us/articles/19482416296593-How-can-I-reach-NordVPN-customer-support) for help.
* If you want a router with out-of-the-box security and anonymity that NordVPN provides, head over to our partners at [FlashRouters](https://nordvpn.com/flashrouters/). They offer pre-configured routers delivering top-notch security and performance.
* Here is our list of [recommended routers for NordVPN](https://support.nordvpn.com/hc/en-us/articles/20195707547025-Which-router-should-I-use-with-NordVPN).",https://support.nordvpn.com/hc/en-us/related/click?data=BAh7CjobZGVzdGluYXRpb25fYXJ0aWNsZV9pZGwrCBEC9%2F2IEjoYcmVmZXJyZXJfYXJ0aWNsZV9pZGwrCBEeLijLEToLbG9jYWxlSSIKZW4tdXMGOgZFVDoIdXJsSSJKL2hjL2VuLXVzL2FydGljbGVzLzIwMzc5NTg1Njc1NzkzLVdoaWNoLXJvdXRlcnMtZG9uLXQtc3VwcG9ydC1Ob3JkVlBOBjsIVDoJcmFua2kK--4f673462f4b21dab065db4cc9fe6b85ef6eb83e4
Set Up SmartDNS VPN feature on LG TV,"To configure your LG TV for the [Smart DNS VPN feature](https://nordvpn.com/features/streaming/smart-play/), you would need to follow these steps:
1. On the device you're currently using, ensure that you're connected to the same network that is used for the LG TV.(E.g. if your LG TV is connected to Wi-Fi_123, then connect your current device to the same Wi-Fi).
2. Now, open Nord Account and log in. Afterward, in the Services section, click on NordVPN.
3. In the SmartDNS category, press the Activate button.This will allowlist your IP address and allow you to use SmartDNS on the network that your LG TV is connected to. (The following steps may vary depending on the model of your TV)
4. Now, turn on your LG Smart TV and press Settings on your remote.
5. From this settings menu scroll down to Network and select Network Connection.
6. Connect your LG Smart TV to the same network as is used by your current device.
7. Select Your Network and then Select Other Network List.
8. Select Set Expert Button.
9. Select Your Network Connection.
10. Scroll Down to the DNS Mode and select Manual Tab. Then enter 103.86.96.103 (and 103.86.99.103 if allowed to enter second) and Press OK.
And that's it, the SmartDNS VPN feature is now enabled on your LG TV. Enjoy!",https://support.nordvpn.com/hc/en-us/related/click?data=BAh7CjobZGVzdGluYXRpb25fYXJ0aWNsZV9pZGwrCBEeLijLEToYcmVmZXJyZXJfYXJ0aWNsZV9pZGwrCJEgsuKuEToLbG9jYWxlSSIKZW4tdXMGOgZFVDoIdXJsSSJLL2hjL2VuLXVzL2FydGljbGVzLzE5NTY0MjUwMTQ0MjczLVNldC1VcC1TbWFydEROUy1WUE4tZmVhdHVyZS1vbi1MRy1UVgY7CFQ6CXJhbmtpBg%3D%3D--9bc988664227e05d51f53487b8f248180d832cf7
How to Set Up SmartDNS on Apple TV,"[Smart DNS](https://support.nordvpn.com/hc/en-us/articles/19442825306257-What-is-SmartDNS) technology works by automatically switching your [DNS servers](https://nordvpn.com/blog/what-is-dns-server/) (which provide IP addresses for your devices to connect to) whenever you try to access unavailable content. This is especially useful if you want to access legitimate subscriptions from your home country when you’re away.
To enable NordVPN’s smart DNS on your Apple TV, follow these steps:
1. On the device you're currently using, ensure that you're connected to the same network as your Apple TV.(For example, if your Apple TV is connected to “Wi-Fi_123,” then connect your current device to the same Wi-Fi).
2. Now, [open your Nord Account and log in](https://my.nordaccount.com/dashboard/). Afterward, in the “Services” section, click on NordVPN.
3. In the “Smart DNS” category, press the “Activate” button.This will allowlist your [IP address](https://nordvpn.com/what-is-my-ip/) and allow you to use smart DNS on the network that your Apple TV is connected to. (The next steps could vary based on the model of your Apple TV.)
4. On your Apple TV, navigate to “General” and select “Network.”
5. Click on “Wi-Fi” at the top and select the network you allowlist in step 3.
6. Select “Configure DNS” and choose “Manual.”
7. Enter our smart DNS server addresses:Primary DNS: 103.86.99.103Secondary DNS (if available): 103.86.96.103",https://support.nordvpn.com/hc/en-us/related/click?data=BAh7CjobZGVzdGluYXRpb25fYXJ0aWNsZV9pZGwrCJEuKDTLEToYcmVmZXJyZXJfYXJ0aWNsZV9pZGwrCJEgsuKuEToLbG9jYWxlSSIKZW4tdXMGOgZFVDoIdXJsSSJJL2hjL2VuLXVzL2FydGljbGVzLzE5NTY0NDUxMDgxODczLUhvdy10by1TZXQtVXAtU21hcnRETlMtb24tQXBwbGUtVFYGOwhUOglyYW5raQc%3D--eb1eccf4c28a327c1708b60946cef0d714c6c93f
How to cancel auto-renewal for your subscription,"If your subscription was purchased via the Google Play Store, Apple App Store, or Amazon App Store and you wish to cancel it, follow the respective articles below:
* Cancelling your [Google Play Store NordVPN subscription](https://support.google.com/googleplay/answer/7018481)
* Cancelling your [Apple App Store NordVPN subscription](https://support.apple.com/en-lamr/118428)
* Cancelling your [Amazon App Store NordVPN subscription](https://www.amazonforum.com/s/question/0D54P00007IG0CkSAL/amazon-appstore-subscriptions)
## Cancelling your NordVPN subscription
If you have purchased your subscription directly from NordVPN and wish for your subscription to no longer renew at the subsequent billing date, you may cancel your subscription via your [Nord Account](https://my.nordaccount.com/).
You can follow the same steps to cancel your NordPass, NordLocker, Dedicated IP, or bundle subscription services.
To cancel the automatic renewal of your NordVPN subscription, follow the steps below:
1. Log in to your [Nord Account](https://my.nordaccount.com/)
2. Open the billing tab:
3. Click cancel next to auto-renewal:
4. Select cancel auto-renewal:
5. Your auto-renewal status will now change to off:
You will receive a confirmation email to your registered email account if your subscription cancellation is successful:
If you wish to receive a refund, please read [our article on NordVPN's refund policy](https://support.nordvpn.com/hc/en-us/articles/19476991311121-What-is-your-money-back-policy).",https://support.nordvpn.com/hc/en-us/related/click?data=BAh7CjobZGVzdGluYXRpb25fYXJ0aWNsZV9pZGwrCJFczG7JEToYcmVmZXJyZXJfYXJ0aWNsZV9pZGwrCJE8dFhcEjoLbG9jYWxlSSIKZW4tdXMGOgZFVDoIdXJsSSJXL2hjL2VuLXVzL2FydGljbGVzLzE5NTU2ODQ0OTg1NDg5LUhvdy10by1jYW5jZWwtYXV0by1yZW5ld2FsLWZvci15b3VyLXN1YnNjcmlwdGlvbgY7CFQ6CXJhbmtpBw%3D%3D--11ce1c30d21f216059cd314d5422934c2bad0e17
How to reach NordVPN customer support?,"While we don't offer phone support, we have different options to contact NordVPN customer support available 24/7 and ready to help you!
## Help Center
First off, if you run into any issues using NordVPN - check out our Help Center that is available in 14 languages: English, German, French, Danish, Italian, Spanish, Norwegian, Swedish, Dutch, Japanese, Korean, Polish, Portuguese-Brazilian, Traditional Chinese.
You can change the language by scrolling down until you see the language change option and clicking on the language you prefer. This will ensure that you can look for information in a language comfortable for you.
After you have set the language you want to look information in, you can find solutions in the help center by either:
* Searching for information using Help Center's search bar, which will list out articles according to the keywords typed in the search query:
* Navigating to one of the categories available in the Help Center:
* [FAQ](https://support.nordvpn.com/hc/en-us/categories/200593301-FAQ) - in this category you'll find Frequently asked questions and NordVPN app setup tutorials;
* [General info](https://support.nordvpn.com/hc/en-us/categories/360000293597-General-info) - here, you'll be able to find information on NordVPN functionalities, features, and SmartPlay;
* [Billing](https://support.nordvpn.com/hc/en-us/categories/360000293617-Billing) - this category covers payment, subscription, and account management topics;
* [Connectivity](https://support.nordvpn.com/hc/en-us/categories/200614302-Connectivity) - the last category available covers troubleshooting articles, here you can find help regarding NordVPN connectivity, internet speed with NordVPN on, manual setups for routers and different OSes, proxies.
## Support agents
However, if you're looking for assistance on your specific case, you can reach out to our developed conversation bots or human customer support agents by:
* Chat
* Email
We have two teams to assist you:
* Customer Care & Billing Team: They can tell you about NordVPN, help set up your devices, make sure you can access streaming sites, and answer questions about dedicated IPs. As well as helpyou with your NordVPN subscription, account, or payments.
* Connection Team: They can assist with setting up NordVPN on your router, fixing advanced connectivity problems, and helping in places with internet restrictions.",https://support.nordvpn.com/hc/en-us/related/click?data=BAh7CjobZGVzdGluYXRpb25fYXJ0aWNsZV9pZGwrCJGygBq4EToYcmVmZXJyZXJfYXJ0aWNsZV9pZGwrCJE8dFhcEjoLbG9jYWxlSSIKZW4tdXMGOgZFVDoIdXJsSSJML2hjL2VuLXVzL2FydGljbGVzLzE5NDgyNDE2Mjk2NTkzLUhvdy10by1yZWFjaC1Ob3JkVlBOLWN1c3RvbWVyLXN1cHBvcnQGOwhUOglyYW5raQg%3D--8eaf206aef7a476f2872bed275341eb01e157144
Dedicated IP: Renewal and cancellation,"If you want to renew your dedicated IP service or cancel auto-renewal for your dedicated IP subscription, the steps you need to take depend on how you purchased the dedicated IP service.
## You bought the dedicated IP in your Nord Account
If you have purchased a dedicated IP in your [Nord Account](https://my.nordaccount.com/), the service will be renewed automatically. It makes no difference if you bought the dedicated IP as a standalone service or got it with a VPN bundle.
If you no longer want a particular dedicated IP anymore, you can[ cancel auto-renewal for your subscription in your Nord Account](https://support.nordvpn.com/hc/en-us/articles/19556844985489-How-to-cancel-a-subscription). Please note that this is not a refund, as outlined in[ NordVPN’s refund policy](https://support.nordvpn.com/hc/en-us/articles/19476991311121-What-is-your-money-back-policy).
## You bought the dedicated IP using a coupon code
Dedicated IP services purchased using a coupon code are not subject to auto-renewal. To renew your dedicated IP addresses, you will need to manually[ buy the dedicated IP service](https://support.nordvpn.com/hc/en-us/articles/19484196251921-How-to-purchase-a-dedicated-IP-address).
When your dedicated IP subscription is about to expire, we will send a reminder about renewal to your registered Nord Account email address.",https://support.nordvpn.com/hc/en-us/related/click?data=BAh7CjobZGVzdGluYXRpb25fYXJ0aWNsZV9pZGwrCBGwWaEXFToYcmVmZXJyZXJfYXJ0aWNsZV9pZGwrCJE8dFhcEjoLbG9jYWxlSSIKZW4tdXMGOgZFVDoIdXJsSSJML2hjL2VuLXVzL2FydGljbGVzLzIzMTkxMjM1NDQwNjU3LURlZGljYXRlZC1JUC1SZW5ld2FsLWFuZC1jYW5jZWxsYXRpb24GOwhUOglyYW5raQo%3D--915441d898bcdb6616f201d4a3af3d429f28ed83
What is your money-back policy?,"Here is the refund and cancellation policy at the core of our 30-day money-back guarantee:
“...if you are not satisfied with our Services, you may cancel the Subscription and request a refund within 30 days following your purchase of our Services (“Money Back Guarantee”). Please note that Subscriptions may be refunded on the basis of the Money Back Guarantee only after the initial purchase. Once a Subscription is renewed, it cannot be refunded on the basis of the Money Back Guarantee, unless applicable law provides otherwise.”
This and other conditions of our service can be found in our [Terms of Service](https://my.nordaccount.com/legal/terms-of-service/).
Here are our instructions for [how to cancel](https://support.nordvpn.com/hc/en-us/articles/19556844985489-How-to-cancel-auto-renewal-for-your-subscription) automatic payment renewal.
## Requesting a refund
Previously, refunds could only be processed through our support team. We have now implemented an automated refund system that is more efficient, faster, and convenient for our customers to use. This change also improves our ability to gather feedback, allowing us to better understand issues and improve our service. As we continue to refine this new process, your feedback is welcomed to help us enhance it further.
To request a refund for your payment, contact our customer support team via live chat available in the bottom right corner of the page, and indicate you would like us to refund your payment.
1. You will receive a link to your Nord Account dashboard. Follow the link and verify it’s you who’s trying to access the account.
2. In the following window, you will see which payments are eligible for a refund. Such payments will have a Refund button available. To proceed, click on Refund.Please keep in mind that not all payments are eligible for refunds, and certain terms apply depending on where you bought the subscription:
* * Apple App Store: Subscriptions purchased via the Apple App Store are subject to Apple's refund policies. We're unable to issue refunds for payments made through the Apple App Store. For assistance, please reach out to Apple directly via Apple Support.
* Amazon Appstore: If you've purchased your subscription through the Amazon App Store, contact Amazon directly for assistance via Amazon Support.
* Google Play Store: Refunds for payments made through the Google Play Store can be requested through NordVPN’s customer support, provided they fall within the refund terms outlined above. Additionally, if the payment was made within the last 48 hours, you can request a refund directly from your Google Play account. For more details, visit Google Play Support.
* Retailers or resellers: If you've purchased a subscription outside the NordVPN website (e.g., physical store, online shop, or marketplace like BestBuy or StackSocial), please contact the retailer directly regarding the refund.
1. In the following window, select the reason for canceling the service and requesting a refund. Your feedback is invaluable because it helps us pinpoint areas for improvement and ensures a better experience for all our users.Once completed, click Submit and Continue. 
2. You will see your refund summary. You can confirm it by clicking Refund.
3. After submitting the request, you will receive a confirmation email saying that your refund has been ordered.
4. You should now see the refund status for your payment as Refund Processing. This means that your request has been received and is currently being processed. This process can take up to a few hours*.*Please note, that due to recent implementation, it may take up to 4 hours for a refund request to be processed.
5. Once the refund is complete, the refund status on your dashboard will change to Refunded, and you will receive a confirmation email. Please note that depending on your payment method, it may take up to 10 business days for the refund to reach your account. If there was an error or you have any other questions, please contact our customer support team directly.",https://support.nordvpn.com/hc/en-us/related/click?data=BAh7CjobZGVzdGluYXRpb25fYXJ0aWNsZV9pZGwrCBH9Jde2EToYcmVmZXJyZXJfYXJ0aWNsZV9pZGwrCBFBeVJcEjoLbG9jYWxlSSIKZW4tdXMGOgZFVDoIdXJsSSJFL2hjL2VuLXVzL2FydGljbGVzLzE5NDc2OTkxMzExMTIxLVdoYXQtaXMteW91ci1tb25leS1iYWNrLXBvbGljeQY7CFQ6CXJhbmtpBg%3D%3D--96bbc1bbba08fe626e662dd499c69cf725a7283b
Cyber insurance benefits: subscription and cancellation,"This article covers common questions relating to your cyber insurance benefits subscription and its cancellation.
### How do I cancel my cyber insurance benefits?
Your cyber insurance benefits will end when you cancel your NordVPN Ultimate bundle subscription.
### Will my insurance benefits still be valid if I move abroad?
The insurance benefits are currently only available to customers residing in the UK, US, SE, DE, FR, IT, NL. Hence, it will be available only if you move to one of these countries.",https://support.nordvpn.com/hc/en-us/related/click?data=BAh7CjobZGVzdGluYXRpb25fYXJ0aWNsZV9pZGwrCJE8dFhcEjoYcmVmZXJyZXJfYXJ0aWNsZV9pZGwrCBFBeVJcEjoLbG9jYWxlSSIKZW4tdXMGOgZFVDoIdXJsSSJdL2hjL2VuLXVzL2FydGljbGVzLzIwMTg3ODMwMzAzODg5LUN5YmVyLWluc3VyYW5jZS1iZW5lZml0cy1zdWJzY3JpcHRpb24tYW5kLWNhbmNlbGxhdGlvbgY7CFQ6CXJhbmtpBw%3D%3D--85afcd8c674a1a758544842ab9e9834e195babfd
How to cancel auto-renewal for your subscription,"If your subscription was purchased via the Google Play Store, Apple App Store, or Amazon App Store and you wish to cancel it, follow the respective articles below:
* Cancelling your [Google Play Store NordVPN subscription](https://support.google.com/googleplay/answer/7018481)
* Cancelling your [Apple App Store NordVPN subscription](https://support.apple.com/en-lamr/118428)
* Cancelling your [Amazon App Store NordVPN subscription](https://www.amazonforum.com/s/question/0D54P00007IG0CkSAL/amazon-appstore-subscriptions)
## Cancelling your NordVPN subscription
If you have purchased your subscription directly from NordVPN and wish for your subscription to no longer renew at the subsequent billing date, you may cancel your subscription via your [Nord Account](https://my.nordaccount.com/).
You can follow the same steps to cancel your NordPass, NordLocker, Dedicated IP, or bundle subscription services.
To cancel the automatic renewal of your NordVPN subscription, follow the steps below:
1. Log in to your [Nord Account](https://my.nordaccount.com/)
2. Open the billing tab:
3. Click cancel next to auto-renewal:
4. Select cancel auto-renewal:
5. Your auto-renewal status will now change to off:
You will receive a confirmation email to your registered email account if your subscription cancellation is successful:
If you wish to receive a refund, please read [our article on NordVPN's refund policy](https://support.nordvpn.com/hc/en-us/articles/19476991311121-What-is-your-money-back-policy).",https://support.nordvpn.com/hc/en-us/related/click?data=BAh7CjobZGVzdGluYXRpb25fYXJ0aWNsZV9pZGwrCJFczG7JEToYcmVmZXJyZXJfYXJ0aWNsZV9pZGwrCBFBeVJcEjoLbG9jYWxlSSIKZW4tdXMGOgZFVDoIdXJsSSJXL2hjL2VuLXVzL2FydGljbGVzLzE5NTU2ODQ0OTg1NDg5LUhvdy10by1jYW5jZWwtYXV0by1yZW5ld2FsLWZvci15b3VyLXN1YnNjcmlwdGlvbgY7CFQ6CXJhbmtpCA%3D%3D--51960c0a75968a2ac145918d2b60b0380e46d3aa
Unauthorised use of Credit or Debit card,"NordVPN provides VPN services through subscriptions. If you see a suspicious charge from NordVPN or any Nord product on your card statement, contact customer support for help:
* Email: support@nordvpn.com
* Live chat: Click the chat bubble at the bottom-right of their website.
To help identify the payment, provide these details:
* First six and last four digits of the card
* Cardholder name
* Amount charged
* Date of the transaction
Sometimes, the charges might be due to a friend or family member using your card.",https://support.nordvpn.com/hc/en-us/related/click?data=BAh7CjobZGVzdGluYXRpb25fYXJ0aWNsZV9pZGwrCJH8jX3nEToYcmVmZXJyZXJfYXJ0aWNsZV9pZGwrCBFBeVJcEjoLbG9jYWxlSSIKZW4tdXMGOgZFVDoIdXJsSSJPL2hjL2VuLXVzL2FydGljbGVzLzE5Njg1OTQxNTc0ODAxLVVuYXV0aG9yaXNlZC11c2Utb2YtQ3JlZGl0LW9yLURlYml0LWNhcmQGOwhUOglyYW5raQk%3D--d4e54068d5f2d171eb69e04fe9d0d2f595d01799
Which router should I use with NordVPN?,"It's important that a router supports VPN configurations to use NordVPN; however, to maximize your NordVPN experience, a router that’s pre-configured for VPN use is key.
For example, FlashRouters offers a [wide range of NordVPN-compatible devices](https://nordvpn.com/flashrouters/) optimized for secure, high-speed connections right out of the box without having to configure or set up the routers.
For the best out-of-the-box router solution with extra safety, privacy, streaming capabilities, and an exclusive NordLynx integration, we recommend the [Privacy Hero 2](https://www.flashrouters.com/privacy-hero-nordvpn-router-by-flashrouters). This unique cloud-connected device also includes 1 year of NordVPN plus 1 year of Privacy Hero service, providing seamless security and performance for your home network.
## Why Choose FlashRouters?
[FlashRouters](https://nordvpn.com/flashrouters/) offers some of the best routers for NordVPN pre-configured to deliver top-notch security and performance:
* Top-Tier Security: Your entire network is shielded by NordVPN, keeping your online activity private and secure.
* Speed & Stability: Our devices are equipped with powerful processors and advanced WiFi technologies, ensuring fast and stable VPN connections.
* Plug-and-Play VPN Setup: Skip the headaches of manual configuration. FlashRouters comes pre-flashed and optimized for NordVPN compatibility.
* Ongoing Support: Need networking support assistance? Their expert support team is here to help with your setup and troubleshooting.
### More NordVPN Recommended Routers Options (OpenVPN Only)
Flashrouters also have a few models supporting only OpenVPN connection:
* [Next Gen WiFi 7](https://www.flashrouters.com/router-basics/wireless-be): These devices are significantly higher cost but offer NordVPN OpenVPN support.
* [Mesh VPN Routers](https://www.flashrouters.com/routers?fmr_use_case=344): Looking for more extensive VPN coverage? FlashRouters offers a wide array of heavily tested [Mesh WiFi Systems for NordVPN](https://www.flashrouters.com/routers?fmr_use_case=344).
* [AX3000 VPN Router](https://www.flashrouters.com/cudy-wr3000-vpn-router-by-flashrouters): If the lowest price is the main concern, this AX3000 is a popular economy device for OpenVPN.
## Configurable devices
You can also buy a router and configure it yourself. While many different routers are available from other manufacturers, the most commonly used are Asus routers, as most have a built-in OpenVPN client and require minimal effort to set up.
Some popular examples include the Asus RT-AX86U, RT-AX68U, and RT-AX88U (AX6000). However, these devices will not support NordLynx.
Most other routers require firmware flashing, which might be tricky and does not work on all platforms. If you want a legacy router that provides OpenVPN encryption, you can also find any router that supports the following custom firmware:
* DD-WRT:
* Tomato:
* OpenWRT:
* Merlin:
The next step will be to learn [how to set up NordVPN on your router](https://support.nordvpn.com/hc/en-us/articles/19426084718865-Setting-up-a-router-with-NordVPN).",https://support.nordvpn.com/hc/en-us/related/click?data=BAh7CjobZGVzdGluYXRpb25fYXJ0aWNsZV9pZGwrCJFt%2BS1eEjoYcmVmZXJyZXJfYXJ0aWNsZV9pZGwrCBEmsyz1EToLbG9jYWxlSSIKZW4tdXMGOgZFVDoIdXJsSSJNL2hjL2VuLXVzL2FydGljbGVzLzIwMTk1NzA3NTQ3MDI1LVdoaWNoLXJvdXRlci1zaG91bGQtSS11c2Utd2l0aC1Ob3JkVlBOBjsIVDoJcmFua2kJ--a090ee7f884d0288609b837cffb79dd01c791770
Cyber insurance benefits: payment and charges,"This article will cover cyber insurance payment and charges questions.
## Table of contents:
* [Paying for insurance benefits](https://support.nordvpn.com/hc/en-us/related/click?data=BAh7CjobZGVzdGluYXRpb25fYXJ0aWNsZV9pZGwrCBFBeVJcEjoYcmVmZXJyZXJfYXJ0aWNsZV9pZGwrCBEZYkVcEjoLbG9jYWxlSSIKZW4tdXMGOgZFVDoIdXJsSSJTL2hjL2VuLXVzL2FydGljbGVzLzIwMTg3NzI5OTY5NDI1LUN5YmVyLWluc3VyYW5jZS1iZW5lZml0cy1wYXltZW50LWFuZC1jaGFyZ2VzBjsIVDoJcmFua2kH--a0fac81a0dea8ab272d918b284b02eb8e7b6bd8e#Paying%20for%20insurance%20benefits)
* [Paying excess ](
### How do I pay for these insurance benefits?
There are no separate payments for insurance benefits. These insurance benefits are automatically included in your NordVPN Ultimate bundle subscription.
### What is the excess, and when do I pay it?
The excess is the amount you must pay towards an insurance claim's overall cost. We Cyber Insurance will then contribute the rest – up to the limit of the cover. The excess for the cyber insurance benefits is 100 GBP per claim. The excess is deducted from the reimbursement you will receive in case of an approved claim.",https://support.nordvpn.com/hc/en-us/related/click?data=BAh7CjobZGVzdGluYXRpb25fYXJ0aWNsZV9pZGwrCBFBeVJcEjoYcmVmZXJyZXJfYXJ0aWNsZV9pZGwrCBEZYkVcEjoLbG9jYWxlSSIKZW4tdXMGOgZFVDoIdXJsSSJTL2hjL2VuLXVzL2FydGljbGVzLzIwMTg3NzI5OTY5NDI1LUN5YmVyLWluc3VyYW5jZS1iZW5lZml0cy1wYXltZW50LWFuZC1jaGFyZ2VzBjsIVDoJcmFua2kH--a0fac81a0dea8ab272d918b284b02eb8e7b6bd8e
I forgot my NordVPN password. What to do?,"1. Go to the Nord Account entry page: , and click on Log in to Nord Account. 
2. Click on Forgot your password? After that, enter your registered E-Mail address and click on Send Reset Link.
3. A password reset link will be automatically sent to your e-mail:
4. Go over to your e-mail account and use the password reset link to set a new NordVPN password. Afterward, you will be able to log in to our applications and connect to our servers.",https://support.nordvpn.com/hc/en-us/related/click?data=BAh7CjobZGVzdGluYXRpb25fYXJ0aWNsZV9pZGwrCBFo2XTZEToYcmVmZXJyZXJfYXJ0aWNsZV9pZGwrCBEZYkVcEjoLbG9jYWxlSSIKZW4tdXMGOgZFVDoIdXJsSSJOL2hjL2VuLXVzL2FydGljbGVzLzE5NjI1NjY1OTgwNDMzLUktZm9yZ290LW15LU5vcmRWUE4tcGFzc3dvcmQtV2hhdC10by1kbwY7CFQ6CXJhbmtpCA%3D%3D--1c2669f13fe0448bba84549c89543f7fcaa7e22c
How to use NordVPN Tray functionality on Linux,"With the release of the 3.18.0 NordVPN version for Linux, we introduce a new feature for all supported Linux devices – The tray icon. This feature allows you to see and control NordVPN connections more easily.
In order to connect to the VPN, you’ll have to install [NordVPN on your Linux](https://nordvpn.com/download/linux/) device and log in.
## Using Tray on Linux
By default, the NordVPN Tray function should be visible at the top right of your screen when the VPN is open. In case you are unable to see it, open the terminal and enter any NordVPN-related command, such as:
```
nordvpn login
```
or
```
nordvpn
```

At the top right of your screen, you will see a white NordVPN logo. This means you’re not connected to the VPN:

When you click on it, you will see the following information:
* VPN connection status, which will indicate that you're disconnected;
* Quick connect button to connect to a recommended server;
* The settings button, where you can toggle the tray icon and notifications;
* The option to log in, or, if you are already logged in, you will see the email address of your account;
* Log out button;
* Quit button to close the app.

Once you’re connected, the NordVPN logo will be blue instead:

If you click on the blue logo, you will see your VPN connection status and information along with an additional disconnect button:

And now you know how to use the Tray functionality on Linux. Read more on using NordVPN on Linux.",https://support.nordvpn.com/hc/en-us/related/click?data=BAh7CjobZGVzdGluYXRpb25fYXJ0aWNsZV9pZGwrCJG4Hy06FzoYcmVmZXJyZXJfYXJ0aWNsZV9pZGwrCBEZYkVcEjoLbG9jYWxlSSIKZW4tdXMGOgZFVDoIdXJsSSJVL2hjL2VuLXVzL2FydGljbGVzLzI1NTM4NjMyNTk1NjAxLUhvdy10by11c2UtTm9yZFZQTi1UcmF5LWZ1bmN0aW9uYWxpdHktb24tTGludXgGOwhUOglyYW5raQk%3D--2c8b0a85bfada4468a90c5d3059097ff1bc7c1f3
Manual OpenVPN connection setup on iPad / iPhone,"Note: if you are using iOS 15 or later, please follow this tutorial.
OpenVPN is a popular protocol our specialty servers use to provide extra functionality. This is an alternative connection method for when you are having trouble with the [native NordVPN app for iOS](https://nordvpn.com/download/ios/). Here’s how to configure your iOS device for this connection method:
1. Go to the [App Store](https://apps.apple.com/us/app/nordvpn-vpn-fast-secure/id905953485?mt=8) on your iPad/iPhone.
2. Tap on Search.
3. Type openvpn connect in the search bar.
4. Tap on the installation button.
5. Enter your iTunes Store credentials and tap OK.
6. Once the app is installed, download the .OVPN configuration file.
Follow the steps below to find the manual connection configuration files:
1. Log into your [Nord Account](https://my.nordaccount.com/), and click NordVPN.
2. Scroll down to Advanced Settings and click Set up NordVPN manually.
3. Select the OpenVPN configuration files tab.
4. Find the server you wish to connect to by using the Search bar or by scrolling down and download it by clicking Download UDP or Download TCP.
5. When connecting to OpenVPN & IKEv2 manually, you're going to need to use the Username and Password from the Service credential tab.
1. Select Open in OpenVPN.Alternatively, if you're brought to a safari window, follow these steps:
1. Click on the Share icon:
2. In the application list, select the OpenVPN Connect application (in case you don't see it, select more and then choose the application as mentioned earlier):
3. Once the OpenVPN Connect application is open, select File:
4. Afterward, select Add:
2. Enter your NordVPN service credentials, choose to save the password in a keychain, and tap ADD in the top right corner.You can find your NordVPN service credentials (username and password) through the [Nord Account dashboard](https://my.nordaccount.com/dashboard/nordvpn/):
Follow the steps below to find the service credentials for manual connection setup:
1. Log into your [Nord Account](https://my.nordaccount.com/), click NordVPN, and, under Manual setup, click on Service credentials. Here you'll find the Username and Password needed to connect manually.

1. You will see a pop-up asking for permission to add OpenVPN to your VPN configurations. Click Allow.
2. Tap on the toggle switch to connect to VPN.
3. That’s it! You have successfully connected.
4. To change a server, disconnect from the current server by tapping the toggle switch next to it and enable another imported profile.
5. To disconnect, tap on the same toggle button you used to connect.",https://support.nordvpn.com/hc/en-us/related/click?data=BAh7CjobZGVzdGluYXRpb25fYXJ0aWNsZV9pZGwrCBHS5seBEjoYcmVmZXJyZXJfYXJ0aWNsZV9pZGwrCBEZYkVcEjoLbG9jYWxlSSIKZW4tdXMGOgZFVDoIdXJsSSJVL2hjL2VuLXVzL2FydGljbGVzLzIwMzQ4NjEzODc0MTkzLU1hbnVhbC1PcGVuVlBOLWNvbm5lY3Rpb24tc2V0dXAtb24taVBhZC1pUGhvbmUGOwhUOglyYW5raQo%3D--8a7c89abc874b875cc139198cbbb4affc36a9e6e
Cyber insurance benefits: coverage and claims,"This article will cover questions on cyber insurance coverage and claims.
## Table of contents:
* [Types of issues covered by the insurance benefits](https://support.nordvpn.com/hc/en-us/related/click?data=BAh7CjobZGVzdGluYXRpb25fYXJ0aWNsZV9pZGwrCJG67PpbEjoYcmVmZXJyZXJfYXJ0aWNsZV9pZGwrCJHJDAhcEjoLbG9jYWxlSSIKZW4tdXMGOgZFVDoIdXJsSSJTL2hjL2VuLXVzL2FydGljbGVzLzIwMTg2MjYxMTQyMTYxLUN5YmVyLWluc3VyYW5jZS1iZW5lZml0cy1jb3ZlcmFnZS1hbmQtY2xhaW1zBjsIVDoJcmFua2kG--5ec5e8313ef77931b8587c8c9c0597822669ca59#Types%20of%20issues%20covered%20by%20the%20insurance%20benefits)
* [Situations where insurance benefits are not applicable](https://support.nordvpn.com/hc/en-us/related/click?data=BAh7CjobZGVzdGluYXRpb25fYXJ0aWNsZV9pZGwrCJG67PpbEjoYcmVmZXJyZXJfYXJ0aWNsZV9pZGwrCJHJDAhcEjoLbG9jYWxlSSIKZW4tdXMGOgZFVDoIdXJsSSJTL2hjL2VuLXVzL2FydGljbGVzLzIwMTg2MjYxMTQyMTYxLUN5YmVyLWluc3VyYW5jZS1iZW5lZml0cy1jb3ZlcmFnZS1hbmQtY2xhaW1zBjsIVDoJcmFua2kG--5ec5e8313ef77931b8587c8c9c0597822669ca59#Situations%20where%20insurance%20benefits%20are%20not%20applicable)
* [Conditions for making a claim](https://support.nordvpn.com/hc/en-us/related/click?data=BAh7CjobZGVzdGluYXRpb25fYXJ0aWNsZV9pZGwrCJG67PpbEjoYcmVmZXJyZXJfYXJ0aWNsZV9pZGwrCJHJDAhcEjoLbG9jYWxlSSIKZW4tdXMGOgZFVDoIdXJsSSJTL2hjL2VuLXVzL2FydGljbGVzLzIwMTg2MjYxMTQyMTYxLUN5YmVyLWluc3VyYW5jZS1iZW5lZml0cy1jb3ZlcmFnZS1hbmQtY2xhaW1zBjsIVDoJcmFua2kG--5ec5e8313ef77931b8587c8c9c0597822669ca59#Conditions%20for%20making%20a%20claim)
* [Where do the insurance benefits cover you](https://support.nordvpn.com/hc/en-us/related/click?data=BAh7CjobZGVzdGluYXRpb25fYXJ0aWNsZV9pZGwrCJG67PpbEjoYcmVmZXJyZXJfYXJ0aWNsZV9pZGwrCJHJDAhcEjoLbG9jYWxlSSIKZW4tdXMGOgZFVDoIdXJsSSJTL2hjL2VuLXVzL2FydGljbGVzLzIwMTg2MjYxMTQyMTYxLUN5YmVyLWluc3VyYW5jZS1iZW5lZml0cy1jb3ZlcmFnZS1hbmQtY2xhaW1zBjsIVDoJcmFua2kG--5ec5e8313ef77931b8587c8c9c0597822669ca59#Where%20do%20the%20insurance%20benefits%20cover%20you)
* [Cryptocurrency coverage](https://support.nordvpn.com/hc/en-us/related/click?data=BAh7CjobZGVzdGluYXRpb25fYXJ0aWNsZV9pZGwrCJG67PpbEjoYcmVmZXJyZXJfYXJ0aWNsZV9pZGwrCJHJDAhcEjoLbG9jYWxlSSIKZW4tdXMGOgZFVDoIdXJsSSJTL2hjL2VuLXVzL2FydGljbGVzLzIwMTg2MjYxMTQyMTYxLUN5YmVyLWluc3VyYW5jZS1iZW5lZml0cy1jb3ZlcmFnZS1hbmQtY2xhaW1zBjsIVDoJcmFua2kG--5ec5e8313ef77931b8587c8c9c0597822669ca59#Cryptocurrency%20coverage)
### What types of issues do these insurance benefits cover?
Scam loss recovery provides reimbursement when you have transferred funds from a personal account in response to a cyber scam, whereby you have been tricked into opening or responding to emails, text messages, and phone calls that appeared to be from legitimate entities or people who you trust and/or are known to you, which were sent with the purpose of defrauding you. Examples of such [scams](https://nordvpn.com/blog/what-is-a-scam/) include but are not limited to: [phishing](https://nordvpn.com/blog/what-is-phishing/) (emails); [smishing](https://nordvpn.com/blog/smishing/) (text messages); [vishing](https://nordvpn.com/blog/what-is-vishing/) (fraudulent pre-recorded messages); and [spoofing](https://nordvpn.com/blog/spoofing/) (impersonation phone calls).
Online shopping fraud recovery provides reimbursement when you have purchased eligible items/services online from a website/trading platform that turned out to be fraudulent. Some examples include:
* You purchased an item via an online sales advertisement. No receipt or proof of purchase was provided after you completed the payment. The website subsequently went missing, and it turned out the webpage was fraudulent.
* You performed an electronic transaction to book a scheduled cleaning service from an online advertisement, however, no service was rendered, and all the contact details on the ad turned out to be fabricated.
* You performed an electronic transaction to make a purchase from a webpage that was impersonating a legitimate brand, company, or online merchant and only realized it after the transaction was made.
### Are there any situations not covered by these insurance benefits?
There are a number of situations not covered under the following insurance benefits.
#### Not covered by scam loss recovery:
* Any transactions from a business account
* Advance fee fraud, where you are promised goods, services, and/or financial gains in return for an upfront payment, including payment by electronic transaction
* Confidence scams/[romance scams](https://nordvpn.com/blog/online-dating-scams/), where someone befriends you, forms a personal connection with you, or pretends to be interested in a romantic relationship with you and convinces you to transfer money to them.
#### Not covered by online shopping fraud recovery
* Online purchases where cash, cryptocurrency such as bitcoins, vouchers, or reward points are the form of payment
* Online purchases for items/services which are not classed as eligible items/services
* Unauthorized transactions on your payment card or e-money account because of online shopping fraud, leading to the cloning of your payment card or identity theft
### Is there any restriction or condition for making a claim?
The following conditions apply in order to make a claim:
* You must have had an active NordVPN Ultimate bundle subscription at the time of the incident that resulted in your claim.
* You must report the fraud to the Action Fraud website www.actionfraud.police.uk within 24 hours of you discovering it. Action Fraud will issue you with a crime reference number.
* You must notify your bank or your e-money account provider within 24 hours of you discovering the fraud, so it can make attempts to stop any transactions from going through or to trace where the funds have gone.
* You must make reasonable attempts to recover any lost funds.
* You must retain documentary evidence of the fraud.
* You must submit your claim as soon as practicable by completing an online submission via your NordVPN account.
* You must provide accurate information to us in the event of a claim. If you don’t, you could invalidate your insurance benefits, or we might reject a claim.
Please be aware that the insurer is unable to pay any claims that would result in breaches of the UN resolutions, trade or economic sanctions, or other laws of the UK, EU, or USA.
### Where am I covered?
You are covered worldwide, 24 hours a day. However, please be aware that the insurer cannot pay any claims that would result in breaches of the UN resolutions, trade or economic sanctions, or other laws of the UK, EU, or USA.
### Are transactions involving cryptocurrencies like Bitcoin covered?
No, transactions involving cryptocurrency of any kind are not covered by these insurance benefits.",https://support.nordvpn.com/hc/en-us/related/click?data=BAh7CjobZGVzdGluYXRpb25fYXJ0aWNsZV9pZGwrCJG67PpbEjoYcmVmZXJyZXJfYXJ0aWNsZV9pZGwrCJHJDAhcEjoLbG9jYWxlSSIKZW4tdXMGOgZFVDoIdXJsSSJTL2hjL2VuLXVzL2FydGljbGVzLzIwMTg2MjYxMTQyMTYxLUN5YmVyLWluc3VyYW5jZS1iZW5lZml0cy1jb3ZlcmFnZS1hbmQtY2xhaW1zBjsIVDoJcmFua2kG--5ec5e8313ef77931b8587c8c9c0597822669ca59
What is your money-back policy?,"Here is the refund and cancellation policy at the core of our 30-day money-back guarantee:
“...if you are not satisfied with our Services, you may cancel the Subscription and request a refund within 30 days following your purchase of our Services (“Money Back Guarantee”). Please note that Subscriptions may be refunded on the basis of the Money Back Guarantee only after the initial purchase. Once a Subscription is renewed, it cannot be refunded on the basis of the Money Back Guarantee, unless applicable law provides otherwise.”
This and other conditions of our service can be found in our [Terms of Service](https://my.nordaccount.com/legal/terms-of-service/).
Here are our instructions for [how to cancel](https://support.nordvpn.com/hc/en-us/articles/19556844985489-How-to-cancel-auto-renewal-for-your-subscription) automatic payment renewal.
## Requesting a refund
Previously, refunds could only be processed through our support team. We have now implemented an automated refund system that is more efficient, faster, and convenient for our customers to use. This change also improves our ability to gather feedback, allowing us to better understand issues and improve our service. As we continue to refine this new process, your feedback is welcomed to help us enhance it further.
To request a refund for your payment, contact our customer support team via live chat available in the bottom right corner of the page, and indicate you would like us to refund your payment.
1. You will receive a link to your Nord Account dashboard. Follow the link and verify it’s you who’s trying to access the account.
2. In the following window, you will see which payments are eligible for a refund. Such payments will have a Refund button available. To proceed, click on Refund.Please keep in mind that not all payments are eligible for refunds, and certain terms apply depending on where you bought the subscription:
* * Apple App Store: Subscriptions purchased via the Apple App Store are subject to Apple's refund policies. We're unable to issue refunds for payments made through the Apple App Store. For assistance, please reach out to Apple directly via Apple Support.
* Amazon Appstore: If you've purchased your subscription through the Amazon App Store, contact Amazon directly for assistance via Amazon Support.
* Google Play Store: Refunds for payments made through the Google Play Store can be requested through NordVPN’s customer support, provided they fall within the refund terms outlined above. Additionally, if the payment was made within the last 48 hours, you can request a refund directly from your Google Play account. For more details, visit Google Play Support.
* Retailers or resellers: If you've purchased a subscription outside the NordVPN website (e.g., physical store, online shop, or marketplace like BestBuy or StackSocial), please contact the retailer directly regarding the refund.
1. In the following window, select the reason for canceling the service and requesting a refund. Your feedback is invaluable because it helps us pinpoint areas for improvement and ensures a better experience for all our users.Once completed, click Submit and Continue. 
2. You will see your refund summary. You can confirm it by clicking Refund.
3. After submitting the request, you will receive a confirmation email saying that your refund has been ordered.
4. You should now see the refund status for your payment as Refund Processing. This means that your request has been received and is currently being processed. This process can take up to a few hours*.*Please note, that due to recent implementation, it may take up to 4 hours for a refund request to be processed.
5. Once the refund is complete, the refund status on your dashboard will change to Refunded, and you will receive a confirmation email. Please note that depending on your payment method, it may take up to 10 business days for the refund to reach your account. If there was an error or you have any other questions, please contact our customer support team directly.",https://support.nordvpn.com/hc/en-us/related/click?data=BAh7CjobZGVzdGluYXRpb25fYXJ0aWNsZV9pZGwrCBH9Jde2EToYcmVmZXJyZXJfYXJ0aWNsZV9pZGwrCJHJDAhcEjoLbG9jYWxlSSIKZW4tdXMGOgZFVDoIdXJsSSJFL2hjL2VuLXVzL2FydGljbGVzLzE5NDc2OTkxMzExMTIxLVdoYXQtaXMteW91ci1tb25leS1iYWNrLXBvbGljeQY7CFQ6CXJhbmtpBw%3D%3D--c381056efc03e8d5204263ae08b1c5a1bcd3af8c
Cyber insurance benefits: additional FAQs,"You can find additional questions answered about cyber insurance in this article.
## Table of contents:
* [Ability to purchase additional coverage](https://support.nordvpn.com/hc/en-us/related/click?data=BAh7CjobZGVzdGluYXRpb25fYXJ0aWNsZV9pZGwrCJHPMOtbEjoYcmVmZXJyZXJfYXJ0aWNsZV9pZGwrCJHJDAhcEjoLbG9jYWxlSSIKZW4tdXMGOgZFVDoIdXJsSSJPL2hjL2VuLXVzL2FydGljbGVzLzIwMTg1OTk3MTY4NTI5LUN5YmVyLWluc3VyYW5jZS1iZW5lZml0cy1hZGRpdGlvbmFsLUZBUXMGOwhUOglyYW5raQg%3D--6d65892bd16e214d88c2248d9b650677cc2724ee#Ability%20to%20purchase%20additional%20coverage)
* [Who is the insurance benefits receiver](https://support.nordvpn.com/hc/en-us/related/click?data=BAh7CjobZGVzdGluYXRpb25fYXJ0aWNsZV9pZGwrCJHPMOtbEjoYcmVmZXJyZXJfYXJ0aWNsZV9pZGwrCJHJDAhcEjoLbG9jYWxlSSIKZW4tdXMGOgZFVDoIdXJsSSJPL2hjL2VuLXVzL2FydGljbGVzLzIwMTg1OTk3MTY4NTI5LUN5YmVyLWluc3VyYW5jZS1iZW5lZml0cy1hZGRpdGlvbmFsLUZBUXMGOwhUOglyYW5raQg%3D--6d65892bd16e214d88c2248d9b650677cc2724ee#Who%20is%20the%20insurance%20benefits%20receiver)
* [Waiting period](https://support.nordvpn.com/hc/en-us/related/click?data=BAh7CjobZGVzdGluYXRpb25fYXJ0aWNsZV9pZGwrCJHPMOtbEjoYcmVmZXJyZXJfYXJ0aWNsZV9pZGwrCJHJDAhcEjoLbG9jYWxlSSIKZW4tdXMGOgZFVDoIdXJsSSJPL2hjL2VuLXVzL2FydGljbGVzLzIwMTg1OTk3MTY4NTI5LUN5YmVyLWluc3VyYW5jZS1iZW5lZml0cy1hZGRpdGlvbmFsLUZBUXMGOwhUOglyYW5raQg%3D--6d65892bd16e214d88c2248d9b650677cc2724ee#Waiting%20period)
* [Cybersecurity practices that must be followed](https://support.nordvpn.com/hc/en-us/related/click?data=BAh7CjobZGVzdGluYXRpb25fYXJ0aWNsZV9pZGwrCJHPMOtbEjoYcmVmZXJyZXJfYXJ0aWNsZV9pZGwrCJHJDAhcEjoLbG9jYWxlSSIKZW4tdXMGOgZFVDoIdXJsSSJPL2hjL2VuLXVzL2FydGljbGVzLzIwMTg1OTk3MTY4NTI5LUN5YmVyLWluc3VyYW5jZS1iZW5lZml0cy1hZGRpdGlvbmFsLUZBUXMGOwhUOglyYW5raQg%3D--6d65892bd16e214d88c2248d9b650677cc2724ee#Cybersecurity%20practices%20that%20must%20be%20followed)
* [Secondary financial impacts coverage](https://support.nordvpn.com/hc/en-us/related/click?data=BAh7CjobZGVzdGluYXRpb25fYXJ0aWNsZV9pZGwrCJHPMOtbEjoYcmVmZXJyZXJfYXJ0aWNsZV9pZGwrCJHJDAhcEjoLbG9jYWxlSSIKZW4tdXMGOgZFVDoIdXJsSSJPL2hjL2VuLXVzL2FydGljbGVzLzIwMTg1OTk3MTY4NTI5LUN5YmVyLWluc3VyYW5jZS1iZW5lZml0cy1hZGRpdGlvbmFsLUZBUXMGOwhUOglyYW5raQg%3D--6d65892bd16e214d88c2248d9b650677cc2724ee#Secondary%20financial%20impacts%20coverage)
* [Reasons for getting your insurance benefits canceled or ceased](https://support.nordvpn.com/hc/en-us/related/click?data=BAh7CjobZGVzdGluYXRpb25fYXJ0aWNsZV9pZGwrCJHPMOtbEjoYcmVmZXJyZXJfYXJ0aWNsZV9pZGwrCJHJDAhcEjoLbG9jYWxlSSIKZW4tdXMGOgZFVDoIdXJsSSJPL2hjL2VuLXVzL2FydGljbGVzLzIwMTg1OTk3MTY4NTI5LUN5YmVyLWluc3VyYW5jZS1iZW5lZml0cy1hZGRpdGlvbmFsLUZBUXMGOwhUOglyYW5raQg%3D--6d65892bd16e214d88c2248d9b650677cc2724ee#Reasons%20for%20getting%20your%20insurance%20benefits%20canceled%20or%20ceased)
* [Policy renewal](https://support.nordvpn.com/hc/en-us/related/click?data=BAh7CjobZGVzdGluYXRpb25fYXJ0aWNsZV9pZGwrCJHPMOtbEjoYcmVmZXJyZXJfYXJ0aWNsZV9pZGwrCJHJDAhcEjoLbG9jYWxlSSIKZW4tdXMGOgZFVDoIdXJsSSJPL2hjL2VuLXVzL2FydGljbGVzLzIwMTg1OTk3MTY4NTI5LUN5YmVyLWluc3VyYW5jZS1iZW5lZml0cy1hZGRpdGlvbmFsLUZBUXMGOwhUOglyYW5raQg%3D--6d65892bd16e214d88c2248d9b650677cc2724ee#Policy%20renewal)
* [Contact direct](https://support.nordvpn.com/hc/en-us/related/click?data=BAh7CjobZGVzdGluYXRpb25fYXJ0aWNsZV9pZGwrCJHPMOtbEjoYcmVmZXJyZXJfYXJ0aWNsZV9pZGwrCJHJDAhcEjoLbG9jYWxlSSIKZW4tdXMGOgZFVDoIdXJsSSJPL2hjL2VuLXVzL2FydGljbGVzLzIwMTg1OTk3MTY4NTI5LUN5YmVyLWluc3VyYW5jZS1iZW5lZml0cy1hZGRpdGlvbmFsLUZBUXMGOwhUOglyYW5raQg%3D--6d65892bd16e214d88c2248d9b650677cc2724ee#Contact%20direct)
### Can I purchase additional coverage above the £5,000 limit?
No, you cannot purchase additional coverage above the £5,000 limit.
### Are family members or other individuals using my NordVPN account also covered under this policy?
No, these insurance benefits are only applicable to the owner of the NordVPN account who has purchased the NordVPN Ultimate bundle subscription.
### Is there a waiting period before the insurance benefits cover becomes active?
There is no waiting period. As soon as you have purchased a NordVPN Ultimate bundle subscription, you are covered by the insurance benefits.
### Are there any specific cybersecurity practices I need to follow to ensure my claim will be valid?
You are responsible for taking reasonable precautions to prevent losses due to cyber fraud. Such precautions include avoiding clicking on suspicious links and [verifying the identity](https://nordvpn.com/blog/identity-verification/) of their sender, e.g., checking the email address and/or phone number or verifying payee information with the bank before responding.
You must also comply with the terms and conditions of your bank or e-money account provider and follow any instructions given by them with regard to avoiding [fraud](https://nordvpn.com/blog/what-is-fraud/), such as never disclosing login details, PIN numbers, or [OTP (One-Time-Passcodes)](https://nordvpn.com/blog/one-time-password-explained/) to anyone.
If you have been a victim of cyber fraud, you must notify your bank or e-money account provider within 24 hours of you discovering the fraud, so they can make attempts to stop the transaction from going through or trace where the funds have gone.
If you have failed to adhere to any of the above, or if it is deemed that you have been unreasonably negligent, then your claim may be denied.
### In the case of a cyber scam, am I covered for any secondary financial impacts, like loss of investment gains?
No, the insurance benefits only cover funds transferred or transactions made by you directly in response to a cyber scam.
### In what circumstances might Chubb or NordVPN cancel or cease the insurance benefits cover?
Either the insurer (Chubb) or the group policyholder (NordVPN) may cancel or cease the insurance benefits for any of the following reasons:
* by mutual agreement between the two parties.
* if you, or anyone acting on your behalf, knowingly makes a claim which is in any way dishonest, false, or fraudulent.
You will be notified in the event of cancellation of these insurance benefits.
### How do I renew my policy, and will there be any change in terms upon renewal?
As long as you have an active NordVPN Ultimate bundle subscription, you need not take any additional action. The policy and the insurance benefits will continue, and there will be no changes to the terms of the policy upon renewal as long as the group policy between Chubb and NordVPN is valid. However, if there are any changes to the group policy or if the group policy is no longer valid, you will be notified at least 60 days in advance.
### Is there any way to reach out to someone if I have any additional questions?
If you have any additional questions about the insurance benefits, you can contact chubbcyberclaims@ie.sedgwick.com",https://support.nordvpn.com/hc/en-us/related/click?data=BAh7CjobZGVzdGluYXRpb25fYXJ0aWNsZV9pZGwrCJHPMOtbEjoYcmVmZXJyZXJfYXJ0aWNsZV9pZGwrCJHJDAhcEjoLbG9jYWxlSSIKZW4tdXMGOgZFVDoIdXJsSSJPL2hjL2VuLXVzL2FydGljbGVzLzIwMTg1OTk3MTY4NTI5LUN5YmVyLWluc3VyYW5jZS1iZW5lZml0cy1hZGRpdGlvbmFsLUZBUXMGOwhUOglyYW5raQg%3D--6d65892bd16e214d88c2248d9b650677cc2724ee
Cyber insurance benefits: subscription and cancellation,"This article covers common questions relating to your cyber insurance benefits subscription and its cancellation.
### How do I cancel my cyber insurance benefits?
Your cyber insurance benefits will end when you cancel your NordVPN Ultimate bundle subscription.
### Will my insurance benefits still be valid if I move abroad?
The insurance benefits are currently only available to customers residing in the UK, US, SE, DE, FR, IT, NL. Hence, it will be available only if you move to one of these countries.",https://support.nordvpn.com/hc/en-us/related/click?data=BAh7CjobZGVzdGluYXRpb25fYXJ0aWNsZV9pZGwrCJE8dFhcEjoYcmVmZXJyZXJfYXJ0aWNsZV9pZGwrCJHJDAhcEjoLbG9jYWxlSSIKZW4tdXMGOgZFVDoIdXJsSSJdL2hjL2VuLXVzL2FydGljbGVzLzIwMTg3ODMwMzAzODg5LUN5YmVyLWluc3VyYW5jZS1iZW5lZml0cy1zdWJzY3JpcHRpb24tYW5kLWNhbmNlbGxhdGlvbgY7CFQ6CXJhbmtpCQ%3D%3D--11afada7b9d241bc43a761a29ca35a4459b59cd7
Cyber insurance benefits: insurance claims process,"This article will answer questions about the cyber insurance claims process.
## Table of contents:
* [Filing a claim due to a cyber scam or an online shopping fraud](https://support.nordvpn.com/hc/en-us/related/click?data=BAh7CjobZGVzdGluYXRpb25fYXJ0aWNsZV9pZGwrCJE42vlbEjoYcmVmZXJyZXJfYXJ0aWNsZV9pZGwrCJHJDAhcEjoLbG9jYWxlSSIKZW4tdXMGOgZFVDoIdXJsSSJYL2hjL2VuLXVzL2FydGljbGVzLzIwMTg2MjQzMTUyMDE3LUN5YmVyLWluc3VyYW5jZS1iZW5lZml0cy1pbnN1cmFuY2UtY2xhaW1zLXByb2Nlc3MGOwhUOglyYW5raQo%3D--e7723e9323ccc1e7fbadc981c3925ff16c30070a#Filing%20a%20claim%20due%20to%20a%20cyber%20scam%20or%20an%20online%20shopping%20fraud)
* [Unable to file a claim via NordVPN account](https://support.nordvpn.com/hc/en-us/related/click?data=BAh7CjobZGVzdGluYXRpb25fYXJ0aWNsZV9pZGwrCJE42vlbEjoYcmVmZXJyZXJfYXJ0aWNsZV9pZGwrCJHJDAhcEjoLbG9jYWxlSSIKZW4tdXMGOgZFVDoIdXJsSSJYL2hjL2VuLXVzL2FydGljbGVzLzIwMTg2MjQzMTUyMDE3LUN5YmVyLWluc3VyYW5jZS1iZW5lZml0cy1pbnN1cmFuY2UtY2xhaW1zLXByb2Nlc3MGOwhUOglyYW5raQo%3D--e7723e9323ccc1e7fbadc981c3925ff16c30070a#Unable%20to%20file%20a%20claim%20via%20NordVPN%20account)
* [Documentation needed to access a claim](https://support.nordvpn.com/hc/en-us/related/click?data=BAh7CjobZGVzdGluYXRpb25fYXJ0aWNsZV9pZGwrCJE42vlbEjoYcmVmZXJyZXJfYXJ0aWNsZV9pZGwrCJHJDAhcEjoLbG9jYWxlSSIKZW4tdXMGOgZFVDoIdXJsSSJYL2hjL2VuLXVzL2FydGljbGVzLzIwMTg2MjQzMTUyMDE3LUN5YmVyLWluc3VyYW5jZS1iZW5lZml0cy1pbnN1cmFuY2UtY2xhaW1zLXByb2Nlc3MGOwhUOglyYW5raQo%3D--e7723e9323ccc1e7fbadc981c3925ff16c30070a#Documentation%20needed%20to%20access%20a%20claim)
* [Covered and possible to claim budget](https://support.nordvpn.com/hc/en-us/related/click?data=BAh7CjobZGVzdGluYXRpb25fYXJ0aWNsZV9pZGwrCJE42vlbEjoYcmVmZXJyZXJfYXJ0aWNsZV9pZGwrCJHJDAhcEjoLbG9jYWxlSSIKZW4tdXMGOgZFVDoIdXJsSSJYL2hjL2VuLXVzL2FydGljbGVzLzIwMTg2MjQzMTUyMDE3LUN5YmVyLWluc3VyYW5jZS1iZW5lZml0cy1pbnN1cmFuY2UtY2xhaW1zLXByb2Nlc3MGOwhUOglyYW5raQo%3D--e7723e9323ccc1e7fbadc981c3925ff16c30070a#Covered%20and%20possible%20to%20claim%20budget)
* [Claim process length and updates](https://support.nordvpn.com/hc/en-us/related/click?data=BAh7CjobZGVzdGluYXRpb25fYXJ0aWNsZV9pZGwrCJE42vlbEjoYcmVmZXJyZXJfYXJ0aWNsZV9pZGwrCJHJDAhcEjoLbG9jYWxlSSIKZW4tdXMGOgZFVDoIdXJsSSJYL2hjL2VuLXVzL2FydGljbGVzLzIwMTg2MjQzMTUyMDE3LUN5YmVyLWluc3VyYW5jZS1iZW5lZml0cy1pbnN1cmFuY2UtY2xhaW1zLXByb2Nlc3MGOwhUOglyYW5raQo%3D--e7723e9323ccc1e7fbadc981c3925ff16c30070a#Claim%20process%20length%20and%20updates)
### How do I file a claim in the event of a cyber scam or online shopping fraud?
The easiest way to file a claim is via your NordVPN account. Simply log in and select “Cyber insurance” on your account home page. Next, select the “File a claim” button, and from there, you will be asked to select which insurance benefit your claim relates to. You will then be prompted to enter some contact information and details about the incident and follow the remaining steps to completion.
### What do I do if I am unable to file the claim via my NordVPN account?
Alternatively, you can submit your claim to chubbcyberclaims@ie.sedgwick.com, entering “NordVPN claims” in the subject line, providing your name, address, email address, and phone number, a description of the incident, and attaching any supporting documentation.
### What documentation is required to support a claim?
The following supporting documents will be required to assess any claims:
#### For claims under scam loss recovery, supporting documentation includes:
* A bank statement showing evidence of bank transfers relating to the incident
* A copy of the police report/crime reference number obtained after reporting the incident to Action Fraud via www.actionfraud.police.uk
* A copy of any chat communication, SMS, call logs, email, website, or other method of digital communication that led to the incident or request for funds
* A copy of any chat communication, SMS, call logs, email, website, or other method of digital communication showing reasonable attempts to recover the funds back from the third party
* Any additional supporting documents proving that you are the victim of fraud
#### For claims under online shopping fraud recovery, supporting documentation includes:
* A bank statement showing evidence of purchase relating to the incident
* A copy of the police report/crime reference number obtained after reporting the incident to Action Fraud via www.actionfraud.police.uk
* A copy of any chat communication, SMS, call logs, email, website, or other method of digital communication showing reasonable attempts to recover the funds back from the vendor
* Any additional supporting documents proving that you are the victim of fraud
You can attach the supporting documents in the online portal once you are redirected via the “File a claim” button on your NordVPN account, so make sure you have them ready to have as quick handling of your claim as possible.
### What is the maximum amount I can claim?
The maximum amount you can claim under the insurance benefits in total is £5,000 within a 12-month period.
### How long does the claim process typically take, and how will I be updated on the status of my claim?
After submitting a claim, you should receive an acknowledgment email within 1 hour confirming your submission. Please allow for up to 7 business days for us to process your claim. You may be contacted for further information, so please look out for communications to help us process your claim as quickly as possible. Once a claim is approved, payment to your account will typically take 3-5 business days. Please note that we will only make claim payments to a bank account registered in your name in the United Kingdom.",https://support.nordvpn.com/hc/en-us/related/click?data=BAh7CjobZGVzdGluYXRpb25fYXJ0aWNsZV9pZGwrCJE42vlbEjoYcmVmZXJyZXJfYXJ0aWNsZV9pZGwrCJHJDAhcEjoLbG9jYWxlSSIKZW4tdXMGOgZFVDoIdXJsSSJYL2hjL2VuLXVzL2FydGljbGVzLzIwMTg2MjQzMTUyMDE3LUN5YmVyLWluc3VyYW5jZS1iZW5lZml0cy1pbnN1cmFuY2UtY2xhaW1zLXByb2Nlc3MGOwhUOglyYW5raQo%3D--e7723e9323ccc1e7fbadc981c3925ff16c30070a
What is Threat Protection Pro™ and Threat Protection?,"Threat Protection Pro™ is a feature that automatically blocks ads, trackers, and malicious URLs. When you visit a website known for scamming people, this feature displays an in-browser alert to warn you about possible fraud. Threat Protection Pro™ also scans downloads for malware and checks your apps for security vulnerabilities. You don't need an active VPN connection for Threat Protection Pro™ to work. Click here to learn more.
Threat Protection Pro™ is available on:
* Windows (You may also choose Threat Protection)
* macOS (You may also choose Threat Protection on the App Store NordVPN version)
Threat Protection is a feature that blocks ads, trackers, and unsafe domains based on DNS filtering. It only works when you're connected to one of the NordVPN's servers.
Threat Protection is available on:
* Android
* iOS
* Linux
* macOS
* Windows
* NordVPN Chrome Extension
* NordVPN Firefox Extension
* NordVPN Edge Extension
### What is the difference between Threat Protection Pro™ and Threat Protection?
The main differences between the two features are:
* Threat Protection Pro™ works without being connected to the VPN, but you must be connected to one of the NordVPN servers to use the Threat Protection feature.
* Windows and macOS devices support both Threat Protection Pro™ and Threat Protection features. Meanwhile, Android, iOS, and Linux devices and Chrome, Firefox, and Edge extensions support only Threat Protection.
* Threat Protection Pro™ deletes any malware-ridden file during download and blocks trackers, while Threat Protection doesn't.",https://support.nordvpn.com/hc/en-us/related/click?data=BAh7CjobZGVzdGluYXRpb25fYXJ0aWNsZV9pZGwrCBH2CT2%2BEToYcmVmZXJyZXJfYXJ0aWNsZV9pZGwrCJG67PpbEjoLbG9jYWxlSSIKZW4tdXMGOgZFVDoIdXJsSSJaL2hjL2VuLXVzL2FydGljbGVzLzE5NTA4NzY1NTIxNDI1LVdoYXQtaXMtVGhyZWF0LVByb3RlY3Rpb24tUHJvLWFuZC1UaHJlYXQtUHJvdGVjdGlvbgY7CFQ6CXJhbmtpBw%3D%3D--3e1eb870e56e8d0ced93455433bed8f7d372706d
Should I choose NordVPN app or NordVPN extension?,"When purchasing a NordVPN subscription, you get access to the [NordVPN application](https://nordvpn.com/download/) for Windows, Android, macOS, iOS, and Linux OS devices. You also get access to the [NordVPN proxy extension](https://nordvpn.com/features/proxy-extension/) for your Chrome, Edge, and Firefox browsers. While both provide security and hide your online presence, they do have different additional benefits.
## NordVPN extension's main benefits:
* NordVPN's proxy extension does not ask for administrator rights for use.
* Secures only your browser traffic.
* Shorter setup than the application.
* The extension allows you to access blocked websites and streaming services without closing or minimizing your browser.
* You can choose websites you wish to exclude from the secure connection using the [Split Tunneling](https://nordvpn.com/features/split-tunneling/) feature.
## NordVPN application's main benefits:
* Has different server categories such as [Double VPN Servers](https://nordvpn.com/features/double-vpn/), [Obfuscated Servers](https://nordvpn.com/features/obfuscated-servers/), and [Dedicated IP](https://nordvpn.com/features/dedicated-ip/).
* Let's you choose between [OpenVPN and Nordlynx](https://support.nordvpn.com/hc/en-us/articles/19482810153745-Which-NordVPN-protocol-should-I-choose) connection protocols.
* You can prevent your device from making unprotected connections by using the [Kill Switch](https://support.nordvpn.com/hc/en-us/articles/19509682644369-NordVPN-Kill-Switch-how-does-it-work) feature.
* Offers a new secure communication between devices feature - [Meshnet](https://nordvpn.com/meshnet/).
* Prevent others from exploiting account information leaked to the dangerous dark web while using the [Dark Web Monitor](https://nordvpn.com/features/dark-web-monitor/) feature.
* Allows you to choose specific cities/regions.
Which product version you should use depends on your online security needs.",https://support.nordvpn.com/hc/en-us/related/click?data=BAh7CjobZGVzdGluYXRpb25fYXJ0aWNsZV9pZGwrCBF9OpB7EjoYcmVmZXJyZXJfYXJ0aWNsZV9pZGwrCJG67PpbEjoLbG9jYWxlSSIKZW4tdXMGOgZFVDoIdXJsSSJXL2hjL2VuLXVzL2FydGljbGVzLzIwMzIxOTEwMDI5NTg1LVNob3VsZC1JLWNob29zZS1Ob3JkVlBOLWFwcC1vci1Ob3JkVlBOLWV4dGVuc2lvbgY7CFQ6CXJhbmtpCA%3D%3D--887b455b99b461dc653b2167a99cc884092ffdc4
Change your DNS servers on Windows,"Here's how you can change the DNS servers on...
* [Windows 7,8.1,10](https://support.nordvpn.com/Connectivity/Windows/1088041672/Change-your-DNS-servers-on-Windows.htm#Windows%207,8.1,10)
* [Windows 11](https://support.nordvpn.com/Connectivity/Windows/1088041672/Change-your-DNS-servers-on-Windows.htm#Windows%2011)
## Windows 7,8.1,10
1. Right-click the network icon (or the Wi-Fi icon if you are connected to Wi-Fi) in the taskbar notification area and select Network and Sharing Center.
2. Select Change adapter options.
3. Right-click the TAP-NordVPN Windows adapter V9 and choose Properties.
4. Select Internet Protocol Version 4 (TCP/IPv4) and click Properties.
5. Select Use the following DNS server addresses and enter NordVPN's DNS addresses:Preferred DNS server: 103.86.96.100Alternate DNS server: 103.86.99.100
6. Repeat steps 3-5 for your physical network adapter, which will be called Ethernet or Wi-Fi (depending on which one you use).
And you're done! The DNS servers should have now been successfully set.
## On Windows 11
1. At the bottom of your screen, find and press on the magnifying glass icon. 
2. A window with a search bar will appear. Type in ""Manage Network Adapter Settings"" and open the matching result.
3. Find TAP-NordVPN Windows adapter V9, and click on it. More details will appear, including the option to ""View additional properties"". Press it. 
4. Next to ""DNS server assignment"" press the ""Edit"" button. 
5. In the small pop-up box, select ""Manual"".
6. Now, adjust the settings as follows:IPv4 turned ONPreferred DNS: 103.86.96.100Alternate DNS: 103.86.99.100IPv6 turned OFFThen, press Save.7. Repeat steps 3-6 for your physical network adapter, which will be called Ethernet or Wi-Fi (depending on which one you use)",https://support.nordvpn.com/hc/en-us/related/click?data=BAh7CjobZGVzdGluYXRpb25fYXJ0aWNsZV9pZGwrCBF4VlwdEjoYcmVmZXJyZXJfYXJ0aWNsZV9pZGwrCJG67PpbEjoLbG9jYWxlSSIKZW4tdXMGOgZFVDoIdXJsSSJJL2hjL2VuLXVzL2FydGljbGVzLzE5OTE3MzEyNTIyMjU3LUNoYW5nZS15b3VyLUROUy1zZXJ2ZXJzLW9uLVdpbmRvd3MGOwhUOglyYW5raQk%3D--d34bf0740d1cc88cf8a6b8bce9b407a0549fce4f
What to do if you’re unable to redeem NordVPN service from Revolut?,"If you are not able to redeem your NordVPN coupon, or your subscription does not get activated, please make sure that the following is in order:",https://support.nordvpn.com/hc/en-us/related/click?data=BAh7CjobZGVzdGluYXRpb25fYXJ0aWNsZV9pZGwrCJEobdndGzoYcmVmZXJyZXJfYXJ0aWNsZV9pZGwrCJG67PpbEjoLbG9jYWxlSSIKZW4tdXMGOgZFVDoIdXJsSSJTL2hjL2VuLXVzL2FydGljbGVzLzMwNjM5NjQ5NTMyMDQ5LUhvdy10by1yZWRlZW0tYS1SZXZvbHV0LU5vcmRWUE4tc3Vic2NyaXB0aW9uBjsIVDoJcmFua2kK--1479aa7973f762aa51c88d19d87b071ce7782da2
How to redeem a Revolut NordVPN subscription,"In this article you will learn how to redeem your NordVPN subscription gifted from Revolut.
In order to be eligible for a NordVPN subscription, you must have a Premium, Metal, or Ultra plan with Revolut.
Follow the steps below to redeem your subscription:
1. Open your Revolut app.
2. Tap your profile icon in the top-left corner.
3. Select Your plan.
4. Scroll down to your benefits, and tap See all
5. Tap NordVPN and follow the instructions.
Once you have followed these steps, you should have redeemed your NordVPN subscription successfully.
## What to do if you’re unable to redeem NordVPN service from Revolut?
If you are not able to redeem your NordVPN coupon, or your subscription does not get activated, please make sure that the following is in order:
* Your Revolut subscription is active.
* If you have changed your Revolut plan, make sure to re-activate your NordVPN services.
* Check for any spelling mistakes in the NordVPN coupon.
If you are still encountering issues, please contact our [customer support team](https://support.nordvpn.com/hc/en-us/requests/new?ticket_form_id=21068086896145).",https://support.nordvpn.com/hc/en-us/related/click?data=BAh7CjobZGVzdGluYXRpb25fYXJ0aWNsZV9pZGwrCJEobdndGzoYcmVmZXJyZXJfYXJ0aWNsZV9pZGwrCJG67PpbEjoLbG9jYWxlSSIKZW4tdXMGOgZFVDoIdXJsSSJTL2hjL2VuLXVzL2FydGljbGVzLzMwNjM5NjQ5NTMyMDQ5LUhvdy10by1yZWRlZW0tYS1SZXZvbHV0LU5vcmRWUE4tc3Vic2NyaXB0aW9uBjsIVDoJcmFua2kK--1479aa7973f762aa51c88d19d87b071ce7782da2
What is your money-back policy?,"Here is the refund and cancellation policy at the core of our 30-day money-back guarantee:
“...if you are not satisfied with our Services, you may cancel the Subscription and request a refund within 30 days following your purchase of our Services (“Money Back Guarantee”). Please note that Subscriptions may be refunded on the basis of the Money Back Guarantee only after the initial purchase. Once a Subscription is renewed, it cannot be refunded on the basis of the Money Back Guarantee, unless applicable law provides otherwise.”
This and other conditions of our service can be found in our [Terms of Service](https://my.nordaccount.com/legal/terms-of-service/).
Here are our instructions for [how to cancel](https://support.nordvpn.com/hc/en-us/articles/19556844985489-How-to-cancel-auto-renewal-for-your-subscription) automatic payment renewal.
## Requesting a refund
Previously, refunds could only be processed through our support team. We have now implemented an automated refund system that is more efficient, faster, and convenient for our customers to use. This change also improves our ability to gather feedback, allowing us to better understand issues and improve our service. As we continue to refine this new process, your feedback is welcomed to help us enhance it further.
To request a refund for your payment, contact our customer support team via live chat available in the bottom right corner of the page, and indicate you would like us to refund your payment.
1. You will receive a link to your Nord Account dashboard. Follow the link and verify it’s you who’s trying to access the account.
2. In the following window, you will see which payments are eligible for a refund. Such payments will have a Refund button available. To proceed, click on Refund.Please keep in mind that not all payments are eligible for refunds, and certain terms apply depending on where you bought the subscription:
* * Apple App Store: Subscriptions purchased via the Apple App Store are subject to Apple's refund policies. We're unable to issue refunds for payments made through the Apple App Store. For assistance, please reach out to Apple directly via Apple Support.
* Amazon Appstore: If you've purchased your subscription through the Amazon App Store, contact Amazon directly for assistance via Amazon Support.
* Google Play Store: Refunds for payments made through the Google Play Store can be requested through NordVPN’s customer support, provided they fall within the refund terms outlined above. Additionally, if the payment was made within the last 48 hours, you can request a refund directly from your Google Play account. For more details, visit Google Play Support.
* Retailers or resellers: If you've purchased a subscription outside the NordVPN website (e.g., physical store, online shop, or marketplace like BestBuy or StackSocial), please contact the retailer directly regarding the refund.
1. In the following window, select the reason for canceling the service and requesting a refund. Your feedback is invaluable because it helps us pinpoint areas for improvement and ensures a better experience for all our users.Once completed, click Submit and Continue. 
2. You will see your refund summary. You can confirm it by clicking Refund.
3. After submitting the request, you will receive a confirmation email saying that your refund has been ordered.
4. You should now see the refund status for your payment as Refund Processing. This means that your request has been received and is currently being processed. This process can take up to a few hours*.*Please note, that due to recent implementation, it may take up to 4 hours for a refund request to be processed.
5. Once the refund is complete, the refund status on your dashboard will change to Refunded, and you will receive a confirmation email. Please note that depending on your payment method, it may take up to 10 business days for the refund to reach your account. If there was an error or you have any other questions, please contact our customer support team directly.",https://support.nordvpn.com/hc/en-us/related/click?data=BAh7CjobZGVzdGluYXRpb25fYXJ0aWNsZV9pZGwrCBH9Jde2EToYcmVmZXJyZXJfYXJ0aWNsZV9pZGwrCJE42vlbEjoLbG9jYWxlSSIKZW4tdXMGOgZFVDoIdXJsSSJFL2hjL2VuLXVzL2FydGljbGVzLzE5NDc2OTkxMzExMTIxLVdoYXQtaXMteW91ci1tb25leS1iYWNrLXBvbGljeQY7CFQ6CXJhbmtpBg%3D%3D--578f8cbcfaca3ed3fd2d44408fdf84dc00426dac
Cyber insurance benefits: general questions,"This article will cover general questions regarding cyber insurance benefits.
## Table of contents:
* [What cyber insurance benefits are included with the NordVPN Ultimate bundle subscription?](
* [Who is the insurer of the policy?](
* [How do I qualify for the insurance benefits?](
* [When do the insurance benefits come into force, and when do they terminate?](
* [Is there any personal information shared with the insurer when I purchase a plan with insurance benefits?](
### What cyber insurance benefits are included with the NordVPN Ultimate bundle subscription?
The cyber insurance benefits included with the NordVPN Ultimate bundle subscription are:
* Scam loss recovery provides reimbursement for funds you have transferred from a personal account in response to a fraudulent text message, email, or phone call.
* Online shopping fraud recovery provides reimbursement when you have purchased eligible items online from a website/trading platform that turned out to be fraudulent. Eligible items are any items, services, or digital content that are:
* not counterfeit or fake goods.
* not stocks, shares, bonds, currencies, or digital assets.
* not goods bought using store credit or finance/leasing options or which were not paid in full.
* not goods purchased from an individual through a private transaction.
* not confiscated or declared illegal by any government, customs, or public body.
* not animals or livestock.
* not cash or its equivalents, traveler’s cheques, or tickets.
* not classified as real estate.
* not motor vehicles, motorcycles/scooters, watercraft or aircraft, and any equipment and/or parts necessary for their operation or maintenance.
* not subscription-based, where you are paying a recurring fee for a service.
### Who is the insurer of the policy?
The policy's insurer that provides you with the insurance benefits is Chubb European Group SE, UK Branch. For more information about Chubb, please visit .
### How do I qualify for the insurance benefits?
The insurance benefits will be provided on the condition that the insured person:
1. a) is over 18 years of age and is resident and domiciled in the United Kingdom at the start of the coverage period and for the duration of the entire coverage period; and
2. b) holds a NordVPN Ultimate bundle subscription in effect for the duration of the coverage period.
The time when the incident occurred means:
* For claims under the scam loss recovery category — the date you transferred funds in response to a fraudulent text, email, or phone call.
* For claims under the online shopping fraud recovery category — the date you purchased the items/services online.
### When do the insurance benefits come into force, and when do they terminate?
The insurance benefits enter into force as soon as you purchase a NordVPN Ultimate bundle subscription and will terminate:
* if you cancel auto-renewal for your NordVPN Ultimate bundle subscription.
* if the insurer or NordVPN serves notice to end the insurance benefits.
### Is there any personal information shared with the insurer when I purchase a plan with insurance benefits?
No, your personal information is not shared with the insurer when you purchase a plan with insurance benefits. However, if you need to file a claim under any of the insurance benefits, you will be asked to provide your name, address, and email address and may be requested to provide additional information necessary for the purpose of verifying a claim.",https://support.nordvpn.com/hc/en-us/related/click?data=BAh7CjobZGVzdGluYXRpb25fYXJ0aWNsZV9pZGwrCJHJDAhcEjoYcmVmZXJyZXJfYXJ0aWNsZV9pZGwrCJE42vlbEjoLbG9jYWxlSSIKZW4tdXMGOgZFVDoIdXJsSSJRL2hjL2VuLXVzL2FydGljbGVzLzIwMTg2NDgxMzQ2OTYxLUN5YmVyLWluc3VyYW5jZS1iZW5lZml0cy1nZW5lcmFsLXF1ZXN0aW9ucwY7CFQ6CXJhbmtpBw%3D%3D--754f5ed9c4d746210ad2e616739b04282c9bdafa
Cyber insurance benefits: payment and charges,"This article will cover cyber insurance payment and charges questions.
## Table of contents:
* [Paying for insurance benefits](https://support.nordvpn.com/hc/en-us/related/click?data=BAh7CjobZGVzdGluYXRpb25fYXJ0aWNsZV9pZGwrCBFBeVJcEjoYcmVmZXJyZXJfYXJ0aWNsZV9pZGwrCJE42vlbEjoLbG9jYWxlSSIKZW4tdXMGOgZFVDoIdXJsSSJTL2hjL2VuLXVzL2FydGljbGVzLzIwMTg3NzI5OTY5NDI1LUN5YmVyLWluc3VyYW5jZS1iZW5lZml0cy1wYXltZW50LWFuZC1jaGFyZ2VzBjsIVDoJcmFua2kI--5877d16bcf93e714e06b2c5bf53732920d953caf#Paying%20for%20insurance%20benefits)
* [Paying excess ](
### How do I pay for these insurance benefits?
There are no separate payments for insurance benefits. These insurance benefits are automatically included in your NordVPN Ultimate bundle subscription.
### What is the excess, and when do I pay it?
The excess is the amount you must pay towards an insurance claim's overall cost. We Cyber Insurance will then contribute the rest – up to the limit of the cover. The excess for the cyber insurance benefits is 100 GBP per claim. The excess is deducted from the reimbursement you will receive in case of an approved claim.",https://support.nordvpn.com/hc/en-us/related/click?data=BAh7CjobZGVzdGluYXRpb25fYXJ0aWNsZV9pZGwrCBFBeVJcEjoYcmVmZXJyZXJfYXJ0aWNsZV9pZGwrCJE42vlbEjoLbG9jYWxlSSIKZW4tdXMGOgZFVDoIdXJsSSJTL2hjL2VuLXVzL2FydGljbGVzLzIwMTg3NzI5OTY5NDI1LUN5YmVyLWluc3VyYW5jZS1iZW5lZml0cy1wYXltZW50LWFuZC1jaGFyZ2VzBjsIVDoJcmFua2kI--5877d16bcf93e714e06b2c5bf53732920d953caf
Cyber insurance benefits: coverage and claims,"This article will cover questions on cyber insurance coverage and claims.
## Table of contents:
* [Types of issues covered by the insurance benefits](https://support.nordvpn.com/hc/en-us/related/click?data=BAh7CjobZGVzdGluYXRpb25fYXJ0aWNsZV9pZGwrCJG67PpbEjoYcmVmZXJyZXJfYXJ0aWNsZV9pZGwrCJE42vlbEjoLbG9jYWxlSSIKZW4tdXMGOgZFVDoIdXJsSSJTL2hjL2VuLXVzL2FydGljbGVzLzIwMTg2MjYxMTQyMTYxLUN5YmVyLWluc3VyYW5jZS1iZW5lZml0cy1jb3ZlcmFnZS1hbmQtY2xhaW1zBjsIVDoJcmFua2kJ--7db91134c3d6567d08023697038526d1a500a3ba#Types%20of%20issues%20covered%20by%20the%20insurance%20benefits)
* [Situations where insurance benefits are not applicable](https://support.nordvpn.com/hc/en-us/related/click?data=BAh7CjobZGVzdGluYXRpb25fYXJ0aWNsZV9pZGwrCJG67PpbEjoYcmVmZXJyZXJfYXJ0aWNsZV9pZGwrCJE42vlbEjoLbG9jYWxlSSIKZW4tdXMGOgZFVDoIdXJsSSJTL2hjL2VuLXVzL2FydGljbGVzLzIwMTg2MjYxMTQyMTYxLUN5YmVyLWluc3VyYW5jZS1iZW5lZml0cy1jb3ZlcmFnZS1hbmQtY2xhaW1zBjsIVDoJcmFua2kJ--7db91134c3d6567d08023697038526d1a500a3ba#Situations%20where%20insurance%20benefits%20are%20not%20applicable)
* [Conditions for making a claim](https://support.nordvpn.com/hc/en-us/related/click?data=BAh7CjobZGVzdGluYXRpb25fYXJ0aWNsZV9pZGwrCJG67PpbEjoYcmVmZXJyZXJfYXJ0aWNsZV9pZGwrCJE42vlbEjoLbG9jYWxlSSIKZW4tdXMGOgZFVDoIdXJsSSJTL2hjL2VuLXVzL2FydGljbGVzLzIwMTg2MjYxMTQyMTYxLUN5YmVyLWluc3VyYW5jZS1iZW5lZml0cy1jb3ZlcmFnZS1hbmQtY2xhaW1zBjsIVDoJcmFua2kJ--7db91134c3d6567d08023697038526d1a500a3ba#Conditions%20for%20making%20a%20claim)
* [Where do the insurance benefits cover you](https://support.nordvpn.com/hc/en-us/related/click?data=BAh7CjobZGVzdGluYXRpb25fYXJ0aWNsZV9pZGwrCJG67PpbEjoYcmVmZXJyZXJfYXJ0aWNsZV9pZGwrCJE42vlbEjoLbG9jYWxlSSIKZW4tdXMGOgZFVDoIdXJsSSJTL2hjL2VuLXVzL2FydGljbGVzLzIwMTg2MjYxMTQyMTYxLUN5YmVyLWluc3VyYW5jZS1iZW5lZml0cy1jb3ZlcmFnZS1hbmQtY2xhaW1zBjsIVDoJcmFua2kJ--7db91134c3d6567d08023697038526d1a500a3ba#Where%20do%20the%20insurance%20benefits%20cover%20you)
* [Cryptocurrency coverage](https://support.nordvpn.com/hc/en-us/related/click?data=BAh7CjobZGVzdGluYXRpb25fYXJ0aWNsZV9pZGwrCJG67PpbEjoYcmVmZXJyZXJfYXJ0aWNsZV9pZGwrCJE42vlbEjoLbG9jYWxlSSIKZW4tdXMGOgZFVDoIdXJsSSJTL2hjL2VuLXVzL2FydGljbGVzLzIwMTg2MjYxMTQyMTYxLUN5YmVyLWluc3VyYW5jZS1iZW5lZml0cy1jb3ZlcmFnZS1hbmQtY2xhaW1zBjsIVDoJcmFua2kJ--7db91134c3d6567d08023697038526d1a500a3ba#Cryptocurrency%20coverage)
### What types of issues do these insurance benefits cover?
Scam loss recovery provides reimbursement when you have transferred funds from a personal account in response to a cyber scam, whereby you have been tricked into opening or responding to emails, text messages, and phone calls that appeared to be from legitimate entities or people who you trust and/or are known to you, which were sent with the purpose of defrauding you. Examples of such [scams](https://nordvpn.com/blog/what-is-a-scam/) include but are not limited to: [phishing](https://nordvpn.com/blog/what-is-phishing/) (emails); [smishing](https://nordvpn.com/blog/smishing/) (text messages); [vishing](https://nordvpn.com/blog/what-is-vishing/) (fraudulent pre-recorded messages); and [spoofing](https://nordvpn.com/blog/spoofing/) (impersonation phone calls).
Online shopping fraud recovery provides reimbursement when you have purchased eligible items/services online from a website/trading platform that turned out to be fraudulent. Some examples include:
* You purchased an item via an online sales advertisement. No receipt or proof of purchase was provided after you completed the payment. The website subsequently went missing, and it turned out the webpage was fraudulent.
* You performed an electronic transaction to book a scheduled cleaning service from an online advertisement, however, no service was rendered, and all the contact details on the ad turned out to be fabricated.
* You performed an electronic transaction to make a purchase from a webpage that was impersonating a legitimate brand, company, or online merchant and only realized it after the transaction was made.
### Are there any situations not covered by these insurance benefits?
There are a number of situations not covered under the following insurance benefits.
#### Not covered by scam loss recovery:
* Any transactions from a business account
* Advance fee fraud, where you are promised goods, services, and/or financial gains in return for an upfront payment, including payment by electronic transaction
* Confidence scams/[romance scams](https://nordvpn.com/blog/online-dating-scams/), where someone befriends you, forms a personal connection with you, or pretends to be interested in a romantic relationship with you and convinces you to transfer money to them.
#### Not covered by online shopping fraud recovery
* Online purchases where cash, cryptocurrency such as bitcoins, vouchers, or reward points are the form of payment
* Online purchases for items/services which are not classed as eligible items/services
* Unauthorized transactions on your payment card or e-money account because of online shopping fraud, leading to the cloning of your payment card or identity theft
### Is there any restriction or condition for making a claim?
The following conditions apply in order to make a claim:
* You must have had an active NordVPN Ultimate bundle subscription at the time of the incident that resulted in your claim.
* You must report the fraud to the Action Fraud website www.actionfraud.police.uk within 24 hours of you discovering it. Action Fraud will issue you with a crime reference number.
* You must notify your bank or your e-money account provider within 24 hours of you discovering the fraud, so it can make attempts to stop any transactions from going through or to trace where the funds have gone.
* You must make reasonable attempts to recover any lost funds.
* You must retain documentary evidence of the fraud.
* You must submit your claim as soon as practicable by completing an online submission via your NordVPN account.
* You must provide accurate information to us in the event of a claim. If you don’t, you could invalidate your insurance benefits, or we might reject a claim.
Please be aware that the insurer is unable to pay any claims that would result in breaches of the UN resolutions, trade or economic sanctions, or other laws of the UK, EU, or USA.
### Where am I covered?
You are covered worldwide, 24 hours a day. However, please be aware that the insurer cannot pay any claims that would result in breaches of the UN resolutions, trade or economic sanctions, or other laws of the UK, EU, or USA.
### Are transactions involving cryptocurrencies like Bitcoin covered?
No, transactions involving cryptocurrency of any kind are not covered by these insurance benefits.",https://support.nordvpn.com/hc/en-us/related/click?data=BAh7CjobZGVzdGluYXRpb25fYXJ0aWNsZV9pZGwrCJG67PpbEjoYcmVmZXJyZXJfYXJ0aWNsZV9pZGwrCJE42vlbEjoLbG9jYWxlSSIKZW4tdXMGOgZFVDoIdXJsSSJTL2hjL2VuLXVzL2FydGljbGVzLzIwMTg2MjYxMTQyMTYxLUN5YmVyLWluc3VyYW5jZS1iZW5lZml0cy1jb3ZlcmFnZS1hbmQtY2xhaW1zBjsIVDoJcmFua2kJ--7db91134c3d6567d08023697038526d1a500a3ba
How can I get a receipt for my payment,"If you are looking for information on how to generate an Invoice for your payment, please check this article instead: [How can I get an Invoice for my company?](https://support.nordvpn.com/hc/en-us/articles/19744005126801-How-can-I-get-an-Invoice-for-my-company)
1. Log in to your account on the [Nord Account](https://my.nordaccount.com/) page.
2. Navigate to Billing History.
3. Click the Receipt button under the Download column.
4. Wait until a PDF file icon pops-up. Click on the Receipt highlight to download it.",https://support.nordvpn.com/hc/en-us/related/click?data=BAh7CjobZGVzdGluYXRpb25fYXJ0aWNsZV9pZGwrCBF41iyHEjoYcmVmZXJyZXJfYXJ0aWNsZV9pZGwrCJE42vlbEjoLbG9jYWxlSSIKZW4tdXMGOgZFVDoIdXJsSSJNL2hjL2VuLXVzL2FydGljbGVzLzIwMzcxNzgyMTM3ODczLUhvdy1jYW4tSS1nZXQtYS1yZWNlaXB0LWZvci1teS1wYXltZW50BjsIVDoJcmFua2kK--3c175a9c60f5474fb7df79de6a44a6d4fe93f75a
What is your money-back policy?,"Here is the refund and cancellation policy at the core of our 30-day money-back guarantee:
“...if you are not satisfied with our Services, you may cancel the Subscription and request a refund within 30 days following your purchase of our Services (“Money Back Guarantee”). Please note that Subscriptions may be refunded on the basis of the Money Back Guarantee only after the initial purchase. Once a Subscription is renewed, it cannot be refunded on the basis of the Money Back Guarantee, unless applicable law provides otherwise.”
This and other conditions of our service can be found in our [Terms of Service](https://my.nordaccount.com/legal/terms-of-service/).
Here are our instructions for [how to cancel](https://support.nordvpn.com/hc/en-us/articles/19556844985489-How-to-cancel-auto-renewal-for-your-subscription) automatic payment renewal.
## Requesting a refund
Previously, refunds could only be processed through our support team. We have now implemented an automated refund system that is more efficient, faster, and convenient for our customers to use. This change also improves our ability to gather feedback, allowing us to better understand issues and improve our service. As we continue to refine this new process, your feedback is welcomed to help us enhance it further.
To request a refund for your payment, contact our customer support team via live chat available in the bottom right corner of the page, and indicate you would like us to refund your payment.
1. You will receive a link to your Nord Account dashboard. Follow the link and verify it’s you who’s trying to access the account.
2. In the following window, you will see which payments are eligible for a refund. Such payments will have a Refund button available. To proceed, click on Refund.Please keep in mind that not all payments are eligible for refunds, and certain terms apply depending on where you bought the subscription:
* * Apple App Store: Subscriptions purchased via the Apple App Store are subject to Apple's refund policies. We're unable to issue refunds for payments made through the Apple App Store. For assistance, please reach out to Apple directly via Apple Support.
* Amazon Appstore: If you've purchased your subscription through the Amazon App Store, contact Amazon directly for assistance via Amazon Support.
* Google Play Store: Refunds for payments made through the Google Play Store can be requested through NordVPN’s customer support, provided they fall within the refund terms outlined above. Additionally, if the payment was made within the last 48 hours, you can request a refund directly from your Google Play account. For more details, visit Google Play Support.
* Retailers or resellers: If you've purchased a subscription outside the NordVPN website (e.g., physical store, online shop, or marketplace like BestBuy or StackSocial), please contact the retailer directly regarding the refund.
1. In the following window, select the reason for canceling the service and requesting a refund. Your feedback is invaluable because it helps us pinpoint areas for improvement and ensures a better experience for all our users.Once completed, click Submit and Continue. 
2. You will see your refund summary. You can confirm it by clicking Refund.
3. After submitting the request, you will receive a confirmation email saying that your refund has been ordered.
4. You should now see the refund status for your payment as Refund Processing. This means that your request has been received and is currently being processed. This process can take up to a few hours*.*Please note, that due to recent implementation, it may take up to 4 hours for a refund request to be processed.
5. Once the refund is complete, the refund status on your dashboard will change to Refunded, and you will receive a confirmation email. Please note that depending on your payment method, it may take up to 10 business days for the refund to reach your account. If there was an error or you have any other questions, please contact our customer support team directly.",https://support.nordvpn.com/hc/en-us/related/click?data=BAh7CjobZGVzdGluYXRpb25fYXJ0aWNsZV9pZGwrCBH9Jde2EToYcmVmZXJyZXJfYXJ0aWNsZV9pZGwrCBF41iyHEjoLbG9jYWxlSSIKZW4tdXMGOgZFVDoIdXJsSSJFL2hjL2VuLXVzL2FydGljbGVzLzE5NDc2OTkxMzExMTIxLVdoYXQtaXMteW91ci1tb25leS1iYWNrLXBvbGljeQY7CFQ6CXJhbmtpBg%3D%3D--0a0ca7369b739c3ec00141e7166f4668140c1de3
How can I get an Invoice for my company,"If you are looking for a guide on how to get a receipt, check this article: How can I get a receipt for my payment?
1. Log in to your account on the Nord Account page.
2. Navigate Billing History. Click the Invoice button under the Download column.
3. A window will pop-up, asking for additional information. Please input all the required information and click Generate Invoice.
4. Wait until a PDF file icon pops up. Click on the Invoice highlight to download it.",https://support.nordvpn.com/hc/en-us/related/click?data=BAh7CjobZGVzdGluYXRpb25fYXJ0aWNsZV9pZGwrCJF6aQL1EToYcmVmZXJyZXJfYXJ0aWNsZV9pZGwrCBF41iyHEjoLbG9jYWxlSSIKZW4tdXMGOgZFVDoIdXJsSSJOL2hjL2VuLXVzL2FydGljbGVzLzE5NzQ0MDA1MTI2ODAxLUhvdy1jYW4tSS1nZXQtYW4tSW52b2ljZS1mb3ItbXktY29tcGFueQY7CFQ6CXJhbmtpBw%3D%3D--11116093905ab08228eece7b04f9a9aa3c5fa11e
How to reach NordVPN customer support?,"While we don't offer phone support, we have different options to contact NordVPN customer support available 24/7 and ready to help you!
## Help Center
First off, if you run into any issues using NordVPN - check out our Help Center that is available in 14 languages: English, German, French, Danish, Italian, Spanish, Norwegian, Swedish, Dutch, Japanese, Korean, Polish, Portuguese-Brazilian, Traditional Chinese.
You can change the language by scrolling down until you see the language change option and clicking on the language you prefer. This will ensure that you can look for information in a language comfortable for you.
After you have set the language you want to look information in, you can find solutions in the help center by either:
* Searching for information using Help Center's search bar, which will list out articles according to the keywords typed in the search query:
* Navigating to one of the categories available in the Help Center:
* [FAQ](https://support.nordvpn.com/hc/en-us/categories/200593301-FAQ) - in this category you'll find Frequently asked questions and NordVPN app setup tutorials;
* [General info](https://support.nordvpn.com/hc/en-us/categories/360000293597-General-info) - here, you'll be able to find information on NordVPN functionalities, features, and SmartPlay;
* [Billing](https://support.nordvpn.com/hc/en-us/categories/360000293617-Billing) - this category covers payment, subscription, and account management topics;
* [Connectivity](https://support.nordvpn.com/hc/en-us/categories/200614302-Connectivity) - the last category available covers troubleshooting articles, here you can find help regarding NordVPN connectivity, internet speed with NordVPN on, manual setups for routers and different OSes, proxies.
## Support agents
However, if you're looking for assistance on your specific case, you can reach out to our developed conversation bots or human customer support agents by:
* Chat
* Email
We have two teams to assist you:
* Customer Care & Billing Team: They can tell you about NordVPN, help set up your devices, make sure you can access streaming sites, and answer questions about dedicated IPs. As well as helpyou with your NordVPN subscription, account, or payments.
* Connection Team: They can assist with setting up NordVPN on your router, fixing advanced connectivity problems, and helping in places with internet restrictions.",https://support.nordvpn.com/hc/en-us/related/click?data=BAh7CjobZGVzdGluYXRpb25fYXJ0aWNsZV9pZGwrCJGygBq4EToYcmVmZXJyZXJfYXJ0aWNsZV9pZGwrCBF41iyHEjoLbG9jYWxlSSIKZW4tdXMGOgZFVDoIdXJsSSJML2hjL2VuLXVzL2FydGljbGVzLzE5NDgyNDE2Mjk2NTkzLUhvdy10by1yZWFjaC1Ob3JkVlBOLWN1c3RvbWVyLXN1cHBvcnQGOwhUOglyYW5raQg%3D--1b2f9b71dd384dba29e74b5a9c061a527d9531bf
Unauthorised use of Credit or Debit card,"NordVPN provides VPN services through subscriptions. If you see a suspicious charge from NordVPN or any Nord product on your card statement, contact customer support for help:
* Email: support@nordvpn.com
* Live chat: Click the chat bubble at the bottom-right of their website.
To help identify the payment, provide these details:
* First six and last four digits of the card
* Cardholder name
* Amount charged
* Date of the transaction
Sometimes, the charges might be due to a friend or family member using your card.",https://support.nordvpn.com/hc/en-us/related/click?data=BAh7CjobZGVzdGluYXRpb25fYXJ0aWNsZV9pZGwrCJH8jX3nEToYcmVmZXJyZXJfYXJ0aWNsZV9pZGwrCBF41iyHEjoLbG9jYWxlSSIKZW4tdXMGOgZFVDoIdXJsSSJPL2hjL2VuLXVzL2FydGljbGVzLzE5Njg1OTQxNTc0ODAxLVVuYXV0aG9yaXNlZC11c2Utb2YtQ3JlZGl0LW9yLURlYml0LWNhcmQGOwhUOglyYW5raQk%3D--96e611ddffdc8ff0bac92b428f69eca611d29db6
Dedicated IP: Renewal and cancellation,"If you want to renew your dedicated IP service or cancel auto-renewal for your dedicated IP subscription, the steps you need to take depend on how you purchased the dedicated IP service.
## You bought the dedicated IP in your Nord Account
If you have purchased a dedicated IP in your [Nord Account](https://my.nordaccount.com/), the service will be renewed automatically. It makes no difference if you bought the dedicated IP as a standalone service or got it with a VPN bundle.
If you no longer want a particular dedicated IP anymore, you can[ cancel auto-renewal for your subscription in your Nord Account](https://support.nordvpn.com/hc/en-us/articles/19556844985489-How-to-cancel-a-subscription). Please note that this is not a refund, as outlined in[ NordVPN’s refund policy](https://support.nordvpn.com/hc/en-us/articles/19476991311121-What-is-your-money-back-policy).
## You bought the dedicated IP using a coupon code
Dedicated IP services purchased using a coupon code are not subject to auto-renewal. To renew your dedicated IP addresses, you will need to manually[ buy the dedicated IP service](https://support.nordvpn.com/hc/en-us/articles/19484196251921-How-to-purchase-a-dedicated-IP-address).
When your dedicated IP subscription is about to expire, we will send a reminder about renewal to your registered Nord Account email address.",https://support.nordvpn.com/hc/en-us/related/click?data=BAh7CjobZGVzdGluYXRpb25fYXJ0aWNsZV9pZGwrCBGwWaEXFToYcmVmZXJyZXJfYXJ0aWNsZV9pZGwrCBF41iyHEjoLbG9jYWxlSSIKZW4tdXMGOgZFVDoIdXJsSSJML2hjL2VuLXVzL2FydGljbGVzLzIzMTkxMjM1NDQwNjU3LURlZGljYXRlZC1JUC1SZW5ld2FsLWFuZC1jYW5jZWxsYXRpb24GOwhUOglyYW5raQo%3D--03c61bc23d6868e37a3ce688603a3a9c3d277f25
How to get NordVPN with activation code,"To begin using NordVPN, you must activate your account using a [25-character “activation key”](https://my.nordaccount.com/activate/), which can be purchased from a physical or online retailer. This is the only method available for activating your account using the activation key.
To activate NordVPN with an activation key, follow the instructions below:
1. Enter your NordVPN activation code and your email address, then click Continue.
2. Check for the verification code in your email inbox.
3. Copy the verification code from the email we sent you and paste it into the box.
4. If you are a new NordVPN user, create a password for your Nord Account. Otherwise, type in your old password to log in.
5. Download the NordVPN app.
After you've set up your NordVPN account with the activation code and downloaded the app - you'll need to install it. Read our blog's article on [how to set up NordVPN](https://nordvpn.com/blog/how-to-set-up-a-vpn/).
If you experience any error when entering the activation code, please check [our article on common issues with activation codes](https://support.nordvpn.com/hc/en-us/articles/20286544549777-Common-issues-with-activation-codes).A useful reminder: Using a cracked version of NordVPN may lead to the loss of sensitive information, such as personal credentials. There is software online that promises one free access to ”cracked” NordVPN accounts. However, NordVPN serial cracks are most often chock-full of malware, adware intended to gain access to your credentials or devices, or other online threats. We recommend that you read about the [dangers of cracking programs](https://nordvpn.com/blog/crack/).",https://support.nordvpn.com/hc/en-us/related/click?data=BAh7CjobZGVzdGluYXRpb25fYXJ0aWNsZV9pZGwrCJEvyoDnEToYcmVmZXJyZXJfYXJ0aWNsZV9pZGwrCJEXSFRzEjoLbG9jYWxlSSIKZW4tdXMGOgZFVDoIdXJsSSJOL2hjL2VuLXVzL2FydGljbGVzLzE5Njg1OTk1ODUxNjY1LUhvdy10by1nZXQtTm9yZFZQTi13aXRoLWFjdGl2YXRpb24tY29kZQY7CFQ6CXJhbmtpBg%3D%3D--7ca84ce38acb01212cfa218db0e032c8f2f51497
I did not receive an activation email,"When signing up for the [NordVPN service](https://nordvpn.com/), you need to enter an email address. You will be using it for login and will receive your password to that same address. So make sure that the email address you provide is valid and can be accessed by you.
If you have signed up successfully but have not received any email with your login credentials, follow these steps:
* Wait for up to 5 minutes after the signup for your email to arrive.
* Check your junk, spam, promotions, and other sections of your email account. Activation emails are sent to many users so that they might be flagged for spam or similar.
* You can get your password resent by following these steps:
1. Login to your Nord Account on this page: 
2. Click on Forgot your password? hyperlink:
3. Enter your Nord Account registration e-mail address and click Send Reset Link:",https://support.nordvpn.com/hc/en-us/related/click?data=BAh7CjobZGVzdGluYXRpb25fYXJ0aWNsZV9pZGwrCJEYjiP1EToYcmVmZXJyZXJfYXJ0aWNsZV9pZGwrCJEXSFRzEjoLbG9jYWxlSSIKZW4tdXMGOgZFVDoIdXJsSSJML2hjL2VuLXVzL2FydGljbGVzLzE5NzQ0NTYxMTc0NjczLUktZGlkLW5vdC1yZWNlaXZlLWFuLWFjdGl2YXRpb24tZW1haWwGOwhUOglyYW5raQc%3D--27c3cb9b19e94bf8ba4b2aec113b0725beb9fa3e
How to reach NordVPN customer support?,"While we don't offer phone support, we have different options to contact NordVPN customer support available 24/7 and ready to help you!
## Help Center
First off, if you run into any issues using NordVPN - check out our Help Center that is available in 14 languages: English, German, French, Danish, Italian, Spanish, Norwegian, Swedish, Dutch, Japanese, Korean, Polish, Portuguese-Brazilian, Traditional Chinese.
You can change the language by scrolling down until you see the language change option and clicking on the language you prefer. This will ensure that you can look for information in a language comfortable for you.
After you have set the language you want to look information in, you can find solutions in the help center by either:
* Searching for information using Help Center's search bar, which will list out articles according to the keywords typed in the search query:
* Navigating to one of the categories available in the Help Center:
* [FAQ](https://support.nordvpn.com/hc/en-us/categories/200593301-FAQ) - in this category you'll find Frequently asked questions and NordVPN app setup tutorials;
* [General info](https://support.nordvpn.com/hc/en-us/categories/360000293597-General-info) - here, you'll be able to find information on NordVPN functionalities, features, and SmartPlay;
* [Billing](https://support.nordvpn.com/hc/en-us/categories/360000293617-Billing) - this category covers payment, subscription, and account management topics;
* [Connectivity](https://support.nordvpn.com/hc/en-us/categories/200614302-Connectivity) - the last category available covers troubleshooting articles, here you can find help regarding NordVPN connectivity, internet speed with NordVPN on, manual setups for routers and different OSes, proxies.
## Support agents
However, if you're looking for assistance on your specific case, you can reach out to our developed conversation bots or human customer support agents by:
* Chat
* Email
We have two teams to assist you:
* Customer Care & Billing Team: They can tell you about NordVPN, help set up your devices, make sure you can access streaming sites, and answer questions about dedicated IPs. As well as helpyou with your NordVPN subscription, account, or payments.
* Connection Team: They can assist with setting up NordVPN on your router, fixing advanced connectivity problems, and helping in places with internet restrictions.",https://support.nordvpn.com/hc/en-us/related/click?data=BAh7CjobZGVzdGluYXRpb25fYXJ0aWNsZV9pZGwrCJGygBq4EToYcmVmZXJyZXJfYXJ0aWNsZV9pZGwrCJEXSFRzEjoLbG9jYWxlSSIKZW4tdXMGOgZFVDoIdXJsSSJML2hjL2VuLXVzL2FydGljbGVzLzE5NDgyNDE2Mjk2NTkzLUhvdy10by1yZWFjaC1Ob3JkVlBOLWN1c3RvbWVyLXN1cHBvcnQGOwhUOglyYW5raQg%3D--467ac9eaa1034f61cf08400643bb290351d7aed7
What is your money-back policy?,"Here is the refund and cancellation policy at the core of our 30-day money-back guarantee:
“...if you are not satisfied with our Services, you may cancel the Subscription and request a refund within 30 days following your purchase of our Services (“Money Back Guarantee”). Please note that Subscriptions may be refunded on the basis of the Money Back Guarantee only after the initial purchase. Once a Subscription is renewed, it cannot be refunded on the basis of the Money Back Guarantee, unless applicable law provides otherwise.”
This and other conditions of our service can be found in our [Terms of Service](https://my.nordaccount.com/legal/terms-of-service/).
Here are our instructions for [how to cancel](https://support.nordvpn.com/hc/en-us/articles/19556844985489-How-to-cancel-auto-renewal-for-your-subscription) automatic payment renewal.
## Requesting a refund
Previously, refunds could only be processed through our support team. We have now implemented an automated refund system that is more efficient, faster, and convenient for our customers to use. This change also improves our ability to gather feedback, allowing us to better understand issues and improve our service. As we continue to refine this new process, your feedback is welcomed to help us enhance it further.
To request a refund for your payment, contact our customer support team via live chat available in the bottom right corner of the page, and indicate you would like us to refund your payment.
1. You will receive a link to your Nord Account dashboard. Follow the link and verify it’s you who’s trying to access the account.
2. In the following window, you will see which payments are eligible for a refund. Such payments will have a Refund button available. To proceed, click on Refund.Please keep in mind that not all payments are eligible for refunds, and certain terms apply depending on where you bought the subscription:
* * Apple App Store: Subscriptions purchased via the Apple App Store are subject to Apple's refund policies. We're unable to issue refunds for payments made through the Apple App Store. For assistance, please reach out to Apple directly via Apple Support.
* Amazon Appstore: If you've purchased your subscription through the Amazon App Store, contact Amazon directly for assistance via Amazon Support.
* Google Play Store: Refunds for payments made through the Google Play Store can be requested through NordVPN’s customer support, provided they fall within the refund terms outlined above. Additionally, if the payment was made within the last 48 hours, you can request a refund directly from your Google Play account. For more details, visit Google Play Support.
* Retailers or resellers: If you've purchased a subscription outside the NordVPN website (e.g., physical store, online shop, or marketplace like BestBuy or StackSocial), please contact the retailer directly regarding the refund.
1. In the following window, select the reason for canceling the service and requesting a refund. Your feedback is invaluable because it helps us pinpoint areas for improvement and ensures a better experience for all our users.Once completed, click Submit and Continue. 
2. You will see your refund summary. You can confirm it by clicking Refund.
3. After submitting the request, you will receive a confirmation email saying that your refund has been ordered.
4. You should now see the refund status for your payment as Refund Processing. This means that your request has been received and is currently being processed. This process can take up to a few hours*.*Please note, that due to recent implementation, it may take up to 4 hours for a refund request to be processed.
5. Once the refund is complete, the refund status on your dashboard will change to Refunded, and you will receive a confirmation email. Please note that depending on your payment method, it may take up to 10 business days for the refund to reach your account. If there was an error or you have any other questions, please contact our customer support team directly.",https://support.nordvpn.com/hc/en-us/related/click?data=BAh7CjobZGVzdGluYXRpb25fYXJ0aWNsZV9pZGwrCBH9Jde2EToYcmVmZXJyZXJfYXJ0aWNsZV9pZGwrCJEXSFRzEjoLbG9jYWxlSSIKZW4tdXMGOgZFVDoIdXJsSSJFL2hjL2VuLXVzL2FydGljbGVzLzE5NDc2OTkxMzExMTIxLVdoYXQtaXMteW91ci1tb25leS1iYWNrLXBvbGljeQY7CFQ6CXJhbmtpCQ%3D%3D--c2a399af556c0784bb1eeac1186d2625dea14c2a
I have just paid. Will I be charged again,"Any payment method other than CoinPayments, prepaid and gift cards, will create an ongoing subscription. It will automatically charge you after your NordVPN account expires.",https://support.nordvpn.com/hc/en-us/related/click?data=BAh7CjobZGVzdGluYXRpb25fYXJ0aWNsZV9pZGwrCJFBdCH1EToYcmVmZXJyZXJfYXJ0aWNsZV9pZGwrCJEXSFRzEjoLbG9jYWxlSSIKZW4tdXMGOgZFVDoIdXJsSSJPL2hjL2VuLXVzL2FydGljbGVzLzE5NzQ0NTI1OTI2ODAxLUktaGF2ZS1qdXN0LXBhaWQtV2lsbC1JLWJlLWNoYXJnZWQtYWdhaW4GOwhUOglyYW5raQo%3D--6b6cf5ca9893971285f4cbbde9ffe35335917c0f
Plans and prices of NordVPN service,"In this article, you will learn about Nord subscription plan options. [NordVPN subscription plan prices](https://nordvpn.com/pricing/) are regularly updated on our website.
You can purchase NordVPN plans directly from the App Store or [Google Play Store](https://play.google.com/store/apps/details?id=com.nordvpn.android&hl=en), or from the Nord pricing page, where you’ll find all available options.
## Subscription plans
On the [NordPVN pricing page](https://nordvpn.com/pricing/#compare-plans-desktop) you’ll find the available options:
* [Basic](https://support.nordvpn.com/hc/en-us/related/click?data=BAh7CjobZGVzdGluYXRpb25fYXJ0aWNsZV9pZGwrCBHFHBH1EToYcmVmZXJyZXJfYXJ0aWNsZV9pZGwrCBEmsyz1EToLbG9jYWxlSSIKZW4tdXMGOgZFVDoIdXJsSSJKL2hjL2VuLXVzL2FydGljbGVzLzE5NzQ0MjUxNzU3ODQxLVBsYW5zLWFuZC1wcmljZXMtb2YtTm9yZFZQTi1zZXJ2aWNlBjsIVDoJcmFua2kG--015355f155659bb87696ce90e45f764547bf9486#Basic)
* [Plus](https://support.nordvpn.com/hc/en-us/related/click?data=BAh7CjobZGVzdGluYXRpb25fYXJ0aWNsZV9pZGwrCBHFHBH1EToYcmVmZXJyZXJfYXJ0aWNsZV9pZGwrCBEmsyz1EToLbG9jYWxlSSIKZW4tdXMGOgZFVDoIdXJsSSJKL2hjL2VuLXVzL2FydGljbGVzLzE5NzQ0MjUxNzU3ODQxLVBsYW5zLWFuZC1wcmljZXMtb2YtTm9yZFZQTi1zZXJ2aWNlBjsIVDoJcmFua2kG--015355f155659bb87696ce90e45f764547bf9486#Plus)
* [Complete](https://support.nordvpn.com/hc/en-us/related/click?data=BAh7CjobZGVzdGluYXRpb25fYXJ0aWNsZV9pZGwrCBHFHBH1EToYcmVmZXJyZXJfYXJ0aWNsZV9pZGwrCBEmsyz1EToLbG9jYWxlSSIKZW4tdXMGOgZFVDoIdXJsSSJKL2hjL2VuLXVzL2FydGljbGVzLzE5NzQ0MjUxNzU3ODQxLVBsYW5zLWFuZC1wcmljZXMtb2YtTm9yZFZQTi1zZXJ2aWNlBjsIVDoJcmFua2kG--015355f155659bb87696ce90e45f764547bf9486#Complete)
* [Ultra](https://support.nordvpn.com/hc/en-us/related/click?data=BAh7CjobZGVzdGluYXRpb25fYXJ0aWNsZV9pZGwrCBHFHBH1EToYcmVmZXJyZXJfYXJ0aWNsZV9pZGwrCBEmsyz1EToLbG9jYWxlSSIKZW4tdXMGOgZFVDoIdXJsSSJKL2hjL2VuLXVzL2FydGljbGVzLzE5NzQ0MjUxNzU3ODQxLVBsYW5zLWFuZC1wcmljZXMtb2YtTm9yZFZQTi1zZXJ2aWNlBjsIVDoJcmFua2kG--015355f155659bb87696ce90e45f764547bf9486#Ultra)
With this plan you'll get:
* [VPN features](https://support.nordvpn.com/hc/en-us/articles/19559429814545-List-of-NordVPN-features)Secure, high-speed VPNThreat Protection10 devices secured at once
* [30-day money-back guarantee](https://support.nordvpn.com/hc/en-us/articles/19476991311121-What-is-your-money-back-policy)
This plan focuses on core security and privacy, making it a great choice for users who only need reliable VPN protection.
With this plan you'll get:
* [VPN features](https://support.nordvpn.com/hc/en-us/articles/19559429814545-List-of-NordVPN-features)Secure, high-speed VPNThreat Protection10 devices secured at once
* Threat Protection Pro™Anti-malware protectionAdvanced browsing protectionAd and tracker blocker
* [Password management]( password managerData breach scanner
* [30-day money-back guarantee](https://support.nordvpn.com/hc/en-us/articles/19476991311121-What-is-your-money-back-policy)
This plan provides a well-rounded security suite, combining VPN protection with advanced tools to protect your online activities.
With this plan you'll get:
* [VPN features](https://support.nordvpn.com/hc/en-us/articles/19559429814545-List-of-NordVPN-features)Secure, high-speed VPNThreat Protection10 devices secured at once
* Threat Protection Pro™Anti-malware protectionAdvanced browsing protectionAd and tracker blocker
* [Password management]( password managerData breach scanner
* [Secure cloud storage](https://support.nordvpn.com/hc/en-us/articles/33436996432913-How-to-set-up-secure-cloud-storage-with-NordLocker)1 TB of encrypted cloud storage
* [30-day money-back guarantee](https://support.nordvpn.com/hc/en-us/articles/19476991311121-What-is-your-money-back-policy)
This plan is perfect for those who want complete online security, privacy, and secure cloud storage in one package.
With this plan you'll get:
* [VPN features](https://support.nordvpn.com/hc/en-us/articles/19559429814545-List-of-NordVPN-features)Secure, high-speed VPNThreat Protection10 devices secured at once
* Threat Protection Pro™Anti-malware protectionAdvanced browsing protectionAd and tracker blocker
* [Password management]( password managerData breach scanner
* [Secure cloud storage](https://support.nordvpn.com/hc/en-us/articles/33436996432913-How-to-set-up-secure-cloud-storage-with-NordLocker)1 TB of encrypted cloud storage
* IncogniPersonal data removal tool
* [30-day money-back guarantee](https://support.nordvpn.com/hc/en-us/articles/19476991311121-What-is-your-money-back-policy)
This plan is ideal for users who want maximum security, privacy, and data protection, including the ability to remove personal data from online sources.
## FAQs
How do I get a NordVPN subscription?
If you’re trying to subscribe to NordVPN, follow our handy guide on [how to get a subscription](https://support.nordvpn.com/hc/en-us/articles/19478048190481-How-to-purchase-a-NordVPN-subscription).
What subscription plans does NordVPN offer?
NordVPN currently offers 2-year, 1-year, and 1-month subscription plans.
Can I pay for a NordVPN subscription in monthly installments?
You can pay monthly by selecting NordVPN’s 1-month plan. NordVPN’s 2-year and 1-year plans must be [paid for in full](https://support.nordvpn.com/hc/en-us/articles/19476182512273-Does-NordVPN-charge-all-at-once) at purchase.
Does NordVPN have a family plan?
Yes, NordVPN now offers a [Family Plan](https://nordvpn.com/pricing/family-site/). It includes the same [subscription options]( Plus, Complete, and Ultra—each with the same features and benefits. The key difference is that the Family Plan allows you to create up to five separate accounts.
Do you offer discounts or coupons for NordVPN plans?
Yes — we have an extensive guide on [how to get NordVPN cheaper.](https://support.nordvpn.com/hc/en-us/articles/19477702164369-How-to-get-NordVPN-cheaper) You can also find our special [monthly deals](https://nordvpn.com/coupon/?nv_tri=TC_4672000958802338_1740990944276&nv_trs=1743145761762_1743150468731_38_251&_gl=1*fomogl*_gcl_aw*R0NMLjE3NDMwODcyNjguQ2p3S0NBanc3cE9fQmhBbEVpd0E0cE1RdkZvWHk2UWEtS0pFOTNOYkk4SWhTY2VhOVJGbGdFaldOTkZxTUxwcXUtNWlCTzQ0ODNXQTFSb0NmOElRQXZEX0J3RQ..*_gcl_au*MTk3MjQ4MjMyLjE3NDA5OTMyMzQ.*FPAU*MTk3MjQ4MjMyLjE3NDA5OTMyMzQ.*_ga*MTc2ODgyMjcxMy4xNzQwOTkwOTQ1*_ga_LEXMJ1N516*MTc0MzE0NTcwMi40Mi4xLjE3NDMxNTAzOTUuMjUuMC4w&_ga=2.254984456.1665114719.1742821287-1768822713.1740990945).
What is your money-back guarantee and how do I cancel?
To learn more about our money-back guarantee, check out [our refund policy](https://support.nordvpn.com/hc/en-us/articles/19476991311121-What-is-your-money-back-policy). If you wish to cancel your subscription, [follow our cancellation guide](https://support.nordvpn.com/hc/en-us/articles/19556844985489-How-to-cancel-auto-renewal-for-your-subscription).",https://support.nordvpn.com/hc/en-us/related/click?data=BAh7CjobZGVzdGluYXRpb25fYXJ0aWNsZV9pZGwrCBHFHBH1EToYcmVmZXJyZXJfYXJ0aWNsZV9pZGwrCBEmsyz1EToLbG9jYWxlSSIKZW4tdXMGOgZFVDoIdXJsSSJKL2hjL2VuLXVzL2FydGljbGVzLzE5NzQ0MjUxNzU3ODQxLVBsYW5zLWFuZC1wcmljZXMtb2YtTm9yZFZQTi1zZXJ2aWNlBjsIVDoJcmFua2kG--015355f155659bb87696ce90e45f764547bf9486
What should I do if I choose the wrong VAT country?,"You can [generate an invoice](https://support.nordvpn.com/hc/en-us/articles/19744005126801-How-can-I-get-an-Invoice-for-my-company) from your [NordAccount](https://my.nordaccount.com/) and then claim the tax return in your local tax office. Alternatively, our [support can issue a refund](https://support.nordvpn.com/hc/en-us/articles/19476991311121-What-is-your-money-back-policy) for your payment, and then you can re-subscribe to our service while selecting a country with a different VAT.",https://support.nordvpn.com/hc/en-us/related/click?data=BAh7CjobZGVzdGluYXRpb25fYXJ0aWNsZV9pZGwrCJFbhAH1EToYcmVmZXJyZXJfYXJ0aWNsZV9pZGwrCBEmsyz1EToLbG9jYWxlSSIKZW4tdXMGOgZFVDoIdXJsSSJHL2hjL2VuLXVzL2FydGljbGVzLzE5NzQzOTkwMTExMTIxLVdoYXQtaXMtVkFULWFuZC13aHktYW0tSS1jaGFyZ2VkBjsIVDoJcmFua2kH--5804a1ea1a8cc5de3ae67e5950b20d9df04a549d
"What is VAT, and why am I charged","VAT (Value Added Tax) is a tax that is added to goods and services, including digital services. We collect VAT on behalf of the country you select on the [checkout page](https://nordcheckout.com/?product_group=nordvpn&cart_id=2d53ba3b-8d07-4190-a795-f63fa287ffef) and use the EU VAT MOSS system which covers all European countries. We pay VAT quarterly to the respective countries as this is mandatory for online software sales.
You can see a VAT charge next to the price of the NordVPN service under the Order summary.
## What should I do if I choose the wrong VAT country?
You can [generate an invoice](https://support.nordvpn.com/hc/en-us/articles/19744005126801-How-can-I-get-an-Invoice-for-my-company) from your [NordAccount](https://my.nordaccount.com/) and then claim the tax return in your local tax office. Alternatively, our [support can issue a refund](https://support.nordvpn.com/hc/en-us/articles/19476991311121-What-is-your-money-back-policy) for your payment, and then you can re-subscribe to our service while selecting a country with a different VAT.",https://support.nordvpn.com/hc/en-us/related/click?data=BAh7CjobZGVzdGluYXRpb25fYXJ0aWNsZV9pZGwrCJFbhAH1EToYcmVmZXJyZXJfYXJ0aWNsZV9pZGwrCBEmsyz1EToLbG9jYWxlSSIKZW4tdXMGOgZFVDoIdXJsSSJHL2hjL2VuLXVzL2FydGljbGVzLzE5NzQzOTkwMTExMTIxLVdoYXQtaXMtVkFULWFuZC13aHktYW0tSS1jaGFyZ2VkBjsIVDoJcmFua2kH--5804a1ea1a8cc5de3ae67e5950b20d9df04a549d
I have been charged twice,"Please [contact our support team](https://support.nordvpn.com/hc/en-us/articles/19482416296593-How-can-I-reach-NordVPN-customer-support) and provide as much information about your payment as possible. We need it to have a better ability to identify your payments. The information that would help us:
* Payment type (credit card, CoinPayments, etc.)
* Payment date(s) - tell us your last 5 payment dates
* Transaction ID or payment number of your last 5 payments that you were provided.
* In some cases, we may ask you for a photo/screenshot proof of your transaction.",https://support.nordvpn.com/hc/en-us/related/click?data=BAh7CjobZGVzdGluYXRpb25fYXJ0aWNsZV9pZGwrCBGhvgn1EToYcmVmZXJyZXJfYXJ0aWNsZV9pZGwrCBEmsyz1EToLbG9jYWxlSSIKZW4tdXMGOgZFVDoIdXJsSSJAL2hjL2VuLXVzL2FydGljbGVzLzE5NzQ0MTI4MTQ3NzI5LUktaGF2ZS1iZWVuLWNoYXJnZWQtdHdpY2UGOwhUOglyYW5raQo%3D--b1dfa2cac48bf29d9e9613cf5689a936c3112b01
What is your money-back policy?,"Here is the refund and cancellation policy at the core of our 30-day money-back guarantee:
“...if you are not satisfied with our Services, you may cancel the Subscription and request a refund within 30 days following your purchase of our Services (“Money Back Guarantee”). Please note that Subscriptions may be refunded on the basis of the Money Back Guarantee only after the initial purchase. Once a Subscription is renewed, it cannot be refunded on the basis of the Money Back Guarantee, unless applicable law provides otherwise.”
This and other conditions of our service can be found in our [Terms of Service](https://my.nordaccount.com/legal/terms-of-service/).
Here are our instructions for [how to cancel](https://support.nordvpn.com/hc/en-us/articles/19556844985489-How-to-cancel-auto-renewal-for-your-subscription) automatic payment renewal.
## Requesting a refund
Previously, refunds could only be processed through our support team. We have now implemented an automated refund system that is more efficient, faster, and convenient for our customers to use. This change also improves our ability to gather feedback, allowing us to better understand issues and improve our service. As we continue to refine this new process, your feedback is welcomed to help us enhance it further.
To request a refund for your payment, contact our customer support team via live chat available in the bottom right corner of the page, and indicate you would like us to refund your payment.
1. You will receive a link to your Nord Account dashboard. Follow the link and verify it’s you who’s trying to access the account.
2. In the following window, you will see which payments are eligible for a refund. Such payments will have a Refund button available. To proceed, click on Refund.Please keep in mind that not all payments are eligible for refunds, and certain terms apply depending on where you bought the subscription:
* * Apple App Store: Subscriptions purchased via the Apple App Store are subject to Apple's refund policies. We're unable to issue refunds for payments made through the Apple App Store. For assistance, please reach out to Apple directly via Apple Support.
* Amazon Appstore: If you've purchased your subscription through the Amazon App Store, contact Amazon directly for assistance via Amazon Support.
* Google Play Store: Refunds for payments made through the Google Play Store can be requested through NordVPN’s customer support, provided they fall within the refund terms outlined above. Additionally, if the payment was made within the last 48 hours, you can request a refund directly from your Google Play account. For more details, visit Google Play Support.
* Retailers or resellers: If you've purchased a subscription outside the NordVPN website (e.g., physical store, online shop, or marketplace like BestBuy or StackSocial), please contact the retailer directly regarding the refund.
1. In the following window, select the reason for canceling the service and requesting a refund. Your feedback is invaluable because it helps us pinpoint areas for improvement and ensures a better experience for all our users.Once completed, click Submit and Continue. 
2. You will see your refund summary. You can confirm it by clicking Refund.
3. After submitting the request, you will receive a confirmation email saying that your refund has been ordered.
4. You should now see the refund status for your payment as Refund Processing. This means that your request has been received and is currently being processed. This process can take up to a few hours*.*Please note, that due to recent implementation, it may take up to 4 hours for a refund request to be processed.
5. Once the refund is complete, the refund status on your dashboard will change to Refunded, and you will receive a confirmation email. Please note that depending on your payment method, it may take up to 10 business days for the refund to reach your account. If there was an error or you have any other questions, please contact our customer support team directly.",https://support.nordvpn.com/hc/en-us/related/click?data=BAh7CjobZGVzdGluYXRpb25fYXJ0aWNsZV9pZGwrCBH9Jde2EToYcmVmZXJyZXJfYXJ0aWNsZV9pZGwrCBFWUSf1EToLbG9jYWxlSSIKZW4tdXMGOgZFVDoIdXJsSSJFL2hjL2VuLXVzL2FydGljbGVzLzE5NDc2OTkxMzExMTIxLVdoYXQtaXMteW91ci1tb25leS1iYWNrLXBvbGljeQY7CFQ6CXJhbmtpBg%3D%3D--eacbbfbc81da7c3f5149fe4c1f526e0ab835145c
How to cancel auto-renewal for your subscription,"If your subscription was purchased via the Google Play Store, Apple App Store, or Amazon App Store and you wish to cancel it, follow the respective articles below:
* Cancelling your [Google Play Store NordVPN subscription](https://support.google.com/googleplay/answer/7018481)
* Cancelling your [Apple App Store NordVPN subscription](https://support.apple.com/en-lamr/118428)
* Cancelling your [Amazon App Store NordVPN subscription](https://www.amazonforum.com/s/question/0D54P00007IG0CkSAL/amazon-appstore-subscriptions)
## Cancelling your NordVPN subscription
If you have purchased your subscription directly from NordVPN and wish for your subscription to no longer renew at the subsequent billing date, you may cancel your subscription via your [Nord Account](https://my.nordaccount.com/).
You can follow the same steps to cancel your NordPass, NordLocker, Dedicated IP, or bundle subscription services.
To cancel the automatic renewal of your NordVPN subscription, follow the steps below:
1. Log in to your [Nord Account](https://my.nordaccount.com/)
2. Open the billing tab:
3. Click cancel next to auto-renewal:
4. Select cancel auto-renewal:
5. Your auto-renewal status will now change to off:
You will receive a confirmation email to your registered email account if your subscription cancellation is successful:
If you wish to receive a refund, please read [our article on NordVPN's refund policy](https://support.nordvpn.com/hc/en-us/articles/19476991311121-What-is-your-money-back-policy).",https://support.nordvpn.com/hc/en-us/related/click?data=BAh7CjobZGVzdGluYXRpb25fYXJ0aWNsZV9pZGwrCJFczG7JEToYcmVmZXJyZXJfYXJ0aWNsZV9pZGwrCBFWUSf1EToLbG9jYWxlSSIKZW4tdXMGOgZFVDoIdXJsSSJXL2hjL2VuLXVzL2FydGljbGVzLzE5NTU2ODQ0OTg1NDg5LUhvdy10by1jYW5jZWwtYXV0by1yZW5ld2FsLWZvci15b3VyLXN1YnNjcmlwdGlvbgY7CFQ6CXJhbmtpBw%3D%3D--c4bf77e60788a8cb12d7b2bb53dd6744109a5765
I can't make a payment,"Payments may fail for various reasons. Here are a few tips you might find useful.
Credit Card
To avoid multiple charges or a temporary hold of funds, do not make repeated attempts to complete a purchase.
You may contact your credit card company – it is likely to have information about the failed transaction and the status of your account.
If you’ve tried to make a payment with a credit card, but your account is still not active, there are a few common causes:
* Insufficient funds. Check if your bank account has enough credit to make the payment.
* Incorrect information. The information you provide when paying must match the information on your credit card.
* Expired card. Check the expiration date of your card.
* Fraud detection. This usually happens when you try to make a payment while connected to a VPN or when using a proxy. Having an unusual IP address (such as an IP address of a country different from the one where your credit card was issued) may also be the cause.
* The transaction was declined by the issuing bank. You may want to contact your bank and allow future payments to NordVPN.
If you use a prepaid credit card, register it online before use. Contact the card issuer if you have trouble completing the registration.
CoinGate
Have you tried to make a payment with Crypto Currencies but your account is still inactive? Your transaction may not have been confirmed in the coin network yet – just give it more time.
Your transaction might also have timed out if you took too long to make the payment. In this case, [contact our support team](https://support.nordvpn.com/hc/en-us/articles/19482416296593-How-can-I-reach-NordVPN-customer-support), and we will be glad to help you.",https://support.nordvpn.com/hc/en-us/related/click?data=BAh7CjobZGVzdGluYXRpb25fYXJ0aWNsZV9pZGwrCJHfbYz0EToYcmVmZXJyZXJfYXJ0aWNsZV9pZGwrCBFWUSf1EToLbG9jYWxlSSIKZW4tdXMGOgZFVDoIdXJsSSI9L2hjL2VuLXVzL2FydGljbGVzLzE5NzQyMDI1NzAzMzEzLUktY2FuLXQtbWFrZS1hLXBheW1lbnQGOwhUOglyYW5raQg%3D--b0427c7ce7f758b665b2e31af699895cfa317faf
How can I renew my NordVPN subscription?,"If you had a [NordVPN subscription](https://nordcheckout.com/) before that you have decided to discontinue and wish to subscribe to our services again - you can do that in two ways:
### Activate your subscription via Nord Account:
1. Open [Nord Account](https://my.nordaccount.com/) and choose to log in.
2. Enter your registered NordVPN email address and password, then click ""Log in.""
3. On the homepage of Nord Account, click to ""Renew plan.""
### Purchase a new subscription:
1. Go to NordVPN's official website by clicking [here](https://nordvpn.com/pricing/).
2. Follow the subscription purchase process shown in this article: [How to purchase a NordVPN subscription](https://nordvpn.zendesk.com/hc/en-us/articles/19478048190481).
3. Enter your existing Nord Account email address for a renewal to be added. No need to create a new account.",https://support.nordvpn.com/hc/en-us/related/click?data=BAh7CjobZGVzdGluYXRpb25fYXJ0aWNsZV9pZGwrCBFC3lFzEjoYcmVmZXJyZXJfYXJ0aWNsZV9pZGwrCBFWUSf1EToLbG9jYWxlSSIKZW4tdXMGOgZFVDoIdXJsSSJOL2hjL2VuLXVzL2FydGljbGVzLzIwMjg2NTA0MDU5NDA5LUhvdy1jYW4tSS1yZW5ldy1teS1Ob3JkVlBOLXN1YnNjcmlwdGlvbgY7CFQ6CXJhbmtpCQ%3D%3D--3da9fb4e820a5c7d7fc0b9bd0615aef7d1125497
Dedicated IP: Renewal and cancellation,"If you want to renew your dedicated IP service or cancel auto-renewal for your dedicated IP subscription, the steps you need to take depend on how you purchased the dedicated IP service.
## You bought the dedicated IP in your Nord Account
If you have purchased a dedicated IP in your [Nord Account](https://my.nordaccount.com/), the service will be renewed automatically. It makes no difference if you bought the dedicated IP as a standalone service or got it with a VPN bundle.
If you no longer want a particular dedicated IP anymore, you can[ cancel auto-renewal for your subscription in your Nord Account](https://support.nordvpn.com/hc/en-us/articles/19556844985489-How-to-cancel-a-subscription). Please note that this is not a refund, as outlined in[ NordVPN’s refund policy](https://support.nordvpn.com/hc/en-us/articles/19476991311121-What-is-your-money-back-policy).
## You bought the dedicated IP using a coupon code
Dedicated IP services purchased using a coupon code are not subject to auto-renewal. To renew your dedicated IP addresses, you will need to manually[ buy the dedicated IP service](https://support.nordvpn.com/hc/en-us/articles/19484196251921-How-to-purchase-a-dedicated-IP-address).
When your dedicated IP subscription is about to expire, we will send a reminder about renewal to your registered Nord Account email address.",https://support.nordvpn.com/hc/en-us/related/click?data=BAh7CjobZGVzdGluYXRpb25fYXJ0aWNsZV9pZGwrCBGwWaEXFToYcmVmZXJyZXJfYXJ0aWNsZV9pZGwrCBFWUSf1EToLbG9jYWxlSSIKZW4tdXMGOgZFVDoIdXJsSSJML2hjL2VuLXVzL2FydGljbGVzLzIzMTkxMjM1NDQwNjU3LURlZGljYXRlZC1JUC1SZW5ld2FsLWFuZC1jYW5jZWxsYXRpb24GOwhUOglyYW5raQo%3D--beb8538ed52cdc762c20ac41f9f7ab7d5390b791
How to cancel auto-renewal for your subscription,"If your subscription was purchased via the Google Play Store, Apple App Store, or Amazon App Store and you wish to cancel it, follow the respective articles below:
* Cancelling your [Google Play Store NordVPN subscription](https://support.google.com/googleplay/answer/7018481)
* Cancelling your [Apple App Store NordVPN subscription](https://support.apple.com/en-lamr/118428)
* Cancelling your [Amazon App Store NordVPN subscription](https://www.amazonforum.com/s/question/0D54P00007IG0CkSAL/amazon-appstore-subscriptions)
## Cancelling your NordVPN subscription
If you have purchased your subscription directly from NordVPN and wish for your subscription to no longer renew at the subsequent billing date, you may cancel your subscription via your [Nord Account](https://my.nordaccount.com/).
You can follow the same steps to cancel your NordPass, NordLocker, Dedicated IP, or bundle subscription services.
To cancel the automatic renewal of your NordVPN subscription, follow the steps below:
1. Log in to your [Nord Account](https://my.nordaccount.com/)
2. Open the billing tab:
3. Click cancel next to auto-renewal:
4. Select cancel auto-renewal:
5. Your auto-renewal status will now change to off:
You will receive a confirmation email to your registered email account if your subscription cancellation is successful:
If you wish to receive a refund, please read [our article on NordVPN's refund policy](https://support.nordvpn.com/hc/en-us/articles/19476991311121-What-is-your-money-back-policy).",https://support.nordvpn.com/hc/en-us/related/click?data=BAh7CjobZGVzdGluYXRpb25fYXJ0aWNsZV9pZGwrCJFczG7JEToYcmVmZXJyZXJfYXJ0aWNsZV9pZGwrCJFBdCH1EToLbG9jYWxlSSIKZW4tdXMGOgZFVDoIdXJsSSJXL2hjL2VuLXVzL2FydGljbGVzLzE5NTU2ODQ0OTg1NDg5LUhvdy10by1jYW5jZWwtYXV0by1yZW5ld2FsLWZvci15b3VyLXN1YnNjcmlwdGlvbgY7CFQ6CXJhbmtpBg%3D%3D--8e3305ef9452d4232e3ac01410381fad61268544
What is your money-back policy?,"Here is the refund and cancellation policy at the core of our 30-day money-back guarantee:
“...if you are not satisfied with our Services, you may cancel the Subscription and request a refund within 30 days following your purchase of our Services (“Money Back Guarantee”). Please note that Subscriptions may be refunded on the basis of the Money Back Guarantee only after the initial purchase. Once a Subscription is renewed, it cannot be refunded on the basis of the Money Back Guarantee, unless applicable law provides otherwise.”
This and other conditions of our service can be found in our [Terms of Service](https://my.nordaccount.com/legal/terms-of-service/).
Here are our instructions for [how to cancel](https://support.nordvpn.com/hc/en-us/articles/19556844985489-How-to-cancel-auto-renewal-for-your-subscription) automatic payment renewal.
## Requesting a refund
Previously, refunds could only be processed through our support team. We have now implemented an automated refund system that is more efficient, faster, and convenient for our customers to use. This change also improves our ability to gather feedback, allowing us to better understand issues and improve our service. As we continue to refine this new process, your feedback is welcomed to help us enhance it further.
To request a refund for your payment, contact our customer support team via live chat available in the bottom right corner of the page, and indicate you would like us to refund your payment.
1. You will receive a link to your Nord Account dashboard. Follow the link and verify it’s you who’s trying to access the account.
2. In the following window, you will see which payments are eligible for a refund. Such payments will have a Refund button available. To proceed, click on Refund.Please keep in mind that not all payments are eligible for refunds, and certain terms apply depending on where you bought the subscription:
* * Apple App Store: Subscriptions purchased via the Apple App Store are subject to Apple's refund policies. We're unable to issue refunds for payments made through the Apple App Store. For assistance, please reach out to Apple directly via Apple Support.
* Amazon Appstore: If you've purchased your subscription through the Amazon App Store, contact Amazon directly for assistance via Amazon Support.
* Google Play Store: Refunds for payments made through the Google Play Store can be requested through NordVPN’s customer support, provided they fall within the refund terms outlined above. Additionally, if the payment was made within the last 48 hours, you can request a refund directly from your Google Play account. For more details, visit Google Play Support.
* Retailers or resellers: If you've purchased a subscription outside the NordVPN website (e.g., physical store, online shop, or marketplace like BestBuy or StackSocial), please contact the retailer directly regarding the refund.
1. In the following window, select the reason for canceling the service and requesting a refund. Your feedback is invaluable because it helps us pinpoint areas for improvement and ensures a better experience for all our users.Once completed, click Submit and Continue. 
2. You will see your refund summary. You can confirm it by clicking Refund.
3. After submitting the request, you will receive a confirmation email saying that your refund has been ordered.
4. You should now see the refund status for your payment as Refund Processing. This means that your request has been received and is currently being processed. This process can take up to a few hours*.*Please note, that due to recent implementation, it may take up to 4 hours for a refund request to be processed.
5. Once the refund is complete, the refund status on your dashboard will change to Refunded, and you will receive a confirmation email. Please note that depending on your payment method, it may take up to 10 business days for the refund to reach your account. If there was an error or you have any other questions, please contact our customer support team directly.",https://support.nordvpn.com/hc/en-us/related/click?data=BAh7CjobZGVzdGluYXRpb25fYXJ0aWNsZV9pZGwrCBH9Jde2EToYcmVmZXJyZXJfYXJ0aWNsZV9pZGwrCJFBdCH1EToLbG9jYWxlSSIKZW4tdXMGOgZFVDoIdXJsSSJFL2hjL2VuLXVzL2FydGljbGVzLzE5NDc2OTkxMzExMTIxLVdoYXQtaXMteW91ci1tb25leS1iYWNrLXBvbGljeQY7CFQ6CXJhbmtpBw%3D%3D--b99d76833f0c2f4b75d67d5fe2105875a4f5aee8
Unauthorised use of Credit or Debit card,"NordVPN provides VPN services through subscriptions. If you see a suspicious charge from NordVPN or any Nord product on your card statement, contact customer support for help:
* Email: support@nordvpn.com
* Live chat: Click the chat bubble at the bottom-right of their website.
To help identify the payment, provide these details:
* First six and last four digits of the card
* Cardholder name
* Amount charged
* Date of the transaction
Sometimes, the charges might be due to a friend or family member using your card.",https://support.nordvpn.com/hc/en-us/related/click?data=BAh7CjobZGVzdGluYXRpb25fYXJ0aWNsZV9pZGwrCJH8jX3nEToYcmVmZXJyZXJfYXJ0aWNsZV9pZGwrCJFBdCH1EToLbG9jYWxlSSIKZW4tdXMGOgZFVDoIdXJsSSJPL2hjL2VuLXVzL2FydGljbGVzLzE5Njg1OTQxNTc0ODAxLVVuYXV0aG9yaXNlZC11c2Utb2YtQ3JlZGl0LW9yLURlYml0LWNhcmQGOwhUOglyYW5raQg%3D--d72250c01aea51ebfad4fe85d4a6e384d5e4fef6
How much will I need to pay upon renewal?,"At the end of your initial plan, your subscription will be renewed automatically and you will be charged the applicable renewal price for the service. You can find more information on renewal prices in our [subscription renewal pricing page](https://my.nordaccount.com/legal/pricing/).
The renewal price is subject to change, but you will be notified of any changes by email before your subscription is renewed.
You don’t need to renew your NordVPN subscription manually — unless you [cancel auto-renewal for your subscription](https://support.nordvpn.com/hc/en-us/articles/19556844985489-How-to-cancel-auto-renewal-for-your-subscription), it will be renewed automatically.",https://support.nordvpn.com/hc/en-us/related/click?data=BAh7CjobZGVzdGluYXRpb25fYXJ0aWNsZV9pZGwrCBFz%2FuG2EToYcmVmZXJyZXJfYXJ0aWNsZV9pZGwrCJFBdCH1EToLbG9jYWxlSSIKZW4tdXMGOgZFVDoIdXJsSSJPL2hjL2VuLXVzL2FydGljbGVzLzE5NDc3MTczMjY5MjY1LUhvdy1tdWNoLXdpbGwtSS1uZWVkLXRvLXBheS11cG9uLXJlbmV3YWwGOwhUOglyYW5raQk%3D--68e56a69cd087467c012ceabfa94c47c2abe3a69
I did not receive an activation email,"When signing up for the [NordVPN service](https://nordvpn.com/), you need to enter an email address. You will be using it for login and will receive your password to that same address. So make sure that the email address you provide is valid and can be accessed by you.
If you have signed up successfully but have not received any email with your login credentials, follow these steps:
* Wait for up to 5 minutes after the signup for your email to arrive.
* Check your junk, spam, promotions, and other sections of your email account. Activation emails are sent to many users so that they might be flagged for spam or similar.
* You can get your password resent by following these steps:
1. Login to your Nord Account on this page: 
2. Click on Forgot your password? hyperlink:
3. Enter your Nord Account registration e-mail address and click Send Reset Link:",https://support.nordvpn.com/hc/en-us/related/click?data=BAh7CjobZGVzdGluYXRpb25fYXJ0aWNsZV9pZGwrCJEYjiP1EToYcmVmZXJyZXJfYXJ0aWNsZV9pZGwrCJFBdCH1EToLbG9jYWxlSSIKZW4tdXMGOgZFVDoIdXJsSSJML2hjL2VuLXVzL2FydGljbGVzLzE5NzQ0NTYxMTc0NjczLUktZGlkLW5vdC1yZWNlaXZlLWFuLWFjdGl2YXRpb24tZW1haWwGOwhUOglyYW5raQo%3D--a21a592bea8f49b61eaf505888016cac21a9d098
Plans and prices of NordVPN service,"In this article, you will learn about Nord subscription plan options. [NordVPN subscription plan prices](https://nordvpn.com/pricing/) are regularly updated on our website.
You can purchase NordVPN plans directly from the App Store or [Google Play Store](https://play.google.com/store/apps/details?id=com.nordvpn.android&hl=en), or from the Nord pricing page, where you’ll find all available options.
## Subscription plans
On the [NordPVN pricing page](https://nordvpn.com/pricing/#compare-plans-desktop) you’ll find the available options:
* [Basic](https://support.nordvpn.com/hc/en-us/related/click?data=BAh7CjobZGVzdGluYXRpb25fYXJ0aWNsZV9pZGwrCBHFHBH1EToYcmVmZXJyZXJfYXJ0aWNsZV9pZGwrCJG0FBz1EToLbG9jYWxlSSIKZW4tdXMGOgZFVDoIdXJsSSJKL2hjL2VuLXVzL2FydGljbGVzLzE5NzQ0MjUxNzU3ODQxLVBsYW5zLWFuZC1wcmljZXMtb2YtTm9yZFZQTi1zZXJ2aWNlBjsIVDoJcmFua2kG--c3ec3de40011cdb4b1e7a3a387199dc22e4e4d5a#Basic)
* [Plus](https://support.nordvpn.com/hc/en-us/related/click?data=BAh7CjobZGVzdGluYXRpb25fYXJ0aWNsZV9pZGwrCBHFHBH1EToYcmVmZXJyZXJfYXJ0aWNsZV9pZGwrCJG0FBz1EToLbG9jYWxlSSIKZW4tdXMGOgZFVDoIdXJsSSJKL2hjL2VuLXVzL2FydGljbGVzLzE5NzQ0MjUxNzU3ODQxLVBsYW5zLWFuZC1wcmljZXMtb2YtTm9yZFZQTi1zZXJ2aWNlBjsIVDoJcmFua2kG--c3ec3de40011cdb4b1e7a3a387199dc22e4e4d5a#Plus)
* [Complete](https://support.nordvpn.com/hc/en-us/related/click?data=BAh7CjobZGVzdGluYXRpb25fYXJ0aWNsZV9pZGwrCBHFHBH1EToYcmVmZXJyZXJfYXJ0aWNsZV9pZGwrCJG0FBz1EToLbG9jYWxlSSIKZW4tdXMGOgZFVDoIdXJsSSJKL2hjL2VuLXVzL2FydGljbGVzLzE5NzQ0MjUxNzU3ODQxLVBsYW5zLWFuZC1wcmljZXMtb2YtTm9yZFZQTi1zZXJ2aWNlBjsIVDoJcmFua2kG--c3ec3de40011cdb4b1e7a3a387199dc22e4e4d5a#Complete)
* [Ultra](https://support.nordvpn.com/hc/en-us/related/click?data=BAh7CjobZGVzdGluYXRpb25fYXJ0aWNsZV9pZGwrCBHFHBH1EToYcmVmZXJyZXJfYXJ0aWNsZV9pZGwrCJG0FBz1EToLbG9jYWxlSSIKZW4tdXMGOgZFVDoIdXJsSSJKL2hjL2VuLXVzL2FydGljbGVzLzE5NzQ0MjUxNzU3ODQxLVBsYW5zLWFuZC1wcmljZXMtb2YtTm9yZFZQTi1zZXJ2aWNlBjsIVDoJcmFua2kG--c3ec3de40011cdb4b1e7a3a387199dc22e4e4d5a#Ultra)
With this plan you'll get:
* [VPN features](https://support.nordvpn.com/hc/en-us/articles/19559429814545-List-of-NordVPN-features)Secure, high-speed VPNThreat Protection10 devices secured at once
* [30-day money-back guarantee](https://support.nordvpn.com/hc/en-us/articles/19476991311121-What-is-your-money-back-policy)
This plan focuses on core security and privacy, making it a great choice for users who only need reliable VPN protection.
With this plan you'll get:
* [VPN features](https://support.nordvpn.com/hc/en-us/articles/19559429814545-List-of-NordVPN-features)Secure, high-speed VPNThreat Protection10 devices secured at once
* Threat Protection Pro™Anti-malware protectionAdvanced browsing protectionAd and tracker blocker
* [Password management]( password managerData breach scanner
* [30-day money-back guarantee](https://support.nordvpn.com/hc/en-us/articles/19476991311121-What-is-your-money-back-policy)
This plan provides a well-rounded security suite, combining VPN protection with advanced tools to protect your online activities.
With this plan you'll get:
* [VPN features](https://support.nordvpn.com/hc/en-us/articles/19559429814545-List-of-NordVPN-features)Secure, high-speed VPNThreat Protection10 devices secured at once
* Threat Protection Pro™Anti-malware protectionAdvanced browsing protectionAd and tracker blocker
* [Password management]( password managerData breach scanner
* [Secure cloud storage](https://support.nordvpn.com/hc/en-us/articles/33436996432913-How-to-set-up-secure-cloud-storage-with-NordLocker)1 TB of encrypted cloud storage
* [30-day money-back guarantee](https://support.nordvpn.com/hc/en-us/articles/19476991311121-What-is-your-money-back-policy)
This plan is perfect for those who want complete online security, privacy, and secure cloud storage in one package.
With this plan you'll get:
* [VPN features](https://support.nordvpn.com/hc/en-us/articles/19559429814545-List-of-NordVPN-features)Secure, high-speed VPNThreat Protection10 devices secured at once
* Threat Protection Pro™Anti-malware protectionAdvanced browsing protectionAd and tracker blocker
* [Password management]( password managerData breach scanner
* [Secure cloud storage](https://support.nordvpn.com/hc/en-us/articles/33436996432913-How-to-set-up-secure-cloud-storage-with-NordLocker)1 TB of encrypted cloud storage
* IncogniPersonal data removal tool
* [30-day money-back guarantee](https://support.nordvpn.com/hc/en-us/articles/19476991311121-What-is-your-money-back-policy)
This plan is ideal for users who want maximum security, privacy, and data protection, including the ability to remove personal data from online sources.
## FAQs
How do I get a NordVPN subscription?
If you’re trying to subscribe to NordVPN, follow our handy guide on [how to get a subscription](https://support.nordvpn.com/hc/en-us/articles/19478048190481-How-to-purchase-a-NordVPN-subscription).
What subscription plans does NordVPN offer?
NordVPN currently offers 2-year, 1-year, and 1-month subscription plans.
Can I pay for a NordVPN subscription in monthly installments?
You can pay monthly by selecting NordVPN’s 1-month plan. NordVPN’s 2-year and 1-year plans must be [paid for in full](https://support.nordvpn.com/hc/en-us/articles/19476182512273-Does-NordVPN-charge-all-at-once) at purchase.
Does NordVPN have a family plan?
Yes, NordVPN now offers a [Family Plan](https://nordvpn.com/pricing/family-site/). It includes the same [subscription options]( Plus, Complete, and Ultra—each with the same features and benefits. The key difference is that the Family Plan allows you to create up to five separate accounts.
Do you offer discounts or coupons for NordVPN plans?
Yes — we have an extensive guide on [how to get NordVPN cheaper.](https://support.nordvpn.com/hc/en-us/articles/19477702164369-How-to-get-NordVPN-cheaper) You can also find our special [monthly deals](https://nordvpn.com/coupon/?nv_tri=TC_4672000958802338_1740990944276&nv_trs=1743145761762_1743150468731_38_251&_gl=1*fomogl*_gcl_aw*R0NMLjE3NDMwODcyNjguQ2p3S0NBanc3cE9fQmhBbEVpd0E0cE1RdkZvWHk2UWEtS0pFOTNOYkk4SWhTY2VhOVJGbGdFaldOTkZxTUxwcXUtNWlCTzQ0ODNXQTFSb0NmOElRQXZEX0J3RQ..*_gcl_au*MTk3MjQ4MjMyLjE3NDA5OTMyMzQ.*FPAU*MTk3MjQ4MjMyLjE3NDA5OTMyMzQ.*_ga*MTc2ODgyMjcxMy4xNzQwOTkwOTQ1*_ga_LEXMJ1N516*MTc0MzE0NTcwMi40Mi4xLjE3NDMxNTAzOTUuMjUuMC4w&_ga=2.254984456.1665114719.1742821287-1768822713.1740990945).
What is your money-back guarantee and how do I cancel?
To learn more about our money-back guarantee, check out [our refund policy](https://support.nordvpn.com/hc/en-us/articles/19476991311121-What-is-your-money-back-policy). If you wish to cancel your subscription, [follow our cancellation guide](https://support.nordvpn.com/hc/en-us/articles/19556844985489-How-to-cancel-auto-renewal-for-your-subscription).",https://support.nordvpn.com/hc/en-us/related/click?data=BAh7CjobZGVzdGluYXRpb25fYXJ0aWNsZV9pZGwrCBHFHBH1EToYcmVmZXJyZXJfYXJ0aWNsZV9pZGwrCJG0FBz1EToLbG9jYWxlSSIKZW4tdXMGOgZFVDoIdXJsSSJKL2hjL2VuLXVzL2FydGljbGVzLzE5NzQ0MjUxNzU3ODQxLVBsYW5zLWFuZC1wcmljZXMtb2YtTm9yZFZQTi1zZXJ2aWNlBjsIVDoJcmFua2kG--c3ec3de40011cdb4b1e7a3a387199dc22e4e4d5a
How to cancel auto-renewal for your subscription,"If your subscription was purchased via the Google Play Store, Apple App Store, or Amazon App Store and you wish to cancel it, follow the respective articles below:
* Cancelling your [Google Play Store NordVPN subscription](https://support.google.com/googleplay/answer/7018481)
* Cancelling your [Apple App Store NordVPN subscription](https://support.apple.com/en-lamr/118428)
* Cancelling your [Amazon App Store NordVPN subscription](https://www.amazonforum.com/s/question/0D54P00007IG0CkSAL/amazon-appstore-subscriptions)
## Cancelling your NordVPN subscription
If you have purchased your subscription directly from NordVPN and wish for your subscription to no longer renew at the subsequent billing date, you may cancel your subscription via your [Nord Account](https://my.nordaccount.com/).
You can follow the same steps to cancel your NordPass, NordLocker, Dedicated IP, or bundle subscription services.
To cancel the automatic renewal of your NordVPN subscription, follow the steps below:
1. Log in to your [Nord Account](https://my.nordaccount.com/)
2. Open the billing tab:
3. Click cancel next to auto-renewal:
4. Select cancel auto-renewal:
5. Your auto-renewal status will now change to off:
You will receive a confirmation email to your registered email account if your subscription cancellation is successful:
If you wish to receive a refund, please read [our article on NordVPN's refund policy](https://support.nordvpn.com/hc/en-us/articles/19476991311121-What-is-your-money-back-policy).",https://support.nordvpn.com/hc/en-us/related/click?data=BAh7CjobZGVzdGluYXRpb25fYXJ0aWNsZV9pZGwrCJFczG7JEToYcmVmZXJyZXJfYXJ0aWNsZV9pZGwrCJG0FBz1EToLbG9jYWxlSSIKZW4tdXMGOgZFVDoIdXJsSSJXL2hjL2VuLXVzL2FydGljbGVzLzE5NTU2ODQ0OTg1NDg5LUhvdy10by1jYW5jZWwtYXV0by1yZW5ld2FsLWZvci15b3VyLXN1YnNjcmlwdGlvbgY7CFQ6CXJhbmtpBw%3D%3D--3ffcae99a844fd6b41d0c718ec546f7412515ba4
How to setup NordVPN on Android,"From October 17th, 2024, older applications will have a few function limitations. The issues can affect
Android applications version 7.9.2 and below. They can include not receiving notifications in the app and reduced Dark Web Monitoring and Meshnet functionality.To resolve the issue, please update your application to the latest version.
To begin using NordVPN on your Android device, all you need to do is to download the VPN for Android, sign in (or sign up), and then connect to a NordVPN server. As soon as you've successfully connected to a NordVPN server, your Android's internet connection will be secure and private.
To go through these steps with ease, check out the instructions we provide below. Additionally, you'll find the various ways in which you can adjust the NordVPN app for Android to suit your needs!
## Table of contents:
* How to download and install NordVPN for Android
* How to set up the NordVPN mobile app for Android
* How to use NordVPN Android app
* Choosing between different servers
* Adjusting VPN settings
* (Optional) Sideload the NordVPN app
## How to download and install NordVPN for Android
First, download NordVPN for Android and install the app on your Android device.
1. Open Play Store.
2. Enter NordVPN in the search bar and select the NordVPN app. Tap Install.
### How to set up the NordVPN mobile app for Android
1. Once you’ve installed the application, tap to open it.
2. In the main menu, tap SIGN UP to create a new account or LOG IN if you already have one.
3. Pressing on any of the two buttons above will open your browser and take you to our Nord Account page, where you can either proceed with logging in or creating an account.Please note that in case you're signing up, you will be asked to get a subscription before you may begin using the service. 
### How to use NordVPN Android app
To make your connection to the internet secure and private, connect to a NordVPN server. This can be done in several ways: by pressing on the QUICK CONNECT button, clicking on a country name within the Country List, or finding a server through the search bar.Now you know how to set up a vpn on Android but there's a lot more NordVPN can offer to make your experience the best for you. Let's take a look at the different options and features that you can adjust according to your needs.Swipe up on the main screen to find all server options and features.
1. 1. Quick Connect: connect to the closest and least loaded server. This connection method is useful when the specifics of server location or other settings aren't as important as getting lighting-fast service.
2. Traffic routing: Traffic routing is one of the Meshnet features. It allows you to route all of your Internet traffic through your friends or your other device and use the IP address of that device to access the Internet.
3. Specialty servers: NordVPN offers a variety of different types of servers, each with unique benefits. Learn more about them in our dedicated article: What do the different server categories mean?
4. Search bar: use it to find specific servers. You can input the name of a country, city, server number, or even the name of the specialty category.
5. All countries list: another method for connecting - simply scroll through the list for the country you would like to connect to, and then on the country name when you find it.
6. [Meshnet](https://nordvpn.com/meshnet/): this feature allows you to create a secure, private network for many devices located anywhere in the world, access them remotely, and send all your online traffic through another device.
7. Notifications: here you can find all news about the latest updates and security tips.
8. Statistics and Settings: by clicking here you can find your connection statistics and by pressing this cogwheel icon you will open the settings menu. There's a separate section below that explains all of the options found there.
## Choosing between different servers
Connecting to a specific country: Swipe up to see the Country list. There, tap on the country you're looking for, and you will be automatically connected to a server in that location.

Alternatively, the pins on the world map signify where we have servers and the number of them in the country. Pressing on them will show you the exact city servers we have. You can tap on different pins without a number and connect to any desired city.Finally, you can also click on the search bar, and type in the country's name there.
Connecting to a specific city: You can tap on the three dots next to a country to select a specific city.

The search bar can help here, too. Type in the name of the city, and it will appear as long as we have VPN servers in it.
Connecting to a specific server: have a server number in mind that you want to reuse? Type it into the search bar, and you'll get it:

## Adjusting VPN settings
1. On the map screen, tap the user profile icon in the bottom right corner to access Account Statistics and Settings.
2. Tap on the gear icon at the top right corner to find all application settings. 
## VPN connection
Auto-connect: this option allows you to have the app automatically connect you to a VPN server the soonest there is access to the internet. Click here to learn more about this feature. Protocol: here you can switch between TCP, UDP, and NordLynx connection protocols. In short terms, the TCP protocol makes the connection slightly more stable, at the cost of speed. UDP, on the other hand, offers the opposite: a speedier, though less reliable connection. NordLynx has the best of both worlds, it provides speed and reliability.Split tunneling: this allows you to specify which apps go through the VPN connection. DNS: specifies a particular DNS server for the NordVPN app.Local network discovery: lets you stay invisible to devices on your local area network (LAN) when disabled.Metered connection: gives you more control over the data usage.
## Tools

Threat Protection: blocks intrusive ads and malicious domains based on DNS filtering. You can enable this feature once you connect to one of the NordVPN's servers. It comes with all the NordVPN plans. Read more about [stopping intrusive ads with NordVPN's ad blocker](https://nordvpn.com/features/threat-protection/ad-blocker/) on our feature page.
Due to Google's policies, Threat Protection no longer blocks ads for NordVPN apps downloaded from the Google Play Store. However, it still protects you from malicious domains and trackers through DNS filtering. You can download the NordVPN app with ad-blocking functionality directly from our website.
Kill Switch: cuts off your internet connection when you’re disconnected from secure NordVPN servers.Tapjacking protection: keeps you safe from unintentional disconnects by requiring 2 steps to disable VPN.
## General
Appearance: the go-to settings section for changing between light, dark and neutral display modes. Help us improve: by turning on this feature, you can share your anonymous data to help us improve in the future.
## Auto-connect
1. Select which networks NordVPN can use to automatically establish a VPN connection on Android: mobile networks, Wi-Fi and Ethernet, or Always (for any network).
2. If you choose to automatically connect to the Fastest available server, you will be able to choose one of the servers from your Recent Connections, one of the Specialty servers, or a server in a specific country.Please note: a Trusted networks section is visible only on lower versions than Android 10. It allows you to disable Auto-Connect on specific Wi-Fi networks. For example, you can make an exception for your home Wi-Fi if you trust it. Later versions do not allow this feature due to security changes in the Android OS.
## (Optional) Sideload the NordVPN app
If you're unable to download NordVPN from the Google Play Store, you can get the .apk file here. These files allow users to bypass the Google Play Store if they are having technical issues.
To install the app, you will need to change the security settings on your device. Go to Settings > Security & Privacy > More Settings > Install unknown apps. Select the browser you used to download the NordVPN .apk file and enable Allow from this source.On Android version 7.0 and below, you can find this option in Settings > Security > Unknown sources.
Looking for a tutorial on how to install and use NordVPN on Android TV? Read this article.",https://support.nordvpn.com/hc/en-us/related/click?data=BAh7CjobZGVzdGluYXRpb25fYXJ0aWNsZV9pZGwrCBGfx1KwEToYcmVmZXJyZXJfYXJ0aWNsZV9pZGwrCBH6mgyDHToLbG9jYWxlSSIKZW4tdXMGOgZFVDoIdXJsSSJGL2hjL2VuLXVzL2FydGljbGVzLzE5NDQ5MDAwNzMwMzg1LUhvdy10by1zZXR1cC1Ob3JkVlBOLW9uLUFuZHJvaWQGOwhUOglyYW5raQg%3D--2defb06e57a790cd208e131e4b745c627b72c3d7
How to get NordVPN cheaper,"The best NordVPN plans currently available are displayed on our [pricing page](https://nordvpn.com/pricing/). However, here are some additional deals:
* Student discount - NordVPN offers an additional discount for students and apprentices who are 18-26 years old.
* NordVPN coupons - here, you can find special monthly deals.
* Affiliate coupon codes - we recommend checking out if your favorite content creators are a part of our Affiliate Program, as they can provide you with special discount codes. Follow this guide to learn how to apply the NordVPN discount code.
* Referring a friend - with this opportunity, you can receive a month of NordVPN services for free for referring a friend.
* Occasional deals - NordVPN offers plenty of discounts and gifts to its customers throughout the year. Here, you can see where to find them and find out the best time to get them. For example, you can keep an eye out for special Cyber Monday or Black Friday VPN deals.",https://support.nordvpn.com/hc/en-us/related/click?data=BAh7CjobZGVzdGluYXRpb25fYXJ0aWNsZV9pZGwrCJG%2FhAG3EToYcmVmZXJyZXJfYXJ0aWNsZV9pZGwrCJG0FBz1EToLbG9jYWxlSSIKZW4tdXMGOgZFVDoIdXJsSSJBL2hjL2VuLXVzL2FydGljbGVzLzE5NDc3NzAyMTY0MzY5LUhvdy10by1nZXQtTm9yZFZQTi1jaGVhcGVyBjsIVDoJcmFua2kI--77b6b3e6c3fe0d8020bfe9041e4c956a83c6ade1
Does NordVPN have a free trial,"NordVPN does not offer a free trial for purchases made on its website, but we do provide our customers with a [30-day money-back guarantee](https://nordvpn.com/risk-free-vpn/) to try out our services: ""Every customer is eligible for a refund, as long as their initial payment is not older than 30 days.""
This and other conditions of our service can be found in our [Terms of Service](https://my.nordaccount.com/legal/terms-of-service/).
A free trial is available for Android users that download our [VPN for Android from Google Play](https://play.google.com/store/apps/details?id=com.nordvpn.android&hl=en&gl=US). This trial is organized by Google Play itself and follows its Terms of Service.
Please keep in mind that we only allow one free trial per customer, so make sure you log into your NordVPN account when ordering a subscription. You can cancel the free Android trial (and avoid being charged) on Google Play.
If you have any questions regarding the trial, [contact the Google Play Store directly](https://support.google.com/store#topic=3237699&contact=1).",https://support.nordvpn.com/hc/en-us/related/click?data=BAh7CjobZGVzdGluYXRpb25fYXJ0aWNsZV9pZGwrCJE%2FADT1EToYcmVmZXJyZXJfYXJ0aWNsZV9pZGwrCJG0FBz1EToLbG9jYWxlSSIKZW4tdXMGOgZFVDoIdXJsSSJFL2hjL2VuLXVzL2FydGljbGVzLzE5NzQ0ODM3MDkxMjE3LURvZXMtTm9yZFZQTi1oYXZlLWEtZnJlZS10cmlhbAY7CFQ6CXJhbmtpCQ%3D%3D--f935e6e9dbabc5434bb5afc85a7fd90efd5199f8
Can not contact support,"If you need assistance with NordVPN services, you can contact our Customer Support team by clicking the Live Chat button at the bottom right of the screen. Note: Please ensure that you’ve accepted all or functionality cookies on our website for the Live Chat button to appear.If the chat doesn't appear after clicking the button, try turning off your ad-blocker for the NordVPN website and Help Center, as it tends to cause these issues. If you still cannot see it, we recommend trying a different browser.Alternatively, you can also contact us by filling out the request form, and we'll respond within 24 hours. Our team is committed to providing quick and accurate assistance, and we truly appreciate your patience.",https://support.nordvpn.com/hc/en-us/related/click?data=BAh7CjobZGVzdGluYXRpb25fYXJ0aWNsZV9pZGwrCJEPnSeCEjoYcmVmZXJyZXJfYXJ0aWNsZV9pZGwrCJG0FBz1EToLbG9jYWxlSSIKZW4tdXMGOgZFVDoIdXJsSSI%2BL2hjL2VuLXVzL2FydGljbGVzLzIwMzUwMjE5NjUzMDA5LUNhbi1ub3QtY29udGFjdC1zdXBwb3J0BjsIVDoJcmFua2kK--b8a54185e9e251011ea729f32b101e8a83a963fa
What is your money-back policy?,"Here is the refund and cancellation policy at the core of our 30-day money-back guarantee:
“...if you are not satisfied with our Services, you may cancel the Subscription and request a refund within 30 days following your purchase of our Services (“Money Back Guarantee”). Please note that Subscriptions may be refunded on the basis of the Money Back Guarantee only after the initial purchase. Once a Subscription is renewed, it cannot be refunded on the basis of the Money Back Guarantee, unless applicable law provides otherwise.”
This and other conditions of our service can be found in our [Terms of Service](https://my.nordaccount.com/legal/terms-of-service/).
Here are our instructions for [how to cancel](https://support.nordvpn.com/hc/en-us/articles/19556844985489-How-to-cancel-auto-renewal-for-your-subscription) automatic payment renewal.
## Requesting a refund
Previously, refunds could only be processed through our support team. We have now implemented an automated refund system that is more efficient, faster, and convenient for our customers to use. This change also improves our ability to gather feedback, allowing us to better understand issues and improve our service. As we continue to refine this new process, your feedback is welcomed to help us enhance it further.
To request a refund for your payment, contact our customer support team via live chat available in the bottom right corner of the page, and indicate you would like us to refund your payment.
1. You will receive a link to your Nord Account dashboard. Follow the link and verify it’s you who’s trying to access the account.
2. In the following window, you will see which payments are eligible for a refund. Such payments will have a Refund button available. To proceed, click on Refund.Please keep in mind that not all payments are eligible for refunds, and certain terms apply depending on where you bought the subscription:
* * Apple App Store: Subscriptions purchased via the Apple App Store are subject to Apple's refund policies. We're unable to issue refunds for payments made through the Apple App Store. For assistance, please reach out to Apple directly via Apple Support.
* Amazon Appstore: If you've purchased your subscription through the Amazon App Store, contact Amazon directly for assistance via Amazon Support.
* Google Play Store: Refunds for payments made through the Google Play Store can be requested through NordVPN’s customer support, provided they fall within the refund terms outlined above. Additionally, if the payment was made within the last 48 hours, you can request a refund directly from your Google Play account. For more details, visit Google Play Support.
* Retailers or resellers: If you've purchased a subscription outside the NordVPN website (e.g., physical store, online shop, or marketplace like BestBuy or StackSocial), please contact the retailer directly regarding the refund.
1. In the following window, select the reason for canceling the service and requesting a refund. Your feedback is invaluable because it helps us pinpoint areas for improvement and ensures a better experience for all our users.Once completed, click Submit and Continue. 
2. You will see your refund summary. You can confirm it by clicking Refund.
3. After submitting the request, you will receive a confirmation email saying that your refund has been ordered.
4. You should now see the refund status for your payment as Refund Processing. This means that your request has been received and is currently being processed. This process can take up to a few hours*.*Please note, that due to recent implementation, it may take up to 4 hours for a refund request to be processed.
5. Once the refund is complete, the refund status on your dashboard will change to Refunded, and you will receive a confirmation email. Please note that depending on your payment method, it may take up to 10 business days for the refund to reach your account. If there was an error or you have any other questions, please contact our customer support team directly.",https://support.nordvpn.com/hc/en-us/related/click?data=BAh7CjobZGVzdGluYXRpb25fYXJ0aWNsZV9pZGwrCBH9Jde2EToYcmVmZXJyZXJfYXJ0aWNsZV9pZGwrCJEobdndGzoLbG9jYWxlSSIKZW4tdXMGOgZFVDoIdXJsSSJFL2hjL2VuLXVzL2FydGljbGVzLzE5NDc2OTkxMzExMTIxLVdoYXQtaXMteW91ci1tb25leS1iYWNrLXBvbGljeQY7CFQ6CXJhbmtpBg%3D%3D--610918b2a42effccedac15b5bb0163e63a74c208
How to cancel auto-renewal for your subscription,"If your subscription was purchased via the Google Play Store, Apple App Store, or Amazon App Store and you wish to cancel it, follow the respective articles below:
* Cancelling your [Google Play Store NordVPN subscription](https://support.google.com/googleplay/answer/7018481)
* Cancelling your [Apple App Store NordVPN subscription](https://support.apple.com/en-lamr/118428)
* Cancelling your [Amazon App Store NordVPN subscription](https://www.amazonforum.com/s/question/0D54P00007IG0CkSAL/amazon-appstore-subscriptions)
## Cancelling your NordVPN subscription
If you have purchased your subscription directly from NordVPN and wish for your subscription to no longer renew at the subsequent billing date, you may cancel your subscription via your [Nord Account](https://my.nordaccount.com/).
You can follow the same steps to cancel your NordPass, NordLocker, Dedicated IP, or bundle subscription services.
To cancel the automatic renewal of your NordVPN subscription, follow the steps below:
1. Log in to your [Nord Account](https://my.nordaccount.com/)
2. Open the billing tab:
3. Click cancel next to auto-renewal:
4. Select cancel auto-renewal:
5. Your auto-renewal status will now change to off:
You will receive a confirmation email to your registered email account if your subscription cancellation is successful:
If you wish to receive a refund, please read [our article on NordVPN's refund policy](https://support.nordvpn.com/hc/en-us/articles/19476991311121-What-is-your-money-back-policy).",https://support.nordvpn.com/hc/en-us/related/click?data=BAh7CjobZGVzdGluYXRpb25fYXJ0aWNsZV9pZGwrCJFczG7JEToYcmVmZXJyZXJfYXJ0aWNsZV9pZGwrCJEobdndGzoLbG9jYWxlSSIKZW4tdXMGOgZFVDoIdXJsSSJXL2hjL2VuLXVzL2FydGljbGVzLzE5NTU2ODQ0OTg1NDg5LUhvdy10by1jYW5jZWwtYXV0by1yZW5ld2FsLWZvci15b3VyLXN1YnNjcmlwdGlvbgY7CFQ6CXJhbmtpBw%3D%3D--86bde3ca6b99758a8209becb21e9c373099c784e
Common issues with activation codes,"Activation codes let you create a prepaid NordVPN account, extend an existing subscription, or even give NordVPN as a gift to others. To get started, follow our guide on [how to use a NordVPN activation code](https://support.nordvpn.com/hc/en-us/articles/19685995851665-How-to-get-NordVPN-with-activation-code).
This article addresses the most common issues that users have encountered when trying to apply activation codes.
Wrong email address
Before you apply the activation code, please double-check the email address you provided. The activation code will be applied to the email address you specify immediately, even if it is incorrect. If you mistakenly enter an email address that is not tied to your Nord Account, please [contact our customer support team](https://nordvpn.com/contact-us/) for assistance.
Ambiguous symbols
It is easy to confuse the letter “O” (capital “o”) for “0” (zero) and the letter “I” (capital “i”) for “l” (lowercase “L”). Try replacing these ambiguous symbols with their lookalikes if you’ve entered the rest of the code correctly.
This issue only affects older NordVPN activation codes, because we have stopped using ambiguous symbols to avoid confusion.
Code already activated
Any given activation code can only be used once. If you’ve applied that activation code to extend your subscription at some point in the past, any further attempts will end in error.
You can check the status of your subscription by logging in to [Nord Account](https://my.nordaccount.com/). If you can’t remember your Nord Account credentials, use our handy password recovery tool.
Activating multiple codes
Each NordVPN activation code must be applied separately. If you have multiple activation codes, simply repeat the [activation process](https://support.nordvpn.com/hc/en-us/articles/19685995851665-How-to-get-NordVPN-with-activation-code) for each one.",https://support.nordvpn.com/hc/en-us/related/click?data=BAh7CjobZGVzdGluYXRpb25fYXJ0aWNsZV9pZGwrCJEXSFRzEjoYcmVmZXJyZXJfYXJ0aWNsZV9pZGwrCJEobdndGzoLbG9jYWxlSSIKZW4tdXMGOgZFVDoIdXJsSSJKL2hjL2VuLXVzL2FydGljbGVzLzIwMjg2NTQ0NTQ5Nzc3LUNvbW1vbi1pc3N1ZXMtd2l0aC1hY3RpdmF0aW9uLWNvZGVzBjsIVDoJcmFua2kI--f64b4596f3db0bc02895681fa649da0e6d7d3853
How to apply a NordVPN coupon code,"To apply a NordVPN discount code, follow these steps:
1. Go to our [pricing page.](https://nordvpn.com/pricing/)
2. Select a preferred plan.
3. Click do you have a promo code?:
4. Enter the coupon code you have, and press apply:Now you will have the deal corresponding to your [NordVPN coupon](https://nordvpn.com/coupon/) code applied to your purchase.
After clicking apply, your coupon code will be applied to your purchase.
NordVPN provides discounts during certain events, such as on [Black Friday](https://nordvpn.com/black-friday/) and [Cyber Monday](https://nordvpn.com/cyber-monday/). Make sure to regularly check out our main page for any active deals.",https://support.nordvpn.com/hc/en-us/related/click?data=BAh7CjobZGVzdGluYXRpb25fYXJ0aWNsZV9pZGwrCBFNhrXnEToYcmVmZXJyZXJfYXJ0aWNsZV9pZGwrCJEobdndGzoLbG9jYWxlSSIKZW4tdXMGOgZFVDoIdXJsSSJJL2hjL2VuLXVzL2FydGljbGVzLzE5Njg2ODgwNTk1MjE3LUhvdy10by1hcHBseS1hLU5vcmRWUE4tY291cG9uLWNvZGUGOwhUOglyYW5raQk%3D--48453dbc6eb2b75763fece3a24c7fa3431b0dafa
How to take a screenshot?,"During troubleshooting with our Customer Support team, you may need to uploada screenshot of a specific application or website to help describe the issue at hand – this also helps our Support team efficiently troubleshoot the problems you are facing.
Select your device below and follow the instructions:
* [macOS](https://support.nordvpn.com/hc/en-us/related/click?data=BAh7CjobZGVzdGluYXRpb25fYXJ0aWNsZV9pZGwrCBEG0zDnEToYcmVmZXJyZXJfYXJ0aWNsZV9pZGwrCJEobdndGzoLbG9jYWxlSSIKZW4tdXMGOgZFVDoIdXJsSSI%2FL2hjL2VuLXVzL2FydGljbGVzLzE5Njg0NjU0MjUzNTg1LUhvdy10by10YWtlLWEtc2NyZWVuc2hvdAY7CFQ6CXJhbmtpCg%3D%3D--e5d158e2cc98b1d5c6dd42c351ff75689a3c7ae6#macOS)
* [Linux](https://support.nordvpn.com/hc/en-us/related/click?data=BAh7CjobZGVzdGluYXRpb25fYXJ0aWNsZV9pZGwrCBEG0zDnEToYcmVmZXJyZXJfYXJ0aWNsZV9pZGwrCJEobdndGzoLbG9jYWxlSSIKZW4tdXMGOgZFVDoIdXJsSSI%2FL2hjL2VuLXVzL2FydGljbGVzLzE5Njg0NjU0MjUzNTg1LUhvdy10by10YWtlLWEtc2NyZWVuc2hvdAY7CFQ6CXJhbmtpCg%3D%3D--e5d158e2cc98b1d5c6dd42c351ff75689a3c7ae6#Linux)
* [Windows](https://support.nordvpn.com/hc/en-us/related/click?data=BAh7CjobZGVzdGluYXRpb25fYXJ0aWNsZV9pZGwrCBEG0zDnEToYcmVmZXJyZXJfYXJ0aWNsZV9pZGwrCJEobdndGzoLbG9jYWxlSSIKZW4tdXMGOgZFVDoIdXJsSSI%2FL2hjL2VuLXVzL2FydGljbGVzLzE5Njg0NjU0MjUzNTg1LUhvdy10by10YWtlLWEtc2NyZWVuc2hvdAY7CFQ6CXJhbmtpCg%3D%3D--e5d158e2cc98b1d5c6dd42c351ff75689a3c7ae6#Windows)
* [Android](https://support.nordvpn.com/hc/en-us/related/click?data=BAh7CjobZGVzdGluYXRpb25fYXJ0aWNsZV9pZGwrCBEG0zDnEToYcmVmZXJyZXJfYXJ0aWNsZV9pZGwrCJEobdndGzoLbG9jYWxlSSIKZW4tdXMGOgZFVDoIdXJsSSI%2FL2hjL2VuLXVzL2FydGljbGVzLzE5Njg0NjU0MjUzNTg1LUhvdy10by10YWtlLWEtc2NyZWVuc2hvdAY7CFQ6CXJhbmtpCg%3D%3D--e5d158e2cc98b1d5c6dd42c351ff75689a3c7ae6#Android)
* [iOS](https://support.nordvpn.com/hc/en-us/related/click?data=BAh7CjobZGVzdGluYXRpb25fYXJ0aWNsZV9pZGwrCBEG0zDnEToYcmVmZXJyZXJfYXJ0aWNsZV9pZGwrCJEobdndGzoLbG9jYWxlSSIKZW4tdXMGOgZFVDoIdXJsSSI%2FL2hjL2VuLXVzL2FydGljbGVzLzE5Njg0NjU0MjUzNTg1LUhvdy10by10YWtlLWEtc2NyZWVuc2hvdAY7CFQ6CXJhbmtpCg%3D%3D--e5d158e2cc98b1d5c6dd42c351ff75689a3c7ae6#iOS)
* [Chromebook](https://support.nordvpn.com/hc/en-us/related/click?data=BAh7CjobZGVzdGluYXRpb25fYXJ0aWNsZV9pZGwrCBEG0zDnEToYcmVmZXJyZXJfYXJ0aWNsZV9pZGwrCJEobdndGzoLbG9jYWxlSSIKZW4tdXMGOgZFVDoIdXJsSSI%2FL2hjL2VuLXVzL2FydGljbGVzLzE5Njg0NjU0MjUzNTg1LUhvdy10by10YWtlLWEtc2NyZWVuc2hvdAY7CFQ6CXJhbmtpCg%3D%3D--e5d158e2cc98b1d5c6dd42c351ff75689a3c7ae6#Chromebook)
## Taking a screenshot on macOS
Follow these steps to take a screenshot on your macOS device:
### Take a screenshot of your entire screen:
1. Press Shift + Command (⌘) + 3.
2. Find the screenshot as a .png file on your desktop.
### Take a screenshot of a specific window:
1. Press Shift + Command (⌘) + 4. The pointer changes to a crosshair.
2. Press the Spacebar. The pointer changes to a camera.
3. Move the camera over a window to highlight it.
4. Click your mouse or trackpad to take a screenshot of the highlighted window. To cancel, press the Esc (Escape) key before you click.
5. Find the screenshot as a .png file on your desktop.
You can find alternative ways of taking a screenshot on Mac [here](https://support.apple.com/en-us/HT201361).
## Taking a screenshot on Linux
Follow these steps to take a screenshot on your Linux device:
1. Press PrtScn to take a full-screen screenshot. The screenshot will show everything in your display.
2. You will be prompted to select where you would like to save the screenshot file.
If this method does not work on your specific setup of Linux you can find alternative ways of taking a screenshot [here](https://www.wikihow.com/Take-a-Screenshot-in-Linux).
## Taking a screenshot on Windows
Windows devices include a built-in app to take screenshots called the Snipping Tool.
1. To open and use the Snipping Tool, select the Start button that looks like the Windows logo. 
2. Type in Snipping Tool in the search bar and click on the Snipping Tool to launch the app.
3. Once the App launches, you can see a window with screenshot options such as the shape and the timer. Choose Free-form, Rectangular, Window, or Full-screen Snip and press the Windows logo key + Shift + S (all at the same time).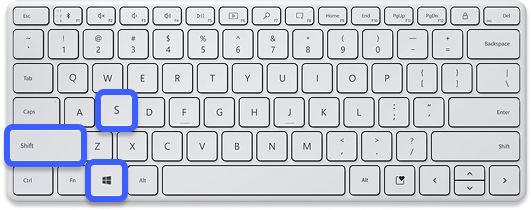
4. Alternatively, you can press New, then choose the shape you wish to make the screenshot in and use your cursor while pressing the left button on your mouse.When making free-form or rectangular snips, use your mouse to select the area you want to capture. This will usually be your browser window, the NordVPN app, or a specific application.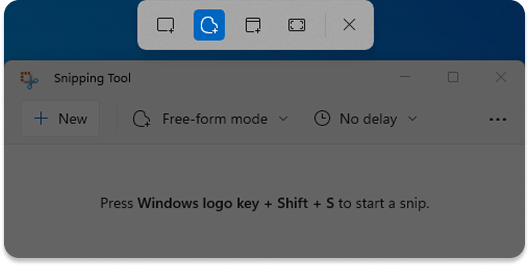
5. Click on the pop-up in the bottom right corner of your screen. It will appear once a screenshot (snip) is made.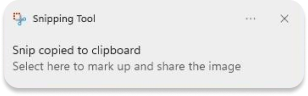
6. The Snipping Tool window will extend. Click the Save button at the top right of the Snipping Tool.
7. Choose a location where you wish to save your screenshot and click Save.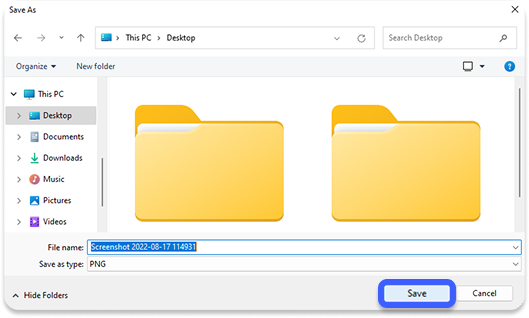
## Taking a screenshot on Android
To take a screenshot of an Android device, please follow these steps:Press and hold the Volume Down + Power buttons at the same time, and you’ll see a brief onscreen animation followed by a confirmation in the notification bar that the action was successful.
## Taking a screenshot on iOS
To take screenshots on your iOS device, please follow these steps.
### iPhone 8 or earlier, iPad, or iPod touch:
1. Press and hold the Top or Side button together with the Home button.
2. Release the buttons to take a screenshot.
3. In iOS 11, a thumbnail of your screenshot appears in the lower-left corner of your device. Tap the thumbnail to add drawings and text with Markup, or press and hold the thumbnail to share the screenshot. Swipe left on the thumbnail to dismiss it.
To find the screenshot you just took, along with the ones you've taken before, go to Photos > Albums > Screenshots.
### iPhone X or newer:
1. Press and hold the Side button alongside the Volume up button.
2. Release the buttons to take a screenshot.
3. A thumbnail of your screenshot appears in the lower-left corner of your device. Tap the thumbnail to add drawings and text with Markup, or press and hold the thumbnail to share the screenshot. Swipe left on the thumbnail to dismiss it.
## Taking a screenshot on a Chromebook
Follow the steps below to take a screenshot on your Chromebook.
1. Press Shift + Ctrl + Show windows on your keyboard.
2. Select and drag the desired application/window to take a screenshot.
3. Alternatively, press Ctrl + Shift + Show windows, and select a screenshot feature from the toolbar:
* Take a full-screen screenshot.
* Take a partial screenshot.
* Take a window screenshot.
If you need additional assistance, check out [Chromebook's screenshot-taking guide with pictures](https://www.google.com/chromebook/howto/take-full-screenshots/).",https://support.nordvpn.com/hc/en-us/related/click?data=BAh7CjobZGVzdGluYXRpb25fYXJ0aWNsZV9pZGwrCBEG0zDnEToYcmVmZXJyZXJfYXJ0aWNsZV9pZGwrCJEobdndGzoLbG9jYWxlSSIKZW4tdXMGOgZFVDoIdXJsSSI%2FL2hjL2VuLXVzL2FydGljbGVzLzE5Njg0NjU0MjUzNTg1LUhvdy10by10YWtlLWEtc2NyZWVuc2hvdAY7CFQ6CXJhbmtpCg%3D%3D--e5d158e2cc98b1d5c6dd42c351ff75689a3c7ae6
How to purchase a NordVPN subscription,"If you would like to purchase a NordVPN subscription and see the prices of the plans, visit the [NordVPN pricing page](https://nordvpn.com/pricing/). Once you have reached the pricing page, follow along to the steps below to purchase your NordVPN subscription:
## Purchasing the NordVPN subscription
To begin with your purchase, follow the steps below:
1. Choose the subscription period (2-year, 1-year, or Monthly):
2. Pick a security service package that suits your needs: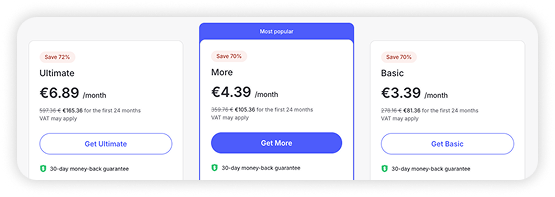
3. Type in your email address that you prefer to use with NordVPN services. 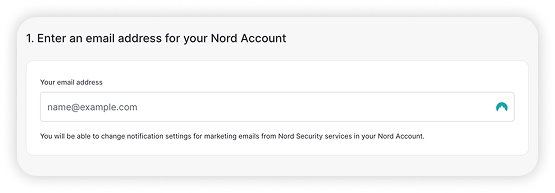
4. Select a payment method: 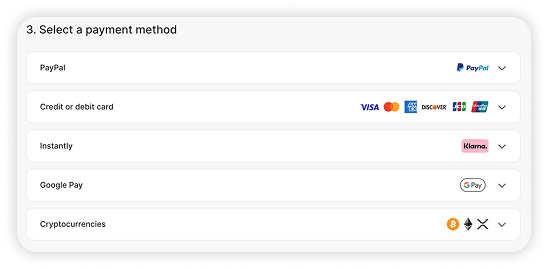
5. Fill in all the payment information to complete your purchase, and click on complete the purchase:
6. Check your registered NordVPN service email inbox and look for the purchase confirmation email.
In case you haven't received an activation email, check out our article on [what to do if you have not received an activation email](https://support.nordvpn.com/hc/en-us/articles/19744561174673-I-did-not-receive-an-activation-email).
If you ever have any questions, feel free to [contact us](https://support.nordvpn.com/hc/en-us/articles/19482416296593-How-can-I-reach-NordVPN-customer-support)",https://nordvpn.zendesk.com/hc/en-us/articles/19478048190481
How much will I need to pay upon renewal?,"At the end of your initial plan, your subscription will be renewed automatically and you will be charged the applicable renewal price for the service. You can find more information on renewal prices in our [subscription renewal pricing page](https://my.nordaccount.com/legal/pricing/).
The renewal price is subject to change, but you will be notified of any changes by email before your subscription is renewed.
You don’t need to renew your NordVPN subscription manually — unless you [cancel auto-renewal for your subscription](https://support.nordvpn.com/hc/en-us/articles/19556844985489-How-to-cancel-auto-renewal-for-your-subscription), it will be renewed automatically.",https://support.nordvpn.com/hc/en-us/related/click?data=BAh7CjobZGVzdGluYXRpb25fYXJ0aWNsZV9pZGwrCBFz%2FuG2EToYcmVmZXJyZXJfYXJ0aWNsZV9pZGwrCBFC3lFzEjoLbG9jYWxlSSIKZW4tdXMGOgZFVDoIdXJsSSJPL2hjL2VuLXVzL2FydGljbGVzLzE5NDc3MTczMjY5MjY1LUhvdy1tdWNoLXdpbGwtSS1uZWVkLXRvLXBheS11cG9uLXJlbmV3YWwGOwhUOglyYW5raQY%3D--eaf7f3cc760d4c0376cc54fde500f74c95222064
How to cancel auto-renewal for your subscription,"If your subscription was purchased via the Google Play Store, Apple App Store, or Amazon App Store and you wish to cancel it, follow the respective articles below:
* Cancelling your [Google Play Store NordVPN subscription](https://support.google.com/googleplay/answer/7018481)
* Cancelling your [Apple App Store NordVPN subscription](https://support.apple.com/en-lamr/118428)
* Cancelling your [Amazon App Store NordVPN subscription](https://www.amazonforum.com/s/question/0D54P00007IG0CkSAL/amazon-appstore-subscriptions)
## Cancelling your NordVPN subscription
If you have purchased your subscription directly from NordVPN and wish for your subscription to no longer renew at the subsequent billing date, you may cancel your subscription via your [Nord Account](https://my.nordaccount.com/).
You can follow the same steps to cancel your NordPass, NordLocker, Dedicated IP, or bundle subscription services.
To cancel the automatic renewal of your NordVPN subscription, follow the steps below:
1. Log in to your [Nord Account](https://my.nordaccount.com/)
2. Open the billing tab:
3. Click cancel next to auto-renewal:
4. Select cancel auto-renewal:
5. Your auto-renewal status will now change to off:
You will receive a confirmation email to your registered email account if your subscription cancellation is successful:
If you wish to receive a refund, please read [our article on NordVPN's refund policy](https://support.nordvpn.com/hc/en-us/articles/19476991311121-What-is-your-money-back-policy).",https://support.nordvpn.com/hc/en-us/related/click?data=BAh7CjobZGVzdGluYXRpb25fYXJ0aWNsZV9pZGwrCJFczG7JEToYcmVmZXJyZXJfYXJ0aWNsZV9pZGwrCBFC3lFzEjoLbG9jYWxlSSIKZW4tdXMGOgZFVDoIdXJsSSJXL2hjL2VuLXVzL2FydGljbGVzLzE5NTU2ODQ0OTg1NDg5LUhvdy10by1jYW5jZWwtYXV0by1yZW5ld2FsLWZvci15b3VyLXN1YnNjcmlwdGlvbgY7CFQ6CXJhbmtpBw%3D%3D--92b1be74752de8cad8b89a4d98f402308a97c186
What is your money-back policy?,"Here is the refund and cancellation policy at the core of our 30-day money-back guarantee:
“...if you are not satisfied with our Services, you may cancel the Subscription and request a refund within 30 days following your purchase of our Services (“Money Back Guarantee”). Please note that Subscriptions may be refunded on the basis of the Money Back Guarantee only after the initial purchase. Once a Subscription is renewed, it cannot be refunded on the basis of the Money Back Guarantee, unless applicable law provides otherwise.”
This and other conditions of our service can be found in our [Terms of Service](https://my.nordaccount.com/legal/terms-of-service/).
Here are our instructions for [how to cancel](https://support.nordvpn.com/hc/en-us/articles/19556844985489-How-to-cancel-auto-renewal-for-your-subscription) automatic payment renewal.
## Requesting a refund
Previously, refunds could only be processed through our support team. We have now implemented an automated refund system that is more efficient, faster, and convenient for our customers to use. This change also improves our ability to gather feedback, allowing us to better understand issues and improve our service. As we continue to refine this new process, your feedback is welcomed to help us enhance it further.
To request a refund for your payment, contact our customer support team via live chat available in the bottom right corner of the page, and indicate you would like us to refund your payment.
1. You will receive a link to your Nord Account dashboard. Follow the link and verify it’s you who’s trying to access the account.
2. In the following window, you will see which payments are eligible for a refund. Such payments will have a Refund button available. To proceed, click on Refund.Please keep in mind that not all payments are eligible for refunds, and certain terms apply depending on where you bought the subscription:
* * Apple App Store: Subscriptions purchased via the Apple App Store are subject to Apple's refund policies. We're unable to issue refunds for payments made through the Apple App Store. For assistance, please reach out to Apple directly via Apple Support.
* Amazon Appstore: If you've purchased your subscription through the Amazon App Store, contact Amazon directly for assistance via Amazon Support.
* Google Play Store: Refunds for payments made through the Google Play Store can be requested through NordVPN’s customer support, provided they fall within the refund terms outlined above. Additionally, if the payment was made within the last 48 hours, you can request a refund directly from your Google Play account. For more details, visit Google Play Support.
* Retailers or resellers: If you've purchased a subscription outside the NordVPN website (e.g., physical store, online shop, or marketplace like BestBuy or StackSocial), please contact the retailer directly regarding the refund.
1. In the following window, select the reason for canceling the service and requesting a refund. Your feedback is invaluable because it helps us pinpoint areas for improvement and ensures a better experience for all our users.Once completed, click Submit and Continue. 
2. You will see your refund summary. You can confirm it by clicking Refund.
3. After submitting the request, you will receive a confirmation email saying that your refund has been ordered.
4. You should now see the refund status for your payment as Refund Processing. This means that your request has been received and is currently being processed. This process can take up to a few hours*.*Please note, that due to recent implementation, it may take up to 4 hours for a refund request to be processed.
5. Once the refund is complete, the refund status on your dashboard will change to Refunded, and you will receive a confirmation email. Please note that depending on your payment method, it may take up to 10 business days for the refund to reach your account. If there was an error or you have any other questions, please contact our customer support team directly.",https://support.nordvpn.com/hc/en-us/related/click?data=BAh7CjobZGVzdGluYXRpb25fYXJ0aWNsZV9pZGwrCBH9Jde2EToYcmVmZXJyZXJfYXJ0aWNsZV9pZGwrCBFC3lFzEjoLbG9jYWxlSSIKZW4tdXMGOgZFVDoIdXJsSSJFL2hjL2VuLXVzL2FydGljbGVzLzE5NDc2OTkxMzExMTIxLVdoYXQtaXMteW91ci1tb25leS1iYWNrLXBvbGljeQY7CFQ6CXJhbmtpCA%3D%3D--7a95692d2c58e4e1a6f2e5247b8497de264466f3
I have just paid. Will I be charged again,"Any payment method other than CoinPayments, prepaid and gift cards, will create an ongoing subscription. It will automatically charge you after your NordVPN account expires.",https://support.nordvpn.com/hc/en-us/related/click?data=BAh7CjobZGVzdGluYXRpb25fYXJ0aWNsZV9pZGwrCJFBdCH1EToYcmVmZXJyZXJfYXJ0aWNsZV9pZGwrCBFC3lFzEjoLbG9jYWxlSSIKZW4tdXMGOgZFVDoIdXJsSSJPL2hjL2VuLXVzL2FydGljbGVzLzE5NzQ0NTI1OTI2ODAxLUktaGF2ZS1qdXN0LXBhaWQtV2lsbC1JLWJlLWNoYXJnZWQtYWdhaW4GOwhUOglyYW5raQk%3D--1cc0288dbcc609ca4ba2c95ccb2b1b7a5c86c750
How do I stop NordVPN from blocking sites?,"If the issue persists, try these steps:",https://support.nordvpn.com/hc/en-us/related/click?data=BAh7CjobZGVzdGluYXRpb25fYXJ0aWNsZV9pZGwrCBG51uNGEjoYcmVmZXJyZXJfYXJ0aWNsZV9pZGwrCJHOYN5WEjoLbG9jYWxlSSIKZW4tdXMGOgZFVDoIdXJsSSJcL2hjL2VuLXVzL2FydGljbGVzLzIwMDk1Njc5NTEwODAxLUktY2FuLXQtcmVhY2gtc29tZS13ZWJzaXRlcy13aGVuLWNvbm5lY3RlZC10by1Ob3JkVlBOBjsIVDoJcmFua2kJ--c3c399e7588f3878d7f1e61092ef3a32b41de3f0
Does NordVPN have a free trial,"NordVPN does not offer a free trial for purchases made on its website, but we do provide our customers with a [30-day money-back guarantee](https://nordvpn.com/risk-free-vpn/) to try out our services: ""Every customer is eligible for a refund, as long as their initial payment is not older than 30 days.""
This and other conditions of our service can be found in our [Terms of Service](https://my.nordaccount.com/legal/terms-of-service/).
A free trial is available for Android users that download our [VPN for Android from Google Play](https://play.google.com/store/apps/details?id=com.nordvpn.android&hl=en&gl=US). This trial is organized by Google Play itself and follows its Terms of Service.
Please keep in mind that we only allow one free trial per customer, so make sure you log into your NordVPN account when ordering a subscription. You can cancel the free Android trial (and avoid being charged) on Google Play.
If you have any questions regarding the trial, [contact the Google Play Store directly](https://support.google.com/store#topic=3237699&contact=1).",https://support.nordvpn.com/hc/en-us/related/click?data=BAh7CjobZGVzdGluYXRpb25fYXJ0aWNsZV9pZGwrCJE%2FADT1EToYcmVmZXJyZXJfYXJ0aWNsZV9pZGwrCBFC3lFzEjoLbG9jYWxlSSIKZW4tdXMGOgZFVDoIdXJsSSJFL2hjL2VuLXVzL2FydGljbGVzLzE5NzQ0ODM3MDkxMjE3LURvZXMtTm9yZFZQTi1oYXZlLWEtZnJlZS10cmlhbAY7CFQ6CXJhbmtpCg%3D%3D--8234c23368c07c8146db23d7b5bea578f85541b4
What is your money-back policy?,"Here is the refund and cancellation policy at the core of our 30-day money-back guarantee:
“...if you are not satisfied with our Services, you may cancel the Subscription and request a refund within 30 days following your purchase of our Services (“Money Back Guarantee”). Please note that Subscriptions may be refunded on the basis of the Money Back Guarantee only after the initial purchase. Once a Subscription is renewed, it cannot be refunded on the basis of the Money Back Guarantee, unless applicable law provides otherwise.”
This and other conditions of our service can be found in our [Terms of Service](https://my.nordaccount.com/legal/terms-of-service/).
Here are our instructions for [how to cancel](https://support.nordvpn.com/hc/en-us/articles/19556844985489-How-to-cancel-auto-renewal-for-your-subscription) automatic payment renewal.
## Requesting a refund
Previously, refunds could only be processed through our support team. We have now implemented an automated refund system that is more efficient, faster, and convenient for our customers to use. This change also improves our ability to gather feedback, allowing us to better understand issues and improve our service. As we continue to refine this new process, your feedback is welcomed to help us enhance it further.
To request a refund for your payment, contact our customer support team via live chat available in the bottom right corner of the page, and indicate you would like us to refund your payment.
1. You will receive a link to your Nord Account dashboard. Follow the link and verify it’s you who’s trying to access the account.
2. In the following window, you will see which payments are eligible for a refund. Such payments will have a Refund button available. To proceed, click on Refund.Please keep in mind that not all payments are eligible for refunds, and certain terms apply depending on where you bought the subscription:
* * Apple App Store: Subscriptions purchased via the Apple App Store are subject to Apple's refund policies. We're unable to issue refunds for payments made through the Apple App Store. For assistance, please reach out to Apple directly via Apple Support.
* Amazon Appstore: If you've purchased your subscription through the Amazon App Store, contact Amazon directly for assistance via Amazon Support.
* Google Play Store: Refunds for payments made through the Google Play Store can be requested through NordVPN’s customer support, provided they fall within the refund terms outlined above. Additionally, if the payment was made within the last 48 hours, you can request a refund directly from your Google Play account. For more details, visit Google Play Support.
* Retailers or resellers: If you've purchased a subscription outside the NordVPN website (e.g., physical store, online shop, or marketplace like BestBuy or StackSocial), please contact the retailer directly regarding the refund.
1. In the following window, select the reason for canceling the service and requesting a refund. Your feedback is invaluable because it helps us pinpoint areas for improvement and ensures a better experience for all our users.Once completed, click Submit and Continue. 
2. You will see your refund summary. You can confirm it by clicking Refund.
3. After submitting the request, you will receive a confirmation email saying that your refund has been ordered.
4. You should now see the refund status for your payment as Refund Processing. This means that your request has been received and is currently being processed. This process can take up to a few hours*.*Please note, that due to recent implementation, it may take up to 4 hours for a refund request to be processed.
5. Once the refund is complete, the refund status on your dashboard will change to Refunded, and you will receive a confirmation email. Please note that depending on your payment method, it may take up to 10 business days for the refund to reach your account. If there was an error or you have any other questions, please contact our customer support team directly.",https://support.nordvpn.com/hc/en-us/related/click?data=BAh7CjobZGVzdGluYXRpb25fYXJ0aWNsZV9pZGwrCBH9Jde2EToYcmVmZXJyZXJfYXJ0aWNsZV9pZGwrCJE%2FADT1EToLbG9jYWxlSSIKZW4tdXMGOgZFVDoIdXJsSSJFL2hjL2VuLXVzL2FydGljbGVzLzE5NDc2OTkxMzExMTIxLVdoYXQtaXMteW91ci1tb25leS1iYWNrLXBvbGljeQY7CFQ6CXJhbmtpBg%3D%3D--7546ba33106820ba89c17a50ff76b9eac3e1e5b6
How to reach NordVPN customer support?,"While we don't offer phone support, we have different options to contact NordVPN customer support available 24/7 and ready to help you!
## Help Center
First off, if you run into any issues using NordVPN - check out our Help Center that is available in 14 languages: English, German, French, Danish, Italian, Spanish, Norwegian, Swedish, Dutch, Japanese, Korean, Polish, Portuguese-Brazilian, Traditional Chinese.
You can change the language by scrolling down until you see the language change option and clicking on the language you prefer. This will ensure that you can look for information in a language comfortable for you.
After you have set the language you want to look information in, you can find solutions in the help center by either:
* Searching for information using Help Center's search bar, which will list out articles according to the keywords typed in the search query:
* Navigating to one of the categories available in the Help Center:
* [FAQ](https://support.nordvpn.com/hc/en-us/categories/200593301-FAQ) - in this category you'll find Frequently asked questions and NordVPN app setup tutorials;
* [General info](https://support.nordvpn.com/hc/en-us/categories/360000293597-General-info) - here, you'll be able to find information on NordVPN functionalities, features, and SmartPlay;
* [Billing](https://support.nordvpn.com/hc/en-us/categories/360000293617-Billing) - this category covers payment, subscription, and account management topics;
* [Connectivity](https://support.nordvpn.com/hc/en-us/categories/200614302-Connectivity) - the last category available covers troubleshooting articles, here you can find help regarding NordVPN connectivity, internet speed with NordVPN on, manual setups for routers and different OSes, proxies.
## Support agents
However, if you're looking for assistance on your specific case, you can reach out to our developed conversation bots or human customer support agents by:
* Chat
* Email
We have two teams to assist you:
* Customer Care & Billing Team: They can tell you about NordVPN, help set up your devices, make sure you can access streaming sites, and answer questions about dedicated IPs. As well as helpyou with your NordVPN subscription, account, or payments.
* Connection Team: They can assist with setting up NordVPN on your router, fixing advanced connectivity problems, and helping in places with internet restrictions.",https://support.nordvpn.com/hc/en-us/related/click?data=BAh7CjobZGVzdGluYXRpb25fYXJ0aWNsZV9pZGwrCJGygBq4EToYcmVmZXJyZXJfYXJ0aWNsZV9pZGwrCJE%2FADT1EToLbG9jYWxlSSIKZW4tdXMGOgZFVDoIdXJsSSJML2hjL2VuLXVzL2FydGljbGVzLzE5NDgyNDE2Mjk2NTkzLUhvdy10by1yZWFjaC1Ob3JkVlBOLWN1c3RvbWVyLXN1cHBvcnQGOwhUOglyYW5raQc%3D--968d0c65f1c4a492623927d7a1bf42f37205cec6
How to cancel auto-renewal for your subscription,"If your subscription was purchased via the Google Play Store, Apple App Store, or Amazon App Store and you wish to cancel it, follow the respective articles below:
* Cancelling your [Google Play Store NordVPN subscription](https://support.google.com/googleplay/answer/7018481)
* Cancelling your [Apple App Store NordVPN subscription](https://support.apple.com/en-lamr/118428)
* Cancelling your [Amazon App Store NordVPN subscription](https://www.amazonforum.com/s/question/0D54P00007IG0CkSAL/amazon-appstore-subscriptions)
## Cancelling your NordVPN subscription
If you have purchased your subscription directly from NordVPN and wish for your subscription to no longer renew at the subsequent billing date, you may cancel your subscription via your [Nord Account](https://my.nordaccount.com/).
You can follow the same steps to cancel your NordPass, NordLocker, Dedicated IP, or bundle subscription services.
To cancel the automatic renewal of your NordVPN subscription, follow the steps below:
1. Log in to your [Nord Account](https://my.nordaccount.com/)
2. Open the billing tab:
3. Click cancel next to auto-renewal:
4. Select cancel auto-renewal:
5. Your auto-renewal status will now change to off:
You will receive a confirmation email to your registered email account if your subscription cancellation is successful:
If you wish to receive a refund, please read [our article on NordVPN's refund policy](https://support.nordvpn.com/hc/en-us/articles/19476991311121-What-is-your-money-back-policy).",https://support.nordvpn.com/hc/en-us/related/click?data=BAh7CjobZGVzdGluYXRpb25fYXJ0aWNsZV9pZGwrCJFczG7JEToYcmVmZXJyZXJfYXJ0aWNsZV9pZGwrCJE%2FADT1EToLbG9jYWxlSSIKZW4tdXMGOgZFVDoIdXJsSSJXL2hjL2VuLXVzL2FydGljbGVzLzE5NTU2ODQ0OTg1NDg5LUhvdy10by1jYW5jZWwtYXV0by1yZW5ld2FsLWZvci15b3VyLXN1YnNjcmlwdGlvbgY7CFQ6CXJhbmtpCA%3D%3D--1f114f28b964ebc0e7ff1c12f001698b4f267614
"What is a Nord Account, and how do you use it?","A Nord Account lets you easily manage all of your Nord Security services (including [NordVPN](https://nordvpn.com/pt-br/), [NordPass](https://nordpass.com/), and [NordLocker](https://nordlocker.com/)) from a single control panel.
### What can I do with a Nord Account?
1. Manage all of your Nord Security accounts in one place.
2. Use one login to sign in to all your Nord Security accounts.
3. Upgrade your service plans.
4. Cancel auto-renewal for your subscriptions.
If you have a NordVPN, NordPass, or NordLocker account, you’re automatically eligible for a [Nord Account](https://my.nordaccount.com/) and can start using it right away.
### Why use a Nord Account?
* No need for multiple accounts and passwords. Use your Nord Account credentials to easily sign in to all of your Nord Security accounts — you need just one email address and one password.
* Manage all services in one place. Once you sign in to your Nord Account, you’ll be able to view and extend your Nord Security subscriptions, cancel auto-renewal, see your billing history, download apps, and read the latest security reports.
* Simplify logins. A Nord Account lets you sign in to any of your Nord Security accounts with one click — simply look for the “Log in with Nord Account” button in Nord Security apps. Nord Accounts use the “OpenID Connect” standard for user authentication.
## Using a Nord Account
I’m a NordVPN user. What do I need to do?
Nothing! Your NordVPN account details automatically transfer to your Nord Account. Simply [sign in to your Nord Account](https://nordaccount.com/login/) to manage your Nord Security subscriptions and auto-renewals.
I want to get NordVPN. What do I need to do?
I use other Nord Security products and already have a Nord Account:
You can get NordVPN in three easy steps:
1. [Log in to your Nord Account](https://nordaccount.com/login/).
2. Go to the Dashboard, and under NordVPN, click Upgrade plan.
3. The checkout page will open. Select a plan and complete your payment.
Now, you can sign in to NordVPN with your Nord Account login.
I have never used Nord Security products:
You can subscribe to NordVPN and start using your new Nord Account in four easy steps:
1. [Choose a subscription plan](https://nordvpn.com/pricing/).
2. Fill in your details and complete your payment.
3. You will be sent a Nord Account registration link to the email address you signed up with. Click on the link and create a password.
4. [Download the NordVPN app](https://nordvpn.com/download/) and sign in with your Nord Account credentials.
I want to delete/close my Nord Account. How can I do it?
Follow the steps in our [article on how to delete or close your Nord Account](https://support.nordvpn.com/FAQ/1521982312/How-can-I-delete-my-NordVPN-account.htm).
I want a refund and/or to cancel auto-renewal for my subscription through my Nord Account.
* Follow our [guide on NordVPN’s money-back policy](https://support.nordvpn.com/hc/en-us/articles/19476991311121-What-is-your-money-back-policy) to get a refund for your purchase.
* Read our guide on [how to cancel auto-renewal for your subscription](https://support.nordvpn.com/hc/en-us/articles/19556844985489-How-to-cancel-a-subscription) through your Nord Account.
Manage all of your cybersecurity needs on one platform with your [Nord Account](https://my.nordaccount.com/dashboard/).",https://support.nordvpn.com/hc/en-us/related/click?data=BAh7CjobZGVzdGluYXRpb25fYXJ0aWNsZV9pZGwrCBEfFs%2FMEToYcmVmZXJyZXJfYXJ0aWNsZV9pZGwrCJE%2FADT1EToLbG9jYWxlSSIKZW4tdXMGOgZFVDoIdXJsSSJTL2hjL2VuLXVzL2FydGljbGVzLzE5NTcxMzQ1MzM0MDMzLVdoYXQtaXMtYS1Ob3JkLUFjY291bnQtYW5kLWhvdy1kby15b3UtdXNlLWl0BjsIVDoJcmFua2kJ--4a08234a473ab7b3d76a760c61e450b45b3a8004
How much will I need to pay upon renewal?,"At the end of your initial plan, your subscription will be renewed automatically and you will be charged the applicable renewal price for the service. You can find more information on renewal prices in our [subscription renewal pricing page](https://my.nordaccount.com/legal/pricing/).
The renewal price is subject to change, but you will be notified of any changes by email before your subscription is renewed.
You don’t need to renew your NordVPN subscription manually — unless you [cancel auto-renewal for your subscription](https://support.nordvpn.com/hc/en-us/articles/19556844985489-How-to-cancel-auto-renewal-for-your-subscription), it will be renewed automatically.",https://support.nordvpn.com/hc/en-us/related/click?data=BAh7CjobZGVzdGluYXRpb25fYXJ0aWNsZV9pZGwrCBFz%2FuG2EToYcmVmZXJyZXJfYXJ0aWNsZV9pZGwrCJE%2FADT1EToLbG9jYWxlSSIKZW4tdXMGOgZFVDoIdXJsSSJPL2hjL2VuLXVzL2FydGljbGVzLzE5NDc3MTczMjY5MjY1LUhvdy1tdWNoLXdpbGwtSS1uZWVkLXRvLXBheS11cG9uLXJlbmV3YWwGOwhUOglyYW5raQo%3D--93bafb46a5ad98a09e32914203f45016ec55177f
Common issues with activation codes,"Activation codes let you create a prepaid NordVPN account, extend an existing subscription, or even give NordVPN as a gift to others. To get started, follow our guide on [how to use a NordVPN activation code](https://support.nordvpn.com/hc/en-us/articles/19685995851665-How-to-get-NordVPN-with-activation-code).
This article addresses the most common issues that users have encountered when trying to apply activation codes.
Wrong email address
Before you apply the activation code, please double-check the email address you provided. The activation code will be applied to the email address you specify immediately, even if it is incorrect. If you mistakenly enter an email address that is not tied to your Nord Account, please [contact our customer support team](https://nordvpn.com/contact-us/) for assistance.
Ambiguous symbols
It is easy to confuse the letter “O” (capital “o”) for “0” (zero) and the letter “I” (capital “i”) for “l” (lowercase “L”). Try replacing these ambiguous symbols with their lookalikes if you’ve entered the rest of the code correctly.
This issue only affects older NordVPN activation codes, because we have stopped using ambiguous symbols to avoid confusion.
Code already activated
Any given activation code can only be used once. If you’ve applied that activation code to extend your subscription at some point in the past, any further attempts will end in error.
You can check the status of your subscription by logging in to [Nord Account](https://my.nordaccount.com/). If you can’t remember your Nord Account credentials, use our handy password recovery tool.
Activating multiple codes
Each NordVPN activation code must be applied separately. If you have multiple activation codes, simply repeat the [activation process](https://support.nordvpn.com/hc/en-us/articles/19685995851665-How-to-get-NordVPN-with-activation-code) for each one.",https://support.nordvpn.com/hc/en-us/related/click?data=BAh7CjobZGVzdGluYXRpb25fYXJ0aWNsZV9pZGwrCJEXSFRzEjoYcmVmZXJyZXJfYXJ0aWNsZV9pZGwrCJEYjiP1EToLbG9jYWxlSSIKZW4tdXMGOgZFVDoIdXJsSSJKL2hjL2VuLXVzL2FydGljbGVzLzIwMjg2NTQ0NTQ5Nzc3LUNvbW1vbi1pc3N1ZXMtd2l0aC1hY3RpdmF0aW9uLWNvZGVzBjsIVDoJcmFua2kG--83a122e60eb0c1fdf2fb55f7076cda9e37875d8d
Connect to NordVPN with Firefox extension,"## Setting up NordVPN extension on Firefox
You can get the [VPN service for Firefox](https://nordvpn.com/download/firefox-extension/) from the [Firefox website for extensions](https://addons.mozilla.org/en-US/firefox/addon/nordvpn-proxy-extension/).
1. To install the extension click Add to Firefox.
2. Afterward, you will be prompted to grant permission for this application, click Add.
3. After that, you will be asked to allow the extension to run in a private window, check this and click ""Okay"". 
4. After the installation is finished NordVPN logo will appear on the Toolbar on the top right corner of the browser.
5. Click on the NordVPN logo and you will be prompted to sign in, use your NordVPN credentials to do so. 
## Using and customizing the NordVPN Firefox Extension
Let's look at how you can make the first connection and adjust the extension settings to suit your needs. 
1. Protected status: when you connect to a NordVPN server, this bar will confirm that your connection is successful by displaying the status as Protected.
2. Quick Connect: the fastest way to begin using the NordVPN extension. After pressing Quick Connect, you'll be immediately connected to a NordVPN server.
3. Search: whereas the Quick Connect option will decide on a server location for you, this option allows you to specify the country of the NordVPN server.
4. Settings: here, you can find your General, Connection, Security and privacy settings.General: in these settings, you can find your subscription information, application appearance, language preferences, and a function to import and export [split tunneling](https://support.nordvpn.com/hc/en-us/articles/20321703651985-Split-Tunneling-feature-on-NordVPN-extension) settings.Connection: when accessing connection settings, you can choose to automatically connect to NordVPN servers or add URLs that you wish to be excluded from the NordVPN connection.Security and privacy: enable the [WebRTC](https://support.nordvpn.com/hc/en-us/articles/20318383008529-How-to-stop-WebRTC-leaks) Leaks option and the [Threat Protection](https://support.nordvpn.com/General-info/Features/1047407402/What-are-Threat-Protection-and-Threat-Protection-Lite.htm) feature. Also, choose to turn on security warnings for suspicious websites.
5. Support Assistance: more information about the extension and live chat with an agent option can be found here.
6. Notifications: updates and news about the NordVPN extension.
7. Main extension window: If you click here, you can open the main extension window.
8. List of Recently Connected Countries: This section displays the countries to which you have established a recent connection. In case you haven't connected to any server yet, you will find recommendations for countries to connect to.",https://support.nordvpn.com/hc/en-us/related/click?data=BAh7CjobZGVzdGluYXRpb25fYXJ0aWNsZV9pZGwrCJGWbEKCEjoYcmVmZXJyZXJfYXJ0aWNsZV9pZGwrCBHDasUQGzoLbG9jYWxlSSIKZW4tdXMGOgZFVDoIdXJsSSJQL2hjL2VuLXVzL2FydGljbGVzLzIwMzUwNjY5NDYxMTM3LUNvbm5lY3QtdG8tTm9yZFZQTi13aXRoLUZpcmVmb3gtZXh0ZW5zaW9uBjsIVDoJcmFua2kH--28e89a91b59bac8bfa655662122c3c93910bcae3
NordVPN proxy setup for BitTorrent,"When you connect to NordVPN’s servers, you can use BitTorrent and most other peer-to-peer platforms. But if you want to avoid using the [NordVPN app](https://nordvpn.com/download/), setting up a VPN proxy is the next best thing.
Note that NordVPN service should never be used to bypass copyright regulations. NordVPN does not promote, condone, or endorse the use of the service for such purposes. For more details, please read the NordVPN [Terms of Service](https://my.nordaccount.com/legal/terms-of-service/).
## How to set up NordVPN with BitTorrent
1. Open BitTorrent.
2. In the menu bar, click Option > Preferences. Alternatively, press Ctrl + P on your keyboard.
3. Select the Connection section.
4. Under Proxy Server, from the Type dropdown, select Socks5.
5. In the Proxy field, enter an address of a selected proxy server.Here is a list of servers you can choose from:amsterdam.nl.socks.nordhold.netatlanta.us.socks.nordhold.netdallas.us.socks.nordhold.netlos-angeles.us.socks.nordhold.netnl.socks.nordhold.netse.socks.nordhold.netstockholm.se.socks.nordhold.netus.socks.nordhold.netnew-york.us.socks.nordhold.netsan-francisco.us.socks.nordhold.netdetroit.us.socks.nordhold.net
6. In the Port field, type in 1080.
7. Select the following checkboxes:
* Authentication
* Use proxy for hostname lookups
* Use proxy for peer-to-peer connections
* Disable all local DNS lookups
* Disable features that leak identifying information
* Disable connections unsupported by the proxy
8. Enter your authentication details.Username: NordVPN service usernamePassword: NordVPN service passwordYou can find your NordVPN service credentials (service username and service password) in the [Nord Account dashboard](https://my.nordaccount.com/dashboard/nordvpn/):
1. Click Set up NordVPN manually.
2. You will receive a verification code in your email that you use for NordVPN services. Type the code in: 
3. Copy the credentials using the “Copy” buttons on the right:
9. Click Apply and OK to save changes.
## How to check if your proxy setup is working
1. Visit the [ipleak.net](https://ipleak.net/) website.
2. Scroll down to the Torrent Address detection section, click Activate, and click this Magnet Link.
3. A new window will show up, prompting you to open BitTorrent. Select Open BitTorrent.Important: keep ipleak.net open.
4. Once BitTorrent opens, click OK to add the torrent.
5. While the torrent is downloading metadata, return to the ipleak website.
6. Under Torrent Address detection, you should see the IP address of your chosen proxy server.If no address is showing, click the Refresh button to update the results.
You should find that BitTorrent is securely downloading files via the NordVPN SOCKS5 proxy server you selected.",https://support.nordvpn.com/hc/en-us/related/click?data=BAh7CjobZGVzdGluYXRpb25fYXJ0aWNsZV9pZGwrCJExIOacEjoYcmVmZXJyZXJfYXJ0aWNsZV9pZGwrCBGGPoCwEToLbG9jYWxlSSIKZW4tdXMGOgZFVDoIdXJsSSJJL2hjL2VuLXVzL2FydGljbGVzLzIwNDY1MDg1MDY3NjY1LU5vcmRWUE4tcHJveHktc2V0dXAtZm9yLUJpdFRvcnJlbnQGOwhUOglyYW5raQc%3D--7a5e26fdf3de3b3beac57abab918bdaff21539ac
How to get NordVPN with activation code,"To begin using NordVPN, you must activate your account using a [25-character “activation key”](https://my.nordaccount.com/activate/), which can be purchased from a physical or online retailer. This is the only method available for activating your account using the activation key.
To activate NordVPN with an activation key, follow the instructions below:
1. Enter your NordVPN activation code and your email address, then click Continue.
2. Check for the verification code in your email inbox.
3. Copy the verification code from the email we sent you and paste it into the box.
4. If you are a new NordVPN user, create a password for your Nord Account. Otherwise, type in your old password to log in.
5. Download the NordVPN app.
After you've set up your NordVPN account with the activation code and downloaded the app - you'll need to install it. Read our blog's article on [how to set up NordVPN](https://nordvpn.com/blog/how-to-set-up-a-vpn/).
If you experience any error when entering the activation code, please check [our article on common issues with activation codes](https://support.nordvpn.com/hc/en-us/articles/20286544549777-Common-issues-with-activation-codes).A useful reminder: Using a cracked version of NordVPN may lead to the loss of sensitive information, such as personal credentials. There is software online that promises one free access to ”cracked” NordVPN accounts. However, NordVPN serial cracks are most often chock-full of malware, adware intended to gain access to your credentials or devices, or other online threats. We recommend that you read about the [dangers of cracking programs](https://nordvpn.com/blog/crack/).",https://support.nordvpn.com/hc/en-us/related/click?data=BAh7CjobZGVzdGluYXRpb25fYXJ0aWNsZV9pZGwrCJEvyoDnEToYcmVmZXJyZXJfYXJ0aWNsZV9pZGwrCJEYjiP1EToLbG9jYWxlSSIKZW4tdXMGOgZFVDoIdXJsSSJOL2hjL2VuLXVzL2FydGljbGVzLzE5Njg1OTk1ODUxNjY1LUhvdy10by1nZXQtTm9yZFZQTi13aXRoLWFjdGl2YXRpb24tY29kZQY7CFQ6CXJhbmtpBw%3D%3D--17296cdd1948660f6f463f463db21f2e5df39e92
Why my NordVPN account is still inactive,"If you paid for the NordVPN service, but it still insists that you get a plan when you open the app, follow these steps:
1. Make sure you are logged in with the same E-Mail that you purchased a subscription.
2. Wait for a payment to be processed:
* Payments via credit card may take up to 40 minutes to be verified.
* Payments via iDeal (Netherlands) may take up to 40 minutes to be verified.
* Payments via CoinGate may take up to 1.5 hours to be verified.
If your account is still inactive after you've logged in with the same e-mail address and waited until your payment is processed - [Contact our support team](https://support.nordvpn.com/hc/en-us/articles/19482416296593-How-can-I-reach-NordVPN-customer-support)",https://support.nordvpn.com/hc/en-us/related/click?data=BAh7CjobZGVzdGluYXRpb25fYXJ0aWNsZV9pZGwrCBE0Nnf0EToYcmVmZXJyZXJfYXJ0aWNsZV9pZGwrCJEYjiP1EToLbG9jYWxlSSIKZW4tdXMGOgZFVDoIdXJsSSJPL2hjL2VuLXVzL2FydGljbGVzLzE5NzQxNjY5NzMzMzkzLVdoeS1teS1Ob3JkVlBOLWFjY291bnQtaXMtc3RpbGwtaW5hY3RpdmUGOwhUOglyYW5raQg%3D--2e6d755d332cd36ffbf0cb45ce259e90da0c91c5
How to cancel auto-renewal for your subscription,"If your subscription was purchased via the Google Play Store, Apple App Store, or Amazon App Store and you wish to cancel it, follow the respective articles below:
* Cancelling your [Google Play Store NordVPN subscription](https://support.google.com/googleplay/answer/7018481)
* Cancelling your [Apple App Store NordVPN subscription](https://support.apple.com/en-lamr/118428)
* Cancelling your [Amazon App Store NordVPN subscription](https://www.amazonforum.com/s/question/0D54P00007IG0CkSAL/amazon-appstore-subscriptions)
## Cancelling your NordVPN subscription
If you have purchased your subscription directly from NordVPN and wish for your subscription to no longer renew at the subsequent billing date, you may cancel your subscription via your [Nord Account](https://my.nordaccount.com/).
You can follow the same steps to cancel your NordPass, NordLocker, Dedicated IP, or bundle subscription services.
To cancel the automatic renewal of your NordVPN subscription, follow the steps below:
1. Log in to your [Nord Account](https://my.nordaccount.com/)
2. Open the billing tab:
3. Click cancel next to auto-renewal:
4. Select cancel auto-renewal:
5. Your auto-renewal status will now change to off:
You will receive a confirmation email to your registered email account if your subscription cancellation is successful:
If you wish to receive a refund, please read [our article on NordVPN's refund policy](https://support.nordvpn.com/hc/en-us/articles/19476991311121-What-is-your-money-back-policy).",https://support.nordvpn.com/hc/en-us/related/click?data=BAh7CjobZGVzdGluYXRpb25fYXJ0aWNsZV9pZGwrCJFczG7JEToYcmVmZXJyZXJfYXJ0aWNsZV9pZGwrCJEYjiP1EToLbG9jYWxlSSIKZW4tdXMGOgZFVDoIdXJsSSJXL2hjL2VuLXVzL2FydGljbGVzLzE5NTU2ODQ0OTg1NDg5LUhvdy10by1jYW5jZWwtYXV0by1yZW5ld2FsLWZvci15b3VyLXN1YnNjcmlwdGlvbgY7CFQ6CXJhbmtpCQ%3D%3D--3bca4d2cf83a03f6a9a1b859c2aa6f0d287a250c
I have just paid. Will I be charged again,"Any payment method other than CoinPayments, prepaid and gift cards, will create an ongoing subscription. It will automatically charge you after your NordVPN account expires.",https://support.nordvpn.com/hc/en-us/related/click?data=BAh7CjobZGVzdGluYXRpb25fYXJ0aWNsZV9pZGwrCJFBdCH1EToYcmVmZXJyZXJfYXJ0aWNsZV9pZGwrCJEYjiP1EToLbG9jYWxlSSIKZW4tdXMGOgZFVDoIdXJsSSJPL2hjL2VuLXVzL2FydGljbGVzLzE5NzQ0NTI1OTI2ODAxLUktaGF2ZS1qdXN0LXBhaWQtV2lsbC1JLWJlLWNoYXJnZWQtYWdhaW4GOwhUOglyYW5raQo%3D--3e9b36c3e9ee8bc0b23a364ad9aec93573915665
What is NordPass?,"NordPass is a tool designed to help you manage your passwords securely and effortlessly. Created by NordSecurity, the same company behind NordVPN, NordPass allows you to store login details, autofill forms, keep private notes safe, and generate strong passwords. Like other NordSecurity products, NordPass integrates with your Nord Account for easy access and management.",https://support.nordvpn.com/hc/en-us/articles/33467690873105-How-to-set-up-password-manager-with-NordPass#h_01JPJ86ZBEWKS9JM1881698JW4
What is Nord Account?,"With your Nord Account, you can easily manage all your Nord products, including NordVPN, NordPass, and NordLocker. Purchasing NordVPN or any bundle provides automatic access to a Nord Account. Guidance on how to access NordPass using your Nord Account is provided later in this article.",https://support.nordvpn.com/hc/en-us/articles/33467690873105-How-to-set-up-password-manager-with-NordPass#h_01JPJ86ZBEWKS9JM1881698JW4
How to get started with NordPass?,The process to start with NordPass is detailed below.,https://support.nordvpn.com/hc/en-us/articles/33467690873105-How-to-set-up-password-manager-with-NordPass#h_01JPJ86ZBEWKS9JM1881698JW4
How to set up password manager with NordPass,"If you've subscribed to a NordVPN Plus, Complete, or Ultra plan, you've got a bundle that includes the NordPass password manager. This guide will walk you through setting it up and securing your passwords.
In this article, we will cover:
* [What is NordPass?](
* [What is Nord Account?](
* [How to get started with NordPass?](
* [Installing NordPass](
* [Logging into NordPass](
## What is NordPass?
NordPass is a tool designed to help you manage your passwords securely and effortlessly. Created by NordSecurity, the same company behind NordVPN, NordPass allows you to store login details, autofill forms, keep private notes safe, and generate strong passwords. Like other NordSecurity products, NordPass integrates with your Nord Account for easy access and management.
## What is Nord Account?
With your Nord Account, you can easily manage all your Nord products, including NordVPN, NordPass, and NordLocker. Purchasing NordVPN or any bundle provides automatic access to a Nord Account. Guidance on how to access NordPass using your Nord Account is provided later in this article.
[Learn more about Nord Account and how to use it.](https://support.nordvpn.com/hc/en-us/articles/19571345334033-What-is-a-Nord-Account-and-how-do-you-use-it)
## How to get started with NordPass?
The process to start with NordPass is detailed below.
### Installing NordPass
Start securing your passwords with NordPass by choosing your preferred installation method:
* You can install the NordPass application directly on your device. [Installation guides for different operating systems are available. ](https://support.nordpass.com/hc/en-us/articles/360004799257-Installing-NordPass-desktop-application)
* Alternatively, for seamless browsing, install the NordPass browser extension – [learn how across various browsers.](https://support.nordpass.com/hc/en-us/articles/360010298318-Adding-the-NordPass-browser-extension)
* MacOS users also have the option to add the Safari NordPass extension. [Learn how to do that.](https://support.nordpass.com/hc/en-us/articles/360009942298-NordPass-Safari-extension-setup-for-macOS)
### Logging into NordPass
Once installed, open your NordPass application or browser extension and click Login with Nord Account. Enter your Nord Account credentials to log in, and you're all set!
Learn more about the password manager, and if you need any further assistance, visit [NordPass's Help Center](https://support.nordpass.com/hc/en-us).",https://support.nordvpn.com/hc/en-us/articles/33467690873105-How-to-set-up-password-manager-with-NordPass#h_01JPJ86ZBEWKS9JM1881698JW4
How to get NordVPN cheaper,"The best NordVPN plans currently available are displayed on our [pricing page](https://nordvpn.com/pricing/). However, here are some additional deals:
* Student discount - NordVPN offers an additional discount for students and apprentices who are 18-26 years old.
* NordVPN coupons - here, you can find special monthly deals.
* Affiliate coupon codes - we recommend checking out if your favorite content creators are a part of our Affiliate Program, as they can provide you with special discount codes. Follow this guide to learn how to apply the NordVPN discount code.
* Referring a friend - with this opportunity, you can receive a month of NordVPN services for free for referring a friend.
* Occasional deals - NordVPN offers plenty of discounts and gifts to its customers throughout the year. Here, you can see where to find them and find out the best time to get them. For example, you can keep an eye out for special Cyber Monday or Black Friday VPN deals.",https://support.nordvpn.com/hc/en-us/related/click?data=BAh7CjobZGVzdGluYXRpb25fYXJ0aWNsZV9pZGwrCJG%2FhAG3EToYcmVmZXJyZXJfYXJ0aWNsZV9pZGwrCBHFHBH1EToLbG9jYWxlSSIKZW4tdXMGOgZFVDoIdXJsSSJBL2hjL2VuLXVzL2FydGljbGVzLzE5NDc3NzAyMTY0MzY5LUhvdy10by1nZXQtTm9yZFZQTi1jaGVhcGVyBjsIVDoJcmFua2kG--238b4625922d34bd0a492951fcef4d61eeea1265
Can NordVPN be used with multiple devices?,"A total of ten devices can be connected with one NordVPN account at the same time, enabling NordVPN account sharing within families. However, there is one condition. If you connect the devices to the same server, you have to choose different [VPN protocols](https://nordvpn.com/blog/protocols/) (TCP and UDP are different protocols, so you can [connect one device to TCP and another to UDP](https://support.nordvpn.com/hc/en-us/articles/20465552867345-Switching-protocol-to-OpenVPN-UDP-or-TCP) on the same server). That means that a total of five devices can be connected to one server at the same time: through HTTP proxy, SOCKS5, NordLynx, OpenVPN TCP, and OpenVPN UDP. If you have one more device, you can connect it to another server using any protocol.If you have even more devices, you can [set up your router with our VPN](https://nordvpn.com/blog/setup-vpn-router/). The router uses only one device slot, but all the devices connected to the network will be under VPN protection.In order to use NordVPN on your other devices, [download](https://nordvpn.com/download/) our application and log in to your NordVPN account.",https://support.nordvpn.com/hc/en-us/related/click?data=BAh7CjobZGVzdGluYXRpb25fYXJ0aWNsZV9pZGwrCJGKxbq2EToYcmVmZXJyZXJfYXJ0aWNsZV9pZGwrCBHFHBH1EToLbG9jYWxlSSIKZW4tdXMGOgZFVDoIdXJsSSJOL2hjL2VuLXVzL2FydGljbGVzLzE5NDc2NTE1MjI4MzA1LUhvdy1tYW55LWRldmljZXMtY2FuLUktdXNlLXdpdGgtTm9yZFZQTgY7CFQ6CXJhbmtpBw%3D%3D--cecd0f0c309ced59bf6bb45acebed2300fa13c5f
How many devices can I use with NordVPN?,"## Can NordVPN be used with multiple devices?
A total of ten devices can be connected with one NordVPN account at the same time, enabling NordVPN account sharing within families. However, there is one condition. If you connect the devices to the same server, you have to choose different [VPN protocols](https://nordvpn.com/blog/protocols/) (TCP and UDP are different protocols, so you can [connect one device to TCP and another to UDP](https://support.nordvpn.com/hc/en-us/articles/20465552867345-Switching-protocol-to-OpenVPN-UDP-or-TCP) on the same server). That means that a total of five devices can be connected to one server at the same time: through HTTP proxy, SOCKS5, NordLynx, OpenVPN TCP, and OpenVPN UDP. If you have one more device, you can connect it to another server using any protocol.If you have even more devices, you can [set up your router with our VPN](https://nordvpn.com/blog/setup-vpn-router/). The router uses only one device slot, but all the devices connected to the network will be under VPN protection.In order to use NordVPN on your other devices, [download](https://nordvpn.com/download/) our application and log in to your NordVPN account.",https://support.nordvpn.com/hc/en-us/related/click?data=BAh7CjobZGVzdGluYXRpb25fYXJ0aWNsZV9pZGwrCJGKxbq2EToYcmVmZXJyZXJfYXJ0aWNsZV9pZGwrCBHFHBH1EToLbG9jYWxlSSIKZW4tdXMGOgZFVDoIdXJsSSJOL2hjL2VuLXVzL2FydGljbGVzLzE5NDc2NTE1MjI4MzA1LUhvdy1tYW55LWRldmljZXMtY2FuLUktdXNlLXdpdGgtTm9yZFZQTgY7CFQ6CXJhbmtpBw%3D%3D--cecd0f0c309ced59bf6bb45acebed2300fa13c5f
How to purchase a NordVPN subscription,"If you would like to purchase a NordVPN subscription and see the prices of the plans, visit the [NordVPN pricing page](https://nordvpn.com/pricing/). Once you have reached the pricing page, follow along to the steps below to purchase your NordVPN subscription:
## Purchasing the NordVPN subscription
To begin with your purchase, follow the steps below:
1. Choose the subscription period (2-year, 1-year, or Monthly):
2. Pick a security service package that suits your needs:
3. Type in your email address that you prefer to use with NordVPN services. 
4. Select a payment method: 
5. Fill in all the payment information to complete your purchase, and click on complete the purchase:
6. Check your registered NordVPN service email inbox and look for the purchase confirmation email.
In case you haven't received an activation email, check out our article on [what to do if you have not received an activation email](https://support.nordvpn.com/hc/en-us/articles/19744561174673-I-did-not-receive-an-activation-email).
If you ever have any questions, feel free to [contact us](https://support.nordvpn.com/hc/en-us/articles/19482416296593-How-can-I-reach-NordVPN-customer-support)",https://support.nordvpn.com/hc/en-us/related/click?data=BAh7CjobZGVzdGluYXRpb25fYXJ0aWNsZV9pZGwrCBGwJBa3EToYcmVmZXJyZXJfYXJ0aWNsZV9pZGwrCBHFHBH1EToLbG9jYWxlSSIKZW4tdXMGOgZFVDoIdXJsSSJNL2hjL2VuLXVzL2FydGljbGVzLzE5NDc4MDQ4MTkwNDgxLUhvdy10by1wdXJjaGFzZS1hLU5vcmRWUE4tc3Vic2NyaXB0aW9uBjsIVDoJcmFua2kI--08c01579c58eea6c77eeda9eb203058e0ac225f4
What is your money-back policy?,"Here is the refund and cancellation policy at the core of our 30-day money-back guarantee:
“...if you are not satisfied with our Services, you may cancel the Subscription and request a refund within 30 days following your purchase of our Services (“Money Back Guarantee”). Please note that Subscriptions may be refunded on the basis of the Money Back Guarantee only after the initial purchase. Once a Subscription is renewed, it cannot be refunded on the basis of the Money Back Guarantee, unless applicable law provides otherwise.”
This and other conditions of our service can be found in our [Terms of Service](https://my.nordaccount.com/legal/terms-of-service/).
Here are our instructions for [how to cancel](https://support.nordvpn.com/hc/en-us/articles/19556844985489-How-to-cancel-auto-renewal-for-your-subscription) automatic payment renewal.
## Requesting a refund
Previously, refunds could only be processed through our support team. We have now implemented an automated refund system that is more efficient, faster, and convenient for our customers to use. This change also improves our ability to gather feedback, allowing us to better understand issues and improve our service. As we continue to refine this new process, your feedback is welcomed to help us enhance it further.
To request a refund for your payment, contact our customer support team via live chat available in the bottom right corner of the page, and indicate you would like us to refund your payment.
1. You will receive a link to your Nord Account dashboard. Follow the link and verify it’s you who’s trying to access the account.
2. In the following window, you will see which payments are eligible for a refund. Such payments will have a Refund button available. To proceed, click on Refund.Please keep in mind that not all payments are eligible for refunds, and certain terms apply depending on where you bought the subscription:
* * Apple App Store: Subscriptions purchased via the Apple App Store are subject to Apple's refund policies. We're unable to issue refunds for payments made through the Apple App Store. For assistance, please reach out to Apple directly via Apple Support.
* Amazon Appstore: If you've purchased your subscription through the Amazon App Store, contact Amazon directly for assistance via Amazon Support.
* Google Play Store: Refunds for payments made through the Google Play Store can be requested through NordVPN’s customer support, provided they fall within the refund terms outlined above. Additionally, if the payment was made within the last 48 hours, you can request a refund directly from your Google Play account. For more details, visit Google Play Support.
* Retailers or resellers: If you've purchased a subscription outside the NordVPN website (e.g., physical store, online shop, or marketplace like BestBuy or StackSocial), please contact the retailer directly regarding the refund.
1. In the following window, select the reason for canceling the service and requesting a refund. Your feedback is invaluable because it helps us pinpoint areas for improvement and ensures a better experience for all our users.Once completed, click Submit and Continue. 
2. You will see your refund summary. You can confirm it by clicking Refund.
3. After submitting the request, you will receive a confirmation email saying that your refund has been ordered.
4. You should now see the refund status for your payment as Refund Processing. This means that your request has been received and is currently being processed. This process can take up to a few hours*.*Please note, that due to recent implementation, it may take up to 4 hours for a refund request to be processed.
5. Once the refund is complete, the refund status on your dashboard will change to Refunded, and you will receive a confirmation email. Please note that depending on your payment method, it may take up to 10 business days for the refund to reach your account. If there was an error or you have any other questions, please contact our customer support team directly.",https://support.nordvpn.com/hc/en-us/related/click?data=BAh7CjobZGVzdGluYXRpb25fYXJ0aWNsZV9pZGwrCBH9Jde2EToYcmVmZXJyZXJfYXJ0aWNsZV9pZGwrCBHFHBH1EToLbG9jYWxlSSIKZW4tdXMGOgZFVDoIdXJsSSJFL2hjL2VuLXVzL2FydGljbGVzLzE5NDc2OTkxMzExMTIxLVdoYXQtaXMteW91ci1tb25leS1iYWNrLXBvbGljeQY7CFQ6CXJhbmtpCQ%3D%3D--7fa9a5c91177090a29c8d689a15097b3e8b3b1f1
Is NordVPN down?,"When a NordVPN server is down, it’s removed from the app’s server list. All NordVPN servers you see on the app should be online.",https://support.nordvpn.com/hc/en-us/related/click?data=BAh7CjobZGVzdGluYXRpb25fYXJ0aWNsZV9pZGwrCBFu1tFWEjoYcmVmZXJyZXJfYXJ0aWNsZV9pZGwrCBHFHBH1EToLbG9jYWxlSSIKZW4tdXMGOgZFVDoIdXJsSSJLL2hjL2VuLXVzL2FydGljbGVzLzIwMTY0MDk2OTc4NDQ5LVVuYWJsZS10by1jb25uZWN0LXRvLU5vcmRWUE4tc2VydmVycwY7CFQ6CXJhbmtpCg%3D%3D--ddca702a7e1cc4b844be785c4c92a22738a58111
Unable to connect to NordVPN servers,"Several different factors may interfere with your NordVPN connection. Here’s what may help fix the problem.
## Operating system-specific NordVPN connection guides
If you are experiencing issues connecting on any of the operating systems below, try following these VPN troubleshooting guides:
* [Troubleshooting connectivity on Windows](https://support.nordvpn.com/hc/en-us/articles/19748510235921-Troubleshooting-NordVPN-connectivity-on-Windows)
* [Troubleshooting connectivity on Android](https://support.nordvpn.com/hc/en-us/articles/20041281541777-Troubleshooting-connectivity-on-Android)
* [Troubleshooting connectivity on iOS](https://support.nordvpn.com/hc/en-us/articles/20397808850833-Troubleshooting-connectivity-on-iOS)
* [Troubleshooting connectivity of Linux app](https://support.nordvpn.com/hc/en-us/articles/20398047039889-Troubleshooting-NordVPN-connectivity-issues-on-Linux)
* [Troubleshooting connectivity on macOS](https://support.nordvpn.com/hc/en-us/articles/19920758451345-NordVPN-not-connecting-on-Mac)
## General NordVPN connection tips
These tips may help if your NordVPN server is down or if NordVPN is stuck on “connecting”:
* If you can’t connect to a specific server, try a few different NordVPN servers. You can use the auto-connect feature or the NordVPN server locator tool to find the right server for you.
Follow the steps below to find the best server for your connection:
1. Log into your [Nord Account](https://my.nordaccount.com/), and click NordVPN.
2. Scroll down to Advanced Settings and click Set up NordVPN manually.
3. Select the Server recommendation tab. According to your location, the best server will be recommended.
4. By pressing Advanced filters you can further customize the recommended servers by selecting the Server type and the Security protocol.
In case you wish to select a specific server, follow these steps:
1. Under Set up NordVPN manually, select OpenVPN configuration files.
2. Find the server you wish to connect to by using the Search bar or by scrolling down and download it by clicking Download UDP or Download TCP.
3. When connecting to OpenVPN & IKEv2 manually, you're going to need to use the Username and Password from the Service credential tab.
* On the NordVPN app, log out of your account and log back in. Try connecting again.
* [Uninstall the app](https://support.nordvpn.com/hc/en-us/articles/19481023452561-How-to-uninstall-NordVPN-software), reboot your device, and [install the app again](https://support.nordvpn.com/hc/en-us/articles/20289779952017-How-to-start-using-NordVPN). Try connecting to a server now.
* Try using a different connection method/protocol for your device.
## Is NordVPN down?
When a NordVPN server is down, it’s removed from the app’s server list. All NordVPN servers you see on the app should be online.
If you can’t connect to a server and the solutions above don’t work, your device or network may be causing the problem. To check if that’s the case, try using NordVPN on a different device on the same network.
For example, if NordVPN doesn’t work on your Android phone, try using it on your PC. If both devices don’t connect, you may be experiencing network issues. If your PC connects successfully, you may need to reconfigure your phone.
## Connecting from a country with internet restrictions
If you can’t connect from a country with internet restrictions, you may find a solution in this article:
* [Connecting from a country with internet restrictions](https://support.nordvpn.com/hc/en-us/articles/19572011021457-Connecting-from-a-country-with-internet-restrictions).",https://support.nordvpn.com/hc/en-us/related/click?data=BAh7CjobZGVzdGluYXRpb25fYXJ0aWNsZV9pZGwrCBFu1tFWEjoYcmVmZXJyZXJfYXJ0aWNsZV9pZGwrCBHFHBH1EToLbG9jYWxlSSIKZW4tdXMGOgZFVDoIdXJsSSJLL2hjL2VuLXVzL2FydGljbGVzLzIwMTY0MDk2OTc4NDQ5LVVuYWJsZS10by1jb25uZWN0LXRvLU5vcmRWUE4tc2VydmVycwY7CFQ6CXJhbmtpCg%3D%3D--ddca702a7e1cc4b844be785c4c92a22738a58111
What is your money-back policy?,"Here is the refund and cancellation policy at the core of our 30-day money-back guarantee:
“...if you are not satisfied with our Services, you may cancel the Subscription and request a refund within 30 days following your purchase of our Services (“Money Back Guarantee”). Please note that Subscriptions may be refunded on the basis of the Money Back Guarantee only after the initial purchase. Once a Subscription is renewed, it cannot be refunded on the basis of the Money Back Guarantee, unless applicable law provides otherwise.”
This and other conditions of our service can be found in our [Terms of Service](https://my.nordaccount.com/legal/terms-of-service/).
Here are our instructions for [how to cancel](https://support.nordvpn.com/hc/en-us/articles/19556844985489-How-to-cancel-auto-renewal-for-your-subscription) automatic payment renewal.
## Requesting a refund
Previously, refunds could only be processed through our support team. We have now implemented an automated refund system that is more efficient, faster, and convenient for our customers to use. This change also improves our ability to gather feedback, allowing us to better understand issues and improve our service. As we continue to refine this new process, your feedback is welcomed to help us enhance it further.
To request a refund for your payment, contact our customer support team via live chat available in the bottom right corner of the page, and indicate you would like us to refund your payment.
1. You will receive a link to your Nord Account dashboard. Follow the link and verify it’s you who’s trying to access the account.
2. In the following window, you will see which payments are eligible for a refund. Such payments will have a Refund button available. To proceed, click on Refund.Please keep in mind that not all payments are eligible for refunds, and certain terms apply depending on where you bought the subscription:
* * Apple App Store: Subscriptions purchased via the Apple App Store are subject to Apple's refund policies. We're unable to issue refunds for payments made through the Apple App Store. For assistance, please reach out to Apple directly via Apple Support.
* Amazon Appstore: If you've purchased your subscription through the Amazon App Store, contact Amazon directly for assistance via Amazon Support.
* Google Play Store: Refunds for payments made through the Google Play Store can be requested through NordVPN’s customer support, provided they fall within the refund terms outlined above. Additionally, if the payment was made within the last 48 hours, you can request a refund directly from your Google Play account. For more details, visit Google Play Support.
* Retailers or resellers: If you've purchased a subscription outside the NordVPN website (e.g., physical store, online shop, or marketplace like BestBuy or StackSocial), please contact the retailer directly regarding the refund.
1. In the following window, select the reason for canceling the service and requesting a refund. Your feedback is invaluable because it helps us pinpoint areas for improvement and ensures a better experience for all our users.Once completed, click Submit and Continue. 
2. You will see your refund summary. You can confirm it by clicking Refund.
3. After submitting the request, you will receive a confirmation email saying that your refund has been ordered.
4. You should now see the refund status for your payment as Refund Processing. This means that your request has been received and is currently being processed. This process can take up to a few hours*.*Please note, that due to recent implementation, it may take up to 4 hours for a refund request to be processed.
5. Once the refund is complete, the refund status on your dashboard will change to Refunded, and you will receive a confirmation email. Please note that depending on your payment method, it may take up to 10 business days for the refund to reach your account. If there was an error or you have any other questions, please contact our customer support team directly.",https://support.nordvpn.com/hc/en-us/related/click?data=BAh7CjobZGVzdGluYXRpb25fYXJ0aWNsZV9pZGwrCBH9Jde2EToYcmVmZXJyZXJfYXJ0aWNsZV9pZGwrCJFczG7JEToLbG9jYWxlSSIKZW4tdXMGOgZFVDoIdXJsSSJFL2hjL2VuLXVzL2FydGljbGVzLzE5NDc2OTkxMzExMTIxLVdoYXQtaXMteW91ci1tb25leS1iYWNrLXBvbGljeQY7CFQ6CXJhbmtpBg%3D%3D--86c9309159437842e77e99d8c7398f5752aa5241
Does NordVPN have a free trial,"NordVPN does not offer a free trial for purchases made on its website, but we do provide our customers with a [30-day money-back guarantee](https://nordvpn.com/risk-free-vpn/) to try out our services: ""Every customer is eligible for a refund, as long as their initial payment is not older than 30 days.""
This and other conditions of our service can be found in our [Terms of Service](https://my.nordaccount.com/legal/terms-of-service/).
A free trial is available for Android users that download our [VPN for Android from Google Play](https://play.google.com/store/apps/details?id=com.nordvpn.android&hl=en&gl=US). This trial is organized by Google Play itself and follows its Terms of Service.
Please keep in mind that we only allow one free trial per customer, so make sure you log into your NordVPN account when ordering a subscription. You can cancel the free Android trial (and avoid being charged) on Google Play.
If you have any questions regarding the trial, [contact the Google Play Store directly](https://support.google.com/store#topic=3237699&contact=1).",https://support.nordvpn.com/hc/en-us/related/click?data=BAh7CjobZGVzdGluYXRpb25fYXJ0aWNsZV9pZGwrCJE%2FADT1EToYcmVmZXJyZXJfYXJ0aWNsZV9pZGwrCJFczG7JEToLbG9jYWxlSSIKZW4tdXMGOgZFVDoIdXJsSSJFL2hjL2VuLXVzL2FydGljbGVzLzE5NzQ0ODM3MDkxMjE3LURvZXMtTm9yZFZQTi1oYXZlLWEtZnJlZS10cmlhbAY7CFQ6CXJhbmtpBw%3D%3D--917a7df2ce65085671787072e0922b9237604c87
Dedicated IP: Renewal and cancellation,"If you want to renew your dedicated IP service or cancel auto-renewal for your dedicated IP subscription, the steps you need to take depend on how you purchased the dedicated IP service.
## You bought the dedicated IP in your Nord Account
If you have purchased a dedicated IP in your [Nord Account](https://my.nordaccount.com/), the service will be renewed automatically. It makes no difference if you bought the dedicated IP as a standalone service or got it with a VPN bundle.
If you no longer want a particular dedicated IP anymore, you can[ cancel auto-renewal for your subscription in your Nord Account](https://support.nordvpn.com/hc/en-us/articles/19556844985489-How-to-cancel-a-subscription). Please note that this is not a refund, as outlined in[ NordVPN’s refund policy](https://support.nordvpn.com/hc/en-us/articles/19476991311121-What-is-your-money-back-policy).
## You bought the dedicated IP using a coupon code
Dedicated IP services purchased using a coupon code are not subject to auto-renewal. To renew your dedicated IP addresses, you will need to manually[ buy the dedicated IP service](https://support.nordvpn.com/hc/en-us/articles/19484196251921-How-to-purchase-a-dedicated-IP-address).
When your dedicated IP subscription is about to expire, we will send a reminder about renewal to your registered Nord Account email address.",https://support.nordvpn.com/hc/en-us/related/click?data=BAh7CjobZGVzdGluYXRpb25fYXJ0aWNsZV9pZGwrCBGwWaEXFToYcmVmZXJyZXJfYXJ0aWNsZV9pZGwrCJFczG7JEToLbG9jYWxlSSIKZW4tdXMGOgZFVDoIdXJsSSJML2hjL2VuLXVzL2FydGljbGVzLzIzMTkxMjM1NDQwNjU3LURlZGljYXRlZC1JUC1SZW5ld2FsLWFuZC1jYW5jZWxsYXRpb24GOwhUOglyYW5raQg%3D--5c2d08209ab976a9f1a1487879360a5b45a42f6f
Cyber insurance benefits: subscription and cancellation,"This article covers common questions relating to your cyber insurance benefits subscription and its cancellation.
### How do I cancel my cyber insurance benefits?
Your cyber insurance benefits will end when you cancel your NordVPN Ultimate bundle subscription.
### Will my insurance benefits still be valid if I move abroad?
The insurance benefits are currently only available to customers residing in the UK, US, SE, DE, FR, IT, NL. Hence, it will be available only if you move to one of these countries.",https://support.nordvpn.com/hc/en-us/related/click?data=BAh7CjobZGVzdGluYXRpb25fYXJ0aWNsZV9pZGwrCJE8dFhcEjoYcmVmZXJyZXJfYXJ0aWNsZV9pZGwrCJFczG7JEToLbG9jYWxlSSIKZW4tdXMGOgZFVDoIdXJsSSJdL2hjL2VuLXVzL2FydGljbGVzLzIwMTg3ODMwMzAzODg5LUN5YmVyLWluc3VyYW5jZS1iZW5lZml0cy1zdWJzY3JpcHRpb24tYW5kLWNhbmNlbGxhdGlvbgY7CFQ6CXJhbmtpCQ%3D%3D--f4706e8c60957e7701eaa33a84d535ad054896d9
How to start using NordVPN,"If you are interested in starting to use the NordVPN service but are unsure how to do so, this article will introduce you to the steps needed to begin using NordVPN today.
In this article we will cover:
* [Downloading NordVPN](
* [Installing NordVPN](
* [Purchasing a NordVPN plan](
* [Connecting to NordVPN](
* [Connecting to NordVPN on Linux](
* [Additional NordVPN features](
## Downloading NordVPN
To begin using NordVPN, you will first need to download the application for your respective device:
* Download the NordVPN application for Windows
* Download the NordVPN application for macOS
* Download the NordVPN application for Linux
* Download the NordVPN application for Android
* Download the NordVPN application for iOS
## Installing NordVPN
If you are not sure how to install and set up the application, choose the OS you're going to use and follow one of the guides below:
* Learn how to install NordVPN on Windows 7 and 8.1
* Learn how to install NordVPN on Windows 10 and 11
* Learn how to install NordVPN on macOS
* Learn how to install NordVPN on Linux
* Learn how to install NordVPN on Android
* Learn how to install NordVPN on iOS
Once the application has been set up, you need to purchase the desired plan.
## Purchasing a NordVPN plan
The following article will introduce you to [NordVPN Plans and Prices](https://support.nordvpn.com/hc/en-us/articles/19744251757841-Plans-and-prices-of-NordVPN-service). And if you're uncertain how to proceed with the purchase, read the article on [purchasing a NordVPN subscription](https://support.nordvpn.com/hc/en-us/articles/19478048190481-How-to-purchase-a-NordVPN-subscription).
Once you have an active subscription, you need to connect to NordVPN.
## Connecting to NordVPN
In order to connect to NordVPN, follow along below:
1. Use the quick connect button:Alternatively, you can use the dots on the map to connect to specific locations.
2. Click the dot in a country:Lastly, you may also use the search bar.
3. Type in the name of the country you would like to connect to:
### Connecting to NordVPN on Linux
To connect on a Linux device, you will need to type in the following commands :
```
nordvpn connect
```
```
nordvpn c
```
To connect to specific servers, use:
```
nordvpn connect
```
(eg. nordvpn connect uk715)
Follow our article on how to [connect to NordVPN using Linux Terminal](https://support.nordvpn.com/hc/en-us/articles/20164827795345-Connect-to-NordVPN-using-Linux-Terminal).
That's it! Now you can begin using the app and investigating the different features.
## Additional NordVPN features
Here you can find some articles covering NordVPN's features:
* [Different NordVPN server categories explained](https://support.nordvpn.com/hc/en-us/articles/19479130821521-Different-NordVPN-server-categories-explained)
* [NordVPN Kill Switch: how does it work](https://support.nordvpn.com/hc/en-us/articles/19509682644369-NordVPN-Kill-Switch-how-does-it-work)
* [What is Threat Protection Pro™ and Threat Protection?](https://support.nordvpn.com/hc/en-us/articles/19508765521425-What-is-Threat-Protection-Pro-and-Threat-Protection)
* [Dedicated NordVPN IP addresses](https://support.nordvpn.com/hc/en-us/articles/19507808024209-Dedicated-NordVPN-IP-addresses)",https://support.nordvpn.com/hc/en-us/related/click?data=BAh7CjobZGVzdGluYXRpb25fYXJ0aWNsZV9pZGwrCJFpIBV0EjoYcmVmZXJyZXJfYXJ0aWNsZV9pZGwrCJFczG7JEToLbG9jYWxlSSIKZW4tdXMGOgZFVDoIdXJsSSJBL2hjL2VuLXVzL2FydGljbGVzLzIwMjg5Nzc5OTUyMDE3LUhvdy10by1zdGFydC11c2luZy1Ob3JkVlBOBjsIVDoJcmFua2kK--ea35ee21cabf592a15f6482c1cee75af6098ce08
How to use NordVPN on gaming consoles,"Video gaming consoles do not support built-in VPN functionality. You can’t download NordVPN on PlayStation or Xbox, for example.
To set up your PS4, PS5, Xbox, or other gaming console with NordVPN, you can use one of these methods:
1. Set up NordVPN on your router.
2. Set up a VPN-protected hotspot and connect to that network on your gaming console.",https://support.nordvpn.com/hc/en-us/related/click?data=BAh7CjobZGVzdGluYXRpb25fYXJ0aWNsZV9pZGwrCBHFXQgTEzoYcmVmZXJyZXJfYXJ0aWNsZV9pZGwrCBH6mgyDHToLbG9jYWxlSSIKZW4tdXMGOgZFVDoIdXJsSSJML2hjL2VuLXVzL2FydGljbGVzLzIwOTcyNDY1NjY5MzkzLUhvdy10by11c2UtTm9yZFZQTi1vbi1nYW1pbmctY29uc29sZXMGOwhUOglyYW5raQY%3D--8975bbb81c9e32cb25d50826711fa879df43845c
How to use NordVPN with Roku,"Roku is a streaming device that plugs into your TV. It runs on Roku OS, which is not supported by NordVPN, so you can’t install the NordVPN app on Roku.
No worries! You can choose between two options when setting up NordVPN on Roku TV:
1. [Set up NordVPN on your router.](https://nordvpn.zendesk.com/hc/en-us/articles/19426084718865)
2. Set up a VPN-protected hotspot and connect to that network on your Roku device.",https://support.nordvpn.com/hc/en-us/related/click?data=BAh7CjobZGVzdGluYXRpb25fYXJ0aWNsZV9pZGwrCBGugv8SEzoYcmVmZXJyZXJfYXJ0aWNsZV9pZGwrCBH6mgyDHToLbG9jYWxlSSIKZW4tdXMGOgZFVDoIdXJsSSJDL2hjL2VuLXVzL2FydGljbGVzLzIwOTcyMzE3MDkzMzkzLUhvdy10by11c2UtTm9yZFZQTi13aXRoLVJva3UGOwhUOglyYW5raQc%3D--445ffc176a3a2308e859f5c41268c2249dc5ce49
How to set up dedicated IP,"NordVPN’s Dedicated IP feature provides a unique, static IP address that ensures reliable access and improved privacy. Unlike shared IPs, this one is solely yours, making it perfect for services that require a fixed IP. Learn more about [dedicated IP](https://nordvpn.com/features/dedicated-ip/) on our website.If you have purchased a dedicated IP, you can easily set it up through your NordVPN account by following these steps:
1. Log in to your Nord Account:
2. Once logged in, select the NordVPN button located in the upper-left section on your dashboard:
3. If your dedicated IP is not yet ready to use, you will see a setup required warning in the dedicated IP tab:
4. Click the set up dedicated IP button:
5. Press the preferred IP address location drop-down menu:
6. Next, select you wanted dedicated IP location from the drop-down menu:
7. When you select your preferred location, click the set up dedicated IP button:
8. You will be assigned an IP address in the country that you’ve chosen:
9. You should now see your assigned IP address in the dedicated IP tab:
Once this is done, you have successfully set up the NordVPN dedicated IP. You can now proceed with connecting to a dedicated IP on your device:
* Connect to a dedicated IP server on Windows
* Connect to a dedicated IP server on Linux
* Connect to a dedicated IP server on macOS
* Connect to a dedicated IP server on iOS
* Connect to a dedicated IP server on Android
If you experience any issues or have additional questions, do not hesitate to submit a request to our customer success team.",https://support.nordvpn.com/hc/en-us/related/click?data=BAh7CjobZGVzdGluYXRpb25fYXJ0aWNsZV9pZGwrCBECcjS7EjoYcmVmZXJyZXJfYXJ0aWNsZV9pZGwrCBH6mgyDHToLbG9jYWxlSSIKZW4tdXMGOgZFVDoIdXJsSSJBL2hjL2VuLXVzL2FydGljbGVzLzIwNTk1MjQ4MDcxMTg1LUhvdy10by1zZXQtdXAtZGVkaWNhdGVkLUlQBjsIVDoJcmFua2kJ--a88681e7079bb39e95fd6de75515d56588f3c722
How to use NordWhisper on NordVPN,"NordWhisper is a new NordVPN protocol designed to overcome restrictive local network environments, ensuring a smoother and more consistent browsing experience. It is the ideal solution when dealing with filtered content on office or campus networks, Wi-Fi networks with security filtering found at airports, cafes, hotels, or conferences. All of this is achieved while maintaining your security and privacy.Please note that NordWhisper is not compatible with Meshnet, DIP, Obfuscated servers, Onion Over VPN, or P2P servers.Currently, NordWhisper is available on Windows, Android, and Linux devices. To use this protocol, check the guidelines below:
* [Windows](https://support.nordvpn.com/hc/en-us/related/click?data=BAh7CjobZGVzdGluYXRpb25fYXJ0aWNsZV9pZGwrCJEfsr2sHDoYcmVmZXJyZXJfYXJ0aWNsZV9pZGwrCBH6mgyDHToLbG9jYWxlSSIKZW4tdXMGOgZFVDoIdXJsSSJIL2hjL2VuLXVzL2FydGljbGVzLzMxNTI4MjQyNTE5OTUzLUhvdy10by11c2UtTm9yZFdoaXNwZXItb24tTm9yZFZQTgY7CFQ6CXJhbmtpCg%3D%3D--b379be9ec1201e737ea84115d26c2110d7bfb727#Windows)
* [Android](https://support.nordvpn.com/hc/en-us/related/click?data=BAh7CjobZGVzdGluYXRpb25fYXJ0aWNsZV9pZGwrCJEfsr2sHDoYcmVmZXJyZXJfYXJ0aWNsZV9pZGwrCBH6mgyDHToLbG9jYWxlSSIKZW4tdXMGOgZFVDoIdXJsSSJIL2hjL2VuLXVzL2FydGljbGVzLzMxNTI4MjQyNTE5OTUzLUhvdy10by11c2UtTm9yZFdoaXNwZXItb24tTm9yZFZQTgY7CFQ6CXJhbmtpCg%3D%3D--b379be9ec1201e737ea84115d26c2110d7bfb727#Android)
* [Android TV](https://support.nordvpn.com/hc/en-us/related/click?data=BAh7CjobZGVzdGluYXRpb25fYXJ0aWNsZV9pZGwrCJEfsr2sHDoYcmVmZXJyZXJfYXJ0aWNsZV9pZGwrCBH6mgyDHToLbG9jYWxlSSIKZW4tdXMGOgZFVDoIdXJsSSJIL2hjL2VuLXVzL2FydGljbGVzLzMxNTI4MjQyNTE5OTUzLUhvdy10by11c2UtTm9yZFdoaXNwZXItb24tTm9yZFZQTgY7CFQ6CXJhbmtpCg%3D%3D--b379be9ec1201e737ea84115d26c2110d7bfb727#Android-TV)
* [Linux](https://support.nordvpn.com/hc/en-us/related/click?data=BAh7CjobZGVzdGluYXRpb25fYXJ0aWNsZV9pZGwrCJEfsr2sHDoYcmVmZXJyZXJfYXJ0aWNsZV9pZGwrCBH6mgyDHToLbG9jYWxlSSIKZW4tdXMGOgZFVDoIdXJsSSJIL2hjL2VuLXVzL2FydGljbGVzLzMxNTI4MjQyNTE5OTUzLUhvdy10by11c2UtTm9yZFdoaXNwZXItb24tTm9yZFZQTgY7CFQ6CXJhbmtpCg%3D%3D--b379be9ec1201e737ea84115d26c2110d7bfb727#Linux)
## Windows
To use the NordWhisper protocol on your Windows device, follow these steps:
1. Open the NordVPN app, click on Settings and select Connection.
2. Next to VPN protocol click on the dropdown list and select NordWhisper.Once you reconnect, your Windows device will be under VPN connection using the NordWhisper protocol.
## Android
To use the NordWhisper protocol on your Android device, follow these steps:
1. Open the NordVPN app, tap on your Profile on the bottom right of the screen and select Settings.
2. Tap on VPN Protocol.
3. Select NordWhisper.Once you reconnect, you'll be connected to the VPN using the NordWhisper protocol on your Android device.
## Android TV
To use the NordWhisper protocol on your Android TV device, follow these steps:
1. Open the NordVPN app, select Settings in the side panel on the left and under App settings choose Protocol. Now select NordWhisper.Once reconnected, your Android TV will be connected to the VPN using the NordWhisper protocol.
## Linux
To use the NordWhisper protocol on your Linux device, follow these steps:
1. Once you've logged into your NordVPN account, you can change the connect protocol in use with the following command:
```
nordvpn set technology NORDWHISPER
```
Now, when connecting to the VPN, you'll be using the NordWhisper protocol.",https://support.nordvpn.com/hc/en-us/related/click?data=BAh7CjobZGVzdGluYXRpb25fYXJ0aWNsZV9pZGwrCJEfsr2sHDoYcmVmZXJyZXJfYXJ0aWNsZV9pZGwrCBH6mgyDHToLbG9jYWxlSSIKZW4tdXMGOgZFVDoIdXJsSSJIL2hjL2VuLXVzL2FydGljbGVzLzMxNTI4MjQyNTE5OTUzLUhvdy10by11c2UtTm9yZFdoaXNwZXItb24tTm9yZFZQTgY7CFQ6CXJhbmtpCg%3D%3D--b379be9ec1201e737ea84115d26c2110d7bfb727
Changing DNS server addresses for MS Office & OneDrive,"1. Go to Control Panel > Network and Sharing Center > Change adapter settings.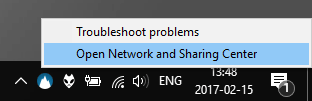Under the View your active networks section, you will see the name of your active network.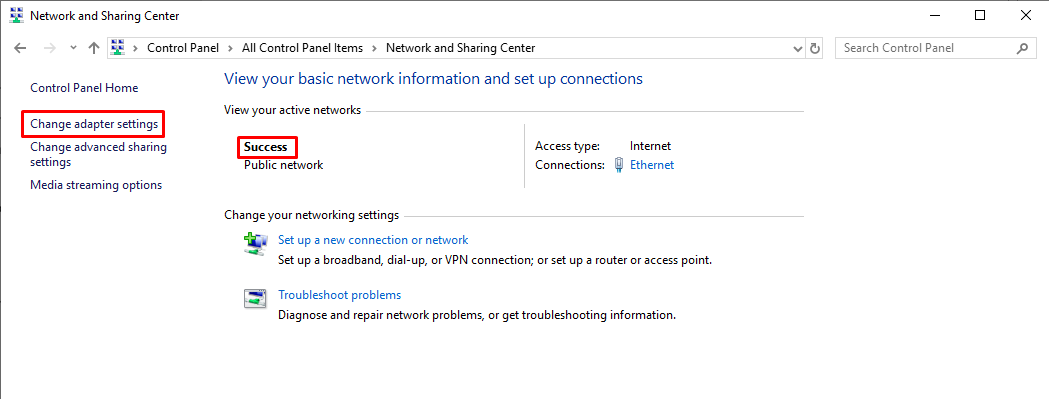
2. Right-click on your active network adapter and select Properties. Make sure you have selected the network adapter with the name from the previous step.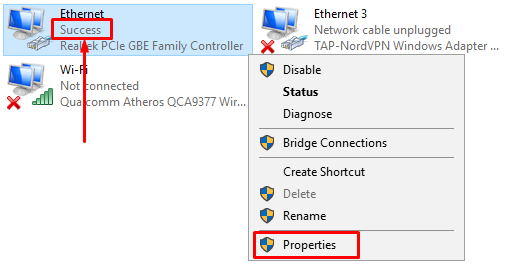
3. Select IPv4 and click Properties.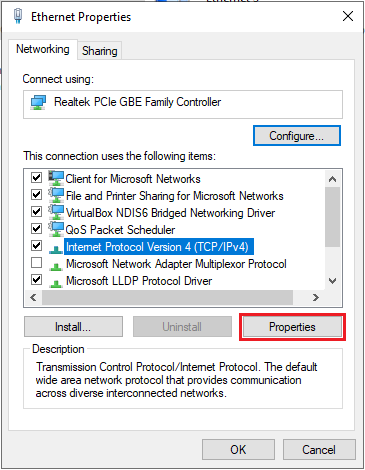
4. Add the following DNS addresses and click OK: 8.8.8.88.8.4.4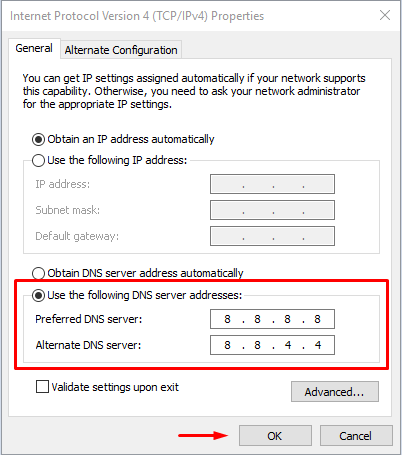",https://support.nordvpn.com/hc/en-us/articles/19920692061969-Changing-DNS-server-addresses-for-MS-Office-OneDrive
Changing DNS server addresses for MS Office & OneDrive,"1. Go to Control Panel > Network and Sharing Center > Change adapter settings.Under the View your active networks section, you will see the name of your active network.
2. Right-click on your active network adapter and select Properties. Make sure you have selected the network adapter with the name from the previous step.
3. Select IPv4 and click Properties.
4. Add the following DNS addresses and click OK: 8.8.8.88.8.4.4",https://support.nordvpn.com/hc/en-us/related/click?data=BAh7CjobZGVzdGluYXRpb25fYXJ0aWNsZV9pZGwrCBEnxiUeEjoYcmVmZXJyZXJfYXJ0aWNsZV9pZGwrCBHPDlOzFDoLbG9jYWxlSSIKZW4tdXMGOgZFVDoIdXJsSSJbL2hjL2VuLXVzL2FydGljbGVzLzE5OTIwNjkyMDYxOTY5LUNoYW5naW5nLUROUy1zZXJ2ZXItYWRkcmVzc2VzLWZvci1NUy1PZmZpY2UtT25lRHJpdmUGOwhUOglyYW5raQY%3D--1ae9b7ea404c61004065767fd6a7586f748e7051
Common Windows application issues,"This article covers problems you may encounter when using NordVPN on Windows devices, including situations where NordVPN is not working on your Windows 10 device, or you have no internet access with NordVPN on Windows 10.
## “Error 1001” during installation
If you encountered “Error 1001” while trying to install the NordVPN app on Windows, follow these steps:
1. Update your Windows system using the “Windows update” tool.
2. Make sure you’re running the latest .NET Runtime version:
1. Click the “Start” button, type “control panel” in the search bar, and select the “Control panel” app.
2. Click “Programs” and select “Programs and features.”
3. Check the version number beside the “Microsoft .NET Framework” entry. If it is not version 4.8 or later, download the latest .NET Runtime version.
3. Temporarily disable your cybersecurity software (such as your antivirus and firewall) and try installing the NordVPN app for Windows again.
## Crash or freeze
If your NordVPN app keeps freezing, follow these steps:
1. Uninstall the NordVPN application.
2. [Update your Windows operating system to the latest available version](https://support.microsoft.com/en-us/windows/update-windows-3c5ae7fc-9fb6-9af1-1984-b5e0412c556a).
3. Install the [latest NordVPN app for Windows](https://nordvpn.com/download/windows/).
If the above method failed to fix your issue, try the following:
1. Press the “Windows” key and the “R” key at the same time to open the ""Run"" window.
2. Type in ""services.msc"" (without the quotation marks) and press “Enter” to open the ""Services"" window.
3. Check if the “Task scheduler” is running — if it is not, right-click on the “Task scheduler” entry and select “Start.” You can also access the “Windows event log” from this window.
## NordVPN Kill Switch feature does not work
If the Kill Switch feature fails to stop specific apps, you can manually add their executable files (.exe) to the Kill Switch list in the NordVPN app:
1. Go to “Settings.”
2. Select “Kill Switch” in the left sidebar menu.
3. Click on “Add apps” under “App Kill Switch” and select the app’s executable file. For example, you would need to add the following file for Skype:C:\Program Files (x86)\Skype\Phone\Skype.exe
## No internet access when connected to a NordVPN server
If you’re getting disconnected from the internet when you connect to a VPN server, try the following to fix the problem:
* Connect to a different VPN server in the NordVPN app.
* Change your VPN connection protocol:
1. 1. [Switch to OpenVPN](https://support.nordvpn.com/hc/en-us/articles/19774135293969-Switching-protocol-to-OpenVPN-UDP-or-TCP-Windows) (UDP or TCP)
2. Switch to NordLynx
* Disable your other cybersecurity software (such as your antivirus and firewall) to check if it’s responsible for the issue. If the NordVPN app works after disabling other cybersecurity software, you may need to add exceptions for NordVPN files.
* Perform a network flush:
1. 1. Open the NordVPN application.
2. Head to the ""Advanced"" section.
3. Click ""Run diagnostics tool.""
4. In the opened window, select ""Network flush.""
5. Restart your PC and try connecting to VPN servers again.
If the problem persists, reinstall the NordVPN app:
1. Uninstall the NordVPN application.
2. Restart your device.
3. Install the latest version of the NordVPN Windows app.
## A certain feature of the application is not working properly
If you discover that a feature isn’t working as it should, follow these steps:
1. Open the ""Settings"" menu in the NordVPN app.
2. Head to the ""Advanced"" section.
3. Click ""Run diagnostics tool.""
4. In the opened window, select ""Reset app.""
5. Re-launch the application.
If the problem persists, try the following:
* Update to the [latest NordVPN Windows app](https://nordvpn.com/download/windows/) version.
* Reinstall the NordVPN app:
1. 1. [Uninstall the NordVPN application](https://support.nordvpn.com/General-info/1047410452/How-to-uninstall-NordVPN-software.htm).
2. Restart your device.
3. Install the latest version of the NordVPN Windows app.
## NordVPN is not working after an update
If your NordVPN Windows application has stopped working after an update, try the following to fix the problem:
* Disable your other cybersecurity software (such as your antivirus and firewall) to check if it’s responsible for the issue. If the NordVPN app works after disabling other cybersecurity software, you may need to add exceptions for NordVPN files.
* Uninstall the NordVPN app and reboot your Windows device, then download and install the latest version of the NordVPN Windows app.
## The NordVPN icon is missing
If the NordVPN application icon is missing from the NordVPN shortcut on your desktop, follow these steps:
1. Left-click the broken NordVPN app icon to select the shortcut.
2. Right-click the selected shortcut and choose “Delete.”
3. Right-click on your desktop, choose “New,” and select “Shortcut.”
4. Click “Browse,” find the NordVPN directory, and select the NordVPN executable file (.exe).
5. Name the shortcut and click “Finish.”
Alternatively, you can try reinstalling the NordVPN Windows app:
1. Uninstall the NordVPN application.
2. Restart your device.
3. Install the latest version of the NordVPN Windows app.",https://support.nordvpn.com/hc/en-us/related/click?data=BAh7CjobZGVzdGluYXRpb25fYXJ0aWNsZV9pZGwrCJHOYN5WEjoYcmVmZXJyZXJfYXJ0aWNsZV9pZGwrCBHPDlOzFDoLbG9jYWxlSSIKZW4tdXMGOgZFVDoIdXJsSSJIL2hjL2VuLXVzL2FydGljbGVzLzIwMTY0MzA3MzczNzEzLUNvbW1vbi1XaW5kb3dzLWFwcGxpY2F0aW9uLWlzc3VlcwY7CFQ6CXJhbmtpBw%3D%3D--4a849ce5ec0e12b3547c1d0a204ba3635597d49d
How to connect to your dedicated IP on Windows,"With a NordVPN dedicated IP, you get faster speeds, less CAPTCHA requests and increased security. NordVPN's dedicated IP is a unique IP that is assigned to a specific server, which ensures that you have your own private connection.
In this article, we will cover how to locate and connect to your [dedicated IP](https://nordvpn.com/features/dedicated-ip/) on Windows.
In order for you to be able to connect, first double-check if you have done the following:
1. Purchased a dedicated IP;
2. Set up the dedicated IP in Nord Account.
If these steps are done, you can move forward and connect to your dedicated IP in the NordVPN app on:
* [ Windows 7 and 8.1](
* [Windows 10 and 11](
For additional information, you can also read [our article about NordVPN's dedicated IP and how it works](https://support.nordvpn.com/hc/en-us/articles/19507808024209-Dedicated-NordVPN-IP-addresses).
## On Windows 7 and 8.1:
To connect to NordVPN dedicated IP on Windows 7 and 8.1, follow these steps:
1. Open the NordVPN application.
2. Go to the dedicated IP category on the left. 
3. Hover over dedicated IP, and click on the three-dot button:
4. Select fastest for your country and server, and click connect:
You may also use the search bar located in the top-left corner of the application window to connect to your dedicated IP:
1. Enter your dedicated IP country, and server number:
2. Tap your dedicated IP to connect:
## On Windows 10 and 11:
To connect to NordVPN dedicated IP on Windows 10 and 11, follow the steps below:
1. Open your NordVPN application.
2. Click specialty servers:
3. Hover over dedicated IP and click the three-dot menu:
4. Click connect.
You may also use the search bar located in the top-left corner of the application window to connect to your dedicated IP:
1. Type in your dedicated ip into the search bar:
2. Click your dedicated IP to connect:
After completing the steps, you will have connected to your dedicated IP successfully. If you wish to test your connection, visit [NordVPN's DNS leak checker website](https://nordvpn.com/dns-leak-test/).
Please be aware that your email will be linked to that dedicated IP address.",https://support.nordvpn.com/hc/en-us/related/click?data=BAh7CjobZGVzdGluYXRpb25fYXJ0aWNsZV9pZGwrCJGQ2fucEjoYcmVmZXJyZXJfYXJ0aWNsZV9pZGwrCBHPDlOzFDoLbG9jYWxlSSIKZW4tdXMGOgZFVDoIdXJsSSJVL2hjL2VuLXVzL2FydGljbGVzLzIwNDY1NDQ5NTM3NjgxLUhvdy10by1jb25uZWN0LXRvLXlvdXItZGVkaWNhdGVkLUlQLW9uLVdpbmRvd3MGOwhUOglyYW5raQg%3D--220facd76564256d623362dafcd79d416e0e6403
How to get NordVPN cheaper,"The best NordVPN plans currently available are displayed on our [pricing page](https://nordvpn.com/pricing/). However, here are some additional deals:
* Student discount - NordVPN offers an additional discount for students and apprentices who are 18-26 years old.
* NordVPN coupons - here, you can find special monthly deals.
* Affiliate coupon codes - we recommend checking out if your favorite content creators are a part of our Affiliate Program, as they can provide you with special discount codes. Follow this guide to learn how to apply the NordVPN discount code.
* Referring a friend - with this opportunity, you can receive a month of NordVPN services for free for referring a friend.
* Occasional deals - NordVPN offers plenty of discounts and gifts to its customers throughout the year. Here, you can see where to find them and find out the best time to get them. For example, you can keep an eye out for special Cyber Monday or Black Friday VPN deals.",https://support.nordvpn.com/hc/en-us/related/click?data=BAh7CjobZGVzdGluYXRpb25fYXJ0aWNsZV9pZGwrCJG%2FhAG3EToYcmVmZXJyZXJfYXJ0aWNsZV9pZGwrCBHPDlOzFDoLbG9jYWxlSSIKZW4tdXMGOgZFVDoIdXJsSSJBL2hjL2VuLXVzL2FydGljbGVzLzE5NDc3NzAyMTY0MzY5LUhvdy10by1nZXQtTm9yZFZQTi1jaGVhcGVyBjsIVDoJcmFua2kJ--b812b9887b0982b700db78207c67671d99f58171
How to re-install NordVPN on Android,"To reinstall NordVPN on your Android device and ensure you have the latest version for the best experience, follow these steps.
1. Open the Settings app on your phone and select Apps or Apps & Notifications (the selection may vary depending on your phone type).
2. After opening the Apps settings, you may also need to press Manage Apps (this may vary depending on your phone type).
3. After opening Manage apps (or just Apps, depending on your phone model), search for or scroll down to find and tap the NordVPN app.
4. Tap Uninstall and confirm app deletion.
5. Once uninstalled, download the latest NordVPN app version from [Google Play](https://play.google.com/store/apps/details?id=com.nordvpn.android&hl=en&pli=1) or our website, where you’ll also find setup instructions.",https://support.nordvpn.com/hc/en-us/related/click?data=BAh7CjobZGVzdGluYXRpb25fYXJ0aWNsZV9pZGwrCJHeZGQOGzoYcmVmZXJyZXJfYXJ0aWNsZV9pZGwrCBHPDlOzFDoLbG9jYWxlSSIKZW4tdXMGOgZFVDoIdXJsSSJLL2hjL2VuLXVzL2FydGljbGVzLzI5NzQ4NjI3ODI0MjczLUhvdy10by1yZS1pbnN0YWxsLU5vcmRWUE4tb24tQW5kcm9pZAY7CFQ6CXJhbmtpCg%3D%3D--c6eb6418ed2aa9a04b319e4b0728a299571106d5
How to set up dedicated IP,"NordVPN’s Dedicated IP feature provides a unique, static IP address that ensures reliable access and improved privacy. Unlike shared IPs, this one is solely yours, making it perfect for services that require a fixed IP. Learn more about [dedicated IP](https://nordvpn.com/features/dedicated-ip/) on our website.If you have purchased a dedicated IP, you can easily set it up through your NordVPN account by following these steps:
1. Log in to your Nord Account:
2. Once logged in, select the NordVPN button located in the upper-left section on your dashboard:
3. If your dedicated IP is not yet ready to use, you will see a setup required warning in the dedicated IP tab:
4. Click the set up dedicated IP button:
5. Press the preferred IP address location drop-down menu:
6. Next, select you wanted dedicated IP location from the drop-down menu:
7. When you select your preferred location, click the set up dedicated IP button:
8. You will be assigned an IP address in the country that you’ve chosen:
9. You should now see your assigned IP address in the dedicated IP tab:
Once this is done, you have successfully set up the NordVPN dedicated IP. You can now proceed with connecting to a dedicated IP on your device:
* Connect to a dedicated IP server on Windows
* Connect to a dedicated IP server on Linux
* Connect to a dedicated IP server on macOS
* Connect to a dedicated IP server on iOS
* Connect to a dedicated IP server on Android
If you experience any issues or have additional questions, do not hesitate to submit a request to our customer success team.",https://support.nordvpn.com/hc/en-us/articles/23189768691345-Setting-up-a-dedicated-IP-after-purchase
Where does NordVPN have dedicated IP addresses?,NordVPN-dedicated IP addresses are offered in these regions:,https://support.nordvpn.com/hc/en-us/related/click?data=BAh7CjobZGVzdGluYXRpb25fYXJ0aWNsZV9pZGwrCJG29wO%2BEToYcmVmZXJyZXJfYXJ0aWNsZV9pZGwrCJGQ2fucEjoLbG9jYWxlSSIKZW4tdXMGOgZFVDoIdXJsSSJFL2hjL2VuLXVzL2FydGljbGVzLzE5NTA3ODA4MDI0MjA5LURlZGljYXRlZC1Ob3JkVlBOLUlQLWFkZHJlc3NlcwY7CFQ6CXJhbmtpBg%3D%3D--67d153474a047c015c84ab25d24b77362e47af53
Dedicated NordVPN IP addresses,"When using NordVPN, your IP address changes to that of your VPN server. Normally, you share this IP address with other NordVPN users connected to the same server. However, if you purchase a NordVPN dedicated IP, you will get an IP address that belongs to you and you alone.
The advantages of a NordVPN dedicated IP addressNordVPN's dedicated IP allows you to bypass CAPTCHAs, easily access corporate networks, and avoid blocklists for IP addresses tainted by unscrupulous use. You can use the dedicated IP feature on up to 10 devices at the same time: simply connect with the [Open VPN (TCP)](https://support.nordvpn.com/hc/en-us/articles/20465552867345-Switching-protocol-to-OpenVPN-UDP-or-TCP) or [OpenVPN (UDP)](https://support.nordvpn.com/hc/en-us/articles/20465552867345-Switching-protocol-to-OpenVPN-UDP-or-TCP) protocol. You can also connect via the [NordLynx](https://support.nordvpn.com/hc/en-us/articles/19564565879441-What-is-NordLynx) protocol, however, it only supports one simultaneous connection. Dedicated IP is not available via tvOS, browser extension or the IKEv2 protocol.
## Where does NordVPN have dedicated IP addresses?
NordVPN-dedicated IP addresses are offered in these regions:
* The United States (Los Angeles, Dallas, New York, Chicago, Seattle, Miami)
* Germany (Frankfurt)
* The United Kingdom (London)
* The Netherlands (Amsterdam)
* France (Paris)
* Canada (Toronto)
* Japan (Tokyo)
* Italy (Milan)
* Sweden (Stockholm)
* Australia (Sydney)
* Hong Kong (Hong Kong)
* Switzerland (Zurich)
* Spain (Madrid)
* Belgium (Brussel)
* Denmark (Copenhagen)
* Poland (Warsaw)
* Portugal (Lisbon)
* South Africa (Johannesburg)
* Mexico
* Czech Republic (Prague)
Please note:
* If you are connecting from a country with internet restrictions, the dedicated IP address feature may fail to work as server accessibility from such regions is limited. Please consult our article on [how to connect from within a country with internet restrictions](https://support.nordvpn.com/hc/en-us/articles/19572011021457-Connecting-from-a-country-with-internet-restrictions) for more information.
* In case you wish to change your dedicated IP after a while, you may do that once per subscription. To change the dedicated IP, get in touch with NordVPN support.
Here is a list of tutorials showing you how to connect to your dedicated IP by NordVPN on different platforms:
* [Windows](https://support.nordvpn.com/hc/en-us/articles/20465449537681-How-to-connect-to-your-dedicated-IP-on-Windows)
* [Linux](https://support.nordvpn.com/hc/en-us/articles/19684336200081-How-to-connect-to-your-dedicated-IP-on-Linux)
* [macOS](https://support.nordvpn.com/hc/en-us/articles/19678530026641-How-to-connect-to-your-dedicated-IP-on-macOS)
* [iOS](https://support.nordvpn.com/hc/en-us/articles/19682095316625-How-to-connect-to-your-dedicated-IP-on-iOS)
* [Android](https://support.nordvpn.com/hc/en-us/articles/19682489581585-How-to-connect-to-your-dedicated-IP-on-Android)
You can test dedicated IP servers in the ""dedicated IP"" category in the application. The dedicated IP address you see in the application, would only connect you to a shared IP address. Once you make a purchase and get dedicated IP assigned, you would be able to connect to the specific server that would give you a static IP address that only you would be able to access.
If you wish to purchase a dedicated IP address in these regions, you can find a guide on how to do so here: [How to purchase a dedicated IP address.](https://support.nordvpn.com/hc/en-us/articles/19484196251921-How-to-purchase-a-Dedicated-IP-address)
Please be aware that if you purchase a NordVPN dedicated IP, your email will be linked to that IP address. For more information, please consult our Privacy Policy.",https://support.nordvpn.com/hc/en-us/related/click?data=BAh7CjobZGVzdGluYXRpb25fYXJ0aWNsZV9pZGwrCJG29wO%2BEToYcmVmZXJyZXJfYXJ0aWNsZV9pZGwrCJGQ2fucEjoLbG9jYWxlSSIKZW4tdXMGOgZFVDoIdXJsSSJFL2hjL2VuLXVzL2FydGljbGVzLzE5NTA3ODA4MDI0MjA5LURlZGljYXRlZC1Ob3JkVlBOLUlQLWFkZHJlc3NlcwY7CFQ6CXJhbmtpBg%3D%3D--67d153474a047c015c84ab25d24b77362e47af53
How to set up dedicated IP,"NordVPN’s Dedicated IP feature provides a unique, static IP address that ensures reliable access and improved privacy. Unlike shared IPs, this one is solely yours, making it perfect for services that require a fixed IP. Learn more about [dedicated IP](https://nordvpn.com/features/dedicated-ip/) on our website.If you have purchased a dedicated IP, you can easily set it up through your NordVPN account by following these steps:
1. Log in to your Nord Account:
2. Once logged in, select the NordVPN button located in the upper-left section on your dashboard:
3. If your dedicated IP is not yet ready to use, you will see a setup required warning in the dedicated IP tab:
4. Click the set up dedicated IP button:
5. Press the preferred IP address location drop-down menu:
6. Next, select you wanted dedicated IP location from the drop-down menu:
7. When you select your preferred location, click the set up dedicated IP button:
8. You will be assigned an IP address in the country that you’ve chosen:
9. You should now see your assigned IP address in the dedicated IP tab:
Once this is done, you have successfully set up the NordVPN dedicated IP. You can now proceed with connecting to a dedicated IP on your device:
* Connect to a dedicated IP server on Windows
* Connect to a dedicated IP server on Linux
* Connect to a dedicated IP server on macOS
* Connect to a dedicated IP server on iOS
* Connect to a dedicated IP server on Android
If you experience any issues or have additional questions, do not hesitate to submit a request to our customer success team.",https://support.nordvpn.com/hc/en-us/related/click?data=BAh7CjobZGVzdGluYXRpb25fYXJ0aWNsZV9pZGwrCBECcjS7EjoYcmVmZXJyZXJfYXJ0aWNsZV9pZGwrCJGQ2fucEjoLbG9jYWxlSSIKZW4tdXMGOgZFVDoIdXJsSSJBL2hjL2VuLXVzL2FydGljbGVzLzIwNTk1MjQ4MDcxMTg1LUhvdy10by1zZXQtdXAtZGVkaWNhdGVkLUlQBjsIVDoJcmFua2kH--78b7119a131dac55006e1ff68900e7b67a15ca4c
Not sure if your router is supported and/or can't find it on the list above?,"First, see if you can find your router on our [list of unsupported routers](https://support.nordvpn.com/hc/en-us/articles/20379585675793-Which-routers-don-t-support-NordVPN).",https://support.nordvpn.com/hc/en-us/related/click?data=BAh7CjobZGVzdGluYXRpb25fYXJ0aWNsZV9pZGwrCBEJ4fyqEToYcmVmZXJyZXJfYXJ0aWNsZV9pZGwrCJGQ2fucEjoLbG9jYWxlSSIKZW4tdXMGOgZFVDoIdXJsSSJHL2hjL2VuLXVzL2FydGljbGVzLzE5NDI2MDg0NzE4ODY1LVNldHRpbmctdXAtYS1yb3V0ZXItd2l0aC1Ob3JkVlBOBjsIVDoJcmFua2kI--a07016ce97e68137b77508e453e695989caff29c
Setting up a router with NordVPN,"The procedure of setting up NordVPN on your router will depend on your router’s firmware or manufacturer. If you can’t find the VPN router setup tutorial for your router’s firmware on the following list, continue scrolling down for further instructions. You may also check out our list of [router recommendations](https://support.nordvpn.com/hc/en-us/articles/20195707547025-Which-router-should-I-use-with-NordVPN).
Note: If your router was issued by your ISP, it probably does not support VPN configurations. If that is the case, there are routers that come pre-configured with NordVPN. Our partner FlashRouters offers a selection of powerful routers that come with NordVPN out of the box, including the [Privacy Hero](https://www.flashrouters.com/privacy-hero-nordvpn-router-by-flashrouters) with exclusive integration for NordLynx - the fastest VPN protocol.
## Setup tutorials for supported routers and firmware:
* [ASUS WRT](https://support.nordvpn.com/hc/en-us/articles/20286376420753-How-to-set-up-NordVPN-on-Asus-WRT-firmware) (native firmware)
* [ASUS Merlin](https://support.nordvpn.com/hc/en-us/articles/20319214011921-AsusWRT-Merlin-setup-with-NordVPN)
* [DD-WRT](https://support.nordvpn.com/hc/en-us/articles/20308623061265-DD-WRT-setup-with-NordVPN)
* [Privacy Hero](https://support.flashrouters.com/privacy-hero/vpn-setup-privacy-hero/privacy-hero-nordlynx-vpn-setup/)
* [Roqos](https://support.flashrouters.com/roqoscore/nordvpn-setup-on-roqos/)
* [Gl.iNET](https://support.nordvpn.com/hc/en-us/articles/20226926174225-GL-iNet-setup-with-NordVPN)
* [Mikrotik](https://support.nordvpn.com/hc/en-us/articles/20398642652561-MikroTik-IKEv2-setup-with-NordVPN)
* [NetDUMA](https://support.nordvpn.com/hc/en-us/articles/20323695823761-Netduma-setup-with-NordVPN)
* [OPNsense](https://support.nordvpn.com/hc/en-us/articles/20397569418129-OPNsense-21-setup-with-NordVPN)
* [OpenWRT](https://support.nordvpn.com/hc/en-us/articles/20340177222289-OpenWrt-setup-with-NordVPN)
* [Padavan](https://support.nordvpn.com/hc/en-us/articles/20323041135889-Padavan-setup-with-NordVPN)
* [Sabai](https://support.nordvpn.com/hc/en-us/articles/20323512359697-Sabai-setup-with-NordVPN)
* [Tomato](https://support.nordvpn.com/hc/en-us/articles/20317675285777-How-to-set-up-VPN-on-Tomato)
* [pfSense](https://support.nordvpn.com/hc/en-us/articles/20285211284497-pfSense-setup-with-NordVPN)
* [DrayTek](https://support.nordvpn.com/hc/en-us/articles/20397988815633-DrayTek-Vigor-IKEv2-setup-with-NordVPN)
* [EdgeRouter](https://support.nordvpn.com/hc/en-us/articles/20321386897041-EdgeRouter-and-Ubiquiti-setup-with-NordVPN)
* [TP-Link](https://support.nordvpn.com/hc/en-us/articles/20280525082001-Setting-up-TP-Link-with-NordVPN)
* Starlink (read more about how to use [VPN on Starlink](https://nordvpn.com/blog/starlink-vpn/))
## Not sure if your router is supported and/or can't find it on the list above?
First, see if you can find your router on our [list of unsupported routers](https://support.nordvpn.com/hc/en-us/articles/20379585675793-Which-routers-don-t-support-NordVPN).
If it’s not on there, check the user manual that came with your router (usually, manuals are available for download on the manufacturer’s website). Search the manual for any mentions of OpenVPN support. Your router must support the OpenVPN client in order to potentially support a NordVPN configuration. If you can’t find this information in the manual, consider contacting your router’s manufacturer.
If none of the tips mentioned above have helped you set up a connection, feel free to contact our support team!",https://support.nordvpn.com/hc/en-us/related/click?data=BAh7CjobZGVzdGluYXRpb25fYXJ0aWNsZV9pZGwrCBEJ4fyqEToYcmVmZXJyZXJfYXJ0aWNsZV9pZGwrCJGQ2fucEjoLbG9jYWxlSSIKZW4tdXMGOgZFVDoIdXJsSSJHL2hjL2VuLXVzL2FydGljbGVzLzE5NDI2MDg0NzE4ODY1LVNldHRpbmctdXAtYS1yb3V0ZXItd2l0aC1Ob3JkVlBOBjsIVDoJcmFua2kI--a07016ce97e68137b77508e453e695989caff29c
How to re-install NordVPN on Android,"To reinstall NordVPN on your Android device and ensure you have the latest version for the best experience, follow these steps.
1. Open the Settings app on your phone and select Apps or Apps & Notifications (the selection may vary depending on your phone type).
2. After opening the Apps settings, you may also need to press Manage Apps (this may vary depending on your phone type).
3. After opening Manage apps (or just Apps, depending on your phone model), search for or scroll down to find and tap the NordVPN app.
4. Tap Uninstall and confirm app deletion.
5. Once uninstalled, download the latest NordVPN app version from [Google Play](https://play.google.com/store/apps/details?id=com.nordvpn.android&hl=en&pli=1) or our website, where you’ll also find setup instructions.",https://support.nordvpn.com/hc/en-us/related/click?data=BAh7CjobZGVzdGluYXRpb25fYXJ0aWNsZV9pZGwrCJHeZGQOGzoYcmVmZXJyZXJfYXJ0aWNsZV9pZGwrCJHGaSD8GjoLbG9jYWxlSSIKZW4tdXMGOgZFVDoIdXJsSSJLL2hjL2VuLXVzL2FydGljbGVzLzI5NzQ4NjI3ODI0MjczLUhvdy10by1yZS1pbnN0YWxsLU5vcmRWUE4tb24tQW5kcm9pZAY7CFQ6CXJhbmtpCg%3D%3D--3a3dccfaefdeed540d9f1db20b6b4803449729c0
Switching protocol to OpenVPN UDP or TCP - Windows,"The NordVPN Windows app lets you fine-tune your VPN experience by selecting your VPN protocol. This tutorial teaches you how to change the NordVPN protocol to OpenVPN UDP or TCP. Before you begin, we encourage you to read our article on the [difference between TCP and UDP](https://nordvpn.com/blog/tcp-or-udp-which-is-better/).
## On Windows 7 and 8.1:
1. Open NordVPN the app and click on the cog (gear) icon in the bottom-left corner.
2. Click “Auto-connect” on the left side of the settings and make sure to disable ""Choose a VPN protocol and server automatically."" Next to “VPN protocol,” select “OpenVPN (UDP)” or “OpenVPN (TCP)” from the drop-down menu.
## On Windows 10 and 11:
1. Open NordVPN the app and click on the cog (gear) icon to access the app settings.
2. Click on “Connection.”
3. Under “VPN protocol,” select “OpenVPN (UDP)” or “OpenVPN (TCP)” from the drop-down menu.",https://support.nordvpn.com/hc/en-us/related/click?data=BAh7CjobZGVzdGluYXRpb25fYXJ0aWNsZV9pZGwrCBFYTwb8EToYcmVmZXJyZXJfYXJ0aWNsZV9pZGwrCJGQ2fucEjoLbG9jYWxlSSIKZW4tdXMGOgZFVDoIdXJsSSJXL2hjL2VuLXVzL2FydGljbGVzLzE5Nzc0MTM1MjkzOTY5LVN3aXRjaGluZy1wcm90b2NvbC10by1PcGVuVlBOLVVEUC1vci1UQ1AtV2luZG93cwY7CFQ6CXJhbmtpCQ%3D%3D--f7cf41ada3002689fd76e9da2cd4d2f55e898fd4
Improve connection speed on Windows with NordVPN app,"If you are experiencing slow connection speed while connected to [NordVPN on Windows](https://nordvpn.com/download/windows/), try the following:
1. Make sure to use the latest version of NordVPN app. You can [uninstall the app](https://support.nordvpn.com/hc/en-us/articles/19481023452561-How-to-uninstall-NordVPN-software) and [install the latest version from our website](https://nordvpn.com/download/windows/).
2. Restart your device.
3. Restart your router or modem. If your router is set up with a VPN, and the speed is insufficient, try using VPN solely on your computer or phone.
4. If you are using Wi-Fi, switch to a wired connection.
5. Connect to a VPN server geographically closer to you.
6. Open the Settings menu and go to the Auto Connect tab. Disable Choose a VPN protocol and server automatically and select NordLynx in the VPN protocol field.
7. Try a different connection method/protocol on your device. Tutorials for various connection methods can be found [here](https://support.nordvpn.com/hc/en-us/sections/19326591402001-Windows)
Internet speed can also be directly affected by the condition of both your hardware and firmware. Here’s what we recommend:
1. Make sure you have the latest available drivers and software on your computer, including Ethernet adapter and motherboard drivers, BIOS updates, router firmware, etc.
2. Temporarily disable your firewall to see whether it will have an impact on your overall internet speed. If it does, check your firewall settings and remove unnecessary rules or consider using different firewall software.
3. Close any applications that may be transferring data in the background, e.g. software for downloading or file sharing.
4. Old and sometimes even new routers provided to you by your internet service provider often use outdated firmware or are technically poorly manufactured. This can directly impact your internet speed, so we recommend investing in a better router.",https://support.nordvpn.com/hc/en-us/related/click?data=BAh7CjobZGVzdGluYXRpb25fYXJ0aWNsZV9pZGwrCJEw8gaJEjoYcmVmZXJyZXJfYXJ0aWNsZV9pZGwrCJGQ2fucEjoLbG9jYWxlSSIKZW4tdXMGOgZFVDoIdXJsSSJbL2hjL2VuLXVzL2FydGljbGVzLzIwMzc5NzM2MzU0OTYxLUltcHJvdmUtY29ubmVjdGlvbi1zcGVlZC1vbi1XaW5kb3dzLXdpdGgtTm9yZFZQTi1hcHAGOwhUOglyYW5raQo%3D--30bd0f007dda3d8d84398ad7619cb1101a3da867
How to uninstall NordVPN software,"You can uninstall NordVPN software the same way you remove most software from your operating system. Here's how:
Uninstall NordVPN from Windows
Microsoft has an always-up-to-date article on how to uninstall software. Read it to learn [how to remove NordVPN from Windows](https://support.microsoft.com/en-us/windows/uninstall-or-remove-apps-and-programs-in-windows-4b55f974-2cc6-2d2b-d092-5905080eaf98).
Uninstall NordVPN from macOS
If you need to completely remove NordVPN from your Mac, Apple has an always-up-to-date article on [how to uninstall software on MacOS](https://support.apple.com/guide/mac-help/install-and-uninstall-other-apps-mh35835/mac).
Uninstall NordVPN from Android
Google has an always-up-to-date article on [how to uninstall apps from your Android device](https://support.google.com/googleplay/topic/13627086?visit_id=638531866536647271-934343169&rd=1).
Uninstall NordVPN from iOS
Apple has an always-up-to-date article on [how to uninstall apps from iPhone and iPads](https://support.apple.com/en-us/101550).
Uninstall NordVPN from Linux
In order to remove NordVPN for Linux, type this command in the terminal:sudo apt-get --purge remove 'nordvpn*'
Alternatively, you can type the following commands:
sudo dpkg -P nordvpnsudo dpkg -P nordvpn-release",https://support.nordvpn.com/hc/en-us/articles/19481023452561-How-to-uninstall-NordVPN-software
Speed and bandwidth,"NordVPN does not apply any speed or bandwidth limits, but using a VPN in itself can sometimes decrease your internet speed to a certain degree.
[When you are connected to a VPN,](https://nordvpn.com/) your connection speed depends on a number of factors, including the physical proximity of the server, its load, your original internet speed, the VPN protocol you are using, and more. If you are connected to the closest available server through OpenVPN UDP, you can expect around a 30% drop in speed. If that’s too slow, you can use the [NordLynx](https://support.nordvpn.com/hc/en-us/articles/19564565879441-What-is-NordLynx) protocol instead, which provides much better speed.
If you are experiencing any issues when connected to NordVPN, first check your internet speed without VPN to make sure you have no underlying issues with your internet connection. You can do so [on this website](https://www.speedtest.net/). If you have confirmed that the slower connection is related to the use of VPN, bear in mind that a slightly reduced internet speed is normal when your traffic goes through an encrypted [VPN tunnel](https://nordvpn.com/de/blog/vpn-tunnel/).
However, if the connection speed is reduced significantly, or if you notice that the performance is poorer than the one you usually have with the VPN, try the following tips for your device:
* [Tips to improve connection speed on Windows](https://support.nordvpn.com/hc/en-us/articles/20379736354961-Improve-connection-speed-on-Windows-with-NordVPN-app)
* [Tips to improve connection speed on macOS](https://support.nordvpn.com/hc/en-us/articles/20396667808657-Improve-connection-speed-on-macOS-with-NordVPN-app)
* [Tips to improve connection speed on Android](https://support.nordvpn.com/hc/en-us/articles/20379831991697-Improve-connection-speed-on-Android-with-NordVPN-app)
* [Tips to improve connection speed on iOS](https://support.nordvpn.com/hc/en-us/articles/20396465736849-Improve-connection-speed-on-iOS-with-NordVPN-app)",https://support.nordvpn.com/hc/en-us/related/click?data=BAh7CjobZGVzdGluYXRpb25fYXJ0aWNsZV9pZGwrCBEisWFyEjoYcmVmZXJyZXJfYXJ0aWNsZV9pZGwrCJEw8gaJEjoLbG9jYWxlSSIKZW4tdXMGOgZFVDoIdXJsSSI6L2hjL2VuLXVzL2FydGljbGVzLzIwMjgyNDc0NTcwMjU3LVNwZWVkLWFuZC1iYW5kd2lkdGgGOwhUOglyYW5raQY%3D--2b70268b03f6a85570910d3bfee699d3fcf899b2
Common Windows application issues,"This article covers problems you may encounter when using NordVPN on Windows devices, including situations where NordVPN is not working on your Windows 10 device, or you have no internet access with NordVPN on Windows 10.
## “Error 1001” during installation
If you encountered “Error 1001” while trying to install the NordVPN app on Windows, follow these steps:
1. Update your Windows system using the “Windows update” tool.
2. Make sure you’re running the latest .NET Runtime version:
1. Click the “Start” button, type “control panel” in the search bar, and select the “Control panel” app.
2. Click “Programs” and select “Programs and features.”
3. Check the version number beside the “Microsoft .NET Framework” entry. If it is not version 4.8 or later, download the latest .NET Runtime version.
3. Temporarily disable your cybersecurity software (such as your antivirus and firewall) and try installing the NordVPN app for Windows again.
## Crash or freeze
If your NordVPN app keeps freezing, follow these steps:
1. Uninstall the NordVPN application.
2. [Update your Windows operating system to the latest available version](https://support.microsoft.com/en-us/windows/update-windows-3c5ae7fc-9fb6-9af1-1984-b5e0412c556a).
3. Install the [latest NordVPN app for Windows](https://nordvpn.com/download/windows/).
If the above method failed to fix your issue, try the following:
1. Press the “Windows” key and the “R” key at the same time to open the ""Run"" window.
2. Type in ""services.msc"" (without the quotation marks) and press “Enter” to open the ""Services"" window.
3. Check if the “Task scheduler” is running — if it is not, right-click on the “Task scheduler” entry and select “Start.” You can also access the “Windows event log” from this window.
## NordVPN Kill Switch feature does not work
If the Kill Switch feature fails to stop specific apps, you can manually add their executable files (.exe) to the Kill Switch list in the NordVPN app:
1. Go to “Settings.”
2. Select “Kill Switch” in the left sidebar menu.
3. Click on “Add apps” under “App Kill Switch” and select the app’s executable file. For example, you would need to add the following file for Skype:C:\Program Files (x86)\Skype\Phone\Skype.exe
## No internet access when connected to a NordVPN server
If you’re getting disconnected from the internet when you connect to a VPN server, try the following to fix the problem:
* Connect to a different VPN server in the NordVPN app.
* Change your VPN connection protocol:
1. 1. [Switch to OpenVPN](https://support.nordvpn.com/hc/en-us/articles/19774135293969-Switching-protocol-to-OpenVPN-UDP-or-TCP-Windows) (UDP or TCP)
2. Switch to NordLynx
* Disable your other cybersecurity software (such as your antivirus and firewall) to check if it’s responsible for the issue. If the NordVPN app works after disabling other cybersecurity software, you may need to add exceptions for NordVPN files.
* Perform a network flush:
1. 1. Open the NordVPN application.
2. Head to the ""Advanced"" section.
3. Click ""Run diagnostics tool.""
4. In the opened window, select ""Network flush.""
5. Restart your PC and try connecting to VPN servers again.
If the problem persists, reinstall the NordVPN app:
1. Uninstall the NordVPN application.
2. Restart your device.
3. Install the latest version of the NordVPN Windows app.
## A certain feature of the application is not working properly
If you discover that a feature isn’t working as it should, follow these steps:
1. Open the ""Settings"" menu in the NordVPN app.
2. Head to the ""Advanced"" section.
3. Click ""Run diagnostics tool.""
4. In the opened window, select ""Reset app.""
5. Re-launch the application.
If the problem persists, try the following:
* Update to the [latest NordVPN Windows app](https://nordvpn.com/download/windows/) version.
* Reinstall the NordVPN app:
1. 1. [Uninstall the NordVPN application](https://support.nordvpn.com/General-info/1047410452/How-to-uninstall-NordVPN-software.htm).
2. Restart your device.
3. Install the latest version of the NordVPN Windows app.
## NordVPN is not working after an update
If your NordVPN Windows application has stopped working after an update, try the following to fix the problem:
* Disable your other cybersecurity software (such as your antivirus and firewall) to check if it’s responsible for the issue. If the NordVPN app works after disabling other cybersecurity software, you may need to add exceptions for NordVPN files.
* Uninstall the NordVPN app and reboot your Windows device, then download and install the latest version of the NordVPN Windows app.
## The NordVPN icon is missing
If the NordVPN application icon is missing from the NordVPN shortcut on your desktop, follow these steps:
1. Left-click the broken NordVPN app icon to select the shortcut.
2. Right-click the selected shortcut and choose “Delete.”
3. Right-click on your desktop, choose “New,” and select “Shortcut.”
4. Click “Browse,” find the NordVPN directory, and select the NordVPN executable file (.exe).
5. Name the shortcut and click “Finish.”
Alternatively, you can try reinstalling the NordVPN Windows app:
1. Uninstall the NordVPN application.
2. Restart your device.
3. Install the latest version of the NordVPN Windows app.",https://support.nordvpn.com/hc/en-us/related/click?data=BAh7CjobZGVzdGluYXRpb25fYXJ0aWNsZV9pZGwrCJHOYN5WEjoYcmVmZXJyZXJfYXJ0aWNsZV9pZGwrCJEw8gaJEjoLbG9jYWxlSSIKZW4tdXMGOgZFVDoIdXJsSSJIL2hjL2VuLXVzL2FydGljbGVzLzIwMTY0MzA3MzczNzEzLUNvbW1vbi1XaW5kb3dzLWFwcGxpY2F0aW9uLWlzc3VlcwY7CFQ6CXJhbmtpBw%3D%3D--af09b293e14f36be99612547d9895d04638f83b5
Installing NordVPN application on macOS,"The first step towards online security is setting up NordVPN correctly. Follow these simple steps to install the NordVPN app and connect to a VPN server.
Note: NordVPN supports macOS 11 Big Sur, macOS 12 Monterey, macOS 13 Ventura, and macOS Sanoma 14 and above.
Attention: If you encounter issues during the installation of NordVPN on macOS Ventura, please refer to the following guide for a possible solution: macOS Ventura Error: The Installation Failed.
* Downloading and installing the NordVPN app
* Setting up the NordVPN application
* Connecting to servers
* [Connecting to a specific server](
* [Connecting to a specific country](
* NordVPN features
* [Map](
* [Threat Protection Pro™](
* [Meshnet](
* [Dark Web Monitor](
* [Presets](
* [Statistics](
* [Settings](
* [Quick Help](
* NordVPN settings
* [General](
* [Auto-connect](
* [Kill Switch](
* [DNS](
* [Appearance](
* [Refer a friend](
* [Other Apps](
* [Account](
## Downloading and installing the NordVPN app
1. Download [NordVPN for macOS](https://nordvpn.com/download/mac/):Alternatively, [click here to download the latest macOS version](https://downloads.nordcdn.com/apps/macos/generic/NordVPN-OpenVPN/latest/NordVPN.pkg).
2. Navigate to the folder where you downloaded the NordVPN.pkg file and double-click on it to begin the installation:Note: Ensure the download file is saved locally on your device (e.g., downloads folder, desktop) and not within Dropbox or other file management/synchronization tools or special folders.
3. A new Install window will pop up, guiding you through the installation process. Choose to continue:
4. Click on install:
5. You will be asked for permission to install the installer, which is required to establish secure VPN tunnels. Enter your Mac's password and choose to install the software:You can also confirm it with a fingerprint:
6. Give access to the installer to files in the Downloads folder by clicking ok in the new pop-up window:
7. A message will confirm that the app was successfully installed. Close the window:
## Setting up and using the NordVPN application
1. Open your launchpad and click on the NordVPN icon:
2. If you have a NordVPN account, click log In in the top-right corner of the screen and enter your email address and password. If you are a new user, click sign up at the top-right corner of the screen:
3. When logging in, you will be redirected to your Nord Account. Enter your registered email address and password. You can also sign in using your Google account or Apple ID or by entering a one-time login code:
4. If you are a new user, create a [Nord Account](https://my.nordaccount.com/) by entering your email address and other required information:
5. After completing the above steps, you will be prompted to open the NordVPN app. Agree to always allow Nord Account and grant access to the app:
6. After a successful login, you will be introduced to the main NordVPN application window:
## Connecting to servers
The Quick Connect button in the top-right corner will automatically connect you to a server recommended by our smart algorithm.
### Connecting to a specific server
To connect to a specific server, click on the Search field in the top-left corner of the app. Enter a country, a category, or a specific server number (e.g., Canada #1224) to find what you need.
### Connecting to a specific country
All servers in the left sidebar are sorted by country and specialty.To connect to a specialty server, hover over one of the categories under [Specialty Servers](https://support.nordvpn.com/hc/en-us/articles/19479130821521-Different-NordVPN-server-categories-explained), and click on the three-dot menu to select a country:
To connect to a specific country, simply click on it:
## NordVPN features
### Map
The map tab is the app’s home. Here, you can find and navigate NordVPN servers using the map, search bar, or specialty section.

### Threat Protection Pro™
Threat Protection Pro™ is a special NordVPN feature that automatically blocks ads, trackers, and malicious URLs. When you visit a website known for scamming people, this feature displays an in-browser alert to warn you about possible fraud. Threat Protection Pro™ also scans downloads for malware and checks your apps for security vulnerabilities. Available with selected NordVPN plans, this feature can work without an active VPN connection. [Learn more about Threat Protection Pro™](https://nordvpn.com/features/threat-protection/).
### 
If your NordVPN subscription doesn’t include Threat Protection Pro™, you can use the Threat Protection feature instead. It blocks intrusive ads and malicious domains based on DNS filtering and works whenever you’re connected to a VPN server. Threat Protection comes with all NordVPN plans.
### Meshnet
The [Meshnet](https://nordvpn.com/meshnet/) feature helps you to access devices over encrypted tunnels. [Learn more about Meshnet](https://meshnet.nordvpn.com/getting-started/meshnet-explained).

### Dark Web Monitor
[Dark Web Monitor](https://nordvpn.com/features/dark-web-monitor/) scans the internet for any credential leaks associated with your registered NordVPN e-mail address.

### Presets
Presets let you load a specified set of configurations, including server number, type, protocol, and more, at the click of a button! You’ll find many uses for this feature, like instantly loading a streaming service or a game with the necessary settings to experience a smooth session.
How to set up presets?
Start at the preferences page, as depicted above. You can either edit an existing preset or create a new one by pressing Add new.

In this example, we’ll add a new one by building it from scratch. After pressing Add new, you will see a menu with the settings you can use. First, give the preset a name. Next, select from available VPN protocols. If you change the default setting Use recommended, you’ll be able to alter the server type. Here you can set a specialty server or any regular one as your type:Depending on the server availability, you may also have the choice of selecting either a specific region:Finally, you can add either a web page or an app to the preset. It will be displayed under the preset name on the main screen:If you press Add link, a field will appear for the URL of the website you would like easy access to. After inserting the URL, press Enter to register it. When you set up the configuration, press Save preset, and it will be added to the main screen.
### Statistics
Statistics show you more information about your connection.

### Settings
The settings tab displays the app settings.

### Quick Help
Here you can find connection logs, be directed to our Help Center, and write an email to our customer support

## NordVPN settings
### General
The general tab has the following features:
* Auto launch when the computer starts — toggle to open the NordVPN app automatically every time you turn your device on.
* VPN Protocol — will let you choose from 3 different [connection protocols](https://support.nordvpn.com/hc/en-us/articles/19482810153745-Which-NordVPN-protocol-should-I-choose) (OpenVPN UDP, OpenVPN TCP, and NordLynx).
* Automatically check for updates — will check if you’re using the latest version of the NordVPN app.
* Help Us Improve — makes NordVPN better by sending us aggregated anonymous data.

### Auto-connect
The auto-connect tab features the following functions:
* When using an untrusted network— toggle to automatically connect to a network that is not added to a Trusted network list.
* Connect to — select a specific country from the list.
* The current network — shows the network you are currently connected to.
* Trusted network — you won't be automatically connected to a VPN while on a trusted Wi-Fi network.

### Kill Switch
[Kill Switch](https://nordvpn.com/features/vpn-kill-switch/) prevents unprotected access to the internet when your VPN connection accidentally drops.

### DNS
DNS ensures tighter security and privacy for your traffic. You can configure your device manually to use private NordVPN DNS servers.

### Appearance
Appearance settings let you add an application to your dock, menu bar, or both and choose between dark and light modes.

### Refer a friend
The Refer a Friend tab provides you with your personal referral link and instructions on how to refer NordVPN to your friends.

### Other Apps
The other Apps tab introduces other [Nord Security](https://nordsecurity.com/) products.

### Account
The account section shows your NordVPN profile and subscription information. Here, you’ll also find links to [NordVPN's Terms of Services](https://my.nordaccount.com/legal/terms-of-service/) and [Privacy Policy](https://my.nordaccount.com/legal/privacy-policy/).
",https://support.nordvpn.com/hc/en-us/articles/19456281201041
Enabling Threat Protection Pro™ on macOS,"Read the guide below to enable and start using [Threat Protection Pro™](https://nordvpn.com/features/threat-protection/) on the latest macOS versions. If you are using an older version of macOS, check out [enabling Threat Protection Pro™ on older macOS versions](https://support.nordvpn.com/hc/en-us/articles/29670177883793-Enabling-Threat-Protection-Pro-on-older-macOS-versions).
This feature automatically blocks ads, trackers, and malicious URLs and is only available with selected NordVPN plans. Learn more about what is [NordVPN Threat Protection Pro™](https://support.nordvpn.com/hc/en-us/articles/19508765521425-What-is-Threat-Protection-Pro-and-Threat-Protection).
To be able to enable Threat Protection Pro™, you need to see a shield icon within the app. If you can't find Threat Protection Pro™, you are probably using the App Store version. In that case, [delete the application from your macOS device](https://support.apple.com/en-gb/guide/mac-help/mh35835/mac) and [download NordVPN’s macOS version](https://downloads.nordcdn.com/apps/macos/generic/NordVPN-OpenVPN/latest/NordVPN.pkg) from our website.
## Setting up Threat Protection Pro™ on macOS
To set up Threat Protection Pro™ on macOS, follow the steps bellow:
1. Open the NordVPN application and click on the shield icon in the left bar.
2. Click Set up in the Overview tab.
3. You’ll see a window. Click on Set up Threat Protection Pro™. Please note that this guide displays how to set up Threat Protection Pro™ on macOS Sequoia. If you're using an older macOS version, check out how to set up Threat Protection Pro™ on older macOS versions.You'll then have to enter System settings > General > Login items & extensions > Endpoint security extensions and turn on the toggle the slider next to NordVPN to the ON position.
4. Confirm this action by typing in your computer’s password or via Touch ID and clicking Update Settings.
5. Once you have successfully allowed the NordVPN Threat Protection Pro extension™ to load, press Continue in the NordVPN app.
6. Next up, enable browser protection by pressing Add proxy configurations. In the pop-up that appears, press Allow.You will be asked to reboot any web browsers that are running in order to enable the Ad & tracker blocker and advanced browsing protection.
7. Once you've enabled the browsing protection, press Continue.
8. Lastly, enable the anti-malware protection by going to System settings > Privacy & security > Full disk access and toggling the NordVPN Threat Protection Pro™ to the ON position.We also recommend enabling [cloud-based deep threat scanner](https://nordvpn.com/blog/cloud-based-threat-scanner/) to protect your devices from malware.To do so, go to System Settings > Privacy & Security > Full Disk Access and click on the toggle icon next to NordVPN Threat Protection Pro™.If you’re using macOS Monterey version or older — go to Security & Privacy, select Full Disk Access in the left panel, and click on the lock icon at the bottom.
9. Confirm this action by typing in your computer’s password or via Touch ID and clicking update settings.You've successfully set up NordVPN Threat Protection Pro™.
10. To pause or disable Threat Protection Pro™, click the pause button and select the option you prefer.
## Enabling cloud-based threat scanning for malware in files
If you wish to enable the [cloud-based deep threat scanner](https://nordvpn.com/blog/cloud-based-threat-scanner/) to protect your devices from malware after the initial setup wizard is over, follow these steps: Go to the NordVPN app > Threat Protection Pro™ > Settings and click the toggle next to Cloud-based threat detection.You’ve successfully enabled the cloud-based deep threat scanning for malware detection.",https://support.nordvpn.com/hc/en-us/related/click?data=BAh7CjobZGVzdGluYXRpb25fYXJ0aWNsZV9pZGwrCBHNaCtlEjoYcmVmZXJyZXJfYXJ0aWNsZV9pZGwrCBGmhsf7GjoLbG9jYWxlSSIKZW4tdXMGOgZFVDoIdXJsSSJOL2hjL2VuLXVzL2FydGljbGVzLzIwMjI1NzI5Mjg1MzkzLUVuYWJsaW5nLVRocmVhdC1Qcm90ZWN0aW9uLVByby1vbi1tYWNPUwY7CFQ6CXJhbmtpBg%3D%3D--db0b65cbab3d2acf40b87cf23a9c07581422ff26
NordVPN proxy setup on Deluge,"The simplest way to use Deluge securely is to connect to NordVPN before using it. However, when you can’t access the NordVPN app, setting up a NordVPN proxy is the next best thing.
Note that NordVPN service should never be used to bypass copyright regulations. NordVPN does not promote, condone, or endorse the use of the service for such purposes. For more details, please read the NordVPN [Terms of Service](https://my.nordaccount.com/legal/terms-of-service/).
## How to set up NordVPN with Deluge
1. Open Deluge.
2. Open Preferences.
* On Windows and Linux: click Edit > Preferences.
* On macOS: in the menu bar, click Deluge > Preferences.
3. Select the Proxy section.
4. From the Proxy dropdown menu, select Socks5 Auth.
5. Fill in the following information:
* Username: NordVPN service username
* Password: NordVPN service passwordYou can find your NordVPN service credentials (service username and service password) in the [Nord Account dashboard](https://my.nordaccount.com/dashboard/nordvpn/):
1. Click Set up NordVPN manually.
2. You will receive a verification code in your email that you use for NordVPN services. Type the code in: 
3. Copy the credentials using the “Copy” buttons on the right:
* Hostname: Address of a selected proxy server.Here is a list of servers you can choose from:amsterdam.nl.socks.nordhold.netatlanta.us.socks.nordhold.netdallas.us.socks.nordhold.netlos-angeles.us.socks.nordhold.netnl.socks.nordhold.netse.socks.nordhold.netstockholm.se.socks.nordhold.netus.socks.nordhold.netnew-york.us.socks.nordhold.netsan-francisco.us.socks.nordhold.netdetroit.us.socks.nordhold.net
* Port: 1080
6. Click Apply and OK to save changes.
## How to check if your proxy setup is working
1. Visit the [ipleak.net](https://ipleak.net/) website.
2. Scroll down to the Torrent Address detection section, click Activate, and click this Magnet Link.
3. A new window will show up, prompting you to open uTorrent. Select Open deluge.Important: keep ipleak.net open.
4. Once Deluge opens, click Add to add the torrent.
5. While the torrent is downloading metadata, return to the ipleak website.
6. Under Torrent Address detection, you should see the IP address of your chosen proxy server.If no address is showing, click the Refresh button to update the results.
If everything is working properly, you should see the IP address of the VPN server you selected. Deluge is now downloading files securely thanks to NordVPN SOCKS5 proxy server.",https://support.nordvpn.com/hc/en-us/related/click?data=BAh7CjobZGVzdGluYXRpb25fYXJ0aWNsZV9pZGwrCBFJRieAEjoYcmVmZXJyZXJfYXJ0aWNsZV9pZGwrCBGGPoCwEToLbG9jYWxlSSIKZW4tdXMGOgZFVDoIdXJsSSJEL2hjL2VuLXVzL2FydGljbGVzLzIwMzQxNjI0MDMxNTA1LU5vcmRWUE4tcHJveHktc2V0dXAtb24tRGVsdWdlBjsIVDoJcmFua2kI--a6d43a9f8ac5947b69821bd482a461f52f2baf9d
Using NordLynx in the NordVPN app - Windows,"NordLynx is the technology we built around the WireGuard® protocol. It lets you experience WireGuard’s speed benefits without compromising your privacy.
## On Windows 7 and 8.1:
1. Install the [NordVPN app for Windows](https://nordvpn.com/download/windows/) and go to the application settings in the bottom left corner.
2. Select Auto-connect on the left side of the menu and make sure to turn off the ""Choose a VPN protocol and server automatically"" option. Afterward, click on the [VPN protocol](https://nordvpn.com/blog/protocols/) drop-down menu and select NordLynx.
## On Windows 10 and 11:
1. Click on a gear icon in the left bottom corner of the app.
2. Click on Connection settings.
3. Under VPN Protocol choose Nordlynx.
WireGuard is a registered trademark of Jason A. Donenfeld.",https://support.nordvpn.com/hc/en-us/related/click?data=BAh7CjobZGVzdGluYXRpb25fYXJ0aWNsZV9pZGwrCJFI5%2BYdEjoYcmVmZXJyZXJfYXJ0aWNsZV9pZGwrCJEw8gaJEjoLbG9jYWxlSSIKZW4tdXMGOgZFVDoIdXJsSSJQL2hjL2VuLXVzL2FydGljbGVzLzE5OTE5NjM3MjY4NjI1LVVzaW5nLU5vcmRMeW54LWluLXRoZS1Ob3JkVlBOLWFwcC1XaW5kb3dzBjsIVDoJcmFua2kI--84157418b4b43952bcda97cc27f49d1895595db7
What is your money-back policy?,"Here is the refund and cancellation policy at the core of our 30-day money-back guarantee:
“...if you are not satisfied with our Services, you may cancel the Subscription and request a refund within 30 days following your purchase of our Services (“Money Back Guarantee”). Please note that Subscriptions may be refunded on the basis of the Money Back Guarantee only after the initial purchase. Once a Subscription is renewed, it cannot be refunded on the basis of the Money Back Guarantee, unless applicable law provides otherwise.”
This and other conditions of our service can be found in our [Terms of Service](https://my.nordaccount.com/legal/terms-of-service/).
Here are our instructions for [how to cancel](https://support.nordvpn.com/hc/en-us/articles/19556844985489-How-to-cancel-auto-renewal-for-your-subscription) automatic payment renewal.
## Requesting a refund
Previously, refunds could only be processed through our support team. We have now implemented an automated refund system that is more efficient, faster, and convenient for our customers to use. This change also improves our ability to gather feedback, allowing us to better understand issues and improve our service. As we continue to refine this new process, your feedback is welcomed to help us enhance it further.
To request a refund for your payment, contact our customer support team via live chat available in the bottom right corner of the page, and indicate you would like us to refund your payment.
1. You will receive a link to your Nord Account dashboard. Follow the link and verify it’s you who’s trying to access the account.
2. In the following window, you will see which payments are eligible for a refund. Such payments will have a Refund button available. To proceed, click on Refund.Please keep in mind that not all payments are eligible for refunds, and certain terms apply depending on where you bought the subscription:
* * Apple App Store: Subscriptions purchased via the Apple App Store are subject to Apple's refund policies. We're unable to issue refunds for payments made through the Apple App Store. For assistance, please reach out to Apple directly via Apple Support.
* Amazon Appstore: If you've purchased your subscription through the Amazon App Store, contact Amazon directly for assistance via Amazon Support.
* Google Play Store: Refunds for payments made through the Google Play Store can be requested through NordVPN’s customer support, provided they fall within the refund terms outlined above. Additionally, if the payment was made within the last 48 hours, you can request a refund directly from your Google Play account. For more details, visit Google Play Support.
* Retailers or resellers: If you've purchased a subscription outside the NordVPN website (e.g., physical store, online shop, or marketplace like BestBuy or StackSocial), please contact the retailer directly regarding the refund.
1. In the following window, select the reason for canceling the service and requesting a refund. Your feedback is invaluable because it helps us pinpoint areas for improvement and ensures a better experience for all our users.Once completed, click Submit and Continue. 
2. You will see your refund summary. You can confirm it by clicking Refund.
3. After submitting the request, you will receive a confirmation email saying that your refund has been ordered.
4. You should now see the refund status for your payment as Refund Processing. This means that your request has been received and is currently being processed. This process can take up to a few hours*.*Please note, that due to recent implementation, it may take up to 4 hours for a refund request to be processed.
5. Once the refund is complete, the refund status on your dashboard will change to Refunded, and you will receive a confirmation email. Please note that depending on your payment method, it may take up to 10 business days for the refund to reach your account. If there was an error or you have any other questions, please contact our customer support team directly.",https://support.nordvpn.com/hc/en-us/related/click?data=BAh7CjobZGVzdGluYXRpb25fYXJ0aWNsZV9pZGwrCBH9Jde2EToYcmVmZXJyZXJfYXJ0aWNsZV9pZGwrCJEw8gaJEjoLbG9jYWxlSSIKZW4tdXMGOgZFVDoIdXJsSSJFL2hjL2VuLXVzL2FydGljbGVzLzE5NDc2OTkxMzExMTIxLVdoYXQtaXMteW91ci1tb25leS1iYWNrLXBvbGljeQY7CFQ6CXJhbmtpCQ%3D%3D--32794cbcfe0503af8e59f307cb132399b8a207ef
How to uninstall NordVPN software,"You can uninstall NordVPN software the same way you remove most software from your operating system. Here's how:
Uninstall NordVPN from Windows
Microsoft has an always-up-to-date article on how to uninstall software. Read it to learn [how to remove NordVPN from Windows](https://support.microsoft.com/en-us/windows/uninstall-or-remove-apps-and-programs-in-windows-4b55f974-2cc6-2d2b-d092-5905080eaf98).
Uninstall NordVPN from macOS
If you need to completely remove NordVPN from your Mac, Apple has an always-up-to-date article on [how to uninstall software on MacOS](https://support.apple.com/guide/mac-help/install-and-uninstall-other-apps-mh35835/mac).
Uninstall NordVPN from Android
Google has an always-up-to-date article on [how to uninstall apps from your Android device](https://support.google.com/googleplay/topic/13627086?visit_id=638531866536647271-934343169&rd=1).
Uninstall NordVPN from iOS
Apple has an always-up-to-date article on [how to uninstall apps from iPhone and iPads](https://support.apple.com/en-us/101550).
Uninstall NordVPN from Linux
In order to remove NordVPN for Linux, type this command in the terminal:sudo apt-get --purge remove 'nordvpn*'
Alternatively, you can type the following commands:
sudo dpkg -P nordvpnsudo dpkg -P nordvpn-release",https://support.nordvpn.com/hc/en-us/related/click?data=BAh7CjobZGVzdGluYXRpb25fYXJ0aWNsZV9pZGwrCJGVe8e3EToYcmVmZXJyZXJfYXJ0aWNsZV9pZGwrCJEw8gaJEjoLbG9jYWxlSSIKZW4tdXMGOgZFVDoIdXJsSSJIL2hjL2VuLXVzL2FydGljbGVzLzE5NDgxMDIzNDUyNTYxLUhvdy10by11bmluc3RhbGwtTm9yZFZQTi1zb2Z0d2FyZQY7CFQ6CXJhbmtpCg%3D%3D--6c0a193783d9d72247a53f245a7d5d6a36bee5c1
Installing and using NordVPN on Windows 7 and 8.1,"We will stop updating the NordVPN app for older Windows versions.As Windows 7/8.1 10 32-bit no longer receive mainstream security updates from Microsoft, it becomes increasingly difficult to ensure security, reliability and provide the latest features of the NordVPN app.That being said we still recommend using the legacy version of the NordVPN client application for connecting to NordVPN servers on your Windows PC. To begin using the NordVPN Windows client application, download and install the NordVPN app on your Windows PC, log in, and connect to a NordVPN server. All of these steps will be covered in this tutorial. If you need a guide on installing and using NordVPN on a newer Windows system, follow the guide [here](https://support.nordvpn.com/hc/en-us/articles/19472023025169-Installing-and-using-NordVPN-on-Windows-10-and-11).
## Table of contents:
Downloading and installingSetting up the applicationChoosing between different serversNordVPN settings menu
* [General settings](
* [Auto-connect settings](
* [Kill Switch settings](
* [Split Tunneling](
* [Advanced settings](
* [My Account](
* [Dark Web Monitor](
## Downloading and installing the NordVPN app
1. Download the NordVPN app:[Download legacy app version for Windows 64-bit](https://downloads.nordcdn.com/apps/windows/NordVPN/latest/NordVPNSetup_x64.exe)[Download legacy app version for Windows 32-bit](https://downloads.nordcdn.com/apps/windows/NordVPN/latest/NordVPNSetup_x86.exe)
2. Go to your Downloads folder and double-click the NordVPNSetup.exe file. 
3. A pop-up window may ask you if you allow the app to make changes to your device. Click Yes.
4. The installer window will open. Click Next.
5. Tick the boxes if you want shortcuts for the NordVPN app on your Desktop and/or the Start menu, then click Next and Install.
6. The installer will proceed with the installation process. Once it’s complete, you will be asked if you want to launch NordVPN right away. Click Finish to complete the setup.
## Setting up and using NordVPN
1. Click on the NordVPN logo on your desktop, and after the app loads up, click Log In to continue.
2. Your browser will open up and load the Nord Account login page. First, enter your username or email address, press Continue, and then enter your password.
3. To start using NordVPN straight away, you can simply press on Quick Connect, wait till you see the status change from Unprotected to Protected and you're good to go for a secure and private session!However, for the full understanding of what the NordVPN app offers, let's briefly go over what you can find on the main screen and then in the settings menu.
1. Search bar: one of the ways you can connect to NordVPN servers. Use the search bar to find specific servers by typing in the name of the country, city, the server number or the specialty server type. Learn more about [VPN servers.](https://nordvpn.com/servers/)
2. Specialty servers: NordVPN offers multiple categories of servers, each one with its own unique benefits. We have a dedicated article explaining the different types in detail: What do the different server categories mean?
3. All countries: a list of countries you can connect to. Hovering over a country's name reveals additional options, such as specifying the city (if applicable) and server name.
4. Quick Connect: this option automatically connects you to the fastest and closest NordVPN server.
5. Threat protection: an innovative solution for dealing with malware, web tracking, malicious ads and more! Read about it here: Threat Protection.
6. Settings menu: clicking on this cogwheel icon reveals additional options which we explain below.
## Choosing between different NordVPN servers
Using the search bar. You can connect to specific servers by typing in a category, region, or a specific server number with a hashtag (e.g. United States #4672) to find what you need.Using the All Countries list or the Servers map. Click on the nodes on the map or on the specific country in the list to connect to the best server in the given location. Clicking on the three dots next to the country name reveals additional connection options, such as the ability to select the specific city and server. 
## NordVPN settings menu
In the Settings tab, you can set up the application to your liking. To open the settings menu, press on the cogwheel icon in the bottom left corner. 
## General settings
* Launch at Windows startup makes NordVPN run automatically when you start your computer. Enabled by default.
* Launch the app minimized displays the NordVPN icon only in the Windows system tray when the computer starts (instead of opening the main window). Enabled by default.
* Show VPN connection status notifications shows Windows notifications each time you connect or disconnect from a server. Enabled by default.
* Threat Protection: block ads and malicious websites protects you from intrusive ads, malware sites, phishing links, and other threats.
* Select app language from the Language dropdown menu. You can select English, Spanish, French, or German.
* In the left sidebar, you can also access your account details. The Logout button is also at the bottom.
## Auto-connect settings
* Always when the app launches makes the app connect to a server automatically upon starting when using an Ethernet connection or Wi-Fi network. It does not apply to Trusted Wi-Fi networks. Disabled by default.
* Auto-connect on Wi-Fi makes the app connect to a server automatically when you connect to a network: Unsecure networks or Always. Disabled by default.Unsecure networks: connect to a server automatically when you connect to an unsecure Wi-Fi network. Unsecure wireless networks are networks without a password and/or networks with weak encryption. It only works while connecting to a new Wi-Fi network or switching the Wi-Fi network. It does not apply to an Ethernet connection and Trusted Wi-Fi networks. The setting allows you to disconnect after being auto-connected.Always: applies only to Wi-Fi networks. Make the app connect to a server automatically when using Wi-Fi that is not trusted. You will not be able to disconnect unless you trust your current Wi-Fi or disable auto-connect.
* Choose a VPN protocol and server automatically lets the app choose a VPN protocol and server automatically. Enabled by default.
* VPN protocol (visible after disabling the Choose a VPN protocol and server automatically option). UDP is mainly used for streaming and downloading. TCP is more reliable, but also a little slower, and is usually used for web browsing. NordLynx is used by default.
* Auto-connect to lets you select your preferred country or server type, which the app will automatically connect to. You will be able to select a specific city after you select a preferred country.
* Trusted Wi-Fi networks disables Auto-connect on specific Wi-Fi networks. For example, you can make an exception for your home Wi-Fi if you trust it.IMPORTANT NOTE: you will lose internet connectivity while connected to a Trusted Wi-Fi with enabled Internet Kill Switch.
## Kill Switch
* Internet Kill Switch cuts off your internet connection when you’re disconnected from secure NordVPN servers. Disabled by default.
* App Kill Switch shuts down specified programs if you lose VPN connection. For example, if you add Skype to the list, NordVPN will close it whenever you disconnect. Since it takes a few seconds to reach a secure VPN server, this will prevent your data from leaking upon automatically reconnecting to the internet. Disabled by default.
## Split Tunneling
* Split tunneling allows you to exclude applications from the VPN connection. In other words, the apps which you select to add into the split tunneling feature will allow them to stay unaffected by NordVPN.
## Advanced settings
* Custom DNS lets you specify a particular DNS server for the NordVPN application.
* Obfuscated Servers enable you to bypass network restrictions, such as firewalls. This is recommended for countries with restricted network access.
* Invisibility on LAN makes your computer invisible to others on the same local area network (LAN). Keep in mind that once enabled, you will not be able to connect to devices on the same LAN, like printers. Disabled by default.
* Diagnostics runs the NordVPN diagnostics tool if you’re having technical issues. Collect the diagnostic data and provide the ticket ID to our support staff for further assistance. If the diagnostics tool does not give you a ticket ID, you can send the .zip file to our support staff instead.
## My Account
* This section will provide you with the information about your subscription as well as an option to change your password and activate the Two-factor authentication. You can also download our application for other operating systems.
## Dark Web Monitor
* Become notified in case there is a leak of your information related to the email used with NordVPN. Read more about the feature in [our dedicated section](https://nordvpn.com/features/dark-web-monitor/). ",https://support.nordvpn.com/hc/en-us/related/click?data=BAh7CjobZGVzdGluYXRpb25fYXJ0aWNsZV9pZGwrCJFfQ36uEToYcmVmZXJyZXJfYXJ0aWNsZV9pZGwrCBHGTF1zEjoLbG9jYWxlSSIKZW4tdXMGOgZFVDoIdXJsSSJYL2hjL2VuLXVzL2FydGljbGVzLzE5NDQxMTQwMzI2Mjg5LUluc3RhbGxpbmctYW5kLXVzaW5nLU5vcmRWUE4tb24tV2luZG93cy03LWFuZC04LTEGOwhUOglyYW5raQY%3D--4c4af264313f5033fa924c85d5883a696a640c9c
Common Windows application issues,"This article covers problems you may encounter when using NordVPN on Windows devices, including situations where NordVPN is not working on your Windows 10 device, or you have no internet access with NordVPN on Windows 10.
## “Error 1001” during installation
If you encountered “Error 1001” while trying to install the NordVPN app on Windows, follow these steps:
1. Update your Windows system using the “Windows update” tool.
2. Make sure you’re running the latest .NET Runtime version:
1. Click the “Start” button, type “control panel” in the search bar, and select the “Control panel” app.
2. Click “Programs” and select “Programs and features.”
3. Check the version number beside the “Microsoft .NET Framework” entry. If it is not version 4.8 or later, download the latest .NET Runtime version.
3. Temporarily disable your cybersecurity software (such as your antivirus and firewall) and try installing the NordVPN app for Windows again.
## Crash or freeze
If your NordVPN app keeps freezing, follow these steps:
1. Uninstall the NordVPN application.
2. [Update your Windows operating system to the latest available version](https://support.microsoft.com/en-us/windows/update-windows-3c5ae7fc-9fb6-9af1-1984-b5e0412c556a).
3. Install the [latest NordVPN app for Windows](https://nordvpn.com/download/windows/).
If the above method failed to fix your issue, try the following:
1. Press the “Windows” key and the “R” key at the same time to open the ""Run"" window.
2. Type in ""services.msc"" (without the quotation marks) and press “Enter” to open the ""Services"" window.
3. Check if the “Task scheduler” is running — if it is not, right-click on the “Task scheduler” entry and select “Start.” You can also access the “Windows event log” from this window.
## NordVPN Kill Switch feature does not work
If the Kill Switch feature fails to stop specific apps, you can manually add their executable files (.exe) to the Kill Switch list in the NordVPN app:
1. Go to “Settings.”
2. Select “Kill Switch” in the left sidebar menu.
3. Click on “Add apps” under “App Kill Switch” and select the app’s executable file. For example, you would need to add the following file for Skype:C:\Program Files (x86)\Skype\Phone\Skype.exe
## No internet access when connected to a NordVPN server
If you’re getting disconnected from the internet when you connect to a VPN server, try the following to fix the problem:
* Connect to a different VPN server in the NordVPN app.
* Change your VPN connection protocol:
1. 1. [Switch to OpenVPN](https://support.nordvpn.com/hc/en-us/articles/19774135293969-Switching-protocol-to-OpenVPN-UDP-or-TCP-Windows) (UDP or TCP)
2. Switch to NordLynx
* Disable your other cybersecurity software (such as your antivirus and firewall) to check if it’s responsible for the issue. If the NordVPN app works after disabling other cybersecurity software, you may need to add exceptions for NordVPN files.
* Perform a network flush:
1. 1. Open the NordVPN application.
2. Head to the ""Advanced"" section.
3. Click ""Run diagnostics tool.""
4. In the opened window, select ""Network flush.""
5. Restart your PC and try connecting to VPN servers again.
If the problem persists, reinstall the NordVPN app:
1. Uninstall the NordVPN application.
2. Restart your device.
3. Install the latest version of the NordVPN Windows app.
## A certain feature of the application is not working properly
If you discover that a feature isn’t working as it should, follow these steps:
1. Open the ""Settings"" menu in the NordVPN app.
2. Head to the ""Advanced"" section.
3. Click ""Run diagnostics tool.""
4. In the opened window, select ""Reset app.""
5. Re-launch the application.
If the problem persists, try the following:
* Update to the [latest NordVPN Windows app](https://nordvpn.com/download/windows/) version.
* Reinstall the NordVPN app:
1. 1. [Uninstall the NordVPN application](https://support.nordvpn.com/General-info/1047410452/How-to-uninstall-NordVPN-software.htm).
2. Restart your device.
3. Install the latest version of the NordVPN Windows app.
## NordVPN is not working after an update
If your NordVPN Windows application has stopped working after an update, try the following to fix the problem:
* Disable your other cybersecurity software (such as your antivirus and firewall) to check if it’s responsible for the issue. If the NordVPN app works after disabling other cybersecurity software, you may need to add exceptions for NordVPN files.
* Uninstall the NordVPN app and reboot your Windows device, then download and install the latest version of the NordVPN Windows app.
## The NordVPN icon is missing
If the NordVPN application icon is missing from the NordVPN shortcut on your desktop, follow these steps:
1. Left-click the broken NordVPN app icon to select the shortcut.
2. Right-click the selected shortcut and choose “Delete.”
3. Right-click on your desktop, choose “New,” and select “Shortcut.”
4. Click “Browse,” find the NordVPN directory, and select the NordVPN executable file (.exe).
5. Name the shortcut and click “Finish.”
Alternatively, you can try reinstalling the NordVPN Windows app:
1. Uninstall the NordVPN application.
2. Restart your device.
3. Install the latest version of the NordVPN Windows app.",https://support.nordvpn.com/hc/en-us/related/click?data=BAh7CjobZGVzdGluYXRpb25fYXJ0aWNsZV9pZGwrCJHOYN5WEjoYcmVmZXJyZXJfYXJ0aWNsZV9pZGwrCBHGTF1zEjoLbG9jYWxlSSIKZW4tdXMGOgZFVDoIdXJsSSJIL2hjL2VuLXVzL2FydGljbGVzLzIwMTY0MzA3MzczNzEzLUNvbW1vbi1XaW5kb3dzLWFwcGxpY2F0aW9uLWlzc3VlcwY7CFQ6CXJhbmtpBw%3D%3D--0fb8174a2b78af8663b865c9012178b6f51e36f5
Troubleshooting NordVPN connectivity on Windows,"There are several reasons why you may be having trouble connecting to NordVPN on your Windows device. These include issues with your account status, network settings, or app configuration. Here are some steps you can follow to troubleshoot.
* [Make sure your NordVPN account is active](https://support.nordvpn.com/hc/en-us/articles/19602526121489-Making-sure-your-account-is-active).
* Check if you’re using the[ latest NordVPN application version](https://nordvpn.com/blog/nordvpn-windows-release-notes/).
* To do so, open the app, click on Settings (the gear icon at the bottom) and you’ll see the app version at the top, right below the Settings headline.
* If you are using the older version, [uninstall the VPN app](https://nordvpn.com/blog/how-to-uninstall-a-vpn/) and [download the latest NordVPN version for Windows](https://nordvpn.com/download/windows/).
* Change the VPN protocol to Auto and try to Quick connect.
* To do so, open the app, click on Settings (the gear icon at the bottom), and select Connection – you'll find the option to change the connection protocol at the top of the screen. The connection process may take up to 3 minutes
* If you're still unable to connect, try switching to [NordWhisper](https://support.nordvpn.com/hc/en-us/articles/31528242519953-How-to-use-NordWhisper-on-NordVPN) or [OpenVPN UDP/TCP](https://support.nordvpn.com/hc/en-us/articles/19774135293969-Switching-protocol-to-OpenVPN-UDP-or-TCP-Windows) protocols and connecting to [Obfuscated servers](https://nordvpn.com/features/obfuscated-servers/), which you will find under Speciality servers.
* If that does not help, reset the application:
1. Click on the Settings (gear icon) in the bottom left corner.
2. Click General.
3. Scroll down until you see the Diagnostics section, and click Run diagnostics.
4. A new window will open. Select Reset app.
* The issue might lie in the configuration of your [Windows OS, its applications, and networks.](https://support.nordvpn.com/hc/en-us/articles/20164307373713-Common-Windows-application-issues)
After each step, check if the issue remains. In the case that the problems are still there, be sure to reach out to our support team for a quick solution by pressing on either the email or chat button bellow.",https://support.nordvpn.com/hc/en-us/related/click?data=BAh7CjobZGVzdGluYXRpb25fYXJ0aWNsZV9pZGwrCBH97w72EToYcmVmZXJyZXJfYXJ0aWNsZV9pZGwrCBHGTF1zEjoLbG9jYWxlSSIKZW4tdXMGOgZFVDoIdXJsSSJWL2hjL2VuLXVzL2FydGljbGVzLzE5NzQ4NTEwMjM1OTIxLVRyb3VibGVzaG9vdGluZy1Ob3JkVlBOLWNvbm5lY3Rpdml0eS1vbi1XaW5kb3dzBjsIVDoJcmFua2kI--9fe76a6ad5725327172fbeba7226081e4a59afc8
What is Threat Protection Pro™ and Threat Protection?,"Threat Protection Pro™ is a feature that automatically blocks ads, trackers, and malicious URLs. When you visit a website known for scamming people, this feature displays an in-browser alert to warn you about possible fraud. Threat Protection Pro™ also scans downloads for malware and checks your apps for security vulnerabilities. You don't need an active VPN connection for Threat Protection Pro™ to work. Click here to learn more.
Threat Protection Pro™ is available on:
* Windows (You may also choose Threat Protection)
* macOS (You may also choose Threat Protection on the App Store NordVPN version)
Threat Protection is a feature that blocks ads, trackers, and unsafe domains based on DNS filtering. It only works when you're connected to one of the NordVPN's servers.
Threat Protection is available on:
* Android
* iOS
* Linux
* macOS
* Windows
* NordVPN Chrome Extension
* NordVPN Firefox Extension
* NordVPN Edge Extension
### What is the difference between Threat Protection Pro™ and Threat Protection?
The main differences between the two features are:
* Threat Protection Pro™ works without being connected to the VPN, but you must be connected to one of the NordVPN servers to use the Threat Protection feature.
* Windows and macOS devices support both Threat Protection Pro™ and Threat Protection features. Meanwhile, Android, iOS, and Linux devices and Chrome, Firefox, and Edge extensions support only Threat Protection.
* Threat Protection Pro™ deletes any malware-ridden file during download and blocks trackers, while Threat Protection doesn't.",https://support.nordvpn.com/hc/en-us/related/click?data=BAh7CjobZGVzdGluYXRpb25fYXJ0aWNsZV9pZGwrCBH2CT2%2BEToYcmVmZXJyZXJfYXJ0aWNsZV9pZGwrCBGmhsf7GjoLbG9jYWxlSSIKZW4tdXMGOgZFVDoIdXJsSSJaL2hjL2VuLXVzL2FydGljbGVzLzE5NTA4NzY1NTIxNDI1LVdoYXQtaXMtVGhyZWF0LVByb3RlY3Rpb24tUHJvLWFuZC1UaHJlYXQtUHJvdGVjdGlvbgY7CFQ6CXJhbmtpBw%3D%3D--6145461c648437d632a759c3008e676d4f499c45
Which routers don’t support NordVPN,"On 1 December 2018, NordVPN’s servers stopped supporting L2TP/IPsec and PPTP connections. More about that in [this article](https://nordvpn.com/blog/l2tp-pptp-protocol-update/).
If you use any of the routers listed below with their native firmware, you will not be able to use them with our service:
* Arris
* Belkin
* Cisco
* D-Link
* Huawei
* Linksys (except [WRT32X/WRT32XB AC3200](https://www.linksys.com/support-article?articleNum=270535))
* Nighthawk range routers ([unless the router is using DumaOS](https://www.netgear.com/home/online-gaming/))
* [Netgear](https://support.nordvpn.com/hc/en-us/articles/20282781982481-Can-I-set-up-Netgear-router-with-VPN)
* TRENDnet
* Tenda
* TotoLink
* Ubee
* Orbi
* Spectrum
* Xfinity
* Eero
* Verizon
* AT&T
* FRITZ!Box
* Most ISP-provided routers that were mentioned above
You can install the following custom firmware on some of the aforementioned models to make them work:
* DD-WRT:
* Tomato:
* Padavan:
* OpenWRT:
* Merlin:
## Other tips for router connectivity:
* If your router supports the OpenVPN protocol, search our knowledge base for the name of its manufacturer. You should find a tutorial on how to set it up. You can also check our [router tutorials](https://support.nordvpn.com/hc/en-us/sections/19326876055569-Router) section under the Connectivity category. If you cannot find the setup guide for your router, [contact our customer support](https://support.nordvpn.com/hc/en-us/articles/19482416296593-How-can-I-reach-NordVPN-customer-support) for help.
* If you want a router with out-of-the-box security and anonymity that NordVPN provides, head over to our partners at [FlashRouters](https://nordvpn.com/flashrouters/). They offer pre-configured routers delivering top-notch security and performance.
* Here is our list of [recommended routers for NordVPN](https://support.nordvpn.com/hc/en-us/articles/20195707547025-Which-router-should-I-use-with-NordVPN).",https://support.nordvpn.com/hc/en-us/related/click?data=BAh7CjobZGVzdGluYXRpb25fYXJ0aWNsZV9pZGwrCBEC9%2F2IEjoYcmVmZXJyZXJfYXJ0aWNsZV9pZGwrCBHGTF1zEjoLbG9jYWxlSSIKZW4tdXMGOgZFVDoIdXJsSSJKL2hjL2VuLXVzL2FydGljbGVzLzIwMzc5NTg1Njc1NzkzLVdoaWNoLXJvdXRlcnMtZG9uLXQtc3VwcG9ydC1Ob3JkVlBOBjsIVDoJcmFua2kJ--76eee077f49ce3d23ec645b73880bfd07c604593
Improve connection speed on Windows with NordVPN app,"If you are experiencing slow connection speed while connected to [NordVPN on Windows](https://nordvpn.com/download/windows/), try the following:
1. Make sure to use the latest version of NordVPN app. You can [uninstall the app](https://support.nordvpn.com/hc/en-us/articles/19481023452561-How-to-uninstall-NordVPN-software) and [install the latest version from our website](https://nordvpn.com/download/windows/).
2. Restart your device.
3. Restart your router or modem. If your router is set up with a VPN, and the speed is insufficient, try using VPN solely on your computer or phone.
4. If you are using Wi-Fi, switch to a wired connection.
5. Connect to a VPN server geographically closer to you.
6. Open the Settings menu and go to the Auto Connect tab. Disable Choose a VPN protocol and server automatically and select NordLynx in the VPN protocol field.
7. Try a different connection method/protocol on your device. Tutorials for various connection methods can be found [here](https://support.nordvpn.com/hc/en-us/sections/19326591402001-Windows)
Internet speed can also be directly affected by the condition of both your hardware and firmware. Here’s what we recommend:
1. Make sure you have the latest available drivers and software on your computer, including Ethernet adapter and motherboard drivers, BIOS updates, router firmware, etc.
2. Temporarily disable your firewall to see whether it will have an impact on your overall internet speed. If it does, check your firewall settings and remove unnecessary rules or consider using different firewall software.
3. Close any applications that may be transferring data in the background, e.g. software for downloading or file sharing.
4. Old and sometimes even new routers provided to you by your internet service provider often use outdated firmware or are technically poorly manufactured. This can directly impact your internet speed, so we recommend investing in a better router.",https://support.nordvpn.com/hc/en-us/related/click?data=BAh7CjobZGVzdGluYXRpb25fYXJ0aWNsZV9pZGwrCJEw8gaJEjoYcmVmZXJyZXJfYXJ0aWNsZV9pZGwrCBHGTF1zEjoLbG9jYWxlSSIKZW4tdXMGOgZFVDoIdXJsSSJbL2hjL2VuLXVzL2FydGljbGVzLzIwMzc5NzM2MzU0OTYxLUltcHJvdmUtY29ubmVjdGlvbi1zcGVlZC1vbi1XaW5kb3dzLXdpdGgtTm9yZFZQTi1hcHAGOwhUOglyYW5raQo%3D--5d64197ec7b06b40ce4af331aa37dfd22e209b64
How to uninstall NordVPN software,"You can uninstall NordVPN software the same way you remove most software from your operating system. Here's how:
Uninstall NordVPN from Windows
Microsoft has an always-up-to-date article on how to uninstall software. Read it to learn [how to remove NordVPN from Windows](https://support.microsoft.com/en-us/windows/uninstall-or-remove-apps-and-programs-in-windows-4b55f974-2cc6-2d2b-d092-5905080eaf98).
Uninstall NordVPN from macOS
If you need to completely remove NordVPN from your Mac, Apple has an always-up-to-date article on [how to uninstall software on MacOS](https://support.apple.com/guide/mac-help/install-and-uninstall-other-apps-mh35835/mac).
Uninstall NordVPN from Android
Google has an always-up-to-date article on [how to uninstall apps from your Android device](https://support.google.com/googleplay/topic/13627086?visit_id=638531866536647271-934343169&rd=1).
Uninstall NordVPN from iOS
Apple has an always-up-to-date article on [how to uninstall apps from iPhone and iPads](https://support.apple.com/en-us/101550).
Uninstall NordVPN from Linux
In order to remove NordVPN for Linux, type this command in the terminal:sudo apt-get --purge remove 'nordvpn*'
Alternatively, you can type the following commands:
sudo dpkg -P nordvpnsudo dpkg -P nordvpn-release",https://support.nordvpn.com/hc/en-us/related/click?data=BAh7CjobZGVzdGluYXRpb25fYXJ0aWNsZV9pZGwrCJGVe8e3EToYcmVmZXJyZXJfYXJ0aWNsZV9pZGwrCJHOYN5WEjoLbG9jYWxlSSIKZW4tdXMGOgZFVDoIdXJsSSJIL2hjL2VuLXVzL2FydGljbGVzLzE5NDgxMDIzNDUyNTYxLUhvdy10by11bmluc3RhbGwtTm9yZFZQTi1zb2Z0d2FyZQY7CFQ6CXJhbmtpBg%3D%3D--f78f6867288fbbfe35b9e95b17863540fb20164a
The NordVPN application does not open,"If you have the NordVPN application installed, but can’t get it to run, try the following to fix the issue:
1. Install the latest version of NordVPN. We have a handy [tutorial](https://support.nordvpn.com/hc/en-us/articles/19481023452561-How-to-uninstall-NordVPN-software) on how to uninstall the NordVPN application from your device. [This guide](https://support.nordvpn.com/hc/en-us/articles/19482835731345-How-to-download-NordVPN-software) helps you to install a new version.
2. Check the application tray (on Windows devices, it is usually located in the bottom-right corner of the screen) because the app might already be running there.
3. Try [resetting the NordVPN application](https://support.nordvpn.com/hc/en-us/articles/20323582191505-Resetting-your-application-preferences).
4. If you use antivirus software, add exceptions for the NordVPN app.
5. Restart your computer.",https://support.nordvpn.com/hc/en-us/related/click?data=BAh7CjobZGVzdGluYXRpb25fYXJ0aWNsZV9pZGwrCBEA8CteEjoYcmVmZXJyZXJfYXJ0aWNsZV9pZGwrCJHOYN5WEjoLbG9jYWxlSSIKZW4tdXMGOgZFVDoIdXJsSSJML2hjL2VuLXVzL2FydGljbGVzLzIwMTk1NjczMzc0NzM3LVRoZS1Ob3JkVlBOLWFwcGxpY2F0aW9uLWRvZXMtbm90LW9wZW4GOwhUOglyYW5raQc%3D--9c1d5989662202b57ec68c5bec7470e3a75484cb
Is NordVPN down?,"When a NordVPN server is down, it’s removed from the app’s server list. All NordVPN servers you see on the app should be online.",https://support.nordvpn.com/hc/en-us/related/click?data=BAh7CjobZGVzdGluYXRpb25fYXJ0aWNsZV9pZGwrCBFu1tFWEjoYcmVmZXJyZXJfYXJ0aWNsZV9pZGwrCJHOYN5WEjoLbG9jYWxlSSIKZW4tdXMGOgZFVDoIdXJsSSJLL2hjL2VuLXVzL2FydGljbGVzLzIwMTY0MDk2OTc4NDQ5LVVuYWJsZS10by1jb25uZWN0LXRvLU5vcmRWUE4tc2VydmVycwY7CFQ6CXJhbmtpCA%3D%3D--3605adc97e0b9c2b24266a240a559c2ecad5d03a
Unable to connect to NordVPN servers,"Several different factors may interfere with your NordVPN connection. Here’s what may help fix the problem.
## Operating system-specific NordVPN connection guides
If you are experiencing issues connecting on any of the operating systems below, try following these VPN troubleshooting guides:
* [Troubleshooting connectivity on Windows](https://support.nordvpn.com/hc/en-us/articles/19748510235921-Troubleshooting-NordVPN-connectivity-on-Windows)
* [Troubleshooting connectivity on Android](https://support.nordvpn.com/hc/en-us/articles/20041281541777-Troubleshooting-connectivity-on-Android)
* [Troubleshooting connectivity on iOS](https://support.nordvpn.com/hc/en-us/articles/20397808850833-Troubleshooting-connectivity-on-iOS)
* [Troubleshooting connectivity of Linux app](https://support.nordvpn.com/hc/en-us/articles/20398047039889-Troubleshooting-NordVPN-connectivity-issues-on-Linux)
* [Troubleshooting connectivity on macOS](https://support.nordvpn.com/hc/en-us/articles/19920758451345-NordVPN-not-connecting-on-Mac)
## General NordVPN connection tips
These tips may help if your NordVPN server is down or if NordVPN is stuck on “connecting”:
* If you can’t connect to a specific server, try a few different NordVPN servers. You can use the auto-connect feature or the NordVPN server locator tool to find the right server for you.
Follow the steps below to find the best server for your connection:
1. Log into your [Nord Account](https://my.nordaccount.com/), and click NordVPN.
2. Scroll down to Advanced Settings and click Set up NordVPN manually.
3. Select the Server recommendation tab. According to your location, the best server will be recommended.
4. By pressing Advanced filters you can further customize the recommended servers by selecting the Server type and the Security protocol.
In case you wish to select a specific server, follow these steps:
1. Under Set up NordVPN manually, select OpenVPN configuration files.
2. Find the server you wish to connect to by using the Search bar or by scrolling down and download it by clicking Download UDP or Download TCP.
3. When connecting to OpenVPN & IKEv2 manually, you're going to need to use the Username and Password from the Service credential tab.
* On the NordVPN app, log out of your account and log back in. Try connecting again.
* [Uninstall the app](https://support.nordvpn.com/hc/en-us/articles/19481023452561-How-to-uninstall-NordVPN-software), reboot your device, and [install the app again](https://support.nordvpn.com/hc/en-us/articles/20289779952017-How-to-start-using-NordVPN). Try connecting to a server now.
* Try using a different connection method/protocol for your device.
## Is NordVPN down?
When a NordVPN server is down, it’s removed from the app’s server list. All NordVPN servers you see on the app should be online.
If you can’t connect to a server and the solutions above don’t work, your device or network may be causing the problem. To check if that’s the case, try using NordVPN on a different device on the same network.
For example, if NordVPN doesn’t work on your Android phone, try using it on your PC. If both devices don’t connect, you may be experiencing network issues. If your PC connects successfully, you may need to reconfigure your phone.
## Connecting from a country with internet restrictions
If you can’t connect from a country with internet restrictions, you may find a solution in this article:
* [Connecting from a country with internet restrictions](https://support.nordvpn.com/hc/en-us/articles/19572011021457-Connecting-from-a-country-with-internet-restrictions).",https://support.nordvpn.com/hc/en-us/related/click?data=BAh7CjobZGVzdGluYXRpb25fYXJ0aWNsZV9pZGwrCBFu1tFWEjoYcmVmZXJyZXJfYXJ0aWNsZV9pZGwrCJHOYN5WEjoLbG9jYWxlSSIKZW4tdXMGOgZFVDoIdXJsSSJLL2hjL2VuLXVzL2FydGljbGVzLzIwMTY0MDk2OTc4NDQ5LVVuYWJsZS10by1jb25uZWN0LXRvLU5vcmRWUE4tc2VydmVycwY7CFQ6CXJhbmtpCA%3D%3D--3605adc97e0b9c2b24266a240a559c2ecad5d03a
I can’t reach some websites when connected to NordVPN,"If you cannot access some websites or suspect that NordVPN is blocking them, follow these instructions:
* [Clear the cache of your browser](https://nordvpn.com/blog/how-to-clear-your-cache/) while connected to the VPN.
* [Use the incognito mode](https://nordvpn.com/blog/how-to-go-incognito/), safe mode, or private mode in your web browser:
* [How to enable Chrome safe mode](https://nordvpn.com/blog/chrome-safe-mode/)
* [How to enable private mode on Safari](https://nordvpn.com/blog/turn-off-private-browsing-on-safari/)
* Try a different browser, such as Chrome, Edge, or Brave.
After each step, check if you can access the website in question.
## How do I stop NordVPN from blocking sites?
If the issue persists, try these steps:
* Switch between VPN servers. Simply disconnect from the server you're currently connected to and click/tap on a different location using the NordVPN map.
* If you trust the website you’re trying to access, you can disable the Threat Protection feature or exclude that particular domain from the Threat Protection Pro™ blocked domains list. To do that, go to the Web protection tab in the Threat Protection Pro™ settings and choose to exclude the blocked domain from threat blocking. Try to visit that web page once again. If you still can’t access the site, please reach out to our customer support.
* If you’re using a Windows device, your antivirus/firewall may be blocking the access. Try adding exceptions for NordVPN.exe and nordvpn-service.exe.
* Try other connection methods, such as the [>OpenVPN<](https://support.nordvpn.com/hc/en-us/articles/19683394518161-OpenVPN-connection-on-NordVPN) or [>IKEv2<](https://support.nordvpn.com/hc/en-us/articles/19685604677905-What-is-IKEv2) protocols.
* [Connect to obfuscated servers](https://support.nordvpn.com/hc/en-us/articles/19615332252561) (via the OpenVPN connection).
* If you have recently installed our app, try restarting your device and checking our [>VPN troubleshooting tutorial<](https://support.nordvpn.com/hc/en-us/articles/20164096978449-Unable-to-connect-to-NordVPN-servers).",https://support.nordvpn.com/hc/en-us/related/click?data=BAh7CjobZGVzdGluYXRpb25fYXJ0aWNsZV9pZGwrCBG51uNGEjoYcmVmZXJyZXJfYXJ0aWNsZV9pZGwrCJHOYN5WEjoLbG9jYWxlSSIKZW4tdXMGOgZFVDoIdXJsSSJcL2hjL2VuLXVzL2FydGljbGVzLzIwMDk1Njc5NTEwODAxLUktY2FuLXQtcmVhY2gtc29tZS13ZWJzaXRlcy13aGVuLWNvbm5lY3RlZC10by1Ob3JkVlBOBjsIVDoJcmFua2kJ--c3c399e7588f3878d7f1e61092ef3a32b41de3f0
Improve connection speed on Windows with NordVPN app,"If you are experiencing slow connection speed while connected to [NordVPN on Windows](https://nordvpn.com/download/windows/), try the following:
1. Make sure to use the latest version of NordVPN app. You can [uninstall the app](https://support.nordvpn.com/hc/en-us/articles/19481023452561-How-to-uninstall-NordVPN-software) and [install the latest version from our website](https://nordvpn.com/download/windows/).
2. Restart your device.
3. Restart your router or modem. If your router is set up with a VPN, and the speed is insufficient, try using VPN solely on your computer or phone.
4. If you are using Wi-Fi, switch to a wired connection.
5. Connect to a VPN server geographically closer to you.
6. Open the Settings menu and go to the Auto Connect tab. Disable Choose a VPN protocol and server automatically and select NordLynx in the VPN protocol field.
7. Try a different connection method/protocol on your device. Tutorials for various connection methods can be found [here](https://support.nordvpn.com/hc/en-us/sections/19326591402001-Windows)
Internet speed can also be directly affected by the condition of both your hardware and firmware. Here’s what we recommend:
1. Make sure you have the latest available drivers and software on your computer, including Ethernet adapter and motherboard drivers, BIOS updates, router firmware, etc.
2. Temporarily disable your firewall to see whether it will have an impact on your overall internet speed. If it does, check your firewall settings and remove unnecessary rules or consider using different firewall software.
3. Close any applications that may be transferring data in the background, e.g. software for downloading or file sharing.
4. Old and sometimes even new routers provided to you by your internet service provider often use outdated firmware or are technically poorly manufactured. This can directly impact your internet speed, so we recommend investing in a better router.",https://support.nordvpn.com/hc/en-us/related/click?data=BAh7CjobZGVzdGluYXRpb25fYXJ0aWNsZV9pZGwrCJEw8gaJEjoYcmVmZXJyZXJfYXJ0aWNsZV9pZGwrCJHOYN5WEjoLbG9jYWxlSSIKZW4tdXMGOgZFVDoIdXJsSSJbL2hjL2VuLXVzL2FydGljbGVzLzIwMzc5NzM2MzU0OTYxLUltcHJvdmUtY29ubmVjdGlvbi1zcGVlZC1vbi1XaW5kb3dzLXdpdGgtTm9yZFZQTi1hcHAGOwhUOglyYW5raQo%3D--4e6d98a134ef01fbfb42e76db54dbf0a9b75a863
Enabling Threat Protection Pro™ on macOS,"Read the guide below to enable and start using [Threat Protection Pro™](https://nordvpn.com/features/threat-protection/) on the latest macOS versions. If you are using an older version of macOS, check out [enabling Threat Protection Pro™ on older macOS versions](https://support.nordvpn.com/hc/en-us/articles/29670177883793-Enabling-Threat-Protection-Pro-on-older-macOS-versions).
This feature automatically blocks ads, trackers, and malicious URLs and is only available with selected NordVPN plans. Learn more about what is [NordVPN Threat Protection Pro™](https://support.nordvpn.com/hc/en-us/articles/19508765521425-What-is-Threat-Protection-Pro-and-Threat-Protection).
To be able to enable Threat Protection Pro™, you need to see a shield icon within the app. If you can't find Threat Protection Pro™, you are probably using the App Store version. In that case, [delete the application from your macOS device](https://support.apple.com/en-gb/guide/mac-help/mh35835/mac) and [download NordVPN’s macOS version](https://downloads.nordcdn.com/apps/macos/generic/NordVPN-OpenVPN/latest/NordVPN.pkg) from our website.
## Setting up Threat Protection Pro™ on macOS
To set up Threat Protection Pro™ on macOS, follow the steps bellow:
1. Open the NordVPN application and click on the shield icon in the left bar.
2. Click Set up in the Overview tab.
3. You’ll see a window. Click on Set up Threat Protection Pro™. Please note that this guide displays how to set up Threat Protection Pro™ on macOS Sequoia. If you're using an older macOS version, check out how to set up Threat Protection Pro™ on older macOS versions.You'll then have to enter System settings > General > Login items & extensions > Endpoint security extensions and turn on the toggle the slider next to NordVPN to the ON position.
4. Confirm this action by typing in your computer’s password or via Touch ID and clicking Update Settings.
5. Once you have successfully allowed the NordVPN Threat Protection Pro extension™ to load, press Continue in the NordVPN app.
6. Next up, enable browser protection by pressing Add proxy configurations. In the pop-up that appears, press Allow.You will be asked to reboot any web browsers that are running in order to enable the Ad & tracker blocker and advanced browsing protection.
7. Once you've enabled the browsing protection, press Continue.
8. Lastly, enable the anti-malware protection by going to System settings > Privacy & security > Full disk access and toggling the NordVPN Threat Protection Pro™ to the ON position.We also recommend enabling [cloud-based deep threat scanner](https://nordvpn.com/blog/cloud-based-threat-scanner/) to protect your devices from malware.To do so, go to System Settings > Privacy & Security > Full Disk Access and click on the toggle icon next to NordVPN Threat Protection Pro™.If you’re using macOS Monterey version or older — go to Security & Privacy, select Full Disk Access in the left panel, and click on the lock icon at the bottom.
9. Confirm this action by typing in your computer’s password or via Touch ID and clicking update settings.You've successfully set up NordVPN Threat Protection Pro™.
10. To pause or disable Threat Protection Pro™, click the pause button and select the option you prefer.
## Enabling cloud-based threat scanning for malware in files
If you wish to enable the [cloud-based deep threat scanner](https://nordvpn.com/blog/cloud-based-threat-scanner/) to protect your devices from malware after the initial setup wizard is over, follow these steps: Go to the NordVPN app > Threat Protection Pro™ > Settings and click the toggle next to Cloud-based threat detection.You’ve successfully enabled the cloud-based deep threat scanning for malware detection.",https://support.nordvpn.com/hc/en-us/related/click?data=BAh7CjobZGVzdGluYXRpb25fYXJ0aWNsZV9pZGwrCBHNaCtlEjoYcmVmZXJyZXJfYXJ0aWNsZV9pZGwrCJHGaSD8GjoLbG9jYWxlSSIKZW4tdXMGOgZFVDoIdXJsSSJOL2hjL2VuLXVzL2FydGljbGVzLzIwMjI1NzI5Mjg1MzkzLUVuYWJsaW5nLVRocmVhdC1Qcm90ZWN0aW9uLVByby1vbi1tYWNPUwY7CFQ6CXJhbmtpBg%3D%3D--49210398801eb7c18fc100cf4de6c6f4949128ff
How to resolve the Threat Protection Pro™ browser protection is off pop-up?,"The NordVPN app will notify you in case the browsing protection is off. In order to resolve it, you need to provide the NordVPN app with the permissions needed:",https://support.nordvpn.com/hc/en-us/related/click?data=BAh7CjobZGVzdGluYXRpb25fYXJ0aWNsZV9pZGwrCBGmhsf7GjoYcmVmZXJyZXJfYXJ0aWNsZV9pZGwrCJHGaSD8GjoLbG9jYWxlSSIKZW4tdXMGOgZFVDoIdXJsSSJbL2hjL2VuLXVzL2FydGljbGVzLzI5NjY4Njg2NjAzNzkzLUhvdy10by1yZXNvbHZlLVRocmVhdC1Qcm90ZWN0aW9uLVByby1pc3N1ZXMtb24tbWFjT1MGOwhUOglyYW5raQc%3D--4c1d04d6be0cd54ee5ab3bbf339e99594818c74f
How to resolve the Threat Protection Pro™ anti-malware protection is off pop-up?,"The NordVPN app will also notify you in case the anti-malware protection is off. In order to resolve it, you need to provide the NordVPN app with the permissions needed:",https://support.nordvpn.com/hc/en-us/related/click?data=BAh7CjobZGVzdGluYXRpb25fYXJ0aWNsZV9pZGwrCBGmhsf7GjoYcmVmZXJyZXJfYXJ0aWNsZV9pZGwrCJHGaSD8GjoLbG9jYWxlSSIKZW4tdXMGOgZFVDoIdXJsSSJbL2hjL2VuLXVzL2FydGljbGVzLzI5NjY4Njg2NjAzNzkzLUhvdy10by1yZXNvbHZlLVRocmVhdC1Qcm90ZWN0aW9uLVByby1pc3N1ZXMtb24tbWFjT1MGOwhUOglyYW5raQc%3D--4c1d04d6be0cd54ee5ab3bbf339e99594818c74f
How to resolve the Threat Protection Pro™ failed to start error?,Another error you may be notified about is when Threat Protection Pro™ is unable to start its internal processes.,https://support.nordvpn.com/hc/en-us/related/click?data=BAh7CjobZGVzdGluYXRpb25fYXJ0aWNsZV9pZGwrCBGmhsf7GjoYcmVmZXJyZXJfYXJ0aWNsZV9pZGwrCJHGaSD8GjoLbG9jYWxlSSIKZW4tdXMGOgZFVDoIdXJsSSJbL2hjL2VuLXVzL2FydGljbGVzLzI5NjY4Njg2NjAzNzkzLUhvdy10by1yZXNvbHZlLVRocmVhdC1Qcm90ZWN0aW9uLVByby1pc3N1ZXMtb24tbWFjT1MGOwhUOglyYW5raQc%3D--4c1d04d6be0cd54ee5ab3bbf339e99594818c74f
How to resolve Threat Protection Pro™ issues on macOS?,"In order to resolve issues with [Threat Protection Pro™](https://nordvpn.com/features/threat-protection/), it is important to first understand this NordVPN feature and how it works. This feature enhances your security by automatically blocking ads, trackers, and malicious URLs. Threat Protection Pro™ is only available with selected NordVPN plans.
If you wish to know more, check out our article on [what Threat Protection Pro™ is and how it works](https://support.nordvpn.com/hc/en-us/articles/19508765521425-What-is-Threat-Protection-Pro-and-Threat-Protection).
If you need additional guidance, read our article on how to enable Threat Protection Pro™ on your macOS device.
Most of the issues you may get are caused by not providing the NordVPN app with the restrictions needed. The NordVPN app will notify you in case your browsing protection or the anti-malware protection is off. You may also get the Threat Protection Pro failed to start error.
This article covers the following:
* [How to resolve the Threat Protection Pro™ browser protection is off pop-up?](
* [How to resolve the Threat Protection Pro™ anti-malware protection is off pop-up?](
* [How to resolve the Threat Protection Pro™ failed to start error?](
## How to resolve the Threat Protection Pro™ browser protection is off pop-up?
The NordVPN app will notify you in case the browsing protection is off. In order to resolve it, you need to provide the NordVPN app with the permissions needed:
1. On the pop-up, click on restore protection.
2. Click enable.
## How to resolve the Threat Protection Pro™ anti-malware protection is off pop-up?
The NordVPN app will also notify you in case the anti-malware protection is off. In order to resolve it, you need to provide the NordVPN app with the permissions needed:
1. On the pop-up, click restore protection.You will also see the following notification in the Overview window – click Set up.
2. Go to System Settings > Privacy & Security > Full Disk Access and click on the toggle icon next to NordVPN Threat Protection Pro™.
## How to resolve the Threat Protection Pro™ failed to start error?
Another error you may be notified about is when Threat Protection Pro™ is unable to start its internal processes.
To resolve this error, try the following:
* Press Try again – this will reboot the internal Threat Protection Pro™ processes and should resolve the issues you are facing in most scenarios.
* Log out and Log back into your account, and try launching Threat Protection Pro™ again.
* Try going to System Settings > General > Login items & extensions > Endpoint security extensions > Click (...) button > Locate the Threat Protection Pro™ extension and enable it manually.
* Try reinstalling the NordVPN app on your macOS device. For reference, see our article on [installing the NordVPN application on macOS](https://support.nordvpn.com/hc/en-us/articles/19456281201041).If you are using macOS Sequoia and above, we recommend a full clean up of Threat Protection Pro™ before reinstalling:1) Go to System Settings > General > Login items & extensions > Endpoint security extensions > Click (...) button > Delete NordVPN extension.2) Go to System Settings > Privacy & Security > Full Disk Access > Delete Threat Protection.3) Delete the NordVPN app. You can check out [how to uninstall NordVPN software](https://support.nordvpn.com/hc/en-us/articles/19481023452561-How-to-uninstall-NordVPN-software) for reference.4) Open terminal and run:
```
defaults delete com.nordvpn.macos
```
Once finished, restart your macOS device. 5) Open terminal again and run the following:
```
systemextensionsctl list
```
It should show 0 – if it does, it means that all NordVPN software has been removed from your macOS device.6) Reinstall the NordVPN application.
* If the issue still persists and you are still unable to start Threat Protection Pro™, submit the issue by pressing report while making sure that send app logs are marked in the report form.",https://support.nordvpn.com/hc/en-us/related/click?data=BAh7CjobZGVzdGluYXRpb25fYXJ0aWNsZV9pZGwrCBGmhsf7GjoYcmVmZXJyZXJfYXJ0aWNsZV9pZGwrCJHGaSD8GjoLbG9jYWxlSSIKZW4tdXMGOgZFVDoIdXJsSSJbL2hjL2VuLXVzL2FydGljbGVzLzI5NjY4Njg2NjAzNzkzLUhvdy10by1yZXNvbHZlLVRocmVhdC1Qcm90ZWN0aW9uLVByby1pc3N1ZXMtb24tbWFjT1MGOwhUOglyYW5raQc%3D--4c1d04d6be0cd54ee5ab3bbf339e99594818c74f
Installing NordVPN application on macOS,"The first step towards online security is setting up NordVPN correctly. Follow these simple steps to install the NordVPN app and connect to a VPN server.
Note: NordVPN supports macOS 11 Big Sur, macOS 12 Monterey, macOS 13 Ventura, and macOS Sanoma 14 and above.
Attention: If you encounter issues during the installation of NordVPN on macOS Ventura, please refer to the following guide for a possible solution: macOS Ventura Error: The Installation Failed.
* Downloading and installing the NordVPN app
* Setting up the NordVPN application
* Connecting to servers
* [Connecting to a specific server](
* [Connecting to a specific country](
* NordVPN features
* [Map](
* [Threat Protection Pro™](
* [Meshnet](
* [Dark Web Monitor](
* [Presets](
* [Statistics](
* [Settings](
* [Quick Help](
* NordVPN settings
* [General](
* [Auto-connect](
* [Kill Switch](
* [DNS](
* [Appearance](
* [Refer a friend](
* [Other Apps](
* [Account](
## Downloading and installing the NordVPN app
1. Download [NordVPN for macOS](https://nordvpn.com/download/mac/):Alternatively, [click here to download the latest macOS version](https://downloads.nordcdn.com/apps/macos/generic/NordVPN-OpenVPN/latest/NordVPN.pkg).
2. Navigate to the folder where you downloaded the NordVPN.pkg file and double-click on it to begin the installation:Note: Ensure the download file is saved locally on your device (e.g., downloads folder, desktop) and not within Dropbox or other file management/synchronization tools or special folders.
3. A new Install window will pop up, guiding you through the installation process. Choose to continue:
4. Click on install:
5. You will be asked for permission to install the installer, which is required to establish secure VPN tunnels. Enter your Mac's password and choose to install the software:You can also confirm it with a fingerprint:
6. Give access to the installer to files in the Downloads folder by clicking ok in the new pop-up window:
7. A message will confirm that the app was successfully installed. Close the window:
## Setting up and using the NordVPN application
1. Open your launchpad and click on the NordVPN icon:
2. If you have a NordVPN account, click log In in the top-right corner of the screen and enter your email address and password. If you are a new user, click sign up at the top-right corner of the screen:
3. When logging in, you will be redirected to your Nord Account. Enter your registered email address and password. You can also sign in using your Google account or Apple ID or by entering a one-time login code:
4. If you are a new user, create a [Nord Account](https://my.nordaccount.com/) by entering your email address and other required information:
5. After completing the above steps, you will be prompted to open the NordVPN app. Agree to always allow Nord Account and grant access to the app:
6. After a successful login, you will be introduced to the main NordVPN application window:
## Connecting to servers
The Quick Connect button in the top-right corner will automatically connect you to a server recommended by our smart algorithm.
### Connecting to a specific server
To connect to a specific server, click on the Search field in the top-left corner of the app. Enter a country, a category, or a specific server number (e.g., Canada #1224) to find what you need.
### Connecting to a specific country
All servers in the left sidebar are sorted by country and specialty.To connect to a specialty server, hover over one of the categories under [Specialty Servers](https://support.nordvpn.com/hc/en-us/articles/19479130821521-Different-NordVPN-server-categories-explained), and click on the three-dot menu to select a country:
To connect to a specific country, simply click on it:
## NordVPN features
### Map
The map tab is the app’s home. Here, you can find and navigate NordVPN servers using the map, search bar, or specialty section.

### Threat Protection Pro™
Threat Protection Pro™ is a special NordVPN feature that automatically blocks ads, trackers, and malicious URLs. When you visit a website known for scamming people, this feature displays an in-browser alert to warn you about possible fraud. Threat Protection Pro™ also scans downloads for malware and checks your apps for security vulnerabilities. Available with selected NordVPN plans, this feature can work without an active VPN connection. [Learn more about Threat Protection Pro™](https://nordvpn.com/features/threat-protection/).
### 
If your NordVPN subscription doesn’t include Threat Protection Pro™, you can use the Threat Protection feature instead. It blocks intrusive ads and malicious domains based on DNS filtering and works whenever you’re connected to a VPN server. Threat Protection comes with all NordVPN plans.
### Meshnet
The [Meshnet](https://nordvpn.com/meshnet/) feature helps you to access devices over encrypted tunnels. [Learn more about Meshnet](https://meshnet.nordvpn.com/getting-started/meshnet-explained).

### Dark Web Monitor
[Dark Web Monitor](https://nordvpn.com/features/dark-web-monitor/) scans the internet for any credential leaks associated with your registered NordVPN e-mail address.

### Presets
Presets let you load a specified set of configurations, including server number, type, protocol, and more, at the click of a button! You’ll find many uses for this feature, like instantly loading a streaming service or a game with the necessary settings to experience a smooth session.
How to set up presets?
Start at the preferences page, as depicted above. You can either edit an existing preset or create a new one by pressing Add new.

In this example, we’ll add a new one by building it from scratch. After pressing Add new, you will see a menu with the settings you can use. First, give the preset a name. Next, select from available VPN protocols. If you change the default setting Use recommended, you’ll be able to alter the server type. Here you can set a specialty server or any regular one as your type:Depending on the server availability, you may also have the choice of selecting either a specific region:Finally, you can add either a web page or an app to the preset. It will be displayed under the preset name on the main screen:If you press Add link, a field will appear for the URL of the website you would like easy access to. After inserting the URL, press Enter to register it. When you set up the configuration, press Save preset, and it will be added to the main screen.
### Statistics
Statistics show you more information about your connection.

### Settings
The settings tab displays the app settings.

### Quick Help
Here you can find connection logs, be directed to our Help Center, and write an email to our customer support

## NordVPN settings
### General
The general tab has the following features:
* Auto launch when the computer starts — toggle to open the NordVPN app automatically every time you turn your device on.
* VPN Protocol — will let you choose from 3 different [connection protocols](https://support.nordvpn.com/hc/en-us/articles/19482810153745-Which-NordVPN-protocol-should-I-choose) (OpenVPN UDP, OpenVPN TCP, and NordLynx).
* Automatically check for updates — will check if you’re using the latest version of the NordVPN app.
* Help Us Improve — makes NordVPN better by sending us aggregated anonymous data.

### Auto-connect
The auto-connect tab features the following functions:
* When using an untrusted network— toggle to automatically connect to a network that is not added to a Trusted network list.
* Connect to — select a specific country from the list.
* The current network — shows the network you are currently connected to.
* Trusted network — you won't be automatically connected to a VPN while on a trusted Wi-Fi network.

### Kill Switch
[Kill Switch](https://nordvpn.com/features/vpn-kill-switch/) prevents unprotected access to the internet when your VPN connection accidentally drops.

### DNS
DNS ensures tighter security and privacy for your traffic. You can configure your device manually to use private NordVPN DNS servers.

### Appearance
Appearance settings let you add an application to your dock, menu bar, or both and choose between dark and light modes.

### Refer a friend
The Refer a Friend tab provides you with your personal referral link and instructions on how to refer NordVPN to your friends.

### Other Apps
The other Apps tab introduces other [Nord Security](https://nordsecurity.com/) products.

### Account
The account section shows your NordVPN profile and subscription information. Here, you’ll also find links to [NordVPN's Terms of Services](https://my.nordaccount.com/legal/terms-of-service/) and [Privacy Policy](https://my.nordaccount.com/legal/privacy-policy/).
",https://support.nordvpn.com/hc/en-us/related/click?data=BAh7CjobZGVzdGluYXRpb25fYXJ0aWNsZV9pZGwrCJHJugSyEToYcmVmZXJyZXJfYXJ0aWNsZV9pZGwrCJHGaSD8GjoLbG9jYWxlSSIKZW4tdXMGOgZFVDoIdXJsSSJOL2hjL2VuLXVzL2FydGljbGVzLzE5NDU2MjgxMjAxMDQxLUluc3RhbGxpbmctTm9yZFZQTi1hcHBsaWNhdGlvbi1vbi1tYWNPUwY7CFQ6CXJhbmtpCA%3D%3D--8f11224cbfc0448da797c26765c195bf5dd818dc
Installing NordVPN (App Store) version on macOS,"From October 17th, 2024, older applications will have a few function limitations. The issues can affect macOS applications version 8.27.2 and below. They can include not receiving notifications in the app and reduced Dark Web Monitoring and Meshnet functionality.To resolve the issue, please update your application to the latest version.
This article will help you set up the [NordVPN application on your Mac](https://nordvpn.com/download/mac/) and connect to a VPN server. Note: The NordVPN (App Store) app is compatible with macOS 11 and later versions.
## Table of contents:
* [Downloading and installing](
* [Setting up the application](
* [Connecting to servers](
* [NordVPN features menu](
* [NordVPN preference settings](
## Downloading and installing
1. Go to the [NordVPN app page in the App Store](https://apps.apple.com/us/app/nordvpn-vpn-fast-secure/id905953485#?platform=mac) or click download the App Store version of NordVPN on our downloads page:
2. Agree to Open App Store.
3. When the App Store launches, click on the blue Get button and choose to Install the app.
4. Once the download is finished, press the Open button.
## Setting up and using the application
1. Open your Launchpad and click on the NordVPN icon.
2. You can Log In or Sign Up in the top-right corner of the screen.
3. You will be redirected to your Nord Account. To log in, enter your registered email address and password. You can also sign in using your Google account or Apple ID or by entering a code. If you are a new user, you will need to create a [Nord Account](https://my.nordaccount.com/) by entering your email address and other required information.
4. After completing the above steps, you will be prompted to open the NordVPN app. Agree always to allow Nord Account and grant access to the app.
5. After a successful login, you will see the main NordVPN application window.Here, you can find NordVPN servers and navigate in the map itself, search bar, or specialty section.
## Connecting to servers
1. The Quick Connect button in the top-right corner will automatically connect you to a server.
2. To connect to a specific server, click on the Search field in the top-left corner of the app. Enter a country, a category, or a specific server number (e.g., Canada #1224) to find what you need.
3. All servers in the left sidebar are sorted by country and specialty.To connect to a specialty server, hover over one of the categories under [Specialty Servers](https://support.nordvpn.com/hc/en-us/articles/19479130821521-Different-NordVPN-server-categories-explained), and click on the three-dot menu to select a Country.
4. To connect to a specific country, click on it.
## NordVPN features menu
### Map

* Map - here, you can find and navigate NordVPN servers in the map itself, search bar, or specialty section
### Threat Protection Pro™/Threat Protection

* Threat Protection Pro™ is a special NordVPN feature that automatically blocks ads, trackers, and malicious URLs. When you visit a website known for scamming people, this feature displays an in-browser alert to warn you about possible fraud. Threat Protection Pro™ also scans downloads for malware and checks your apps for security vulnerabilities. Available with selected NordVPN plans, Threat Protection Pro™ can work without an active VPN connection. Learn more about[ Threat Protection Pro™](https://nordvpn.com/features/threat-protection/).If your NordVPN subscription doesn’t include Threat Protection Pro™, you can use the Threat Protection feature instead. It blocks intrusive ads and malicious domains based on DNS filtering and works whenever you’re connected to a VPN server. Threat Protection comes with all NordVPN plans.
### Meshnet

* The [Meshnet](https://nordvpn.com/meshnet/) feature helps you to access devices over encrypted tunnels. [Learn more about Meshnet](https://meshnet.nordvpn.com/getting-started/meshnet-explained).
### Dark Web Monitor

* [Dark Web Monitor](https://nordvpn.com/features/dark-web-monitor/) scans the internet for any credential leaks associated with your registered NordVPN e-mail address.
### Presets
Presets let you load up a specified set of configurations, including server number, type, protocol, and more. You can configure your settings to experience a smooth session, for e.g., so that a streaming service or a game loads up instantly!
#### How to set up presets?
Start at the preferences page. You can either edit an existing preset or create a new one by clicking Add new.Let's build it from scratch. After pressing Add new, you will see a menu with the settings you can use. Give the preset a name. Next, select from available VPN protocols. If you change the default setting Use recommended, you’ll be able to alter the server type. Here you can set a specialty server or any regular one as your type.Depending on the server availability, you may also have the choice of selecting a specific region.Finally, you can add either a web page or an app to the preset. It will be displayed under the preset name on the main screen. If you press Add link button, a field will appear for the URL of the website you would like easy access to. After inserting the URL, press Enter to register it. When you're done, press Save preset, and it will be added to the main screen.
### Statistics

* Statistics show you more information about your connection.
### Settings
To change application settings and find various features click on the gear icon at the bottom-left corner of the app:

* Settings tab displays the NordVPN app settings.
### Quick Help

* Here you can find your connection logs, a direct to our Help Center, or our customer support email.
## NordVPN settings
### General

* Launch the app on computer startup — toggle to open the NordVPN app automatically every time you turn your device on.
* VPN Protocol — this option will let you choose from 3 different [connection protocols](https://support.nordvpn.com/hc/en-us/articles/19482810153745-Which-NordVPN-protocol-should-I-choose) (OpenVPN UDP, OpenVPN TCP, and NordLynx).
* Help Us Improve — makes NordVPN better by sending us aggregated anonymous data.
### Auto-connect

* When using an untrusted network — toggle to automatically be connected to a VPN when you're connected to a network that is not added to a Trusted network list.
* Connect to — you can select a specific country from the list.
* The current network — shows the network you are currently connected to.
* Trusted network — you won't be automatically connected to a VPN while on a trusted Wi-Fi network.
### Kill Switch

* [Kill Switch](https://nordvpn.com/features/vpn-kill-switch/) prevents unprotected access to the internet when your VPN connection accidentally drops.
* Advanced Kill Switch is an additional layer of security that can be enabled to prevent WebRTC leaks. However, it functions separately from the system-wide Internet Kill Switch. Read [more information about Kill Switch](https://support.nordvpn.com/hc/en-us/articles/19509682644369-NordVPN-Kill-Switch-how-does-it-work).
* Stay invisible on a local network — this will let you [keep your device invisible on an unsafe local network](https://support.nordvpn.com/hc/en-us/articles/20225371443345-Staying-invisible-on-unsafe-local-networks-on-macOS).
### Appearance

* Appearance settings let you add an application to your dock and menu bar. Also, it lets you choose between dark and light modes.
### Other Apps

* Other Apps tab introduces other [Nord Security](https://nordsecurity.com/) products. As well as a scannable QR code that directly leads you to the NordVPN mobile app download.
### Account

* Account section shows your NordVPN profile and subscription information. Here you’ll also find links to [NordVPN Terms of Services](https://my.nordaccount.com/legal/terms-of-service/) and [Privacy Policy](https://my.nordaccount.com/legal/privacy-policy/).",https://support.nordvpn.com/hc/en-us/related/click?data=BAh7CjobZGVzdGluYXRpb25fYXJ0aWNsZV9pZGwrCJHa8kGjEjoYcmVmZXJyZXJfYXJ0aWNsZV9pZGwrCJHGaSD8GjoLbG9jYWxlSSIKZW4tdXMGOgZFVDoIdXJsSSJUL2hjL2VuLXVzL2FydGljbGVzLzIwNDkyMzk1NDAzOTIxLUluc3RhbGxpbmctTm9yZFZQTi1BcHAtU3RvcmUtdmVyc2lvbi1vbi1tYWNPUwY7CFQ6CXJhbmtpCQ%3D%3D--0649a91ed61dcfe0fbf733fdf25638cca70b4ecf
Installing NordVPN application on macOS,"The first step towards online security is setting up NordVPN correctly. Follow these simple steps to install the NordVPN app and connect to a VPN server.
Note: NordVPN supports macOS 11 Big Sur, macOS 12 Monterey, macOS 13 Ventura, and macOS Sanoma 14 and above.
Attention: If you encounter issues during the installation of NordVPN on macOS Ventura, please refer to the following guide for a possible solution: macOS Ventura Error: The Installation Failed.
* Downloading and installing the NordVPN app
* Setting up the NordVPN application
* Connecting to servers
* [Connecting to a specific server](
* [Connecting to a specific country](
* NordVPN features
* [Map](
* [Threat Protection Pro™](
* [Meshnet](
* [Dark Web Monitor](
* [Presets](
* [Statistics](
* [Settings](
* [Quick Help](
* NordVPN settings
* [General](
* [Auto-connect](
* [Kill Switch](
* [DNS](
* [Appearance](
* [Refer a friend](
* [Other Apps](
* [Account](
## Downloading and installing the NordVPN app
1. Download [NordVPN for macOS](https://nordvpn.com/download/mac/):Alternatively, [click here to download the latest macOS version](https://downloads.nordcdn.com/apps/macos/generic/NordVPN-OpenVPN/latest/NordVPN.pkg).
2. Navigate to the folder where you downloaded the NordVPN.pkg file and double-click on it to begin the installation:Note: Ensure the download file is saved locally on your device (e.g., downloads folder, desktop) and not within Dropbox or other file management/synchronization tools or special folders.
3. A new Install window will pop up, guiding you through the installation process. Choose to continue:
4. Click on install:
5. You will be asked for permission to install the installer, which is required to establish secure VPN tunnels. Enter your Mac's password and choose to install the software:You can also confirm it with a fingerprint:
6. Give access to the installer to files in the Downloads folder by clicking ok in the new pop-up window:
7. A message will confirm that the app was successfully installed. Close the window:
## Setting up and using the NordVPN application
1. Open your launchpad and click on the NordVPN icon:
2. If you have a NordVPN account, click log In in the top-right corner of the screen and enter your email address and password. If you are a new user, click sign up at the top-right corner of the screen:
3. When logging in, you will be redirected to your Nord Account. Enter your registered email address and password. You can also sign in using your Google account or Apple ID or by entering a one-time login code:
4. If you are a new user, create a [Nord Account](https://my.nordaccount.com/) by entering your email address and other required information:
5. After completing the above steps, you will be prompted to open the NordVPN app. Agree to always allow Nord Account and grant access to the app:
6. After a successful login, you will be introduced to the main NordVPN application window:
## Connecting to servers
The Quick Connect button in the top-right corner will automatically connect you to a server recommended by our smart algorithm.
### Connecting to a specific server
To connect to a specific server, click on the Search field in the top-left corner of the app. Enter a country, a category, or a specific server number (e.g., Canada #1224) to find what you need.
### Connecting to a specific country
All servers in the left sidebar are sorted by country and specialty.To connect to a specialty server, hover over one of the categories under [Specialty Servers](https://support.nordvpn.com/hc/en-us/articles/19479130821521-Different-NordVPN-server-categories-explained), and click on the three-dot menu to select a country:
To connect to a specific country, simply click on it:
## NordVPN features
### Map
The map tab is the app’s home. Here, you can find and navigate NordVPN servers using the map, search bar, or specialty section.

### Threat Protection Pro™
Threat Protection Pro™ is a special NordVPN feature that automatically blocks ads, trackers, and malicious URLs. When you visit a website known for scamming people, this feature displays an in-browser alert to warn you about possible fraud. Threat Protection Pro™ also scans downloads for malware and checks your apps for security vulnerabilities. Available with selected NordVPN plans, this feature can work without an active VPN connection. [Learn more about Threat Protection Pro™](https://nordvpn.com/features/threat-protection/).
### 
If your NordVPN subscription doesn’t include Threat Protection Pro™, you can use the Threat Protection feature instead. It blocks intrusive ads and malicious domains based on DNS filtering and works whenever you’re connected to a VPN server. Threat Protection comes with all NordVPN plans.
### Meshnet
The [Meshnet](https://nordvpn.com/meshnet/) feature helps you to access devices over encrypted tunnels. [Learn more about Meshnet](https://meshnet.nordvpn.com/getting-started/meshnet-explained).

### Dark Web Monitor
[Dark Web Monitor](https://nordvpn.com/features/dark-web-monitor/) scans the internet for any credential leaks associated with your registered NordVPN e-mail address.

### Presets
Presets let you load a specified set of configurations, including server number, type, protocol, and more, at the click of a button! You’ll find many uses for this feature, like instantly loading a streaming service or a game with the necessary settings to experience a smooth session.
How to set up presets?
Start at the preferences page, as depicted above. You can either edit an existing preset or create a new one by pressing Add new.

In this example, we’ll add a new one by building it from scratch. After pressing Add new, you will see a menu with the settings you can use. First, give the preset a name. Next, select from available VPN protocols. If you change the default setting Use recommended, you’ll be able to alter the server type. Here you can set a specialty server or any regular one as your type:Depending on the server availability, you may also have the choice of selecting either a specific region:Finally, you can add either a web page or an app to the preset. It will be displayed under the preset name on the main screen:If you press Add link, a field will appear for the URL of the website you would like easy access to. After inserting the URL, press Enter to register it. When you set up the configuration, press Save preset, and it will be added to the main screen.
### Statistics
Statistics show you more information about your connection.

### Settings
The settings tab displays the app settings.

### Quick Help
Here you can find connection logs, be directed to our Help Center, and write an email to our customer support

## NordVPN settings
### General
The general tab has the following features:
* Auto launch when the computer starts — toggle to open the NordVPN app automatically every time you turn your device on.
* VPN Protocol — will let you choose from 3 different [connection protocols](https://support.nordvpn.com/hc/en-us/articles/19482810153745-Which-NordVPN-protocol-should-I-choose) (OpenVPN UDP, OpenVPN TCP, and NordLynx).
* Automatically check for updates — will check if you’re using the latest version of the NordVPN app.
* Help Us Improve — makes NordVPN better by sending us aggregated anonymous data.

### Auto-connect
The auto-connect tab features the following functions:
* When using an untrusted network— toggle to automatically connect to a network that is not added to a Trusted network list.
* Connect to — select a specific country from the list.
* The current network — shows the network you are currently connected to.
* Trusted network — you won't be automatically connected to a VPN while on a trusted Wi-Fi network.

### Kill Switch
[Kill Switch](https://nordvpn.com/features/vpn-kill-switch/) prevents unprotected access to the internet when your VPN connection accidentally drops.

### DNS
DNS ensures tighter security and privacy for your traffic. You can configure your device manually to use private NordVPN DNS servers.

### Appearance
Appearance settings let you add an application to your dock, menu bar, or both and choose between dark and light modes.

### Refer a friend
The Refer a Friend tab provides you with your personal referral link and instructions on how to refer NordVPN to your friends.

### Other Apps
The other Apps tab introduces other [Nord Security](https://nordsecurity.com/) products.

### Account
The account section shows your NordVPN profile and subscription information. Here, you’ll also find links to [NordVPN's Terms of Services](https://my.nordaccount.com/legal/terms-of-service/) and [Privacy Policy](https://my.nordaccount.com/legal/privacy-policy/).
",https://support.nordvpn.com/hc/en-us/related/click?data=BAh7CjobZGVzdGluYXRpb25fYXJ0aWNsZV9pZGwrCJHJugSyEToYcmVmZXJyZXJfYXJ0aWNsZV9pZGwrCBGmhsf7GjoLbG9jYWxlSSIKZW4tdXMGOgZFVDoIdXJsSSJOL2hjL2VuLXVzL2FydGljbGVzLzE5NDU2MjgxMjAxMDQxLUluc3RhbGxpbmctTm9yZFZQTi1hcHBsaWNhdGlvbi1vbi1tYWNPUwY7CFQ6CXJhbmtpCA%3D%3D--33da1759fcd521ff1dd9ab2a9b6ea8dc4a2642c0
Improve connection speed on macOS with NordVPN app,"If you are experiencing a slow connection speed while connected to NordVPN on macOS, try the following:
1. Make sure to use the latest version of NordVPN app. You can uinstall the app as shown in [this guide](https://support.nordvpn.com/hc/en-us/articles/19481023452561-How-to-uninstall-NordVPN-software) and install the latest version from our website by clicking [here](https://nordvpn.com/download/mac/).
2. Restart your device.
3. If you are using Wi-Fi, switch to a wired connection.
4. Connect to a VPN server geographically closer to you.
5. If you are using a P2P-based program (typically, software for downloading), make sure you are connected to a P2P-optimized server.
6. If you are using the OpenVPN app downloaded from our website, open the app settings and switch from the default UDP protocol to TCP. If you are using the NordVPN IKE app downloaded from the App Store, switch to the [NordLynx](https://support.nordvpn.com/hc/en-us/articles/19564565879441-What-is-NordLynx) protocol.
7. Try a different application version (NordVPN IKE or OpenVPN). You can download it [here](https://nordvpn.com/download/mac/).
Internet speed can also be directly affected by the condition of both your hardware and firmware. Here’s what we recommend:
1. Close any applications that may be transferring data in the background, e.g. software for downloading or file sharing.
2. Old and sometimes even new routers provided to you by your internet service provider often use outdated firmware or are technically poorly manufactured. This can directly impact your internet speed, so we recommend investing in a better router.",https://support.nordvpn.com/hc/en-us/related/click?data=BAh7CjobZGVzdGluYXRpb25fYXJ0aWNsZV9pZGwrCJGrI%2FiMEjoYcmVmZXJyZXJfYXJ0aWNsZV9pZGwrCBGmhsf7GjoLbG9jYWxlSSIKZW4tdXMGOgZFVDoIdXJsSSJZL2hjL2VuLXVzL2FydGljbGVzLzIwMzk2NjY3ODA4NjU3LUltcHJvdmUtY29ubmVjdGlvbi1zcGVlZC1vbi1tYWNPUy13aXRoLU5vcmRWUE4tYXBwBjsIVDoJcmFua2kJ--1dcb014cb7dd6fbdc06c3c1ae835413cad174a72
Enabling Threat Protection Pro™ on older macOS versions,"Read the guide below to enable and start using [Threat Protection Pro™](https://nordvpn.com/features/threat-protection/) on older macOS versions such as Ventura, Sonoma, Big Sur, or Monterey. If you are using a newer macOS version, check out enabling Threat Protection on macOS instead.
Threat Protection Pro™ is an additional security feature available only with selected NordVPN plans. Learn more about [what NordVPN Threat Protection Pro™ is and how it works](https://support.nordvpn.com/hc/en-us/articles/19508765521425-What-is-Threat-Protection-Pro-and-Threat-Protection).
To be able to enable Threat Protection Pro™, you need to see a shield icon within the app. If you can't find Threat Protection Pro™, you are probably using the App Store version. In that case, [delete the application from your macOS device](https://support.apple.com/en-gb/guide/mac-help/mh35835/mac) and [download NordVPN’s macOS version](https://downloads.nordcdn.com/apps/macos/generic/NordVPN-OpenVPN/latest/NordVPN.pkg) from our website.
If the shield icon is present, follow one of the sections below:
* [Setting up Threat Protection Pro™ on macOS Ventura & Sonoma](
* [Setting up Threat Protection Pro™ on macOS Big Sur & Monterey](https://support.nordvpn.com/hc/en-us/related/click?data=BAh7CjobZGVzdGluYXRpb25fYXJ0aWNsZV9pZGwrCJHGaSD8GjoYcmVmZXJyZXJfYXJ0aWNsZV9pZGwrCBGmhsf7GjoLbG9jYWxlSSIKZW4tdXMGOgZFVDoIdXJsSSJdL2hjL2VuLXVzL2FydGljbGVzLzI5NjcwMTc3ODgzNzkzLUVuYWJsaW5nLVRocmVhdC1Qcm90ZWN0aW9uLVByby1vbi1vbGRlci1tYWNPUy12ZXJzaW9ucwY7CFQ6CXJhbmtpCg%3D%3D--04972df5d1ad6e5bab861dc523776597036dfe6d#01JBV0KTJWA4AH5M8XDVEKNTD6)
## Setting up Threat Protection Pro™ on macOS Ventura & Sonoma
When using a native NordVPN application, you can set up Threat Protection Pro™ on macOS Ventura & Sonoma in a few steps:
1. Open the NordVPN application and click on the shield icon in the left bar.
2. Click set up in the overview tab.
3. You’ll see a window. Click on set up Threat Protection Pro™.You'll then have to enter System settings > Privacy & security.
4. Once you are in System Settings, head to Privacy & Security and click Allow under System software from application “NordVPN” was blocked from loading:
5. Confirm this action by typing in your computer’s password or via Touch ID and clicking update settings.
6. Once you have successfully allowed NordVPN to load, go back to the NordVPN app and press continue.
7. Next up, enable browser protection by pressing Add proxy configurations. In the pop-up that appears, press Allow.If you have any web browsers running, you will be asked to reboot them in order to enable the Ad & tracker blocker and advanced browsing protection.
8. Once you've enabled the browsing protection, press continue.
9. Lastly, enable the anti-malware protection by going to System settings > Privacy & security > Full disk access and toggling the NordVPN Threat Protection Pro™ to the ON position.You've successfully set up NordVPN Threat Protection Pro™ on your macOS Ventura or Sonoma device.
## Setting up Threat Protection Pro™ on macOS Big Sur & Monterey
When using a native NordVPN application, you can set up Threat Protection Pro™ on macOS Big Sur & Monterey in a few steps:
1. Open the NordVPN application and click on the shield icon in the left bar.
2. Click set up in the overview tab.
3. You’ll see a window. Click on set up Threat Protection Pro™.You'll then have to enter System settings > Privacy & security and allow the NordVPN application to load:
4. Once you have successfully allowed NordVPN to load, go back to the NordVPN app and press Continue.
5. Next up, press Allow in the pop-up when enabling browser protection.If you have any web browsers running, you will be asked to reboot them in order to enable the Ad & tracker blocker and advanced browsing protection.
6. Once you've enabled the browsing protection, press Continue.
7. Lastly, enable the anti-malware protection by going to System preferences > Security & privacy > Privacy and giving NordVPN Threat Protection Pro™ full disk access. After you're done, make sure to click the lock icon at the bottom.You've successfully set up NordVPN Threat Protection Pro™ on your macOS Monterey or Big Sur device.
To turn on the cloud-based threat scanner for malware after you have finished the setup wizard, go to the NordVPN app > Threat Protection Pro™ > Settings and click the toggle next to Cloud-based threat detection.You’ve successfully enabled the cloud-based deep threat scanning for malware detection.",https://support.nordvpn.com/hc/en-us/related/click?data=BAh7CjobZGVzdGluYXRpb25fYXJ0aWNsZV9pZGwrCJHGaSD8GjoYcmVmZXJyZXJfYXJ0aWNsZV9pZGwrCBGmhsf7GjoLbG9jYWxlSSIKZW4tdXMGOgZFVDoIdXJsSSJdL2hjL2VuLXVzL2FydGljbGVzLzI5NjcwMTc3ODgzNzkzLUVuYWJsaW5nLVRocmVhdC1Qcm90ZWN0aW9uLVByby1vbi1vbGRlci1tYWNPUy12ZXJzaW9ucwY7CFQ6CXJhbmtpCg%3D%3D--04972df5d1ad6e5bab861dc523776597036dfe6d
What is NordLynx,"[NordLynx](https://nordvpn.com/blog/nordlynx-protocol-wireguard/) is NordVPN’s revolutionary technology built around the WireGuard® VPN protocol. It helps you connect to NordVPN servers faster and improves your VPN connection speeds without compromising security or privacy.
NordLynx is much faster than OpenVPN and other VPN protocols, making it a clear upgrade for everyday security. In fact, NordLynx’s [speed test results](https://nordvpn.com/blog/nordlynx-protocol-wireguard/) are among the highest of all commercial VPNs.
To use NordLynx with the NordVPN app for your device, follow the tutorial for your OS below.
* [Linux](https://support.nordvpn.com/hc/en-us/articles/20398711101329-How-can-I-use-NordLynx-in-the-NordVPN-app-for-Linux)
* [Windows](https://support.nordvpn.com/hc/en-us/articles/19919637268625-Using-NordLynx-in-the-NordVPN-app-Windows)
* [iOS](https://support.nordvpn.com/hc/en-us/articles/20459436694801-How-can-I-use-NordLynx-in-the-NordVPN-app-for-iOS)
* [macOS](https://support.nordvpn.com/hc/en-us/articles/19925285940497-How-can-I-use-NordLynx-in-the-NordVPN-app-for-macOS)
* [Android](https://support.nordvpn.com/hc/en-us/articles/20465306064145-Using-NordLynx-in-the-NordVPN-app-for-Android)
If you want to eliminate NordLynx from your VPN connection, simply change to a [different VPN protocol](https://support.nordvpn.com/hc/en-us/articles/19482810153745-Which-NordVPN-protocol-should-I-choose) in your NordVPN settings.
Please be aware that the WireGuard protocol is still under development. While we are confident in our implementation, WireGuard itself may still contain some unresolved bugs, so use it with caution.
WireGuard is a registered trademark of Jason A. Donenfeld.",https://support.nordvpn.com/hc/en-us/related/click?data=BAh7CjobZGVzdGluYXRpb25fYXJ0aWNsZV9pZGwrCJHa%2FzrLEToYcmVmZXJyZXJfYXJ0aWNsZV9pZGwrCJGrI%2FiMEjoLbG9jYWxlSSIKZW4tdXMGOgZFVDoIdXJsSSI3L2hjL2VuLXVzL2FydGljbGVzLzE5NTY0NTY1ODc5NDQxLVdoYXQtaXMtTm9yZEx5bngGOwhUOglyYW5raQY%3D--ca49fe44ded061fe69cd05dee0355824578a31ab
Installing NordVPN (App Store) version on macOS,"From October 17th, 2024, older applications will have a few function limitations. The issues can affect macOS applications version 8.27.2 and below. They can include not receiving notifications in the app and reduced Dark Web Monitoring and Meshnet functionality.To resolve the issue, please update your application to the latest version.
This article will help you set up the [NordVPN application on your Mac](https://nordvpn.com/download/mac/) and connect to a VPN server. Note: The NordVPN (App Store) app is compatible with macOS 11 and later versions.
## Table of contents:
* [Downloading and installing](
* [Setting up the application](
* [Connecting to servers](
* [NordVPN features menu](
* [NordVPN preference settings](
## Downloading and installing
1. Go to the [NordVPN app page in the App Store](https://apps.apple.com/us/app/nordvpn-vpn-fast-secure/id905953485#?platform=mac) or click download the App Store version of NordVPN on our downloads page:
2. Agree to Open App Store.
3. When the App Store launches, click on the blue Get button and choose to Install the app.
4. Once the download is finished, press the Open button.
## Setting up and using the application
1. Open your Launchpad and click on the NordVPN icon.
2. You can Log In or Sign Up in the top-right corner of the screen.
3. You will be redirected to your Nord Account. To log in, enter your registered email address and password. You can also sign in using your Google account or Apple ID or by entering a code. If you are a new user, you will need to create a [Nord Account](https://my.nordaccount.com/) by entering your email address and other required information.
4. After completing the above steps, you will be prompted to open the NordVPN app. Agree always to allow Nord Account and grant access to the app.
5. After a successful login, you will see the main NordVPN application window.Here, you can find NordVPN servers and navigate in the map itself, search bar, or specialty section.
## Connecting to servers
1. The Quick Connect button in the top-right corner will automatically connect you to a server.
2. To connect to a specific server, click on the Search field in the top-left corner of the app. Enter a country, a category, or a specific server number (e.g., Canada #1224) to find what you need.
3. All servers in the left sidebar are sorted by country and specialty.To connect to a specialty server, hover over one of the categories under [Specialty Servers](https://support.nordvpn.com/hc/en-us/articles/19479130821521-Different-NordVPN-server-categories-explained), and click on the three-dot menu to select a Country.
4. To connect to a specific country, click on it.
## NordVPN features menu
### Map

* Map - here, you can find and navigate NordVPN servers in the map itself, search bar, or specialty section
### Threat Protection Pro™/Threat Protection

* Threat Protection Pro™ is a special NordVPN feature that automatically blocks ads, trackers, and malicious URLs. When you visit a website known for scamming people, this feature displays an in-browser alert to warn you about possible fraud. Threat Protection Pro™ also scans downloads for malware and checks your apps for security vulnerabilities. Available with selected NordVPN plans, Threat Protection Pro™ can work without an active VPN connection. Learn more about[ Threat Protection Pro™](https://nordvpn.com/features/threat-protection/).If your NordVPN subscription doesn’t include Threat Protection Pro™, you can use the Threat Protection feature instead. It blocks intrusive ads and malicious domains based on DNS filtering and works whenever you’re connected to a VPN server. Threat Protection comes with all NordVPN plans.
### Meshnet

* The [Meshnet](https://nordvpn.com/meshnet/) feature helps you to access devices over encrypted tunnels. [Learn more about Meshnet](https://meshnet.nordvpn.com/getting-started/meshnet-explained).
### Dark Web Monitor

* [Dark Web Monitor](https://nordvpn.com/features/dark-web-monitor/) scans the internet for any credential leaks associated with your registered NordVPN e-mail address.
### Presets
Presets let you load up a specified set of configurations, including server number, type, protocol, and more. You can configure your settings to experience a smooth session, for e.g., so that a streaming service or a game loads up instantly!
#### How to set up presets?
Start at the preferences page. You can either edit an existing preset or create a new one by clicking Add new.Let's build it from scratch. After pressing Add new, you will see a menu with the settings you can use. Give the preset a name. Next, select from available VPN protocols. If you change the default setting Use recommended, you’ll be able to alter the server type. Here you can set a specialty server or any regular one as your type.Depending on the server availability, you may also have the choice of selecting a specific region.Finally, you can add either a web page or an app to the preset. It will be displayed under the preset name on the main screen. If you press Add link button, a field will appear for the URL of the website you would like easy access to. After inserting the URL, press Enter to register it. When you're done, press Save preset, and it will be added to the main screen.
### Statistics

* Statistics show you more information about your connection.
### Settings
To change application settings and find various features click on the gear icon at the bottom-left corner of the app:

* Settings tab displays the NordVPN app settings.
### Quick Help

* Here you can find your connection logs, a direct to our Help Center, or our customer support email.
## NordVPN settings
### General

* Launch the app on computer startup — toggle to open the NordVPN app automatically every time you turn your device on.
* VPN Protocol — this option will let you choose from 3 different [connection protocols](https://support.nordvpn.com/hc/en-us/articles/19482810153745-Which-NordVPN-protocol-should-I-choose) (OpenVPN UDP, OpenVPN TCP, and NordLynx).
* Help Us Improve — makes NordVPN better by sending us aggregated anonymous data.
### Auto-connect

* When using an untrusted network — toggle to automatically be connected to a VPN when you're connected to a network that is not added to a Trusted network list.
* Connect to — you can select a specific country from the list.
* The current network — shows the network you are currently connected to.
* Trusted network — you won't be automatically connected to a VPN while on a trusted Wi-Fi network.
### Kill Switch

* [Kill Switch](https://nordvpn.com/features/vpn-kill-switch/) prevents unprotected access to the internet when your VPN connection accidentally drops.
* Advanced Kill Switch is an additional layer of security that can be enabled to prevent WebRTC leaks. However, it functions separately from the system-wide Internet Kill Switch. Read [more information about Kill Switch](https://support.nordvpn.com/hc/en-us/articles/19509682644369-NordVPN-Kill-Switch-how-does-it-work).
* Stay invisible on a local network — this will let you [keep your device invisible on an unsafe local network](https://support.nordvpn.com/hc/en-us/articles/20225371443345-Staying-invisible-on-unsafe-local-networks-on-macOS).
### Appearance

* Appearance settings let you add an application to your dock and menu bar. Also, it lets you choose between dark and light modes.
### Other Apps

* Other Apps tab introduces other [Nord Security](https://nordsecurity.com/) products. As well as a scannable QR code that directly leads you to the NordVPN mobile app download.
### Account

* Account section shows your NordVPN profile and subscription information. Here you’ll also find links to [NordVPN Terms of Services](https://my.nordaccount.com/legal/terms-of-service/) and [Privacy Policy](https://my.nordaccount.com/legal/privacy-policy/).",https://support.nordvpn.com/hc/en-us/related/click?data=BAh7CjobZGVzdGluYXRpb25fYXJ0aWNsZV9pZGwrCJHa8kGjEjoYcmVmZXJyZXJfYXJ0aWNsZV9pZGwrCJGrI%2FiMEjoLbG9jYWxlSSIKZW4tdXMGOgZFVDoIdXJsSSJUL2hjL2VuLXVzL2FydGljbGVzLzIwNDkyMzk1NDAzOTIxLUluc3RhbGxpbmctTm9yZFZQTi1BcHAtU3RvcmUtdmVyc2lvbi1vbi1tYWNPUwY7CFQ6CXJhbmtpBw%3D%3D--0feee04ced95ad6112b708e7d90f5379fc6aa2c7
How to connect to NordVPN with IKEv2/IPSec on macOS,"Even though the [IKEv2/IPSec protocol is no longer supported on macOS](https://support.nordvpn.com/Connectivity/iOS/2023641872/IKEv2-IPSec-protocol-is-no-longer-supported-on-iOS-and-macOS.htm) on NordVPN 8.5.0 and newer app versions, this connection method can be used as one of the alternative ways to connect to NordVPN servers if you're unable to install the application.This setup lacks the additional features of the native NordVPN app and requires more steps to set up.For macOS versions Sierra (10.12), High Sierra (10.13), Mojave (10.14), Catalina (10.15), Big Sur (11), and Monterey (12), [please refer to the older macOS 10.12-12 section](https://support.nordvpn.com/hc/en-us/articles/19921536696977-How-to-connect-to-NordVPN-with-IKEv2-IPSec-on-macOS#macOS-10.12-12).If you're using macOS Ventura (13), follow the [macOS 13 section](https://support.nordvpn.com/hc/en-us/articles/19921536696977-How-to-connect-to-NordVPN-with-IKEv2-IPSec-on-macOS#macOS-13), and if you're using macOS Sonoma or later, check out the [macOS 14-15 section](https://support.nordvpn.com/hc/en-us/articles/19921536696977-How-to-connect-to-NordVPN-with-IKEv2-IPSec-on-macOS#macOS-14-15).
Choose your macOS version below:
* [macOS 14-15](https://support.nordvpn.com/hc/en-us/related/click?data=BAh7CjobZGVzdGluYXRpb25fYXJ0aWNsZV9pZGwrCJFCHlgeEjoYcmVmZXJyZXJfYXJ0aWNsZV9pZGwrCJGrI%2FiMEjoLbG9jYWxlSSIKZW4tdXMGOgZFVDoIdXJsSSJaL2hjL2VuLXVzL2FydGljbGVzLzE5OTIxNTM2Njk2OTc3LUhvdy10by1jb25uZWN0LXRvLU5vcmRWUE4td2l0aC1JS0V2Mi1JUFNlYy1vbi1tYWNPUwY7CFQ6CXJhbmtpCA%3D%3D--0c453141ab66b68923aae76182fcd84bea30b633#macOS-14-15)
* [macOS 13](https://support.nordvpn.com/hc/en-us/related/click?data=BAh7CjobZGVzdGluYXRpb25fYXJ0aWNsZV9pZGwrCJFCHlgeEjoYcmVmZXJyZXJfYXJ0aWNsZV9pZGwrCJGrI%2FiMEjoLbG9jYWxlSSIKZW4tdXMGOgZFVDoIdXJsSSJaL2hjL2VuLXVzL2FydGljbGVzLzE5OTIxNTM2Njk2OTc3LUhvdy10by1jb25uZWN0LXRvLU5vcmRWUE4td2l0aC1JS0V2Mi1JUFNlYy1vbi1tYWNPUwY7CFQ6CXJhbmtpCA%3D%3D--0c453141ab66b68923aae76182fcd84bea30b633#macOS-13)
* [macOS 10.12-12](https://support.nordvpn.com/hc/en-us/related/click?data=BAh7CjobZGVzdGluYXRpb25fYXJ0aWNsZV9pZGwrCJFCHlgeEjoYcmVmZXJyZXJfYXJ0aWNsZV9pZGwrCJGrI%2FiMEjoLbG9jYWxlSSIKZW4tdXMGOgZFVDoIdXJsSSJaL2hjL2VuLXVzL2FydGljbGVzLzE5OTIxNTM2Njk2OTc3LUhvdy10by1jb25uZWN0LXRvLU5vcmRWUE4td2l0aC1JS0V2Mi1JUFNlYy1vbi1tYWNPUwY7CFQ6CXJhbmtpCA%3D%3D--0c453141ab66b68923aae76182fcd84bea30b633#macOS-10.12-12)
## Manual IKEv2 connection setup for macOS Sonoma and later
The following steps will guide you on how to set up a manual IKEv2 connection on your macOS Sonoma or later device.
1. First, download the NordVPN IKEv2 certificate to your macOS. The easiest way is to click [this link](https://downloads.nordcdn.com/certificates/root.der) on your macOS device.Once downloaded, open the certificate file in the Downloads folder.
2. The Add Certificates window will appear. Click Add to add the certificate to the login keychain.
3. In the Keychain Access window, login keychains, right-click the NordVPN Root CA certificate, and select Get Info.If you're struggling to find the NordVPN Root CA certificate, use the search bar at the top right.
4. Select the Trust tab and set the IP Security (IPSec) and Extensible Authentication (EAP) fields to Always Trust. Leave all other fields as Never Trust. You will have to enter your Mac password or fingerprint to make these changes. Once done, close the keychain.
5. Click on the Apple logo in the upper-left corner of the screen and select System Preferences....
6. In the System Preferences, select VPN. Afterward, click Add VPN Configuration and select IKEv2...
7. The settings for the new VPN connection will now be displayed. In the Server Address and Remote ID fields, type the server hostname of a NordVPN server.For the Authentication fields, select Username and fill in your NordVPN service username and password.For the sake of this tutorial, we used the hostname of server us8374.nordvpn.com, but you should connect to a server suggested to you.
Follow the steps below to find the best server for your connection:
1. Log into your [Nord Account](https://my.nordaccount.com/), and click NordVPN.
2. Scroll down to Advanced Settings and click Set up NordVPN manually.
3. Select the Server recommendation tab. According to your location, the best server will be recommended.
4. By pressing Advanced filters you can further customize the recommended servers by selecting the Server type and the Security protocol.
5. Under the server IP, next to Available protocols, select IKEv2/IPSec.
6. In the window that pops up, copy the server hostname and use it in your IKEv2 manual connection setup.
7. When connecting to IKEv2 manually, you're going to need to use the Username and Password from the Service credential tab.
8. After these steps, a VPN tab will appear below Network in the System Settings. After you click on it, you will see a VPN connection present. In order to connect to a VPN server, toggle the switch to the on position. To disconnect, complete the reverse action.
You should now be connected.
## Manual IKEv2 connection setup for macOS Ventura
The steps below will guide you on how to set up a manual IKEv2 connection on your macOS Ventura device.
1. First, download the NordVPN IKEv2 certificate to your macOS. The easiest way is to click [this link](https://downloads.nordcdn.com/certificates/root.der) on your macOS device.Once downloaded, open the certificate file in the Downloads folder.
2. A Keychain Access window will open up. Locate the NordVPN Root CA within the login section. Right-click on it and select Get Info.
3. Under NordVPN Root CA, click on the Trust section and set the IP Security (IPSec) and Extensible Authentication (EAP) fields to Always Trust. Leave all other fields as Never Trust. You will have to enter your Mac password to make these changes. Once done, close the keychain.
4. Click on the Apple logo in the upper-right corner of the screen and select System Settings....
5. In the System Settings, click on Network.
6. When the network tab opens, click on the arrow down icon in the lower-right corner (you must have administrator privileges) and then click on Add VPN Configuration. After that, click on IKEv2.
7. The settings for the new VPN connection will now be displayed. In the Server Address and Remote ID fields, type the server hostname of a NordVPN server.For the sake of this tutorial, we used the hostname of server us8374.nordvpn.com, but you should connect to a server suggested to you.
Follow the steps below to find the best server for your connection:
1. Log into your [Nord Account](https://my.nordaccount.com/), and click NordVPN.
2. Scroll down to Advanced Settings and click Set up NordVPN manually.
3. Select the Server recommendation tab. According to your location, the best server will be recommended.
4. By pressing Advanced filters you can further customize the recommended servers by selecting the Server type and the Security protocol.
5. Under the server IP, next to Available protocols, select IKEv2/IPSec.
6. In the window that pops up, copy the server hostname and use it in your IKEv2 manual connection setup.
7. When connecting to IKEv2 manually, you're going to need to use the Username and Password from the Service credential tab.
1. Scroll down to Authentication and in the Type section select Username as the Authentication method. After that, type in your NordVPN service username and password. Click Create.
2. After these steps, a VPN tab will appear below Network in the System Settings. After you click on it, you will see a VPN connection present. In order to connect to a VPN server, click on a button next to it.
3. That’s it! You should now be connected. After clicking on VPN, you can connect to and disconnect from a VPN in the same VPN tab within the System Settings.
If you want to add different servers, you may also do it via the VPN tab. In order to do so, click on ""Add VPN Configuration"" and choose ""IKEv2"", afterward follow the same steps as before.
## Manual IKEv2 connection setup for older macOS versions
The steps below will guide you through setting up a manual IKEv2 connection on older macOS versions, such as Sierra (10.12), High Sierra (10.13), Mojave (10.14), Catalina (10.15), Big Sur (11), and Monterey (12). Although the steps may vary slightly throughout the different versions, the principle of the setup remains the same.
1. First, download the NordVPN IKEv2 certificate to your macOS. The easiest way is to click [this link](https://downloads.nordcdn.com/certificates/root.der) on your macOS device.Once downloaded, open the certificate file in the Downloads folder.
2. The Add Certificates window will appear. Click Add to add the certificate to the login keychain.
3. In the Keychain Access window, login keychains, right-click the NordVPN Root CA certificate, and select Get Info.
4. Set the IP Security (IPSec) and Extensible Authentication (EAP) fields to Always Trust. Leave all other fields as Never Trust. You will have to enter your Mac password to make these changes. Once done, close the keychain.
5. Click on the Apple logo in the upper-left corner of the screen and select System Preferences....
6. In the System Preferences, click on Network.
7. When the network window opens, click on the + icon in the lower-left corner (you must have administrator privileges).
8. A new window will pop up. Fill in the information as so:Interface: select VPN from the drop-down menu. VPN Type: select IKEv2.Service Name: type any name you want. We recommend that you name the service NordVPN (IKEv2).
9. After you have filled in the required fields, click Create:
10. The settings for the new VPN connection will now be displayed. In the Server Address and Remote ID fields, type the hostname of a NordVPN server.For this tutorial, we used the hostname of server NL#37, but you should connect to a server suggested to you.
Follow the steps below to find the best server for your connection:
1. Log into your [Nord Account](https://my.nordaccount.com/), and click NordVPN.
2. Scroll down to Advanced Settings and click Set up NordVPN manually.
3. Select the Server recommendation tab. According to your location, the best server will be recommended.
4. By pressing Advanced filters you can further customize the recommended servers by selecting the Server type and the Security protocol.
5. Under the server IP, next to Available protocols, select IKEv2/IPSec.
6. In the window that pops up, copy the server hostname and use it in your IKEv2 manual connection setup.
7. When connecting to IKEv2 manually, you're going to need to use the Username and Password from the Service credential tab.
1. Click on Authentication Settings…. Select Username as the Authentication method, then type in your NordVPN service username and password. Click OK and then Apply.
Follow the steps below to find the service credentials for manual connection setup:
1. Log into your [Nord Account](https://my.nordaccount.com/), click NordVPN, and, under Manual setup, click on Service credentials. Here you'll find the Username and Password needed to connect manually.
1. After you've set up authentication information, check the Show VPN status in menu bar box (optional), click Connect and then Apply.
You should now be connected.
If you have checked the Show VPN status in menu bar box, you’ll be able to connect to your VPN from the status bar:
",https://support.nordvpn.com/hc/en-us/related/click?data=BAh7CjobZGVzdGluYXRpb25fYXJ0aWNsZV9pZGwrCJFCHlgeEjoYcmVmZXJyZXJfYXJ0aWNsZV9pZGwrCJGrI%2FiMEjoLbG9jYWxlSSIKZW4tdXMGOgZFVDoIdXJsSSJaL2hjL2VuLXVzL2FydGljbGVzLzE5OTIxNTM2Njk2OTc3LUhvdy10by1jb25uZWN0LXRvLU5vcmRWUE4td2l0aC1JS0V2Mi1JUFNlYy1vbi1tYWNPUwY7CFQ6CXJhbmtpCA%3D%3D--0c453141ab66b68923aae76182fcd84bea30b633
How to start using NordVPN,"If you are interested in starting to use the NordVPN service but are unsure how to do so, this article will introduce you to the steps needed to begin using NordVPN today.
In this article we will cover:
* [Downloading NordVPN](
* [Installing NordVPN](
* [Purchasing a NordVPN plan](
* [Connecting to NordVPN](
* [Connecting to NordVPN on Linux](
* [Additional NordVPN features](
## Downloading NordVPN
To begin using NordVPN, you will first need to download the application for your respective device:
* Download the NordVPN application for Windows
* Download the NordVPN application for macOS
* Download the NordVPN application for Linux
* Download the NordVPN application for Android
* Download the NordVPN application for iOS
## Installing NordVPN
If you are not sure how to install and set up the application, choose the OS you're going to use and follow one of the guides below:
* Learn how to install NordVPN on Windows 7 and 8.1
* Learn how to install NordVPN on Windows 10 and 11
* Learn how to install NordVPN on macOS
* Learn how to install NordVPN on Linux
* Learn how to install NordVPN on Android
* Learn how to install NordVPN on iOS
Once the application has been set up, you need to purchase the desired plan.
## Purchasing a NordVPN plan
The following article will introduce you to [NordVPN Plans and Prices](https://support.nordvpn.com/hc/en-us/articles/19744251757841-Plans-and-prices-of-NordVPN-service). And if you're uncertain how to proceed with the purchase, read the article on [purchasing a NordVPN subscription](https://support.nordvpn.com/hc/en-us/articles/19478048190481-How-to-purchase-a-NordVPN-subscription).
Once you have an active subscription, you need to connect to NordVPN.
## Connecting to NordVPN
In order to connect to NordVPN, follow along below:
1. Use the quick connect button:Alternatively, you can use the dots on the map to connect to specific locations.
2. Click the dot in a country:Lastly, you may also use the search bar.
3. Type in the name of the country you would like to connect to:
### Connecting to NordVPN on Linux
To connect on a Linux device, you will need to type in the following commands :
```
nordvpn connect
```
```
nordvpn c
```
To connect to specific servers, use:
```
nordvpn connect
```
(eg. nordvpn connect uk715)
Follow our article on how to [connect to NordVPN using Linux Terminal](https://support.nordvpn.com/hc/en-us/articles/20164827795345-Connect-to-NordVPN-using-Linux-Terminal).
That's it! Now you can begin using the app and investigating the different features.
## Additional NordVPN features
Here you can find some articles covering NordVPN's features:
* [Different NordVPN server categories explained](https://support.nordvpn.com/hc/en-us/articles/19479130821521-Different-NordVPN-server-categories-explained)
* [NordVPN Kill Switch: how does it work](https://support.nordvpn.com/hc/en-us/articles/19509682644369-NordVPN-Kill-Switch-how-does-it-work)
* [What is Threat Protection Pro™ and Threat Protection?](https://support.nordvpn.com/hc/en-us/articles/19508765521425-What-is-Threat-Protection-Pro-and-Threat-Protection)
* [Dedicated NordVPN IP addresses](https://support.nordvpn.com/hc/en-us/articles/19507808024209-Dedicated-NordVPN-IP-addresses)",https://support.nordvpn.com/hc/en-us/related/click?data=BAh7CjobZGVzdGluYXRpb25fYXJ0aWNsZV9pZGwrCJFpIBV0EjoYcmVmZXJyZXJfYXJ0aWNsZV9pZGwrCJGrI%2FiMEjoLbG9jYWxlSSIKZW4tdXMGOgZFVDoIdXJsSSJBL2hjL2VuLXVzL2FydGljbGVzLzIwMjg5Nzc5OTUyMDE3LUhvdy10by1zdGFydC11c2luZy1Ob3JkVlBOBjsIVDoJcmFua2kJ--b565d5593a5815f15bcd02198c35750bcf917c0e
Improve connection speed on iOS with NordVPN app,"If you are experiencing slow internet speed while connected to [NordVPN on iOS](https://nordvpn.com/download/ios/), try one of the following:
1. Make sure to use the latest version of NordVPN app. You can uinstall the app as shown in [this guide](https://support.nordvpn.com/hc/en-us/articles/19481023452561-How-to-uninstall-NordVPN-software) and install the latest version from our website by clicking [here](https://nordvpn.com/download/ios/).
2. Restart your device.
3. Switch to the [NordLynx](https://support.nordvpn.com/hc/en-us/articles/19564565879441-What-is-NordLynx) protocol.
4. If you are using Wi-Fi, switch to a mobile connection and vice versa.
5. Switch to a VPN closer to you geographically.
6. Try a different connection method/protocol on your device. You can find tutorials on various connection methods here: ",https://support.nordvpn.com/hc/en-us/related/click?data=BAh7CjobZGVzdGluYXRpb25fYXJ0aWNsZV9pZGwrCJFMGOyMEjoYcmVmZXJyZXJfYXJ0aWNsZV9pZGwrCJGrI%2FiMEjoLbG9jYWxlSSIKZW4tdXMGOgZFVDoIdXJsSSJXL2hjL2VuLXVzL2FydGljbGVzLzIwMzk2NDY1NzM2ODQ5LUltcHJvdmUtY29ubmVjdGlvbi1zcGVlZC1vbi1pT1Mtd2l0aC1Ob3JkVlBOLWFwcAY7CFQ6CXJhbmtpCg%3D%3D--87c6221a873276b92c2be3e73211dcf0b0675652
NordVPN not connecting on Mac,"There are several reasons why you may be having trouble connecting to [NordVPN on your macOS](https://nordvpn.com/download/mac/) device. These include issues with your account status or app configuration. Here's how you can troubleshoot your connection on macOS:
1. First, check for any [issues with your account](https://support.nordvpn.com/hc/en-us/articles/19602526121489-Making-sure-your-account-is-active).
2. Second, try [switching to the TCP](https://support.nordvpn.com/hc/en-us/articles/19921436351505-Switching-protocol-to-OpenVPN-UDP-or-TCP-macOS) connection protocol. Here's how:
1. Click on the gear icon at the bottom left corner of the app.
2. Select the General tab. Under VPN Protocol, select the OpenVPN (TCP) protocol.
3. If that doesn't help, try [changing your DNS servers](https://support.nordvpn.com/hc/en-us/articles/19921173364113-How-to-change-your-DNS-servers-on-macOS) to Cloudflare DNS (1.1.1.1 and 1.0.0.1) (Note: these DNS servers are not provided by NordVPN, so they should be used at your discretion).
4. Additionally, try using [Obfuscated Servers](https://nordvpn.com/features/obfuscated-servers/). You can locate the Obfuscated Servers under the Specialty Servers section after switching to the TCP protocol.
5. In case of a Keychain pop-up, type in your system password to connect.If it does not disappear after clicking the ""Allow"" or if the ""Always allow"" button is not even clickable, please follow this guide to unlock the keychain.",https://support.nordvpn.com/hc/en-us/related/click?data=BAh7CjobZGVzdGluYXRpb25fYXJ0aWNsZV9pZGwrCJEsuykeEjoYcmVmZXJyZXJfYXJ0aWNsZV9pZGwrCBFlgFiBEjoLbG9jYWxlSSIKZW4tdXMGOgZFVDoIdXJsSSJEL2hjL2VuLXVzL2FydGljbGVzLzE5OTIwNzU4NDUxMzQ1LU5vcmRWUE4tbm90LWNvbm5lY3Rpbmctb24tTWFjBjsIVDoJcmFua2kH--b54c48f468d4ce42d369f8a5cce469635288a194
How to reach NordVPN customer support?,"While we don't offer phone support, we have different options to contact NordVPN customer support available 24/7 and ready to help you!
## Help Center
First off, if you run into any issues using NordVPN - check out our Help Center that is available in 14 languages: English, German, French, Danish, Italian, Spanish, Norwegian, Swedish, Dutch, Japanese, Korean, Polish, Portuguese-Brazilian, Traditional Chinese.
You can change the language by scrolling down until you see the language change option and clicking on the language you prefer. This will ensure that you can look for information in a language comfortable for you.
After you have set the language you want to look information in, you can find solutions in the help center by either:
* Searching for information using Help Center's search bar, which will list out articles according to the keywords typed in the search query:
* Navigating to one of the categories available in the Help Center:
* [FAQ](https://support.nordvpn.com/hc/en-us/categories/200593301-FAQ) - in this category you'll find Frequently asked questions and NordVPN app setup tutorials;
* [General info](https://support.nordvpn.com/hc/en-us/categories/360000293597-General-info) - here, you'll be able to find information on NordVPN functionalities, features, and SmartPlay;
* [Billing](https://support.nordvpn.com/hc/en-us/categories/360000293617-Billing) - this category covers payment, subscription, and account management topics;
* [Connectivity](https://support.nordvpn.com/hc/en-us/categories/200614302-Connectivity) - the last category available covers troubleshooting articles, here you can find help regarding NordVPN connectivity, internet speed with NordVPN on, manual setups for routers and different OSes, proxies.
## Support agents
However, if you're looking for assistance on your specific case, you can reach out to our developed conversation bots or human customer support agents by:
* Chat
* Email
We have two teams to assist you:
* Customer Care & Billing Team: They can tell you about NordVPN, help set up your devices, make sure you can access streaming sites, and answer questions about dedicated IPs. As well as helpyou with your NordVPN subscription, account, or payments.
* Connection Team: They can assist with setting up NordVPN on your router, fixing advanced connectivity problems, and helping in places with internet restrictions.",https://support.nordvpn.com/hc/en-us/related/click?data=BAh7CjobZGVzdGluYXRpb25fYXJ0aWNsZV9pZGwrCJGygBq4EToYcmVmZXJyZXJfYXJ0aWNsZV9pZGwrCBFlgFiBEjoLbG9jYWxlSSIKZW4tdXMGOgZFVDoIdXJsSSJML2hjL2VuLXVzL2FydGljbGVzLzE5NDgyNDE2Mjk2NTkzLUhvdy10by1yZWFjaC1Ob3JkVlBOLWN1c3RvbWVyLXN1cHBvcnQGOwhUOglyYW5raQg%3D--e6c953ac5020443aa159d73f3533c3aa4923666a
Installing NordVPN (App Store) version on macOS,"From October 17th, 2024, older applications will have a few function limitations. The issues can affect macOS applications version 8.27.2 and below. They can include not receiving notifications in the app and reduced Dark Web Monitoring and Meshnet functionality.To resolve the issue, please update your application to the latest version.
This article will help you set up the [NordVPN application on your Mac](https://nordvpn.com/download/mac/) and connect to a VPN server. Note: The NordVPN (App Store) app is compatible with macOS 11 and later versions.
## Table of contents:
* [Downloading and installing](
* [Setting up the application](
* [Connecting to servers](
* [NordVPN features menu](
* [NordVPN preference settings](
## Downloading and installing
1. Go to the [NordVPN app page in the App Store](https://apps.apple.com/us/app/nordvpn-vpn-fast-secure/id905953485#?platform=mac) or click download the App Store version of NordVPN on our downloads page:
2. Agree to Open App Store.
3. When the App Store launches, click on the blue Get button and choose to Install the app.
4. Once the download is finished, press the Open button.
## Setting up and using the application
1. Open your Launchpad and click on the NordVPN icon.
2. You can Log In or Sign Up in the top-right corner of the screen.
3. You will be redirected to your Nord Account. To log in, enter your registered email address and password. You can also sign in using your Google account or Apple ID or by entering a code. If you are a new user, you will need to create a [Nord Account](https://my.nordaccount.com/) by entering your email address and other required information.
4. After completing the above steps, you will be prompted to open the NordVPN app. Agree always to allow Nord Account and grant access to the app.
5. After a successful login, you will see the main NordVPN application window.Here, you can find NordVPN servers and navigate in the map itself, search bar, or specialty section.
## Connecting to servers
1. The Quick Connect button in the top-right corner will automatically connect you to a server.
2. To connect to a specific server, click on the Search field in the top-left corner of the app. Enter a country, a category, or a specific server number (e.g., Canada #1224) to find what you need.
3. All servers in the left sidebar are sorted by country and specialty.To connect to a specialty server, hover over one of the categories under [Specialty Servers](https://support.nordvpn.com/hc/en-us/articles/19479130821521-Different-NordVPN-server-categories-explained), and click on the three-dot menu to select a Country.
4. To connect to a specific country, click on it.
## NordVPN features menu
### Map

* Map - here, you can find and navigate NordVPN servers in the map itself, search bar, or specialty section
### Threat Protection Pro™/Threat Protection

* Threat Protection Pro™ is a special NordVPN feature that automatically blocks ads, trackers, and malicious URLs. When you visit a website known for scamming people, this feature displays an in-browser alert to warn you about possible fraud. Threat Protection Pro™ also scans downloads for malware and checks your apps for security vulnerabilities. Available with selected NordVPN plans, Threat Protection Pro™ can work without an active VPN connection. Learn more about[ Threat Protection Pro™](https://nordvpn.com/features/threat-protection/).If your NordVPN subscription doesn’t include Threat Protection Pro™, you can use the Threat Protection feature instead. It blocks intrusive ads and malicious domains based on DNS filtering and works whenever you’re connected to a VPN server. Threat Protection comes with all NordVPN plans.
### Meshnet

* The [Meshnet](https://nordvpn.com/meshnet/) feature helps you to access devices over encrypted tunnels. [Learn more about Meshnet](https://meshnet.nordvpn.com/getting-started/meshnet-explained).
### Dark Web Monitor

* [Dark Web Monitor](https://nordvpn.com/features/dark-web-monitor/) scans the internet for any credential leaks associated with your registered NordVPN e-mail address.
### Presets
Presets let you load up a specified set of configurations, including server number, type, protocol, and more. You can configure your settings to experience a smooth session, for e.g., so that a streaming service or a game loads up instantly!
#### How to set up presets?
Start at the preferences page. You can either edit an existing preset or create a new one by clicking Add new.Let's build it from scratch. After pressing Add new, you will see a menu with the settings you can use. Give the preset a name. Next, select from available VPN protocols. If you change the default setting Use recommended, you’ll be able to alter the server type. Here you can set a specialty server or any regular one as your type.Depending on the server availability, you may also have the choice of selecting a specific region.Finally, you can add either a web page or an app to the preset. It will be displayed under the preset name on the main screen. If you press Add link button, a field will appear for the URL of the website you would like easy access to. After inserting the URL, press Enter to register it. When you're done, press Save preset, and it will be added to the main screen.
### Statistics

* Statistics show you more information about your connection.
### Settings
To change application settings and find various features click on the gear icon at the bottom-left corner of the app:

* Settings tab displays the NordVPN app settings.
### Quick Help

* Here you can find your connection logs, a direct to our Help Center, or our customer support email.
## NordVPN settings
### General

* Launch the app on computer startup — toggle to open the NordVPN app automatically every time you turn your device on.
* VPN Protocol — this option will let you choose from 3 different [connection protocols](https://support.nordvpn.com/hc/en-us/articles/19482810153745-Which-NordVPN-protocol-should-I-choose) (OpenVPN UDP, OpenVPN TCP, and NordLynx).
* Help Us Improve — makes NordVPN better by sending us aggregated anonymous data.
### Auto-connect

* When using an untrusted network — toggle to automatically be connected to a VPN when you're connected to a network that is not added to a Trusted network list.
* Connect to — you can select a specific country from the list.
* The current network — shows the network you are currently connected to.
* Trusted network — you won't be automatically connected to a VPN while on a trusted Wi-Fi network.
### Kill Switch

* [Kill Switch](https://nordvpn.com/features/vpn-kill-switch/) prevents unprotected access to the internet when your VPN connection accidentally drops.
* Advanced Kill Switch is an additional layer of security that can be enabled to prevent WebRTC leaks. However, it functions separately from the system-wide Internet Kill Switch. Read [more information about Kill Switch](https://support.nordvpn.com/hc/en-us/articles/19509682644369-NordVPN-Kill-Switch-how-does-it-work).
* Stay invisible on a local network — this will let you [keep your device invisible on an unsafe local network](https://support.nordvpn.com/hc/en-us/articles/20225371443345-Staying-invisible-on-unsafe-local-networks-on-macOS).
### Appearance

* Appearance settings let you add an application to your dock and menu bar. Also, it lets you choose between dark and light modes.
### Other Apps

* Other Apps tab introduces other [Nord Security](https://nordsecurity.com/) products. As well as a scannable QR code that directly leads you to the NordVPN mobile app download.
### Account

* Account section shows your NordVPN profile and subscription information. Here you’ll also find links to [NordVPN Terms of Services](https://my.nordaccount.com/legal/terms-of-service/) and [Privacy Policy](https://my.nordaccount.com/legal/privacy-policy/).",https://support.nordvpn.com/hc/en-us/related/click?data=BAh7CjobZGVzdGluYXRpb25fYXJ0aWNsZV9pZGwrCJHa8kGjEjoYcmVmZXJyZXJfYXJ0aWNsZV9pZGwrCBFlgFiBEjoLbG9jYWxlSSIKZW4tdXMGOgZFVDoIdXJsSSJUL2hjL2VuLXVzL2FydGljbGVzLzIwNDkyMzk1NDAzOTIxLUluc3RhbGxpbmctTm9yZFZQTi1BcHAtU3RvcmUtdmVyc2lvbi1vbi1tYWNPUwY7CFQ6CXJhbmtpCQ%3D%3D--9ff4d51e2a757b13acc5cd11504124f69c767d90
How to start using NordVPN,"If you are interested in starting to use the NordVPN service but are unsure how to do so, this article will introduce you to the steps needed to begin using NordVPN today.
In this article we will cover:
* [Downloading NordVPN](
* [Installing NordVPN](
* [Purchasing a NordVPN plan](
* [Connecting to NordVPN](
* [Connecting to NordVPN on Linux](
* [Additional NordVPN features](
## Downloading NordVPN
To begin using NordVPN, you will first need to download the application for your respective device:
* Download the NordVPN application for Windows
* Download the NordVPN application for macOS
* Download the NordVPN application for Linux
* Download the NordVPN application for Android
* Download the NordVPN application for iOS
## Installing NordVPN
If you are not sure how to install and set up the application, choose the OS you're going to use and follow one of the guides below:
* Learn how to install NordVPN on Windows 7 and 8.1
* Learn how to install NordVPN on Windows 10 and 11
* Learn how to install NordVPN on macOS
* Learn how to install NordVPN on Linux
* Learn how to install NordVPN on Android
* Learn how to install NordVPN on iOS
Once the application has been set up, you need to purchase the desired plan.
## Purchasing a NordVPN plan
The following article will introduce you to [NordVPN Plans and Prices](https://support.nordvpn.com/hc/en-us/articles/19744251757841-Plans-and-prices-of-NordVPN-service). And if you're uncertain how to proceed with the purchase, read the article on [purchasing a NordVPN subscription](https://support.nordvpn.com/hc/en-us/articles/19478048190481-How-to-purchase-a-NordVPN-subscription).
Once you have an active subscription, you need to connect to NordVPN.
## Connecting to NordVPN
In order to connect to NordVPN, follow along below:
1. Use the quick connect button:Alternatively, you can use the dots on the map to connect to specific locations.
2. Click the dot in a country:Lastly, you may also use the search bar.
3. Type in the name of the country you would like to connect to:
### Connecting to NordVPN on Linux
To connect on a Linux device, you will need to type in the following commands :
```
nordvpn connect
```
```
nordvpn c
```
To connect to specific servers, use:
```
nordvpn connect
```
(eg. nordvpn connect uk715)
Follow our article on how to [connect to NordVPN using Linux Terminal](https://support.nordvpn.com/hc/en-us/articles/20164827795345-Connect-to-NordVPN-using-Linux-Terminal).
That's it! Now you can begin using the app and investigating the different features.
## Additional NordVPN features
Here you can find some articles covering NordVPN's features:
* [Different NordVPN server categories explained](https://support.nordvpn.com/hc/en-us/articles/19479130821521-Different-NordVPN-server-categories-explained)
* [NordVPN Kill Switch: how does it work](https://support.nordvpn.com/hc/en-us/articles/19509682644369-NordVPN-Kill-Switch-how-does-it-work)
* [What is Threat Protection Pro™ and Threat Protection?](https://support.nordvpn.com/hc/en-us/articles/19508765521425-What-is-Threat-Protection-Pro-and-Threat-Protection)
* [Dedicated NordVPN IP addresses](https://support.nordvpn.com/hc/en-us/articles/19507808024209-Dedicated-NordVPN-IP-addresses)",https://support.nordvpn.com/hc/en-us/related/click?data=BAh7CjobZGVzdGluYXRpb25fYXJ0aWNsZV9pZGwrCJFpIBV0EjoYcmVmZXJyZXJfYXJ0aWNsZV9pZGwrCBFlgFiBEjoLbG9jYWxlSSIKZW4tdXMGOgZFVDoIdXJsSSJBL2hjL2VuLXVzL2FydGljbGVzLzIwMjg5Nzc5OTUyMDE3LUhvdy10by1zdGFydC11c2luZy1Ob3JkVlBOBjsIVDoJcmFua2kK--56743f67caa1ca74736daa7af7bf910b97abfb79
How to change your DNS servers on macOS,"You can manually configure [DNS servers](https://nordvpn.com/blog/what-is-dns-server/) in your macOS settings. We have a separate guide for [configuring DNS servers on devices using the latest macOS Ventura version](https://support.nordvpn.com/hc/en-us/articles/20285887299857-Change-your-DNS-servers-on-macOS-Ventura).
## Manual DNS server configuration
1. Go to “System preferences” and click on “Network.”
2. Select the network interface you are using and click “Advanced.”
3. Open the “DNS” tab and click the “+” button at the bottom, then add the NordVPN DNS server addresses:103.86.96.100103.86.99.100
Congratulations! You have changed your macOS device’s DNS servers to those of NordVPN.",https://support.nordvpn.com/hc/en-us/related/click?data=BAh7CjobZGVzdGluYXRpb25fYXJ0aWNsZV9pZGwrCJE9dkIeEjoYcmVmZXJyZXJfYXJ0aWNsZV9pZGwrCBFBGy1zEjoLbG9jYWxlSSIKZW4tdXMGOgZFVDoIdXJsSSJOL2hjL2VuLXVzL2FydGljbGVzLzE5OTIxMTczMzY0MTEzLUhvdy10by1jaGFuZ2UteW91ci1ETlMtc2VydmVycy1vbi1tYWNPUwY7CFQ6CXJhbmtpBg%3D%3D--6d8c17a1dbc1c7de344738477755555e300de077
What to do if Amazon is not working with NordVPN,"If you can’t access Amazon with NordVPN, follow the steps below.
1. Connect to a different VPN server.
2. [Change the VPN protocol to OpenVPN UDP or TCP](https://support.nordvpn.com/hc/en-us/articles/20465552867345).
3. Do a [NordVPN DNS leak test](https://nordvpn.com/dns-leak-test/) while connected to our servers. If the results bring back your IP address, configure your device manually to use private NordVPN DNS servers.
4. [Clear your browser cache.](https://nordvpn.com/blog/how-to-clear-your-cache/)
5. Use a different browser or open Amazon in private browser mode.
6. Disable the [Threat Protection](https://support.nordvpn.com/hc/en-us/articles/19508765521425) feature. If you’re using Threat Protection Pro™, exclude Amazon from the blocked domains list. To do that, go to the Web protection tab in the Threat Protection Pro™ settings and choose to exclude Amazon from threat blocking.
7. Allowlist NordVPN in the settings of your antivirus if you are using one.",https://support.nordvpn.com/hc/en-us/related/click?data=BAh7CjobZGVzdGluYXRpb25fYXJ0aWNsZV9pZGwrCBHAmA8SEzoYcmVmZXJyZXJfYXJ0aWNsZV9pZGwrCBFBGy1zEjoLbG9jYWxlSSIKZW4tdXMGOgZFVDoIdXJsSSJXL2hjL2VuLXVzL2FydGljbGVzLzIwOTY4MjkyMDA3OTUzLVdoYXQtdG8tZG8taWYtQW1hem9uLWlzLW5vdC13b3JraW5nLXdpdGgtTm9yZFZQTgY7CFQ6CXJhbmtpBw%3D%3D--ddc388be9f16f42d596d257863b0fa751c21bd1b
How to connect to NordVPN with IKEv2/IPSec on macOS,"Even though the [IKEv2/IPSec protocol is no longer supported on macOS](https://support.nordvpn.com/Connectivity/iOS/2023641872/IKEv2-IPSec-protocol-is-no-longer-supported-on-iOS-and-macOS.htm) on NordVPN 8.5.0 and newer app versions, this connection method can be used as one of the alternative ways to connect to NordVPN servers if you're unable to install the application.This setup lacks the additional features of the native NordVPN app and requires more steps to set up.For macOS versions Sierra (10.12), High Sierra (10.13), Mojave (10.14), Catalina (10.15), Big Sur (11), and Monterey (12), [please refer to the older macOS 10.12-12 section](https://support.nordvpn.com/hc/en-us/articles/19921536696977-How-to-connect-to-NordVPN-with-IKEv2-IPSec-on-macOS#macOS-10.12-12).If you're using macOS Ventura (13), follow the [macOS 13 section](https://support.nordvpn.com/hc/en-us/articles/19921536696977-How-to-connect-to-NordVPN-with-IKEv2-IPSec-on-macOS#macOS-13), and if you're using macOS Sonoma or later, check out the [macOS 14-15 section](https://support.nordvpn.com/hc/en-us/articles/19921536696977-How-to-connect-to-NordVPN-with-IKEv2-IPSec-on-macOS#macOS-14-15).
Choose your macOS version below:
* [macOS 14-15](https://support.nordvpn.com/hc/en-us/related/click?data=BAh7CjobZGVzdGluYXRpb25fYXJ0aWNsZV9pZGwrCJFCHlgeEjoYcmVmZXJyZXJfYXJ0aWNsZV9pZGwrCBFBGy1zEjoLbG9jYWxlSSIKZW4tdXMGOgZFVDoIdXJsSSJaL2hjL2VuLXVzL2FydGljbGVzLzE5OTIxNTM2Njk2OTc3LUhvdy10by1jb25uZWN0LXRvLU5vcmRWUE4td2l0aC1JS0V2Mi1JUFNlYy1vbi1tYWNPUwY7CFQ6CXJhbmtpCA%3D%3D--eb688bc5be3d3868c8f90315110e5e0186e03e81#macOS-14-15)
* [macOS 13](https://support.nordvpn.com/hc/en-us/related/click?data=BAh7CjobZGVzdGluYXRpb25fYXJ0aWNsZV9pZGwrCJFCHlgeEjoYcmVmZXJyZXJfYXJ0aWNsZV9pZGwrCBFBGy1zEjoLbG9jYWxlSSIKZW4tdXMGOgZFVDoIdXJsSSJaL2hjL2VuLXVzL2FydGljbGVzLzE5OTIxNTM2Njk2OTc3LUhvdy10by1jb25uZWN0LXRvLU5vcmRWUE4td2l0aC1JS0V2Mi1JUFNlYy1vbi1tYWNPUwY7CFQ6CXJhbmtpCA%3D%3D--eb688bc5be3d3868c8f90315110e5e0186e03e81#macOS-13)
* [macOS 10.12-12](https://support.nordvpn.com/hc/en-us/related/click?data=BAh7CjobZGVzdGluYXRpb25fYXJ0aWNsZV9pZGwrCJFCHlgeEjoYcmVmZXJyZXJfYXJ0aWNsZV9pZGwrCBFBGy1zEjoLbG9jYWxlSSIKZW4tdXMGOgZFVDoIdXJsSSJaL2hjL2VuLXVzL2FydGljbGVzLzE5OTIxNTM2Njk2OTc3LUhvdy10by1jb25uZWN0LXRvLU5vcmRWUE4td2l0aC1JS0V2Mi1JUFNlYy1vbi1tYWNPUwY7CFQ6CXJhbmtpCA%3D%3D--eb688bc5be3d3868c8f90315110e5e0186e03e81#macOS-10.12-12)
## Manual IKEv2 connection setup for macOS Sonoma and later
The following steps will guide you on how to set up a manual IKEv2 connection on your macOS Sonoma or later device.
1. First, download the NordVPN IKEv2 certificate to your macOS. The easiest way is to click [this link](https://downloads.nordcdn.com/certificates/root.der) on your macOS device.Once downloaded, open the certificate file in the Downloads folder.
2. The Add Certificates window will appear. Click Add to add the certificate to the login keychain.
3. In the Keychain Access window, login keychains, right-click the NordVPN Root CA certificate, and select Get Info.If you're struggling to find the NordVPN Root CA certificate, use the search bar at the top right.
4. Select the Trust tab and set the IP Security (IPSec) and Extensible Authentication (EAP) fields to Always Trust. Leave all other fields as Never Trust. You will have to enter your Mac password or fingerprint to make these changes. Once done, close the keychain.
5. Click on the Apple logo in the upper-left corner of the screen and select System Preferences....
6. In the System Preferences, select VPN. Afterward, click Add VPN Configuration and select IKEv2...
7. The settings for the new VPN connection will now be displayed. In the Server Address and Remote ID fields, type the server hostname of a NordVPN server.For the Authentication fields, select Username and fill in your NordVPN service username and password.For the sake of this tutorial, we used the hostname of server us8374.nordvpn.com, but you should connect to a server suggested to you.
Follow the steps below to find the best server for your connection:
1. Log into your [Nord Account](https://my.nordaccount.com/), and click NordVPN.
2. Scroll down to Advanced Settings and click Set up NordVPN manually.
3. Select the Server recommendation tab. According to your location, the best server will be recommended.
4. By pressing Advanced filters you can further customize the recommended servers by selecting the Server type and the Security protocol.
5. Under the server IP, next to Available protocols, select IKEv2/IPSec.
6. In the window that pops up, copy the server hostname and use it in your IKEv2 manual connection setup.
7. When connecting to IKEv2 manually, you're going to need to use the Username and Password from the Service credential tab.
8. After these steps, a VPN tab will appear below Network in the System Settings. After you click on it, you will see a VPN connection present. In order to connect to a VPN server, toggle the switch to the on position. To disconnect, complete the reverse action.
You should now be connected.
## Manual IKEv2 connection setup for macOS Ventura
The steps below will guide you on how to set up a manual IKEv2 connection on your macOS Ventura device.
1. First, download the NordVPN IKEv2 certificate to your macOS. The easiest way is to click [this link](https://downloads.nordcdn.com/certificates/root.der) on your macOS device.Once downloaded, open the certificate file in the Downloads folder.
2. A Keychain Access window will open up. Locate the NordVPN Root CA within the login section. Right-click on it and select Get Info.
3. Under NordVPN Root CA, click on the Trust section and set the IP Security (IPSec) and Extensible Authentication (EAP) fields to Always Trust. Leave all other fields as Never Trust. You will have to enter your Mac password to make these changes. Once done, close the keychain.
4. Click on the Apple logo in the upper-right corner of the screen and select System Settings....
5. In the System Settings, click on Network.
6. When the network tab opens, click on the arrow down icon in the lower-right corner (you must have administrator privileges) and then click on Add VPN Configuration. After that, click on IKEv2.
7. The settings for the new VPN connection will now be displayed. In the Server Address and Remote ID fields, type the server hostname of a NordVPN server.For the sake of this tutorial, we used the hostname of server us8374.nordvpn.com, but you should connect to a server suggested to you.
Follow the steps below to find the best server for your connection:
1. Log into your [Nord Account](https://my.nordaccount.com/), and click NordVPN.
2. Scroll down to Advanced Settings and click Set up NordVPN manually.
3. Select the Server recommendation tab. According to your location, the best server will be recommended.
4. By pressing Advanced filters you can further customize the recommended servers by selecting the Server type and the Security protocol.
5. Under the server IP, next to Available protocols, select IKEv2/IPSec.
6. In the window that pops up, copy the server hostname and use it in your IKEv2 manual connection setup.
7. When connecting to IKEv2 manually, you're going to need to use the Username and Password from the Service credential tab.
1. Scroll down to Authentication and in the Type section select Username as the Authentication method. After that, type in your NordVPN service username and password. Click Create.
2. After these steps, a VPN tab will appear below Network in the System Settings. After you click on it, you will see a VPN connection present. In order to connect to a VPN server, click on a button next to it.
3. That’s it! You should now be connected. After clicking on VPN, you can connect to and disconnect from a VPN in the same VPN tab within the System Settings.
If you want to add different servers, you may also do it via the VPN tab. In order to do so, click on ""Add VPN Configuration"" and choose ""IKEv2"", afterward follow the same steps as before.
## Manual IKEv2 connection setup for older macOS versions
The steps below will guide you through setting up a manual IKEv2 connection on older macOS versions, such as Sierra (10.12), High Sierra (10.13), Mojave (10.14), Catalina (10.15), Big Sur (11), and Monterey (12). Although the steps may vary slightly throughout the different versions, the principle of the setup remains the same.
1. First, download the NordVPN IKEv2 certificate to your macOS. The easiest way is to click [this link](https://downloads.nordcdn.com/certificates/root.der) on your macOS device.Once downloaded, open the certificate file in the Downloads folder.
2. The Add Certificates window will appear. Click Add to add the certificate to the login keychain.
3. In the Keychain Access window, login keychains, right-click the NordVPN Root CA certificate, and select Get Info.
4. Set the IP Security (IPSec) and Extensible Authentication (EAP) fields to Always Trust. Leave all other fields as Never Trust. You will have to enter your Mac password to make these changes. Once done, close the keychain.
5. Click on the Apple logo in the upper-left corner of the screen and select System Preferences....
6. In the System Preferences, click on Network.
7. When the network window opens, click on the + icon in the lower-left corner (you must have administrator privileges).
8. A new window will pop up. Fill in the information as so:Interface: select VPN from the drop-down menu. VPN Type: select IKEv2.Service Name: type any name you want. We recommend that you name the service NordVPN (IKEv2).
9. After you have filled in the required fields, click Create:
10. The settings for the new VPN connection will now be displayed. In the Server Address and Remote ID fields, type the hostname of a NordVPN server.For this tutorial, we used the hostname of server NL#37, but you should connect to a server suggested to you.
Follow the steps below to find the best server for your connection:
1. Log into your [Nord Account](https://my.nordaccount.com/), and click NordVPN.
2. Scroll down to Advanced Settings and click Set up NordVPN manually.
3. Select the Server recommendation tab. According to your location, the best server will be recommended.
4. By pressing Advanced filters you can further customize the recommended servers by selecting the Server type and the Security protocol.
5. Under the server IP, next to Available protocols, select IKEv2/IPSec.
6. In the window that pops up, copy the server hostname and use it in your IKEv2 manual connection setup.
7. When connecting to IKEv2 manually, you're going to need to use the Username and Password from the Service credential tab.
1. Click on Authentication Settings…. Select Username as the Authentication method, then type in your NordVPN service username and password. Click OK and then Apply.
Follow the steps below to find the service credentials for manual connection setup:
1. Log into your [Nord Account](https://my.nordaccount.com/), click NordVPN, and, under Manual setup, click on Service credentials. Here you'll find the Username and Password needed to connect manually.
1. After you've set up authentication information, check the Show VPN status in menu bar box (optional), click Connect and then Apply.
You should now be connected.
If you have checked the Show VPN status in menu bar box, you’ll be able to connect to your VPN from the status bar:
",https://support.nordvpn.com/hc/en-us/related/click?data=BAh7CjobZGVzdGluYXRpb25fYXJ0aWNsZV9pZGwrCJFCHlgeEjoYcmVmZXJyZXJfYXJ0aWNsZV9pZGwrCBFBGy1zEjoLbG9jYWxlSSIKZW4tdXMGOgZFVDoIdXJsSSJaL2hjL2VuLXVzL2FydGljbGVzLzE5OTIxNTM2Njk2OTc3LUhvdy10by1jb25uZWN0LXRvLU5vcmRWUE4td2l0aC1JS0V2Mi1JUFNlYy1vbi1tYWNPUwY7CFQ6CXJhbmtpCA%3D%3D--eb688bc5be3d3868c8f90315110e5e0186e03e81
Improve connection speed on macOS with NordVPN app,"If you are experiencing a slow connection speed while connected to NordVPN on macOS, try the following:
1. Make sure to use the latest version of NordVPN app. You can uinstall the app as shown in [this guide](https://support.nordvpn.com/hc/en-us/articles/19481023452561-How-to-uninstall-NordVPN-software) and install the latest version from our website by clicking [here](https://nordvpn.com/download/mac/).
2. Restart your device.
3. If you are using Wi-Fi, switch to a wired connection.
4. Connect to a VPN server geographically closer to you.
5. If you are using a P2P-based program (typically, software for downloading), make sure you are connected to a P2P-optimized server.
6. If you are using the OpenVPN app downloaded from our website, open the app settings and switch from the default UDP protocol to TCP. If you are using the NordVPN IKE app downloaded from the App Store, switch to the [NordLynx](https://support.nordvpn.com/hc/en-us/articles/19564565879441-What-is-NordLynx) protocol.
7. Try a different application version (NordVPN IKE or OpenVPN). You can download it [here](https://nordvpn.com/download/mac/).
Internet speed can also be directly affected by the condition of both your hardware and firmware. Here’s what we recommend:
1. Close any applications that may be transferring data in the background, e.g. software for downloading or file sharing.
2. Old and sometimes even new routers provided to you by your internet service provider often use outdated firmware or are technically poorly manufactured. This can directly impact your internet speed, so we recommend investing in a better router.",https://support.nordvpn.com/hc/en-us/related/click?data=BAh7CjobZGVzdGluYXRpb25fYXJ0aWNsZV9pZGwrCJGrI%2FiMEjoYcmVmZXJyZXJfYXJ0aWNsZV9pZGwrCBFBGy1zEjoLbG9jYWxlSSIKZW4tdXMGOgZFVDoIdXJsSSJZL2hjL2VuLXVzL2FydGljbGVzLzIwMzk2NjY3ODA4NjU3LUltcHJvdmUtY29ubmVjdGlvbi1zcGVlZC1vbi1tYWNPUy13aXRoLU5vcmRWUE4tYXBwBjsIVDoJcmFua2kJ--03d4e794926de2797884eba0f28da5d3be5fa2e0
DD-WRT setup with NordVPN,"DD-WRT is custom firmware for routers which support the OpenVPN protocol and is available on a wide variety of routers. You can check if your router supports DD-WRT firmware [here](https://wiki.dd-wrt.com/wiki/index.php/Supported_Devices) and learn how to install DD-WRT firmware on a router [here](https://wiki.dd-wrt.com/wiki/index.php/Installation).This tutorial will show you how to set up a DD-WRT VPN using an OpenVPN connection on your DD-WRT router using the DD-WRT OpenVPN client UI.
Alternative setup method:
* [Setup via FlashRouters Privacy App](https://support.nordvpn.com/hc/en-us/articles/20462541897617-DD-WRT-setup-with-FlashRouters-Privacy-app)
1. In the DD-WRT Administrative Interface, navigate to Setup > Basic Setup. Under Network Address Server Settings (DHCP), set these NordVPN DNS addresses:Static DNS 1: 103.86.96.100Static DNS 2: 103.86.99.100Static DNS 3: 0.0.0.0 (default)Use DNSMasq for DHCP: CheckedUse DNSMasq for DNS: CheckedDHCP-Authoritative: CheckedThen, Save and Apply settings.If you're setting up two routers, you should change the second router’s local IP address to a different one from the main router's. (In this case, the main router's IP is 192.168.1.1, while the one you’re connecting to a NordVPN server is accessible via 192.168.2.1)2. Navigate to Setup > IPV6. Set IPv6 to Disable, click Save, and then Apply Settings.(this is a recommended step to make sure your IP doesn’t leak)

3. Navigate to Service > VPN. Under OpenVPN Client, set Start OpenVPN Client to Enable in order to see the options necessary for this configuration. Then set the following:Server IP/Name: For the sake of this tutorial, we used us936.nordvpn.com, but you should connect to a server suggested to you in the server recommendation tab in your NordAccount dashboard.
Follow the steps below to find the best server for your connection:
1. Log into your [Nord Account](https://my.nordaccount.com/), and click NordVPN.
2. Scroll down to Advanced Settings and click Set up NordVPN manually.
3. Select the Server recommendation tab. According to your location, the best server will be recommended.
4. By pressing Advanced filters you can further customize the recommended servers by selecting the Server type and the Security protocol.
In case you wish to select a specific server, follow these steps:
1. Under Set up NordVPN manually, select OpenVPN configuration files.
2. Find the server you wish to connect to by using the Search bar or by scrolling down and download it by clicking Download UDP or Download TCP.
3. When connecting to OpenVPN & IKEv2 manually, you're going to need to use the Username and Password from the Service credential tab.
Port: 1194 (or 443 for the TCP protocol)Tunnel Device: TUNTunnel Protocol: UDP (or TCP)Encryption Cipher: AES-256-CBCHash Algorithm: SHA-512User Pass Authentication: EnableUsername, Password: Your NordVPN service credentialsFirst Data Cipher: Not setSecond Data Cipher: Not setThird Data Cipher: Not set
Note: If the Username and Password fields are missing, fill in the remaining fields and proceed to step 3.1
You can find your NordVPN service credentials (service username and service password) in the [Nord Account dashboard](https://my.nordaccount.com/dashboard/nordvpn/):
Follow the steps below to find the service credentials for manual connection setup:
1. Log into your [Nord Account](https://my.nordaccount.com/), click NordVPN, and, under Manual setup, click on Service credentials. Here you'll find the Username and Password needed to connect manually.

Advanced Options: Enable (this will enable additional options)
TLS Cipher: NoneLZO Compression: NoNAT: Enable
The options not mentioned in this guide should be left with default values.3.1. (Optional, depending on step 3.) If the Username and Password fields are missing, go to Administration > Commands and enter this code:
echo ""YOURUSERNAMEYOURPASSWORD"" > /tmp/openvpncl/user.conf/usr/bin/killall openvpn/usr/sbin/openvpn --config /tmp/openvpncl/openvpn.conf --route-up /tmp/openvpncl/route-up.sh --down-pre /tmp/openvpncl/route-down.sh --daemon
Replace YOURUSERNAME and YOURPASSWORD with your respective NordVPN service credentials. Click Save Startup and return to the previous VPN tab.4. In the Additional Config box either enter or copy/paste these commands:
remote-cert-tls serverremote-randomnobindtun-mtu 1500tun-mtu-extra 32mssfix 1450persist-keypersist-tunping-timer-remreneg-sec 0#log /tmp/vpn.log#Delete `#` in the line below if your router does not have credentials fields and you followed the 3.1 step#auth-user-pass /tmp/openvpncl/user.conf
5. Open the OpenVPN configuration file you downloaded in Step 3 in any text editor of your preference (preferably WordPad or Notepad++, as regular notepad does not have the correct formatting).
6. When you open the .ovpn file of the server you chose (in our case, us936_nordvpn_com.udp.ovpn) in a text editor, you should see the part of the file (do NOT copy the and tags):
7. Copy its contents into the CA Cert field. Make sure the entire text gets pasted, including the-----BEGIN CERTIFICATE----- and -----END CERTIFICATE----- lines.8. Now go back to the configuration file and scroll down to the part. Copy the contents of the TLS Key:9. Paste the contents into the TLS Auth Key field. Make sure the entire text gets pasted in, including the-----BEGIN OpenVPN Static key V1----- and -----END OpenVPN Static key V1----- lines.10. After entering the data, click Save, and then Apply Settings.

11. To verify that the VPN is working, navigate to Status > OpenVPNUnder State, you should see the message ""Client: CONNECTED SUCCESS"".Optional Kill Switch setup (for advanced users):To create a kill switch, go to Administration > Commands and enter this script:
WAN_IF=`nvram get wan_iface`iptables -I FORWARD -i br0 -o $WAN_IF -j REJECT --reject-with icmp-host-prohibitediptables -I FORWARD -i br0 -p tcp -o $WAN_IF -j REJECT --reject-with tcp-resetiptables -I FORWARD -i br0 -p udp -o $WAN_IF -j REJECT --reject-with udp-reset
Select Save Firewall, go to Administration > Management > Reboot router.
For other options check out our list of routers compatible with NordVPN.",https://support.nordvpn.com/hc/en-us/related/click?data=BAh7CjobZGVzdGluYXRpb25fYXJ0aWNsZV9pZGwrCBFxQ3h4EjoYcmVmZXJyZXJfYXJ0aWNsZV9pZGwrCBFBGy1zEjoLbG9jYWxlSSIKZW4tdXMGOgZFVDoIdXJsSSJAL2hjL2VuLXVzL2FydGljbGVzLzIwMzA4NjIzMDYxMjY1LURELVdSVC1zZXR1cC13aXRoLU5vcmRWUE4GOwhUOglyYW5raQo%3D--417ec30ecf375cb417c2a43f8f34cc7911de4918
What is Threat Protection Pro™ and Threat Protection?,"Threat Protection Pro™ is a feature that automatically blocks ads, trackers, and malicious URLs. When you visit a website known for scamming people, this feature displays an in-browser alert to warn you about possible fraud. Threat Protection Pro™ also scans downloads for malware and checks your apps for security vulnerabilities. You don't need an active VPN connection for Threat Protection Pro™ to work. Click here to learn more.
Threat Protection Pro™ is available on:
* Windows (You may also choose Threat Protection)
* macOS (You may also choose Threat Protection on the App Store NordVPN version)
Threat Protection is a feature that blocks ads, trackers, and unsafe domains based on DNS filtering. It only works when you're connected to one of the NordVPN's servers.
Threat Protection is available on:
* Android
* iOS
* Linux
* macOS
* Windows
* NordVPN Chrome Extension
* NordVPN Firefox Extension
* NordVPN Edge Extension
### What is the difference between Threat Protection Pro™ and Threat Protection?
The main differences between the two features are:
* Threat Protection Pro™ works without being connected to the VPN, but you must be connected to one of the NordVPN servers to use the Threat Protection feature.
* Windows and macOS devices support both Threat Protection Pro™ and Threat Protection features. Meanwhile, Android, iOS, and Linux devices and Chrome, Firefox, and Edge extensions support only Threat Protection.
* Threat Protection Pro™ deletes any malware-ridden file during download and blocks trackers, while Threat Protection doesn't.",https://support.nordvpn.com/hc/en-us/related/click?data=BAh7CjobZGVzdGluYXRpb25fYXJ0aWNsZV9pZGwrCBH2CT2%2BEToYcmVmZXJyZXJfYXJ0aWNsZV9pZGwrCBHNaCtlEjoLbG9jYWxlSSIKZW4tdXMGOgZFVDoIdXJsSSJaL2hjL2VuLXVzL2FydGljbGVzLzE5NTA4NzY1NTIxNDI1LVdoYXQtaXMtVGhyZWF0LVByb3RlY3Rpb24tUHJvLWFuZC1UaHJlYXQtUHJvdGVjdGlvbgY7CFQ6CXJhbmtpBg%3D%3D--163ea40f8b680e300920dcec81e04871c7f43aed
How do I stop NordVPN from blocking sites?,"If the issue persists, try these steps:",https://support.nordvpn.com/hc/en-us/related/click?data=BAh7CjobZGVzdGluYXRpb25fYXJ0aWNsZV9pZGwrCBG51uNGEjoYcmVmZXJyZXJfYXJ0aWNsZV9pZGwrCBHNaCtlEjoLbG9jYWxlSSIKZW4tdXMGOgZFVDoIdXJsSSJcL2hjL2VuLXVzL2FydGljbGVzLzIwMDk1Njc5NTEwODAxLUktY2FuLXQtcmVhY2gtc29tZS13ZWJzaXRlcy13aGVuLWNvbm5lY3RlZC10by1Ob3JkVlBOBjsIVDoJcmFua2kH--85c270736364d35add770f1e65fec764c608ebc6
I can’t reach some websites when connected to NordVPN,"If you cannot access some websites or suspect that NordVPN is blocking them, follow these instructions:
* [Clear the cache of your browser](https://nordvpn.com/blog/how-to-clear-your-cache/) while connected to the VPN.
* [Use the incognito mode](https://nordvpn.com/blog/how-to-go-incognito/), safe mode, or private mode in your web browser:
* [How to enable Chrome safe mode](https://nordvpn.com/blog/chrome-safe-mode/)
* [How to enable private mode on Safari](https://nordvpn.com/blog/turn-off-private-browsing-on-safari/)
* Try a different browser, such as Chrome, Edge, or Brave.
After each step, check if you can access the website in question.
## How do I stop NordVPN from blocking sites?
If the issue persists, try these steps:
* Switch between VPN servers. Simply disconnect from the server you're currently connected to and click/tap on a different location using the NordVPN map.
* If you trust the website you’re trying to access, you can disable the Threat Protection feature or exclude that particular domain from the Threat Protection Pro™ blocked domains list. To do that, go to the Web protection tab in the Threat Protection Pro™ settings and choose to exclude the blocked domain from threat blocking. Try to visit that web page once again. If you still can’t access the site, please reach out to our customer support.
* If you’re using a Windows device, your antivirus/firewall may be blocking the access. Try adding exceptions for NordVPN.exe and nordvpn-service.exe.
* Try other connection methods, such as the [>OpenVPN<](https://support.nordvpn.com/hc/en-us/articles/19683394518161-OpenVPN-connection-on-NordVPN) or [>IKEv2<](https://support.nordvpn.com/hc/en-us/articles/19685604677905-What-is-IKEv2) protocols.
* [Connect to obfuscated servers](https://support.nordvpn.com/hc/en-us/articles/19615332252561) (via the OpenVPN connection).
* If you have recently installed our app, try restarting your device and checking our [>VPN troubleshooting tutorial<](https://support.nordvpn.com/hc/en-us/articles/20164096978449-Unable-to-connect-to-NordVPN-servers).",https://support.nordvpn.com/hc/en-us/related/click?data=BAh7CjobZGVzdGluYXRpb25fYXJ0aWNsZV9pZGwrCBG51uNGEjoYcmVmZXJyZXJfYXJ0aWNsZV9pZGwrCBHNaCtlEjoLbG9jYWxlSSIKZW4tdXMGOgZFVDoIdXJsSSJcL2hjL2VuLXVzL2FydGljbGVzLzIwMDk1Njc5NTEwODAxLUktY2FuLXQtcmVhY2gtc29tZS13ZWJzaXRlcy13aGVuLWNvbm5lY3RlZC10by1Ob3JkVlBOBjsIVDoJcmFua2kH--85c270736364d35add770f1e65fec764c608ebc6
Installing NordVPN (App Store) version on macOS,"From October 17th, 2024, older applications will have a few function limitations. The issues can affect macOS applications version 8.27.2 and below. They can include not receiving notifications in the app and reduced Dark Web Monitoring and Meshnet functionality.To resolve the issue, please update your application to the latest version.
This article will help you set up the [NordVPN application on your Mac](https://nordvpn.com/download/mac/) and connect to a VPN server. Note: The NordVPN (App Store) app is compatible with macOS 11 and later versions.
## Table of contents:
* [Downloading and installing](
* [Setting up the application](
* [Connecting to servers](
* [NordVPN features menu](
* [NordVPN preference settings](
## Downloading and installing
1. Go to the [NordVPN app page in the App Store](https://apps.apple.com/us/app/nordvpn-vpn-fast-secure/id905953485#?platform=mac) or click download the App Store version of NordVPN on our downloads page:
2. Agree to Open App Store.
3. When the App Store launches, click on the blue Get button and choose to Install the app.
4. Once the download is finished, press the Open button.
## Setting up and using the application
1. Open your Launchpad and click on the NordVPN icon.
2. You can Log In or Sign Up in the top-right corner of the screen.
3. You will be redirected to your Nord Account. To log in, enter your registered email address and password. You can also sign in using your Google account or Apple ID or by entering a code. If you are a new user, you will need to create a [Nord Account](https://my.nordaccount.com/) by entering your email address and other required information.
4. After completing the above steps, you will be prompted to open the NordVPN app. Agree always to allow Nord Account and grant access to the app.
5. After a successful login, you will see the main NordVPN application window.Here, you can find NordVPN servers and navigate in the map itself, search bar, or specialty section.
## Connecting to servers
1. The Quick Connect button in the top-right corner will automatically connect you to a server.
2. To connect to a specific server, click on the Search field in the top-left corner of the app. Enter a country, a category, or a specific server number (e.g., Canada #1224) to find what you need.
3. All servers in the left sidebar are sorted by country and specialty.To connect to a specialty server, hover over one of the categories under [Specialty Servers](https://support.nordvpn.com/hc/en-us/articles/19479130821521-Different-NordVPN-server-categories-explained), and click on the three-dot menu to select a Country.
4. To connect to a specific country, click on it.
## NordVPN features menu
### Map

* Map - here, you can find and navigate NordVPN servers in the map itself, search bar, or specialty section
### Threat Protection Pro™/Threat Protection

* Threat Protection Pro™ is a special NordVPN feature that automatically blocks ads, trackers, and malicious URLs. When you visit a website known for scamming people, this feature displays an in-browser alert to warn you about possible fraud. Threat Protection Pro™ also scans downloads for malware and checks your apps for security vulnerabilities. Available with selected NordVPN plans, Threat Protection Pro™ can work without an active VPN connection. Learn more about[ Threat Protection Pro™](https://nordvpn.com/features/threat-protection/).If your NordVPN subscription doesn’t include Threat Protection Pro™, you can use the Threat Protection feature instead. It blocks intrusive ads and malicious domains based on DNS filtering and works whenever you’re connected to a VPN server. Threat Protection comes with all NordVPN plans.
### Meshnet

* The [Meshnet](https://nordvpn.com/meshnet/) feature helps you to access devices over encrypted tunnels. [Learn more about Meshnet](https://meshnet.nordvpn.com/getting-started/meshnet-explained).
### Dark Web Monitor

* [Dark Web Monitor](https://nordvpn.com/features/dark-web-monitor/) scans the internet for any credential leaks associated with your registered NordVPN e-mail address.
### Presets
Presets let you load up a specified set of configurations, including server number, type, protocol, and more. You can configure your settings to experience a smooth session, for e.g., so that a streaming service or a game loads up instantly!
#### How to set up presets?
Start at the preferences page. You can either edit an existing preset or create a new one by clicking Add new.Let's build it from scratch. After pressing Add new, you will see a menu with the settings you can use. Give the preset a name. Next, select from available VPN protocols. If you change the default setting Use recommended, you’ll be able to alter the server type. Here you can set a specialty server or any regular one as your type.Depending on the server availability, you may also have the choice of selecting a specific region.Finally, you can add either a web page or an app to the preset. It will be displayed under the preset name on the main screen. If you press Add link button, a field will appear for the URL of the website you would like easy access to. After inserting the URL, press Enter to register it. When you're done, press Save preset, and it will be added to the main screen.
### Statistics

* Statistics show you more information about your connection.
### Settings
To change application settings and find various features click on the gear icon at the bottom-left corner of the app:

* Settings tab displays the NordVPN app settings.
### Quick Help

* Here you can find your connection logs, a direct to our Help Center, or our customer support email.
## NordVPN settings
### General

* Launch the app on computer startup — toggle to open the NordVPN app automatically every time you turn your device on.
* VPN Protocol — this option will let you choose from 3 different [connection protocols](https://support.nordvpn.com/hc/en-us/articles/19482810153745-Which-NordVPN-protocol-should-I-choose) (OpenVPN UDP, OpenVPN TCP, and NordLynx).
* Help Us Improve — makes NordVPN better by sending us aggregated anonymous data.
### Auto-connect

* When using an untrusted network — toggle to automatically be connected to a VPN when you're connected to a network that is not added to a Trusted network list.
* Connect to — you can select a specific country from the list.
* The current network — shows the network you are currently connected to.
* Trusted network — you won't be automatically connected to a VPN while on a trusted Wi-Fi network.
### Kill Switch

* [Kill Switch](https://nordvpn.com/features/vpn-kill-switch/) prevents unprotected access to the internet when your VPN connection accidentally drops.
* Advanced Kill Switch is an additional layer of security that can be enabled to prevent WebRTC leaks. However, it functions separately from the system-wide Internet Kill Switch. Read [more information about Kill Switch](https://support.nordvpn.com/hc/en-us/articles/19509682644369-NordVPN-Kill-Switch-how-does-it-work).
* Stay invisible on a local network — this will let you [keep your device invisible on an unsafe local network](https://support.nordvpn.com/hc/en-us/articles/20225371443345-Staying-invisible-on-unsafe-local-networks-on-macOS).
### Appearance

* Appearance settings let you add an application to your dock and menu bar. Also, it lets you choose between dark and light modes.
### Other Apps

* Other Apps tab introduces other [Nord Security](https://nordsecurity.com/) products. As well as a scannable QR code that directly leads you to the NordVPN mobile app download.
### Account

* Account section shows your NordVPN profile and subscription information. Here you’ll also find links to [NordVPN Terms of Services](https://my.nordaccount.com/legal/terms-of-service/) and [Privacy Policy](https://my.nordaccount.com/legal/privacy-policy/).",https://support.nordvpn.com/hc/en-us/related/click?data=BAh7CjobZGVzdGluYXRpb25fYXJ0aWNsZV9pZGwrCJHa8kGjEjoYcmVmZXJyZXJfYXJ0aWNsZV9pZGwrCBHNaCtlEjoLbG9jYWxlSSIKZW4tdXMGOgZFVDoIdXJsSSJUL2hjL2VuLXVzL2FydGljbGVzLzIwNDkyMzk1NDAzOTIxLUluc3RhbGxpbmctTm9yZFZQTi1BcHAtU3RvcmUtdmVyc2lvbi1vbi1tYWNPUwY7CFQ6CXJhbmtpCA%3D%3D--a6765239ebb5f797a1d57e299e68cea307c66259
How to cancel auto-renewal for your subscription,"If your subscription was purchased via the Google Play Store, Apple App Store, or Amazon App Store and you wish to cancel it, follow the respective articles below:
* Cancelling your [Google Play Store NordVPN subscription](https://support.google.com/googleplay/answer/7018481)
* Cancelling your [Apple App Store NordVPN subscription](https://support.apple.com/en-lamr/118428)
* Cancelling your [Amazon App Store NordVPN subscription](https://www.amazonforum.com/s/question/0D54P00007IG0CkSAL/amazon-appstore-subscriptions)
## Cancelling your NordVPN subscription
If you have purchased your subscription directly from NordVPN and wish for your subscription to no longer renew at the subsequent billing date, you may cancel your subscription via your [Nord Account](https://my.nordaccount.com/).
You can follow the same steps to cancel your NordPass, NordLocker, Dedicated IP, or bundle subscription services.
To cancel the automatic renewal of your NordVPN subscription, follow the steps below:
1. Log in to your [Nord Account](https://my.nordaccount.com/)
2. Open the billing tab:
3. Click cancel next to auto-renewal:
4. Select cancel auto-renewal:
5. Your auto-renewal status will now change to off:
You will receive a confirmation email to your registered email account if your subscription cancellation is successful:
If you wish to receive a refund, please read [our article on NordVPN's refund policy](https://support.nordvpn.com/hc/en-us/articles/19476991311121-What-is-your-money-back-policy).",https://support.nordvpn.com/hc/en-us/related/click?data=BAh7CjobZGVzdGluYXRpb25fYXJ0aWNsZV9pZGwrCJFczG7JEToYcmVmZXJyZXJfYXJ0aWNsZV9pZGwrCBHNaCtlEjoLbG9jYWxlSSIKZW4tdXMGOgZFVDoIdXJsSSJXL2hjL2VuLXVzL2FydGljbGVzLzE5NTU2ODQ0OTg1NDg5LUhvdy10by1jYW5jZWwtYXV0by1yZW5ld2FsLWZvci15b3VyLXN1YnNjcmlwdGlvbgY7CFQ6CXJhbmtpCQ%3D%3D--15415d9cb431de74157caec5d9d7e98a80e73c73
How to build the NordVPN Docker image,"Docker is a tool for easy deployment and management of applications in lightweight containers. Setting up NordVPN on a Docker container will secure your internet connection and protect your online privacy of other Docker containers as well.
## Setting up the Docker environment
To build the NordVPN Docker image on Linux, you will first need to set up the Docker environment:
1. [Install the Docker engine on Linux](https://docs.docker.com/engine/install/ubuntu/).
2. Once you have Docker installed, go to the terminal.
3. Create a new directory for your image using this command:
```
mkdir
```
4. Go to the created directory:
```
cd
```
5. Create a Dockerfile:
```
touch Dockerfile
```
6. Go to the file with your preferred text editor. In this example, we use nano.
```
nano Dockerfile
```
7. Copy and paste the following script into the file:
```
FROM ubuntu:24.04RUN apt-get update && \
apt-get install -y --no-install-recommends wget apt-transport-https ca-certificates && \
apt-get install -y --no-install-recommends wget apt-transport-https ca-certificates && \ wget -qO /etc/apt/trusted.gpg.d/nordvpn_public.asc https://repo.nordvpn.com/gpg/nordvpn_public.asc && \ echo ""deb https://repo.nordvpn.com/deb/nordvpn/debian stable main"" > /etc/apt/sources.list.d/nordvpn.list && \ apt-get update && \ apt-get install -y --no-install-recommends nordvpn && \ apt-get clean && \ rm -rf /var/lib/apt/lists/*ENTRYPOINT /etc/init.d/nordvpn start && sleep 5 && /bin/bash -c ""$@""CMD bash
```
8. Click Ctrl + X, then Y, and finally, Enter to save and exit.
Now, you've successfully set up a Docker environment for further NordVPN Docker image building.
## Building the NordVPN Docker image
After you have set up the environment in Docker, make sure you’re in the same directory you have just created, which stores the Dockerfile. Once you’re certain you’re in the correct directory, you can proceed with building the NordVPN Docker image by following these steps:
1. Build the image with this command (add your desired image name):
```
sudo docker build -t .
```
Note: Do not forget the dot at the end of the command line.
2. Run the image:
```
sudo docker run -it --hostname mycontainer --cap-add=NET_ADMIN --sysctl net.ipv6.conf.all.disable_ipv6=0
```
Explanation:-it - instructs Docker to allocate a pseudo-TTY connected to the container’s stdin; creating an interactive bash shell in the container;--cap-add - needed to successfully run the NordVPN Daemon and connect to our servers;--sysctl net.ipv6.conf.all.disable_ipv6=0 - [disables IPv6 traffic on Linux](https://support.nordvpn.com/hc/en-us/articles/20164669224337-How-to-disable-IPv6-on-Linux) for the NordVPN container, making sure that there are no leaks after connecting to our servers.--hostname - the hostname for your container. The flag should be used to prevent Meshnet hostname from changing after restarting the Docker container.
3. [Login to NordVPN using a token](https://support.nordvpn.com/hc/en-us/articles/20286980309265-How-to-use-a-token-with-NordVPN-on-Linux) method:
```
nordvpn login --token
```
After the steps are done, you have successfully set up NordVPN Docker image.
For more detailed information on how to use Docker, check the Docker documentation.",https://support.nordvpn.com/hc/en-us/related/click?data=BAh7CjobZGVzdGluYXRpb25fYXJ0aWNsZV9pZGwrCJEVbRGdEjoYcmVmZXJyZXJfYXJ0aWNsZV9pZGwrCBGGPoCwEToLbG9jYWxlSSIKZW4tdXMGOgZFVDoIdXJsSSJML2hjL2VuLXVzL2FydGljbGVzLzIwNDY1ODExNTI3MDU3LUhvdy10by1idWlsZC10aGUtTm9yZFZQTi1Eb2NrZXItaW1hZ2UGOwhUOglyYW5raQk%3D--114452e67f978f27897a79074a1674ed37538db0
Staying invisible on unsafe local networks on macOS,"If you received a message about a potentially unsafe network, your connection requires additional caution. The problem emerges in scenarios where a router assigns non-RFC1918 IP addresses for the local network. This might seem technical, but in simple terms, certain types of local network configurations can result in VPN traffic being unintentionally exposed.
## How Does This Affect You?
If our macOS client detects a potentially misconfigured network (i.e. one that hands out non-RFC1918 IP addresses), it will send you a notification. Upon receiving this alert, we will ask you to enable the 'Invisibility on LAN' feature, ensuring your VPN traffic remains private.
## How to enable the “Stay invisible on a local network” feature
Note: the feature is only available from NordVPN 8.8.3 app version.
When you connect to an unsafe network, NordVPN will send you a pop-up: Stay invisible on a local network. Choose Enable protection.
Alternatively, follow these steps:
1. Connect to a NordVPN server.
2. Access Settings.
3. Choose General settings if you’re using the NordVPN version downloaded from .
4. Click to activate Stay invisible on a local network.
5. Reconnect to apply the new settings.Choose Kill Switch settings from the left side menu and activate Kill Switch (advanced) (if you’re using NordVPN’s App Store version).
6. A notification will appear, confirming that protection against unsafe local networks is active.",https://support.nordvpn.com/hc/en-us/related/click?data=BAh7CjobZGVzdGluYXRpb25fYXJ0aWNsZV9pZGwrCJGQFBZlEjoYcmVmZXJyZXJfYXJ0aWNsZV9pZGwrCBHNaCtlEjoLbG9jYWxlSSIKZW4tdXMGOgZFVDoIdXJsSSJaL2hjL2VuLXVzL2FydGljbGVzLzIwMjI1MzcxNDQzMzQ1LVN0YXlpbmctaW52aXNpYmxlLW9uLXVuc2FmZS1sb2NhbC1uZXR3b3Jrcy1vbi1tYWNPUwY7CFQ6CXJhbmtpCg%3D%3D--2d6265fac5bb3adb70040791b56a643bc50d9411
Connecting to NordVPN (IKEv2/IPSec) on Android,"These instructions will help you to connect to NordVPN on Android using the IKEv2 protocol.
1. Download the [NordVPN IKEv2 connection certificate](https://downloads.nordcdn.com/certificates/root.der).
2. Download and install the [strongSwan VPN Client app from Google Play](https://play.google.com/store/apps/details?id=org.strongswan.android).
3. Open the strongSwan application.
4. Tap on the three-dot icon in the top-right corner of the app and select ""CA certificates"" from the drop-down menu.
5. In the following screen, tap on the three-dot icon again and select ""Import certificate.""
6. Select the root.der file that you have downloaded in step 1.
7. Confirm your selection by tapping Import certificate.
8. Tap the left-pointing arrow to go back to the main screen of the strongSwan app.
9. Select Add VPN profile.
10. In the Server field, enter the hostname of a NordVPN server.For the sake of this tutorial, the server hostname will be “us6180.nordvpn.com.” Press Advanced filters and select in the Security Protocol dropdown, select IKEv2/IPsec.
Follow the steps below to find the best server for your connection:
1. Log into your [Nord Account](https://my.nordaccount.com/), and click NordVPN.
2. Scroll down to Advanced Settings and click Set up NordVPN manually.
3. Select the Server recommendation tab. According to your location, the best server will be recommended.
4. By pressing Advanced filters you can further customize the recommended servers by selecting the Server type and the Security protocol.
5. Under the server IP, next to Available protocols, select IKEv2/IPSec.
6. In the window that pops up, copy the server hostname and use it in your IKEv2 manual connection setup.
7. When connecting to IKEv2 manually, you're going to need to use the Username and Password from the Service credential tab.
1. Enter your NordVPN service credentials in the “Username” and “Password” fields.
2. All other settings can stay the same. You can give the profile whatever name you want in the “Profile name” field.Once you have entered all the required information, click ""Save.""
3. To connect, tap the profile you have just created.
4. The application will ask you for the permissions necessary to form a VPN connection. Tap ""OK.""Note: Different devices may display different warning messages.
5. If the status field shows that you are “Connected,” the connection to the VPN server has been successful. You can now minimize the application and use your device as usual – your internet traffic is now secured by NordVPN.To disconnect from the server, tap ""Disconnect.""",https://support.nordvpn.com/hc/en-us/related/click?data=BAh7CjobZGVzdGluYXRpb25fYXJ0aWNsZV9pZGwrCBHe4lWCEjoYcmVmZXJyZXJfYXJ0aWNsZV9pZGwrCJHeZGQOGzoLbG9jYWxlSSIKZW4tdXMGOgZFVDoIdXJsSSJTL2hjL2VuLXVzL2FydGljbGVzLzIwMzUwOTk1OTc5NzkzLUNvbm5lY3RpbmctdG8tTm9yZFZQTi1JS0V2Mi1JUFNlYy1vbi1BbmRyb2lkBjsIVDoJcmFua2kG--f9110c7388791f53a1f3d8607d8ea3707e29dbdd
How to reach NordVPN customer support?,"While we don't offer phone support, we have different options to contact NordVPN customer support available 24/7 and ready to help you!
## Help Center
First off, if you run into any issues using NordVPN - check out our Help Center that is available in 14 languages: English, German, French, Danish, Italian, Spanish, Norwegian, Swedish, Dutch, Japanese, Korean, Polish, Portuguese-Brazilian, Traditional Chinese.
You can change the language by scrolling down until you see the language change option and clicking on the language you prefer. This will ensure that you can look for information in a language comfortable for you.
After you have set the language you want to look information in, you can find solutions in the help center by either:
* Searching for information using Help Center's search bar, which will list out articles according to the keywords typed in the search query:
* Navigating to one of the categories available in the Help Center:
* [FAQ](https://support.nordvpn.com/hc/en-us/categories/200593301-FAQ) - in this category you'll find Frequently asked questions and NordVPN app setup tutorials;
* [General info](https://support.nordvpn.com/hc/en-us/categories/360000293597-General-info) - here, you'll be able to find information on NordVPN functionalities, features, and SmartPlay;
* [Billing](https://support.nordvpn.com/hc/en-us/categories/360000293617-Billing) - this category covers payment, subscription, and account management topics;
* [Connectivity](https://support.nordvpn.com/hc/en-us/categories/200614302-Connectivity) - the last category available covers troubleshooting articles, here you can find help regarding NordVPN connectivity, internet speed with NordVPN on, manual setups for routers and different OSes, proxies.
## Support agents
However, if you're looking for assistance on your specific case, you can reach out to our developed conversation bots or human customer support agents by:
* Chat
* Email
We have two teams to assist you:
* Customer Care & Billing Team: They can tell you about NordVPN, help set up your devices, make sure you can access streaming sites, and answer questions about dedicated IPs. As well as helpyou with your NordVPN subscription, account, or payments.
* Connection Team: They can assist with setting up NordVPN on your router, fixing advanced connectivity problems, and helping in places with internet restrictions.",https://support.nordvpn.com/hc/en-us/related/click?data=BAh7CjobZGVzdGluYXRpb25fYXJ0aWNsZV9pZGwrCJGygBq4EToYcmVmZXJyZXJfYXJ0aWNsZV9pZGwrCJHeZGQOGzoLbG9jYWxlSSIKZW4tdXMGOgZFVDoIdXJsSSJML2hjL2VuLXVzL2FydGljbGVzLzE5NDgyNDE2Mjk2NTkzLUhvdy10by1yZWFjaC1Ob3JkVlBOLWN1c3RvbWVyLXN1cHBvcnQGOwhUOglyYW5raQc%3D--4dfef18c8dca7fa9545cf1b90311367a500404ae
Does NordVPN work on Android TV and Nvidia Shield?,"Yes, NordVPN works on Android TV and Nvidia Shield. You can follow the steps below about the installation process.",https://support.nordvpn.com/hc/en-us/related/click?data=BAh7CjobZGVzdGluYXRpb25fYXJ0aWNsZV9pZGwrCBFD7ucfEjoYcmVmZXJyZXJfYXJ0aWNsZV9pZGwrCJHeZGQOGzoLbG9jYWxlSSIKZW4tdXMGOgZFVDoIdXJsSSJiL2hjL2VuLXVzL2FydGljbGVzLzE5OTI4MjQ0NDM3Nzc3LUluc3RhbGxpbmctYW5kLXVzaW5nLU5vcmRWUE4tb24tQW5kcm9pZC1UVi1vci1OdmlkaWEtU2hpZWxkBjsIVDoJcmFua2kI--86a0b53f92cecd29bb4a29741539b38d7b0eccc7
Installing and using NordVPN on Android TV or Nvidia Shield,"If you would like to use NordVPN on your Android TV or Nvidia Shield, this guide with assist you to correctly install the NordVPN app on these devices. This article will cover the following points:
* [Does NordVPN work on Android TV and Nvidia Shield?](
* [How to set up a VPN on Nvidia Shield and Android TV](
* [How to use a VPN on Nvidia Shield and Android TV](
## Does NordVPN work on Android TV and Nvidia Shield?
Yes, NordVPN works on Android TV and Nvidia Shield. You can follow the steps below about the installation process.
## How to set up a VPN on Nvidia Shield and Android TV
1. [ Download the NordVPN app for Android TV ](https://nordvpn.com/download/android-tv/) from our website and install it. You can also find NordVPN on the [ Google Play ](https://play.google.com/store/apps/details?id=com.nordvpn.android&hl=en)store.
2. Once the application has finished installing, open the NordVPN app. You will see the application's main menu. Select log in to use your existing NordVPN account or sign up to create a new one: 
* If you have clicked sign up, you will see a QR code. Scan it with your smartphone and wait for the Nord Account page to load. Once the page has loaded, complete the registration process: 
3. Log in to NordVPN on your TV with your account. Like in the screenshot below, you will receive a number for [ remote validation ](https://nordaccount.com/remote) on your phone, laptop, or PC. Alternatively, you can simply scan the QR code: 
4. You may be greeted with a few warning messages. These are default Android warning messages for VPN connections — it is safe to continue. In some cases, you may be required to mark a checkbox in the popup window.  
## How to use a VPN on Nvidia Shield and Android TV
The NordVPN app is easy to use. In this section, we will explore how to connect to NordVPN servers on your Nvidia Shield or Android TV and go through the app’s settings.
1. Press quick connect on the main screen to let our smart algorithm automatically pick the best server for your needs: 
2. You can click any country button in the all countries section to quickly connect to a NordVPN server for the selected country: 
3. In the specialty servers section, you will find P2P, Obfuscated, Dedicated IP, Double VPN, and Onion Over VPN servers. 
4. In settings, you can check your subscription status, set up auto-connect, or select the settings sub-menu to control your NordVPN features (such as enabling/disabling Threat Protection, switching VPN protocols, enabling local network discovery, and setting up a custom DNS):  
5. The split tunneling section lets you choose which apps bypass your VPN connection: 
After following the guide above, you will be able to use NordVPN on your Android TV and your Nvidia Shield. If you experience any issues while installing NordVPN on these devices, feel free to [contact our support team ](https://nordvpn.com/contact-us/)for further assistance.",https://support.nordvpn.com/hc/en-us/related/click?data=BAh7CjobZGVzdGluYXRpb25fYXJ0aWNsZV9pZGwrCBFD7ucfEjoYcmVmZXJyZXJfYXJ0aWNsZV9pZGwrCJHeZGQOGzoLbG9jYWxlSSIKZW4tdXMGOgZFVDoIdXJsSSJiL2hjL2VuLXVzL2FydGljbGVzLzE5OTI4MjQ0NDM3Nzc3LUluc3RhbGxpbmctYW5kLXVzaW5nLU5vcmRWUE4tb24tQW5kcm9pZC1UVi1vci1OdmlkaWEtU2hpZWxkBjsIVDoJcmFua2kI--86a0b53f92cecd29bb4a29741539b38d7b0eccc7
Improve connection speed on Android with NordVPN app,"If you are experiencing slow connection speed while connected to [VPN on Android](https://nordvpn.com/download/android/), try these steps:
1. Make sure to use the latest version of NordVPN app. You can [uninstall the app](https://support.nordvpn.com/hc/en-us/articles/19481023452561-How-to-uninstall-NordVPN-software) and [install the latest version from our website](https://nordvpn.com/download/windows/).
2. Restart your device.
3. Switch to [NordLynx](https://support.nordvpn.com/hc/en-us/articles/19564565879441-What-is-NordLynx) protocol.
4. If you are using Wi-Fi, switch to a mobile connection or vice versa.
5. Switch the VPN server to one closer to you geographically.
6. Open app settings and [switch](https://support.nordvpn.com/hc/en-us/articles/19973901502609-Switching-protocol-to-OpenVPN-UDP-or-TCP-Android) from the default UDP protocol to TCP.
7. Try a different connection method/protocol on your device. Tutorials for various connection methods can be found here: [https://support.nordvpn.com/Connectivity/Android/](https://support.nordvpn.com/hc/en-us/sections/19326609878673-Android)",https://support.nordvpn.com/hc/en-us/related/click?data=BAh7CjobZGVzdGluYXRpb25fYXJ0aWNsZV9pZGwrCJF9pQyJEjoYcmVmZXJyZXJfYXJ0aWNsZV9pZGwrCJHeZGQOGzoLbG9jYWxlSSIKZW4tdXMGOgZFVDoIdXJsSSJbL2hjL2VuLXVzL2FydGljbGVzLzIwMzc5ODMxOTkxNjk3LUltcHJvdmUtY29ubmVjdGlvbi1zcGVlZC1vbi1BbmRyb2lkLXdpdGgtTm9yZFZQTi1hcHAGOwhUOglyYW5raQk%3D--0114e55adb8dc32c90721a8774179311f497a271
Change your DNS servers on Android TV with NordVPN,"Note: when you’re connected to a NordVPN server, NordVPN’s private DNS servers are used by default.
To use NordVPN’s [DNS servers](https://nordvpn.com/blog/what-is-dns/) on Android TV when not connected to a NordVPN server, follow these steps:
1. Open Settings on your Android TV. They are usually designated by a cogwheel icon.
2. Head to Network and Internet and write down the [IP address](https://nordvpn.com/what-is-my-ip/) (marked “1” in the picture below).Select IP settings (marked “2” in the picture below).
3. In IP settings, switch to Static.
4. Enter the IP address from step 2.
5. [Find your gateway (router IP) address](https://nordvpn.com/blog/find-router-ip-address/) and enter it in the appropriate field.
6. Make sure the Network prefix length is 24 — change it if necessary.
7. Enter the first DNS address: 103.86.96.100
8. Enter the second DNS address: 103.86.99.100
Android TV is now configured to use [private DNS](https://nordvpn.com/blog/private-dns/) servers instead of your ISP's default DNS servers.",https://support.nordvpn.com/hc/en-us/related/click?data=BAh7CjobZGVzdGluYXRpb25fYXJ0aWNsZV9pZGwrCBHSaSqdEjoYcmVmZXJyZXJfYXJ0aWNsZV9pZGwrCJHeZGQOGzoLbG9jYWxlSSIKZW4tdXMGOgZFVDoIdXJsSSJZL2hjL2VuLXVzL2FydGljbGVzLzIwNDY2MjMwNzQzNTY5LUNoYW5nZS15b3VyLUROUy1zZXJ2ZXJzLW9uLUFuZHJvaWQtVFYtd2l0aC1Ob3JkVlBOBjsIVDoJcmFua2kK--2d290ec60e6db77ff42ad422b9ad5ef2d3bf75b4
What is SmartDNS?,"SmartDNS is a technology that lets you access content on your smart TV that may not be available in your region. SmartDNS is integrated into [NordVPN SmartPlay](https://nordvpn.com/features/streaming/smart-play/), so you only need to have a [NordVPN subscription](https://nordvpn.com/pricing/) to access it. SmartDNS does not protect your devices the way a [VPN connection](https://nordvpn.com/what-is-a-vpn/) does — it simply provides access to streaming content. Keep in mind that it may not work with all of the streaming services you can access while connected to NordVPN.
Table of contents:
* [SmartDNS-supported streaming services](
* [How to enable the SmartDNS feature](
* [How to set up the SmartDNS feature on your device](
## SmartDNS-supported streaming services
The landscape of streaming entertainment offers a multitude of choices. To help you navigate these options, the following list presents the complete selection of SmartDNS-supported supported services:
* Amazon Prime (US region)
* Disney Plus (US region)
* Fox Now / Fox Sports Go / Fox News (US region)
* MAX (US region)
* Netflix Originals
* Paramount+
* Peacock TV
* Fubo TV
## How to enable the SmartDNS feature
The activation process is designed for simplicity, allowing you to quickly access region-locked content. Follow these steps to enable NordVPN's SmartDNS feature:
1. Allowlist [your original IP address](https://nordvpn.com/what-is-my-ip/) — the one you have when your VPN is switched off. Make sure to allowlist your IPv4 address, not IPv6, as we do not support IPv6 yet.
2. Disconnect from NordVPN (or any other VPN connection).
3. Log in to your NordAccount:
4. Then, select the NordVPN button located in the upper-left section on your dashboard:
5. Click the enable button on the SmartDNS tab:
6. Activate the SmartDNS feature by clicking on the activate SmartDNS button:Note: the activation can take up to 10 minutes. In the meantime, the status will be shown as pending.
## How to set up the SmartDNS feature on your device
NordVPN SmartDNS offers a simple setup process, allowing you to quickly configure your devices and access geo-restricted streaming content by adjusting a few network settings.
Here’s how to set up SmartDNS on NordVPN for the following devices:
* [SmartDNS on LG TV](https://support.nordvpn.com/hc/en-us/articles/19564250144273-Set-Up-SmartDNS-VPN-feature-on-LG-TV)
* [SmartDNS on Apple TV](https://support.nordvpn.com/hc/en-us/articles/19564451081873-How-to-Set-Up-SmartDNS-on-Apple-TV)
For instructions for other devices, use these [DNS servers](https://nordvpn.com/blog/what-is-dns-server/):
* Primary: 103.86.96.103
* Secondary (if available): 103.86.99.103
If you experience any issues or have additional questions, do not hesitate to [submit a request](https://support.nordvpn.com/hc/en-us/articles/19482416296593-How-to-reach-NordVPN-customer-support) to our customer success team.
The NordVPN service should never be used to bypass copyright regulations. NordVPN does not promote, condone, or endorse the use of the service for such purposes. For more details, please read the [NordVPN Terms of Service](https://my.nordaccount.com/legal/terms-of-service/).",https://support.nordvpn.com/hc/en-us/related/click?data=BAh7CjobZGVzdGluYXRpb25fYXJ0aWNsZV9pZGwrCJEgsuKuEToYcmVmZXJyZXJfYXJ0aWNsZV9pZGwrCBHSaSqdEjoLbG9jYWxlSSIKZW4tdXMGOgZFVDoIdXJsSSI3L2hjL2VuLXVzL2FydGljbGVzLzE5NDQyODI1MzA2MjU3LVdoYXQtaXMtU21hcnRETlMGOwhUOglyYW5raQY%3D--0bc155d3f5483f532e32531a2e23b95d0bf22c5e
Switching protocol to OpenVPN UDP or TCP - Android,"If you want to switch protocol to OpenVPN UDP or OpenVPN TCP on Android, follow these steps:
1. Open application Profile & Settings (bottom right corner).
2. Tap on the gear icon in the top right corner.
3. Select Protocol.
4. Choose OpenVPN (TCP) or OpenVPN(UDP).",https://support.nordvpn.com/hc/en-us/related/click?data=BAh7CjobZGVzdGluYXRpb25fYXJ0aWNsZV9pZGwrCJHITYkqEjoYcmVmZXJyZXJfYXJ0aWNsZV9pZGwrCBFq8ESCEjoLbG9jYWxlSSIKZW4tdXMGOgZFVDoIdXJsSSJXL2hjL2VuLXVzL2FydGljbGVzLzE5OTczOTAxNTAyNjA5LVN3aXRjaGluZy1wcm90b2NvbC10by1PcGVuVlBOLVVEUC1vci1UQ1AtQW5kcm9pZAY7CFQ6CXJhbmtpCA%3D%3D--decd765d4adaab47d9f4501ef84416a7578ee59f
Set Up SmartDNS VPN feature on LG TV,"To configure your LG TV for the [Smart DNS VPN feature](https://nordvpn.com/features/streaming/smart-play/), you would need to follow these steps:
1. On the device you're currently using, ensure that you're connected to the same network that is used for the LG TV.(E.g. if your LG TV is connected to Wi-Fi_123, then connect your current device to the same Wi-Fi).
2. Now, open Nord Account and log in. Afterward, in the Services section, click on NordVPN.
3. In the SmartDNS category, press the Activate button.This will allowlist your IP address and allow you to use SmartDNS on the network that your LG TV is connected to. (The following steps may vary depending on the model of your TV)
4. Now, turn on your LG Smart TV and press Settings on your remote.
5. From this settings menu scroll down to Network and select Network Connection.
6. Connect your LG Smart TV to the same network as is used by your current device.
7. Select Your Network and then Select Other Network List.
8. Select Set Expert Button.
9. Select Your Network Connection.
10. Scroll Down to the DNS Mode and select Manual Tab. Then enter 103.86.96.103 (and 103.86.99.103 if allowed to enter second) and Press OK.
And that's it, the SmartDNS VPN feature is now enabled on your LG TV. Enjoy!",https://support.nordvpn.com/hc/en-us/related/click?data=BAh7CjobZGVzdGluYXRpb25fYXJ0aWNsZV9pZGwrCBEeLijLEToYcmVmZXJyZXJfYXJ0aWNsZV9pZGwrCBHSaSqdEjoLbG9jYWxlSSIKZW4tdXMGOgZFVDoIdXJsSSJLL2hjL2VuLXVzL2FydGljbGVzLzE5NTY0MjUwMTQ0MjczLVNldC1VcC1TbWFydEROUy1WUE4tZmVhdHVyZS1vbi1MRy1UVgY7CFQ6CXJhbmtpBw%3D%3D--9014d65106c099f61081a48fc1e1fe1d8f466acf
Using NordLynx in the NordVPN app for Android,"NordLynx is the technology we built around the WireGuard® protocol. It lets you experience WireGuard’s speed benefits without compromising your privacy.
1. Install the [VPN for android](https://nordvpn.com/download/android/).
2. Navigate to Account & App Settings in the bottom right corner and tap on the gear icon in the right top corner:
3. Choose Protocol:
4. Select Nordlynx and connect to the VPN:
WireGuard is a registered trademark of Jason A. Donenfeld.",https://support.nordvpn.com/hc/en-us/related/click?data=BAh7CjobZGVzdGluYXRpb25fYXJ0aWNsZV9pZGwrCBFVTPOcEjoYcmVmZXJyZXJfYXJ0aWNsZV9pZGwrCBHSaSqdEjoLbG9jYWxlSSIKZW4tdXMGOgZFVDoIdXJsSSJUL2hjL2VuLXVzL2FydGljbGVzLzIwNDY1MzA2MDY0MTQ1LVVzaW5nLU5vcmRMeW54LWluLXRoZS1Ob3JkVlBOLWFwcC1mb3ItQW5kcm9pZAY7CFQ6CXJhbmtpCA%3D%3D--9bddbb822cc202591184a5f2562990090d9dcc0f
Checking your device configuration,"1. Add exceptions for the NordVPN app to your antivirus, cleaner, and power saver applications. Since NordVPN runs in the background when you are connected to VPN, these applications may interfere with its stability or might not let you connect at all.
2. Make sure you do not have any [firewall](https://nordvpn.com/blog/what-is-nat-firewall/) apps running. Firewall applications on Android devices use the same VPN interface as the NordVPN app, so it might not be able to connect while a firewall application is active on the same device.3. Try changing the [DNS](https://support.nordvpn.com/hc/en-us/articles/19442825306257-What-is-SmartDNS) servers:
* Open the device Settings.
* Go to Connections and select Wi-Fi.
* Click the cog icon next to your current network and select Advanced.
* Change IP settings to Static.
* In the DNS 1 and DNS 2 fields that appeared, enter the following IP addresses: 103.86.96.100 and 103.86.99.100.
* Press Save, disconnect from the network, and reconnect for changes to take effect.
4. Try resetting your network settings:
* Open the device Settings.
* Go to General management and select Reset.
* Tap Reset network settings.
* Press Reset settings.
* If you use a lock on your device, unlock it to proceed.
* Tap Reset settings again to reset all network settings.",https://support.nordvpn.com/hc/en-us/related/click?data=BAh7CjobZGVzdGluYXRpb25fYXJ0aWNsZV9pZGwrCJEwn1EfEjoYcmVmZXJyZXJfYXJ0aWNsZV9pZGwrCBHSaSqdEjoLbG9jYWxlSSIKZW4tdXMGOgZFVDoIdXJsSSJJL2hjL2VuLXVzL2FydGljbGVzLzE5OTI1NzIyNjczMjk3LUNoZWNraW5nLXlvdXItZGV2aWNlLWNvbmZpZ3VyYXRpb24GOwhUOglyYW5raQk%3D--cb09daa203990a72a7d17e1f21501dac6bbd5c7a
Connecting to NordVPN (IKEv2/IPSec) on Android,"These instructions will help you to connect to NordVPN on Android using the IKEv2 protocol.
1. Download the [NordVPN IKEv2 connection certificate](https://downloads.nordcdn.com/certificates/root.der).
2. Download and install the [strongSwan VPN Client app from Google Play](https://play.google.com/store/apps/details?id=org.strongswan.android).
3. Open the strongSwan application.
4. Tap on the three-dot icon in the top-right corner of the app and select ""CA certificates"" from the drop-down menu.
5. In the following screen, tap on the three-dot icon again and select ""Import certificate.""
6. Select the root.der file that you have downloaded in step 1.
7. Confirm your selection by tapping Import certificate.
8. Tap the left-pointing arrow to go back to the main screen of the strongSwan app.
9. Select Add VPN profile.
10. In the Server field, enter the hostname of a NordVPN server.For the sake of this tutorial, the server hostname will be “us6180.nordvpn.com.” Press Advanced filters and select in the Security Protocol dropdown, select IKEv2/IPsec.
Follow the steps below to find the best server for your connection:
1. Log into your [Nord Account](https://my.nordaccount.com/), and click NordVPN.
2. Scroll down to Advanced Settings and click Set up NordVPN manually.
3. Select the Server recommendation tab. According to your location, the best server will be recommended.
4. By pressing Advanced filters you can further customize the recommended servers by selecting the Server type and the Security protocol.
5. Under the server IP, next to Available protocols, select IKEv2/IPSec.
6. In the window that pops up, copy the server hostname and use it in your IKEv2 manual connection setup.
7. When connecting to IKEv2 manually, you're going to need to use the Username and Password from the Service credential tab.
1. Enter your NordVPN service credentials in the “Username” and “Password” fields.
2. All other settings can stay the same. You can give the profile whatever name you want in the “Profile name” field.Once you have entered all the required information, click ""Save.""
3. To connect, tap the profile you have just created.
4. The application will ask you for the permissions necessary to form a VPN connection. Tap ""OK.""Note: Different devices may display different warning messages.
5. If the status field shows that you are “Connected,” the connection to the VPN server has been successful. You can now minimize the application and use your device as usual – your internet traffic is now secured by NordVPN.To disconnect from the server, tap ""Disconnect.""",https://support.nordvpn.com/hc/en-us/related/click?data=BAh7CjobZGVzdGluYXRpb25fYXJ0aWNsZV9pZGwrCBHe4lWCEjoYcmVmZXJyZXJfYXJ0aWNsZV9pZGwrCBHSaSqdEjoLbG9jYWxlSSIKZW4tdXMGOgZFVDoIdXJsSSJTL2hjL2VuLXVzL2FydGljbGVzLzIwMzUwOTk1OTc5NzkzLUNvbm5lY3RpbmctdG8tTm9yZFZQTi1JS0V2Mi1JUFNlYy1vbi1BbmRyb2lkBjsIVDoJcmFua2kK--358cfaeb2aa71d779f93b4cf2fb7c5e0166ff480
Which NordVPN protocol should I choose,"NordVPN supports several security encryption protocols to provide a VPN service. The security levels and purposes of these VPN protocols are different, but so are our customers’ needs. We encourage you to take a closer look at the strengths and weaknesses of each VPN protocol. While we want you to be able to choose freely, we also feel it’s our duty to advise you on what might suit you best.
1. OpenVPN
OpenVPN is a mature and robust piece of open-source software that enables us to provide a reliable and secure VPN service. It is a versatile VPN protocol that can be used on both TCP and UDP ports. OpenVPN supports a great number of strong encryption algorithms and ciphers: to ensure the protection of your data, we use AES-256-GCM with a 4096-bit DH key. If you are conscious about your security and are wondering what the most stable NordVPN protocol is, we recommend OpenVPN.
2. WireGuard (NordLynx) (Recommended by NordVPN and used by default in most of our apps)
WireGuard is the newest and fastest tunneling protocol, and the entire VPN industry is talking about it. It uses state-of-the-art cryptography that outshines the current leader, OpenVPN. However, it’s still considered experimental, so VPN providers need to look for new solutions (like NordLynx by NordVPN) to overcome WireGuard’s vulnerabilities.
Modern, extremely fast, and incredibly lean in its architecture, WireGuard is backed by thorough academic research. WireGuard consists of only 4,000 lines of code, making it easy to deploy, audit, and fix. To put it into perspective, OpenVPN runs on 400,000 lines of code, meaning that WireGuard makes up only 1% of OpenVPN’s massive architecture.
NordLynx is currently used by default in NordVPN apps. If you’re wondering which VPN protocol is best for gaming or other online speed-dependent activities, the answer is always NordLynx.
3. NordWhisper (Recommended by NordVPN to use for restrictive networks)
The latest protocol added to NordVPN and designed to overcome restrictive local network environments while ensuring your security. It is the ideal solution when dealing with filtered content on office or campus networks and Wi-Fi networks with security filtering found at airports, cafes, hotels, or conferences.
NordWhisper is not compatible with Meshnet, DIP, Obfuscated servers, Onion Over VPN, or P2P servers.
Learn [how to use NordWhisper on NordVPN](https://support.nordvpn.com/hc/en-us/articles/31528242519953-How-to-use-NordWhisper-on-NordVPN).",https://support.nordvpn.com/hc/en-us/related/click?data=BAh7CjobZGVzdGluYXRpb25fYXJ0aWNsZV9pZGwrCBF7%2BjG4EToYcmVmZXJyZXJfYXJ0aWNsZV9pZGwrCBFVTPOcEjoLbG9jYWxlSSIKZW4tdXMGOgZFVDoIdXJsSSJNL2hjL2VuLXVzL2FydGljbGVzLzE5NDgyODEwMTUzNzQ1LVdoaWNoLU5vcmRWUE4tcHJvdG9jb2wtc2hvdWxkLUktY2hvb3NlBjsIVDoJcmFua2kG--2d83d5dc7d44b937046ea50f76443eb2cfe5922a
Improve connection speed on Android with NordVPN app,"If you are experiencing slow connection speed while connected to [VPN on Android](https://nordvpn.com/download/android/), try these steps:
1. Make sure to use the latest version of NordVPN app. You can [uninstall the app](https://support.nordvpn.com/hc/en-us/articles/19481023452561-How-to-uninstall-NordVPN-software) and [install the latest version from our website](https://nordvpn.com/download/windows/).
2. Restart your device.
3. Switch to [NordLynx](https://support.nordvpn.com/hc/en-us/articles/19564565879441-What-is-NordLynx) protocol.
4. If you are using Wi-Fi, switch to a mobile connection or vice versa.
5. Switch the VPN server to one closer to you geographically.
6. Open app settings and [switch](https://support.nordvpn.com/hc/en-us/articles/19973901502609-Switching-protocol-to-OpenVPN-UDP-or-TCP-Android) from the default UDP protocol to TCP.
7. Try a different connection method/protocol on your device. Tutorials for various connection methods can be found here: [https://support.nordvpn.com/Connectivity/Android/](https://support.nordvpn.com/hc/en-us/sections/19326609878673-Android)",https://support.nordvpn.com/hc/en-us/related/click?data=BAh7CjobZGVzdGluYXRpb25fYXJ0aWNsZV9pZGwrCJF9pQyJEjoYcmVmZXJyZXJfYXJ0aWNsZV9pZGwrCBFVTPOcEjoLbG9jYWxlSSIKZW4tdXMGOgZFVDoIdXJsSSJbL2hjL2VuLXVzL2FydGljbGVzLzIwMzc5ODMxOTkxNjk3LUltcHJvdmUtY29ubmVjdGlvbi1zcGVlZC1vbi1BbmRyb2lkLXdpdGgtTm9yZFZQTi1hcHAGOwhUOglyYW5raQc%3D--5e56360a830225beb768f498f462db6107eb9d96
What OpenVPN ports does NordVPN use?,"With NordVPN, you can connect via OpenVPN both over TCP and UDP.",https://support.nordvpn.com/hc/en-us/related/click?data=BAh7CjobZGVzdGluYXRpb25fYXJ0aWNsZV9pZGwrCJH8vOXmEToYcmVmZXJyZXJfYXJ0aWNsZV9pZGwrCBGGPoCwEToLbG9jYWxlSSIKZW4tdXMGOgZFVDoIdXJsSSJEL2hjL2VuLXVzL2FydGljbGVzLzE5NjgzMzk0NTE4MTYxLU9wZW5WUE4tY29ubmVjdGlvbi1vbi1Ob3JkVlBOBjsIVDoJcmFua2kK--ea334f2516150f87c4a6ea8baabc644100e1144b
How to re-install NordVPN on Android,"To reinstall NordVPN on your Android device and ensure you have the latest version for the best experience, follow these steps.
1. Open the Settings app on your phone and select Apps or Apps & Notifications (the selection may vary depending on your phone type).
2. After opening the Apps settings, you may also need to press Manage Apps (this may vary depending on your phone type).
3. After opening Manage apps (or just Apps, depending on your phone model), search for or scroll down to find and tap the NordVPN app.
4. Tap Uninstall and confirm app deletion.
5. Once uninstalled, download the latest NordVPN app version from [Google Play](https://play.google.com/store/apps/details?id=com.nordvpn.android&hl=en&pli=1) or our website, where you’ll also find setup instructions.",https://support.nordvpn.com/hc/en-us/related/click?data=BAh7CjobZGVzdGluYXRpb25fYXJ0aWNsZV9pZGwrCJHeZGQOGzoYcmVmZXJyZXJfYXJ0aWNsZV9pZGwrCBFVTPOcEjoLbG9jYWxlSSIKZW4tdXMGOgZFVDoIdXJsSSJLL2hjL2VuLXVzL2FydGljbGVzLzI5NzQ4NjI3ODI0MjczLUhvdy10by1yZS1pbnN0YWxsLU5vcmRWUE4tb24tQW5kcm9pZAY7CFQ6CXJhbmtpCA%3D%3D--3ece4f0e6018949101faad69c452d305c9b67d05
How can I use NordLynx in the NordVPN app for iOS,"NordLynx is the technology we built around the WireGuard® protocol. It lets you experience WireGuard’s speed benefits without compromising your privacy.
1. Install the [NordVPN app for iOS](https://nordvpn.com/download/ios/).
2. Navigate to the profile in the bottom right-hand corner:
3. Tap on the gear icon in the upper right corner:
4. Tap on Protocol.
5. Select NordLynx and connect to VPN.
Done! You are now using the NordLynx protocol on your iOS device.
WireGuard is a registered trademark of Jason A. Donenfeld.",https://support.nordvpn.com/hc/en-us/related/click?data=BAh7CjobZGVzdGluYXRpb25fYXJ0aWNsZV9pZGwrCBHddJWbEjoYcmVmZXJyZXJfYXJ0aWNsZV9pZGwrCBFVTPOcEjoLbG9jYWxlSSIKZW4tdXMGOgZFVDoIdXJsSSJYL2hjL2VuLXVzL2FydGljbGVzLzIwNDU5NDM2Njk0ODAxLUhvdy1jYW4tSS11c2UtTm9yZEx5bngtaW4tdGhlLU5vcmRWUE4tYXBwLWZvci1pT1MGOwhUOglyYW5raQk%3D--9b7a62f37759e06f4fe9f1aafbcae4250b6a6e3a
Manual OpenVPN connection setup on iPad / iPhone,"Note: if you are using iOS 15 or later, please follow this tutorial.
OpenVPN is a popular protocol our specialty servers use to provide extra functionality. This is an alternative connection method for when you are having trouble with the [native NordVPN app for iOS](https://nordvpn.com/download/ios/). Here’s how to configure your iOS device for this connection method:
1. Go to the [App Store](https://apps.apple.com/us/app/nordvpn-vpn-fast-secure/id905953485?mt=8) on your iPad/iPhone.
2. Tap on Search.
3. Type openvpn connect in the search bar.
4. Tap on the installation button.
5. Enter your iTunes Store credentials and tap OK.
6. Once the app is installed, download the .OVPN configuration file.
Follow the steps below to find the manual connection configuration files:
1. Log into your [Nord Account](https://my.nordaccount.com/), and click NordVPN.
2. Scroll down to Advanced Settings and click Set up NordVPN manually.
3. Select the OpenVPN configuration files tab.
4. Find the server you wish to connect to by using the Search bar or by scrolling down and download it by clicking Download UDP or Download TCP.
5. When connecting to OpenVPN & IKEv2 manually, you're going to need to use the Username and Password from the Service credential tab.
1. Select Open in OpenVPN.Alternatively, if you're brought to a safari window, follow these steps:
1. Click on the Share icon:
2. In the application list, select the OpenVPN Connect application (in case you don't see it, select more and then choose the application as mentioned earlier):
3. Once the OpenVPN Connect application is open, select File:
4. Afterward, select Add:
2. Enter your NordVPN service credentials, choose to save the password in a keychain, and tap ADD in the top right corner.You can find your NordVPN service credentials (username and password) through the [Nord Account dashboard](https://my.nordaccount.com/dashboard/nordvpn/):
Follow the steps below to find the service credentials for manual connection setup:
1. Log into your [Nord Account](https://my.nordaccount.com/), click NordVPN, and, under Manual setup, click on Service credentials. Here you'll find the Username and Password needed to connect manually.

1. You will see a pop-up asking for permission to add OpenVPN to your VPN configurations. Click Allow.
2. Tap on the toggle switch to connect to VPN.
3. That’s it! You have successfully connected.
4. To change a server, disconnect from the current server by tapping the toggle switch next to it and enable another imported profile.
5. To disconnect, tap on the same toggle button you used to connect.",https://support.nordvpn.com/hc/en-us/related/click?data=BAh7CjobZGVzdGluYXRpb25fYXJ0aWNsZV9pZGwrCBHS5seBEjoYcmVmZXJyZXJfYXJ0aWNsZV9pZGwrCBFVTPOcEjoLbG9jYWxlSSIKZW4tdXMGOgZFVDoIdXJsSSJVL2hjL2VuLXVzL2FydGljbGVzLzIwMzQ4NjEzODc0MTkzLU1hbnVhbC1PcGVuVlBOLWNvbm5lY3Rpb24tc2V0dXAtb24taVBhZC1pUGhvbmUGOwhUOglyYW5raQo%3D--40674aada081dbd16c3679328e5bf8025e57ad34
Switching protocol to OpenVPN UDP or TCP - Android,"If you want to switch protocol to OpenVPN UDP or OpenVPN TCP on Android, follow these steps:
1. Open application Profile & Settings (bottom right corner).
2. Tap on the gear icon in the top right corner.
3. Select Protocol.
4. Choose OpenVPN (TCP) or OpenVPN(UDP).",https://support.nordvpn.com/hc/en-us/related/click?data=BAh7CjobZGVzdGluYXRpb25fYXJ0aWNsZV9pZGwrCJHITYkqEjoYcmVmZXJyZXJfYXJ0aWNsZV9pZGwrCJF9pQyJEjoLbG9jYWxlSSIKZW4tdXMGOgZFVDoIdXJsSSJXL2hjL2VuLXVzL2FydGljbGVzLzE5OTczOTAxNTAyNjA5LVN3aXRjaGluZy1wcm90b2NvbC10by1PcGVuVlBOLVVEUC1vci1UQ1AtQW5kcm9pZAY7CFQ6CXJhbmtpBg%3D%3D--4c2bad4f1d0f339993143b43878ca97bb2bdf46c
Using NordLynx in the NordVPN app for Android,"NordLynx is the technology we built around the WireGuard® protocol. It lets you experience WireGuard’s speed benefits without compromising your privacy.
1. Install the [VPN for android](https://nordvpn.com/download/android/).
2. Navigate to Account & App Settings in the bottom right corner and tap on the gear icon in the right top corner:
3. Choose Protocol:
4. Select Nordlynx and connect to the VPN:
WireGuard is a registered trademark of Jason A. Donenfeld.",https://support.nordvpn.com/hc/en-us/related/click?data=BAh7CjobZGVzdGluYXRpb25fYXJ0aWNsZV9pZGwrCBFVTPOcEjoYcmVmZXJyZXJfYXJ0aWNsZV9pZGwrCJF9pQyJEjoLbG9jYWxlSSIKZW4tdXMGOgZFVDoIdXJsSSJUL2hjL2VuLXVzL2FydGljbGVzLzIwNDY1MzA2MDY0MTQ1LVVzaW5nLU5vcmRMeW54LWluLXRoZS1Ob3JkVlBOLWFwcC1mb3ItQW5kcm9pZAY7CFQ6CXJhbmtpBw%3D%3D--0e1dd940c3a011da5fa8a7d784830427bdb80ed7
Change your DNS servers on Android TV with NordVPN,"Note: when you’re connected to a NordVPN server, NordVPN’s private DNS servers are used by default.
To use NordVPN’s [DNS servers](https://nordvpn.com/blog/what-is-dns/) on Android TV when not connected to a NordVPN server, follow these steps:
1. Open Settings on your Android TV. They are usually designated by a cogwheel icon.
2. Head to Network and Internet and write down the [IP address](https://nordvpn.com/what-is-my-ip/) (marked “1” in the picture below).Select IP settings (marked “2” in the picture below).
3. In IP settings, switch to Static.
4. Enter the IP address from step 2.
5. [Find your gateway (router IP) address](https://nordvpn.com/blog/find-router-ip-address/) and enter it in the appropriate field.
6. Make sure the Network prefix length is 24 — change it if necessary.
7. Enter the first DNS address: 103.86.96.100
8. Enter the second DNS address: 103.86.99.100
Android TV is now configured to use [private DNS](https://nordvpn.com/blog/private-dns/) servers instead of your ISP's default DNS servers.",https://support.nordvpn.com/hc/en-us/related/click?data=BAh7CjobZGVzdGluYXRpb25fYXJ0aWNsZV9pZGwrCBHSaSqdEjoYcmVmZXJyZXJfYXJ0aWNsZV9pZGwrCJF9pQyJEjoLbG9jYWxlSSIKZW4tdXMGOgZFVDoIdXJsSSJZL2hjL2VuLXVzL2FydGljbGVzLzIwNDY2MjMwNzQzNTY5LUNoYW5nZS15b3VyLUROUy1zZXJ2ZXJzLW9uLUFuZHJvaWQtVFYtd2l0aC1Ob3JkVlBOBjsIVDoJcmFua2kI--d733ceb1f91852288be0fde3e297e5bcd623a114
How to set up the NordVPN browser extension,"Here are guides on how to set up NordVPN proxy extension on your:
* [Chrome Browser](https://support.nordvpn.com/hc/en-us/articles/20349533941265-How-to-set-up-NordVPN-with-Chrome-extension)
* [Firefox Browser](https://support.nordvpn.com/hc/en-us/articles/20350669461137-Connect-to-NordVPN-with-Firefox-extension)
* [Edge Browser](https://support.nordvpn.com/hc/en-us/articles/19627093939601-Connect-to-NordVPN-with-Edge-Extension)",https://support.nordvpn.com/hc/en-us/related/click?data=BAh7CjobZGVzdGluYXRpb25fYXJ0aWNsZV9pZGwrCBFsr4t7EjoYcmVmZXJyZXJfYXJ0aWNsZV9pZGwrCBHDasUQGzoLbG9jYWxlSSIKZW4tdXMGOgZFVDoIdXJsSSJSL2hjL2VuLXVzL2FydGljbGVzLzIwMzIxODMzODA2ODY1LUhvdy10by1zZXQtdXAtdGhlLU5vcmRWUE4tYnJvd3Nlci1leHRlbnNpb24GOwhUOglyYW5raQg%3D--2a7133107ce2843e3a78286c6b6c74cbf9ffded0
Improve connection speed on Windows with NordVPN app,"If you are experiencing slow connection speed while connected to [NordVPN on Windows](https://nordvpn.com/download/windows/), try the following:
1. Make sure to use the latest version of NordVPN app. You can [uninstall the app](https://support.nordvpn.com/hc/en-us/articles/19481023452561-How-to-uninstall-NordVPN-software) and [install the latest version from our website](https://nordvpn.com/download/windows/).
2. Restart your device.
3. Restart your router or modem. If your router is set up with a VPN, and the speed is insufficient, try using VPN solely on your computer or phone.
4. If you are using Wi-Fi, switch to a wired connection.
5. Connect to a VPN server geographically closer to you.
6. Open the Settings menu and go to the Auto Connect tab. Disable Choose a VPN protocol and server automatically and select NordLynx in the VPN protocol field.
7. Try a different connection method/protocol on your device. Tutorials for various connection methods can be found [here](https://support.nordvpn.com/hc/en-us/sections/19326591402001-Windows)
Internet speed can also be directly affected by the condition of both your hardware and firmware. Here’s what we recommend:
1. Make sure you have the latest available drivers and software on your computer, including Ethernet adapter and motherboard drivers, BIOS updates, router firmware, etc.
2. Temporarily disable your firewall to see whether it will have an impact on your overall internet speed. If it does, check your firewall settings and remove unnecessary rules or consider using different firewall software.
3. Close any applications that may be transferring data in the background, e.g. software for downloading or file sharing.
4. Old and sometimes even new routers provided to you by your internet service provider often use outdated firmware or are technically poorly manufactured. This can directly impact your internet speed, so we recommend investing in a better router.",https://support.nordvpn.com/hc/en-us/related/click?data=BAh7CjobZGVzdGluYXRpb25fYXJ0aWNsZV9pZGwrCJEw8gaJEjoYcmVmZXJyZXJfYXJ0aWNsZV9pZGwrCJF9pQyJEjoLbG9jYWxlSSIKZW4tdXMGOgZFVDoIdXJsSSJbL2hjL2VuLXVzL2FydGljbGVzLzIwMzc5NzM2MzU0OTYxLUltcHJvdmUtY29ubmVjdGlvbi1zcGVlZC1vbi1XaW5kb3dzLXdpdGgtTm9yZFZQTi1hcHAGOwhUOglyYW5raQk%3D--8c61c149bf79216b7b32754e0414e32eccd087ea
What is your money-back policy?,"Here is the refund and cancellation policy at the core of our 30-day money-back guarantee:
“...if you are not satisfied with our Services, you may cancel the Subscription and request a refund within 30 days following your purchase of our Services (“Money Back Guarantee”). Please note that Subscriptions may be refunded on the basis of the Money Back Guarantee only after the initial purchase. Once a Subscription is renewed, it cannot be refunded on the basis of the Money Back Guarantee, unless applicable law provides otherwise.”
This and other conditions of our service can be found in our [Terms of Service](https://my.nordaccount.com/legal/terms-of-service/).
Here are our instructions for [how to cancel](https://support.nordvpn.com/hc/en-us/articles/19556844985489-How-to-cancel-auto-renewal-for-your-subscription) automatic payment renewal.
## Requesting a refund
Previously, refunds could only be processed through our support team. We have now implemented an automated refund system that is more efficient, faster, and convenient for our customers to use. This change also improves our ability to gather feedback, allowing us to better understand issues and improve our service. As we continue to refine this new process, your feedback is welcomed to help us enhance it further.
To request a refund for your payment, contact our customer support team via live chat available in the bottom right corner of the page, and indicate you would like us to refund your payment.
1. You will receive a link to your Nord Account dashboard. Follow the link and verify it’s you who’s trying to access the account.
2. In the following window, you will see which payments are eligible for a refund. Such payments will have a Refund button available. To proceed, click on Refund.Please keep in mind that not all payments are eligible for refunds, and certain terms apply depending on where you bought the subscription:
* * Apple App Store: Subscriptions purchased via the Apple App Store are subject to Apple's refund policies. We're unable to issue refunds for payments made through the Apple App Store. For assistance, please reach out to Apple directly via Apple Support.
* Amazon Appstore: If you've purchased your subscription through the Amazon App Store, contact Amazon directly for assistance via Amazon Support.
* Google Play Store: Refunds for payments made through the Google Play Store can be requested through NordVPN’s customer support, provided they fall within the refund terms outlined above. Additionally, if the payment was made within the last 48 hours, you can request a refund directly from your Google Play account. For more details, visit Google Play Support.
* Retailers or resellers: If you've purchased a subscription outside the NordVPN website (e.g., physical store, online shop, or marketplace like BestBuy or StackSocial), please contact the retailer directly regarding the refund.
1. In the following window, select the reason for canceling the service and requesting a refund. Your feedback is invaluable because it helps us pinpoint areas for improvement and ensures a better experience for all our users.Once completed, click Submit and Continue. 
2. You will see your refund summary. You can confirm it by clicking Refund.
3. After submitting the request, you will receive a confirmation email saying that your refund has been ordered.
4. You should now see the refund status for your payment as Refund Processing. This means that your request has been received and is currently being processed. This process can take up to a few hours*.*Please note, that due to recent implementation, it may take up to 4 hours for a refund request to be processed.
5. Once the refund is complete, the refund status on your dashboard will change to Refunded, and you will receive a confirmation email. Please note that depending on your payment method, it may take up to 10 business days for the refund to reach your account. If there was an error or you have any other questions, please contact our customer support team directly.",https://support.nordvpn.com/hc/en-us/related/click?data=BAh7CjobZGVzdGluYXRpb25fYXJ0aWNsZV9pZGwrCBH9Jde2EToYcmVmZXJyZXJfYXJ0aWNsZV9pZGwrCJF9pQyJEjoLbG9jYWxlSSIKZW4tdXMGOgZFVDoIdXJsSSJFL2hjL2VuLXVzL2FydGljbGVzLzE5NDc2OTkxMzExMTIxLVdoYXQtaXMteW91ci1tb25leS1iYWNrLXBvbGljeQY7CFQ6CXJhbmtpCg%3D%3D--3caf3892192efaaeb114998da487068d4635081b
Manual OpenVPN setup on Android,"The OpenVPN Connect application can be used as an alternative way to connect to NordVPN servers on your [Android device](https://nordvpn.com/download/android/). Since this manual connection method is more complicated to set up, it is recommended for advanced Android users.
1. First, download the configuration files for a server via your NordAccount dashboard.
Follow the steps below to find the manual connection configuration files:
1. Log into your [Nord Account](https://my.nordaccount.com/), and click NordVPN.
2. Scroll down to Advanced Settings and click Set up NordVPN manually.
3. Select the OpenVPN configuration files tab.
4. Find the server you wish to connect to by using the Search bar or by scrolling down and download it by clicking Download UDP or Download TCP.
5. When connecting to OpenVPN & IKEv2 manually, you're going to need to use the Username and Password from the Service credential tab.
1. To install OpenVPN on your phone or tablet, first go to the Google Play Store.
2. In the search bar at the top of the screen, type “OpenVPN Connect” (without the quotation marks). Once you find the app, click “Install” to download it.
3. To begin using OpenVPN on Android, launch OpenVPN Connect from your home screen or app menu. In the following window, select “File.”
4. A window will pop up, asking you if you allow the app to access certain data on your device. Click ""Allow."" 
5. Navigate to the folder where you have downloaded the OpenVPN configuration file. It should be in the “Downloads” folder by default. Choose the files you want to import and press ""Import"" at the bottom.
6. In the following window, type any title for the connection and enter your NordVPN service credentials. In the upper-right corner, press ""Add.""You can find your NordVPN service credentials (username and password) through the [Nord Account dashboard](https://my.nordaccount.com/dashboard/nordvpn/):
Follow the steps below to find the service credentials for manual connection setup:
1. Log into your [Nord Account](https://my.nordaccount.com/), click NordVPN, and, under Manual setup, click on Service credentials. Here you'll find the Username and Password needed to connect manually.
1. Once you have successfully configured the connection, you can initiate it by tapping the toggle switch next to the OpenVPN profile.
2. The application will ask you for the permissions necessary for the VPN connection. Click ""Ok.""
3. In the following prompt, tap ""Continue."" 
4. If the connection is successful, you will see a window similar to the one below displaying your connection stats, such as your current data throughput and connection duration.
That’s it — enjoy privacy and security online.",https://support.nordvpn.com/hc/en-us/related/click?data=BAh7CjobZGVzdGluYXRpb25fYXJ0aWNsZV9pZGwrCJHuEGofEjoYcmVmZXJyZXJfYXJ0aWNsZV9pZGwrCBHe4lWCEjoLbG9jYWxlSSIKZW4tdXMGOgZFVDoIdXJsSSJGL2hjL2VuLXVzL2FydGljbGVzLzE5OTI2MTMyNzgwNjg5LU1hbnVhbC1PcGVuVlBOLXNldHVwLW9uLUFuZHJvaWQGOwhUOglyYW5raQY%3D--25f6a879e077280e0b26b5d5f5b52b70ec747b01
How to setup NordVPN on Android,"From October 17th, 2024, older applications will have a few function limitations. The issues can affect
Android applications version 7.9.2 and below. They can include not receiving notifications in the app and reduced Dark Web Monitoring and Meshnet functionality.To resolve the issue, please update your application to the latest version.
To begin using NordVPN on your Android device, all you need to do is to download the VPN for Android, sign in (or sign up), and then connect to a NordVPN server. As soon as you've successfully connected to a NordVPN server, your Android's internet connection will be secure and private.
To go through these steps with ease, check out the instructions we provide below. Additionally, you'll find the various ways in which you can adjust the NordVPN app for Android to suit your needs!
## Table of contents:
* How to download and install NordVPN for Android
* How to set up the NordVPN mobile app for Android
* How to use NordVPN Android app
* Choosing between different servers
* Adjusting VPN settings
* (Optional) Sideload the NordVPN app
## How to download and install NordVPN for Android
First, download NordVPN for Android and install the app on your Android device.
1. Open Play Store.
2. Enter NordVPN in the search bar and select the NordVPN app. Tap Install.
### How to set up the NordVPN mobile app for Android
1. Once you’ve installed the application, tap to open it.
2. In the main menu, tap SIGN UP to create a new account or LOG IN if you already have one.
3. Pressing on any of the two buttons above will open your browser and take you to our Nord Account page, where you can either proceed with logging in or creating an account.Please note that in case you're signing up, you will be asked to get a subscription before you may begin using the service. 
### How to use NordVPN Android app
To make your connection to the internet secure and private, connect to a NordVPN server. This can be done in several ways: by pressing on the QUICK CONNECT button, clicking on a country name within the Country List, or finding a server through the search bar.Now you know how to set up a vpn on Android but there's a lot more NordVPN can offer to make your experience the best for you. Let's take a look at the different options and features that you can adjust according to your needs.Swipe up on the main screen to find all server options and features.
1. 1. Quick Connect: connect to the closest and least loaded server. This connection method is useful when the specifics of server location or other settings aren't as important as getting lighting-fast service.
2. Traffic routing: Traffic routing is one of the Meshnet features. It allows you to route all of your Internet traffic through your friends or your other device and use the IP address of that device to access the Internet.
3. Specialty servers: NordVPN offers a variety of different types of servers, each with unique benefits. Learn more about them in our dedicated article: What do the different server categories mean?
4. Search bar: use it to find specific servers. You can input the name of a country, city, server number, or even the name of the specialty category.
5. All countries list: another method for connecting - simply scroll through the list for the country you would like to connect to, and then on the country name when you find it.
6. [Meshnet](https://nordvpn.com/meshnet/): this feature allows you to create a secure, private network for many devices located anywhere in the world, access them remotely, and send all your online traffic through another device.
7. Notifications: here you can find all news about the latest updates and security tips.
8. Statistics and Settings: by clicking here you can find your connection statistics and by pressing this cogwheel icon you will open the settings menu. There's a separate section below that explains all of the options found there.
## Choosing between different servers
Connecting to a specific country: Swipe up to see the Country list. There, tap on the country you're looking for, and you will be automatically connected to a server in that location.

Alternatively, the pins on the world map signify where we have servers and the number of them in the country. Pressing on them will show you the exact city servers we have. You can tap on different pins without a number and connect to any desired city.Finally, you can also click on the search bar, and type in the country's name there.
Connecting to a specific city: You can tap on the three dots next to a country to select a specific city.

The search bar can help here, too. Type in the name of the city, and it will appear as long as we have VPN servers in it.
Connecting to a specific server: have a server number in mind that you want to reuse? Type it into the search bar, and you'll get it:

## Adjusting VPN settings
1. On the map screen, tap the user profile icon in the bottom right corner to access Account Statistics and Settings.
2. Tap on the gear icon at the top right corner to find all application settings. 
## VPN connection
Auto-connect: this option allows you to have the app automatically connect you to a VPN server the soonest there is access to the internet. Click here to learn more about this feature. Protocol: here you can switch between TCP, UDP, and NordLynx connection protocols. In short terms, the TCP protocol makes the connection slightly more stable, at the cost of speed. UDP, on the other hand, offers the opposite: a speedier, though less reliable connection. NordLynx has the best of both worlds, it provides speed and reliability.Split tunneling: this allows you to specify which apps go through the VPN connection. DNS: specifies a particular DNS server for the NordVPN app.Local network discovery: lets you stay invisible to devices on your local area network (LAN) when disabled.Metered connection: gives you more control over the data usage.
## Tools

Threat Protection: blocks intrusive ads and malicious domains based on DNS filtering. You can enable this feature once you connect to one of the NordVPN's servers. It comes with all the NordVPN plans. Read more about [stopping intrusive ads with NordVPN's ad blocker](https://nordvpn.com/features/threat-protection/ad-blocker/) on our feature page.
Due to Google's policies, Threat Protection no longer blocks ads for NordVPN apps downloaded from the Google Play Store. However, it still protects you from malicious domains and trackers through DNS filtering. You can download the NordVPN app with ad-blocking functionality directly from our website.
Kill Switch: cuts off your internet connection when you’re disconnected from secure NordVPN servers.Tapjacking protection: keeps you safe from unintentional disconnects by requiring 2 steps to disable VPN.
## General
Appearance: the go-to settings section for changing between light, dark and neutral display modes. Help us improve: by turning on this feature, you can share your anonymous data to help us improve in the future.
## Auto-connect
1. Select which networks NordVPN can use to automatically establish a VPN connection on Android: mobile networks, Wi-Fi and Ethernet, or Always (for any network).
2. If you choose to automatically connect to the Fastest available server, you will be able to choose one of the servers from your Recent Connections, one of the Specialty servers, or a server in a specific country.Please note: a Trusted networks section is visible only on lower versions than Android 10. It allows you to disable Auto-Connect on specific Wi-Fi networks. For example, you can make an exception for your home Wi-Fi if you trust it. Later versions do not allow this feature due to security changes in the Android OS.
## (Optional) Sideload the NordVPN app
If you're unable to download NordVPN from the Google Play Store, you can get the .apk file here. These files allow users to bypass the Google Play Store if they are having technical issues.
To install the app, you will need to change the security settings on your device. Go to Settings > Security & Privacy > More Settings > Install unknown apps. Select the browser you used to download the NordVPN .apk file and enable Allow from this source.On Android version 7.0 and below, you can find this option in Settings > Security > Unknown sources.
Looking for a tutorial on how to install and use NordVPN on Android TV? Read this article.",https://support.nordvpn.com/hc/en-us/related/click?data=BAh7CjobZGVzdGluYXRpb25fYXJ0aWNsZV9pZGwrCBGfx1KwEToYcmVmZXJyZXJfYXJ0aWNsZV9pZGwrCBHe4lWCEjoLbG9jYWxlSSIKZW4tdXMGOgZFVDoIdXJsSSJGL2hjL2VuLXVzL2FydGljbGVzLzE5NDQ5MDAwNzMwMzg1LUhvdy10by1zZXR1cC1Ob3JkVlBOLW9uLUFuZHJvaWQGOwhUOglyYW5raQc%3D--f27374bd7531e7f13a058d84545579129a7f5055
How to connect to NordVPN with IKEv2/IPSec on iOS,"In this guide, we will cover how to set up an IKEv2 manual connection on an [iOS device (iPhone/iPad)](https://nordvpn.com/download/ios/).
Even though the [IKEv2/IPSec protocol is no longer supported on iOS](https://support.nordvpn.com/hc/en-us/articles/20226405871761-IKEv2-IPSec-protocol-is-no-longer-supported-on-iOS-and-macOS) on NordVPN 8.10.1 and newer app versions, this connection method can be used as one of the alternative ways to connect to NordVPN servers if you're unable to install the application.
This setup lacks the additional features of the native NordVPN app and requires more steps to set up.
## Manual connection setup
1. Download the NordVPN IKEv2 certificate to your device. You can do so by opening this link in Safari:
2. The certificate installation dialogue will appear. Tap Install in each step:
3. Once the certificate is installed, tap Done to complete the installation.3.1. On iOS 12.2 and later versions, after you download the certificate, you might see a pop-up saying ""Profile Downloaded - Review the profile in Settings app if you want to install it"".3.2. Navigate to your device Settings > Profile Downloaded > NordVPN Root CA > Install > Trust.If you cannot see the Profile Downloaded button, go to Settings > General > Profiles. You should find the downloaded profile there.
4. Now you have to determine which server to connect to. Go to . The tool will pick a server recommended for you. In our case, the recommended server is US #810 with the hostname us810.nordvpn.com. We will use this server as a reference in all further steps.
Follow the steps below to find the best server for your connection:
1. Log into your [Nord Account](https://my.nordaccount.com/), and click NordVPN.
2. Scroll down to Advanced Settings and click Set up NordVPN manually.
3. Select the Server recommendation tab. According to your location, the best server will be recommended.
4. By pressing Advanced filters you can further customize the recommended servers by selecting the Server type and the Security protocol.
5. Under the server IP, next to Available protocols, select IKEv2/IPSec.
6. In the window that pops up, copy the server hostname and use it in your IKEv2 manual connection setup.
7. When connecting to IKEv2 manually, you're going to need to use the Username and Password from the Service credential tab.
1. Go to Settings > General > VPN.Note: If you are using a newer version of iOS (15+) find the VPN setting section by the following pathway:General > VPN & Device Management > VPN
2. Tap on Add VPN Configuration...
3. Fill the boxes as follows:Type: IKEv2Description: Any preferred name for the VPN connectionServer: The hostname of the server (see step 4)Remote ID: The same hostname as in the Server fieldLocal ID: Leave emptyUser Authentication: UsernameUsername: Your NordVPN service usernamePassword: Your NordVPN service passwordYou can find your NordVPN service credentials (username and password) through the [Nord Account dashboard](https://my.nordaccount.com/dashboard/nordvpn/):
Follow the steps below to find the service credentials for manual connection setup:
1. Log into your [Nord Account](https://my.nordaccount.com/), click NordVPN, and, under Manual setup, click on Service credentials. Here you'll find the Username and Password needed to connect manually.
Proxy: OffTap Done.
1. To enable the VPN, go back to the device Settings and click on the toggle switch next to VPN.",https://support.nordvpn.com/hc/en-us/related/click?data=BAh7CjobZGVzdGluYXRpb25fYXJ0aWNsZV9pZGwrCJGGbiWHEjoYcmVmZXJyZXJfYXJ0aWNsZV9pZGwrCBHe4lWCEjoLbG9jYWxlSSIKZW4tdXMGOgZFVDoIdXJsSSJYL2hjL2VuLXVzL2FydGljbGVzLzIwMzcxNjU3ODg1MzI5LUhvdy10by1jb25uZWN0LXRvLU5vcmRWUE4td2l0aC1JS0V2Mi1JUFNlYy1vbi1pT1MGOwhUOglyYW5raQg%3D--f685c255d889f18e476a57f36a30e8b5ffbd8c92
Adjusting the Android app configuration,"Make these adjustments to check if your application is set up correctly:
* Try [switching](https://support.nordvpn.com/hc/en-us/articles/19973901502609-Switching-protocol-to-OpenVPN-UDP-or-TCP-Android) between [TCP and UDP](https://nordvpn.com/blog/tcp-or-udp-which-is-better/)
* Switch between different servers: try connecting to various countries or specific servers
* Try reinstalling the NordVPN app:Go to the Google Play Store, search for NordVPN, and click Uninstall. After the uninstall process finishes, click Install again.
If none of this helps, please check other troubleshooting methods for Android: [Troubleshooting connectivity on Android.](https://support.nordvpn.com/hc/en-us/articles/20041281541777-Troubleshooting-connectivity-on-Android)",https://support.nordvpn.com/hc/en-us/related/click?data=BAh7CjobZGVzdGluYXRpb25fYXJ0aWNsZV9pZGwrCBFq8ESCEjoYcmVmZXJyZXJfYXJ0aWNsZV9pZGwrCBHe4lWCEjoLbG9jYWxlSSIKZW4tdXMGOgZFVDoIdXJsSSJOL2hjL2VuLXVzL2FydGljbGVzLzIwMzUwNzExNjU0OTI5LUFkanVzdGluZy10aGUtQW5kcm9pZC1hcHAtY29uZmlndXJhdGlvbgY7CFQ6CXJhbmtpCQ%3D%3D--e2d47ea26cb8fea0c4c9ac0bc284f5fbd1c6b940
Connecting to NordVPN from country with internet restrictions,"If you're experiencing internet restrictions that are limiting your access to online content, there is a solution available to help you bypass these restrictions. In this article, we'll provide step-by-step instructions on how to bypass internet restriction on various devices, including Windows, Mac, Android, strongSwan, and iOS. Choose a section relative to you down below to begin:
* [Windows](https://support.nordvpn.com/hc/en-us/related/click?data=BAh7CjobZGVzdGluYXRpb25fYXJ0aWNsZV9pZGwrCJG0w%2FbMEToYcmVmZXJyZXJfYXJ0aWNsZV9pZGwrCBHe4lWCEjoLbG9jYWxlSSIKZW4tdXMGOgZFVDoIdXJsSSJkL2hjL2VuLXVzL2FydGljbGVzLzE5NTcyMDExMDIxNDU3LUNvbm5lY3RpbmctdG8tTm9yZFZQTi1mcm9tLWNvdW50cnktd2l0aC1pbnRlcm5ldC1yZXN0cmljdGlvbnMGOwhUOglyYW5raQo%3D--e91b54afbb183a5c2d9d67b5cae7764a2bc05a32#Windows)
* [macOS](https://support.nordvpn.com/hc/en-us/related/click?data=BAh7CjobZGVzdGluYXRpb25fYXJ0aWNsZV9pZGwrCJG0w%2FbMEToYcmVmZXJyZXJfYXJ0aWNsZV9pZGwrCBHe4lWCEjoLbG9jYWxlSSIKZW4tdXMGOgZFVDoIdXJsSSJkL2hjL2VuLXVzL2FydGljbGVzLzE5NTcyMDExMDIxNDU3LUNvbm5lY3RpbmctdG8tTm9yZFZQTi1mcm9tLWNvdW50cnktd2l0aC1pbnRlcm5ldC1yZXN0cmljdGlvbnMGOwhUOglyYW5raQo%3D--e91b54afbb183a5c2d9d67b5cae7764a2bc05a32#macOS)
* [Android - OVPN](https://support.nordvpn.com/hc/en-us/related/click?data=BAh7CjobZGVzdGluYXRpb25fYXJ0aWNsZV9pZGwrCJG0w%2FbMEToYcmVmZXJyZXJfYXJ0aWNsZV9pZGwrCBHe4lWCEjoLbG9jYWxlSSIKZW4tdXMGOgZFVDoIdXJsSSJkL2hjL2VuLXVzL2FydGljbGVzLzE5NTcyMDExMDIxNDU3LUNvbm5lY3RpbmctdG8tTm9yZFZQTi1mcm9tLWNvdW50cnktd2l0aC1pbnRlcm5ldC1yZXN0cmljdGlvbnMGOwhUOglyYW5raQo%3D--e91b54afbb183a5c2d9d67b5cae7764a2bc05a32#Android---OVPN)
* [Android - IKEv2](https://support.nordvpn.com/hc/en-us/related/click?data=BAh7CjobZGVzdGluYXRpb25fYXJ0aWNsZV9pZGwrCJG0w%2FbMEToYcmVmZXJyZXJfYXJ0aWNsZV9pZGwrCBHe4lWCEjoLbG9jYWxlSSIKZW4tdXMGOgZFVDoIdXJsSSJkL2hjL2VuLXVzL2FydGljbGVzLzE5NTcyMDExMDIxNDU3LUNvbm5lY3RpbmctdG8tTm9yZFZQTi1mcm9tLWNvdW50cnktd2l0aC1pbnRlcm5ldC1yZXN0cmljdGlvbnMGOwhUOglyYW5raQo%3D--e91b54afbb183a5c2d9d67b5cae7764a2bc05a32#Android---IKEv2)
* [iOS](https://support.nordvpn.com/hc/en-us/related/click?data=BAh7CjobZGVzdGluYXRpb25fYXJ0aWNsZV9pZGwrCJG0w%2FbMEToYcmVmZXJyZXJfYXJ0aWNsZV9pZGwrCBHe4lWCEjoLbG9jYWxlSSIKZW4tdXMGOgZFVDoIdXJsSSJkL2hjL2VuLXVzL2FydGljbGVzLzE5NTcyMDExMDIxNDU3LUNvbm5lY3RpbmctdG8tTm9yZFZQTi1mcm9tLWNvdW50cnktd2l0aC1pbnRlcm5ldC1yZXN0cmljdGlvbnMGOwhUOglyYW5raQo%3D--e91b54afbb183a5c2d9d67b5cae7764a2bc05a32#iOS)
* [strong Swan](https://support.nordvpn.com/hc/en-us/related/click?data=BAh7CjobZGVzdGluYXRpb25fYXJ0aWNsZV9pZGwrCJG0w%2FbMEToYcmVmZXJyZXJfYXJ0aWNsZV9pZGwrCBHe4lWCEjoLbG9jYWxlSSIKZW4tdXMGOgZFVDoIdXJsSSJkL2hjL2VuLXVzL2FydGljbGVzLzE5NTcyMDExMDIxNDU3LUNvbm5lY3RpbmctdG8tTm9yZFZQTi1mcm9tLWNvdW50cnktd2l0aC1pbnRlcm5ldC1yZXN0cmljdGlvbnMGOwhUOglyYW5raQo%3D--e91b54afbb183a5c2d9d67b5cae7764a2bc05a32#strong-Swan)
## Avoiding local internet restrictions on Windows
Note: Unfortunately, we are currently experiencing some connectivity issues in the China region as our server configurations for manual connections and applications have recently been blocked. Our developers are aware of the issue and are working on a solution as soon as possible. We apologize for the inconvenience and thank you for your patience.
In case you’re facing internet restrictions on your Windows device, you can solve the internet restrictions by using the NordVPN NordLynx protocol. Follow the steps below to get started:
1. [Download the NordVPN application](https://downloads.nordcdn.com/apps/windows/NordVPN/latest/NordVPNSetup.exe).
2. Go into the settings menu of the NordVPN app:
3. Click connection:
4. Click the VPN protocol drop-down:
5. Switch to the [NordLynx protocol:](https://support.nordvpn.com/hc/en-us/articles/19564565879441-What-is-NordLynx)
6. Return to the main screen and press quick connect.
You should now be able to connect.
## Avoiding local internet restrictions on macOS
To bypass internet restrictions on your macOS device, you can set up an IKEv2 VPN connection. To get started, follow the steps below:
1. Download the NordVPN IKEv2 certificate to your Mac.
2. Click on the downloads folder.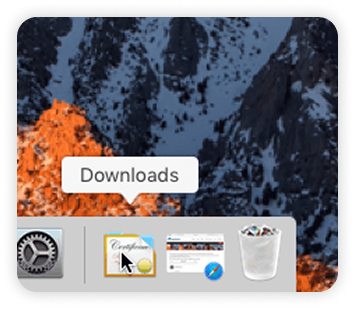
3. Open root.der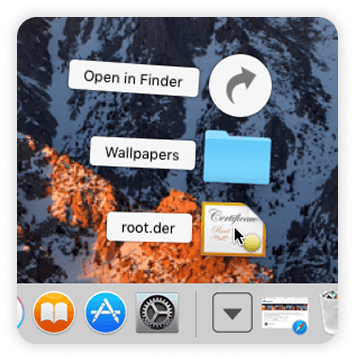
4. Click add to add the certificate to the login keychain.
5. Right-click the NordVPN Root CA certificate in the login keychain, and select get info.
6. Under when using this certificate, find extensible authentication (EAP) and IP Security (IPsec) and select always trust for both. 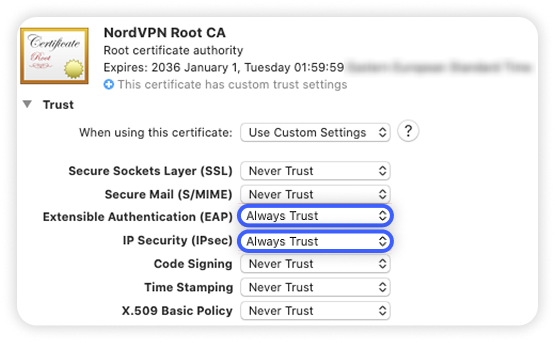You will have to enter your mac password to make these changes.
7. Click on the Apple icon in the upper left-hand corner of the screen, and select system preferences.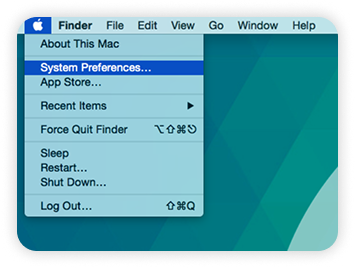
8. In system preferences, click the network icon.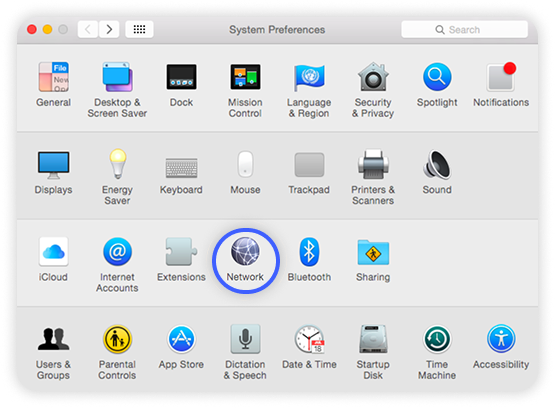
9. Click the + icon in the lower left-hand corner of the screen.You must have administrator privileges.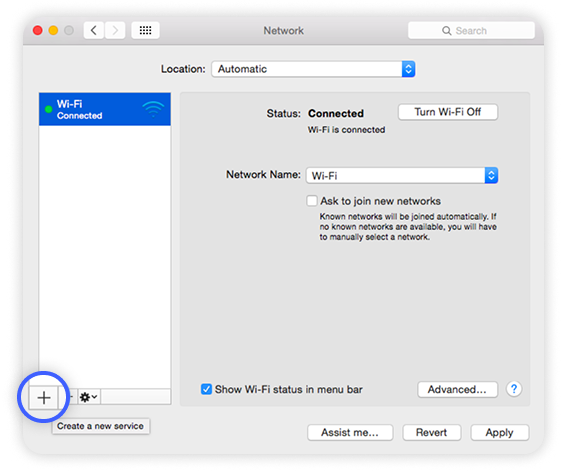
10. From the interface dropdown list, select VPN.
11. For VPN type select IKEv2.
12. Input a name for the service name field, once done, click create.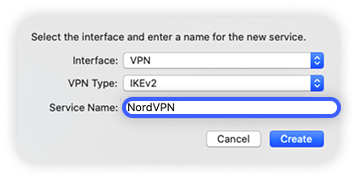
13. The settings for the new VPN connection will now be displayed.In the server address field, enter the IP from the list below.In the remote ID field, enter NordVPN's server domain name from the same list:
Server Address: | Remote ID:
---|---
```
178.79.177.90
```
| - | ```
uk2326.nordvpn.com
```
```
178.79.177.195
```
| - | ```
uk2326.nordvpn.com
```
```
178.79.177.150
```
| - | ```
uk2326.nordvpn.com
```
```
212.71.235.149
```
| - | ```
uk2326.nordvpn.com
```
```
212.71.235.93
```
| - | ```
uk2326.nordvpn.com
```
```
173.255.216.165
```
| - | ```
us5783.nordvpn.com
```
```
172.104.115.248
```
| - | ```
jp598.nordvpn.com
```
```
172.104.115.220
```
| - | ```
jp599.nordvpn.com
```
```
172.104.115.82
```
| - | ```
jp598.nordvpn.com
```
```
172.104.115.26
```
| - | ```
jp598.nordvpn.com
```
```
172.104.115.47
```
| - | ```
jp599.nordvpn.com
```
Example: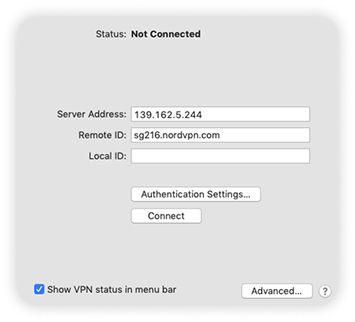
1. Click authentication settings
2. Select username as the authentication method.
3. Enter your NordVPN service username and service password. Click ok and apply.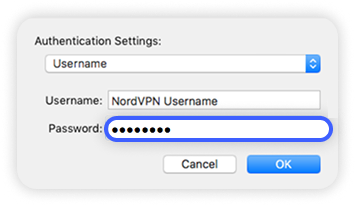You can find your NordVPN service credentials (service username and service password) in the [Nord Account dashboard](https://my.nordaccount.com/dashboard/nordvpn/):
4. Click NordVPN.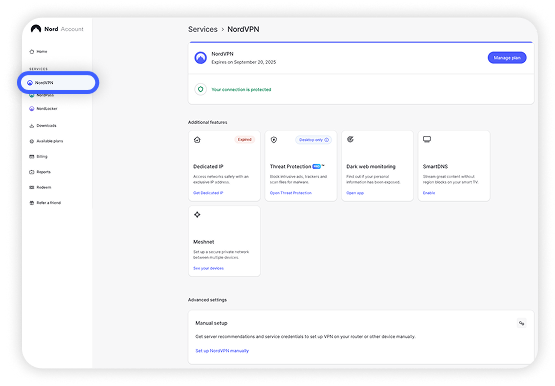
5. Select set up NordVPN manually.
6. You will receive a verification code in your registered email. 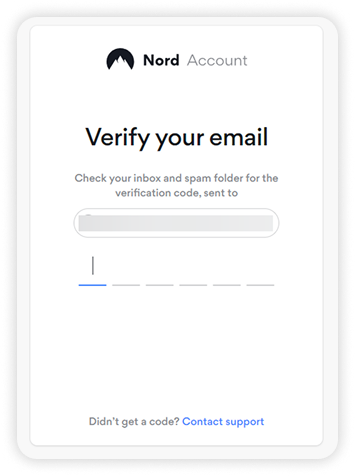
7. Copy the credentials using the buttons on the right.
8. Click connect and apply.
You will now be connected. If you’ve chosen to see the VPN status in the menu bar, you can control your VPN connection from there.

After completing the steps, your macOS device should be connected successfully.
## Avoiding local internet restrictions on Android
If you are struggling with internet restrictions on your Android device, you can bypass them by using Obfuscated servers. Follow the steps below to get started:
1. [Download our application](https://downloads.nordcdn.com/apps/android/generic/nordvpn-sideload/latest/NordVPN.apk?source_caller=ui&shortlink=m41zobj1&c=android-app-apk&pid=nordvpn.com&af_xp=custom).
2. [Switch to Open VPN (TCP).](https://support.nordvpn.com/hc/en-us/articles/19973901502609-Switching-protocol-to-OpenVPN-UDP-or-TCP-Android)
3. Go to specialty servers tab: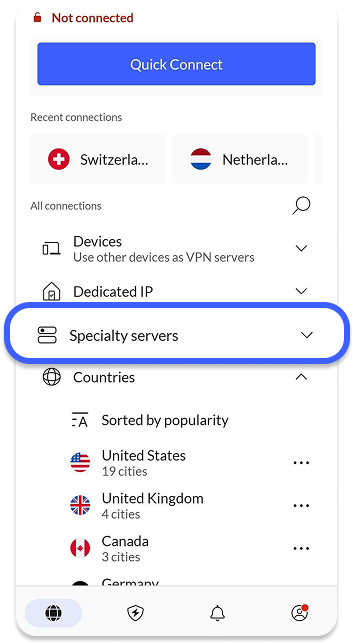
4. Connect to obfuscated servers:
Once you have completed the steps, your device will be connected to the obfuscated servers.
## Avoiding local internet restrictions on Android - IKEv2
You can bypass internet restrictions on your Android device by using the IKEv2 protocol. Follow the steps below to get started:
Firstly, [download the NordVPN IKEv2 connection certificate.](https://downloads.nordcdn.com/certificates/root.der)Next up, you'll need a server hostname to connect to. Follow the steps below to find the best server for your connection:
1. Log into your [Nord Account](https://my.nordaccount.com/?_gl=1*144igq8*_gcl_aw*R0NMLjE3MzMxMjE5MzQuQ2owS0NRaUFyN0M2QmhEUkFSSXNBT1VLaWZoYktXbFBCWnVtM0N1VTZvSXJXdnBxVzRDMG5hQVN3SkxMSENTVTRLdGYtM3MtME9FTVNpd2FBdUh2RUFMd193Y0I.*_gcl_au*NTU4NzA4MjgyLjE3MzE0OTcxNTU.*FPAU*NTU4NzA4MjgyLjE3MzE0OTcxNTU.*_ga*ODk2Mjg3NDQ3LjE3MjM1MDUwMjE.*_ga_LEXMJ1N516*MTczOTI1Mzk1Ni41NS4xLjE3MzkyNTUwMTkuNTkuMC4w&_ga=2.79116950.321693579.1739185791-896287447.1723505021&nv_tri=TC_6510770784465425_1723505020819&nv_trs=1739185790499_1739185790499_41_0), and click NordVPN.
2. Scroll down to advanced settings and click set up NordVPN manually.
3. Select the Server recommendation tab. According to your location, the best server will be recommended.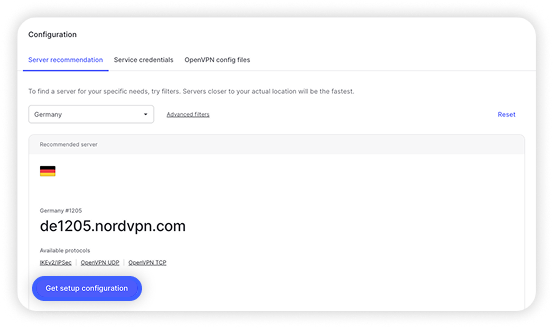
4. By pressing advanced filters you can further customize the recommended servers by selecting the server type and the security protocol.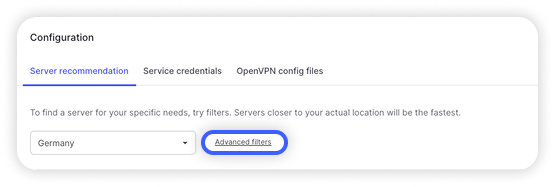
5. Under the server IP, next to available protocols, select IKEv2/IPSec.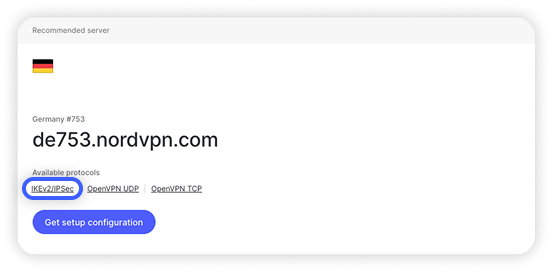
6. In the window that pops up, copy the server hostname and use it in your IKEv2 manual connection setup.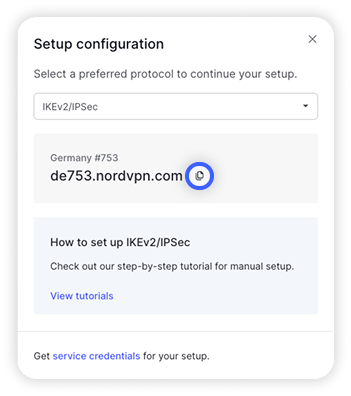
7. When connecting to IKEv2 manually, you're going to need to use the username and password from the service credential tab.
1. Download and install the strongSwan VPN Client from the [Play Store](https://play.google.com/store/apps/details?id=org.strongswan.android) or [directly from us.](https://download.strongswan.org/Android/strongSwan-2.3.3.apk)
2. Open the strongSwan application.
3. Tap on the three-dot icon in the top-right corner of the app and select CA certificates from the drop-down menu.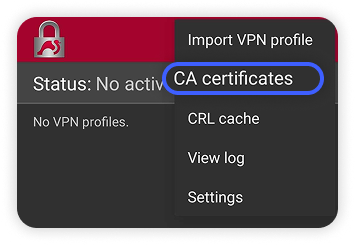
4. Tap on the three-dot icon again and select import certificate.
5. Select the root.der file you downloaded in the first step.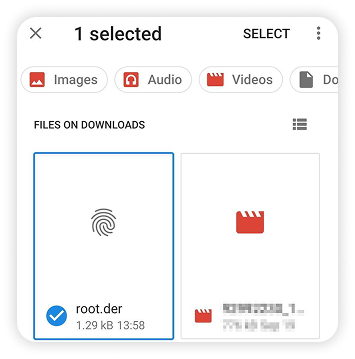
6. Confirm by tapping import certificate.
7. Tap the left-pointing arrow to go back to the main screen of the strongSwan app.
8. Select add VPN profile.
9. Now you'll have to fill out several fields, starting with the one labeled server.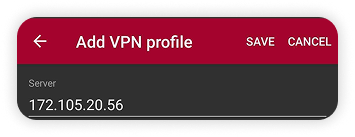
10. Enter a server IP address from the list below. You'll need the server hostname later on in the tutorial:
```
66.175.217.239 - us5783.nordvpn.com
```
```
74.207.240.34 - us5783.nordvpn.com
```
```
74.207.240.173 - us5783.nordvpn.com
```
```
74.207.252.8 - us5783.nordvpn.com
```
```
74.207.252.88 - us5783.nordvpn.com
```
```
139.162.124.92 - jp598.nordvpn.com
```
```
139.162.124.101 - jp598.nordvpn.com
```
```
139.162.124.107 - jp598.nordvpn.com
```
```
139.162.124.113 - jp598.nordvpn.com
```
```
139.162.124.114 - jp598.nordvpn.com
```
11. Enter your NordVPN service credentials in the username and password fields.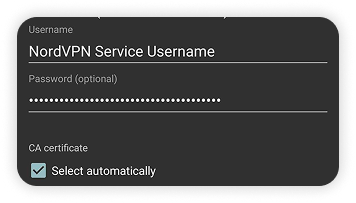
12. Click on show advanced settings.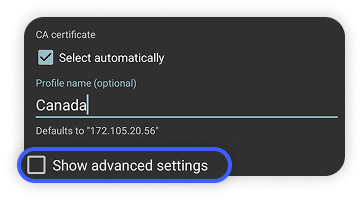In the new field server identity enter the hostname that stood next to the IP address that you chose in step 16.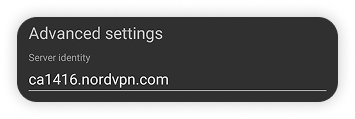Once you have entered all the information, click save.
1. To connect, tap the profile you have just created.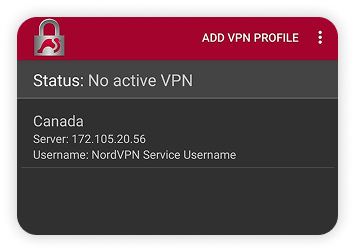
2. The application will ask you for the permissions necessary for the VPN connection. Click ok.Note: Different devices may display slightly different warning messages.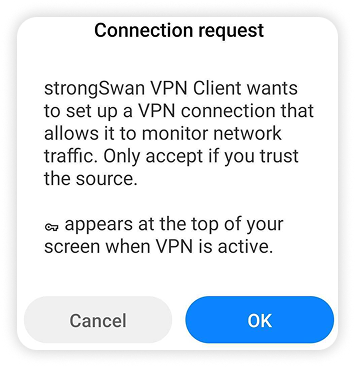
Once you see a status saying you are connected, you have successfully connected to the VPN server. You can now minimize the application and use your device as usual – all of your internet traffic is now secure and goes through a VPN.Tap disconnect to disconnect from the server.
## Avoiding local internet restrictions on iOS
If you are encountering internet restrictions on your iOS device, you can bypass them by setting up an IKEv2 connection. Follow along to the steps below to get started:
1. Download the [NordVPN IKEv2 certificate](https://downloads.nordcdn.com/certificates/root.der) to your device.
2. Tap install in each of the steps: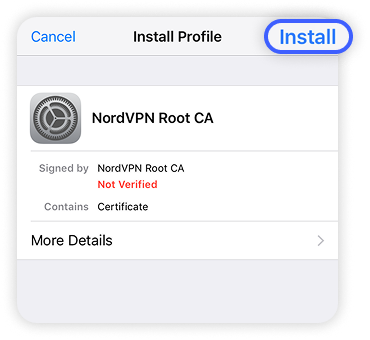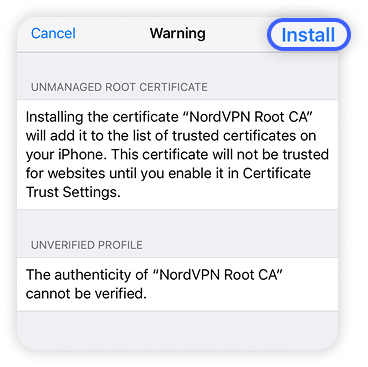
3. Tap done to complete the installation.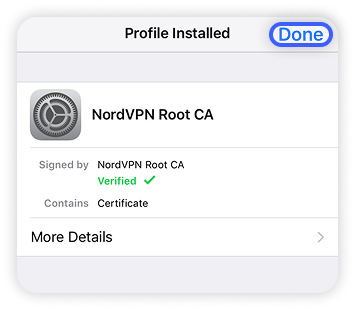In the iOS 12.2 version and above, after you download the certificate, you might see a pop-up saying: ""Profile downloaded. Review the profile in Settings app if you want to install it.""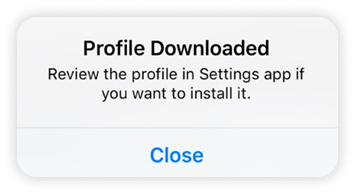
4. Go to your iOS settings.
5. Tap profile downloaded.
6. Go to NordVPN Root CA.
7. Tap install.
8. Tap trust.
9. If you cannot see the profile downloaded option, go to settings.
10. Tap general.
11. Select profiles. You should find the downloaded profile there.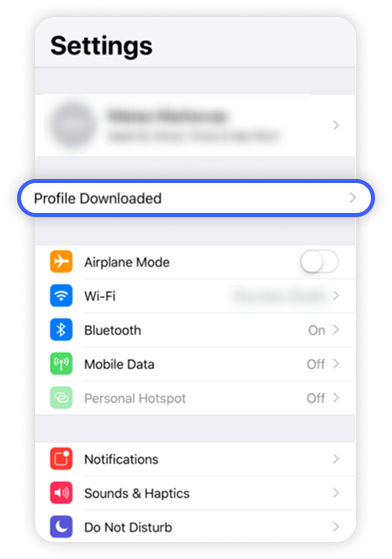
12. Open Settings.
13. Select general.
14. Tap VPN.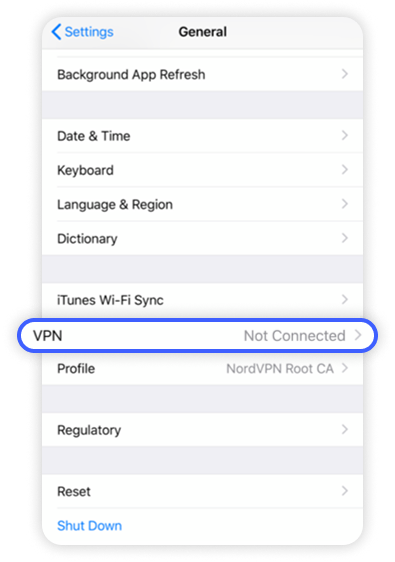
15. Tap add VPN configuration.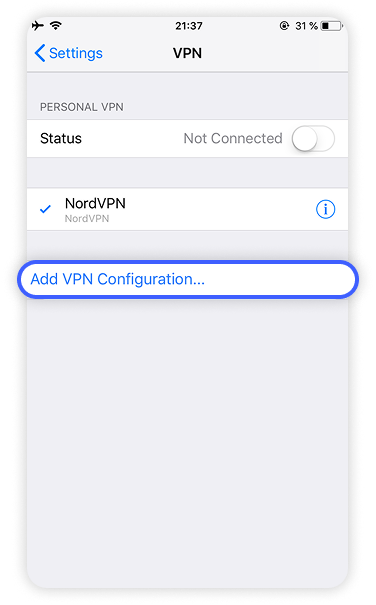
16. Complete the fields as follows:Type: IKEv2Description: Any preferred name for the VPN connectionServer: server IP from the list belowRemote ID: server hostname from the list belowLocal ID: Leave emptyUser Authentication: UsernameUsername: Your NordVPN service credentials Password: Your NordVPN service passwordProxy: OffYou can find your NordVPN service credentials (username and password) through the [Nord Account dashboard](https://my.nordaccount.com/dashboard/nordvpn/):
1. Go to the menu bar:
2. Click NordVPN.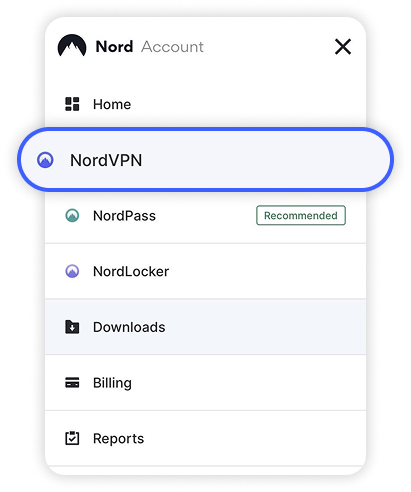
3. Scroll down and click Set up NordVPN manually.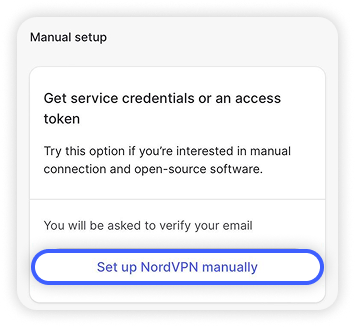
4. You will receive a verification code in your registered email. Type the code in: 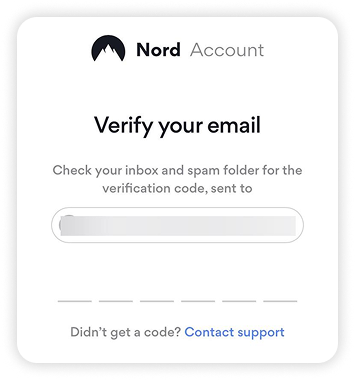
5. Copy the credentials using the copy button below.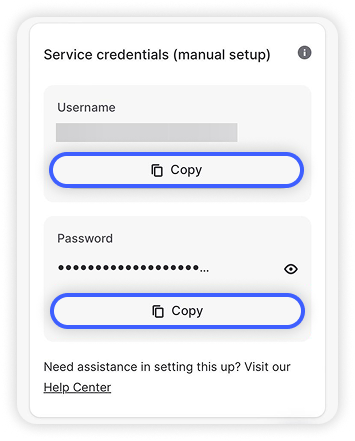
6. IP and hostname list:
```
178.79.177.90 - uk2326.nordvpn.com
```
```
178.79.177.195 - uk2326.nordvpn.com
```
```
178.79.177.150 - uk2326.nordvpn.com
```
```
212.71.235.149 - uk2326.nordvpn.com
```
```
212.71.235.93 - uk2326.nordvpn.com
```
```
173.255.216.165 - us5783.nordvpn.com
```
```
172.104.115.248 - jp598.nordvpn.com
```
```
172.104.115.220 - jp599.nordvpn.com
```
```
172.104.115.82 - jp598.nordvpn.com
```
```
172.104.115.26 - jp598.nordvpn.com
```
```
172.104.115.47 - jp599.nordvpn.com
```
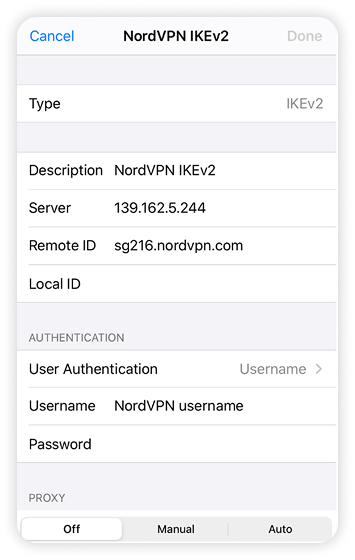Tap done.
7. Go back to the settings menu of the device and tap the toggle switch next to VPN to enable the VPN connection.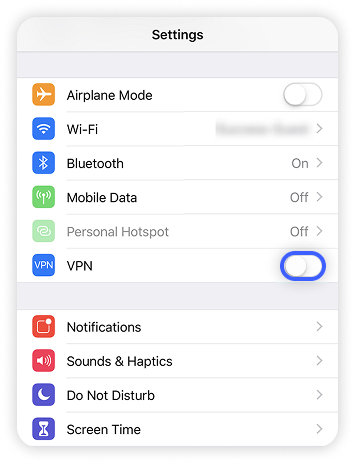
After completing the steps, your NordVPN connection will be enabled successfully.
## Avoiding local internet restrictions on strongSwan
In this guide you will learn how to bypass local internet restrictions on strongSwan, follow the steps below to begin:
1. Make sure you have all the required dependencies on your device. To do this, run the following command:
```
sudo apt-get update && sudo apt-get upgrade
```
2. Next, get the following packages:
```
sudo apt-get install strongswan libcharon-extra-plugins libcharon-standard-plugins
```
Note: For Arch-based distributions and others, you might not have libcharon packages, as they are in the strongswan package. In this case, run:
```
pacman -S strongswan
```
3. Open ipsec.secrets Note: copy-pasting the command may lead to issues. It would be best to type out by hand).
```
sudo nano /etc/ipsec.secrets
```
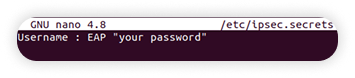
4. Now, change the fields username and your password for your NordVPN username and password as found below.
5. Click NordVPN in the [Nord Account dashboard](https://my.nordaccount.com/dashboard/nordvpn/):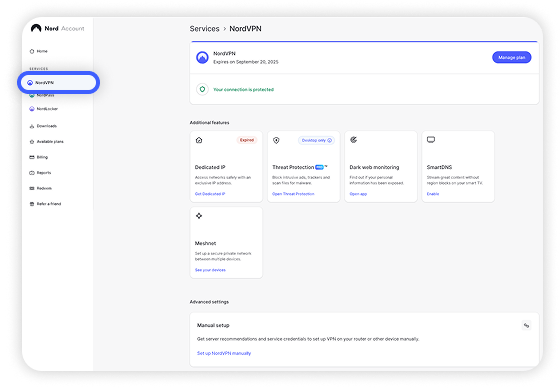
6. Select set up NordVPN manually. 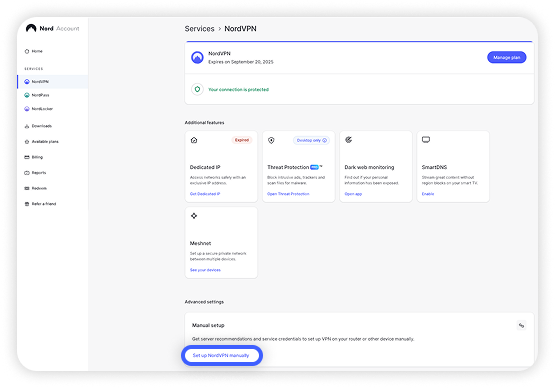
7. You will receive a verification code in your email that you use for NordVPN services. Type the code in: 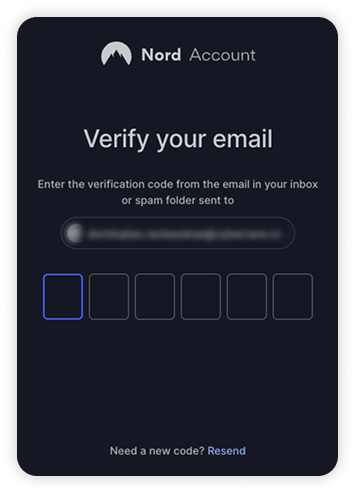
8. Copy the credentials using the copy buttons on the right: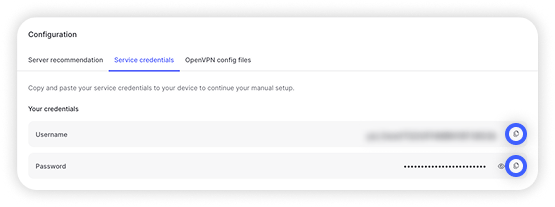
9. Your password must be wrapped inside double-quotes. Also, make sure to have a space between username, :, and EAP.To save the changes, press CTRL+O, and then exit nano editor by pressing CTRL+X.
10. Once again, use the preferred text editor to enter /etc/ipsec.conf file. Do not forget root privileges since the file is write-protected from anyone except root.
```
sudo nano /etc/ipsec.conf
```
11. Copy-paste this into the config:conn NordVPNkeyexchange=ikev2dpdaction=cleardpddelay=300seap_identity=""USERNAME""leftauth=eap-mschapv2left=%defaultrouteleftsourceip=%configright=SERVER_IPrightauth=pubkeyrightsubnet=0.0.0.0/0rightid=%SERVER_HOSTNAMErightca=/etc/ipsec.d/cacerts/NordVPN.pemtype=tunnelauto=add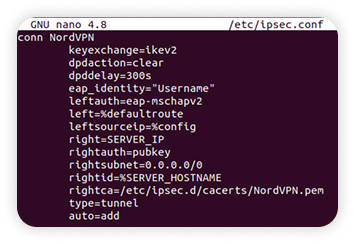
12. Change USERNAME to your NordVPN service username from step 9, SERVER_IP to the IP from the list of servers below, for example 172.105.20.56, and SERVER_HOSTNAME to the hostname of the server from the list below:
```
178.79.177.90 - uk2326.nordvpn.com
```
```
178.79.177.195 - uk2326.nordvpn.com
```
```
178.79.177.150 - uk2326.nordvpn.com
```
```
212.71.235.149 - uk2326.nordvpn.com
```
```
212.71.235.93 - uk2326.nordvpn.com
```
```
173.255.216.165 - us5783.nordvpn.com
```
```
172.104.115.248 - jp598.nordvpn.com
```
```
172.104.115.220 - jp599.nordvpn.com
```
```
172.104.115.82 - jp598.nordvpn.com
```
```
172.104.115.26 - jp598.nordvpn.com
```
```
172.104.115.47 - jp599.nordvpn.com
```
13. Enter /etc/strongswan.d/charon/constraints.conf file.
```
sudo nano /etc/strongswan.d/charon/constraints.conf
```
14. Inside the file, change load = yes to load = no. Download the NordVPN RSA certificate.
```
sudo wget https://downloads.nordcdn.com/certificates/root.pem -O /etc/ipsec.d/cacerts/NordVPN.pem
```
15. Now let’s restart ipsec in order to reload all configuration files.
```
sudo ipsec restart
```
If you’ve made any typos in /etc/ipsec.conf file you’ll be notified when the service will begin starting.
16. After it’s done, you can connect by launching this command:
```
sudo ipsec up NordVPN
```
This command should show the output “Connection NordVPN has been established successfully”.
17. To disconnect, type:
```
sudo ipsec down NordVPN
```
### Changing the server:
1. Edit the file /etc/ipsec.conf:
```
sudo nano /etc/ipsec.conf
```
2. Change the right and rightid fields with ones that correspond with a different server and save the file. For example:
```
right=45.79.113.73
```
```
rightid=us5733.nordvpn.com
```
3. Run the commands:
```
sudo ipsec restart
```
```
sudo ipsec up NordVPN
```
## Common errors and their solutions:
If you are receiving no config named 'NordVPN' error after running the ipsec up NordVPN command, please refer to our article regarding the [Linux IKEv2 MSCHAPv2 fix](https://support.nord-help.com/hc/en-us/articles/20371936731665-Linux-IKEv2-MSCHAPv2-fix).If you are getting the error: Error ""generating INFORMATIONAL request 4 [ N(AUTH_FAILED) ]"".Follow these steps:
1. Run the command:
```
sudo rm /etc/ipsec.sec*
```
2. Create a new ipsec.secret file using the command:
```
sudo nano /etc/ipsec.secrets
```
3. Enter the credentials as described in the step 4 of the main guide, and save the file.
4. Run the commands:
```
sudo ipsec restart
```
```
sudo ipsec up NordVPN
```
After following the steps, your device should be connected succesfully.",https://support.nordvpn.com/hc/en-us/related/click?data=BAh7CjobZGVzdGluYXRpb25fYXJ0aWNsZV9pZGwrCJG0w%2FbMEToYcmVmZXJyZXJfYXJ0aWNsZV9pZGwrCBHe4lWCEjoLbG9jYWxlSSIKZW4tdXMGOgZFVDoIdXJsSSJkL2hjL2VuLXVzL2FydGljbGVzLzE5NTcyMDExMDIxNDU3LUNvbm5lY3RpbmctdG8tTm9yZFZQTi1mcm9tLWNvdW50cnktd2l0aC1pbnRlcm5ldC1yZXN0cmljdGlvbnMGOwhUOglyYW5raQo%3D--e91b54afbb183a5c2d9d67b5cae7764a2bc05a32
Troubleshooting connectivity on Android,"There are several reasons why you may be having trouble connecting to [NordVPN on your Android](https://nordvpn.com/download/android/) device. These include issues with your account status, app configuration, or network settings. To troubleshoot, go through the following steps one by one.
* [Make sure your NordVPN account is active](https://support.nordvpn.com/hc/en-us/articles/19602526121489-Making-sure-your-account-is-active).
* [Check if your NordVPN app is up to date](https://nordvpn.com/blog/nordvpn-ios-release-notes/).
* To do so, open the app, tap on Profile in the bottom right corner, select Settings at the top right of the screen, and scroll down to the bottom of the screen.
* If you are using an older version, [reinstall the NordVPN app on your Android device.](https://support.nordvpn.com/hc/en-us/articles/29748627824273-How-to-re-install-NordVPN-on-Android)
* Stop any ongoing VPN connections, kill the NordVPN app, clear the app cache, restart it, and try to connect.
* Change mobile network – instead of Wi-Fi, try mobile data and vice versa.
* If you're using Quick connect, try connecting to a specific country server.
* If connecting to a specific server doesn't work, try other servers as well.
* Change the VPN connection protocol.
* Try switching to the [NordWhisper](https://support.nordvpn.com/hc/en-us/articles/31528242519953-How-to-use-NordWhisper-on-NordVPN) and [OpenVPN UDP/TCP](https://support.nordvpn.com/hc/en-us/articles/20465699170321-Switching-protocol-to-OpenVPN-UDP-or-TCP-iOS) protocols and connecting again.
* Try connecting to [Obfuscated servers](https://nordvpn.com/features/obfuscated-servers/) while using the OpenVPN UDP/TCP protocol.
* [Reinstall the NordVPN app on Android](https://support.nordvpn.com/hc/en-us/articles/29748627824273-How-to-re-install-NordVPN-on-Android).
* [Check your Android device configuration](https://support.nordvpn.com/hc/en-us/articles/19925722673297-Checking-your-device-configuration).
After each step, check if the issue remains. In the case that the problems are still there, be sure to reach out to our support team for a quick solution by pressing on either the email or chat button bellow.",https://support.nordvpn.com/hc/en-us/related/click?data=BAh7CjobZGVzdGluYXRpb25fYXJ0aWNsZV9pZGwrCJGWdzk6EjoYcmVmZXJyZXJfYXJ0aWNsZV9pZGwrCBFq8ESCEjoLbG9jYWxlSSIKZW4tdXMGOgZFVDoIdXJsSSJOL2hjL2VuLXVzL2FydGljbGVzLzIwMDQxMjgxNTQxNzc3LVRyb3VibGVzaG9vdGluZy1jb25uZWN0aXZpdHktb24tQW5kcm9pZAY7CFQ6CXJhbmtpBg%3D%3D--be2a33b823cd5bc9c676d02332691ca1a81e37b2
Connecting to NordVPN (IKEv2/IPSec) on Android,"These instructions will help you to connect to NordVPN on Android using the IKEv2 protocol.
1. Download the [NordVPN IKEv2 connection certificate](https://downloads.nordcdn.com/certificates/root.der).
2. Download and install the [strongSwan VPN Client app from Google Play](https://play.google.com/store/apps/details?id=org.strongswan.android).
3. Open the strongSwan application.
4. Tap on the three-dot icon in the top-right corner of the app and select ""CA certificates"" from the drop-down menu.
5. In the following screen, tap on the three-dot icon again and select ""Import certificate.""
6. Select the root.der file that you have downloaded in step 1.
7. Confirm your selection by tapping Import certificate.
8. Tap the left-pointing arrow to go back to the main screen of the strongSwan app.
9. Select Add VPN profile.
10. In the Server field, enter the hostname of a NordVPN server.For the sake of this tutorial, the server hostname will be “us6180.nordvpn.com.” Press Advanced filters and select in the Security Protocol dropdown, select IKEv2/IPsec.
Follow the steps below to find the best server for your connection:
1. Log into your [Nord Account](https://my.nordaccount.com/), and click NordVPN.
2. Scroll down to Advanced Settings and click Set up NordVPN manually.
3. Select the Server recommendation tab. According to your location, the best server will be recommended.
4. By pressing Advanced filters you can further customize the recommended servers by selecting the Server type and the Security protocol.
5. Under the server IP, next to Available protocols, select IKEv2/IPSec.
6. In the window that pops up, copy the server hostname and use it in your IKEv2 manual connection setup.
7. When connecting to IKEv2 manually, you're going to need to use the Username and Password from the Service credential tab.
1. Enter your NordVPN service credentials in the “Username” and “Password” fields.
2. All other settings can stay the same. You can give the profile whatever name you want in the “Profile name” field.Once you have entered all the required information, click ""Save.""
3. To connect, tap the profile you have just created.
4. The application will ask you for the permissions necessary to form a VPN connection. Tap ""OK.""Note: Different devices may display different warning messages.
5. If the status field shows that you are “Connected,” the connection to the VPN server has been successful. You can now minimize the application and use your device as usual – your internet traffic is now secured by NordVPN.To disconnect from the server, tap ""Disconnect.""",https://support.nordvpn.com/hc/en-us/related/click?data=BAh7CjobZGVzdGluYXRpb25fYXJ0aWNsZV9pZGwrCBHe4lWCEjoYcmVmZXJyZXJfYXJ0aWNsZV9pZGwrCBFq8ESCEjoLbG9jYWxlSSIKZW4tdXMGOgZFVDoIdXJsSSJTL2hjL2VuLXVzL2FydGljbGVzLzIwMzUwOTk1OTc5NzkzLUNvbm5lY3RpbmctdG8tTm9yZFZQTi1JS0V2Mi1JUFNlYy1vbi1BbmRyb2lkBjsIVDoJcmFua2kH--c8d75d0df9bbde35e439f25fa5c3f32637955d37
How to set up NordVPN with Chrome extension,"## How to set up the NordVPN Chrome extension
1. Download [VPN Chrome extension](https://nordvpn.com/download/chrome-extension/) form our website, or you can get it from [Google Chrome Web Store](https://chromewebstore.google.com/detail/nordvpn-vpn-proxy-for-pri/fjoaledfpmneenckfbpdfhkmimnjocfa).
2. Click on Add to Chrome button. 
3. Chrome might ask you if you want to add the extension. Click Add extension.
4. Then you will receive a NordVPN notification that the extension was added successfully.
5. After the installation is finished, the NordVPN logo will appear on the toolbar in the top-right corner of the browser. Click on the NordVPN logo and you will be prompted to either login or sign up using Nord Account.
## How to use and customize the NordVPN Chrome Extension
Now that you have a VPN for Chrome let's look at how you can make your first connection and adjust the extension settings to suit your needs.
1. Protected status: when you connect to a NordVPN server, this bar will confirm that your connection is successful by displaying the status as Protected.
2. Quick Connect: the fastest way to begin using the NordVPN extension. After pressing Quick Connect, you'll immediately connect to a NordVPN server.
3. Search: whereas the Quick Connect option will decide on a server location for you, this option allows you to specify the country of the NordVPN server.
4. Settings: here, you can find your General, Connection, Security and privacy settings. General: in these settings, you can find your subscription information, application appearance, language preferences, and a function to import and export [split tunneling](https://support.nordvpn.com/hc/en-us/articles/20321703651985-Split-Tunneling-feature-on-NordVPN-extension) settings.Connection: when accessing connection settings, you can choose to automatically connect to NordVPN servers or add URLs that you wish to be excluded from the NordVPN connection.Security and privacy: enable the [WebRTC](https://support.nordvpn.com/hc/en-us/articles/20318383008529-How-to-stop-WebRTC-leaks) Leaks option and the [Threat Protection](https://support.nordvpn.com/General-info/Features/1047407402/What-are-Threat-Protection-and-Threat-Protection-Lite.htm) feature. Also, choose to turn on security warnings for suspicious websites.
5. Support Assistance: more information about the extension and live chat with an agent option can be found here.
6. Notifications: updates and news about the NordVPN extension.
7. Main extension window: If you click here, you can open the main extension window.
8. List of Recently Connected Countries: This section displays the countries to which you have established a recent connection. In case you haven't connected to any server yet, you will find recommendations for countries to connect to.
And that's it! Enjoy browsing securely using your VPN for Chrome.",https://support.nordvpn.com/hc/en-us/related/click?data=BAh7CjobZGVzdGluYXRpb25fYXJ0aWNsZV9pZGwrCBHuvf6BEjoYcmVmZXJyZXJfYXJ0aWNsZV9pZGwrCJGWbEKCEjoLbG9jYWxlSSIKZW4tdXMGOgZFVDoIdXJsSSJSL2hjL2VuLXVzL2FydGljbGVzLzIwMzQ5NTMzOTQxMjY1LUhvdy10by1zZXQtdXAtTm9yZFZQTi13aXRoLUNocm9tZS1leHRlbnNpb24GOwhUOglyYW5raQg%3D--ec44e30312c13ca86b8ecfeaab4e878d2c157651
Change your DNS servers on Android TV with NordVPN,"Note: when you’re connected to a NordVPN server, NordVPN’s private DNS servers are used by default.
To use NordVPN’s [DNS servers](https://nordvpn.com/blog/what-is-dns/) on Android TV when not connected to a NordVPN server, follow these steps:
1. Open Settings on your Android TV. They are usually designated by a cogwheel icon.
2. Head to Network and Internet and write down the [IP address](https://nordvpn.com/what-is-my-ip/) (marked “1” in the picture below).Select IP settings (marked “2” in the picture below).
3. In IP settings, switch to Static.
4. Enter the IP address from step 2.
5. [Find your gateway (router IP) address](https://nordvpn.com/blog/find-router-ip-address/) and enter it in the appropriate field.
6. Make sure the Network prefix length is 24 — change it if necessary.
7. Enter the first DNS address: 103.86.96.100
8. Enter the second DNS address: 103.86.99.100
Android TV is now configured to use [private DNS](https://nordvpn.com/blog/private-dns/) servers instead of your ISP's default DNS servers.",https://support.nordvpn.com/hc/en-us/related/click?data=BAh7CjobZGVzdGluYXRpb25fYXJ0aWNsZV9pZGwrCBHSaSqdEjoYcmVmZXJyZXJfYXJ0aWNsZV9pZGwrCBFq8ESCEjoLbG9jYWxlSSIKZW4tdXMGOgZFVDoIdXJsSSJZL2hjL2VuLXVzL2FydGljbGVzLzIwNDY2MjMwNzQzNTY5LUNoYW5nZS15b3VyLUROUy1zZXJ2ZXJzLW9uLUFuZHJvaWQtVFYtd2l0aC1Ob3JkVlBOBjsIVDoJcmFua2kJ--d43ec2f7a75fdbff96cb9b2634f165a758938253
Using NordLynx in the NordVPN app for Android,"NordLynx is the technology we built around the WireGuard® protocol. It lets you experience WireGuard’s speed benefits without compromising your privacy.
1. Install the [VPN for android](https://nordvpn.com/download/android/).
2. Navigate to Account & App Settings in the bottom right corner and tap on the gear icon in the right top corner:
3. Choose Protocol:
4. Select Nordlynx and connect to the VPN:
WireGuard is a registered trademark of Jason A. Donenfeld.",https://support.nordvpn.com/hc/en-us/related/click?data=BAh7CjobZGVzdGluYXRpb25fYXJ0aWNsZV9pZGwrCBFVTPOcEjoYcmVmZXJyZXJfYXJ0aWNsZV9pZGwrCBFq8ESCEjoLbG9jYWxlSSIKZW4tdXMGOgZFVDoIdXJsSSJUL2hjL2VuLXVzL2FydGljbGVzLzIwNDY1MzA2MDY0MTQ1LVVzaW5nLU5vcmRMeW54LWluLXRoZS1Ob3JkVlBOLWFwcC1mb3ItQW5kcm9pZAY7CFQ6CXJhbmtpCg%3D%3D--48caaeeebeed47db8cb8c3874d559a856ffbdeeb
What is an unsafe local network on iOS,"Invisibility on LAN feature has been released on iOS. It will effectively mitigate the issue, however please be aware that due to the improper implementation by Apple, turning it on may affect VPN connection stability.
If you received a message about a potentially unsafe network, your connection requires additional caution. The problem emerges in scenarios where a router assigns non-RFC1918 IP addresses for the local network. This might seem technical, but in simple terms, certain types of local network configurations can result in VPN traffic being unintentionally exposed. Note: this feature is only supported on 16+ OS versions
### What Does This Mean for You?
If you're using an iOS device on a network that hands out non-RFC1918 IP addresses (which our app will detect), you'll receive a warning. This doesn't automatically mean the network is harmful, but it's a sign to be extra cautious. If possible, we recommend not to use that network.If you have access to the router you are connected to, you can change your Local Area Network IP range. In order to do that, please follow the steps detailed in [checking and changing your WiFi configuration](https://support.nordvpn.com/hc/en-us/articles/20188826004369-Checking-and-changing-your-WiFi-configuration) article.
We're actively liaising with Apple, hoping for a fix as for now, there is no way for us to resolve the issue without breaking the application and resulting in various connection issues. Until then, please be attentive to any alerts from our app and consider disconnecting from networks flagged as potentially unsafe.
Thank you for trusting us with your online privacy. We are committed to ensuring your digital security and will continue to keep you updated on any further developments.",https://support.nordvpn.com/hc/en-us/related/click?data=BAh7CjobZGVzdGluYXRpb25fYXJ0aWNsZV9pZGwrCJHhtgJlEjoYcmVmZXJyZXJfYXJ0aWNsZV9pZGwrCBF8VPDrFjoLbG9jYWxlSSIKZW4tdXMGOgZFVDoIdXJsSSJNL2hjL2VuLXVzL2FydGljbGVzLzIwMjI1MDQ2NTM2NTkzLVdoYXQtaXMtYW4tdW5zYWZlLWxvY2FsLW5ldHdvcmstb24taU9TBjsIVDoJcmFua2kG--e6a0b874399a0c30aa2229fc2e6b8b14a929714c
Switching protocol to OpenVPN UDP or TCP (iOS),"1. Open the application and click on the profile icon in the bottom right corner. 
2. Open the settings menu (gear icon).
3. Click on the Protocol tab.
4. Select the OpenVPN (UDP) or OpenVPN (TCP) option.",https://support.nordvpn.com/hc/en-us/related/click?data=BAh7CjobZGVzdGluYXRpb25fYXJ0aWNsZV9pZGwrCBGougqdEjoYcmVmZXJyZXJfYXJ0aWNsZV9pZGwrCBF8VPDrFjoLbG9jYWxlSSIKZW4tdXMGOgZFVDoIdXJsSSJTL2hjL2VuLXVzL2FydGljbGVzLzIwNDY1Njk5MTcwMzIxLVN3aXRjaGluZy1wcm90b2NvbC10by1PcGVuVlBOLVVEUC1vci1UQ1AtaU9TBjsIVDoJcmFua2kH--88ff94752793d7d3547da087ee71bf4436751dd3
What is a jailbroken device,"### What does the term mean?
Jailbreaking refers to bypassing of certain device restrictions. These restrictions are set by the manufacturer, usually in order to increase the security and the reliability of their devices. For instance, Apple restricts the ability of its customers when it comes to downloading applications from outside the Apple App Store. In order to sideload applications, which is to download them from an unofficial source, users must first jailbreak their iOS devices. By doing so, root access is gained, meaning that users can modify the needed files and directories that are otherwise hidden.
Essentially, jailbreaking provides greater control over one's device. However, additional freedom comes at a risk to security as well as privacy. One example stems from potential malware that can be downloaded from insecure sources. Unlike the Apple App Store where apps are thoroughly checked, there is no guarantee that the apps from outside will be safe. In the case that they indeed possess malware, your credentials and other personal information could be stolen without your knowledge.
### How can I know if my device is jailbroken, and can NordVPN protect me if it is?
First of all, the iOS version of the NordVPN application comes with a system that automatically detects whether or not your device could be jailbroken. If it is, you will be greeted with the following message:

Additionally, you can also find the jailbreak indication by scrolling to the bottom of the Settings menu:

If you suspect that your device may have malware or spyware installed, we do not recommend installing and using NordVPN. This is because your credentials may be stolen by malicious applications. Additionally, although NordVPN encrypts your connection to the internet, as well as protects your privacy online, it cannot prevent damage from downloading the above-mentioned files.",https://support.nordvpn.com/hc/en-us/related/click?data=BAh7CjobZGVzdGluYXRpb25fYXJ0aWNsZV9pZGwrCBFz%2FhudEjoYcmVmZXJyZXJfYXJ0aWNsZV9pZGwrCBF8VPDrFjoLbG9jYWxlSSIKZW4tdXMGOgZFVDoIdXJsSSJCL2hjL2VuLXVzL2FydGljbGVzLzIwNDY1OTg4ODI1ODczLVdoYXQtaXMtYS1qYWlsYnJva2VuLWRldmljZQY7CFQ6CXJhbmtpCA%3D%3D--35cc847cb0df323747a204c29c278aed228a89d1
Troubleshooting connectivity on iOS,"There are several reasons why you may be having trouble connecting to [NordVPN on your iOS](https://nordvpn.com/download/ios/) device. These include issues with your account status, network settings, or app configuration. Here are some steps you can follow to troubleshoot.
* [Make sure your NordVPN account is active](https://support.nordvpn.com/hc/en-us/articles/19602526121489-Making-sure-your-account-is-active).
* [Check if your NordVPN app is up to date](https://nordvpn.com/blog/nordvpn-ios-release-notes/).
* To do so, open the app, tap on Profile in the bottom right corner, select Settings at the top right of the screen, and scroll down to the bottom of the screen.
* If you are using an older version, uninstall the NordVPN app and download the latest NordVPN version for iOS.
* Stop any ongoing VPN connections, kill the NordVPN app, restart it, and try to connect.
* Change mobile network – instead of Wi-Fi, try mobile data and vice versa.
* If you're using Quick connect, try connecting to a specific country server.
* If connecting to a specific server doesn't work, try other servers as well.
* Change the VPN connection protocol.
* Try switching to the [NordWhisper](https://support.nordvpn.com/hc/en-us/articles/31528242519953-How-to-use-NordWhisper-on-NordVPN) and [OpenVPN UDP/TCP](https://support.nordvpn.com/hc/en-us/articles/20465699170321-Switching-protocol-to-OpenVPN-UDP-or-TCP-iOS) protocols and connecting again.
* Try connecting to [Obfuscated servers](https://nordvpn.com/features/obfuscated-servers/) while using the OpenVPN UDP/TCP protocol.
* If that does not help, reset the application:
1. Tap on the Profile in the bottom right corner.
2. Select Settings (gear icon) at the top right of the screen.
3. Tap Reset VPN profile.
* Reinstall the NordVPN app. To do so, tap and hold the NordVPN icon and tap on the X icon in the upper-left corner. After the app has been uninstalled, [download and install NordVPN on your iPhone](https://support.nordvpn.com/hc/en-us/articles/19451338152849-Installing-the-NordVPN-app-on-iPhone-or-iPad) again.
* If you're using a Wi-Fi connection, try to [change your DNS servers](https://support.nordvpn.com/hc/en-us/articles/20398776567313-Change-your-DNS-servers-on-iOS).
After each step, check if the issue remains. In the case that the problems are still there, be sure to reach out to our support team for a quick solution by pressing on either the email or chat button bellow.",https://support.nordvpn.com/hc/en-us/related/click?data=BAh7CjobZGVzdGluYXRpb25fYXJ0aWNsZV9pZGwrCJGXJjyNEjoYcmVmZXJyZXJfYXJ0aWNsZV9pZGwrCBF8VPDrFjoLbG9jYWxlSSIKZW4tdXMGOgZFVDoIdXJsSSJKL2hjL2VuLXVzL2FydGljbGVzLzIwMzk3ODA4ODUwODMzLVRyb3VibGVzaG9vdGluZy1jb25uZWN0aXZpdHktb24taU9TBjsIVDoJcmFua2kJ--aad26741c00a135e5985d8c4d9c4701ed460a03b
Manual OpenVPN connection setup on iOS 15,"Note: The OpenVPN app supports only 15 and newer versions of iOS.
Please follow these OpenVPN setup instructions on your [iOS 15 device](https://nordvpn.com/download/ios/):
1. Go to the App Store on your iPhone/iPad.
2. Tap on Search bar.
3. Enter ""openvpn connect"" in the search bar.
4. Find the OpenVPN Connect application and tap on its installation button.
5. Once the app is installed, download the .ovpn configuration file. You may also use [NordVPN server recommendation tool](https://my.nordaccount.com/dashboard/nordvpn/manual-configuration/server-recommendation/).
Follow the steps below to find the manual connection configuration files:
1. Log into your [Nord Account](https://my.nordaccount.com/), and click NordVPN.
2. Scroll down to Advanced Settings and click Set up NordVPN manually.
3. Select the OpenVPN configuration files tab.
4. Find the server you wish to connect to by using the Search bar or by scrolling down and download it by clicking Download UDP or Download TCP.
5. When connecting to OpenVPN & IKEv2 manually, you're going to need to use the Username and Password from the Service credential tab.
1. When the configuration is downloaded, select the Downloads button in the top right corner. After that, click on the downloaded configuration.
2. When the downloaded configuration opens up, select Share button in the top right corner.
3. In the Share sheet, tap Copy to OpenVPN button.
4. Inside the OpenVPN application, select File and tap Add to add the imported configuration.
5. You will get a pop-up asking for permission to add OpenVPN to your VPN configurations. Click Allow.
6. Enter your NordVPN service credentials.
Follow the steps below to find the service credentials for manual connection setup:
1. Log into your [Nord Account](https://my.nordaccount.com/), click NordVPN, and, under Manual setup, click on Service credentials. Here you'll find the Username and Password needed to connect manually.
1. Tap on the switch of the imported configuration to connect to a VPN server.
2. To change a server, tap on the slider button to disconnect. Tap on another imported profile to connect to the other server.
3. To disconnect, tap on the same button you used to connect.",https://support.nordvpn.com/hc/en-us/related/click?data=BAh7CjobZGVzdGluYXRpb25fYXJ0aWNsZV9pZGwrCBFiLo6bEjoYcmVmZXJyZXJfYXJ0aWNsZV9pZGwrCBF8VPDrFjoLbG9jYWxlSSIKZW4tdXMGOgZFVDoIdXJsSSJQL2hjL2VuLXVzL2FydGljbGVzLzIwNDU5MzE0NjM1MjgxLU1hbnVhbC1PcGVuVlBOLWNvbm5lY3Rpb24tc2V0dXAtb24taU9TLTE1BjsIVDoJcmFua2kK--f72829d54bd7a2367856ccfd10f72c8bae249080
Invisibility on a local network: why we had to build a broken feature?,"Our goal at NordVPN is to provide our customers with intuitive experiences, ease of access, and the most advanced VPN features in the industry. We take pride in our continuous focus on security; however, sometimes, it comes with the cost of building a terrible feature. Here's why.
We recently found ourselves facing a Catch-22 situation, when, due to bugs in Apple's VPN API configuration, we had to choose to either sacrifice our users' experience with the app or, under certain scenarios, put a risk on their security or privacy. We believe such a choice should never occur in the first place, and we suspect that a global tech powerhouse often boasting about its focus on users' privacy understands this as well. As of yet, we are saddened by the fact that our pleas for Apple to implement the necessary fixes on their operating systems continue to be acknowledged yet bafflingly ignored.
Being limited in what we can do on our side, we decided to offer a feature that, while aiming to offer the best possible solution security-wise, radically differs from our vision of an intuitive and smooth experience users should expect from their cybersecurity provider.
Stay invisible on a local network feature is our way to mitigate the TunnelCrack and TunnelVision vulnerabilities present in the VPN industry. In the case of TunnelCrack, certain routers may be configured in a way where they leak VPN traffic when using non-RFC1918 IP addresses, which is an industry-wide issue and only applies to macOS and iOS platforms. TunnelVision attack, in general, is a network technique that uses an operating system's dynamic host configuration protocol (DHCP) to try to route the traffic outside of the VPN's tunnel.
For our macOS VPN clients, the “Stay invisible on a local network” feature automatically sets the appropriate API parameters and alerts users when connected to an unsafe network, mitigating the VPN traffic leak on macOS. We have also built an unsecured network detection feature that will detect non-RFC1918 IP ranges, notify about possible risks, and inform users to enable “Stay invisible on a local network.” On iOS, the app will also inform users when they connect to an unsecured network through push notifications and in-app messages. The feature was fully released by the beginning of August 2023.
In contrast, our iOS VPN clients present more considerable challenges due to issues within Apple's implementation of the API parameters. Notably, in iOS versions 14.2 and above, enabling the ""Stay invisible on a local network"" feature causes internet connections to crash under certain conditions. It also prevents our VPN application from receiving client updates, leading to user internet connection crashes when updates are released.
The NordVPN team hopes that this inevitably crude solution for an impossible situation will, for the time being, offer sufficient data privacy for our users and – at the same time – prompt Apple to implement the necessary changes faster.
What OS are impacted?
The TunnelCrack and TunnelVision vulnerabilities affect our macOS and iOS VPN clients, while our Android, Linux, and Windows clients were immune due to implemented mitigations.
NordVPN Linux and Windows applications can configure the OS's firewall to prevent any traffic from exiting the device except through the VPN tunnel.
What connectivity limitations are put in place when this feature is turned ON?
With the feature turned ON, users cannot access other network devices, such as computers, printers, or TVs. The feature also blocks AirDrop usage.
What experience-breaking effects can users expect?
Enabling the feature in iOS 16.4 and later versions can prevent the NordVPN application from receiving client updates, leading to crashes of the user's internet connection when updates are released. Once users are cut off from the internet, the only solution is a device restart.
How can users ensure the safety of their data in NordVPN apps?
NordVPN apps do not leak traffic under any known circumstances if the Stay invisible on a local network and Kill Switch features are enabled within the app settings menu. It’s important to note that the feature is only available to iOS versions 16 and above. Visual instructions on [how to enable the feature on iOS](https://support.nordvpn.com/hc/en-us/articles/20225046536593-What-is-an-unsafe-local-network-on-iOS) or how to enable this feature on macOS.
Does the feature protect users from TunnelVision utilizing Option 121, too?Yes, it does.
Can NordVPN provide a bug-free solution without Apple's input?
No. Unfortunately, the bugs that come with using our feature are beyond our control. Apple's team has confirmed the bugs' existence and gave no clear timeline for their resolution.
What else can users do to ensure a better experience using this feature?
We believe that sufficiently maintained digital security is a collective effort. While we will continue searching for better solutions within our capacity, we are adamant that Apple needs to address the urgent issues of significant bugs in their operating systems. We invite everyone who is not indifferent to user privacy and security issues to keep pressuring Apple to fix its shortcomings in VPN API service.",https://support.nordvpn.com/hc/en-us/related/click?data=BAh7CjobZGVzdGluYXRpb25fYXJ0aWNsZV9pZGwrCBF8VPDrFjoYcmVmZXJyZXJfYXJ0aWNsZV9pZGwrCBFz%2FhudEjoLbG9jYWxlSSIKZW4tdXMGOgZFVDoIdXJsSSJrL2hjL2VuLXVzL2FydGljbGVzLzI1MjAyNjA1MTk0MjU3LUludmlzaWJpbGl0eS1vbi1hLWxvY2FsLW5ldHdvcmstd2h5LXdlLWhhZC10by1idWlsZC1hLWJyb2tlbi1mZWF0dXJlBjsIVDoJcmFua2kG--147c76501b71b398026d42ca117283c93139436c
Change your DNS servers on iOS,"You can manually configure the DNS servers in your iOS settings. Here is how:
1. Open Settings;
2. Tap on Wi-Fi. If it's switched off, turn it on;
3. Pick a Wi-Fi network and tap on the blue i icon;
4. Tap Configure DNS and select Manual;
5. Tap Add Server and add these DNS addresses:103.86.96.100103.86.99.100
6. Tap Save.",https://support.nordvpn.com/hc/en-us/related/click?data=BAh7CjobZGVzdGluYXRpb25fYXJ0aWNsZV9pZGwrCBHG1HWNEjoYcmVmZXJyZXJfYXJ0aWNsZV9pZGwrCBFz%2FhudEjoLbG9jYWxlSSIKZW4tdXMGOgZFVDoIdXJsSSJFL2hjL2VuLXVzL2FydGljbGVzLzIwMzk4Nzc2NTY3MzEzLUNoYW5nZS15b3VyLUROUy1zZXJ2ZXJzLW9uLWlPUwY7CFQ6CXJhbmtpBw%3D%3D--a9799dd1819cc5bf4a102c2ee4d097a52e00e40f
Switching protocol to OpenVPN UDP or TCP (iOS),"1. Open the application and click on the profile icon in the bottom right corner. 
2. Open the settings menu (gear icon).
3. Click on the Protocol tab.
4. Select the OpenVPN (UDP) or OpenVPN (TCP) option.",https://support.nordvpn.com/hc/en-us/related/click?data=BAh7CjobZGVzdGluYXRpb25fYXJ0aWNsZV9pZGwrCBGougqdEjoYcmVmZXJyZXJfYXJ0aWNsZV9pZGwrCBFz%2FhudEjoLbG9jYWxlSSIKZW4tdXMGOgZFVDoIdXJsSSJTL2hjL2VuLXVzL2FydGljbGVzLzIwNDY1Njk5MTcwMzIxLVN3aXRjaGluZy1wcm90b2NvbC10by1PcGVuVlBOLVVEUC1vci1UQ1AtaU9TBjsIVDoJcmFua2kI--72a9b89c27cabe912ef130382fbd36a323c8f2c4
Manual OpenVPN connection setup on iOS 15,"Note: The OpenVPN app supports only 15 and newer versions of iOS.
Please follow these OpenVPN setup instructions on your [iOS 15 device](https://nordvpn.com/download/ios/):
1. Go to the App Store on your iPhone/iPad.
2. Tap on Search bar.
3. Enter ""openvpn connect"" in the search bar.
4. Find the OpenVPN Connect application and tap on its installation button.
5. Once the app is installed, download the .ovpn configuration file. You may also use [NordVPN server recommendation tool](https://my.nordaccount.com/dashboard/nordvpn/manual-configuration/server-recommendation/).
Follow the steps below to find the manual connection configuration files:
1. Log into your [Nord Account](https://my.nordaccount.com/), and click NordVPN.
2. Scroll down to Advanced Settings and click Set up NordVPN manually.
3. Select the OpenVPN configuration files tab.
4. Find the server you wish to connect to by using the Search bar or by scrolling down and download it by clicking Download UDP or Download TCP.
5. When connecting to OpenVPN & IKEv2 manually, you're going to need to use the Username and Password from the Service credential tab.
1. When the configuration is downloaded, select the Downloads button in the top right corner. After that, click on the downloaded configuration.
2. When the downloaded configuration opens up, select Share button in the top right corner.
3. In the Share sheet, tap Copy to OpenVPN button.
4. Inside the OpenVPN application, select File and tap Add to add the imported configuration.
5. You will get a pop-up asking for permission to add OpenVPN to your VPN configurations. Click Allow.
6. Enter your NordVPN service credentials.
Follow the steps below to find the service credentials for manual connection setup:
1. Log into your [Nord Account](https://my.nordaccount.com/), click NordVPN, and, under Manual setup, click on Service credentials. Here you'll find the Username and Password needed to connect manually.
1. Tap on the switch of the imported configuration to connect to a VPN server.
2. To change a server, tap on the slider button to disconnect. Tap on another imported profile to connect to the other server.
3. To disconnect, tap on the same button you used to connect.",https://support.nordvpn.com/hc/en-us/related/click?data=BAh7CjobZGVzdGluYXRpb25fYXJ0aWNsZV9pZGwrCBFiLo6bEjoYcmVmZXJyZXJfYXJ0aWNsZV9pZGwrCBFz%2FhudEjoLbG9jYWxlSSIKZW4tdXMGOgZFVDoIdXJsSSJQL2hjL2VuLXVzL2FydGljbGVzLzIwNDU5MzE0NjM1MjgxLU1hbnVhbC1PcGVuVlBOLWNvbm5lY3Rpb24tc2V0dXAtb24taU9TLTE1BjsIVDoJcmFua2kJ--9d91d40769e808563b1a425f69149d1786cc5f90
How to connect to NordVPN with IKEv2/IPSec on iOS,"In this guide, we will cover how to set up an IKEv2 manual connection on an [iOS device (iPhone/iPad)](https://nordvpn.com/download/ios/).
Even though the [IKEv2/IPSec protocol is no longer supported on iOS](https://support.nordvpn.com/hc/en-us/articles/20226405871761-IKEv2-IPSec-protocol-is-no-longer-supported-on-iOS-and-macOS) on NordVPN 8.10.1 and newer app versions, this connection method can be used as one of the alternative ways to connect to NordVPN servers if you're unable to install the application.
This setup lacks the additional features of the native NordVPN app and requires more steps to set up.
## Manual connection setup
1. Download the NordVPN IKEv2 certificate to your device. You can do so by opening this link in Safari:
2. The certificate installation dialogue will appear. Tap Install in each step:
3. Once the certificate is installed, tap Done to complete the installation.3.1. On iOS 12.2 and later versions, after you download the certificate, you might see a pop-up saying ""Profile Downloaded - Review the profile in Settings app if you want to install it"".3.2. Navigate to your device Settings > Profile Downloaded > NordVPN Root CA > Install > Trust.If you cannot see the Profile Downloaded button, go to Settings > General > Profiles. You should find the downloaded profile there.
4. Now you have to determine which server to connect to. Go to . The tool will pick a server recommended for you. In our case, the recommended server is US #810 with the hostname us810.nordvpn.com. We will use this server as a reference in all further steps.
Follow the steps below to find the best server for your connection:
1. Log into your [Nord Account](https://my.nordaccount.com/), and click NordVPN.
2. Scroll down to Advanced Settings and click Set up NordVPN manually.
3. Select the Server recommendation tab. According to your location, the best server will be recommended.
4. By pressing Advanced filters you can further customize the recommended servers by selecting the Server type and the Security protocol.
5. Under the server IP, next to Available protocols, select IKEv2/IPSec.
6. In the window that pops up, copy the server hostname and use it in your IKEv2 manual connection setup.
7. When connecting to IKEv2 manually, you're going to need to use the Username and Password from the Service credential tab.
1. Go to Settings > General > VPN.Note: If you are using a newer version of iOS (15+) find the VPN setting section by the following pathway:General > VPN & Device Management > VPN
2. Tap on Add VPN Configuration...
3. Fill the boxes as follows:Type: IKEv2Description: Any preferred name for the VPN connectionServer: The hostname of the server (see step 4)Remote ID: The same hostname as in the Server fieldLocal ID: Leave emptyUser Authentication: UsernameUsername: Your NordVPN service usernamePassword: Your NordVPN service passwordYou can find your NordVPN service credentials (username and password) through the [Nord Account dashboard](https://my.nordaccount.com/dashboard/nordvpn/):
Follow the steps below to find the service credentials for manual connection setup:
1. Log into your [Nord Account](https://my.nordaccount.com/), click NordVPN, and, under Manual setup, click on Service credentials. Here you'll find the Username and Password needed to connect manually.
Proxy: OffTap Done.
1. To enable the VPN, go back to the device Settings and click on the toggle switch next to VPN.",https://support.nordvpn.com/hc/en-us/related/click?data=BAh7CjobZGVzdGluYXRpb25fYXJ0aWNsZV9pZGwrCJGGbiWHEjoYcmVmZXJyZXJfYXJ0aWNsZV9pZGwrCBFz%2FhudEjoLbG9jYWxlSSIKZW4tdXMGOgZFVDoIdXJsSSJYL2hjL2VuLXVzL2FydGljbGVzLzIwMzcxNjU3ODg1MzI5LUhvdy10by1jb25uZWN0LXRvLU5vcmRWUE4td2l0aC1JS0V2Mi1JUFNlYy1vbi1pT1MGOwhUOglyYW5raQo%3D--f4b2dc487e199ad124933958d0f5ced01c57b8d7
Why use NordVPN DNS servers?,"DNS servers translate human-friendly domain names such as www.google.com into IP addresses like 192.168.1.1 so your device can connect to websites. When you type a website address, your device asks a DNS server for the IP address. If the server doesn’t know it, it looks it up from other servers. Changing DNS servers provides you with increased security as well as speed. With default DNS you may be subject to DNS hijacking. DNS hijacking is a cyberattack where attackers redirect or alter DNS settings to send users to fake websites or malicious servers. This can lead to phishing, malware infections, data theft, or blocking access to legitimate sites. It often occurs through router vulnerabilities or malware.",https://support.nordvpn.com/hc/en-us/related/click?data=BAh7CjobZGVzdGluYXRpb25fYXJ0aWNsZV9pZGwrCBFegJ%2FQEToYcmVmZXJyZXJfYXJ0aWNsZV9pZGwrCBHG1HWNEjoLbG9jYWxlSSIKZW4tdXMGOgZFVDoIdXJsSSJML2hjL2VuLXVzL2FydGljbGVzLzE5NTg3NzI2ODU5NzkzLVdoYXQtYXJlLU5vcmRWUE4tRE5TLXNlcnZlci1hZGRyZXNzZXMGOwhUOglyYW5raQY%3D--eb610f3eb5df9cd066e61fd7bb2e17c0a809a940
How to connect to your dedicated IP on iOS,"A NordVPN dedicated IP is a unique IP address assigned solely to a specific server, ensuring it's not shared with any other device or network. With the NordVPN dedicated IP, you get improved connection speeds, reduced CAPTCHA requests, and enhanced security through exclusive accessibility.
In this tutorial, you will learn how to locate and connect to your purchased and assigned NordVPN dedicated IP.
The dedicated IP server category is available only with OpenVPN (UDP) and OpenVPN (TCP) protocols.
In order to connect, double-check if you have done the following:
1. Purchased a dedicated IP;
2. Set up the dedicated IP in your Nord Account.
## Connecting to your NordVPN dedicated IP on iOS
To connect to your NordVPN dedicated IP on your iOS device, follow along to the steps below:
1. Open your NordVPN app.
2. [Enable the OpenVPN (UDP) or ](https://support.nordvpn.com/Connectivity/iOS/1490186412/Switching-connection-protocol-to-OpenVPN-UDP-or-TCP-on-iOS.htm)OpenVPN (TCP) protocol.
3. In the homepage, scroll to specialty servers:
4. Tap dedicated IP:
5. Tap on your dedicated IP to connect:
Alternatively, you can connect by typing in your dedicated IP address into the search bar. To get connected using this method, follow the steps below:
1. Type your dedicated IP into the search bar:
2. Tap your dedicated IP to connect:
After completing the steps, you will have connected to your dedicated IP successfully. If you wish to test your connection, visit [NordVPN's DNS leak checker website](https://nordvpn.com/dns-leak-test/).
Please be aware that your email will be linked to that dedicated IP address.",https://support.nordvpn.com/hc/en-us/related/click?data=BAh7CjobZGVzdGluYXRpb25fYXJ0aWNsZV9pZGwrCJG%2BTJjmEToYcmVmZXJyZXJfYXJ0aWNsZV9pZGwrCBGougqdEjoLbG9jYWxlSSIKZW4tdXMGOgZFVDoIdXJsSSJRL2hjL2VuLXVzL2FydGljbGVzLzE5NjgyMDk1MzE2NjI1LUhvdy10by1jb25uZWN0LXRvLXlvdXItZGVkaWNhdGVkLUlQLW9uLWlPUwY7CFQ6CXJhbmtpBg%3D%3D--78c86a7d6081c65acf2c39e9a7321f527eccefe0
Where does NordVPN have dedicated IP addresses?,NordVPN-dedicated IP addresses are offered in these regions:,https://support.nordvpn.com/hc/en-us/related/click?data=BAh7CjobZGVzdGluYXRpb25fYXJ0aWNsZV9pZGwrCJG29wO%2BEToYcmVmZXJyZXJfYXJ0aWNsZV9pZGwrCBGougqdEjoLbG9jYWxlSSIKZW4tdXMGOgZFVDoIdXJsSSJFL2hjL2VuLXVzL2FydGljbGVzLzE5NTA3ODA4MDI0MjA5LURlZGljYXRlZC1Ob3JkVlBOLUlQLWFkZHJlc3NlcwY7CFQ6CXJhbmtpBw%3D%3D--4b45678a294f09805363c3d7406a10ab7df1e2e7
Dedicated NordVPN IP addresses,"When using NordVPN, your IP address changes to that of your VPN server. Normally, you share this IP address with other NordVPN users connected to the same server. However, if you purchase a NordVPN dedicated IP, you will get an IP address that belongs to you and you alone.
The advantages of a NordVPN dedicated IP addressNordVPN's dedicated IP allows you to bypass CAPTCHAs, easily access corporate networks, and avoid blocklists for IP addresses tainted by unscrupulous use. You can use the dedicated IP feature on up to 10 devices at the same time: simply connect with the [Open VPN (TCP)](https://support.nordvpn.com/hc/en-us/articles/20465552867345-Switching-protocol-to-OpenVPN-UDP-or-TCP) or [OpenVPN (UDP)](https://support.nordvpn.com/hc/en-us/articles/20465552867345-Switching-protocol-to-OpenVPN-UDP-or-TCP) protocol. You can also connect via the [NordLynx](https://support.nordvpn.com/hc/en-us/articles/19564565879441-What-is-NordLynx) protocol, however, it only supports one simultaneous connection. Dedicated IP is not available via tvOS, browser extension or the IKEv2 protocol.
## Where does NordVPN have dedicated IP addresses?
NordVPN-dedicated IP addresses are offered in these regions:
* The United States (Los Angeles, Dallas, New York, Chicago, Seattle, Miami)
* Germany (Frankfurt)
* The United Kingdom (London)
* The Netherlands (Amsterdam)
* France (Paris)
* Canada (Toronto)
* Japan (Tokyo)
* Italy (Milan)
* Sweden (Stockholm)
* Australia (Sydney)
* Hong Kong (Hong Kong)
* Switzerland (Zurich)
* Spain (Madrid)
* Belgium (Brussel)
* Denmark (Copenhagen)
* Poland (Warsaw)
* Portugal (Lisbon)
* South Africa (Johannesburg)
* Mexico
* Czech Republic (Prague)
Please note:
* If you are connecting from a country with internet restrictions, the dedicated IP address feature may fail to work as server accessibility from such regions is limited. Please consult our article on [how to connect from within a country with internet restrictions](https://support.nordvpn.com/hc/en-us/articles/19572011021457-Connecting-from-a-country-with-internet-restrictions) for more information.
* In case you wish to change your dedicated IP after a while, you may do that once per subscription. To change the dedicated IP, get in touch with NordVPN support.
Here is a list of tutorials showing you how to connect to your dedicated IP by NordVPN on different platforms:
* [Windows](https://support.nordvpn.com/hc/en-us/articles/20465449537681-How-to-connect-to-your-dedicated-IP-on-Windows)
* [Linux](https://support.nordvpn.com/hc/en-us/articles/19684336200081-How-to-connect-to-your-dedicated-IP-on-Linux)
* [macOS](https://support.nordvpn.com/hc/en-us/articles/19678530026641-How-to-connect-to-your-dedicated-IP-on-macOS)
* [iOS](https://support.nordvpn.com/hc/en-us/articles/19682095316625-How-to-connect-to-your-dedicated-IP-on-iOS)
* [Android](https://support.nordvpn.com/hc/en-us/articles/19682489581585-How-to-connect-to-your-dedicated-IP-on-Android)
You can test dedicated IP servers in the ""dedicated IP"" category in the application. The dedicated IP address you see in the application, would only connect you to a shared IP address. Once you make a purchase and get dedicated IP assigned, you would be able to connect to the specific server that would give you a static IP address that only you would be able to access.
If you wish to purchase a dedicated IP address in these regions, you can find a guide on how to do so here: [How to purchase a dedicated IP address.](https://support.nordvpn.com/hc/en-us/articles/19484196251921-How-to-purchase-a-Dedicated-IP-address)
Please be aware that if you purchase a NordVPN dedicated IP, your email will be linked to that IP address. For more information, please consult our Privacy Policy.",https://support.nordvpn.com/hc/en-us/related/click?data=BAh7CjobZGVzdGluYXRpb25fYXJ0aWNsZV9pZGwrCJG29wO%2BEToYcmVmZXJyZXJfYXJ0aWNsZV9pZGwrCBGougqdEjoLbG9jYWxlSSIKZW4tdXMGOgZFVDoIdXJsSSJFL2hjL2VuLXVzL2FydGljbGVzLzE5NTA3ODA4MDI0MjA5LURlZGljYXRlZC1Ob3JkVlBOLUlQLWFkZHJlc3NlcwY7CFQ6CXJhbmtpBw%3D%3D--4b45678a294f09805363c3d7406a10ab7df1e2e7
Switching protocol to OpenVPN UDP or TCP,"Some NordVPN server categories, found under the specialty server section, are available only while using OpenVPN UDP or TCP protocols.
Currently, these categories are Double VPN and a part of our obfuscated Servers. This article contains a list of instructions on how to switch your connection protocol on various platforms.
* [Windows](https://support.nordvpn.com/hc/en-us/articles/19774135293969-Switching-protocol-to-OpenVPN-UDP-or-TCP-Windows)
* [Android](https://support.nordvpn.com/hc/en-us/articles/19973901502609-Switching-protocol-to-OpenVPN-UDP-or-TCP-Android)
* [macOS](https://support.nordvpn.com/hc/en-us/articles/19921436351505-Switching-protocol-to-OpenVPN-UDP-or-TCP-macOS)
* [iOS](https://support.nordvpn.com/hc/en-us/articles/20465699170321-Switching-connection-protocol-to-OpenVPN-UDP-or-TCP-iOS)
* [Linux](https://support.nordvpn.com/hc/en-us/articles/20465783529233-Switching-connection-protocol-to-OpenVPN-UDP-or-TCP-on-Linux)",https://support.nordvpn.com/hc/en-us/related/click?data=BAh7CjobZGVzdGluYXRpb25fYXJ0aWNsZV9pZGwrCBFAAgKdEjoYcmVmZXJyZXJfYXJ0aWNsZV9pZGwrCBGougqdEjoLbG9jYWxlSSIKZW4tdXMGOgZFVDoIdXJsSSJPL2hjL2VuLXVzL2FydGljbGVzLzIwNDY1NTUyODY3MzQ1LVN3aXRjaGluZy1wcm90b2NvbC10by1PcGVuVlBOLVVEUC1vci1UQ1AGOwhUOglyYW5raQg%3D--c5411a243636dd8ac2ffb787a9e1ba37afe6f918
How to connect to NordVPN with IKEv2/IPSec on iOS,"In this guide, we will cover how to set up an IKEv2 manual connection on an [iOS device (iPhone/iPad)](https://nordvpn.com/download/ios/).
Even though the [IKEv2/IPSec protocol is no longer supported on iOS](https://support.nordvpn.com/hc/en-us/articles/20226405871761-IKEv2-IPSec-protocol-is-no-longer-supported-on-iOS-and-macOS) on NordVPN 8.10.1 and newer app versions, this connection method can be used as one of the alternative ways to connect to NordVPN servers if you're unable to install the application.
This setup lacks the additional features of the native NordVPN app and requires more steps to set up.
## Manual connection setup
1. Download the NordVPN IKEv2 certificate to your device. You can do so by opening this link in Safari:
2. The certificate installation dialogue will appear. Tap Install in each step:
3. Once the certificate is installed, tap Done to complete the installation.3.1. On iOS 12.2 and later versions, after you download the certificate, you might see a pop-up saying ""Profile Downloaded - Review the profile in Settings app if you want to install it"".3.2. Navigate to your device Settings > Profile Downloaded > NordVPN Root CA > Install > Trust.If you cannot see the Profile Downloaded button, go to Settings > General > Profiles. You should find the downloaded profile there.
4. Now you have to determine which server to connect to. Go to . The tool will pick a server recommended for you. In our case, the recommended server is US #810 with the hostname us810.nordvpn.com. We will use this server as a reference in all further steps.
Follow the steps below to find the best server for your connection:
1. Log into your [Nord Account](https://my.nordaccount.com/), and click NordVPN.
2. Scroll down to Advanced Settings and click Set up NordVPN manually.
3. Select the Server recommendation tab. According to your location, the best server will be recommended.
4. By pressing Advanced filters you can further customize the recommended servers by selecting the Server type and the Security protocol.
5. Under the server IP, next to Available protocols, select IKEv2/IPSec.
6. In the window that pops up, copy the server hostname and use it in your IKEv2 manual connection setup.
7. When connecting to IKEv2 manually, you're going to need to use the Username and Password from the Service credential tab.
1. Go to Settings > General > VPN.Note: If you are using a newer version of iOS (15+) find the VPN setting section by the following pathway:General > VPN & Device Management > VPN
2. Tap on Add VPN Configuration...
3. Fill the boxes as follows:Type: IKEv2Description: Any preferred name for the VPN connectionServer: The hostname of the server (see step 4)Remote ID: The same hostname as in the Server fieldLocal ID: Leave emptyUser Authentication: UsernameUsername: Your NordVPN service usernamePassword: Your NordVPN service passwordYou can find your NordVPN service credentials (username and password) through the [Nord Account dashboard](https://my.nordaccount.com/dashboard/nordvpn/):
Follow the steps below to find the service credentials for manual connection setup:
1. Log into your [Nord Account](https://my.nordaccount.com/), click NordVPN, and, under Manual setup, click on Service credentials. Here you'll find the Username and Password needed to connect manually.
Proxy: OffTap Done.
1. To enable the VPN, go back to the device Settings and click on the toggle switch next to VPN.",https://support.nordvpn.com/hc/en-us/related/click?data=BAh7CjobZGVzdGluYXRpb25fYXJ0aWNsZV9pZGwrCJGGbiWHEjoYcmVmZXJyZXJfYXJ0aWNsZV9pZGwrCBGougqdEjoLbG9jYWxlSSIKZW4tdXMGOgZFVDoIdXJsSSJYL2hjL2VuLXVzL2FydGljbGVzLzIwMzcxNjU3ODg1MzI5LUhvdy10by1jb25uZWN0LXRvLU5vcmRWUE4td2l0aC1JS0V2Mi1JUFNlYy1vbi1pT1MGOwhUOglyYW5raQk%3D--9ab0c3212af63a3ed1bea4dba6797bde417eb6e7
How to connect to your dedicated IP on macOS,"A NordVPN dedicated IP is a unique IP address assigned solely to a specific server, ensuring it's not shared with any other device or network. With a NordVPN dedicated IP, you get improved connection speeds, reduced CAPTCHA requests, and enhanced security through exclusive accessibility.In this article, you will learn how to locate and connect to your [dedicated IP](https://nordvpn.com/features/dedicated-ip/) on macOS.
In order for you to be able to connect, first double-check if you have done the following:
1. Purchased a dedicated IP;
2. Set up the dedicated IP in your Nord Account.
## Connecting to your dedicated IP on macOS
If you have purchased a dedicated IP from NordVPN, and set it up in your Nord Account, you can proceed with connecting to it on your macOS device by following these steps:
1. Launch the NordVPN application.
2. Scroll down to specialty servers:
3. Hover over the dedicated IP, and click on the three-dot menu:
4. Click your dedicated IP server.
You may also use the search bar located in the top-left corner of the application window.
1. Type in your dedicated IP address:
2. Click on your dedicated IP:
After completing the steps, you will be successfully connected to your dedicated IP. If you would like to check your connection, visit [NordVPN's DNS leak checker.](https://nordvpn.com/dns-leak-test/)
Please be aware that your email will be linked to that dedicated IP address.",https://support.nordvpn.com/hc/en-us/related/click?data=BAh7CjobZGVzdGluYXRpb25fYXJ0aWNsZV9pZGwrCJG8ysPlEToYcmVmZXJyZXJfYXJ0aWNsZV9pZGwrCBGougqdEjoLbG9jYWxlSSIKZW4tdXMGOgZFVDoIdXJsSSJTL2hjL2VuLXVzL2FydGljbGVzLzE5Njc4NTMwMDI2NjQxLUhvdy10by1jb25uZWN0LXRvLXlvdXItZGVkaWNhdGVkLUlQLW9uLW1hY09TBjsIVDoJcmFua2kK--45467044d854f2059b336ae8612d0573319c6cf4
Which NordVPN protocol should I choose,"NordVPN supports several security encryption protocols to provide a VPN service. The security levels and purposes of these VPN protocols are different, but so are our customers’ needs. We encourage you to take a closer look at the strengths and weaknesses of each VPN protocol. While we want you to be able to choose freely, we also feel it’s our duty to advise you on what might suit you best.
1. OpenVPN
OpenVPN is a mature and robust piece of open-source software that enables us to provide a reliable and secure VPN service. It is a versatile VPN protocol that can be used on both TCP and UDP ports. OpenVPN supports a great number of strong encryption algorithms and ciphers: to ensure the protection of your data, we use AES-256-GCM with a 4096-bit DH key. If you are conscious about your security and are wondering what the most stable NordVPN protocol is, we recommend OpenVPN.
2. WireGuard (NordLynx) (Recommended by NordVPN and used by default in most of our apps)
WireGuard is the newest and fastest tunneling protocol, and the entire VPN industry is talking about it. It uses state-of-the-art cryptography that outshines the current leader, OpenVPN. However, it’s still considered experimental, so VPN providers need to look for new solutions (like NordLynx by NordVPN) to overcome WireGuard’s vulnerabilities.
Modern, extremely fast, and incredibly lean in its architecture, WireGuard is backed by thorough academic research. WireGuard consists of only 4,000 lines of code, making it easy to deploy, audit, and fix. To put it into perspective, OpenVPN runs on 400,000 lines of code, meaning that WireGuard makes up only 1% of OpenVPN’s massive architecture.
NordLynx is currently used by default in NordVPN apps. If you’re wondering which VPN protocol is best for gaming or other online speed-dependent activities, the answer is always NordLynx.
3. NordWhisper (Recommended by NordVPN to use for restrictive networks)
The latest protocol added to NordVPN and designed to overcome restrictive local network environments while ensuring your security. It is the ideal solution when dealing with filtered content on office or campus networks and Wi-Fi networks with security filtering found at airports, cafes, hotels, or conferences.
NordWhisper is not compatible with Meshnet, DIP, Obfuscated servers, Onion Over VPN, or P2P servers.
Learn [how to use NordWhisper on NordVPN](https://support.nordvpn.com/hc/en-us/articles/31528242519953-How-to-use-NordWhisper-on-NordVPN).",https://support.nordvpn.com/hc/en-us/related/click?data=BAh7CjobZGVzdGluYXRpb25fYXJ0aWNsZV9pZGwrCBF7%2BjG4EToYcmVmZXJyZXJfYXJ0aWNsZV9pZGwrCBHddJWbEjoLbG9jYWxlSSIKZW4tdXMGOgZFVDoIdXJsSSJNL2hjL2VuLXVzL2FydGljbGVzLzE5NDgyODEwMTUzNzQ1LVdoaWNoLU5vcmRWUE4tcHJvdG9jb2wtc2hvdWxkLUktY2hvb3NlBjsIVDoJcmFua2kG--b639c80b7bf088a75af88a8031e8687f3885fea1
What are NordVPN DNS server addresses?,"NordVPN offers private DNS in its apps, which ensures tighter security and privacy for your traffic. The NordVPN native applications automatically use NordVPN's DNS servers when connected to VPN. This prevents DNS leaks during your VPN connection, ensuring that your NordVPN private DNS requests are safe.
NordVPN's DNS server addresses are 103.86.96.100 and 103.86.99.100. [Learn how to change NordVPN DNS servers ]( on it later).
## Why use NordVPN DNS servers?
DNS servers translate human-friendly domain names such as www.google.com into IP addresses like 192.168.1.1 so your device can connect to websites. When you type a website address, your device asks a DNS server for the IP address. If the server doesn’t know it, it looks it up from other servers. Changing DNS servers provides you with increased security as well as speed. With default DNS you may be subject to DNS hijacking. DNS hijacking is a cyberattack where attackers redirect or alter DNS settings to send users to fake websites or malicious servers. This can lead to phishing, malware infections, data theft, or blocking access to legitimate sites. It often occurs through router vulnerabilities or malware.
## How to change NordVPN DNS servers
You can configure your device manually to use private NordVPN DNS servers. This is handy when you are connecting to NordVPN from a non-native app (for example, third-party OpenVPN clients) or if there are any issues setting up the DNS addresses in the NordVPN app. You can alternatively use other preferred DNS servers.Here are tutorials on how to manually set up NordVPN DNS server connections on your operating system:Windows: Change your DNS servers on WindowsmacOS: Change your DNS servers on macOSLinux: Change your DNS servers on LinuxAndroid: Change your DNS servers on AndroidiOS: Change your DNS servers on iOS",https://support.nordvpn.com/hc/en-us/related/click?data=BAh7CjobZGVzdGluYXRpb25fYXJ0aWNsZV9pZGwrCBFegJ%2FQEToYcmVmZXJyZXJfYXJ0aWNsZV9pZGwrCBHG1HWNEjoLbG9jYWxlSSIKZW4tdXMGOgZFVDoIdXJsSSJML2hjL2VuLXVzL2FydGljbGVzLzE5NTg3NzI2ODU5NzkzLVdoYXQtYXJlLU5vcmRWUE4tRE5TLXNlcnZlci1hZGRyZXNzZXMGOwhUOglyYW5raQY%3D--eb610f3eb5df9cd066e61fd7bb2e17c0a809a940
Troubleshooting connectivity on iOS,"There are several reasons why you may be having trouble connecting to [NordVPN on your iOS](https://nordvpn.com/download/ios/) device. These include issues with your account status, network settings, or app configuration. Here are some steps you can follow to troubleshoot.
* [Make sure your NordVPN account is active](https://support.nordvpn.com/hc/en-us/articles/19602526121489-Making-sure-your-account-is-active).
* [Check if your NordVPN app is up to date](https://nordvpn.com/blog/nordvpn-ios-release-notes/).
* To do so, open the app, tap on Profile in the bottom right corner, select Settings at the top right of the screen, and scroll down to the bottom of the screen.
* If you are using an older version, uninstall the NordVPN app and download the latest NordVPN version for iOS.
* Stop any ongoing VPN connections, kill the NordVPN app, restart it, and try to connect.
* Change mobile network – instead of Wi-Fi, try mobile data and vice versa.
* If you're using Quick connect, try connecting to a specific country server.
* If connecting to a specific server doesn't work, try other servers as well.
* Change the VPN connection protocol.
* Try switching to the [NordWhisper](https://support.nordvpn.com/hc/en-us/articles/31528242519953-How-to-use-NordWhisper-on-NordVPN) and [OpenVPN UDP/TCP](https://support.nordvpn.com/hc/en-us/articles/20465699170321-Switching-protocol-to-OpenVPN-UDP-or-TCP-iOS) protocols and connecting again.
* Try connecting to [Obfuscated servers](https://nordvpn.com/features/obfuscated-servers/) while using the OpenVPN UDP/TCP protocol.
* If that does not help, reset the application:
1. Tap on the Profile in the bottom right corner.
2. Select Settings (gear icon) at the top right of the screen.
3. Tap Reset VPN profile.
* Reinstall the NordVPN app. To do so, tap and hold the NordVPN icon and tap on the X icon in the upper-left corner. After the app has been uninstalled, [download and install NordVPN on your iPhone](https://support.nordvpn.com/hc/en-us/articles/19451338152849-Installing-the-NordVPN-app-on-iPhone-or-iPad) again.
* If you're using a Wi-Fi connection, try to [change your DNS servers](https://support.nordvpn.com/hc/en-us/articles/20398776567313-Change-your-DNS-servers-on-iOS).
After each step, check if the issue remains. In the case that the problems are still there, be sure to reach out to our support team for a quick solution by pressing on either the email or chat button bellow.",https://support.nordvpn.com/hc/en-us/related/click?data=BAh7CjobZGVzdGluYXRpb25fYXJ0aWNsZV9pZGwrCJGXJjyNEjoYcmVmZXJyZXJfYXJ0aWNsZV9pZGwrCBHddJWbEjoLbG9jYWxlSSIKZW4tdXMGOgZFVDoIdXJsSSJKL2hjL2VuLXVzL2FydGljbGVzLzIwMzk3ODA4ODUwODMzLVRyb3VibGVzaG9vdGluZy1jb25uZWN0aXZpdHktb24taU9TBjsIVDoJcmFua2kH--87b16e3c3351c0e4545508bfa43255798046fa34
Switching protocol to OpenVPN UDP or TCP (iOS),"1. Open the application and click on the profile icon in the bottom right corner. 
2. Open the settings menu (gear icon).
3. Click on the Protocol tab.
4. Select the OpenVPN (UDP) or OpenVPN (TCP) option.",https://support.nordvpn.com/hc/en-us/related/click?data=BAh7CjobZGVzdGluYXRpb25fYXJ0aWNsZV9pZGwrCBGougqdEjoYcmVmZXJyZXJfYXJ0aWNsZV9pZGwrCBHddJWbEjoLbG9jYWxlSSIKZW4tdXMGOgZFVDoIdXJsSSJTL2hjL2VuLXVzL2FydGljbGVzLzIwNDY1Njk5MTcwMzIxLVN3aXRjaGluZy1wcm90b2NvbC10by1PcGVuVlBOLVVEUC1vci1UQ1AtaU9TBjsIVDoJcmFua2kI--1036c7c73f1bf386272e1ed45de6ab53109235ba
What is Keychain?,"[macOS Keychain](https://nordvpn.com/blog/what-is-keychain-on-mac-and-how-to-use-it/) is a built-in password management app. It stores your passwords, account information, VPN configurations, and authentication credentials so you have fewer things to remember and manage. When the [NordVPN app](https://nordvpn.com/download/) attempts to access these credentials or modify network settings, macOS may prompt you for your Keychain password to ensure security for the following reasons:
* System Security Measures – macOS protects sensitive data, such as VPN credentials and certificates, by storing them in the Keychain. When an app requests access, macOS requires user confirmation to prevent unauthorized access.
* First-Time Connection or After Updates – If it's your first time connecting or the app has been updated, macOS may request Keychain access again as a security check.
* Certificate Authentication – If your VPN uses certificates for authentication, macOS may prompt you to allow access to the stored certificate in your Keychain.
* Keychain Permissions Not Granted – If you previously denied Keychain access or have changed security settings, macOS will ask for permission again.
The Keychain pop-up may vary when using the NordVPN app. If it is blocked, you can enter your Mac user password and select Always Allow. When the pop-up appears again, you can do this up to five times. If, after entering the password, the Nordlynx (Nordlynxtelio) keychain pop-up appears, try to [switch to the Open VPN (TCP) or Open VPN (UDP) connection protocol](https://support.nordvpn.com/hc/en-us/articles/19921436351505-Switching-protocol-to-OpenVPN-UDP-or-TCP-macOS).If the Always Allow option does not help and the pop-up does not disappear, try the following:
1. Open Keychain Access. (Open macOS Launchpad and type in Keychain Access in a search field or in Finder > Applications > Utilities).
2. Select the login entry (upper left corner) in the Keychain window and right-click on it.
3. Click Lock keychain Login.
4. Then try to unlock it.
5. You may need to enter your Mac login password after that.
6. Try to connect to our servers once again.
If you are unable to make any changes in the suggested way, follow the following steps:
1. Open the Terminal (Finder > Applications -> Utilities -> Terminal or cmd+space).
2. Run this single-line command to lock the keychain:
```
security lock-keychain
```
3. Run this single-line command to unlock the keychain:
```
security unlock-keychain
```
You will be required to enter your Mac user password. Please note that its input will be hidden. After you enter the password, hit the Return button.",https://support.nordvpn.com/hc/en-us/related/click?data=BAh7CjobZGVzdGluYXRpb25fYXJ0aWNsZV9pZGwrCJFHoivZEToYcmVmZXJyZXJfYXJ0aWNsZV9pZGwrCBHddJWbEjoLbG9jYWxlSSIKZW4tdXMGOgZFVDoIdXJsSSI3L2hjL2VuLXVzL2FydGljbGVzLzE5NjI0NDM3NjMwODY1LVdoYXQtaXMtS2V5Y2hhaW4GOwhUOglyYW5raQk%3D--58c6b7b126e9b6a27859cf7732db312284c0752d
How to reach NordVPN customer support?,"While we don't offer phone support, we have different options to contact NordVPN customer support available 24/7 and ready to help you!
## Help Center
First off, if you run into any issues using NordVPN - check out our Help Center that is available in 14 languages: English, German, French, Danish, Italian, Spanish, Norwegian, Swedish, Dutch, Japanese, Korean, Polish, Portuguese-Brazilian, Traditional Chinese.
You can change the language by scrolling down until you see the language change option and clicking on the language you prefer. This will ensure that you can look for information in a language comfortable for you.
After you have set the language you want to look information in, you can find solutions in the help center by either:
* Searching for information using Help Center's search bar, which will list out articles according to the keywords typed in the search query:
* Navigating to one of the categories available in the Help Center:
* [FAQ](https://support.nordvpn.com/hc/en-us/categories/200593301-FAQ) - in this category you'll find Frequently asked questions and NordVPN app setup tutorials;
* [General info](https://support.nordvpn.com/hc/en-us/categories/360000293597-General-info) - here, you'll be able to find information on NordVPN functionalities, features, and SmartPlay;
* [Billing](https://support.nordvpn.com/hc/en-us/categories/360000293617-Billing) - this category covers payment, subscription, and account management topics;
* [Connectivity](https://support.nordvpn.com/hc/en-us/categories/200614302-Connectivity) - the last category available covers troubleshooting articles, here you can find help regarding NordVPN connectivity, internet speed with NordVPN on, manual setups for routers and different OSes, proxies.
## Support agents
However, if you're looking for assistance on your specific case, you can reach out to our developed conversation bots or human customer support agents by:
* Chat
* Email
We have two teams to assist you:
* Customer Care & Billing Team: They can tell you about NordVPN, help set up your devices, make sure you can access streaming sites, and answer questions about dedicated IPs. As well as helpyou with your NordVPN subscription, account, or payments.
* Connection Team: They can assist with setting up NordVPN on your router, fixing advanced connectivity problems, and helping in places with internet restrictions.",https://support.nordvpn.com/hc/en-us/related/click?data=BAh7CjobZGVzdGluYXRpb25fYXJ0aWNsZV9pZGwrCJGygBq4EToYcmVmZXJyZXJfYXJ0aWNsZV9pZGwrCBHddJWbEjoLbG9jYWxlSSIKZW4tdXMGOgZFVDoIdXJsSSJML2hjL2VuLXVzL2FydGljbGVzLzE5NDgyNDE2Mjk2NTkzLUhvdy10by1yZWFjaC1Ob3JkVlBOLWN1c3RvbWVyLXN1cHBvcnQGOwhUOglyYW5raQo%3D--208f0a94b9938b128b1d4b586394e7e2f93d7ae1
Manual OpenVPN connection setup on iPad / iPhone,"Note: if you are using iOS 15 or later, please follow this tutorial.
OpenVPN is a popular protocol our specialty servers use to provide extra functionality. This is an alternative connection method for when you are having trouble with the [native NordVPN app for iOS](https://nordvpn.com/download/ios/). Here’s how to configure your iOS device for this connection method:
1. Go to the [App Store](https://apps.apple.com/us/app/nordvpn-vpn-fast-secure/id905953485?mt=8) on your iPad/iPhone.
2. Tap on Search.
3. Type openvpn connect in the search bar.
4. Tap on the installation button.
5. Enter your iTunes Store credentials and tap OK.
6. Once the app is installed, download the .OVPN configuration file.
Follow the steps below to find the manual connection configuration files:
1. Log into your [Nord Account](https://my.nordaccount.com/), and click NordVPN.
2. Scroll down to Advanced Settings and click Set up NordVPN manually.
3. Select the OpenVPN configuration files tab.
4. Find the server you wish to connect to by using the Search bar or by scrolling down and download it by clicking Download UDP or Download TCP.
5. When connecting to OpenVPN & IKEv2 manually, you're going to need to use the Username and Password from the Service credential tab.
1. Select Open in OpenVPN.Alternatively, if you're brought to a safari window, follow these steps:
1. Click on the Share icon:
2. In the application list, select the OpenVPN Connect application (in case you don't see it, select more and then choose the application as mentioned earlier):
3. Once the OpenVPN Connect application is open, select File:
4. Afterward, select Add:
2. Enter your NordVPN service credentials, choose to save the password in a keychain, and tap ADD in the top right corner.You can find your NordVPN service credentials (username and password) through the [Nord Account dashboard](https://my.nordaccount.com/dashboard/nordvpn/):
Follow the steps below to find the service credentials for manual connection setup:
1. Log into your [Nord Account](https://my.nordaccount.com/), click NordVPN, and, under Manual setup, click on Service credentials. Here you'll find the Username and Password needed to connect manually.

1. You will see a pop-up asking for permission to add OpenVPN to your VPN configurations. Click Allow.
2. Tap on the toggle switch to connect to VPN.
3. That’s it! You have successfully connected.
4. To change a server, disconnect from the current server by tapping the toggle switch next to it and enable another imported profile.
5. To disconnect, tap on the same toggle button you used to connect.",https://support.nordvpn.com/hc/en-us/related/click?data=BAh7CjobZGVzdGluYXRpb25fYXJ0aWNsZV9pZGwrCBHS5seBEjoYcmVmZXJyZXJfYXJ0aWNsZV9pZGwrCBFiLo6bEjoLbG9jYWxlSSIKZW4tdXMGOgZFVDoIdXJsSSJVL2hjL2VuLXVzL2FydGljbGVzLzIwMzQ4NjEzODc0MTkzLU1hbnVhbC1PcGVuVlBOLWNvbm5lY3Rpb24tc2V0dXAtb24taVBhZC1pUGhvbmUGOwhUOglyYW5raQY%3D--33ebacc147e58ebf3b287d7b79055474bf953c65
How to connect to NordVPN with IKEv2/IPSec on iOS,"In this guide, we will cover how to set up an IKEv2 manual connection on an [iOS device (iPhone/iPad)](https://nordvpn.com/download/ios/).
Even though the [IKEv2/IPSec protocol is no longer supported on iOS](https://support.nordvpn.com/hc/en-us/articles/20226405871761-IKEv2-IPSec-protocol-is-no-longer-supported-on-iOS-and-macOS) on NordVPN 8.10.1 and newer app versions, this connection method can be used as one of the alternative ways to connect to NordVPN servers if you're unable to install the application.
This setup lacks the additional features of the native NordVPN app and requires more steps to set up.
## Manual connection setup
1. Download the NordVPN IKEv2 certificate to your device. You can do so by opening this link in Safari:
2. The certificate installation dialogue will appear. Tap Install in each step:
3. Once the certificate is installed, tap Done to complete the installation.3.1. On iOS 12.2 and later versions, after you download the certificate, you might see a pop-up saying ""Profile Downloaded - Review the profile in Settings app if you want to install it"".3.2. Navigate to your device Settings > Profile Downloaded > NordVPN Root CA > Install > Trust.If you cannot see the Profile Downloaded button, go to Settings > General > Profiles. You should find the downloaded profile there.
4. Now you have to determine which server to connect to. Go to . The tool will pick a server recommended for you. In our case, the recommended server is US #810 with the hostname us810.nordvpn.com. We will use this server as a reference in all further steps.
Follow the steps below to find the best server for your connection:
1. Log into your [Nord Account](https://my.nordaccount.com/), and click NordVPN.
2. Scroll down to Advanced Settings and click Set up NordVPN manually.
3. Select the Server recommendation tab. According to your location, the best server will be recommended.
4. By pressing Advanced filters you can further customize the recommended servers by selecting the Server type and the Security protocol.
5. Under the server IP, next to Available protocols, select IKEv2/IPSec.
6. In the window that pops up, copy the server hostname and use it in your IKEv2 manual connection setup.
7. When connecting to IKEv2 manually, you're going to need to use the Username and Password from the Service credential tab.
1. Go to Settings > General > VPN.Note: If you are using a newer version of iOS (15+) find the VPN setting section by the following pathway:General > VPN & Device Management > VPN
2. Tap on Add VPN Configuration...
3. Fill the boxes as follows:Type: IKEv2Description: Any preferred name for the VPN connectionServer: The hostname of the server (see step 4)Remote ID: The same hostname as in the Server fieldLocal ID: Leave emptyUser Authentication: UsernameUsername: Your NordVPN service usernamePassword: Your NordVPN service passwordYou can find your NordVPN service credentials (username and password) through the [Nord Account dashboard](https://my.nordaccount.com/dashboard/nordvpn/):
Follow the steps below to find the service credentials for manual connection setup:
1. Log into your [Nord Account](https://my.nordaccount.com/), click NordVPN, and, under Manual setup, click on Service credentials. Here you'll find the Username and Password needed to connect manually.
Proxy: OffTap Done.
1. To enable the VPN, go back to the device Settings and click on the toggle switch next to VPN.",https://support.nordvpn.com/hc/en-us/related/click?data=BAh7CjobZGVzdGluYXRpb25fYXJ0aWNsZV9pZGwrCJGGbiWHEjoYcmVmZXJyZXJfYXJ0aWNsZV9pZGwrCBFiLo6bEjoLbG9jYWxlSSIKZW4tdXMGOgZFVDoIdXJsSSJYL2hjL2VuLXVzL2FydGljbGVzLzIwMzcxNjU3ODg1MzI5LUhvdy10by1jb25uZWN0LXRvLU5vcmRWUE4td2l0aC1JS0V2Mi1JUFNlYy1vbi1pT1MGOwhUOglyYW5raQc%3D--058c6f56273a5ffb6c0b6f76363abeaf980fcf76
Change your DNS servers on iOS,"You can manually configure the DNS servers in your iOS settings. Here is how:
1. Open Settings;
2. Tap on Wi-Fi. If it's switched off, turn it on;
3. Pick a Wi-Fi network and tap on the blue i icon;
4. Tap Configure DNS and select Manual;
5. Tap Add Server and add these DNS addresses:103.86.96.100103.86.99.100
6. Tap Save.",https://support.nordvpn.com/hc/en-us/related/click?data=BAh7CjobZGVzdGluYXRpb25fYXJ0aWNsZV9pZGwrCBHG1HWNEjoYcmVmZXJyZXJfYXJ0aWNsZV9pZGwrCBFiLo6bEjoLbG9jYWxlSSIKZW4tdXMGOgZFVDoIdXJsSSJFL2hjL2VuLXVzL2FydGljbGVzLzIwMzk4Nzc2NTY3MzEzLUNoYW5nZS15b3VyLUROUy1zZXJ2ZXJzLW9uLWlPUwY7CFQ6CXJhbmtpCA%3D%3D--bdc62293be750f37a089090153a1c00e9b5d78ff
How can I use NordLynx in the NordVPN app for iOS,"NordLynx is the technology we built around the WireGuard® protocol. It lets you experience WireGuard’s speed benefits without compromising your privacy.
1. Install the [NordVPN app for iOS](https://nordvpn.com/download/ios/).
2. Navigate to the profile in the bottom right-hand corner:
3. Tap on the gear icon in the upper right corner:
4. Tap on Protocol.
5. Select NordLynx and connect to VPN.
Done! You are now using the NordLynx protocol on your iOS device.
WireGuard is a registered trademark of Jason A. Donenfeld.",https://support.nordvpn.com/hc/en-us/related/click?data=BAh7CjobZGVzdGluYXRpb25fYXJ0aWNsZV9pZGwrCBHddJWbEjoYcmVmZXJyZXJfYXJ0aWNsZV9pZGwrCBFiLo6bEjoLbG9jYWxlSSIKZW4tdXMGOgZFVDoIdXJsSSJYL2hjL2VuLXVzL2FydGljbGVzLzIwNDU5NDM2Njk0ODAxLUhvdy1jYW4tSS11c2UtTm9yZEx5bngtaW4tdGhlLU5vcmRWUE4tYXBwLWZvci1pT1MGOwhUOglyYW5raQk%3D--0b702fc9b1fd1430f79058c228a005729fbc4fbd
Installing NordVPN (App Store) version on macOS,"From October 17th, 2024, older applications will have a few function limitations. The issues can affect macOS applications version 8.27.2 and below. They can include not receiving notifications in the app and reduced Dark Web Monitoring and Meshnet functionality.To resolve the issue, please update your application to the latest version.
This article will help you set up the [NordVPN application on your Mac](https://nordvpn.com/download/mac/) and connect to a VPN server. Note: The NordVPN (App Store) app is compatible with macOS 11 and later versions.
## Table of contents:
* [Downloading and installing](
* [Setting up the application](
* [Connecting to servers](
* [NordVPN features menu](
* [NordVPN preference settings](
## Downloading and installing
1. Go to the [NordVPN app page in the App Store](https://apps.apple.com/us/app/nordvpn-vpn-fast-secure/id905953485#?platform=mac) or click download the App Store version of NordVPN on our downloads page:
2. Agree to Open App Store.
3. When the App Store launches, click on the blue Get button and choose to Install the app.
4. Once the download is finished, press the Open button.
## Setting up and using the application
1. Open your Launchpad and click on the NordVPN icon.
2. You can Log In or Sign Up in the top-right corner of the screen.
3. You will be redirected to your Nord Account. To log in, enter your registered email address and password. You can also sign in using your Google account or Apple ID or by entering a code. If you are a new user, you will need to create a [Nord Account](https://my.nordaccount.com/) by entering your email address and other required information.
4. After completing the above steps, you will be prompted to open the NordVPN app. Agree always to allow Nord Account and grant access to the app.
5. After a successful login, you will see the main NordVPN application window.Here, you can find NordVPN servers and navigate in the map itself, search bar, or specialty section.
## Connecting to servers
1. The Quick Connect button in the top-right corner will automatically connect you to a server.
2. To connect to a specific server, click on the Search field in the top-left corner of the app. Enter a country, a category, or a specific server number (e.g., Canada #1224) to find what you need.
3. All servers in the left sidebar are sorted by country and specialty.To connect to a specialty server, hover over one of the categories under [Specialty Servers](https://support.nordvpn.com/hc/en-us/articles/19479130821521-Different-NordVPN-server-categories-explained), and click on the three-dot menu to select a Country.
4. To connect to a specific country, click on it.
## NordVPN features menu
### Map

* Map - here, you can find and navigate NordVPN servers in the map itself, search bar, or specialty section
### Threat Protection Pro™/Threat Protection

* Threat Protection Pro™ is a special NordVPN feature that automatically blocks ads, trackers, and malicious URLs. When you visit a website known for scamming people, this feature displays an in-browser alert to warn you about possible fraud. Threat Protection Pro™ also scans downloads for malware and checks your apps for security vulnerabilities. Available with selected NordVPN plans, Threat Protection Pro™ can work without an active VPN connection. Learn more about[ Threat Protection Pro™](https://nordvpn.com/features/threat-protection/).If your NordVPN subscription doesn’t include Threat Protection Pro™, you can use the Threat Protection feature instead. It blocks intrusive ads and malicious domains based on DNS filtering and works whenever you’re connected to a VPN server. Threat Protection comes with all NordVPN plans.
### Meshnet

* The [Meshnet](https://nordvpn.com/meshnet/) feature helps you to access devices over encrypted tunnels. [Learn more about Meshnet](https://meshnet.nordvpn.com/getting-started/meshnet-explained).
### Dark Web Monitor

* [Dark Web Monitor](https://nordvpn.com/features/dark-web-monitor/) scans the internet for any credential leaks associated with your registered NordVPN e-mail address.
### Presets
Presets let you load up a specified set of configurations, including server number, type, protocol, and more. You can configure your settings to experience a smooth session, for e.g., so that a streaming service or a game loads up instantly!
#### How to set up presets?
Start at the preferences page. You can either edit an existing preset or create a new one by clicking Add new.Let's build it from scratch. After pressing Add new, you will see a menu with the settings you can use. Give the preset a name. Next, select from available VPN protocols. If you change the default setting Use recommended, you’ll be able to alter the server type. Here you can set a specialty server or any regular one as your type.Depending on the server availability, you may also have the choice of selecting a specific region.Finally, you can add either a web page or an app to the preset. It will be displayed under the preset name on the main screen. If you press Add link button, a field will appear for the URL of the website you would like easy access to. After inserting the URL, press Enter to register it. When you're done, press Save preset, and it will be added to the main screen.
### Statistics

* Statistics show you more information about your connection.
### Settings
To change application settings and find various features click on the gear icon at the bottom-left corner of the app:

* Settings tab displays the NordVPN app settings.
### Quick Help

* Here you can find your connection logs, a direct to our Help Center, or our customer support email.
## NordVPN settings
### General

* Launch the app on computer startup — toggle to open the NordVPN app automatically every time you turn your device on.
* VPN Protocol — this option will let you choose from 3 different [connection protocols](https://support.nordvpn.com/hc/en-us/articles/19482810153745-Which-NordVPN-protocol-should-I-choose) (OpenVPN UDP, OpenVPN TCP, and NordLynx).
* Help Us Improve — makes NordVPN better by sending us aggregated anonymous data.
### Auto-connect

* When using an untrusted network — toggle to automatically be connected to a VPN when you're connected to a network that is not added to a Trusted network list.
* Connect to — you can select a specific country from the list.
* The current network — shows the network you are currently connected to.
* Trusted network — you won't be automatically connected to a VPN while on a trusted Wi-Fi network.
### Kill Switch

* [Kill Switch](https://nordvpn.com/features/vpn-kill-switch/) prevents unprotected access to the internet when your VPN connection accidentally drops.
* Advanced Kill Switch is an additional layer of security that can be enabled to prevent WebRTC leaks. However, it functions separately from the system-wide Internet Kill Switch. Read [more information about Kill Switch](https://support.nordvpn.com/hc/en-us/articles/19509682644369-NordVPN-Kill-Switch-how-does-it-work).
* Stay invisible on a local network — this will let you [keep your device invisible on an unsafe local network](https://support.nordvpn.com/hc/en-us/articles/20225371443345-Staying-invisible-on-unsafe-local-networks-on-macOS).
### Appearance

* Appearance settings let you add an application to your dock and menu bar. Also, it lets you choose between dark and light modes.
### Other Apps

* Other Apps tab introduces other [Nord Security](https://nordsecurity.com/) products. As well as a scannable QR code that directly leads you to the NordVPN mobile app download.
### Account

* Account section shows your NordVPN profile and subscription information. Here you’ll also find links to [NordVPN Terms of Services](https://my.nordaccount.com/legal/terms-of-service/) and [Privacy Policy](https://my.nordaccount.com/legal/privacy-policy/).",https://support.nordvpn.com/hc/en-us/related/click?data=BAh7CjobZGVzdGluYXRpb25fYXJ0aWNsZV9pZGwrCJHa8kGjEjoYcmVmZXJyZXJfYXJ0aWNsZV9pZGwrCBFiLo6bEjoLbG9jYWxlSSIKZW4tdXMGOgZFVDoIdXJsSSJUL2hjL2VuLXVzL2FydGljbGVzLzIwNDkyMzk1NDAzOTIxLUluc3RhbGxpbmctTm9yZFZQTi1BcHAtU3RvcmUtdmVyc2lvbi1vbi1tYWNPUwY7CFQ6CXJhbmtpCg%3D%3D--ee10ec8fd077e0b2f67e09366d9ff3c7af022e8b
Troubleshooting steps for streaming,"Streaming issues like buffering, poor video quality, or interruptions while connected to NordVPN can disrupt your viewing experience. Whether the issue lies with your internet or device, multiple potential causes exist. This guide will walk you through common troubleshooting steps to quickly resolve these issues and restore a smooth streaming experience.
Table of contents:
* [Connection leakage troubleshooting](
* [Troubleshooting steps for various devices](
## Connection leakage troubleshooting
One possible challenge users encounter when troubleshooting streaming issues is a leaking connection. This sometimes occurs when part of their internet traffic bypasses the VPN, leaving sensitive data exposed or causing interruptions in their streaming experience.
If you're having issues with certain streaming services while using NordVPN, first check if your connection is protected by following these steps:
1. Ensure that your connection is set up correctly by checking whether your status says protected on [our website](https://nordvpn.com/):
2. If you are connected to one of our servers but your status says unprotected, proceed to the following steps to ensure your connection is secure. Stop any leaks from your connection by following these tutorials:
* * [WebRTC leak prevention](https://support.nordvpn.com/hc/en-us/articles/20318383008529-How-to-stop-WebRTC-leaks)
* [Disable IPv6](https://support.nordvpn.com/hc/en-us/articles/20350921723409-How-to-disable-IPv6)
## Troubleshooting steps for various devices
Technical issues can sometimes arise when streaming content due to various device-related factors. If your connection is secure and the issues persist, find your device in the tutorials below and follow the instructions. After each step, check if the issue is resolved. If not, proceed to the next step.
### For Windows, macOS, Linux devices
1. Try connecting to a different server of the region you would like to access the streaming service.
2. [Clear the cache of your browser.](https://nordvpn.com/blog/how-to-clear-your-cache/)
3. Try to use a different browser/incognito mode.
4. [Set up NordVPN DNS addresses](https://support.nordvpn.com/hc/en-us/articles/19587726859793-What-are-the-addresses-of-my-NordVPN-DNS-servers) to 103.86.99.100 and 103.86.96.100 on your device.
5. Test the streaming accessibility changes without using [Threat Protection or Threat Protection Pro™](https://support.nordvpn.com/hc/en-us/articles/19508765521425-What-is-Threat-Protection-Pro-and-Threat-Protection) if the features are enabled.
6. [Check](https://support.nordvpn.com/hc/en-us/articles/20290051742353-How-to-check-the-NordVPN-app-version) whether your NordVPN application is updated to the[ latest version](https://nordvpn.com/blog/category/service-updates/app-updates/).
7. As a last resort - try using the[ NordVPN extension](https://nordvpn.com/features/proxy-extension/) instead and access the streaming through your browser. Download the extension by clicking [here](https://support.nordvpn.com/hc/en-us/articles/20321833806865-How-to-set-up-the-NordVPN-browser-extension).
### For Android/iOS devices
1. Try connecting to a different server of the region you would like to access the streaming service.
2. If you are using a specific streaming service app, force stop it, clear the app cache, and restart it.
3. If you are accessing the streaming platform on a browser, [clear your browser's cache.](https://nordvpn.com/blog/how-to-clear-your-cache/)
4. [Set up NordVPN DNS addresses](https://support.nordvpn.com/hc/en-us/articles/19587726859793-What-are-the-addresses-of-my-NordVPN-DNS-servers) to 103.86.99.100 and 103.86.96.100 on your device.
5. Test the streaming accessibility changes without using [Threat Protection or Threat Protection Pro™](https://support.nordvpn.com/hc/en-us/articles/19508765521425-What-is-Threat-Protection-Pro-and-Threat-Protection) if the features are enabled.
### For Android TV boxes
1. Try connecting to a different server in the region where you would like to access the streaming service.
2. If you are using a specific streaming service app, force stop it, clear the app cache, and restart it, here are the steps:
1. Go to Settings > Preferences section > More settings > Apps.
2. Find the streaming service app and press on it.
3. Click the Force Stop button.
4. Click the Clear Cache button.
5. Restart the application.
3. [Set up NordVPN DNS addresses](https://support.nordvpn.com/hc/en-us/articles/20466230743569-Change-your-DNS-servers-on-Android-TV-with-NordVPN) to 103.86.99.100 and 103.86.96.100 on your device.
### For Amazon Fire TV devices
1. Try connecting to a different server of the region you would like to access the streaming service.
2. If you are using a specific streaming service app, force stop it, clear the app cache, and restart it:
1. Go to Settings > Applications > Manage Installed Applications.
2. Find the streaming service app and press on it.
3. Click the Force Stop button.
4. Click the Clear Cache button.
5. Restart the application.
3. [Set up NordVPN DNS addresses](https://support.nordvpn.com/hc/en-us/articles/20466230743569-Change-your-DNS-servers-on-Android-TV-with-NordVPN) to 103.86.99.100 and 103.86.96.100 on your device.
The NordVPN service should never be used to bypass copyright regulations. NordVPN does not promote, condone, or endorse the use of the service for such purposes. For more details, please read the NordVPN [Terms of Service](https://my.nordaccount.com/legal/terms-of-service/).
If you experience other issues or have additional questions, do not hesitate to [submit a request](https://support.nordvpn.com/hc/en-us/articles/19482416296593-How-to-reach-NordVPN-customer-support) to our customer success team.",https://support.nordvpn.com/hc/en-us/related/click?data=BAh7CjobZGVzdGluYXRpb25fYXJ0aWNsZV9pZGwrCBFq9SjKEToYcmVmZXJyZXJfYXJ0aWNsZV9pZGwrCBFsr4t7EjoLbG9jYWxlSSIKZW4tdXMGOgZFVDoIdXJsSSJKL2hjL2VuLXVzL2FydGljbGVzLzE5NTU5OTY4MjM4MDk3LVRyb3VibGVzaG9vdGluZy1zdGVwcy1mb3Itc3RyZWFtaW5nBjsIVDoJcmFua2kJ--259ef0b4550bbb627bfffe7e6e9e301e110f55b3
How to fix your NordVPN iOS connection,"If you’re having trouble connecting to [NordVPN on your iOS device](https://nordvpn.com/download/ios/), we have some tips for adjusting your connection configuration to help fix the problem. After following each set of instructions, check if the issue remains before you continue. Let’s begin:Reset your Wi-Fi network settings (only if using Wi-Fi):
* Tap Settings > General > Reset > Reset Network Settings. This also resets the Wi-Fi networks and passwords, cellular settings, and VPN and APN settings that you’ve used before.
* Launch the Settings app from the Home screen and navigate to Wi-Fi. On the right side of your wireless network field, tap on the i button to view the settings for the network.
* Tap Renew Lease at the bottom of the settings pane to reset your device’s [IP address](https://nordvpn.com/what-is-my-ip/) and to refresh your connection.
* Restart your phone.
Set the NordVPN DNS server addresses (only if using Wi-Fi):
* Open the Settings app;
* Tap on Wi-Fi. If it's switched off, turn it on;
* Pick a Wi-Fi network and tap on the blue “i” icon;
* Tap Configure DNS and select Manual;
* Tap Add Server and add these DNS addresses:103.86.96.100103.86.99.100
* Tap Save.
Switch between different servers:
* Try connecting to various countries or specific servers using the NordVPN app.
Reinstall the NordVPN app:
* Tap and hold the NordVPN icon and tap on the X icon in the upper-left corner. After the app has been uninstalled, [download and install NordVPN on your iPhone](https://support.nordvpn.com/hc/en-us/articles/19451338152849-Installing-the-NordVPN-app-on-iPhone-or-iPad) again.",https://support.nordvpn.com/hc/en-us/related/click?data=BAh7CjobZGVzdGluYXRpb25fYXJ0aWNsZV9pZGwrCBHTncxWEjoYcmVmZXJyZXJfYXJ0aWNsZV9pZGwrCBHG1HWNEjoLbG9jYWxlSSIKZW4tdXMGOgZFVDoIdXJsSSJNL2hjL2VuLXVzL2FydGljbGVzLzIwMTY0MDA5MzgyNjczLUhvdy10by1maXgteW91ci1Ob3JkVlBOLWlPUy1jb25uZWN0aW9uBjsIVDoJcmFua2kH--b50b9663f1c594b1aff767d1fd02aba9c7f960f1
Manual OpenVPN connection setup on iPad / iPhone,"Note: if you are using iOS 15 or later, please follow this tutorial.
OpenVPN is a popular protocol our specialty servers use to provide extra functionality. This is an alternative connection method for when you are having trouble with the [native NordVPN app for iOS](https://nordvpn.com/download/ios/). Here’s how to configure your iOS device for this connection method:
1. Go to the [App Store](https://apps.apple.com/us/app/nordvpn-vpn-fast-secure/id905953485?mt=8) on your iPad/iPhone.
2. Tap on Search.
3. Type openvpn connect in the search bar.
4. Tap on the installation button.
5. Enter your iTunes Store credentials and tap OK.
6. Once the app is installed, download the .OVPN configuration file.
Follow the steps below to find the manual connection configuration files:
1. Log into your [Nord Account](https://my.nordaccount.com/), and click NordVPN.
2. Scroll down to Advanced Settings and click Set up NordVPN manually.
3. Select the OpenVPN configuration files tab.
4. Find the server you wish to connect to by using the Search bar or by scrolling down and download it by clicking Download UDP or Download TCP.
5. When connecting to OpenVPN & IKEv2 manually, you're going to need to use the Username and Password from the Service credential tab.
1. Select Open in OpenVPN.Alternatively, if you're brought to a safari window, follow these steps:
1. Click on the Share icon:
2. In the application list, select the OpenVPN Connect application (in case you don't see it, select more and then choose the application as mentioned earlier):
3. Once the OpenVPN Connect application is open, select File:
4. Afterward, select Add:
2. Enter your NordVPN service credentials, choose to save the password in a keychain, and tap ADD in the top right corner.You can find your NordVPN service credentials (username and password) through the [Nord Account dashboard](https://my.nordaccount.com/dashboard/nordvpn/):
Follow the steps below to find the service credentials for manual connection setup:
1. Log into your [Nord Account](https://my.nordaccount.com/), click NordVPN, and, under Manual setup, click on Service credentials. Here you'll find the Username and Password needed to connect manually.

1. You will see a pop-up asking for permission to add OpenVPN to your VPN configurations. Click Allow.
2. Tap on the toggle switch to connect to VPN.
3. That’s it! You have successfully connected.
4. To change a server, disconnect from the current server by tapping the toggle switch next to it and enable another imported profile.
5. To disconnect, tap on the same toggle button you used to connect.",https://support.nordvpn.com/hc/en-us/related/click?data=BAh7CjobZGVzdGluYXRpb25fYXJ0aWNsZV9pZGwrCBHS5seBEjoYcmVmZXJyZXJfYXJ0aWNsZV9pZGwrCBHG1HWNEjoLbG9jYWxlSSIKZW4tdXMGOgZFVDoIdXJsSSJVL2hjL2VuLXVzL2FydGljbGVzLzIwMzQ4NjEzODc0MTkzLU1hbnVhbC1PcGVuVlBOLWNvbm5lY3Rpb24tc2V0dXAtb24taVBhZC1pUGhvbmUGOwhUOglyYW5raQg%3D--b91f70d6601748d132c2fa956af3223c8ace4b18
Change your DNS servers on Android,"You can manually configure the DNS servers in your Android settings. Here’s how:
1. Open Settings on the device.
2. Select Wi-Fi.
3. Long press your Current network, then select Modify network.
4. Change IP settings to Static.
5. In the DNS 1 and DNS 2 fields that appeared, enter the following:DNS 1: 103.86.96.100DNS 2: 103.86.99.100
6. Press Save, disconnect from the network, and reconnect for the changes to take effect.",https://support.nordvpn.com/hc/en-us/related/click?data=BAh7CjobZGVzdGluYXRpb25fYXJ0aWNsZV9pZGwrCJEAxj06EjoYcmVmZXJyZXJfYXJ0aWNsZV9pZGwrCBHG1HWNEjoLbG9jYWxlSSIKZW4tdXMGOgZFVDoIdXJsSSJJL2hjL2VuLXVzL2FydGljbGVzLzIwMDQxMzUzNzg5NTg1LUNoYW5nZS15b3VyLUROUy1zZXJ2ZXJzLW9uLUFuZHJvaWQGOwhUOglyYW5raQk%3D--b98792011e6ad35eb184e9b9611cd80ecc7d2a4b
How to change your DNS servers on macOS,"You can manually configure [DNS servers](https://nordvpn.com/blog/what-is-dns-server/) in your macOS settings. We have a separate guide for [configuring DNS servers on devices using the latest macOS Ventura version](https://support.nordvpn.com/hc/en-us/articles/20285887299857-Change-your-DNS-servers-on-macOS-Ventura).
## Manual DNS server configuration
1. Go to “System preferences” and click on “Network.”
2. Select the network interface you are using and click “Advanced.”
3. Open the “DNS” tab and click the “+” button at the bottom, then add the NordVPN DNS server addresses:103.86.96.100103.86.99.100
Congratulations! You have changed your macOS device’s DNS servers to those of NordVPN.",https://support.nordvpn.com/hc/en-us/related/click?data=BAh7CjobZGVzdGluYXRpb25fYXJ0aWNsZV9pZGwrCJE9dkIeEjoYcmVmZXJyZXJfYXJ0aWNsZV9pZGwrCBHG1HWNEjoLbG9jYWxlSSIKZW4tdXMGOgZFVDoIdXJsSSJOL2hjL2VuLXVzL2FydGljbGVzLzE5OTIxMTczMzY0MTEzLUhvdy10by1jaGFuZ2UteW91ci1ETlMtc2VydmVycy1vbi1tYWNPUwY7CFQ6CXJhbmtpCg%3D%3D--aaf9459f2d3ae60872505f69ff297aaa60bb7941
How to use NordVPN Tray functionality on Linux,"With the release of the 3.18.0 NordVPN version for Linux, we introduce a new feature for all supported Linux devices – The tray icon. This feature allows you to see and control NordVPN connections more easily.
In order to connect to the VPN, you’ll have to install [NordVPN on your Linux](https://nordvpn.com/download/linux/) device and log in.
## Using Tray on Linux
By default, the NordVPN Tray function should be visible at the top right of your screen when the VPN is open. In case you are unable to see it, open the terminal and enter any NordVPN-related command, such as:
```
nordvpn login
```
or
```
nordvpn
```

At the top right of your screen, you will see a white NordVPN logo. This means you’re not connected to the VPN:

When you click on it, you will see the following information:
* VPN connection status, which will indicate that you're disconnected;
* Quick connect button to connect to a recommended server;
* The settings button, where you can toggle the tray icon and notifications;
* The option to log in, or, if you are already logged in, you will see the email address of your account;
* Log out button;
* Quit button to close the app.

Once you’re connected, the NordVPN logo will be blue instead:

If you click on the blue logo, you will see your VPN connection status and information along with an additional disconnect button:

And now you know how to use the Tray functionality on Linux. Read more on using NordVPN on Linux.",https://support.nordvpn.com/hc/en-us/related/click?data=BAh7CjobZGVzdGluYXRpb25fYXJ0aWNsZV9pZGwrCJG4Hy06FzoYcmVmZXJyZXJfYXJ0aWNsZV9pZGwrCJEdVbRTGzoLbG9jYWxlSSIKZW4tdXMGOgZFVDoIdXJsSSJVL2hjL2VuLXVzL2FydGljbGVzLzI1NTM4NjMyNTk1NjAxLUhvdy10by11c2UtTm9yZFZQTi1UcmF5LWZ1bmN0aW9uYWxpdHktb24tTGludXgGOwhUOglyYW5raQY%3D--e0f4a29dcdd06aaffae782ebe6a423b8fbb9fdfb
How to set up NordVPN with qBittorrent?,Configure your NordVPN qBittorrent proxy settings to use the qBittorrent client with the NordVPN proxy.,https://support.nordvpn.com/hc/en-us/related/click?data=BAh7CjobZGVzdGluYXRpb25fYXJ0aWNsZV9pZGwrCJFAdj1eEjoYcmVmZXJyZXJfYXJ0aWNsZV9pZGwrCJEdVbRTGzoLbG9jYWxlSSIKZW4tdXMGOgZFVDoIdXJsSSJKL2hjL2VuLXVzL2FydGljbGVzLzIwMTk1OTY3Mzg1NzQ1LU5vcmRWUE4tcHJveHktc2V0dXAtZm9yLXFCaXR0b3JyZW50BjsIVDoJcmFua2kH--a15769dd8b44cb909041fd9fb900b8849ce478b5
NordVPN proxy setup for qBittorrent,"NordVPN works with qBittorrent and most other peer-to-peer platforms, so usually there’s no need for a proxy.
If for some reason you cannot use the [NordVPN app](https://nordvpn.com/download/) but still want to access qBittorrent safely, set up a proxy for qBittorrent by connecting to [NordVPN servers](https://nordvpn.com/servers/).
Note that NordVPN service should never be used to bypass copyright regulations. NordVPN does not promote, condone, or endorse the use of the service for such purposes. For more details, please read the NordVPN [Terms of Service](https://my.nordaccount.com/legal/terms-of-service/).
## How to set up NordVPN with qBittorrent?
Configure your NordVPN qBittorrent proxy settings to use the qBittorrent client with the NordVPN proxy.
1. Open qBittorrent.
2. Navigate to the application preferences by clicking Tools > Options. Alternatively, press Alt + O on your keyboard.
3. Select Connection.
4. Locate the Proxy server section and fill in the following information:• Type: SOCKS5• Host: Address of the proxy server of your choiceChoose from this list of servers:amsterdam.nl.socks.nordhold.netatlanta.us.socks.nordhold.netdallas.us.socks.nordhold.netlos-angeles.us.socks.nordhold.netnl.socks.nordhold.netse.socks.nordhold.netstockholm.se.socks.nordhold.netus.socks.nordhold.netnew-york.us.socks.nordhold.netsan-francisco.us.socks.nordhold.netdetroit.us.socks.nordhold.net
* Port: 1080
* Select the Use proxy for peer connections and the Authentication checkboxes.
* Username: Your NordVPN service username
* Password: Your NordVPN service password
* You can find your NordVPN service credentials (service username and service password) in the [Nord Account dashboard](https://my.nordaccount.com/dashboard/nordvpn/):
1. Click Set up NordVPN manually.
2. You will receive a verification code in your email that you use for NordVPN services. Type the code in: 
3. Copy the credentials using the “Copy” buttons on the right:
1. Click Apply and OK to save the changes.
## How to check if your proxy setup is working
You’ve connected to a NordVPN server via SOCKS5 proxy. But just to be sure, let’s check whether it is working correctly.
1. Visit the [ipleak.net](https://ipleak.net/) website.
2. Scroll down to the Torrent Address detection section, click Activate, and click this Magnet Link.
3. A new window will show up, prompting you to open qBittorrent. Select Open qBittorrent.Important: keep ipleak.net open.
4. When qBittorrent is open, click OK to add the torrent.
5. While the torrent is downloading metadata, return to the ipleak website.
6. Under Torrent Address detection, you should see the IP address of your chosen proxy server.If no address is showing, click the Refresh button to update the results.
If you see the NordVPN server IP address, it means that qBittorrent is downloading files through the NordVPN SOCKS5 proxy server and your downloads are secured!",https://support.nordvpn.com/hc/en-us/related/click?data=BAh7CjobZGVzdGluYXRpb25fYXJ0aWNsZV9pZGwrCJFAdj1eEjoYcmVmZXJyZXJfYXJ0aWNsZV9pZGwrCJEdVbRTGzoLbG9jYWxlSSIKZW4tdXMGOgZFVDoIdXJsSSJKL2hjL2VuLXVzL2FydGljbGVzLzIwMTk1OTY3Mzg1NzQ1LU5vcmRWUE4tcHJveHktc2V0dXAtZm9yLXFCaXR0b3JyZW50BjsIVDoJcmFua2kH--a15769dd8b44cb909041fd9fb900b8849ce478b5
How to build the NordVPN Docker image,"Docker is a tool for easy deployment and management of applications in lightweight containers. Setting up NordVPN on a Docker container will secure your internet connection and protect your online privacy of other Docker containers as well.
## Setting up the Docker environment
To build the NordVPN Docker image on Linux, you will first need to set up the Docker environment:
1. [Install the Docker engine on Linux](https://docs.docker.com/engine/install/ubuntu/).
2. Once you have Docker installed, go to the terminal.
3. Create a new directory for your image using this command:
```
mkdir
```
4. Go to the created directory:
```
cd
```
5. Create a Dockerfile:
```
touch Dockerfile
```
6. Go to the file with your preferred text editor. In this example, we use nano.
```
nano Dockerfile
```
7. Copy and paste the following script into the file:
```
FROM ubuntu:24.04RUN apt-get update && \
apt-get install -y --no-install-recommends wget apt-transport-https ca-certificates && \
apt-get install -y --no-install-recommends wget apt-transport-https ca-certificates && \ wget -qO /etc/apt/trusted.gpg.d/nordvpn_public.asc https://repo.nordvpn.com/gpg/nordvpn_public.asc && \ echo ""deb https://repo.nordvpn.com/deb/nordvpn/debian stable main"" > /etc/apt/sources.list.d/nordvpn.list && \ apt-get update && \ apt-get install -y --no-install-recommends nordvpn && \ apt-get clean && \ rm -rf /var/lib/apt/lists/*ENTRYPOINT /etc/init.d/nordvpn start && sleep 5 && /bin/bash -c ""$@""CMD bash
```
8. Click Ctrl + X, then Y, and finally, Enter to save and exit.
Now, you've successfully set up a Docker environment for further NordVPN Docker image building.
## Building the NordVPN Docker image
After you have set up the environment in Docker, make sure you’re in the same directory you have just created, which stores the Dockerfile. Once you’re certain you’re in the correct directory, you can proceed with building the NordVPN Docker image by following these steps:
1. Build the image with this command (add your desired image name):
```
sudo docker build -t .
```
Note: Do not forget the dot at the end of the command line.
2. Run the image:
```
sudo docker run -it --hostname mycontainer --cap-add=NET_ADMIN --sysctl net.ipv6.conf.all.disable_ipv6=0
```
Explanation:-it - instructs Docker to allocate a pseudo-TTY connected to the container’s stdin; creating an interactive bash shell in the container;--cap-add - needed to successfully run the NordVPN Daemon and connect to our servers;--sysctl net.ipv6.conf.all.disable_ipv6=0 - [disables IPv6 traffic on Linux](https://support.nordvpn.com/hc/en-us/articles/20164669224337-How-to-disable-IPv6-on-Linux) for the NordVPN container, making sure that there are no leaks after connecting to our servers.--hostname - the hostname for your container. The flag should be used to prevent Meshnet hostname from changing after restarting the Docker container.
3. [Login to NordVPN using a token](https://support.nordvpn.com/hc/en-us/articles/20286980309265-How-to-use-a-token-with-NordVPN-on-Linux) method:
```
nordvpn login --token
```
After the steps are done, you have successfully set up NordVPN Docker image.
For more detailed information on how to use Docker, check the Docker documentation.",https://support.nordvpn.com/hc/en-us/related/click?data=BAh7CjobZGVzdGluYXRpb25fYXJ0aWNsZV9pZGwrCJEVbRGdEjoYcmVmZXJyZXJfYXJ0aWNsZV9pZGwrCJEdVbRTGzoLbG9jYWxlSSIKZW4tdXMGOgZFVDoIdXJsSSJML2hjL2VuLXVzL2FydGljbGVzLzIwNDY1ODExNTI3MDU3LUhvdy10by1idWlsZC10aGUtTm9yZFZQTi1Eb2NrZXItaW1hZ2UGOwhUOglyYW5raQg%3D--f74a27b33b9dfab64c91ca623223c6c9af87f8bf
How to set up NordVPN with qBittorrent?,Configure your NordVPN qBittorrent proxy settings to use the qBittorrent client with the NordVPN proxy.,https://support.nordvpn.com/hc/en-us/related/click?data=BAh7CjobZGVzdGluYXRpb25fYXJ0aWNsZV9pZGwrCJFAdj1eEjoYcmVmZXJyZXJfYXJ0aWNsZV9pZGwrCBGGPoCwEToLbG9jYWxlSSIKZW4tdXMGOgZFVDoIdXJsSSJKL2hjL2VuLXVzL2FydGljbGVzLzIwMTk1OTY3Mzg1NzQ1LU5vcmRWUE4tcHJveHktc2V0dXAtZm9yLXFCaXR0b3JyZW50BjsIVDoJcmFua2kG--d5f09e1a6ad4ca4faeb51ac9816200215c2b4d23
Troubleshooting NordVPN connectivity issues on Linux,"If you’re having trouble connecting to NordVPN on your Linux device, you can try making a few adjustments. Check if the issue persists after following each set of Linux troubleshooting commands below.
1. Update the NordVPN app:
* Open the terminal.
* Type the following commands to update the app:sudo apt update (or sudo apt-get update)sudo apt upgrade (or sudo apt-get upgrade)
2. Reinstall the app:
* Type the following command to remove the app:sudo apt --purge autoremove nordvpn* (or sudo apt-get --purge autoremove nordvpn*)
* Reinstall the app following our tutorial on [how to install NordVPN on Linux](https://support.nordvpn.com/hc/en-us/articles/19445292364689-Installing-and-using-NordVPN-on-Linux).
3. If you see the “Whoops! Cannot reach System Daemon” error, enter the following commands:
sudo systemctl start nordvpnd sudo systemctl enable nordvpnd
4. If you get an error message: “rotating: transport rotator: ptr timer is locked.”, try the following methods:
* Run the following command to restart the NordVPN daemon: sudo systemctl restart nordvpnd
* Try to disable IPv6 system-wide, as shown in [this](https://support.nordvpn.com/hc/en-us/articles/20164669224337-How-to-disable-IPv6-on-Linux) article.
5. If NordVPN is not connecting on Linux after you’ve tried all of the above, try connecting using the [manual connection method](https://support.nordvpn.com/hc/en-us/articles/20164827795345-Connect-to-NordVPN-using-Linux-Terminal).",https://support.nordvpn.com/hc/en-us/related/click?data=BAh7CjobZGVzdGluYXRpb25fYXJ0aWNsZV9pZGwrCJERWUqNEjoYcmVmZXJyZXJfYXJ0aWNsZV9pZGwrCJEdVbRTGzoLbG9jYWxlSSIKZW4tdXMGOgZFVDoIdXJsSSJbL2hjL2VuLXVzL2FydGljbGVzLzIwMzk4MDQ3MDM5ODg5LVRyb3VibGVzaG9vdGluZy1Ob3JkVlBOLWNvbm5lY3Rpdml0eS1pc3N1ZXMtb24tTGludXgGOwhUOglyYW5raQk%3D--53725c2681bc177770046d96e73afbb4ec83635b
Switching connection protocol to OpenVPN UDP or TCP on Linux,"1. Open the Terminal (Ctrl + Alt + T shortcut).
2. Enable OpenVPN with the following command:nordvpn set technology openvpn
3. Type the following command:nordvpn set protocol tcp (for OpenVPN TCP)ornordvpn set protocol udp (for OpenVPN UDP)
You can also read about the [difference between TCP and UDP](https://nordvpn.com/blog/tcp-or-udp-which-is-better/) protocols.",https://support.nordvpn.com/hc/en-us/related/click?data=BAh7CjobZGVzdGluYXRpb25fYXJ0aWNsZV9pZGwrCBHfwQ%2BdEjoYcmVmZXJyZXJfYXJ0aWNsZV9pZGwrCJEdVbRTGzoLbG9jYWxlSSIKZW4tdXMGOgZFVDoIdXJsSSJjL2hjL2VuLXVzL2FydGljbGVzLzIwNDY1NzgzNTI5MjMzLVN3aXRjaGluZy1jb25uZWN0aW9uLXByb3RvY29sLXRvLU9wZW5WUE4tVURQLW9yLVRDUC1vbi1MaW51eAY7CFQ6CXJhbmtpCg%3D%3D--5634925f6088fc00001f31fdb74635bc563d3881
Installing NordVPN on Linux distributions,"In this article, we'll guide you through NordVPN installation and usage on Linux. We offer .deb and .rpm packages that are compatible with Debian, Ubuntu, Elementary OS, Linux Mint, Fedora, QubesOS, RHEL, CentOS, and openSUSE systems. The NordVPN native application is the recommended option for connecting to NordVPN servers on your Linux device. We designed it with your experience in mind, giving you features like auto-connect, automated Kill Switch, and Threat Protection.
## Table of contents:
* [Installing NordVPN on Linux](
* [Using NordVPN on Linux](
* [Logging in](
* [Account and settings](
* [Specialty servers](
* [Features and configurations](
* [LAN discovery and allowlists](
## Installing NordVPN on Linux
To start using the NordVPN application for Linux, you need to [download the NordVPN Linux client](https://nordvpn.com/download/linux/). You can do that in 2 ways:
1. By [downloading a Snap package](https://snapcraft.io/nordvpn).Snaps are app packages for desktop, cloud, and IoT that are easy to install, secure, cross-platform, and dependency-free. If you do not have Snap pre-installed, you may follow [Snap setup guides for various Linux distributions](https://snapcraft.io/docs/installing-snapd#:~:text=Zorin%20OS-,Without%20snap,-For%20distributions%20without).Please note that currently, we still do not support arm64, but our developers are working on this.
2. By working in the terminal:
1. Open the terminal;
2. Write the command below:
```
sh <(curl -sSf https://downloads.nordcdn.com/apps/linux/install.sh[](https://downloads.nordcdn.com/apps/linux/install.sh))
```
3. Following any on-screen instructions.
Note: If you do not have a curl package, evidenced by the fact that the above does not work, you can alternatively use this command:
```
sh <(wget -qO - https://downloads.nordcdn.com/apps/linux/install.sh)
```
Additionally, if you receive the following issue: Whoops! Permission denied accessing /run/nordvpn/nordvpnd.sock, all you need to do is write the following command:
```
sudo usermod -aG nordvpn $USER
```
and then reboot your device.
## Using NordVPN on Linux
After you have installed the NordVPN application, you can start using it!
Please note that in NordVPN Linux application version 3.18.4, network traffic from the LAN through a VPN-connected computer is blocked by default. To unblock LAN traffic, turn LAN discovery ON or add to the allowlist any subnet or IP traffic to be forwarded.
### Logging in
If you're using a Linux device without a graphical user interface, follow our guide on logging in to NordVPN on Linux devices without GUI.
If you're using a Linux device with a graphical user interface, you can start using it with the commands below:
1. Log in to your NordVPN account by using this command:
```
nordvpn login
```
2. Connect to a NordVPN server by using the command below:
```
nordvpn connect
```
### Account and settings
Here you can find the list of available NordVPN commands for Linux.
Access the NordVPN client settings:
---
```
nordvpn
```
Get an extensive explanation of all commands:
```
man nordvpn
```
See the list of available commands or help for a specific command:
```
nordvpn help
```
| or | ```
nordvpn h
```
Log in or log out:
```
nordvpn login
```
| or | ```
nordvpn logout
```
Connect to a recommended NordVPN server:
```
nordvpn connect
```
| or | ```
nordvpn c
```
Connect to a specific server (e.g. nordvpn connect uk715):
```
nordvpn connect
```
Disconnect from the VPN:
```
nordvpn disconnect
```
| or | ```
nordvpn d
```
See account information:
```
nordvpn account
```
Register a new user account:
```
nordvpn register
```
Rate your last connection quality (1-5):
```
nordvpn rate
```
See the current settings:
```
nordvpn settings
```
See the connection status:
```
nordvpn status
```
See the country list:
```
nordvpn countries
```
See the city list (e.g.: nordvpn cities united_states):
```
nordvpn cities
```
See a list of available server groups:
```
nordvpn groups
```
### Specialty servers
Connect to the closest Double VPN server:
---
```
nordvpn c double_vpn
```
Connect to a specific country using Double VPN servers:
```
nordvpn connect --group double_vpn
```
Connect to a P2P server:
---
```
nordvpn connect p2p
```
Connect to a specific country using P2P servers:
```
nordvpn connect --group p2p
```
Connect to a Dedicated IP server:
---
```
nordvpn connect Dedicated_IP
```
### Features and configurations
Set a configuration option:
---
```
nordvpn set
```
| or | ```
nordvpn s
```
Enable or disable Threat Protection:
```
nordvpn set threatprotectionlite on
```
| or | ```
nordvpn set threatprotectionlite off
```
Enable or disable Kill Switch:
```
nordvpn set killswitch on
```
| or | ```
nordvpn set killswitch off
```
Enable or disable auto-connect:
```
nordvpn set autoconnect on
```
| or | ```
nordvpn set autoconnect off
```
Set a specific server for automatic connection (e.g.: nordvpn set autoconnect on us2435):
```
nordvpn set autoconnect on
```
Enable or disable notifications:
```
nordvpn set notify on
```
| or | ```
nordvpn set notify off
```
Set custom DNS (you can set up a single DNS or two, just add spaces in between):
```
nordvpn set dns 1.1.1.1
```
| or | ```
nordvpn set dns 1.1.1.1 1.0.0.1
```
[Switch between UDP and TCP protocols](https://support.nordvpn.com/hc/en-us/articles/20465552867345-Switching-protocol-to-OpenVPN-UDP-or-TCP):
```
nordvpn set protocol udp
```
| or | ```
nordvpn set protocol tcp
```
Enable or disable [obfuscated servers](https://nordvpn.com/features/obfuscated-servers/):
```
nordvpn set obfuscate on
```
| or | ```
nordvpn set dobfuscate off
```
Set connection technology (OpenVPN or [NordLynx](https://nordvpn.com/blog/nordlynx-protocol-wireguard/)):
```
nordvpn set technology OpenVPN
```
| or | ```
nordvpn set technology NordLynx
```
Turn [Meshnet](https://nordvpn.com/meshnet/) on or off on your device:
```
nordvpn set meshnet on
```
| or | ```
nordvpn set meshnet off
```
To enable or disable the [post-quantum protection in NordVPN](https://support.nordvpn.com/hc/en-us/articles/30046321712529-NordVPN-Post-quantum-encryption-explained):
```
nordvpn set pq on
```
| or | ```
nordvpn set pq off
```
### LAN discovery and allowlists
Enable or disable LAN discovery:
---
```
nordvpn set lan-discovery enable
```
| or | ```
nordvpn set lan-discovery disable
```
Get more information on LAN discovery:
```
nordvpn set lan-discovery --help
```
Add or remove a rule to allowlist a specified incoming port (you can allowlist multiple ports — just separate their numbers with a space):
```
nordvpn whitelist add port
```
| or | ```
nordvpn whitelist remove port
```
Add or remove a rule to allowlist a specified subnet:
```
nordvpn whitelist add subnet
```
| or | ```
nordvpn whitelist remove subnet
```",https://support.nordvpn.com/hc/en-us/related/click?data=BAh7CjobZGVzdGluYXRpb25fYXJ0aWNsZV9pZGwrCBFrCUVeEjoYcmVmZXJyZXJfYXJ0aWNsZV9pZGwrCJG4Hy06FzoLbG9jYWxlSSIKZW4tdXMGOgZFVDoIdXJsSSJQL2hjL2VuLXVzL2FydGljbGVzLzIwMTk2MDk0NDcwOTI5LUluc3RhbGxpbmctTm9yZFZQTi1vbi1MaW51eC1kaXN0cmlidXRpb25zBjsIVDoJcmFua2kG--844a21aef0e7920065055e461e6677e5535491d4
Linux GUI,"At this moment NordVPN Linux application does not have any graphical user interface and the application is used by entering the commands via the Linux terminal window.
Why do I see a NordVPN icon in the Taskbar Tray/Applications list? This icon is automatically generated by Linux whenever a successful installation of NordVPN has been established. Nevertheless, clicking it will not lead to a GUI.
In order to start using NordVPN on Linux, please follow this [guide](https://support.nordvpn.com/hc/en-us/articles/19445292364689-Installing-and-using-NordVPN-on-Linux).",https://support.nordvpn.com/hc/en-us/related/click?data=BAh7CjobZGVzdGluYXRpb25fYXJ0aWNsZV9pZGwrCBH0buR7EjoYcmVmZXJyZXJfYXJ0aWNsZV9pZGwrCJG4Hy06FzoLbG9jYWxlSSIKZW4tdXMGOgZFVDoIdXJsSSIwL2hjL2VuLXVzL2FydGljbGVzLzIwMzIzMzIyNzU0MDY1LUxpbnV4LUdVSQY7CFQ6CXJhbmtpBw%3D%3D--8a6b32cf6fadeb17a6ba4b453f69dff8736cd53a
Connect to NordVPN using Linux Terminal,"Note: We have a separate set of instructions on how to set up the NordVPN application for Linux, and you can download NordVPN for Linux here.
Please note that since Linux has a lot of different distributions, the configuration interfaces may vary.
1. Open Terminal (keyboard shortcut: Ctrl + Alt + T).
2. Disable IPV6. Click here to learn how.
3. Only after disabling IPV6, install the OpenVPN client by entering:
* sudo apt-get install openvpnYou may be asked to enter your user password to confirm your identity.
4. Navigate to the OpenVPN configuration directory with the command:
* cd /etc/openvpn
5. Download the OpenVPN configuration files with the command:
* sudo wget https://downloads.nordcdn.com/configs/archives/servers/ovpn.zipIn case you get ERROR: The certificate of `nordvpn.com’ is not trusted., install the ca-certificates package with the command:
* sudo apt-get install ca-certificates
6. If you do not have the unzip package installed, download it by typing:
* sudo apt-get install unzip
7. Extract ovpn.zip with the command:
* sudo unzip ovpn.zip
8. Remove the files you will no longer use:
* sudo rm ovpn.zip
9. Enter the directory where the server configurations are located. These folders are named either ovpn_udp or ovpn_tcp:
* cd /etc/openvpn/ovpn_udp/
* cd /etc/openvpn/ovpn_tcp/
10. To see the list of all available servers, enter the following command:
* ls -al
11. Choose a server to connect to.For this tutorial, we used us2957.nordvpn.com, but you should connect to the server suggested to you at the [NordVPN server recommendation tool](https://my.nordaccount.com/dashboard/nordvpn/manual-configuration/server-recommendation/). You can find the server hostname right under the server title.
Follow the steps below to find the best server for your connection:
1. Log into your [Nord Account](https://my.nordaccount.com/), and click NordVPN.
2. Scroll down to Advanced Settings and click Set up NordVPN manually.
3. Select the Server recommendation tab. According to your location, the best server will be recommended.
4. By pressing Advanced filters you can further customize the recommended servers by selecting the Server type and the Security protocol.
In case you wish to select a specific server, follow these steps:
1. Under Set up NordVPN manually, select OpenVPN configuration files.
2. Find the server you wish to connect to by using the Search bar or by scrolling down and download it by clicking Download UDP or Download TCP.
1. Start OpenVPN with a chosen configuration by entering one of the following commands:
* sudo openvpn [file name]
* sudo openvpn us2957.nordvpn.com.udp.ovpn
* sudo openvpn /etc/openvpn/ovpn_udp/us2957.nordvpn.com.udp.ovpn
2. OpenVPN will ask you for your credentials. Enter your NordVPN service credentials.
1. You have successfully connected to VPN. To disconnect, open Terminal and press Ctrl + C on your keyboard.",https://support.nordvpn.com/hc/en-us/related/click?data=BAh7CjobZGVzdGluYXRpb25fYXJ0aWNsZV9pZGwrCJHPZf1WEjoYcmVmZXJyZXJfYXJ0aWNsZV9pZGwrCJG4Hy06FzoLbG9jYWxlSSIKZW4tdXMGOgZFVDoIdXJsSSJOL2hjL2VuLXVzL2FydGljbGVzLzIwMTY0ODI3Nzk1MzQ1LUNvbm5lY3QtdG8tTm9yZFZQTi11c2luZy1MaW51eC1UZXJtaW5hbAY7CFQ6CXJhbmtpCA%3D%3D--e57824e27433236975a9f306f63c76fe4118131e
Troubleshooting NordVPN connectivity issues on Linux,"If you’re having trouble connecting to NordVPN on your Linux device, you can try making a few adjustments. Check if the issue persists after following each set of Linux troubleshooting commands below.
1. Update the NordVPN app:
* Open the terminal.
* Type the following commands to update the app:sudo apt update (or sudo apt-get update)sudo apt upgrade (or sudo apt-get upgrade)
2. Reinstall the app:
* Type the following command to remove the app:sudo apt --purge autoremove nordvpn* (or sudo apt-get --purge autoremove nordvpn*)
* Reinstall the app following our tutorial on [how to install NordVPN on Linux](https://support.nordvpn.com/hc/en-us/articles/19445292364689-Installing-and-using-NordVPN-on-Linux).
3. If you see the “Whoops! Cannot reach System Daemon” error, enter the following commands:
sudo systemctl start nordvpnd sudo systemctl enable nordvpnd
4. If you get an error message: “rotating: transport rotator: ptr timer is locked.”, try the following methods:
* Run the following command to restart the NordVPN daemon: sudo systemctl restart nordvpnd
* Try to disable IPv6 system-wide, as shown in [this](https://support.nordvpn.com/hc/en-us/articles/20164669224337-How-to-disable-IPv6-on-Linux) article.
5. If NordVPN is not connecting on Linux after you’ve tried all of the above, try connecting using the [manual connection method](https://support.nordvpn.com/hc/en-us/articles/20164827795345-Connect-to-NordVPN-using-Linux-Terminal).",https://support.nordvpn.com/hc/en-us/related/click?data=BAh7CjobZGVzdGluYXRpb25fYXJ0aWNsZV9pZGwrCJERWUqNEjoYcmVmZXJyZXJfYXJ0aWNsZV9pZGwrCJG4Hy06FzoLbG9jYWxlSSIKZW4tdXMGOgZFVDoIdXJsSSJbL2hjL2VuLXVzL2FydGljbGVzLzIwMzk4MDQ3MDM5ODg5LVRyb3VibGVzaG9vdGluZy1Ob3JkVlBOLWNvbm5lY3Rpdml0eS1pc3N1ZXMtb24tTGludXgGOwhUOglyYW5raQk%3D--fa59b6128c0a030c49753839fde37c42c37d2ad1
Switching connection protocol to OpenVPN UDP or TCP on Linux,"1. Open the Terminal (Ctrl + Alt + T shortcut).
2. Enable OpenVPN with the following command:nordvpn set technology openvpn
3. Type the following command:nordvpn set protocol tcp (for OpenVPN TCP)ornordvpn set protocol udp (for OpenVPN UDP)
You can also read about the [difference between TCP and UDP](https://nordvpn.com/blog/tcp-or-udp-which-is-better/) protocols.",https://support.nordvpn.com/hc/en-us/related/click?data=BAh7CjobZGVzdGluYXRpb25fYXJ0aWNsZV9pZGwrCBHfwQ%2BdEjoYcmVmZXJyZXJfYXJ0aWNsZV9pZGwrCJG4Hy06FzoLbG9jYWxlSSIKZW4tdXMGOgZFVDoIdXJsSSJjL2hjL2VuLXVzL2FydGljbGVzLzIwNDY1NzgzNTI5MjMzLVN3aXRjaGluZy1jb25uZWN0aW9uLXByb3RvY29sLXRvLU9wZW5WUE4tVURQLW9yLVRDUC1vbi1MaW51eAY7CFQ6CXJhbmtpCg%3D%3D--895aaca030fcb8ccfb068a09b00a293753336625
Resetting your application preferences,"Find the relevant instructions by selecting the operating system below.
* [Windows](https://support.nordvpn.com/hc/en-us/articles/20323633965969-Resetting-your-application-preferences-on-Linux#Windows)
* [macOS](https://support.nordvpn.com/hc/en-us/articles/20323633965969-Resetting-your-application-preferences-on-Linux#macOS)
* [Android](https://support.nordvpn.com/hc/en-us/articles/20323633965969-Resetting-your-application-preferences-on-Linux#Android)
* [Linux](https://support.nordvpn.com/hc/en-us/articles/20323633965969-Resetting-your-application-preferences-on-Linux#Linux)
To reset your preferences on the NordVPN [Windows](https://nordvpn.com/download/windows/) app, follow these steps:
1. Open NordVPN, and click on the gear:
2. Head to general:
3. Scroll down and click run diagnostics:
4. Click reset app:It may take up to a few minutes for the app to reset.
Your application preferences and settings will now be reset, and you will be asked to log back in.
To reset your NordVPN application settings on [macOS](https://nordvpn.com/download/mac/), follow these steps:
1. Close the NordVPN application completely by right-clicking the NordVPN in the Dock and selecting Quit:
2. Open the Terminal by pressing Command(⌘) + space bar and typing terminal in the search field:
3. In the Terminal, run these commands:If the application was downloaded from the [App Store](https://apps.apple.com/us/app/nordvpn-vpn-fast-secure/id905953485):
```
defaults delete com.nordvpn.osx-apple
```
If the application was downloaded directly from our [website](https://nordvpn.com/en-us/offer/download/mac/):
```
defaults delete com.nordvpn.macos
```
Your application preferences will now be reset.
To reset your NordVPN application settings on [Android](https://nordvpn.com/offer/download/android/?vpn=brand&nc=Search_-_Belgium_-_Brand+Generic_-_Phrase_-_EN_-_DMT_-_EUR&ns=google&nm=cpc&nt=nordvpn%20android&gad_source=1&gclid=Cj0KCQjw1um-BhDtARIsABjU5x5nKMAMfSYpwSgBIbtcGhZn3uFzM41Em4o4ibJfHtqlYWqrtZmgbkwaAu_qEALw_wcB), follow these steps:
1. Find the NordVPN app on your home screen, long-press the icon, and select app info:
2. A setting window will appear, select storage & cache:
3. Click clear storage:
4. A pop-up will appear, click delete:
Your app preferences have now been reset.
To reset your preferences on the NordVPN [Linux](https://nordvpn.com/download/linux/) app, follow these steps:
1. Press Ctrl + Alt + T to open the terminal.
2. Type the following command and press Enter:
```
sudo rm /var/lib/nordvpn/data/settings.dat
```
3. Next, type the following command and press Enter:
```
sudo rm -rf ~/.config/nordvpn
```
Your app preferences have now been reset.",https://support.nordvpn.com/hc/en-us/articles/20323633965969-Resetting-your-application-preferences-on-Linux
Installing NordVPN on Linux distributions,"In this article, we'll guide you through NordVPN installation and usage on Linux. We offer .deb and .rpm packages that are compatible with Debian, Ubuntu, Elementary OS, Linux Mint, Fedora, QubesOS, RHEL, CentOS, and openSUSE systems. The NordVPN native application is the recommended option for connecting to NordVPN servers on your Linux device. We designed it with your experience in mind, giving you features like auto-connect, automated Kill Switch, and Threat Protection.
## Table of contents:
* [Installing NordVPN on Linux](
* [Using NordVPN on Linux](
* [Logging in](
* [Account and settings](
* [Specialty servers](
* [Features and configurations](
* [LAN discovery and allowlists](
## Installing NordVPN on Linux
To start using the NordVPN application for Linux, you need to [download the NordVPN Linux client](https://nordvpn.com/download/linux/). You can do that in 2 ways:
1. By [downloading a Snap package](https://snapcraft.io/nordvpn).Snaps are app packages for desktop, cloud, and IoT that are easy to install, secure, cross-platform, and dependency-free. If you do not have Snap pre-installed, you may follow [Snap setup guides for various Linux distributions](https://snapcraft.io/docs/installing-snapd#:~:text=Zorin%20OS-,Without%20snap,-For%20distributions%20without).Please note that currently, we still do not support arm64, but our developers are working on this.
2. By working in the terminal:
1. Open the terminal;
2. Write the command below:
```
sh <(curl -sSf https://downloads.nordcdn.com/apps/linux/install.sh[](https://downloads.nordcdn.com/apps/linux/install.sh))
```
3. Following any on-screen instructions.
Note: If you do not have a curl package, evidenced by the fact that the above does not work, you can alternatively use this command:
```
sh <(wget -qO - https://downloads.nordcdn.com/apps/linux/install.sh)
```
Additionally, if you receive the following issue: Whoops! Permission denied accessing /run/nordvpn/nordvpnd.sock, all you need to do is write the following command:
```
sudo usermod -aG nordvpn $USER
```
and then reboot your device.
## Using NordVPN on Linux
After you have installed the NordVPN application, you can start using it!
Please note that in NordVPN Linux application version 3.18.4, network traffic from the LAN through a VPN-connected computer is blocked by default. To unblock LAN traffic, turn LAN discovery ON or add to the allowlist any subnet or IP traffic to be forwarded.
### Logging in
If you're using a Linux device without a graphical user interface, follow our guide on logging in to NordVPN on Linux devices without GUI.
If you're using a Linux device with a graphical user interface, you can start using it with the commands below:
1. Log in to your NordVPN account by using this command:
```
nordvpn login
```
2. Connect to a NordVPN server by using the command below:
```
nordvpn connect
```
### Account and settings
Here you can find the list of available NordVPN commands for Linux.
Access the NordVPN client settings:
---
```
nordvpn
```
Get an extensive explanation of all commands:
```
man nordvpn
```
See the list of available commands or help for a specific command:
```
nordvpn help
```
| or | ```
nordvpn h
```
Log in or log out:
```
nordvpn login
```
| or | ```
nordvpn logout
```
Connect to a recommended NordVPN server:
```
nordvpn connect
```
| or | ```
nordvpn c
```
Connect to a specific server (e.g. nordvpn connect uk715):
```
nordvpn connect
```
Disconnect from the VPN:
```
nordvpn disconnect
```
| or | ```
nordvpn d
```
See account information:
```
nordvpn account
```
Register a new user account:
```
nordvpn register
```
Rate your last connection quality (1-5):
```
nordvpn rate
```
See the current settings:
```
nordvpn settings
```
See the connection status:
```
nordvpn status
```
See the country list:
```
nordvpn countries
```
See the city list (e.g.: nordvpn cities united_states):
```
nordvpn cities
```
See a list of available server groups:
```
nordvpn groups
```
### Specialty servers
Connect to the closest Double VPN server:
---
```
nordvpn c double_vpn
```
Connect to a specific country using Double VPN servers:
```
nordvpn connect --group double_vpn
```
Connect to a P2P server:
---
```
nordvpn connect p2p
```
Connect to a specific country using P2P servers:
```
nordvpn connect --group p2p
```
Connect to a Dedicated IP server:
---
```
nordvpn connect Dedicated_IP
```
### Features and configurations
Set a configuration option:
---
```
nordvpn set
```
| or | ```
nordvpn s
```
Enable or disable Threat Protection:
```
nordvpn set threatprotectionlite on
```
| or | ```
nordvpn set threatprotectionlite off
```
Enable or disable Kill Switch:
```
nordvpn set killswitch on
```
| or | ```
nordvpn set killswitch off
```
Enable or disable auto-connect:
```
nordvpn set autoconnect on
```
| or | ```
nordvpn set autoconnect off
```
Set a specific server for automatic connection (e.g.: nordvpn set autoconnect on us2435):
```
nordvpn set autoconnect on
```
Enable or disable notifications:
```
nordvpn set notify on
```
| or | ```
nordvpn set notify off
```
Set custom DNS (you can set up a single DNS or two, just add spaces in between):
```
nordvpn set dns 1.1.1.1
```
| or | ```
nordvpn set dns 1.1.1.1 1.0.0.1
```
[Switch between UDP and TCP protocols](https://support.nordvpn.com/hc/en-us/articles/20465552867345-Switching-protocol-to-OpenVPN-UDP-or-TCP):
```
nordvpn set protocol udp
```
| or | ```
nordvpn set protocol tcp
```
Enable or disable [obfuscated servers](https://nordvpn.com/features/obfuscated-servers/):
```
nordvpn set obfuscate on
```
| or | ```
nordvpn set dobfuscate off
```
Set connection technology (OpenVPN or [NordLynx](https://nordvpn.com/blog/nordlynx-protocol-wireguard/)):
```
nordvpn set technology OpenVPN
```
| or | ```
nordvpn set technology NordLynx
```
Turn [Meshnet](https://nordvpn.com/meshnet/) on or off on your device:
```
nordvpn set meshnet on
```
| or | ```
nordvpn set meshnet off
```
To enable or disable the [post-quantum protection in NordVPN](https://support.nordvpn.com/hc/en-us/articles/30046321712529-NordVPN-Post-quantum-encryption-explained):
```
nordvpn set pq on
```
| or | ```
nordvpn set pq off
```
### LAN discovery and allowlists
Enable or disable LAN discovery:
---
```
nordvpn set lan-discovery enable
```
| or | ```
nordvpn set lan-discovery disable
```
Get more information on LAN discovery:
```
nordvpn set lan-discovery --help
```
Add or remove a rule to allowlist a specified incoming port (you can allowlist multiple ports — just separate their numbers with a space):
```
nordvpn whitelist add port
```
| or | ```
nordvpn whitelist remove port
```
Add or remove a rule to allowlist a specified subnet:
```
nordvpn whitelist add subnet
```
| or | ```
nordvpn whitelist remove subnet
```",https://support.nordvpn.com/hc/en-us/related/click?data=BAh7CjobZGVzdGluYXRpb25fYXJ0aWNsZV9pZGwrCBFrCUVeEjoYcmVmZXJyZXJfYXJ0aWNsZV9pZGwrCBGYFiKdEjoLbG9jYWxlSSIKZW4tdXMGOgZFVDoIdXJsSSJQL2hjL2VuLXVzL2FydGljbGVzLzIwMTk2MDk0NDcwOTI5LUluc3RhbGxpbmctTm9yZFZQTi1vbi1MaW51eC1kaXN0cmlidXRpb25zBjsIVDoJcmFua2kG--0a4b540a266bdd52bc2bbc2121dc4c53af43b1f8
Connect to NordVPN using Linux Terminal,"Note: We have a separate set of instructions on how to set up the NordVPN application for Linux, and you can download NordVPN for Linux here.
Please note that since Linux has a lot of different distributions, the configuration interfaces may vary.
1. Open Terminal (keyboard shortcut: Ctrl + Alt + T).
2. Disable IPV6. Click here to learn how.
3. Only after disabling IPV6, install the OpenVPN client by entering:
* sudo apt-get install openvpnYou may be asked to enter your user password to confirm your identity.
4. Navigate to the OpenVPN configuration directory with the command:
* cd /etc/openvpn
5. Download the OpenVPN configuration files with the command:
* sudo wget https://downloads.nordcdn.com/configs/archives/servers/ovpn.zipIn case you get ERROR: The certificate of `nordvpn.com’ is not trusted., install the ca-certificates package with the command:
* sudo apt-get install ca-certificates
6. If you do not have the unzip package installed, download it by typing:
* sudo apt-get install unzip
7. Extract ovpn.zip with the command:
* sudo unzip ovpn.zip
8. Remove the files you will no longer use:
* sudo rm ovpn.zip
9. Enter the directory where the server configurations are located. These folders are named either ovpn_udp or ovpn_tcp:
* cd /etc/openvpn/ovpn_udp/
* cd /etc/openvpn/ovpn_tcp/
10. To see the list of all available servers, enter the following command:
* ls -al
11. Choose a server to connect to.For this tutorial, we used us2957.nordvpn.com, but you should connect to the server suggested to you at the [NordVPN server recommendation tool](https://my.nordaccount.com/dashboard/nordvpn/manual-configuration/server-recommendation/). You can find the server hostname right under the server title.
Follow the steps below to find the best server for your connection:
1. Log into your [Nord Account](https://my.nordaccount.com/), and click NordVPN.
2. Scroll down to Advanced Settings and click Set up NordVPN manually.
3. Select the Server recommendation tab. According to your location, the best server will be recommended.
4. By pressing Advanced filters you can further customize the recommended servers by selecting the Server type and the Security protocol.
In case you wish to select a specific server, follow these steps:
1. Under Set up NordVPN manually, select OpenVPN configuration files.
2. Find the server you wish to connect to by using the Search bar or by scrolling down and download it by clicking Download UDP or Download TCP.
1. Start OpenVPN with a chosen configuration by entering one of the following commands:
* sudo openvpn [file name]
* sudo openvpn us2957.nordvpn.com.udp.ovpn
* sudo openvpn /etc/openvpn/ovpn_udp/us2957.nordvpn.com.udp.ovpn
2. OpenVPN will ask you for your credentials. Enter your NordVPN service credentials.
1. You have successfully connected to VPN. To disconnect, open Terminal and press Ctrl + C on your keyboard.",https://support.nordvpn.com/hc/en-us/related/click?data=BAh7CjobZGVzdGluYXRpb25fYXJ0aWNsZV9pZGwrCJHPZf1WEjoYcmVmZXJyZXJfYXJ0aWNsZV9pZGwrCBGYFiKdEjoLbG9jYWxlSSIKZW4tdXMGOgZFVDoIdXJsSSJOL2hjL2VuLXVzL2FydGljbGVzLzIwMTY0ODI3Nzk1MzQ1LUNvbm5lY3QtdG8tTm9yZFZQTi11c2luZy1MaW51eC1UZXJtaW5hbAY7CFQ6CXJhbmtpBw%3D%3D--f4848ab210e4f5b640e931df5e17219583c3c029
How to build the NordVPN Docker image,"Docker is a tool for easy deployment and management of applications in lightweight containers. Setting up NordVPN on a Docker container will secure your internet connection and protect your online privacy of other Docker containers as well.
## Setting up the Docker environment
To build the NordVPN Docker image on Linux, you will first need to set up the Docker environment:
1. [Install the Docker engine on Linux](https://docs.docker.com/engine/install/ubuntu/).
2. Once you have Docker installed, go to the terminal.
3. Create a new directory for your image using this command:
```
mkdir
```
4. Go to the created directory:
```
cd
```
5. Create a Dockerfile:
```
touch Dockerfile
```
6. Go to the file with your preferred text editor. In this example, we use nano.
```
nano Dockerfile
```
7. Copy and paste the following script into the file:
```
FROM ubuntu:24.04RUN apt-get update && \
apt-get install -y --no-install-recommends wget apt-transport-https ca-certificates && \
apt-get install -y --no-install-recommends wget apt-transport-https ca-certificates && \ wget -qO /etc/apt/trusted.gpg.d/nordvpn_public.asc https://repo.nordvpn.com/gpg/nordvpn_public.asc && \ echo ""deb https://repo.nordvpn.com/deb/nordvpn/debian stable main"" > /etc/apt/sources.list.d/nordvpn.list && \ apt-get update && \ apt-get install -y --no-install-recommends nordvpn && \ apt-get clean && \ rm -rf /var/lib/apt/lists/*ENTRYPOINT /etc/init.d/nordvpn start && sleep 5 && /bin/bash -c ""$@""CMD bash
```
8. Click Ctrl + X, then Y, and finally, Enter to save and exit.
Now, you've successfully set up a Docker environment for further NordVPN Docker image building.
## Building the NordVPN Docker image
After you have set up the environment in Docker, make sure you’re in the same directory you have just created, which stores the Dockerfile. Once you’re certain you’re in the correct directory, you can proceed with building the NordVPN Docker image by following these steps:
1. Build the image with this command (add your desired image name):
```
sudo docker build -t .
```
Note: Do not forget the dot at the end of the command line.
2. Run the image:
```
sudo docker run -it --hostname mycontainer --cap-add=NET_ADMIN --sysctl net.ipv6.conf.all.disable_ipv6=0
```
Explanation:-it - instructs Docker to allocate a pseudo-TTY connected to the container’s stdin; creating an interactive bash shell in the container;--cap-add - needed to successfully run the NordVPN Daemon and connect to our servers;--sysctl net.ipv6.conf.all.disable_ipv6=0 - [disables IPv6 traffic on Linux](https://support.nordvpn.com/hc/en-us/articles/20164669224337-How-to-disable-IPv6-on-Linux) for the NordVPN container, making sure that there are no leaks after connecting to our servers.--hostname - the hostname for your container. The flag should be used to prevent Meshnet hostname from changing after restarting the Docker container.
3. [Login to NordVPN using a token](https://support.nordvpn.com/hc/en-us/articles/20286980309265-How-to-use-a-token-with-NordVPN-on-Linux) method:
```
nordvpn login --token
```
After the steps are done, you have successfully set up NordVPN Docker image.
For more detailed information on how to use Docker, check the Docker documentation.",https://support.nordvpn.com/hc/en-us/related/click?data=BAh7CjobZGVzdGluYXRpb25fYXJ0aWNsZV9pZGwrCJEVbRGdEjoYcmVmZXJyZXJfYXJ0aWNsZV9pZGwrCBGYFiKdEjoLbG9jYWxlSSIKZW4tdXMGOgZFVDoIdXJsSSJML2hjL2VuLXVzL2FydGljbGVzLzIwNDY1ODExNTI3MDU3LUhvdy10by1idWlsZC10aGUtTm9yZFZQTi1Eb2NrZXItaW1hZ2UGOwhUOglyYW5raQg%3D--5690b98654e3d2e5e286e31506ea0b8b15405293
Can't log into NordVPN,"You may struggle to log in to NordVPN for several reasons. Are you experiencing any of the following issues?
## Table of contents:
* The NordVPN app login makes me continue in the browser, but when I do, nothing happens in the app.
* I receive ""Error: 429 Too Many Requests.""
* I didn't receive my verification password after signing up.
* The password is incorrect.
* After logging in, the app asks me to log in again.
* NordVPN keeps logging me out.
* I get “error: rotating: transport rotator: ntp check failed” or “rotating: transport rotator: ptr timer is locked.”
### The NordVPN app login makes me continue in the browser, but when I do, nothing happens in the app.
To help solve this problem, try [resetting your NordVPN app preferences](https://support.nordvpn.com/hc/en-us/articles/20323582191505-Resetting-your-application-preferences).
If you are using Linux, try the callback login method:
1. Run the command: nordvpn login.
2. You'll receive a URL. Open it on any device that supports a browser, and finish the login process.
3. Right-click on the Continue button and copy the link address.
4. Run the command:
```
nordvpn login --callback """"
```
and replace with the copied link address.
For example:
```
nordvpn login --callback ""nordvpn://login?action=login&exchange_token=MGFlY2E1NmE4YjM2NDM4NjUzN2VjOWIzYWM3ZTU3ZDliNDdiNzRjZTMwMjE5YjkzZTNhNTI3ZWZlOTIwMGJlOQ%3D%3D&status=done""
```
### I receive the message ""Error: 429 Too Many Requests.""
Follow the steps in our article on how to deal with “Error: 429 Too Many Requests.”
### After signing up, I didn't receive my verification password.
Check your spam folder. If you can't find the email, please [contact our customer support team](https://support.nordvpn.com/hc/en-us/articles/19482416296593-How-can-I-reach-NordVPN-customer-support).
### It says that my password is incorrect.
Try resetting your password. If that doesn’t help, [uninstall the NordVPN app](https://support.nordvpn.com/hc/en-us/articles/19481023452561-How-to-uninstall-NordVPN-software), [download NordVPN](https://nordvpn.com/download/) once again, and see if you can sign in.
### I’m stuck in a NordVPN login loop. After logging in, the app asks me to log in again.
Try resetting your app preferences. If that doesn’t help, uninstall the NordVPN application, download NordVPN once again, and try signing in.
### NordVPN keeps logging me out.
Reset your app preferences or reinstall the NordVPN app. If the above doesn’t help, try changing the DNS addresses on your device. It’s worth noting that other VPN apps or antivirus software may interfere with your NordVPN connection.
### I get “error: rotating: transport rotator: ntp check failed” or “rotating: transport rotator: ptr timer is locked.”
1. Use one of the following commands to remove the app:
```
sudo apt --purge autoremove nordvpn*
```
or
```
sudo apt-get --purge autoremove nordvpn*
```
2. Install the app again on your Linux device.
If you'd like to learn more, check out our article on how the NordVPN sign-up and log-in process works.",https://support.nordvpn.com/hc/en-us/related/click?data=BAh7CjobZGVzdGluYXRpb25fYXJ0aWNsZV9pZGwrCJEBoUleEjoYcmVmZXJyZXJfYXJ0aWNsZV9pZGwrCBGYFiKdEjoLbG9jYWxlSSIKZW4tdXMGOgZFVDoIdXJsSSI9L2hjL2VuLXVzL2FydGljbGVzLzIwMTk2MTcxNTE0MjU3LUNhbi10LWxvZy1pbnRvLU5vcmRWUE4GOwhUOglyYW5raQk%3D--1994c68ab4e6277f37e2fa64566c3ac6d50f9222
How to fix NordVPN background processes that aren’t running?,"If the NordVPN background process is not running on your computer, follow the steps below.
## Reset application settings
1. Right-click the NordVPN shortcut on Desktop and click Open file location.
2. Double-click the folder of your current NordVPN version (e.g. 7.15).
3. Locate Diagnostics and launch it.
4. Click Reset app.
Afterward, the application will be reloaded, and you will be asked to log in.
## Allowlist NordVPN in your antivirus software
If you are using antivirus software, please allowlist the NordVPN application folder in the settings of your antivirus. By default, NordVPN is located in C:\Program Files\NordVPN.
## Collect diagnostics and contact support
In case both solutions above do not work, share the diagnostics with the customer support team for further investigation. Here is how you can do that:
1. Open the NordVPN application and go to Settings.
2. Go to Advanced and click Run Diagnostics Tool.
3. Select Collect Diagnostics.
4. Take note of the Ticket ID and refer it to our customer service.
In case the Ticket ID fails to generate, check the location of the diagnostics .zip file and send the file to our customer service.
For more detailed instructions on gathering diagnostics, check out our [connection logs tutorial](https://nordvpn.zendesk.com/hc/en-us/articles/20379445229073).",https://support.nordvpn.com/hc/en-us/related/click?data=BAh7CjobZGVzdGluYXRpb25fYXJ0aWNsZV9pZGwrCBGdvwcFEzoYcmVmZXJyZXJfYXJ0aWNsZV9pZGwrCBGYFiKdEjoLbG9jYWxlSSIKZW4tdXMGOgZFVDoIdXJsSSJiL2hjL2VuLXVzL2FydGljbGVzLzIwOTEyMzI1NzYyMzIxLUhvdy10by1maXgtTm9yZFZQTi1iYWNrZ3JvdW5kLXByb2Nlc3Nlcy10aGF0LWFyZW4tdC1ydW5uaW5nBjsIVDoJcmFua2kK--93d14153f46c8327a528ce710cd481c4ed14a1c2
Installing NordVPN on Linux distributions,"In this article, we'll guide you through NordVPN installation and usage on Linux. We offer .deb and .rpm packages that are compatible with Debian, Ubuntu, Elementary OS, Linux Mint, Fedora, QubesOS, RHEL, CentOS, and openSUSE systems. The NordVPN native application is the recommended option for connecting to NordVPN servers on your Linux device. We designed it with your experience in mind, giving you features like auto-connect, automated Kill Switch, and Threat Protection.
## Table of contents:
* [Installing NordVPN on Linux](
* [Using NordVPN on Linux](
* [Logging in](
* [Account and settings](
* [Specialty servers](
* [Features and configurations](
* [LAN discovery and allowlists](
## Installing NordVPN on Linux
To start using the NordVPN application for Linux, you need to [download the NordVPN Linux client](https://nordvpn.com/download/linux/). You can do that in 2 ways:
1. By [downloading a Snap package](https://snapcraft.io/nordvpn).Snaps are app packages for desktop, cloud, and IoT that are easy to install, secure, cross-platform, and dependency-free. If you do not have Snap pre-installed, you may follow [Snap setup guides for various Linux distributions](https://snapcraft.io/docs/installing-snapd#:~:text=Zorin%20OS-,Without%20snap,-For%20distributions%20without).Please note that currently, we still do not support arm64, but our developers are working on this.
2. By working in the terminal:
1. Open the terminal;
2. Write the command below:
```
sh <(curl -sSf https://downloads.nordcdn.com/apps/linux/install.sh[](https://downloads.nordcdn.com/apps/linux/install.sh))
```
3. Following any on-screen instructions.
Note: If you do not have a curl package, evidenced by the fact that the above does not work, you can alternatively use this command:
```
sh <(wget -qO - https://downloads.nordcdn.com/apps/linux/install.sh)
```
Additionally, if you receive the following issue: Whoops! Permission denied accessing /run/nordvpn/nordvpnd.sock, all you need to do is write the following command:
```
sudo usermod -aG nordvpn $USER
```
and then reboot your device.
## Using NordVPN on Linux
After you have installed the NordVPN application, you can start using it!
Please note that in NordVPN Linux application version 3.18.4, network traffic from the LAN through a VPN-connected computer is blocked by default. To unblock LAN traffic, turn LAN discovery ON or add to the allowlist any subnet or IP traffic to be forwarded.
### Logging in
If you're using a Linux device without a graphical user interface, follow our guide on logging in to NordVPN on Linux devices without GUI.
If you're using a Linux device with a graphical user interface, you can start using it with the commands below:
1. Log in to your NordVPN account by using this command:
```
nordvpn login
```
2. Connect to a NordVPN server by using the command below:
```
nordvpn connect
```
### Account and settings
Here you can find the list of available NordVPN commands for Linux.
Access the NordVPN client settings:
---
```
nordvpn
```
Get an extensive explanation of all commands:
```
man nordvpn
```
See the list of available commands or help for a specific command:
```
nordvpn help
```
| or | ```
nordvpn h
```
Log in or log out:
```
nordvpn login
```
| or | ```
nordvpn logout
```
Connect to a recommended NordVPN server:
```
nordvpn connect
```
| or | ```
nordvpn c
```
Connect to a specific server (e.g. nordvpn connect uk715):
```
nordvpn connect
```
Disconnect from the VPN:
```
nordvpn disconnect
```
| or | ```
nordvpn d
```
See account information:
```
nordvpn account
```
Register a new user account:
```
nordvpn register
```
Rate your last connection quality (1-5):
```
nordvpn rate
```
See the current settings:
```
nordvpn settings
```
See the connection status:
```
nordvpn status
```
See the country list:
```
nordvpn countries
```
See the city list (e.g.: nordvpn cities united_states):
```
nordvpn cities
```
See a list of available server groups:
```
nordvpn groups
```
### Specialty servers
Connect to the closest Double VPN server:
---
```
nordvpn c double_vpn
```
Connect to a specific country using Double VPN servers:
```
nordvpn connect --group double_vpn
```
Connect to a P2P server:
---
```
nordvpn connect p2p
```
Connect to a specific country using P2P servers:
```
nordvpn connect --group p2p
```
Connect to a Dedicated IP server:
---
```
nordvpn connect Dedicated_IP
```
### Features and configurations
Set a configuration option:
---
```
nordvpn set
```
| or | ```
nordvpn s
```
Enable or disable Threat Protection:
```
nordvpn set threatprotectionlite on
```
| or | ```
nordvpn set threatprotectionlite off
```
Enable or disable Kill Switch:
```
nordvpn set killswitch on
```
| or | ```
nordvpn set killswitch off
```
Enable or disable auto-connect:
```
nordvpn set autoconnect on
```
| or | ```
nordvpn set autoconnect off
```
Set a specific server for automatic connection (e.g.: nordvpn set autoconnect on us2435):
```
nordvpn set autoconnect on
```
Enable or disable notifications:
```
nordvpn set notify on
```
| or | ```
nordvpn set notify off
```
Set custom DNS (you can set up a single DNS or two, just add spaces in between):
```
nordvpn set dns 1.1.1.1
```
| or | ```
nordvpn set dns 1.1.1.1 1.0.0.1
```
[Switch between UDP and TCP protocols](https://support.nordvpn.com/hc/en-us/articles/20465552867345-Switching-protocol-to-OpenVPN-UDP-or-TCP):
```
nordvpn set protocol udp
```
| or | ```
nordvpn set protocol tcp
```
Enable or disable [obfuscated servers](https://nordvpn.com/features/obfuscated-servers/):
```
nordvpn set obfuscate on
```
| or | ```
nordvpn set dobfuscate off
```
Set connection technology (OpenVPN or [NordLynx](https://nordvpn.com/blog/nordlynx-protocol-wireguard/)):
```
nordvpn set technology OpenVPN
```
| or | ```
nordvpn set technology NordLynx
```
Turn [Meshnet](https://nordvpn.com/meshnet/) on or off on your device:
```
nordvpn set meshnet on
```
| or | ```
nordvpn set meshnet off
```
To enable or disable the [post-quantum protection in NordVPN](https://support.nordvpn.com/hc/en-us/articles/30046321712529-NordVPN-Post-quantum-encryption-explained):
```
nordvpn set pq on
```
| or | ```
nordvpn set pq off
```
### LAN discovery and allowlists
Enable or disable LAN discovery:
---
```
nordvpn set lan-discovery enable
```
| or | ```
nordvpn set lan-discovery disable
```
Get more information on LAN discovery:
```
nordvpn set lan-discovery --help
```
Add or remove a rule to allowlist a specified incoming port (you can allowlist multiple ports — just separate their numbers with a space):
```
nordvpn whitelist add port
```
| or | ```
nordvpn whitelist remove port
```
Add or remove a rule to allowlist a specified subnet:
```
nordvpn whitelist add subnet
```
| or | ```
nordvpn whitelist remove subnet
```",https://support.nordvpn.com/hc/en-us/related/click?data=BAh7CjobZGVzdGluYXRpb25fYXJ0aWNsZV9pZGwrCBFrCUVeEjoYcmVmZXJyZXJfYXJ0aWNsZV9pZGwrCJEVbRGdEjoLbG9jYWxlSSIKZW4tdXMGOgZFVDoIdXJsSSJQL2hjL2VuLXVzL2FydGljbGVzLzIwMTk2MDk0NDcwOTI5LUluc3RhbGxpbmctTm9yZFZQTi1vbi1MaW51eC1kaXN0cmlidXRpb25zBjsIVDoJcmFua2kG--cc2c910cd8d80679de6226f6a3119792f49f13e3
What if the token number for NordVPN expires?,"If you lost your token number for NordVPN, or it expired, revoke your token by clicking the Revoke button:",https://support.nordvpn.com/hc/en-us/related/click?data=BAh7CjobZGVzdGluYXRpb25fYXJ0aWNsZV9pZGwrCBFBQW5zEjoYcmVmZXJyZXJfYXJ0aWNsZV9pZGwrCJEVbRGdEjoLbG9jYWxlSSIKZW4tdXMGOgZFVDoIdXJsSSJPL2hjL2VuLXVzL2FydGljbGVzLzIwMjg2OTgwMzA5MjY1LUhvdy10by11c2UtYS10b2tlbi13aXRoLU5vcmRWUE4tb24tTGludXgGOwhUOglyYW5raQc%3D--4dd8fc83e0ea5ec2f7b4eb626c76fd913f37fd34
Switching protocol to OpenVPN UDP or TCP,"Some NordVPN server categories, found under the specialty server section, are available only while using OpenVPN UDP or TCP protocols.
Currently, these categories are Double VPN and a part of our obfuscated Servers. This article contains a list of instructions on how to switch your connection protocol on various platforms.
* [Windows](https://support.nordvpn.com/hc/en-us/articles/19774135293969-Switching-protocol-to-OpenVPN-UDP-or-TCP-Windows)
* [Android](https://support.nordvpn.com/hc/en-us/articles/19973901502609-Switching-protocol-to-OpenVPN-UDP-or-TCP-Android)
* [macOS](https://support.nordvpn.com/hc/en-us/articles/19921436351505-Switching-protocol-to-OpenVPN-UDP-or-TCP-macOS)
* [iOS](https://support.nordvpn.com/hc/en-us/articles/20465699170321-Switching-connection-protocol-to-OpenVPN-UDP-or-TCP-iOS)
* [Linux](https://support.nordvpn.com/hc/en-us/articles/20465783529233-Switching-connection-protocol-to-OpenVPN-UDP-or-TCP-on-Linux)",https://support.nordvpn.com/hc/en-us/related/click?data=BAh7CjobZGVzdGluYXRpb25fYXJ0aWNsZV9pZGwrCBFAAgKdEjoYcmVmZXJyZXJfYXJ0aWNsZV9pZGwrCBHfwQ%2BdEjoLbG9jYWxlSSIKZW4tdXMGOgZFVDoIdXJsSSJPL2hjL2VuLXVzL2FydGljbGVzLzIwNDY1NTUyODY3MzQ1LVN3aXRjaGluZy1wcm90b2NvbC10by1PcGVuVlBOLVVEUC1vci1UQ1AGOwhUOglyYW5raQg%3D--38aba79ba2a4aedcb6907c2f7aa8bb8bee917f6b
How to use a token with NordVPN on Linux,"Here’s how to use a token to log in and log out of the NordVPN app on a Linux machine without a graphical user interface — and what to do if you lose your token.
Note: This login method is also suitable for headless (no GUI) devices.
## Logging in
If you need an alternative way to log in to the Linux application, use the following command:
```
nordvpn login --token
```
You’ll need to access the token number to use this login method.
### To access the token number:
1. Login to Nord Account:
2. Click on NordVPN:
3. Scroll down until you see the advanced settings tab. Click get access token:
4. Verify your email by entering a code you receive to your registered e-mail.
5. Click on generate new token tab.You will be given two options:
* Create a temporary token, which will expire after 30 days.
* Create a token which will not expire. We recommend [enabling MFA](https://support.nordvpn.com/hc/en-us/articles/19442299167889-What-is-MFA-and-how-to-enable-it) if you choose this option.
1. Click on Generate token.
2. A window with a token number will pop up.Please note that the token number will only be shown once. Make sure you log in before you close the window.
3. Once you copy the token number, paste it into the command:
```
nordvpn login --token your_token
```
## Logging out
* If you log out by using nordvpn logout command line, your token will expire, regardless of which token you created, and you won’t be able to log in again using it:
* If you want to re-use your token and do not want it to expire, use the nordvpn logout --persist-token command line:
## What if the token number for NordVPN expires?
If you lost your token number for NordVPN, or it expired, revoke your token by clicking the Revoke button:",https://support.nordvpn.com/hc/en-us/related/click?data=BAh7CjobZGVzdGluYXRpb25fYXJ0aWNsZV9pZGwrCBFBQW5zEjoYcmVmZXJyZXJfYXJ0aWNsZV9pZGwrCJEVbRGdEjoLbG9jYWxlSSIKZW4tdXMGOgZFVDoIdXJsSSJPL2hjL2VuLXVzL2FydGljbGVzLzIwMjg2OTgwMzA5MjY1LUhvdy10by11c2UtYS10b2tlbi13aXRoLU5vcmRWUE4tb24tTGludXgGOwhUOglyYW5raQc%3D--4dd8fc83e0ea5ec2f7b4eb626c76fd913f37fd34
How to set up NordVPN with qBittorrent?,Configure your NordVPN qBittorrent proxy settings to use the qBittorrent client with the NordVPN proxy.,https://support.nordvpn.com/hc/en-us/related/click?data=BAh7CjobZGVzdGluYXRpb25fYXJ0aWNsZV9pZGwrCJFAdj1eEjoYcmVmZXJyZXJfYXJ0aWNsZV9pZGwrCJEVbRGdEjoLbG9jYWxlSSIKZW4tdXMGOgZFVDoIdXJsSSJKL2hjL2VuLXVzL2FydGljbGVzLzIwMTk1OTY3Mzg1NzQ1LU5vcmRWUE4tcHJveHktc2V0dXAtZm9yLXFCaXR0b3JyZW50BjsIVDoJcmFua2kI--3290ad3a45f66a362e3e5e7421e7cb1ec5a96dc8
NordVPN proxy setup for qBittorrent,"NordVPN works with qBittorrent and most other peer-to-peer platforms, so usually there’s no need for a proxy.
If for some reason you cannot use the [NordVPN app](https://nordvpn.com/download/) but still want to access qBittorrent safely, set up a proxy for qBittorrent by connecting to [NordVPN servers](https://nordvpn.com/servers/).
Note that NordVPN service should never be used to bypass copyright regulations. NordVPN does not promote, condone, or endorse the use of the service for such purposes. For more details, please read the NordVPN [Terms of Service](https://my.nordaccount.com/legal/terms-of-service/).
## How to set up NordVPN with qBittorrent?
Configure your NordVPN qBittorrent proxy settings to use the qBittorrent client with the NordVPN proxy.
1. Open qBittorrent.
2. Navigate to the application preferences by clicking Tools > Options. Alternatively, press Alt + O on your keyboard.
3. Select Connection.
4. Locate the Proxy server section and fill in the following information:• Type: SOCKS5• Host: Address of the proxy server of your choiceChoose from this list of servers:amsterdam.nl.socks.nordhold.netatlanta.us.socks.nordhold.netdallas.us.socks.nordhold.netlos-angeles.us.socks.nordhold.netnl.socks.nordhold.netse.socks.nordhold.netstockholm.se.socks.nordhold.netus.socks.nordhold.netnew-york.us.socks.nordhold.netsan-francisco.us.socks.nordhold.netdetroit.us.socks.nordhold.net
* Port: 1080
* Select the Use proxy for peer connections and the Authentication checkboxes.
* Username: Your NordVPN service username
* Password: Your NordVPN service password
* You can find your NordVPN service credentials (service username and service password) in the [Nord Account dashboard](https://my.nordaccount.com/dashboard/nordvpn/):
1. Click Set up NordVPN manually.
2. You will receive a verification code in your email that you use for NordVPN services. Type the code in: 
3. Copy the credentials using the “Copy” buttons on the right:
1. Click Apply and OK to save the changes.
## How to check if your proxy setup is working
You’ve connected to a NordVPN server via SOCKS5 proxy. But just to be sure, let’s check whether it is working correctly.
1. Visit the [ipleak.net](https://ipleak.net/) website.
2. Scroll down to the Torrent Address detection section, click Activate, and click this Magnet Link.
3. A new window will show up, prompting you to open qBittorrent. Select Open qBittorrent.Important: keep ipleak.net open.
4. When qBittorrent is open, click OK to add the torrent.
5. While the torrent is downloading metadata, return to the ipleak website.
6. Under Torrent Address detection, you should see the IP address of your chosen proxy server.If no address is showing, click the Refresh button to update the results.
If you see the NordVPN server IP address, it means that qBittorrent is downloading files through the NordVPN SOCKS5 proxy server and your downloads are secured!",https://support.nordvpn.com/hc/en-us/related/click?data=BAh7CjobZGVzdGluYXRpb25fYXJ0aWNsZV9pZGwrCJFAdj1eEjoYcmVmZXJyZXJfYXJ0aWNsZV9pZGwrCJEVbRGdEjoLbG9jYWxlSSIKZW4tdXMGOgZFVDoIdXJsSSJKL2hjL2VuLXVzL2FydGljbGVzLzIwMTk1OTY3Mzg1NzQ1LU5vcmRWUE4tcHJveHktc2V0dXAtZm9yLXFCaXR0b3JyZW50BjsIVDoJcmFua2kI--3290ad3a45f66a362e3e5e7421e7cb1ec5a96dc8
Connecting to NordVPN (Linux Network Manager),"To connect to NordVPN using the Linux Network Manager, follow these steps:
1. Download the [OpenVPN Configuration File Package](https://downloads.nordcdn.com/configs/archives/servers/ovpn.zip) and extract them into a folder of your choice.
2. Enter the following command to make sure that you have installed all of the available updates on your device system and OpenVPN network manager:sudo apt update && sudo apt full-upgrade -y && sudo apt install network-manager-openvpn-gnome -y
3. Click on the network selection button in the upper-right corner of the screen, press VPN off, and select VPN settings from the drop-down menu.
4. A configuration window will open. Press the + icon next to VPN.
5. You will be prompted to choose a connection type. Select Import from file…
6. You will be asked to select a file you would like to import. Navigate to the folder where you have extracted the configuration files, select one of the files from the list, and click Open.
7. In the pop-up window, enter your NordVPN service username and password. Press Add.You can find your NordVPN service credentials (service username and service password) in the [Nord Account dashboard](https://my.nordaccount.com/dashboard/nordvpn/):
1. Click Set up NordVPN manually.
2. You will receive a verification code in your email that you use for NordVPN services. Type the code in: 
3. Copy the credentials using the Copy buttons on the right:
8. Now click on the toggle under the VPN section to connect to a NordVPN server. The toggle switch will turn green once connected.",https://support.nordvpn.com/hc/en-us/related/click?data=BAh7CjobZGVzdGluYXRpb25fYXJ0aWNsZV9pZGwrCJG0eJaBEjoYcmVmZXJyZXJfYXJ0aWNsZV9pZGwrCJEVbRGdEjoLbG9jYWxlSSIKZW4tdXMGOgZFVDoIdXJsSSJSL2hjL2VuLXVzL2FydGljbGVzLzIwMzQ3Nzg0NTc0MDk3LUNvbm5lY3RpbmctdG8tTm9yZFZQTi1MaW51eC1OZXR3b3JrLU1hbmFnZXIGOwhUOglyYW5raQk%3D--5394a66c051f8bfd7e12c34a0789539075cac6df
OPNsense 21 setup with NordVPN,"1. In order to setup OPNsense with OpenVPN please access your OPNsense via browser.
2. Navigate to System -> Trust -> Authorities and click on the +Add button.You should see this screen:
3. We will configure our OPNsense to connect to US 8561 server but you should connect to a server suggested to you at this page: [https://my.nordaccount.com/dashboard/nordvpn/manual-configuration/server-recommendation/](https://my.nordaccount.acom/dashboard/nordvpn/manual-configuration/server-recommendation/).
You can find the server hostname right under the server title.
Follow the steps below to find the best server for your connection:
1. Log into your [Nord Account](https://my.nordaccount.com/), and click NordVPN.
2. Scroll down to Advanced Settings and click Set up NordVPN manually.
3. Select the Server recommendation tab. According to your location, the best server will be recommended.
4. By pressing Advanced filters you can further customize the recommended servers by selecting the Server type and the Security protocol.
In case you wish to select a specific server, follow these steps:
1. Under Set up NordVPN manually, select OpenVPN configuration files.
2. Find the server you wish to connect to by using the Search bar or by scrolling down and download it by clicking Download UDP or Download TCP.
3. When connecting to OpenVPN & IKEv2 manually, you're going to need to use the Username and Password from the Service credential tab.
1. Press on + Add button. Then fill the fields out like this:Descriptive Name: NordVPN_US8561_CAMethod: Import an existing Certificate AuthorityCertificate data: paste the contents below
```
-----BEGIN CERTIFICATE-----MIIFCjCCAvKgAwIBAgIBATANBgkqhkiG9w0BAQ0FADA5MQswCQYDVQQGEwJQQTEQMA4GA1UEChMHTm9yZFZQTjEYMBYGA1UEAxMPTm9yZFZQTiBSb290IENBMB4XDTE2MDEwMTAwMDAwMFoXDTM1MTIzMTIzNTk1OVowOTELMAkGA1UEBhMCUEExEDAOBgNVBAoTB05vcmRWUE4xGDAWBgNVBAMTD05vcmRWUE4gUm9vdCBDQTCCAiIwDQYJKoZIhvcNAQEBBQADggIPADCCAgoCggIBAMkr/BYhyo0F2upsIMXwC6QvkZps3NN2/eQFkfQIS1gql0aejsKsEnmY0Kaon8uZCTXPsRH1gQNgg5D2gixdd1mJUvV3dE3y9FJrXMoDkXdCGBodvKJyU6lcfEVF6/UxHcbBguZK9UtRHS9eJYm3rpL/5huQMCppX7kUeQ8dpCwd3iKITqwd1ZudDqsWaU0vqzC2H55IyaZ/5/TnCk31Q1UP6BksbbuRcwOVskEDsm6YoWDnn/IIzGOYnFJRzQH5jTz3j1QBvRIuQuBuvUkfhx1FEwhwZigrcxXuMP+QgM54kezgziJUaZcOM2zF3lvrwMvXDMfNeIoJABv9ljw969xQ8czQCU5lMVmA37ltv5Ec9U5hZuwk/9QO1Z+d/r6Jx0mlurS8gnCAKJgwa3kyZw6e4FZ8mYL4vpRRhPdvRTWCMJkeB4yBHyhxUmTRgJHm6YR3D6hcFAc9cQcTEl/I60tMdz33G6m0O42sQt/+AR3YCY/RusWVBJB/qNS94EtNtj8iaebCQW1jHAhvGmFILVR9lzD0EzWKHkvyWEjmUVRgCDd6Ne3eFRNS73gdv/C3l5boYySeu4exkEYVxVRn8DhCxs0MnkMHWFK6MyzXCCn+JnWFDYPfDKHvpff/kLDobtPBf+Lbch5wQy9quY27xaj0XwLyjOltpiSTLWae/Q4vAgMBAAGjHTAbMAwGA1UdEwQFMAMBAf8wCwYDVR0PBAQDAgEGMA0GCSqGSIb3DQEBDQUAA4ICAQC9fUL2sZPxIN2mD32VeNySTgZlCEdVmlq471o/bDMP4B8gnQesFRtXY2ZCjs50Jm73B2LViL9qlREmI6vE5IC8IsRBJSV4ce1WYxyXro5rmVg/k6a10rlsbK/eg//GHoJxDdXDOokLUSnxt7gk3QKpX6eCdh67p0PuWm/7WUJQxH2SDxsT9vB/iZriTIEe/ILoOQF0Aqp7AgNCcLcLAmbxXQkXYCCSB35Vp06u+eTWjG0/pyS5V14stGtw+fA0DJp5ZJV4eqJ5LqxMlYvEZ/qKTEdoCeaXv2QEmN6dVqjDoTAok0t5u4YRXzEVCfXAC3ocplNdtCA72wjFJcSbfif4BSC8bDACTXtnPC7nD0VndZLp+RiNLeiENhk0oTC+UVdSc+n2nJOzkCK0vYu0Ads4JGIB7g8IB3z2t9ICmsWrgnhdNdcOe15BincrGA8avQ1cWXsfIKEjbrnEuEk9b5jel6NfHtPKoHc9mDpRdNPISeVawDBM1mJChneHt59Nh8Gah74+TM1jBsw4fhJPvoc7Atcg740JErb904mZfkIEmojCVPhBHVQ9LHBAdM8qFI2kRK0IynOmAZhexlP/aT/kpEsEPyaZQlnBn3An1CRz8h0SPApL8PytggYKeQmRhl499+6jLxcZ2IegLfqq41dzIjwHwTMplg+1pKIOVojpWA==-----END CERTIFICATE-----
```
Certificate Private Key: leave blank;Serial for next certificate: leave as it is by default;Press Save
2. Navigate to VPN -> OpenVPN -> Clients and press + Add button.
3. Fill in the fields:GENERAL INFORMATIONDisabled: leave unchecked.Description: Any name you like. We will use NordVPN_US8561.Server mode: Peer to Peer (SSL/TLS);Protocol: UDP4 (you can also use TCP4);Device mode: tun;Interface: any;Remote server:Host or address: us8561.nordvpn.com (change to the hostname of the server you are going to use);Port: 1194 (use 443 if you use TCP);Retry DNS resolution: check;Proxy host or address: leave blank;Proxy port: leave blank;Proxy Authentication: None;USER AUTHENTICATION SETTINGSUser name/pass: fill in NordVPN service username and password;
Follow the steps below to find the service credentials for manual connection setup:
1. Log into your [Nord Account](https://my.nordaccount.com/), click NordVPN, and, under Manual setup, click on Service credentials. Here you'll find the Username and Password needed to connect manually.
Renegotiate time: leave blank;CRYPTOGRAPHIC SETTINGS:TLS Authentication: Enabled - Authentication onlyTLS Shared Key: Paste the contents below
```
-----BEGIN OpenVPN Static key V1-----e685bdaf659a25a200e2b9e39e51ff030fc72cf1ce07232bd8b2be5e6c670143f51e937e670eee09d4f2ea5a6e4e69965db852c275351b86fc4ca892d78ae002d6f70d029bd79c4d1c26cf14e9588033cf639f8a74809f29f72b9d58f9b8f5fefc7938eade40e9fed6cb92184abb2cc10eb1a296df243b251df0643d53724cdb5a92a1d6cb817804c4a9319b57d53be580815bcfcb2df55018cc83fc43bc7ff82d51f9b88364776ee9d12fc85cc7ea5b9741c4f598c485316db066d52db4540e212e1518a9bd4828219e24b20d88f598a196c9de96012090e333519ae18d35099427e7b372d348d352dc4c85e18cd4b93f8a56ddb2e64eb67adfc9b337157ff4-----END OpenVPN Static key V1-----
```
Peer Certificate Authority: NordVPN_US8601_CA;Client Certificate: None (Username and Password required);Encryption Algorithm: AES-256-GCM;Auth Digest Algorithm: SHA512;TUNNEL SETTINGS:IPv4 tunnel network: leave blank;IPv6 tunnel network: leave blank;IPv4 remote network: leave blank;IPv6 remote network: leave blank;Limit outgoing bandwidth: leave blank;Compression: Legacy - Disabled LZO algorithm (--comp-lzo no)Type-of-service: leave unchecked;Don’t pull routes: leave unchecked;Don’t add/remove routes: check.ADVANCED CONFIGURATION:Advanced: paste the contents below
remote-random;tun-mtu 1500;tun-mtu-extra 32;mssfix 1450;persist-key;persist-tun;reneg-sec 0;remote-cert-tls server;
Verbosity level: 3 (recommended);Click Save.
1. Navigate to Interfaces -> Assignments and click on + near New Interface. By default, it is ovpnc1.
2. Click on the OPT1 to edit the interface.
3. Click on the Enable Interface and do the following changes:Description: NordVPN (or anything you want);Block private networks: leave unchecked;Block bogon networks: leave unchecked;IPv4 Configuration Type: None;IPv6 Configuration Type: None;MAC address: leave blank;MTU: leave blank;MSS: leave blank;No changes required on the DHCP client configuration so just click on Save button.Click on the Apply changes button.
4. Navigate to Services -> Unbound DNS -> General.Enable: check;Listen port: 53;Network Interfaces: All;DNSSEC: uncheck;DHCP Registration: check;DHCP Domain Override: leave blank;DHCP Static Mappings: check;IPv6 Link-local: unchecked;TXT Comment Support: leave unchecked;DNS Query Forwarding: check;Local Zone Type: Transparent;Custom options: leave blank;Outgoing Network Interfaces: NordVPN (or whatever you named your OpenVPN interface);WPAD Records: leave unchecked;Click Save and Apply changes.
5. Navigate to Services -> Unbound DNS -> Advanced and do the check the following options:Hide Identity: checkHide Version: checkPrefetch Support: checkPrefetch DNS Key Support: checkLeave anything else as it is by default, click Save, and Apply Settings.
6. Navigate to Firewall -> NAT -> Outbound, select Hybrid outbound NAT rule generation (automatically generated rules are applied after manual rules), click Save and Apply Changes.
7. Click on the +Add button on top, on the edit menu, select Interface as NordVPN. Leave anything else by as it is by default, click Save, and Apply Changes.
8. Navigate to Firewall -> Rules -> LAN and delete the IPv6 rule. After that, click on the edit button next to IPv4. Scroll down and under Advanced features, select Gateway as NORDVPN_VPN4. Click Save.Next, click +Add, change Source to LAN net and Destination to LAN Address, don't change anything else, Save and Apply Changes.
9. Navigate to System -> Settings -> General and do the following changes:Under Networking, check the Prefer IPv4 over IPv6;DNS servers:103.86.96.100, Use Gateway: none;103.86.99.100, Use Gateway: none.On DNS server options, uncheck Allow DNS server list to be overridden by DHCP/PPP on WANClick Save and Apply Changes.
10. Navigate to System -> Gateways -> Single and do the following changes:Edit NORDVPN_VPN6 -> click DisabledSave and Apply Changes.
11. Now you can navigate to VPN -> OpenVPN -> Connection Status and it should state that the service is “up”:Restart the connection to assign the OpenVPN Virtual Address to the interfaces.
12. Navigate to Lobby -> Dashboard and confirm the NordVPN Interface has an IP Number
13. You can also check the connection log file under VPN -> OpenVPN -> Log File. If you encounter any connection issues, please send the log file to our [customer support](https://support.nordvpn.com/hc/en-us/articles/19482416296593-How-can-I-reach-NordVPN-customer-support) for the further support.",https://support.nordvpn.com/hc/en-us/related/click?data=BAh7CjobZGVzdGluYXRpb25fYXJ0aWNsZV9pZGwrCJEj4S2NEjoYcmVmZXJyZXJfYXJ0aWNsZV9pZGwrCJEVbRGdEjoLbG9jYWxlSSIKZW4tdXMGOgZFVDoIdXJsSSJFL2hjL2VuLXVzL2FydGljbGVzLzIwMzk3NTY5NDE4MTI5LU9QTnNlbnNlLTIxLXNldHVwLXdpdGgtTm9yZFZQTgY7CFQ6CXJhbmtpCg%3D%3D--ee3cf9601b2aa512b7165823184b0959618d8ea3
Installing NordVPN on Linux distributions,"In this article, we'll guide you through NordVPN installation and usage on Linux. We offer .deb and .rpm packages that are compatible with Debian, Ubuntu, Elementary OS, Linux Mint, Fedora, QubesOS, RHEL, CentOS, and openSUSE systems. The NordVPN native application is the recommended option for connecting to NordVPN servers on your Linux device. We designed it with your experience in mind, giving you features like auto-connect, automated Kill Switch, and Threat Protection.
## Table of contents:
* [Installing NordVPN on Linux](
* [Using NordVPN on Linux](
* [Logging in](
* [Account and settings](
* [Specialty servers](
* [Features and configurations](
* [LAN discovery and allowlists](
## Installing NordVPN on Linux
To start using the NordVPN application for Linux, you need to [download the NordVPN Linux client](https://nordvpn.com/download/linux/). You can do that in 2 ways:
1. By [downloading a Snap package](https://snapcraft.io/nordvpn).Snaps are app packages for desktop, cloud, and IoT that are easy to install, secure, cross-platform, and dependency-free. If you do not have Snap pre-installed, you may follow [Snap setup guides for various Linux distributions](https://snapcraft.io/docs/installing-snapd#:~:text=Zorin%20OS-,Without%20snap,-For%20distributions%20without).Please note that currently, we still do not support arm64, but our developers are working on this.
2. By working in the terminal:
1. Open the terminal;
2. Write the command below:
```
sh <(curl -sSf https://downloads.nordcdn.com/apps/linux/install.sh[](https://downloads.nordcdn.com/apps/linux/install.sh))
```
3. Following any on-screen instructions.
Note: If you do not have a curl package, evidenced by the fact that the above does not work, you can alternatively use this command:
```
sh <(wget -qO - https://downloads.nordcdn.com/apps/linux/install.sh)
```
Additionally, if you receive the following issue: Whoops! Permission denied accessing /run/nordvpn/nordvpnd.sock, all you need to do is write the following command:
```
sudo usermod -aG nordvpn $USER
```
and then reboot your device.
## Using NordVPN on Linux
After you have installed the NordVPN application, you can start using it!
Please note that in NordVPN Linux application version 3.18.4, network traffic from the LAN through a VPN-connected computer is blocked by default. To unblock LAN traffic, turn LAN discovery ON or add to the allowlist any subnet or IP traffic to be forwarded.
### Logging in
If you're using a Linux device without a graphical user interface, follow our guide on logging in to NordVPN on Linux devices without GUI.
If you're using a Linux device with a graphical user interface, you can start using it with the commands below:
1. Log in to your NordVPN account by using this command:
```
nordvpn login
```
2. Connect to a NordVPN server by using the command below:
```
nordvpn connect
```
### Account and settings
Here you can find the list of available NordVPN commands for Linux.
Access the NordVPN client settings:
---
```
nordvpn
```
Get an extensive explanation of all commands:
```
man nordvpn
```
See the list of available commands or help for a specific command:
```
nordvpn help
```
| or | ```
nordvpn h
```
Log in or log out:
```
nordvpn login
```
| or | ```
nordvpn logout
```
Connect to a recommended NordVPN server:
```
nordvpn connect
```
| or | ```
nordvpn c
```
Connect to a specific server (e.g. nordvpn connect uk715):
```
nordvpn connect
```
Disconnect from the VPN:
```
nordvpn disconnect
```
| or | ```
nordvpn d
```
See account information:
```
nordvpn account
```
Register a new user account:
```
nordvpn register
```
Rate your last connection quality (1-5):
```
nordvpn rate
```
See the current settings:
```
nordvpn settings
```
See the connection status:
```
nordvpn status
```
See the country list:
```
nordvpn countries
```
See the city list (e.g.: nordvpn cities united_states):
```
nordvpn cities
```
See a list of available server groups:
```
nordvpn groups
```
### Specialty servers
Connect to the closest Double VPN server:
---
```
nordvpn c double_vpn
```
Connect to a specific country using Double VPN servers:
```
nordvpn connect --group double_vpn
```
Connect to a P2P server:
---
```
nordvpn connect p2p
```
Connect to a specific country using P2P servers:
```
nordvpn connect --group p2p
```
Connect to a Dedicated IP server:
---
```
nordvpn connect Dedicated_IP
```
### Features and configurations
Set a configuration option:
---
```
nordvpn set
```
| or | ```
nordvpn s
```
Enable or disable Threat Protection:
```
nordvpn set threatprotectionlite on
```
| or | ```
nordvpn set threatprotectionlite off
```
Enable or disable Kill Switch:
```
nordvpn set killswitch on
```
| or | ```
nordvpn set killswitch off
```
Enable or disable auto-connect:
```
nordvpn set autoconnect on
```
| or | ```
nordvpn set autoconnect off
```
Set a specific server for automatic connection (e.g.: nordvpn set autoconnect on us2435):
```
nordvpn set autoconnect on
```
Enable or disable notifications:
```
nordvpn set notify on
```
| or | ```
nordvpn set notify off
```
Set custom DNS (you can set up a single DNS or two, just add spaces in between):
```
nordvpn set dns 1.1.1.1
```
| or | ```
nordvpn set dns 1.1.1.1 1.0.0.1
```
[Switch between UDP and TCP protocols](https://support.nordvpn.com/hc/en-us/articles/20465552867345-Switching-protocol-to-OpenVPN-UDP-or-TCP):
```
nordvpn set protocol udp
```
| or | ```
nordvpn set protocol tcp
```
Enable or disable [obfuscated servers](https://nordvpn.com/features/obfuscated-servers/):
```
nordvpn set obfuscate on
```
| or | ```
nordvpn set dobfuscate off
```
Set connection technology (OpenVPN or [NordLynx](https://nordvpn.com/blog/nordlynx-protocol-wireguard/)):
```
nordvpn set technology OpenVPN
```
| or | ```
nordvpn set technology NordLynx
```
Turn [Meshnet](https://nordvpn.com/meshnet/) on or off on your device:
```
nordvpn set meshnet on
```
| or | ```
nordvpn set meshnet off
```
To enable or disable the [post-quantum protection in NordVPN](https://support.nordvpn.com/hc/en-us/articles/30046321712529-NordVPN-Post-quantum-encryption-explained):
```
nordvpn set pq on
```
| or | ```
nordvpn set pq off
```
### LAN discovery and allowlists
Enable or disable LAN discovery:
---
```
nordvpn set lan-discovery enable
```
| or | ```
nordvpn set lan-discovery disable
```
Get more information on LAN discovery:
```
nordvpn set lan-discovery --help
```
Add or remove a rule to allowlist a specified incoming port (you can allowlist multiple ports — just separate their numbers with a space):
```
nordvpn whitelist add port
```
| or | ```
nordvpn whitelist remove port
```
Add or remove a rule to allowlist a specified subnet:
```
nordvpn whitelist add subnet
```
| or | ```
nordvpn whitelist remove subnet
```",https://support.nordvpn.com/hc/en-us/related/click?data=BAh7CjobZGVzdGluYXRpb25fYXJ0aWNsZV9pZGwrCBFrCUVeEjoYcmVmZXJyZXJfYXJ0aWNsZV9pZGwrCBHfwQ%2BdEjoLbG9jYWxlSSIKZW4tdXMGOgZFVDoIdXJsSSJQL2hjL2VuLXVzL2FydGljbGVzLzIwMTk2MDk0NDcwOTI5LUluc3RhbGxpbmctTm9yZFZQTi1vbi1MaW51eC1kaXN0cmlidXRpb25zBjsIVDoJcmFua2kG--bbc07fd0a0dfdcfd3ef01a29fb1173d1a5debd5d
Connecting to NordVPN (Linux Network Manager),"To connect to NordVPN using the Linux Network Manager, follow these steps:
1. Download the [OpenVPN Configuration File Package](https://downloads.nordcdn.com/configs/archives/servers/ovpn.zip) and extract them into a folder of your choice.
2. Enter the following command to make sure that you have installed all of the available updates on your device system and OpenVPN network manager:sudo apt update && sudo apt full-upgrade -y && sudo apt install network-manager-openvpn-gnome -y
3. Click on the network selection button in the upper-right corner of the screen, press VPN off, and select VPN settings from the drop-down menu.
4. A configuration window will open. Press the + icon next to VPN.
5. You will be prompted to choose a connection type. Select Import from file…
6. You will be asked to select a file you would like to import. Navigate to the folder where you have extracted the configuration files, select one of the files from the list, and click Open.
7. In the pop-up window, enter your NordVPN service username and password. Press Add.You can find your NordVPN service credentials (service username and service password) in the [Nord Account dashboard](https://my.nordaccount.com/dashboard/nordvpn/):
1. Click Set up NordVPN manually.
2. You will receive a verification code in your email that you use for NordVPN services. Type the code in: 
3. Copy the credentials using the Copy buttons on the right:
8. Now click on the toggle under the VPN section to connect to a NordVPN server. The toggle switch will turn green once connected.",https://support.nordvpn.com/hc/en-us/related/click?data=BAh7CjobZGVzdGluYXRpb25fYXJ0aWNsZV9pZGwrCJG0eJaBEjoYcmVmZXJyZXJfYXJ0aWNsZV9pZGwrCBHfwQ%2BdEjoLbG9jYWxlSSIKZW4tdXMGOgZFVDoIdXJsSSJSL2hjL2VuLXVzL2FydGljbGVzLzIwMzQ3Nzg0NTc0MDk3LUNvbm5lY3RpbmctdG8tTm9yZFZQTi1MaW51eC1OZXR3b3JrLU1hbmFnZXIGOwhUOglyYW5raQc%3D--ac24f375f67ba165d8d7775921880b6ef8159639
Where does NordVPN have dedicated IP addresses?,NordVPN-dedicated IP addresses are offered in these regions:,https://support.nordvpn.com/hc/en-us/related/click?data=BAh7CjobZGVzdGluYXRpb25fYXJ0aWNsZV9pZGwrCJG29wO%2BEToYcmVmZXJyZXJfYXJ0aWNsZV9pZGwrCBHfwQ%2BdEjoLbG9jYWxlSSIKZW4tdXMGOgZFVDoIdXJsSSJFL2hjL2VuLXVzL2FydGljbGVzLzE5NTA3ODA4MDI0MjA5LURlZGljYXRlZC1Ob3JkVlBOLUlQLWFkZHJlc3NlcwY7CFQ6CXJhbmtpCQ%3D%3D--e0dd5c3a744abbaed5cfbd2a18f7819a71113f5a
How to use NordVPN Tray functionality on Linux,"With the release of the 3.18.0 NordVPN version for Linux, we introduce a new feature for all supported Linux devices – The tray icon. This feature allows you to see and control NordVPN connections more easily.
In order to connect to the VPN, you’ll have to install [NordVPN on your Linux](https://nordvpn.com/download/linux/) device and log in.
## Using Tray on Linux
By default, the NordVPN Tray function should be visible at the top right of your screen when the VPN is open. In case you are unable to see it, open the terminal and enter any NordVPN-related command, such as:
```
nordvpn login
```
or
```
nordvpn
```

At the top right of your screen, you will see a white NordVPN logo. This means you’re not connected to the VPN:

When you click on it, you will see the following information:
* VPN connection status, which will indicate that you're disconnected;
* Quick connect button to connect to a recommended server;
* The settings button, where you can toggle the tray icon and notifications;
* The option to log in, or, if you are already logged in, you will see the email address of your account;
* Log out button;
* Quit button to close the app.

Once you’re connected, the NordVPN logo will be blue instead:

If you click on the blue logo, you will see your VPN connection status and information along with an additional disconnect button:

And now you know how to use the Tray functionality on Linux. Read more on using NordVPN on Linux.",https://support.nordvpn.com/hc/en-us/related/click?data=BAh7CjobZGVzdGluYXRpb25fYXJ0aWNsZV9pZGwrCJG4Hy06FzoYcmVmZXJyZXJfYXJ0aWNsZV9pZGwrCBHfwQ%2BdEjoLbG9jYWxlSSIKZW4tdXMGOgZFVDoIdXJsSSJVL2hjL2VuLXVzL2FydGljbGVzLzI1NTM4NjMyNTk1NjAxLUhvdy10by11c2UtTm9yZFZQTi1UcmF5LWZ1bmN0aW9uYWxpdHktb24tTGludXgGOwhUOglyYW5raQo%3D--02d806228b67824d14392272724be4f7c0d2d57d
Connect to NordVPN using Linux Terminal,"Note: We have a separate set of instructions on how to set up the NordVPN application for Linux, and you can download NordVPN for Linux here.
Please note that since Linux has a lot of different distributions, the configuration interfaces may vary.
1. Open Terminal (keyboard shortcut: Ctrl + Alt + T).
2. Disable IPV6. Click here to learn how.
3. Only after disabling IPV6, install the OpenVPN client by entering:
* sudo apt-get install openvpnYou may be asked to enter your user password to confirm your identity.
4. Navigate to the OpenVPN configuration directory with the command:
* cd /etc/openvpn
5. Download the OpenVPN configuration files with the command:
* sudo wget https://downloads.nordcdn.com/configs/archives/servers/ovpn.zipIn case you get ERROR: The certificate of `nordvpn.com’ is not trusted., install the ca-certificates package with the command:
* sudo apt-get install ca-certificates
6. If you do not have the unzip package installed, download it by typing:
* sudo apt-get install unzip
7. Extract ovpn.zip with the command:
* sudo unzip ovpn.zip
8. Remove the files you will no longer use:
* sudo rm ovpn.zip
9. Enter the directory where the server configurations are located. These folders are named either ovpn_udp or ovpn_tcp:
* cd /etc/openvpn/ovpn_udp/
* cd /etc/openvpn/ovpn_tcp/
10. To see the list of all available servers, enter the following command:
* ls -al
11. Choose a server to connect to.For this tutorial, we used us2957.nordvpn.com, but you should connect to the server suggested to you at the [NordVPN server recommendation tool](https://my.nordaccount.com/dashboard/nordvpn/manual-configuration/server-recommendation/). You can find the server hostname right under the server title.
Follow the steps below to find the best server for your connection:
1. Log into your [Nord Account](https://my.nordaccount.com/), and click NordVPN.
2. Scroll down to Advanced Settings and click Set up NordVPN manually.
3. Select the Server recommendation tab. According to your location, the best server will be recommended.
4. By pressing Advanced filters you can further customize the recommended servers by selecting the Server type and the Security protocol.
In case you wish to select a specific server, follow these steps:
1. Under Set up NordVPN manually, select OpenVPN configuration files.
2. Find the server you wish to connect to by using the Search bar or by scrolling down and download it by clicking Download UDP or Download TCP.
1. Start OpenVPN with a chosen configuration by entering one of the following commands:
* sudo openvpn [file name]
* sudo openvpn us2957.nordvpn.com.udp.ovpn
* sudo openvpn /etc/openvpn/ovpn_udp/us2957.nordvpn.com.udp.ovpn
2. OpenVPN will ask you for your credentials. Enter your NordVPN service credentials.
1. You have successfully connected to VPN. To disconnect, open Terminal and press Ctrl + C on your keyboard.",https://support.nordvpn.com/hc/en-us/related/click?data=BAh7CjobZGVzdGluYXRpb25fYXJ0aWNsZV9pZGwrCJHPZf1WEjoYcmVmZXJyZXJfYXJ0aWNsZV9pZGwrCJERWUqNEjoLbG9jYWxlSSIKZW4tdXMGOgZFVDoIdXJsSSJOL2hjL2VuLXVzL2FydGljbGVzLzIwMTY0ODI3Nzk1MzQ1LUNvbm5lY3QtdG8tTm9yZFZQTi11c2luZy1MaW51eC1UZXJtaW5hbAY7CFQ6CXJhbmtpBg%3D%3D--c083457f9dd0a09acda4d004f535b5bc644696f3
Installing NordVPN on Linux distributions,"In this article, we'll guide you through NordVPN installation and usage on Linux. We offer .deb and .rpm packages that are compatible with Debian, Ubuntu, Elementary OS, Linux Mint, Fedora, QubesOS, RHEL, CentOS, and openSUSE systems. The NordVPN native application is the recommended option for connecting to NordVPN servers on your Linux device. We designed it with your experience in mind, giving you features like auto-connect, automated Kill Switch, and Threat Protection.
## Table of contents:
* [Installing NordVPN on Linux](
* [Using NordVPN on Linux](
* [Logging in](
* [Account and settings](
* [Specialty servers](
* [Features and configurations](
* [LAN discovery and allowlists](
## Installing NordVPN on Linux
To start using the NordVPN application for Linux, you need to [download the NordVPN Linux client](https://nordvpn.com/download/linux/). You can do that in 2 ways:
1. By [downloading a Snap package](https://snapcraft.io/nordvpn).Snaps are app packages for desktop, cloud, and IoT that are easy to install, secure, cross-platform, and dependency-free. If you do not have Snap pre-installed, you may follow [Snap setup guides for various Linux distributions](https://snapcraft.io/docs/installing-snapd#:~:text=Zorin%20OS-,Without%20snap,-For%20distributions%20without).Please note that currently, we still do not support arm64, but our developers are working on this.
2. By working in the terminal:
1. Open the terminal;
2. Write the command below:
```
sh <(curl -sSf https://downloads.nordcdn.com/apps/linux/install.sh[](https://downloads.nordcdn.com/apps/linux/install.sh))
```
3. Following any on-screen instructions.
Note: If you do not have a curl package, evidenced by the fact that the above does not work, you can alternatively use this command:
```
sh <(wget -qO - https://downloads.nordcdn.com/apps/linux/install.sh)
```
Additionally, if you receive the following issue: Whoops! Permission denied accessing /run/nordvpn/nordvpnd.sock, all you need to do is write the following command:
```
sudo usermod -aG nordvpn $USER
```
and then reboot your device.
## Using NordVPN on Linux
After you have installed the NordVPN application, you can start using it!
Please note that in NordVPN Linux application version 3.18.4, network traffic from the LAN through a VPN-connected computer is blocked by default. To unblock LAN traffic, turn LAN discovery ON or add to the allowlist any subnet or IP traffic to be forwarded.
### Logging in
If you're using a Linux device without a graphical user interface, follow our guide on logging in to NordVPN on Linux devices without GUI.
If you're using a Linux device with a graphical user interface, you can start using it with the commands below:
1. Log in to your NordVPN account by using this command:
```
nordvpn login
```
2. Connect to a NordVPN server by using the command below:
```
nordvpn connect
```
### Account and settings
Here you can find the list of available NordVPN commands for Linux.
Access the NordVPN client settings:
---
```
nordvpn
```
Get an extensive explanation of all commands:
```
man nordvpn
```
See the list of available commands or help for a specific command:
```
nordvpn help
```
| or | ```
nordvpn h
```
Log in or log out:
```
nordvpn login
```
| or | ```
nordvpn logout
```
Connect to a recommended NordVPN server:
```
nordvpn connect
```
| or | ```
nordvpn c
```
Connect to a specific server (e.g. nordvpn connect uk715):
```
nordvpn connect
```
Disconnect from the VPN:
```
nordvpn disconnect
```
| or | ```
nordvpn d
```
See account information:
```
nordvpn account
```
Register a new user account:
```
nordvpn register
```
Rate your last connection quality (1-5):
```
nordvpn rate
```
See the current settings:
```
nordvpn settings
```
See the connection status:
```
nordvpn status
```
See the country list:
```
nordvpn countries
```
See the city list (e.g.: nordvpn cities united_states):
```
nordvpn cities
```
See a list of available server groups:
```
nordvpn groups
```
### Specialty servers
Connect to the closest Double VPN server:
---
```
nordvpn c double_vpn
```
Connect to a specific country using Double VPN servers:
```
nordvpn connect --group double_vpn
```
Connect to a P2P server:
---
```
nordvpn connect p2p
```
Connect to a specific country using P2P servers:
```
nordvpn connect --group p2p
```
Connect to a Dedicated IP server:
---
```
nordvpn connect Dedicated_IP
```
### Features and configurations
Set a configuration option:
---
```
nordvpn set
```
| or | ```
nordvpn s
```
Enable or disable Threat Protection:
```
nordvpn set threatprotectionlite on
```
| or | ```
nordvpn set threatprotectionlite off
```
Enable or disable Kill Switch:
```
nordvpn set killswitch on
```
| or | ```
nordvpn set killswitch off
```
Enable or disable auto-connect:
```
nordvpn set autoconnect on
```
| or | ```
nordvpn set autoconnect off
```
Set a specific server for automatic connection (e.g.: nordvpn set autoconnect on us2435):
```
nordvpn set autoconnect on
```
Enable or disable notifications:
```
nordvpn set notify on
```
| or | ```
nordvpn set notify off
```
Set custom DNS (you can set up a single DNS or two, just add spaces in between):
```
nordvpn set dns 1.1.1.1
```
| or | ```
nordvpn set dns 1.1.1.1 1.0.0.1
```
[Switch between UDP and TCP protocols](https://support.nordvpn.com/hc/en-us/articles/20465552867345-Switching-protocol-to-OpenVPN-UDP-or-TCP):
```
nordvpn set protocol udp
```
| or | ```
nordvpn set protocol tcp
```
Enable or disable [obfuscated servers](https://nordvpn.com/features/obfuscated-servers/):
```
nordvpn set obfuscate on
```
| or | ```
nordvpn set dobfuscate off
```
Set connection technology (OpenVPN or [NordLynx](https://nordvpn.com/blog/nordlynx-protocol-wireguard/)):
```
nordvpn set technology OpenVPN
```
| or | ```
nordvpn set technology NordLynx
```
Turn [Meshnet](https://nordvpn.com/meshnet/) on or off on your device:
```
nordvpn set meshnet on
```
| or | ```
nordvpn set meshnet off
```
To enable or disable the [post-quantum protection in NordVPN](https://support.nordvpn.com/hc/en-us/articles/30046321712529-NordVPN-Post-quantum-encryption-explained):
```
nordvpn set pq on
```
| or | ```
nordvpn set pq off
```
### LAN discovery and allowlists
Enable or disable LAN discovery:
---
```
nordvpn set lan-discovery enable
```
| or | ```
nordvpn set lan-discovery disable
```
Get more information on LAN discovery:
```
nordvpn set lan-discovery --help
```
Add or remove a rule to allowlist a specified incoming port (you can allowlist multiple ports — just separate their numbers with a space):
```
nordvpn whitelist add port
```
| or | ```
nordvpn whitelist remove port
```
Add or remove a rule to allowlist a specified subnet:
```
nordvpn whitelist add subnet
```
| or | ```
nordvpn whitelist remove subnet
```",https://support.nordvpn.com/hc/en-us/related/click?data=BAh7CjobZGVzdGluYXRpb25fYXJ0aWNsZV9pZGwrCBFrCUVeEjoYcmVmZXJyZXJfYXJ0aWNsZV9pZGwrCJERWUqNEjoLbG9jYWxlSSIKZW4tdXMGOgZFVDoIdXJsSSJQL2hjL2VuLXVzL2FydGljbGVzLzIwMTk2MDk0NDcwOTI5LUluc3RhbGxpbmctTm9yZFZQTi1vbi1MaW51eC1kaXN0cmlidXRpb25zBjsIVDoJcmFua2kH--21e636f65e1c1199d1563c28b8e9e6714ab5bb36
How to disable IPv6 on Linux,"While both internet service providers and IT experts caution users against disabling IPv6 on Linux devices permanently, it’s OK to turn the protocol off temporarily when troubleshooting network issues. In this article, we will teach you how to disable IPv6 on your Linux device.
### Red Hat-based distributions
Here's how to disable IPv6 on Linux if you’re running a Red Hat-based system:
1. Open the terminal window.
2. Change to the root user.
3. Type these commands: sysctl -w net.ipv6.conf.all.disable_ipv6=1sysctl -w net.ipv6.conf.default.disable_ipv6=1sysctl -w net.ipv6.conf.tun0.disable_ipv6=1
4. To re-enable IPv6, type these commands:sysctl -w net.ipv6.conf.all.disable_ipv6=0sysctl -w net.ipv6.conf.default.disable_ipv6=0sysctl -w net.ipv6.conf.tun0.disable_ipv6=0sysctl -p
### Debian-based distributions
Here's how to disable IPv6 on Linux if you’re running a Debian-based machine.
1. Open the terminal window.
2. Type this command:sudo nano /etc/sysctl.conf
3. Add the following at the bottom of the file:net.ipv6.conf.all.disable_ipv6 = 1net.ipv6.conf.default.disable_ipv6 = 1net.ipv6.conf.lo.disable_ipv6 = 1net.ipv6.conf.tun0.disable_ipv6 = 1
4. Save and close the file.
5. Reboot your device.
6. To re-enable IPv6, remove the above lines from /etc/sysctl.conf and reboot your device.",https://support.nordvpn.com/hc/en-us/related/click?data=BAh7CjobZGVzdGluYXRpb25fYXJ0aWNsZV9pZGwrCJE18vNWEjoYcmVmZXJyZXJfYXJ0aWNsZV9pZGwrCJERWUqNEjoLbG9jYWxlSSIKZW4tdXMGOgZFVDoIdXJsSSJDL2hjL2VuLXVzL2FydGljbGVzLzIwMTY0NjY5MjI0MzM3LUhvdy10by1kaXNhYmxlLUlQdjYtb24tTGludXgGOwhUOglyYW5raQg%3D--d42ae4f139a2087a027535bded45ae9691e9ec5f
How to log in to NordVPN on Linux devices without a GUI,"To log in to NordVPN on your Linux machine without a graphical user interface, enter one of the following commands:
* nordvpn login command with the --token flag
* nordvpn login command with the --callback flag
When using the token login method, follow these steps:
1. Log in to [Nord Account](https://my.nordaccount.com/).
2. Find NordVPN under the Services menu.
3. Locate the Access token tab down below.
4. Click on Generate new token.
5. Pick either token: one that expires in 30 days or one that doesn’t expire. Proceed to Generate token.
6. Click Copy and close.
7. On your Linux machine, run the command: nordvpn login --token and replace with the copied token.
For example:
```
nordvpn login --token 3fe460ksdnf415e45908cec9f9bdbadf7a456a6dfb35dc2c58xxxxx
```
If you choose the callback login method:
1. Run the command: nordvpn login.
2. You'll receive a URL. Open it on any device that supports a browser.
3. Finish the login process.
4. Right-click on the Continue button and copy the link address.
5. Run the command: ”nordvpn login --callback """" and replace