

File size: 14,994 Bytes
edf9d60 |
1 2 3 4 5 6 7 8 9 10 11 12 13 14 15 16 17 18 19 20 21 22 23 24 25 26 27 28 29 30 31 32 33 34 35 36 37 38 39 40 41 42 43 44 45 46 47 48 49 50 51 52 53 54 55 56 57 58 59 60 61 62 63 64 65 66 67 68 69 70 71 72 73 74 75 76 77 78 79 80 81 82 83 84 85 86 87 88 89 90 91 92 93 94 95 96 97 98 99 100 101 102 103 104 105 106 107 108 109 110 111 112 113 114 115 116 117 118 119 120 121 122 123 124 125 126 127 128 129 130 131 132 133 134 135 136 137 138 139 140 141 142 143 144 145 146 147 148 149 150 151 152 153 154 155 156 157 158 159 160 161 162 163 164 165 166 167 168 169 170 171 172 173 174 175 176 177 178 179 180 181 182 183 184 185 186 187 188 189 190 191 192 193 194 195 196 197 198 199 200 201 202 203 204 205 206 207 208 209 210 211 212 213 214 215 216 217 218 219 220 221 222 223 224 225 226 227 228 229 230 231 232 233 234 235 236 237 238 239 240 241 242 243 244 245 246 247 248 249 250 251 252 253 254 255 256 257 258 259 260 261 262 263 264 265 266 267 268 269 270 271 272 273 274 275 276 277 278 279 280 281 282 283 284 285 286 287 288 289 290 291 292 293 294 295 296 297 298 299 300 301 302 303 304 305 306 307 308 309 310 311 312 313 314 315 316 317 318 319 320 321 322 323 324 325 326 327 328 329 330 331 332 |
<!--Copyright 2024 The HuggingFace Team. All rights reserved.
Licensed under the Apache License, Version 2.0 (the "License"); you may not use this file except in compliance with
the License. You may obtain a copy of the License at
http://www.apache.org/licenses/LICENSE-2.0
Unless required by applicable law or agreed to in writing, software distributed under the License is distributed on
an "AS IS" BASIS, WITHOUT WARRANTIES OR CONDITIONS OF ANY KIND, either express or implied. See the License for the
specific language governing permissions and limitations under the License.
-->
# ControlNet
[Adding Conditional Control to Text-to-Image Diffusion Models](https://arxiv.org/abs/2302.05543) (ControlNet)은 Lvmin Zhang과 Maneesh Agrawala에 의해 쓰여졌습니다.
이 예시는 [원본 ControlNet 리포지토리에서 예시 학습하기](https://github.com/lllyasviel/ControlNet/blob/main/docs/train.md)에 기반합니다. ControlNet은 원들을 채우기 위해 [small synthetic dataset](https://huggingface.co/datasets/fusing/fill50k)을 사용해서 학습됩니다.
## 의존성 설치하기
아래의 스크립트를 실행하기 전에, 라이브러리의 학습 의존성을 설치해야 합니다.
<Tip warning={true}>
가장 최신 버전의 예시 스크립트를 성공적으로 실행하기 위해서는, 소스에서 설치하고 최신 버전의 설치를 유지하는 것을 강력하게 추천합니다. 우리는 예시 스크립트들을 자주 업데이트하고 예시에 맞춘 특정한 요구사항을 설치합니다.
</Tip>
위 사항을 만족시키기 위해서, 새로운 가상환경에서 다음 일련의 스텝을 실행하세요:
```bash
git clone https://github.com/huggingface/diffusers
cd diffusers
pip install -e .
```
그 다음에는 [예시 폴더](https://github.com/huggingface/diffusers/tree/main/examples/controlnet)으로 이동합니다.
```bash
cd examples/controlnet
```
이제 실행하세요:
```bash
pip install -r requirements.txt
```
[🤗Accelerate](https://github.com/huggingface/accelerate/) 환경을 초기화 합니다:
```bash
accelerate config
```
혹은 여러분의 환경이 무엇인지 몰라도 기본적인 🤗Accelerate 구성으로 초기화할 수 있습니다:
```bash
accelerate config default
```
혹은 당신의 환경이 노트북 같은 상호작용하는 쉘을 지원하지 않는다면, 아래의 코드로 초기화 할 수 있습니다:
```python
from accelerate.utils import write_basic_config
write_basic_config()
```
## 원을 채우는 데이터셋
원본 데이터셋은 ControlNet [repo](https://huggingface.co/lllyasviel/ControlNet/blob/main/training/fill50k.zip)에 올라와있지만, 우리는 [여기](https://huggingface.co/datasets/fusing/fill50k)에 새롭게 다시 올려서 🤗 Datasets 과 호환가능합니다. 그래서 학습 스크립트 상에서 데이터 불러오기를 다룰 수 있습니다.
우리의 학습 예시는 원래 ControlNet의 학습에 쓰였던 [`stable-diffusion-v1-5/stable-diffusion-v1-5`](https://huggingface.co/stable-diffusion-v1-5/stable-diffusion-v1-5)을 사용합니다. 그렇지만 ControlNet은 대응되는 어느 Stable Diffusion 모델([`CompVis/stable-diffusion-v1-4`](https://huggingface.co/CompVis/stable-diffusion-v1-4)) 혹은 [`stabilityai/stable-diffusion-2-1`](https://huggingface.co/stabilityai/stable-diffusion-2-1)의 증가를 위해 학습될 수 있습니다.
자체 데이터셋을 사용하기 위해서는 [학습을 위한 데이터셋 생성하기](create_dataset) 가이드를 확인하세요.
## 학습
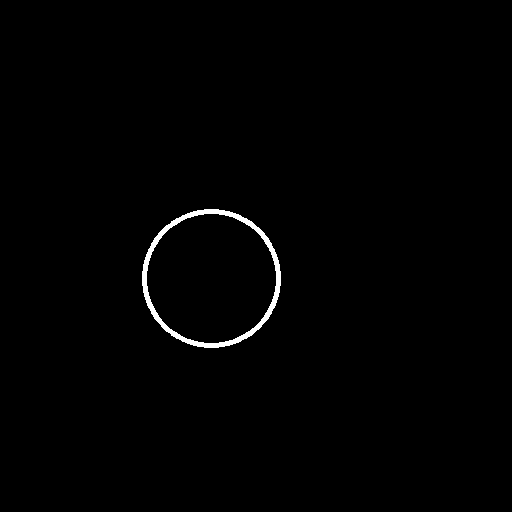
이 학습에 사용될 다음 이미지들을 다운로드하세요:
```sh
wget https://huggingface.co/datasets/huggingface/documentation-images/resolve/main/diffusers/controlnet_training/conditioning_image_1.png
wget https://huggingface.co/datasets/huggingface/documentation-images/resolve/main/diffusers/controlnet_training/conditioning_image_2.png
```
`MODEL_NAME` 환경 변수 (Hub 모델 리포지토리 아이디 혹은 모델 가중치가 있는 디렉토리로 가는 주소)를 명시하고 [`pretrained_model_name_or_path`](https://huggingface.co/docs/diffusers/en/api/diffusion_pipeline#diffusers.DiffusionPipeline.from_pretrained.pretrained_model_name_or_path) 인자로 환경변수를 보냅니다.
학습 스크립트는 당신의 리포지토리에 `diffusion_pytorch_model.bin` 파일을 생성하고 저장합니다.
```bash
export MODEL_DIR="stable-diffusion-v1-5/stable-diffusion-v1-5"
export OUTPUT_DIR="path to save model"
accelerate launch train_controlnet.py \
--pretrained_model_name_or_path=$MODEL_DIR \
--output_dir=$OUTPUT_DIR \
--dataset_name=fusing/fill50k \
--resolution=512 \
--learning_rate=1e-5 \
--validation_image "./conditioning_image_1.png" "./conditioning_image_2.png" \
--validation_prompt "red circle with blue background" "cyan circle with brown floral background" \
--train_batch_size=4 \
--push_to_hub
```
이 기본적인 설정으로는 ~38GB VRAM이 필요합니다.
기본적으로 학습 스크립트는 결과를 텐서보드에 기록합니다. 가중치(weight)와 편향(bias)을 사용하기 위해 `--report_to wandb` 를 전달합니다.
더 작은 batch(배치) 크기로 gradient accumulation(기울기 누적)을 하면 학습 요구사항을 ~20 GB VRAM으로 줄일 수 있습니다.
```bash
export MODEL_DIR="stable-diffusion-v1-5/stable-diffusion-v1-5"
export OUTPUT_DIR="path to save model"
accelerate launch train_controlnet.py \
--pretrained_model_name_or_path=$MODEL_DIR \
--output_dir=$OUTPUT_DIR \
--dataset_name=fusing/fill50k \
--resolution=512 \
--learning_rate=1e-5 \
--validation_image "./conditioning_image_1.png" "./conditioning_image_2.png" \
--validation_prompt "red circle with blue background" "cyan circle with brown floral background" \
--train_batch_size=1 \
--gradient_accumulation_steps=4 \
--push_to_hub
```
## 여러개 GPU로 학습하기
`accelerate` 은 seamless multi-GPU 학습을 고려합니다. `accelerate`과 함께 분산된 학습을 실행하기 위해 [여기](https://huggingface.co/docs/accelerate/basic_tutorials/launch)
의 설명을 확인하세요. 아래는 예시 명령어입니다:
```bash
export MODEL_DIR="stable-diffusion-v1-5/stable-diffusion-v1-5"
export OUTPUT_DIR="path to save model"
accelerate launch --mixed_precision="fp16" --multi_gpu train_controlnet.py \
--pretrained_model_name_or_path=$MODEL_DIR \
--output_dir=$OUTPUT_DIR \
--dataset_name=fusing/fill50k \
--resolution=512 \
--learning_rate=1e-5 \
--validation_image "./conditioning_image_1.png" "./conditioning_image_2.png" \
--validation_prompt "red circle with blue background" "cyan circle with brown floral background" \
--train_batch_size=4 \
--mixed_precision="fp16" \
--tracker_project_name="controlnet-demo" \
--report_to=wandb \
--push_to_hub
```
## 예시 결과
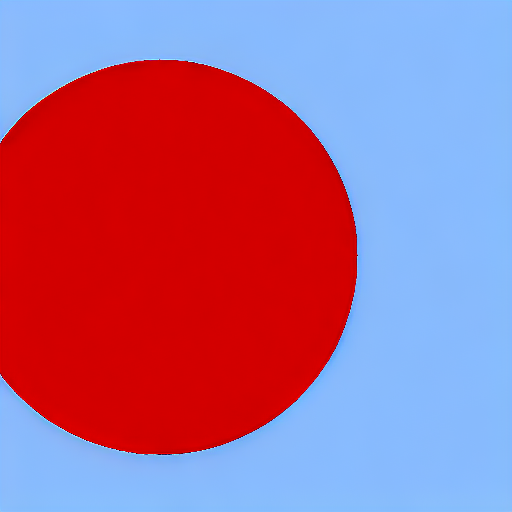
#### 배치 사이즈 8로 300 스텝 이후:
| | |
|-------------------|:-------------------------:|
| | 푸른 배경과 빨간 원 |
 |  |
| | 갈색 꽃 배경과 청록색 원 |
 | 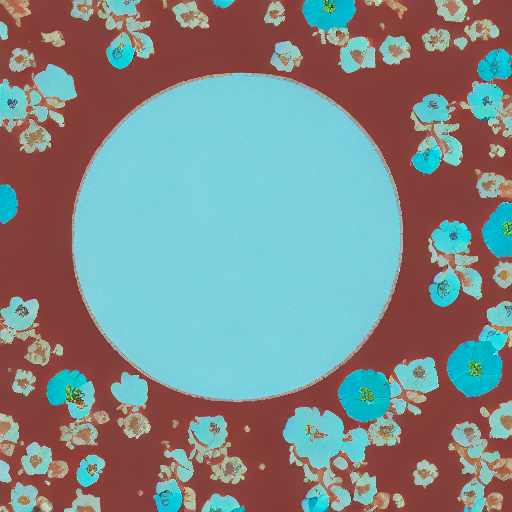 |
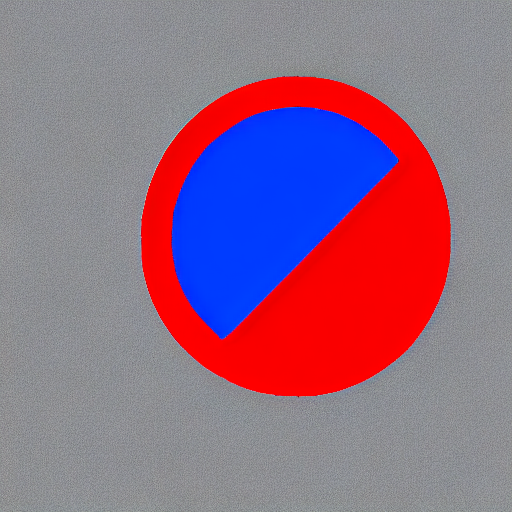
#### 배치 사이즈 8로 6000 스텝 이후:
| | |
|-------------------|:-------------------------:|
| | 푸른 배경과 빨간 원 |
 |  |
| | 갈색 꽃 배경과 청록색 원 |
 | 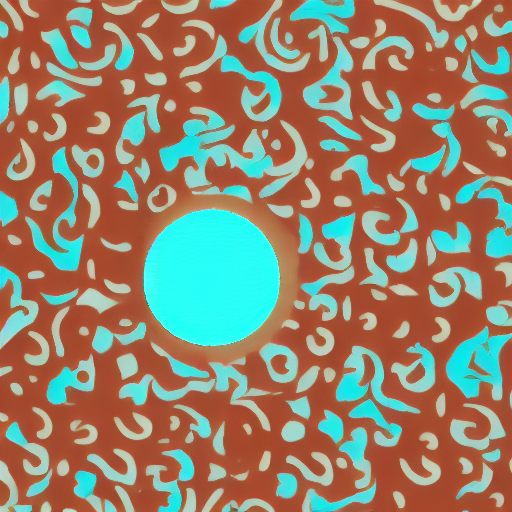 |
## 16GB GPU에서 학습하기
16GB GPU에서 학습하기 위해 다음의 최적화를 진행하세요:
- 기울기 체크포인트 저장하기
- bitsandbyte의 [8-bit optimizer](https://github.com/TimDettmers/bitsandbytes#requirements--installation)가 설치되지 않았다면 링크에 연결된 설명서를 보세요.
이제 학습 스크립트를 시작할 수 있습니다:
```bash
export MODEL_DIR="stable-diffusion-v1-5/stable-diffusion-v1-5"
export OUTPUT_DIR="path to save model"
accelerate launch train_controlnet.py \
--pretrained_model_name_or_path=$MODEL_DIR \
--output_dir=$OUTPUT_DIR \
--dataset_name=fusing/fill50k \
--resolution=512 \
--learning_rate=1e-5 \
--validation_image "./conditioning_image_1.png" "./conditioning_image_2.png" \
--validation_prompt "red circle with blue background" "cyan circle with brown floral background" \
--train_batch_size=1 \
--gradient_accumulation_steps=4 \
--gradient_checkpointing \
--use_8bit_adam \
--push_to_hub
```
## 12GB GPU에서 학습하기
12GB GPU에서 실행하기 위해 다음의 최적화를 진행하세요:
- 기울기 체크포인트 저장하기
- bitsandbyte의 8-bit [optimizer](https://github.com/TimDettmers/bitsandbytes#requirements--installation)(가 설치되지 않았다면 링크에 연결된 설명서를 보세요)
- [xFormers](https://huggingface.co/docs/diffusers/training/optimization/xformers)(가 설치되지 않았다면 링크에 연결된 설명서를 보세요)
- 기울기를 `None`으로 설정
```bash
export MODEL_DIR="stable-diffusion-v1-5/stable-diffusion-v1-5"
export OUTPUT_DIR="path to save model"
accelerate launch train_controlnet.py \
--pretrained_model_name_or_path=$MODEL_DIR \
--output_dir=$OUTPUT_DIR \
--dataset_name=fusing/fill50k \
--resolution=512 \
--learning_rate=1e-5 \
--validation_image "./conditioning_image_1.png" "./conditioning_image_2.png" \
--validation_prompt "red circle with blue background" "cyan circle with brown floral background" \
--train_batch_size=1 \
--gradient_accumulation_steps=4 \
--gradient_checkpointing \
--use_8bit_adam \
--enable_xformers_memory_efficient_attention \
--set_grads_to_none \
--push_to_hub
```
`pip install xformers`으로 `xformers`을 확실히 설치하고 `enable_xformers_memory_efficient_attention`을 사용하세요.
## 8GB GPU에서 학습하기
우리는 ControlNet을 지원하기 위한 DeepSpeed를 철저하게 테스트하지 않았습니다. 환경설정이 메모리를 저장할 때,
그 환경이 성공적으로 학습했는지를 확정하지 않았습니다. 성공한 학습 실행을 위해 설정을 변경해야 할 가능성이 높습니다.
8GB GPU에서 실행하기 위해 다음의 최적화를 진행하세요:
- 기울기 체크포인트 저장하기
- bitsandbyte의 8-bit [optimizer](https://github.com/TimDettmers/bitsandbytes#requirements--installation)(가 설치되지 않았다면 링크에 연결된 설명서를 보세요)
- [xFormers](https://huggingface.co/docs/diffusers/training/optimization/xformers)(가 설치되지 않았다면 링크에 연결된 설명서를 보세요)
- 기울기를 `None`으로 설정
- DeepSpeed stage 2 변수와 optimizer 없에기
- fp16 혼합 정밀도(precision)
[DeepSpeed](https://www.deepspeed.ai/)는 CPU 또는 NVME로 텐서를 VRAM에서 오프로드할 수 있습니다.
이를 위해서 훨씬 더 많은 RAM(약 25 GB)가 필요합니다.
DeepSpeed stage 2를 활성화하기 위해서 `accelerate config`로 환경을 구성해야합니다.
구성(configuration) 파일은 이런 모습이어야 합니다:
```yaml
compute_environment: LOCAL_MACHINE
deepspeed_config:
gradient_accumulation_steps: 4
offload_optimizer_device: cpu
offload_param_device: cpu
zero3_init_flag: false
zero_stage: 2
distributed_type: DEEPSPEED
```
<팁>
[문서](https://huggingface.co/docs/accelerate/usage_guides/deepspeed)를 더 많은 DeepSpeed 설정 옵션을 위해 보세요.
<팁>
기본 Adam optimizer를 DeepSpeed'의 Adam
`deepspeed.ops.adam.DeepSpeedCPUAdam` 으로 바꾸면 상당한 속도 향상을 이룰수 있지만,
Pytorch와 같은 버전의 CUDA toolchain이 필요합니다. 8-비트 optimizer는 현재 DeepSpeed와
호환되지 않는 것 같습니다.
```bash
export MODEL_DIR="stable-diffusion-v1-5/stable-diffusion-v1-5"
export OUTPUT_DIR="path to save model"
accelerate launch train_controlnet.py \
--pretrained_model_name_or_path=$MODEL_DIR \
--output_dir=$OUTPUT_DIR \
--dataset_name=fusing/fill50k \
--resolution=512 \
--validation_image "./conditioning_image_1.png" "./conditioning_image_2.png" \
--validation_prompt "red circle with blue background" "cyan circle with brown floral background" \
--train_batch_size=1 \
--gradient_accumulation_steps=4 \
--gradient_checkpointing \
--enable_xformers_memory_efficient_attention \
--set_grads_to_none \
--mixed_precision fp16 \
--push_to_hub
```
## 추론
학습된 모델은 [`StableDiffusionControlNetPipeline`]과 함께 실행될 수 있습니다.
`base_model_path`와 `controlnet_path` 에 값을 지정하세요 `--pretrained_model_name_or_path` 와
`--output_dir` 는 학습 스크립트에 개별적으로 지정됩니다.
```py
from diffusers import StableDiffusionControlNetPipeline, ControlNetModel, UniPCMultistepScheduler
from diffusers.utils import load_image
import torch
base_model_path = "path to model"
controlnet_path = "path to controlnet"
controlnet = ControlNetModel.from_pretrained(controlnet_path, torch_dtype=torch.float16)
pipe = StableDiffusionControlNetPipeline.from_pretrained(
base_model_path, controlnet=controlnet, torch_dtype=torch.float16
)
# 더 빠른 스케줄러와 메모리 최적화로 diffusion 프로세스 속도 올리기
pipe.scheduler = UniPCMultistepScheduler.from_config(pipe.scheduler.config)
# xformers가 설치되지 않으면 아래 줄을 삭제하기
pipe.enable_xformers_memory_efficient_attention()
pipe.enable_model_cpu_offload()
control_image = load_image("./conditioning_image_1.png")
prompt = "pale golden rod circle with old lace background"
# 이미지 생성하기
generator = torch.manual_seed(0)
image = pipe(prompt, num_inference_steps=20, generator=generator, image=control_image).images[0]
image.save("./output.png")
```
|