| # GitHub |
| This guide walks you through preparing your GitHub environment for MCPMark and authenticating the CLI tools with support for **token pooling** to mitigate rate limits. |
|
|
| ## 1 · Prepare An Evaluation Organization in Github |
|
|
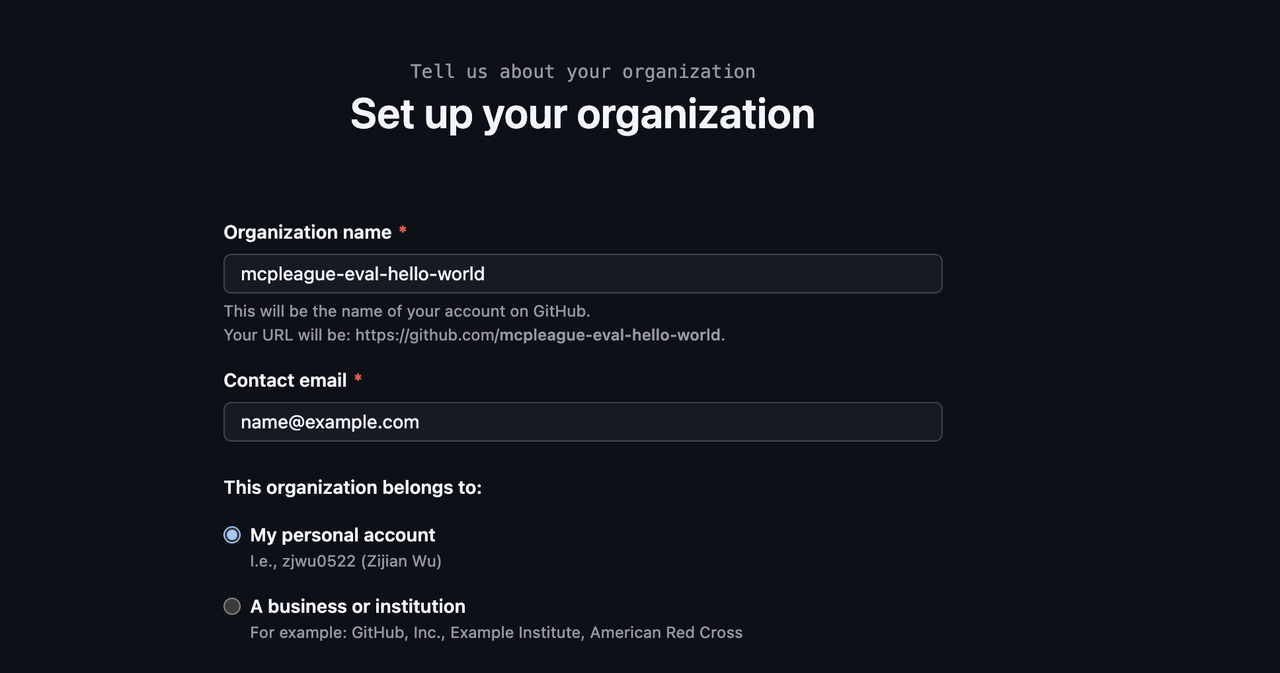
| 1. **Create a free GitHub Organization** |
| - In GitHub, click your avatar → **Your organizations** → **New organization**. |
| - We recommend a name like `mcpmark-eval-xxx`. (Check if there is a conflict with other organization names.) |
| - This keeps all benchmark repositories isolated from your personal and work code. |
| - [](https://postimg.cc/k27xdXc4) |
| 2. **Create Multiple GitHub Accounts (Recommended for Rate Limit Relief)** |
| To effectively distribute API load and avoid rate limiting, we recommend creating **2-4 additional GitHub accounts**: |
| - Create new GitHub accounts (e.g., `your-name-eval-1`, `your-name-eval-2`, etc.) |
| - **Important**: Add all these accounts as **Owners** to your evaluation organization |
| - This allows the token pooling system to distribute requests across multiple accounts |
|
|
| 3. **Generate Fine-Grained Personal Access Tokens (PATs) for Each Account** |
| **Repeat the following process for each GitHub account (including your main account):** |
| - Navigate to *Settings → Developer settings → Personal access tokens → Fine-grained tokens* |
| - Click **Generate new token**, select the evaluation organization you created |
| - [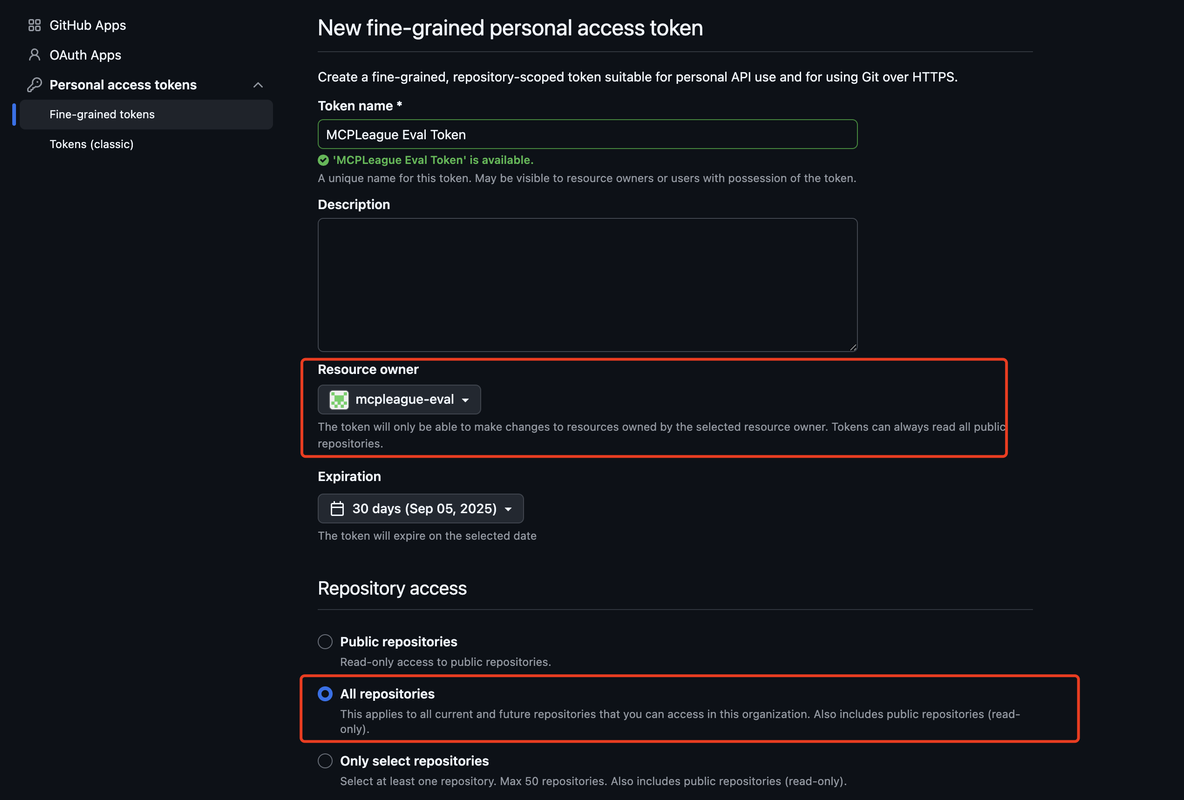](https://postimg.cc/Mv9yqJrm) |
| - Give the token a descriptive name (e.g., *MCPMark Eval Token - Account 1*) |
| - Under **Repository permissions** and **Organization permissions**, enable **All permissions** (read and write if applicable) |
| - [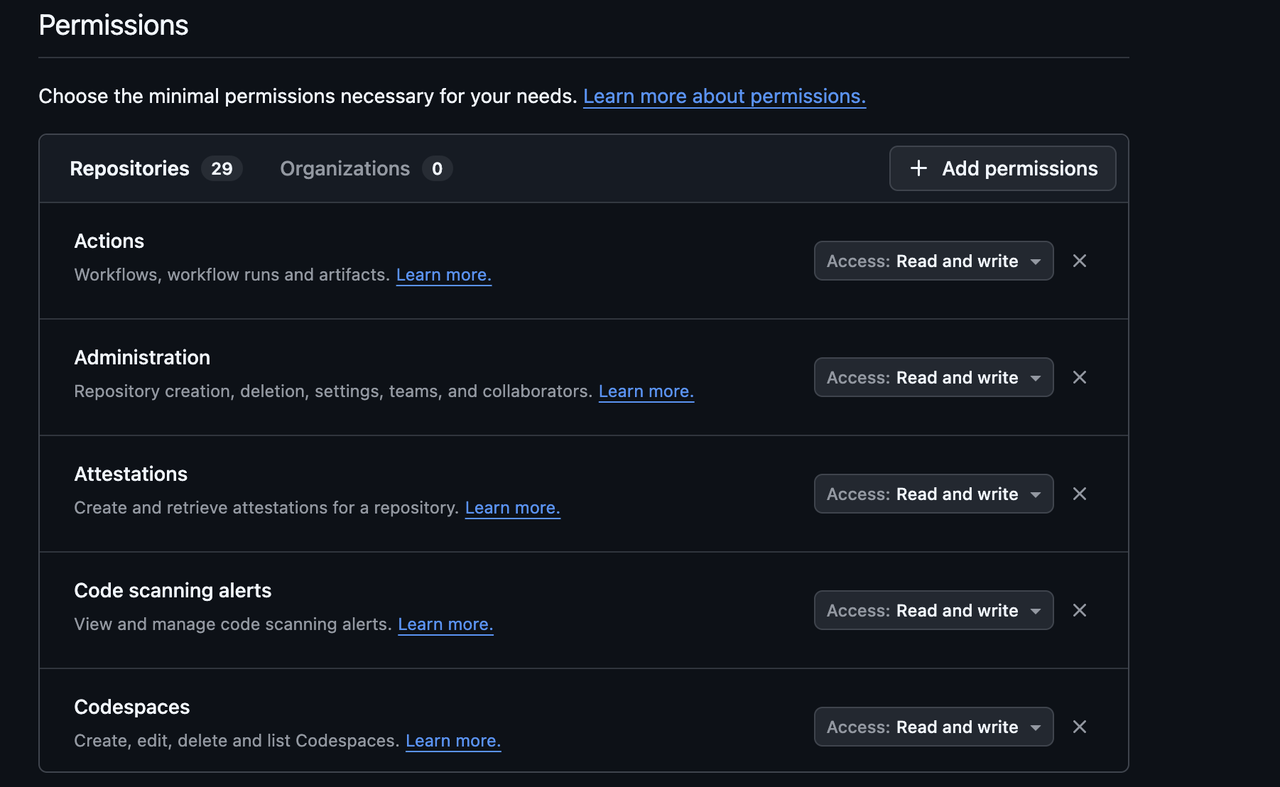](https://postimg.cc/14HFrZP1) |
| - Copy the generated token and save it safely — you'll need all tokens for the next step |
|
|
| 4. **Configure Token Pooling in `.mcp_env`** |
| In your project root, edit (or create) the `.mcp_env` file and add your tokens: |
| |
| **For single token (Basic setup):** |
| ```env |
| ## GitHub - Single Token Configuration |
| GITHUB_TOKENS="your-single-token-here" |
| GITHUB_EVAL_ORG="your-eval-org-name" |
| ``` |
|
|
| **For multiple tokens (Recommended for handling rate limits):** |
| ```env |
| ## GitHub - Token Pooling Configuration |
| GITHUB_TOKENS="token1,token2,token3,token4" |
| GITHUB_EVAL_ORG="your-eval-org-name" |
| ``` |
|
|
| **Important Notes:** |
| - Replace `token1,token2,token3,token4` with your actual tokens (comma-separated, no spaces) |
| - **2-4 tokens** is recommended for optimal rate limit distribution |
| - All tokens must have **the same permissions** on the evaluation organization |
| - The system automatically rotates between tokens to distribute API load |
|
|
| --- |
|
|
| ## 2 · Download the Sample Repository State |
|
|
| We have pre-exported several popular open-source repositories along with curated Issues and PRs. |
|
|
| 1. Download the archive from [Google Drive](https://drive.google.com/drive/folders/16bFDjdtqJYzYJlqKcjKBGomo8DwOhWcN?usp=drive_link). |
| 2. Extract it so that the directory `./github_state/` appears in the project root: |
|
|
| ```bash |
| mkdir -p github_state |
| unzip github_state.zip -d ./github_state |
| ``` |
|
|
| --- |
|
|
| ## 3 · Add New Repositories (Optional) |
|
|
| If you want to benchmark additional repositories: |
|
|
| 1. Export the desired repository state: |
| ```bash |
| python -m src.mcp_services.github.repo_exporter --source_repo_url owner/name --max-issues 20 --max-pulls 5 |
| ``` |
| 2. Open `src/mcp_services/github/state_manager.py` and add a new entry to `self.initial_state_mapping` pointing to the exported folder. |
|
|
| --- |
|
|
| ## 4 · GitHub Rate Limits & Token Pooling Benefits |
|
|
| ### Understanding Rate Limits |
| Fine-grained tokens are subject to GitHub API rate limits: |
| - **Read operations**: 5,000 requests per hour per token |
| - **General write operations**: 80 writes per minute and 500 writes per hour per token |
| - **Content creation (Issues, PRs, Comments)**: **500 requests per hour per token** (Secondary Rate Limit) |
|
|
| ### How Token Pooling Helps |
| With **token pooling**, MCPMark automatically: |
| - **Distributes requests** across multiple tokens to multiply your rate limits |
| - **Rotates tokens** for each task execution to balance load |
| - **Handles rate limit failures** by trying the next available token |
| - **Ensures consistency** between agent execution and verification |
|
|
| ### Example: Rate Limit Multiplication |
| **Read Operations:** |
| - **Single token**: 5,000 requests/hour |
| - **4 tokens**: ~20,000 requests/hour total capacity |
|
|
| **Content Creation (Critical for MCPMark):** |
| - **Single token**: 500 content creation requests/hour |
| - **4 tokens**: ~2,000 content creation requests/hour total capacity |
| - **Automatic failover**: If one token hits limits, others continue working |
|
|
| This dramatically improves evaluation performance, especially for large task batches or frequent testing cycles. **The content creation limit is often the bottleneck**, making token pooling essential for efficient evaluations. |
|
|
| ### Repository Limits |
| MCPMark places a cap on the number of PRs and issues (≤ 50 in total) per repository to ensure reasonable evaluation times and to stay within rate limits. |
|
|
|
|
| ## 2. Running Github Tasks |
|
|
| 1. Configure environment variables: make sure `GITHUB_TOKENS` and `GITHUB_EVAL_ORG` are properly set in `.mcp_env`. |
|
|
| 2. For single task or task group, run |
| ```bash |
| python -m pipeline --exp-name EXPNAME --mcp github --tasks GITHUBTASK --models MODEL --k K |
| ``` |
| Here *EXPNAME* refers to customized experiment name, *GITHUBTASK* refers to the github task or task group selected (see [Task Page](../datasets/task.md) for specific task information), *MODEL* refers to the selected model (see [Introduction Page](../introduction.md) for model supported), *K* refers to the time of independent experiments. |
