| # ControlNet training example |
|
|
| [Adding Conditional Control to Text-to-Image Diffusion Models](https://arxiv.org/abs/2302.05543) by Lvmin Zhang and Maneesh Agrawala. |
|
|
| This example is based on the [training example in the original ControlNet repository](https://github.com/lllyasviel/ControlNet/blob/main/docs/train.md). It trains a ControlNet to fill circles using a [small synthetic dataset](https://huggingface.co/datasets/fusing/fill50k). |
|
|
| ## Installing the dependencies |
|
|
| Before running the scripts, make sure to install the library's training dependencies: |
|
|
| **Important** |
|
|
| To make sure you can successfully run the latest versions of the example scripts, we highly recommend **installing from source** and keeping the install up to date as we update the example scripts frequently and install some example-specific requirements. To do this, execute the following steps in a new virtual environment: |
| ```bash |
| git clone https://github.com/huggingface/diffusers |
| cd diffusers |
| pip install -e . |
| ``` |
|
|
| Then cd in the example folder and run |
| ```bash |
| pip install -r requirements.txt |
| ``` |
|
|
| And initialize an [🤗Accelerate](https://github.com/huggingface/accelerate/) environment with: |
|
|
| ```bash |
| accelerate config |
| ``` |
|
|
| Or for a default accelerate configuration without answering questions about your environment |
|
|
| ```bash |
| accelerate config default |
| ``` |
|
|
| Or if your environment doesn't support an interactive shell e.g. a notebook |
|
|
| ```python |
| from accelerate.utils import write_basic_config |
| write_basic_config() |
| ``` |
|
|
| ## Circle filling dataset |
|
|
| The original dataset is hosted in the [ControlNet repo](https://huggingface.co/lllyasviel/ControlNet/blob/main/training/fill50k.zip). We re-uploaded it to be compatible with `datasets` [here](https://huggingface.co/datasets/fusing/fill50k). Note that `datasets` handles dataloading within the training script. |
|
|
| Our training examples use [Stable Diffusion 1.5](https://huggingface.co/stable-diffusion-v1-5/stable-diffusion-v1-5) as the original set of ControlNet models were trained from it. However, ControlNet can be trained to augment any Stable Diffusion compatible model (such as [CompVis/stable-diffusion-v1-4](https://huggingface.co/CompVis/stable-diffusion-v1-4)) or [stabilityai/stable-diffusion-2-1](https://huggingface.co/stabilityai/stable-diffusion-2-1). |
|
|
| ## Training |
|
|
| Our training examples use two test conditioning images. They can be downloaded by running |
|
|
| ```sh |
| wget https://huggingface.co/datasets/huggingface/documentation-images/resolve/main/diffusers/controlnet_training/conditioning_image_1.png |
| |
| wget https://huggingface.co/datasets/huggingface/documentation-images/resolve/main/diffusers/controlnet_training/conditioning_image_2.png |
| ``` |
|
|
|
|
| ```bash |
| export MODEL_DIR="stable-diffusion-v1-5/stable-diffusion-v1-5" |
| export OUTPUT_DIR="path to save model" |
| |
| accelerate launch train_controlnet.py \ |
| --pretrained_model_name_or_path=$MODEL_DIR \ |
| --output_dir=$OUTPUT_DIR \ |
| --dataset_name=fusing/fill50k \ |
| --resolution=512 \ |
| --learning_rate=1e-5 \ |
| --validation_image "./conditioning_image_1.png" "./conditioning_image_2.png" \ |
| --validation_prompt "red circle with blue background" "cyan circle with brown floral background" \ |
| --train_batch_size=4 |
| ``` |
|
|
| This default configuration requires ~38GB VRAM. |
|
|
| By default, the training script logs outputs to tensorboard. Pass `--report_to wandb` to use weights and |
| biases. |
|
|
| Gradient accumulation with a smaller batch size can be used to reduce training requirements to ~20 GB VRAM. |
|
|
| ```bash |
| export MODEL_DIR="stable-diffusion-v1-5/stable-diffusion-v1-5" |
| export OUTPUT_DIR="path to save model" |
| |
| accelerate launch train_controlnet.py \ |
| --pretrained_model_name_or_path=$MODEL_DIR \ |
| --output_dir=$OUTPUT_DIR \ |
| --dataset_name=fusing/fill50k \ |
| --resolution=512 \ |
| --learning_rate=1e-5 \ |
| --validation_image "./conditioning_image_1.png" "./conditioning_image_2.png" \ |
| --validation_prompt "red circle with blue background" "cyan circle with brown floral background" \ |
| --train_batch_size=1 \ |
| --gradient_accumulation_steps=4 |
| ``` |
|
|
| ## Training with multiple GPUs |
|
|
| `accelerate` allows for seamless multi-GPU training. Follow the instructions [here](https://huggingface.co/docs/accelerate/basic_tutorials/launch) |
| for running distributed training with `accelerate`. Here is an example command: |
|
|
| ```bash |
| export MODEL_DIR="stable-diffusion-v1-5/stable-diffusion-v1-5" |
| export OUTPUT_DIR="path to save model" |
| |
| accelerate launch --mixed_precision="fp16" --multi_gpu train_controlnet.py \ |
| --pretrained_model_name_or_path=$MODEL_DIR \ |
| --output_dir=$OUTPUT_DIR \ |
| --dataset_name=fusing/fill50k \ |
| --resolution=512 \ |
| --learning_rate=1e-5 \ |
| --validation_image "./conditioning_image_1.png" "./conditioning_image_2.png" \ |
| --validation_prompt "red circle with blue background" "cyan circle with brown floral background" \ |
| --train_batch_size=4 \ |
| --mixed_precision="fp16" \ |
| --tracker_project_name="controlnet-demo" \ |
| --report_to=wandb |
| ``` |
|
|
| ## Example results |
|
|
| #### After 300 steps with batch size 8 |
|
|
| | | | |
| |-------------------|:-------------------------:| |
| | | red circle with blue background | |
|  | 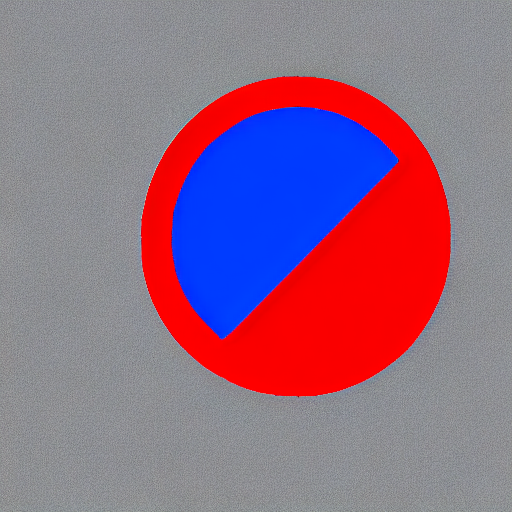 | |
| | | cyan circle with brown floral background | |
|  | 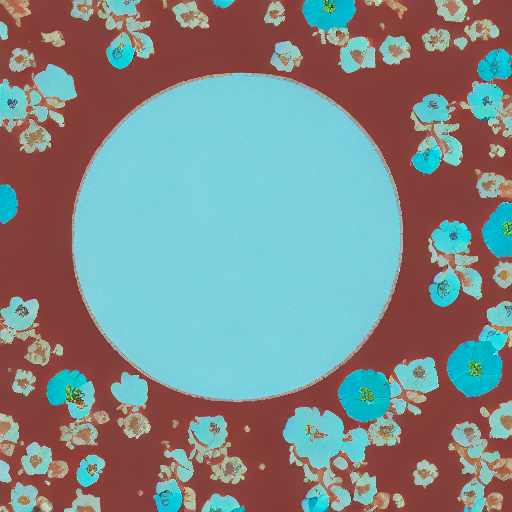 | |
|
|
|
|
| #### After 6000 steps with batch size 8: |
|
|
| | | | |
| |-------------------|:-------------------------:| |
| | | red circle with blue background | |
|  |  | |
| | | cyan circle with brown floral background | |
|  |  | |
|
|
| ## Training on a 16 GB GPU |
|
|
| Optimizations: |
| - Gradient checkpointing |
| - bitsandbyte's 8-bit optimizer |
|
|
| [bitandbytes install instructions](https://github.com/TimDettmers/bitsandbytes#requirements--installation). |
|
|
| ```bash |
| export MODEL_DIR="stable-diffusion-v1-5/stable-diffusion-v1-5" |
| export OUTPUT_DIR="path to save model" |
| |
| accelerate launch train_controlnet.py \ |
| --pretrained_model_name_or_path=$MODEL_DIR \ |
| --output_dir=$OUTPUT_DIR \ |
| --dataset_name=fusing/fill50k \ |
| --resolution=512 \ |
| --learning_rate=1e-5 \ |
| --validation_image "./conditioning_image_1.png" "./conditioning_image_2.png" \ |
| --validation_prompt "red circle with blue background" "cyan circle with brown floral background" \ |
| --train_batch_size=1 \ |
| --gradient_accumulation_steps=4 \ |
| --gradient_checkpointing \ |
| --use_8bit_adam |
| ``` |
|
|
| ## Training on a 12 GB GPU |
|
|
| Optimizations: |
| - Gradient checkpointing |
| - bitsandbyte's 8-bit optimizer |
| - xformers |
| - set grads to none |
|
|
| ```bash |
| export MODEL_DIR="stable-diffusion-v1-5/stable-diffusion-v1-5" |
| export OUTPUT_DIR="path to save model" |
| |
| accelerate launch train_controlnet.py \ |
| --pretrained_model_name_or_path=$MODEL_DIR \ |
| --output_dir=$OUTPUT_DIR \ |
| --dataset_name=fusing/fill50k \ |
| --resolution=512 \ |
| --learning_rate=1e-5 \ |
| --validation_image "./conditioning_image_1.png" "./conditioning_image_2.png" \ |
| --validation_prompt "red circle with blue background" "cyan circle with brown floral background" \ |
| --train_batch_size=1 \ |
| --gradient_accumulation_steps=4 \ |
| --gradient_checkpointing \ |
| --use_8bit_adam \ |
| --enable_xformers_memory_efficient_attention \ |
| --set_grads_to_none |
| ``` |
|
|
| When using `enable_xformers_memory_efficient_attention`, please make sure to install `xformers` by `pip install xformers`. |
|
|
| ## Training on an 8 GB GPU |
|
|
| We have not exhaustively tested DeepSpeed support for ControlNet. While the configuration does |
| save memory, we have not confirmed the configuration to train successfully. You will very likely |
| have to make changes to the config to have a successful training run. |
|
|
| Optimizations: |
| - Gradient checkpointing |
| - xformers |
| - set grads to none |
| - DeepSpeed stage 2 with parameter and optimizer offloading |
| - fp16 mixed precision |
|
|
| [DeepSpeed](https://www.deepspeed.ai/) can offload tensors from VRAM to either |
| CPU or NVME. This requires significantly more RAM (about 25 GB). |
|
|
| Use `accelerate config` to enable DeepSpeed stage 2. |
|
|
| The relevant parts of the resulting accelerate config file are |
|
|
| ```yaml |
| compute_environment: LOCAL_MACHINE |
| deepspeed_config: |
| gradient_accumulation_steps: 4 |
| offload_optimizer_device: cpu |
| offload_param_device: cpu |
| zero3_init_flag: false |
| zero_stage: 2 |
| distributed_type: DEEPSPEED |
| ``` |
|
|
| See [documentation](https://huggingface.co/docs/accelerate/usage_guides/deepspeed) for more DeepSpeed configuration options. |
|
|
| Changing the default Adam optimizer to DeepSpeed's Adam |
| `deepspeed.ops.adam.DeepSpeedCPUAdam` gives a substantial speedup but |
| it requires CUDA toolchain with the same version as pytorch. 8-bit optimizer |
| does not seem to be compatible with DeepSpeed at the moment. |
|
|
| ```bash |
| export MODEL_DIR="stable-diffusion-v1-5/stable-diffusion-v1-5" |
| export OUTPUT_DIR="path to save model" |
| |
| accelerate launch train_controlnet.py \ |
| --pretrained_model_name_or_path=$MODEL_DIR \ |
| --output_dir=$OUTPUT_DIR \ |
| --dataset_name=fusing/fill50k \ |
| --resolution=512 \ |
| --validation_image "./conditioning_image_1.png" "./conditioning_image_2.png" \ |
| --validation_prompt "red circle with blue background" "cyan circle with brown floral background" \ |
| --train_batch_size=1 \ |
| --gradient_accumulation_steps=4 \ |
| --gradient_checkpointing \ |
| --enable_xformers_memory_efficient_attention \ |
| --set_grads_to_none \ |
| --mixed_precision fp16 |
| ``` |
|
|
| ## Performing inference with the trained ControlNet |
|
|
| The trained model can be run the same as the original ControlNet pipeline with the newly trained ControlNet. |
| Set `base_model_path` and `controlnet_path` to the values `--pretrained_model_name_or_path` and |
| `--output_dir` were respectively set to in the training script. |
|
|
| ```py |
| from diffusers import StableDiffusionControlNetPipeline, ControlNetModel, UniPCMultistepScheduler |
| from diffusers.utils import load_image |
| import torch |
| |
| base_model_path = "path to model" |
| controlnet_path = "path to controlnet" |
| |
| controlnet = ControlNetModel.from_pretrained(controlnet_path, torch_dtype=torch.float16) |
| pipe = StableDiffusionControlNetPipeline.from_pretrained( |
| base_model_path, controlnet=controlnet, torch_dtype=torch.float16 |
| ) |
| |
| # speed up diffusion process with faster scheduler and memory optimization |
| pipe.scheduler = UniPCMultistepScheduler.from_config(pipe.scheduler.config) |
| # remove following line if xformers is not installed or when using Torch 2.0. |
| pipe.enable_xformers_memory_efficient_attention() |
| # memory optimization. |
| pipe.enable_model_cpu_offload() |
| |
| control_image = load_image("./conditioning_image_1.png") |
| prompt = "pale golden rod circle with old lace background" |
| |
| # generate image |
| generator = torch.manual_seed(0) |
| image = pipe( |
| prompt, num_inference_steps=20, generator=generator, image=control_image |
| ).images[0] |
| image.save("./output.png") |
| ``` |
|
|
| ## Training with Flax/JAX |
|
|
| For faster training on TPUs and GPUs you can leverage the flax training example. Follow the instructions above to get the model and dataset before running the script. |
|
|
| ### Running on Google Cloud TPU |
|
|
| See below for commands to set up a TPU VM(`--accelerator-type v4-8`). For more details about how to set up and use TPUs, refer to [Cloud docs for single VM setup](https://cloud.google.com/tpu/docs/run-calculation-jax). |
|
|
| First create a single TPUv4-8 VM and connect to it: |
|
|
| ``` |
| ZONE=us-central2-b |
| TPU_TYPE=v4-8 |
| VM_NAME=hg_flax |
| |
| gcloud alpha compute tpus tpu-vm create $VM_NAME \ |
| --zone $ZONE \ |
| --accelerator-type $TPU_TYPE \ |
| --version tpu-vm-v4-base |
| |
| gcloud alpha compute tpus tpu-vm ssh $VM_NAME --zone $ZONE -- \ |
| ``` |
|
|
| When connected install JAX `0.4.5`: |
|
|
| ```sh |
| pip install "jax[tpu]==0.4.5" -f https://storage.googleapis.com/jax-releases/libtpu_releases.html |
| ``` |
|
|
| To verify that JAX was correctly installed, you can run the following command: |
|
|
| ```py |
| import jax |
| jax.device_count() |
| ``` |
|
|
| This should display the number of TPU cores, which should be 4 on a TPUv4-8 VM. |
|
|
| Then install Diffusers and the library's training dependencies: |
|
|
| ```bash |
| git clone https://github.com/huggingface/diffusers |
| cd diffusers |
| pip install . |
| ``` |
|
|
| Then cd in the example folder and run |
|
|
| ```bash |
| pip install -U -r requirements_flax.txt |
| ``` |
|
|
| If you want to use Weights and Biases logging, you should also install `wandb` now |
|
|
| ```bash |
| pip install wandb |
| ``` |
|
|
|
|
| Now let's downloading two conditioning images that we will use to run validation during the training in order to track our progress |
|
|
| ```sh |
| wget https://huggingface.co/datasets/huggingface/documentation-images/resolve/main/diffusers/controlnet_training/conditioning_image_1.png |
| wget https://huggingface.co/datasets/huggingface/documentation-images/resolve/main/diffusers/controlnet_training/conditioning_image_2.png |
| ``` |
|
|
| We encourage you to store or share your model with the community. To use huggingface hub, please login to your Hugging Face account, or ([create one](https://huggingface.co/docs/diffusers/main/en/training/hf.co/join) if you don’t have one already): |
|
|
| ```sh |
| huggingface-cli login |
| ``` |
|
|
| Make sure you have the `MODEL_DIR`,`OUTPUT_DIR` and `HUB_MODEL_ID` environment variables set. The `OUTPUT_DIR` and `HUB_MODEL_ID` variables specify where to save the model to on the Hub: |
|
|
| ```bash |
| export MODEL_DIR="stable-diffusion-v1-5/stable-diffusion-v1-5" |
| export OUTPUT_DIR="runs/fill-circle-{timestamp}" |
| export HUB_MODEL_ID="controlnet-fill-circle" |
| ``` |
|
|
| And finally start the training |
|
|
| ```bash |
| python3 train_controlnet_flax.py \ |
| --pretrained_model_name_or_path=$MODEL_DIR \ |
| --output_dir=$OUTPUT_DIR \ |
| --dataset_name=fusing/fill50k \ |
| --resolution=512 \ |
| --learning_rate=1e-5 \ |
| --validation_image "./conditioning_image_1.png" "./conditioning_image_2.png" \ |
| --validation_prompt "red circle with blue background" "cyan circle with brown floral background" \ |
| --validation_steps=1000 \ |
| --train_batch_size=2 \ |
| --revision="non-ema" \ |
| --from_pt \ |
| --report_to="wandb" \ |
| --tracker_project_name=$HUB_MODEL_ID \ |
| --num_train_epochs=11 \ |
| --push_to_hub \ |
| --hub_model_id=$HUB_MODEL_ID |
| ``` |
|
|
| Since we passed the `--push_to_hub` flag, it will automatically create a model repo under your huggingface account based on `$HUB_MODEL_ID`. By the end of training, the final checkpoint will be automatically stored on the hub. You can find an example model repo [here](https://huggingface.co/YiYiXu/fill-circle-controlnet). |
|
|
| Our training script also provides limited support for streaming large datasets from the Hugging Face Hub. In order to enable streaming, one must also set `--max_train_samples`. Here is an example command (from [this blog article](https://huggingface.co/blog/train-your-controlnet)): |
|
|
| ```bash |
| export MODEL_DIR="stable-diffusion-v1-5/stable-diffusion-v1-5" |
| export OUTPUT_DIR="runs/uncanny-faces-{timestamp}" |
| export HUB_MODEL_ID="controlnet-uncanny-faces" |
| |
| python3 train_controlnet_flax.py \ |
| --pretrained_model_name_or_path=$MODEL_DIR \ |
| --output_dir=$OUTPUT_DIR \ |
| --dataset_name=multimodalart/facesyntheticsspigacaptioned \ |
| --streaming \ |
| --conditioning_image_column=spiga_seg \ |
| --image_column=image \ |
| --caption_column=image_caption \ |
| --resolution=512 \ |
| --max_train_samples 100000 \ |
| --learning_rate=1e-5 \ |
| --train_batch_size=1 \ |
| --revision="flax" \ |
| --report_to="wandb" \ |
| --tracker_project_name=$HUB_MODEL_ID |
| ``` |
|
|
| Note, however, that the performance of the TPUs might get bottlenecked as streaming with `datasets` is not optimized for images. For ensuring maximum throughput, we encourage you to explore the following options: |
|
|
| * [Webdataset](https://webdataset.github.io/webdataset/) |
| * [TorchData](https://github.com/pytorch/data) |
| * [TensorFlow Datasets](https://www.tensorflow.org/datasets/tfless_tfds) |
|
|
| When work with a larger dataset, you may need to run training process for a long time and it’s useful to save regular checkpoints during the process. You can use the following argument to enable intermediate checkpointing: |
|
|
| ```bash |
| --checkpointing_steps=500 |
| ``` |
| This will save the trained model in subfolders of your output_dir. Subfolder names is the number of steps performed so far; for example: a checkpoint saved after 500 training steps would be saved in a subfolder named 500 |
| |
| You can then start your training from this saved checkpoint with |
| |
| ```bash |
| --controlnet_model_name_or_path="./control_out/500" |
| ``` |
| |
| We support training with the Min-SNR weighting strategy proposed in [Efficient Diffusion Training via Min-SNR Weighting Strategy](https://arxiv.org/abs/2303.09556) which helps to achieve faster convergence by rebalancing the loss. To use it, one needs to set the `--snr_gamma` argument. The recommended value when using it is `5.0`. |
| |
| We also support gradient accumulation - it is a technique that lets you use a bigger batch size than your machine would normally be able to fit into memory. You can use `gradient_accumulation_steps` argument to set gradient accumulation steps. The ControlNet author recommends using gradient accumulation to achieve better convergence. Read more [here](https://github.com/lllyasviel/ControlNet/blob/main/docs/train.md#more-consideration-sudden-converge-phenomenon-and-gradient-accumulation). |
| |
| You can **profile your code** with: |
| |
| ```bash |
| --profile_steps==5 |
| ``` |
| |
| Refer to the [JAX documentation on profiling](https://jax.readthedocs.io/en/latest/profiling.html). To inspect the profile trace, you'll have to install and start Tensorboard with the profile plugin: |
| |
| ```bash |
| pip install tensorflow tensorboard-plugin-profile |
| tensorboard --logdir runs/fill-circle-100steps-20230411_165612/ |
| ``` |
| |
| The profile can then be inspected at http://localhost:6006/#profile |
| |
| Sometimes you'll get version conflicts (error messages like `Duplicate plugins for name projector`), which means that you have to uninstall and reinstall all versions of Tensorflow/Tensorboard (e.g. with `pip uninstall tensorflow tf-nightly tensorboard tb-nightly tensorboard-plugin-profile && pip install tf-nightly tbp-nightly tensorboard-plugin-profile`). |
| |
| Note that the debugging functionality of the Tensorboard `profile` plugin is still under active development. Not all views are fully functional, and for example the `trace_viewer` cuts off events after 1M (which can result in all your device traces getting lost if you for example profile the compilation step by accident). |
| |
| ## Support for Stable Diffusion XL |
| |
| We provide a training script for training a ControlNet with [Stable Diffusion XL](https://huggingface.co/papers/2307.01952). Please refer to [README_sdxl.md](./README_sdxl.md) for more details. |
| |