
Buckets:


Using MCP with Local and Open Source Models
In this section, we'll connect MCP with local and open-source models using Continue, a tool for building AI coding assistants that works with local tools like Ollama.
Setup Continue
You can install Continue from the VS Code marketplace.
Continue also has an extension for JetBrains.
VS Code extension
- Click
Installon the Continue extension page in the Visual Studio Marketplace - This will open the Continue extension page in VS Code, where you will need to click
Installagain - The Continue logo will appear on the left sidebar. For a better experience, move Continue to the right sidebar
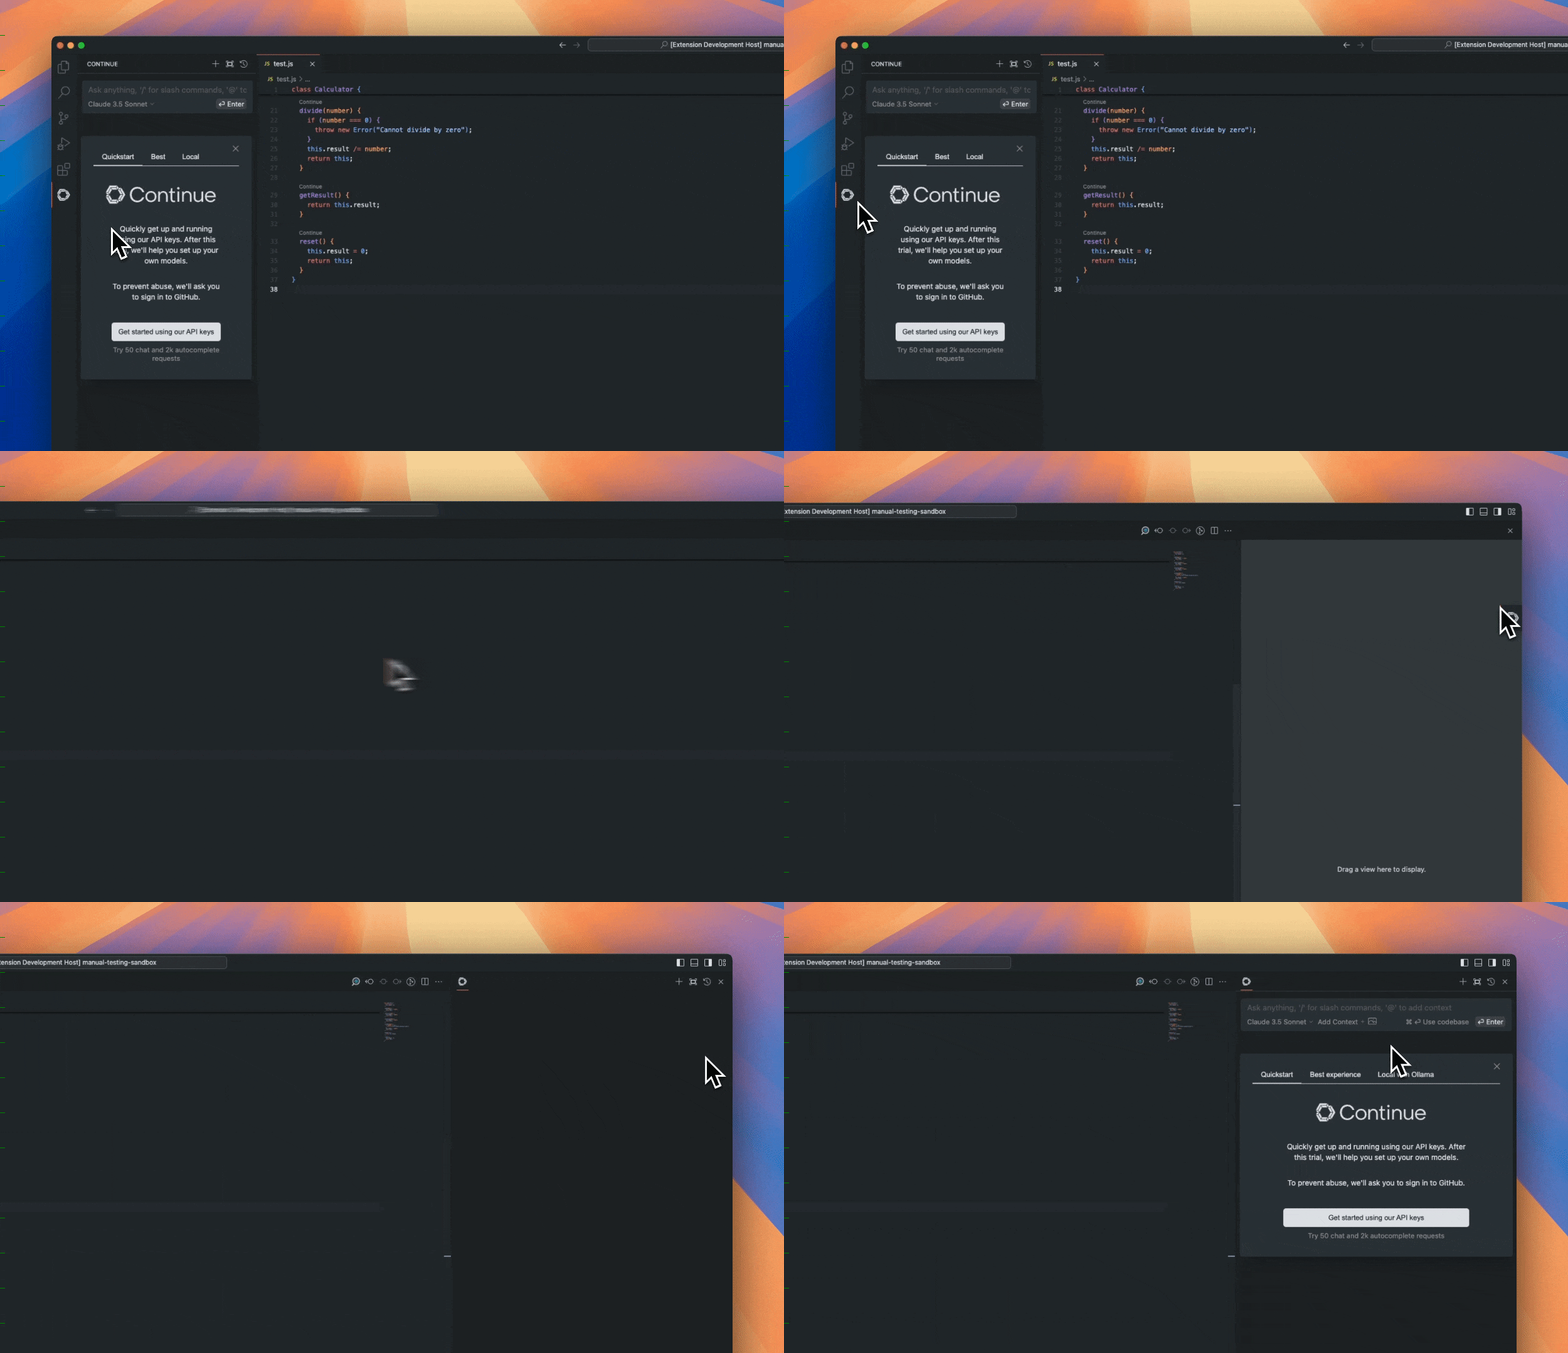
With Continue configured, we'll move on to setting up Ollama to pull local models.
Local Models
There are many ways to run local models that are compatible with Continue. Three popular options are Ollama, Llama.cpp, and LM Studio. Ollama is an open-source tool that allows users to easily run large language models (LLMs) locally. Llama.cpp is a high-performance C++ library for running LLMs that also includes an OpenAI-compatible server. LM Studio provides a graphical interface for running local models.
You can access local models from the Hugging Face Hub and get commands and quick links for all major local inference apps.

Llama.cpp provides llama-server, a lightweight, OpenAI API compatible, HTTP server for serving LLMs. You can either build it from source by following the instructions in the Llama.cpp repository, or use a pre-built binary if available for your system. Check out the Llama.cpp documentation for more information.
Once you have llama-server, you can run a model from Hugging Face with a command like this:
llama-server -hf unsloth/Devstral-Small-2505-GGUF:Q4_K_M
LM Studio is an application for Mac, Windows, and Linux that makes it easy to run open-source models locally with a graphical interface. To get started:
- Click here to open the model in LM Studio.
- Once the model is downloaded, go to the "Local Server" tab and click "Start Server".
To use Ollama, you can install it and download the model you want to run with the ollama run command.
For example, you can download and run the Devstral-Small model with:
ollama run hf.co/unsloth/Devstral-Small-2505-GGUF:Q4_K_M
This model is around 14GB in size, so you need to ensure that the machine you are running it on has enough free RAM. Otherwise you might see an error like: model requires more system memory than is available.
Continue supports various local model providers. Besides Ollama, Llama.cpp, and LM Studio you can also use other providers. For a complete list of supported providers and detailed configuration options, please refer to the Continue documentation.
It is important that we use models that have tool calling as a built-in feature, i.e. Codestral Qwen and Llama 3.1x.
- Create a folder called
.continue/modelsat the top level of your workspace - Add a file to this folder to configure your model provider. For example,
local-models.yaml. - Add the following configuration, depending on whether you are using Ollama, Llama.cpp, or LM Studio.
This configuration is for a llama.cpp model served with llama-server. Note that the model field should match the model you are serving.
name: Llama.cpp model
version: 0.0.1
schema: v1
models:
  - provider: llama.cpp
    model: unsloth/Devstral-Small-2505-GGUF
    apiBase: http://localhost:8080
    defaultCompletionOptions:
      contextLength: 8192 # Adjust based on the model
    name: Llama.cpp Devstral-Small
    roles:
      - chat
      - edit
This configuration is for a model served via LM Studio. The model identifier should match what is loaded in LM Studio.
name: LM Studio Model
version: 0.0.1
schema: v1
models:
  - provider: lmstudio
    model: unsloth/Devstral-Small-2505-GGUF
    name: LM Studio Devstral-Small
    apiBase: http://localhost:1234/v1
    roles:
      - chat
      - edit
This configuration is for an Ollama model.
name: Ollama Devstral model
version: 0.0.1
schema: v1
models:
  - provider: ollama
    model: unsloth/devstral-small-2505-gguf:Q4_K_M
    defaultCompletionOptions:
      contextLength: 8192
    name: Ollama Devstral-Small
    roles:
      - chat
      - edit
By default, each model has a max context length, in this case it is 128000 tokens. This setup includes a larger use of
that context window to perform multiple MCP requests and needs to be able to handle more tokens.
How it works
The tool handshake
Tools provide a powerful way for models to interface with the external world.
They are provided to the model as a JSON object with a name and an arguments
schema. For example, a read_file tool with a filepath argument will give the
model the ability to request the contents of a specific file.
The following handshake describes how the Agent uses tools:
- In Agent mode, available tools are sent along with
userchat requests - The model can choose to include a tool call in its response
- The user gives permission. This step is skipped if the policy for that tool is set to
Automatic - Continue calls the tool using built-in functionality or the MCP server that offers that particular tool
- Continue sends the result back to the model
- The model responds, potentially with another tool call, and step 2 begins again
Continue supports multiple local model providers. You can use different models for different tasks or switch models as needed. This section focuses on local-first solutions, but Continue does work with popular providers like OpenAI, Anthropic, Microsoft/Azure, Mistral, and more. You can also run your own model provider.
Local Model Integration with MCP
Now that we have everything set up, let's add an existing MCP server. Below is a quick example of setting up a new MCP server for use in your assistant:
- Create a folder called
.continue/mcpServersat the top level of your workspace - Add a file called
playwright-mcp.yamlto this folder - Write the following contents to
playwright-mcp.yamland save
name: Playwright mcpServer
version: 0.0.1
schema: v1
mcpServers:
  - name: Browser search
    command: npx
    args:
      - "@playwright/mcp@latest"
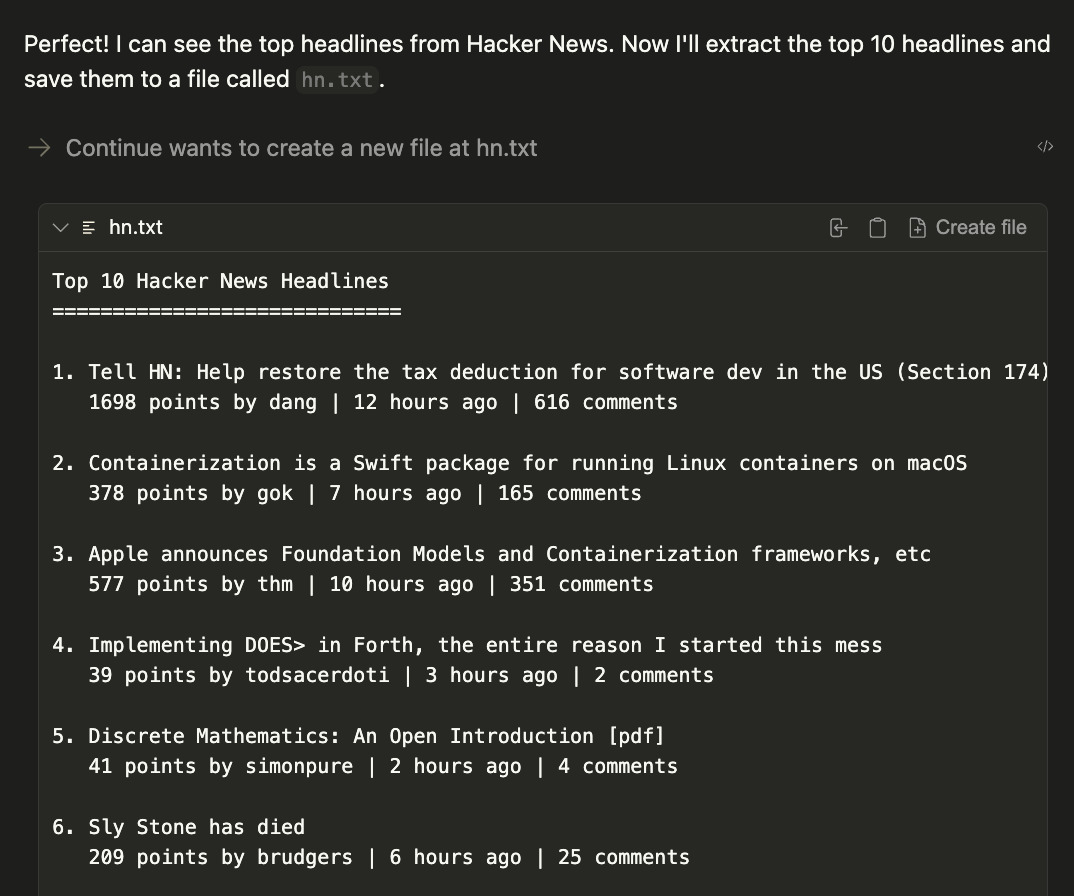
Now test your MCP server by prompting the following command:
1. Using playwright, navigate to https://news.ycombinator.com.

2. Extract the titles and URLs of the top 4 posts on the homepage.

3. Create a file named hn.txt in the root directory of the project.

4. Save this list as plain text in the hn.txt file, with each line containing the title and URL separated by a hyphen.

Do not output code or instructions—just complete the task and confirm when it is done.
The result will be a generated file called hn.txt in the current working directory.
Conclusion
By combining Continue with local models like Llama 3.1 and MCP servers, you've unlocked a powerful development workflow that keeps your code and data private while leveraging cutting-edge AI capabilities.
This setup gives you the flexibility to customize your AI assistant with specialized tools, from web automation to file management, all running entirely on your local machine. Ready to take your development workflow to the next level? Start by experimenting with different MCP servers from the Continue Hub MCP explore page and discover how local AI can transform your coding experience.
Xet Storage Details
- Size:
- 8.53 kB
- Xet hash:
- 15a2c6c5cdb9dfd5440aec5b6487ddbeb122bc1de9cc683a9a2d98e9a4737cd0
Xet efficiently stores files, intelligently splitting them into unique chunks and accelerating uploads and downloads. More info.