Buckets:


| # Building a Svelte application | |
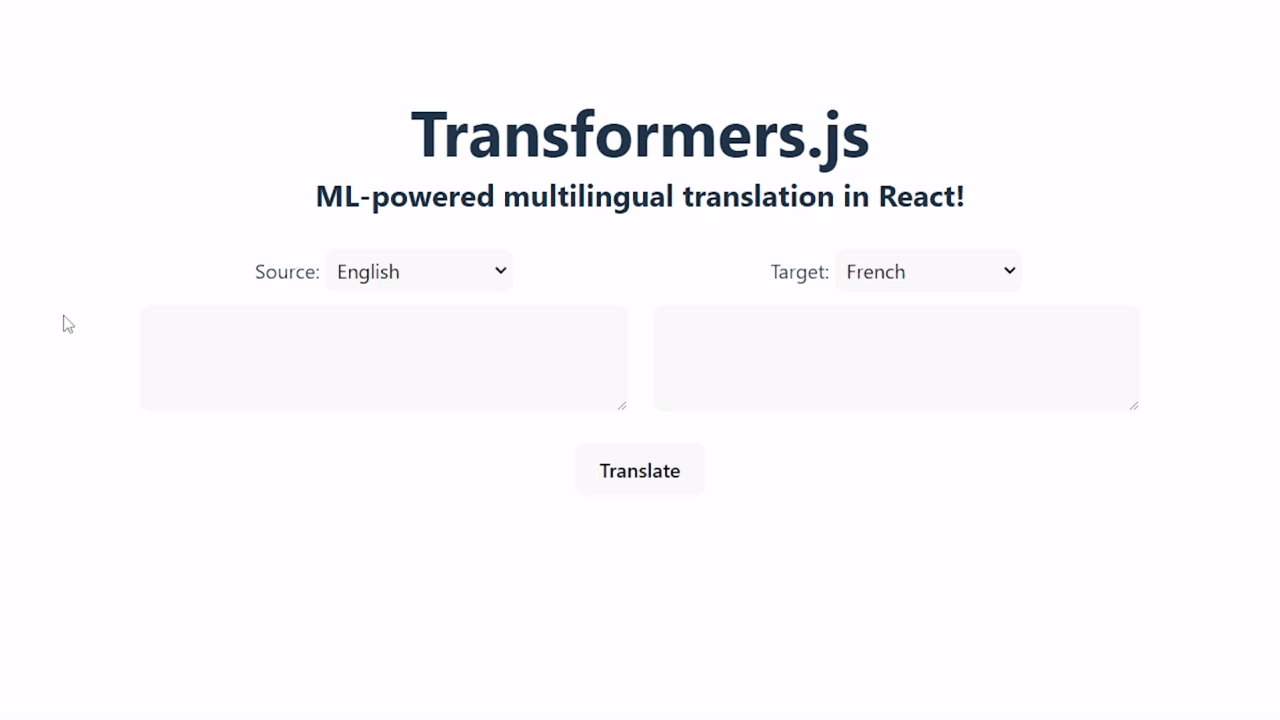
| In this tutorial, we'll be building a simple [Svelte](https://svelte.dev/) application that performs multilingual translation using Transformers.js! The final product will look something like this: | |
|  | |
| Useful links: | |
| - [Source code](https://github.com/huggingface/transformers.js/tree/main/examples/svelte-translator) | |
| ## Prerequisites | |
| - [Node.js](https://nodejs.org/en/) version 18+ | |
| - [npm](https://www.npmjs.com/) version 9+ | |
| ## Step 1: Initialise the project | |
| For this tutorial, we will use [Vite](https://vitejs.dev/) to initialise our project. Vite is a build tool that allows us to quickly set up a Svelte application with minimal configuration. Run the following command in your terminal: | |
| ```bash | |
| npm create vite@latest svelte-translator -- --template svelte | |
| ``` | |
| If prompted to install `create-vite`, type y and press Enter. | |
| Next, enter the project directory and install the necessary development dependencies: | |
| ```bash | |
| cd svelte-translator | |
| npm install | |
| ``` | |
| To test that our application is working, we can run the following command: | |
| ```bash | |
| npm run dev | |
| ``` | |
| Visiting the URL shown in the terminal (e.g., [http://localhost:5173/](http://localhost:5173/)) should show the default "Svelte + Vite" landing page. | |
| You can stop the development server by pressing Ctrl + C in the terminal. | |
| ## Step 2: Install and configure Transformers.js | |
| Now we get to the fun part: adding machine learning to our application! First, install Transformers.js from [NPM](https://www.npmjs.com/package/@huggingface/transformers) with the following command: | |
| ```bash | |
| npm install @huggingface/transformers | |
| ``` | |
| For this application, we will use the [Xenova/nllb-200-distilled-600M](https://huggingface.co/Xenova/nllb-200-distilled-600M) model, which can perform multilingual translation among 200 languages. Before we start, there are 2 things we need to take note of: | |
| 1. ML inference can be quite computationally intensive, so it's better to load and run the models in a separate thread from the main (UI) thread. | |
| 2. Since the model is quite large (>1 GB), we don't want to download it until the user clicks the "Translate" button. | |
| We can achieve both of these goals by using a [Web Worker](https://developer.mozilla.org/en-US/docs/Web/API/Web_Workers_API/Using_web_workers). | |
| Create a file called `worker.js` in the `src` directory. This script will do all the heavy-lifting for us, including loading and running of the translation pipeline. To ensure the model is only loaded once, we will create the `MyTranslationPipeline` class which uses the [singleton pattern](https://en.wikipedia.org/wiki/Singleton_pattern) to lazily create a single instance of the pipeline when `getInstance` is first called, and use this pipeline for all subsequent calls: | |
| ```javascript | |
| import { pipeline, TextStreamer } from "@huggingface/transformers"; | |
| class MyTranslationPipeline { | |
| static task = "translation"; | |
| static model = "Xenova/nllb-200-distilled-600M"; | |
| static instance = null; | |
| static async getInstance(progress_callback = null) { | |
| this.instance ??= pipeline(this.task, this.model, { progress_callback }); | |
| return this.instance; | |
| } | |
| } | |
| ``` | |
| ## Step 3: Design the user interface | |
| We recommend starting the development server again with `npm run dev` | |
| (if not already running) so that you can see your changes in real-time. | |
| First, let's create some child components. Create a folder called `lib` in the `src` directory, and create the following files: | |
| 1. `LanguageSelector.svelte`: This component will allow the user to select the input and output languages. Check out the full list of languages [here](https://github.com/huggingface/transformers.js-examples/tree/main/react-translator/src/components/LanguageSelector.jsx). | |
| ```svelte | |
| export let type = ''; | |
| export let defaultLanguage = ''; | |
| export let onChange = () => {}; | |
| const LANGUAGES = { | |
| "Acehnese (Arabic script)": "ace_Arab", | |
| "Acehnese (Latin script)": "ace_Latn", | |
| "Afrikaans": "afr_Latn", | |
| // ... full list omitted for brevity | |
| "Zulu": "zul_Latn", | |
| }; | |
| {type}: | |
| {#each Object.entries(LANGUAGES) as [key, value]} | |
| {key} | |
| {/each} | |
| ``` | |
| 2. `Progress.svelte`: This component will display the progress for downloading each model file. | |
| ```svelte | |
| export let text = ''; | |
| export let percentage = 0; | |
| {text} ({percentage.toFixed(2)}%) | |
| ``` | |
| Now let's update `App.svelte` in the `src` directory. Replace its contents with the following, which sets up our state variables and renders the UI: | |
| ```svelte | |
| import LanguageSelector from './lib/LanguageSelector.svelte'; | |
| import Progress from './lib/Progress.svelte'; | |
| import './app.css'; | |
| // Model loading | |
| let ready = null; | |
| let disabled = false; | |
| let progressItems = []; | |
| // Inputs and outputs | |
| let input = 'I love walking my dog.'; | |
| let sourceLanguage = 'eng_Latn'; | |
| let targetLanguage = 'fra_Latn'; | |
| let output = ''; | |
| Transformers.js | |
| ML-powered multilingual translation in Svelte! | |
| sourceLanguage = e.target.value} | |
| /> | |
| targetLanguage = e.target.value} | |
| /> | |
| Translate | |
| {#if ready === false} | |
| Loading models... (only run once) | |
| {/if} | |
| {#each progressItems as data (data.file)} | |
| {/each} | |
| ``` | |
| Don't worry about the `translate` function for now. We will define it in the next section. | |
| Next, let's add some CSS to make our app look a little nicer. Modify the following files in the `src` directory: | |
| 1. `app.css`: | |
| View code | |
| ```css | |
| :root { | |
| font-family: Inter, system-ui, Avenir, Helvetica, Arial, sans-serif; | |
| line-height: 1.5; | |
| font-weight: 400; | |
| color: #213547; | |
| background-color: #ffffff; | |
| font-synthesis: none; | |
| text-rendering: optimizeLegibility; | |
| -webkit-font-smoothing: antialiased; | |
| -moz-osx-font-smoothing: grayscale; | |
| -webkit-text-size-adjust: 100%; | |
| } | |
| body { | |
| margin: 0; | |
| display: flex; | |
| place-items: center; | |
| min-width: 320px; | |
| min-height: 100vh; | |
| } | |
| h1 { | |
| font-size: 3.2em; | |
| line-height: 1; | |
| } | |
| h1, | |
| h2 { | |
| margin: 8px; | |
| } | |
| select { | |
| padding: 0.3em; | |
| cursor: pointer; | |
| } | |
| textarea { | |
| padding: 0.6em; | |
| } | |
| button { | |
| padding: 0.6em 1.2em; | |
| cursor: pointer; | |
| font-weight: 500; | |
| } | |
| button[disabled] { | |
| cursor: not-allowed; | |
| } | |
| select, | |
| textarea, | |
| button { | |
| border-radius: 8px; | |
| border: 1px solid transparent; | |
| font-size: 1em; | |
| font-family: inherit; | |
| background-color: #f9f9f9; | |
| transition: border-color 0.25s; | |
| } | |
| select:hover, | |
| textarea:hover, | |
| button:not([disabled]):hover { | |
| border-color: #646cff; | |
| } | |
| select:focus, | |
| select:focus-visible, | |
| textarea:focus, | |
| textarea:focus-visible, | |
| button:focus, | |
| button:focus-visible { | |
| outline: 4px auto -webkit-focus-ring-color; | |
| } | |
| ``` | |
| 2. Add the following styles. You can either put them in `app.css` or in a `` block at the bottom of `App.svelte`: | |
| View code | |
| ```css | |
| #app { | |
| max-width: 1280px; | |
| margin: 0 auto; | |
| padding: 2rem; | |
| text-align: center; | |
| } | |
| .language-container { | |
| display: flex; | |
| gap: 20px; | |
| } | |
| .textbox-container { | |
| display: flex; | |
| justify-content: center; | |
| gap: 20px; | |
| width: 800px; | |
| } | |
| .textbox-container > textarea, | |
| .language-selector { | |
| width: 50%; | |
| } | |
| .language-selector > select { | |
| width: 150px; | |
| } | |
| .progress-container { | |
| position: relative; | |
| font-size: 14px; | |
| color: white; | |
| background-color: #e9ecef; | |
| border: solid 1px; | |
| border-radius: 8px; | |
| text-align: left; | |
| overflow: hidden; | |
| } | |
| .progress-bar { | |
| padding: 0 4px; | |
| z-index: 0; | |
| top: 0; | |
| width: 1%; | |
| overflow: hidden; | |
| background-color: #007bff; | |
| white-space: nowrap; | |
| } | |
| .progress-text { | |
| z-index: 2; | |
| } | |
| .selector-container { | |
| display: flex; | |
| gap: 20px; | |
| } | |
| .progress-bars-container { | |
| padding: 8px; | |
| height: 140px; | |
| } | |
| .container { | |
| margin: 25px; | |
| display: flex; | |
| flex-direction: column; | |
| gap: 10px; | |
| } | |
| ``` | |
| ## Step 4: Connecting everything together | |
| Now that we have a basic user interface set up, we can finally connect everything together. | |
| First, let's set up the Web Worker and the `translate` function. Add the following to the `` section of `App.svelte`: | |
| ```svelte | |
| import { onMount, onDestroy } from 'svelte'; | |
| import LanguageSelector from './lib/LanguageSelector.svelte'; | |
| import Progress from './lib/Progress.svelte'; | |
| import './app.css'; | |
| // ... state variables from before ... | |
| let worker; | |
| onMount(() => { | |
| worker = new Worker(new URL('./worker.js', import.meta.url), { | |
| type: 'module', | |
| }); | |
| worker.addEventListener('message', onMessageReceived); | |
| }); | |
| onDestroy(() => { | |
| worker?.removeEventListener('message', onMessageReceived); | |
| }); | |
| function onMessageReceived(e) { | |
| switch (e.data.status) { | |
| case 'initiate': | |
| ready = false; | |
| progressItems = [...progressItems, e.data]; | |
| break; | |
| case 'progress': | |
| progressItems = progressItems.map((item) => { | |
| if (item.file === e.data.file) { | |
| return { ...item, progress: e.data.progress }; | |
| } | |
| return item; | |
| }); | |
| break; | |
| case 'done': | |
| progressItems = progressItems.filter( | |
| (item) => item.file !== e.data.file, | |
| ); | |
| break; | |
| case 'ready': | |
| ready = true; | |
| break; | |
| case 'update': | |
| output += e.data.output; | |
| break; | |
| case 'complete': | |
| disabled = false; | |
| break; | |
| } | |
| } | |
| function translate() { | |
| disabled = true; | |
| output = ''; | |
| worker.postMessage({ | |
| text: input, | |
| src_lang: sourceLanguage, | |
| tgt_lang: targetLanguage, | |
| }); | |
| } | |
| ``` | |
| Now, let's add an event listener in `src/worker.js` to listen for messages from the main thread. We will send back messages (e.g., for model loading progress and text streaming) to the main thread with `self.postMessage`. | |
| ```javascript | |
| // Listen for messages from the main thread | |
| self.addEventListener("message", async (event) => { | |
| // Retrieve the translation pipeline. When called for the first time, | |
| // this will load the pipeline and save it for future use. | |
| const translator = await MyTranslationPipeline.getInstance((x) => { | |
| // We also add a progress callback to the pipeline so that we can | |
| // track model loading. | |
| self.postMessage(x); | |
| }); | |
| // Capture partial output as it streams from the pipeline | |
| const streamer = new TextStreamer(translator.tokenizer, { | |
| skip_prompt: true, | |
| skip_special_tokens: true, | |
| callback_function: function (text) { | |
| self.postMessage({ | |
| status: "update", | |
| output: text, | |
| }); | |
| }, | |
| }); | |
| // Actually perform the translation | |
| const output = await translator(event.data.text, { | |
| tgt_lang: event.data.tgt_lang, | |
| src_lang: event.data.src_lang, | |
| // Allows for partial output to be captured | |
| streamer, | |
| }); | |
| // Send the output back to the main thread | |
| self.postMessage({ | |
| status: "complete", | |
| output, | |
| }); | |
| }); | |
| ``` | |
| You can now run the application with `npm run dev` and perform multilingual translation directly in your browser! | |
| ## (Optional) Step 5: Build and deploy | |
| To build your application, simply run `npm run build`. This will bundle your application and output the static files to the `dist` folder. | |
| For this demo, we will deploy our application as a static [Hugging Face Space](https://huggingface.co/docs/hub/spaces), but you can deploy it anywhere you like! If you haven't already, you can create a free Hugging Face account [here](https://huggingface.co/join). | |
| 1. Visit [https://huggingface.co/new-space](https://huggingface.co/new-space) and fill in the form. Remember to select "Static" as the space type. | |
| 2. Go to "Files" → "Add file" → "Upload files". Drag the `index.html` file and `public/` folder from the `dist` folder into the upload box and click "Upload". After they have uploaded, scroll down to the button and click "Commit changes to main". | |
| **That's it!** Your application should now be live at `https://huggingface.co/spaces//`! | |
Xet Storage Details
- Size:
- 12.5 kB
- Xet hash:
- d91a8db13f9bdef7748e5d3cfb76af10265bca40ba1c1619b811c99a79b54665
·
Xet efficiently stores files, intelligently splitting them into unique chunks and accelerating uploads and downloads. More info.