
| # A statically generated blog example using Next.js and Prepr | |
| This example showcases Next.js's [Static Generation](https://nextjs.org/docs/basic-features/pages) feature using [Prepr](https://prepr.io/) as the data source. | |
| ## Demo | |
| Check out our Blog page example: | |
| - **Live**: [https://next-blog-prepr.vercel.app/](https://next-blog-prepr.vercel.app/) | |
| - **Preview**: [https://next-blog-prepr.vercel.app/api/preview...](https://next-blog-prepr.vercel.app/api/preview?secret=237864ihasdhj283768&slug=blueberry-cheesecake) | |
| ## How to use | |
| Execute [`create-next-app`](https://github.com/vercel/next.js/tree/canary/packages/create-next-app) with [npm](https://docs.npmjs.com/cli/init), [Yarn](https://yarnpkg.com/lang/en/docs/cli/create/), or [pnpm](https://pnpm.io) to bootstrap the example: | |
| ```bash | |
| npx create-next-app --example cms-prepr cms-prepr-app | |
| ``` | |
| ```bash | |
| yarn create next-app --example cms-prepr cms-prepr-app | |
| ``` | |
| ```bash | |
| pnpm create next-app --example cms-prepr cms-prepr-app | |
| ``` | |
| ## Configuration | |
| ### Step 1. Set up Prepr | |
| **1.1** First, [sign up for a Prepr account](https://signup.prepr.io/). | |
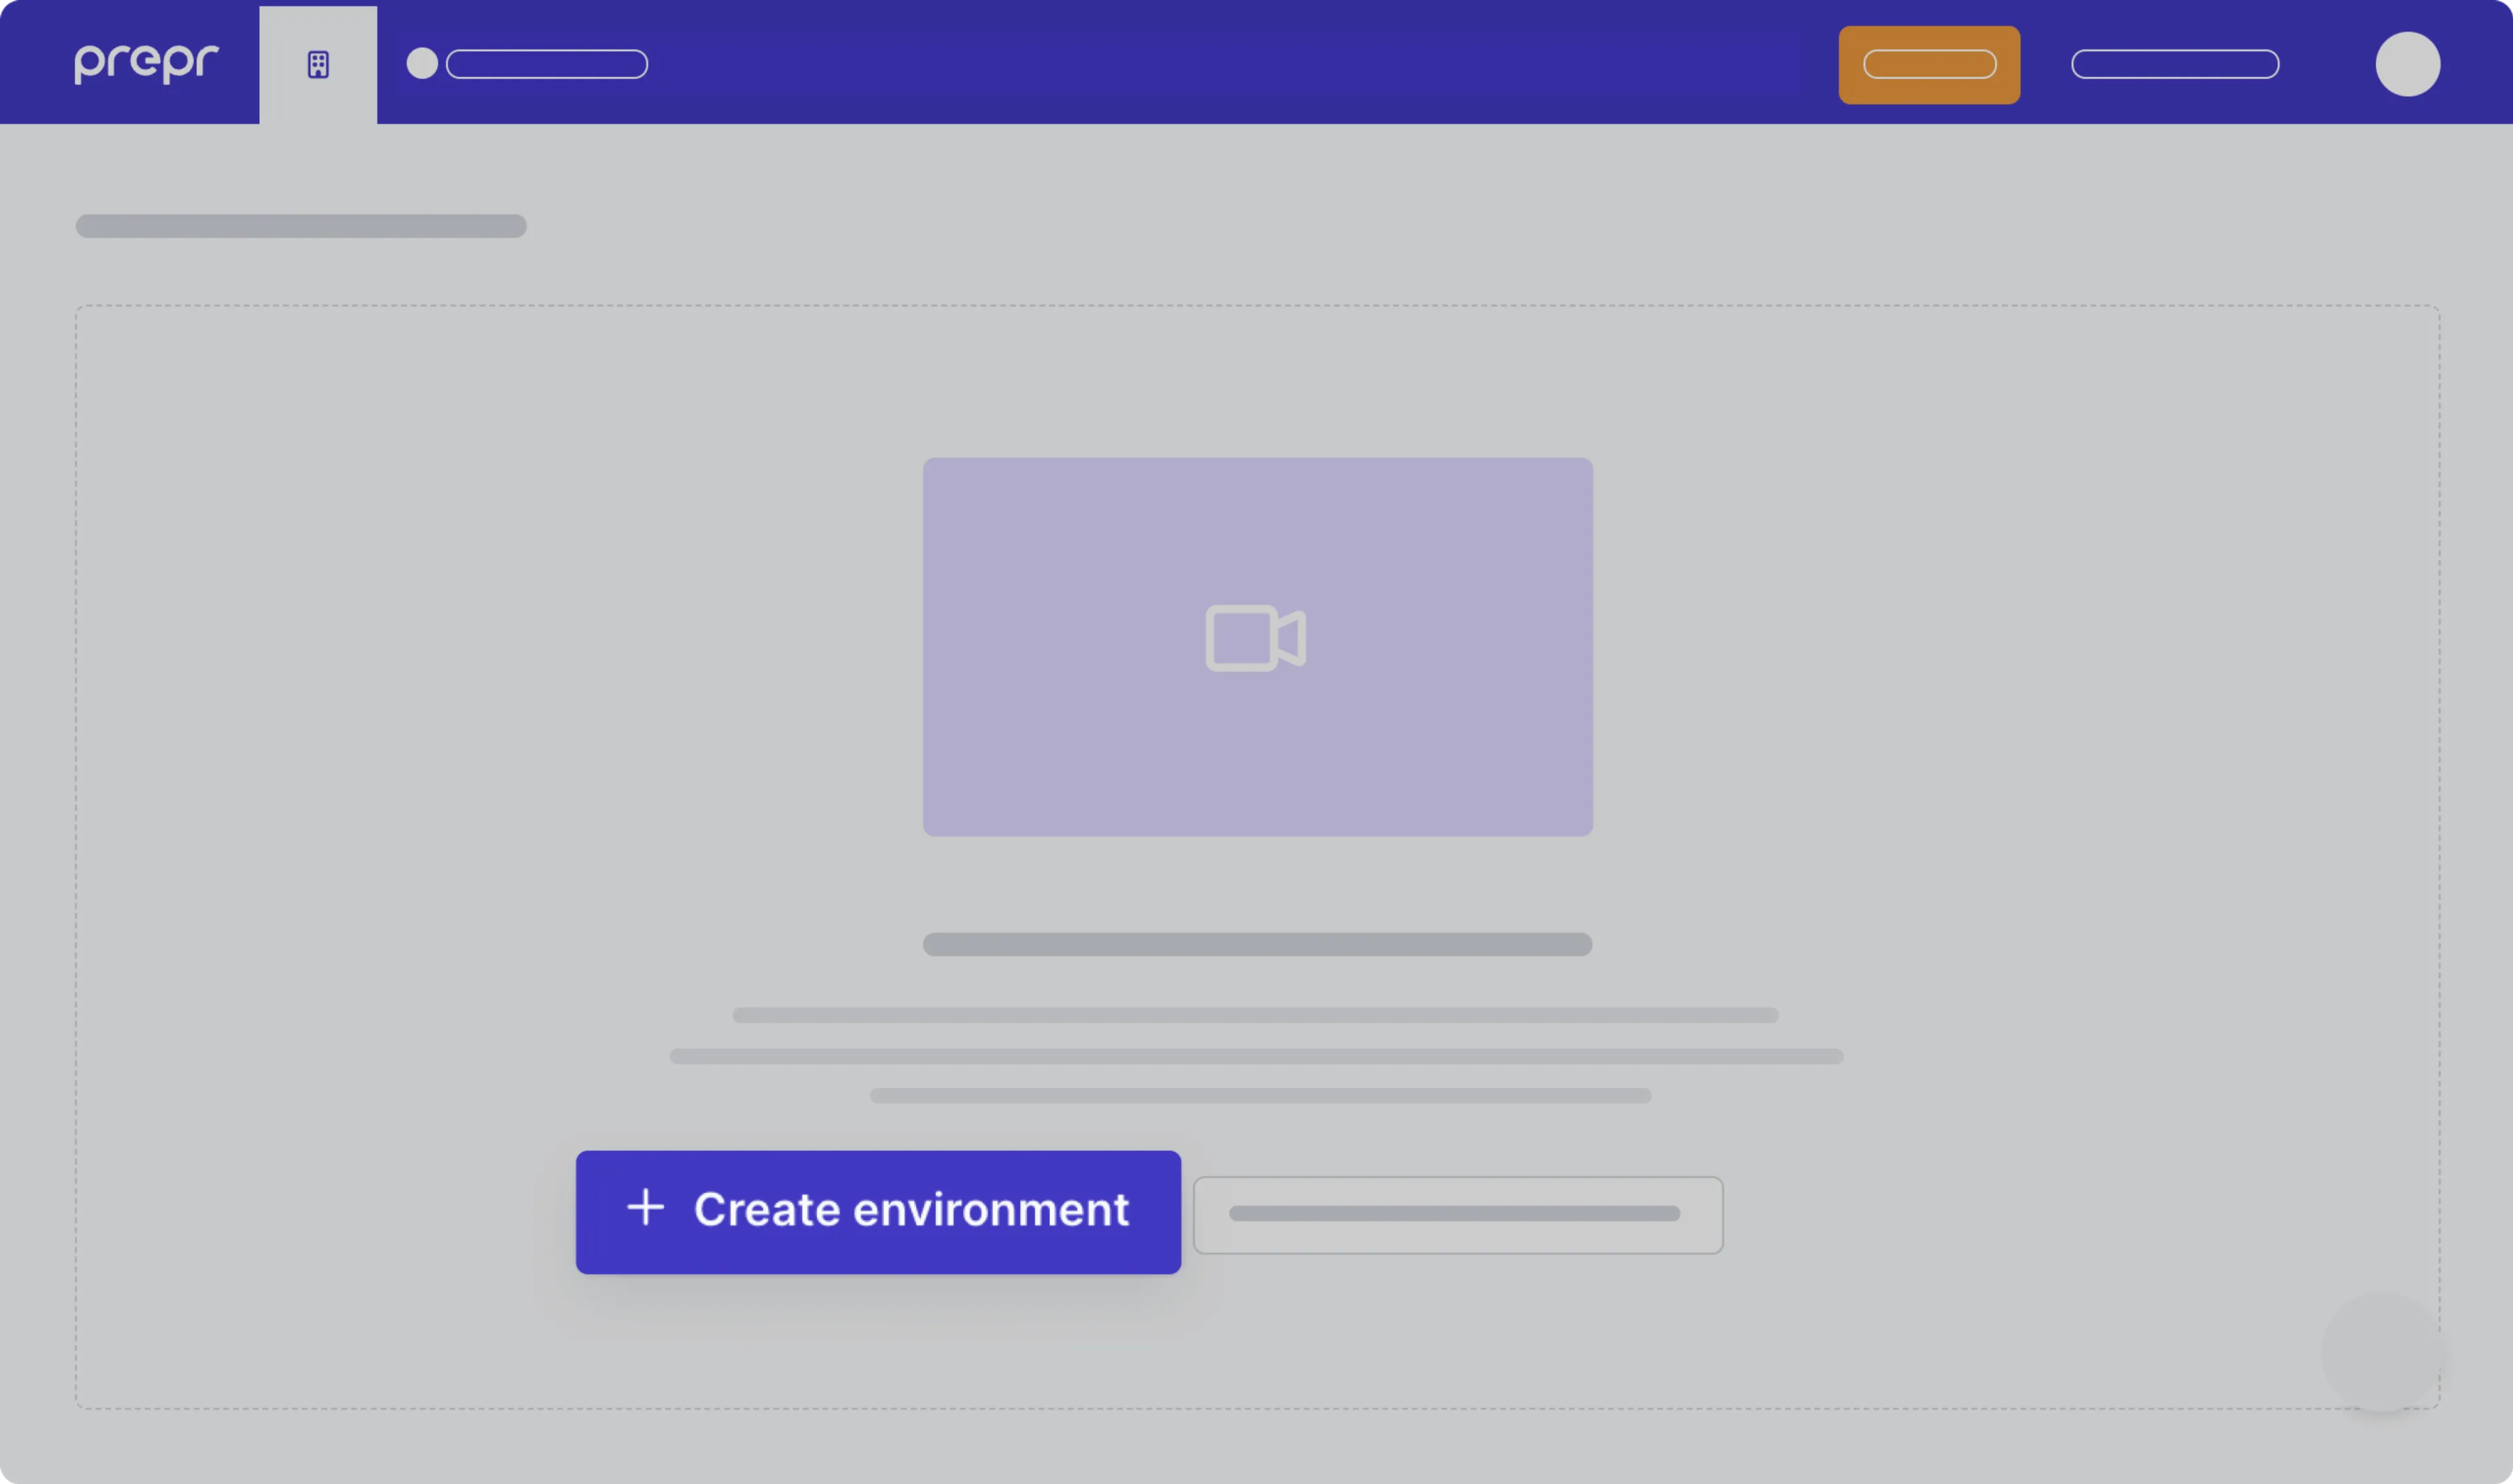
| **1.2** After you sign up, create a new environment in Prepr. For more details, [check out the environment docs](https://docs.prepr.io/developing-with-prepr/set-up-environments). | |
|  | |
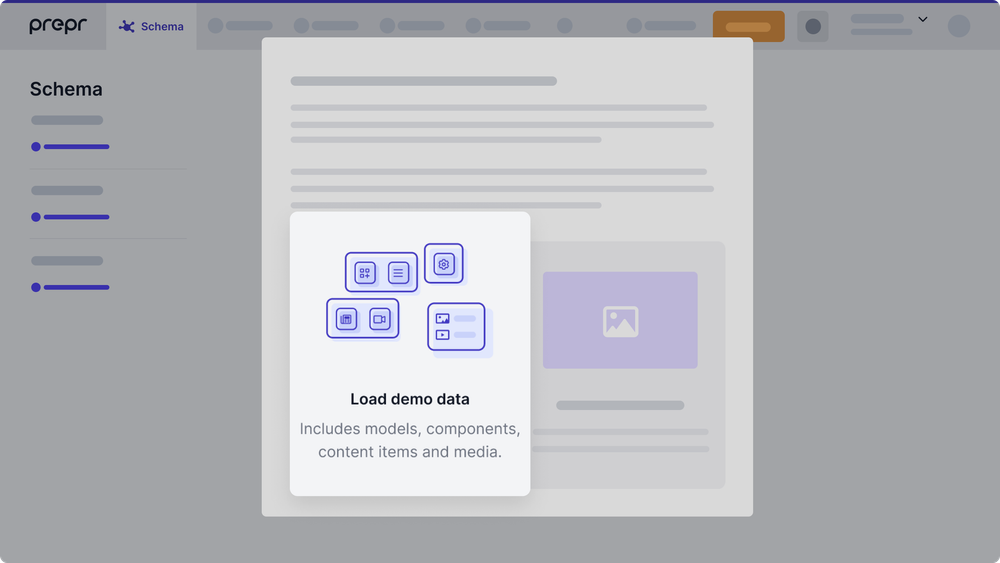
| **1.3** Once you’ve created the environment, choose to **Load demo data**. With that, Prepr will automatically upload sample models, content items, and other data you can use for your example Next.js app. | |
|  | |
| ### Step 2. Set up environment variables | |
| Once you’ve set up your Prepr environment, you can define environment variables for your project. Please proceed with the steps below. | |
| **2.1** Run the following command to copy and rename the `.env.local.example` file as follows: | |
| ```bash | |
| cp .env.local.example .env.local | |
| ``` | |
| The `.env.local` file will be ignored by Git. | |
| **2.2** In your environment, navigate to **Settings > Access Tokens**. You will see the automatically generated access tokens for your Prepr environment. | |
| 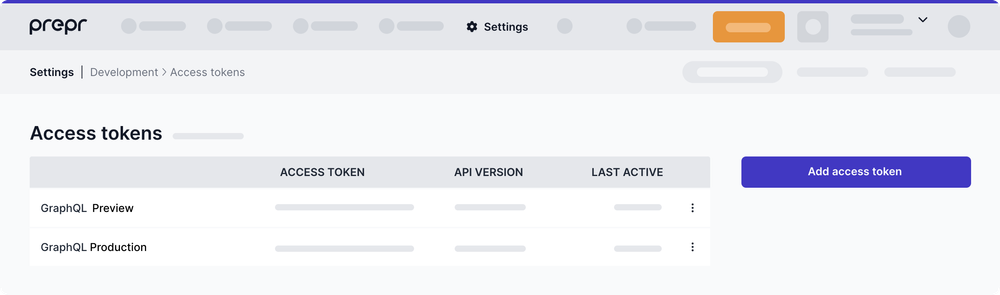 | |
| Copy the _GraphQL Production_ access token and paste it as the `PREPRIO_PRODUCTION_TOKEN` variable in `.env.local`. Then copy and paste the _GraphQL Preview_ access token as the `PREPRIO_PREVIEW_TOKEN` variable. | |
| Alternatively, you can create access tokens yourself by clicking **Add access token**. If so, make sure to [choose the right GraphQL permissions](https://docs.prepr.io/reference/graphql/v1/authorization) for the access tokens. | |
| **2.3** Set a custom value with no spaces as the `PREPRIO_PREVIEW_SECRET` variable, for example, a UUID. This value will be used to enable [preview mode](https://nextjs.org/docs/advanced-features/preview-mode). | |
| Once done, your `.env.local` file should look like this: | |
| ```bash | |
| PREPRIO_API=https://graphql.prepr.io/graphql | |
| PREPRIO_PRODUCTION_TOKEN='your Production access token' | |
| PREPRIO_PREVIEW_TOKEN='your Preview access token' | |
| PREPRIO_PREVIEW_SECRET='your secret id' | |
| ``` | |
| ### Step 3. Run Next.js in development mode | |
| Now that you've finished preparing the project, you may proceed to run it. | |
| **3.1** Execute one of the following commands to install the packages listed in the `package.json` file: | |
| ```bash | |
| npm install | |
| ``` | |
| ```bash | |
| yarn install | |
| ``` | |
| **3.2** Execute one of the following commands to run the dev script defined in the `package.json` file: | |
| ```bash | |
| npm run dev | |
| ``` | |
| ```bash | |
| yarn dev | |
| ``` | |
| Your example Blog website should be up and running on [http://localhost:3000](http://localhost:3000). If it doesn't work, please post on [GitHub discussions](https://github.com/vercel/next.js/discussions). | |
| ### Step 4. Optional: Try Preview mode | |
| Great progress has been made! You are just a few steps away from getting your example website live. | |
| Before proceeding, you can test how the content preview works in Prepr. This step is optional. Proceed to Step 5 if you don’t want to use preview mode. | |
| To try preview mode, follow these steps: | |
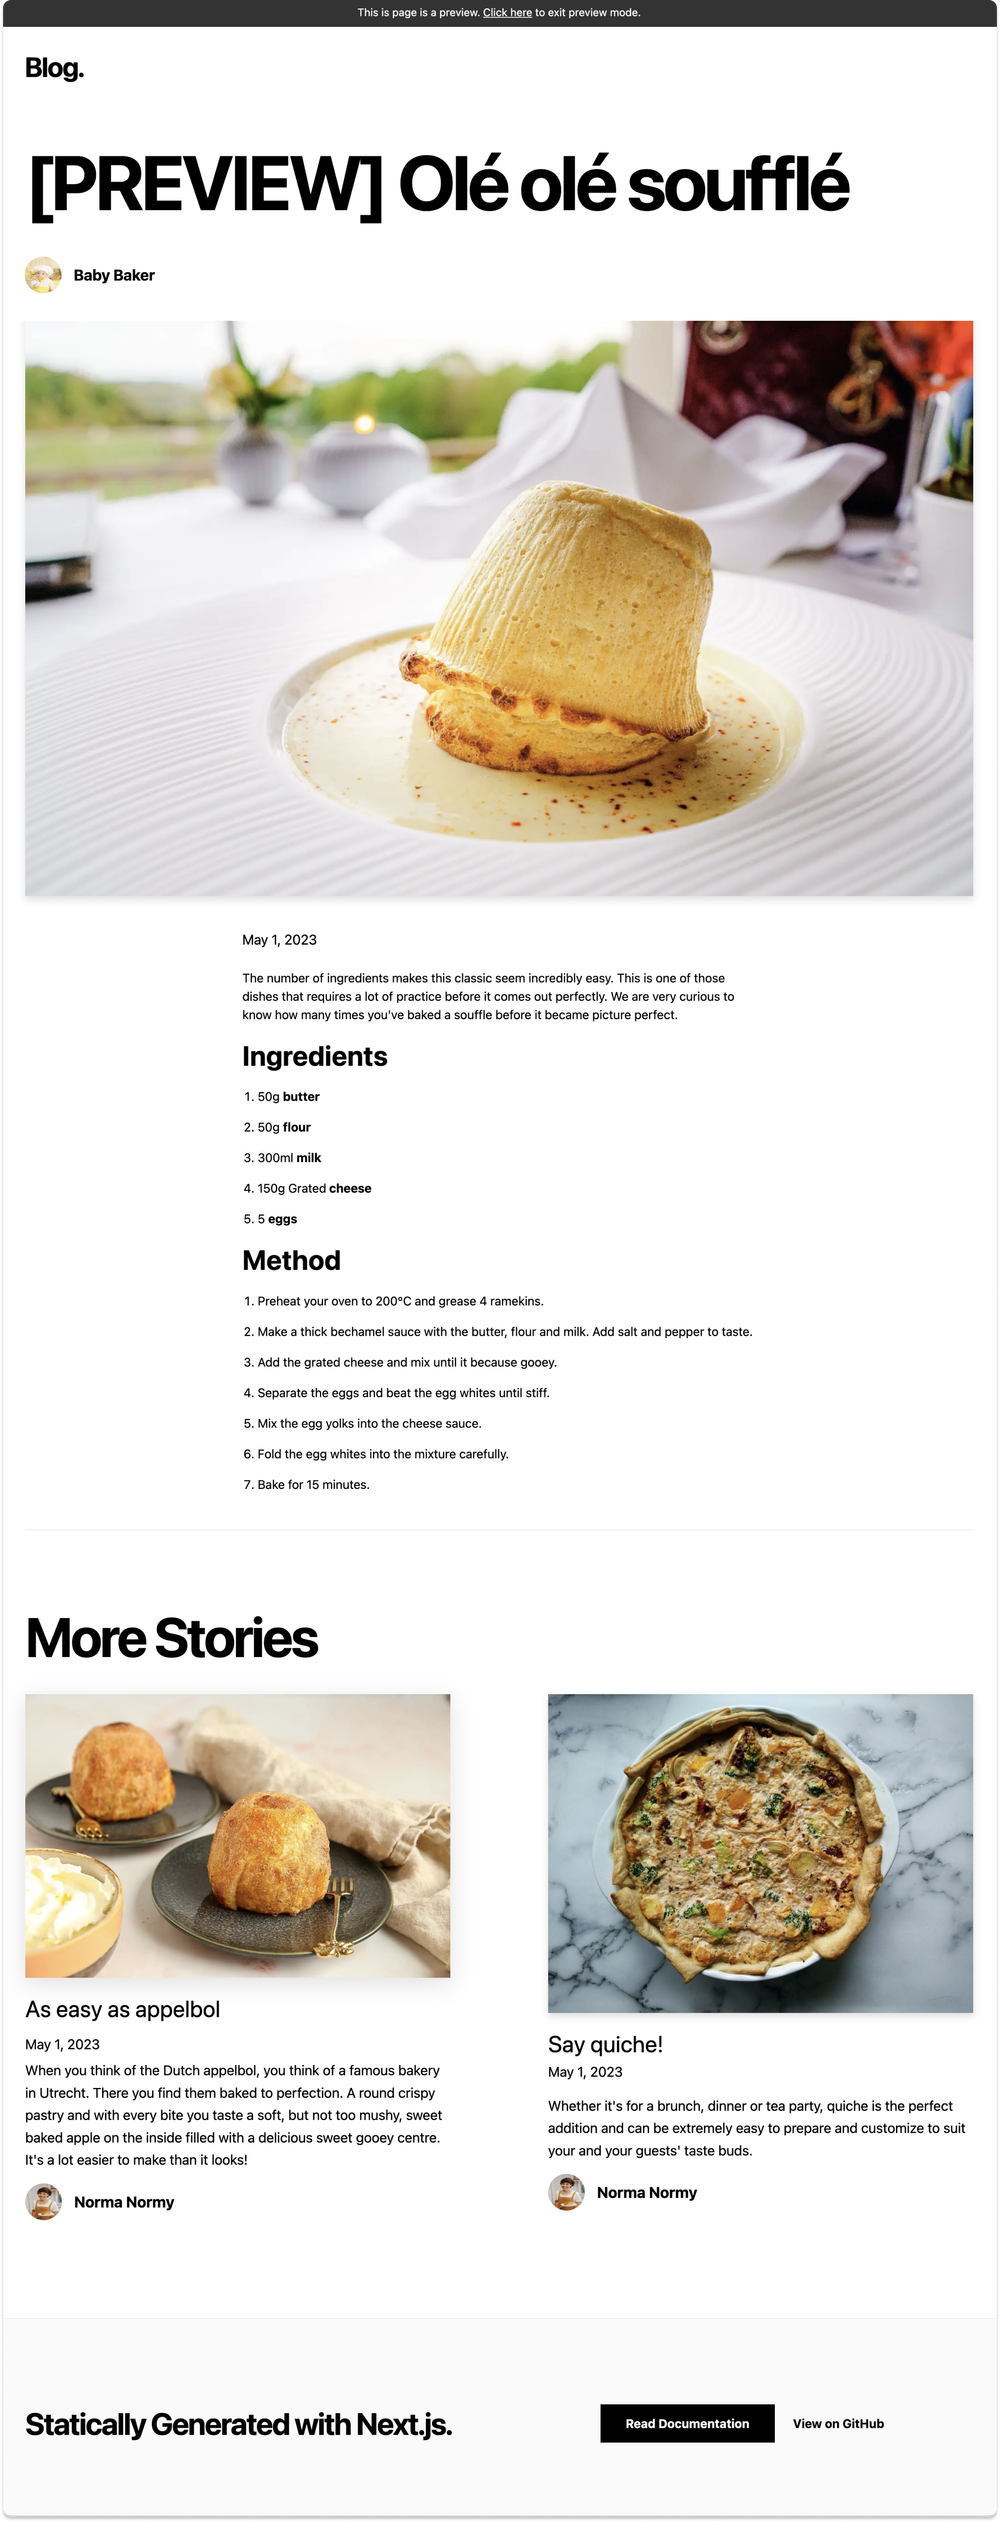
| **4.1** In Prepr, go to one of the content items of the _Article model_ and update the item title. For example, you can add _[PREVIEW]_ in front of the title. After you edit the content item, save it with the _Review status_. | |
| **4.2** To preview the content item, transform its URL to the following format: | |
| `http://localhost:3000/api/preview?secret=<PREPRIO_PREVIEW_SECRET>&slug=<SLUG_TO_PREVIEW>`, | |
| where: | |
| - `<PREPRIO_PREVIEW_SECRET>` is the same preview secret you defined in the `.env.local` file; | |
| - `<SLUG_TO_PREVIEW>` is the slug of the content item you want to preview. | |
| **Note:** To exit the preview mode, you must click on **Click here to exit preview mode** at the top of the page. | |
|  | |
| ### Step 5. Deploy on Vercel | |
| To make your Next.js app available online, deploy it to the cloud using [Vercel](https://vercel.com/?utm_source=github&utm_medium=readme&utm_campaign=next-example). Vercel provides a user-friendly platform for deploying and managing web applications. For more information, please [refer to the Next.js documentation](https://nextjs.org/docs/deployment). | |
| You can go for one of the following options: | |
| - **Deploy your local project**</br> | |
| To deploy your local project to Vercel, push it to GitHub/GitLab/Bitbucket and [import it to Vercel](https://vercel.com/new?utm_source=github&utm_medium=readme&utm_campaign=next-example). | |
| **Important:** When you import your project on Vercel, make sure to click on **Environment Variables** and set them to match your `.env.local` file. | |
| - **Deploy from our template**</br> | |
| Alternatively, you can deploy using our template by clicking on the **Deploy** button below. | |
| [](https://vercel.com/new/clone?repository-url=https://github.com/vercel/next.js/tree/canary/examples/cms-prepr&project-name=cms-prepr&repository-name=cms-prepr&env=PREPRIO_API,PREPRIO_PRODUCTION_TOKEN,PREPRIO_PREVIEW_TOKEN,PREPRIO_PREVIEW_SECRET&envDescription=Required%20to%20connect%20the%20app%20with%20Prepr&envLink=https://vercel.link/cms-prepr-env) | |
| ## Next steps | |
| For more advanced topics, please refer to the Prepr’s documentation: | |
| - [A/B testing](https://docs.prepr.io/optimization-and-personalization/ab-testing) | |
| - [Personalization](https://docs.prepr.io/optimization-and-personalization/personalized-stack) | |
| - [Recommendations](https://docs.prepr.io/optimization-and-personalization/recommendations) | |
| If you have questions, please [get in touch](https://prepr.io/get-in-touch) with one of our specialists or [join our Slack community](https://slack.prepr.io/). | |
| ## Related examples | |
| - [AgilityCMS](/examples/cms-agilitycms) | |
| - [Builder.io](/examples/cms-builder-io) | |
| - [ButterCMS](/examples/cms-buttercms) | |
| - [Contentful](/examples/cms-contentful) | |
| - [Cosmic](/examples/cms-cosmic) | |
| - [DatoCMS](/examples/cms-datocms) | |
| - [DotCMS](/examples/cms-dotcms) | |
| - [Drupal](/examples/cms-drupal) | |
| - [Enterspeed](/examples/cms-enterspeed) | |
| - [Ghost](/examples/cms-ghost) | |
| - [GraphCMS](/examples/cms-graphcms) | |
| - [Kontent.ai](/examples/cms-kontent-ai) | |
| - [MakeSwift](/examples/cms-makeswift) | |
| - [Payload](/examples/cms-payload) | |
| - [Plasmic](/examples/cms-plasmic) | |
| - [Prepr](/examples/cms-prepr) | |
| - [Prismic](/examples/cms-prismic) | |
| - [Sanity](/examples/cms-sanity) | |
| - [Sitecore XM Cloud](/examples/cms-sitecore-xmcloud) | |
| - [Sitefinity](/examples/cms-sitefinity) | |
| - [Storyblok](/examples/cms-storyblok) | |
| - [TakeShape](/examples/cms-takeshape) | |
| - [Tina](/examples/cms-tina) | |
| - [Umbraco](/examples/cms-umbraco) | |
| - [Umbraco heartcore](/examples/cms-umbraco-heartcore) | |
| - [Webiny](/examples/cms-webiny) | |
| - [WordPress](/examples/cms-wordpress) | |
| - [Blog Starter](/examples/blog-starter) | |